The Gen AI applications are only available on the dev environments and public demo environment.
Create a Gen AI application
An administrator enables the NextGen feature for a specific group in the administrative settings.
To deploy a Gen AI application, follow the steps below:
-
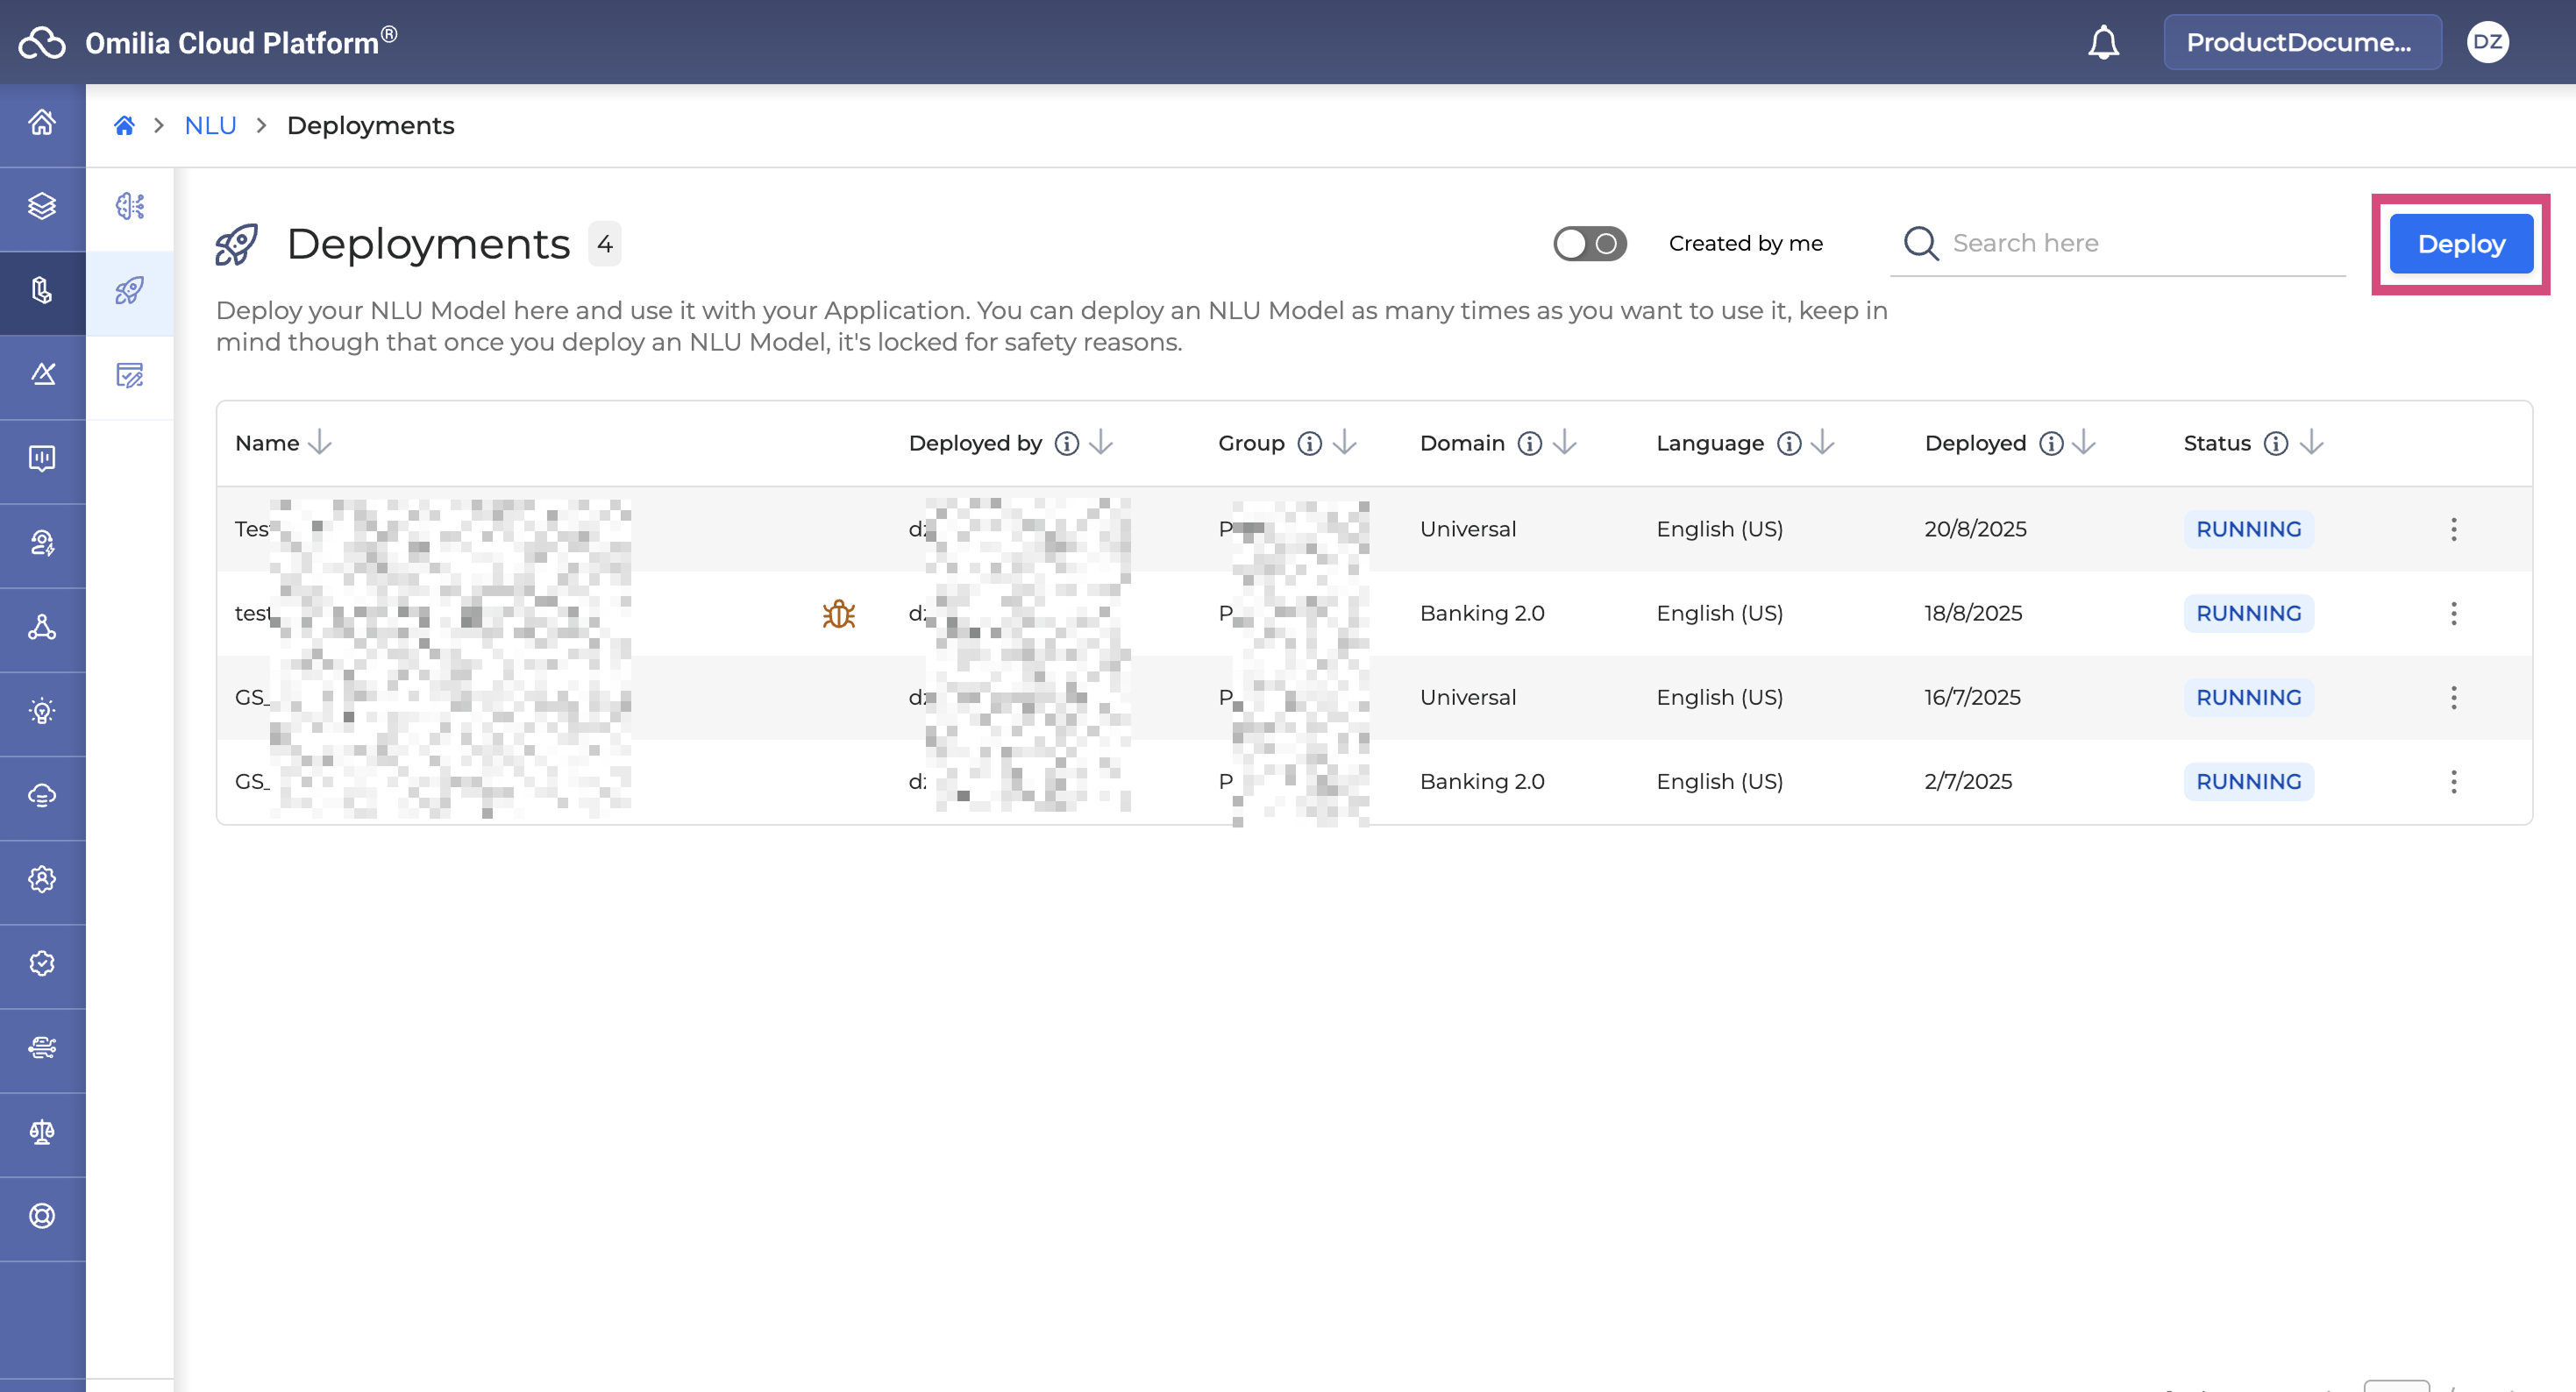
Navigate to NLU → Deployments section and click Deploy.
-
In the opened dialog box, select a deployment type, either Testing or Production, and click Next.

Never use Testing deployment for production! They should only be used for testing purposes.
-
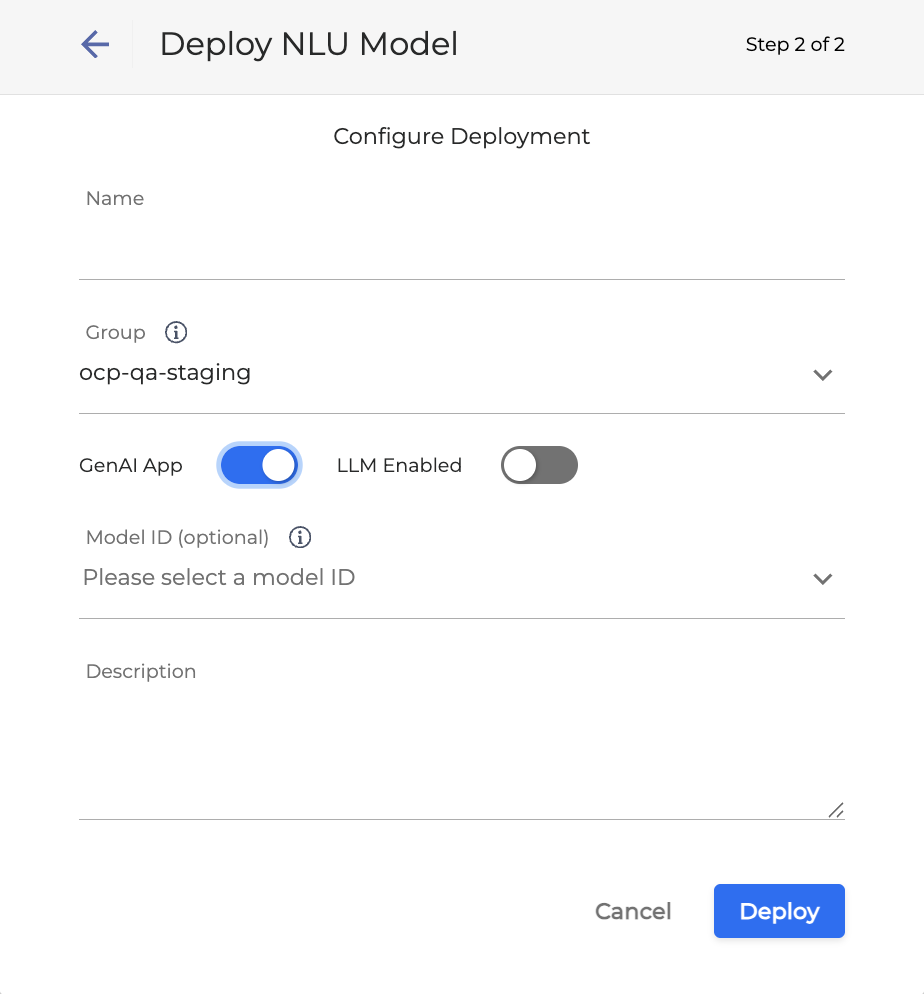
In the dialog box that opens, select a NextGen-enabled group from the Group drop-down list. Turn GenAi App toggle on. Fill in the fields as described below:
-
Name: Name for the Gen AI application.
-
Group: The group the application will be assigned to.
-
LLM Enabled: Depending on the environment, enabling an LLM will include generative AI processing.
-
Model ID: Select a model ID from the drop-down list. If the LLM Enabled option is disabled, this field is required.
-
Description: An optional description for the application.
-
-
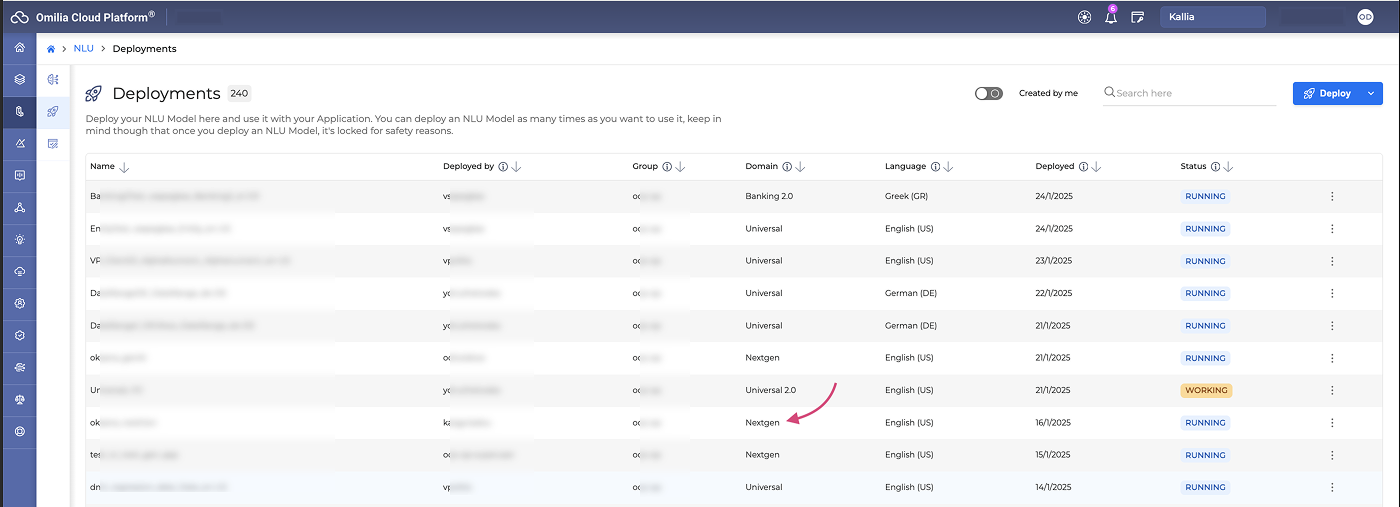
Click Deploy to finalize the creation. Your Gen AI application has been created and is listed under Deployments, its domain defined as Nextgen.
Now you can move on to set up your new application.
Manage a Gen AI application
Once you have created a Gen AI application, you will be forwarded to the following page where you can set it up.

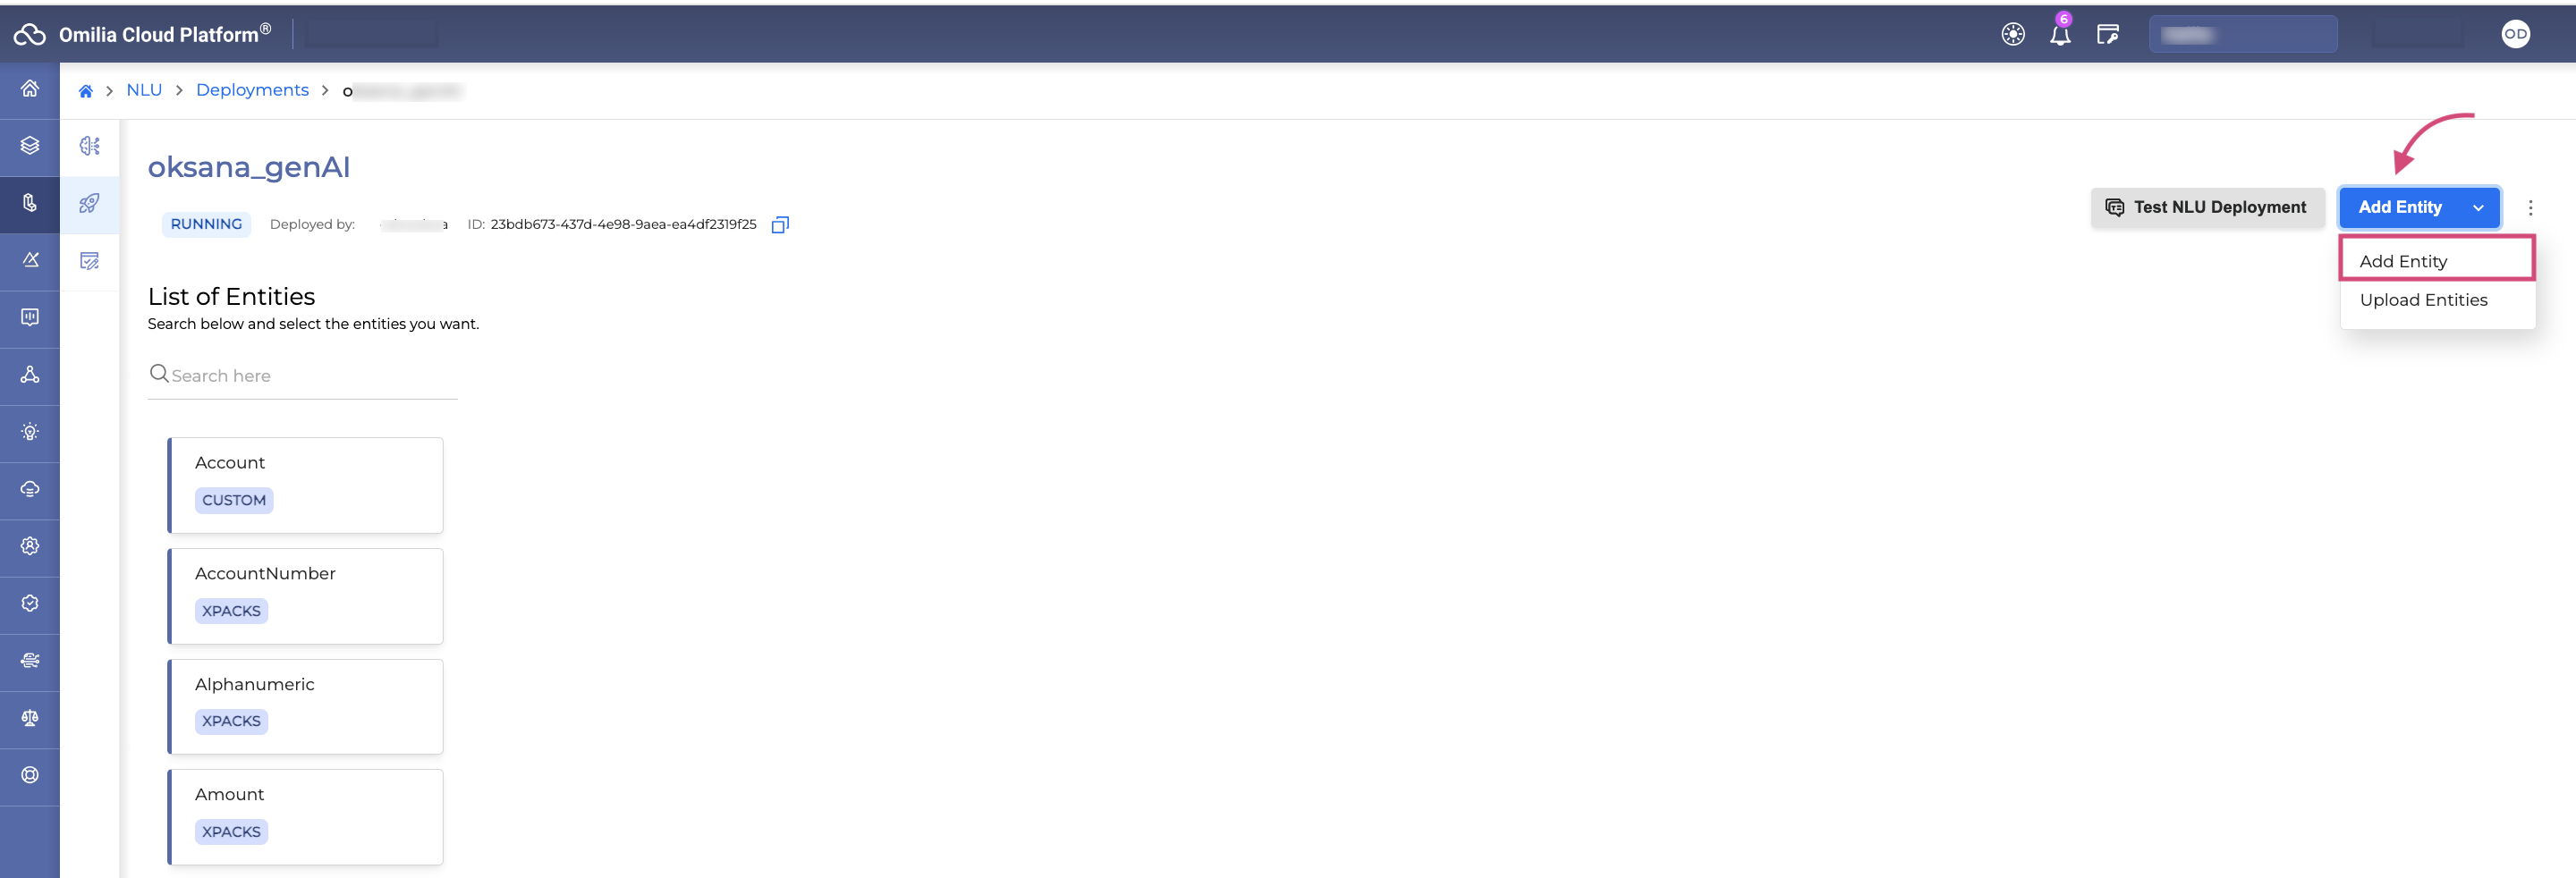
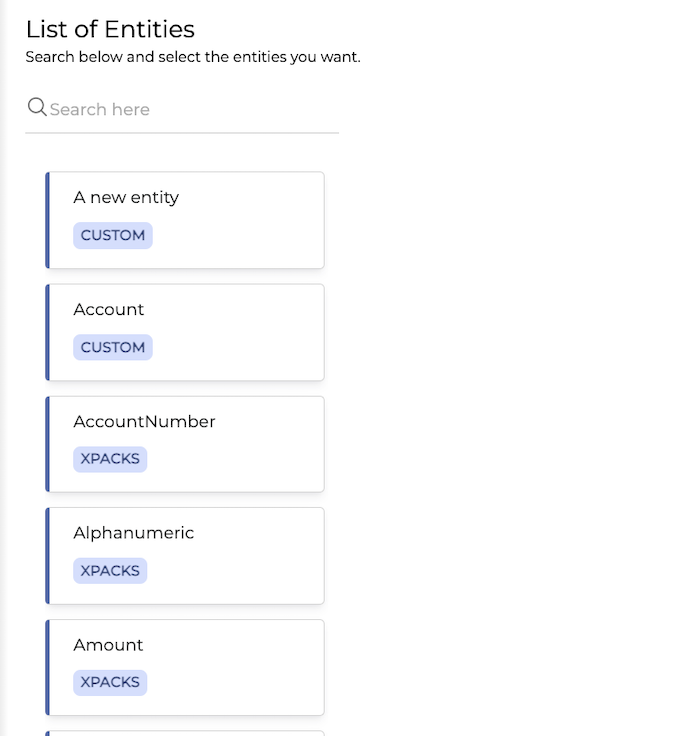
The Gen AI application contains xPack entities that are used with LLM models. To streamline your workflow, utilize the Search field to efficiently filter and select specific entities.
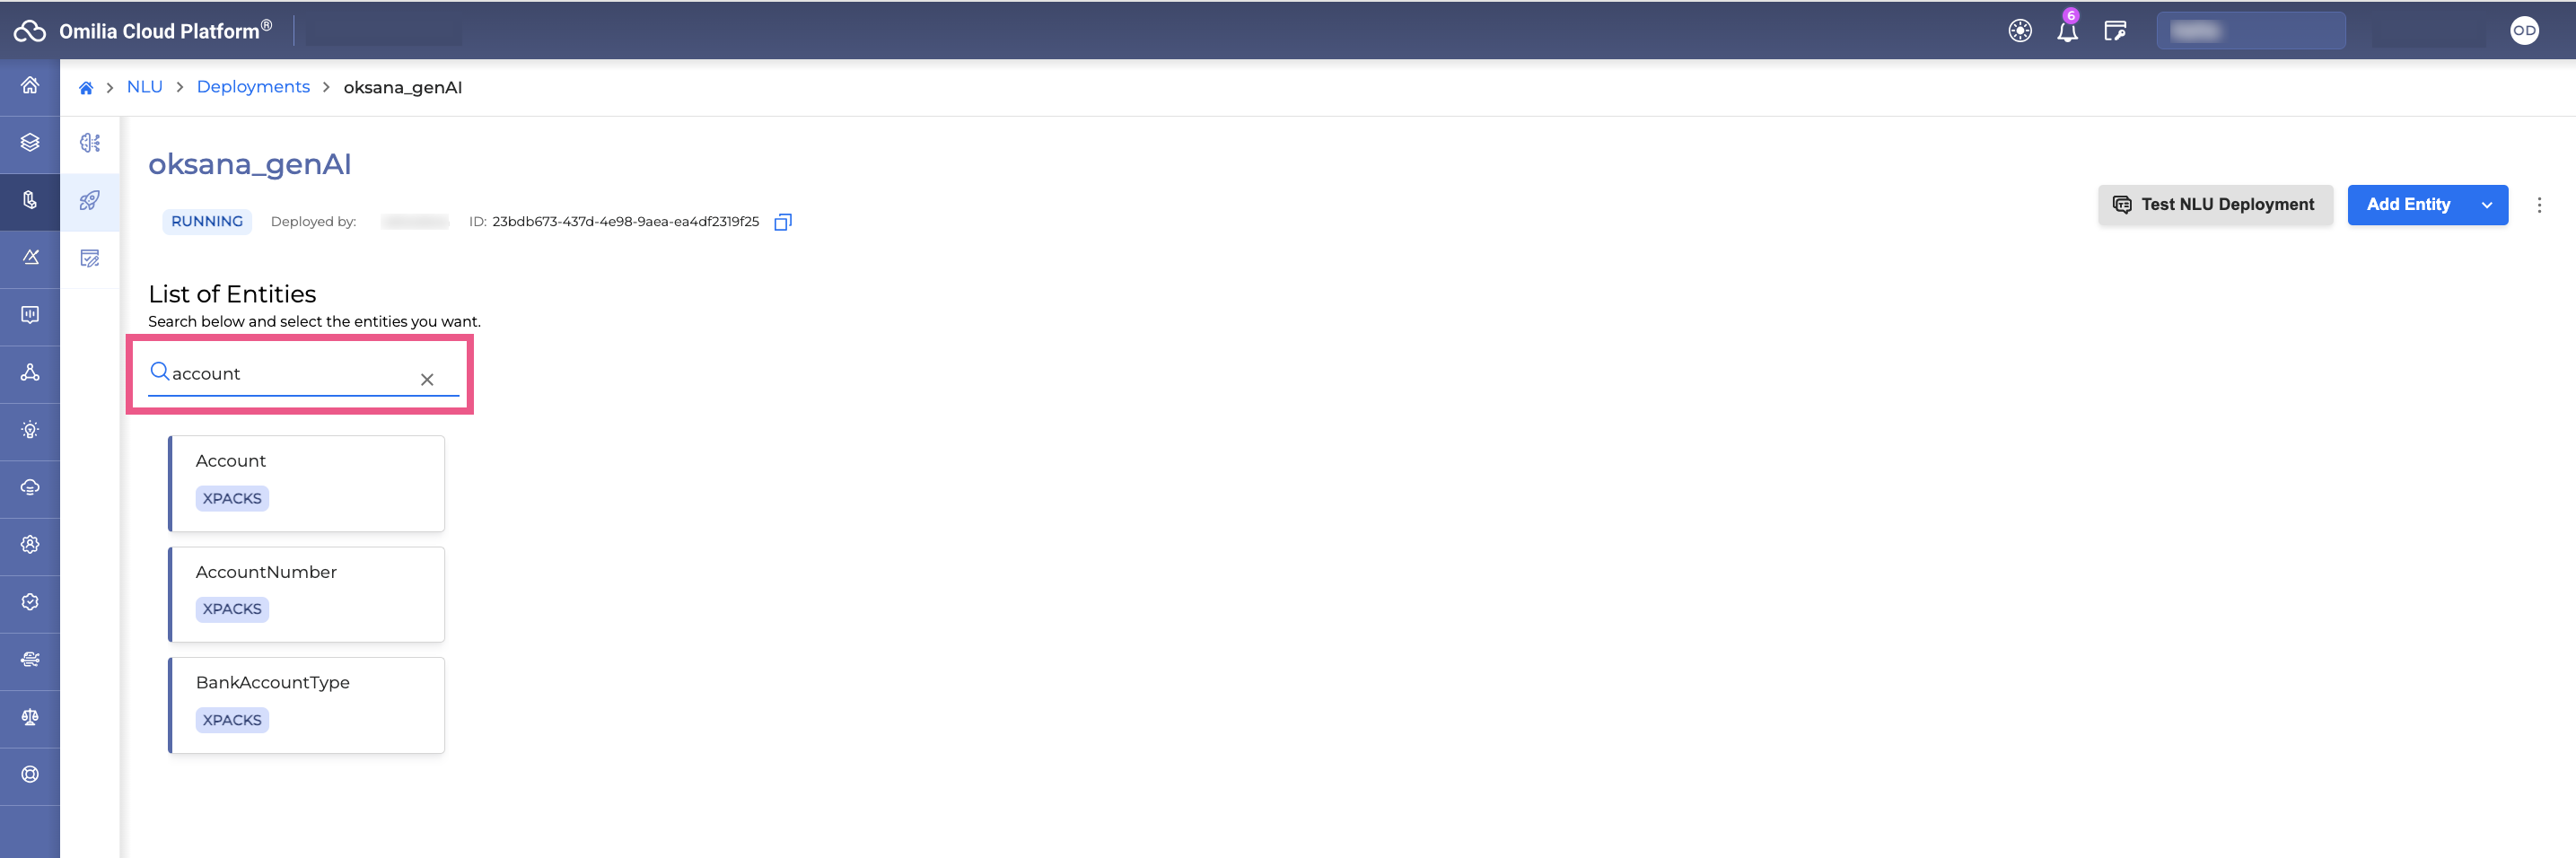
You can adjust the application to your needs by customizing the existing entities, adding or uploading your own entities.
Customize an xPack entity
To modify an existing xPack entity to suit your specific application needs, follow these steps.
The changes will only apply to the selected application.
-
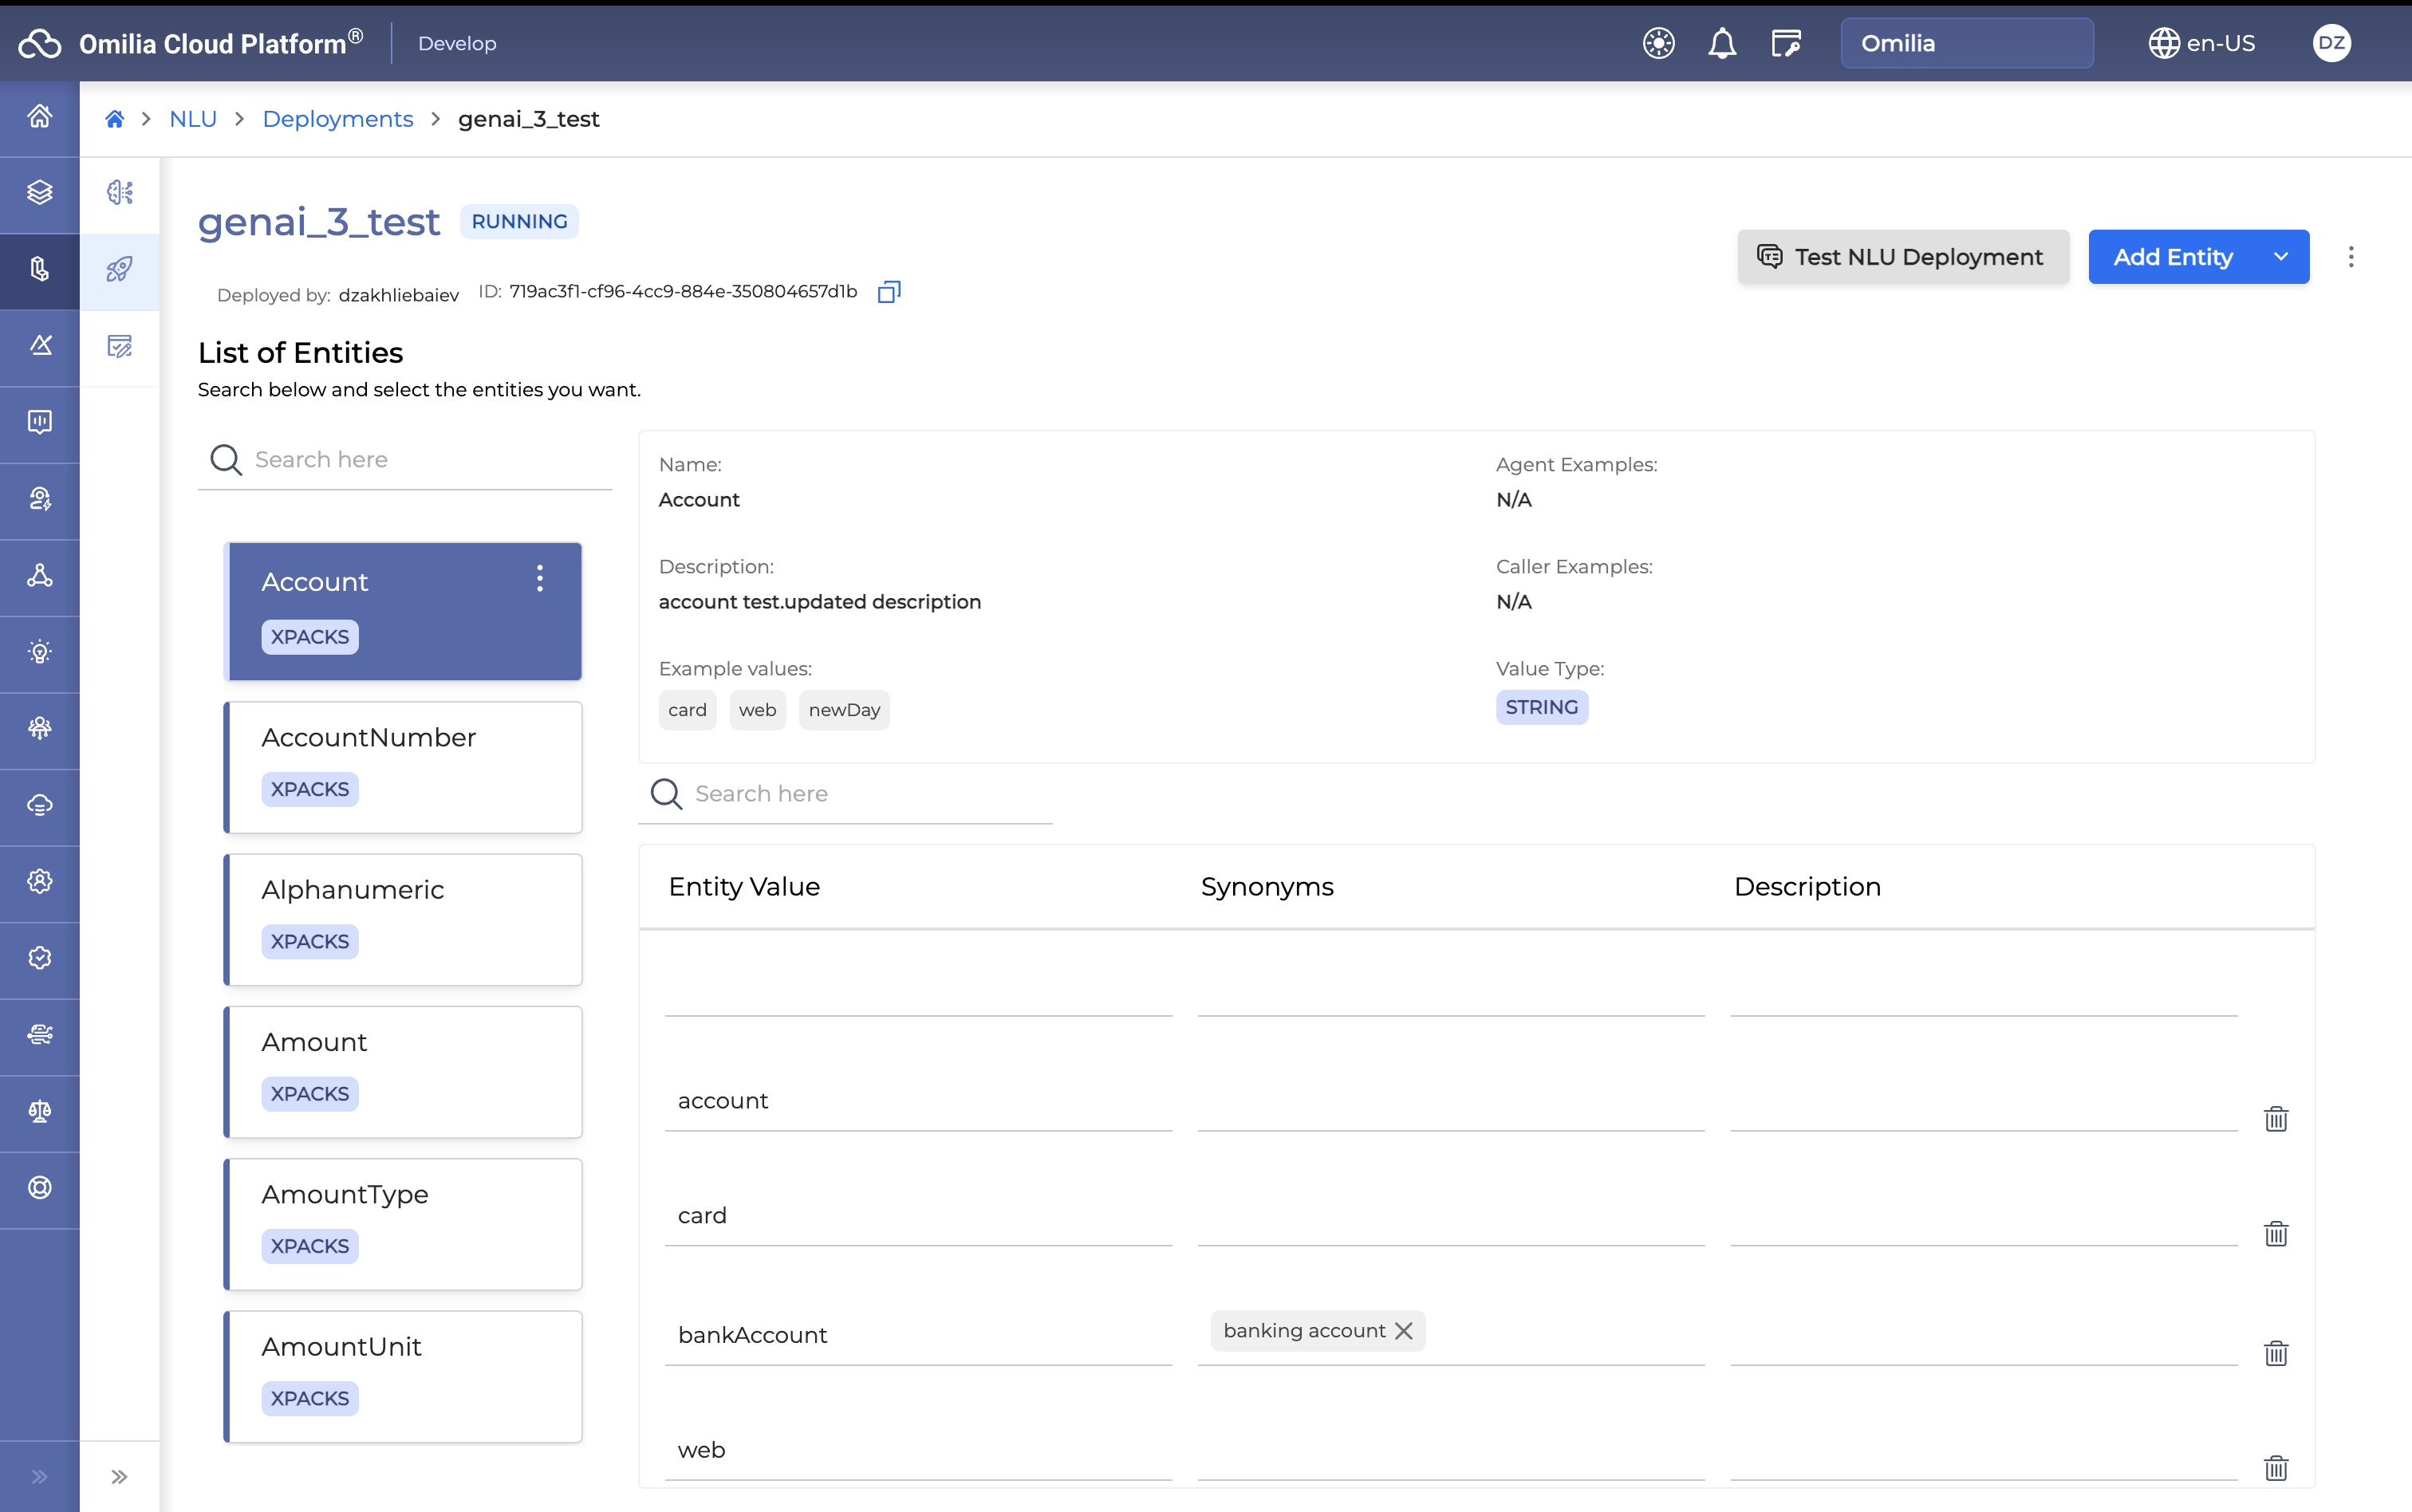
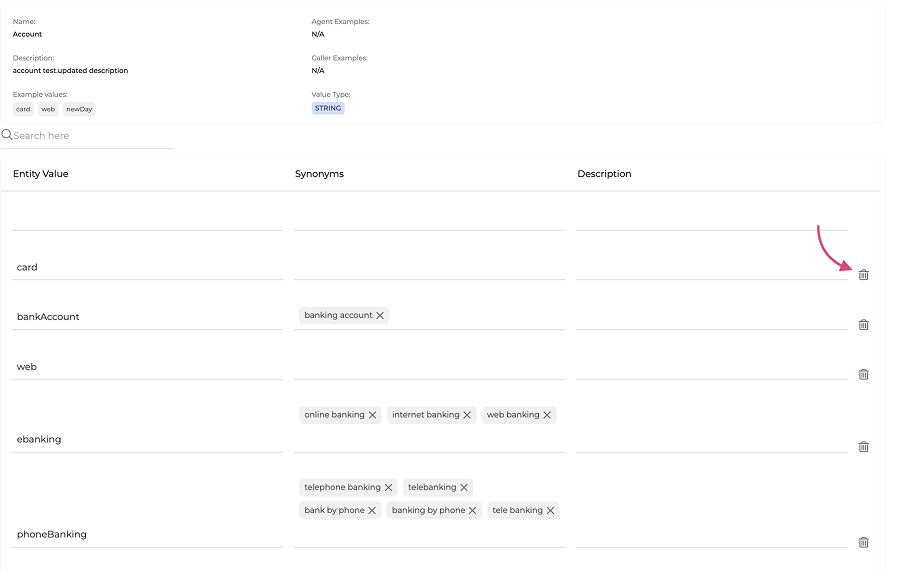
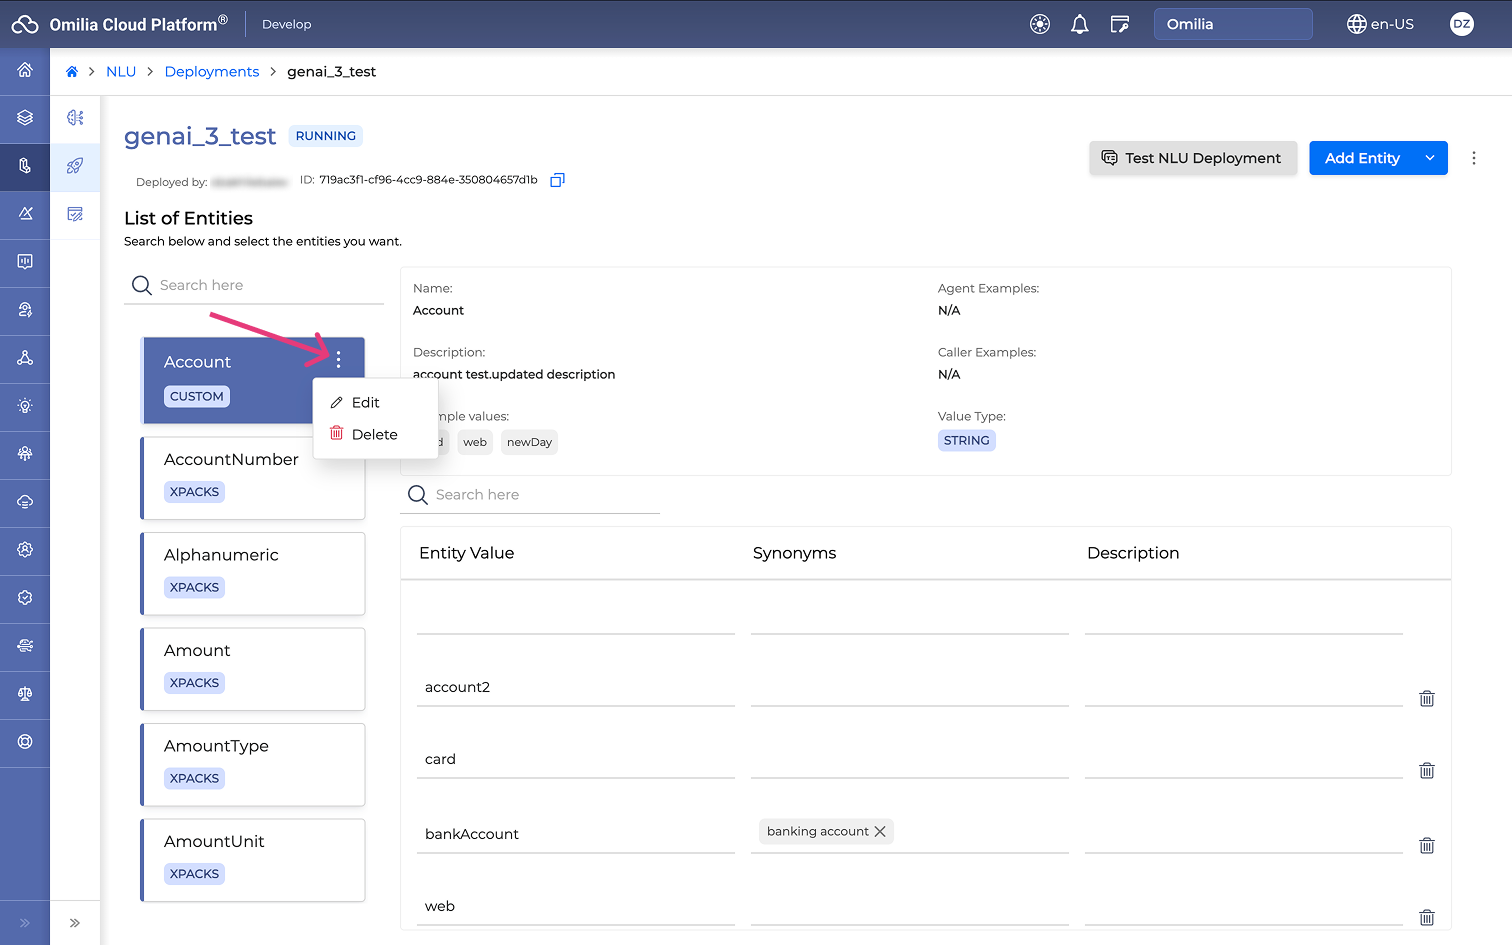
Click on an entity to open the entity details page. You will see the following editable fields:
-
Name: The name of the xPack entity.
-
Description: A brief description of the entity.
-
Example values: A list of example values for the entity.
-
Agent Examples: Example utterances from an agent that contain the entity.
-
Caller Examples: Example utterances from a caller that contain the entity.
-
Value Type: The data type of the entity.
-
Entity Value: Specific values associated with the entity.
-
Synonyms: Alternative terms for entity values.
-
Description: Optional details for each entity value or synonym.
-
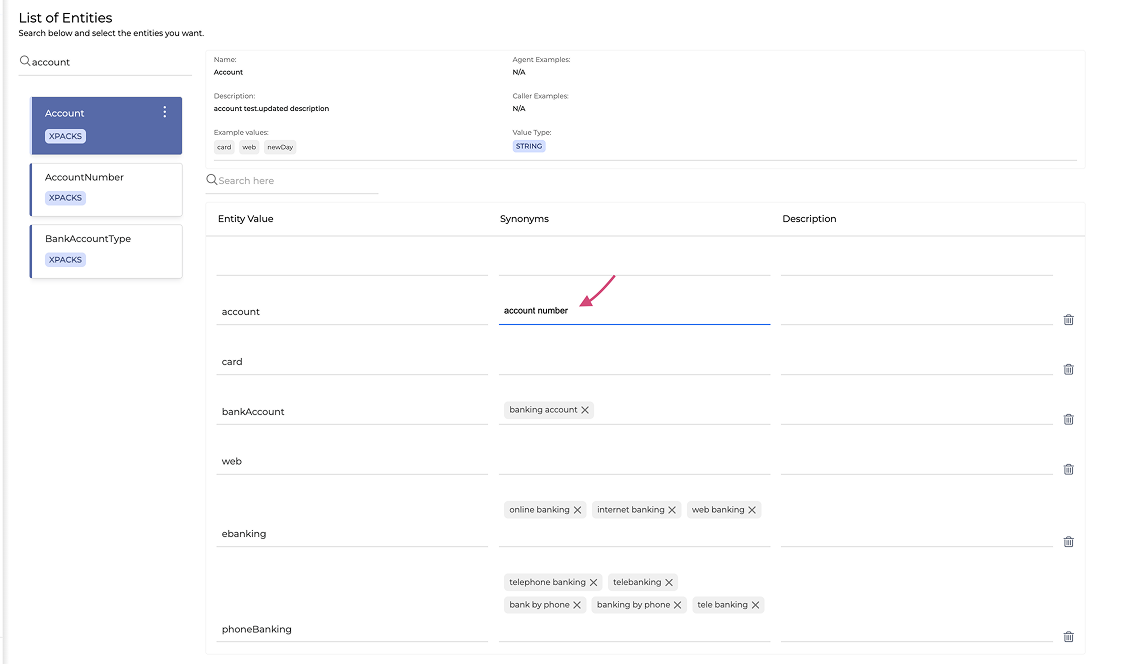
To change an Entity Value or add a Synonym, make your change and press <Enter>.
-
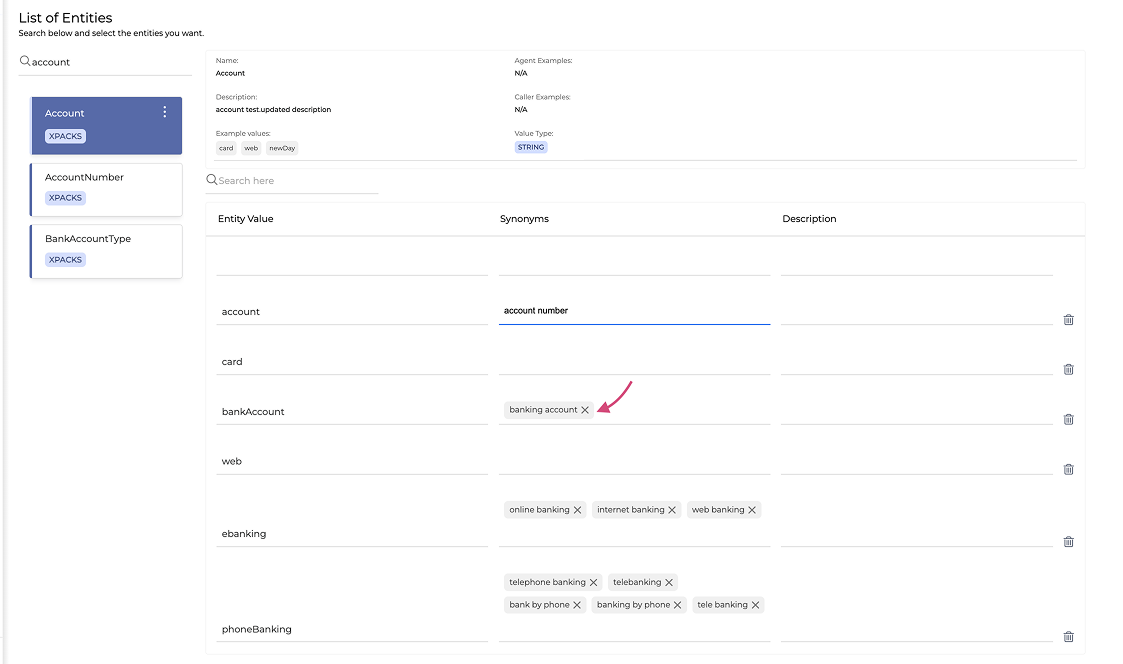
To delete a Synonym, click the Cross icon beside it.
-
To delete an Entity Value, click the Delete icon.
-
Any entity that is modified will be labeled as CUSTOM.

Add an xPack Entity
To add a new custom xPack entity to your Gen AI application, follow the instructions below.
The changes will only apply to the selected application.
-
Click the Add Entity button and select Add Entity.
-
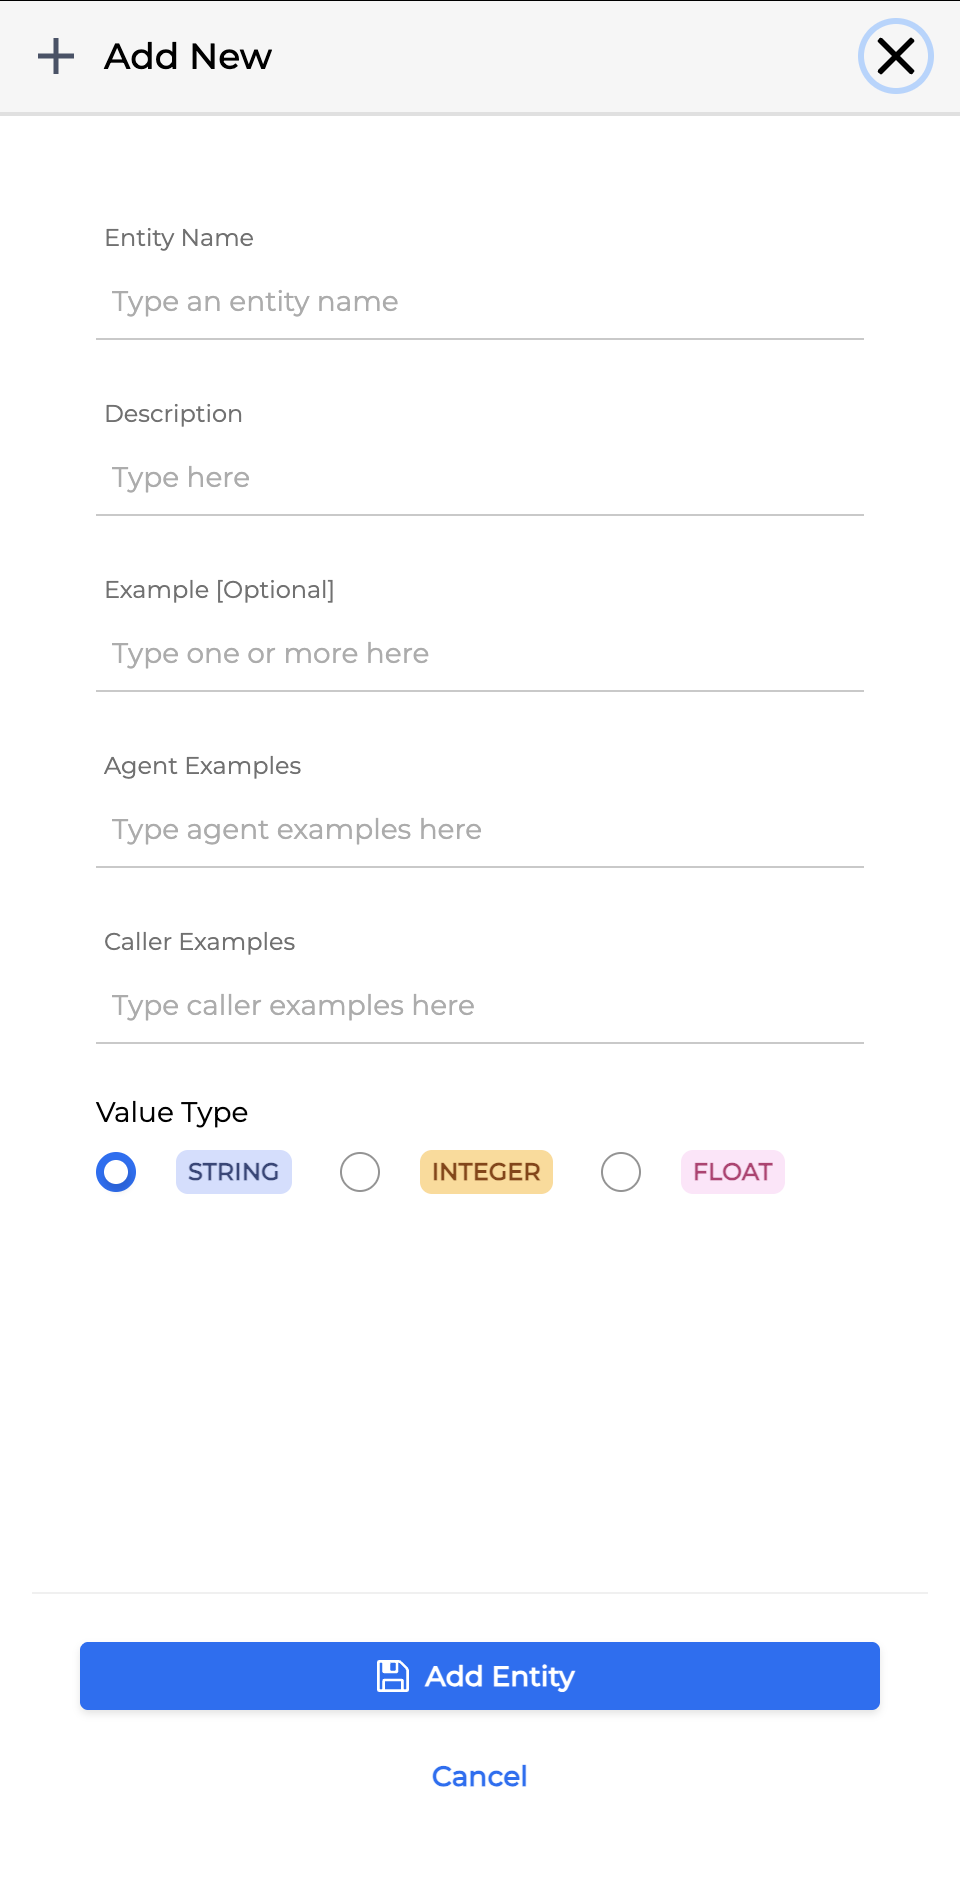
In the dialog box that opens, fill in the fields as described below:
-
Entity Name: The name for the entity.
-
Description: A mandatory description for the entity.
-
Example: An option example.
-
Agent Examples: Example utterances from an agent that contain the entity.
-
Caller Examples: Example utterances from a caller that contain the entity.
-
Value Type: The data type for the entity (e.g., STRING, INTEGER, FLOAT).
-
Click Add Entity to finalize the creation. The created entity will be labelled as CUSTOM and listed in the Entities list.
Upload xPack Entities
To upload multiple xPack entities as a CSV or ZIP file, proceed as follows:
-
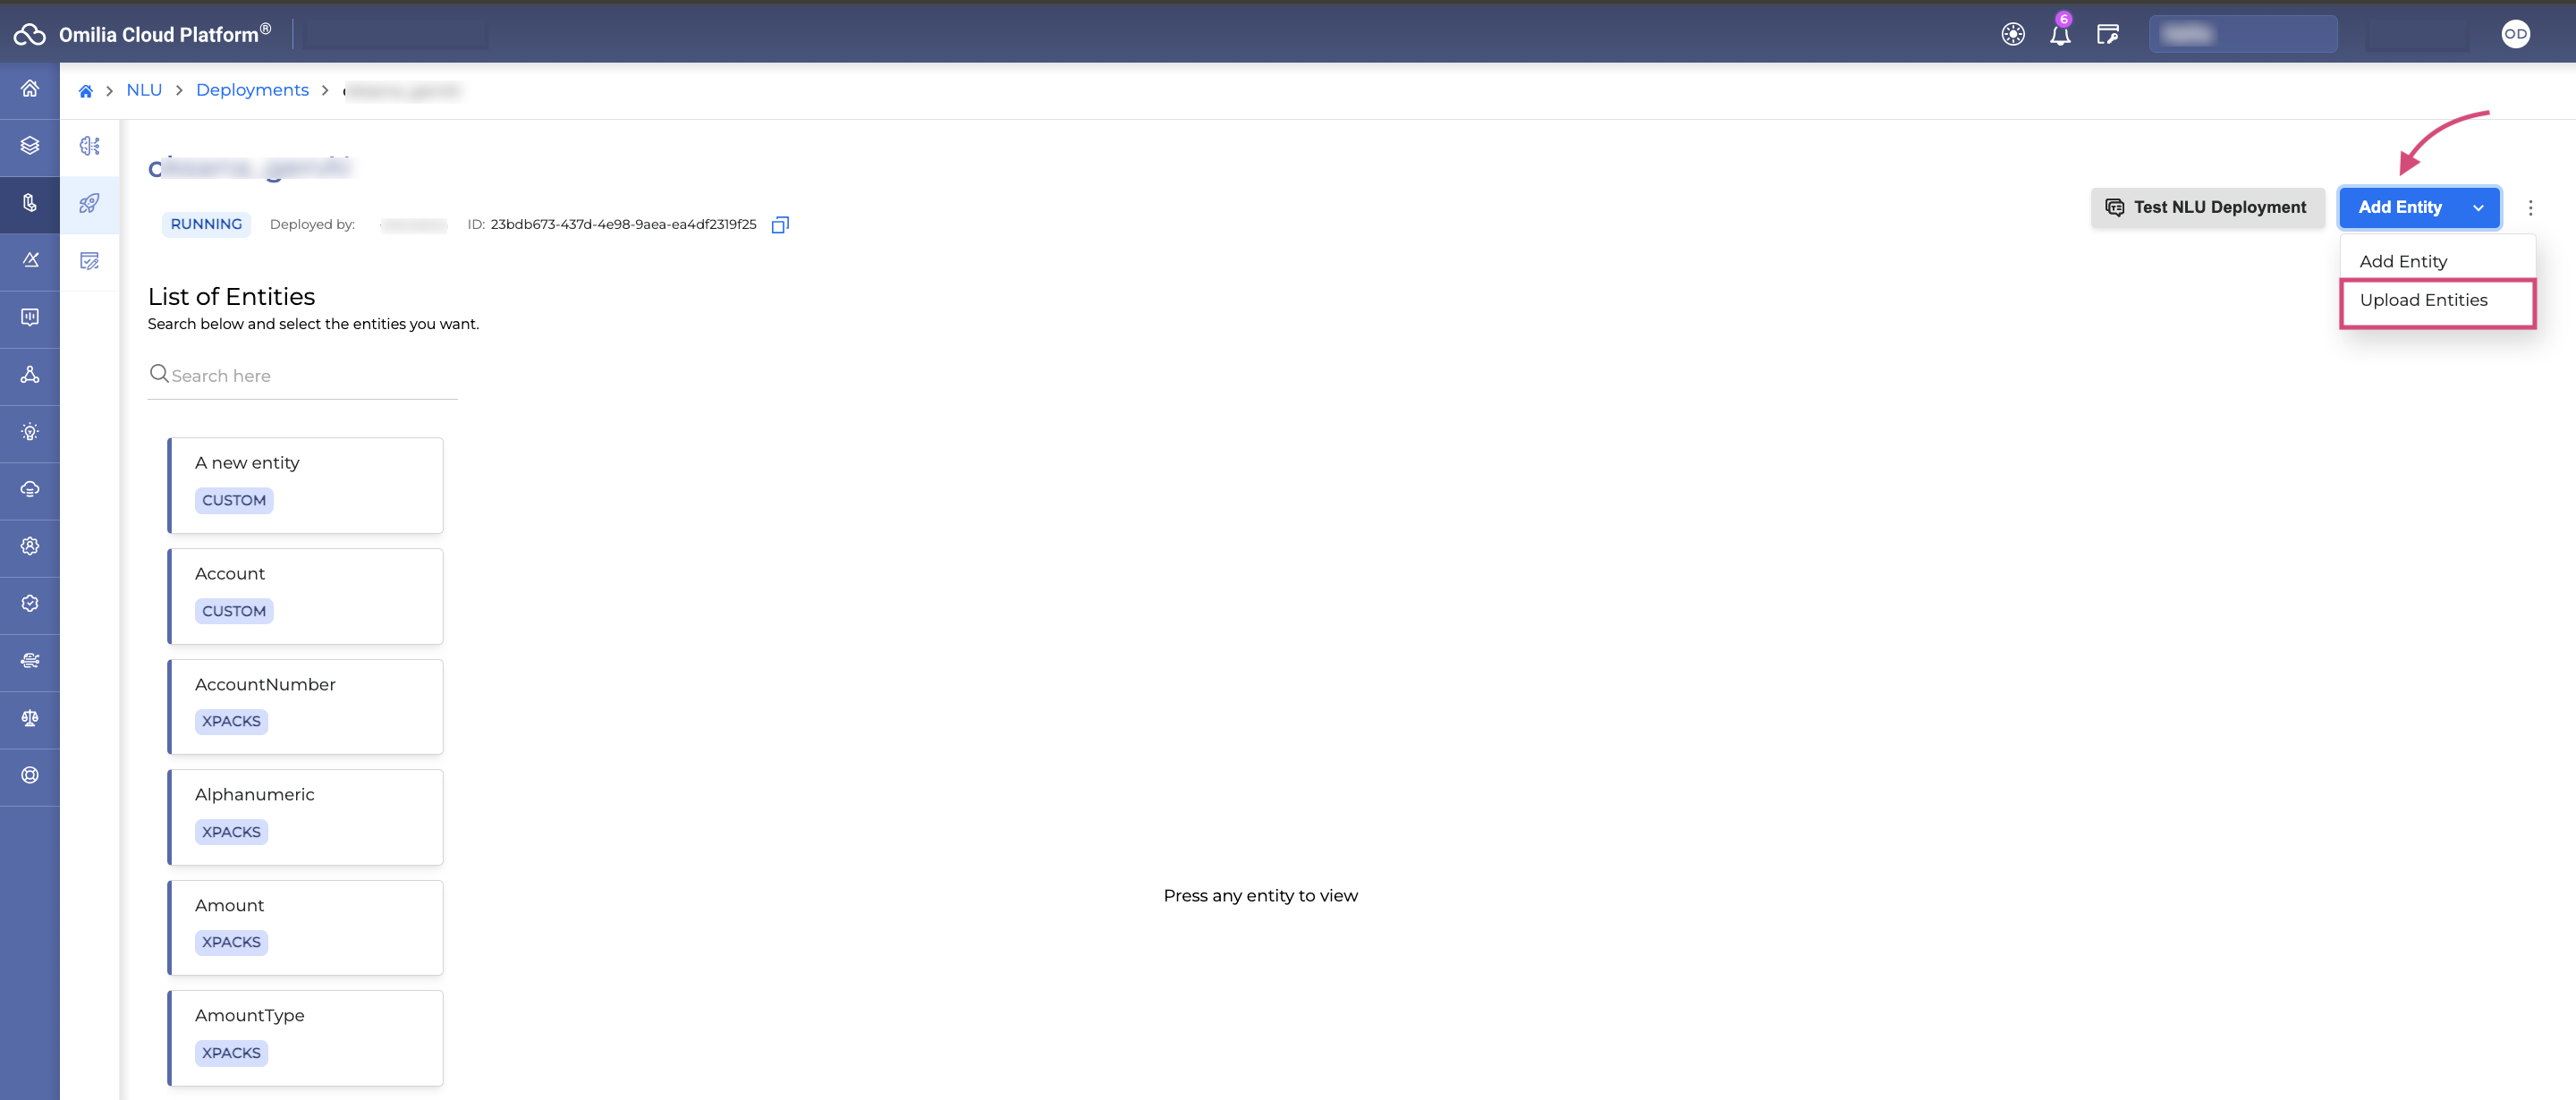
Click the Add Entity button and select Upload Entities.
-
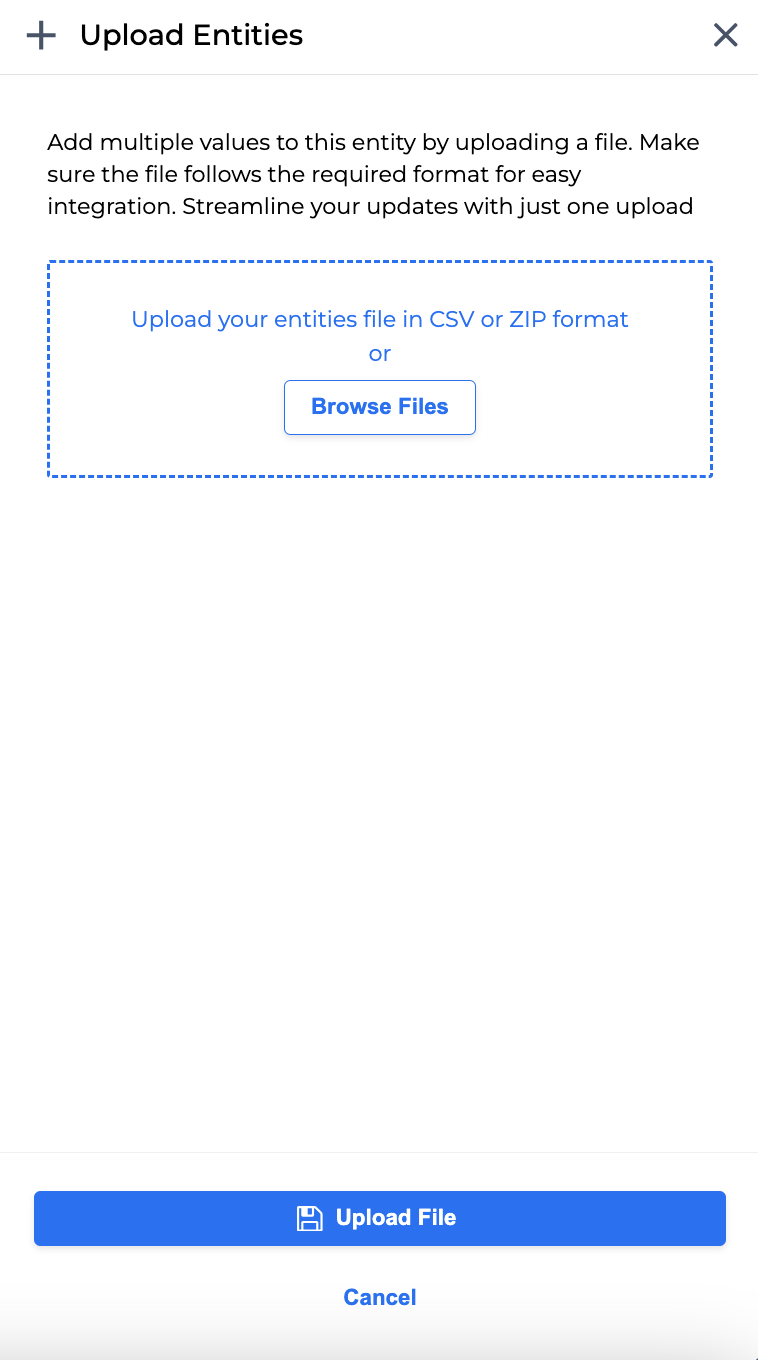
In the dialog box that opens, drag and drop your file or click Browse File to locate and select your CSV or ZIP file.
-
Click Upload Entities to proceed. The entities will be labeled as CUSTOM and appear in the list.
Delete an xPack Entity
Only entities labeled as CUSTOM can be deleted.
To delete a custom entity from your Gen AI application, follow these steps:
-
Select an entity and click the Options Menu icon → Delete.
-
In the confirmation pop-up box, click Delete to confirm.

The entity will be removed from the Gen AI application.
Test a Gen AI application
To test a Gen AI application, proceed as follows:
-
Navigate to NLU → Deployments section → select a Gen AI application and click on it.
-
On the page that opens, click the Test NLU Deployment button.
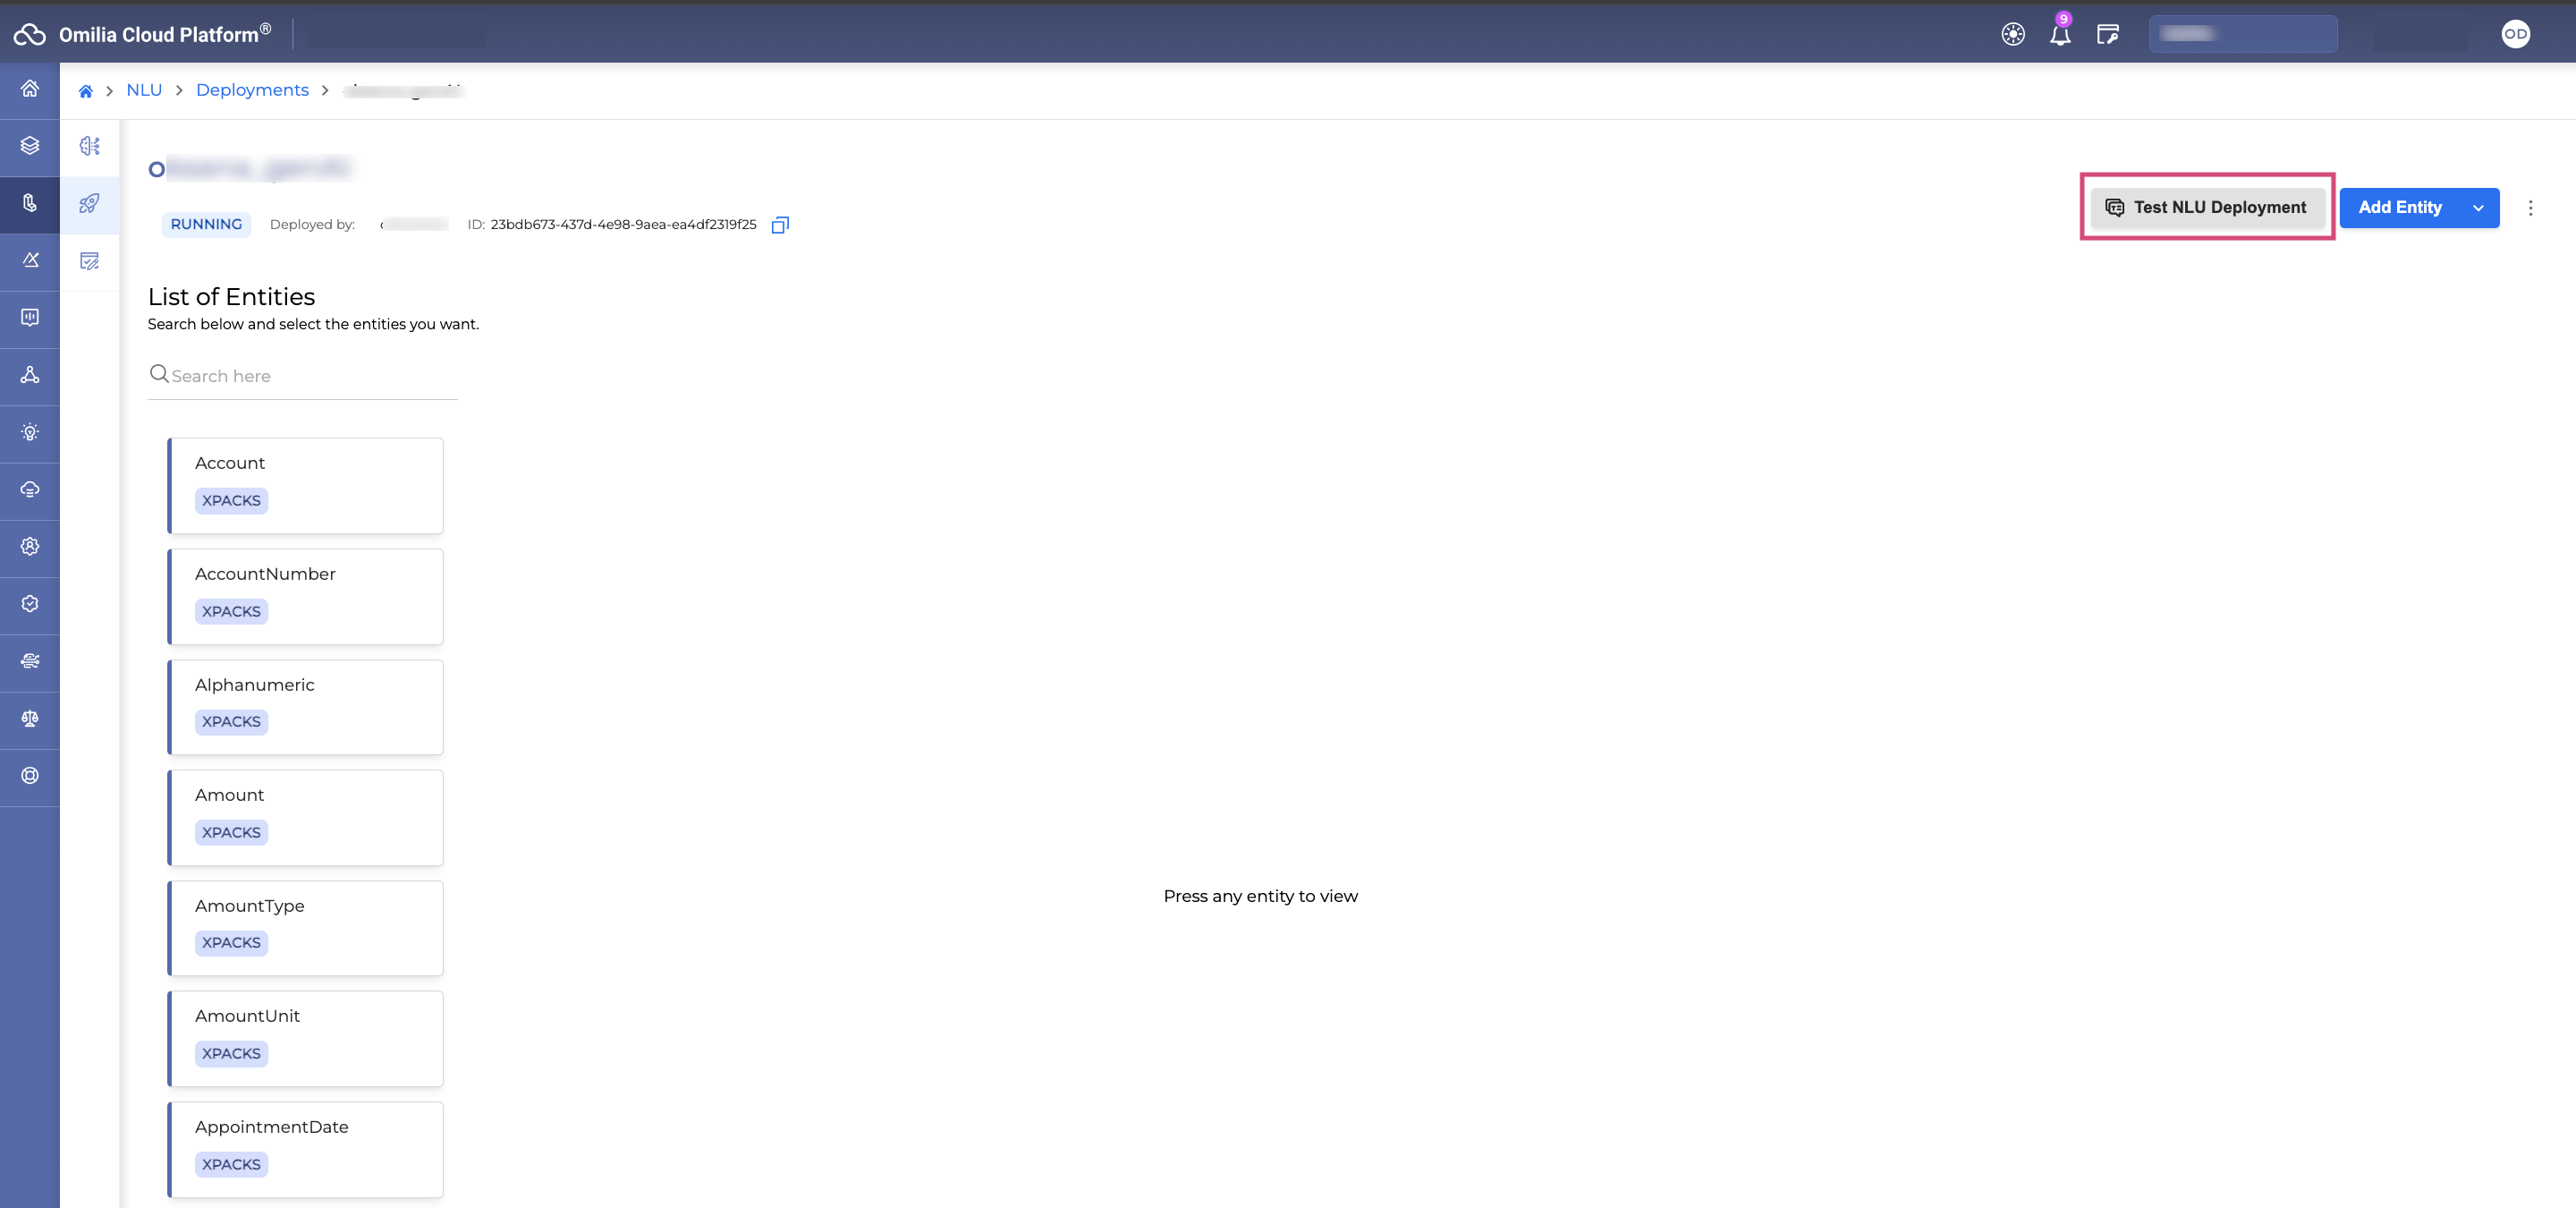
You can only test running models. If a Gen AI model is stopped, the Test NLU Deployment button will be greyed out.
-
The following window opens.
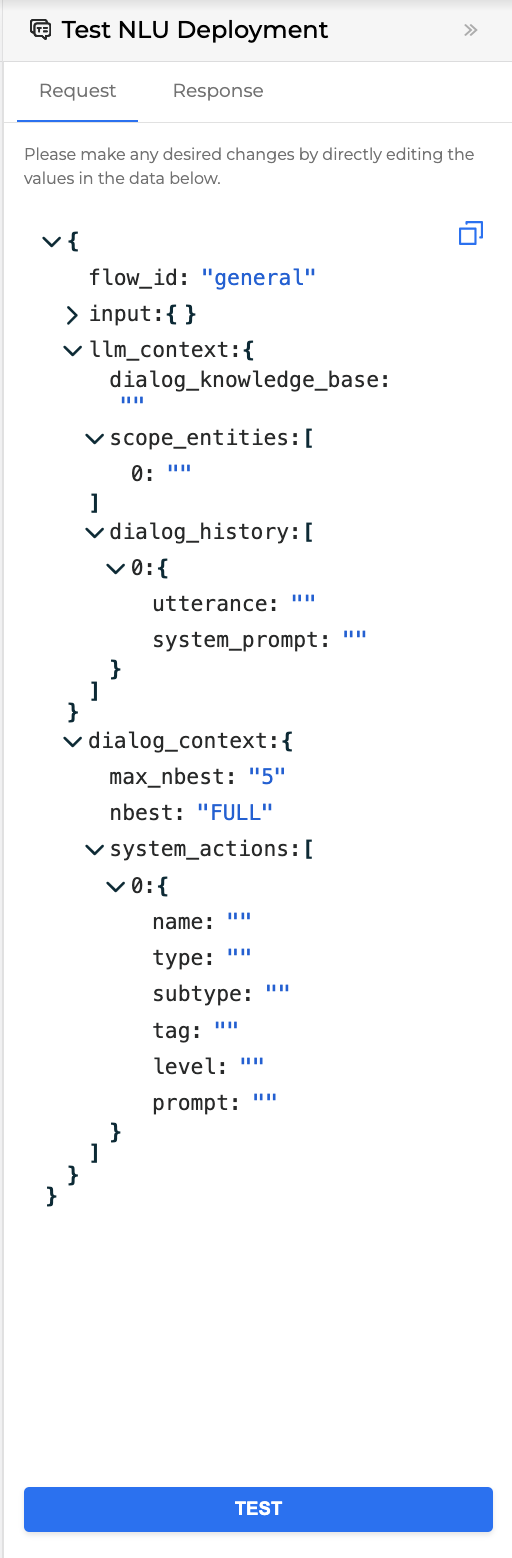
-
In the Request tab, edit the values in the
llm_contextparameters based on the data you want to extract. To edit the values:-
Hover over the value you want to edit and click the Edit icon.
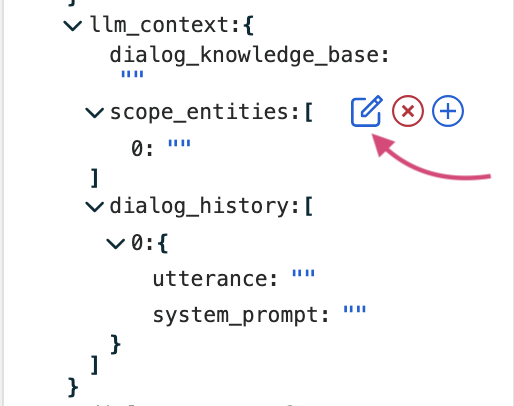
-
Make your changes and click the Tick icon to cofirm.
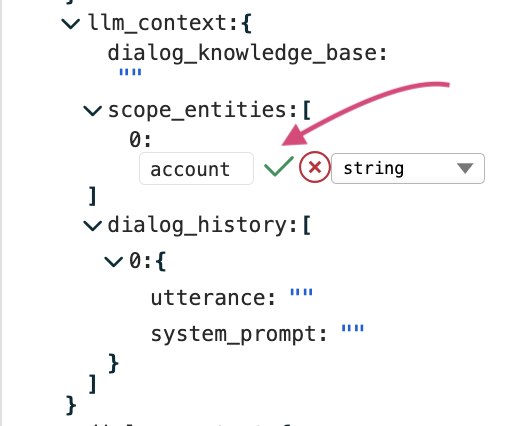
-
-
Click the Test button to start testing.
-
The response is returned as JSON and displayed in the Response tab. You can copy the response body by clicking the Copy icon.
Update Gen AI application’s settings
To access and update the settings of your Gen AI application, follow the step below:
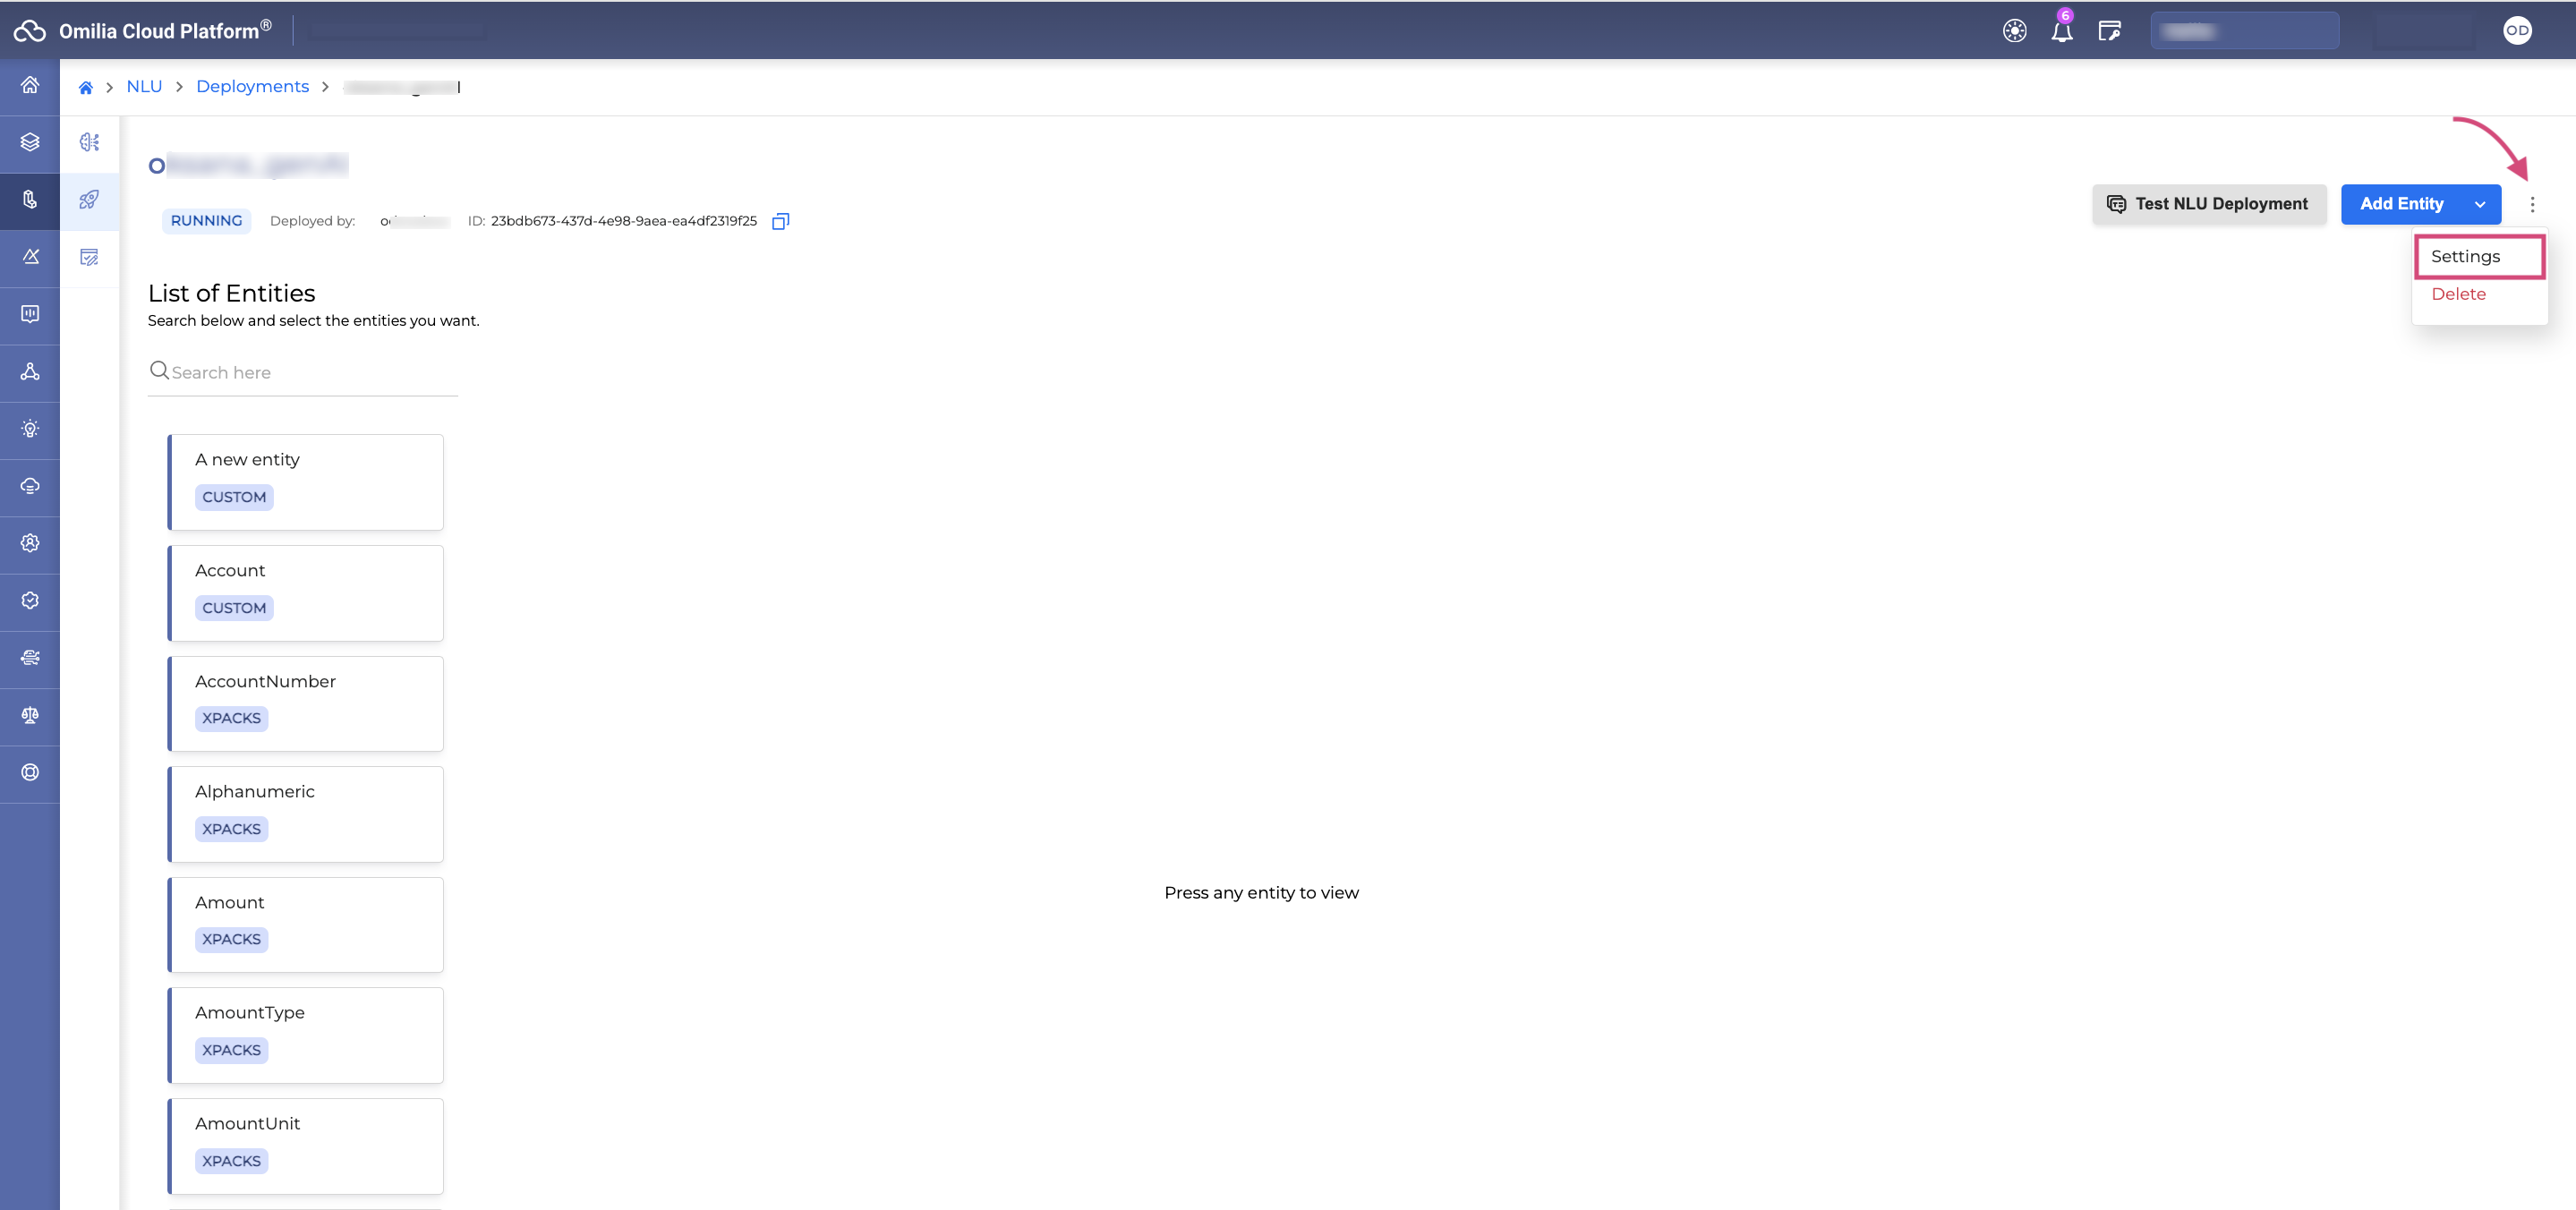
-
Click the Options Menu icon → Settings.
-
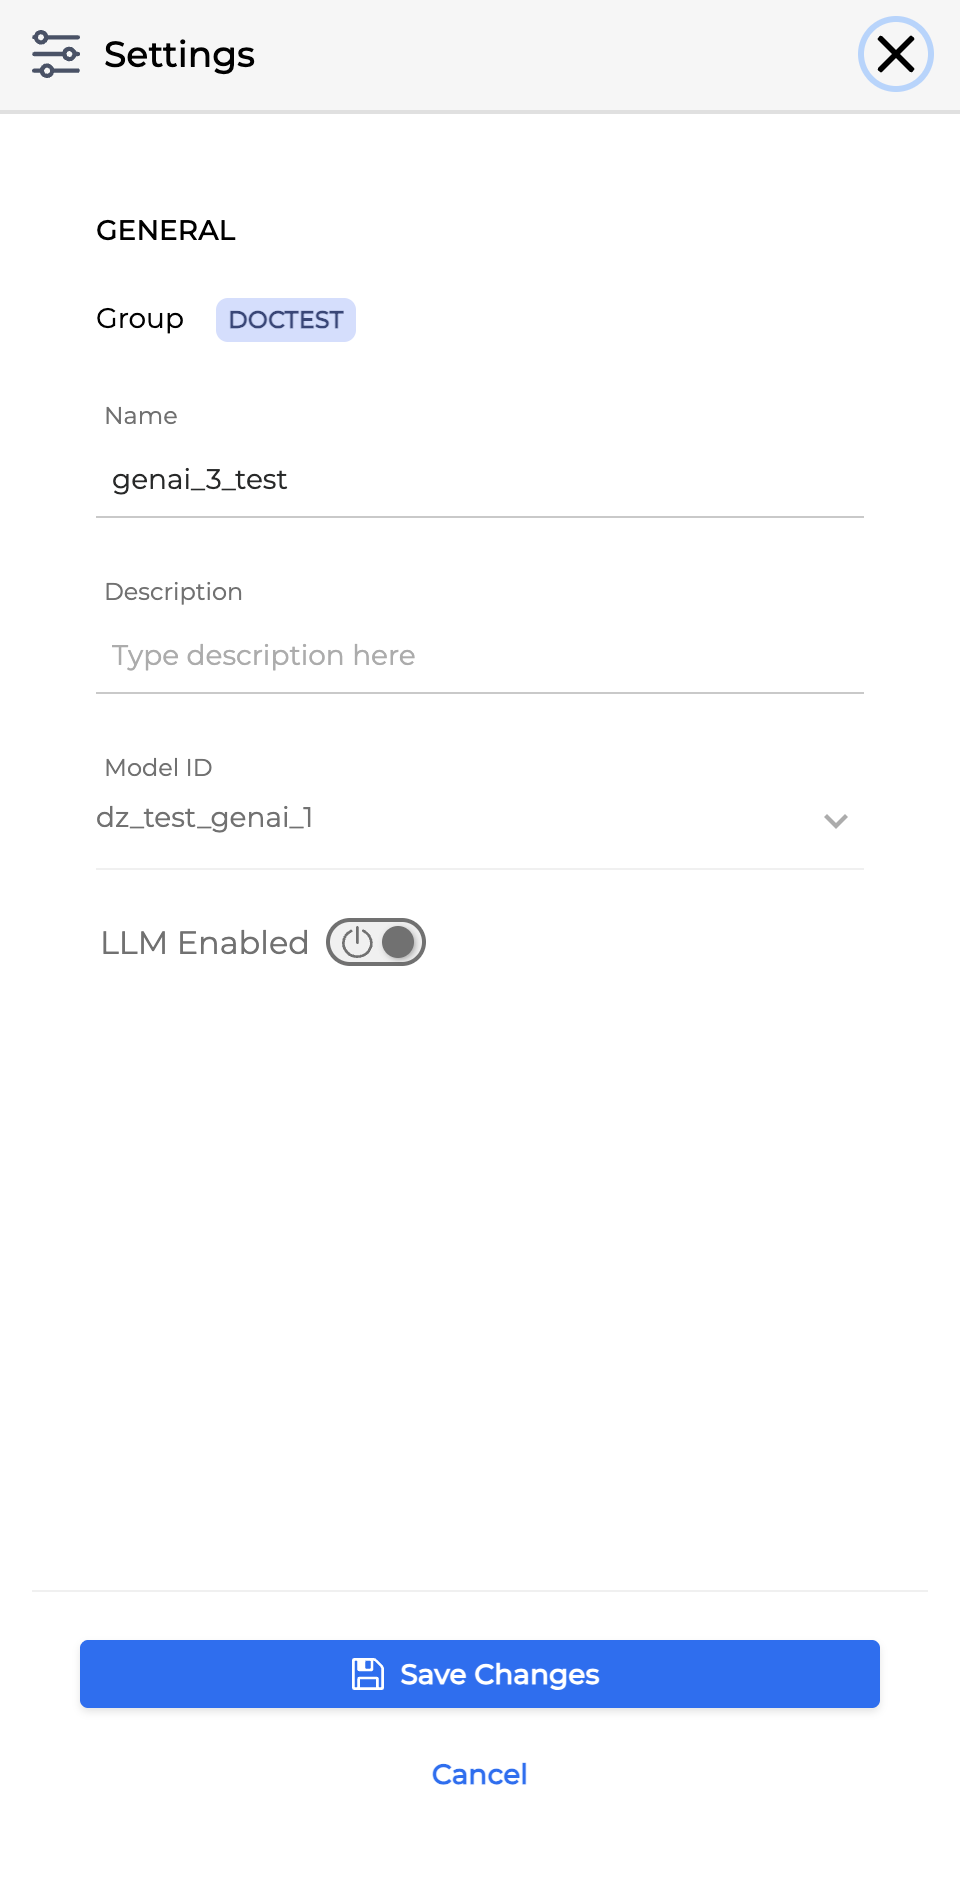
The following dialog box will open:
-
General: The general information about the Gen AI application.
-
Group: Group of users who can use the application. This field is not editable.
-
Name: Editable name of the application.
-
Description: Editable application description.
-
Model ID: The ID of the model the application is assigned to. This field is not editable.
-
LLM Enabled: A toggle to enable or disable generative AI processing for the application.
-
-
Click Save Changes to apply the updates.
Delete a Gen AI application
To remove a Gen AI application, follow the steps below:
-
Navigate to NLU → Deployments section → select a Gen AI application and click on it.
-
On the page that opens, click the Options Menu icon → Delete.

-
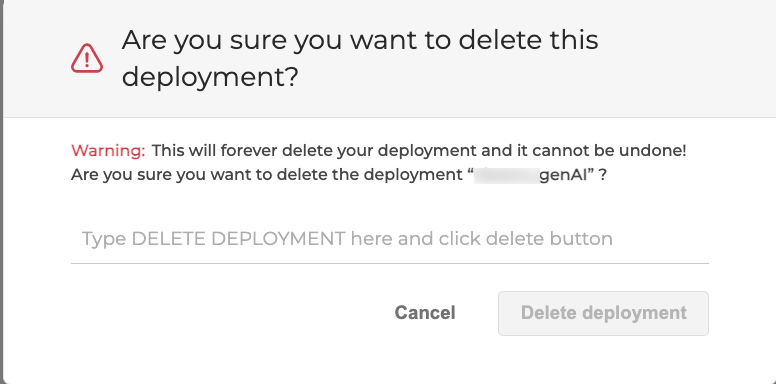
The dialog box opens:
-
Type DELETE DEPLOYMENT and click Delete. The selected Gen AI application will be deleted.
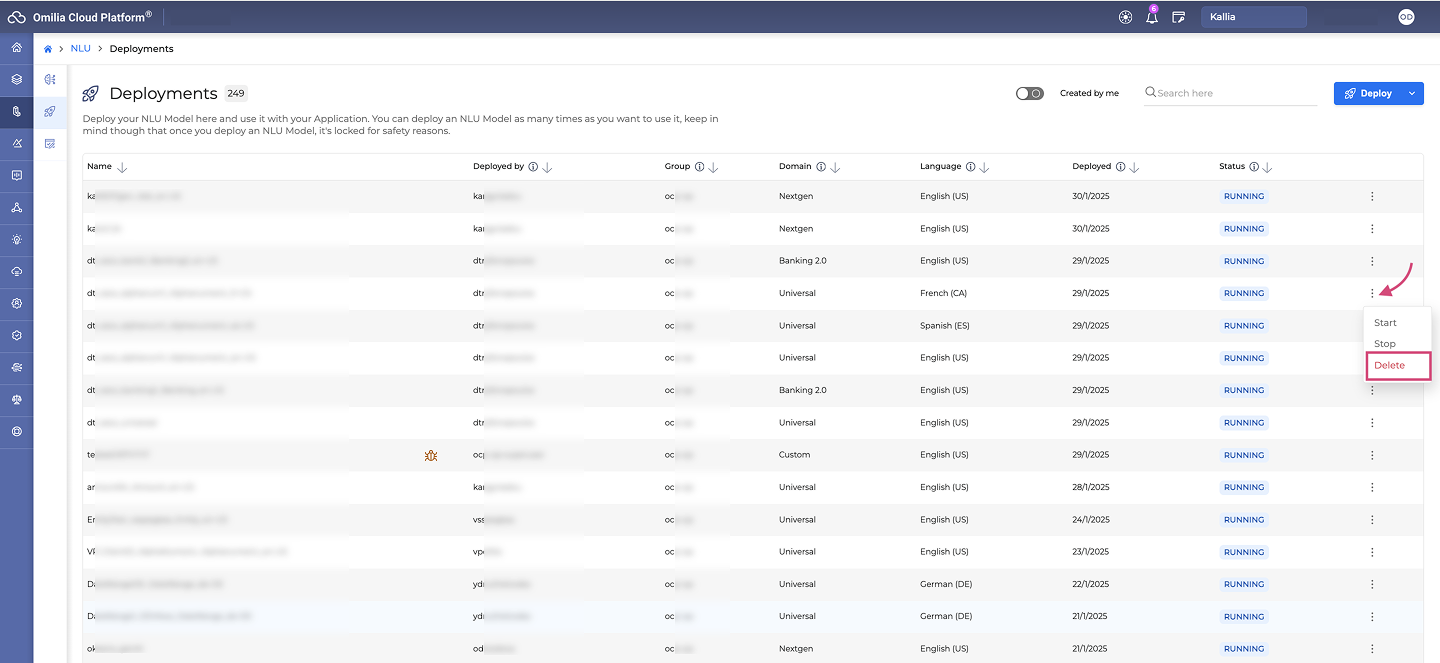
You can also remove a Gen AI application directly from the deployments list by selecting the Options Menu icon and choosing Delete.