Introduction
This document provides an overview of what’s required to successfully integrate OCP® and Talkdesk Digital Connect.
Before configuring OCP® integration with Talkdesk, make sure you have created a Flow in Orchestrator and a Studio Flow in Talkdesk.
Integration steps
Below you can find step-by-step instructions on OCP® and Talkdesk Digital Connect integration.
Create and configure OAuth Client
As the first integration step, you need to create and configure your OAuth client.
To create an OAuth client, proceed as follows:
-
Navigate to Talkdesk Classic.
-
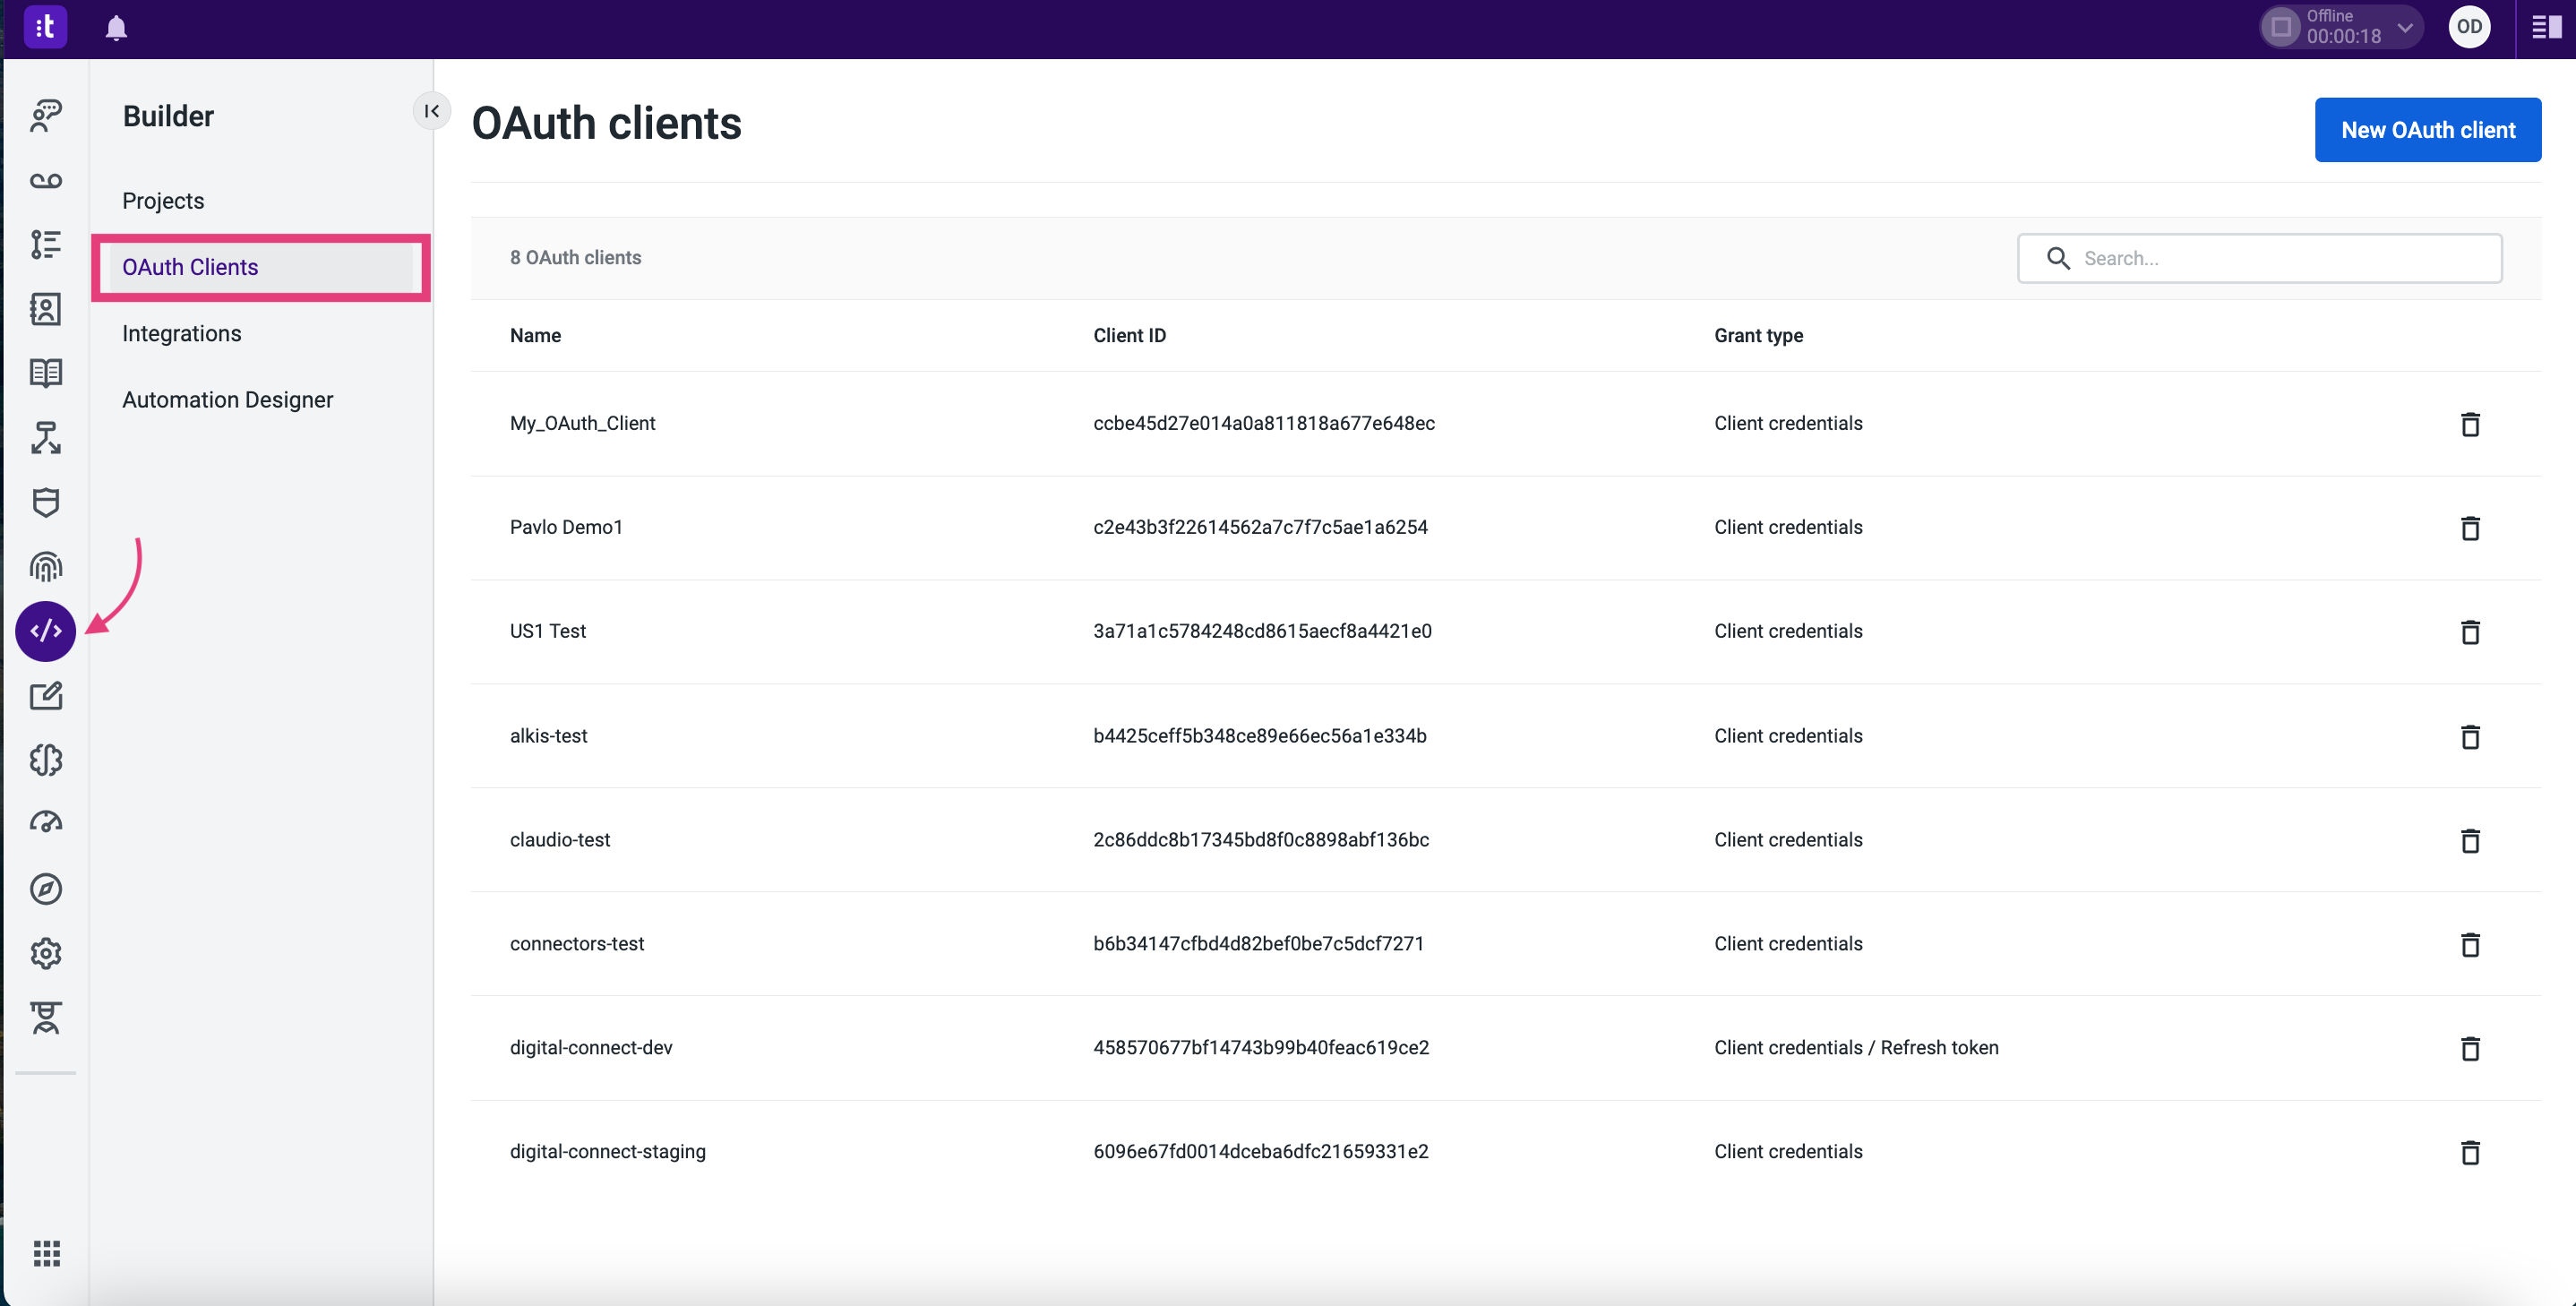
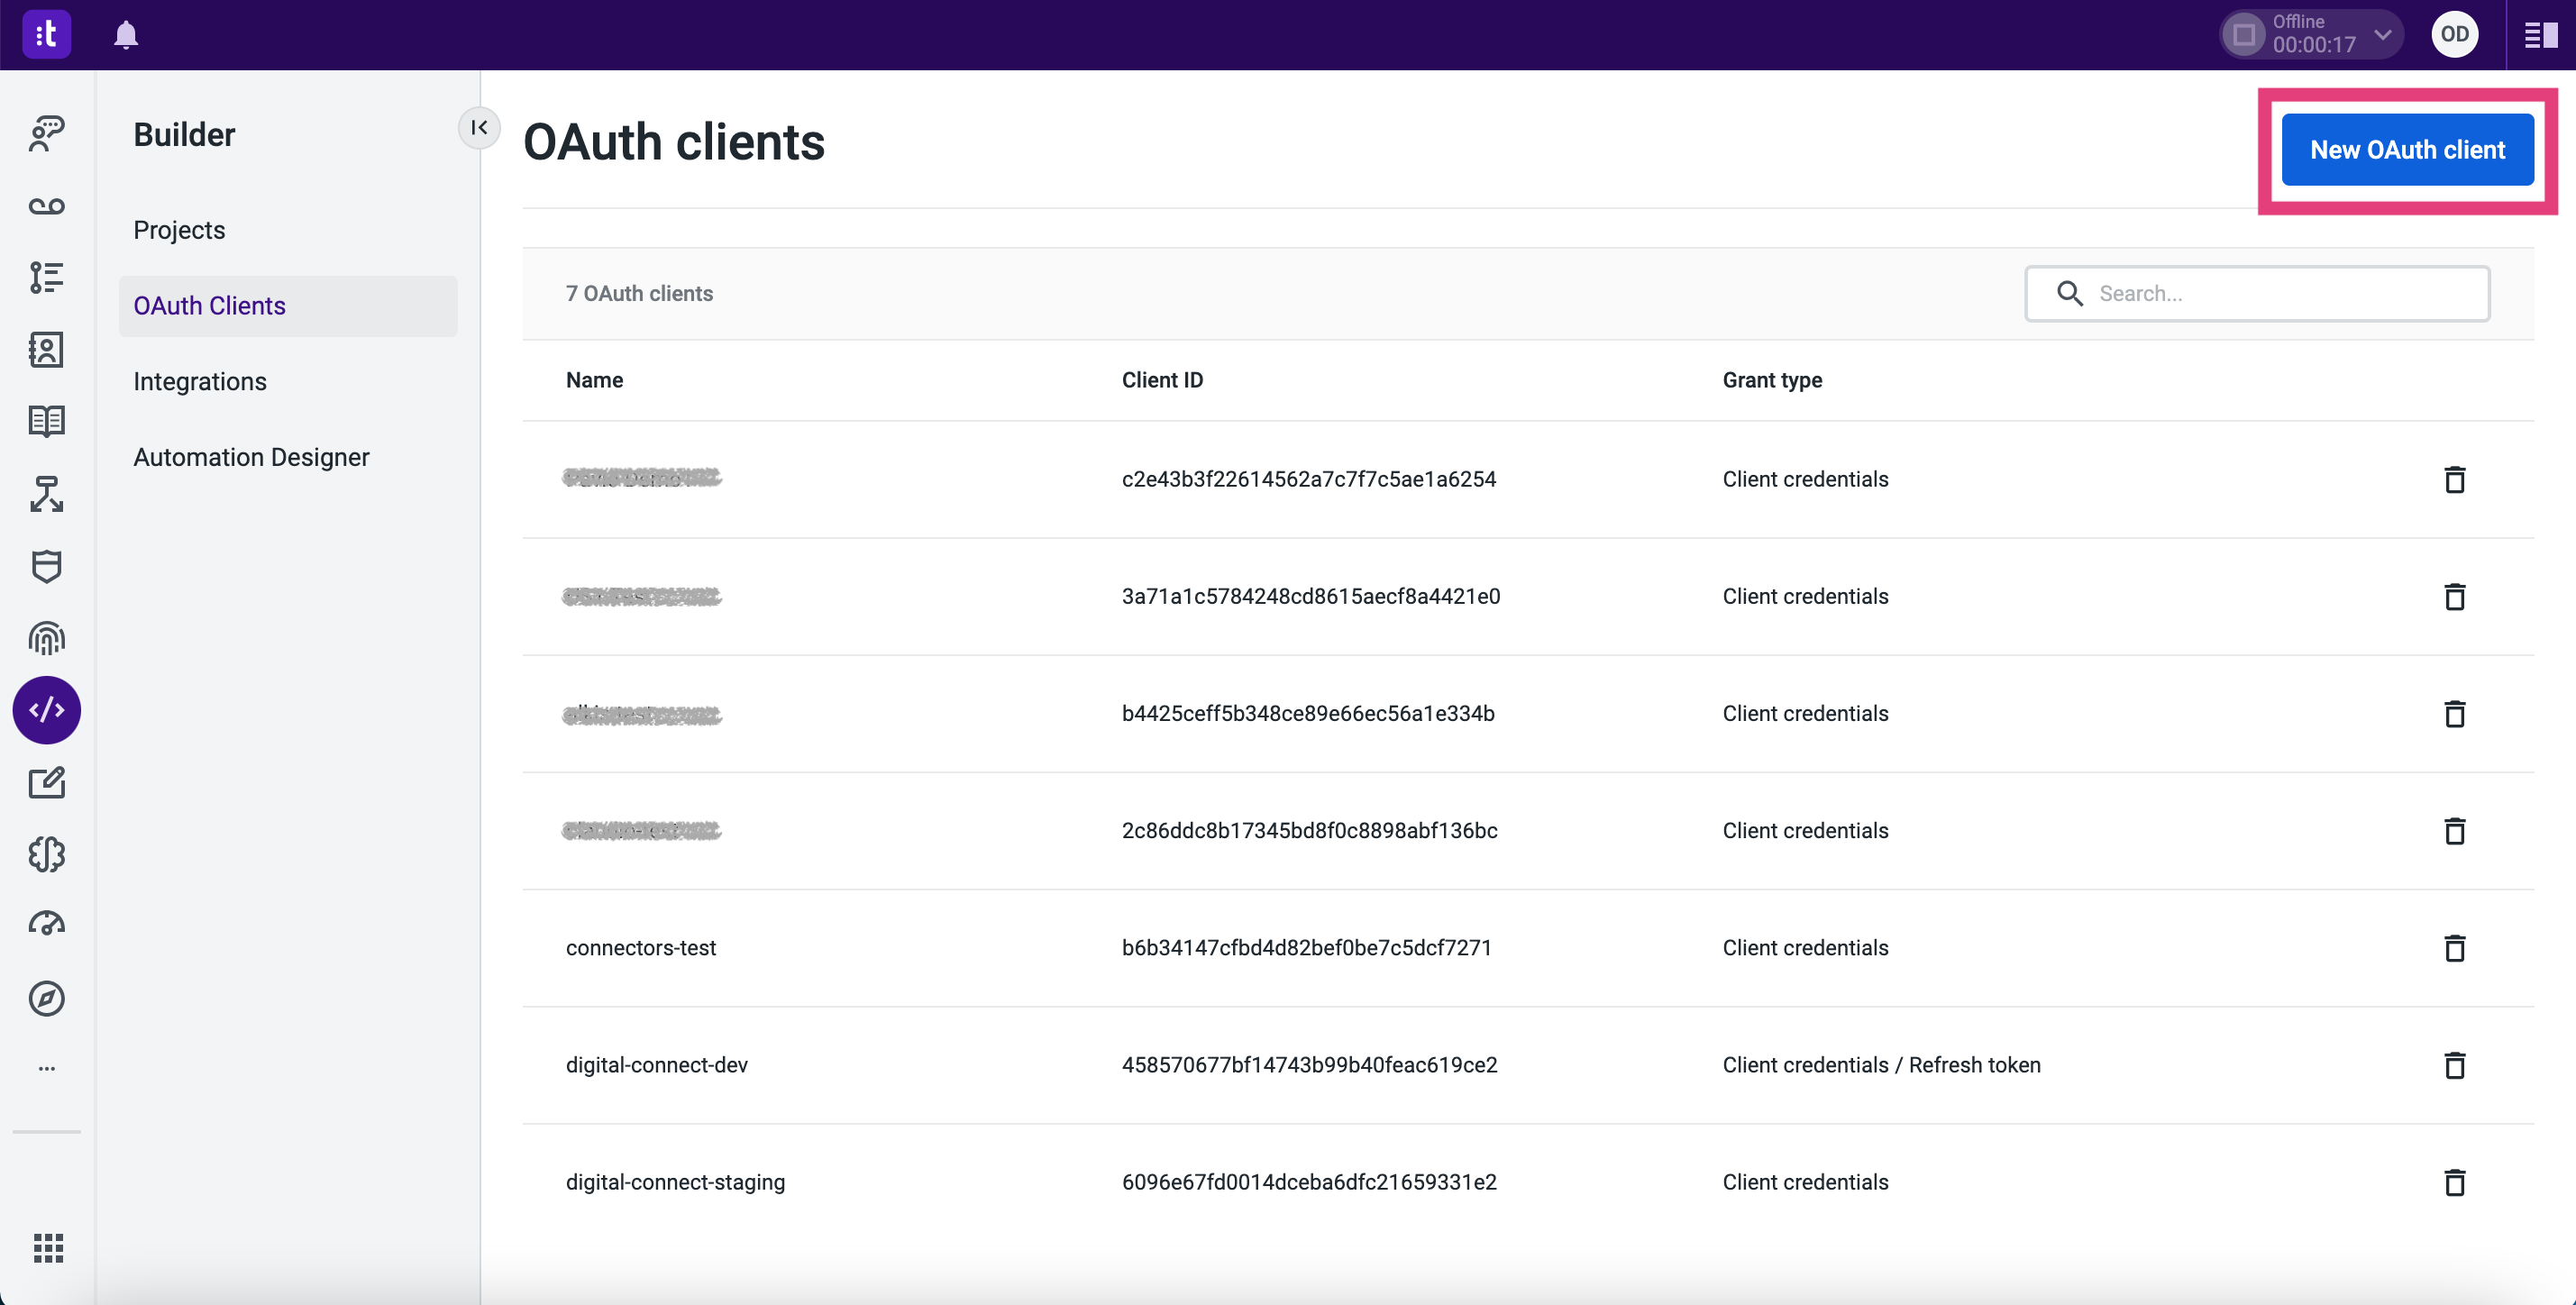
Click My Apps and scroll down to select OAuth Clients.
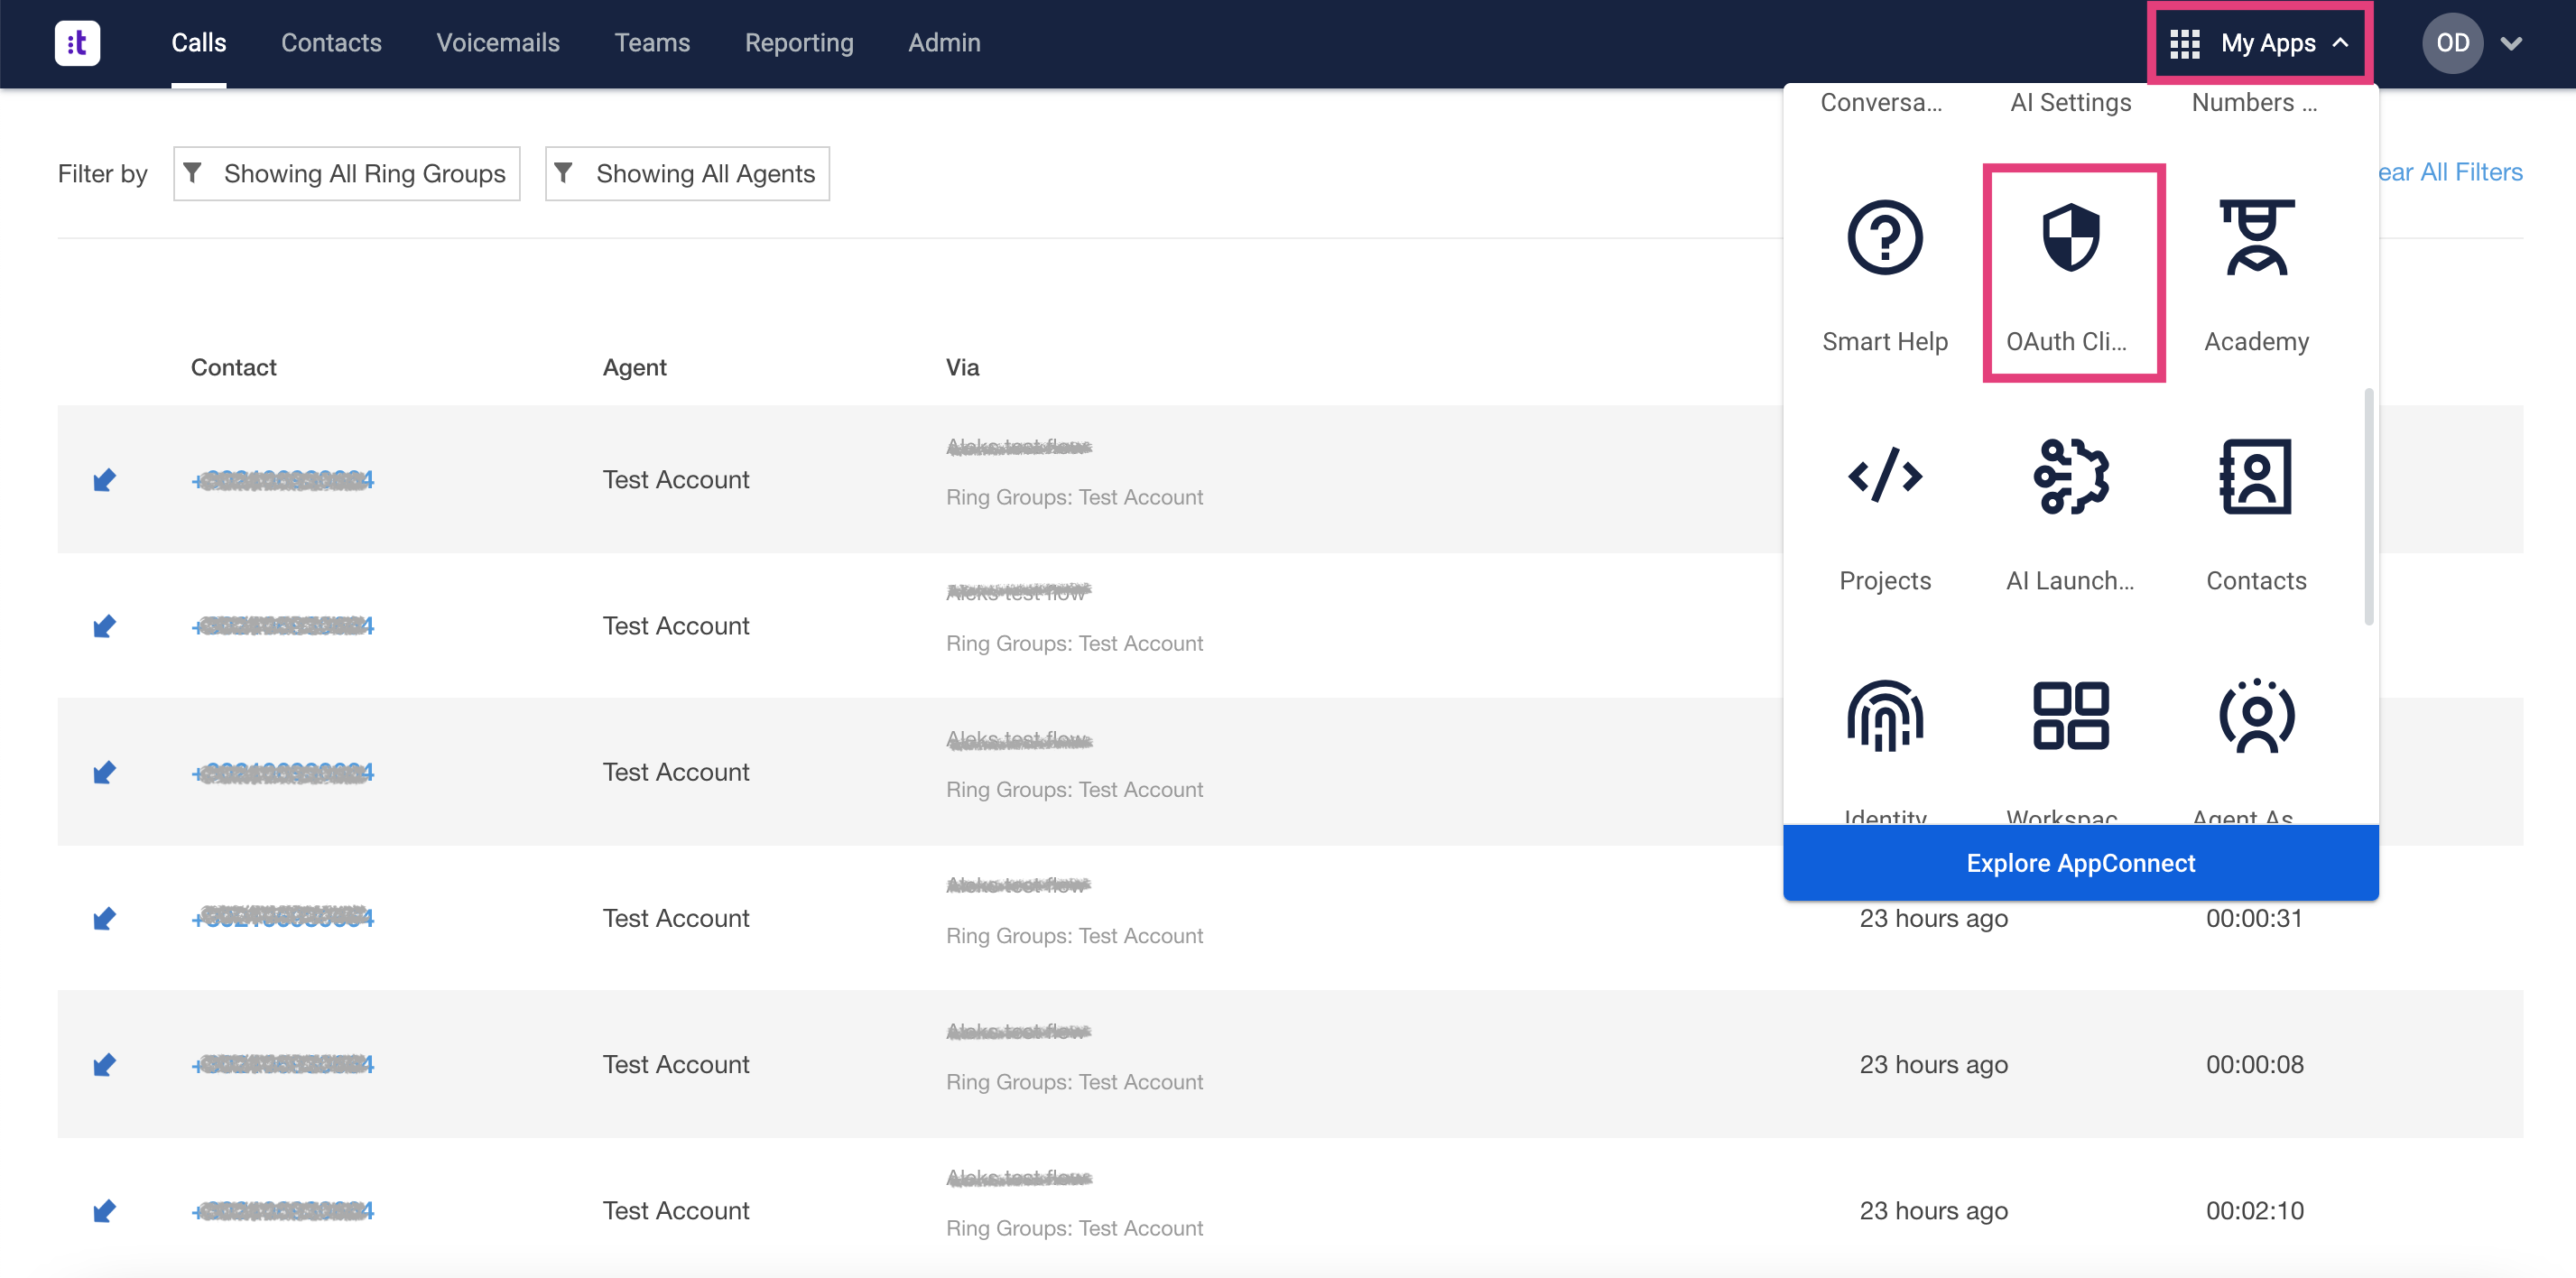
Alternatively, you can navigate to Talkdesk Atlas and select Builder → OAuth Clients as shown below.
-
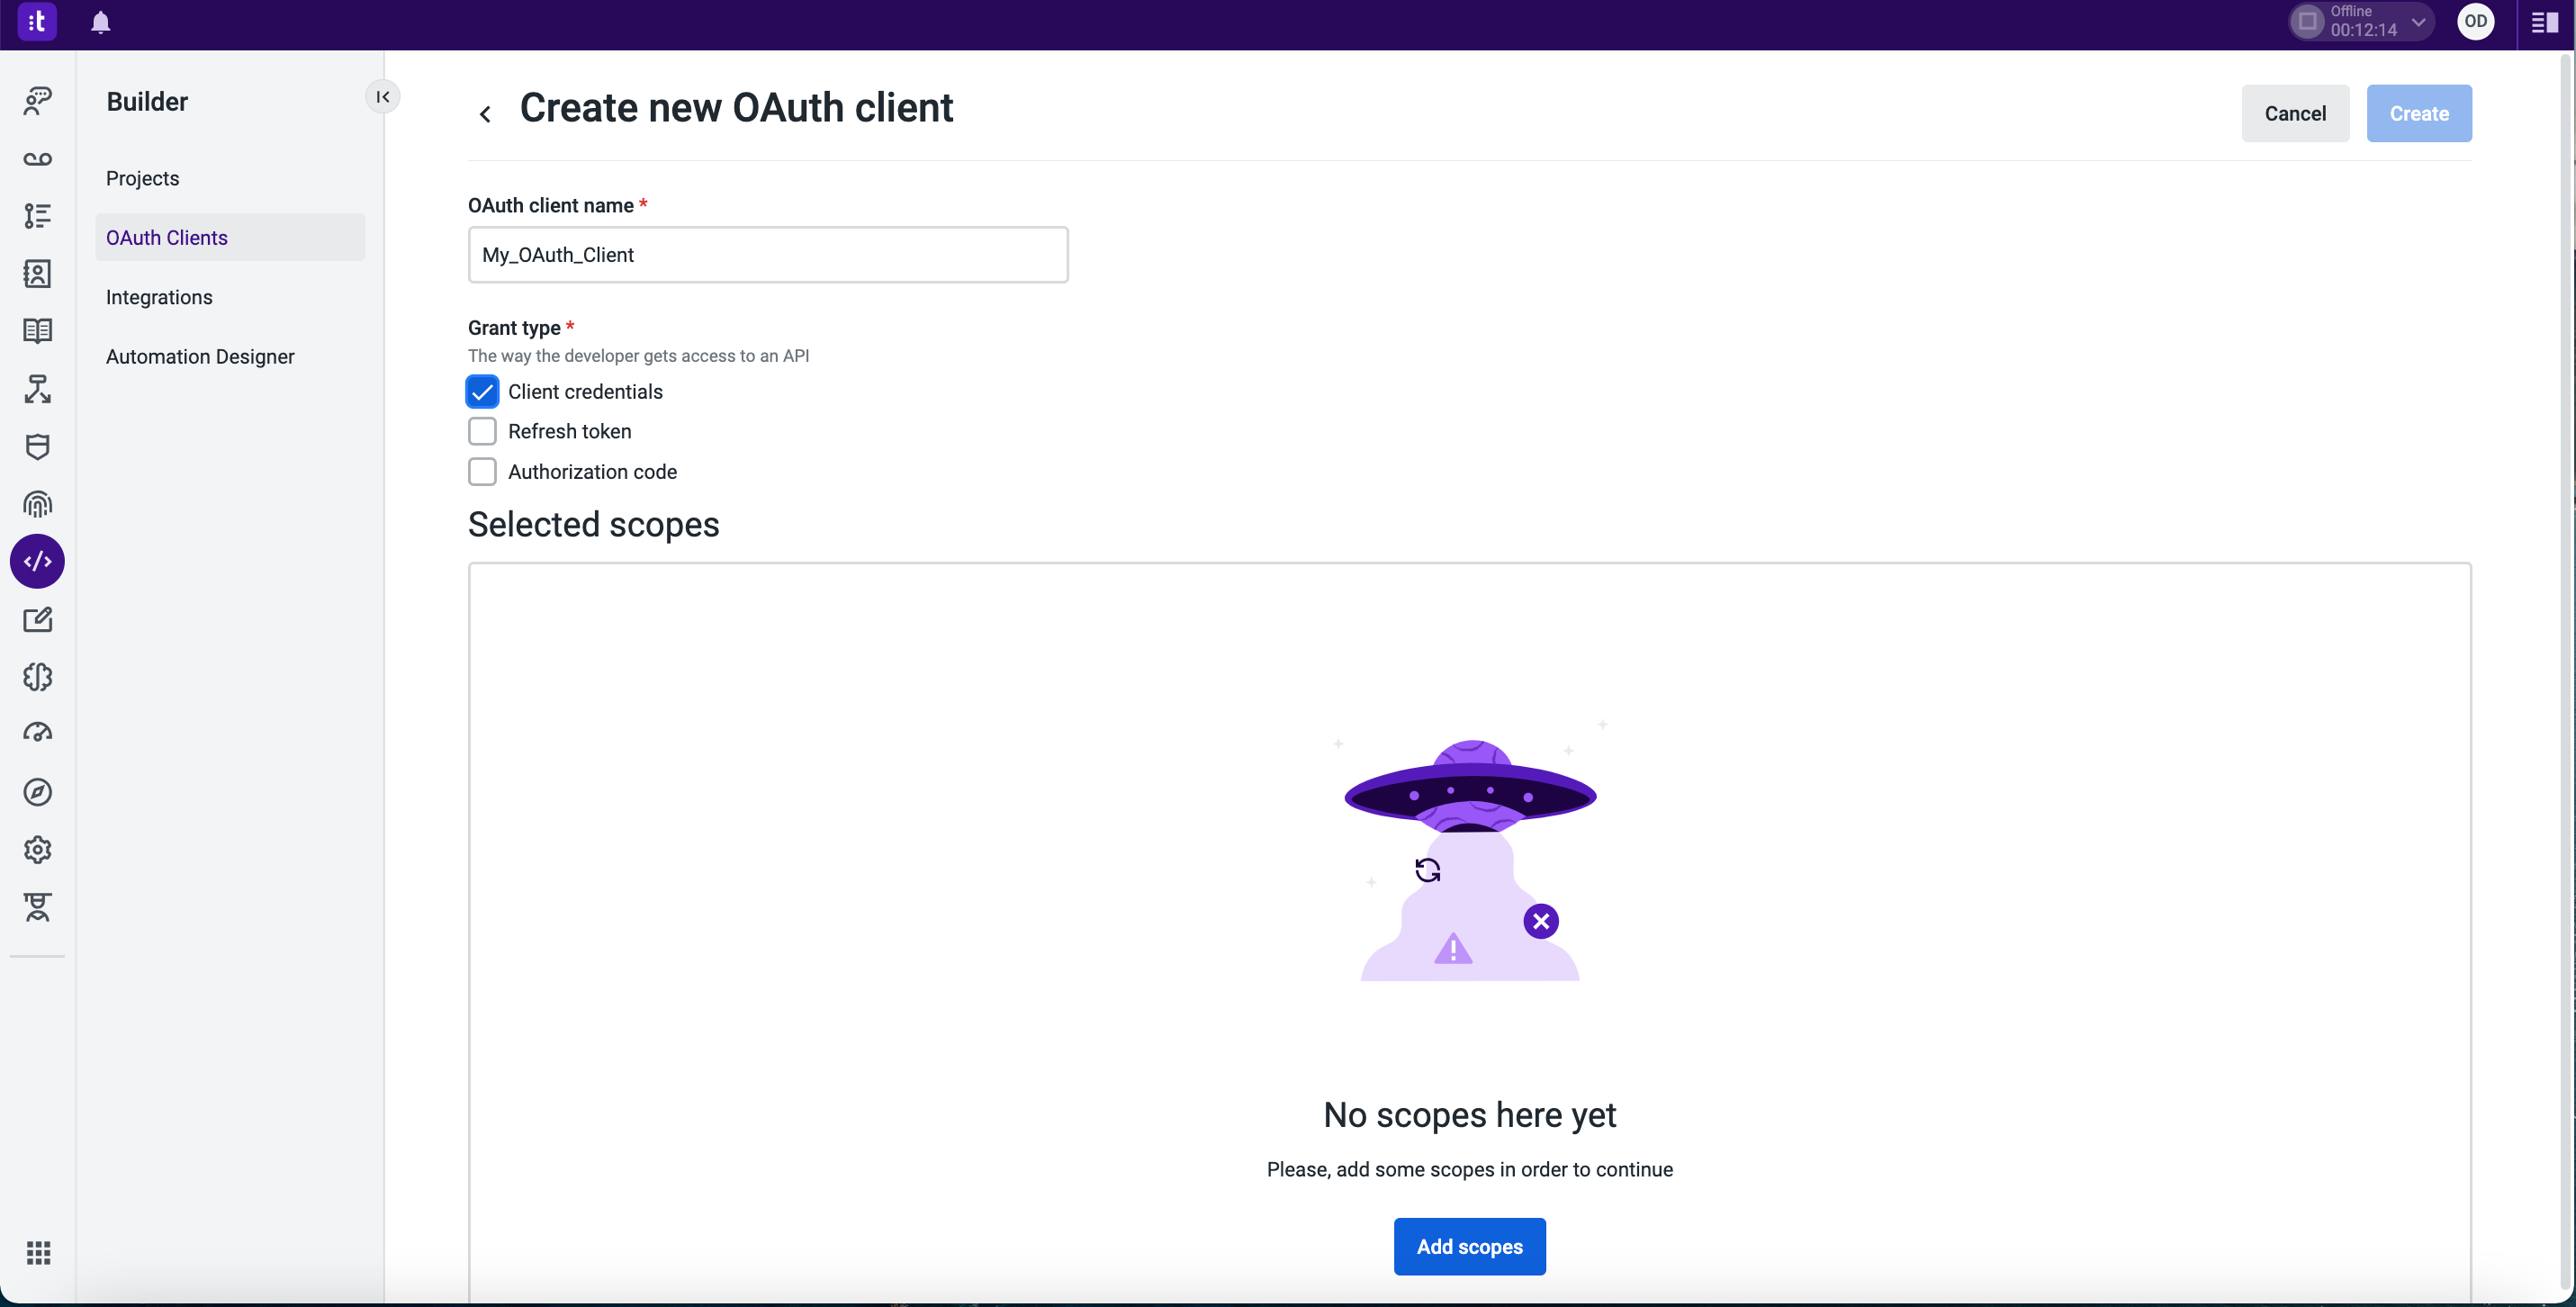
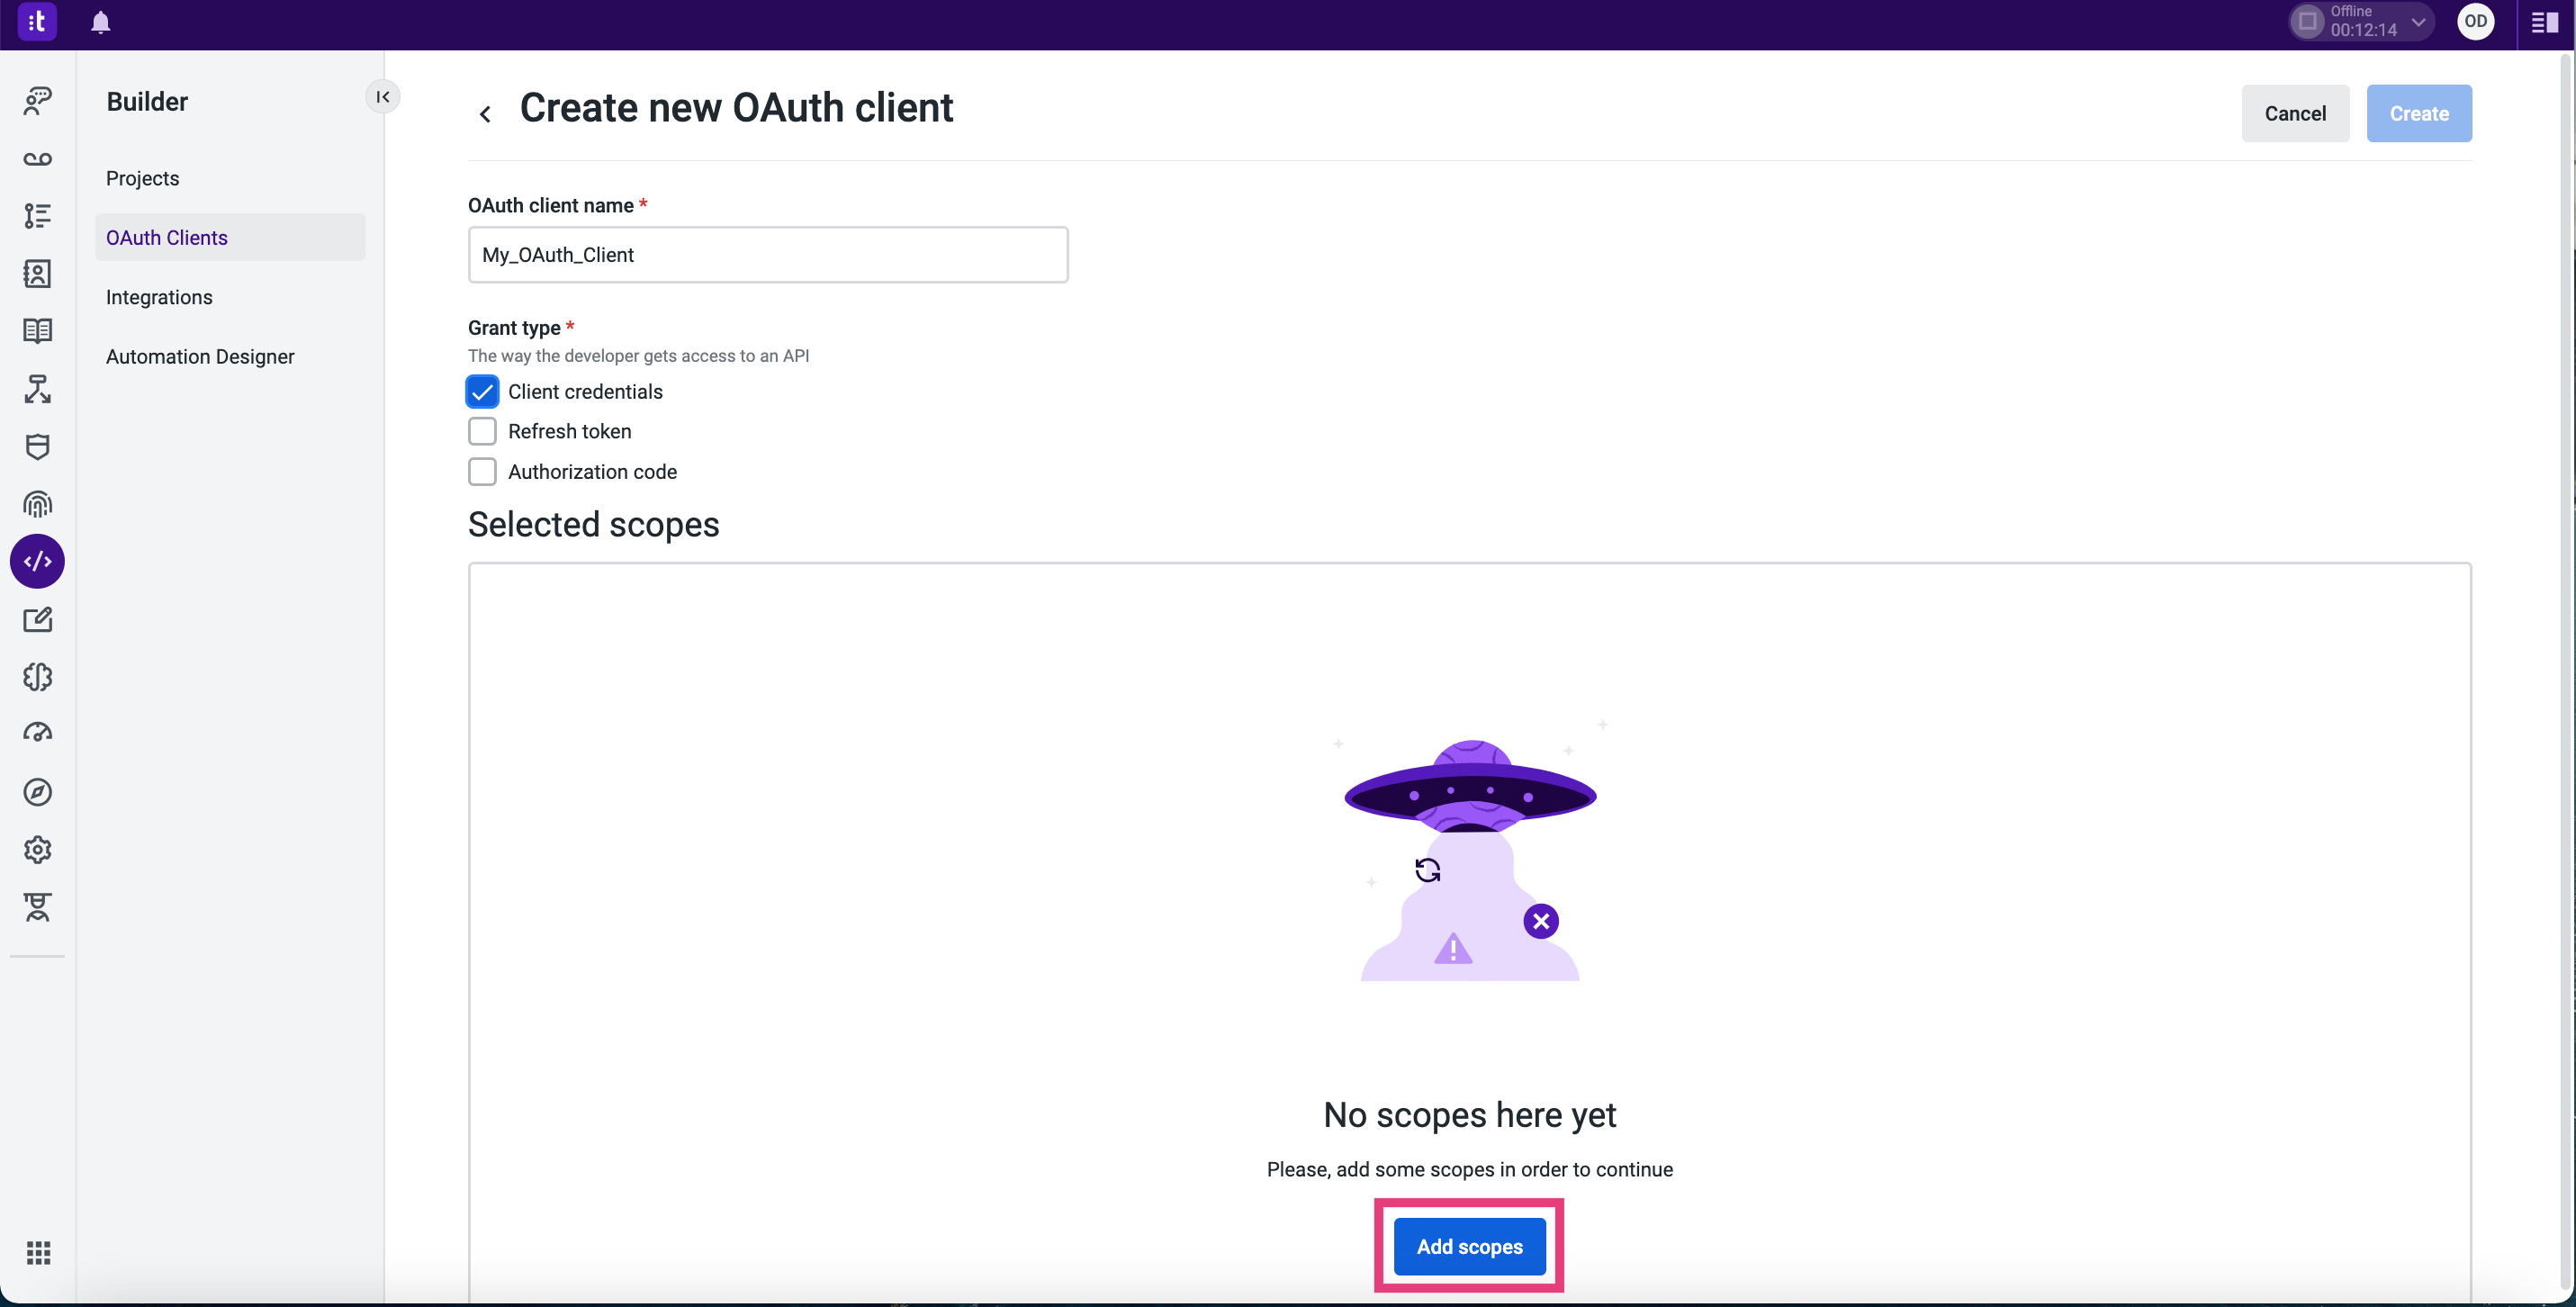
Click New OAuth Client.
-
On the opened page, enter the OAuth client name and mark the Client credentials checkbox.
-
Click Add Scopes.
-
On the opened page, select the following scopes from the list: digital-connect:read, digital-connect:write. Use the Search field to find the needed scopes. Then click the Add scopes to confirm the selection.
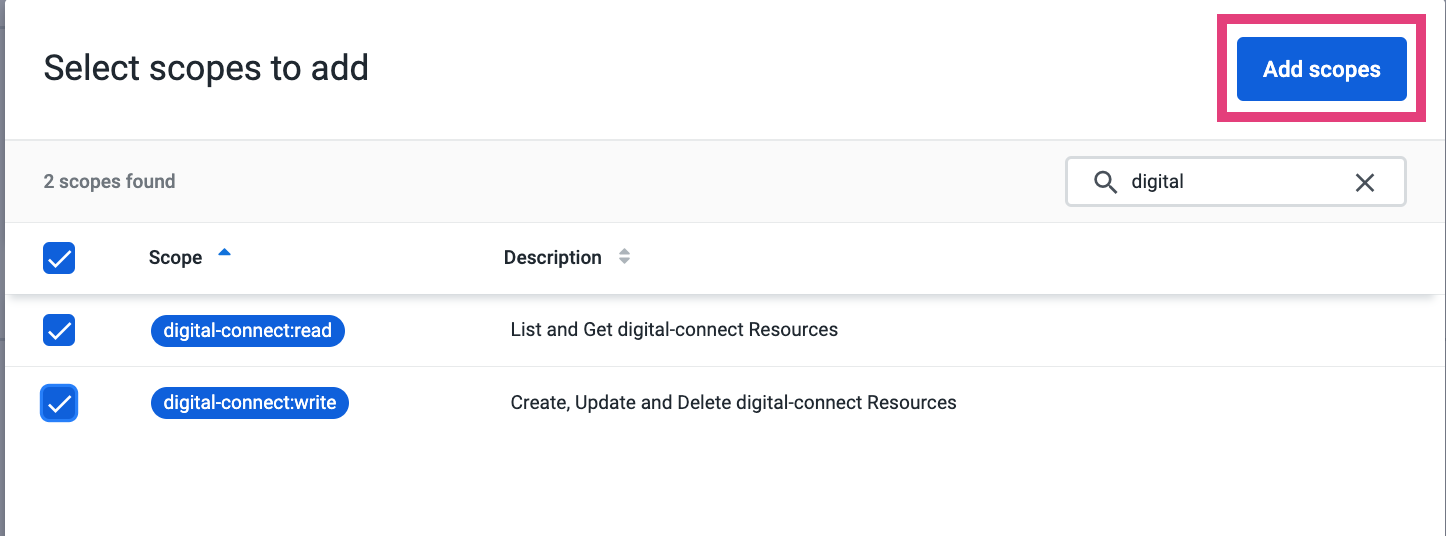
-
Hit the Create button to finalize the process.
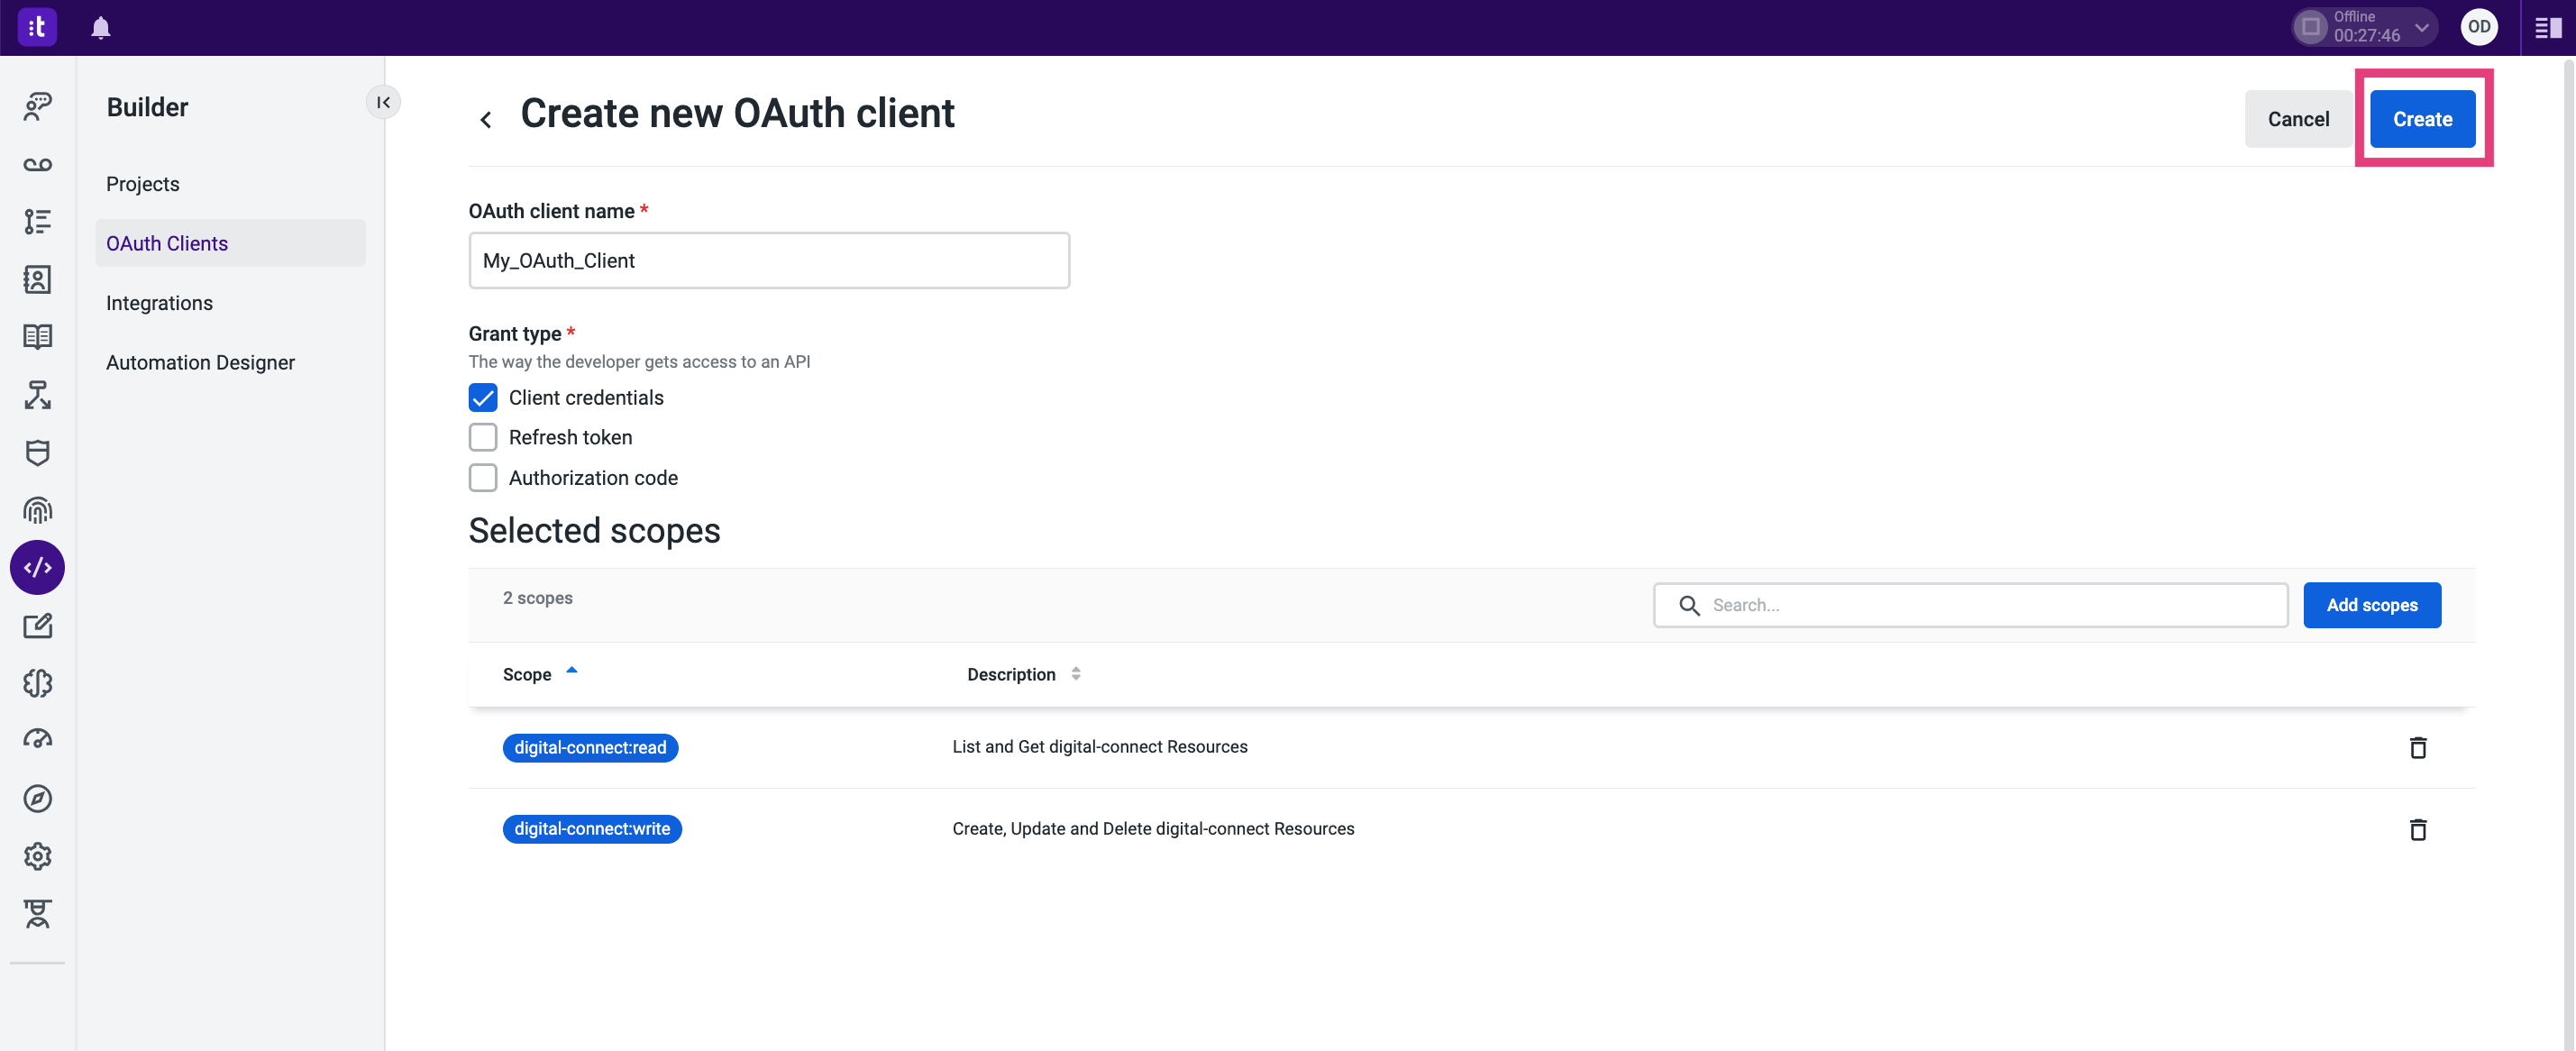
-
You will see a pop-up window with the OAuth client data as shown below.
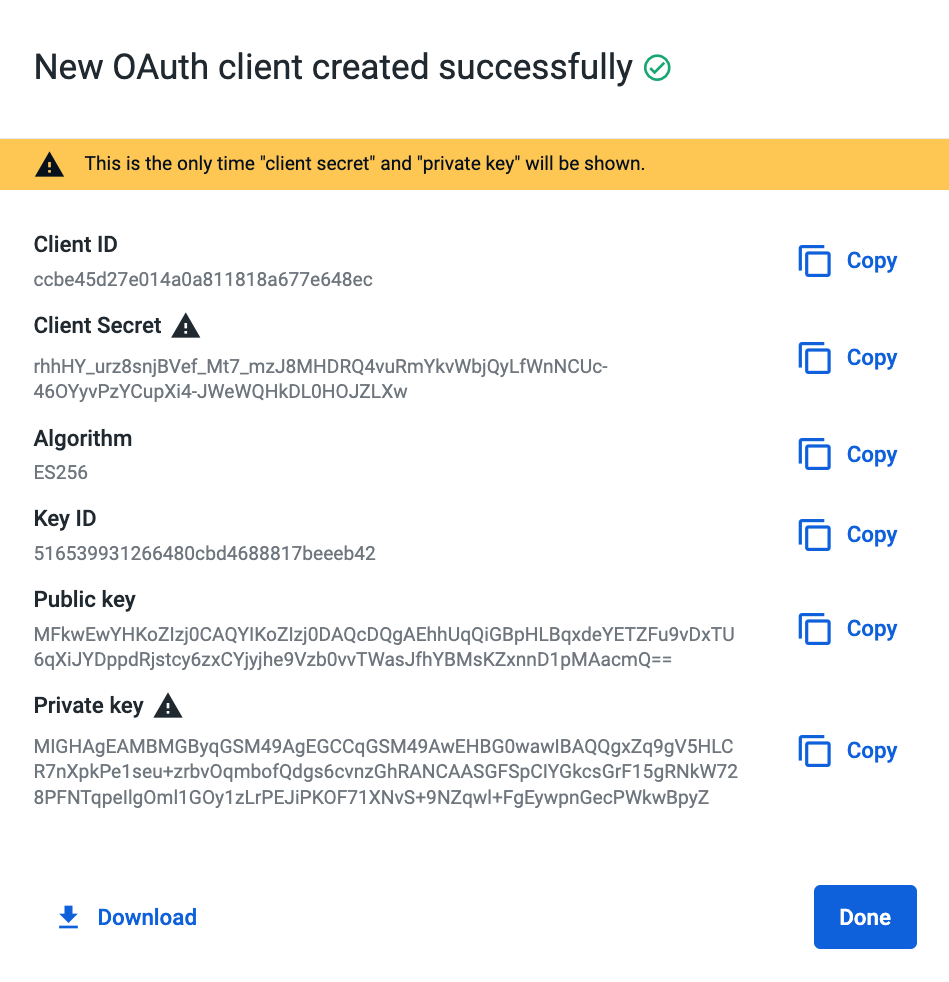
-
Save these data aside for future use. To save all the data as a JSON file, click Download.
The Client Secret and Private key are only shown once after their creation. Make sure you have saved them safely!
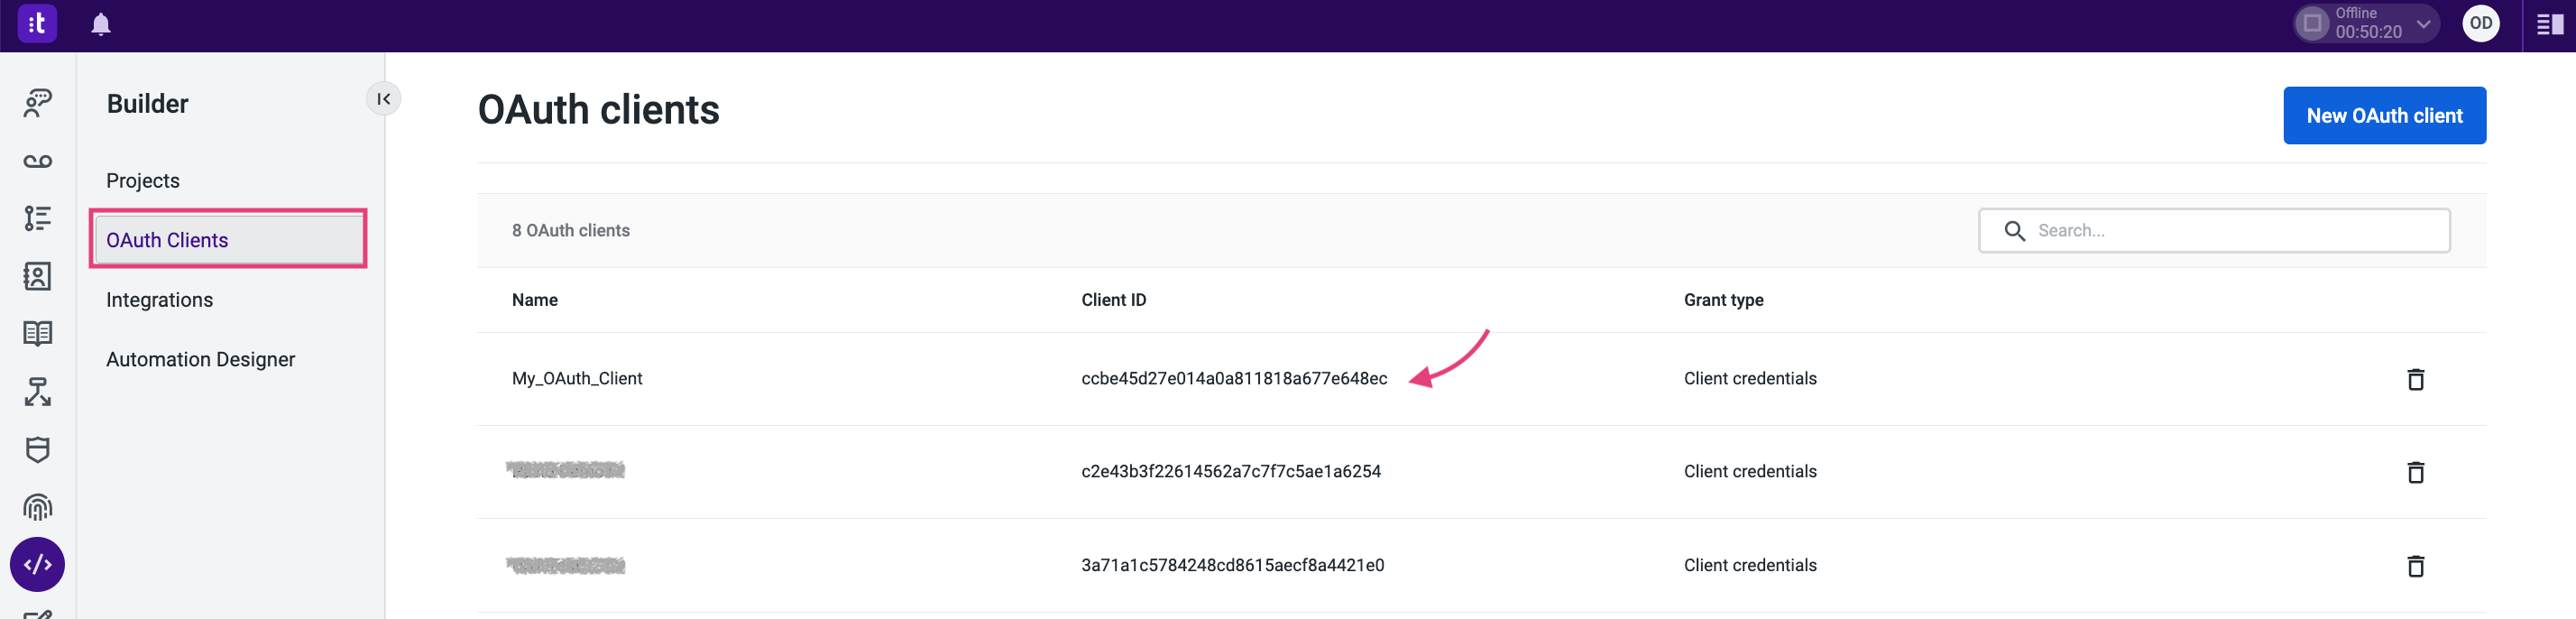
However, you will always have access to the Client ID in Builder → OAuth Clients as shown below.
Configure the connection with OCP®
To configure the connection with OCP®, you need first to create an integration and then set it up correspondingly. You will find more details in the following sections.
Create integration
-
Log in to your Talkdesk Classic account.
-
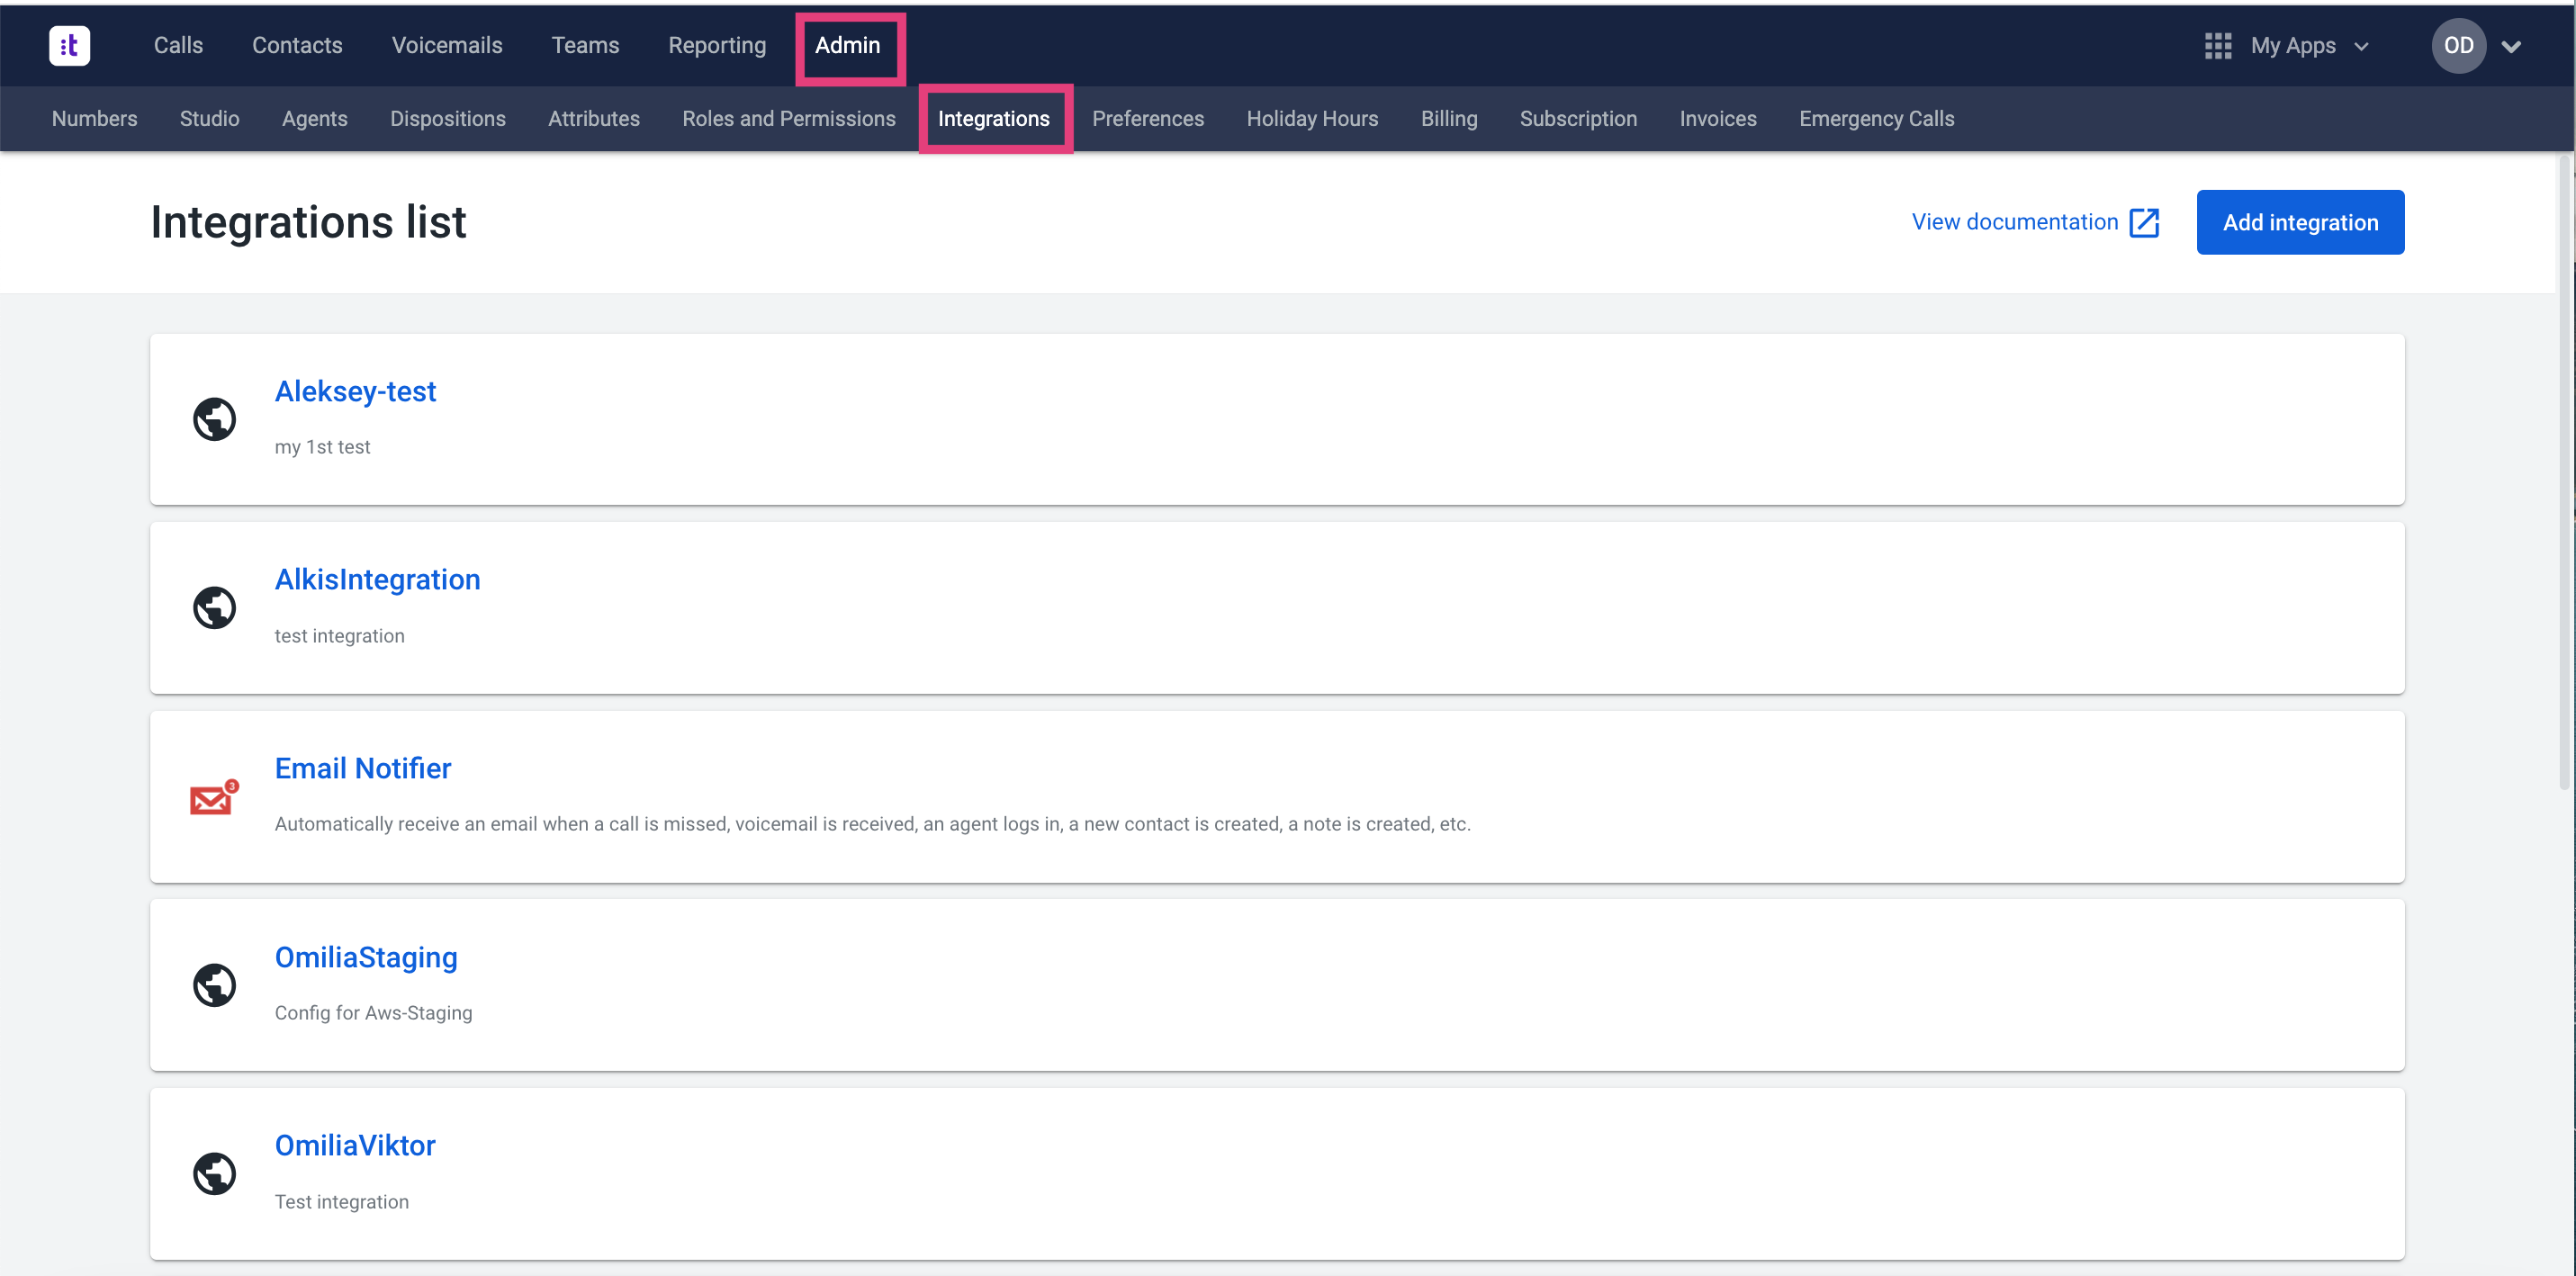
Navigate to the Admin section and go to the Integrations tab.
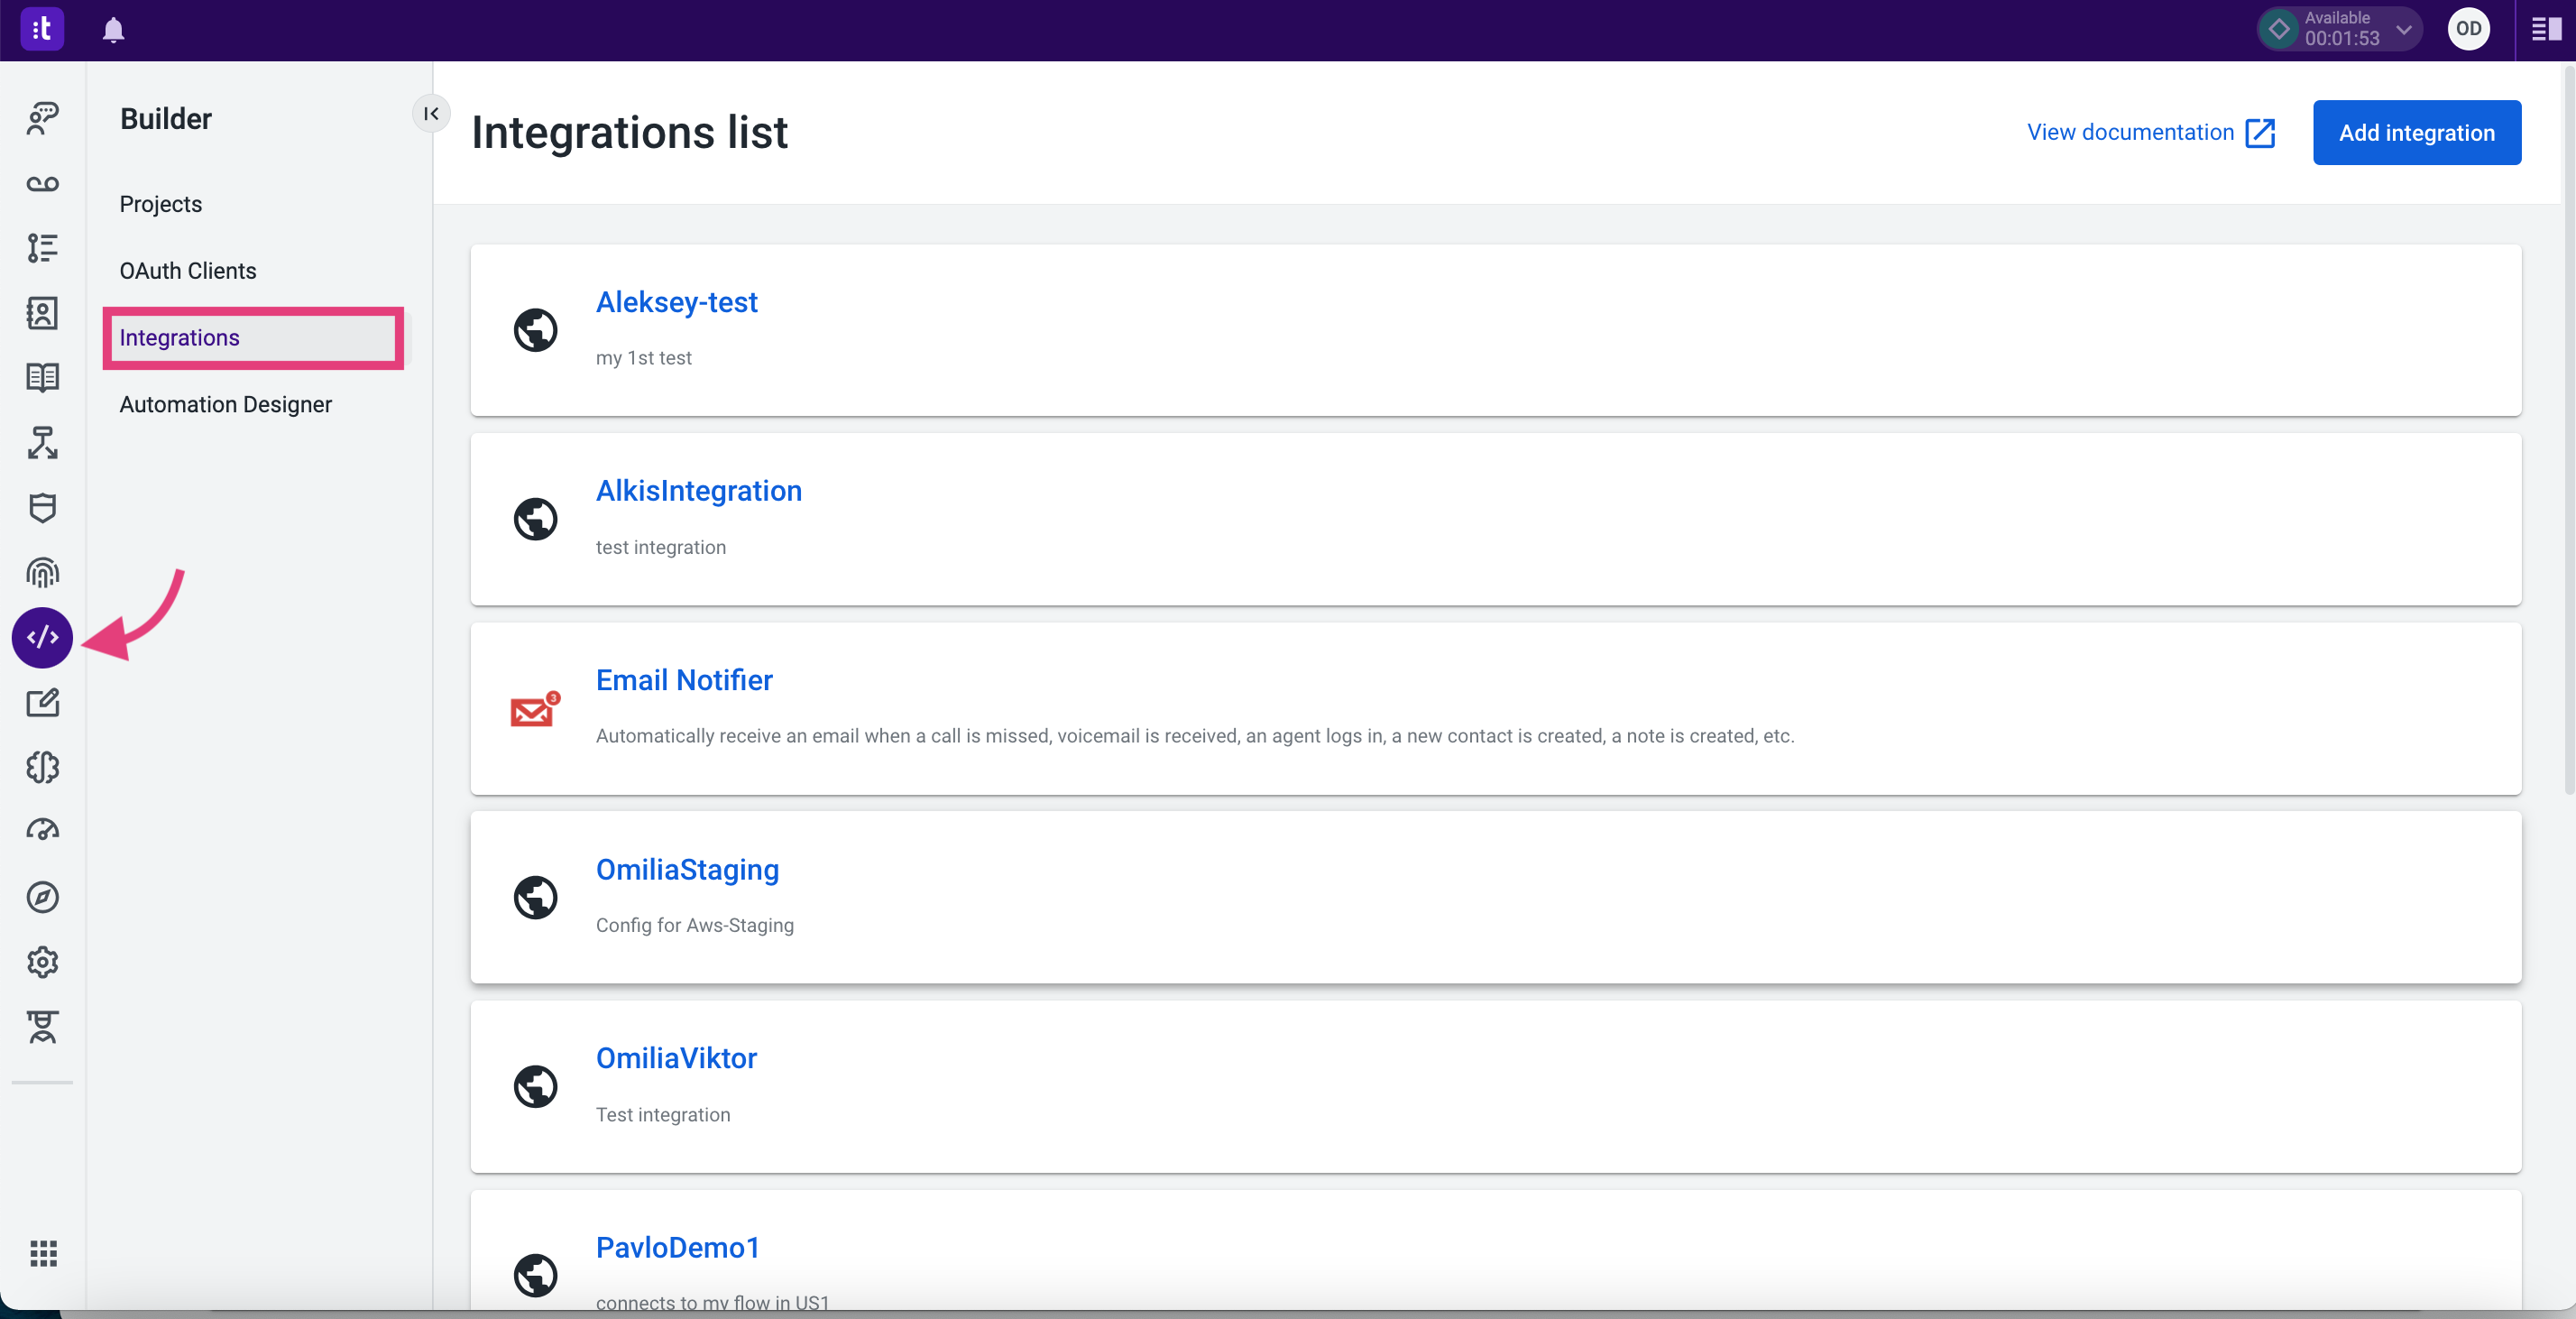
Alternatively, you can reach the Integrations tab from your Talkdesk Atlas account. In this case, select Builder → Integrations as shown below.
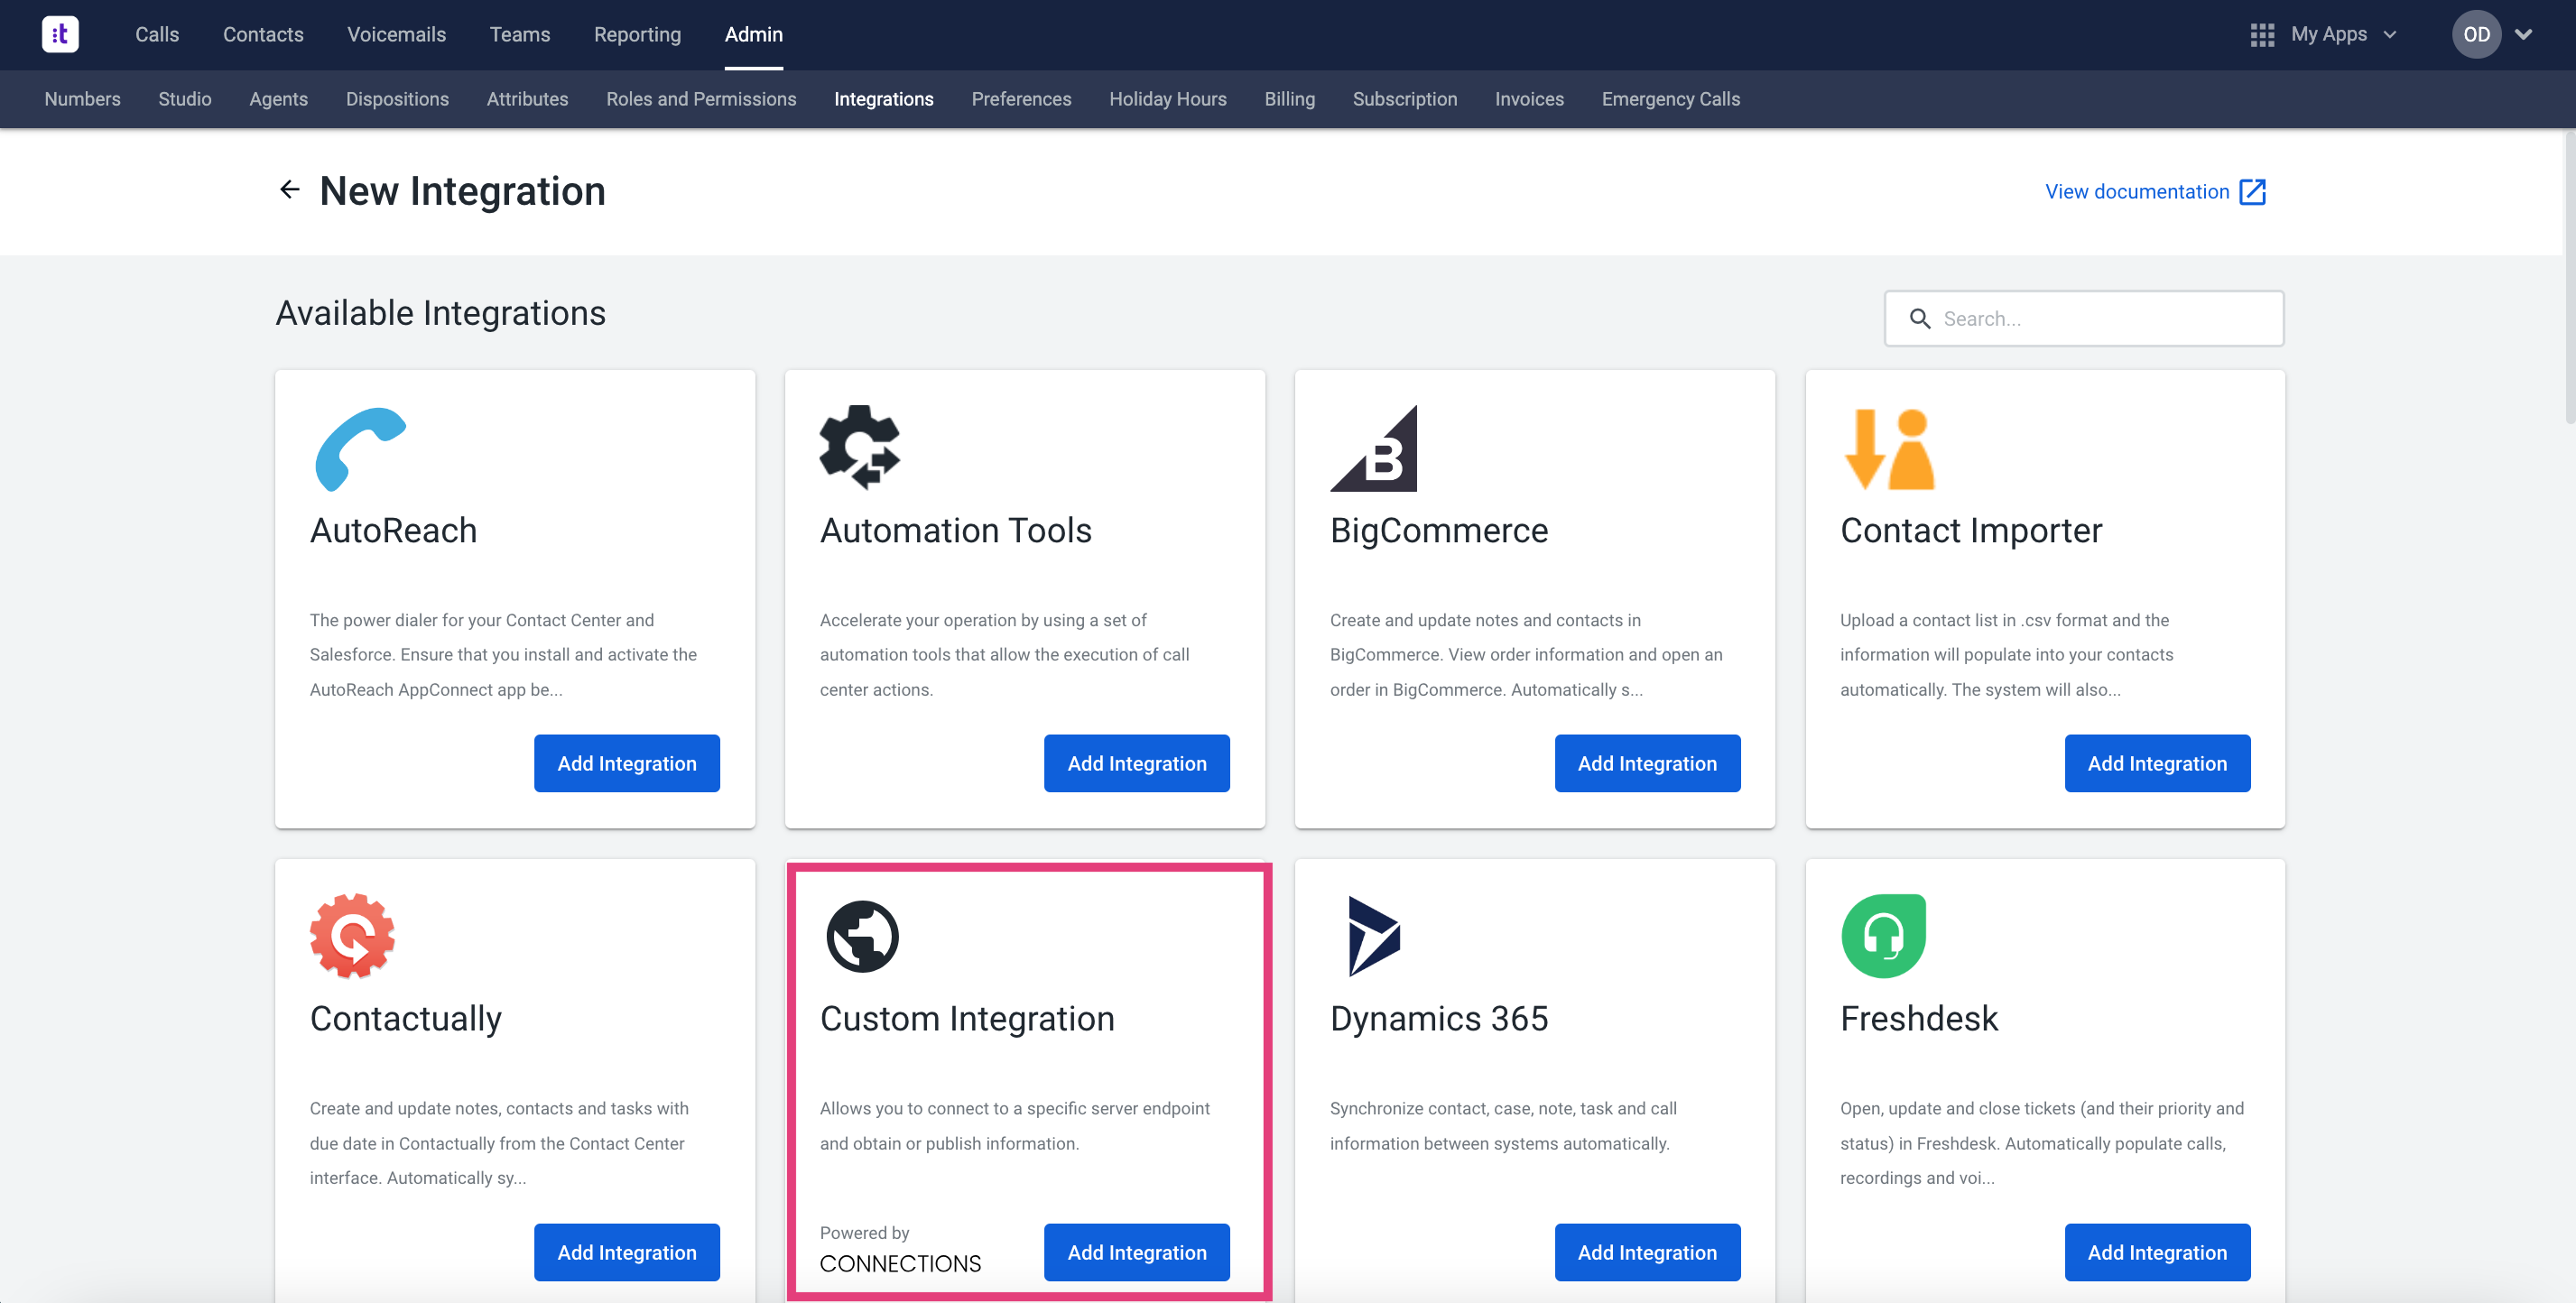
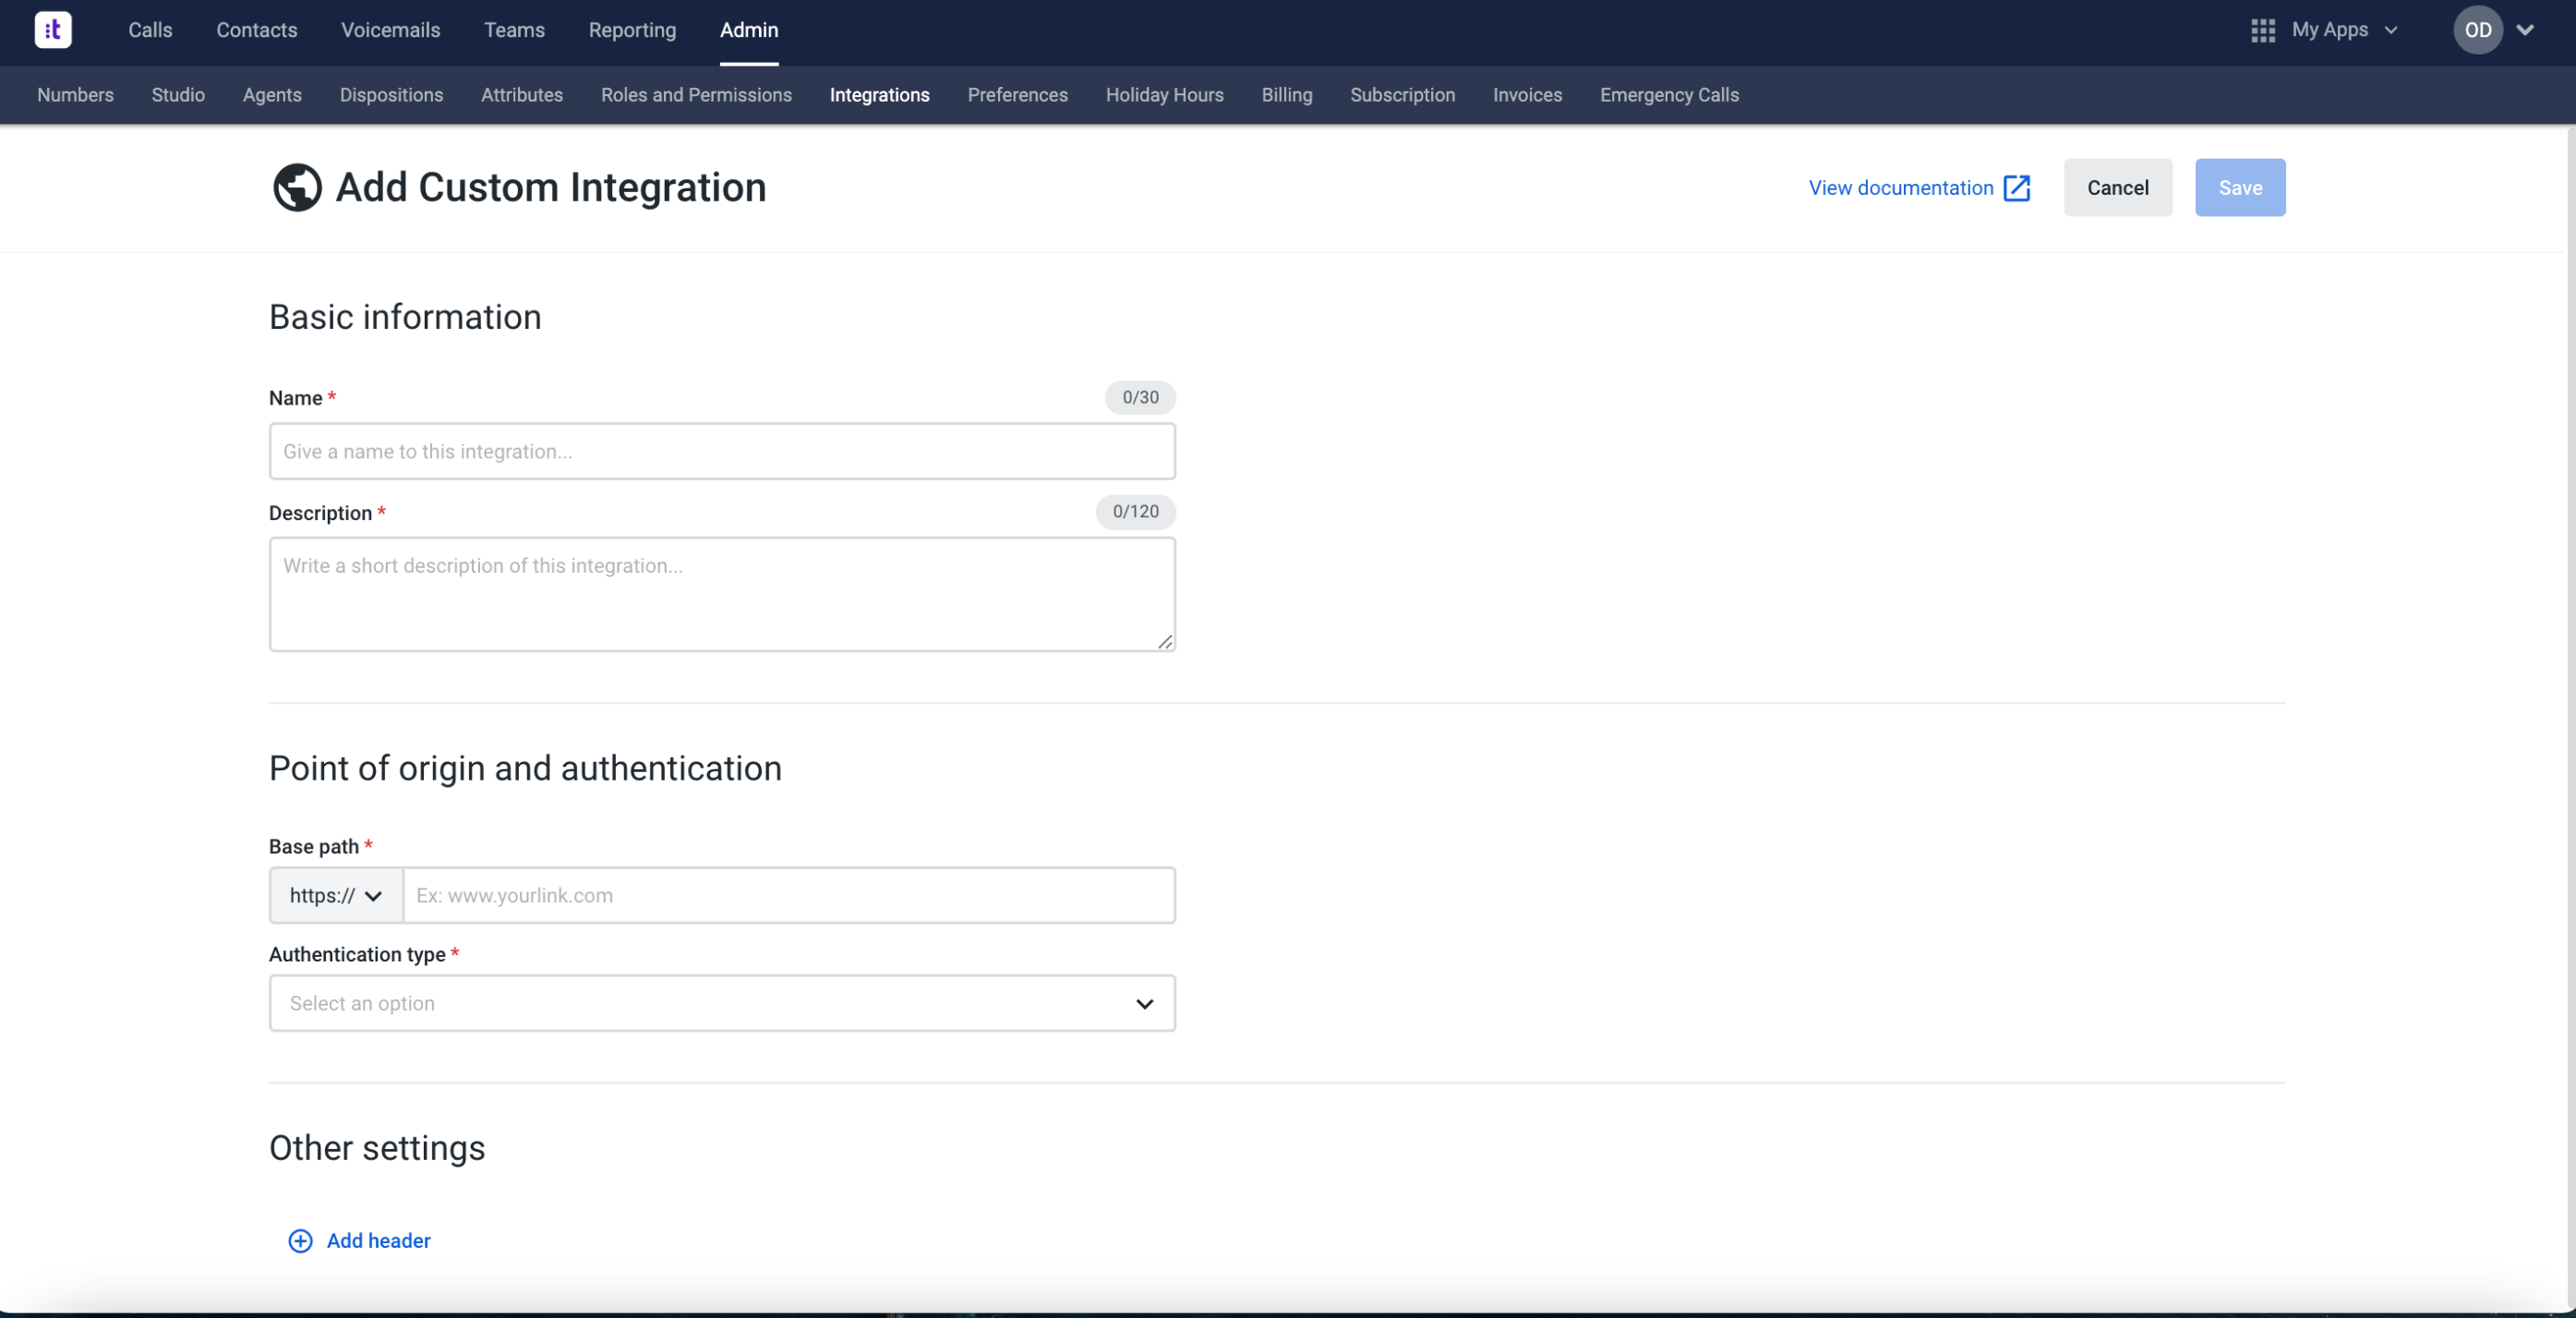
3. Click the Add Integration button and select Custom Integration.
-
On the opened page, fill in the fields as described below:
-
Name: The name of the connection which can be any name you want.
-
Description: Explanation of what the connection does.
-
Base Path: Enter the following base domain URLs:
-
For US East: https://us1-m.ocp.ai/chat/transfer/talkdesk
-
For US West: https://us1-w-m.ocp.ai/chat/transfer/talkdesk
-
For Europe North: https://eu1-m.ocp.ai/chat/transfer/talkdesk
-
-
Authentication type: Select No Authentication from the drop-down list.
-
Add Header: No headers are required.
5. Click the Save button to finalize the process. You are now forwarded to the configuration page of the created integration.
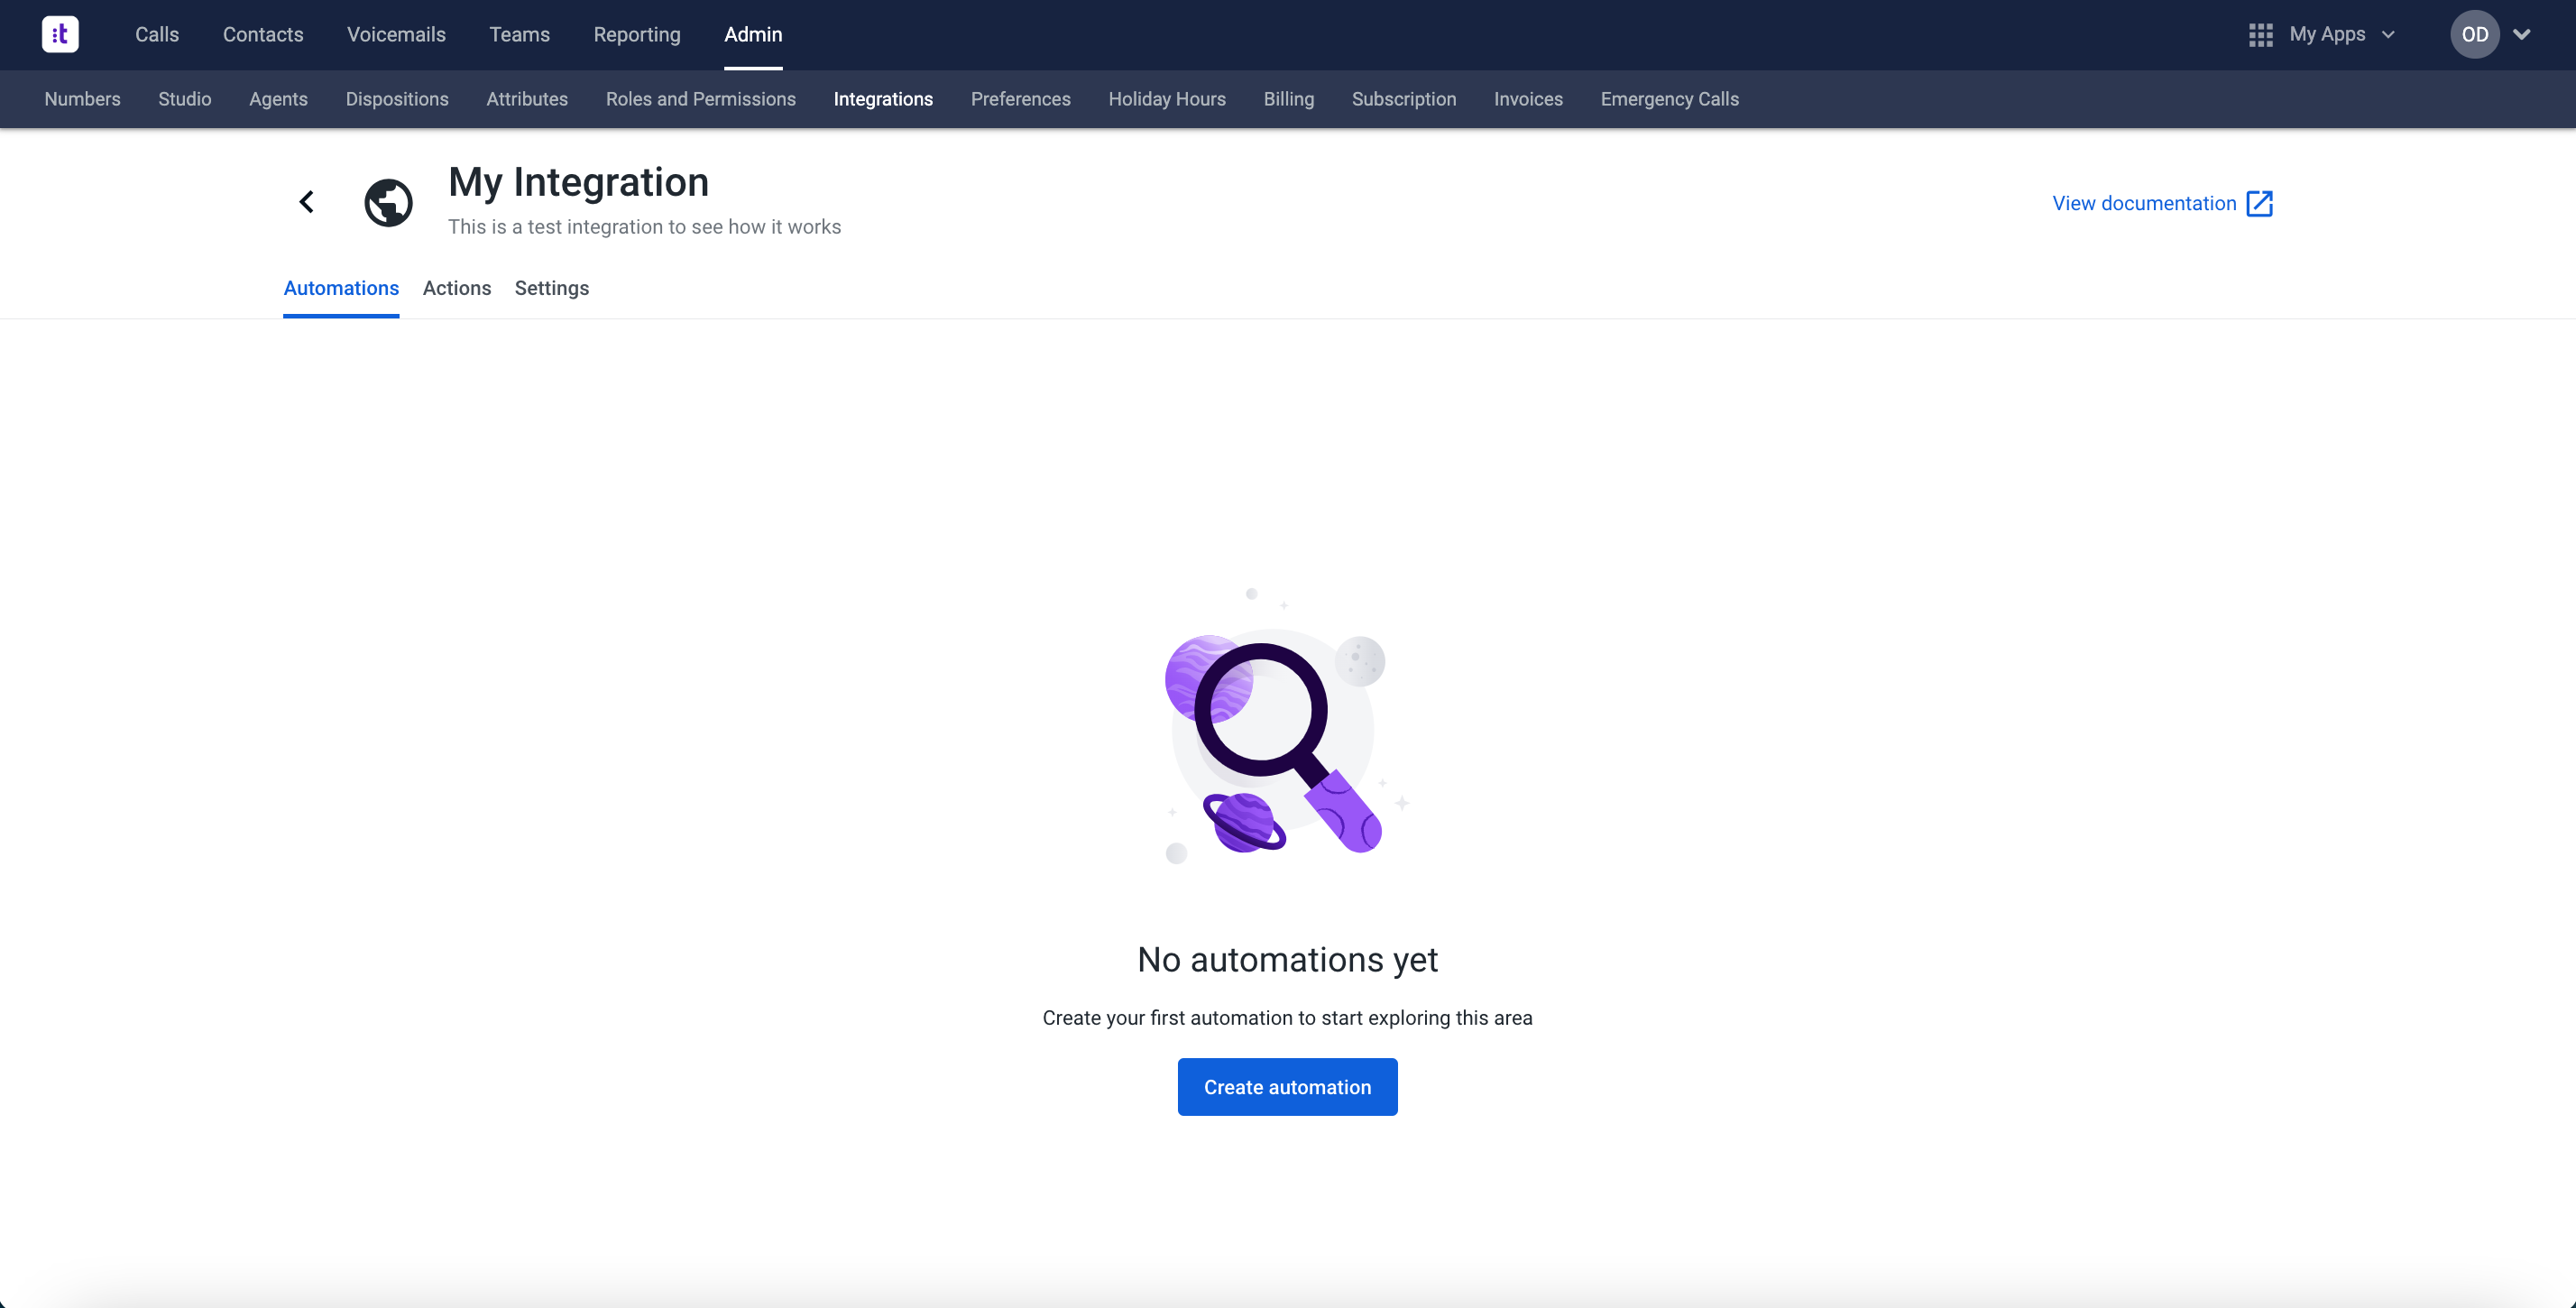
Configure integration
You have just created a new integration and can proceed with configuring it now. To configure your integration, follow the steps below:
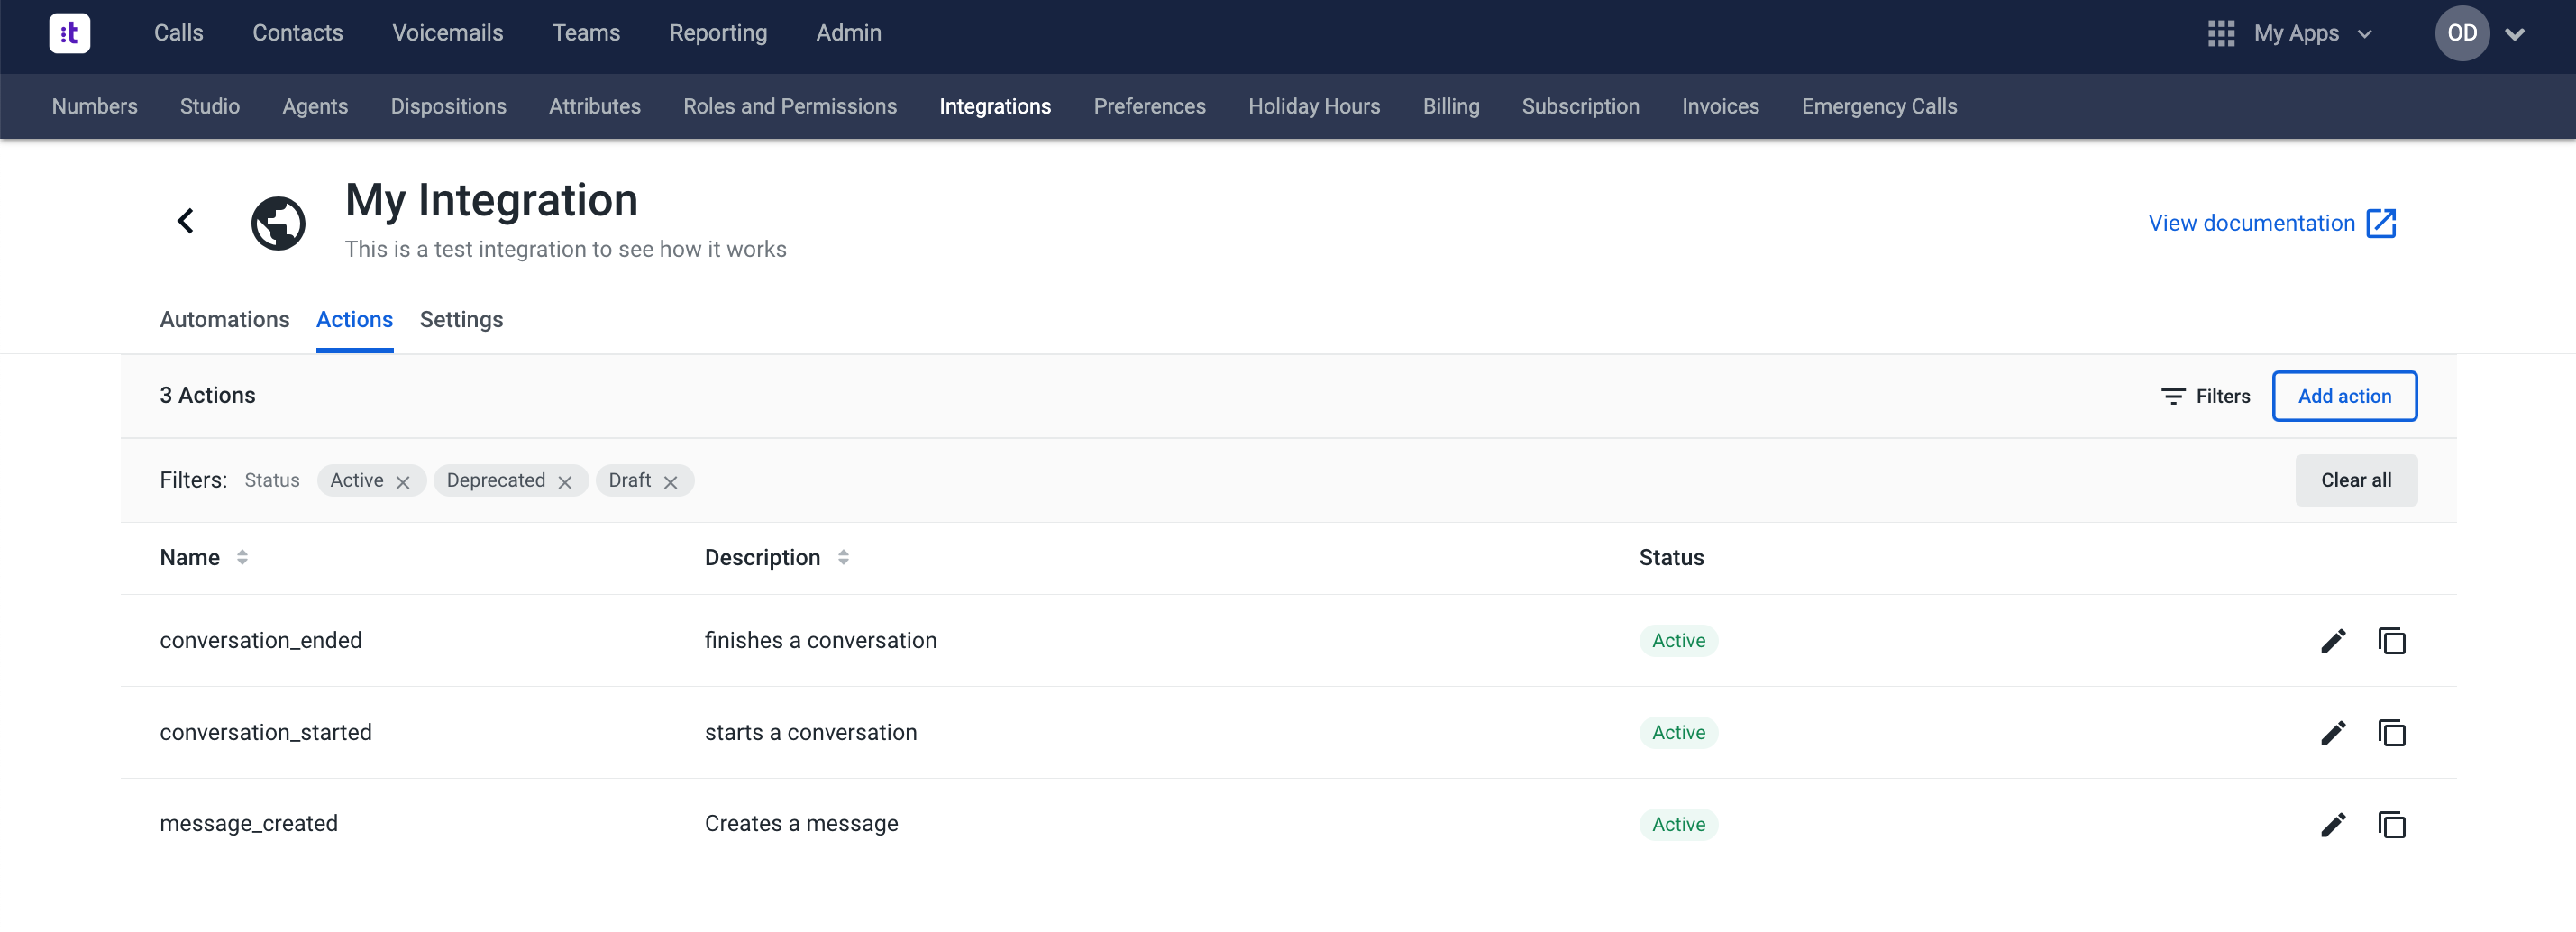
1. Inside your integration, navigate to the Actions tab.
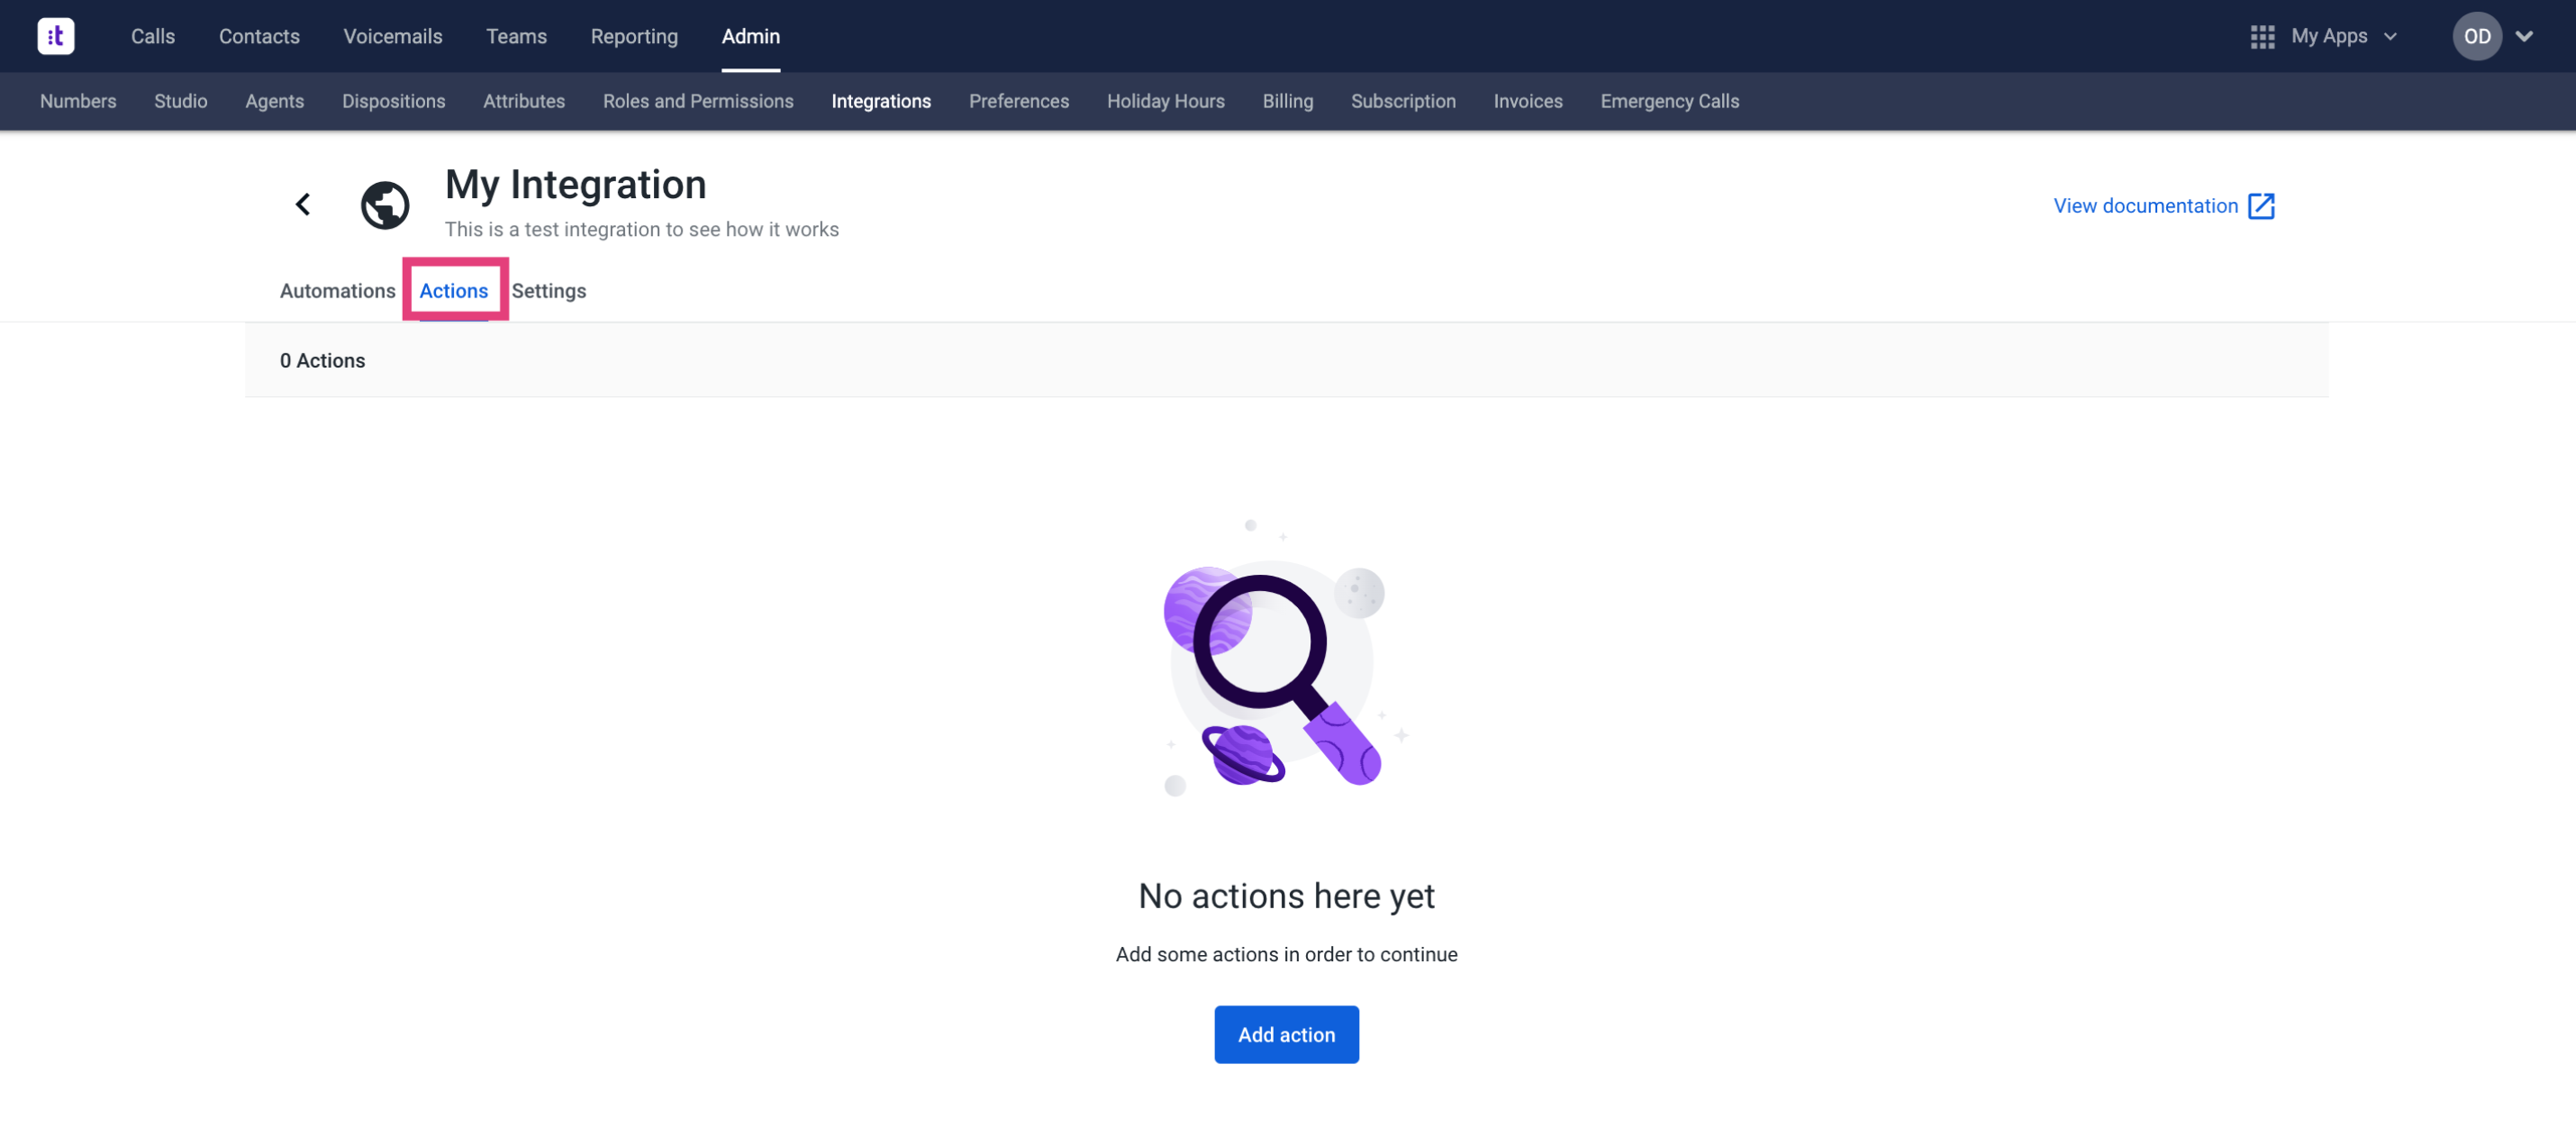
Actions are the entities that send requests to OCP®. In this tab, you need to create three actions with the following names:
-
conversation_started
-
conversation_ended
-
message_created.
Do not modify the names of the actions! The actions must have exactly the mentioned names, other names are not supported.
-
Click the Add action button to create a new action. The following page opens:
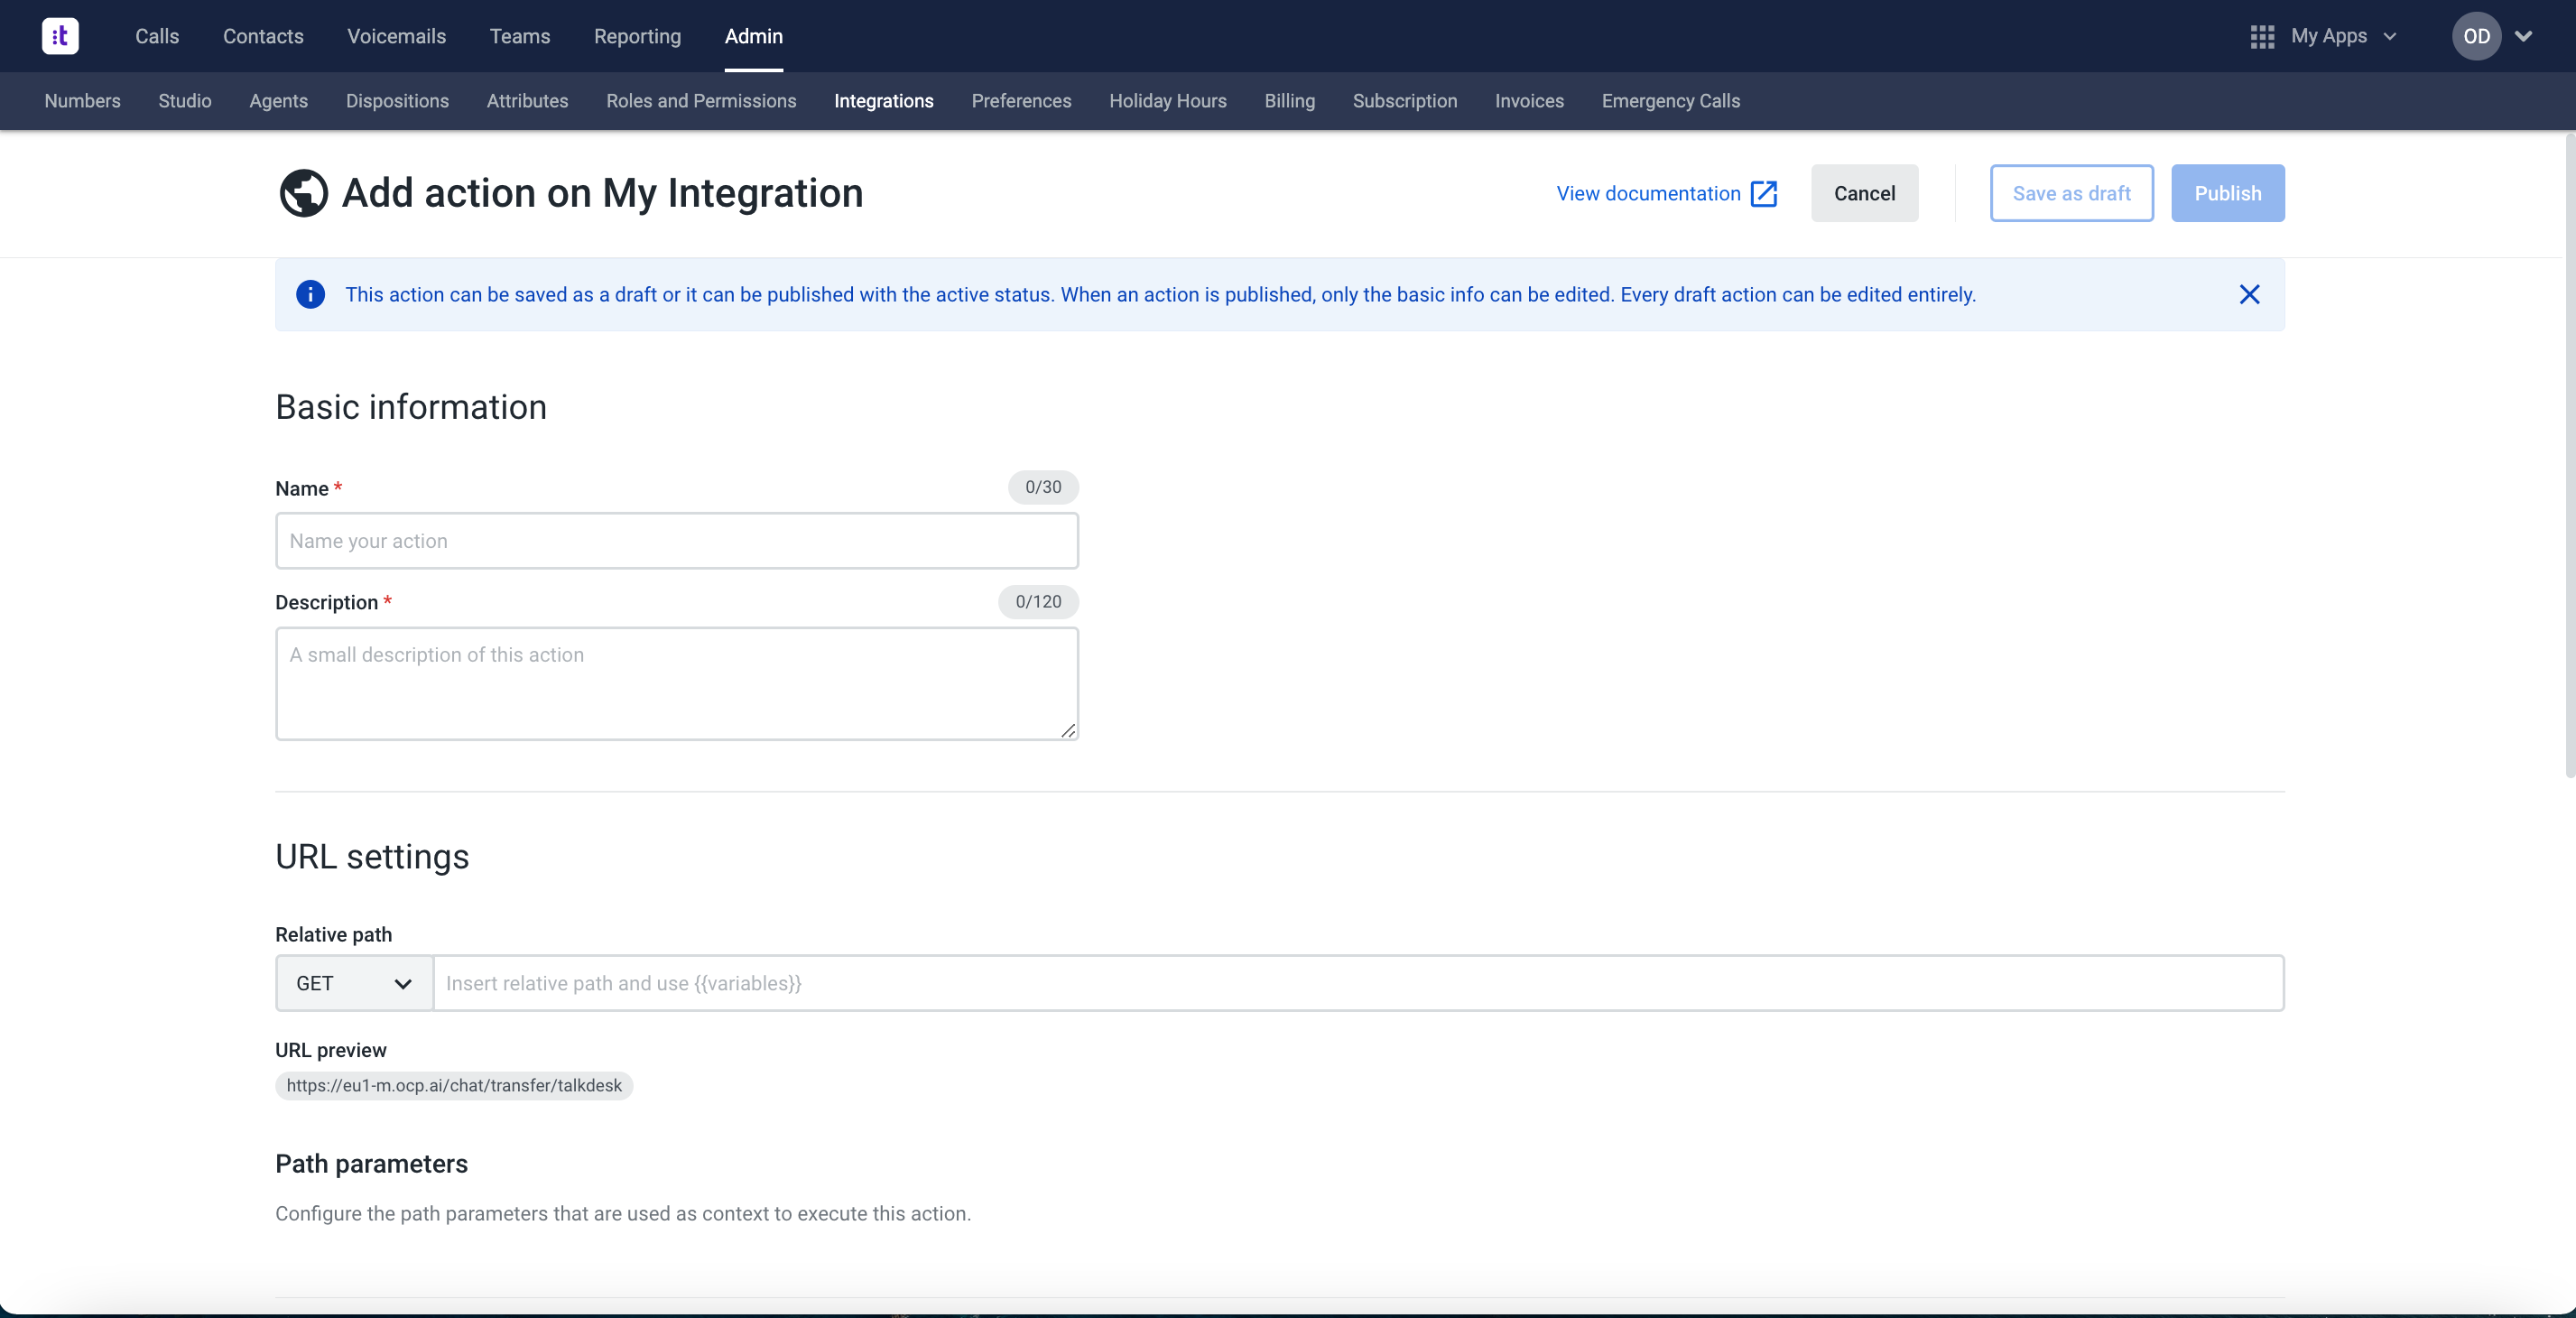
3. Fill in the fields as described below:
-
Basic Information
-
Name: Add the name of the action.
-
Description: Describe what the action does.
-
-
URL Settings
-
Relative path: Select the
POSTmethod from the drop-down list and leave the field empty.
-
-
Inputs and Outputs
-
Input Schema: Input requirements for this action. This is a JSON file that defines what Talkdesk will send to OCP®. Copy and paste the corresponding schema into this field.
-
Output Schema: Output requirements for this action. Leave this field blank.
-
-
Additional Settings
-
Execution Timeout: The seconds allowed to elapse in the system from the moment the action is triggered until a response is received. The default value is 10.
-
-
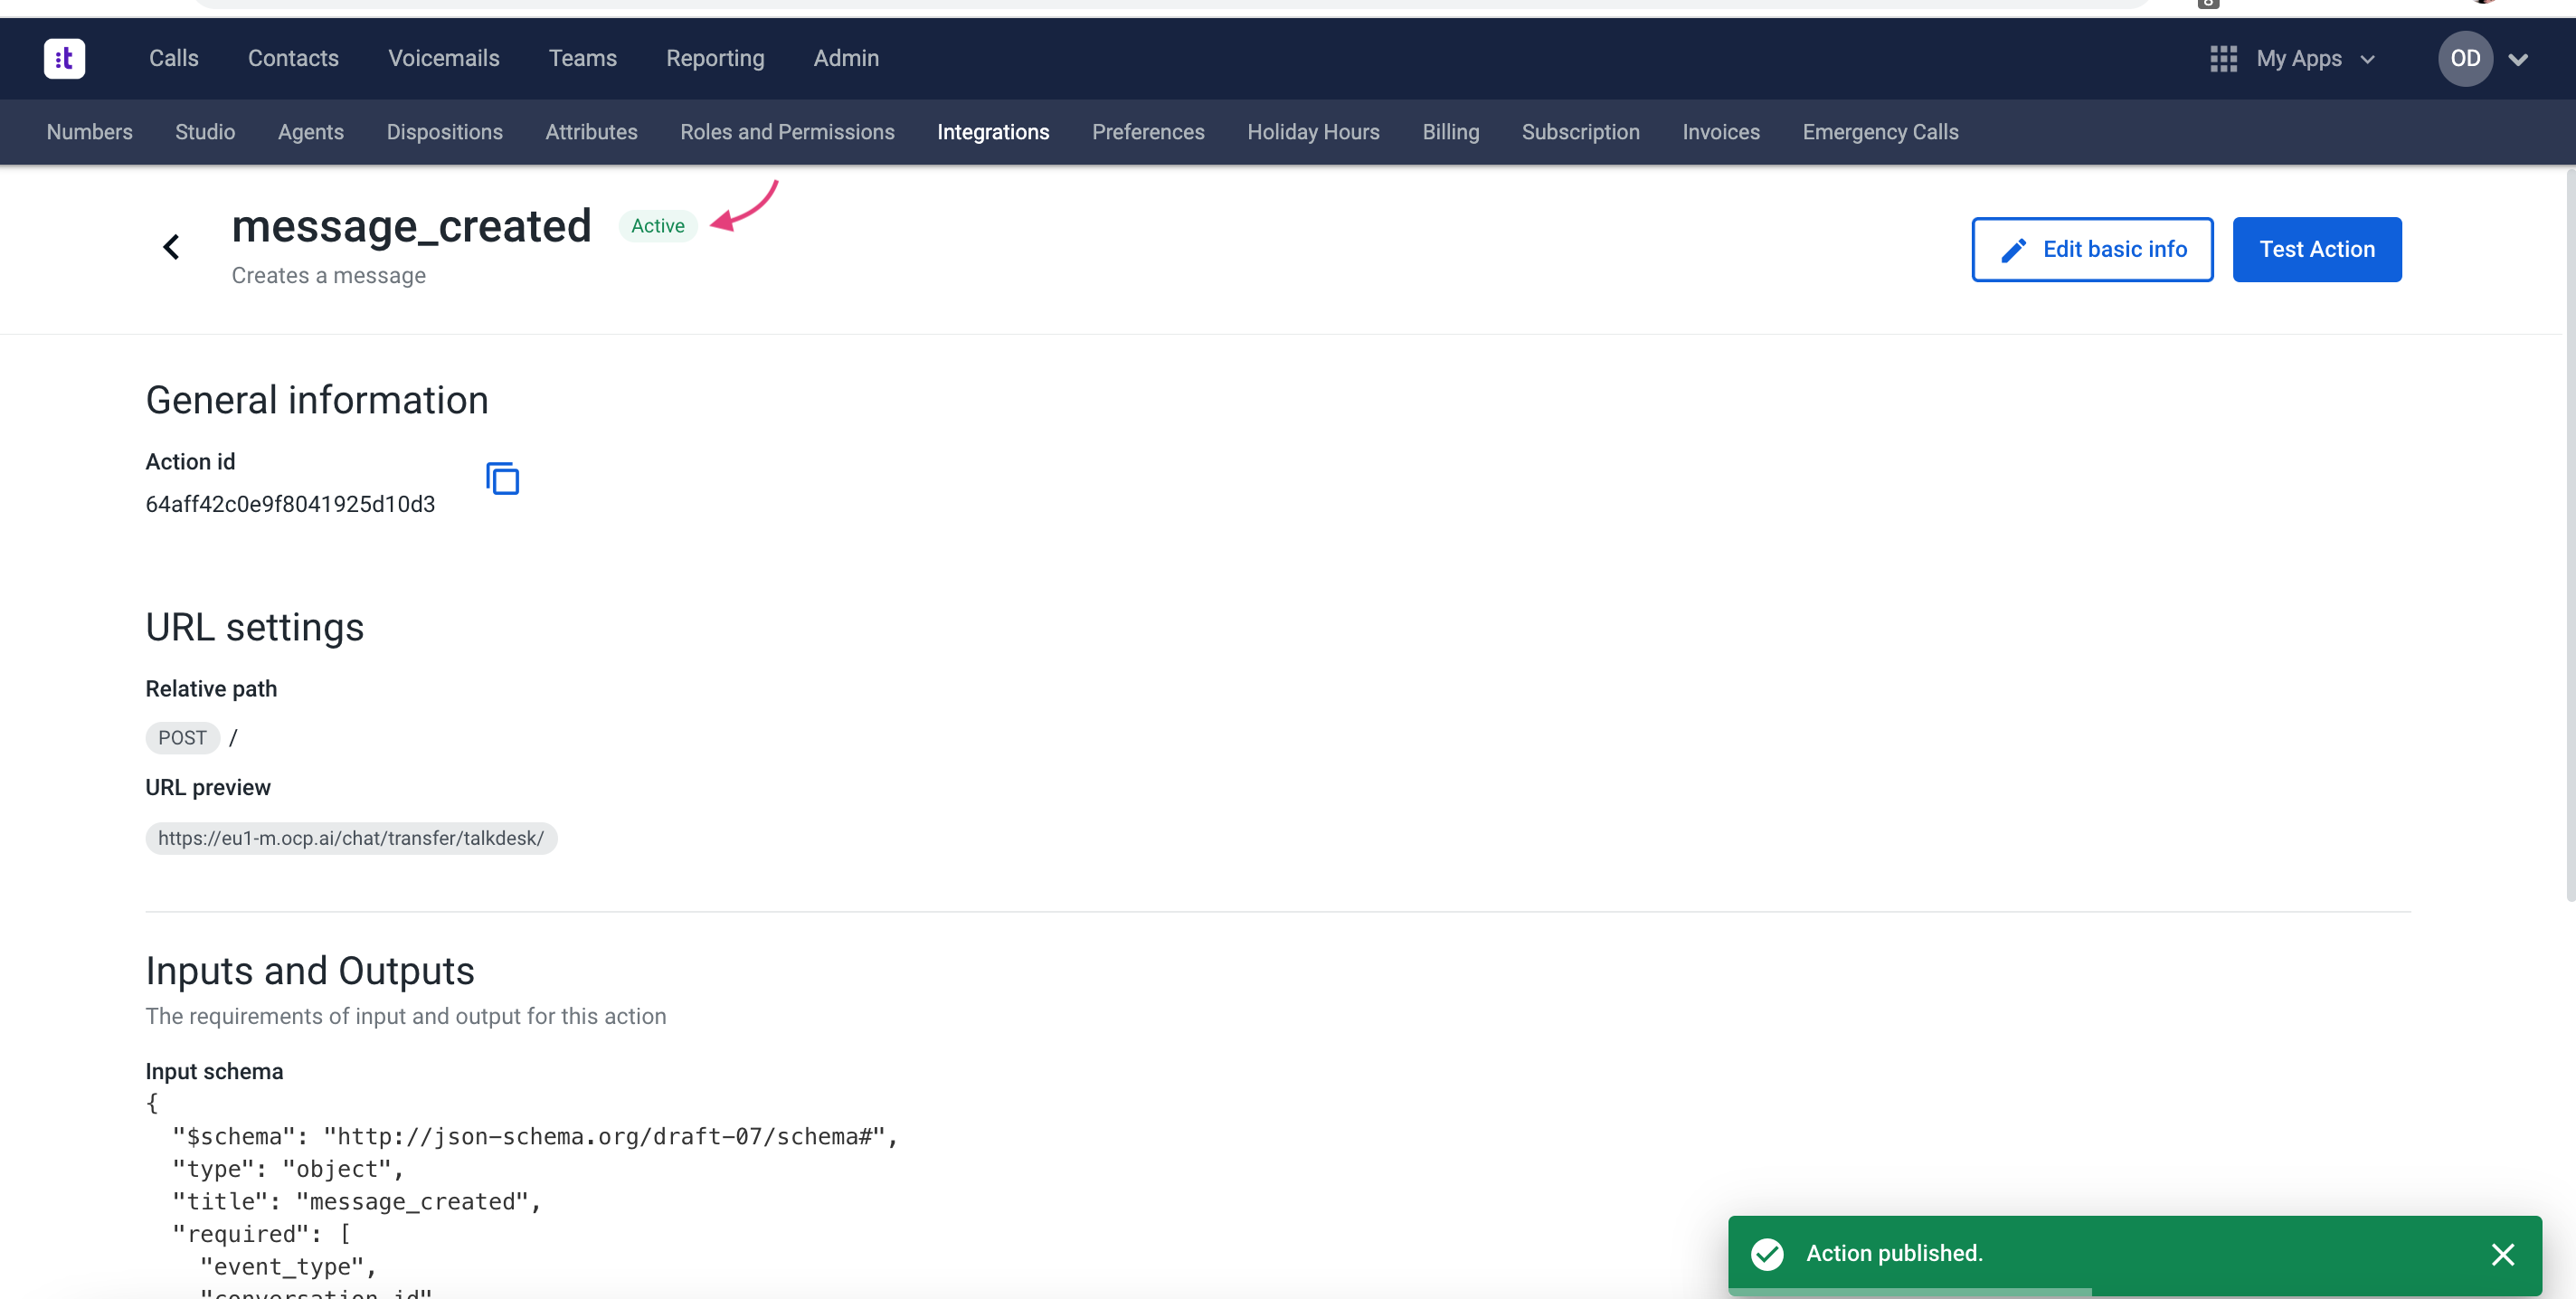
Click Publish.
Make sure all the settings are correct before clicking the Publish button. You will not be able to edit the actions settings after publishing! If you need to make changes later, use the Save as draft button.
-
The published action gets the Active status.
-
Repeat steps 2-4 to create three actions in total. The created actions will be listed as shown below. Make sure that all three actions are in the Active status.
Configure a touchpoint
Now you need to create and configure a touchpoint.
Create a new touchpoint
To create a touchpoint, proceed as follows:
-
Open your Talkdesk Atlas.
-
Navigate to the Admin section and select Channels. Here you can see the list of all available channels.
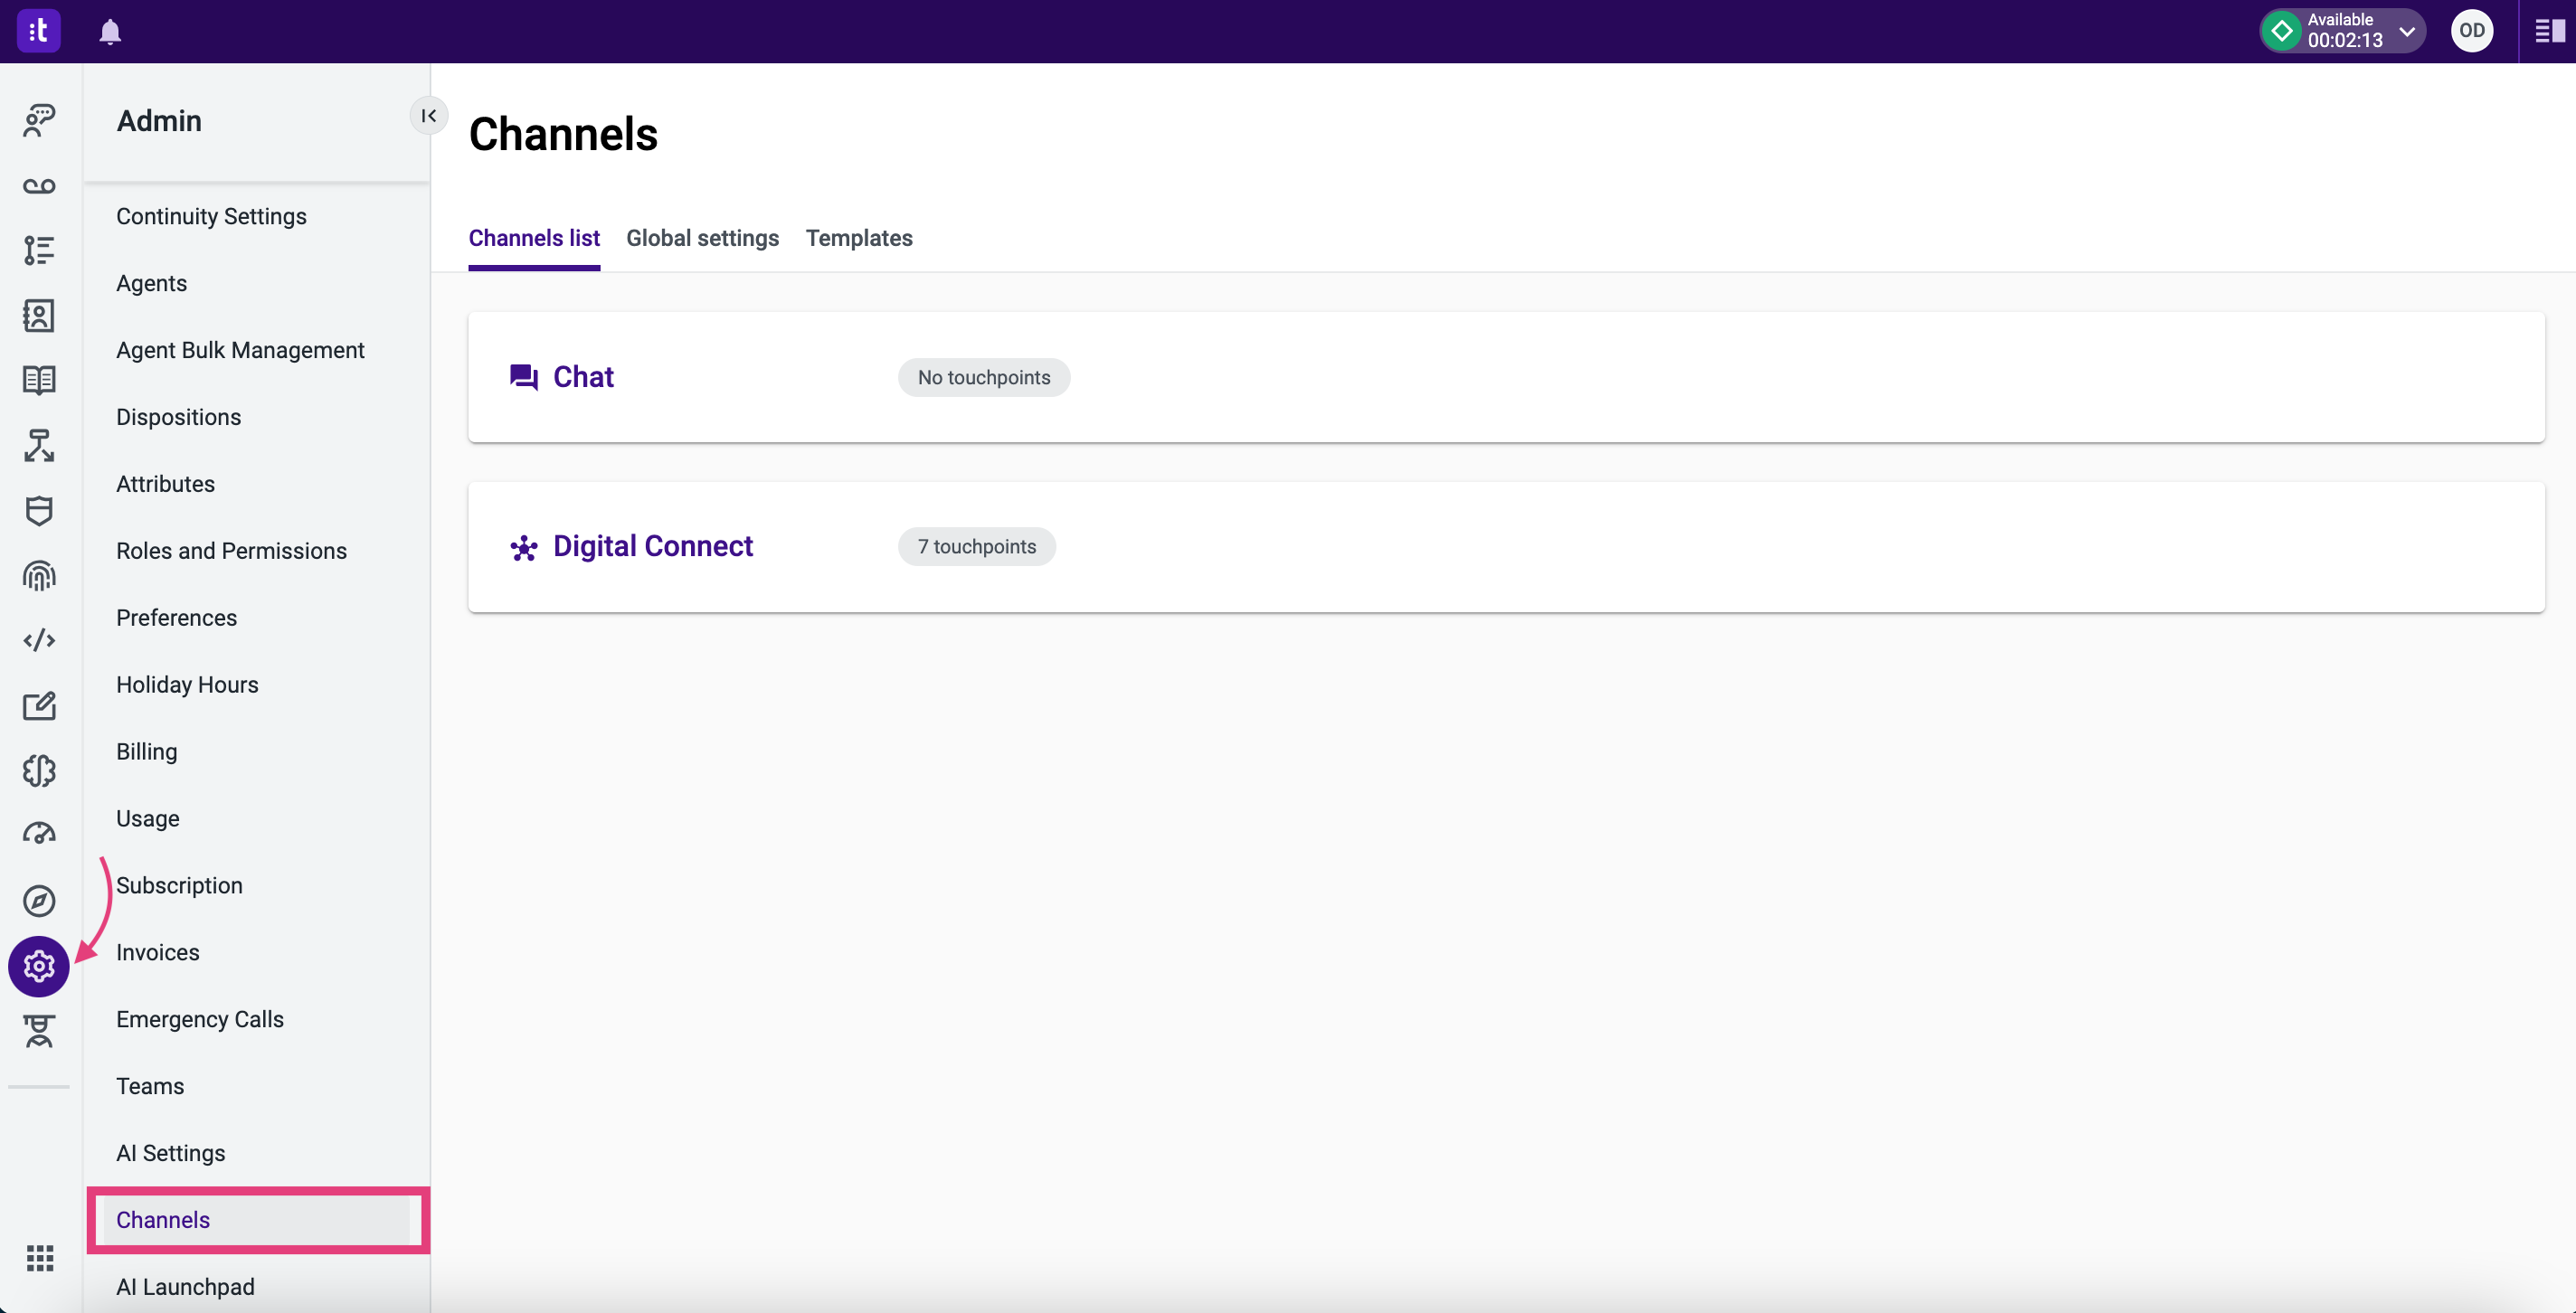
If you cannot see the Admin icon, it is hidden. In this case, click the Meatball menu icon and select Admin as shown below.
-
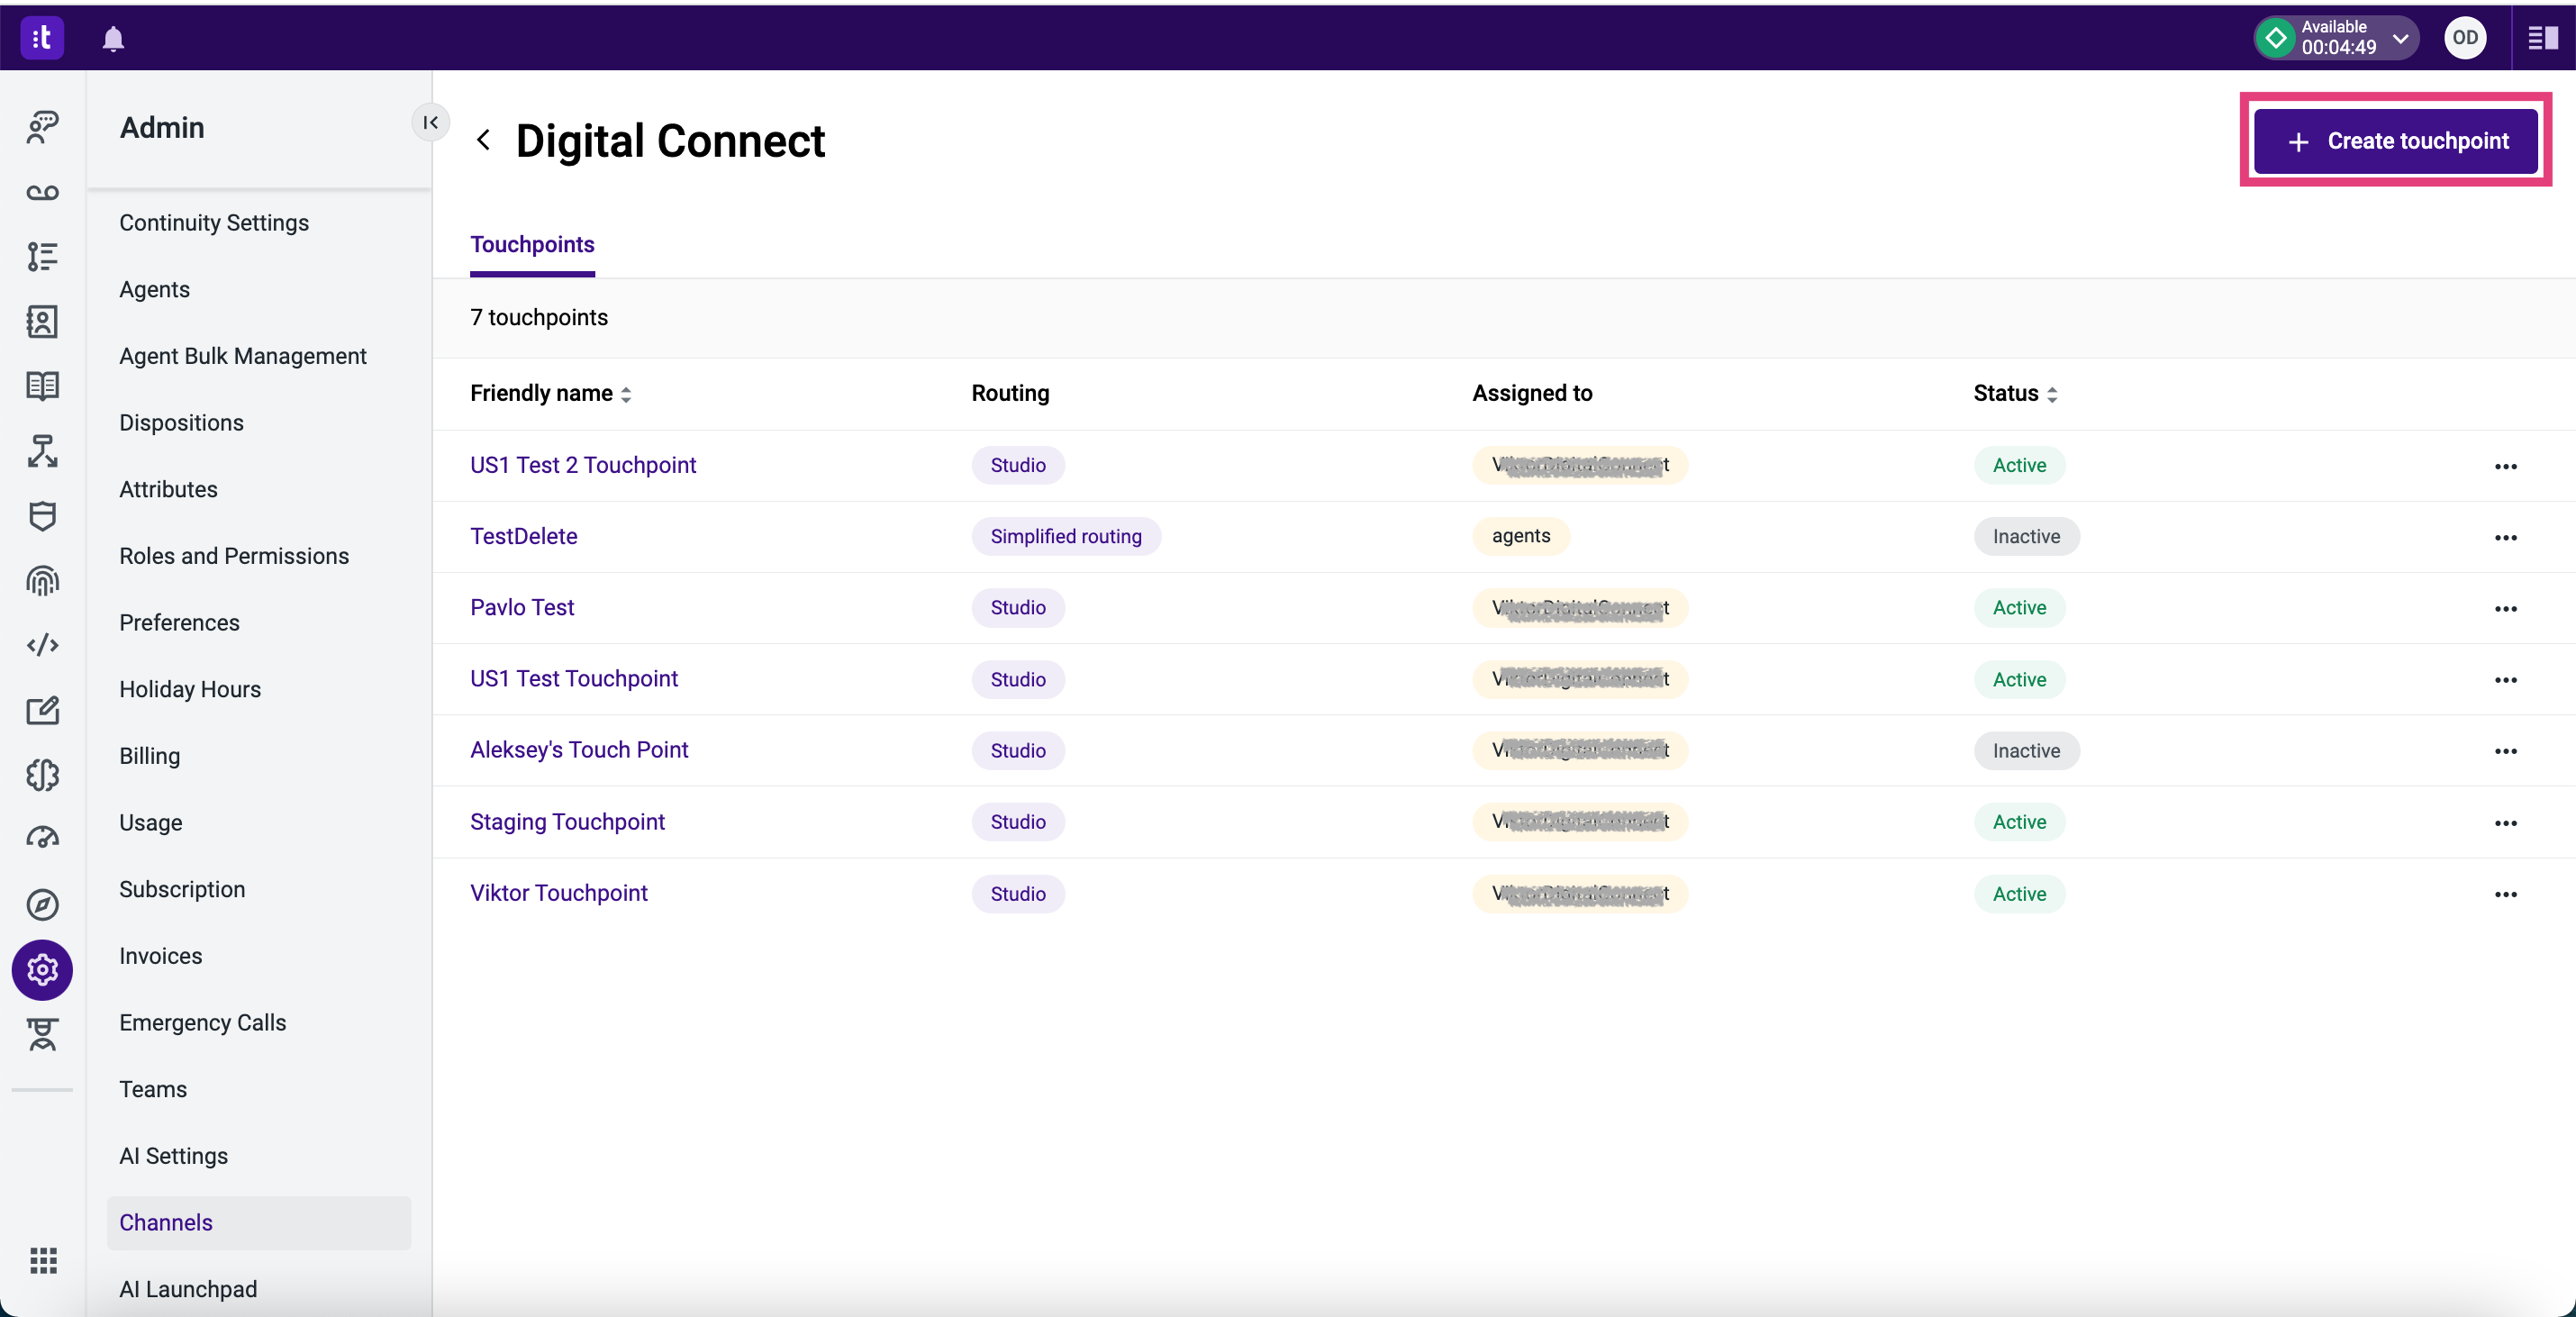
Click Digital Connect. The following page opens and you can see the list of available touchpoints.
-
Click the + Create touchpoint button.
-
In the opened dialog box, fill in the fields as described below:
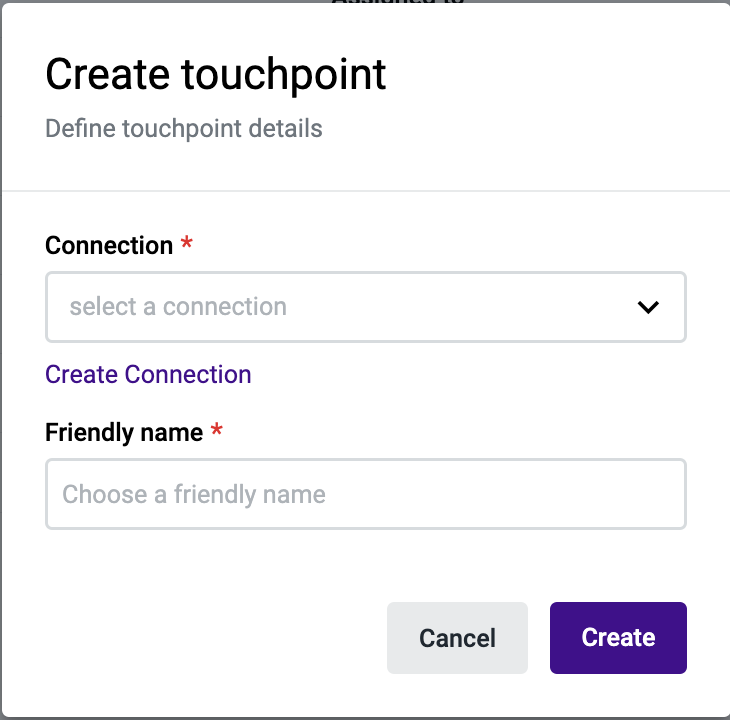
-
Connection: Select a connection from the drop-down list. This is basically the integration you have previously created and configured.
-
Friendly name: Enter a friendly name for your touchpoint.
-
Hit Create.
Configure a touchpoint
To configure a touchpoint, proceed as follows:
-
Select a touchpoint you have created and click on it. The touchpoint configuration page opens.
-
Click Edit.
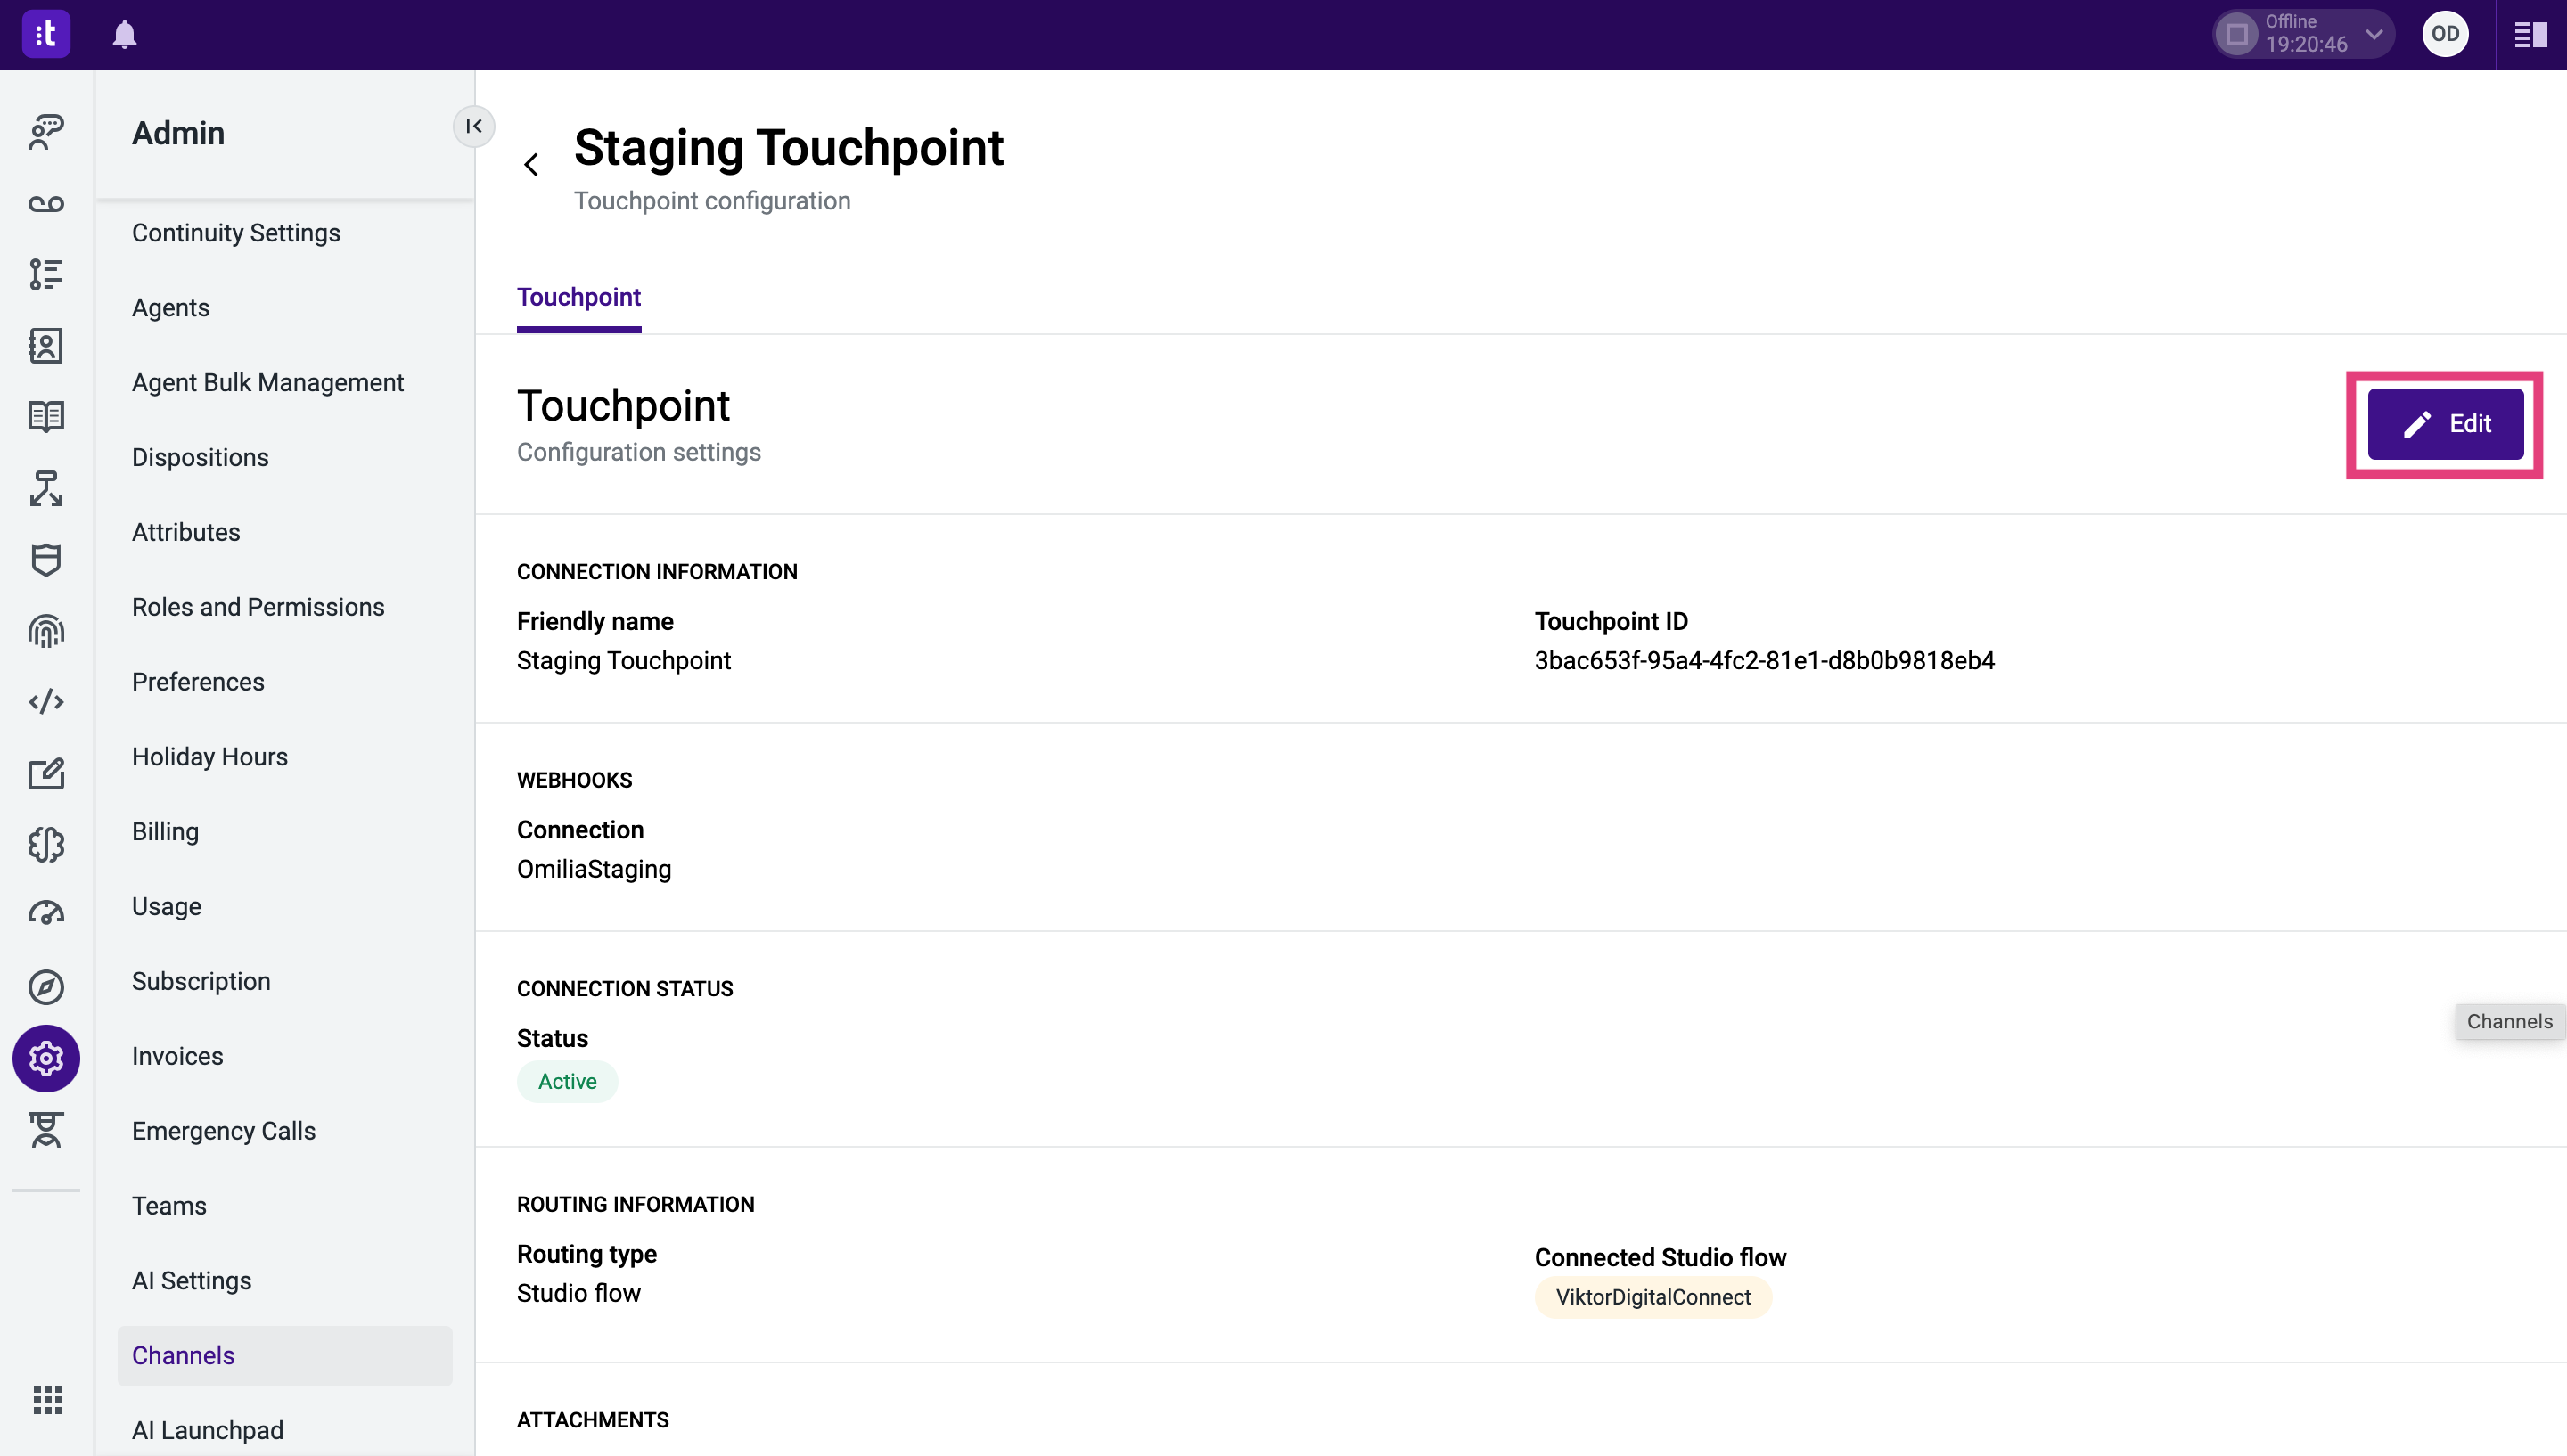
-
In the opened page, fill in the configuration fields as described below:
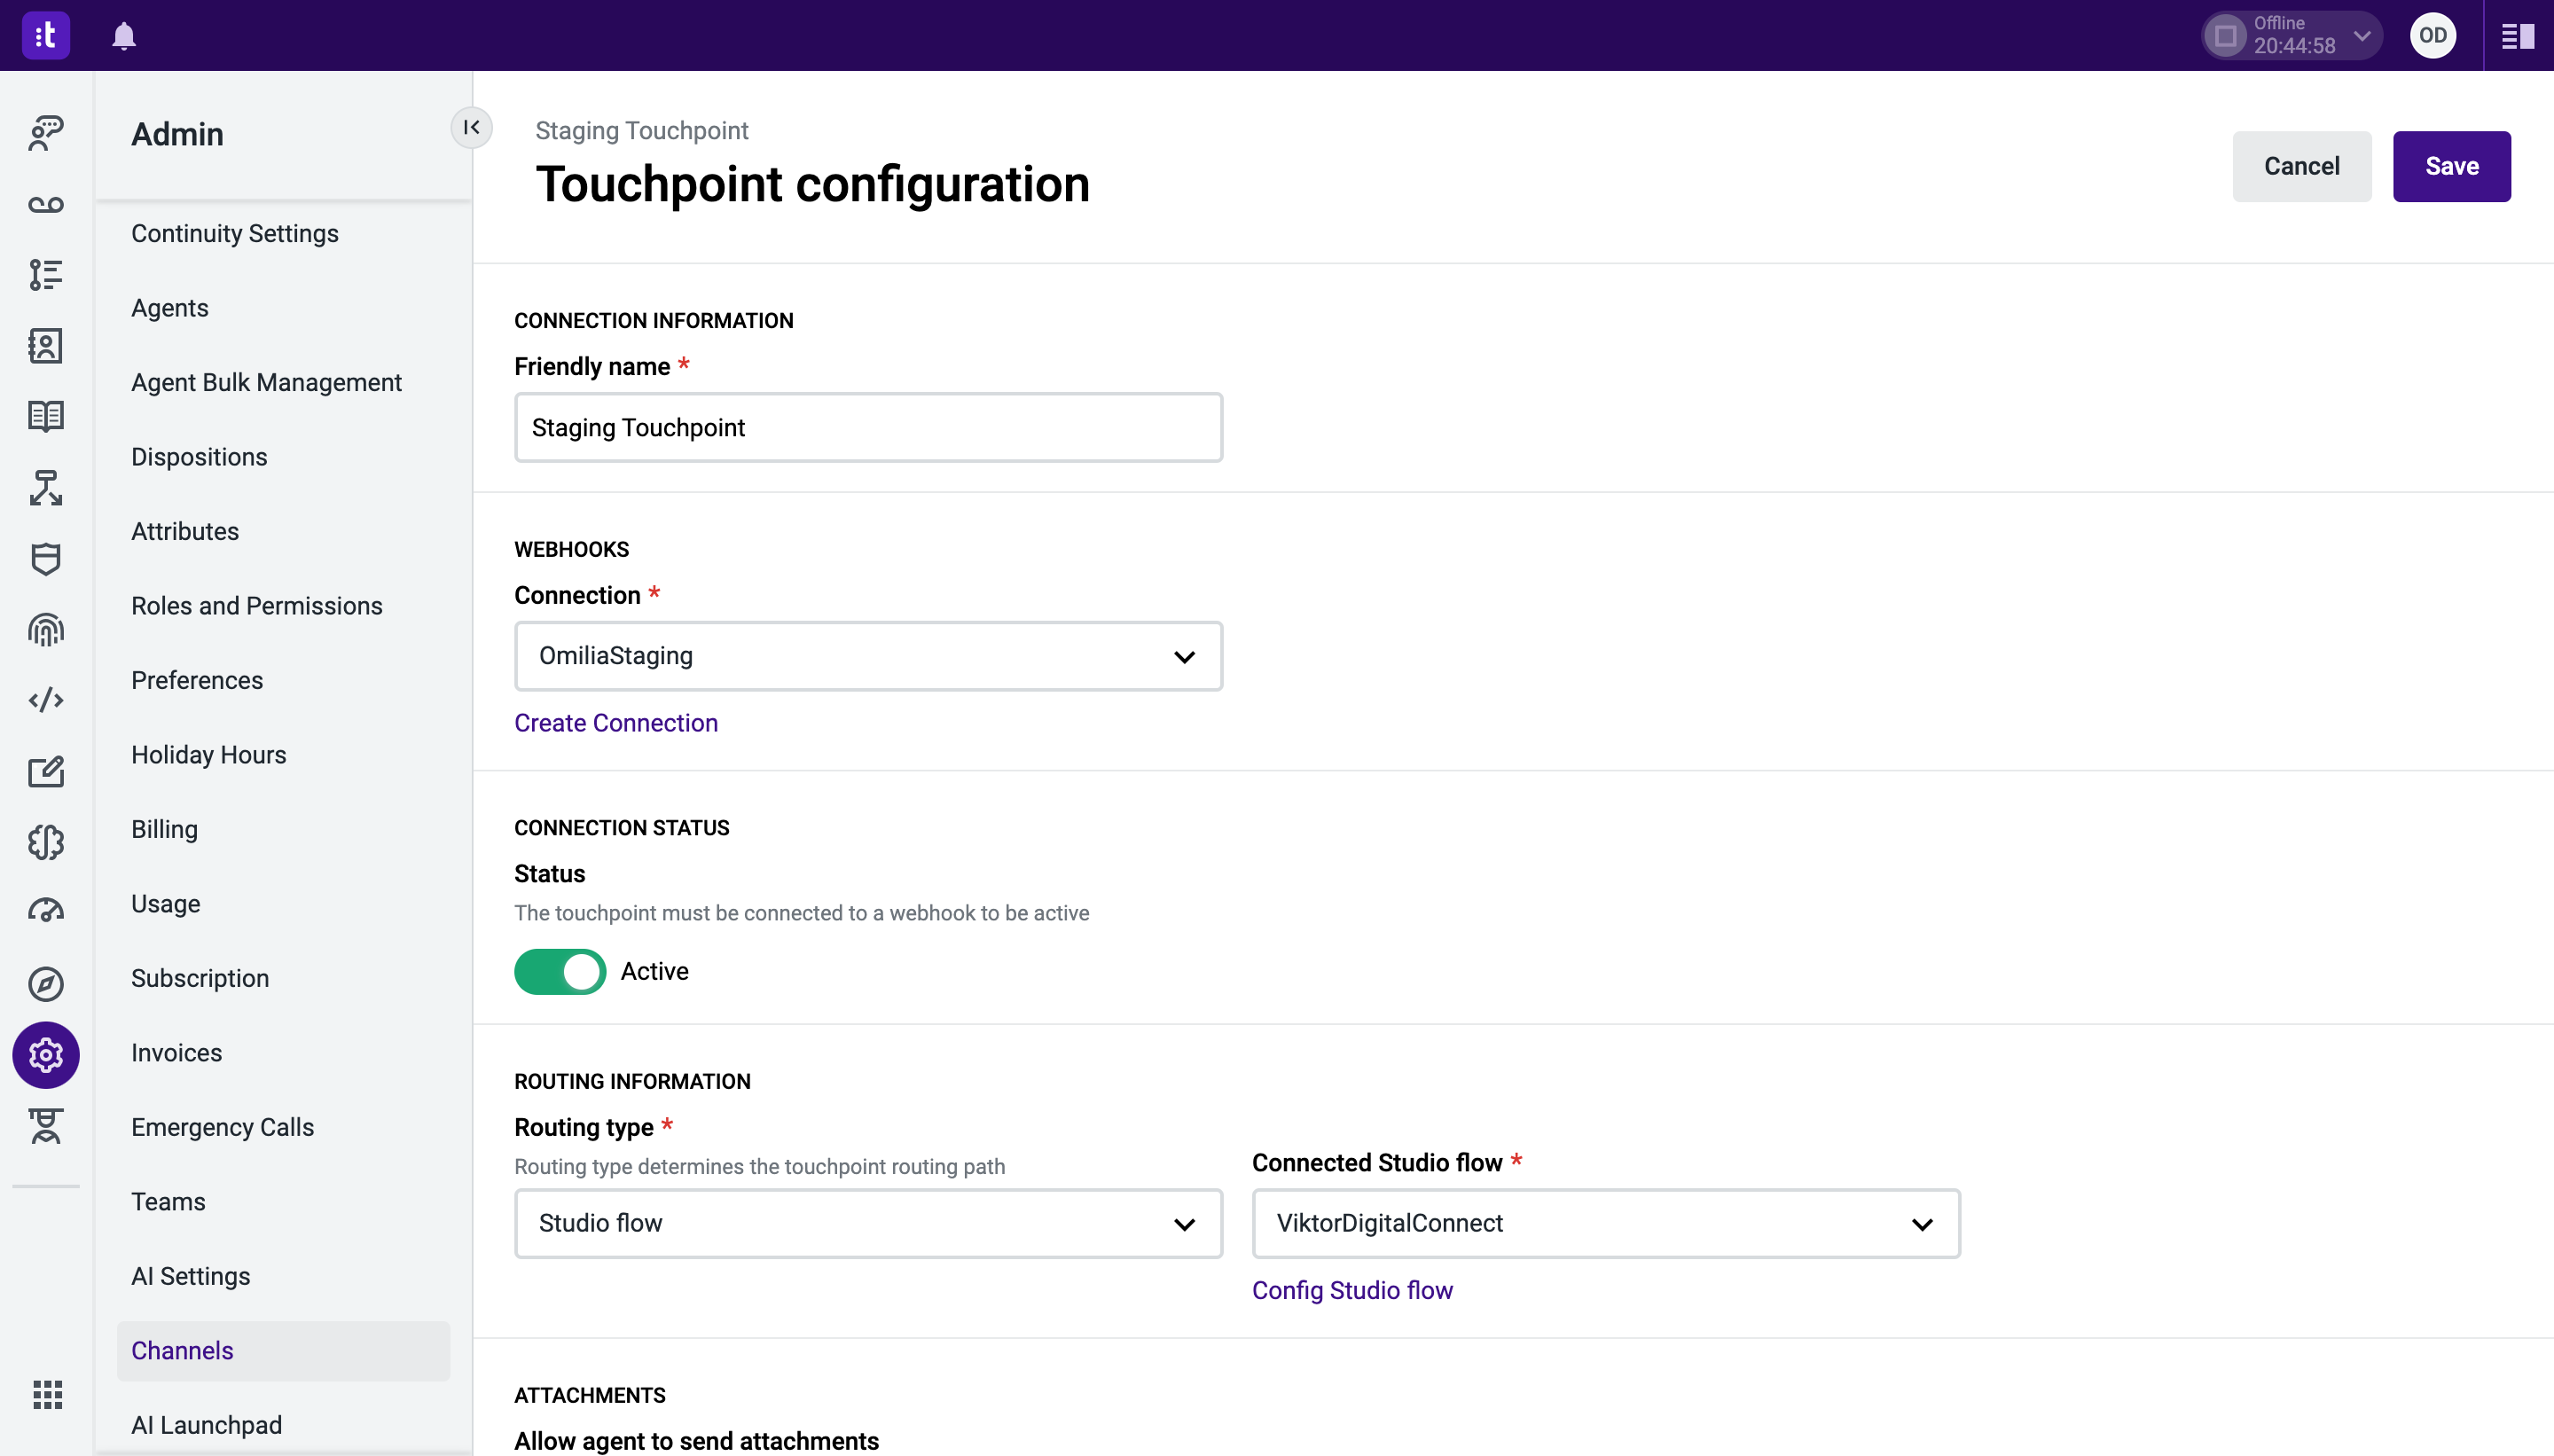
-
Connection Information
-
Friendly Name: The name of the touchpoint (also visible by the agent).
-
-
Webhooks
-
Connection: Select a connection from the drop-down list. This is basically the integration you have previously created and configured.
-
-
Connection Status: The status of the touchpoint. If activated, the touchpoint can create or receive conversations.
-
Routing Information
-
Routing type: Routing type for the selected touchpoint. Two values are available:
-
Studio flow: If this routing type is selected, a list of existing Incoming Message flows will appear, as well as a link to open Studio. You can check how to configure an incoming Message studio flow for Digital Connect.
-
Simplified routing: Allows selecting a list of queues that will receive Digital Connect conversations.
-
-
Connected Studio flow: Select Studio flow from the drop-down list.
-
-
Attachments
-
Allow agent to send attachments: If activated, the agent can send attachments.
-
Maximum file size: Set the allowed file size in KB.
-
Allowed file extensions: Enter the allowed file formats.
-
-
Click Save when finished.
Configure the Studio arguments
At this step, you need to configure the Studio arguments which are used to map the information that can be brought from OCP®. Arguments are parameters that come in the request from OCP® and can be used across the Flow in Talkdesk.
To configure an argument, proceed as follows:
-
Open your Talkdesk Atlas.
-
Navigate to the Studio tab and select Flows.
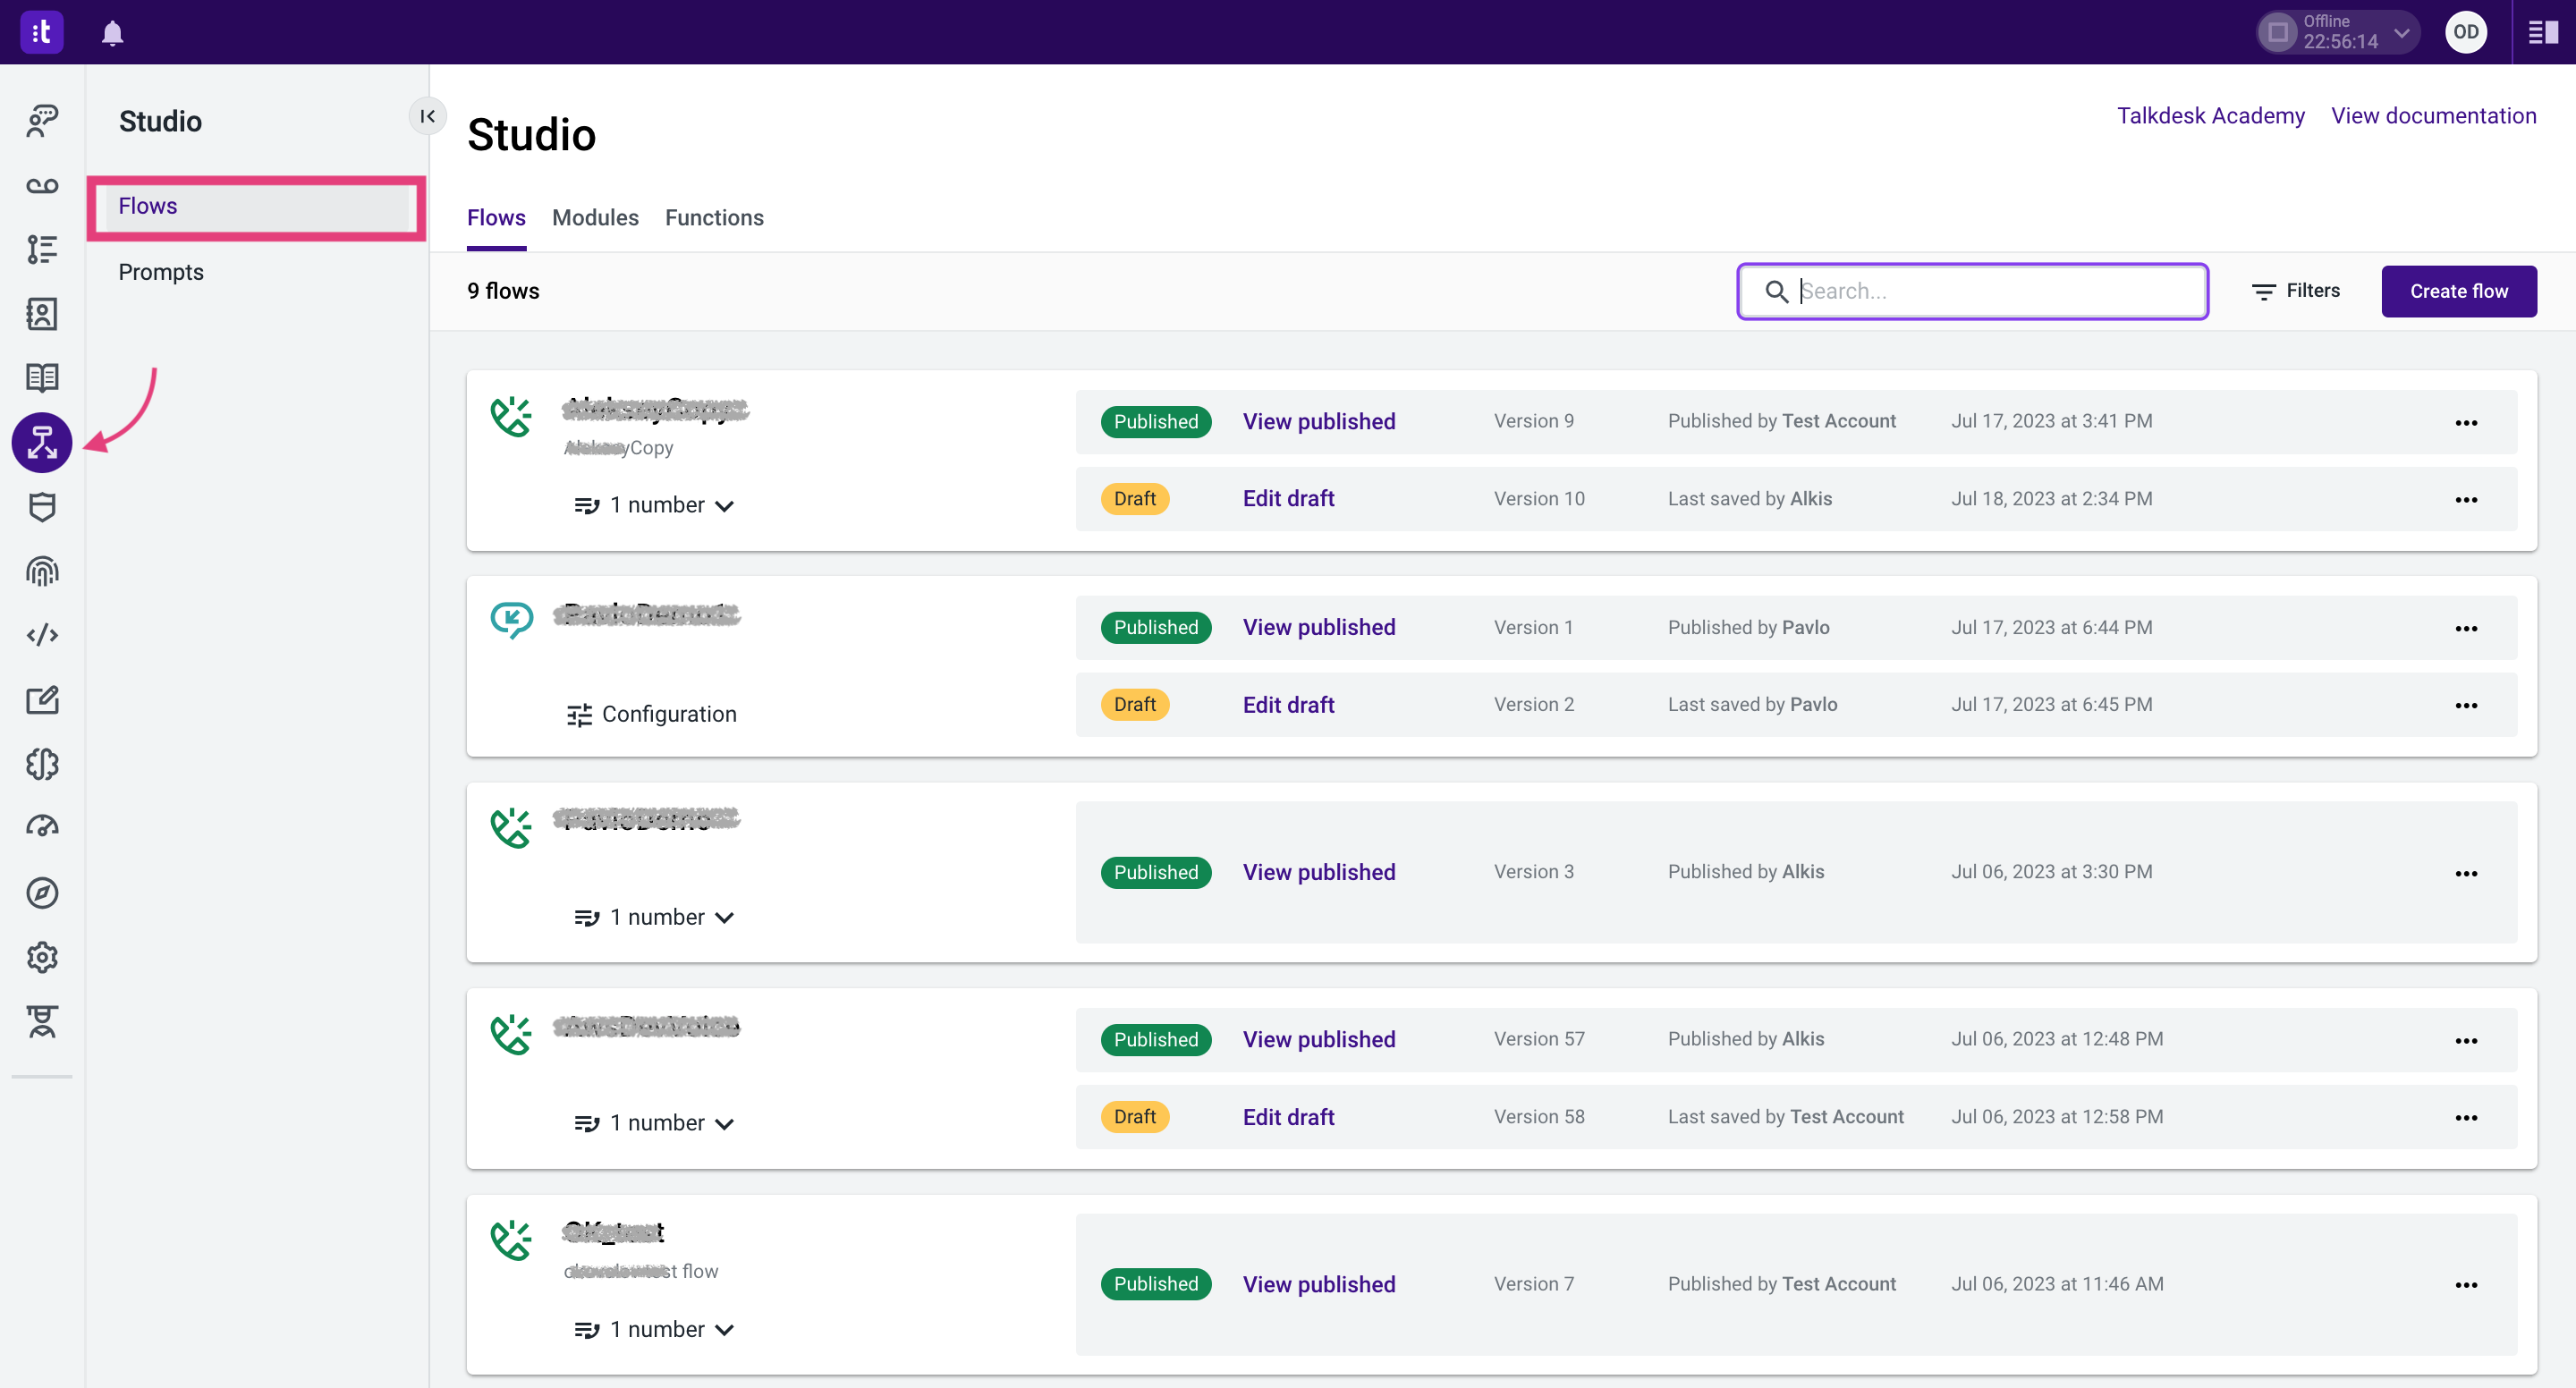
-
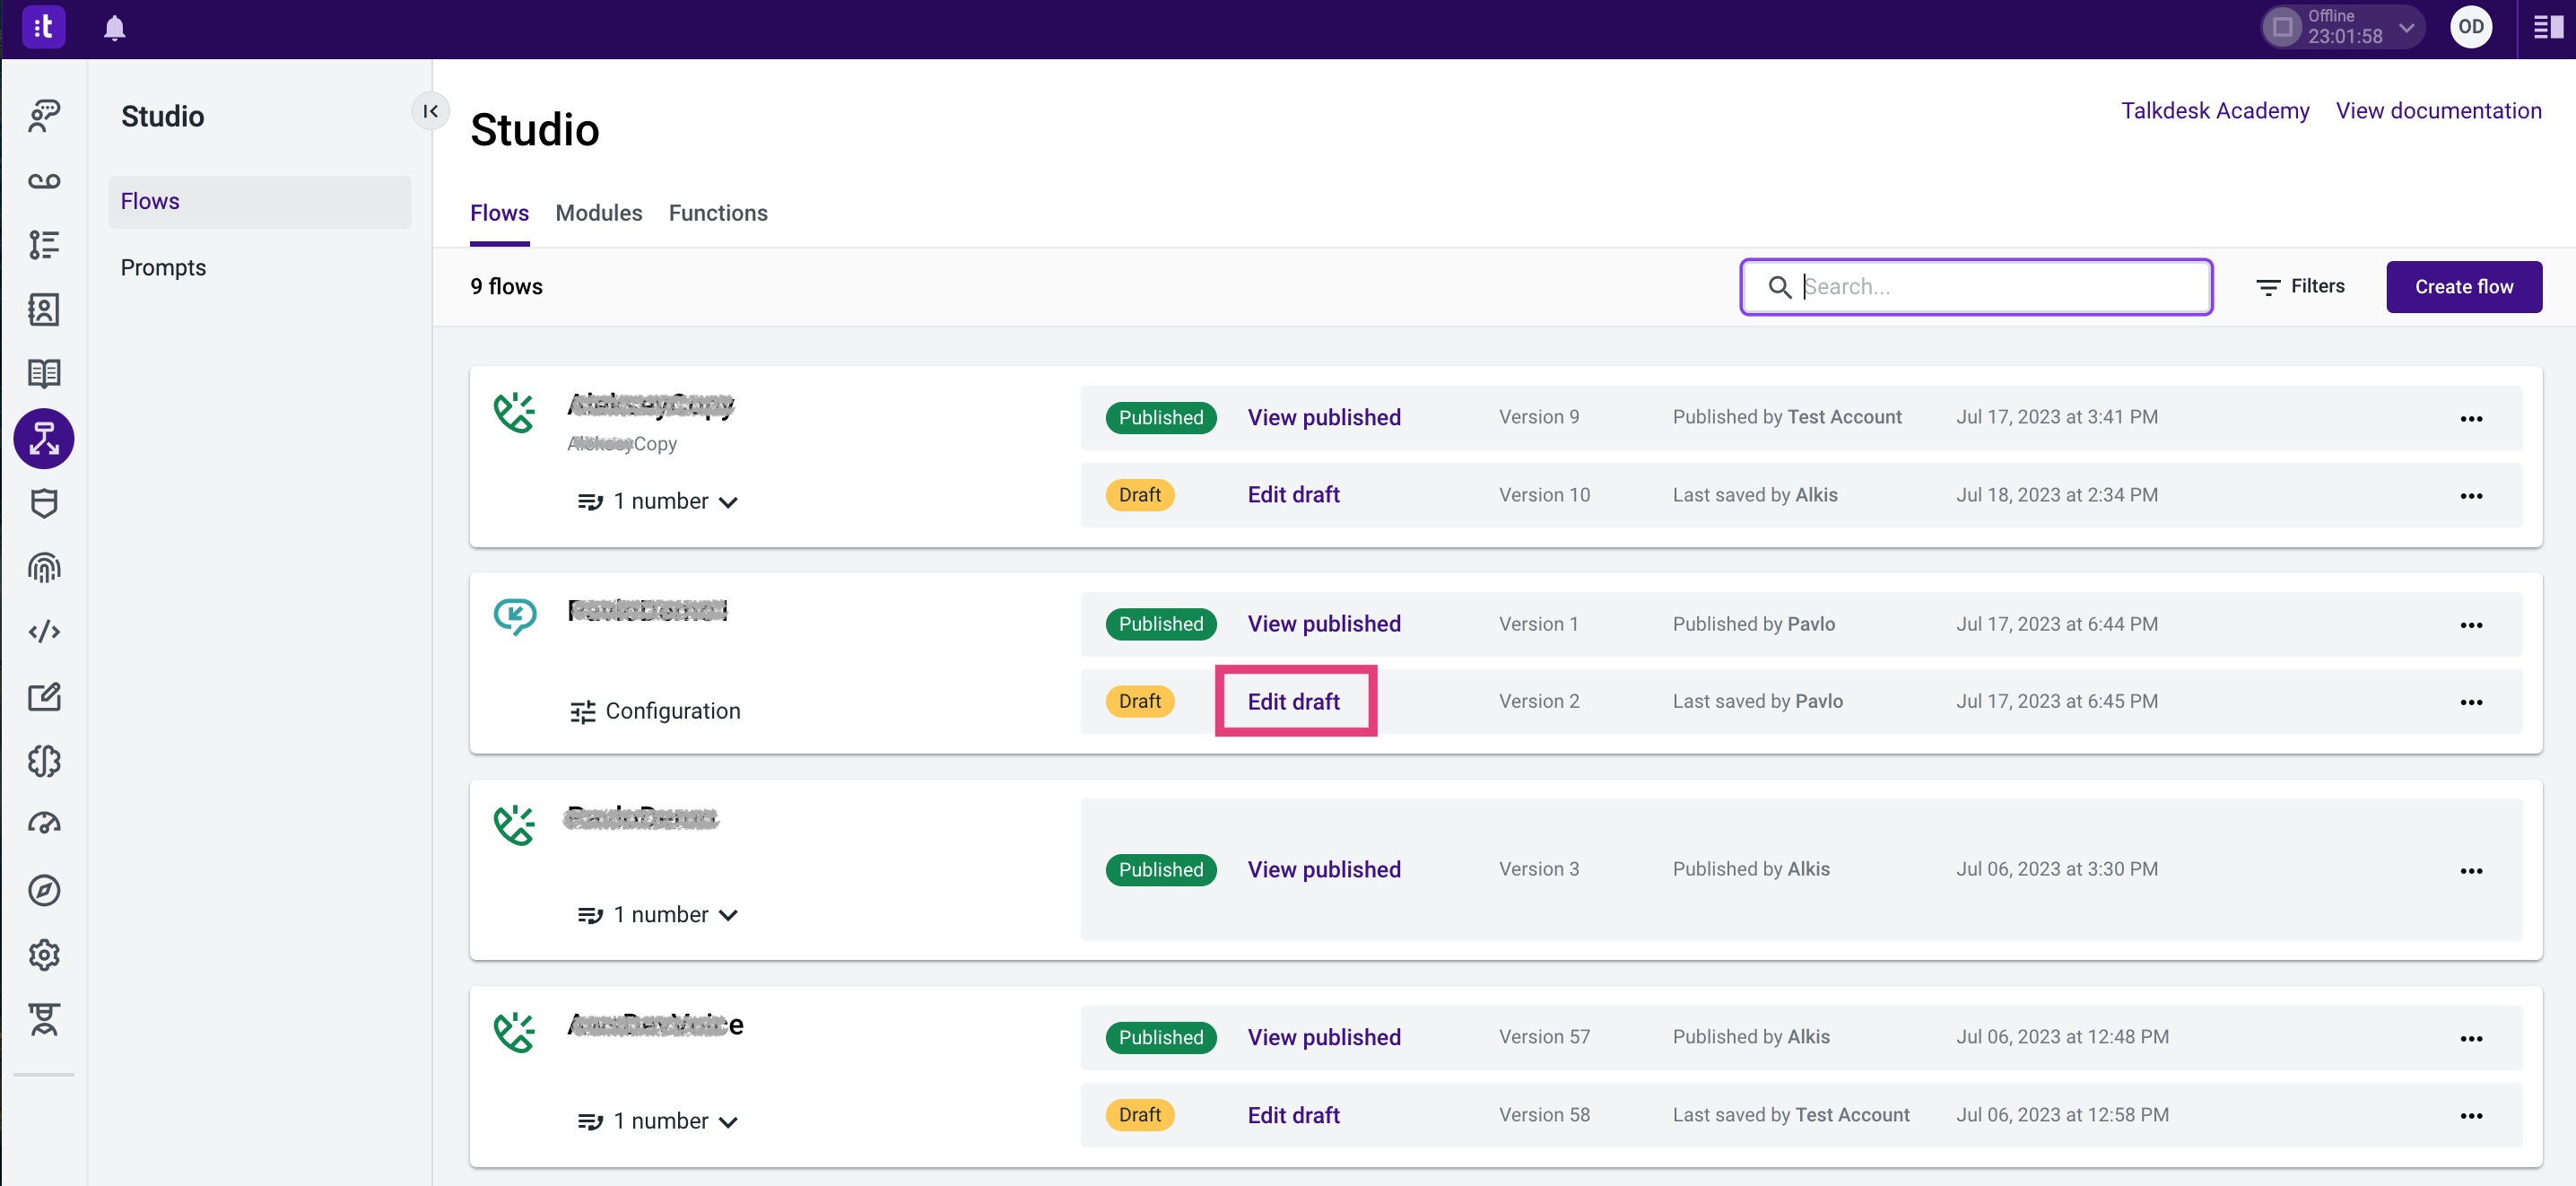
Select a flow and click Edit draft.
-
You will see a canvas with the selected flow.
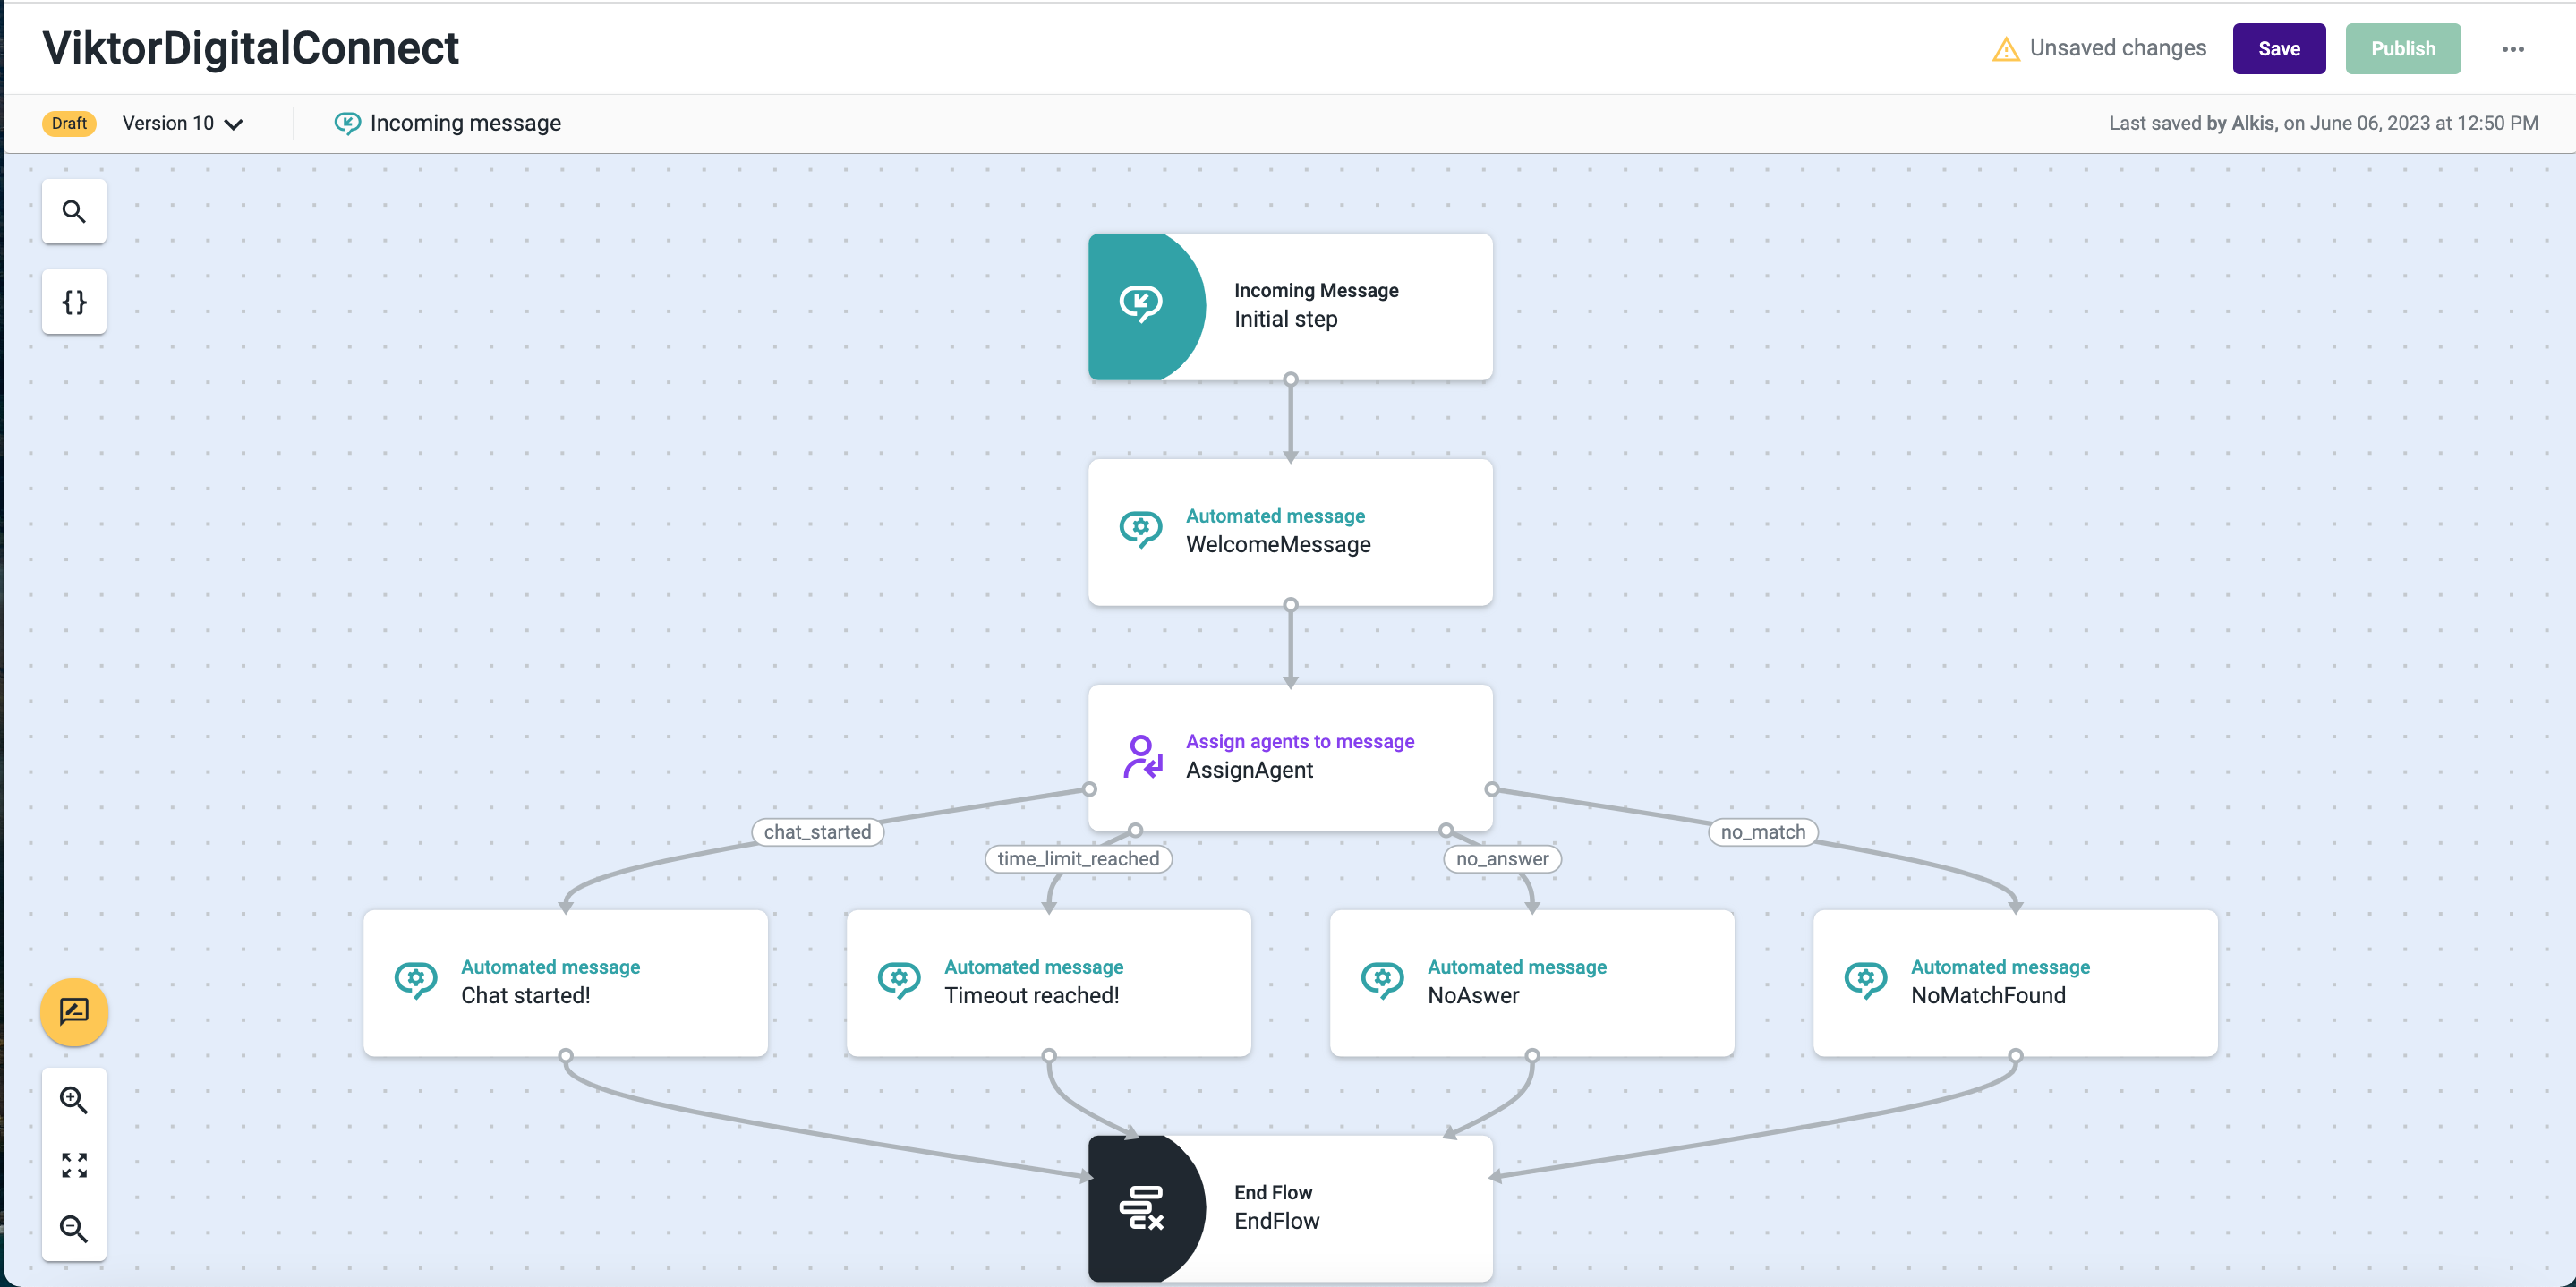
-
Click the first action to open the context menu on the right as shown below.
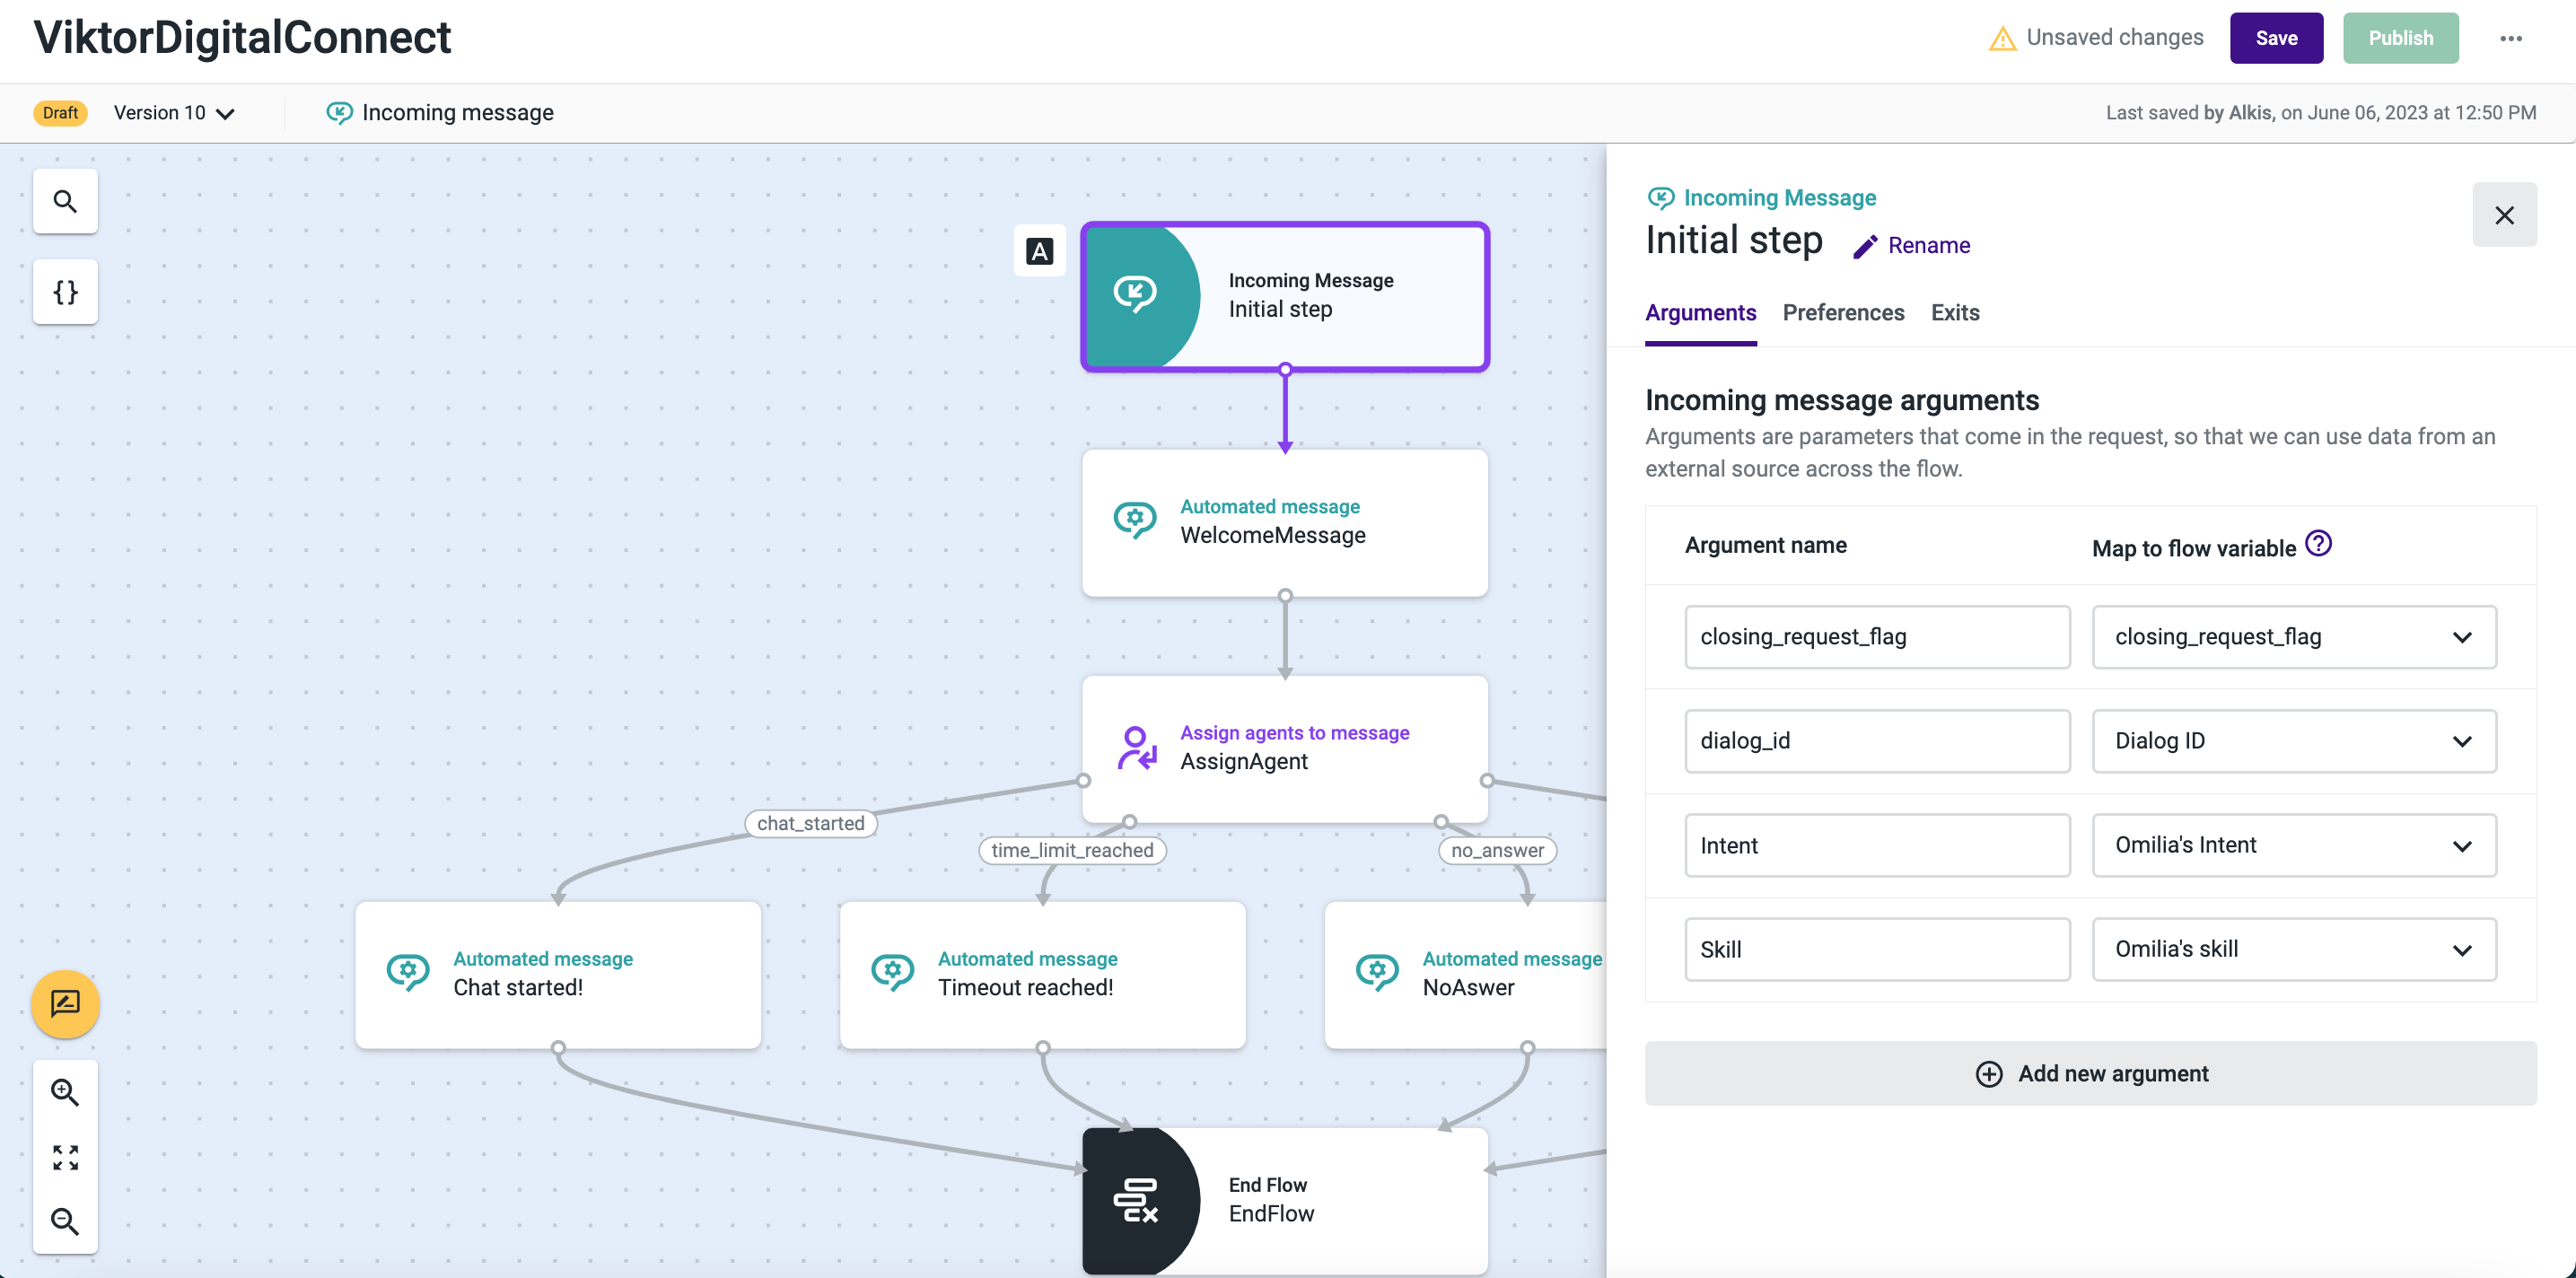
-
Click Add new argument and insert the name of the argument. These arguments are the fields from the flow that will be exposed to an agent. You can use the arguments based on your needs, for example, Intent of the customer, or a Reason for transfer.
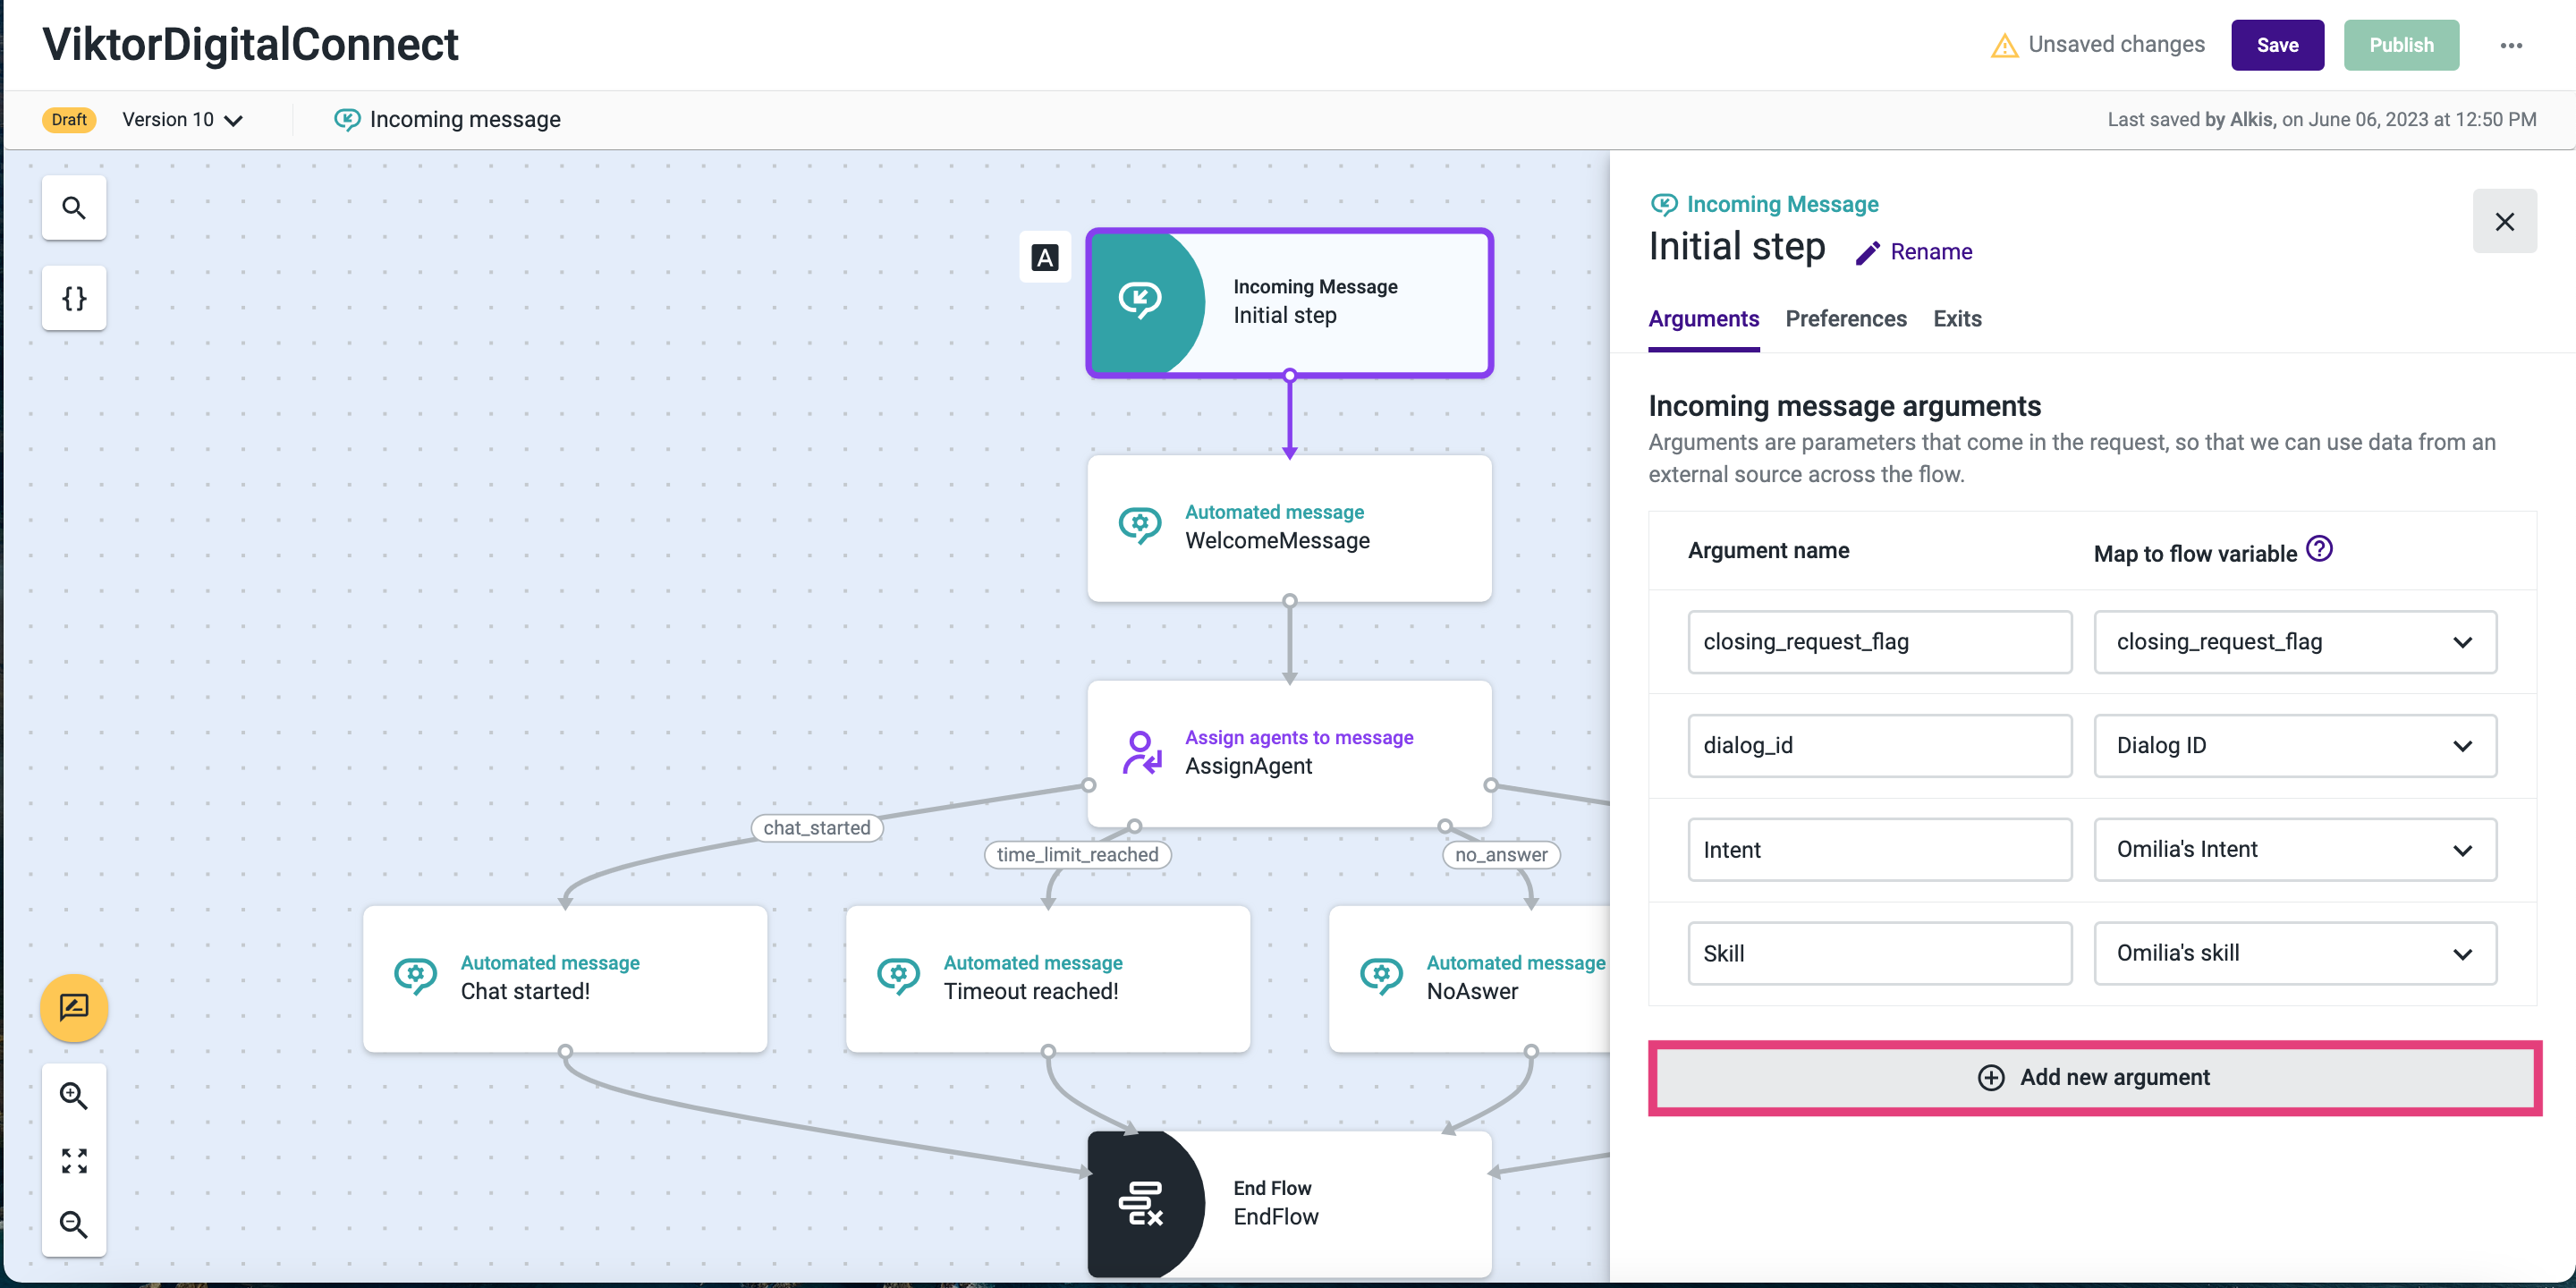
-
From the drop-down list, select a variable name that will be getting the values inside the selected argument.
-
Optionally, click the {} icon to define what context will show up to the agent.
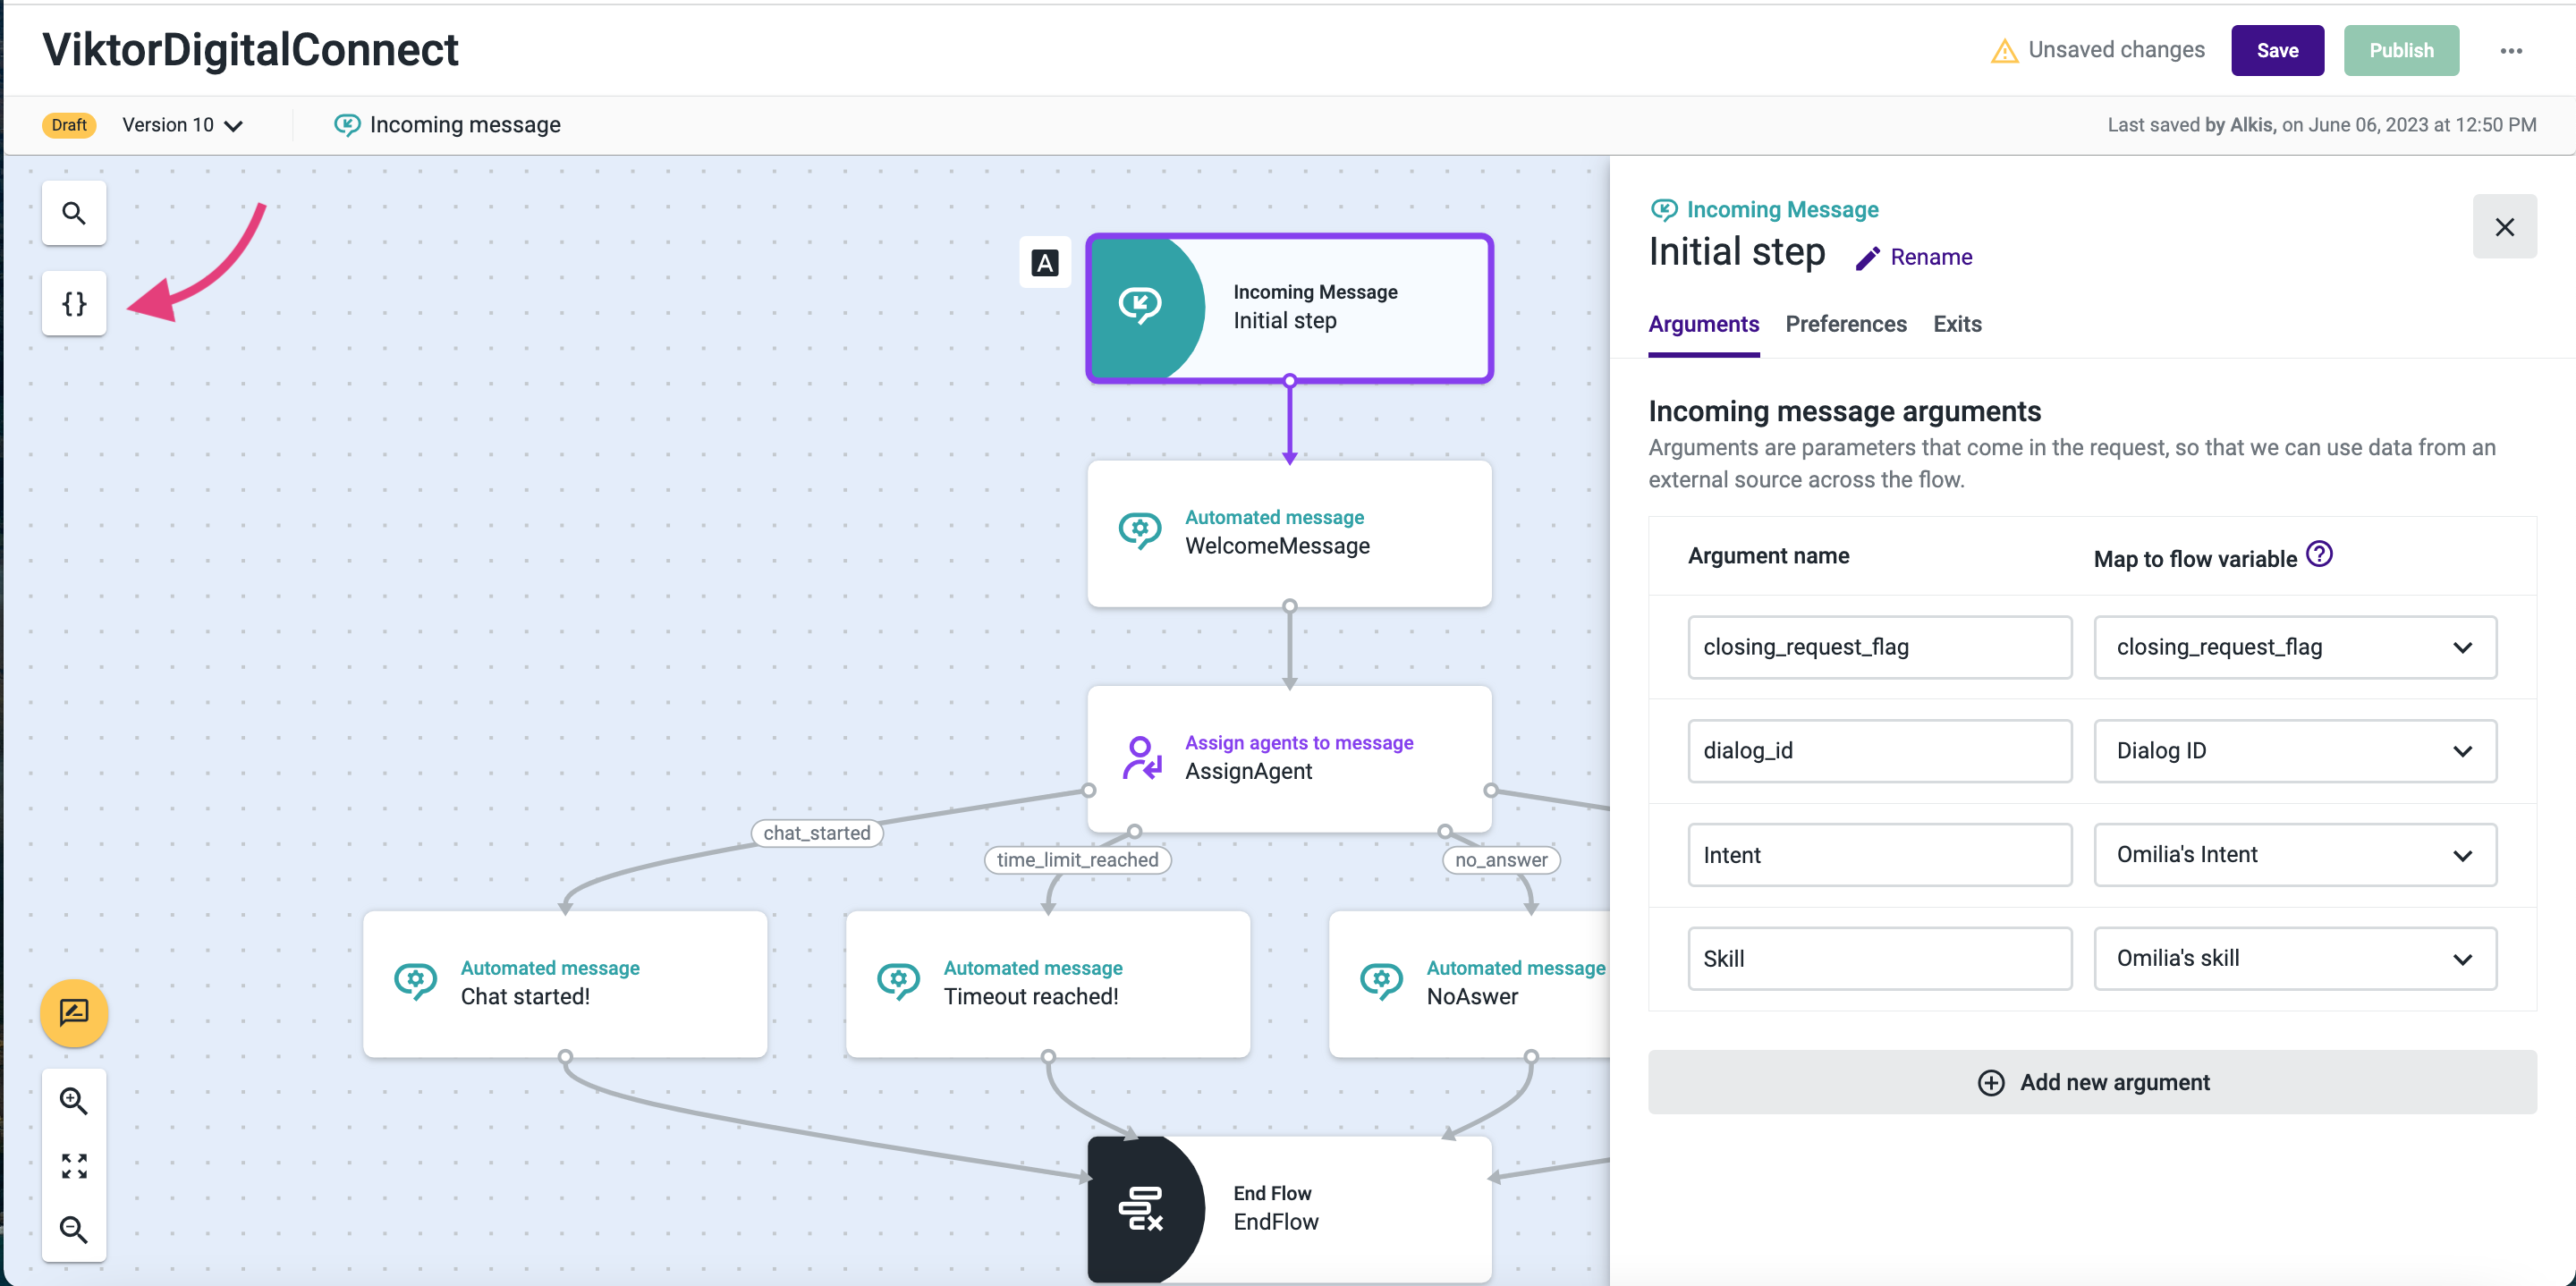
-
In the opened dialog box, select the required fields.
-
Click Save when finished. The selected fields will appear in the Digital Connect chat.
Configure the Transfer module
To integrate Omilia Flow into the Talkdesk chat, follow the guidelines below:
-
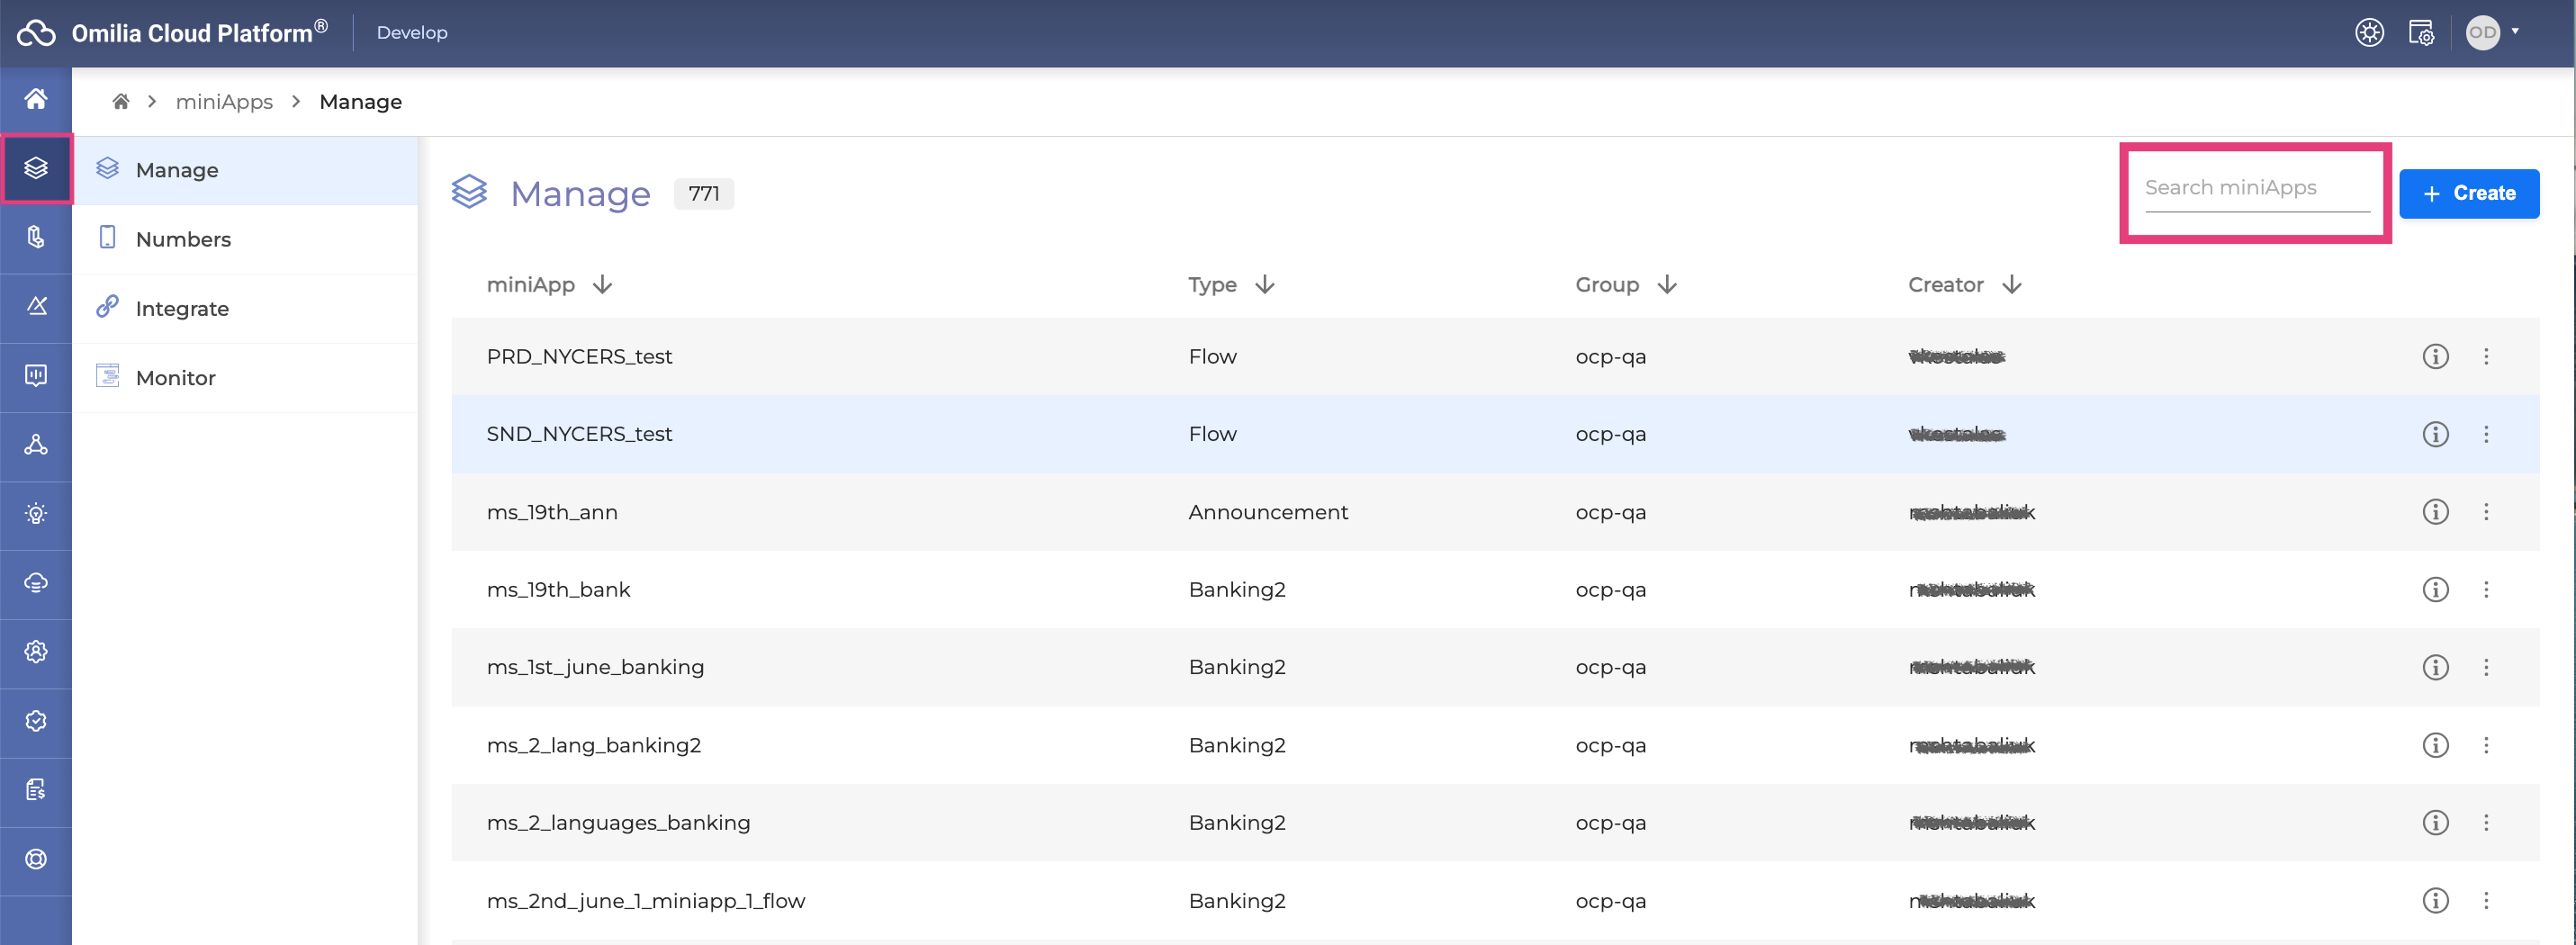
Open your OCP® account:
-
Select miniApps → Manage and search for the needed Flow using the search field.
3. Go to the Chat tab and click the Chat Widget button.

4. The Chat Widget details are open. Navigate to the Webchat configuration for: en-US section and click Edit.
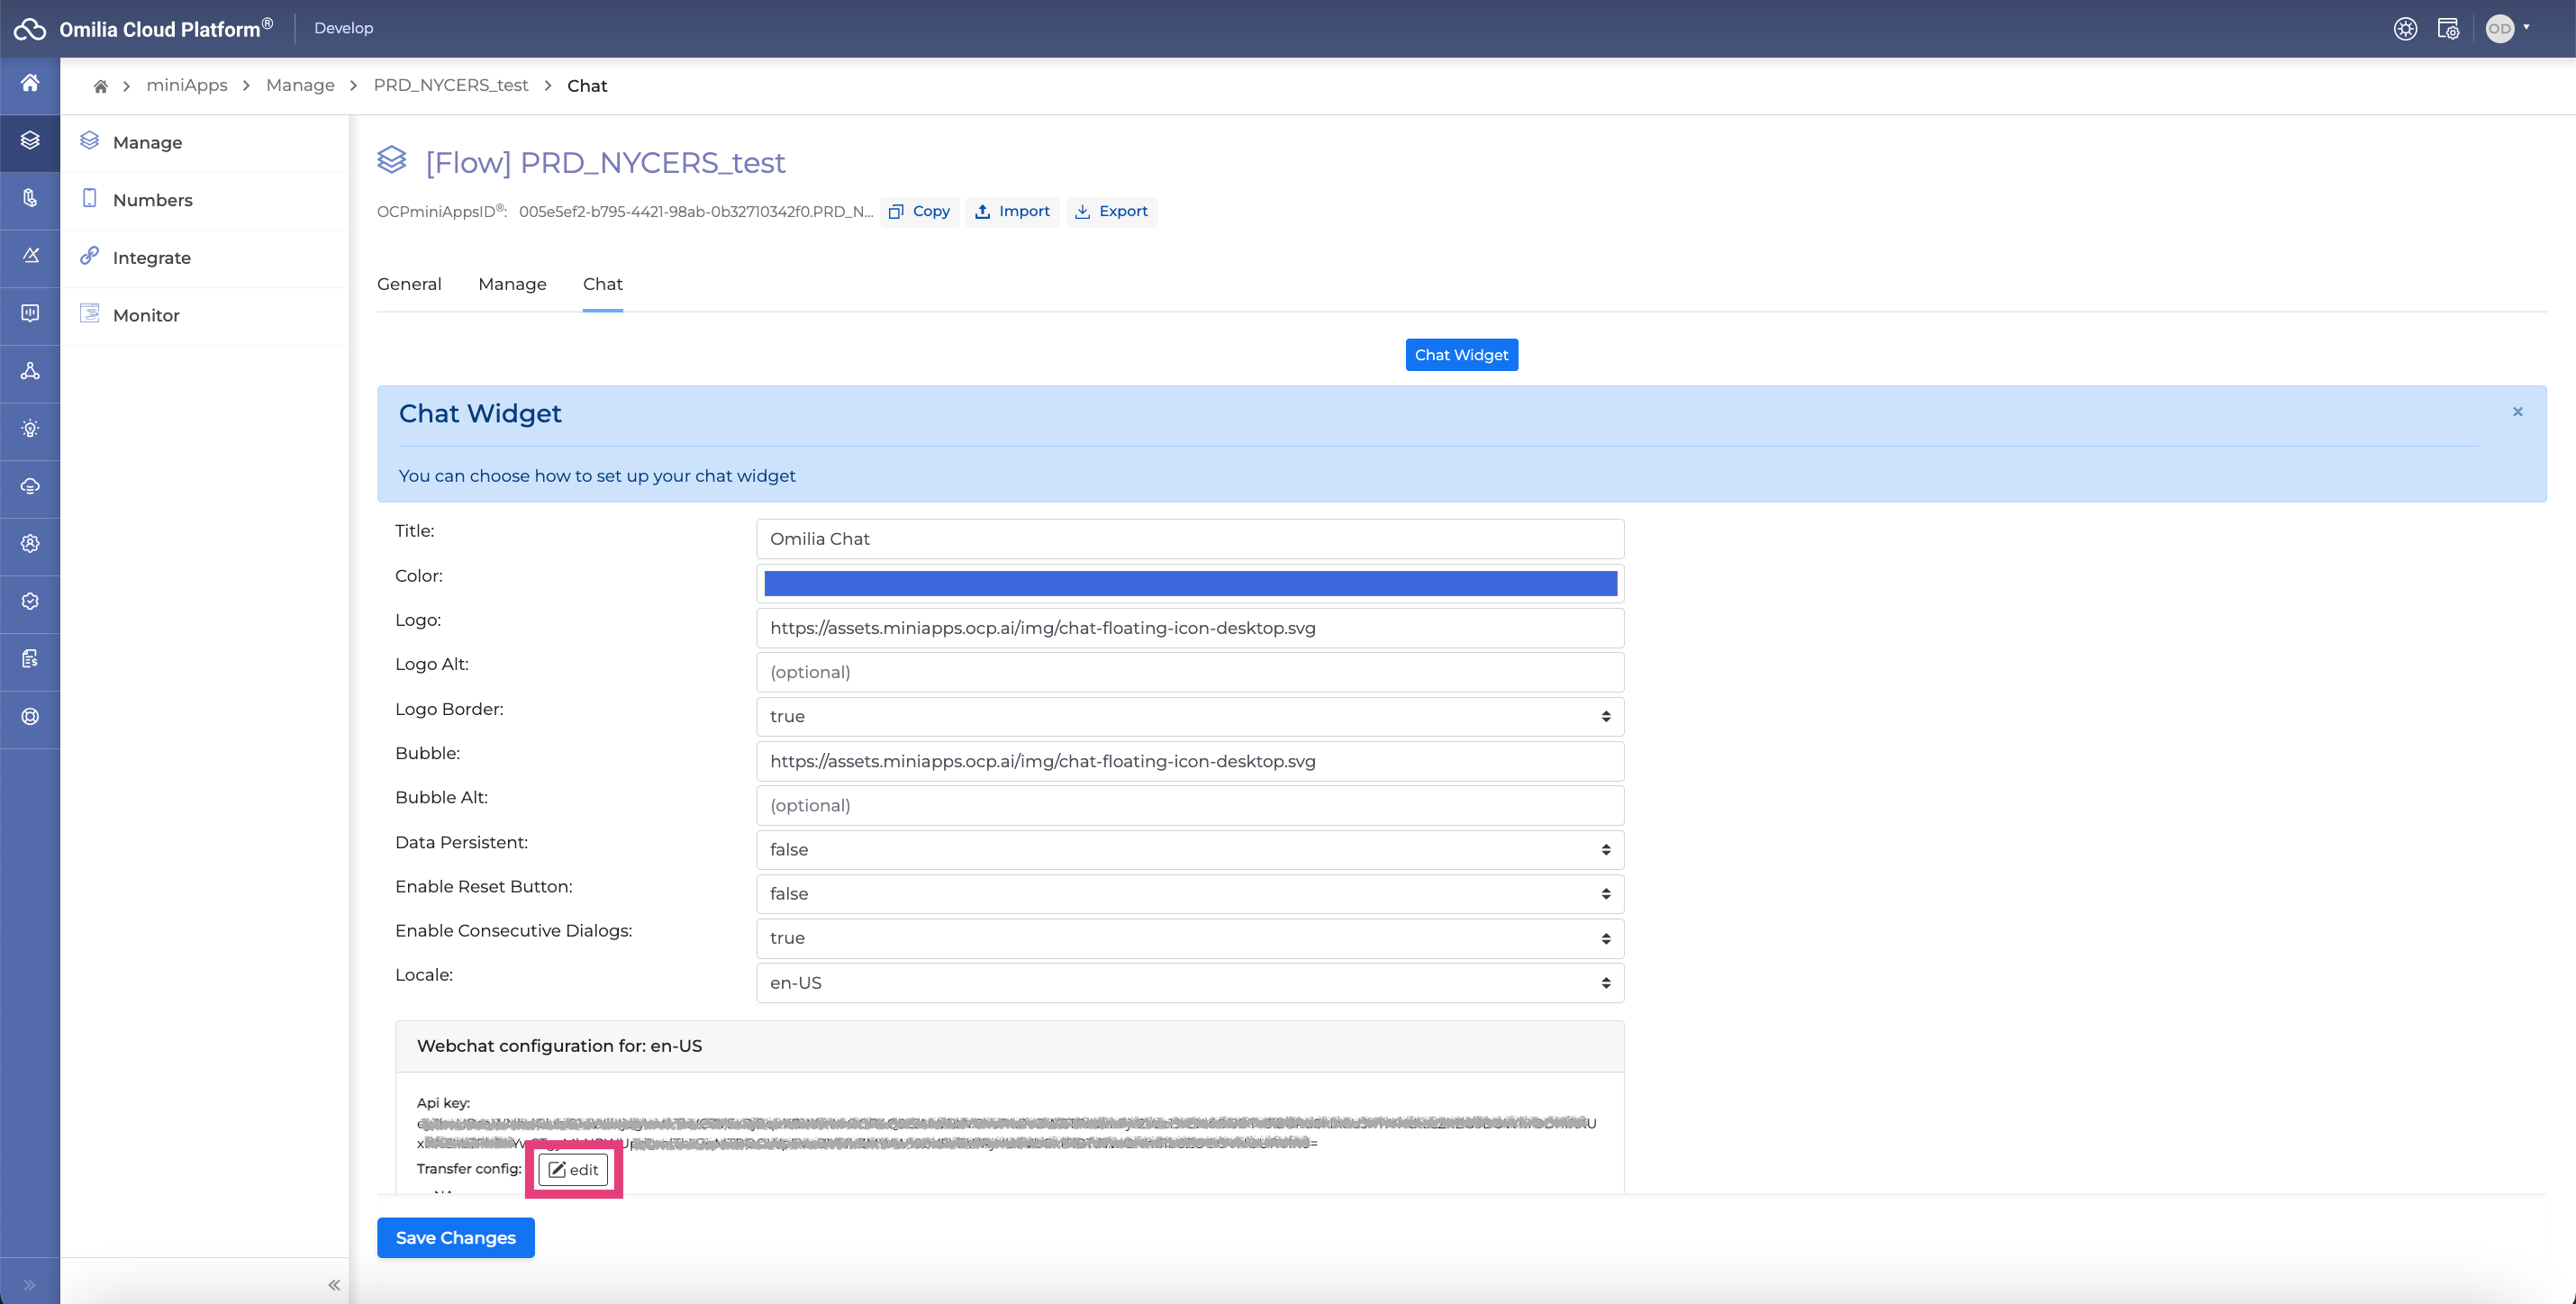
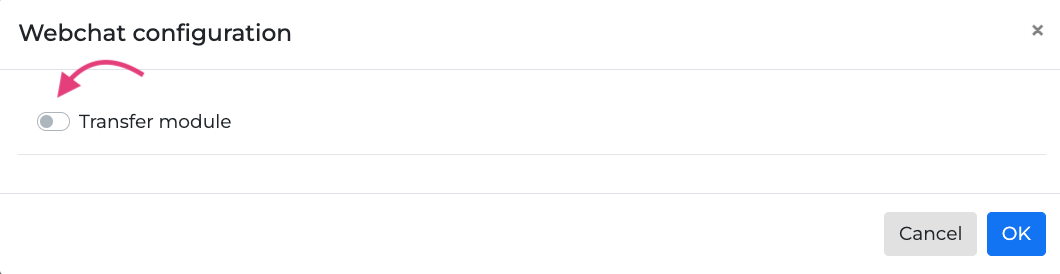
5. In the opened dialog box, switch on the Transfer module toggle.
6. In the Type field, select Talkdesk from the drop-down list.
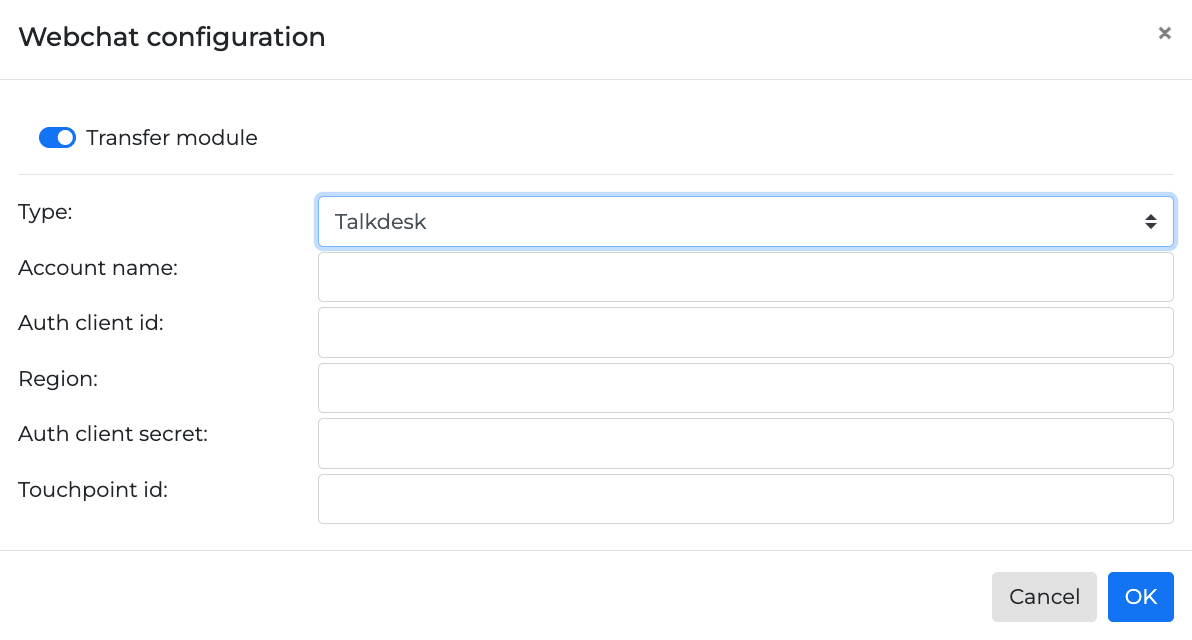
7. Fill in the required fields as described below and click OK when finished.
|
Field name |
Description |
|---|---|
|
Type |
Select Talkdesk from the drop-down list. |
|
Account name |
The name provided by Talkdesk which can be found in the URL of the TalkDesk portal as shown below |
|
Auth client ID |
Authentication client data provided by Talkdesk. For details, see the Configure OAuth Client section. |
|
Region |
Set the US value. For the moment this value is static. |
|
Auth client secret |
Authentication client data provided by Talkdesk. For details, see the Configure OAuth Client section. |
|
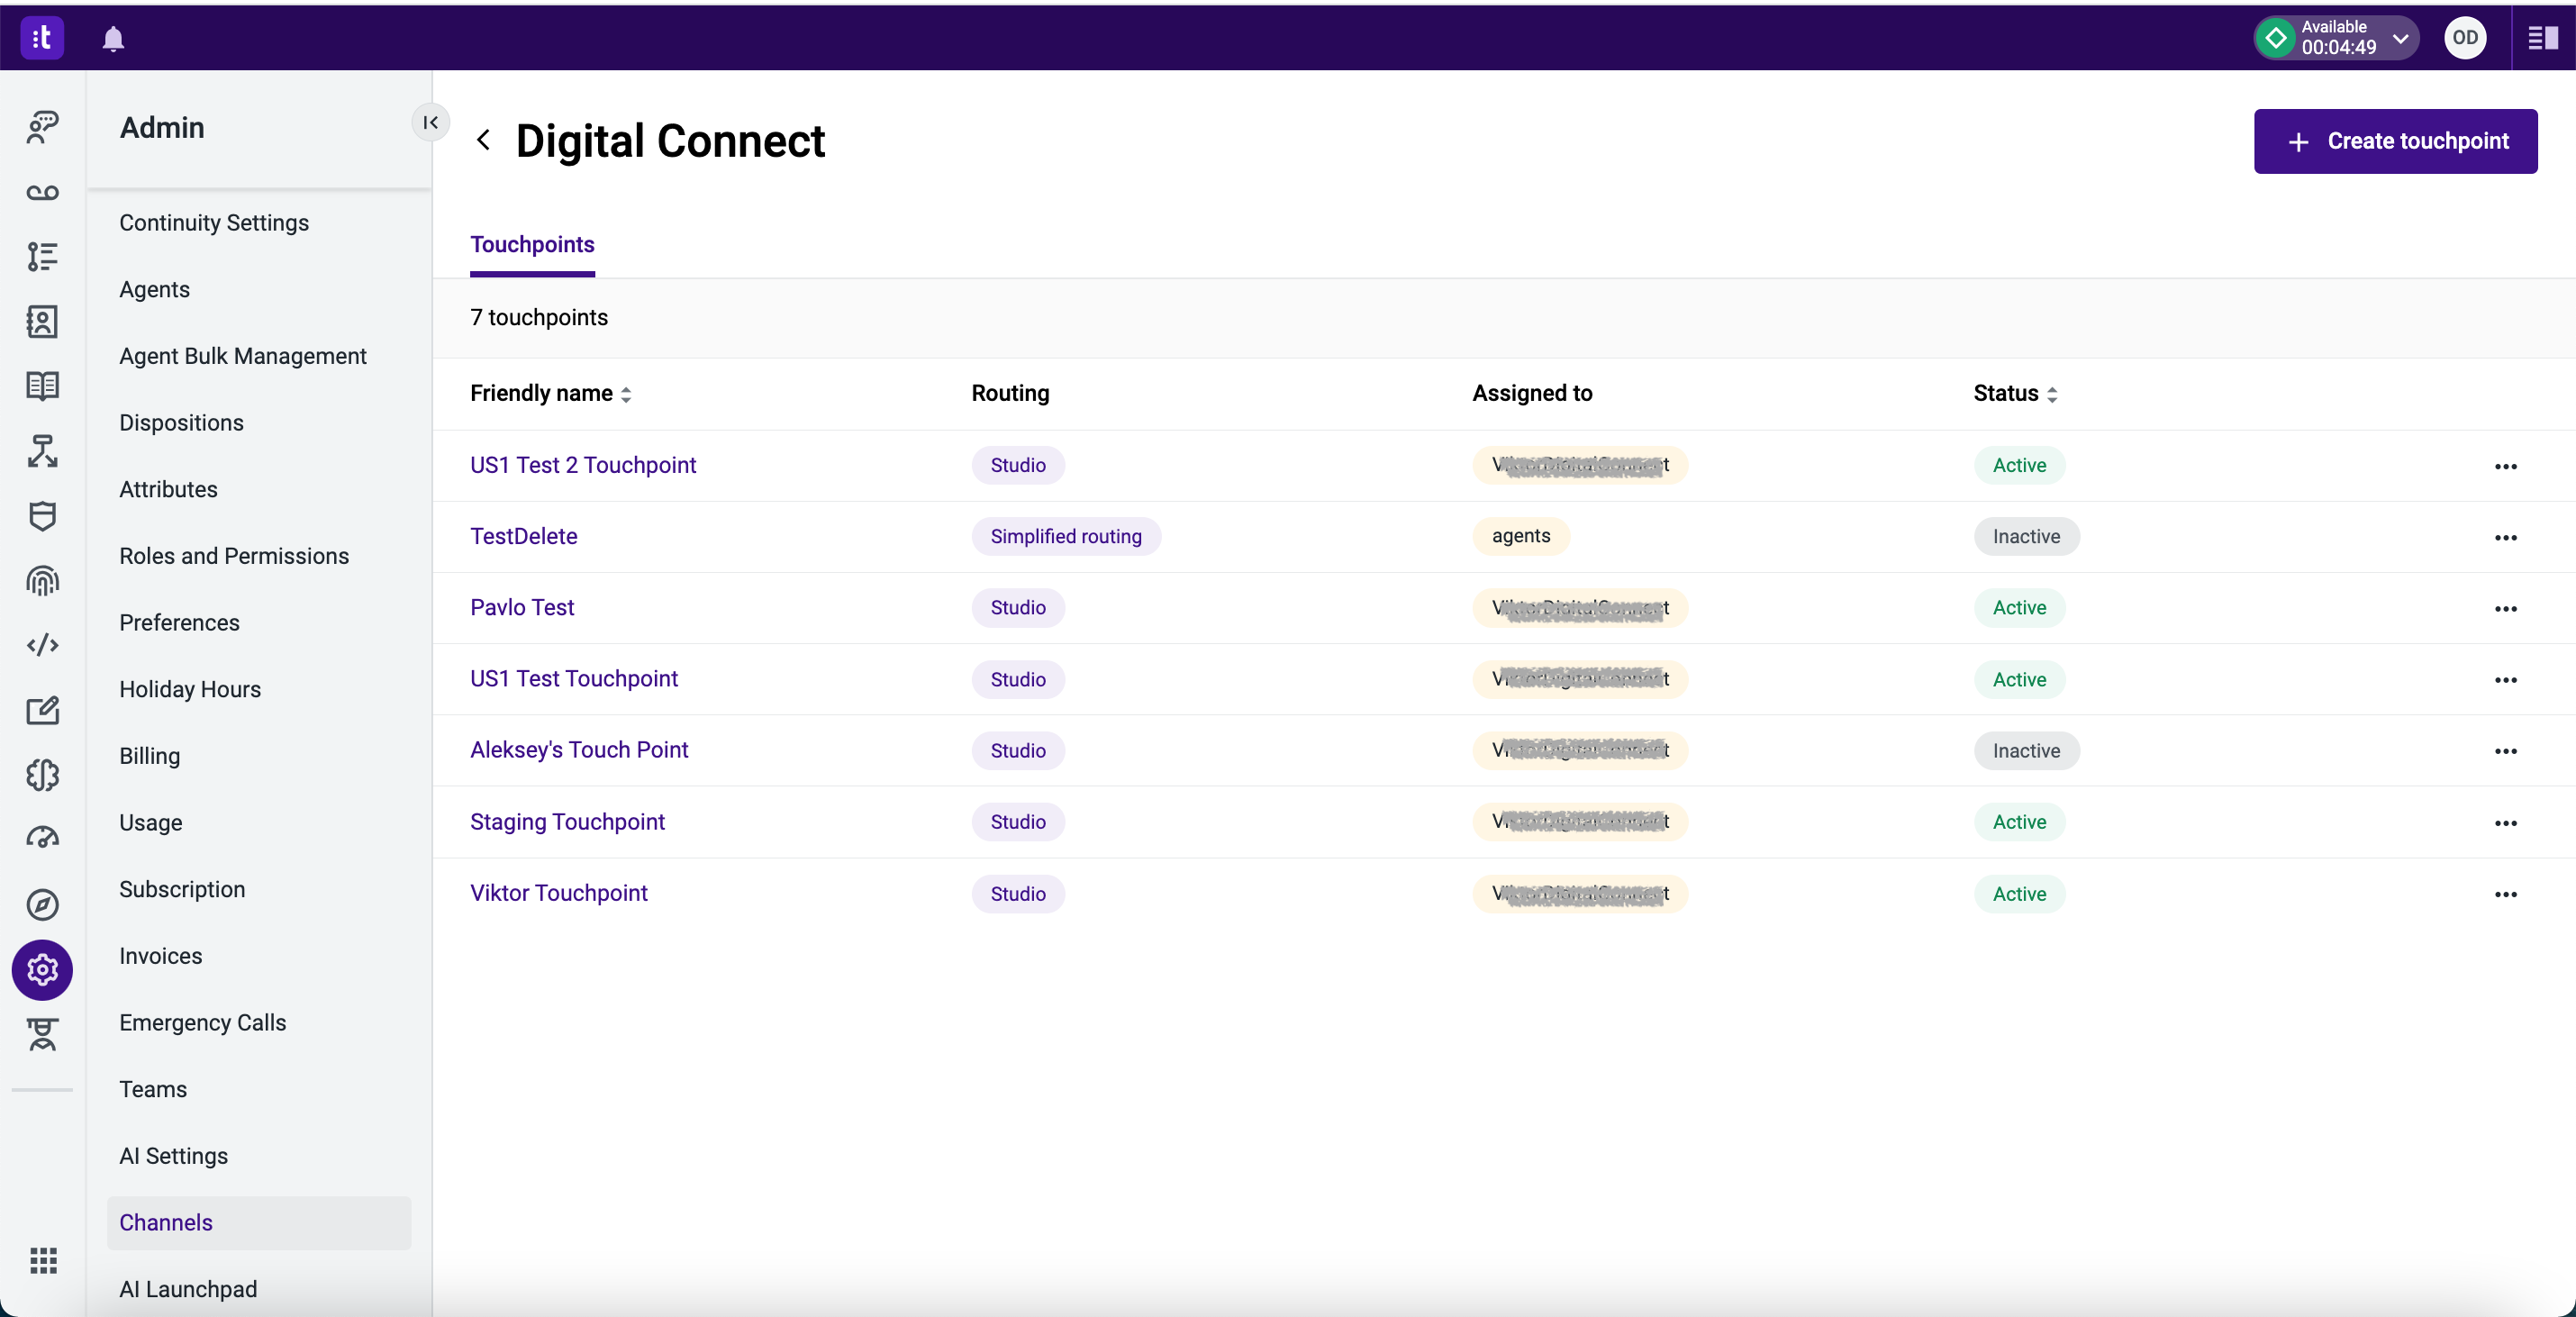
Touchpoint ID |
In Talkdesk, navigate to Admin → Channels → Digital Connect → select the needed touchpoint from the list and copy its Touchpoint ID. Each touchpoint is connected to specific webhook configuration and Studio flow. Click a touchpoint to see the configured values as shown below:
|
Test the connection
To test the connection, navigate to Orchestrator and follow the guidelines described in Test a Dialog Application.
Appendix
Below you can find input schemas, used for configuring the integration actions. Copy and paste the code snippets into the corresponding field.
conversation_started
{
  "$schema": "http://json-schema.org/draft-07/schema#",
  "type": "object",
  "title": "conversation_started",
  "required": [
    "event_type",
    "conversation_id",
    "timestamp",
    "payload"
  ],
  "properties": {
    "event_type": {
      "type": "string",
      "title": "Event Type"
    },
    "conversation_id": {
      "type": "string",
      "title": "Conversation Id"
    },
    "timestamp": {
      "type": "string",
      "title": "Timestamp"
    },
    "payload": {
      "type": "object",
      "title": "The Payload",
      "required": [
        "contact_person",
        "user",
        "touchpoint"
      ],
      "properties": {
        "contact_person": {
          "type": "object",
          "title": "contact to start the conversation with",
          "required": [
            "email"
          ],
          "properties": {
            "email": {
              "type": "string",
              "title": "contact email"
            }
          },
          "additionalProperties": false
        },
        "user": {
          "type": "object",
          "title": "The user that initiated the chat from Talkdesk",
          "required": [
            "name"
          ],
          "properties": {
            "name": {
              "type": "string",
              "title": "the user name"
            }
          },
          "additionalProperties": false
        },
        "touchpoint": {
          "type": "object",
          "title": "The touchpoint used to initiate the conversation",
          "required": [
            "id"
          ],
          "properties": {
            "id": {
              "type": "string",
              "title": "the touchpoint id"
            }
          },
          "additionalProperties": false
        },
        "subject": {
          "type": [
            "string",
            "null"
          ],
          "title": "subject on digital connect"
        }
      },
      "additionalProperties": false
    }
  },
  "additionalProperties": false
}
message_created
{
  "$schema": "http://json-schema.org/draft-07/schema#",
  "type": "object",
  "title": "message_created",
  "required": [
    "event_type",
    "conversation_id",
    "timestamp",
    "payload"
  ],
  "properties": {
    "event_type": {
      "type": "string",
      "title": "Event Type"
    },
    "conversation_id": {
      "type": "string",
      "title": "Conversation Id"
    },
    "timestamp": {
      "type": "string",
      "title": "Timestamp"
    },
    "payload": {
      "type": "object",
      "title": "The Payload",
      "required": [
        "id",
        "created_at",
        "author"
      ],
      "properties": {
        "id": {
          "type": "string",
          "title": "Id"
        },
        "content": {
          "type": "string",
          "title": "Content"
        },
        "created_at": {
          "type": "string",
          "title": "Created at"
        },
        "author": {
          "type": "object",
          "title": "The Payload",
          "required": [
            "name",
            "type"
          ],
          "properties": {
            "name": {
              "type": "string",
              "title": "Name"
            },
            "type": {
              "type": "string",
              "title": "Type"
            }
          },
          "additionalProperties": false
        },
        "attachments": {
          "type": "array",
          "title": "The attachments",
          "items": {
            "type": "object",
            "required": [
              "id",
              "name",
              "type",
              "size"
            ],
            "properties": {
              "id": {
                "type": "string",
                "title": "Id"
              },
              "name": {
                "type": "string",
                "title": "Name"
              },
              "type": {
                "type": "string",
                "title": "Type"
              },
              "size": {
                "type": "number",
                "title": "Size"
              }
            },
            "additionalProperties": false
          }
        }
      },
      "additionalProperties": false
    }
  },
  "additionalProperties": false
}
conversation_ended
{
  "$schema": "http://json-schema.org/draft-07/schema#",
  "type": "object",
  "title": "conversation_ended",
  "required": [
    "event_type",
    "conversation_id",
    "timestamp"
  ],
  "properties": {
    "event_type": {
      "type": "string",
      "title": "Event Type"
    },
    "conversation_id": {
      "type": "string",
      "title": "Conversation Id"
    },
    "timestamp": {
      "type": "string",
      "title": "Timestamp"
    }
  },
  "additionalProperties": false
}