Overview
This guide explains how Omilia Cloud Platform (OCP) integrates with the Genesys Cloud Platform. It aims to provide an in-depth understanding of Omilia’s implementation on Genesys Architect Flow and how it works.
Note that this guide does not cover Voice Biometrics which is described separately:
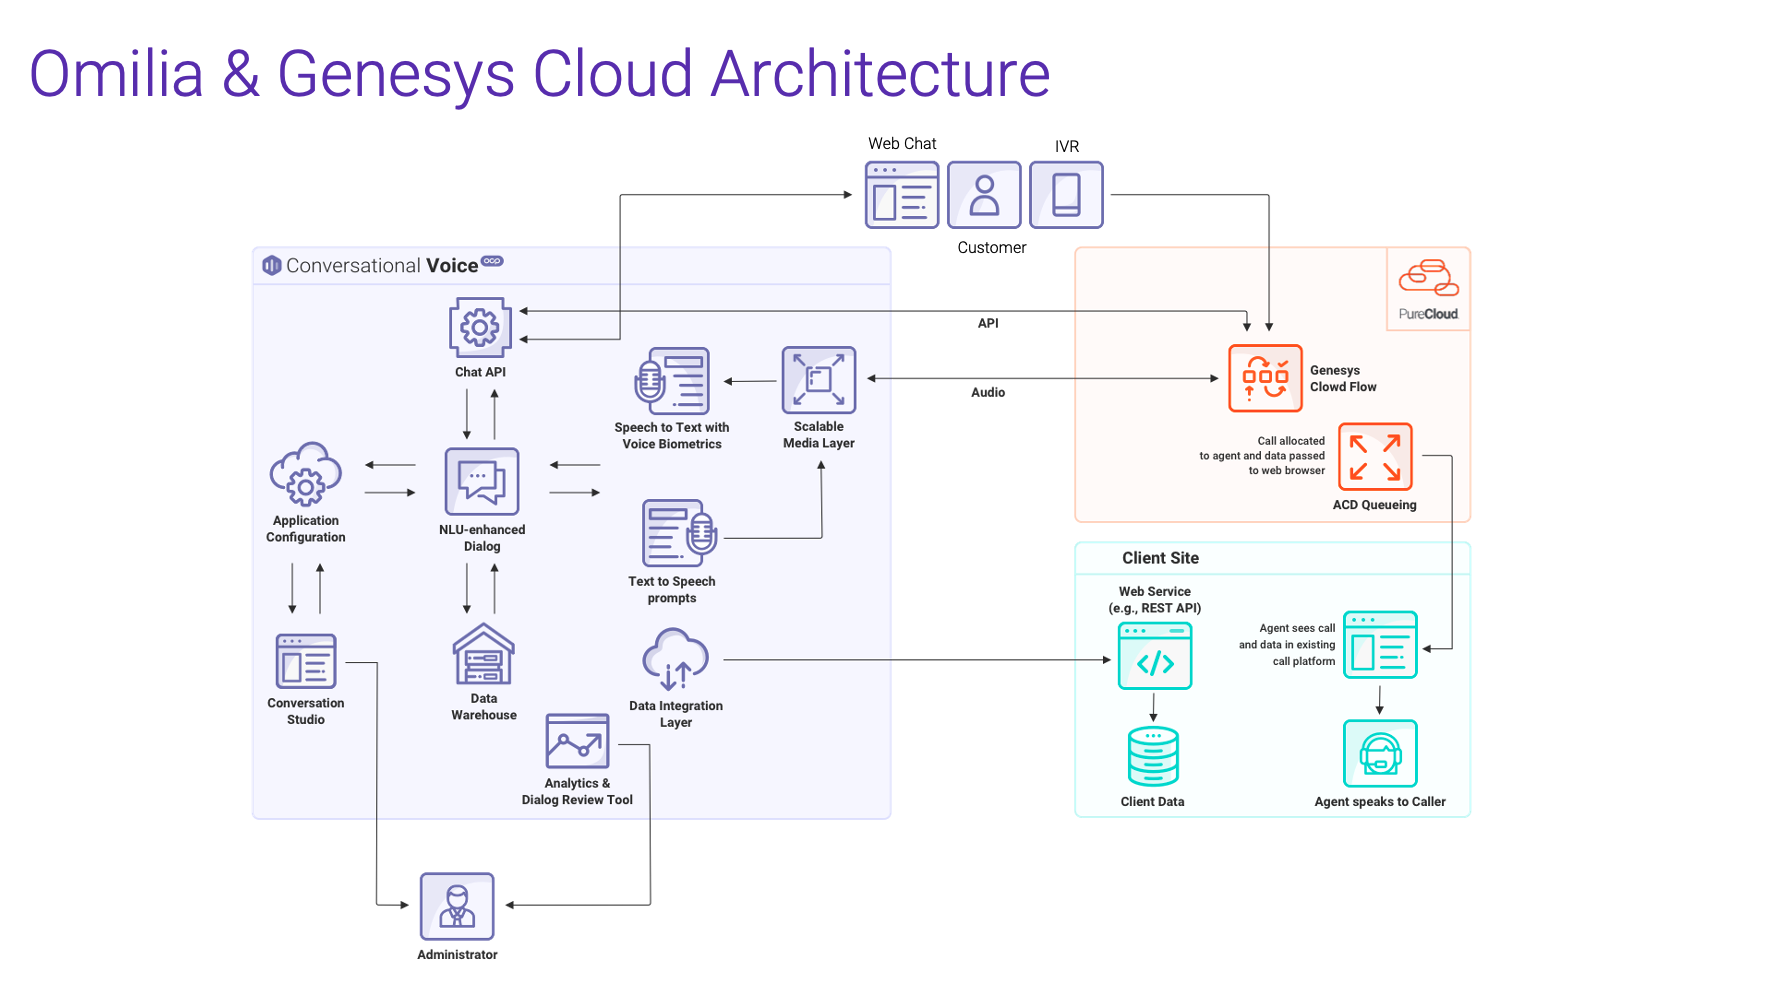
Omilia and Genesys Cloud Architecture
The below figure shows the way Genesys Cloud and OCP Conversational Voice® are integrated to cover the customer requirements.
Additional setups
Check that the phone number you want to use has already been added to the Genesys DID (Direct Inward Dialing) Number. If not, you must add it. This is mandatory for the next steps.
Integration steps
You can find a comprehensive integration walkthrough here. Each step is detailed below for your convenience.
Step 1. Sign up for OCP
Sign up for OCP® as described in the Getting Started with OCP article.
Step 2. Integrate Genesys API with OCP API
To integrate Genesys with OCP, contact Omilia Service Desk and provide the following details. This information is essential for adding your Genesys tenant to the OCP system:
-
Genesys Organization ID (Alphanumeric value in the format xxxxxxxx-xxxx-xxxx-xxxx-xxxxxxxxxxxx)
-
Genesys Cloud region
-
OCP Instance (US1, US2, EU1)
-
OCP group name
-
Genesys OAuth Client API Key
-
Genesys OAuth Client API Secret Key (treat this information as sensitive)
Omilia Support Team will use this data to complete the API integration.
Step 3. Create your first miniApp
Follow the instructions to create your first miniApp.
Step 4. Create a Genesys Queue
To create a queue in Genesys, follow the instructions below:
-
Log in to your Genesys account.
-
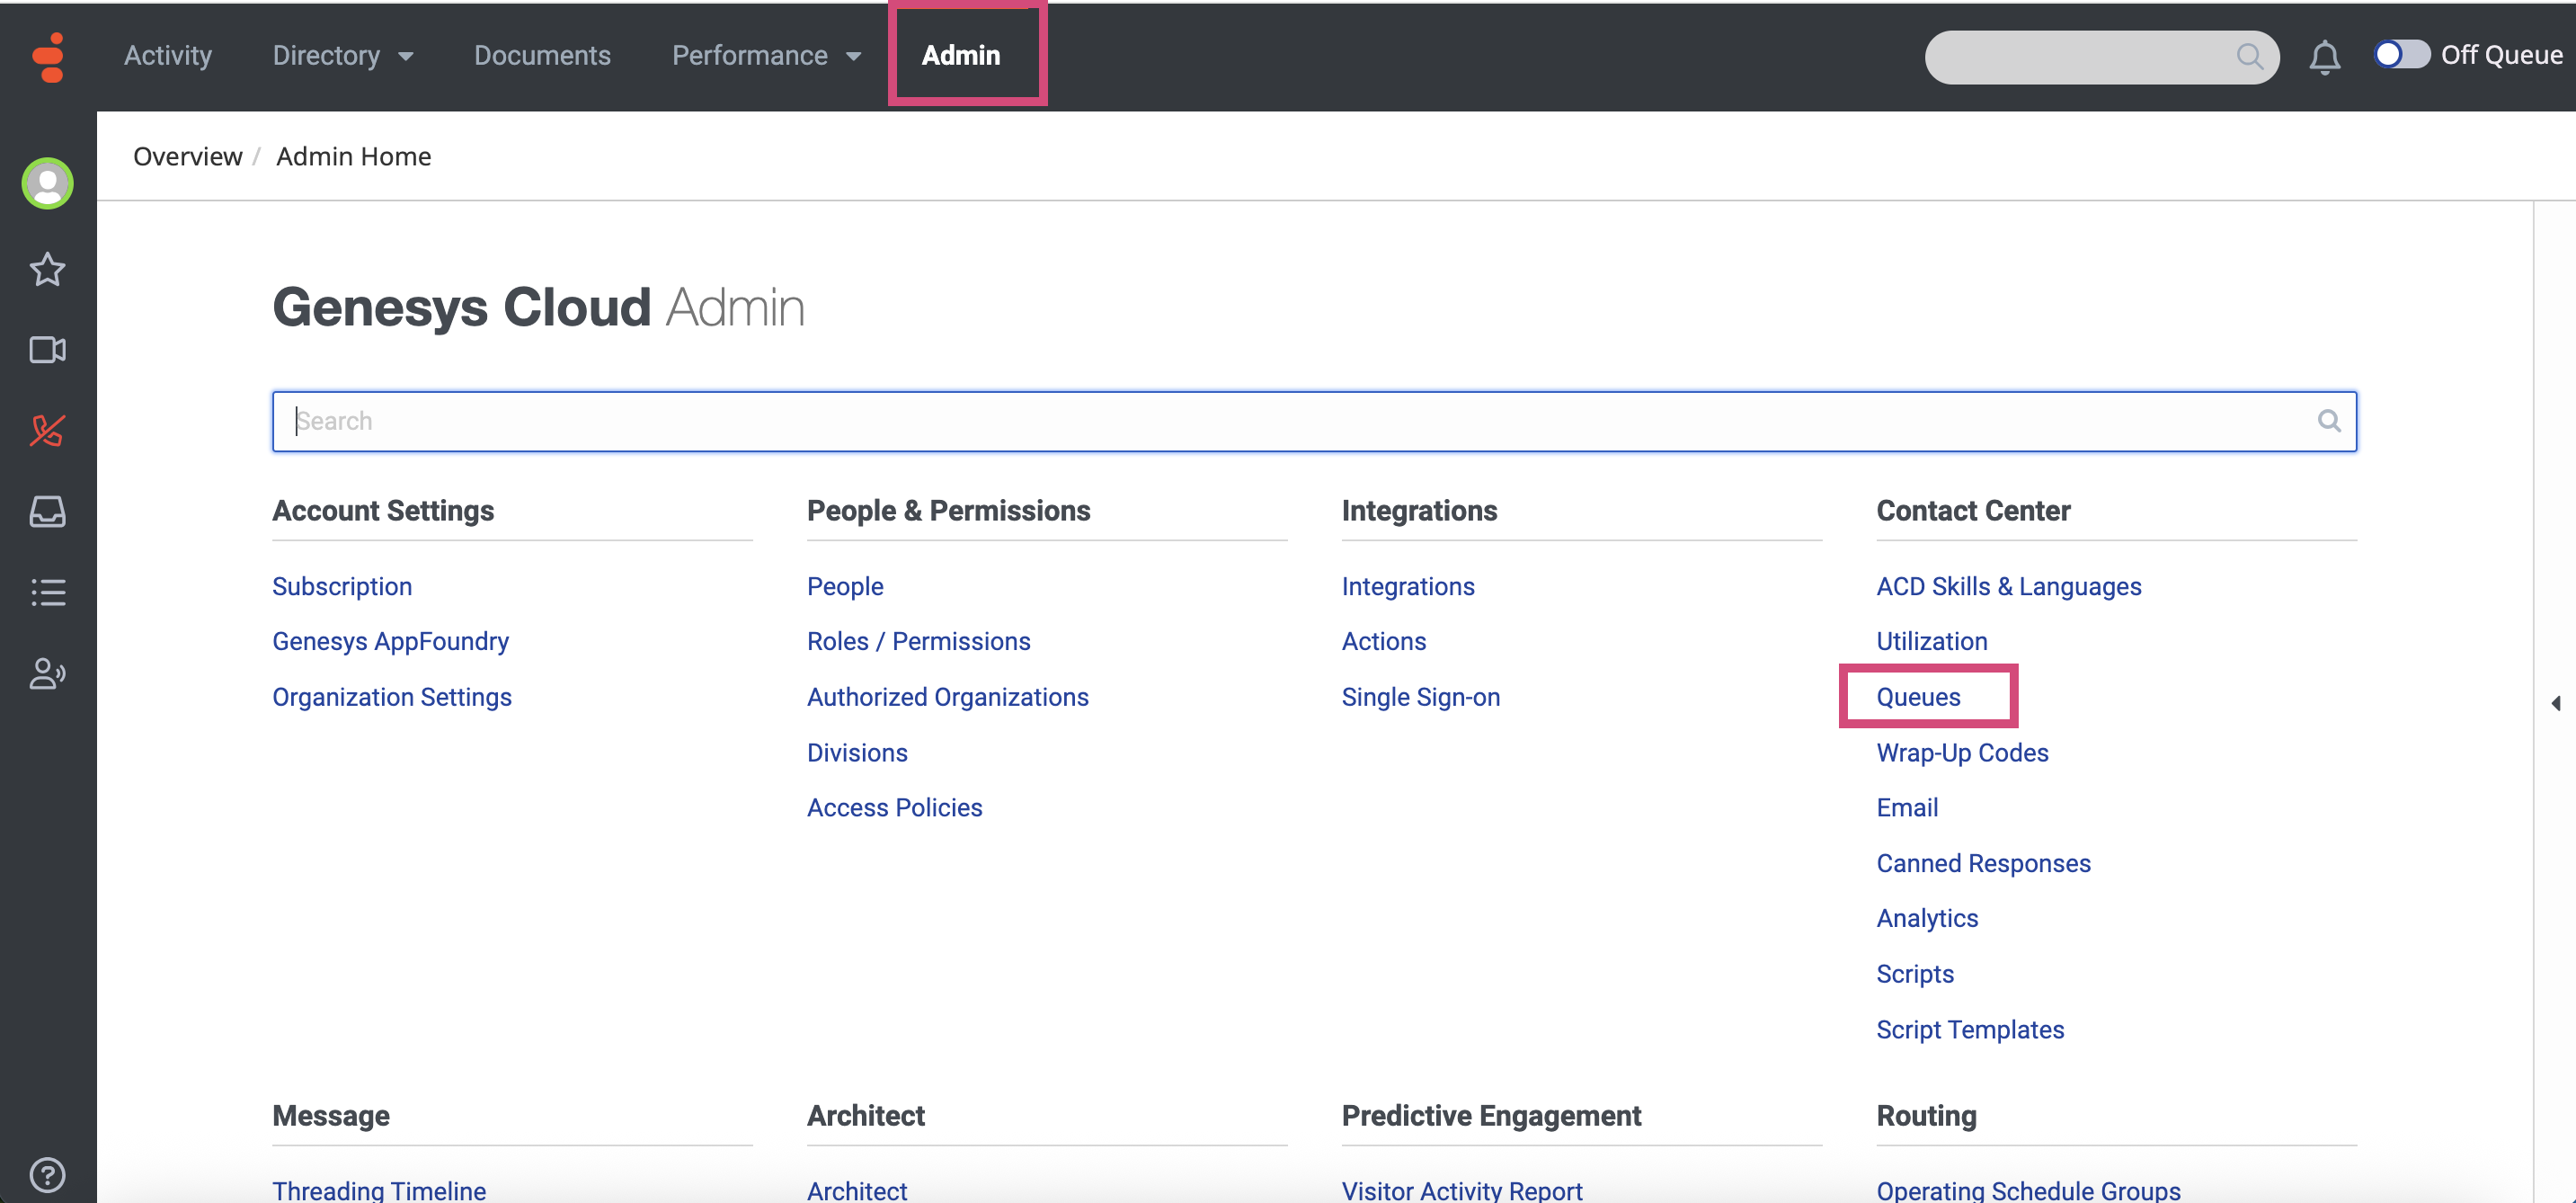
Navigate to the Admin tab and select Contact Center → Queues.
-
In the page that opens, click the +Create Queue button.

-
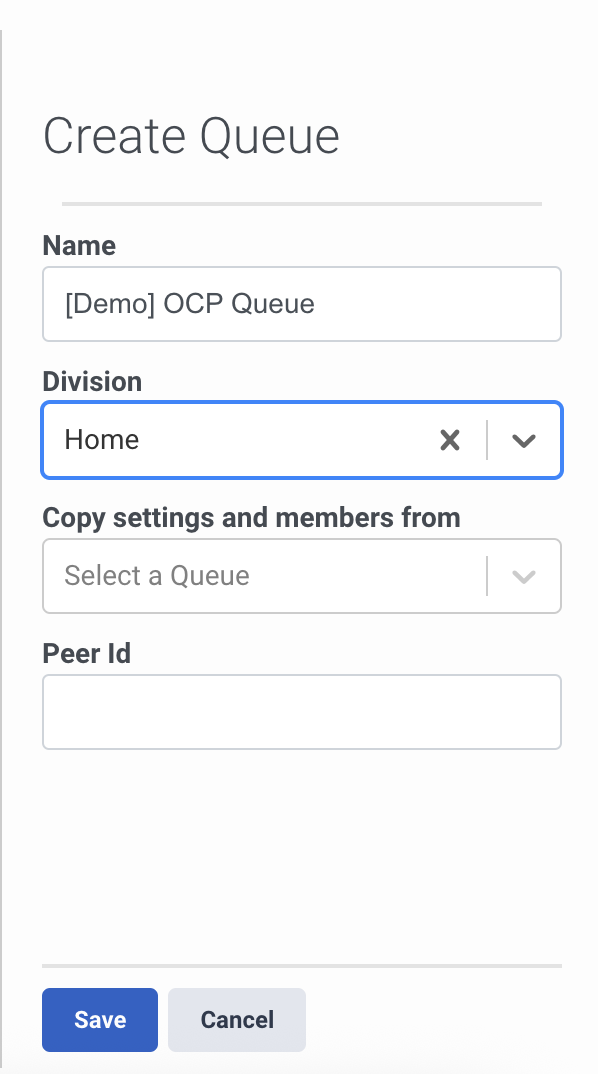
In the Create Queue dialog box that appears on the right, fill in the fields as described below:
-
Name: Enter the name of the queue, for example, [Demo] OCP Queue.
-
Division: Select Home from the drop-down list.
-
Copy settings and members from: Leave this field blank.
-
Peer ID: Leave this field blank.
-
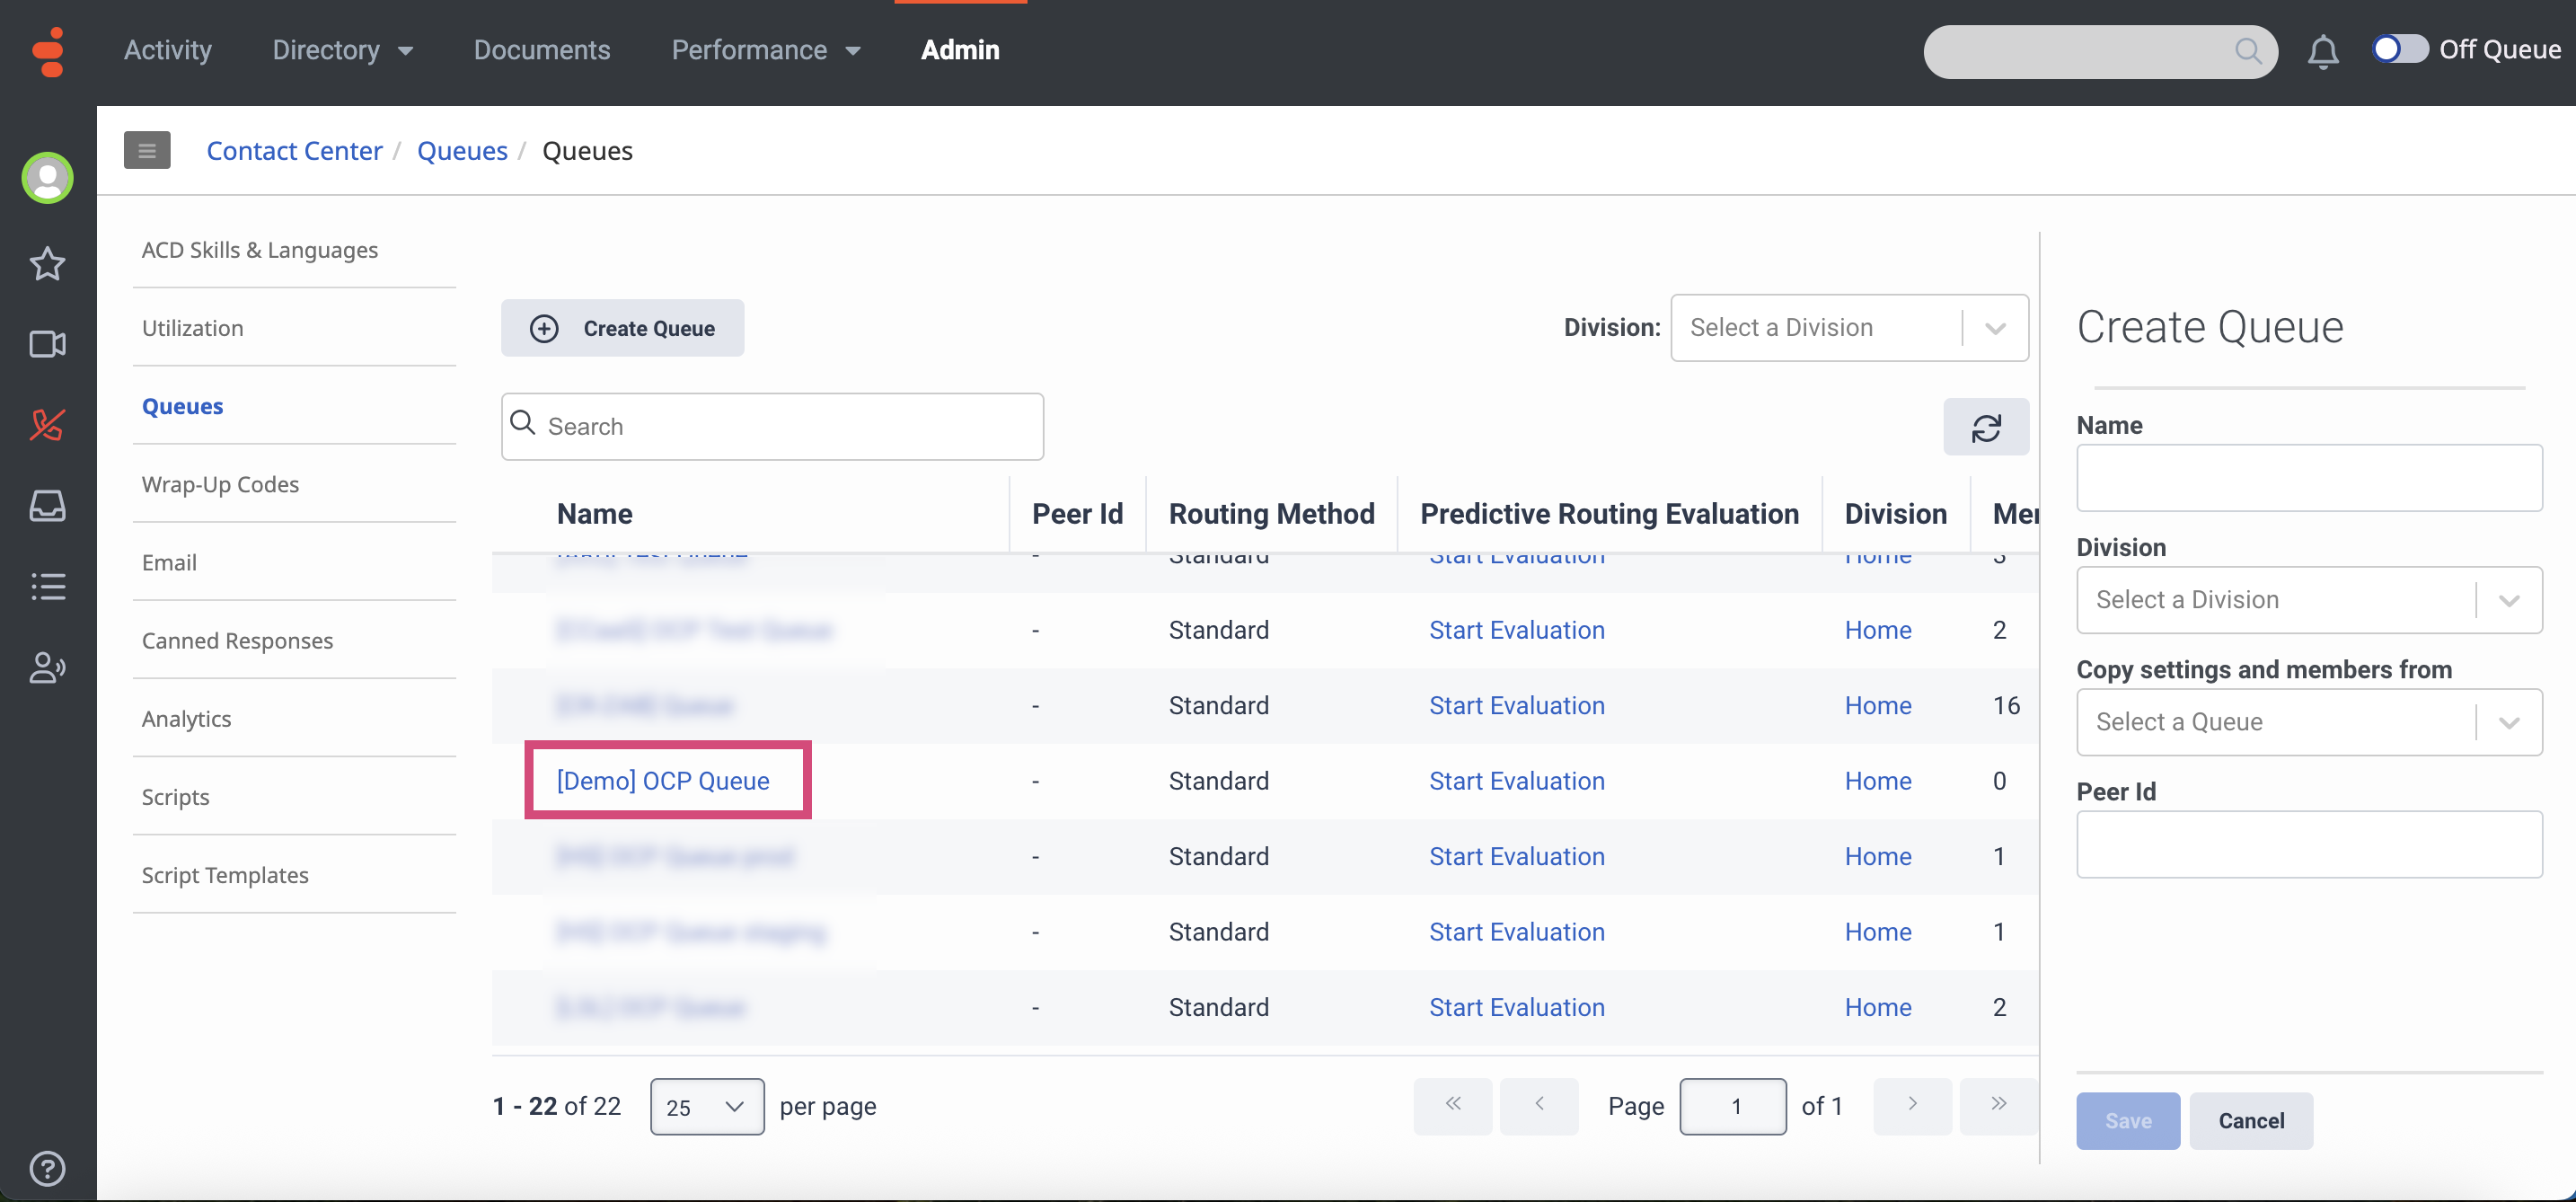
Click Save. The created queue will appear in the list.
-
Click on the queue you have just created and go to Members → Users.

-
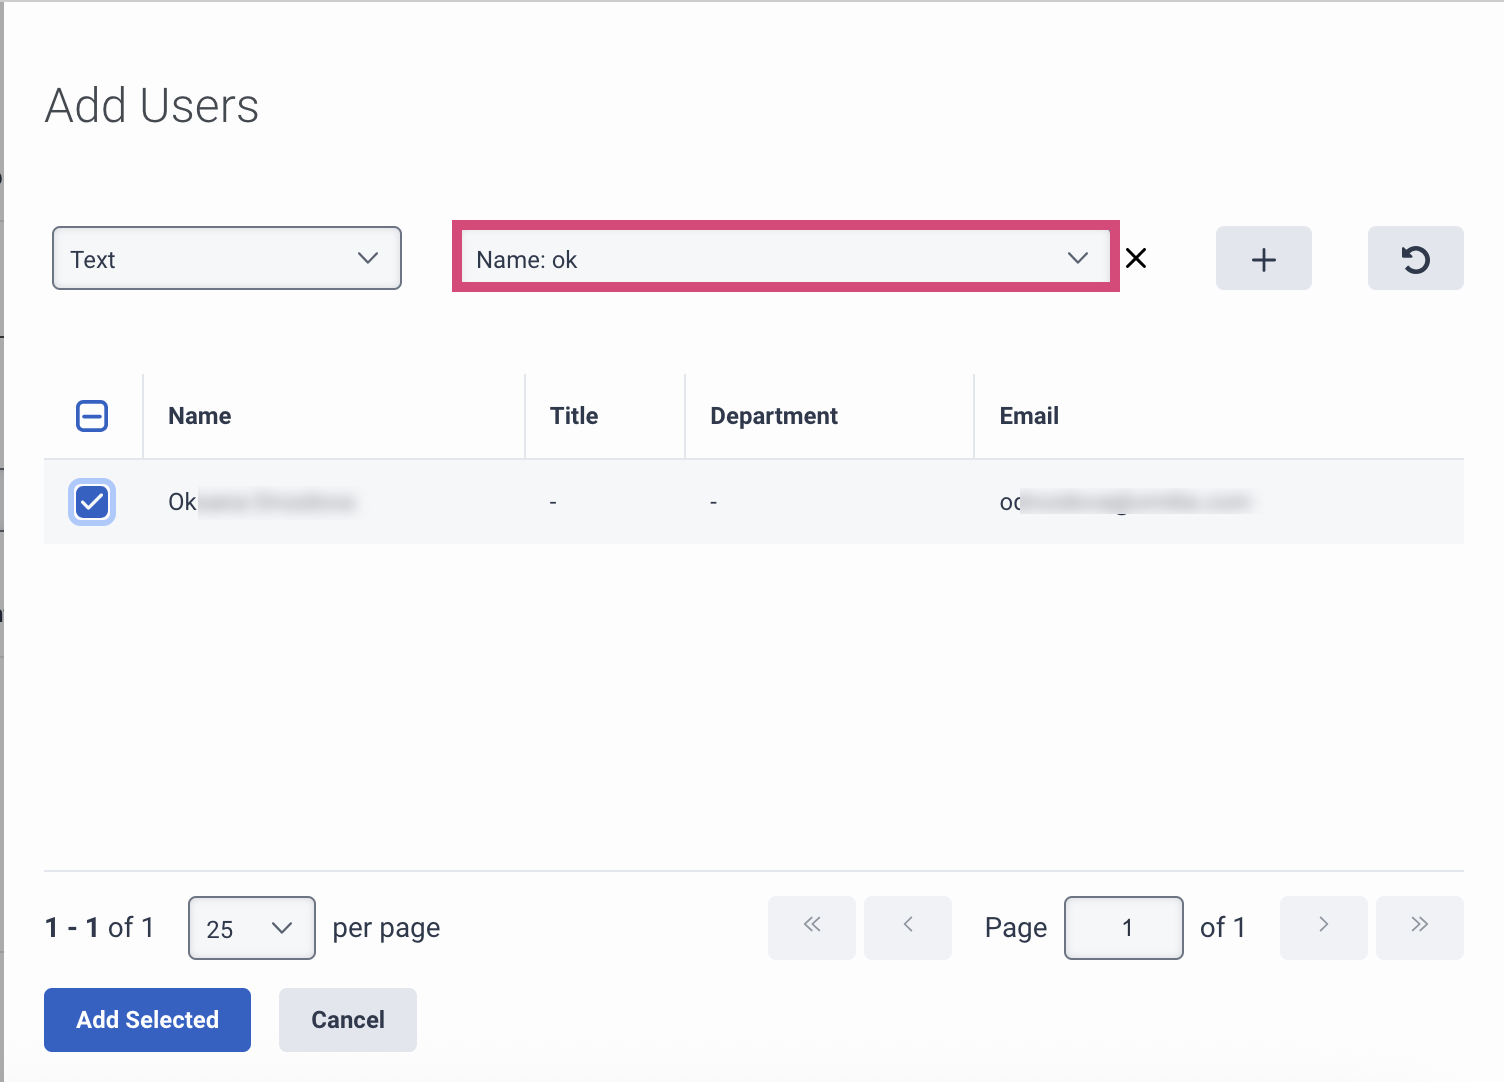
Click Add User.
-
In the dialog box that opens, select the agent you want to add to the queue, and click Add Selected. To locate the needed agent, use the search field to search by Name, Email, Title or Department.
-
The selected agent will be added to the queue and will start receiving calls on Genesys. You can add multiple agents to the queue.
-
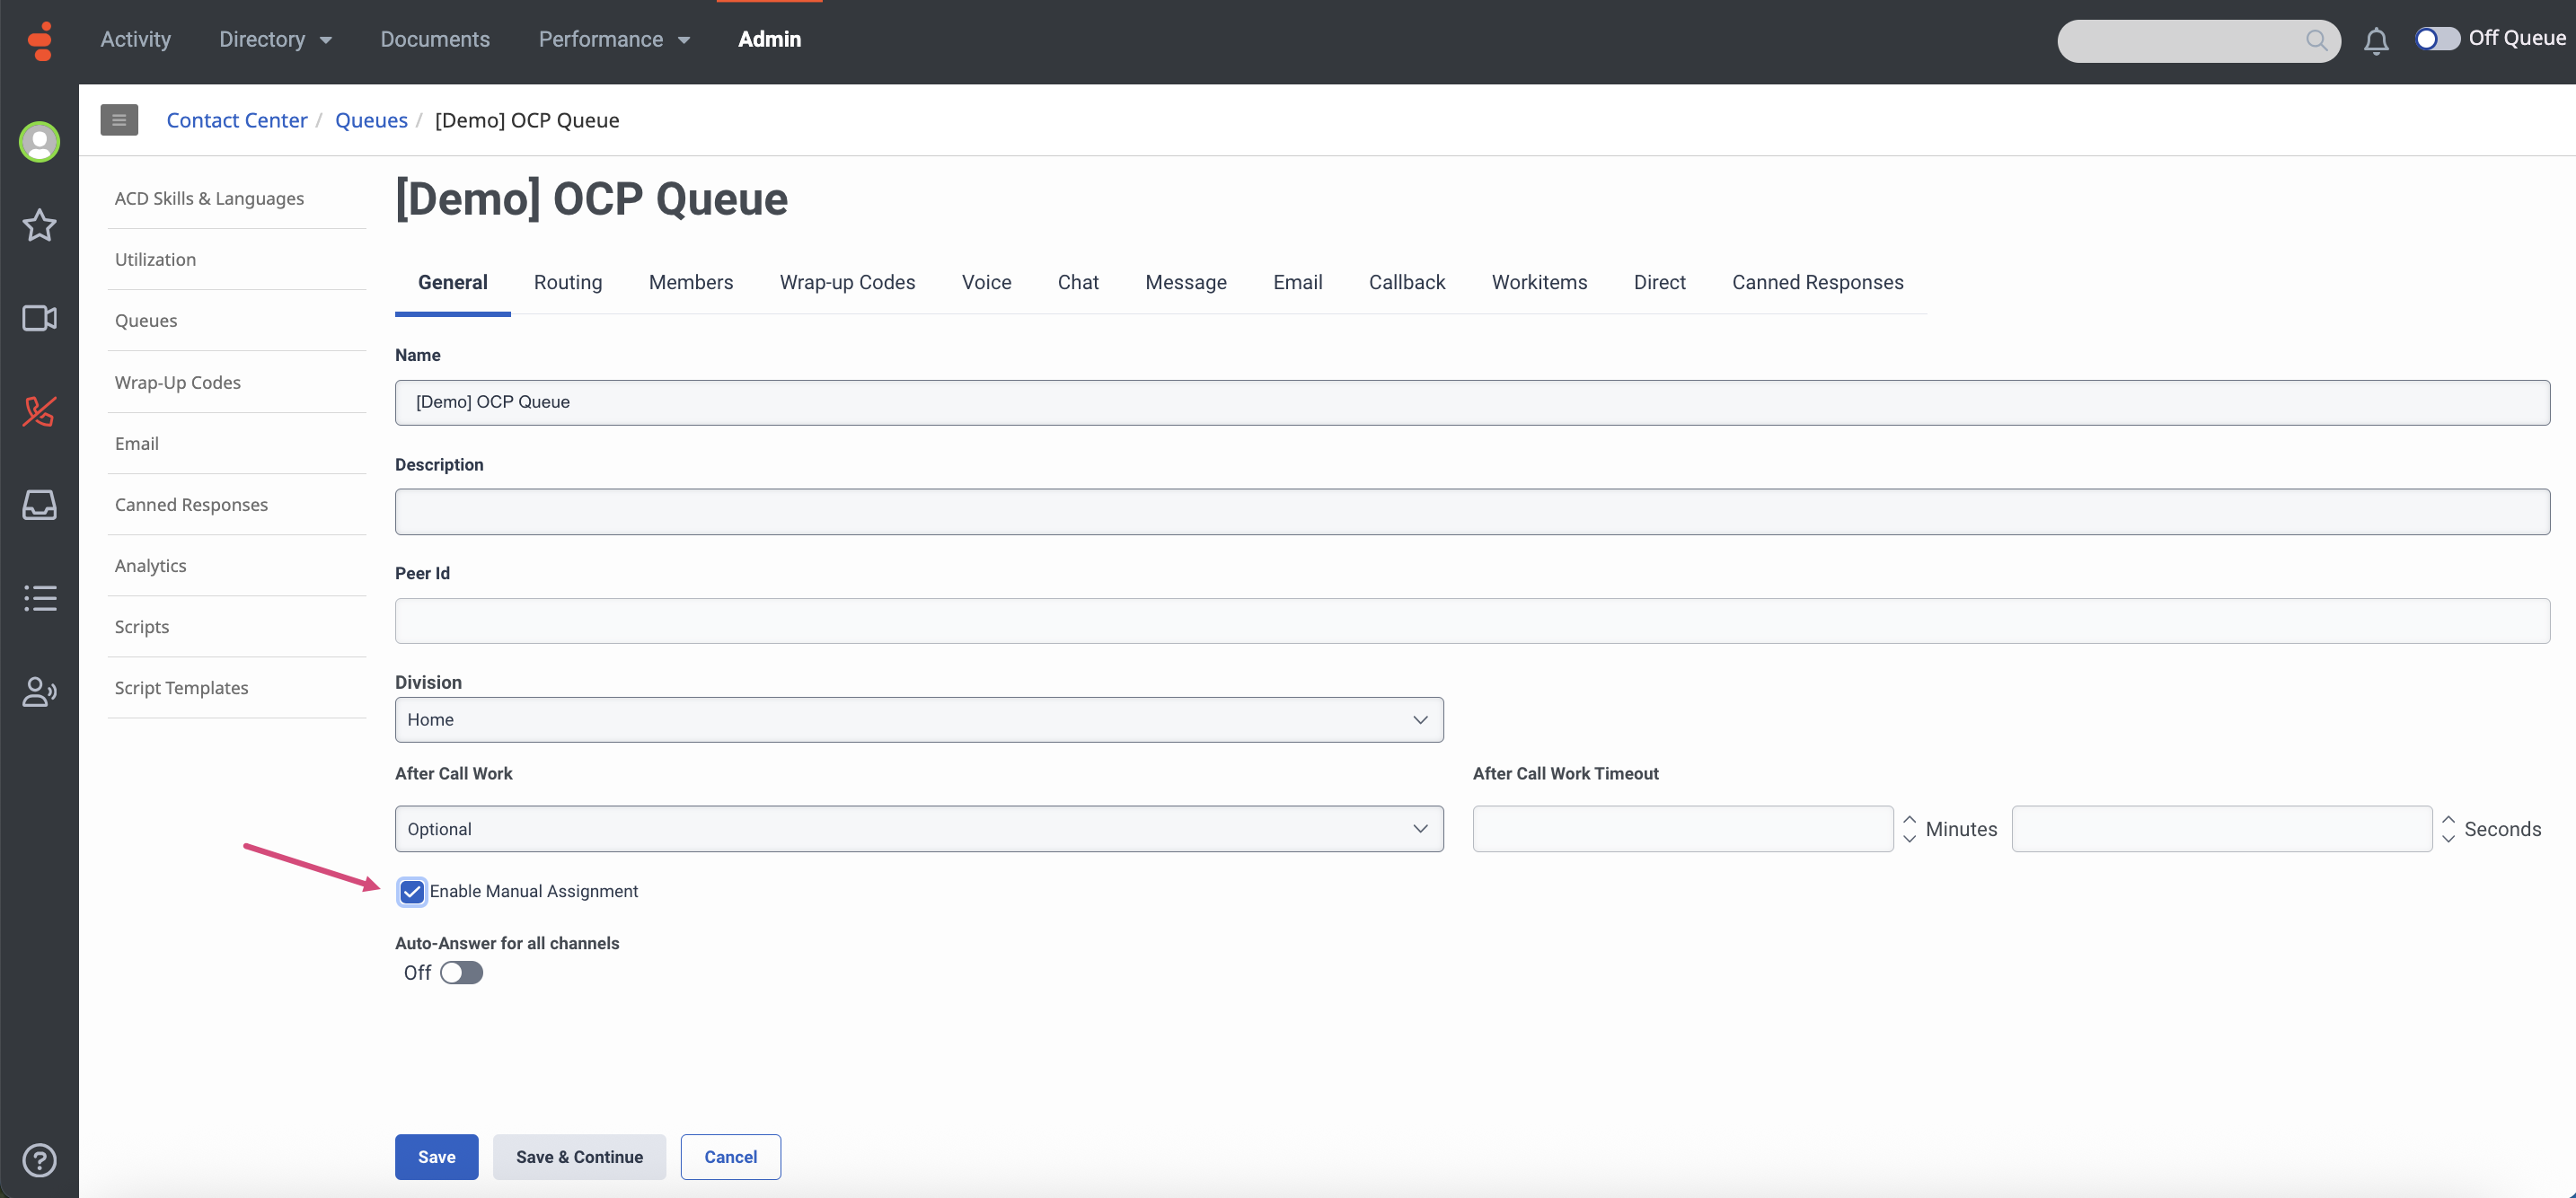
After that, navigate to the General tab and mark the Enable Manual Assignment checkbox.
-
Click Save to finalize the settings.
Step 5. Create a Genesys Cloud Trunk
Set up an External Trunk
Before proceeding with the instructions below, ensure that the BYOC (Bring Your Own Carrier) feature is enabled for your OCP organization. If BYOC is not enabled, reach out to the Omilia Service Desk for assistance.
For further details about BYOC, please refer to the following article by Genesys:
About BYOC Cloud - Genesys Cloud Resource Center
To set up the required Trunk, follow the guidelines below:
-
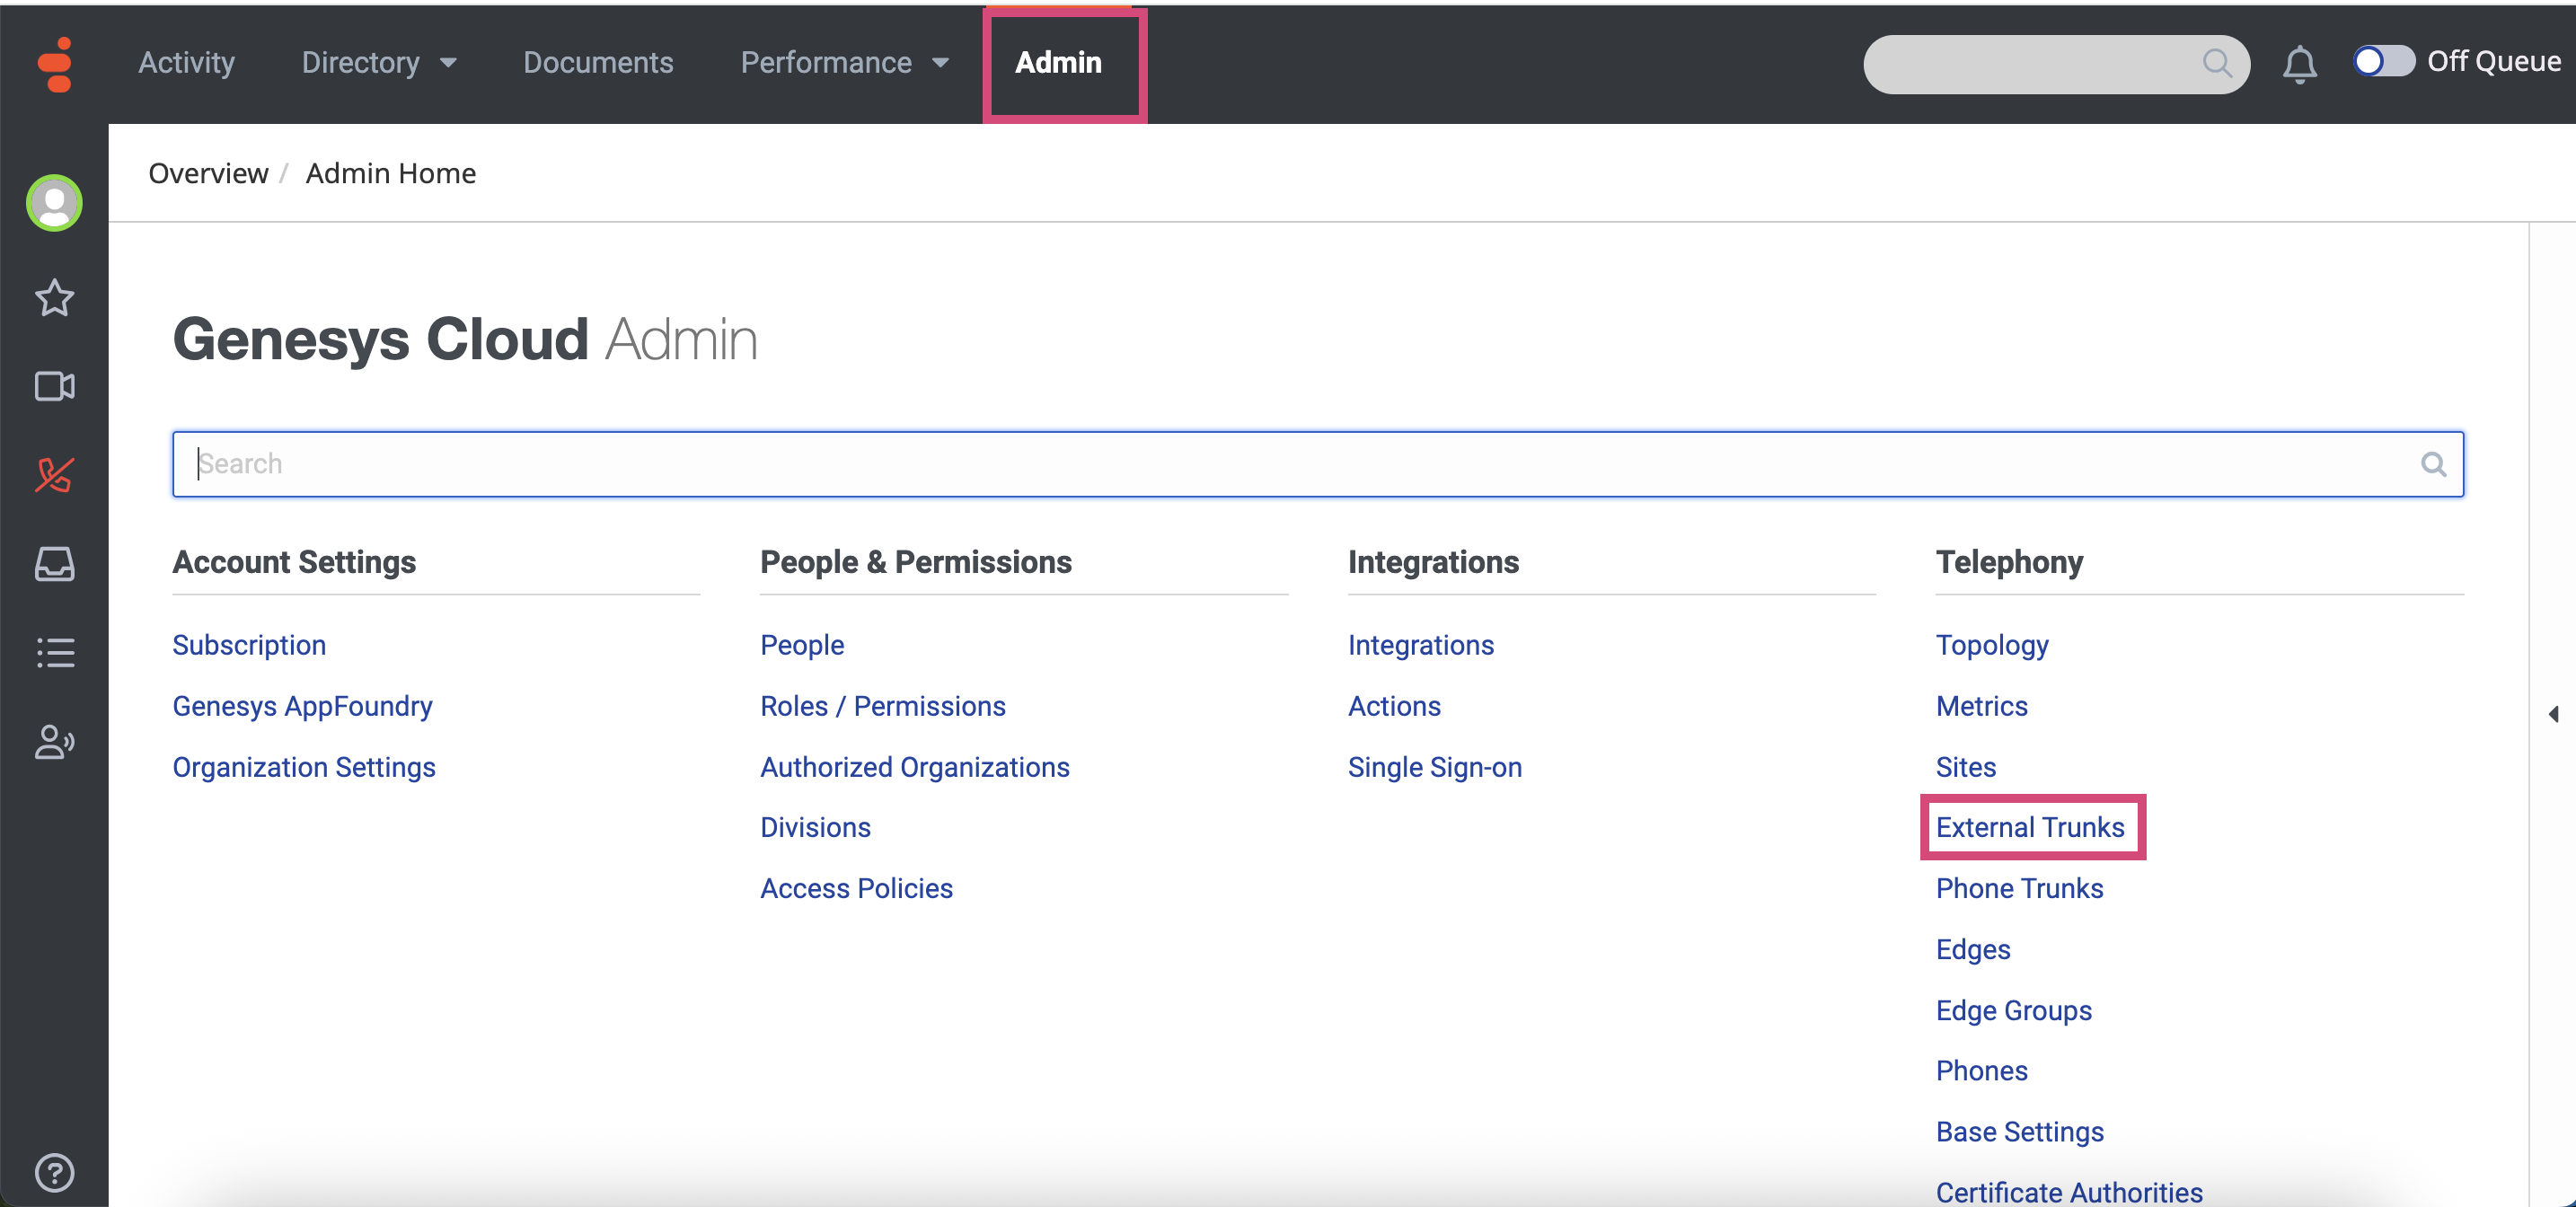
Navigate to the Admin tab and select Telephony → External Trunks.
-
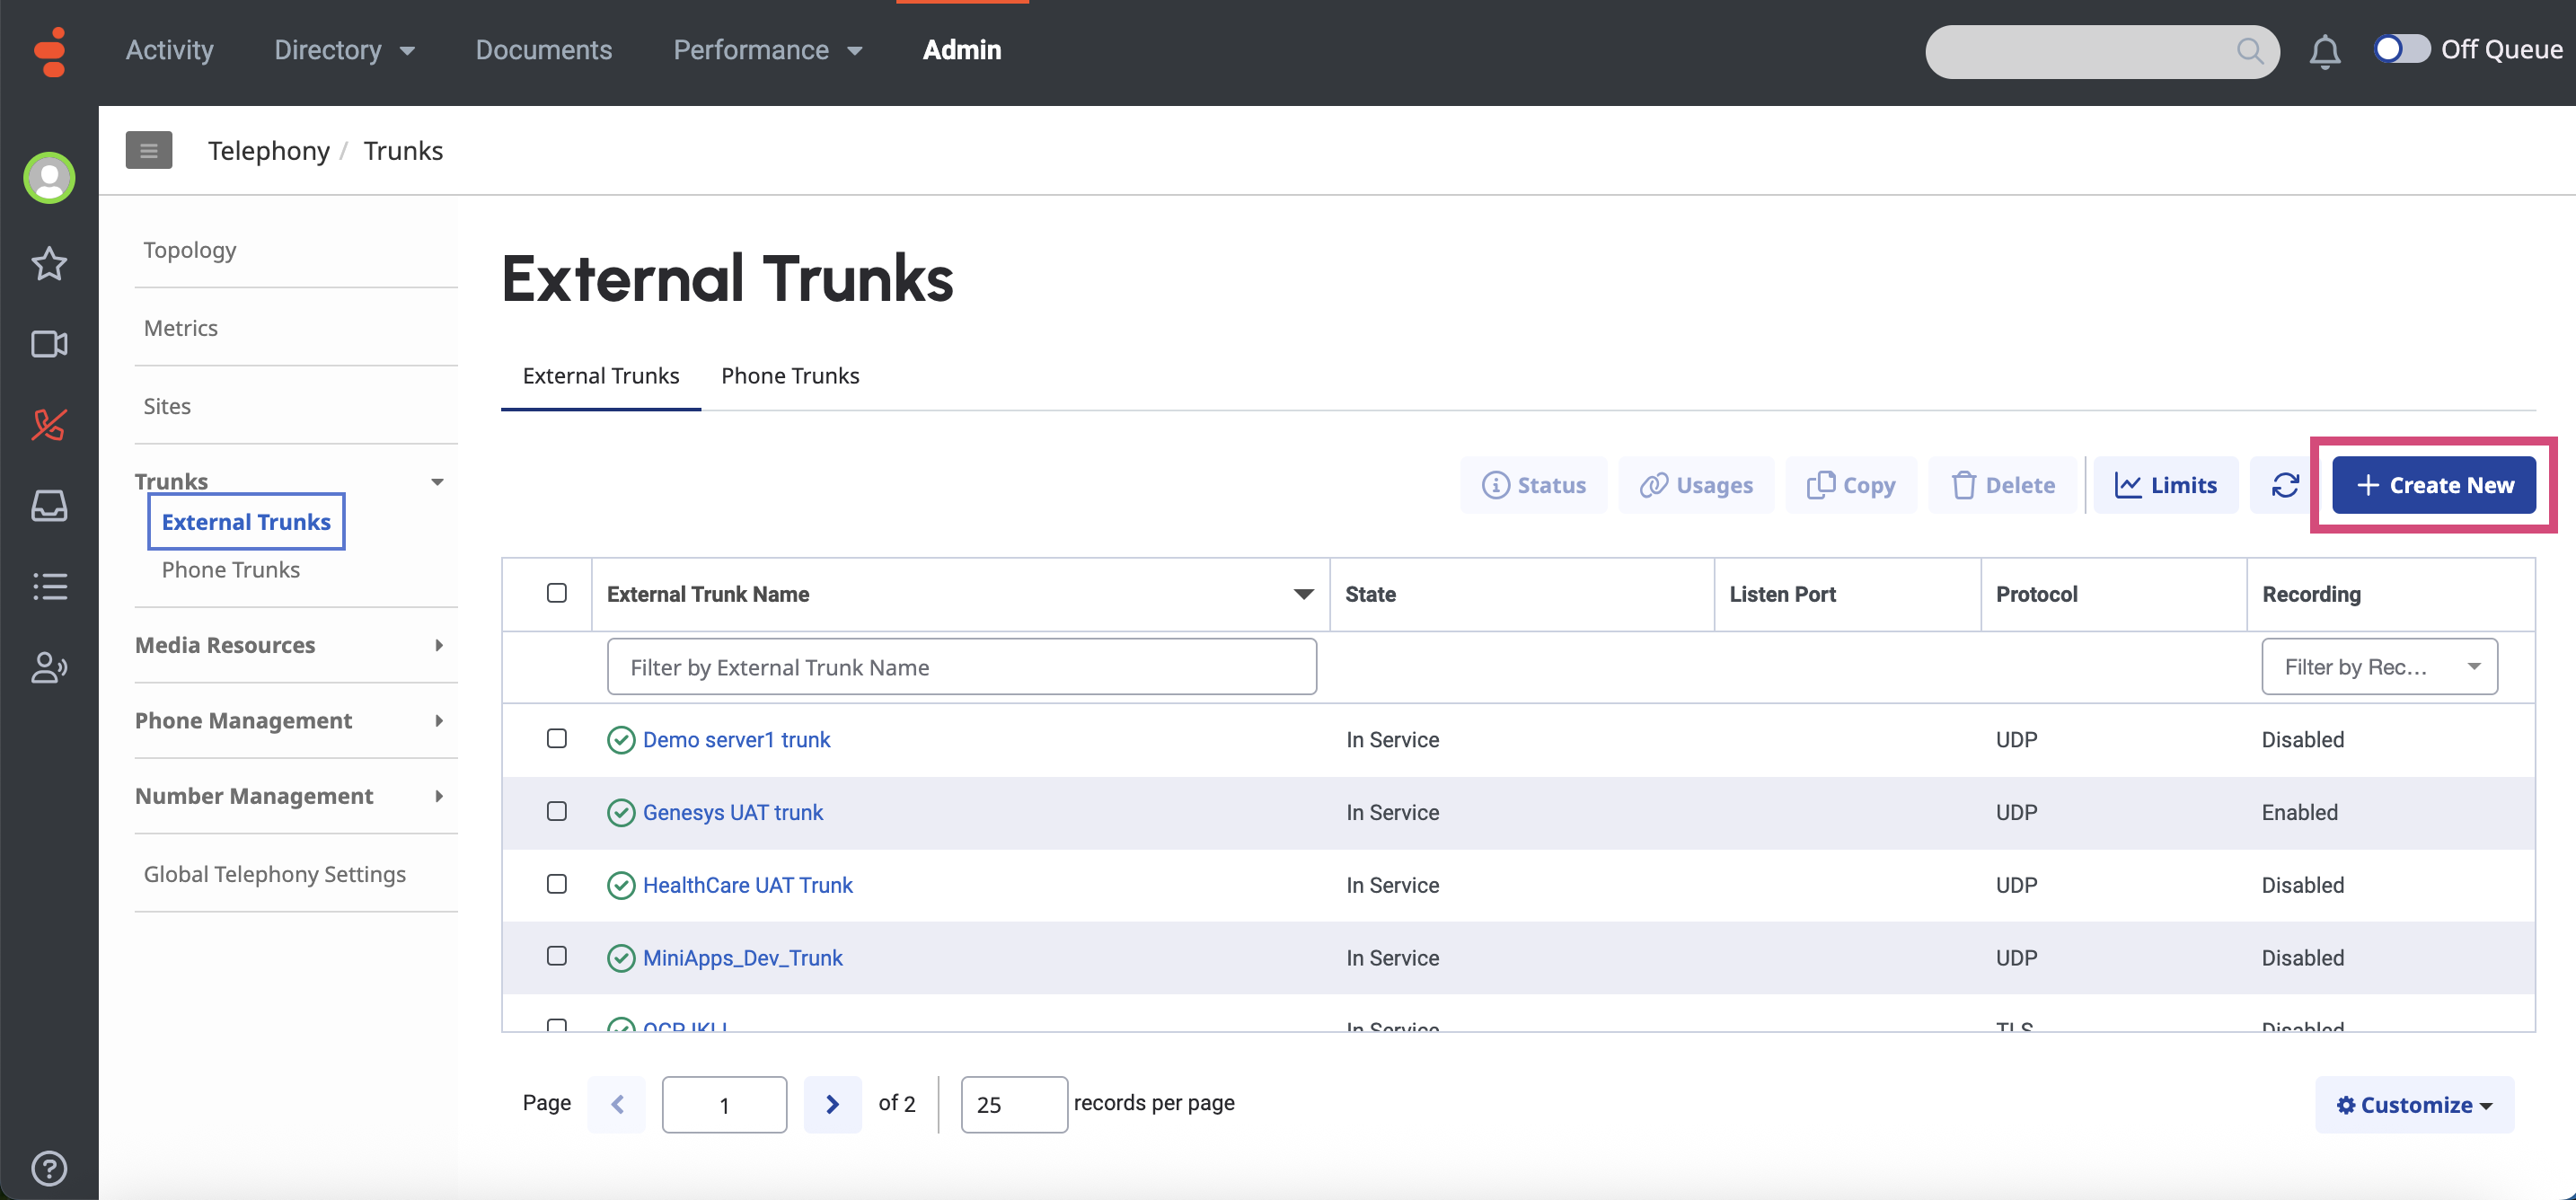
In the page that opens, click + Create New.
-
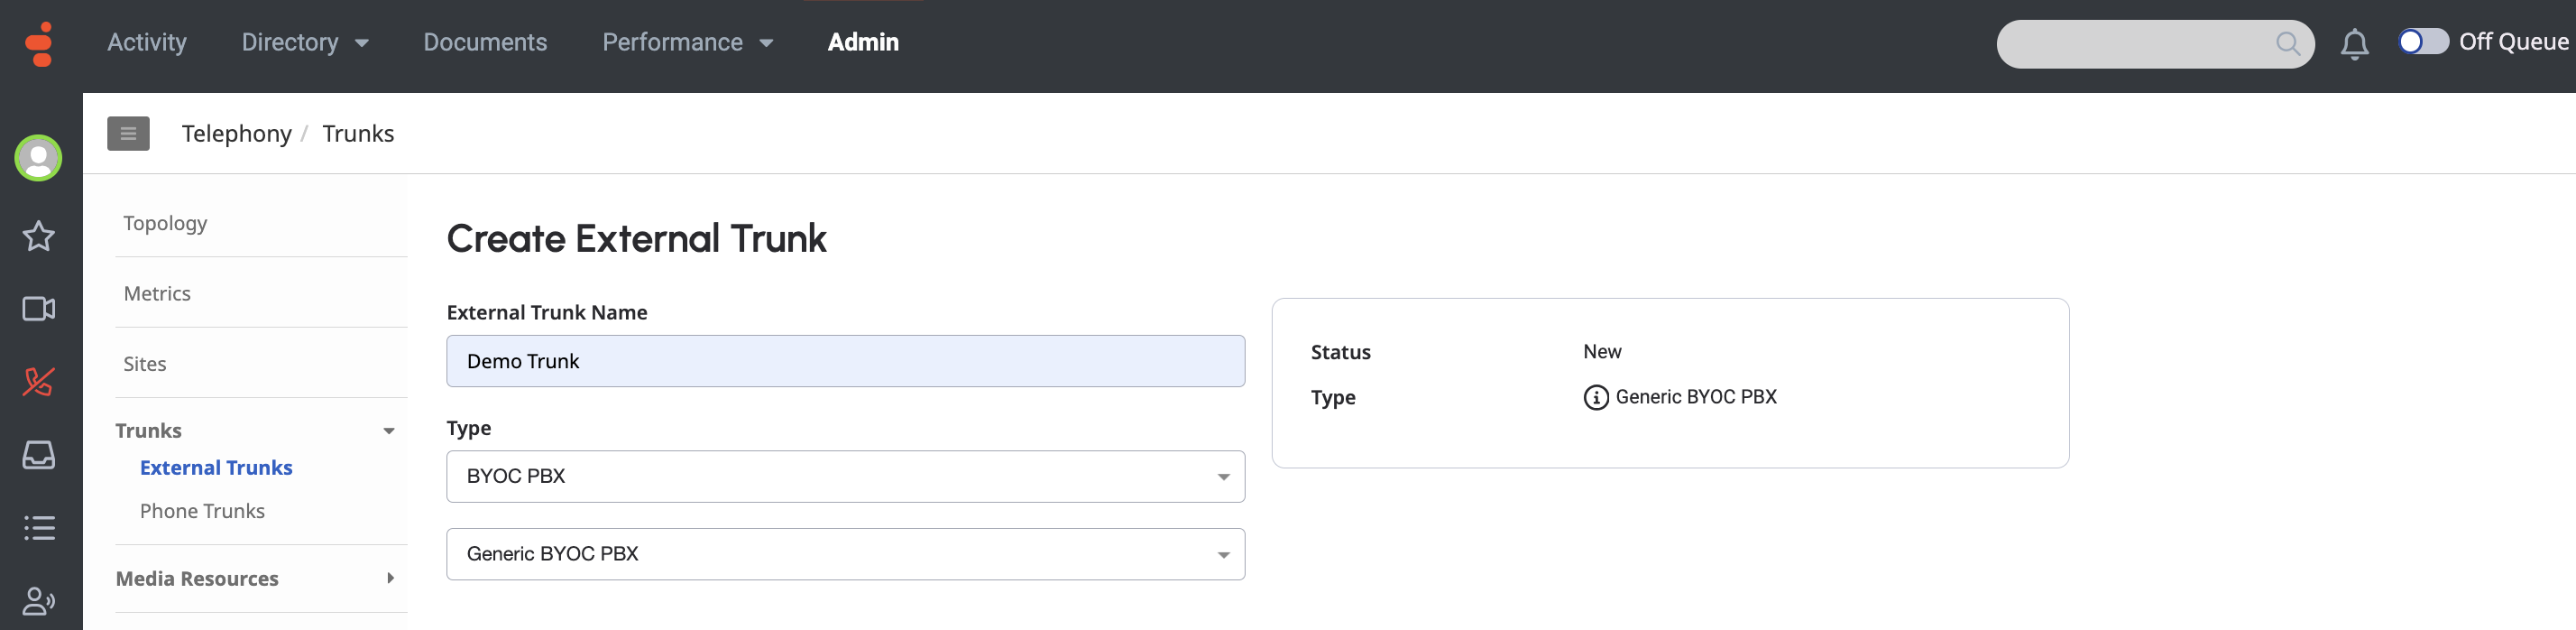
Fill in the fields as described below:
-
External Trunk Name: Enter a descriptive name for the external trunk you are creating.
-
Type: Select BYOC PBX → Generic BYOC PBX from the list.
-
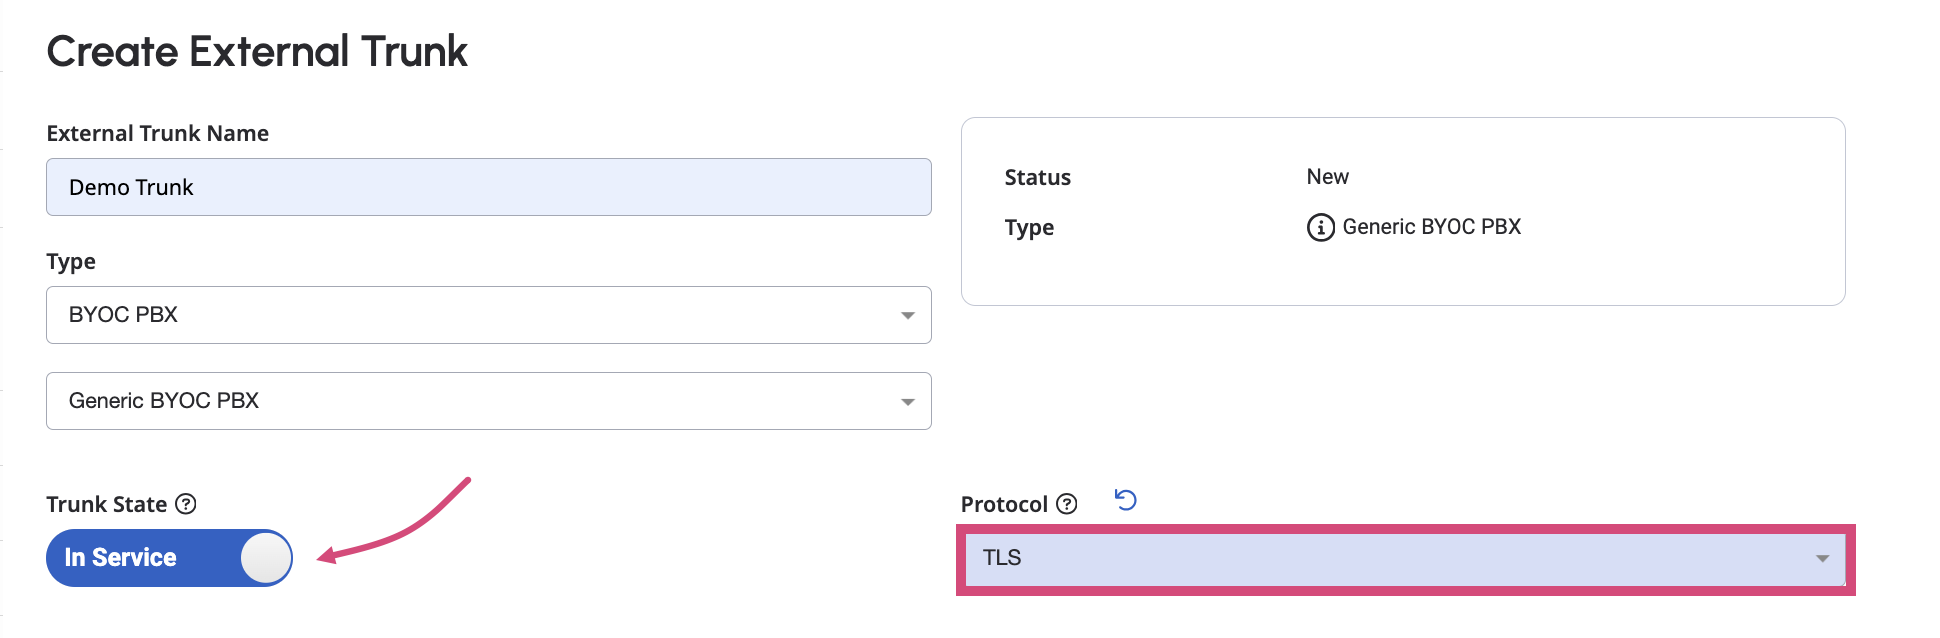
After you have selected the type, an extended list of configuration options will open. Configure the following two options:
-
Trunk State: Set to In Service.
-
Protocol: select TLS from the list.
-
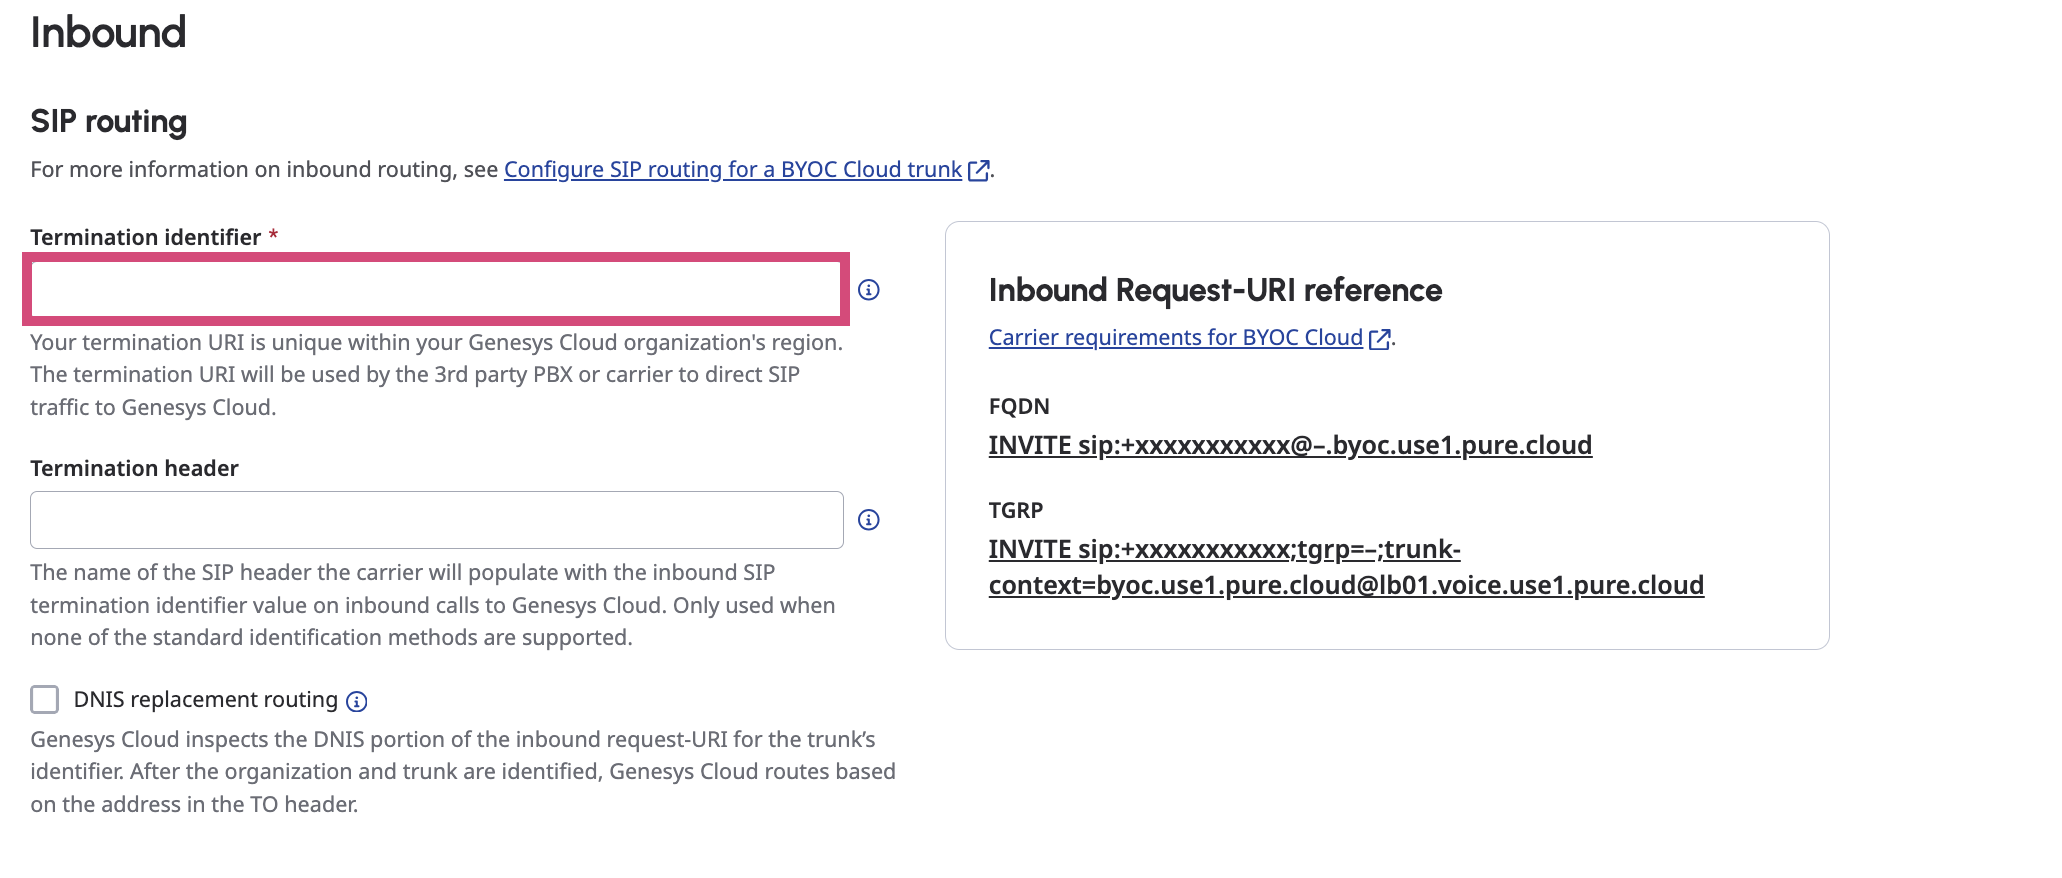
Now, navigate to Inbound → SIP routing and enter Termination Identifier in the following format: {orgId}.miniapps.ocp.ai
-
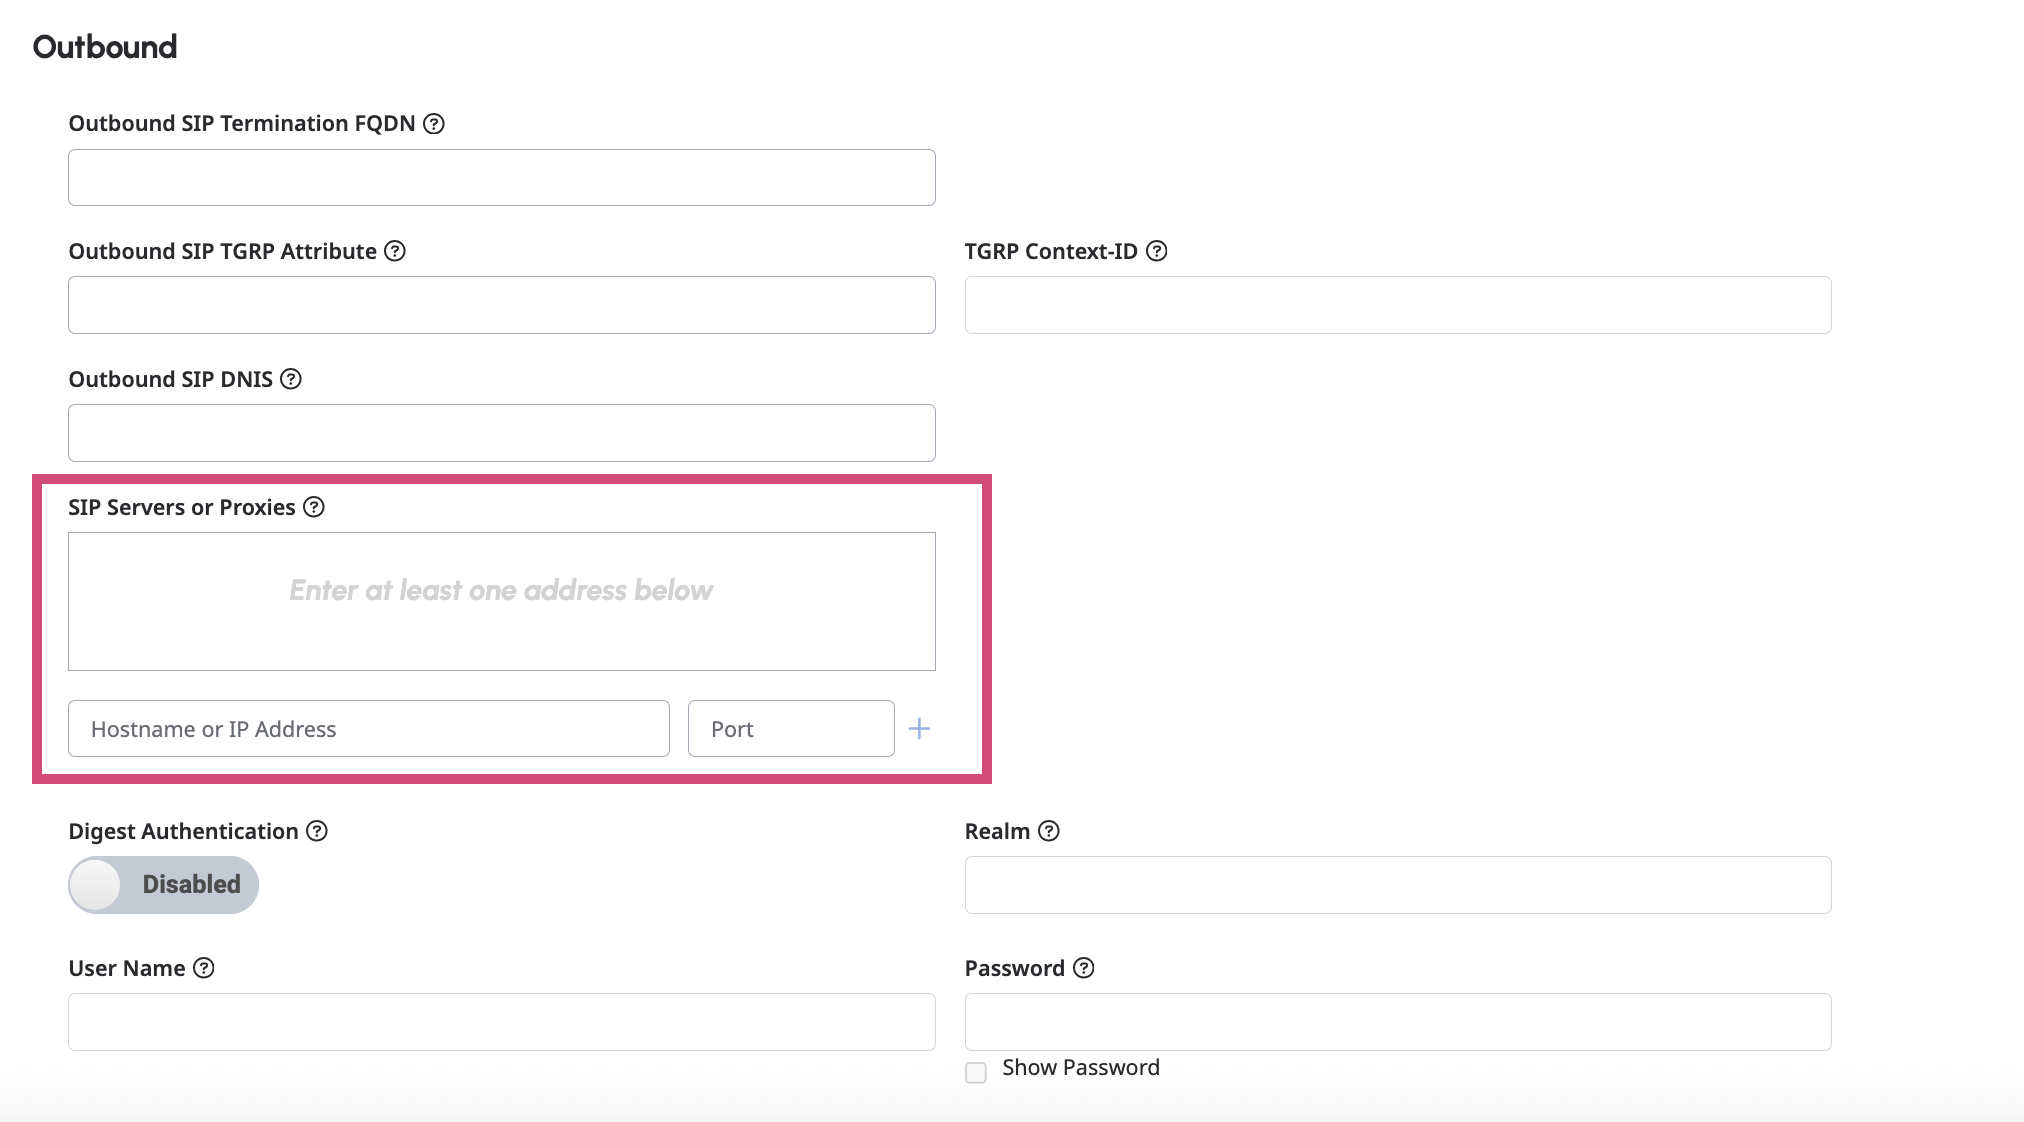
After that, navigate to Outbound and configure the following options as described below.
-
SIP Servers or Proxies: Enter us1-s.ocp.ai:5061
-
Hostname or IP address: Enter us1-s.ocp.ai
-
Port: Enter 5061
-
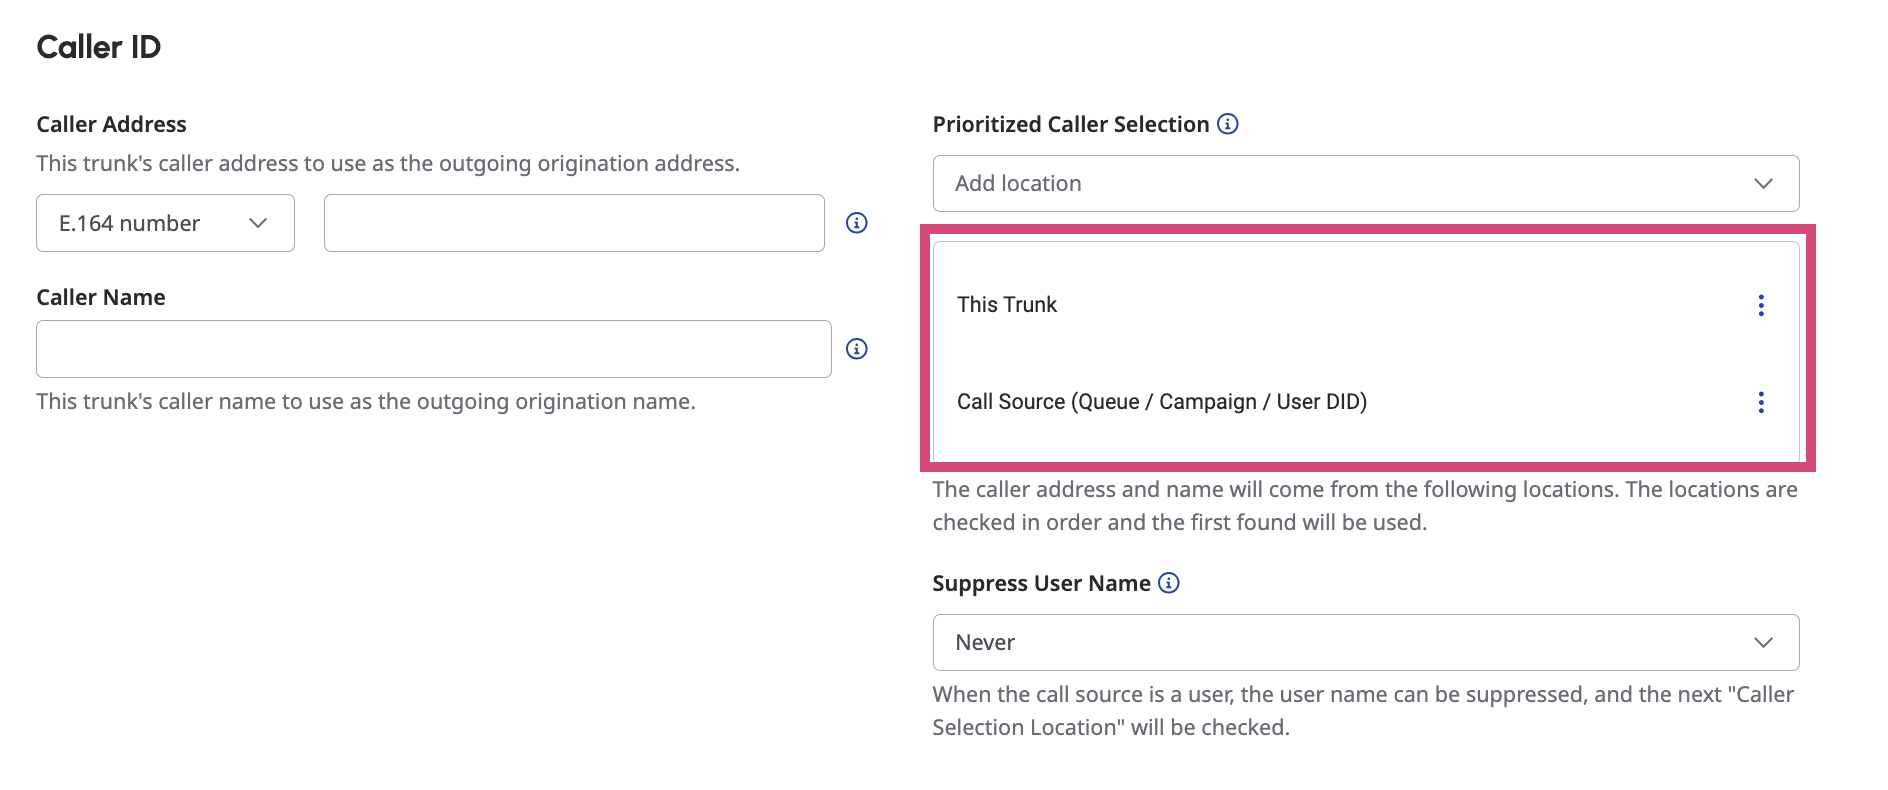
Next, navigate to Caller ID and configure the following options as described below.
-
Prioritized Caller Selection: Make sure the priority has been set as follows:
-
This Trunk
-
Call Source (Queue / Campaign / User DID)
-
-
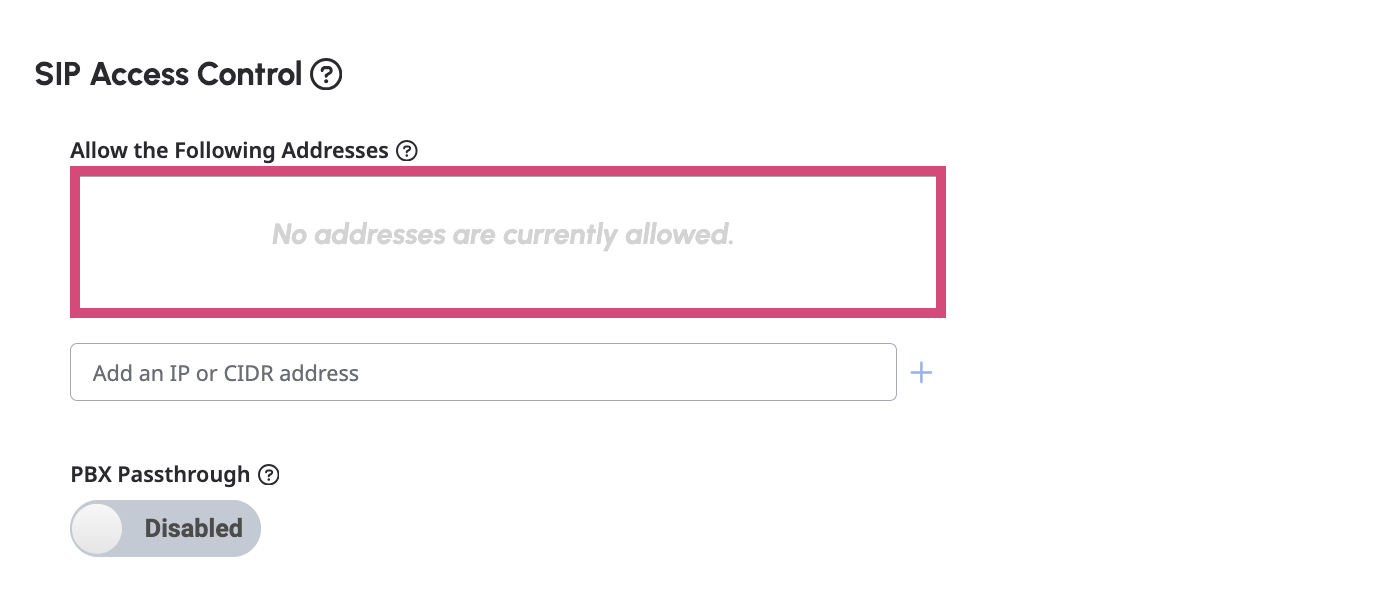
After that, navigate to SIP Access Control and configure the following options as described below.
-
Allow the Following Addresses: Enter IPs of each OCP environment. You can find the IPs by using NsLookup to the FQDN of each OCP environment. For more information, refer to SIP Configuration.
For example:nslookup sip1.demo.ocp.ai
-
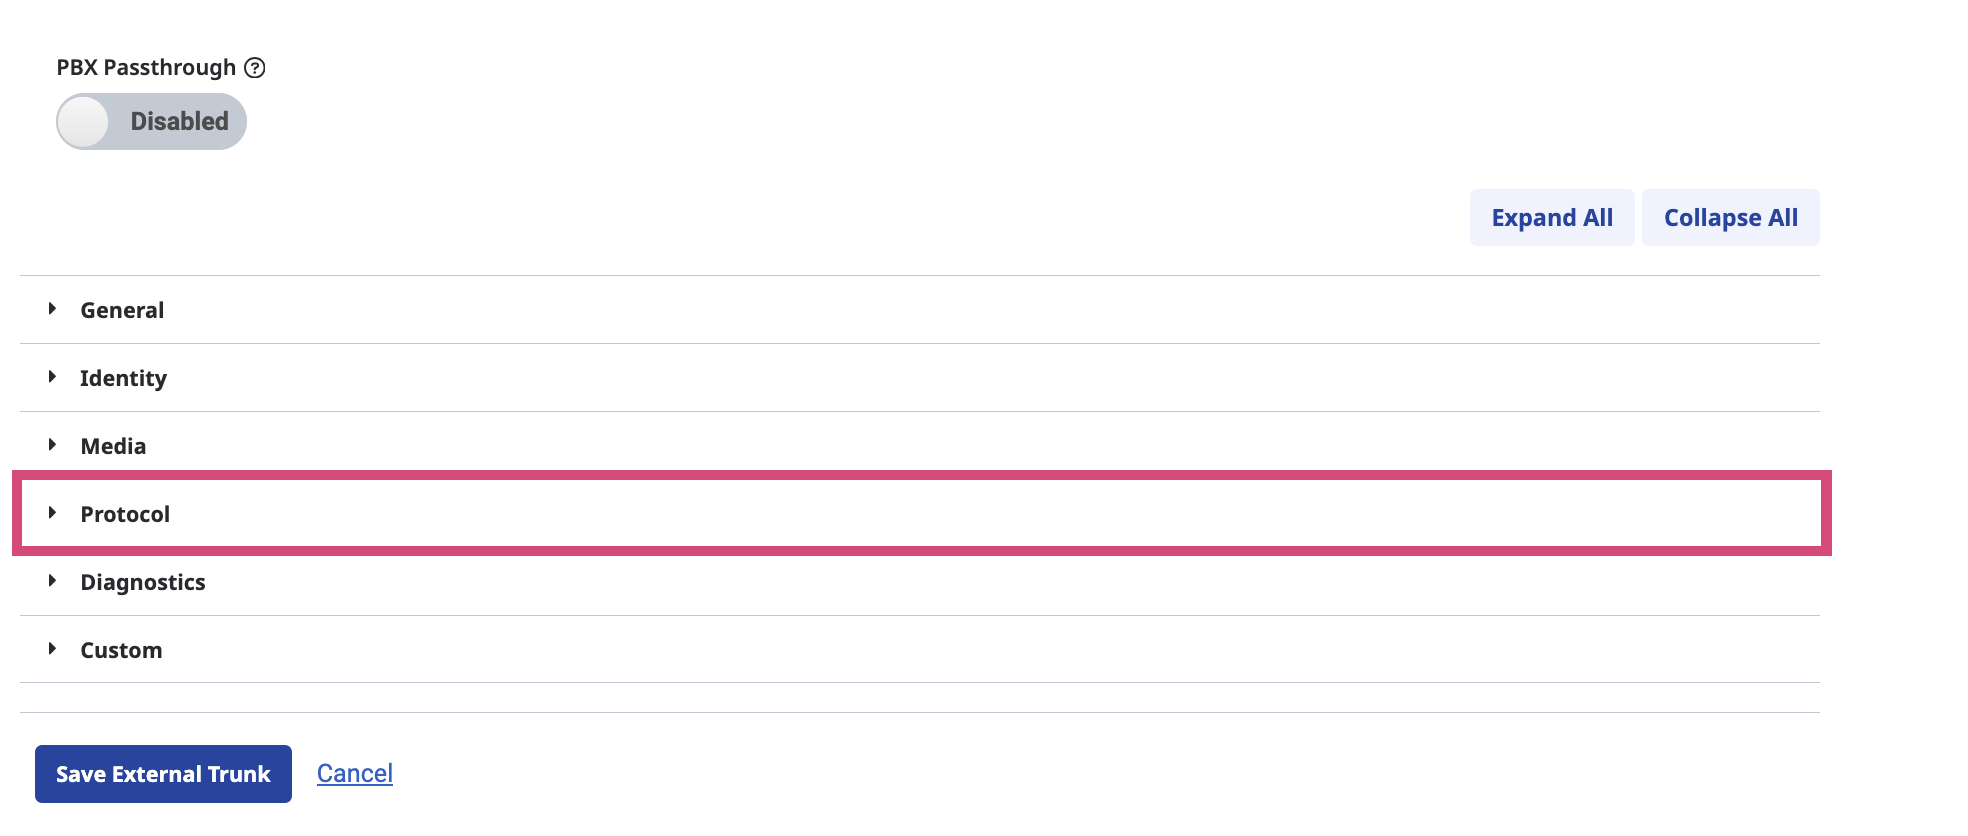
Now, navigate to the Protocol section and click on it to expand.
-
In the expanded section, navigate to User to User Information (UUI) and configure the following options as described below.

-
UUI Passthrough: Set to Enabled.
-
Encoding Format: Select Ascii from the list.
-
Under the Protocol section, navigate to Transfer and set the following options as described below.

-
Take Back and Transfer: Set to Enabled.
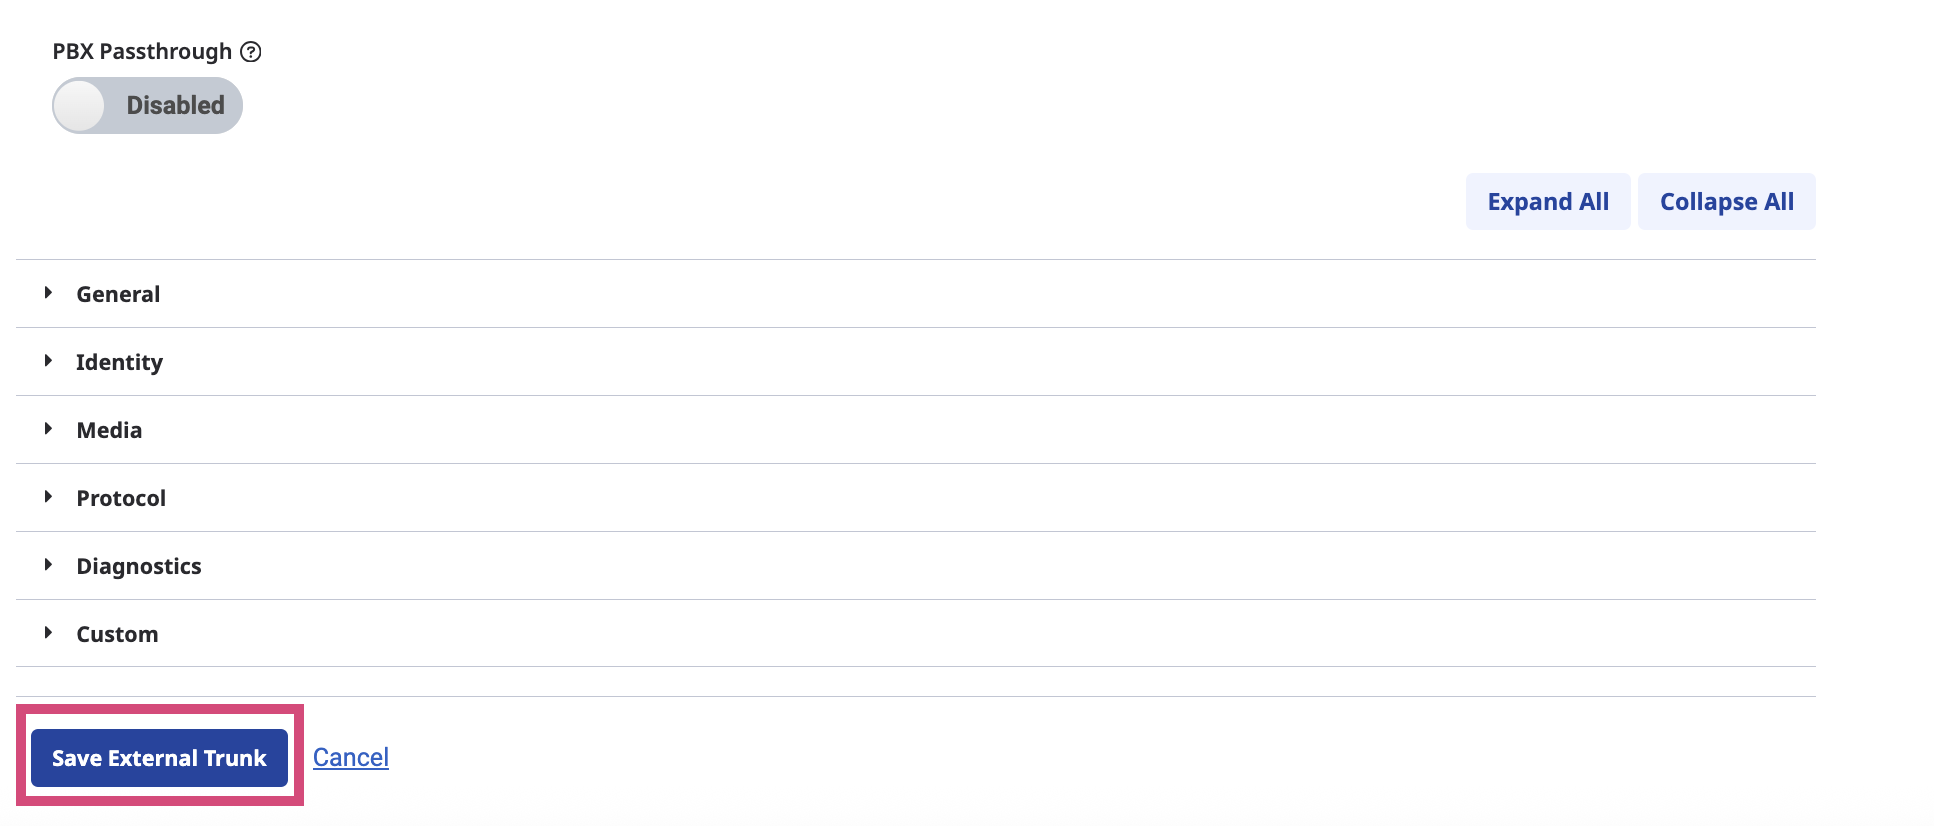
12. Click the Save External Trunk button when finished.
Set up your Number Plan
-
Navigate to the Admin tab and select Telephony → Sites.
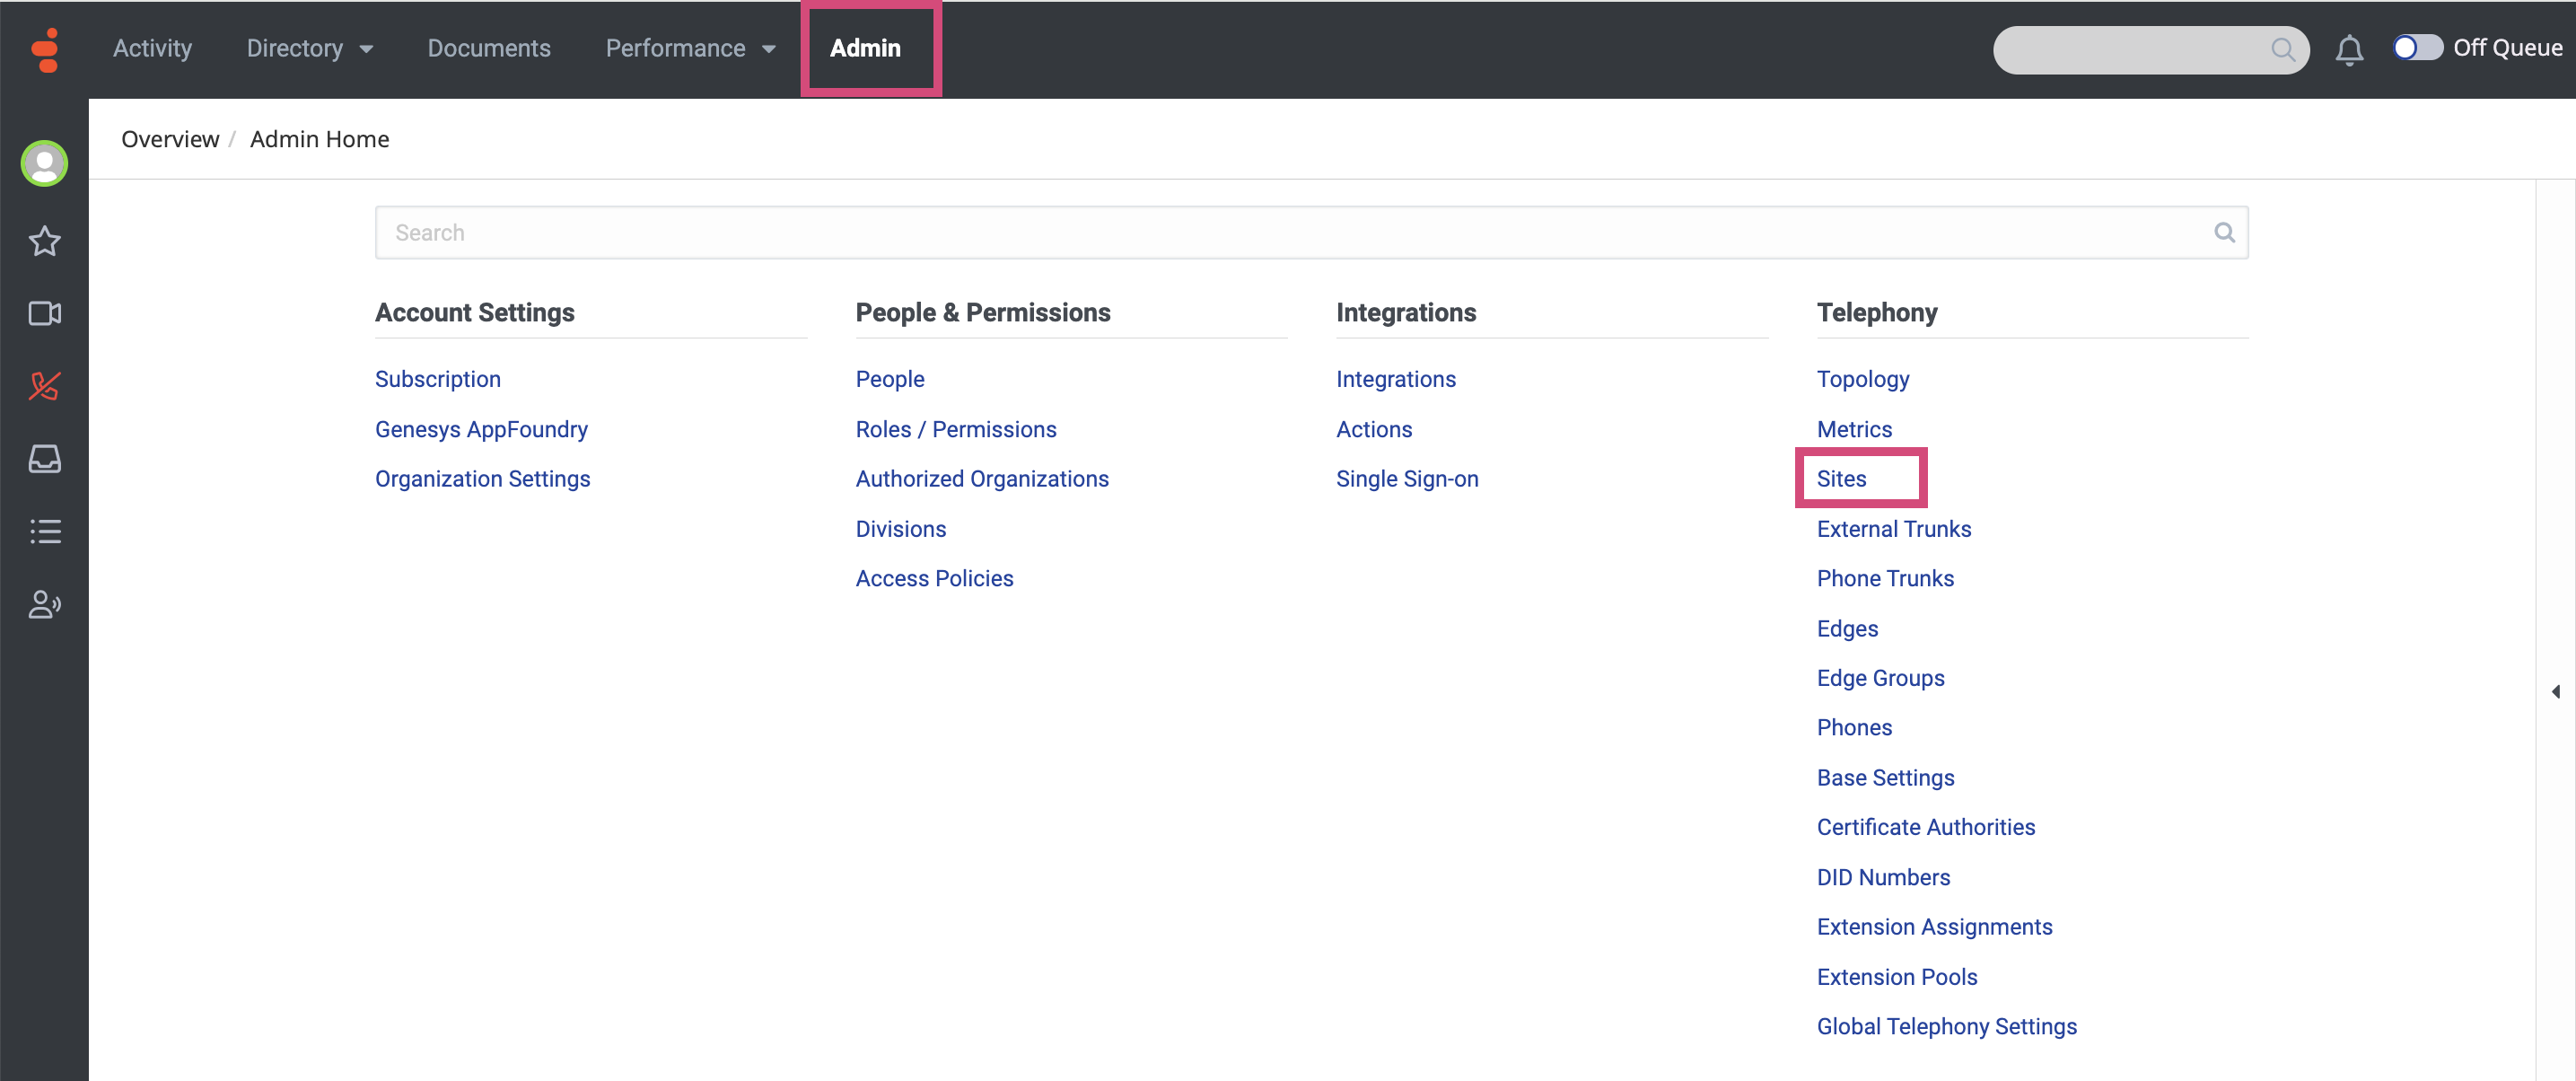
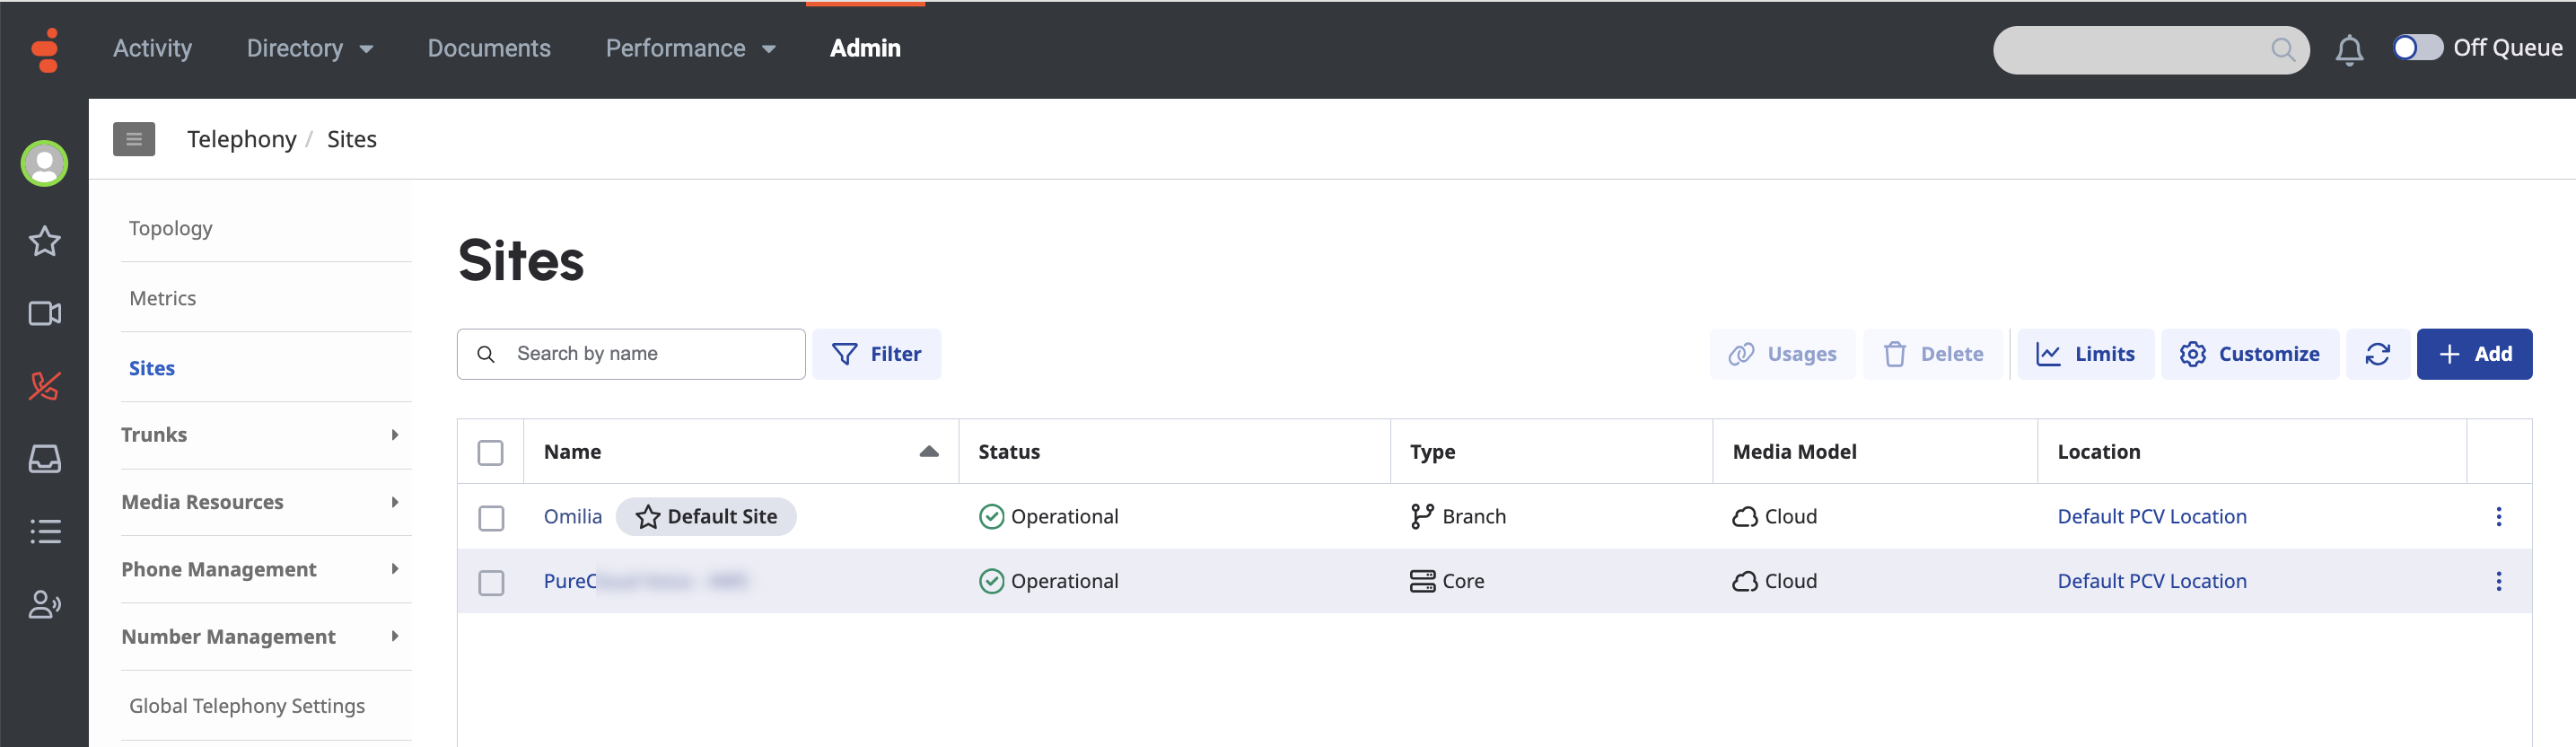
-
In the page that opens, select the site you want to use.
This should be the default site of your environment. Otherwise, the integration could not work properly!
-
Navigate to the Number Plans tab.
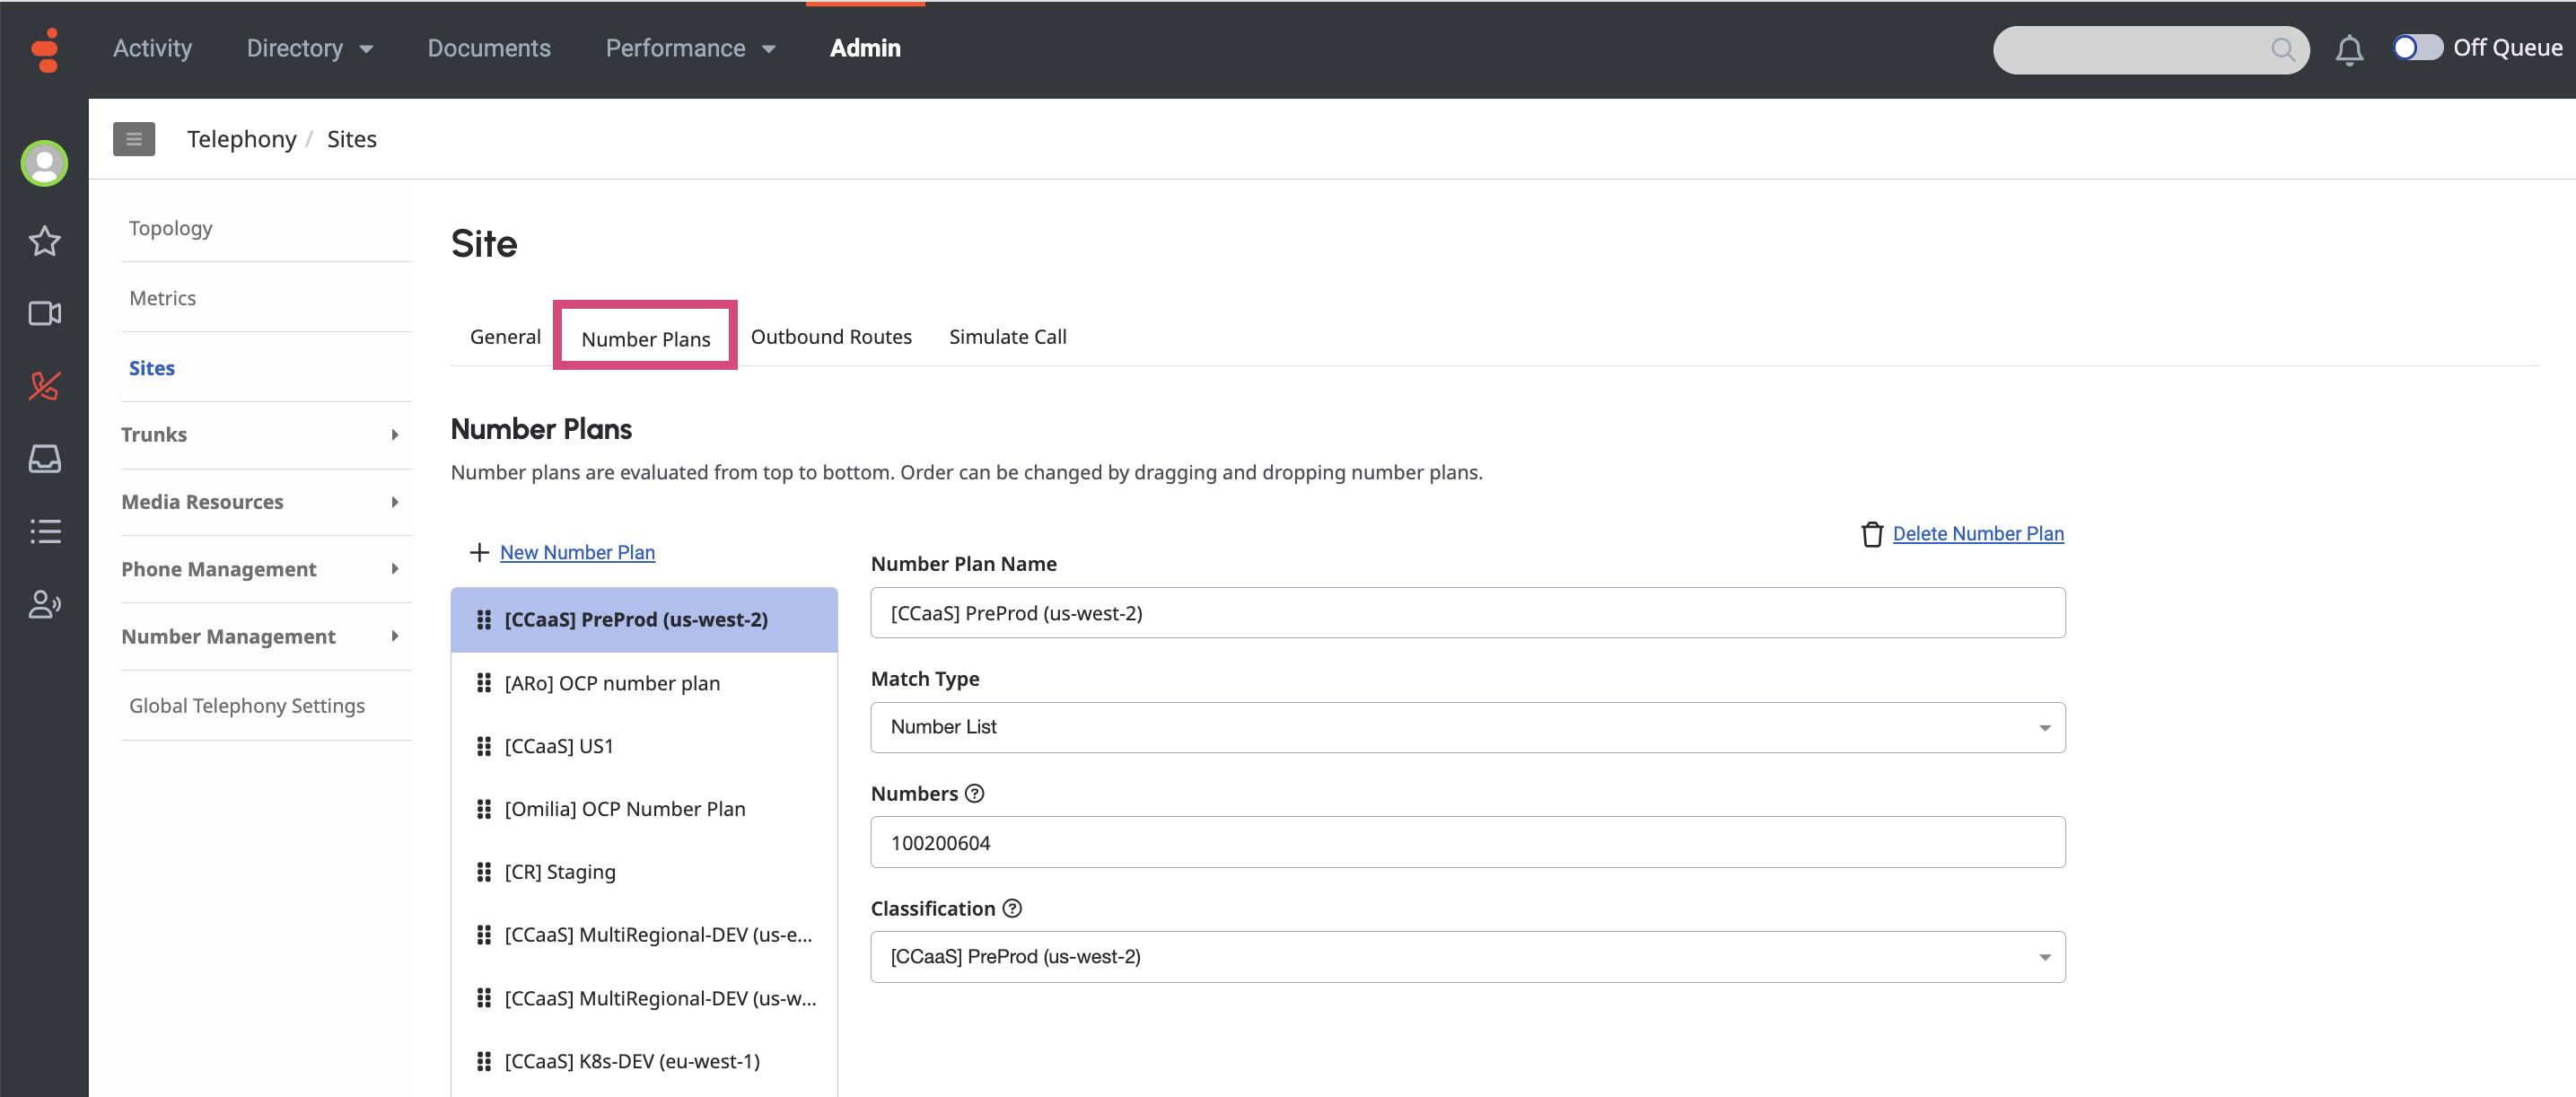
-
Click +New Number Plan, and fill in the fields as shown in the image below.
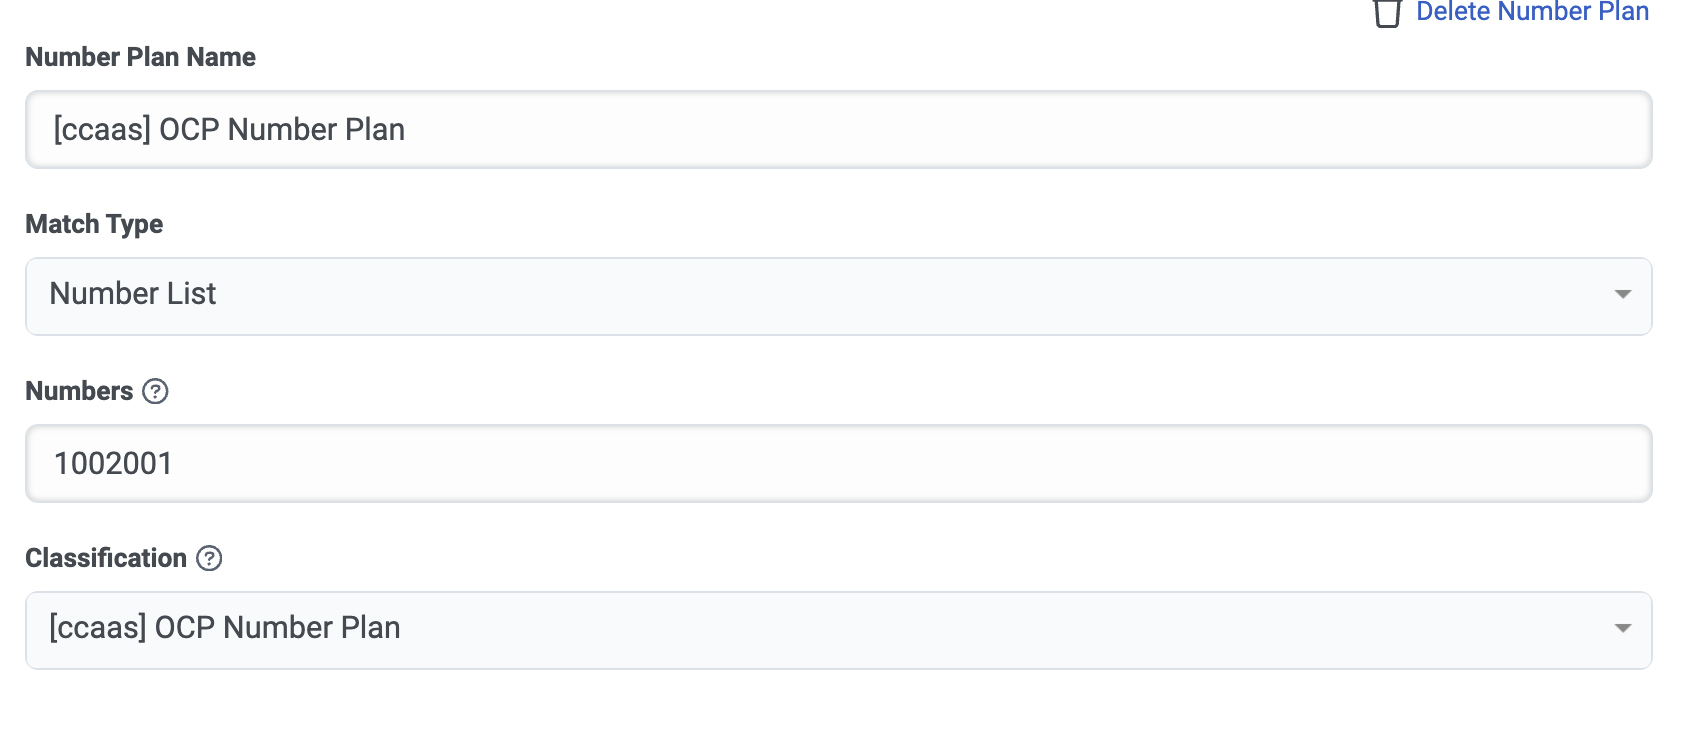
-
Number Plan Name: [ccaas] OCP Number Plan
-
Match Type: Select Number List from the drop-down.
-
Numbers: 1002001
-
Classification: [ccaas] OCP Number Plan
-
Click Save Number Plans when finished.
Keep in mind that the Numbers value must match the Number specified in the Flow inside the Transfer to Number component.
-
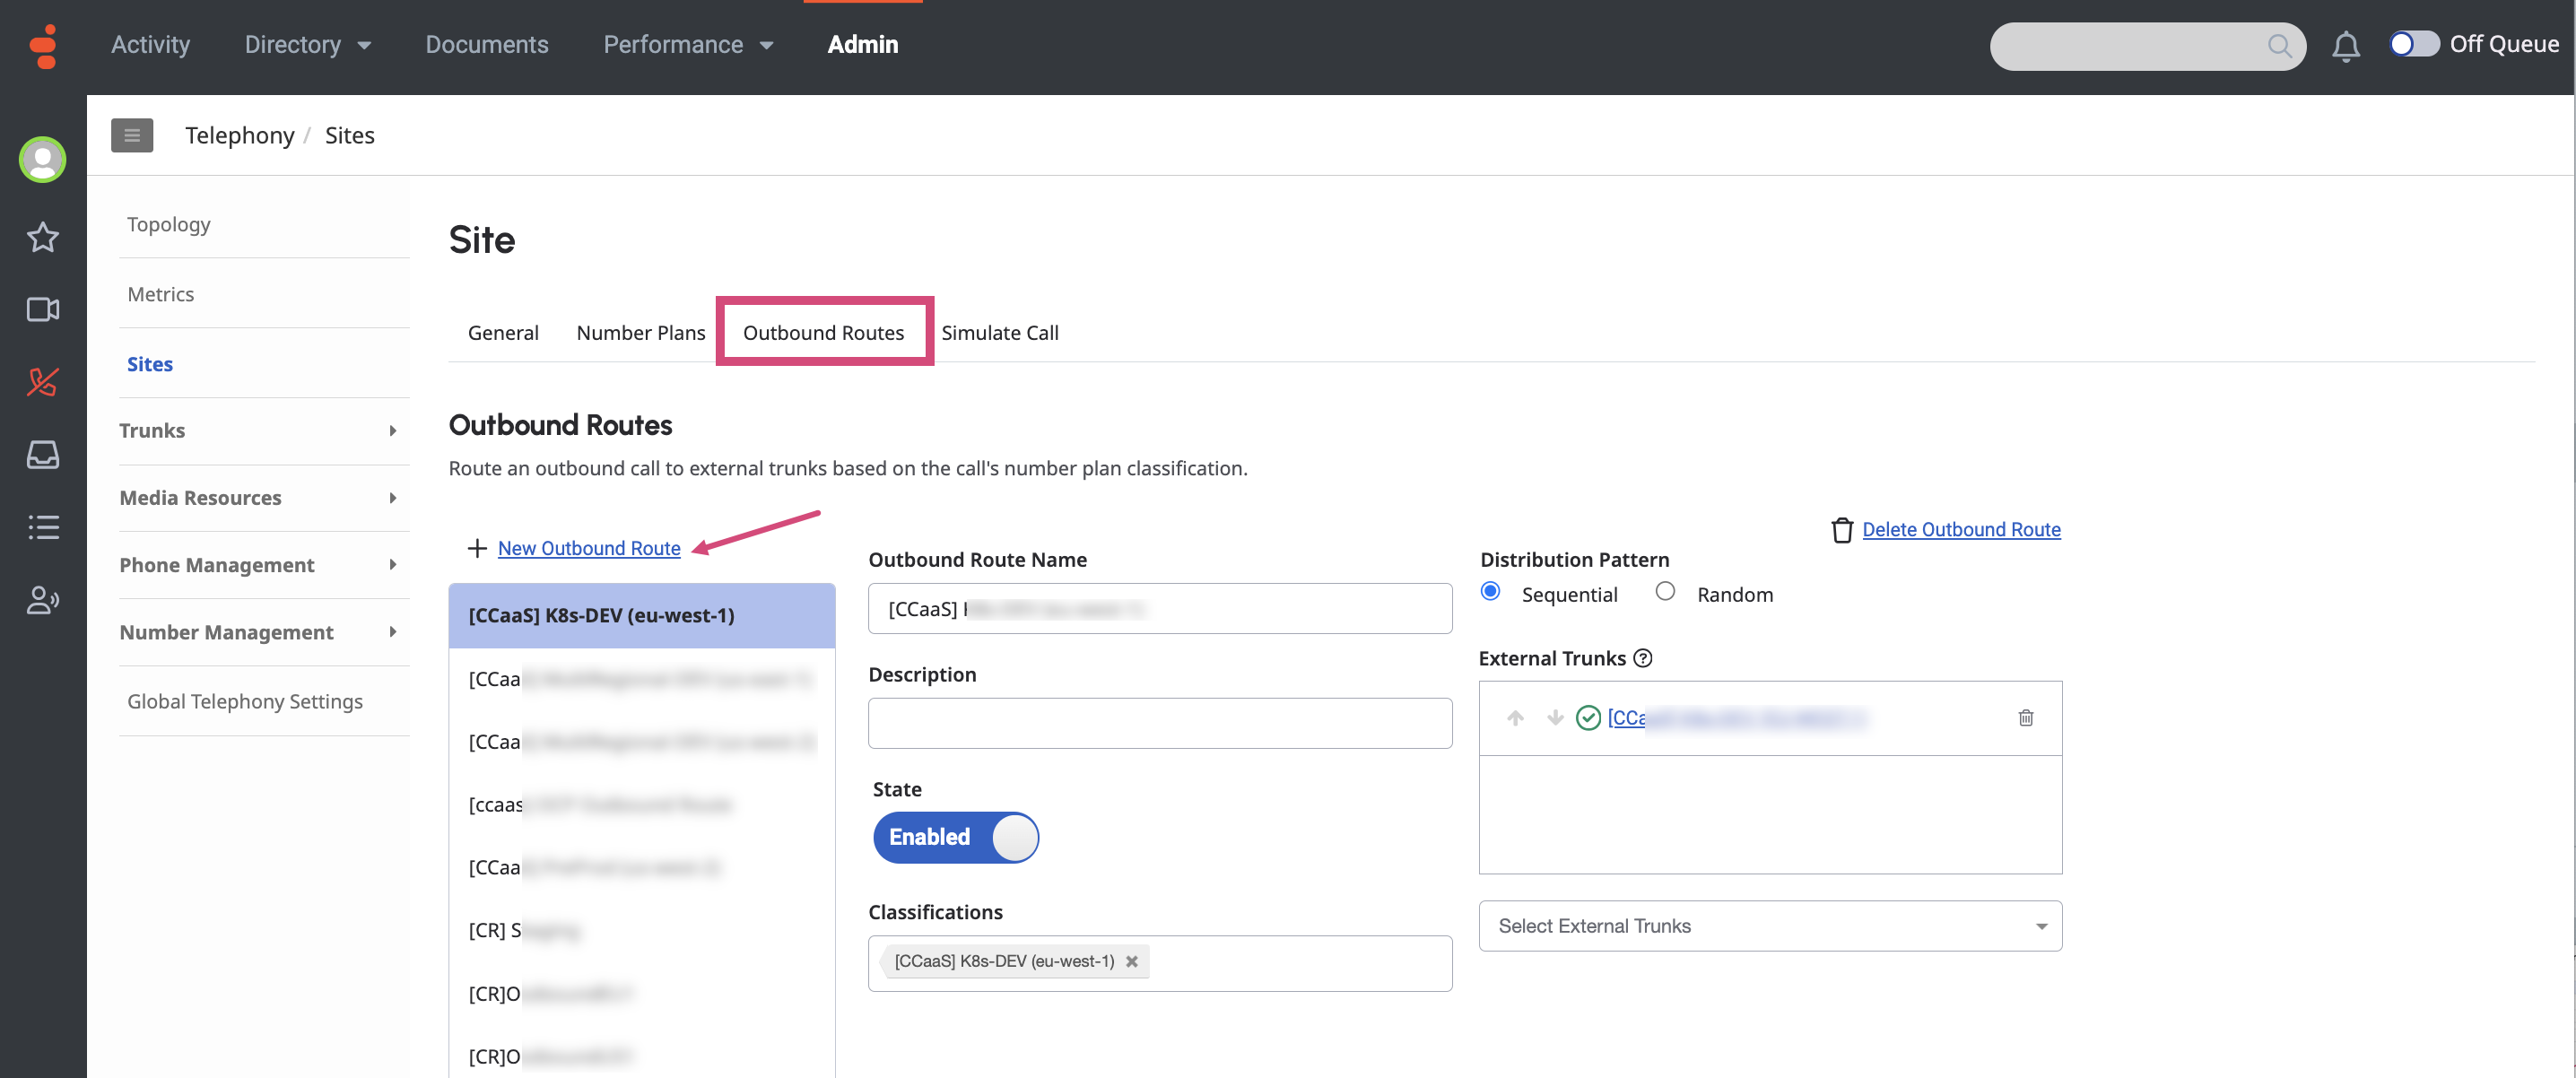
Next, navigate to the Outbound Routes tab and click +New Outbound Route.
-
Fill in the fields as shown in the image below.

-
Outbound Route Name: Enter [ccaas] OCP Outbound Route.
-
State: Select Enabled.
-
Classification: Select the Number Plan you have created previously.
-
Distribution Pattern: Select Sequential.
-
External Trunks: Select the External Trunk you have create previously.
-
Click Save Outbound Routes when finished.
Step 6. Create a Genesys Cloud Script
At this step you have to create a custom UI dashboard for your agents. For manual integration, you will need the script file provided by Omilia.
-
Download the following template script file Standard Script.script and name it as [Omilia] OCP Script.script
For Agent-side voice biometric setup, utilize the following script:
-
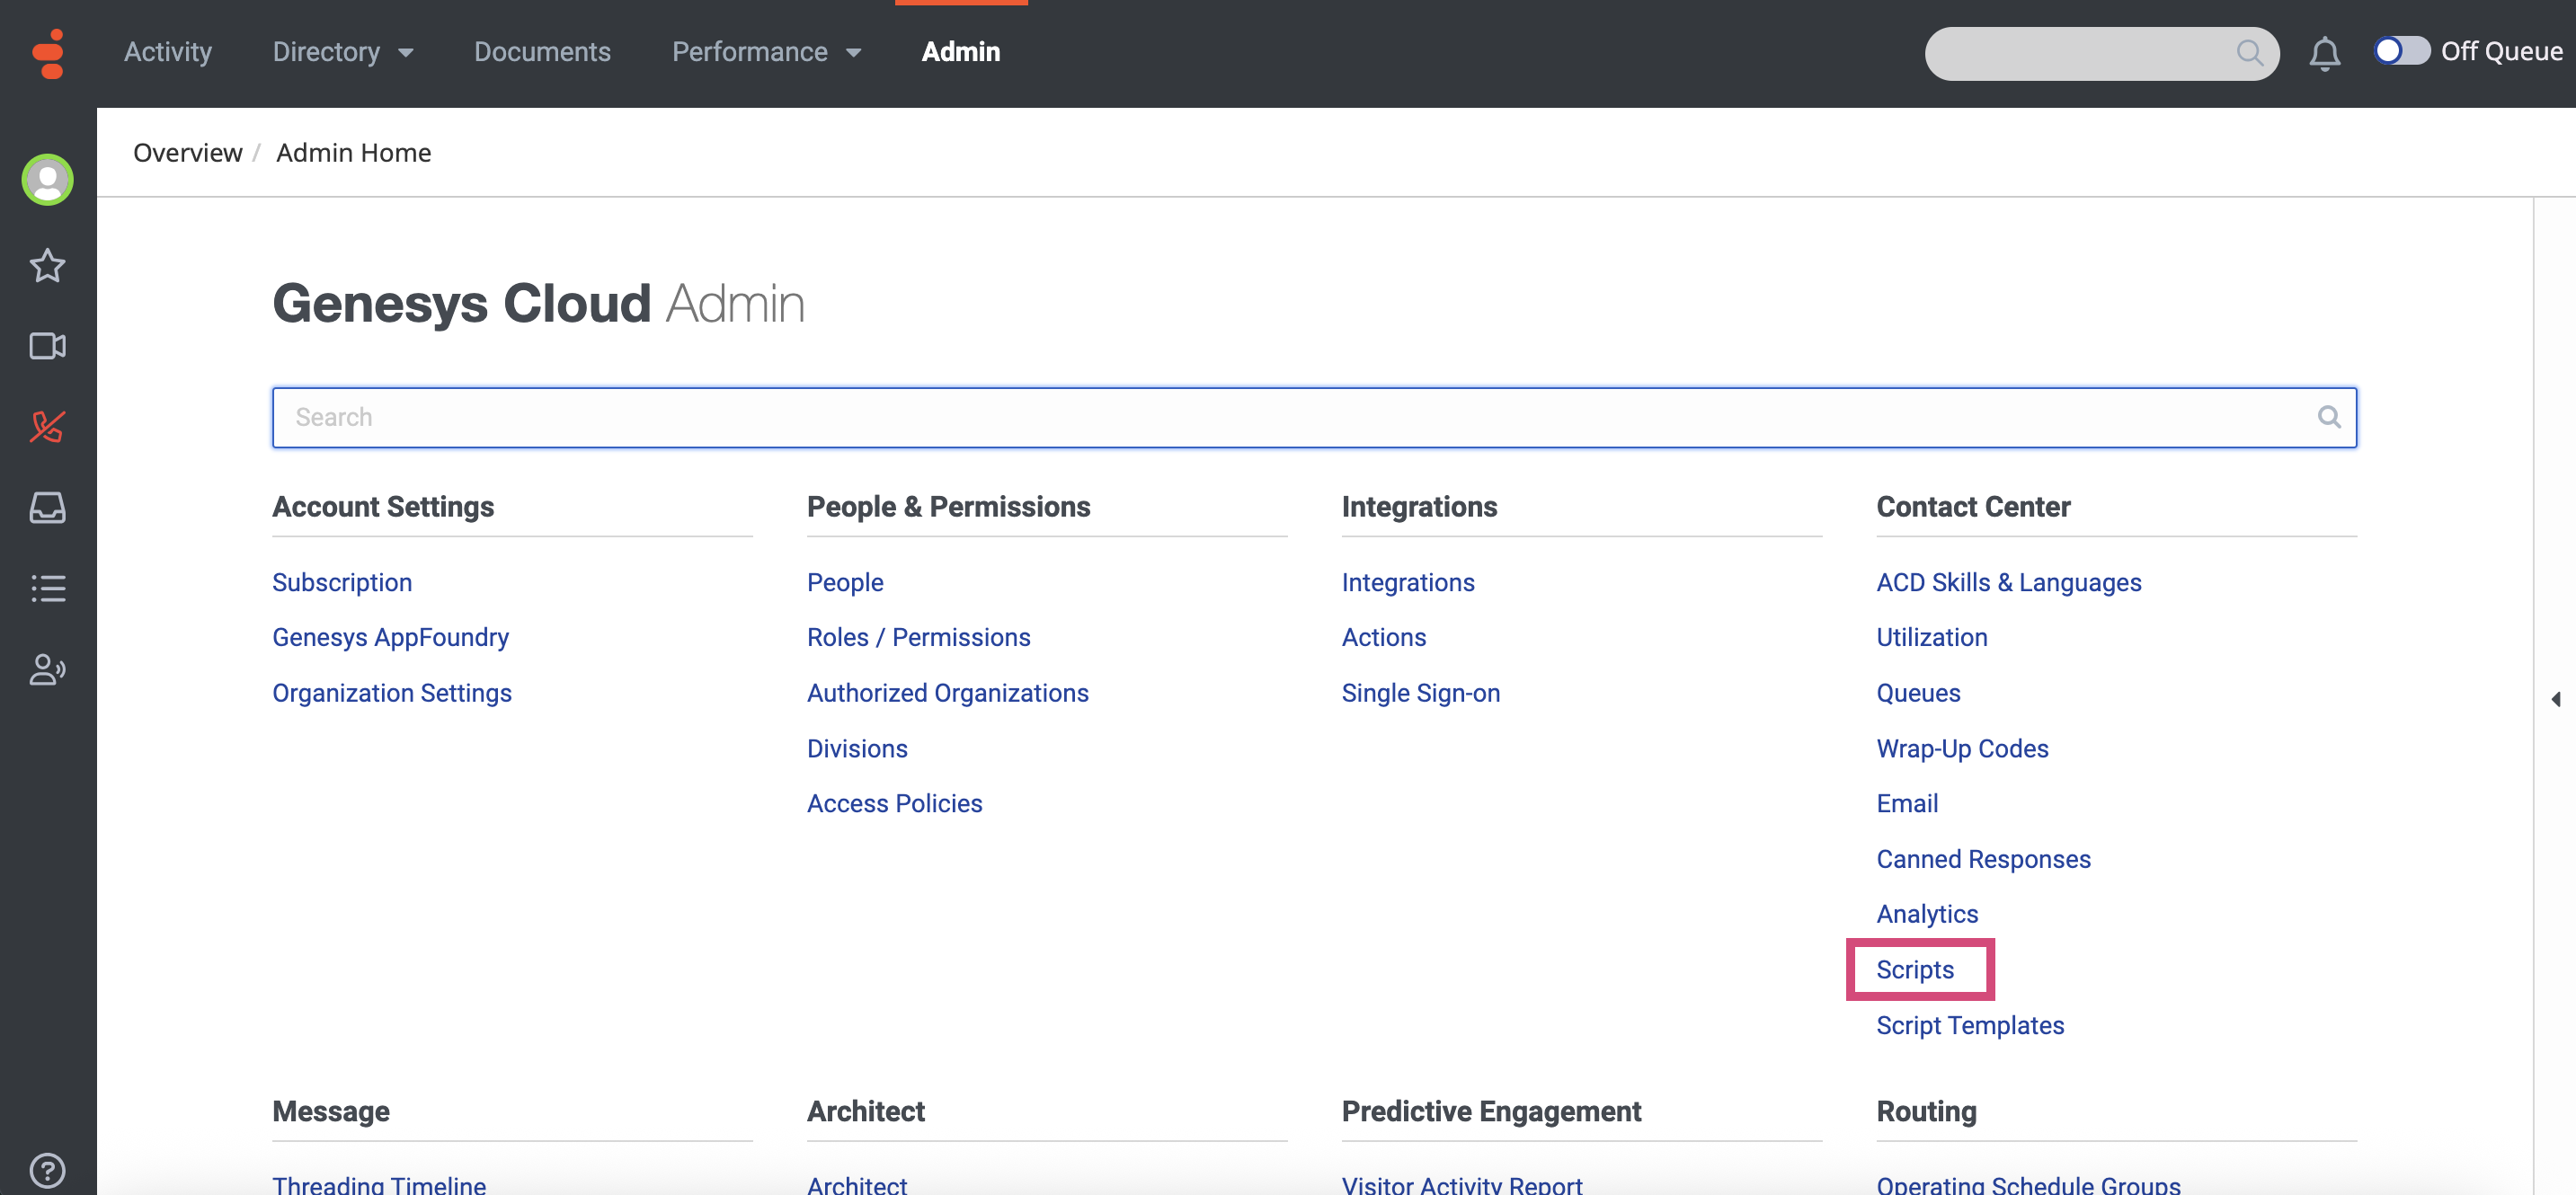
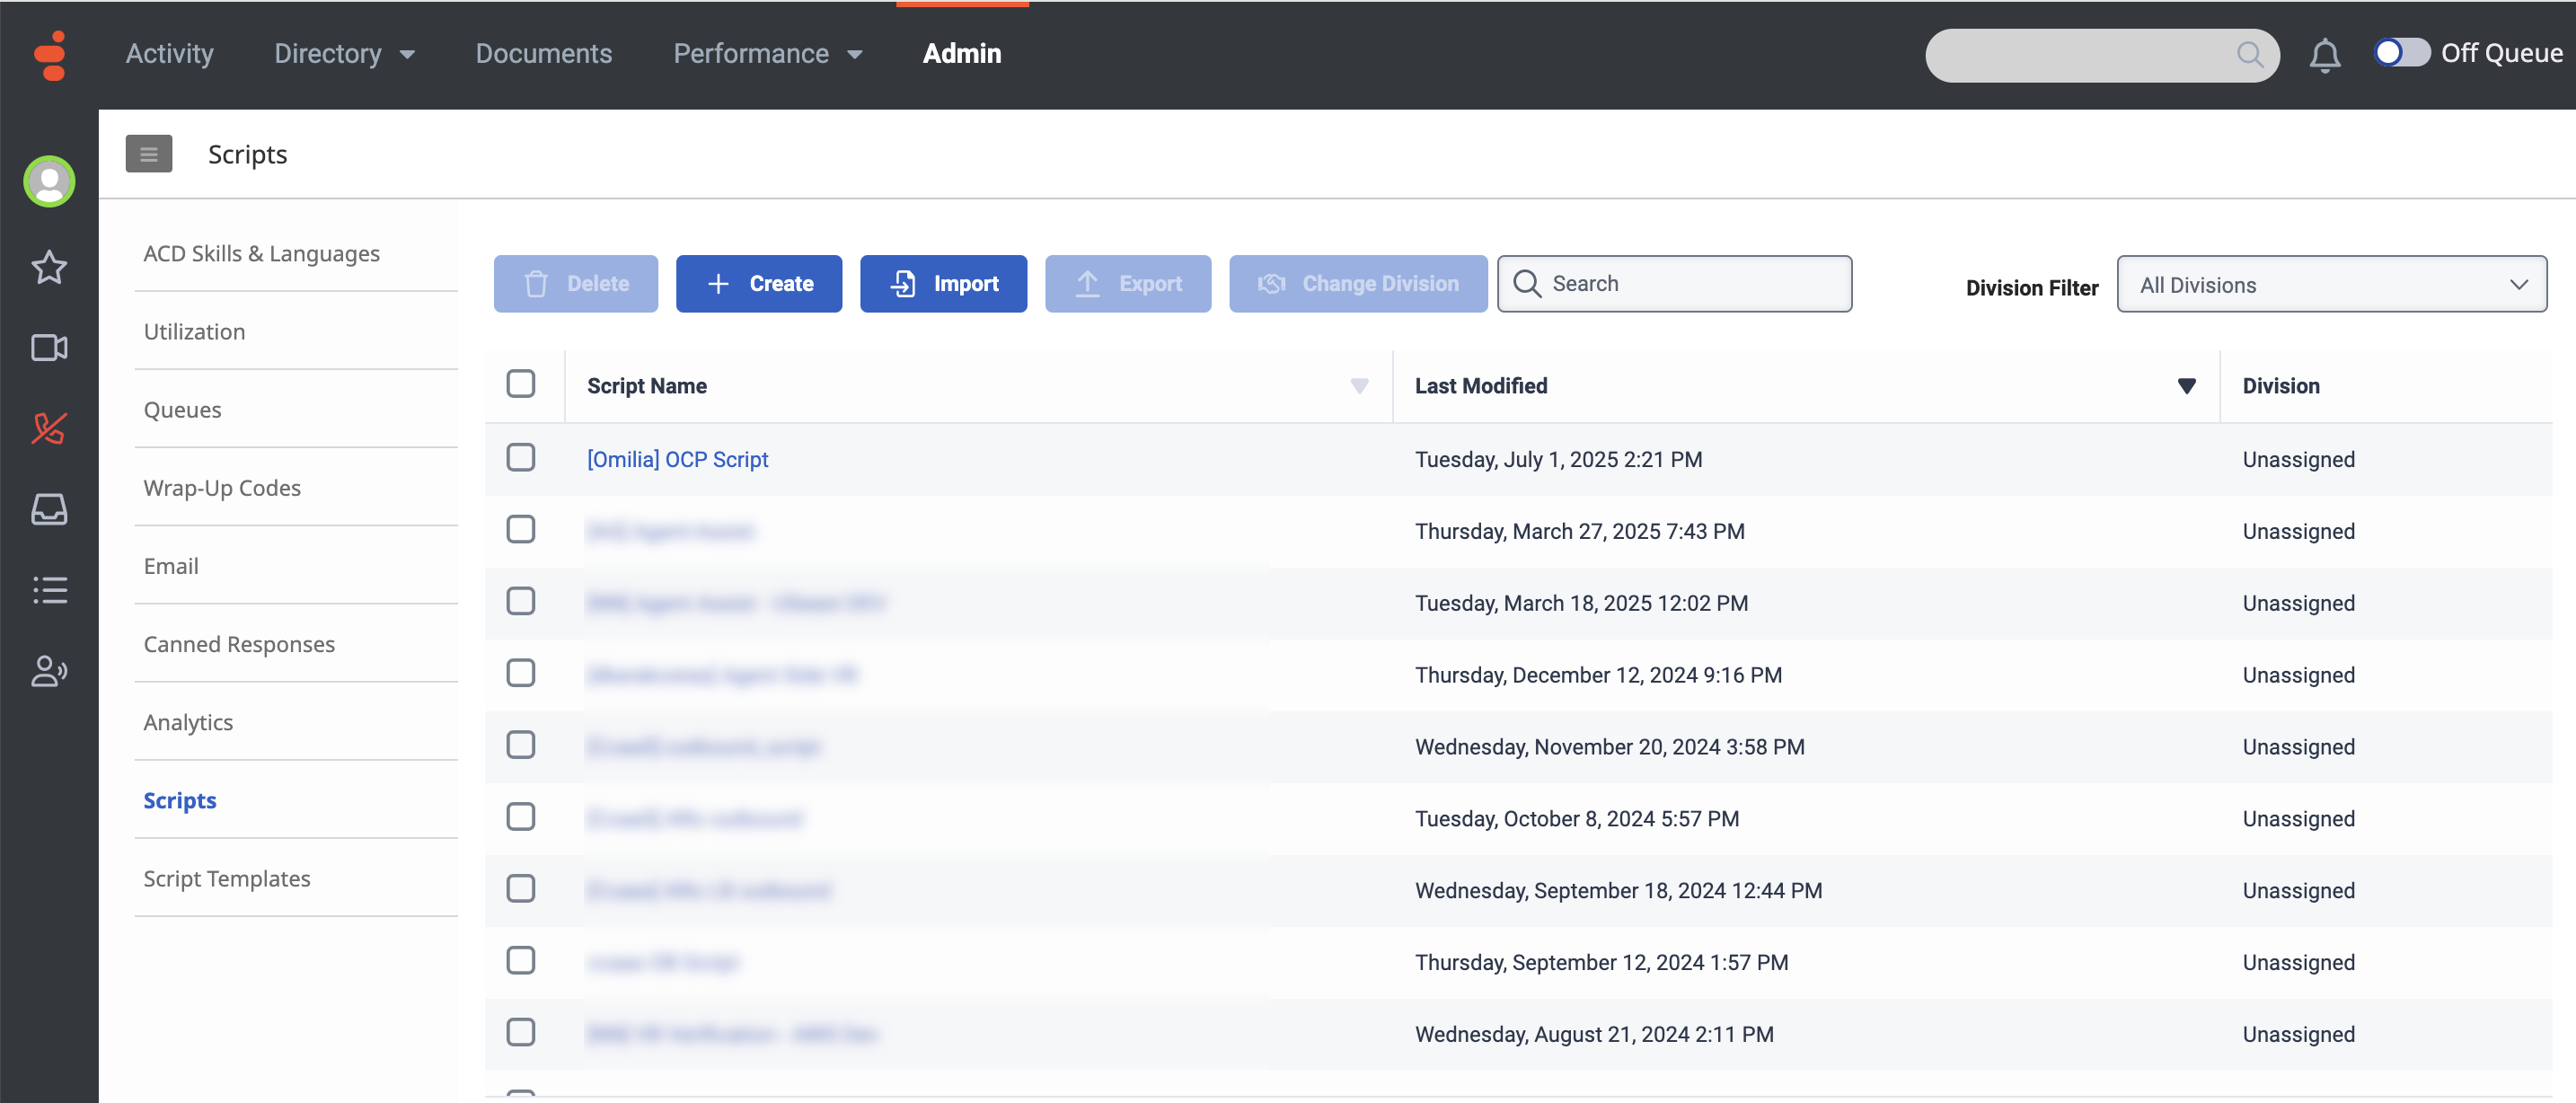
Navigate to the Admin tab and select Contact Center → Scripts.
-
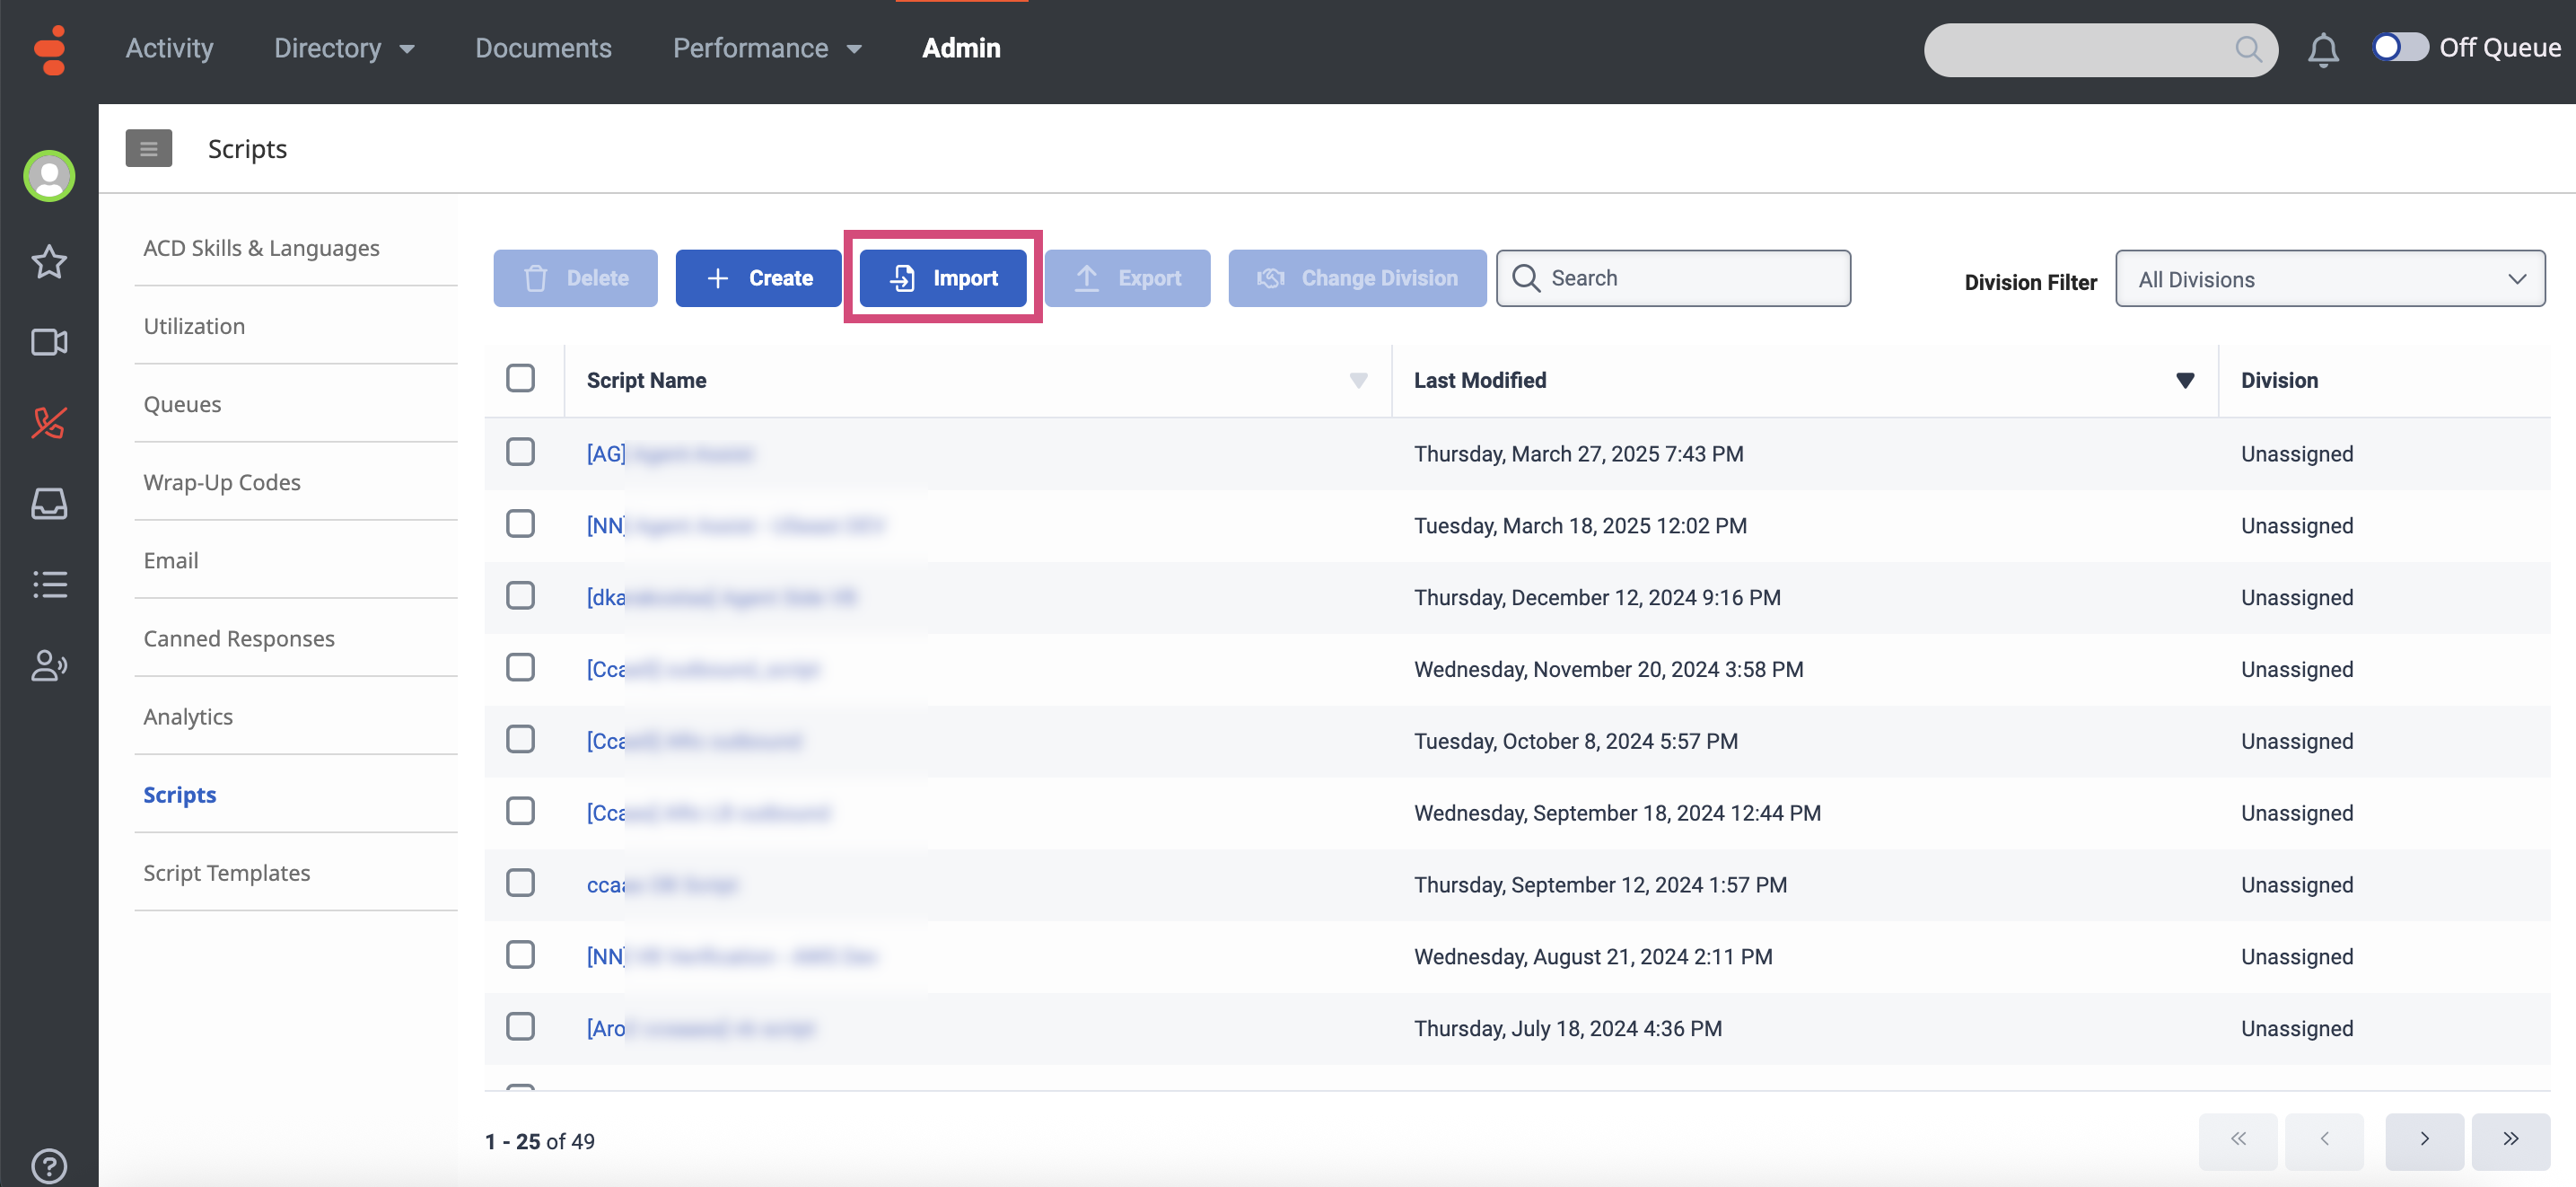
On the page that opens, click the Import button.
-
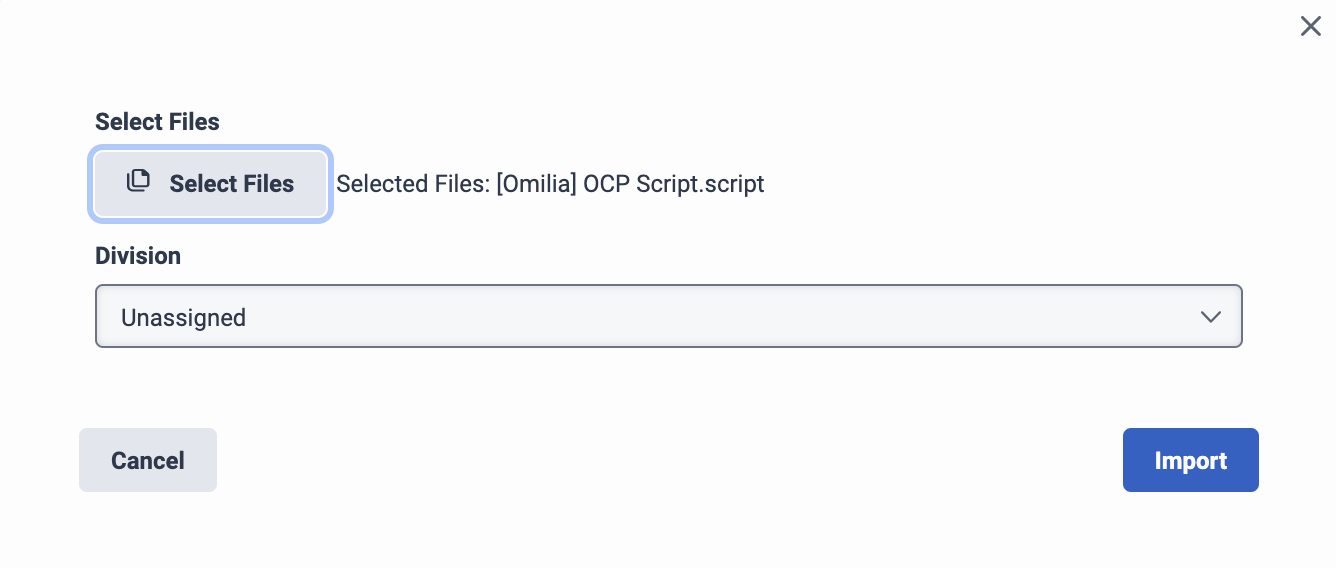
In the dialog box that opens, upload the .script file that you have previously downloaded.
-
Click Import.
-
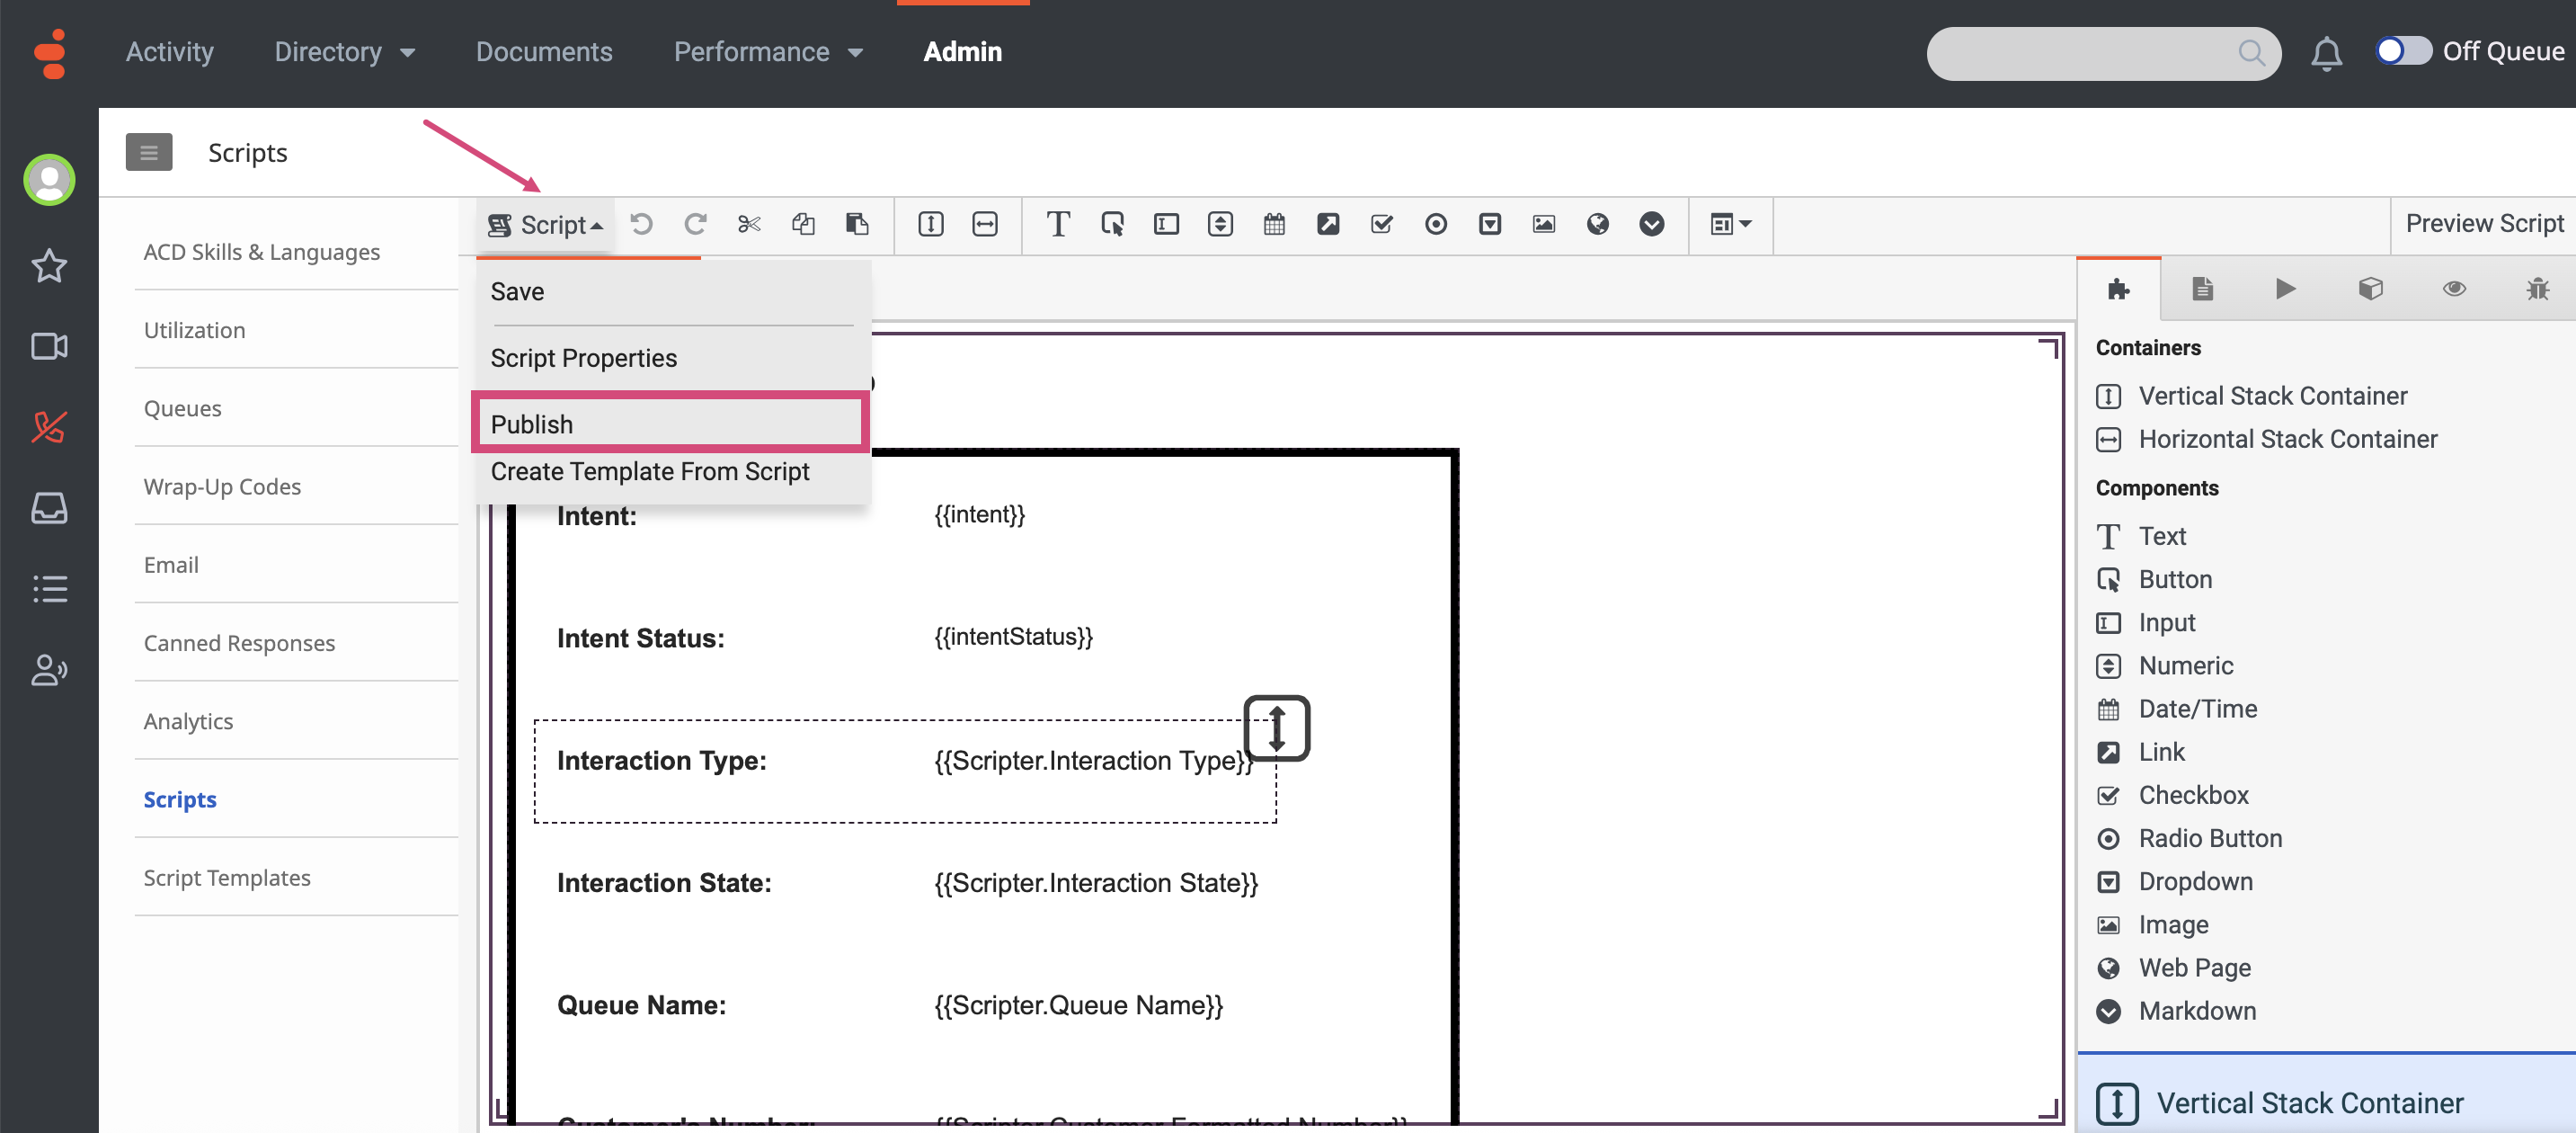
The uploaded script will be added to the scripts list as shown below. Click on [Omilia] OCP Script.script to open its settings.
-
In the settings page that opens, click Script and select Publish.
Step 7. Set up a Genesys Cloud Architect Flow
Create a miniApp flow
Next, you should create the miniApp flow. To create a miniApp flow, follow the guidelines below:
-
Download the following template flow file Standard Inbound Flow.i3InboundFlow and name it as [Omilia] OCP Flow.
-
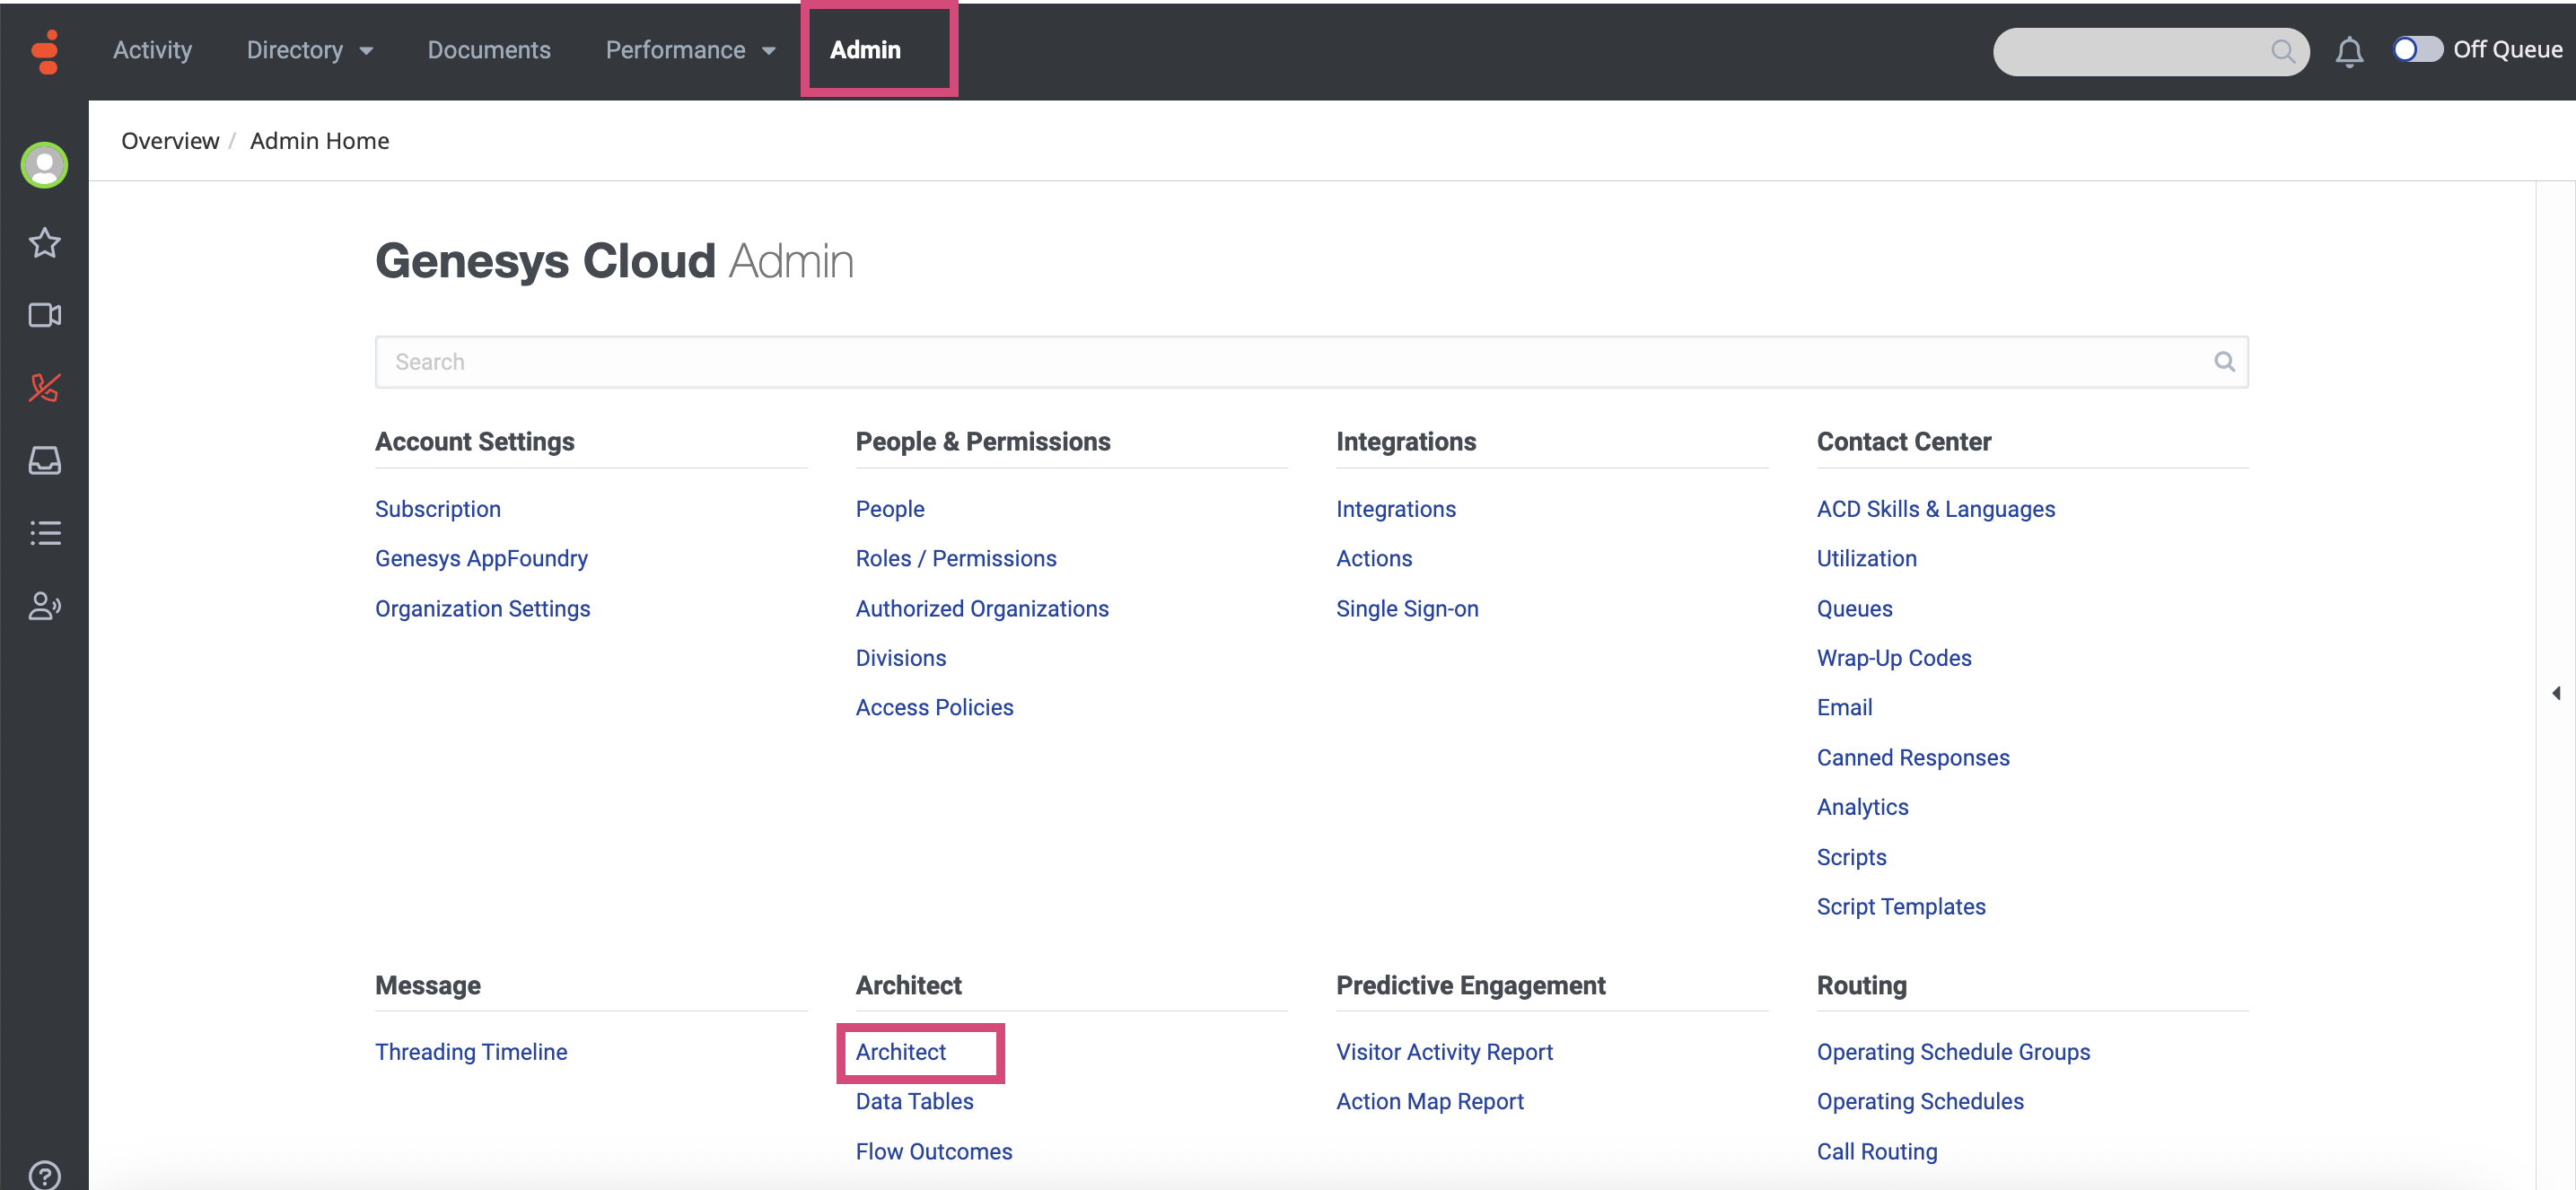
Navigate to the Admin tab and select Architect → Architect.
-
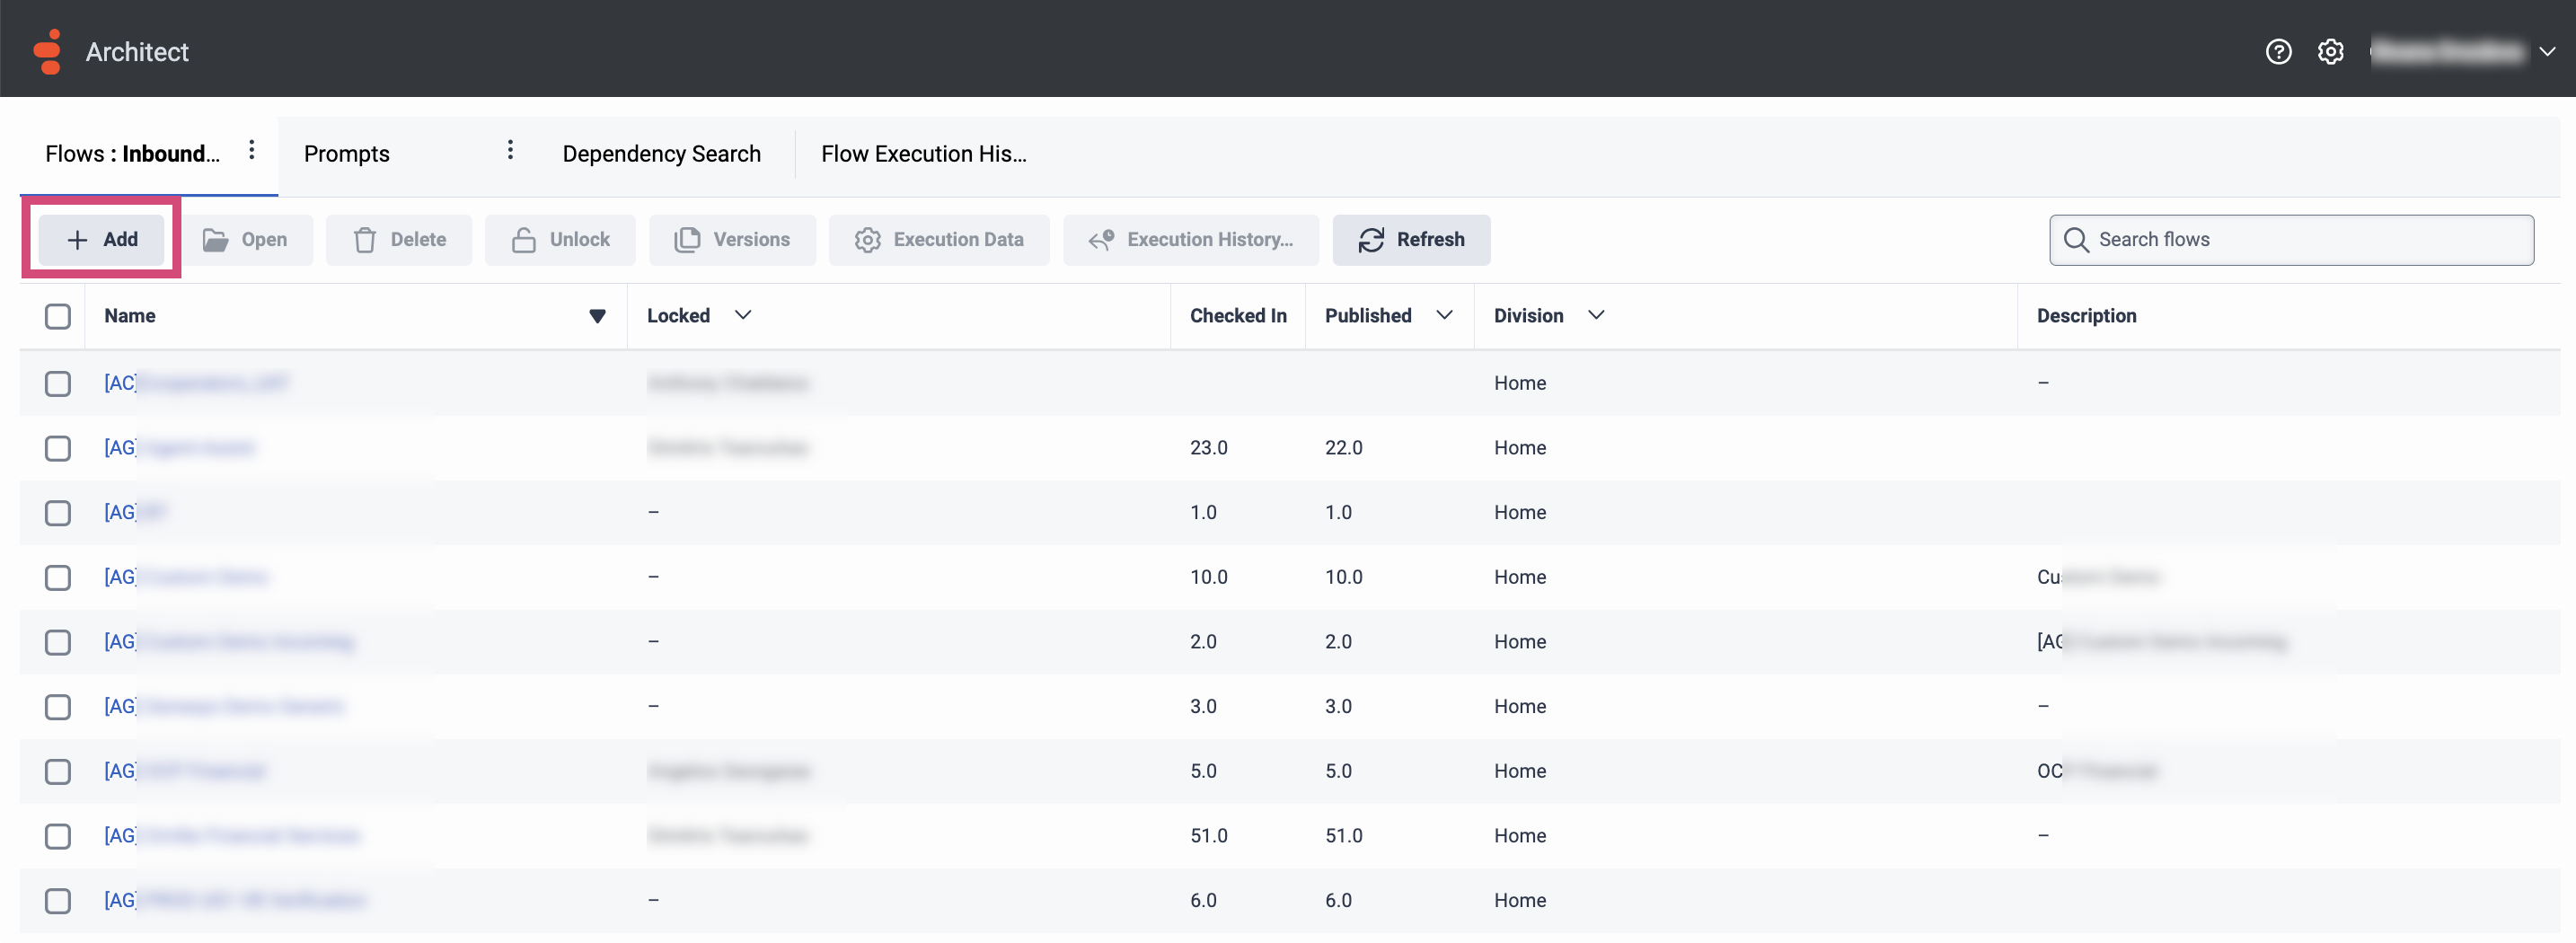
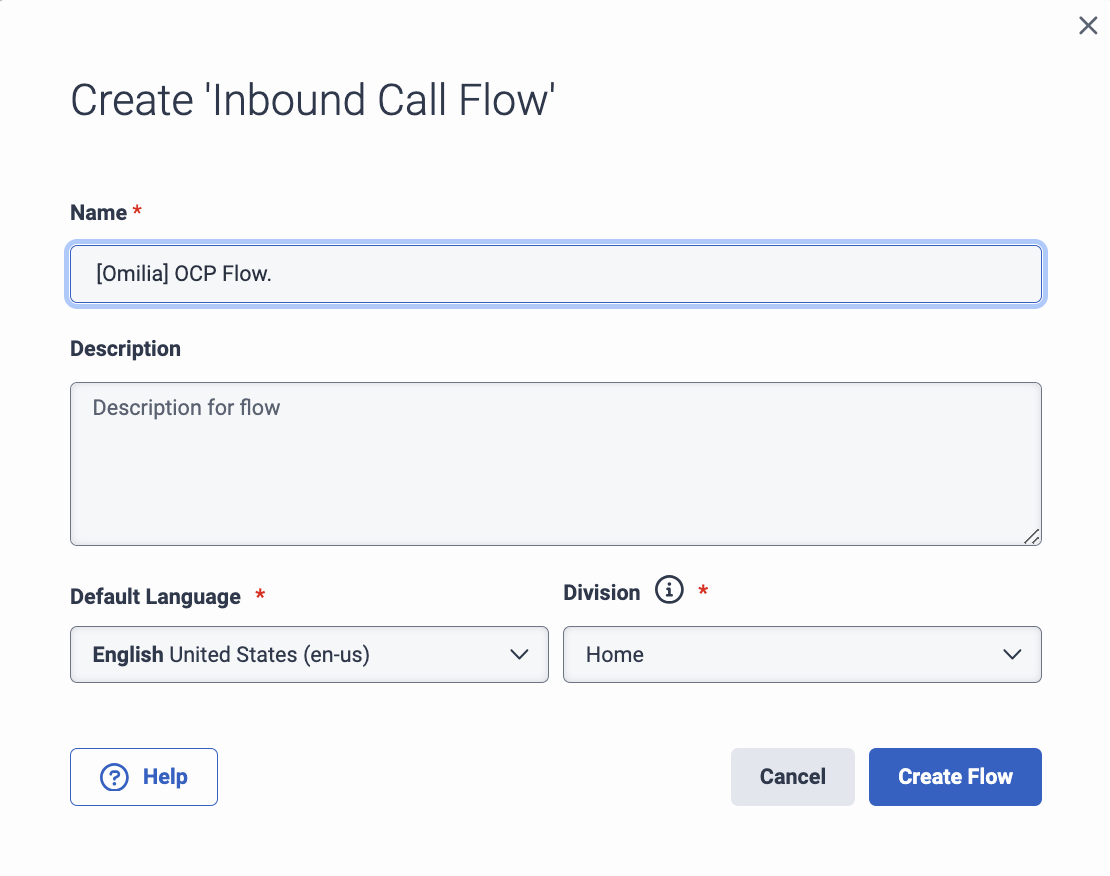
In the page that opens, click the +Add button.
-
In the dialog box that opens, enter the name of the flow as [Omilia] OCP Flow and click Create Flow.
-
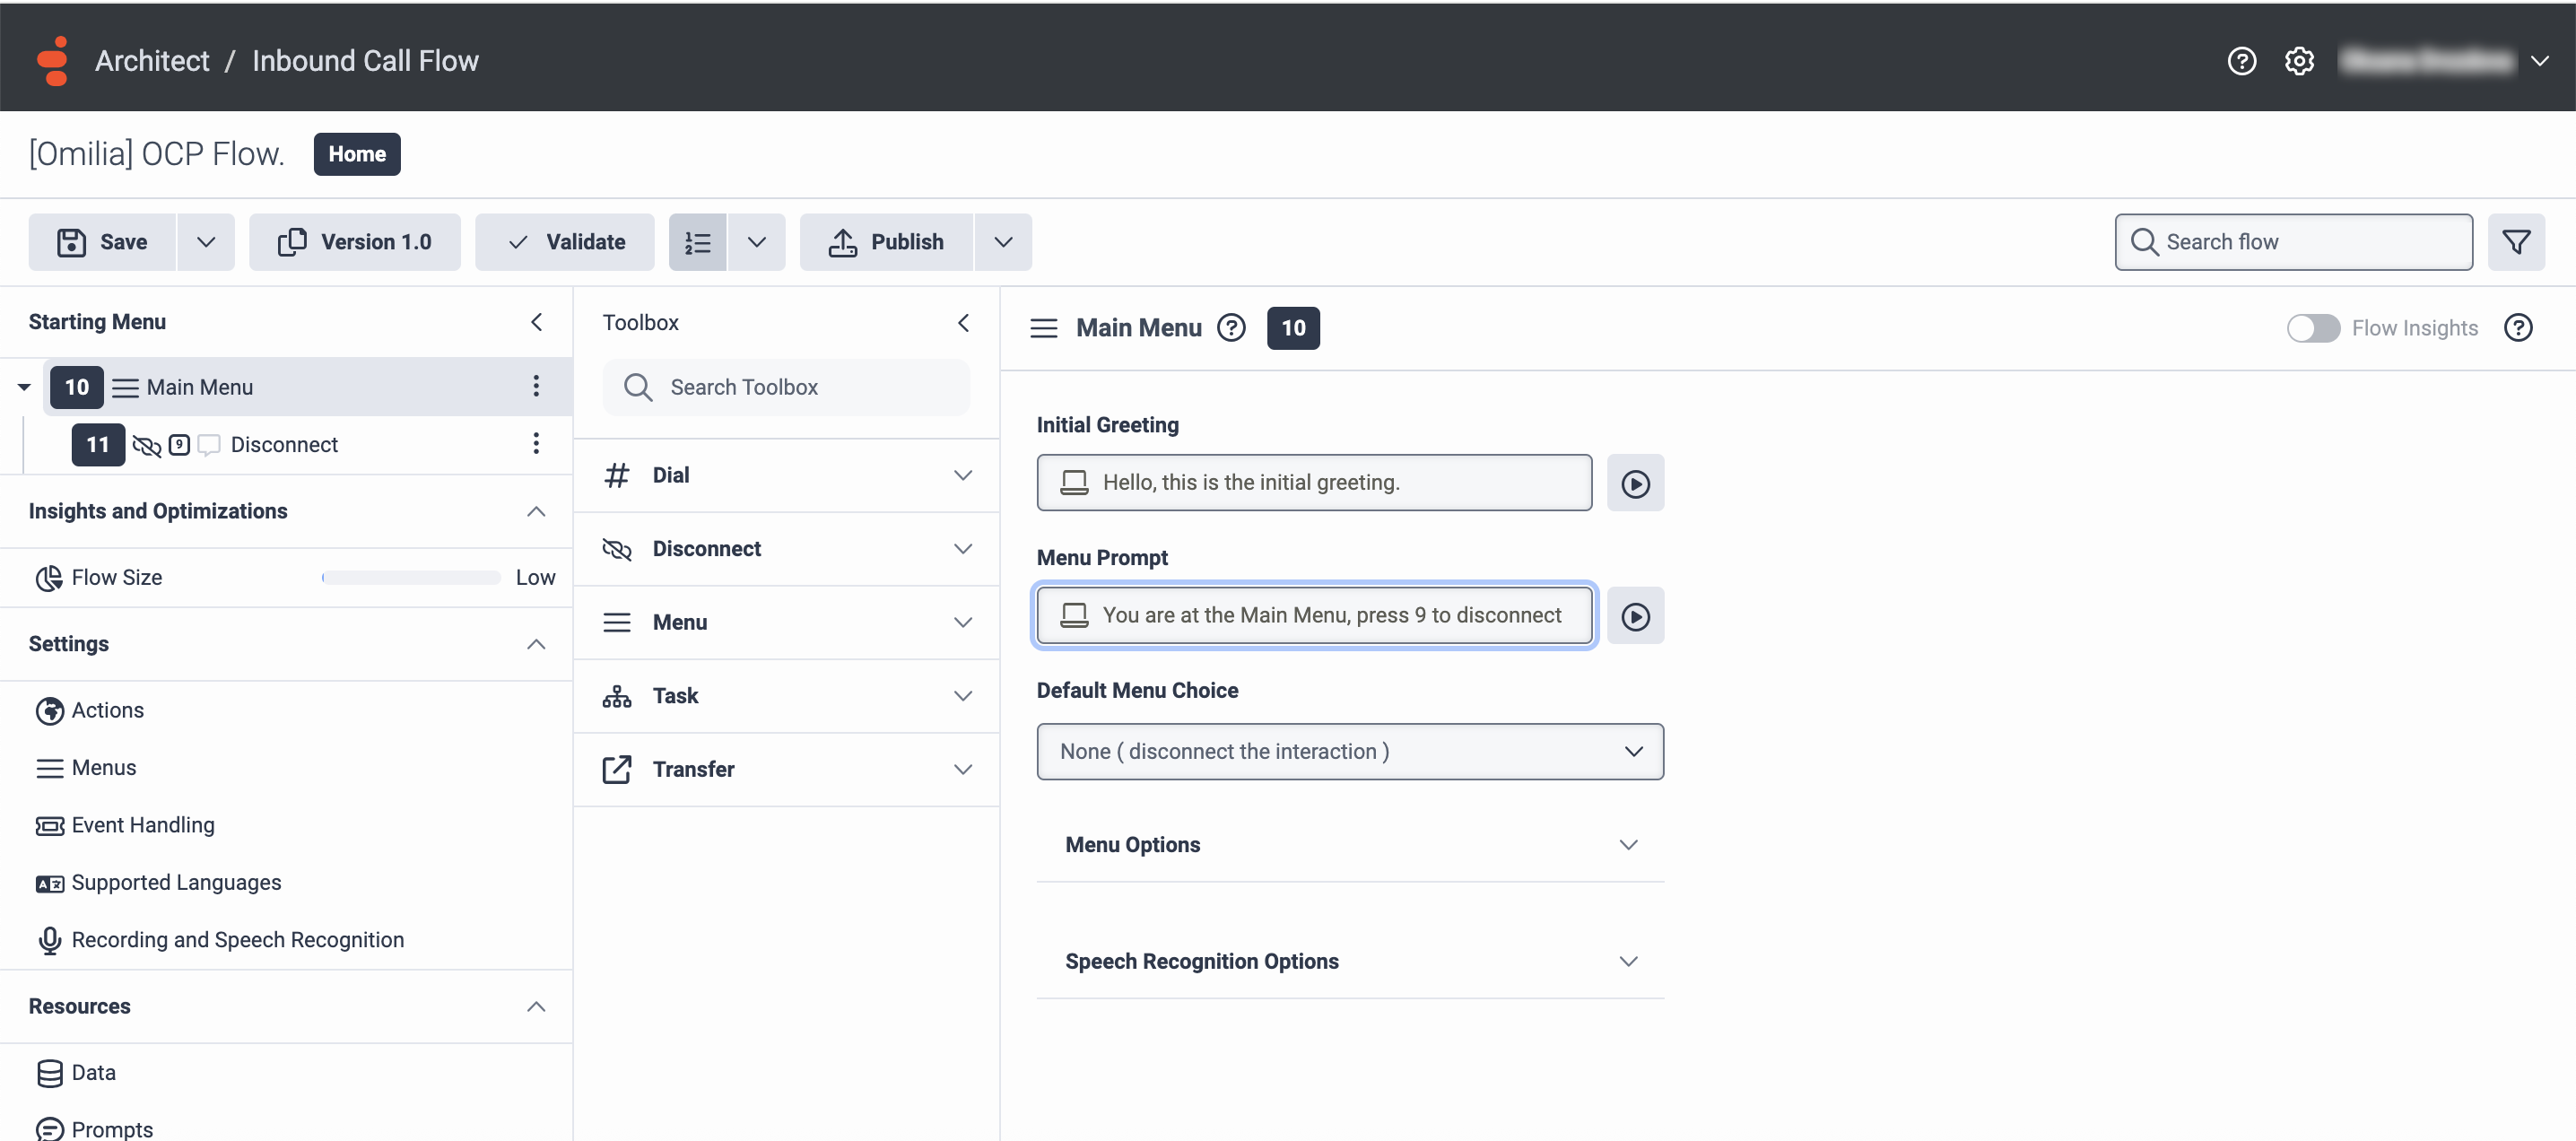
You will be forwarded to the settings page of the flow you have just created.
-
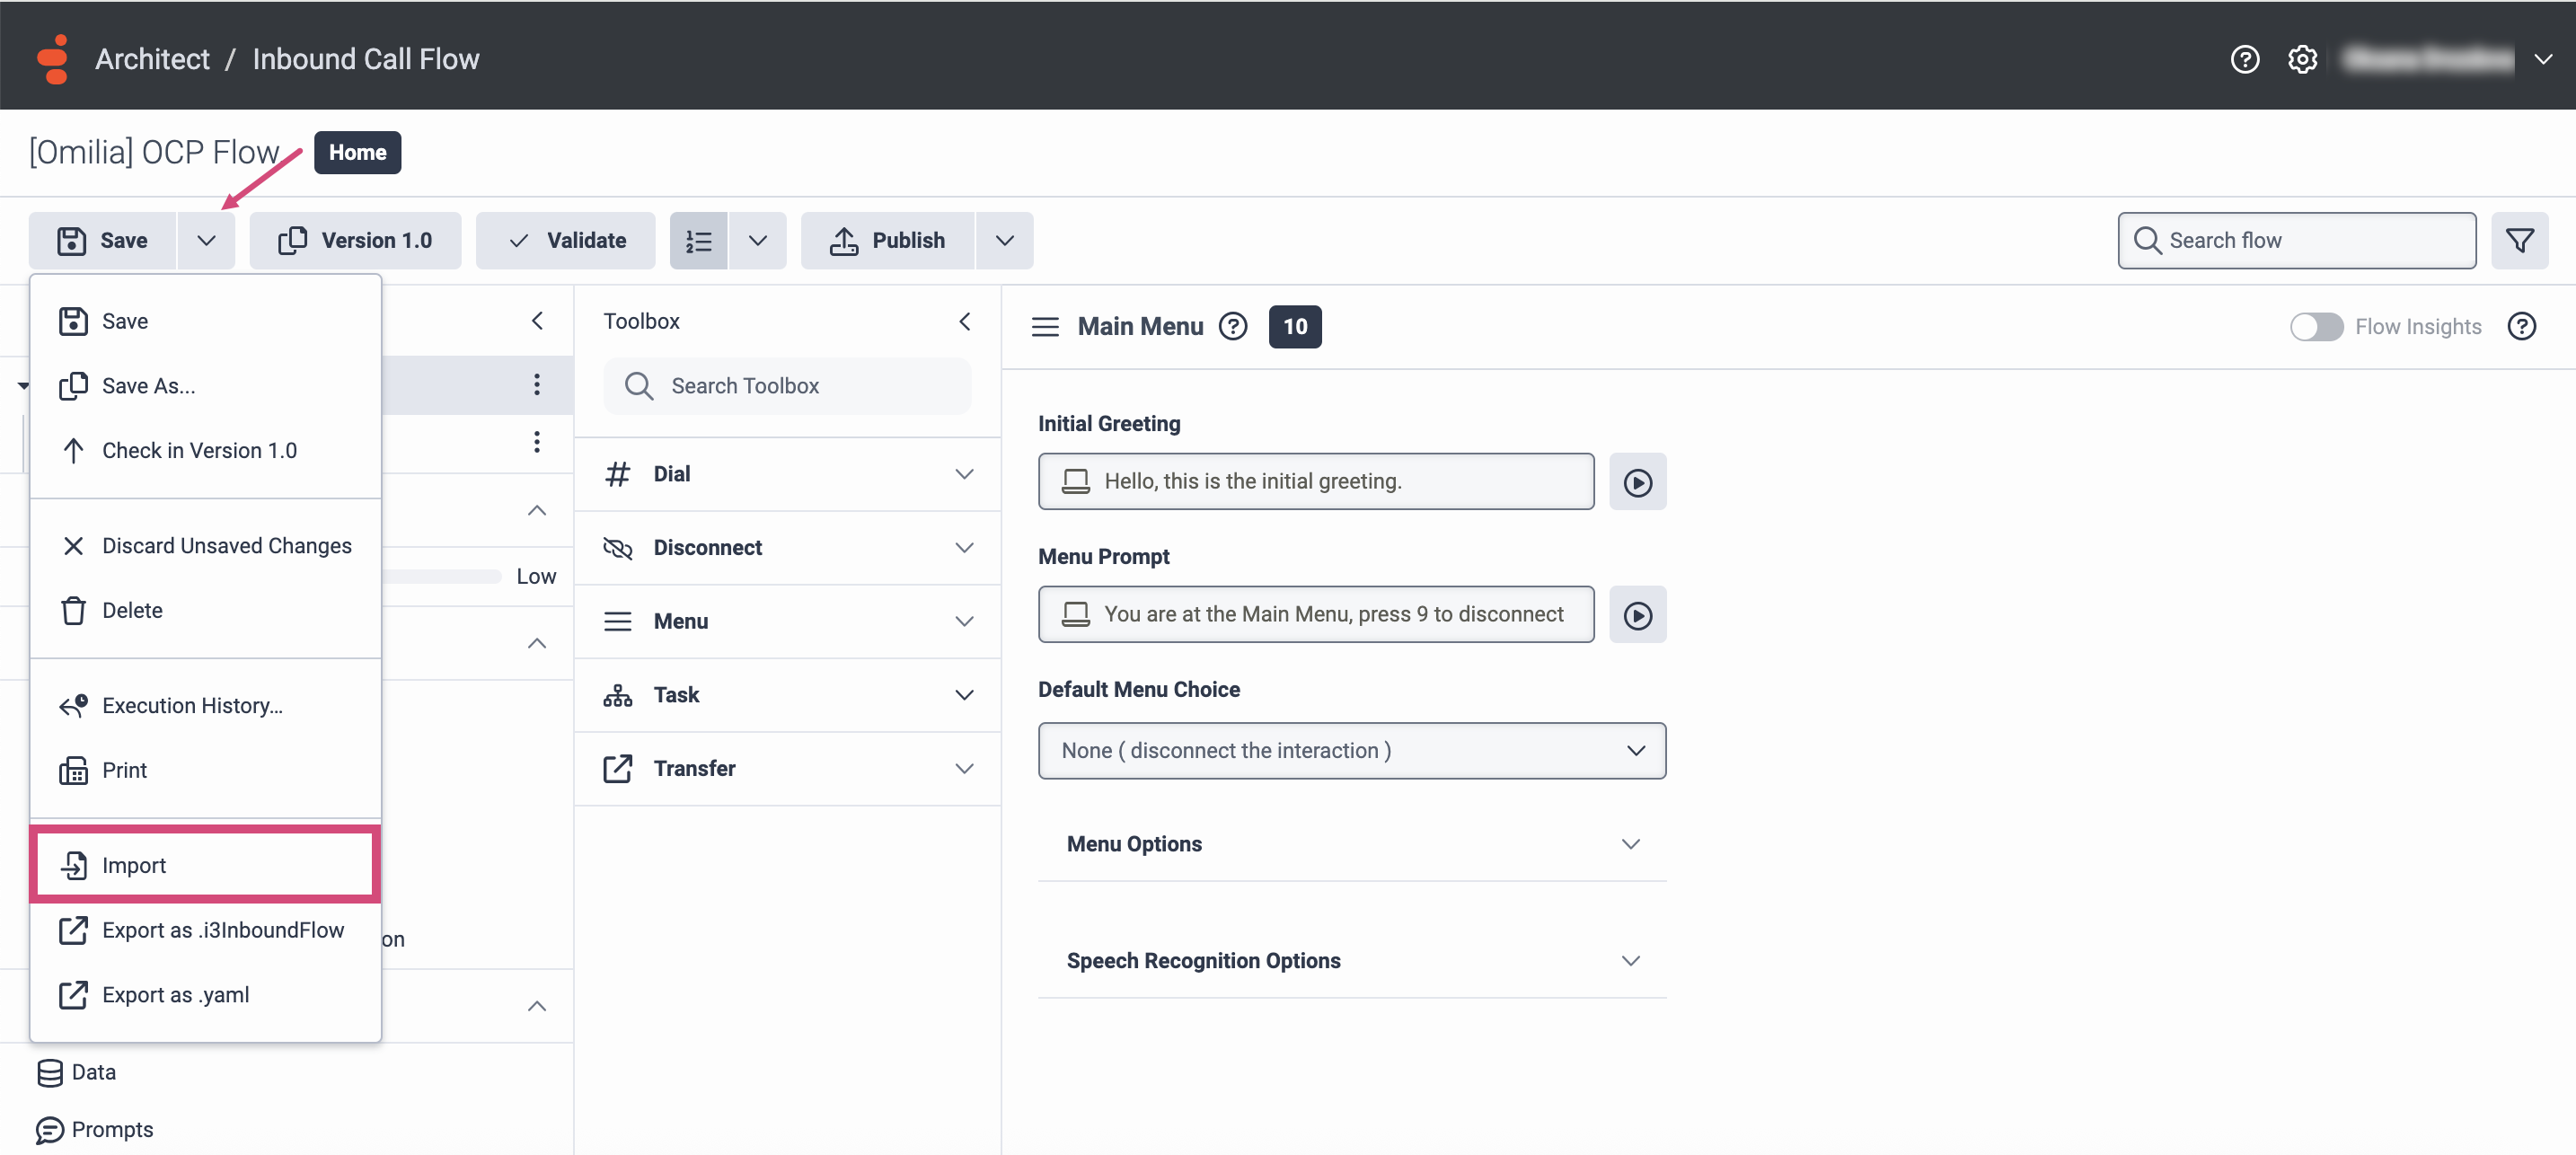
Click the drop-down Arrow near the Save button and select Import.
-
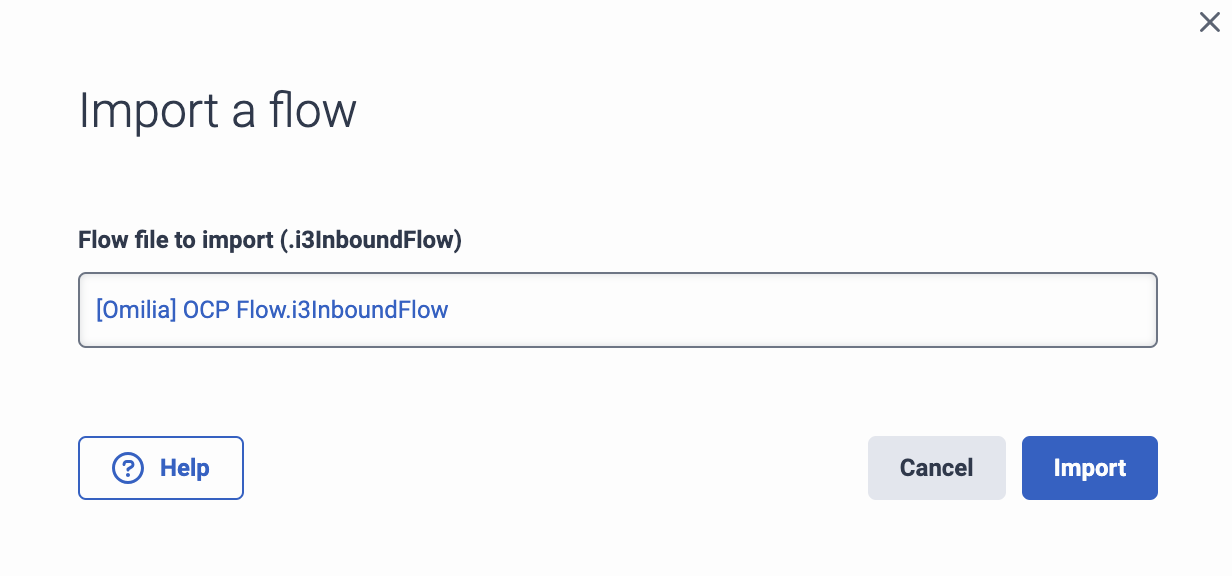
In the dialog box that opens next, upload the Flow template that you have previously downloaded.
-
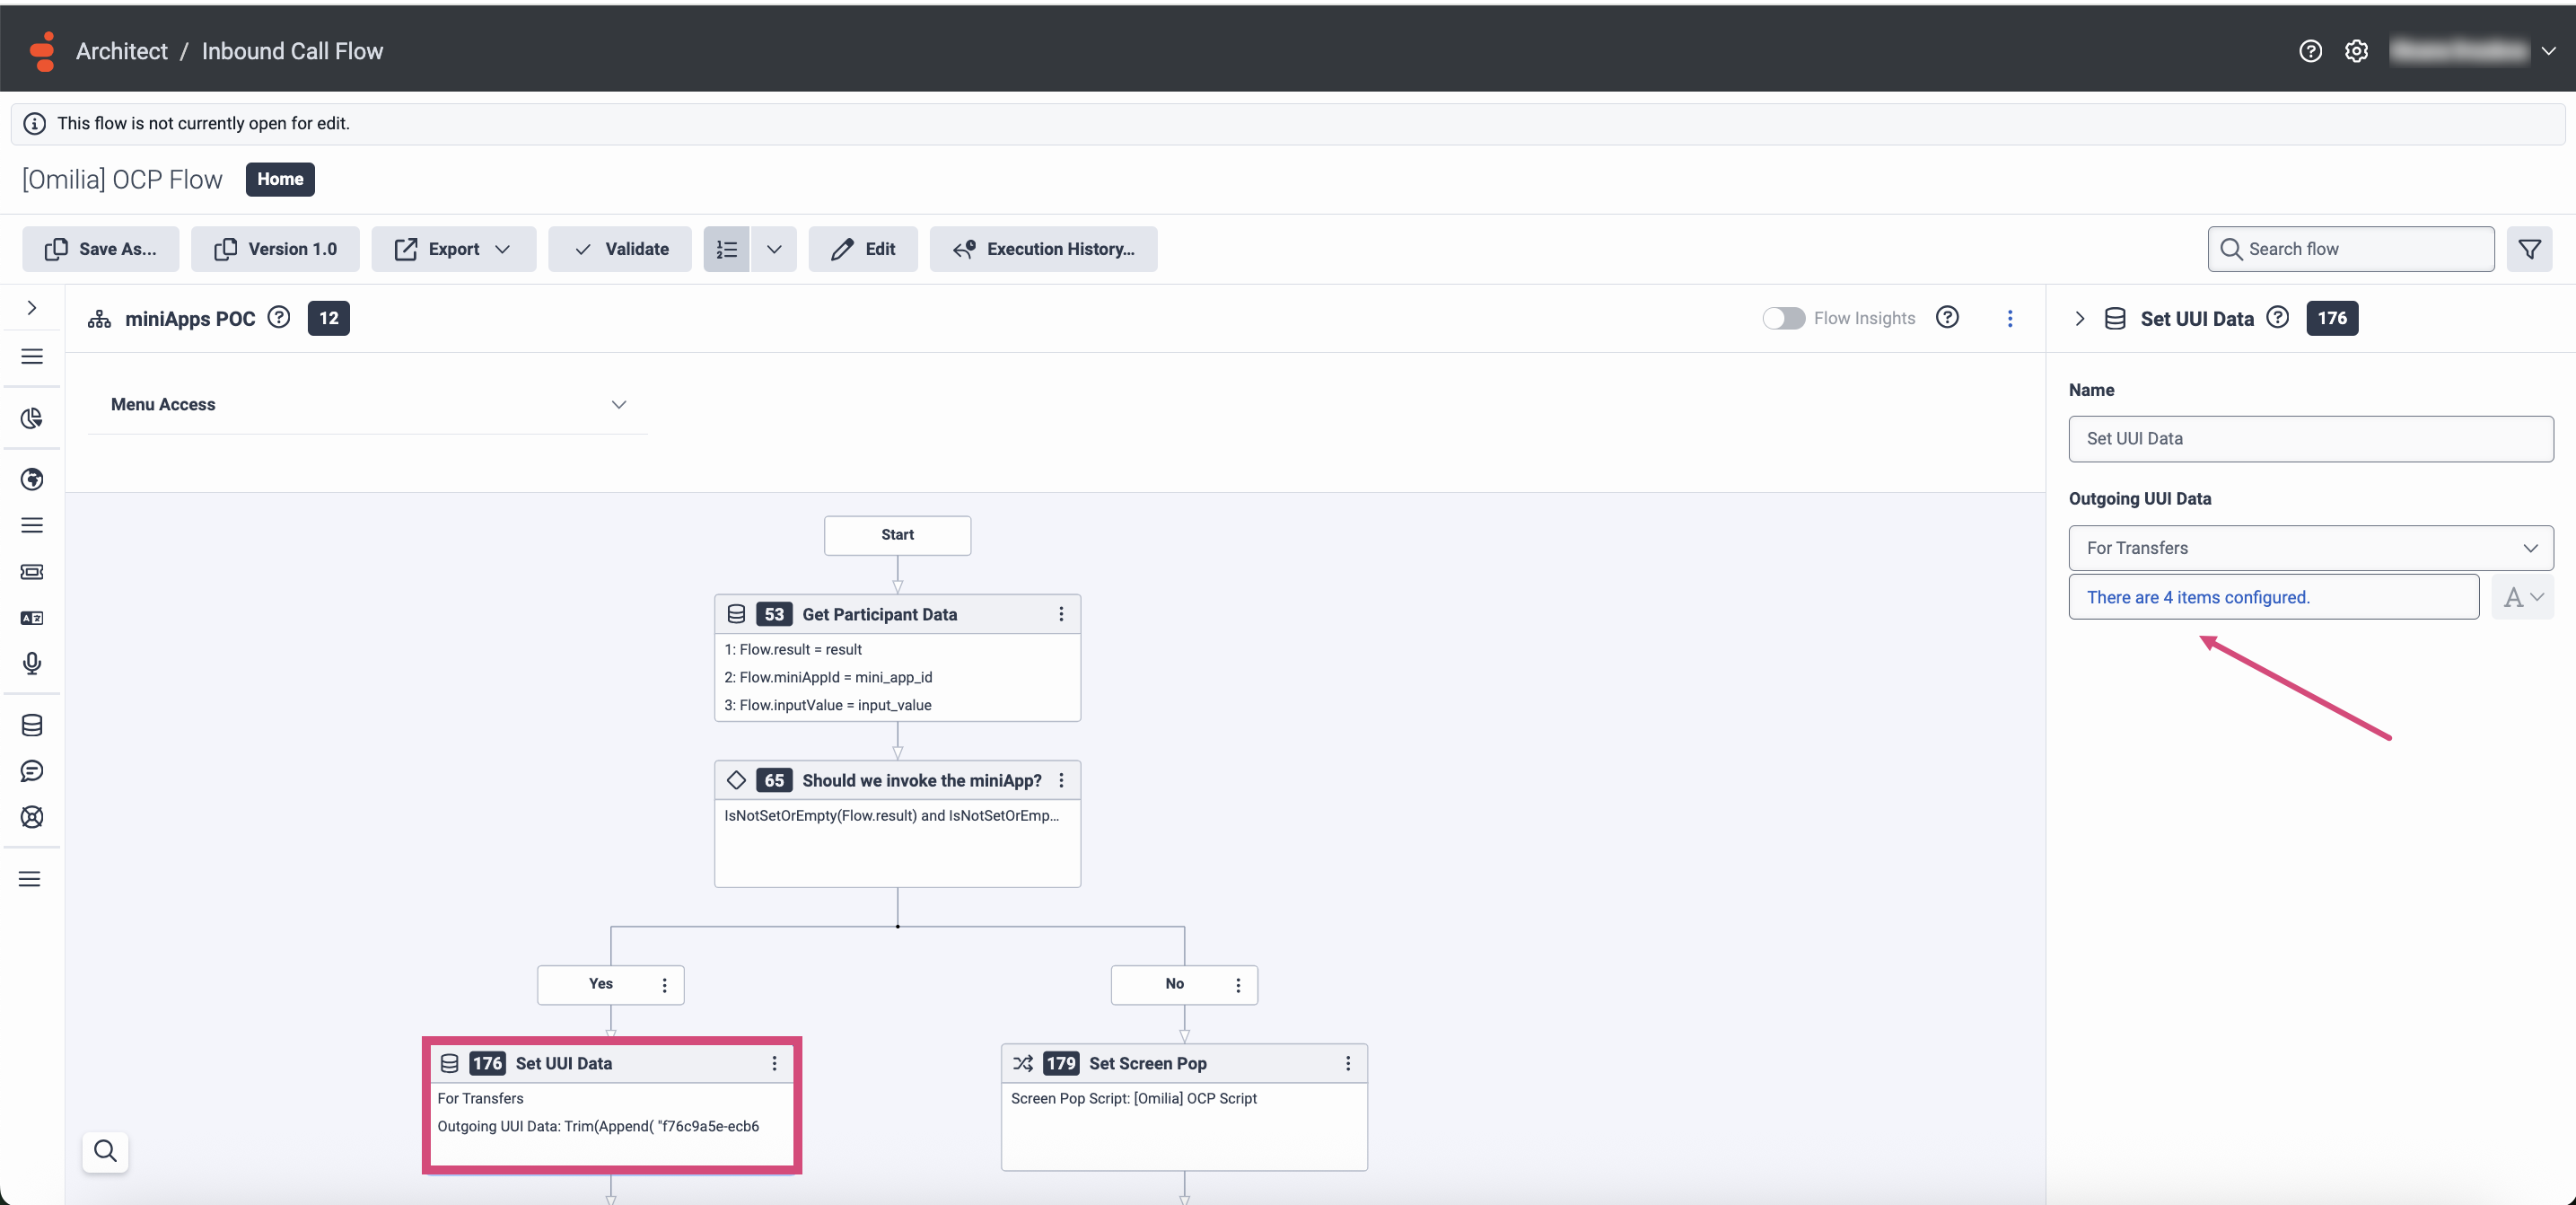
Once the flow is uploaded, navigate to the Starting Menu tab → Main Menu and select miniApps POC. The imported flow will open, and two components (a script and a queue) will appear as missing.
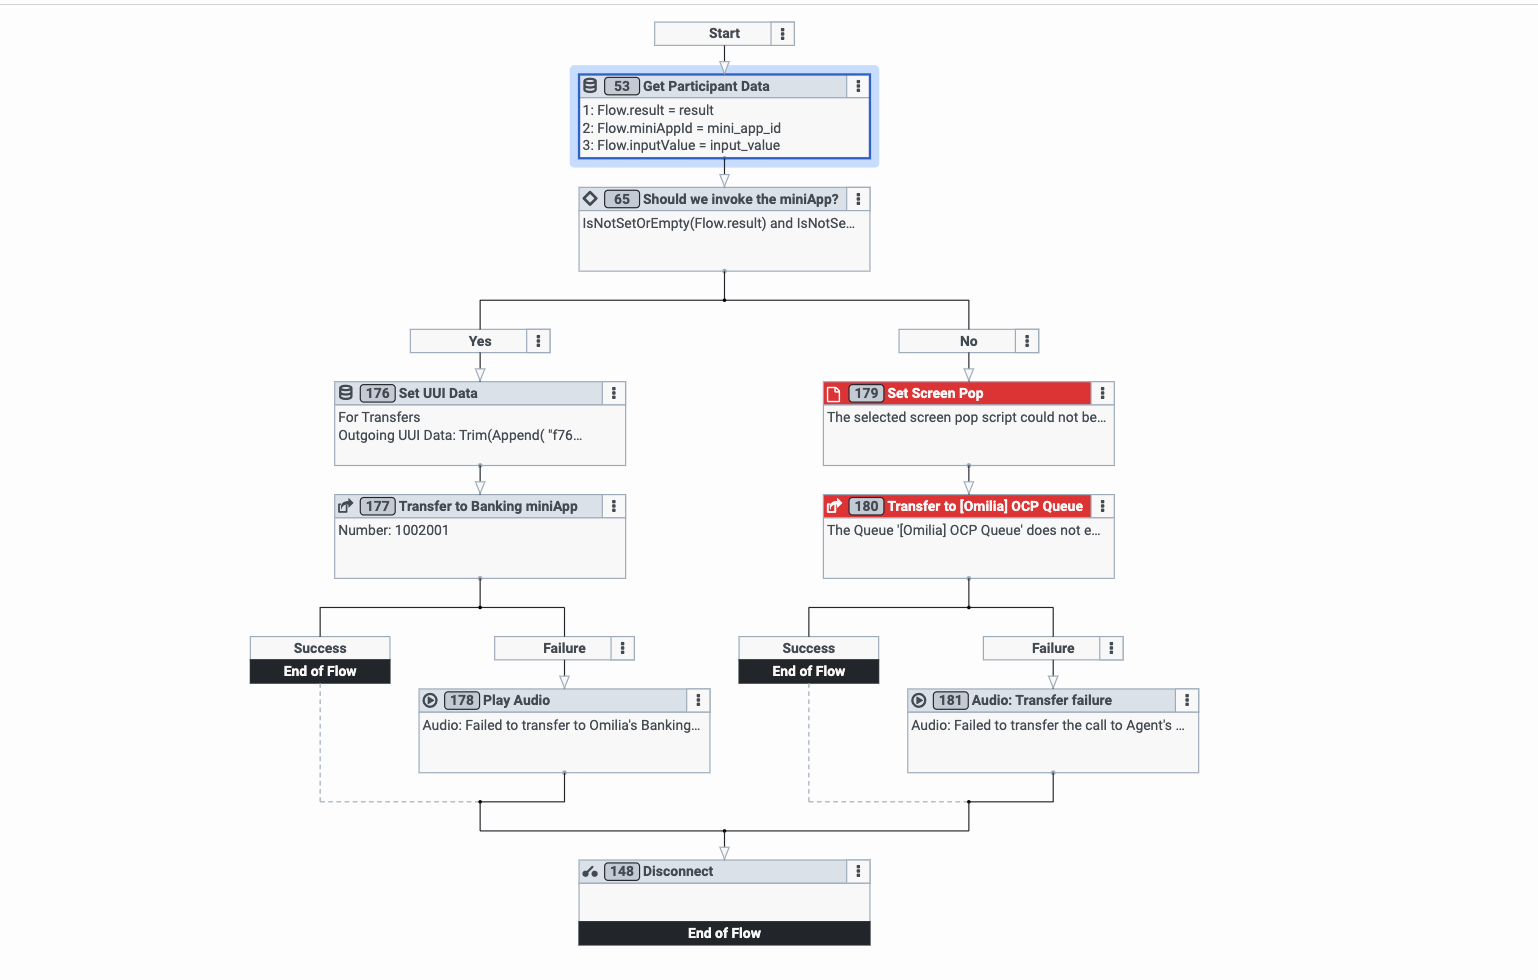
Set UUI Data
Next, you have to update the ID of the miniApp where the flow is transferred. To do this, follow the instructions below:
-
Click on the Set UUI Data action, and then click on the There are 4 items configured setting in the right-side corner.
-
In the dialog box that opens, fill in the fields as described below:
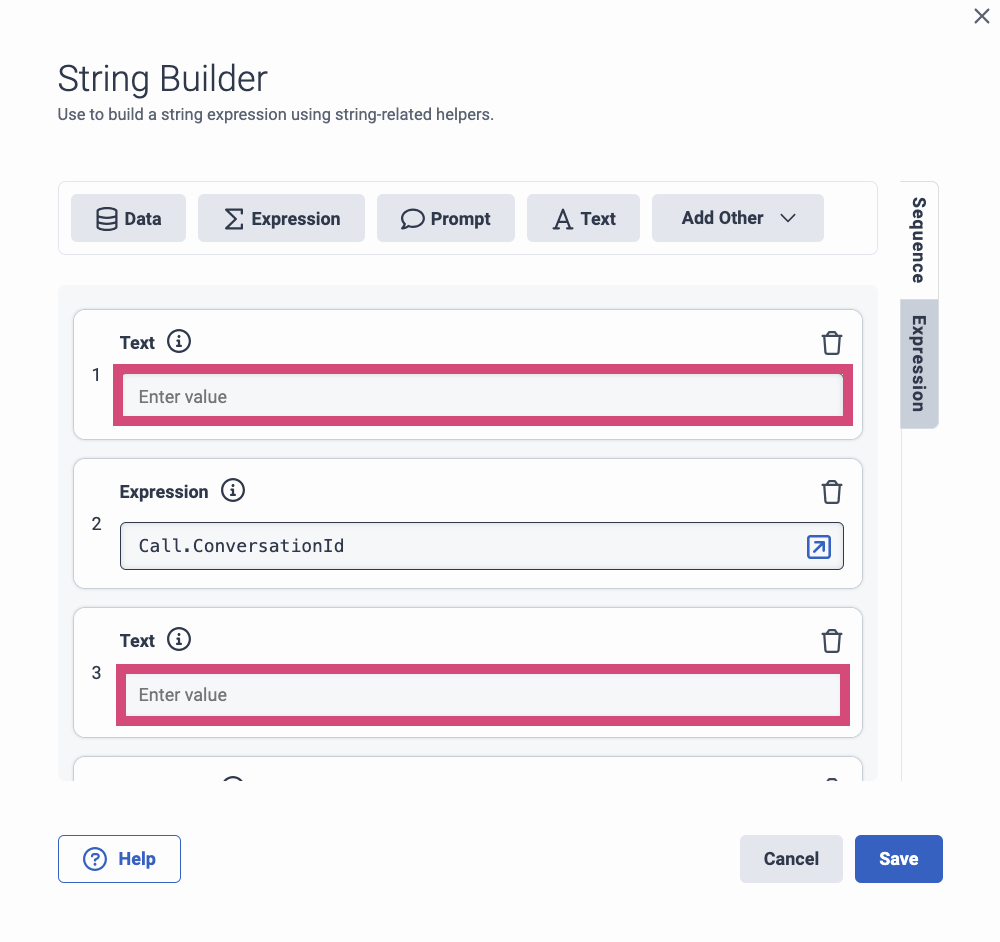
-

-

-

-
To add multiple key-value pair, use a comma separator.
-
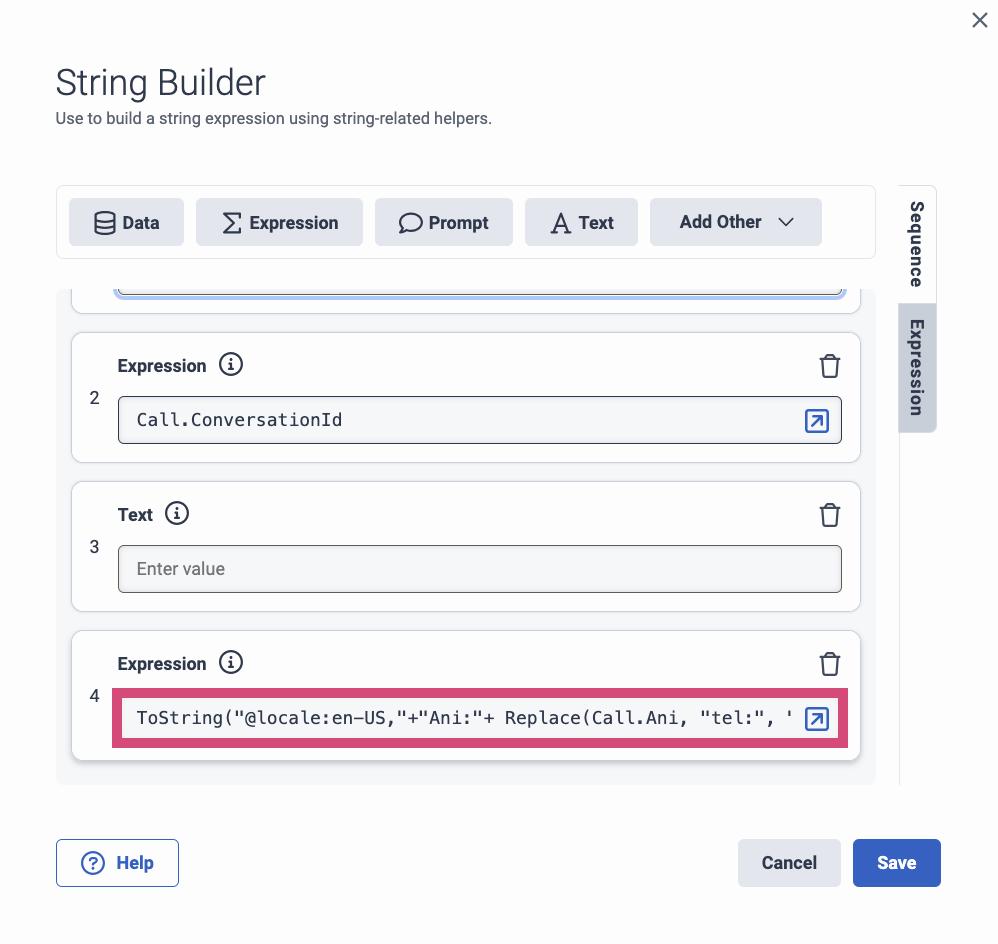
In case the ANI and DNIS do not appear on the SIP headers, use the following syntax to add them:
ToString("@locale:en-US,"+"Ani:"+ Replace(Call.Ani, "tel:", "") + "," +"Dnis:"+ Call.CalledAddressOriginal)
-
Click Save.
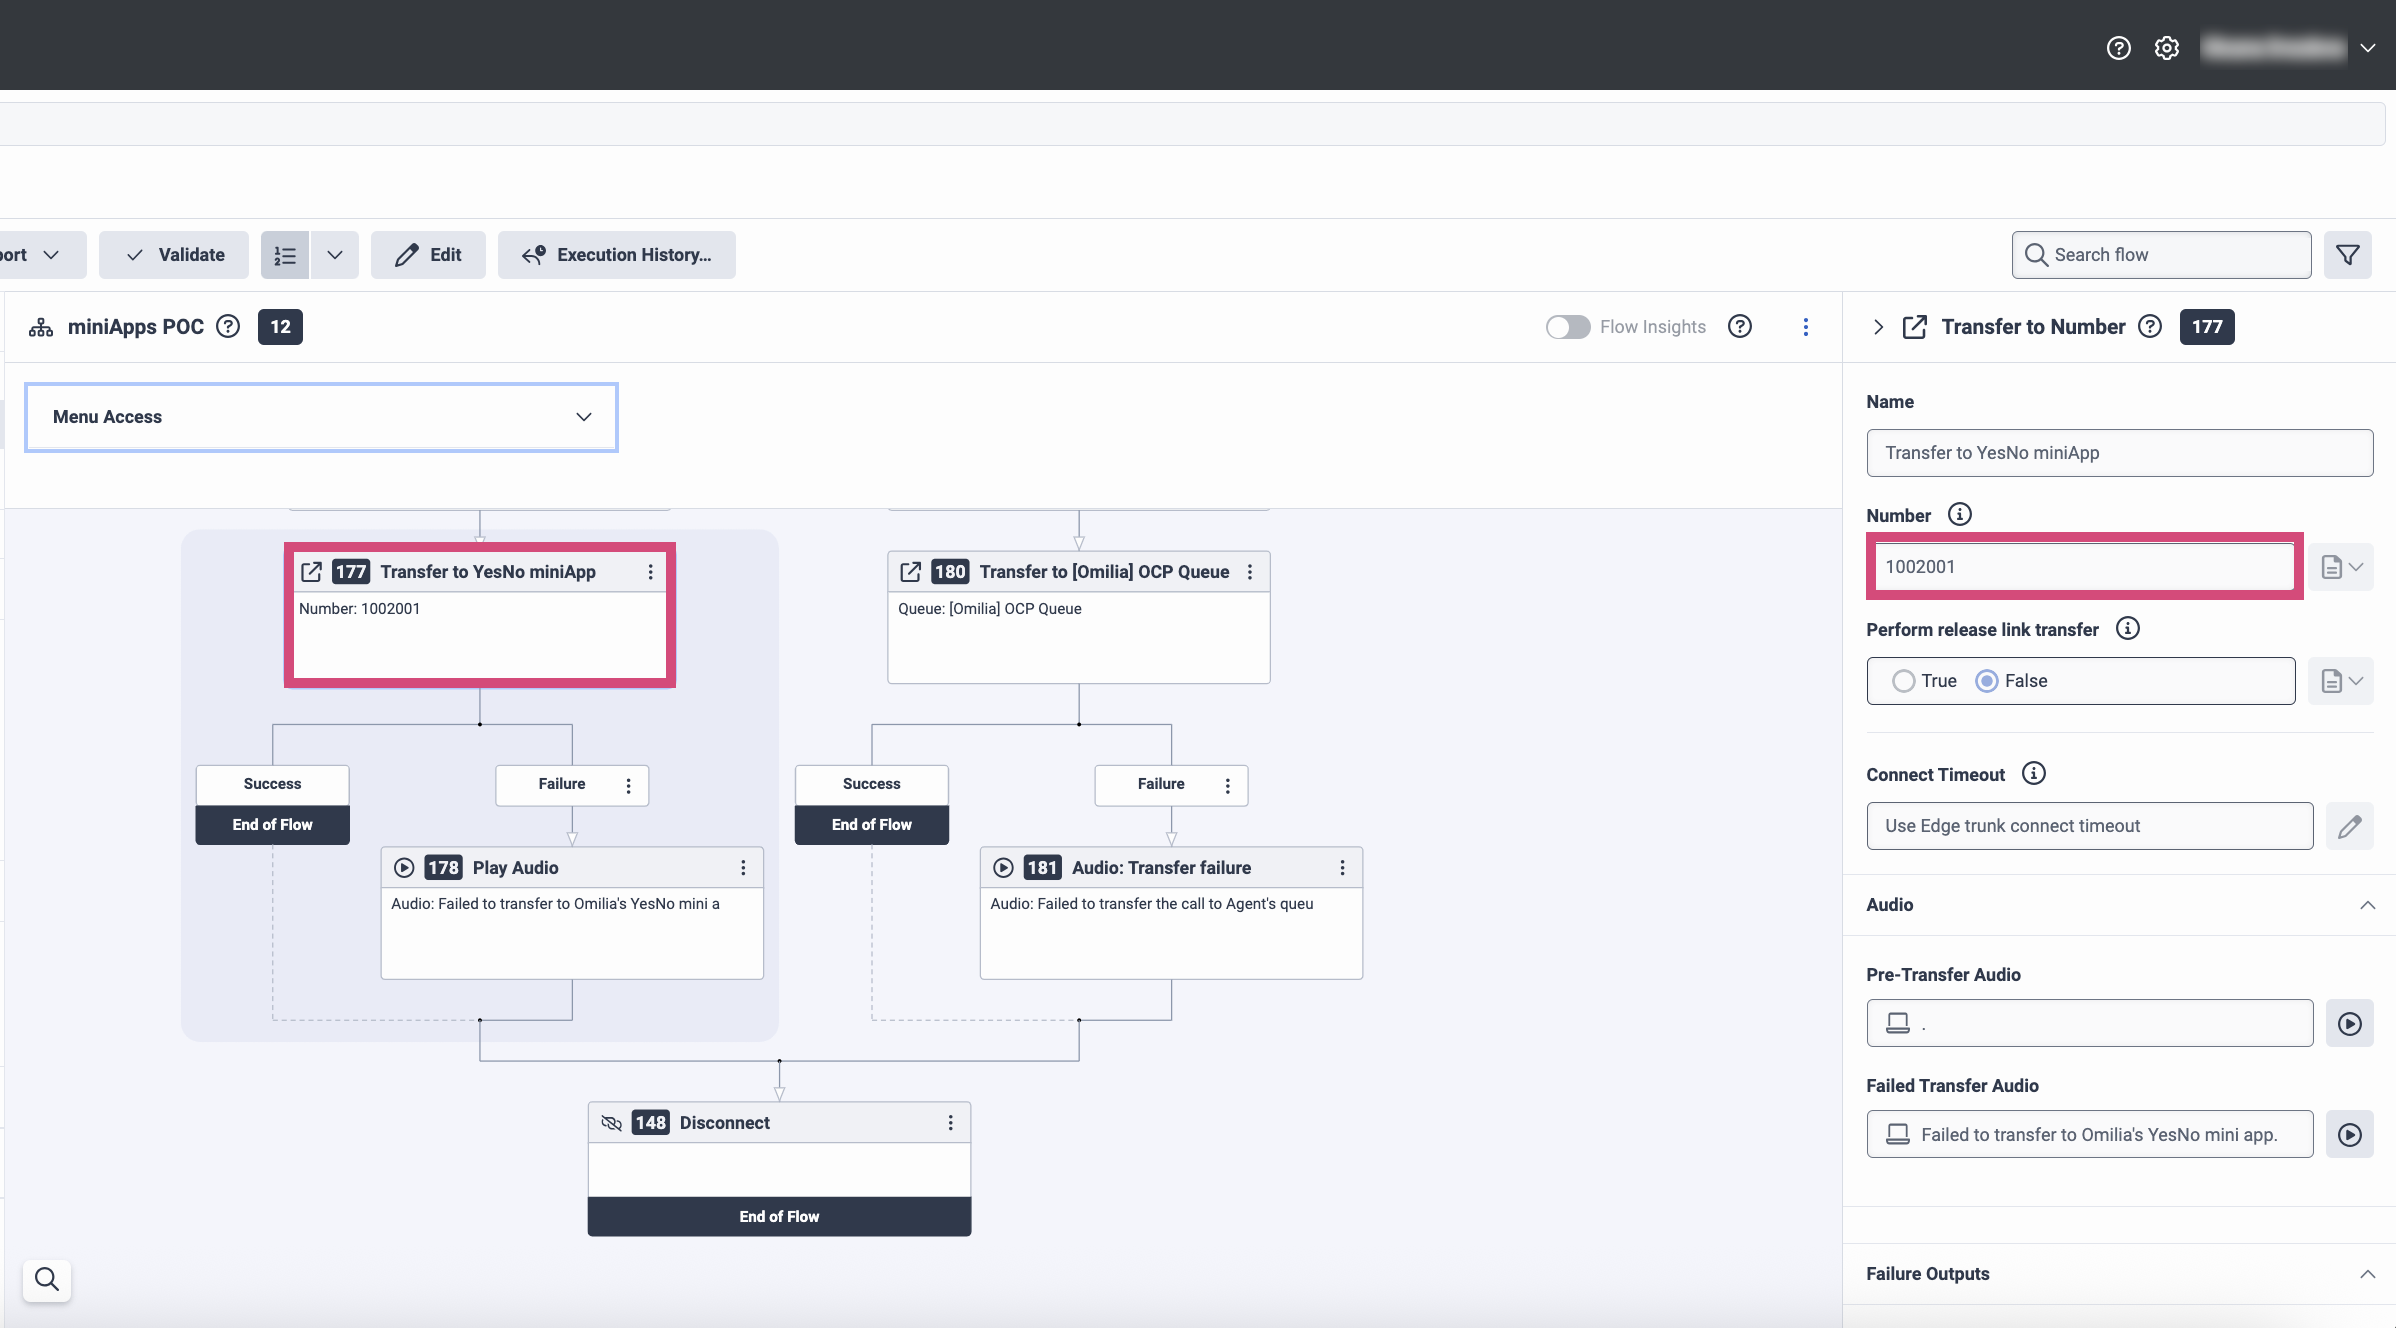
Configure Transfer to YesNo miniApp
As the next step, you need configure Transfer to YesNo miniApp. To do so, proceed as follows:
-
Click on the Transfer to YesNo miniApp action and set the Number value to 1002001 for US1 (in customer projects this may differ).
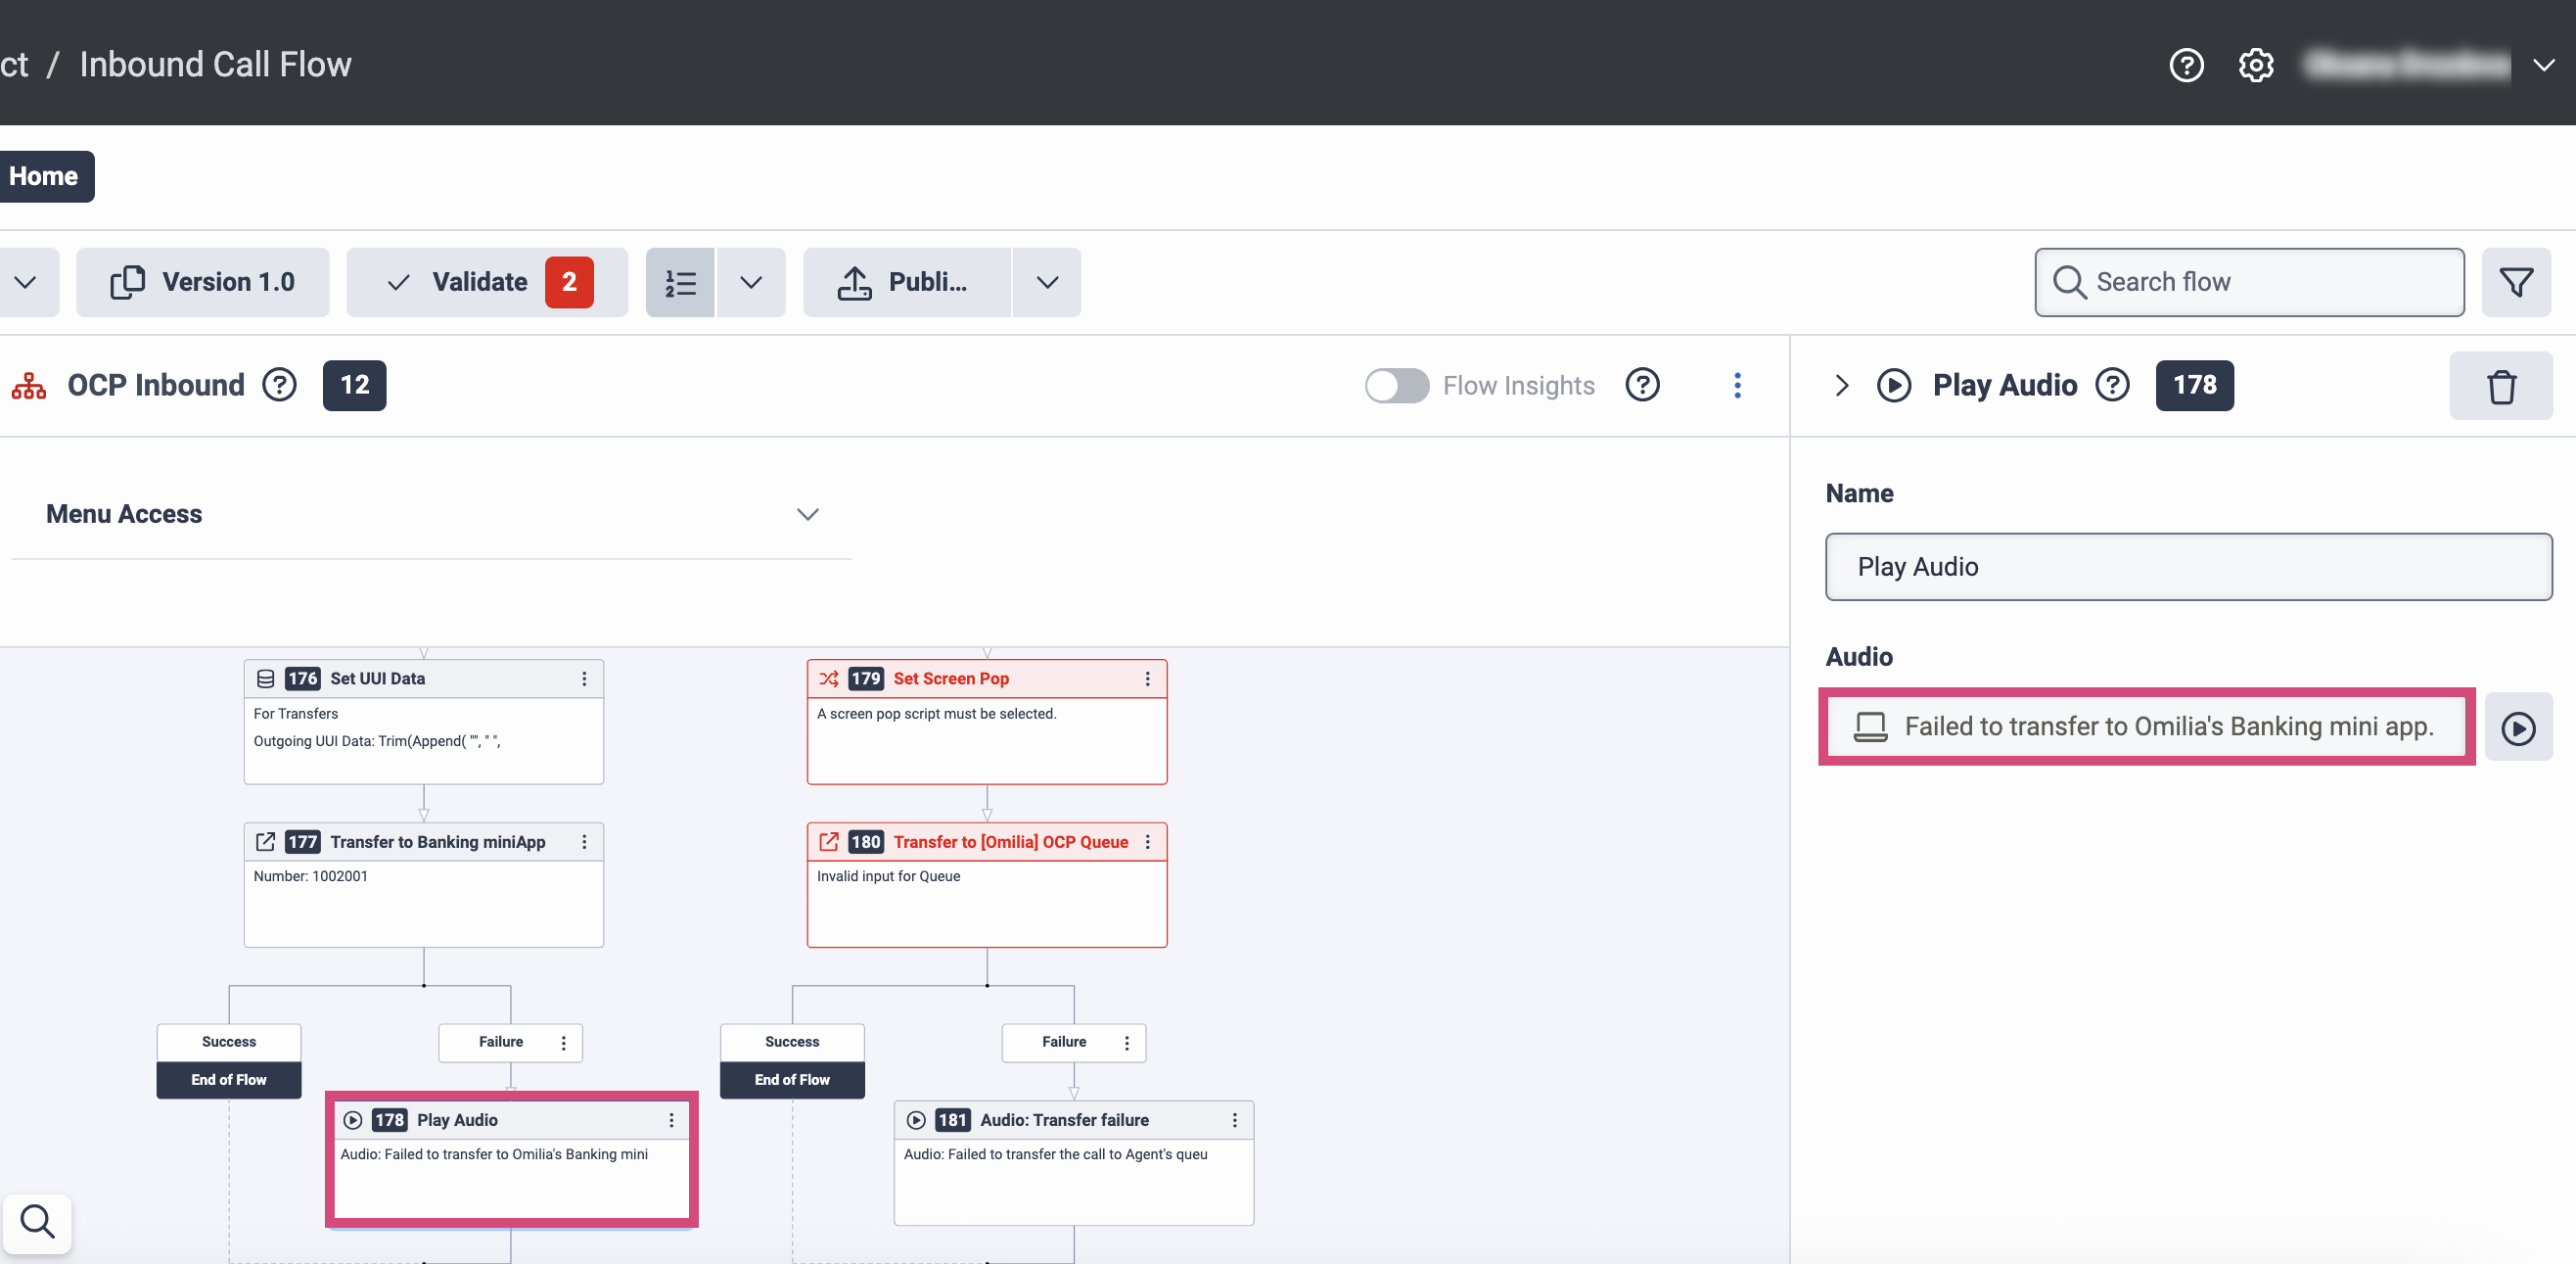
Play Audio
As the next step, configure the audio output that will be playing during a failure. To do so, click on the Play Audio action and configure Audio message.
Configure Set Screen Pop
To configure the Set Screen Pop action, click on the Set Screen Pop action and fill in the fields as described below:
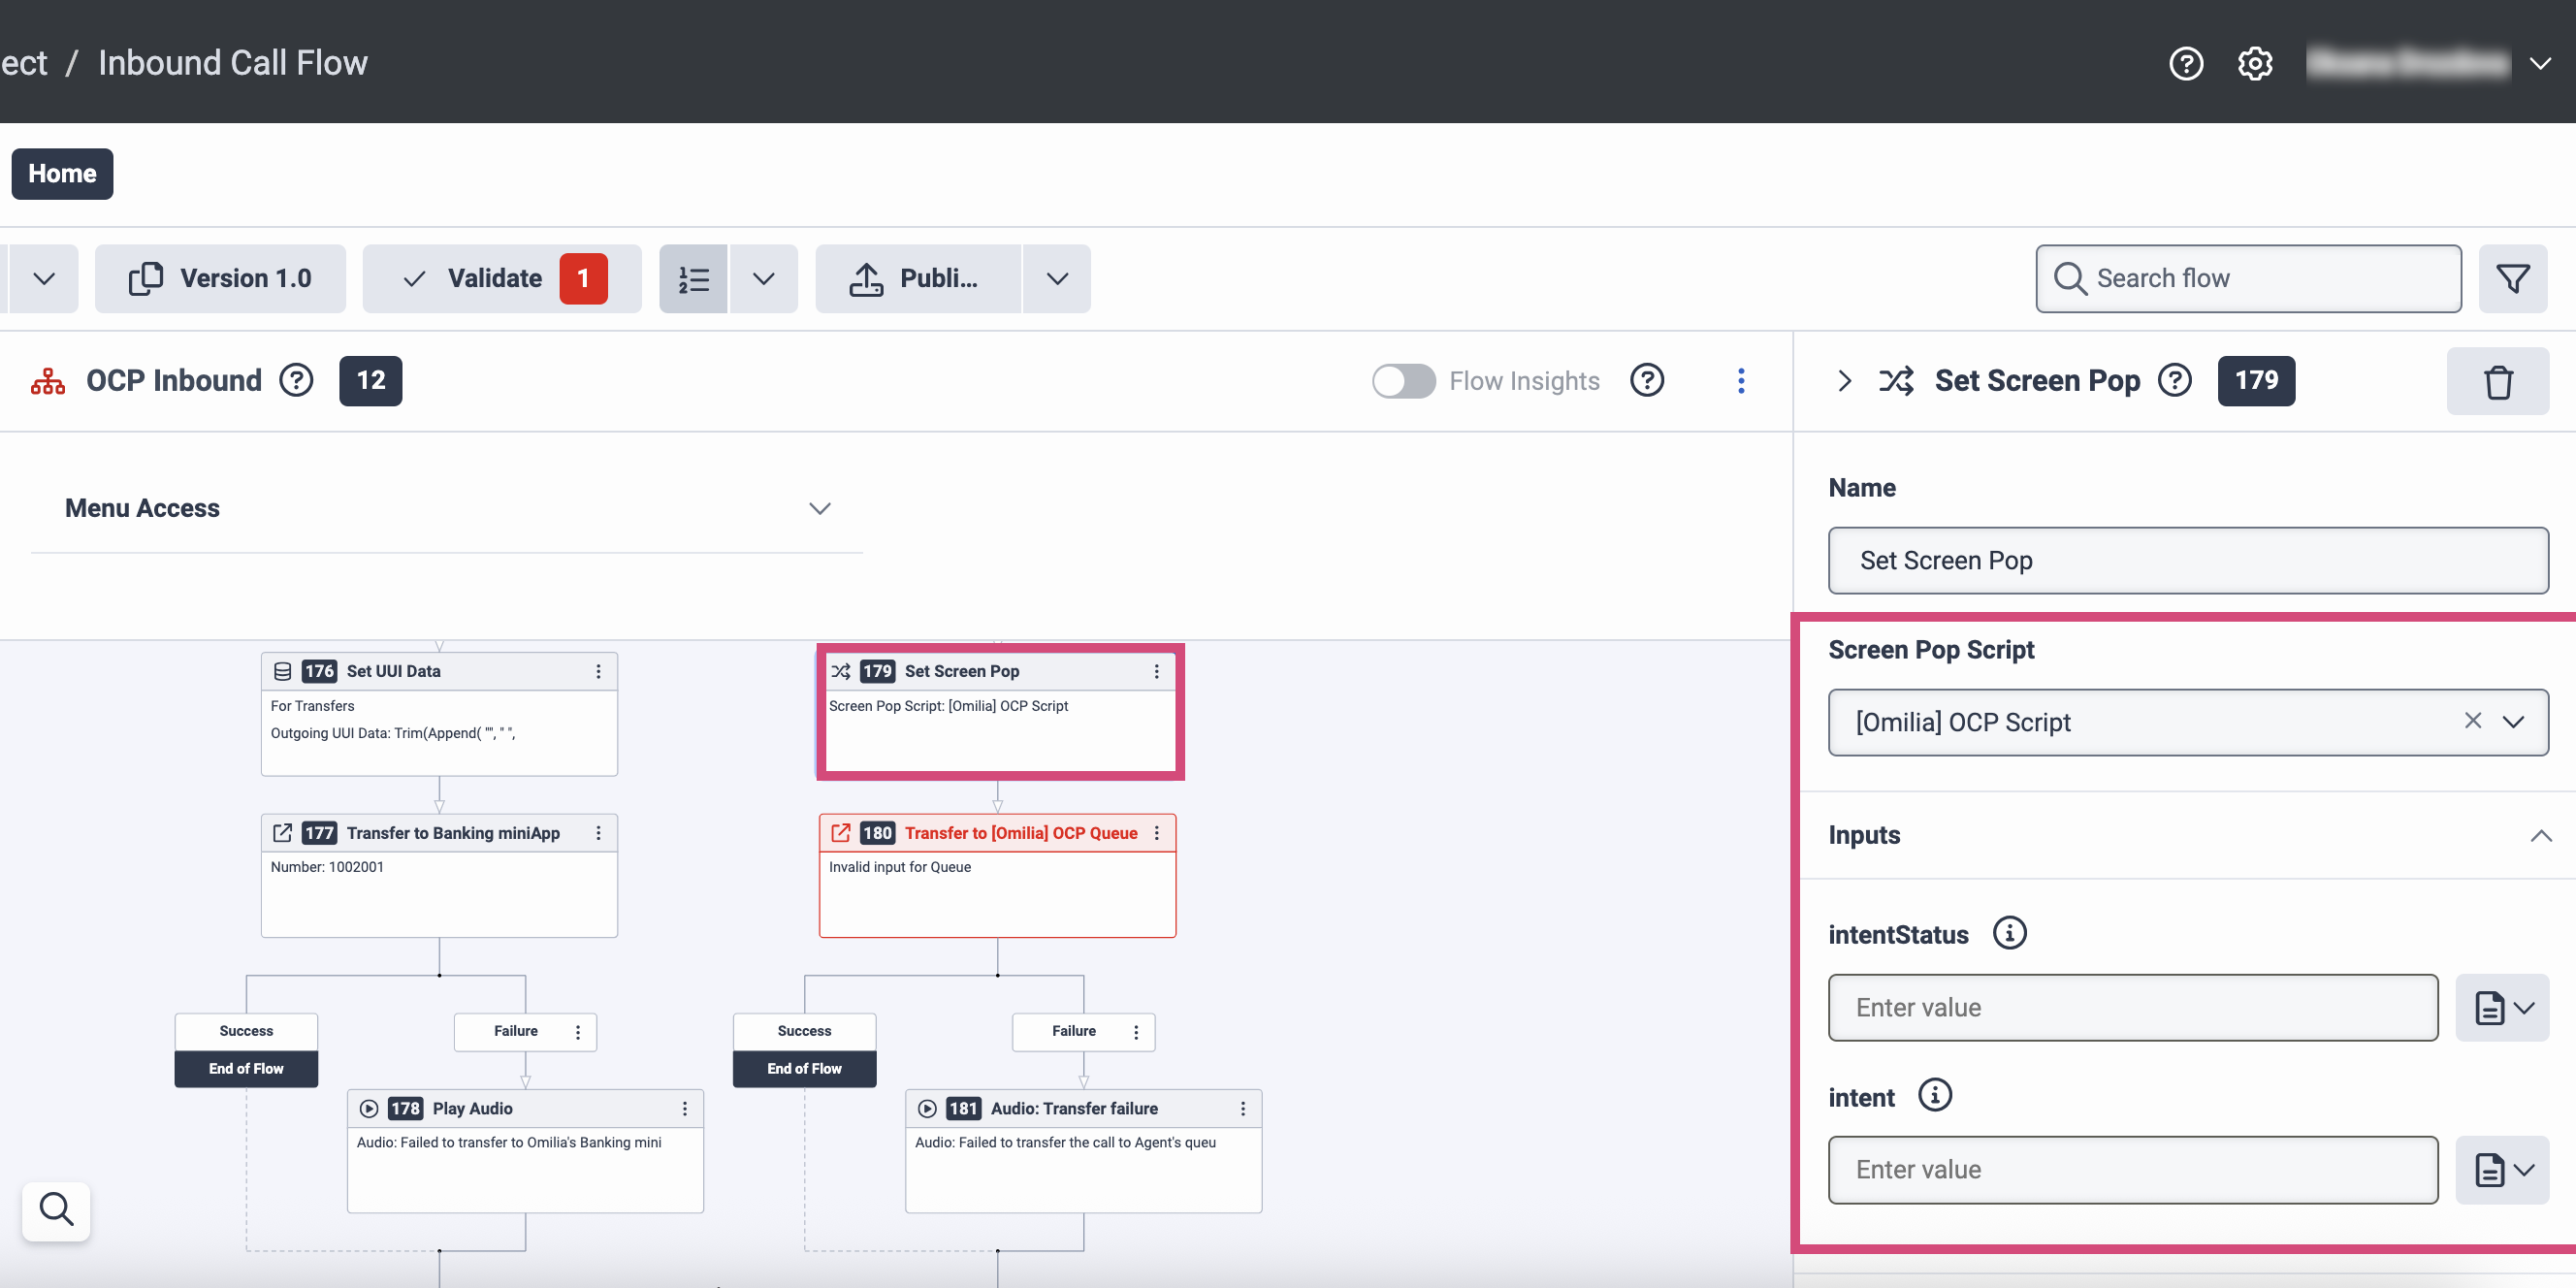
-
Screen Pop Script: Select [Omilia] OCP script from the drop-down list.
-
IntentStatus: Enter Flow.result as an expression.
-
Intent: Enter Flow.inputValue as an expression.

Configure Transfer to [Omilia] OCP Queue
To configure Transfer to [Omilia] OCP Queue, follow the steps below:
-
Click on the Transfer to [Omilia] OCP Queue action and fill in the fields as described below:
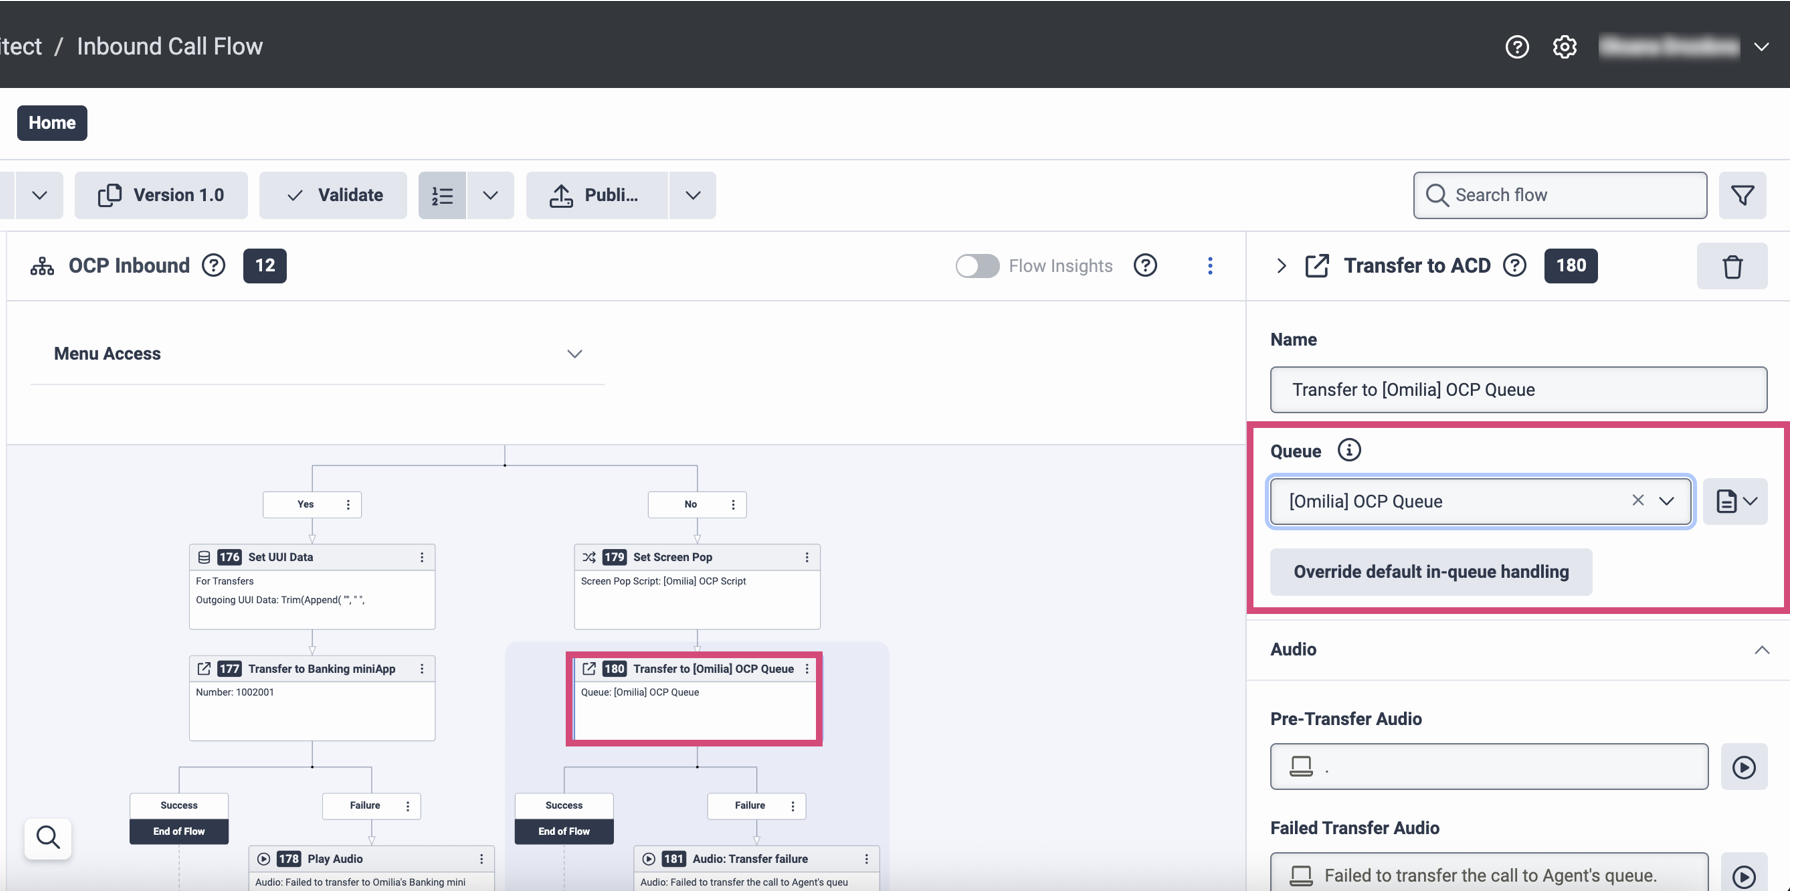
-
Queue: Select [Omilia] OCP Queue from the drop-down list.
-
Click Validate.
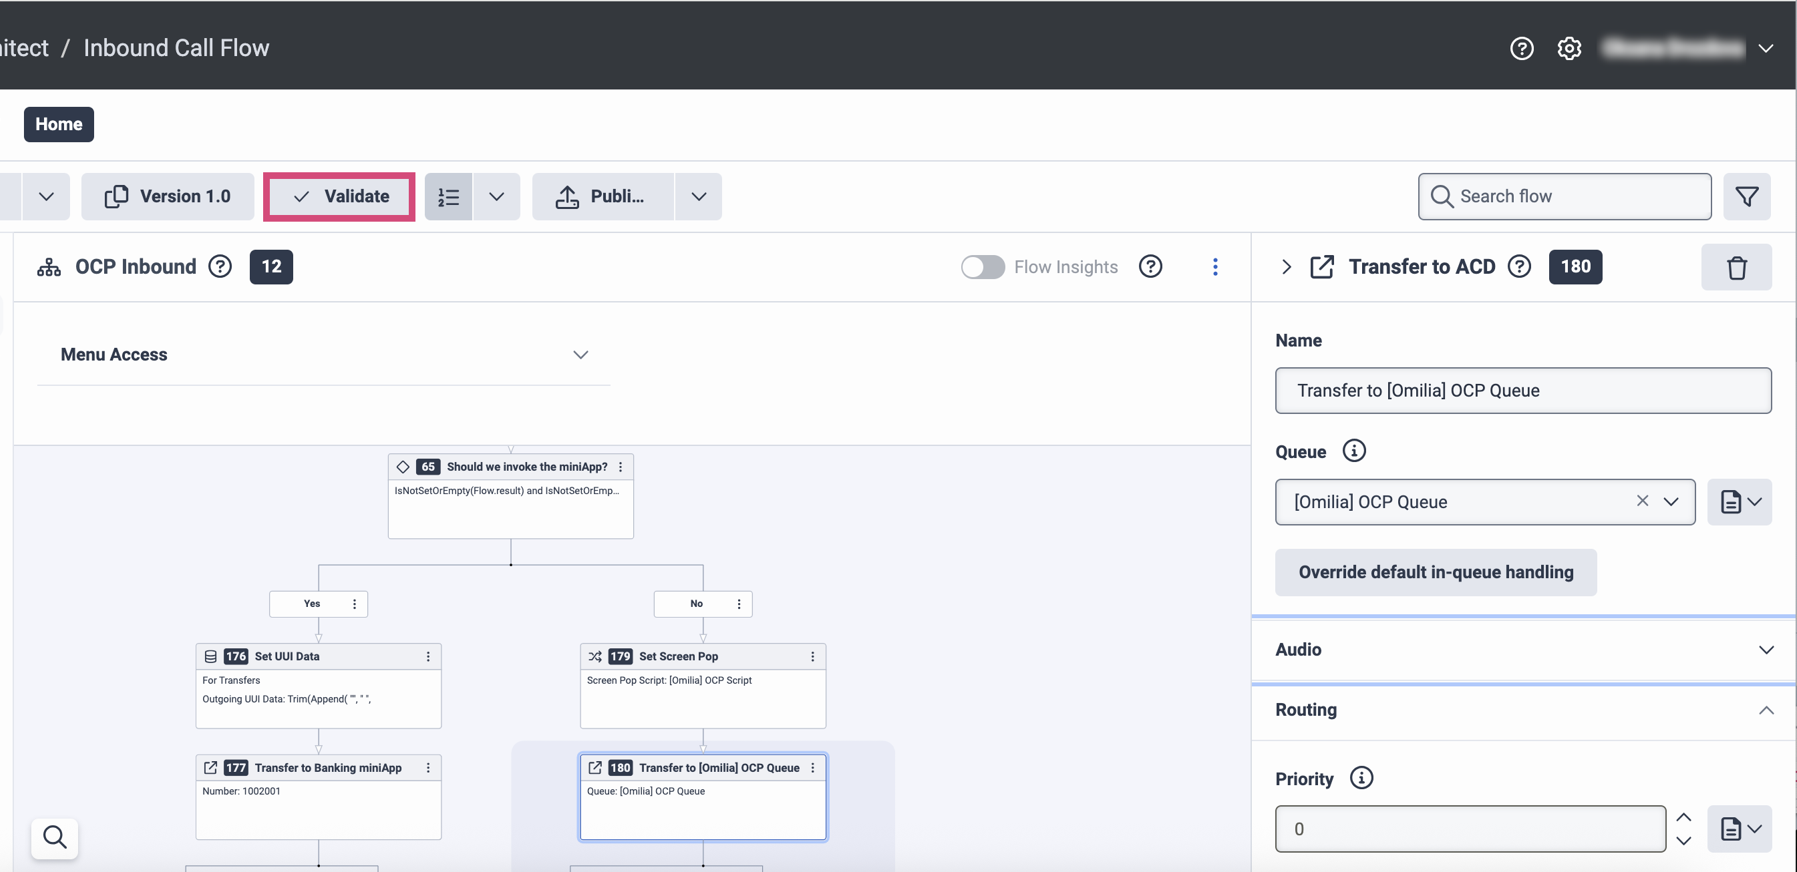
-
Click Save, then click Publish.

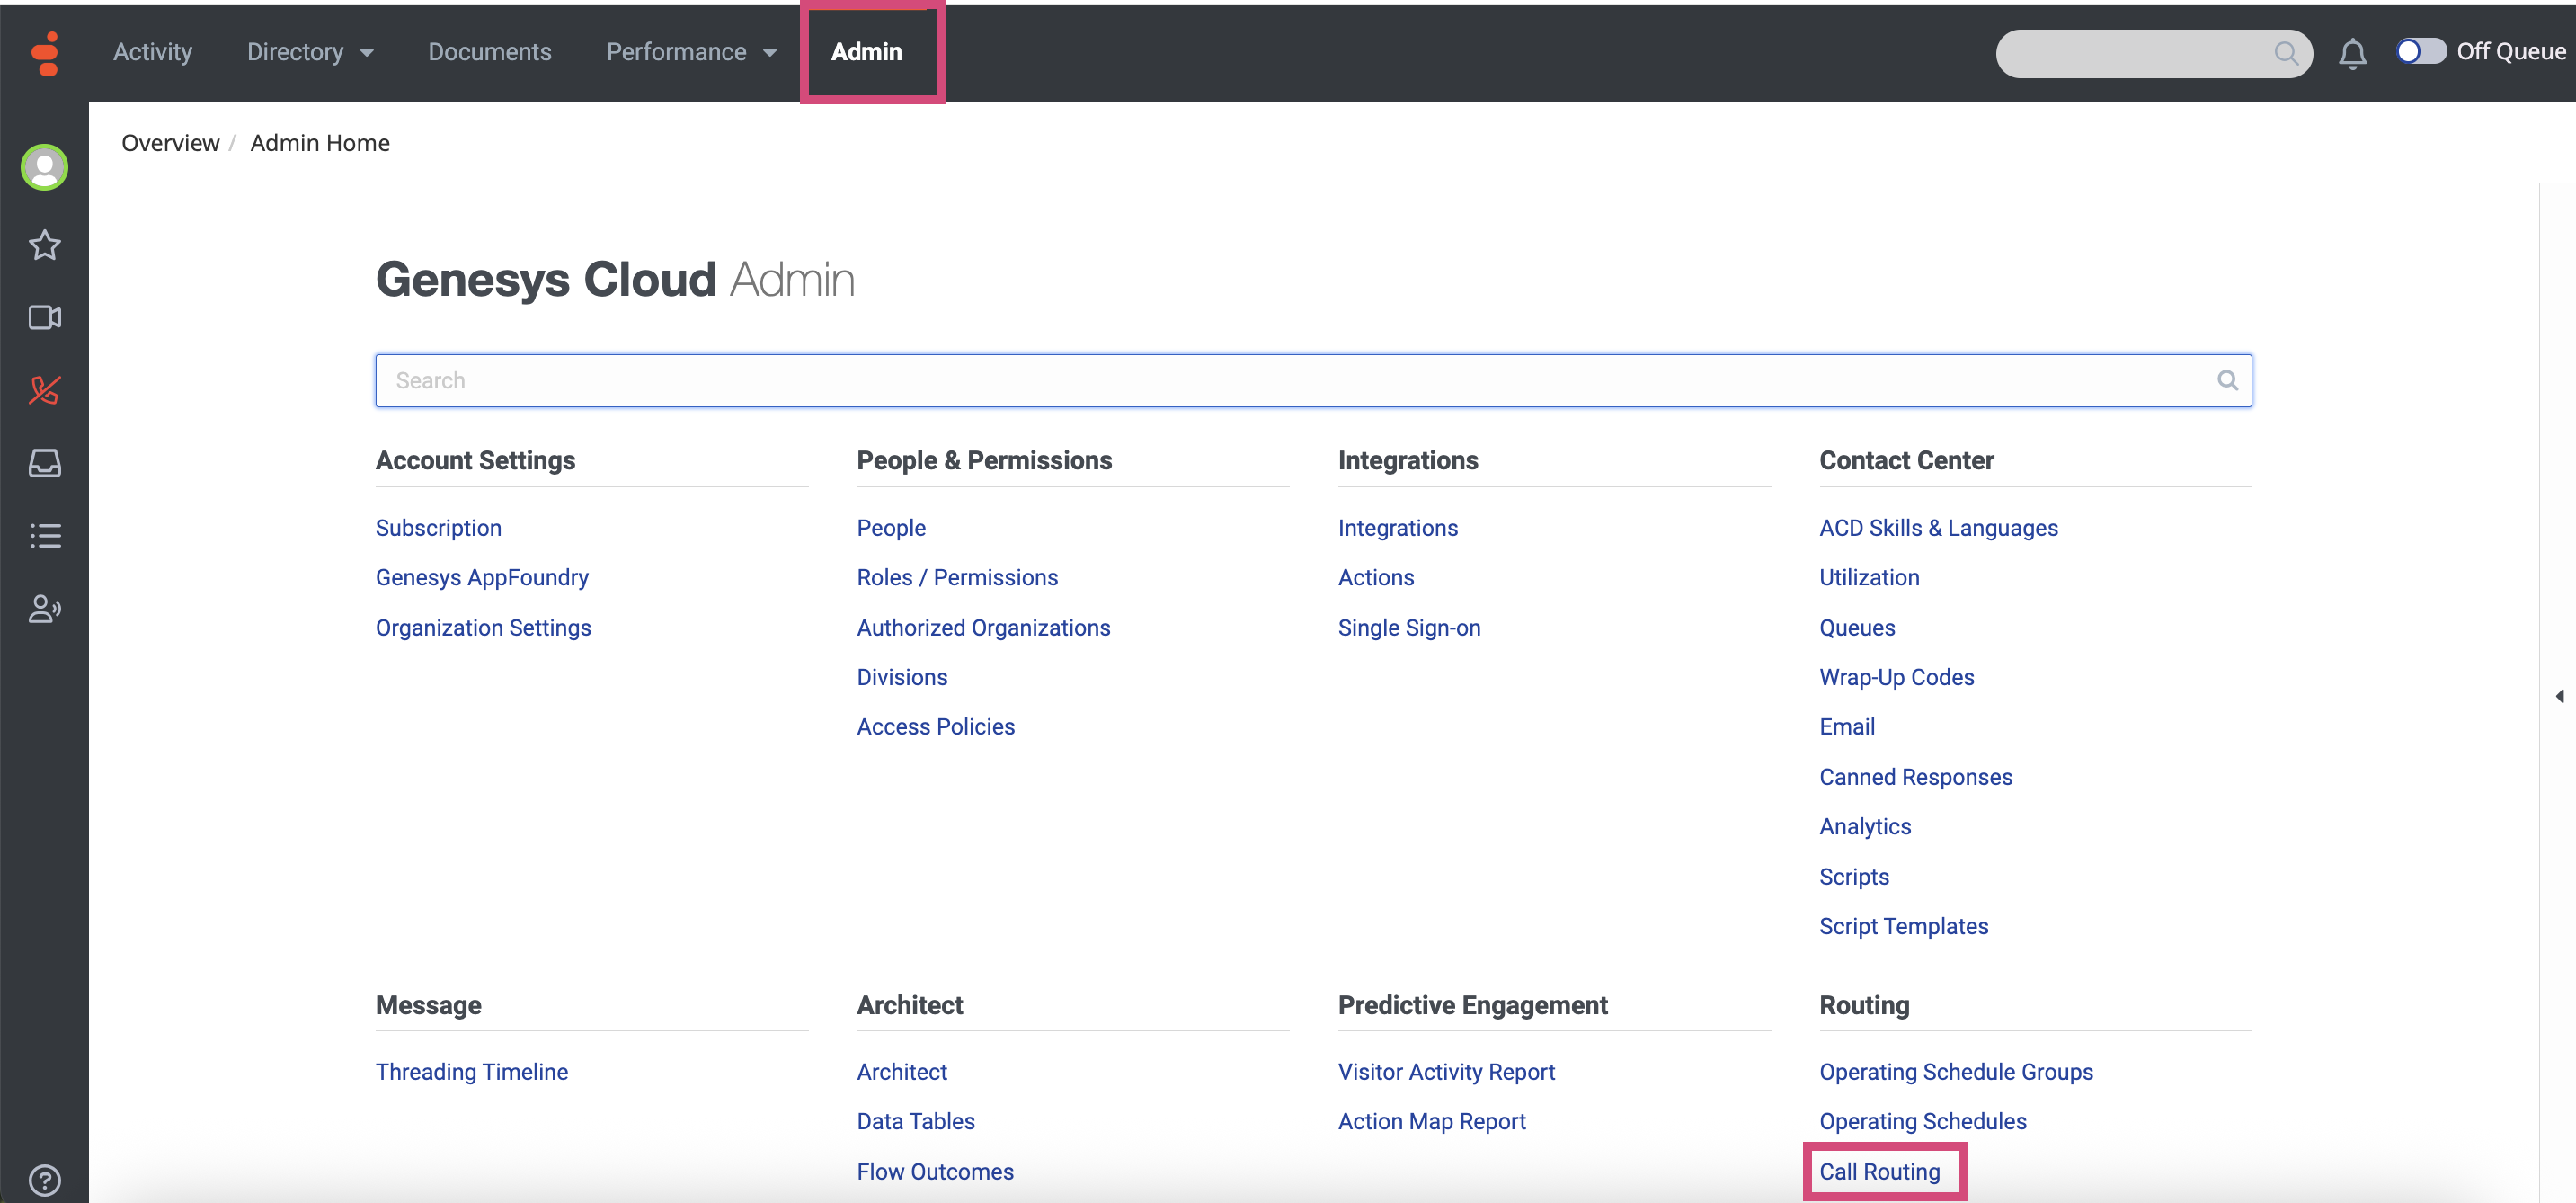
Step 8. Create Your Genesys Cloud Call Routing
At this step, you need to configure a Call routing that establishes the connection between the phone number and the flow. To create the required Call Routing setup, follow the guidelines below:
-
Navigate to the Admin tab and select Routing → Call Routing.
-
Click the +Add button.
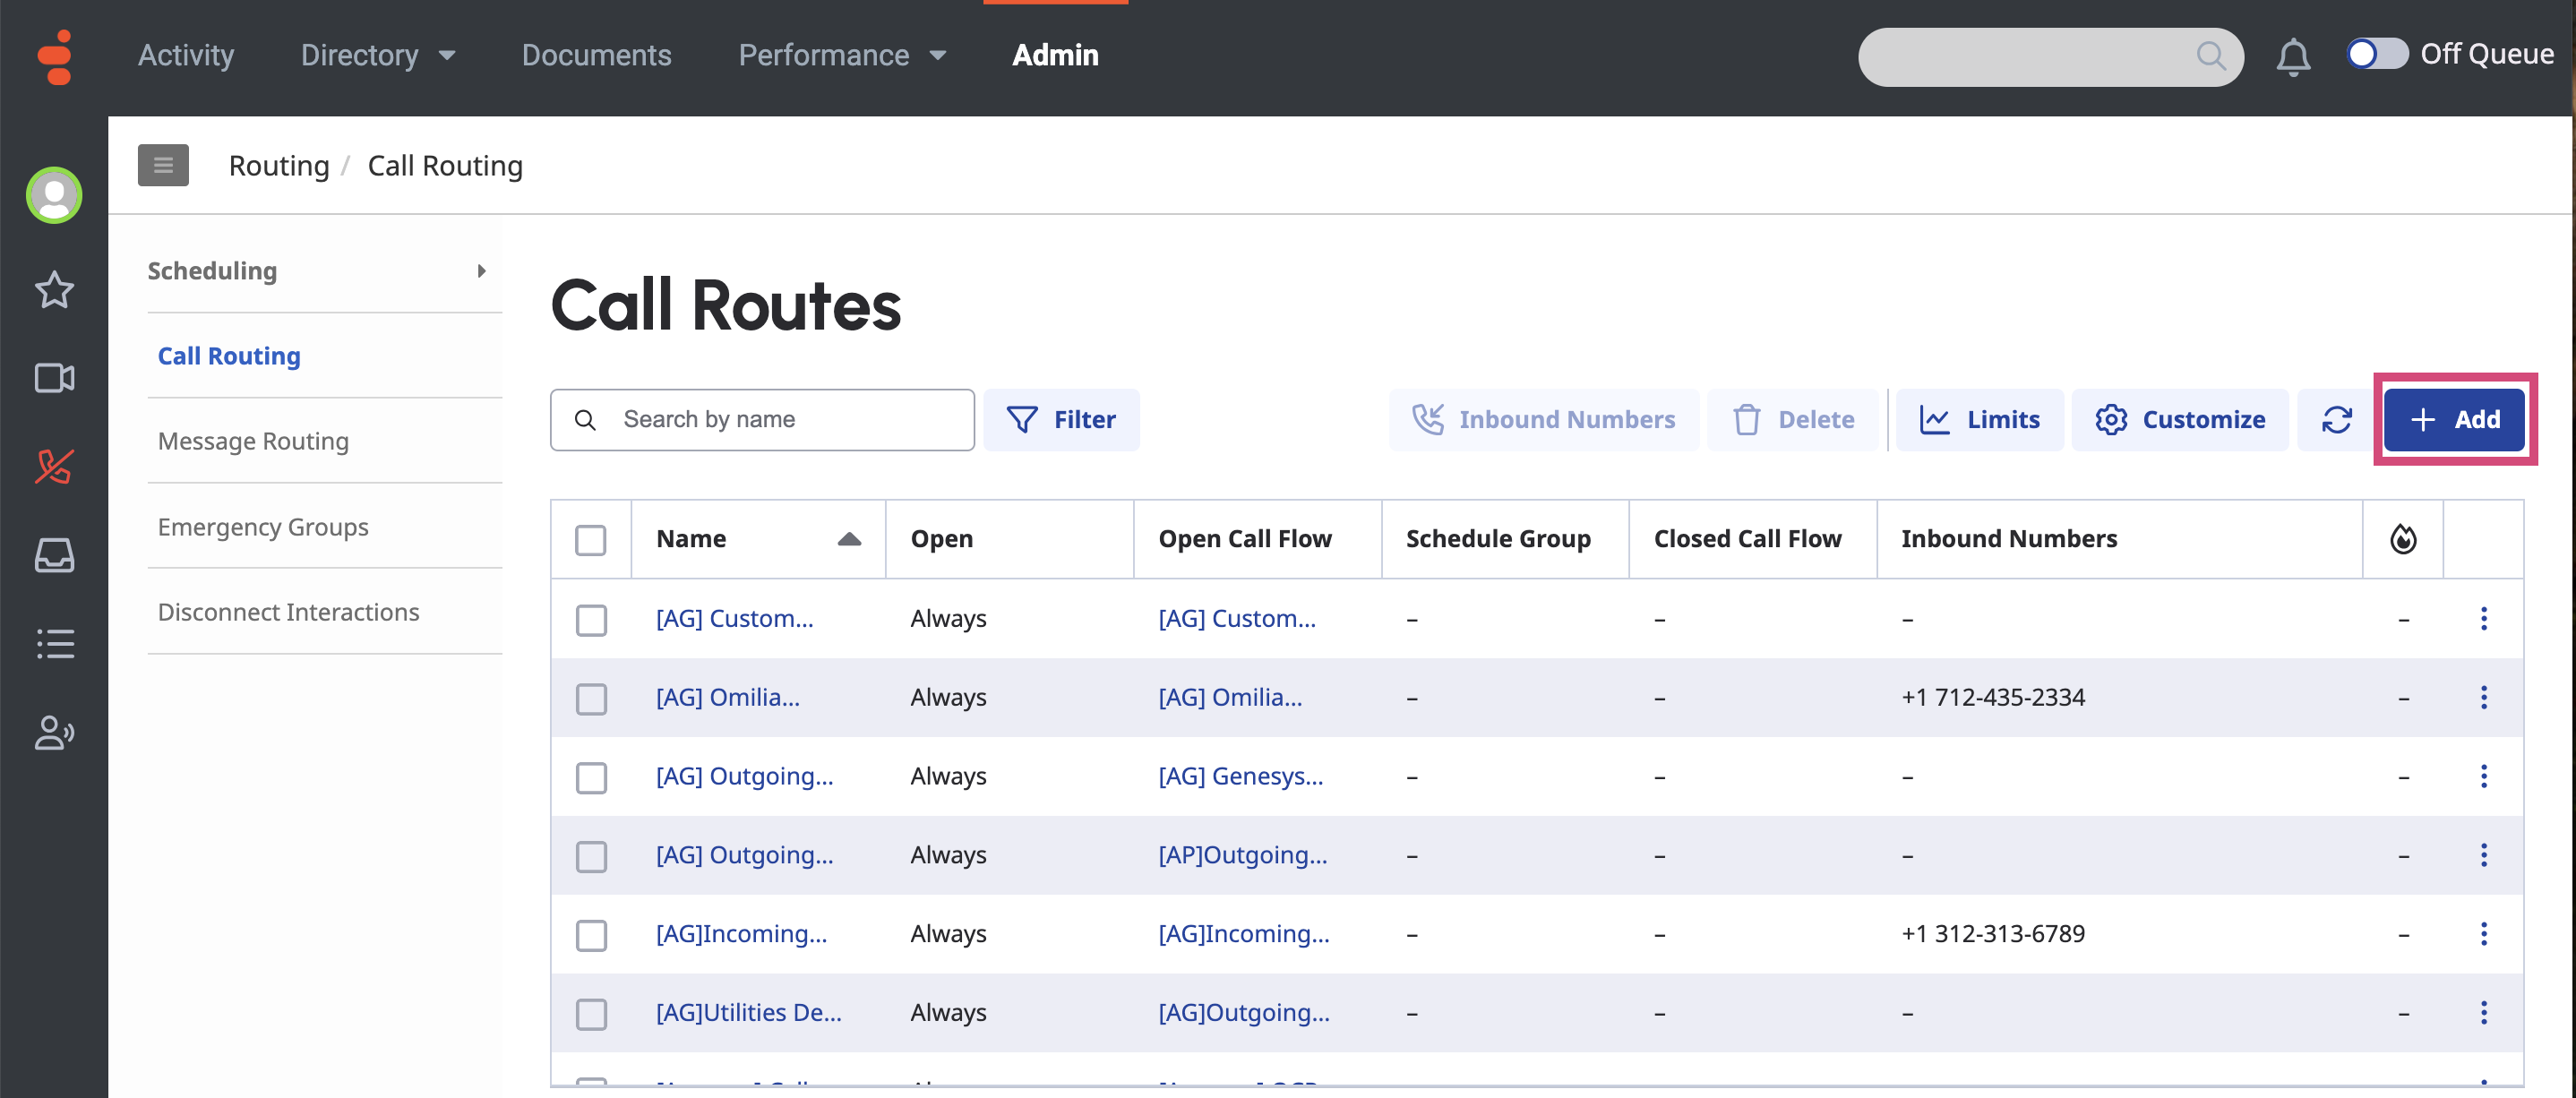
-
In the page that opens, fill in the fields as described below:

-
Name: Enter [Omilia] OCP Call Routing.
-
Division: Select Home from the drop-down list.
-
Route to: Select a flow from the drop-down list.
-
Inbound Numbers: Select the phone number you want to use.
If the Inbound Numbers dropdown is empty, contact GENESYS to ask for a new or spare working number.
-
Click Create to finalize the setup.
Step 9. Test your integration
To test you integration, call the number you used in Step 8. Create Your Genesys Cloud Call Routing
miniApp Session Responses
When a dialog in OCP ends, it will post back the miniApp results to Genesys. The specification of the miniAppResult output can be found in the miniAppResult section.