The Agentic Flows feature is available only in specific environments. Depending on your configuration, this functionality may not be visible in your interface.
Overview
An Agentic Flow is an Orchestrator application in which AI agents — rather than the usual deterministic building blocks — drive the interaction. Instead of following hard-coded paths through miniApps and condition blocks, agents use a large language model (LLM) to analyze caller intent and decide how to respond, which tool to invoke, or which specialized agent to delegate to.
This approach is suited for scenarios that require dynamic routing, multi-step task automation, or knowledge-base-driven question answering. Traditional deterministic flows can still be used when you need precise control over every conversation path.
Additionally, the Agents can extend the capabilities of the deterministic, OCP-type applications. You can combine agents with regular flows and miniApps in the same application. A Concierge Agent can route callers to a Task Agent for payment processing, while a separate branch uses a traditional Flow for address collection.
An Agentic Flow typically follows this structure:
-
A Concierge Agent greets the caller and determines their intentions.
-
The Concierge Agent delegates to one or more Task Agents (for workflow execution), Q&A Agents (for knowledge retrieval), or Escalation Queues (for human handoff).
-
Each Task Agent uses tools (miniApps, MCP servers, web services) to complete its goal.
-
Each Q&A Agent retrieves answers from a Pathfinder knowledge base.
For an automated approach to building agents, use OCP CoPilot. See the Getting Started with AI Agents page for the CoPilot-guided setup.
Agent Types
There are three agent types available for the Orchestrator applications. Each type has a distinct role within an Agentic Flow and enforces specific restrictions on the components it can connect to.
Concierge Agent
The Concierge Agent is the top-level routing agent and the first point of interaction for callers in the contact center. It analyzes caller intent and delegates to the appropriate sub-agent or escalation queue.
Key characteristics:
-
Available only in Agentic-type applications (unless used as as Flow in OCP type applications).
-
Uses other Agents, Pathfinder knowledge bases, Flows, and miniApps (except Intelli, WebService, and Announcement) as its Connected Tools.
-
Manages the welcome prompt and escalation queues.
Example: A Concierge Agent greets callers, determines whether they need billing help, technical support, or general information, and routes to the corresponding Task Agent, Q&A Agent, or human queue.
Concierge Agent as Flow
There is a variation of the Concierge Agent that is used in non-agentic, OCP-type applications to route the conversation.
Read the Concierge Agent as Flow article for the detailed info.
Task Agent
A Task Agent is a dedicated agent that executes a specific, often multi-step workflow with minimal human intervention. It uses tools — miniApps, MCP servers, and web service integrations — to achieve a goal.
Key characteristics:
-
Also available in the OCP-type applications, where it can be added to canvas as a Flow, connecting to other miniapps and building blocks.
-
Can only use Intelli, WebService, and Announcement types of miniApps and MCP servers as its Connected Tools.
-
Connects as a sub-agent to the Concierge Agent.
Example: A payment agent collects card details via a WebService miniApp, validates the amount, processes the transaction, and confirms the result to the caller.
Q&A Agent
A Q&A Agent answers caller questions by retrieving information from a Pathfinder knowledge base. The control plane manages the primary reasoning logic; Orchestrator provides the configuration for the Agent.
Key characteristics:
-
Available in both Agentic-type and OCP-type applications.
-
Connects to active knowledge bases from Pathfinder.
-
Connects as a sub-agent to the Concierge Agent.
Example: A hotel information agent is linked to a Pathfinder project containing PDF brochures and website content. A caller asks, "What time does the bar open?" and the agent retrieves the answer from the indexed knowledge base.
Read more on how to add a knowledge base to the agent below.
Agent Type Comparison
The following table summarizes the capabilities and restrictions for each agent type (excluding the Concierge Agent in OCP type of applications):
|
Capability |
Concierge Agent |
Task Agent |
Q&A Agent |
|---|---|---|---|
|
Available in Agentic-type applications |
Yes |
Yes |
Yes |
|
Available in OCP-type applications |
Yes |
Yes |
Yes |
|
Connects to other agents |
Yes |
No |
No |
|
Connects to tools and miniApps |
Yes |
Yes |
No |
|
Connects to knowledge bases |
Yes |
No |
Yes (only) |
|
Manages escalation queues |
Yes |
No |
No |
|
Has welcome prompt |
Yes |
Yes |
No |
Creating Agentic Application
Agents operate within Agentic-type dialog applications. Create the application container before setting up any agents.
-
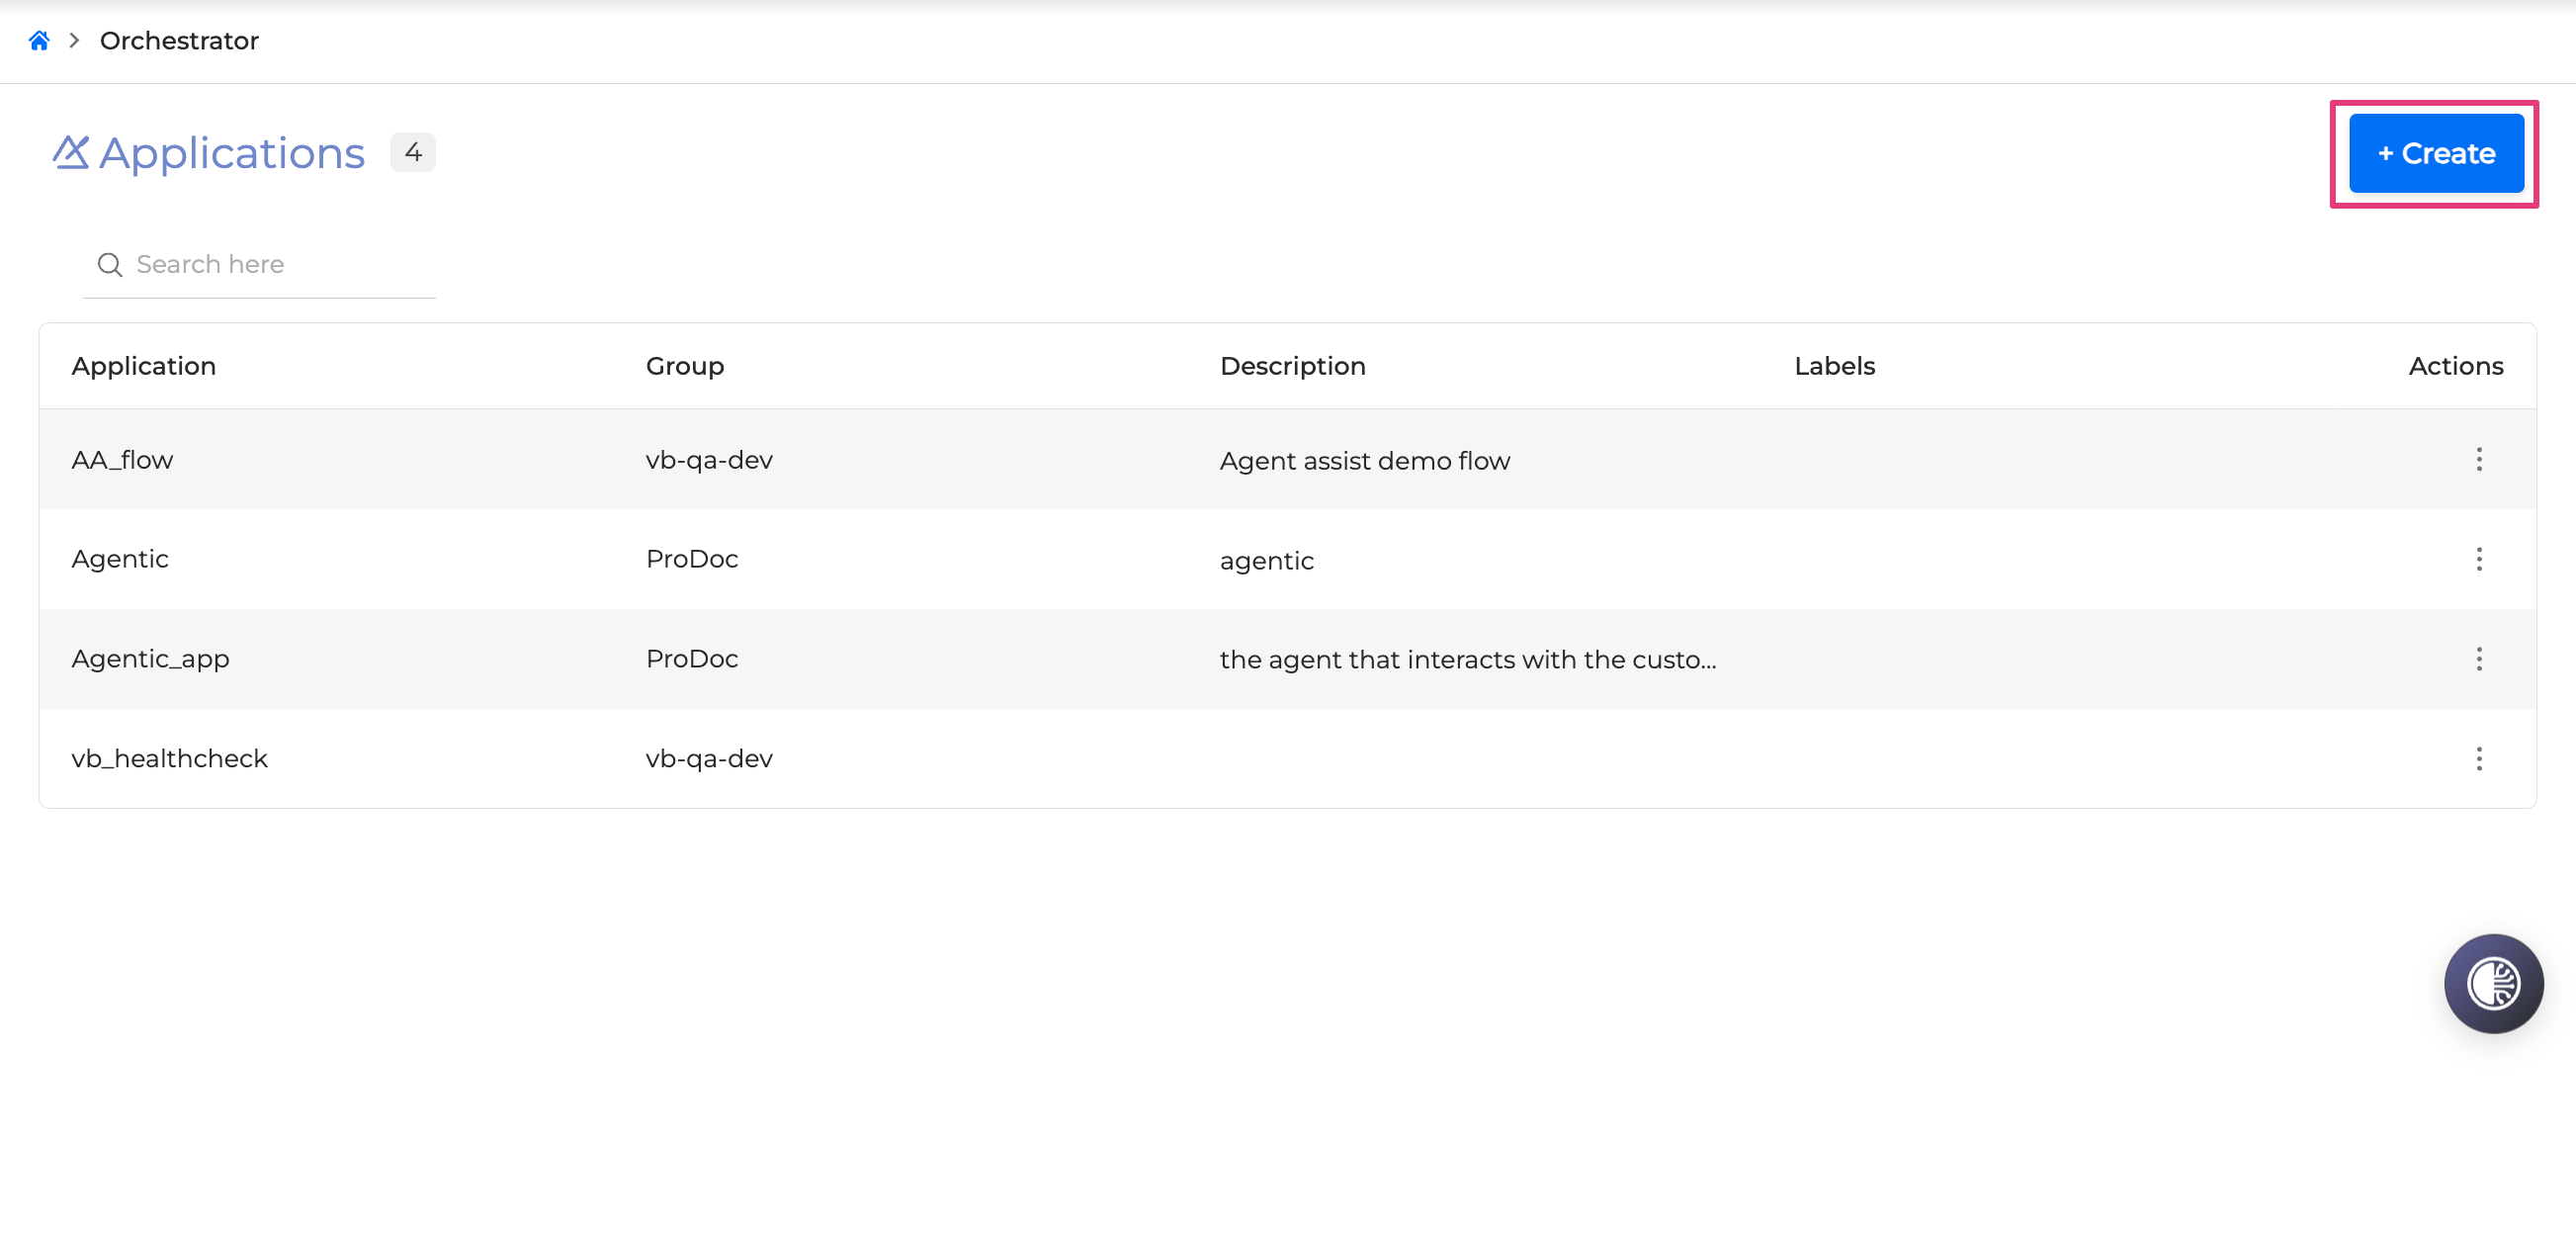
Navigate to the Orchestrator tab.
-
Click +Create to open the application creation dialog.
-
Provide the following details:
-
Application Name: enter a name for the new dialog application.
-
Group: select a group from the dropdown list. The dialog application is accessible to other group members.
-
App Type: select Agentic to enable agents for this application.
-
Description (optional): add a description. The maximum length is 255 characters.
-
Labels (optional): type a label name and press Enter to add it. Click the X icon to the right of a label to remove it.
-
-
Click Save.
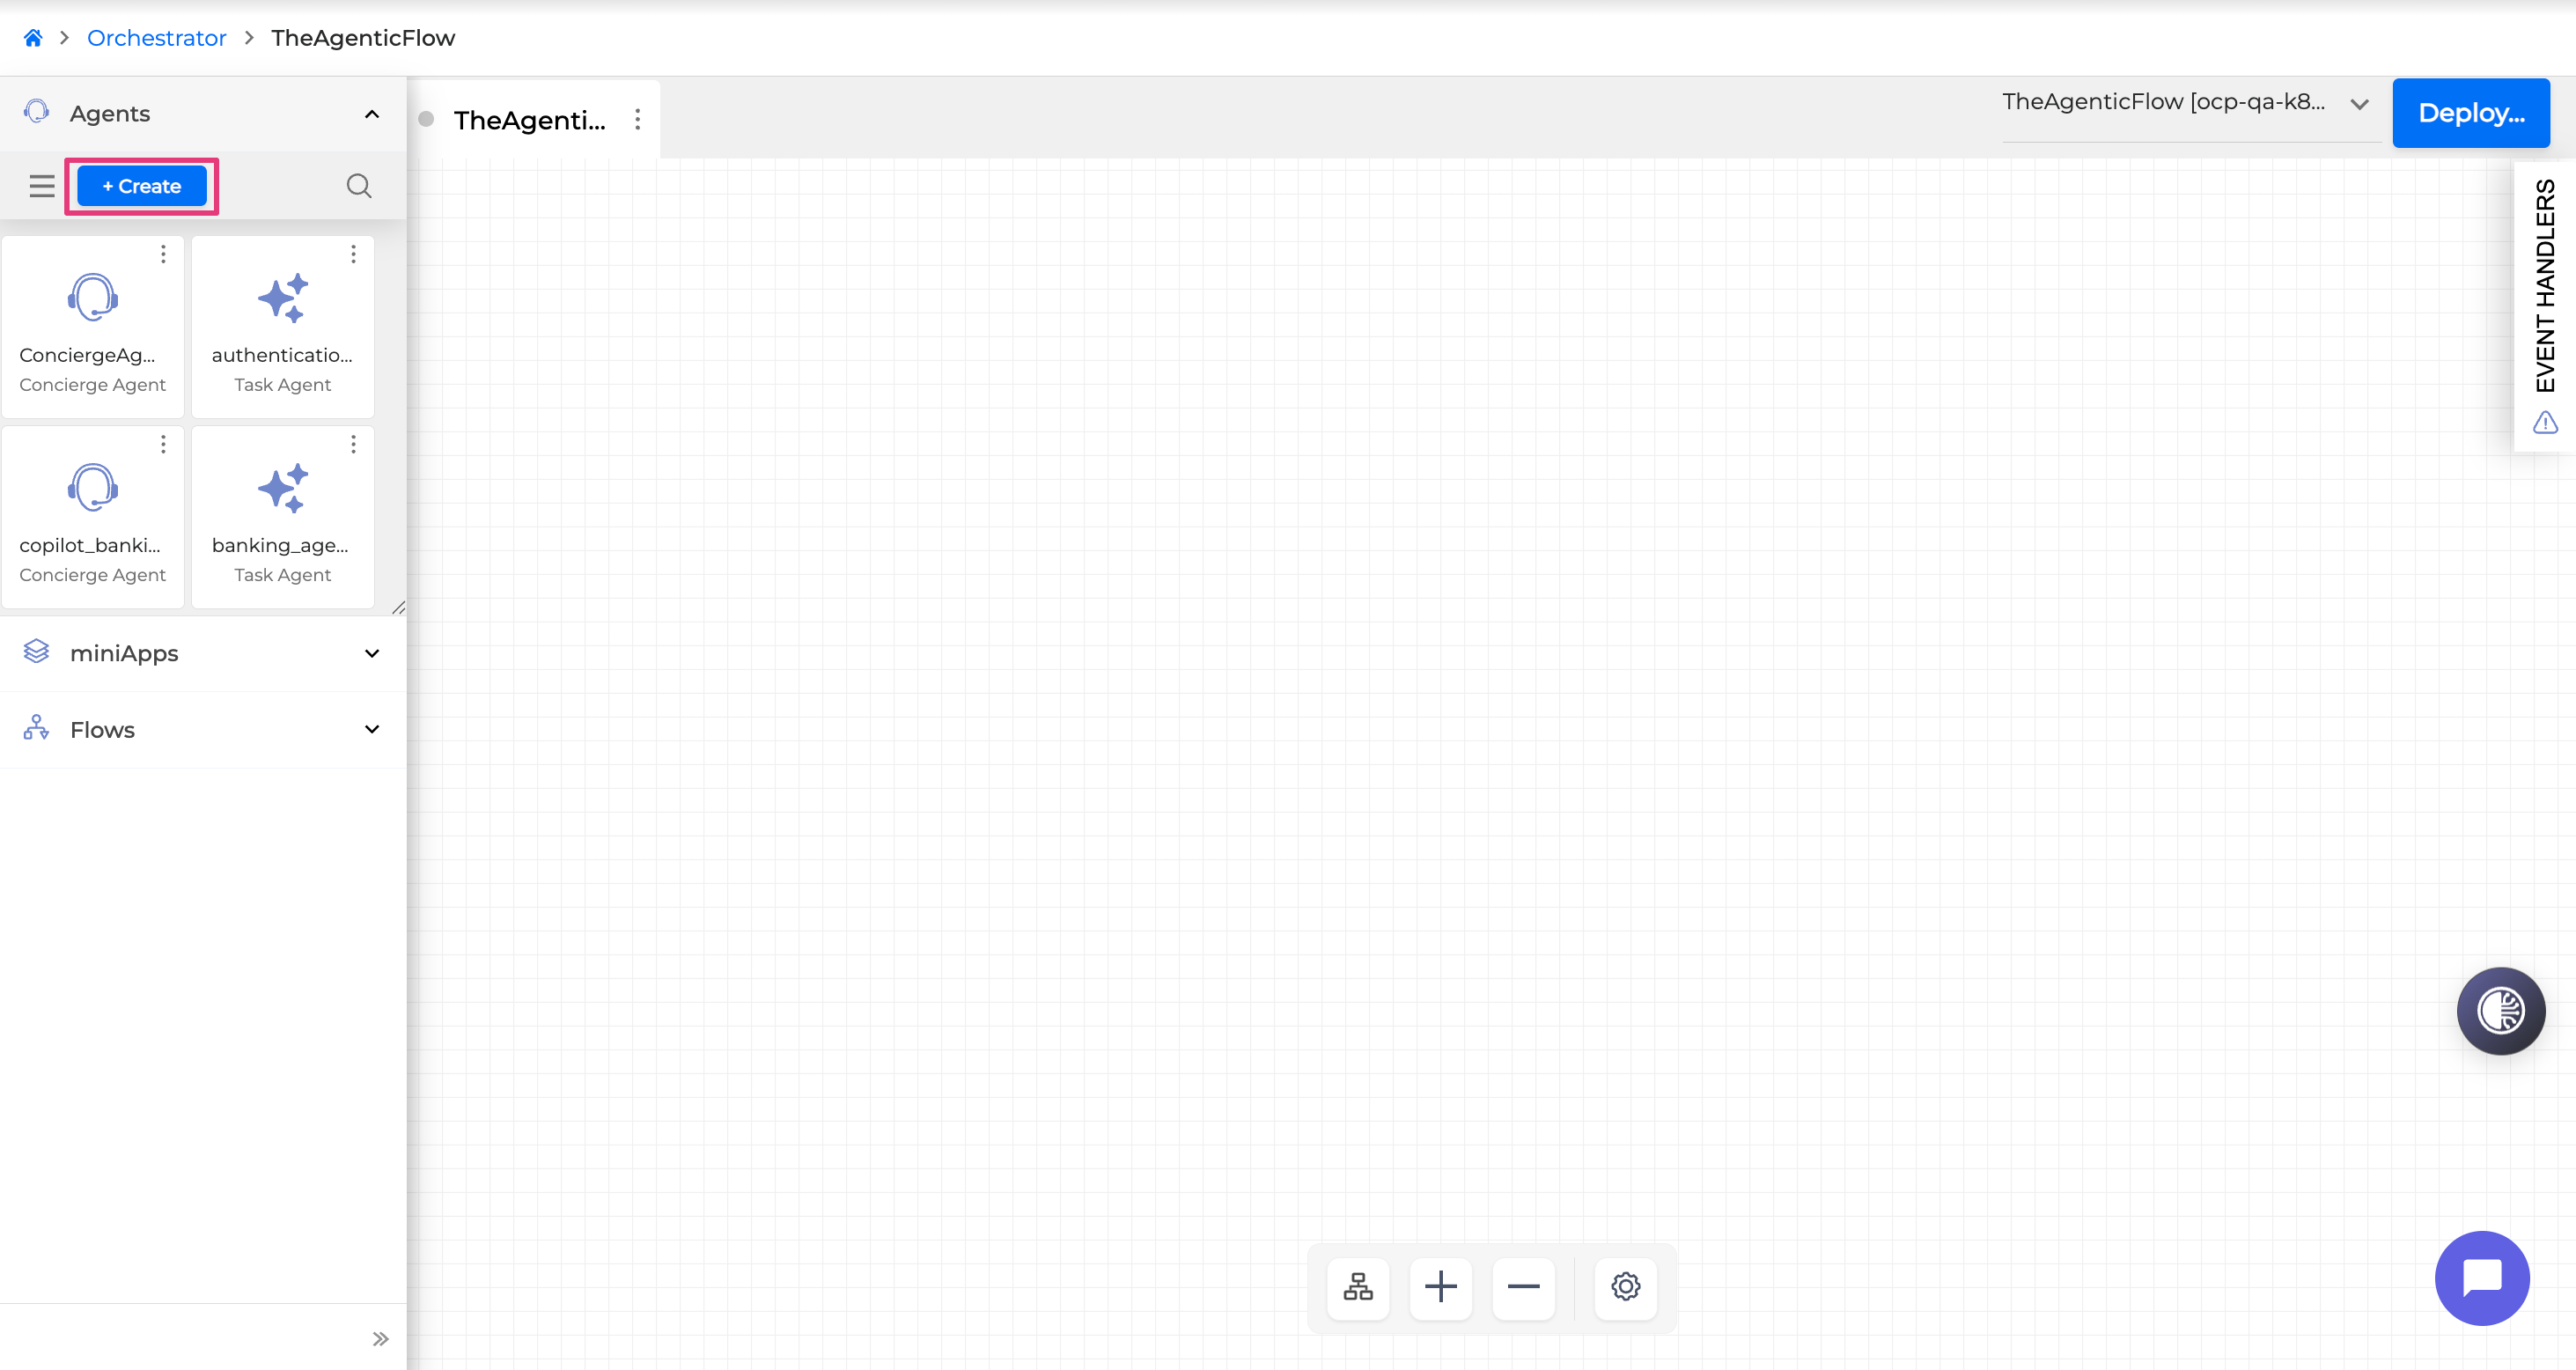
The Orchestrator canvas opens. Agents appear as visual blocks on the canvas, similar to flows.
Creating Agents
After creating an Agentic application, set up the agents that compose the conversation logic.
-
Open the Agentic application.
-
In the building blocks menu on the left, locate the Agents section.
-
Click + Create.
-
On the Create Agent page, provide the following details:
-
Agent Name: enter a descriptive name.
-
Agent Type: select Concierge Agent, Task Agent, or Q&A Agent.
-
Description: enter a summary of what the agent does.
-
Labels (optional): add one or more labels.
-
Input Fields: define the data parameters the agent receives (see Configuring Input and Output Fields below).
-
Output Fields: define the data parameters the agent returns.
-
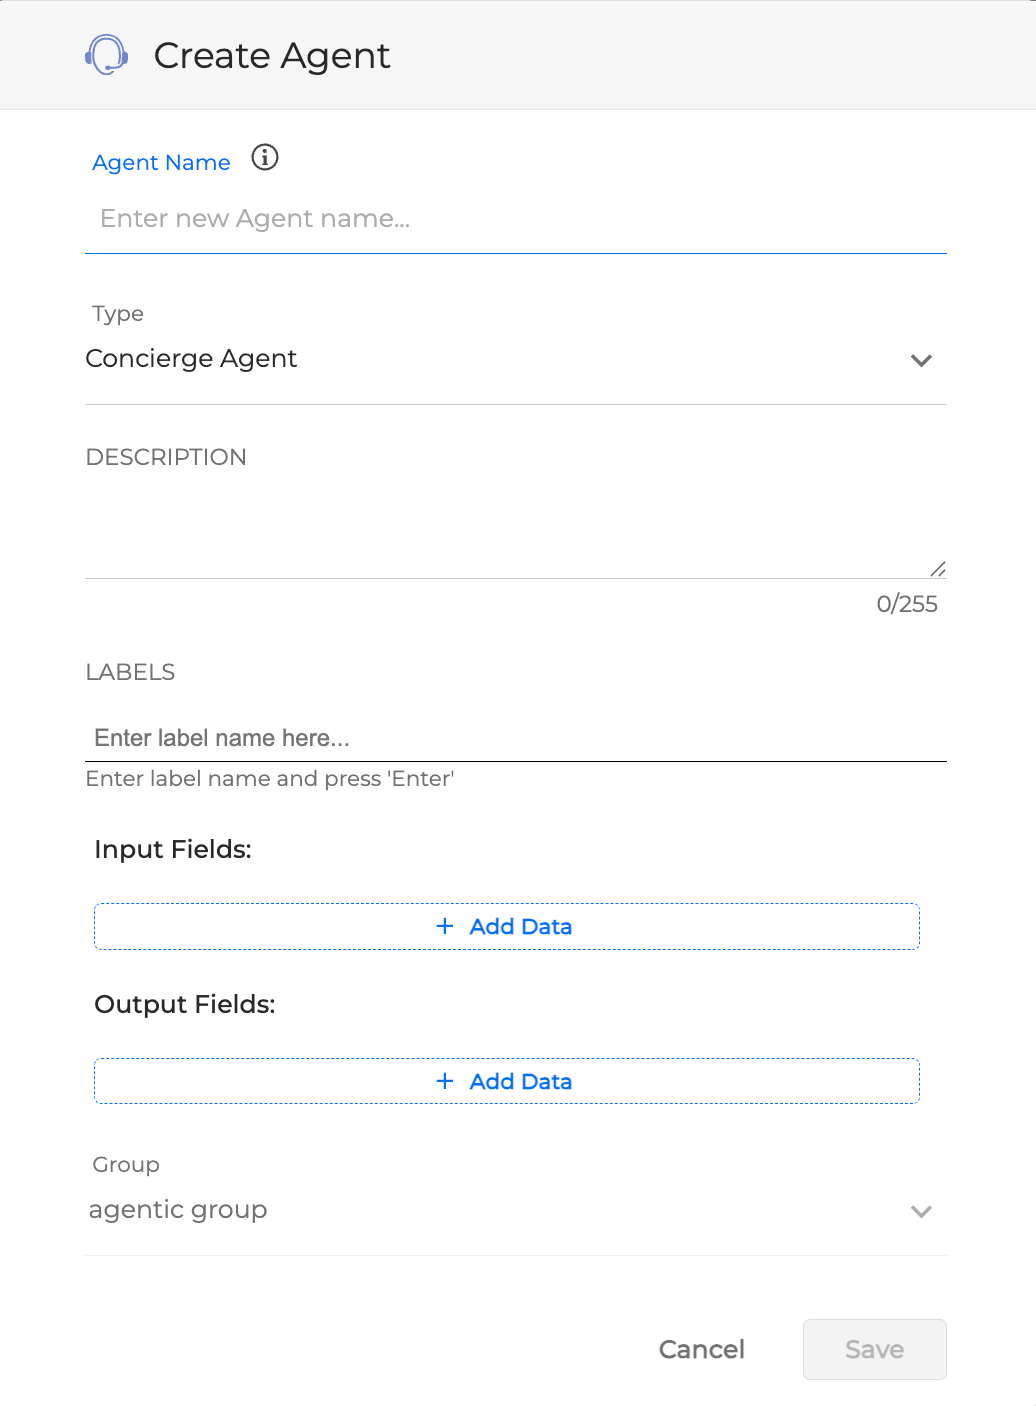
-
Click Save. The agent setup panel opens, where you configure instructions, tools, escalation queues, and other settings.
Configuring Agents
The agent setup panel contains several configuration areas. The following sections describe each area in the order it appears in the interface.

Agent Instructions
Instructions are the natural-language directives that govern how the agent behaves, what tone it uses, and which rules it follows during a conversation.
To add instructions:
-
In the agent setup panel, locate the Instructions area.
-
Type an instruction and press Enter to save it as a separate line.
-
Add as many instruction lines as needed.
-
Double-click an instruction to edit it, or click the X icon to the right to delete it.
The instructions area is collapsible. Use the toggle to collapse or expand it when managing long instruction sets.

Instructions are mandatory for all Agent types. Deployment is blocked until instructions are provided.
Goal field (for Task Agents)
Task Agents must include the Goal in addition to their instructions. This short statement should not exceed 255 characters.
The goal is used to evaluate whether the agents fulfilled its task after the execution.
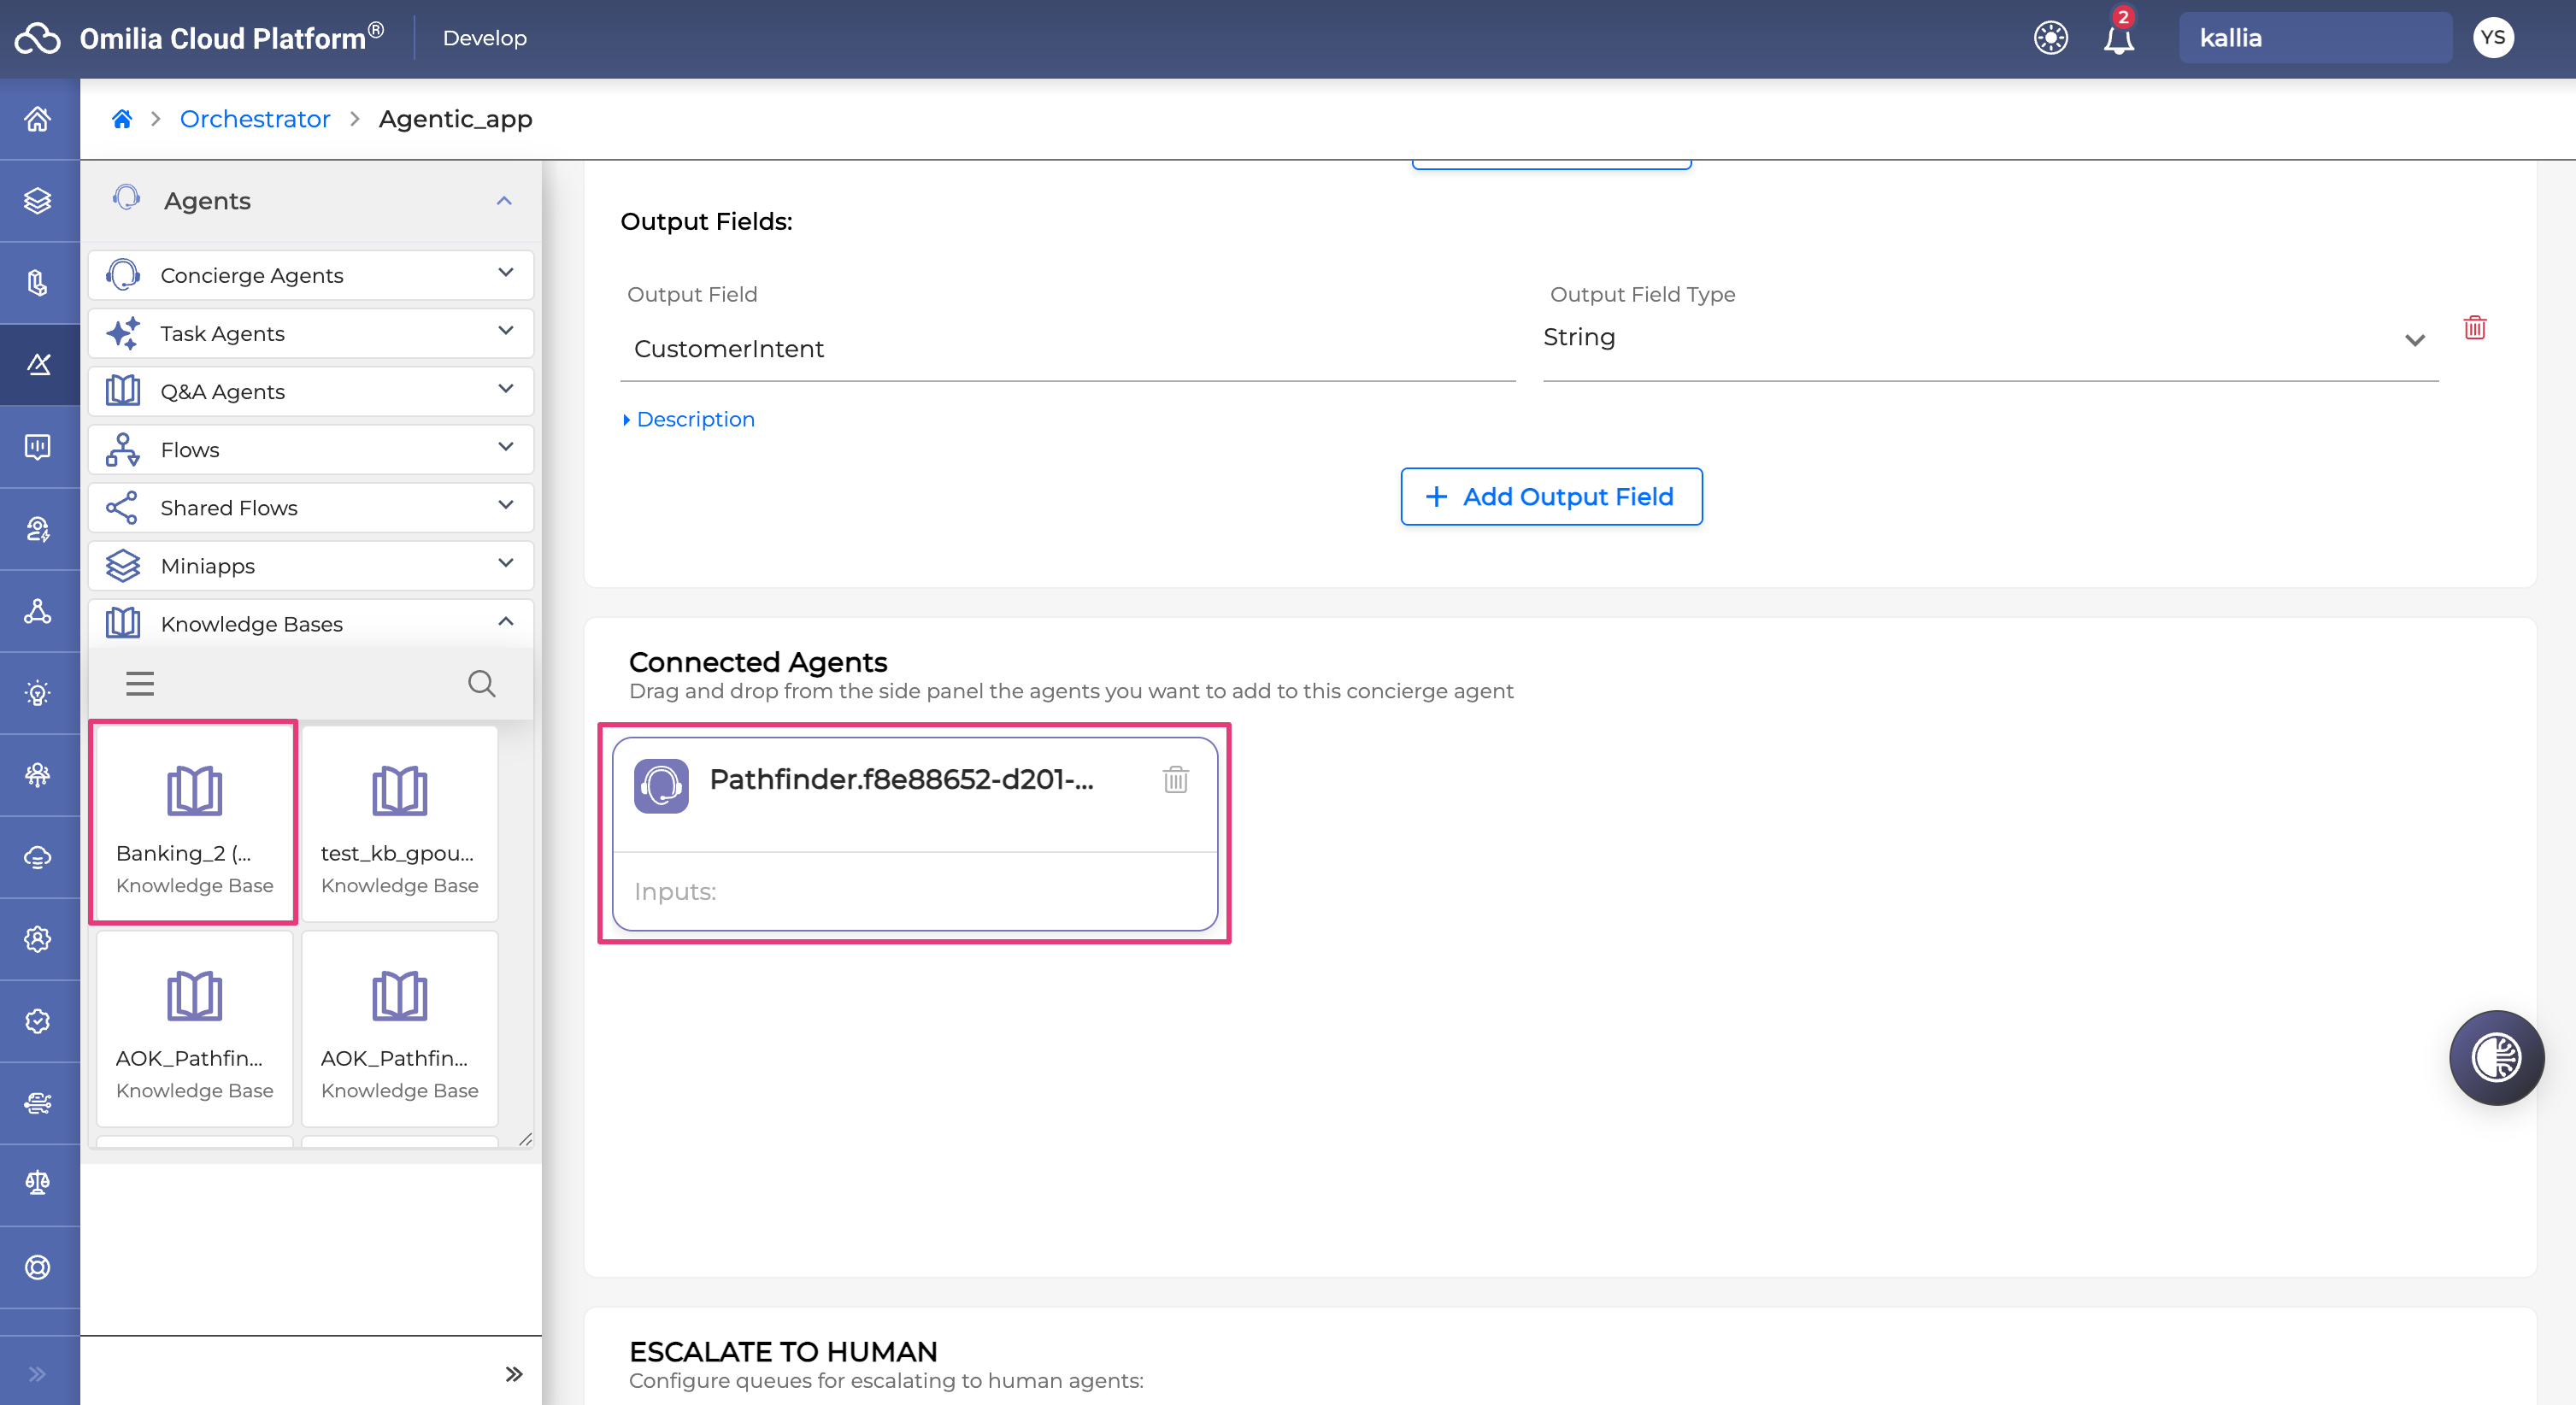
Input and Output Fields
The input and output fields in the agent page are used to exchange the information with other connected nodes only within the deterministic, OCP-type of applications. Instead of the input and output fields, the shared canvas context is used to pass information from and to the agent within the Agentic application.
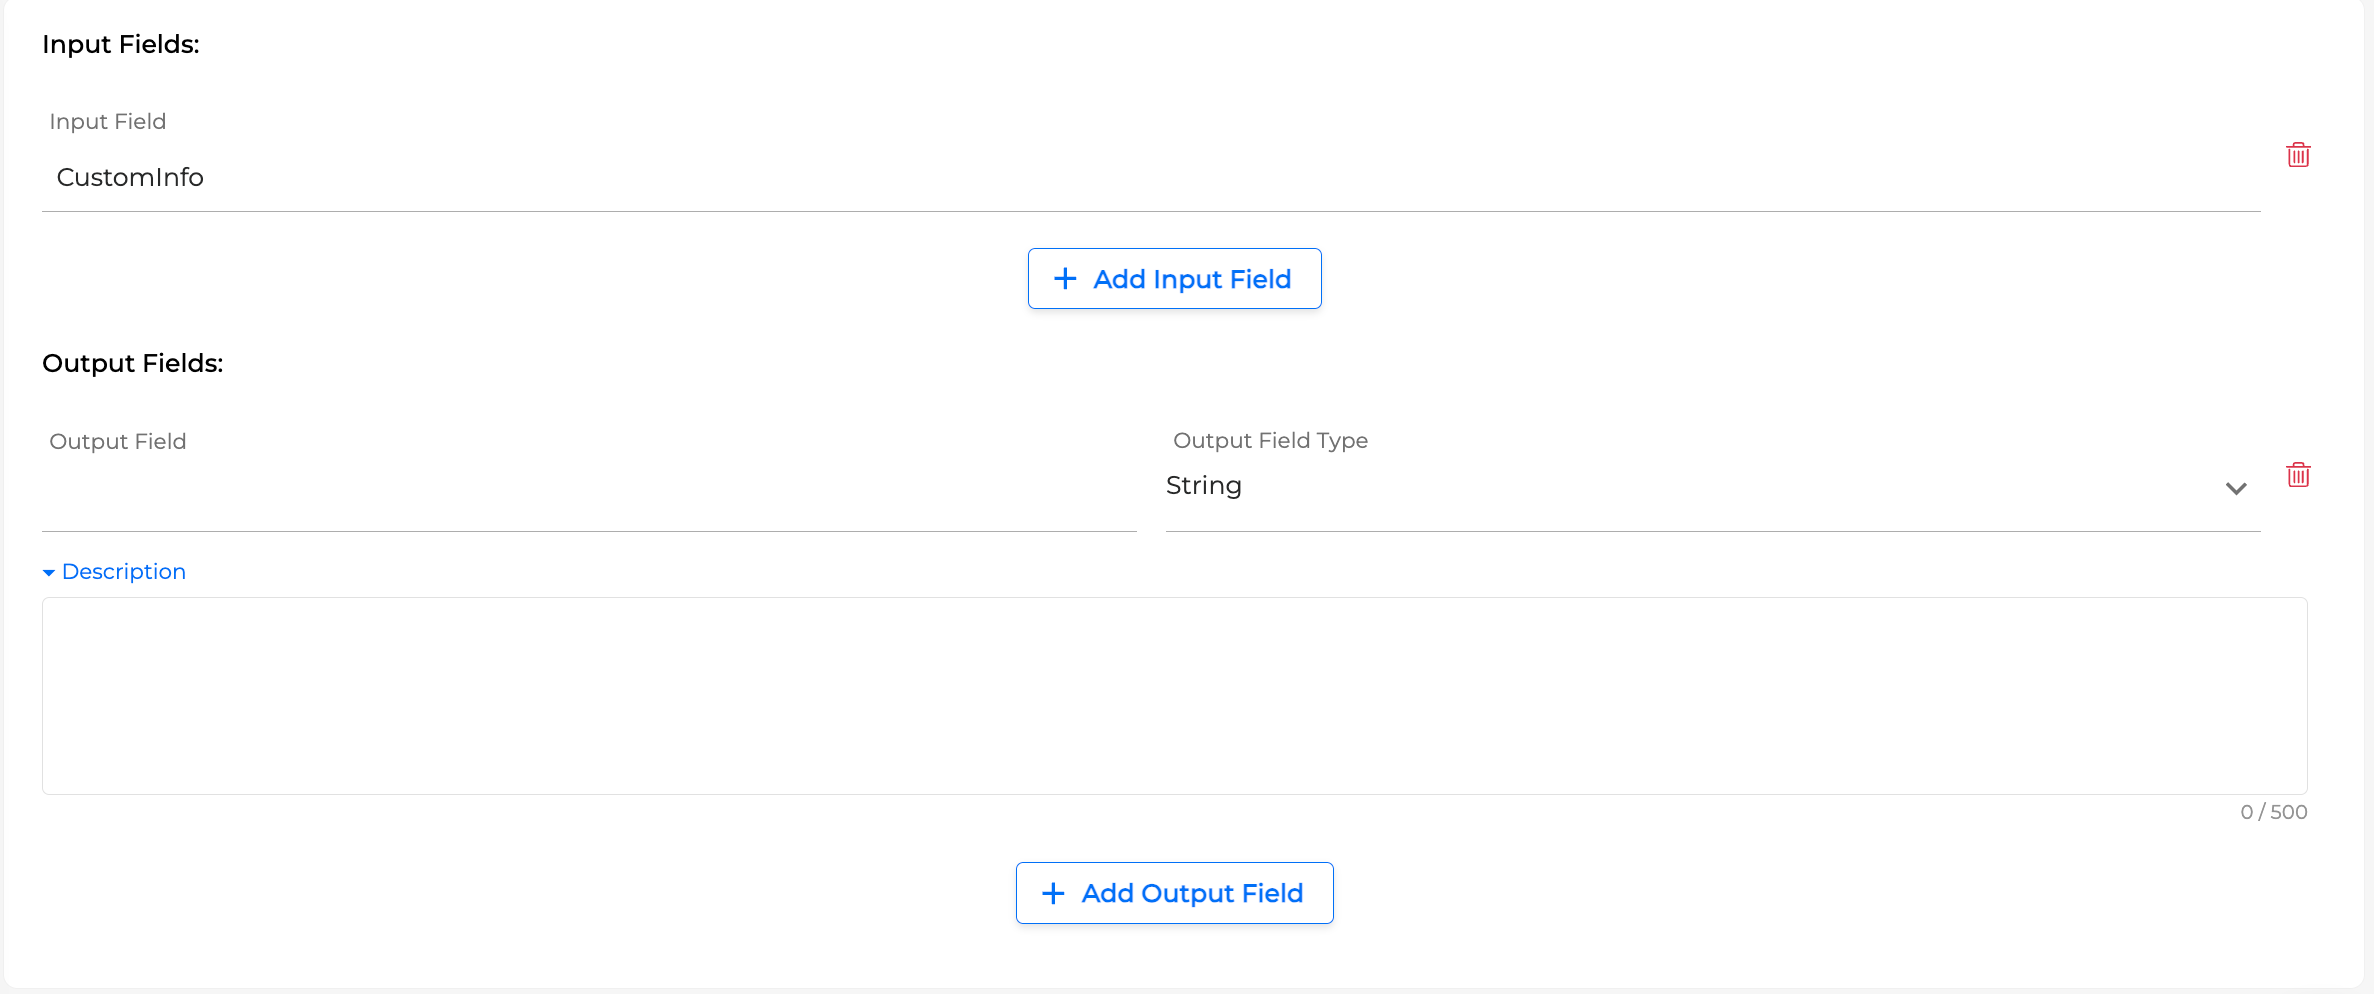
As for output fields, they consist of:
-
Name: the identifier used for data mapping between agents.
-
Output Field Type: the output data type (for example, string or number).
-
Description: a dropdown text field including natural-language explanation of what the output field contains. The agent uses this description to decide how to interpret the field.
Example: An Agent outputs a field named CustomerIntent (type: string, description: "The primary intent category of the caller"). A downstream miniApp receives this field as input and uses it to decide which workflow to execute.
Input and output fields can be edited from within the agent configuration panel after the agent is created. Click the field to modify its name, type, or description.
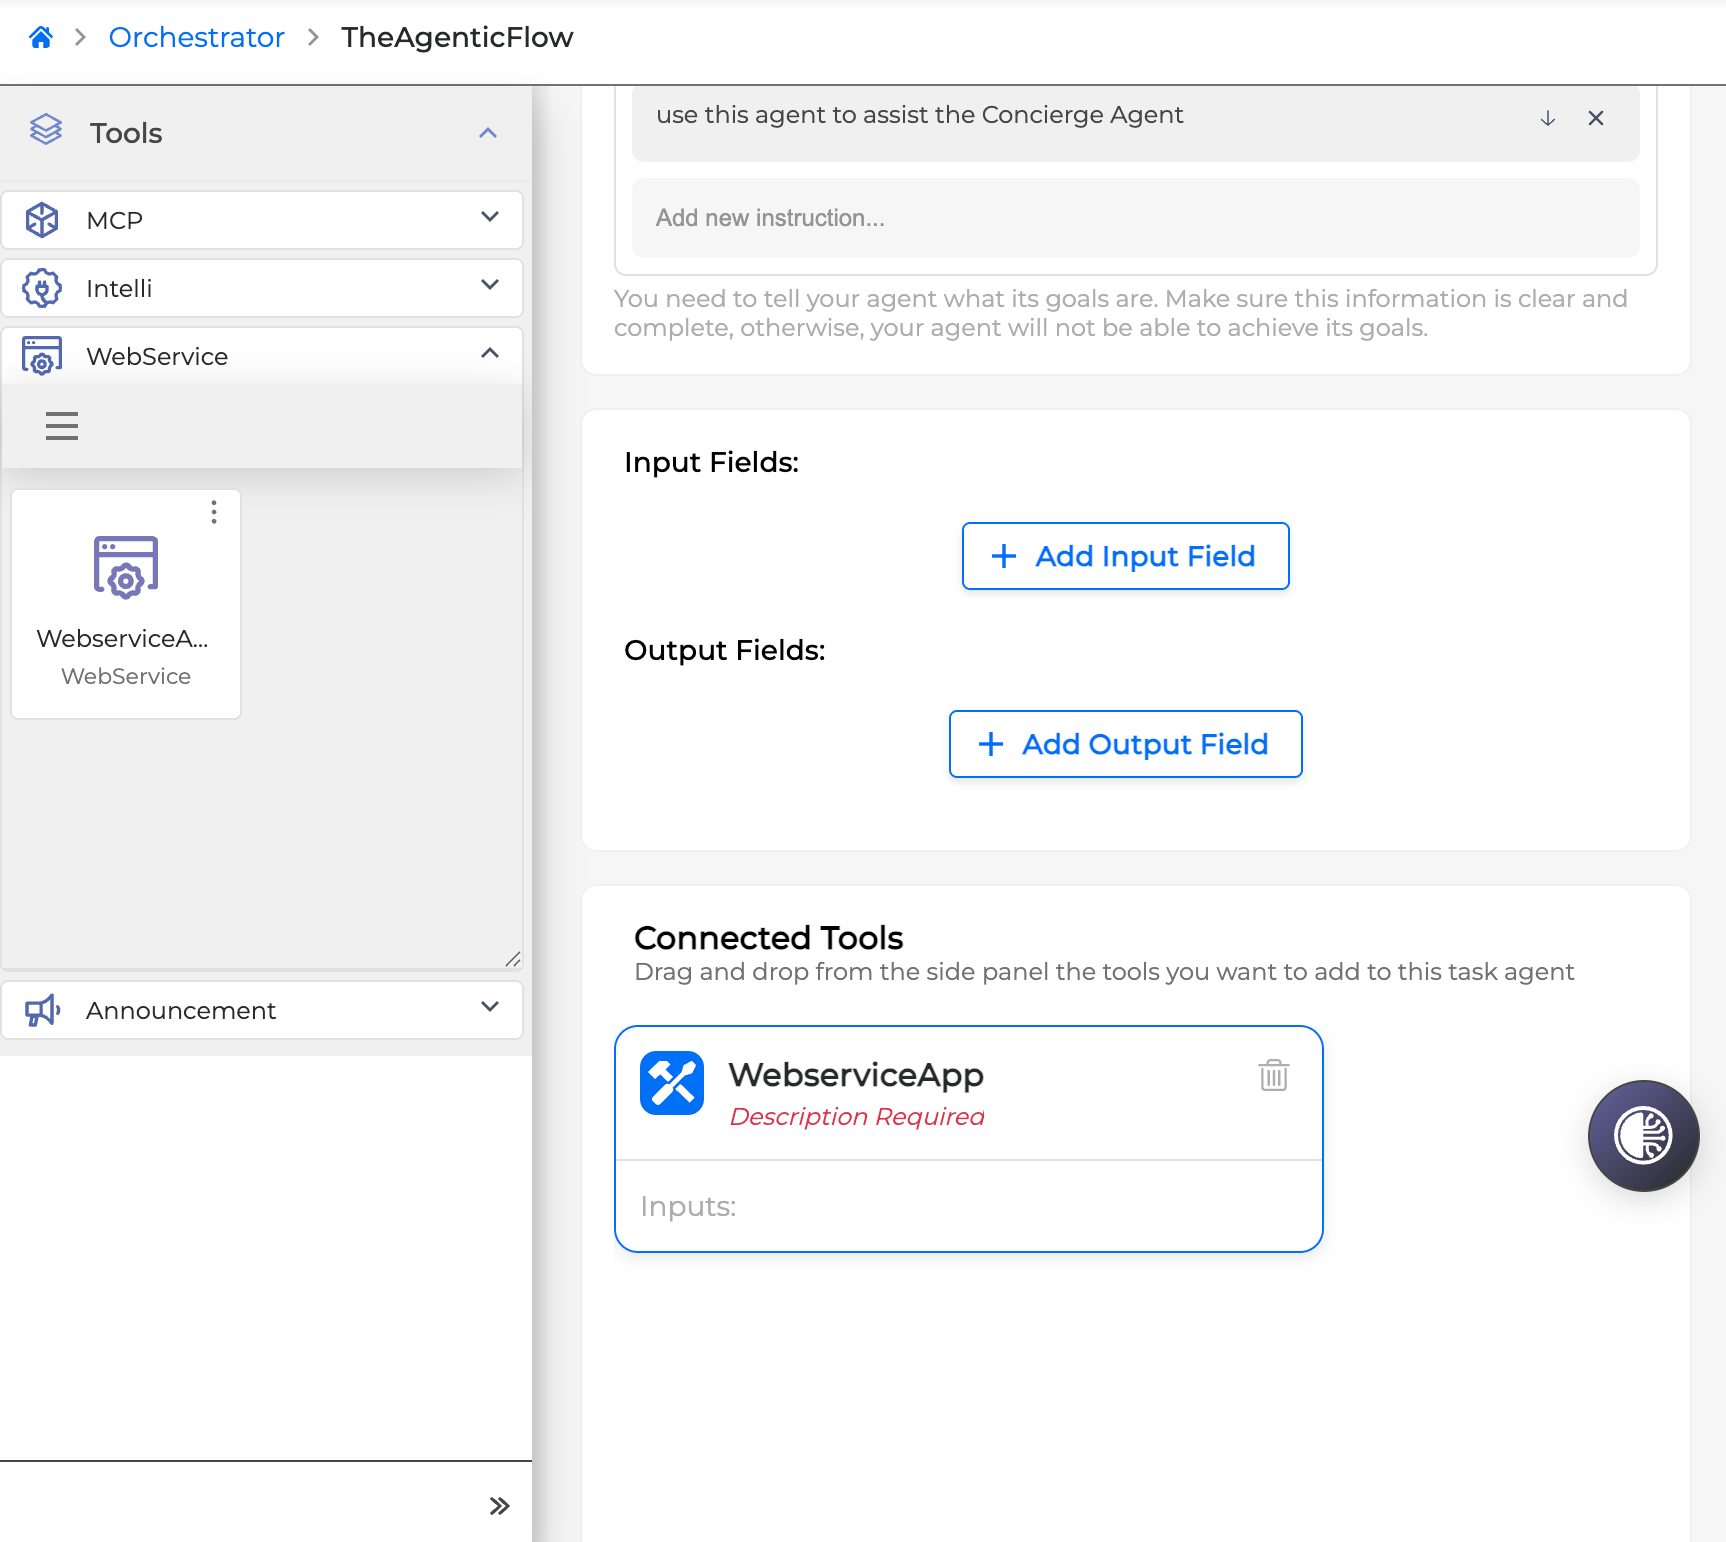
Connecting Tools And Agents
The Connected Tools & Agents add to the capabilities the agent can invoke during a conversation. The available components depend on the agent type (see the Agent Type Comparison table above).
To connect a component:
-
In the agent setup panel, locate the Connected Tools / Agents area.
-
From the left-side menu, drag a component and drop it onto the area.
-
Double-click the added component to edit its Name and Description, and also add Input Fields and their corresponding descriptions.
There are only input fields within the connected agent since the handling of the output fields is done by the calling agent.
-
To remove a component, click the trashcan icon next to it.
-
Click Save to preserve the configuration.
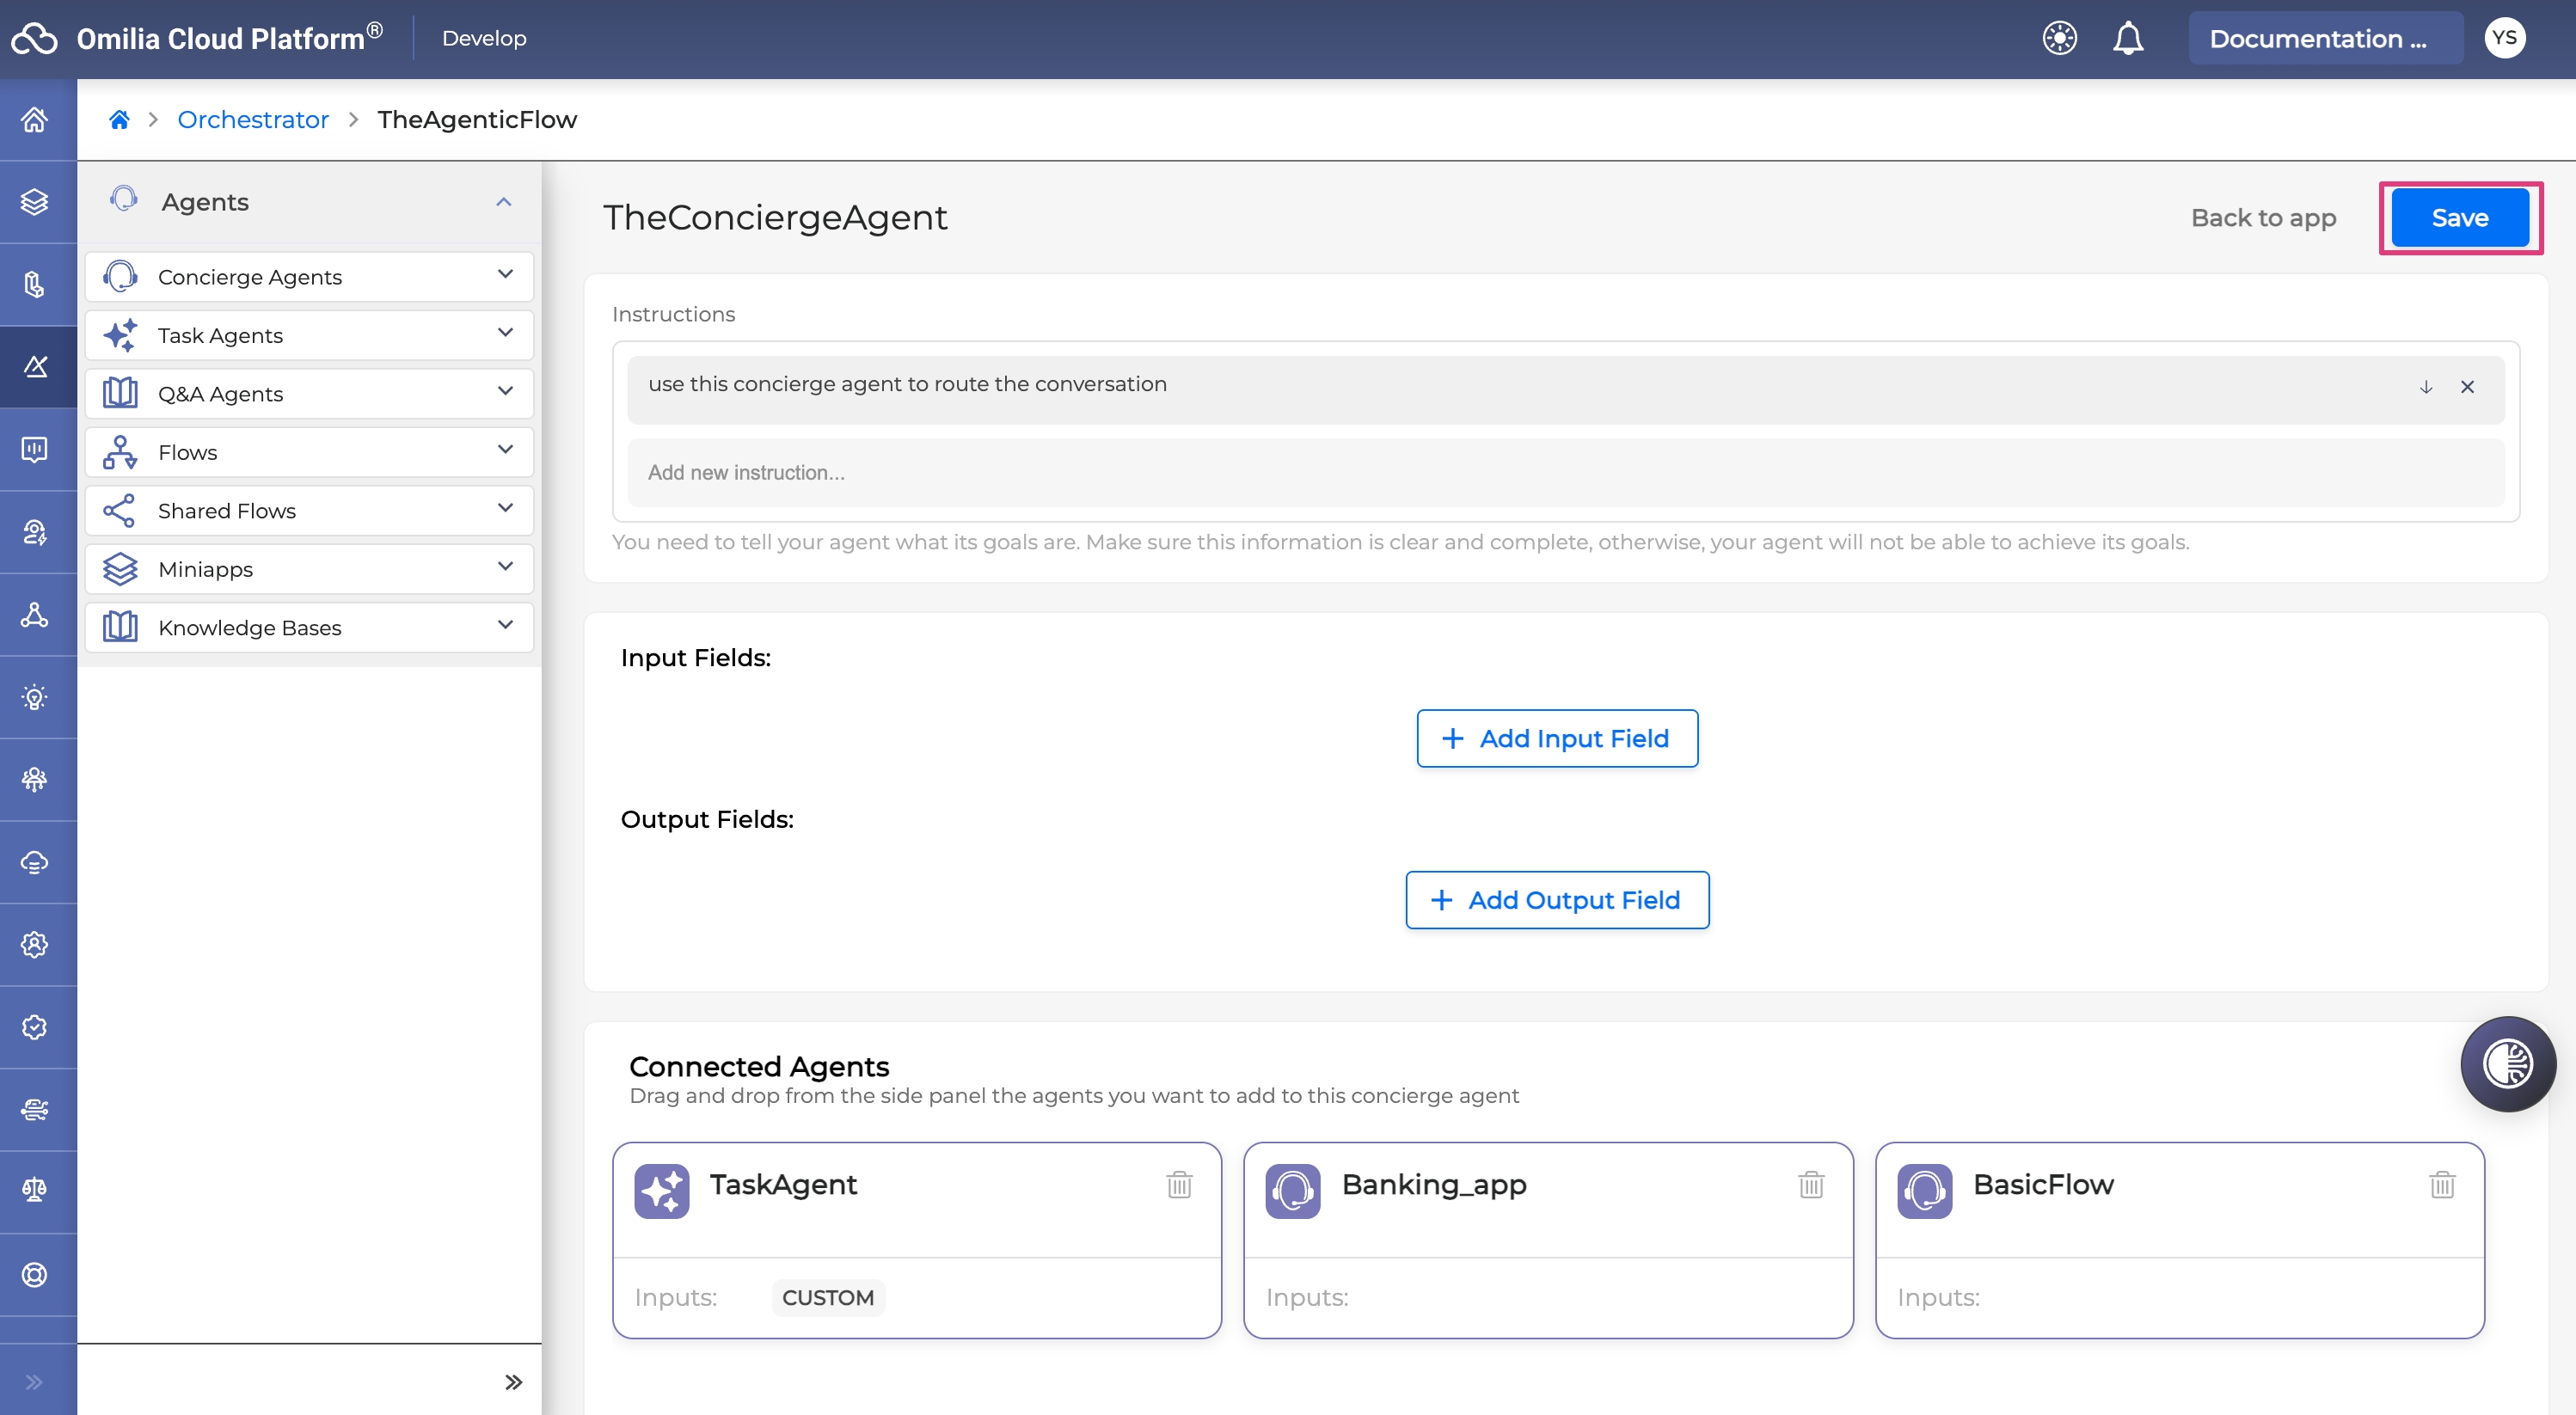
The tool description tells the agent when and how to use the tool. Write clear, action-oriented descriptions. For example: "Use this knowledge base to answer all general customer questions about hotel amenities and policies."
Knowledge Bases (Pathfinder)
Knowledge bases are available as components for Concierge Agents (as a connected tool) and Q&A Agents (as the primary connected resource).
When connecting a Pathfinder knowledge base to a Concierge Agent, drag the knowledge base from the section in the left-side menu:
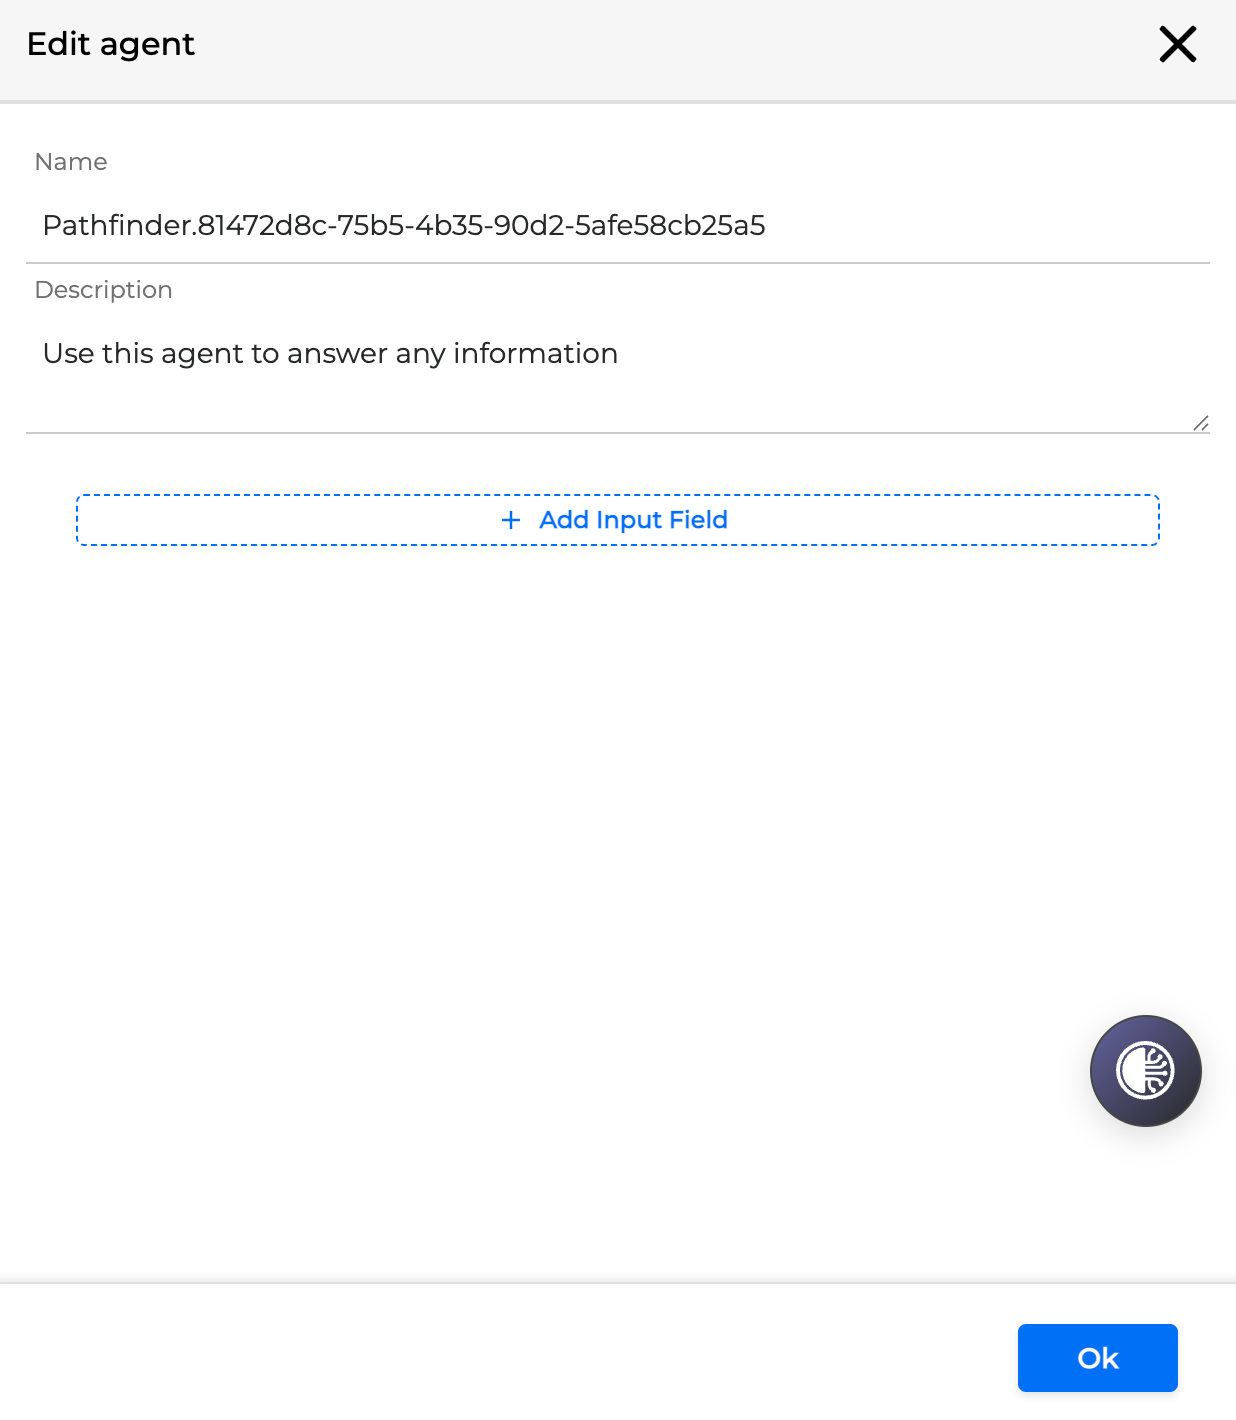
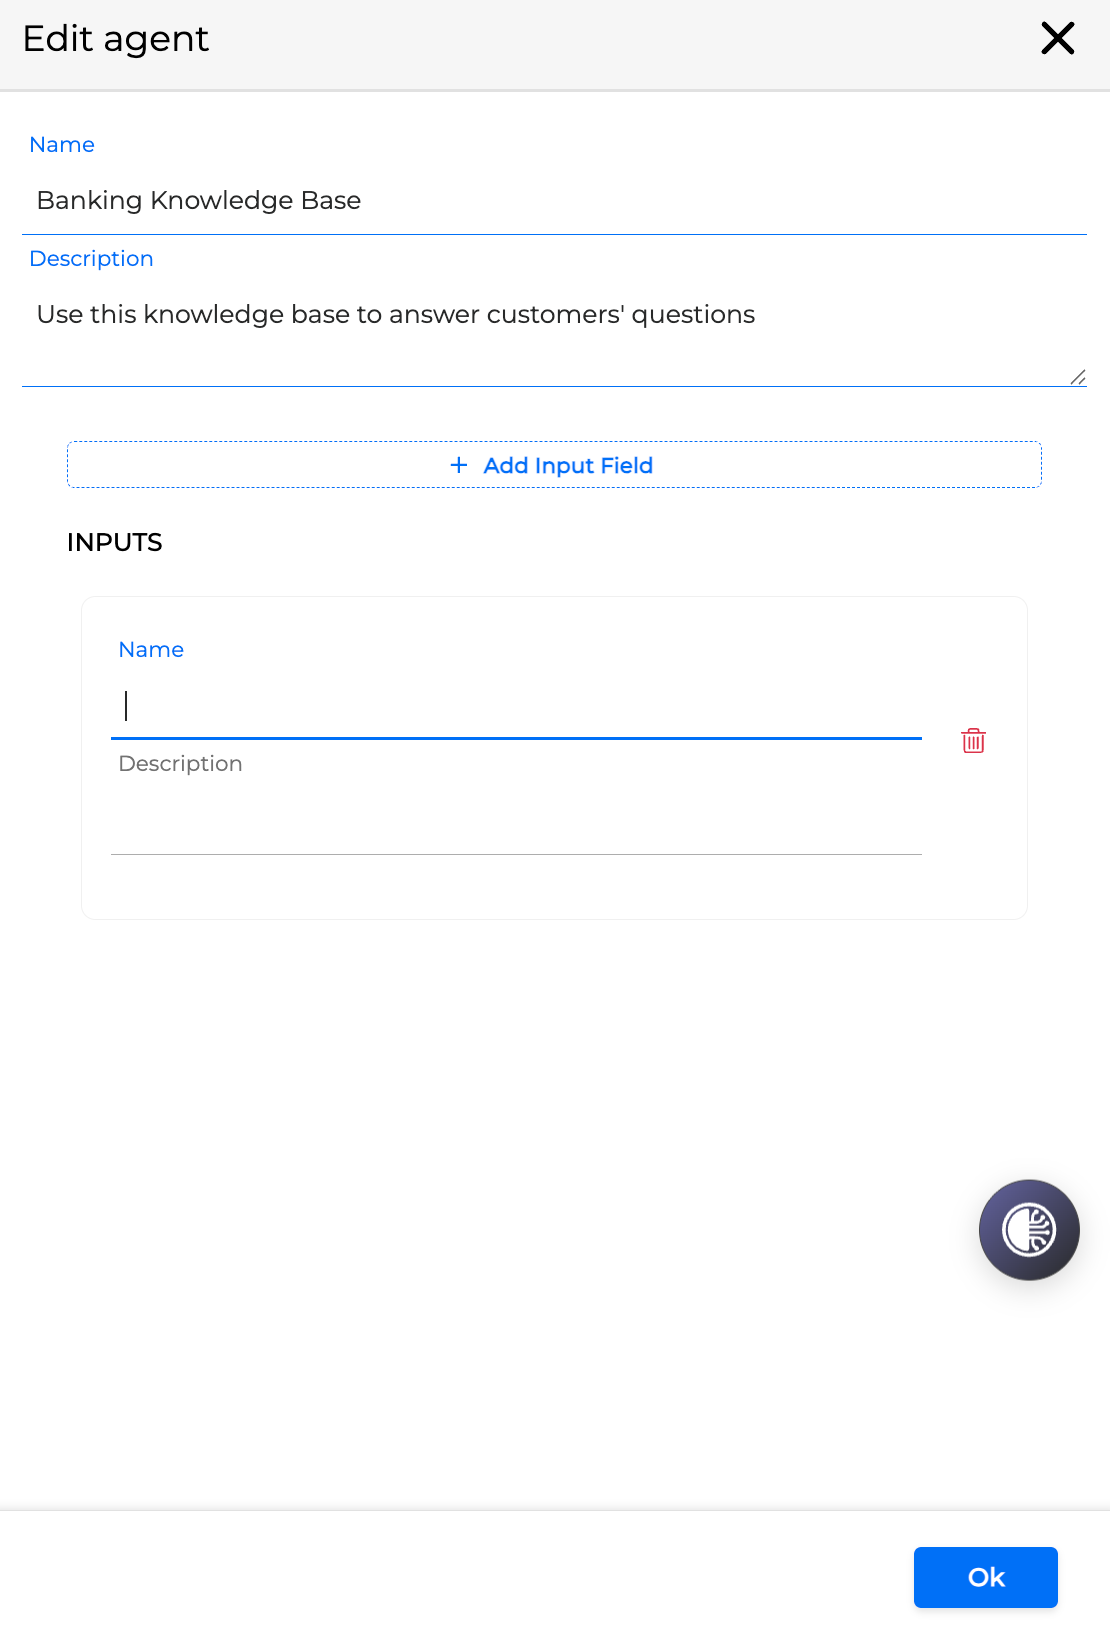
Click on the connected knowledge base to edit its Name, Description and add input fields (with descriptions):
Knowledge Base in Q&A Agent
Q&A Agent uses a Pathfinder knowledge base as its connected tool. When configuring the Q&A agent, select the Pathfinder project from the dropdown list:
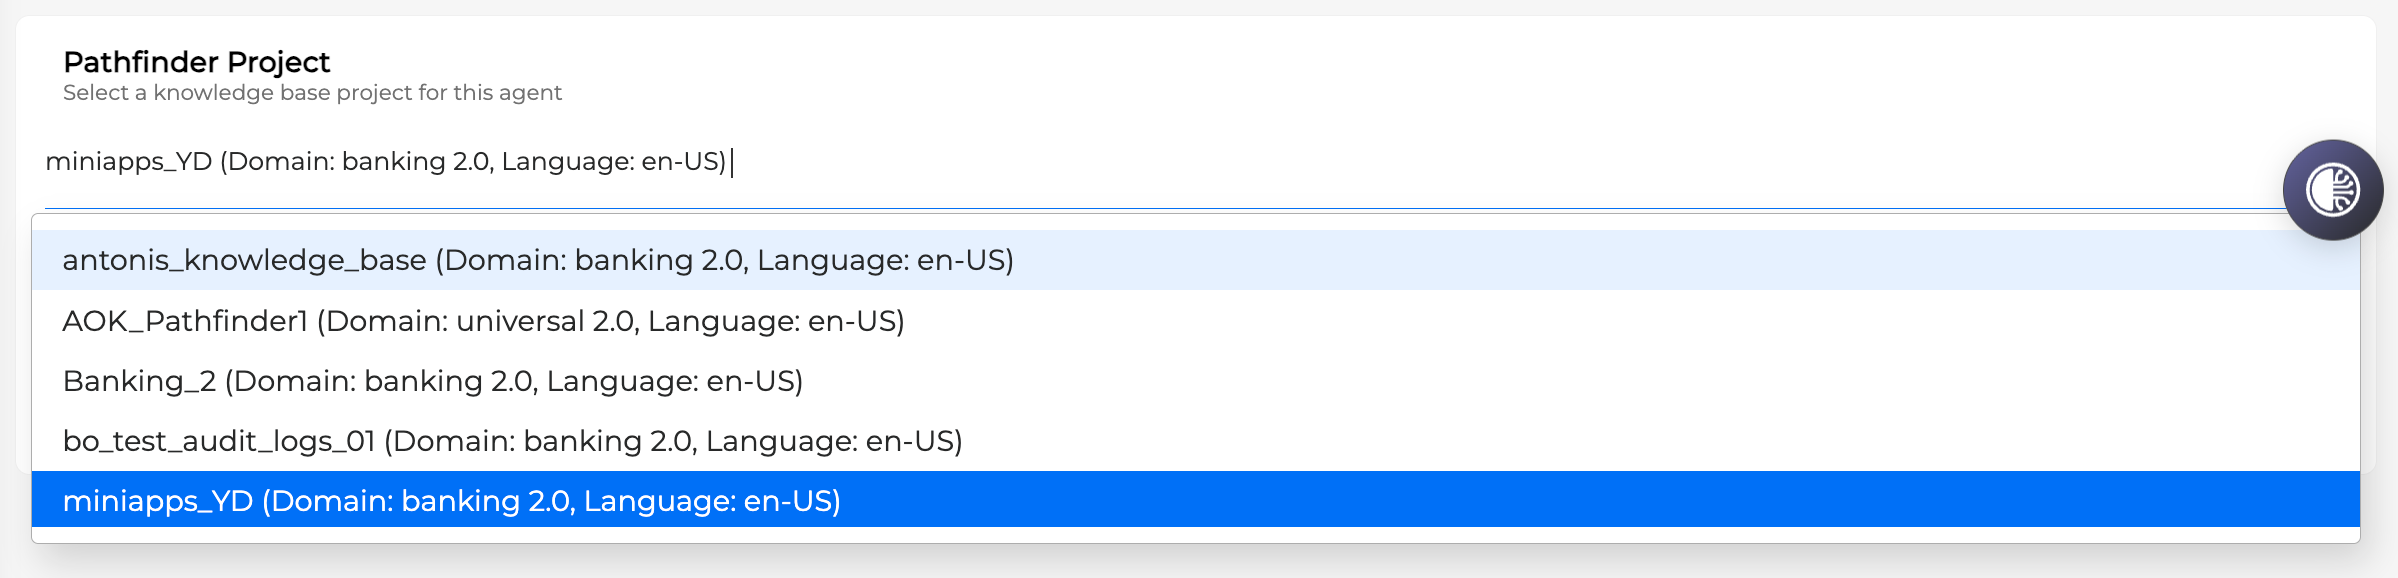
For the Pathfinder projects with the knowledge base enabled, additional filtering schema for the metadata can be set in Pathfinder. These filtering fields can then be used for the retrieval with the description provided so that the control plane understands how to apply this information.

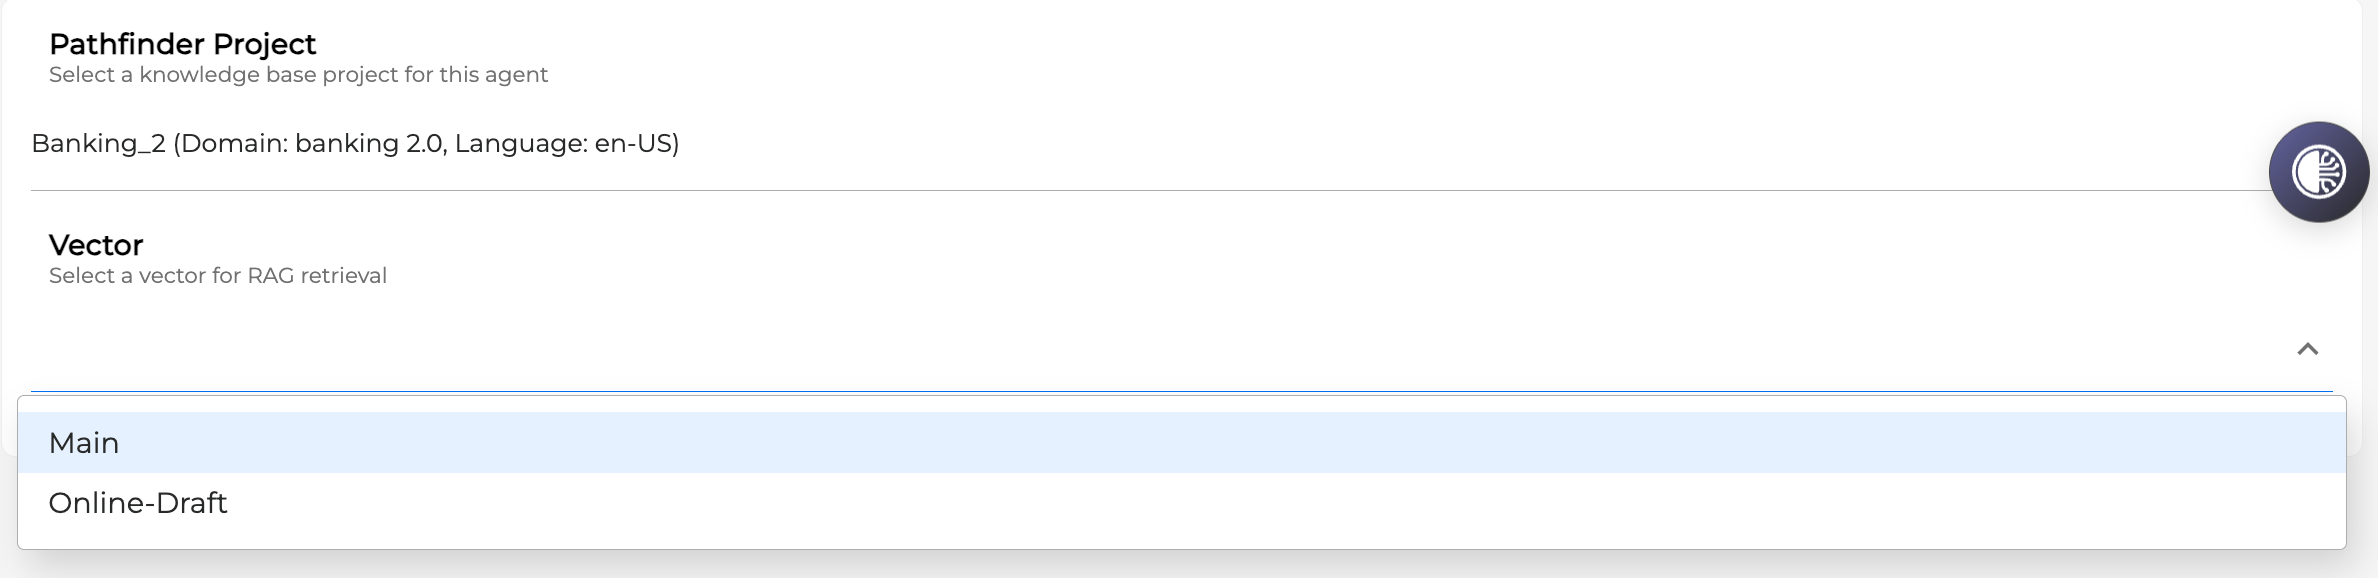
For the Pathfinder projects without the enabled knowledge base, a vector store must be additionally selected from the list:
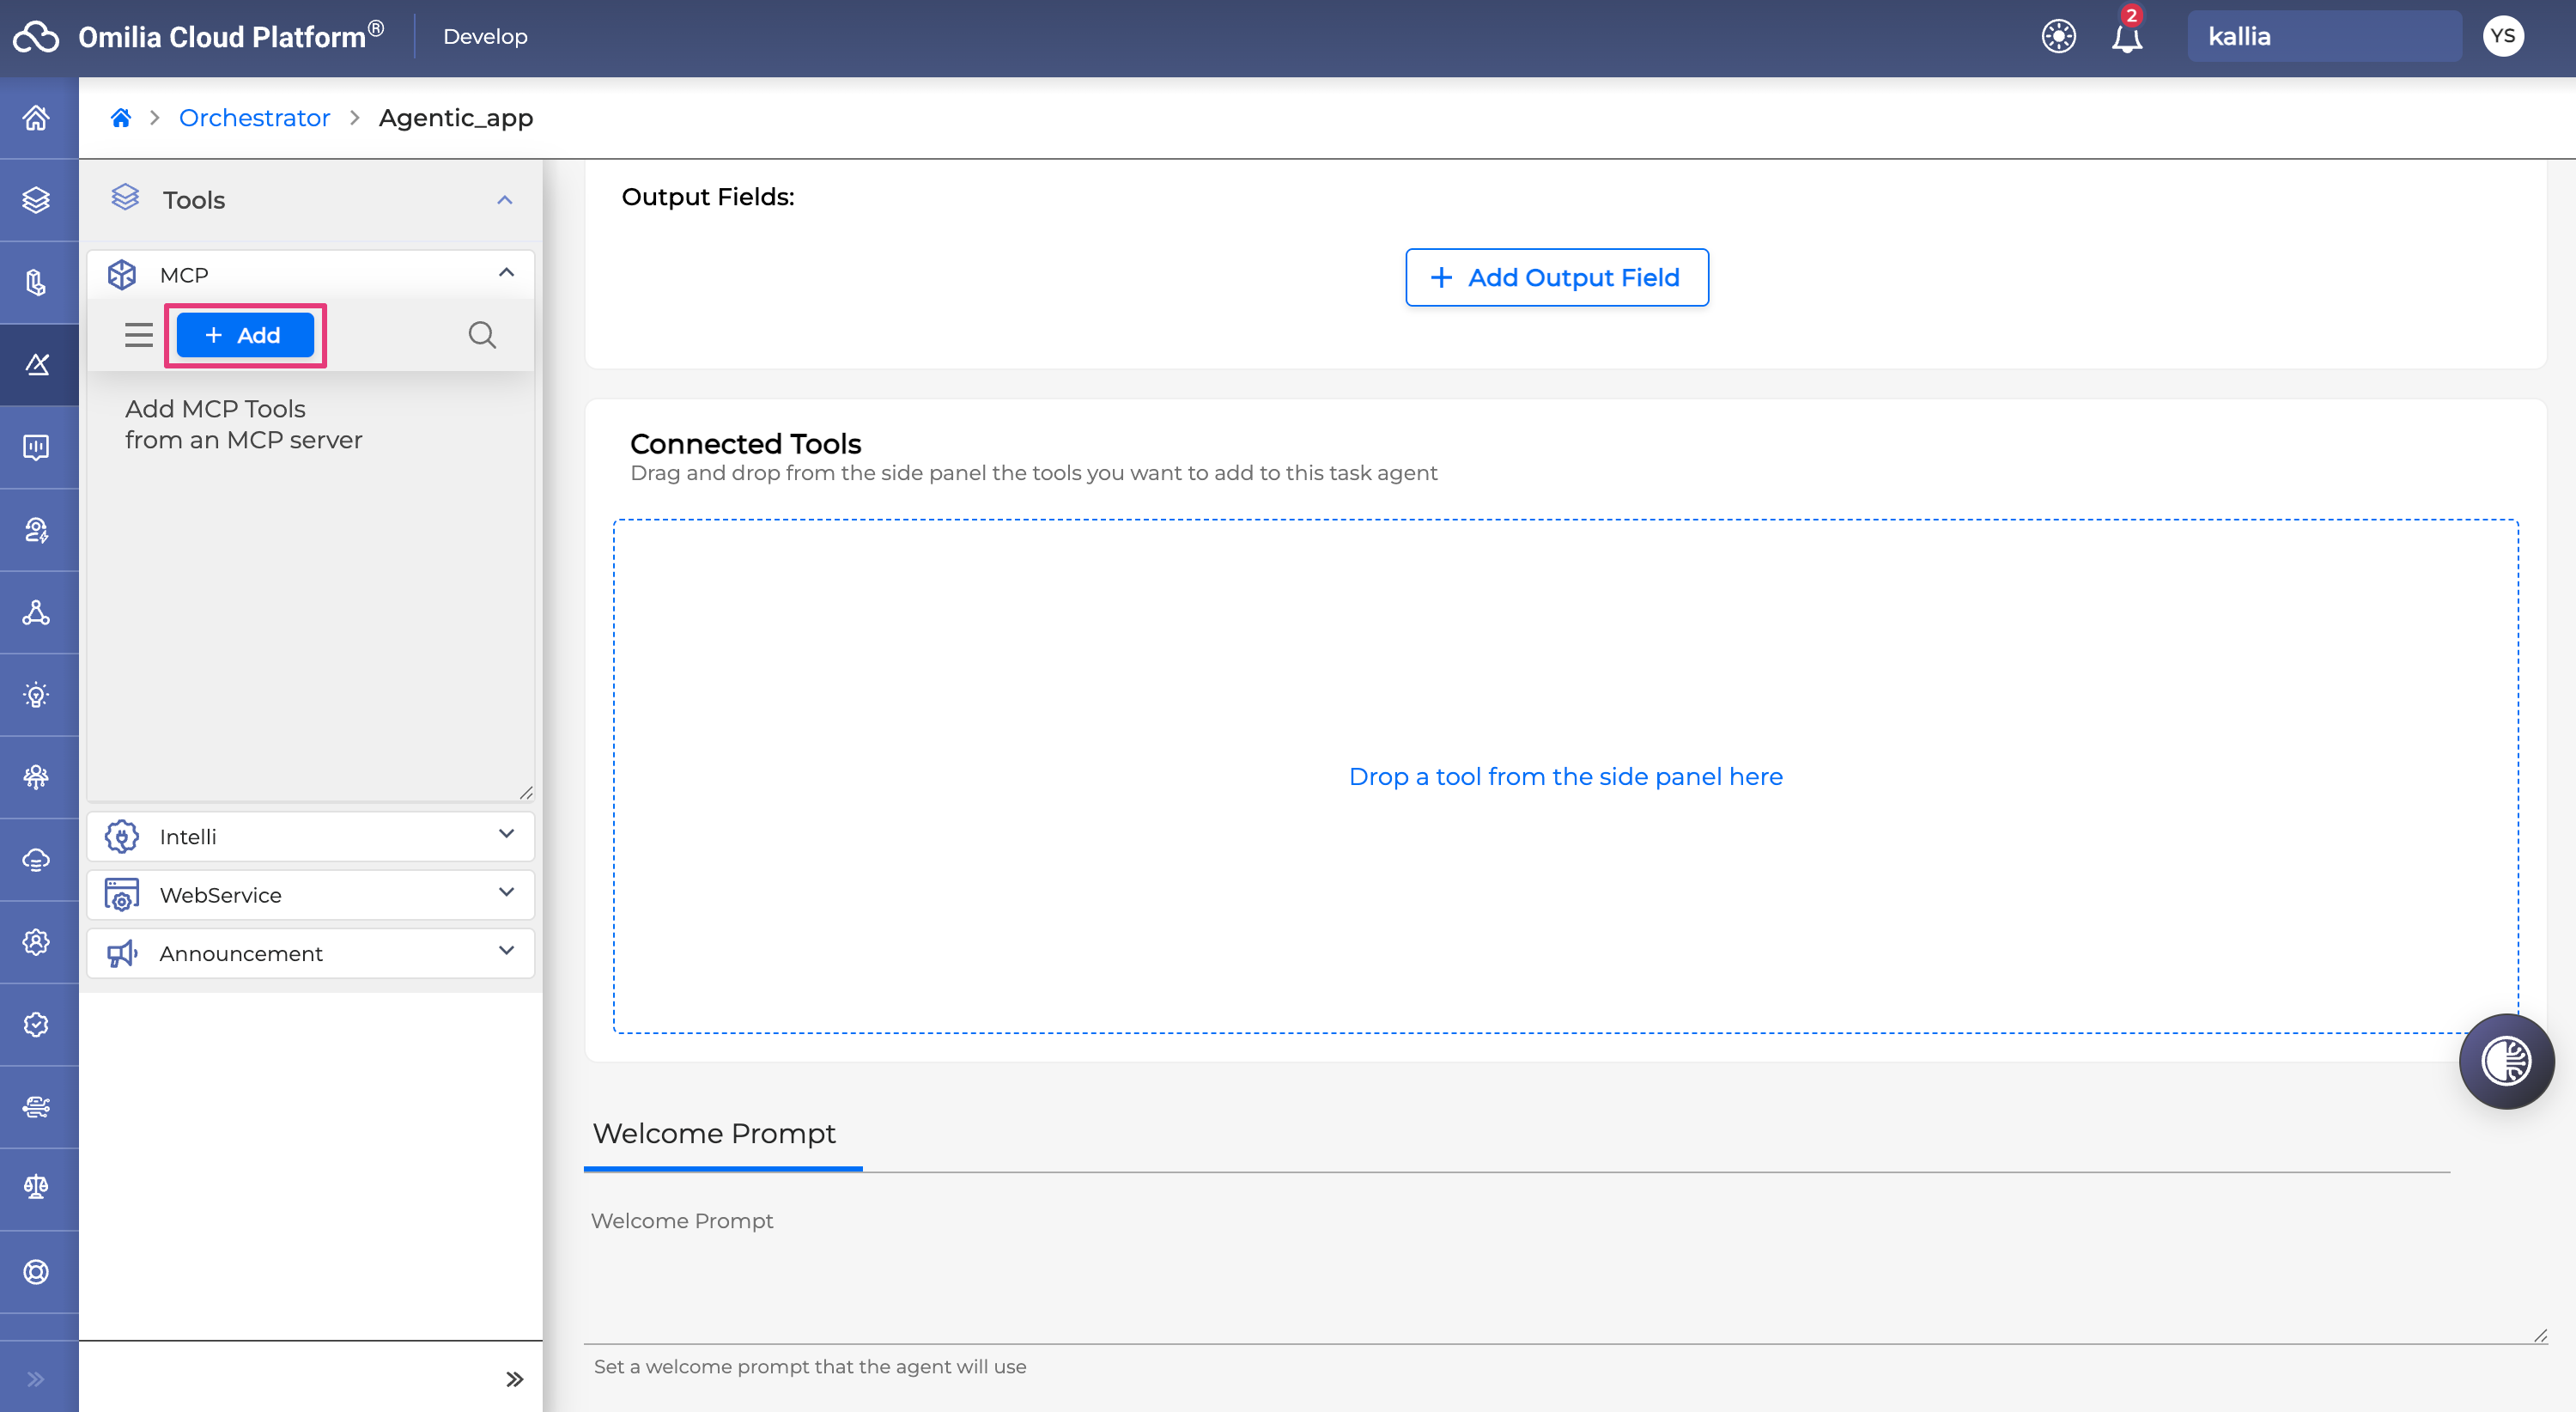
MCP Tools
MCP (Model Context Protocol) tools connect agents to external data sources and services through a remote MCP server.
To add an MCP tool:
-
In the left-side menu, open the MCP section under the Agents and Tools tab.
-
Click +Add.
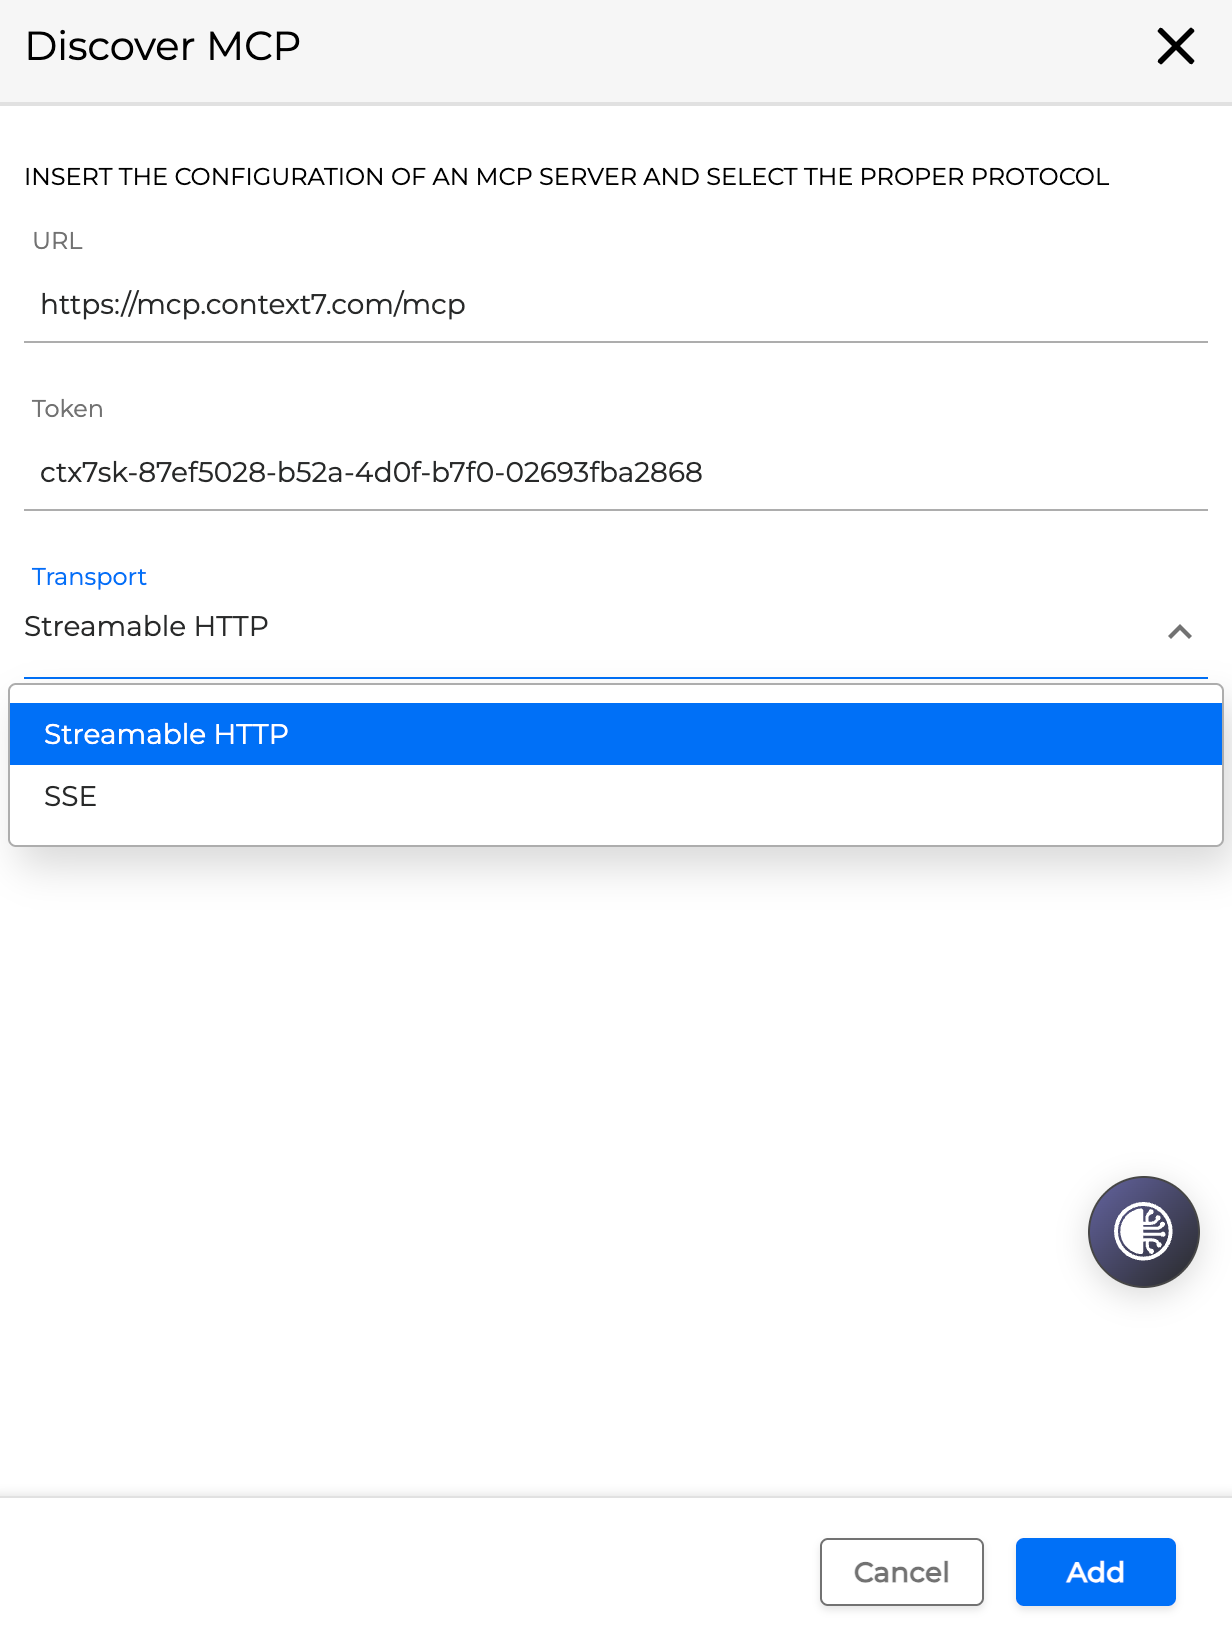
-
Provide the MCP server URL and token (if applicable).
-
Select the transport type for your MCP connection (either Streamable HTTP or SSE).
-
Click Add.
-
The MCP tool appears in the left-side menu. Drag it onto the Connected Tools & Agents area.
-
Click Save.
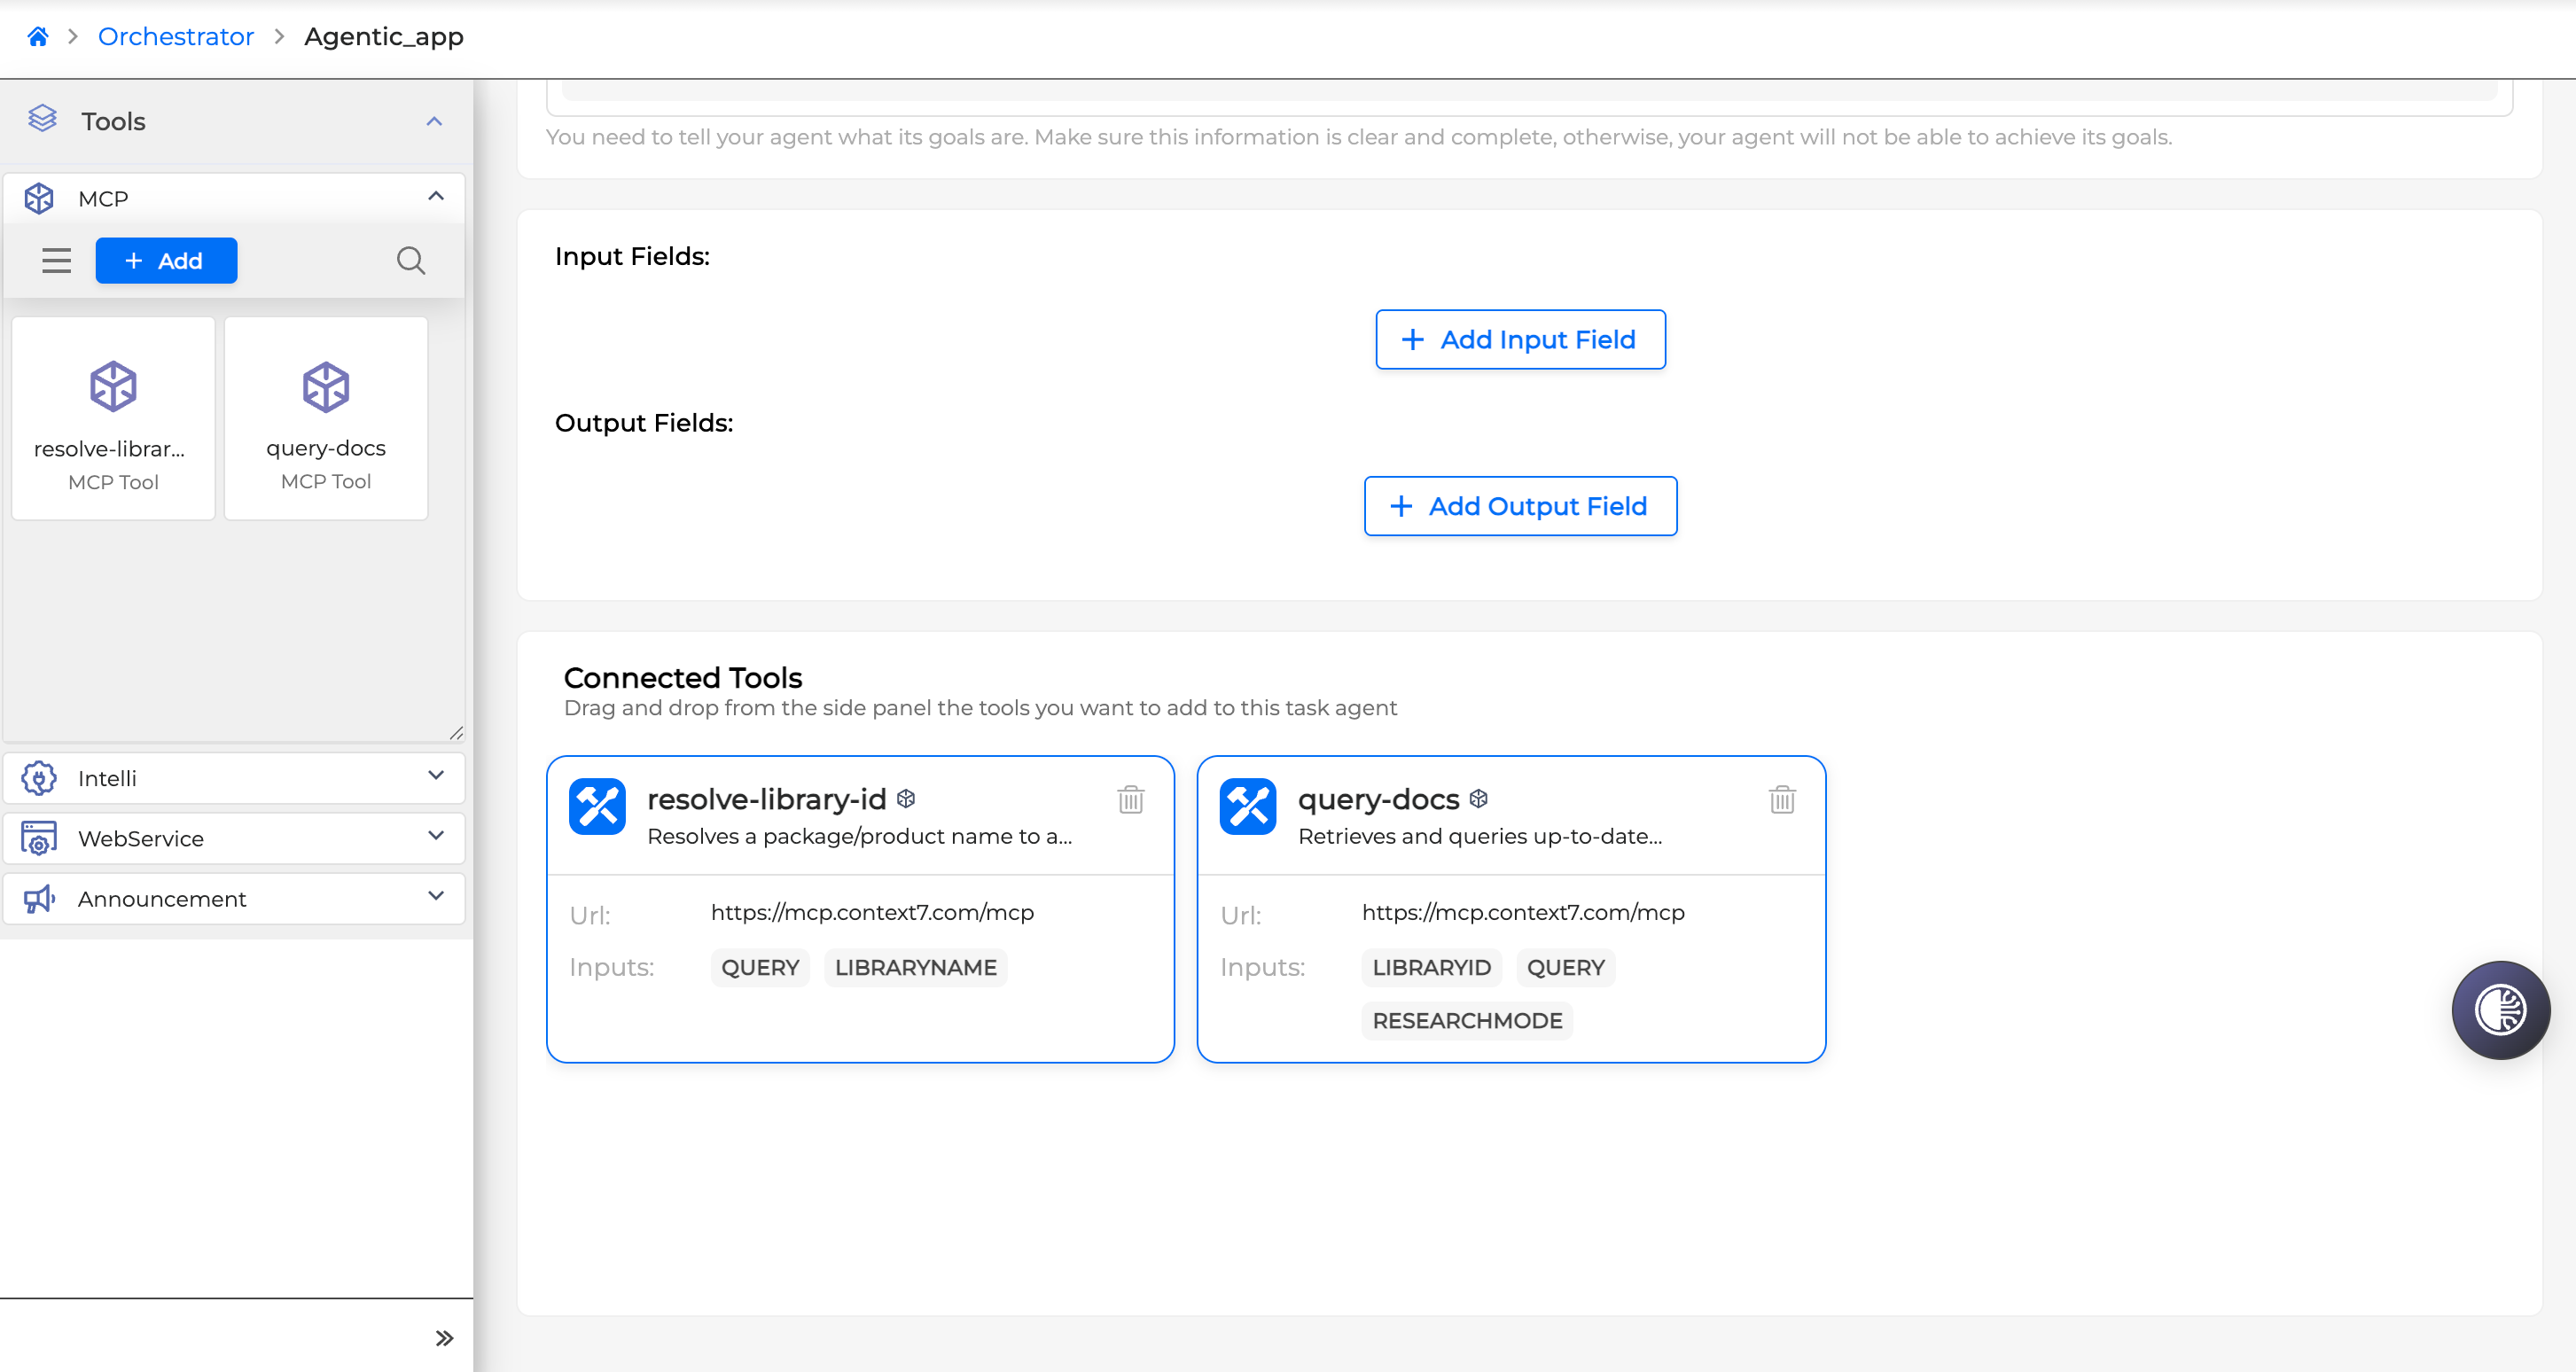
MCP tool metadata is not persisted locally. The list of MCP tools disappears from the left-side menu when you refresh the page. However, the tool connection in Connected Tools & Agents is preserved after you save.
Output Field Redaction in Task Agent
When using the connected tools (including Webservice, Intelli and Announcement miniApps, as well as MCP) in Task Agents, you can mark the output fields of these tools as Required and Secret. This is used for the validation and the narrowing down of the results obtained from the tool.
Add a tool to the Task Agent and click on it to edit:
Click +Add Output Field and tick the Required and/or Secret tick boxes:
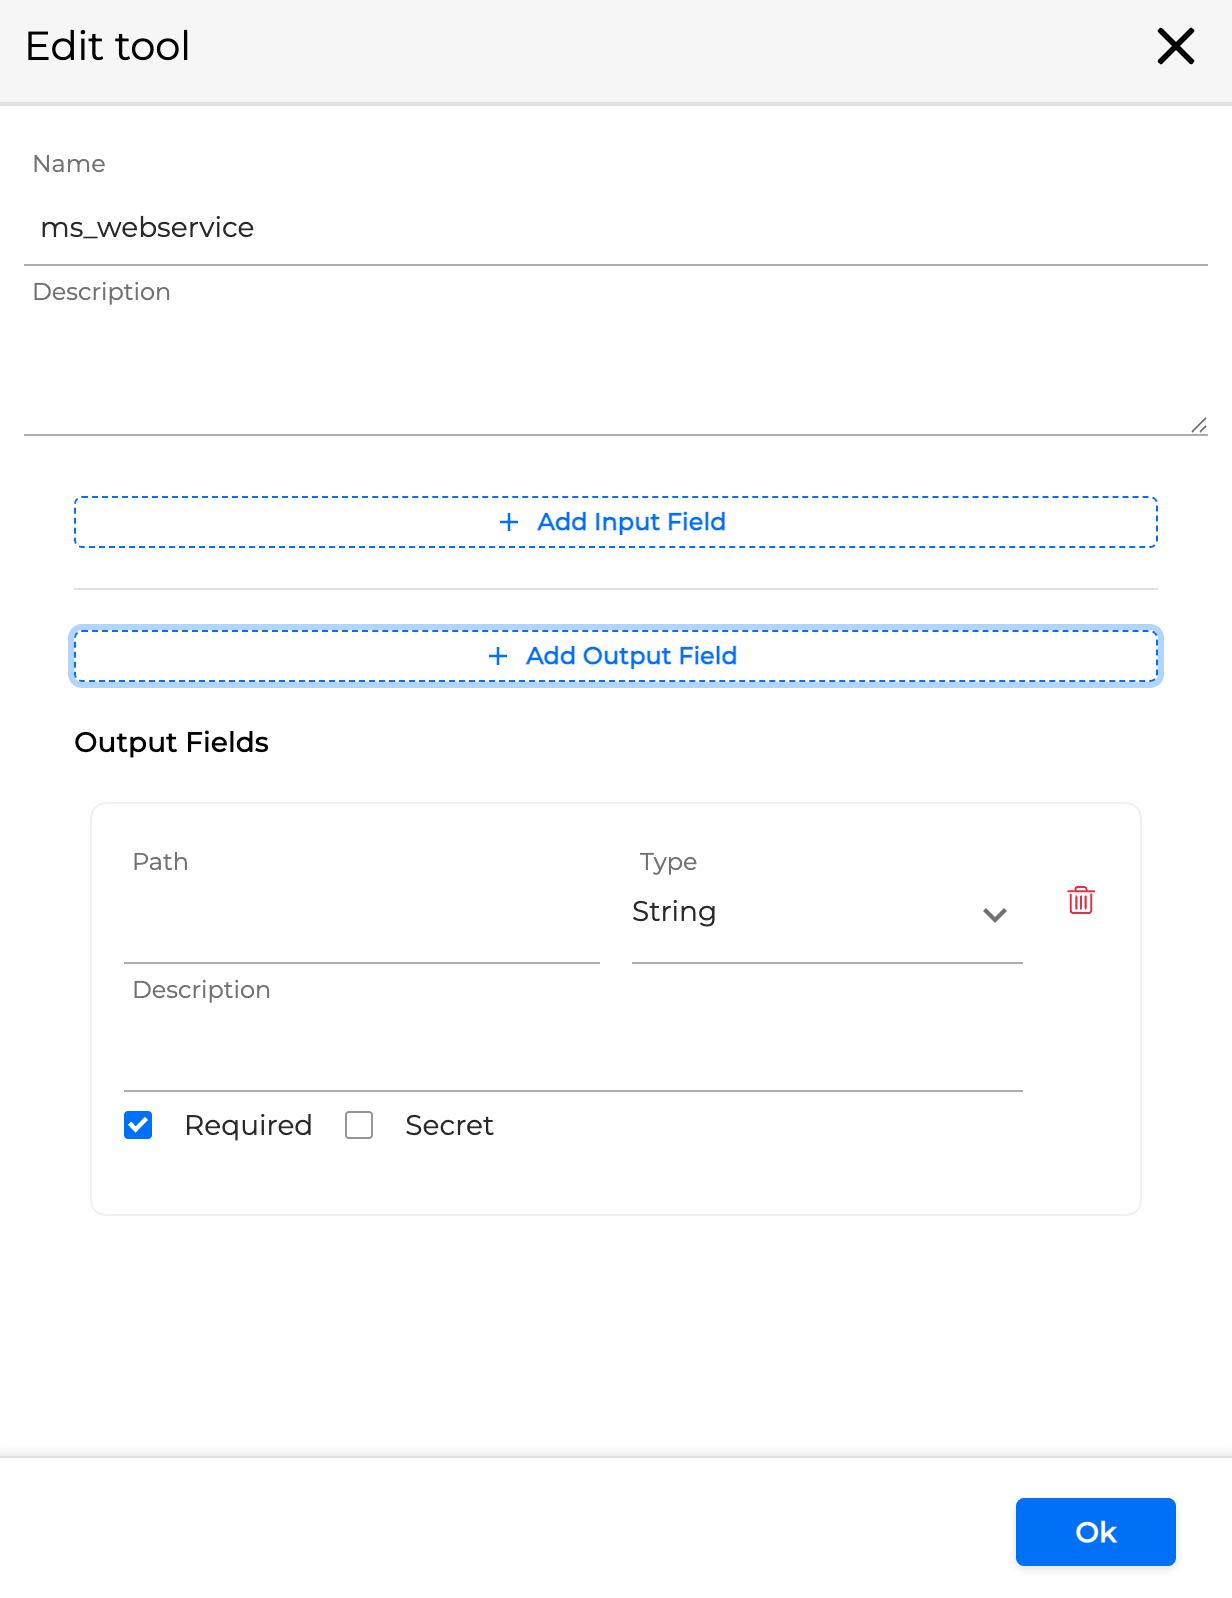
If no output fields are marked Required, then the entire output will be passed from the connected tool. However, if one or more fields are marked as Required, only the fields that were marked as such will be passed down.
If the output field is marked Secret then its value will be hidden from the context and excluded entirely from the context echange.
For example, if the JSON output is
{
	"userId:"user101",
	"token":"token1234",
	"roles":["admin","dev"]
}
And the user declares the fields from it as the following:
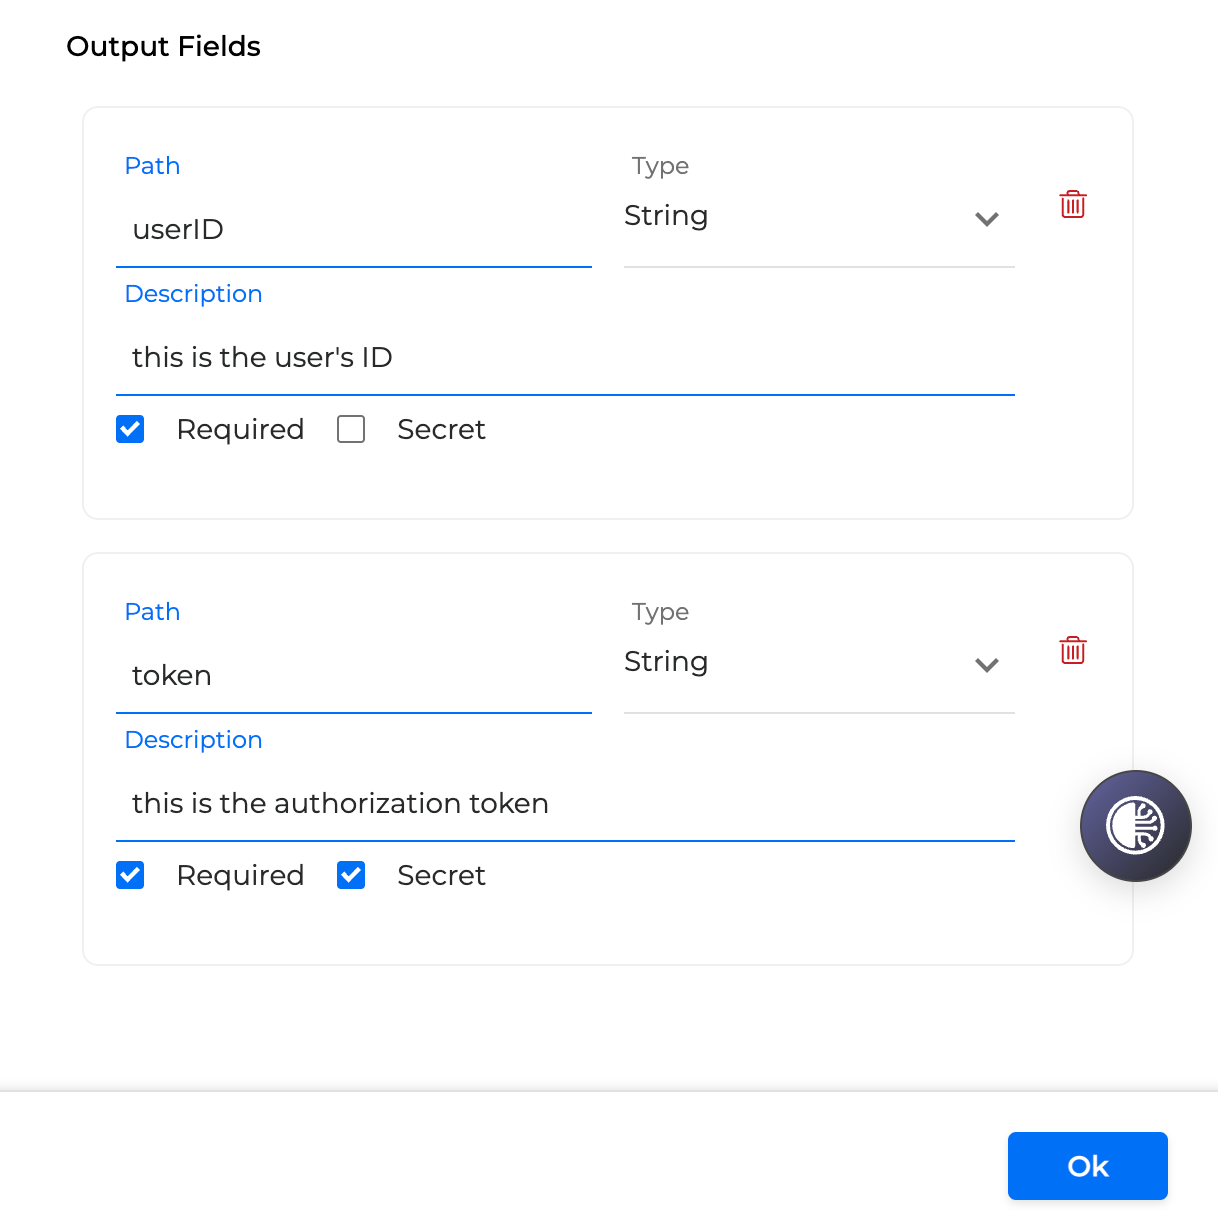
Then the context that will be passed down will appear like this:
{
	"userId:"user101",
	"token":"<ref to secret>",
}
Configuring Escalation Queues
Escalation queues define the conditions under which the Concierge Agent transfers the caller to a human operator. Each queue maps to a specific contact center destination, such as a RingCX queue.
Escalation queues work only with Concierge Agents in Agentic type of applications
To configure an escalation queue:
-
In the agent setup panel, locate the Escalate to Human section.
-
Click + Add Escalation Queue.

-
Provide the following details:
-
Queue Name: a display label for the queue (for example, "Technical Support").
-
Queue ID: the numeric identifier matching the contact center queue (for example, 791311).
-
Queue Description: a natural-language description of when to route to this queue. For example: "Redirect the caller here when they report a technical problem with their account."
-

-
Add additional queues as needed.
The Queue ID is used during testing to validate that the agent routes callers correctly. After a test conversation, check DiaManT logs for the "Extension value is:" entry to confirm the Queue ID matches the expected destination. See Test Dialog Application for details.
Setting Welcome Prompt
The welcome prompt is the first message the caller hears when the Concierge Agent starts a conversation. It sets the tone and identifies the AI assistant.
To configure the welcome prompt:
-
In the agent setup panel, locate the Welcome Prompt section.
-
Type the greeting message in the text field.
-
Click Save.

The welcome prompt is configured on Concierge Agents. Task Agents and Q&A Agents don't display a welcome prompt — they receive control after the Concierge Agent has already greeted the caller.
Agent Settings
The agent setup panel includes a Settings area with configuration options that affect overall agent behavior. The following settings are specific to Agentic Flows.
Reset on Intent
When enabled, the Reset on Intent setting forces the agent to clear its accumulated conversational context when caller intent changes mid-conversation. This prevents stale context from one topic (for example, billing) from influencing the response to a new topic (for example, technical support).
To configure this setting:
-
In the agent setup panel, navigate to the Settings area.
-
Toggle Reset on Intent on or off.
For general information on intent-change behavior in Orchestrator, see Reset on Intent Change.
Configuring Event Handlers for Agents
Task Agents can be used in Event Handlers in the same way as regular Flows.
Specific Event Types (type of errors) that trigger the Error Handler are available for the Agents:
AgentEscalated
AgentOutputIncomplete
Read more regarding the event-handling configuration workflow and event types in Event Handlers.