Introduction
The Number Sets tab is accessible via your OCP → Integrations → Numbers.
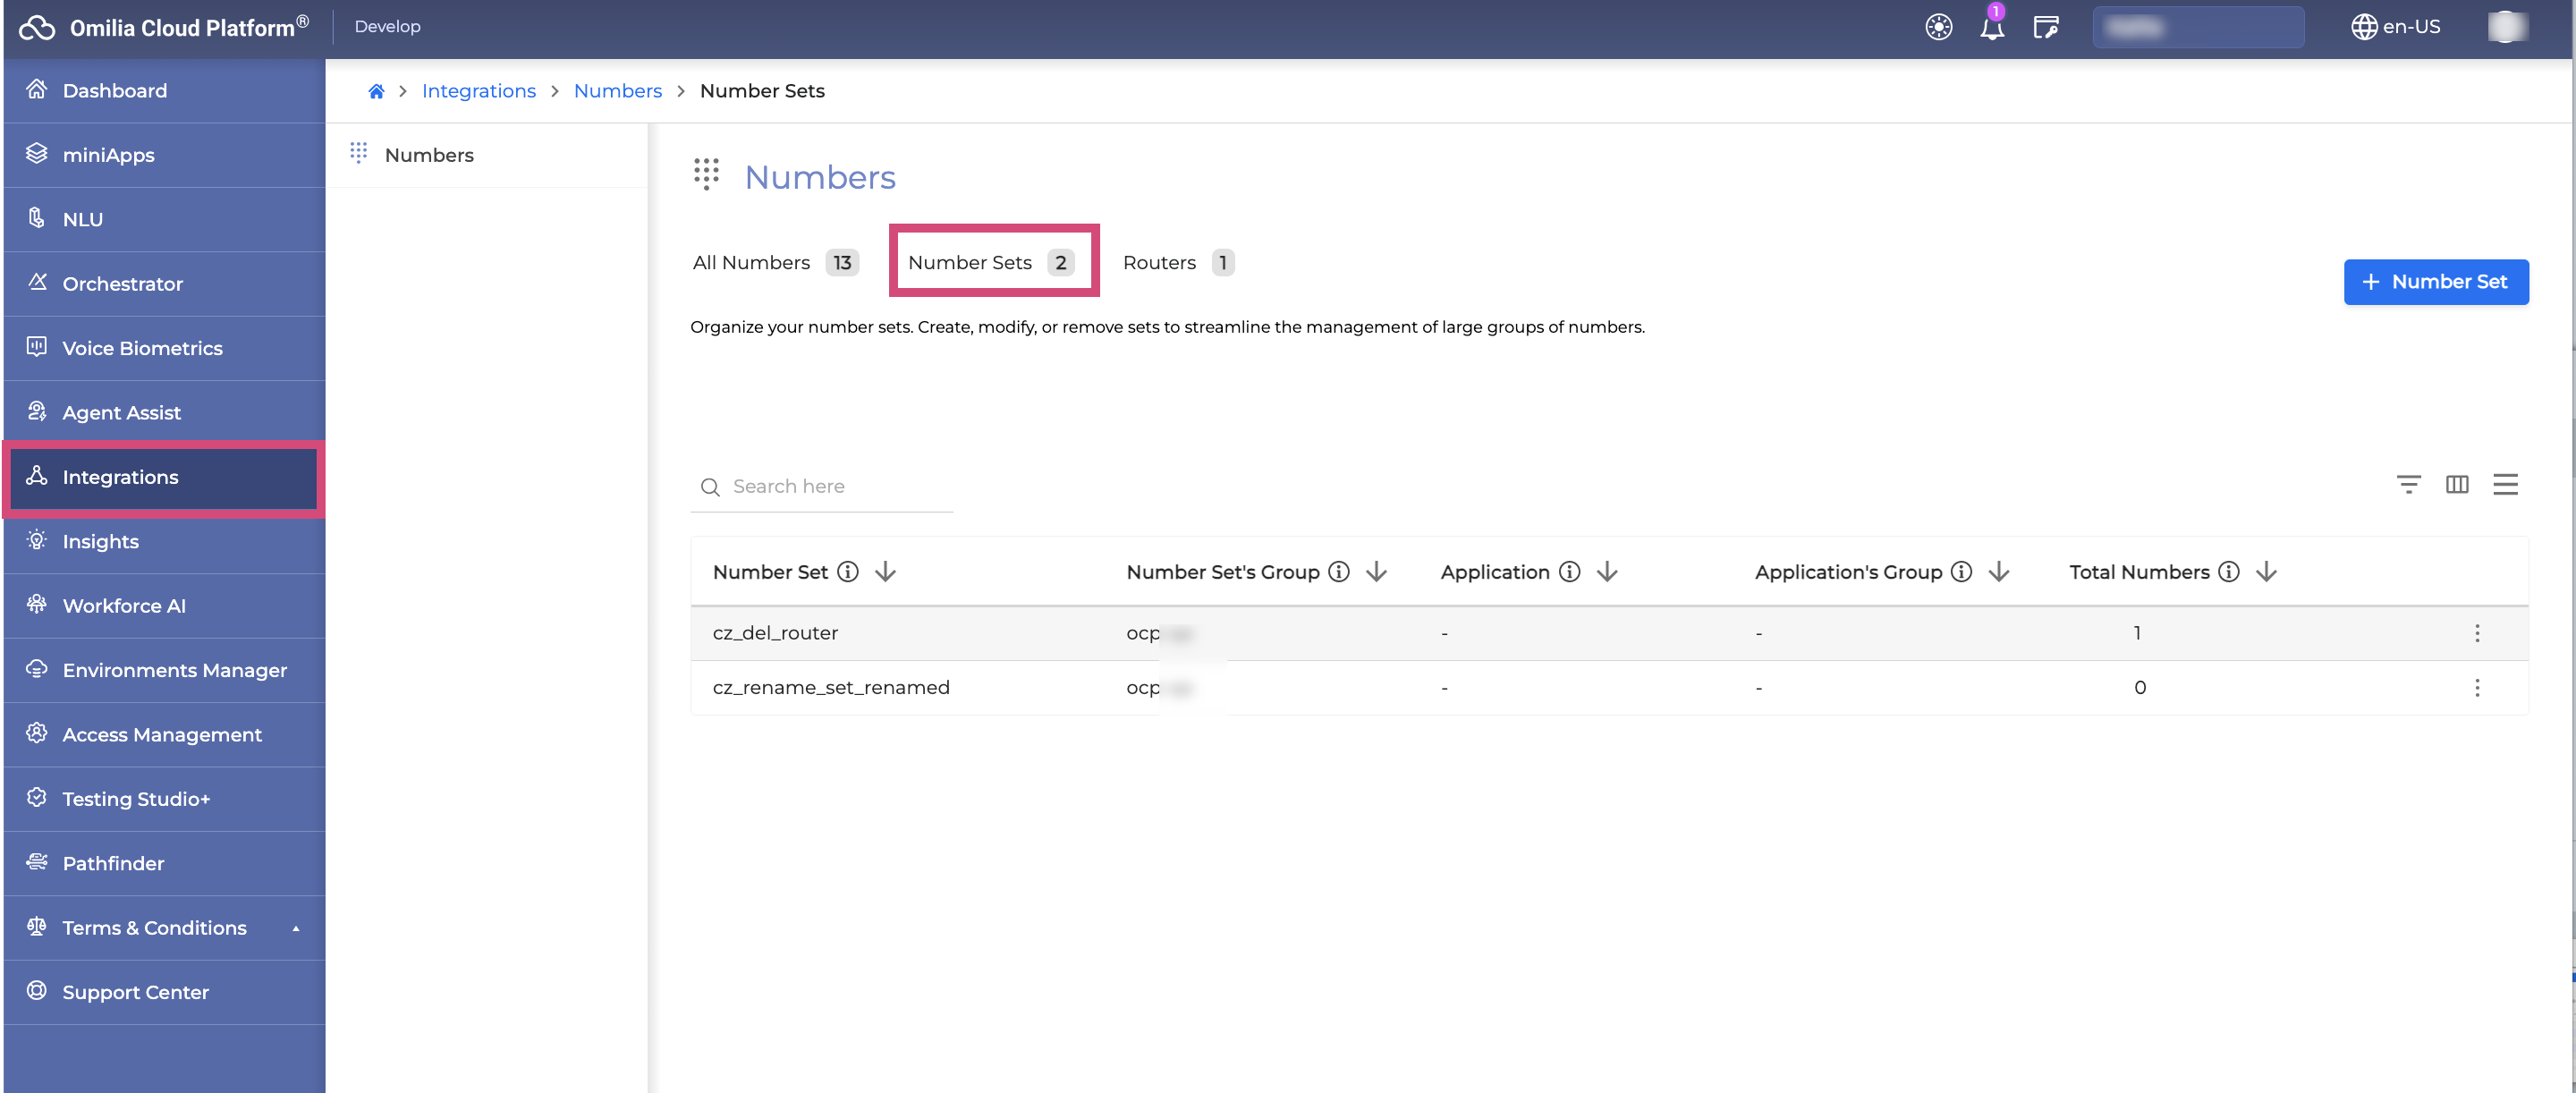
This tab enables you to organize large groups of numbers into number sets and efficiently manage them by performing the following actions:
Below you can find a detailed guide to navigating and utilizing the features on this tab.
Navigation and layout
Before exploring the features of the Number Sets tab, here are some basic navigation tips to help you make the most of its functionalities.
Search field
Use the Search field to shorten the list of numbers to those associated with the text in the filed.
The search engine will scan all elements related to a number, such as number set name, group name, total number and assigned number.

Search filters
The search filters provide flexibility by allowing you to select multiple items from the list. When dealing with extensive lists, these filters include a convenient search field to streamline your selection process, enabling you to quickly locate specific items without the need for endless scrolling.
To open the search filters, click the Filter icon.

Rows height
You can adjust the height of the rows by clicking the Rows Height button.

Number sets management
Create a number set
To create a number set, follow the steps below:
-
Navigate the Number sets tab and click the + Number Set button.

-
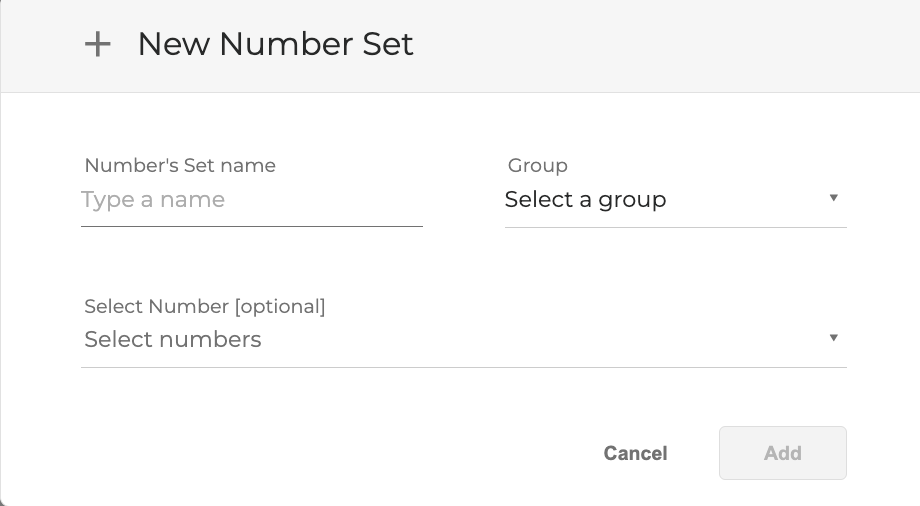
In the opened dialog box, fill in the fields as described below.
-
Number Set Name: Enter a descriptive name for your number set.
-
Group: Select the group this number set will belong to.
-
Select Number: If you wish, you can add numbers to your set at this stage. However, this step is optional, and numbers can be added or modified later as needed.
-
Click Add to finalize the creation process. Your new number set will now be visible in the list of available number sets, ready for use or further configuration.
Edit a number set
To edit a number set, follow the steps below:
-
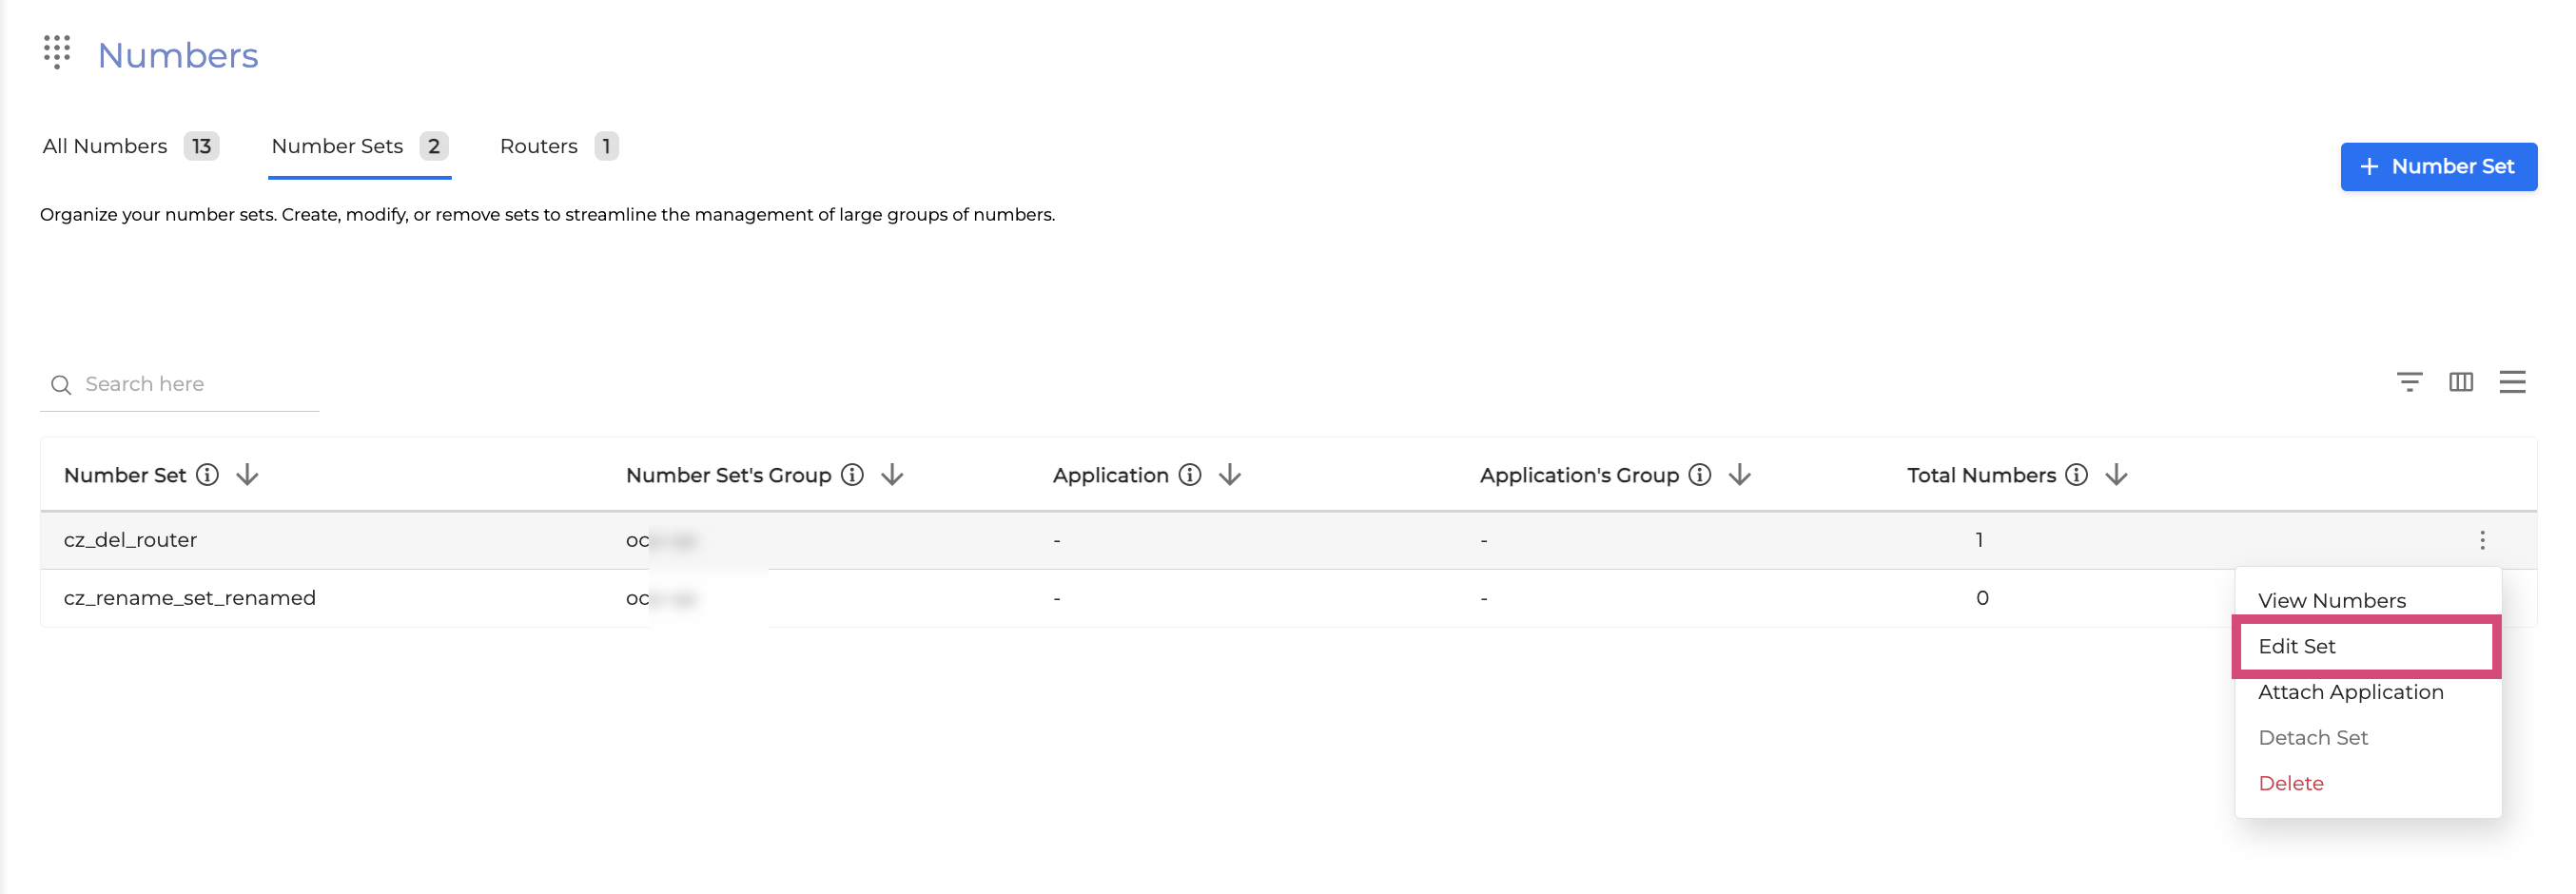
Navigate to the list of available number sets and choose the one you wish to modify.
-
Click the Options menu button → Edit Set.
-
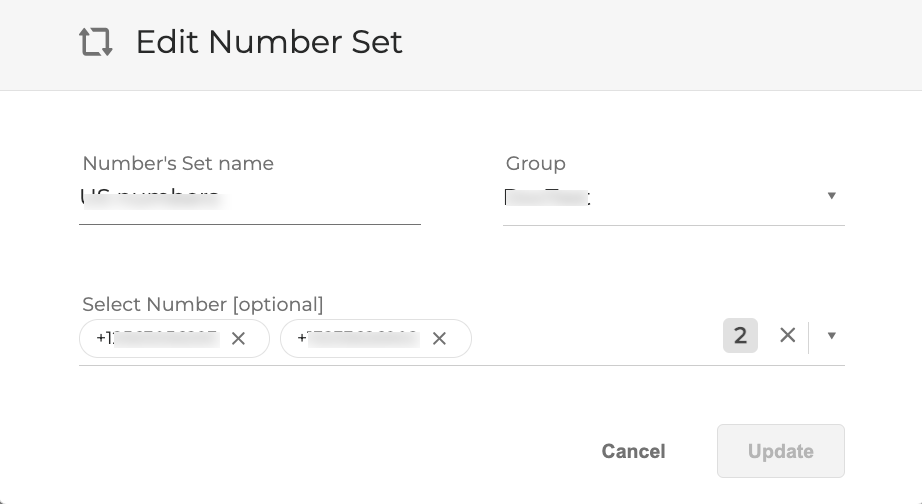
In the dialog box that appears, make the necessary changes to any field. All fields are editable.
-
Click Update to complete the action. The modifications to the selected number set will be saved and reflected immediately.
Attach an application to a number set
You have the option to attach an entire number set to an application or a specific application tag. Once attached, the application will utilize this number set whenever any of its numbers are called. To attach a number set to an application, follow these steps:
Numbers assigned to other applications will be assigned to the Numbers set’s application.
-
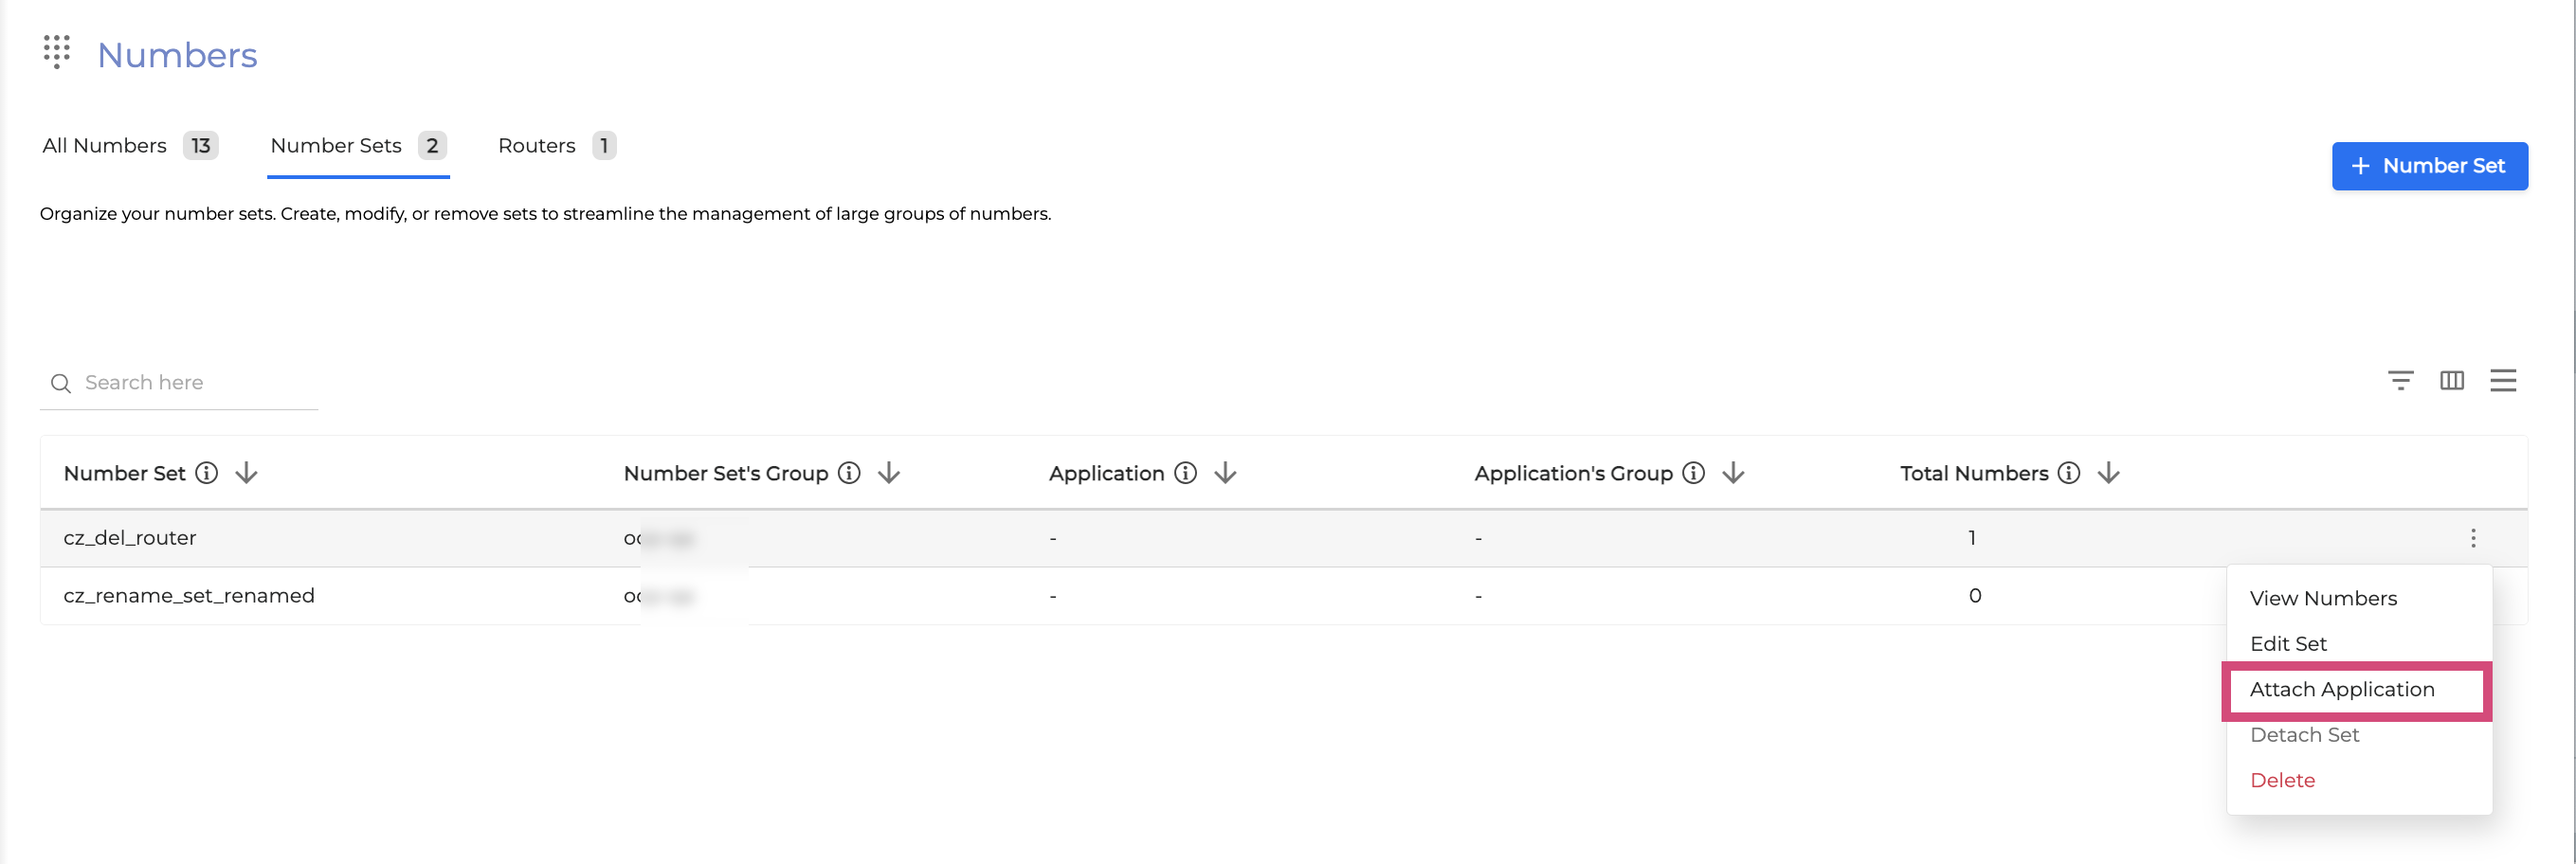
From the list of available number sets, choose the one you intend to attach.
-
Click the Options menu button → Attach Application.
-
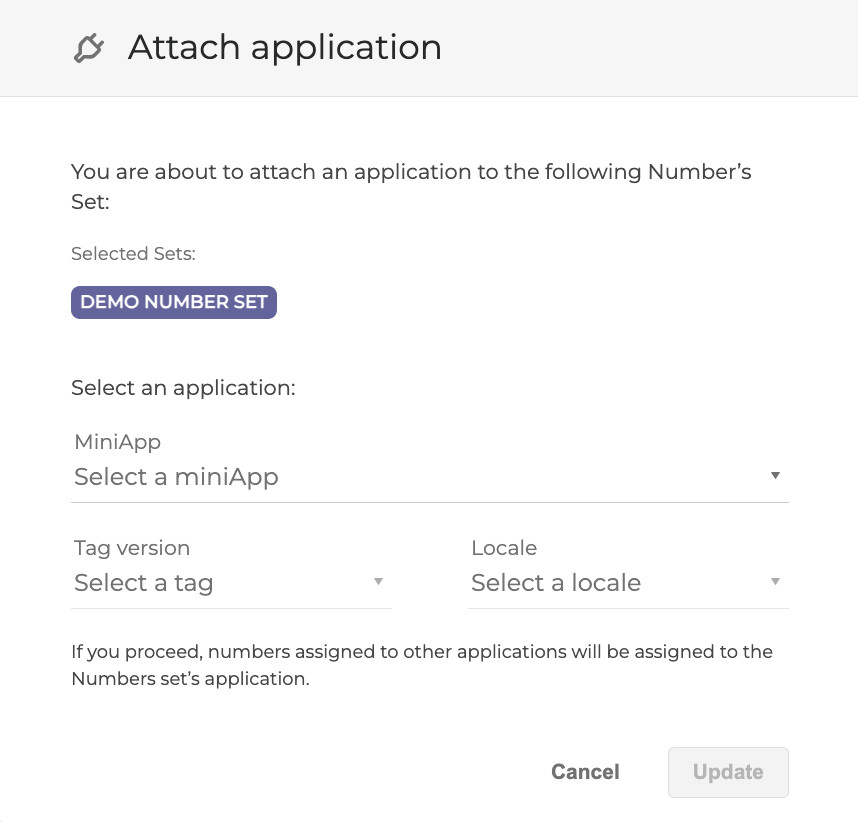
In the dialog box that opens, select a new application destination.
-
miniApp: Select an application to which the number set will be attached.
All numbers in the set, including those added subsequently, will automatically be attached to this application.
-
Tag: Select an application tag if you need to attach the number set to a certain application instance.
-
Locale: Select a locale for your number set.
-
Click Update to finalize the operation. The number set is now successfully attached to your chosen application or application tag.
Create a router for a number set
To efficiently manage your traffic distribution, you can create a router for all numbers in your number set. This router will gradually allocate your traffic across two applications, which can be particularly useful for:
-
Testing new features
-
Transitioning between applications
-
Handling exceptional cases requiring staggered deployment
For more information and detailed step-by-step instructions, refer to the Routers Tab User Guide.
Detach a number set from an application
To remove a number set from an application, proceed as described below:
Detaching a number set from an application will immediately stop all traffic from the numbers included in that set.
-
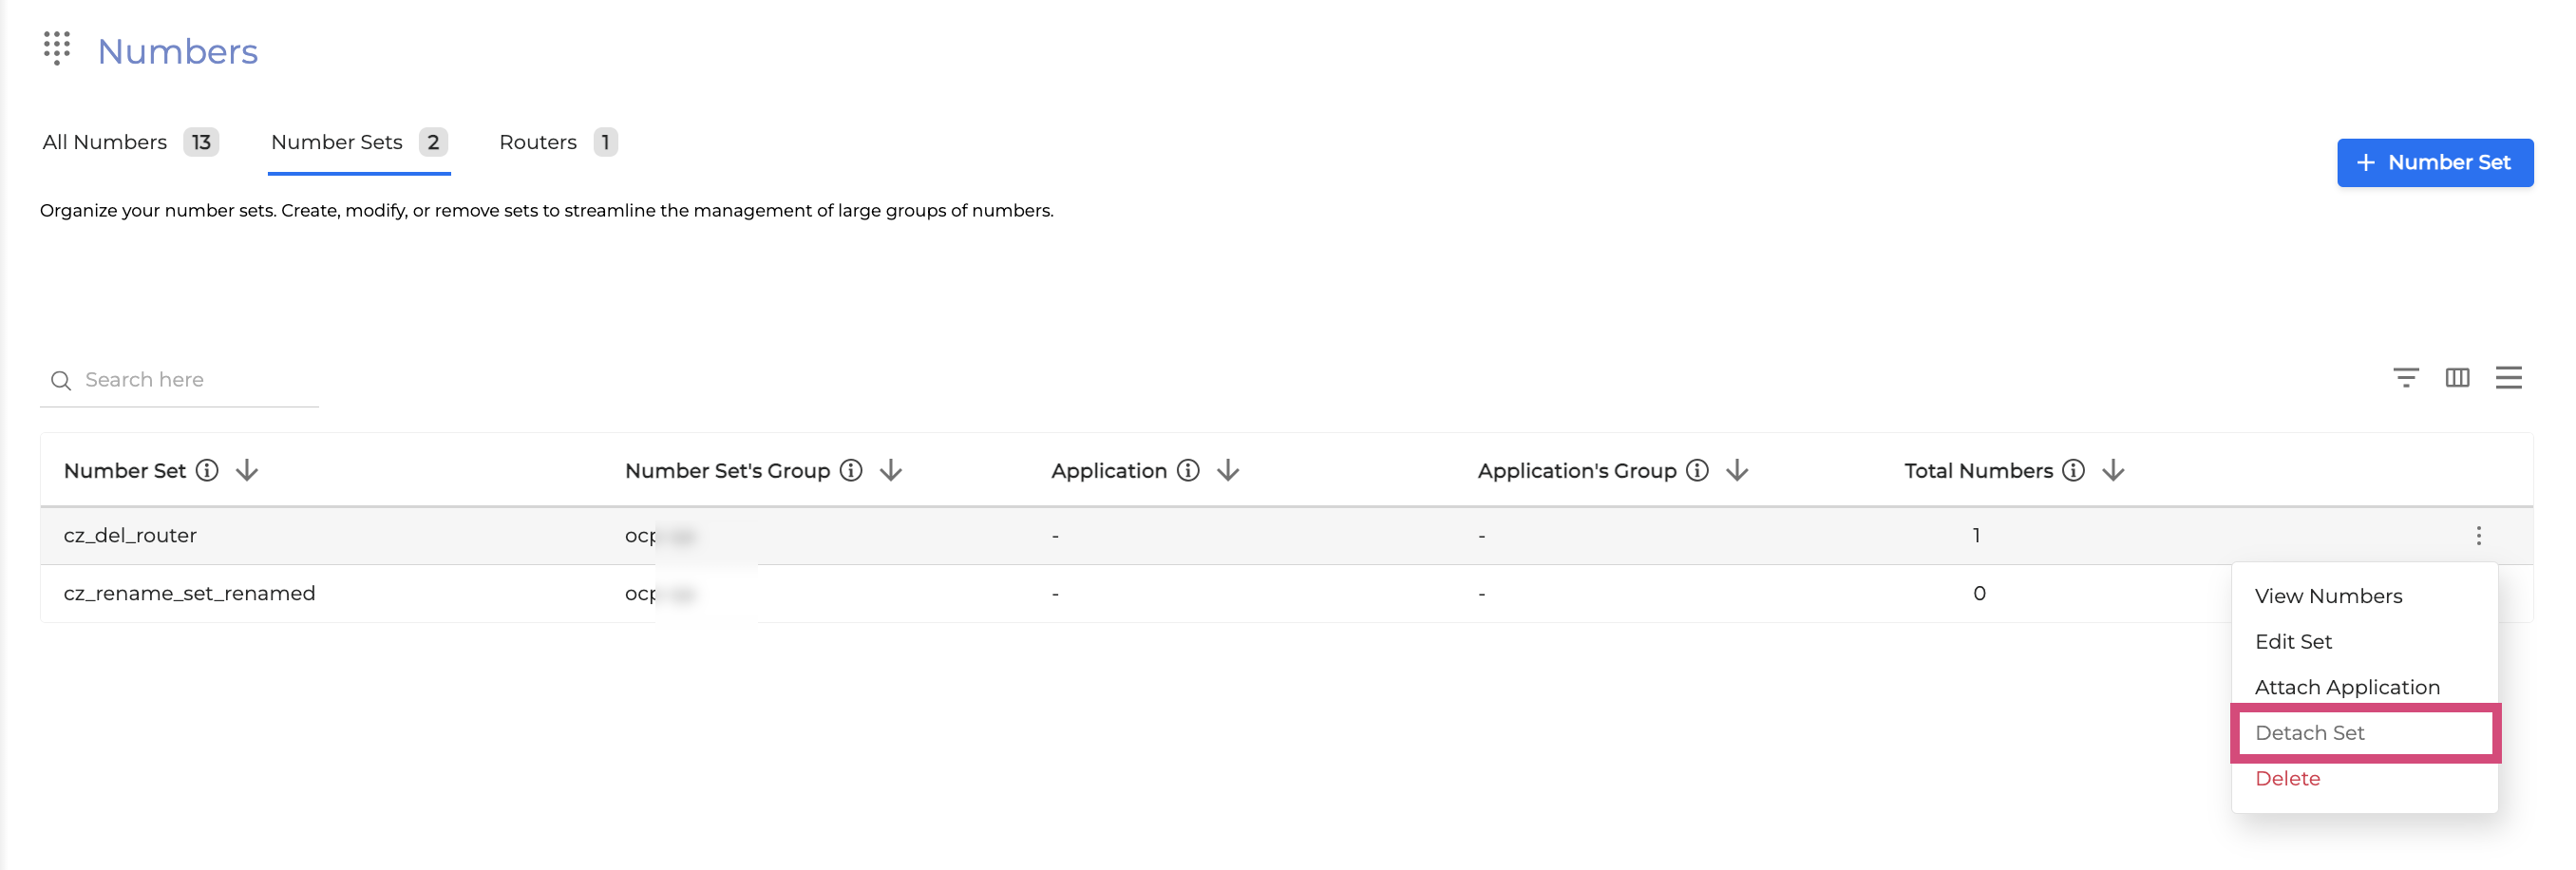
Identify and select the number set you wish to detach from the application.
-
Click the Options menu button → Detach Set.
-
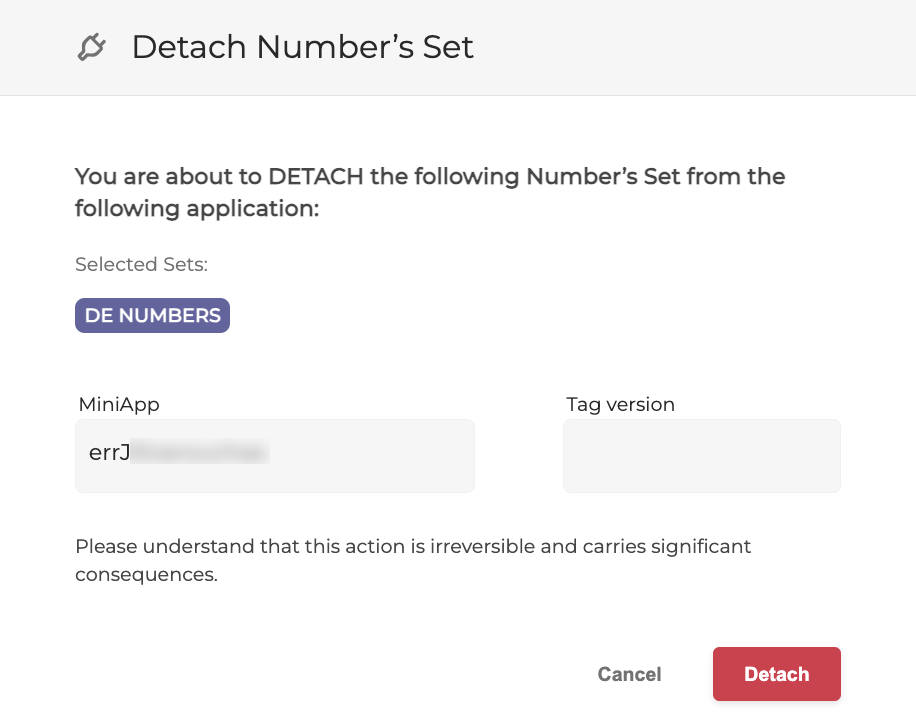
In the dialog box that appears, double-check to ensure that both the number set and the application specified are correct.
-
Click Detach to confirm the action. The number set is now successfully detached from the application.
View the numbers in a number set
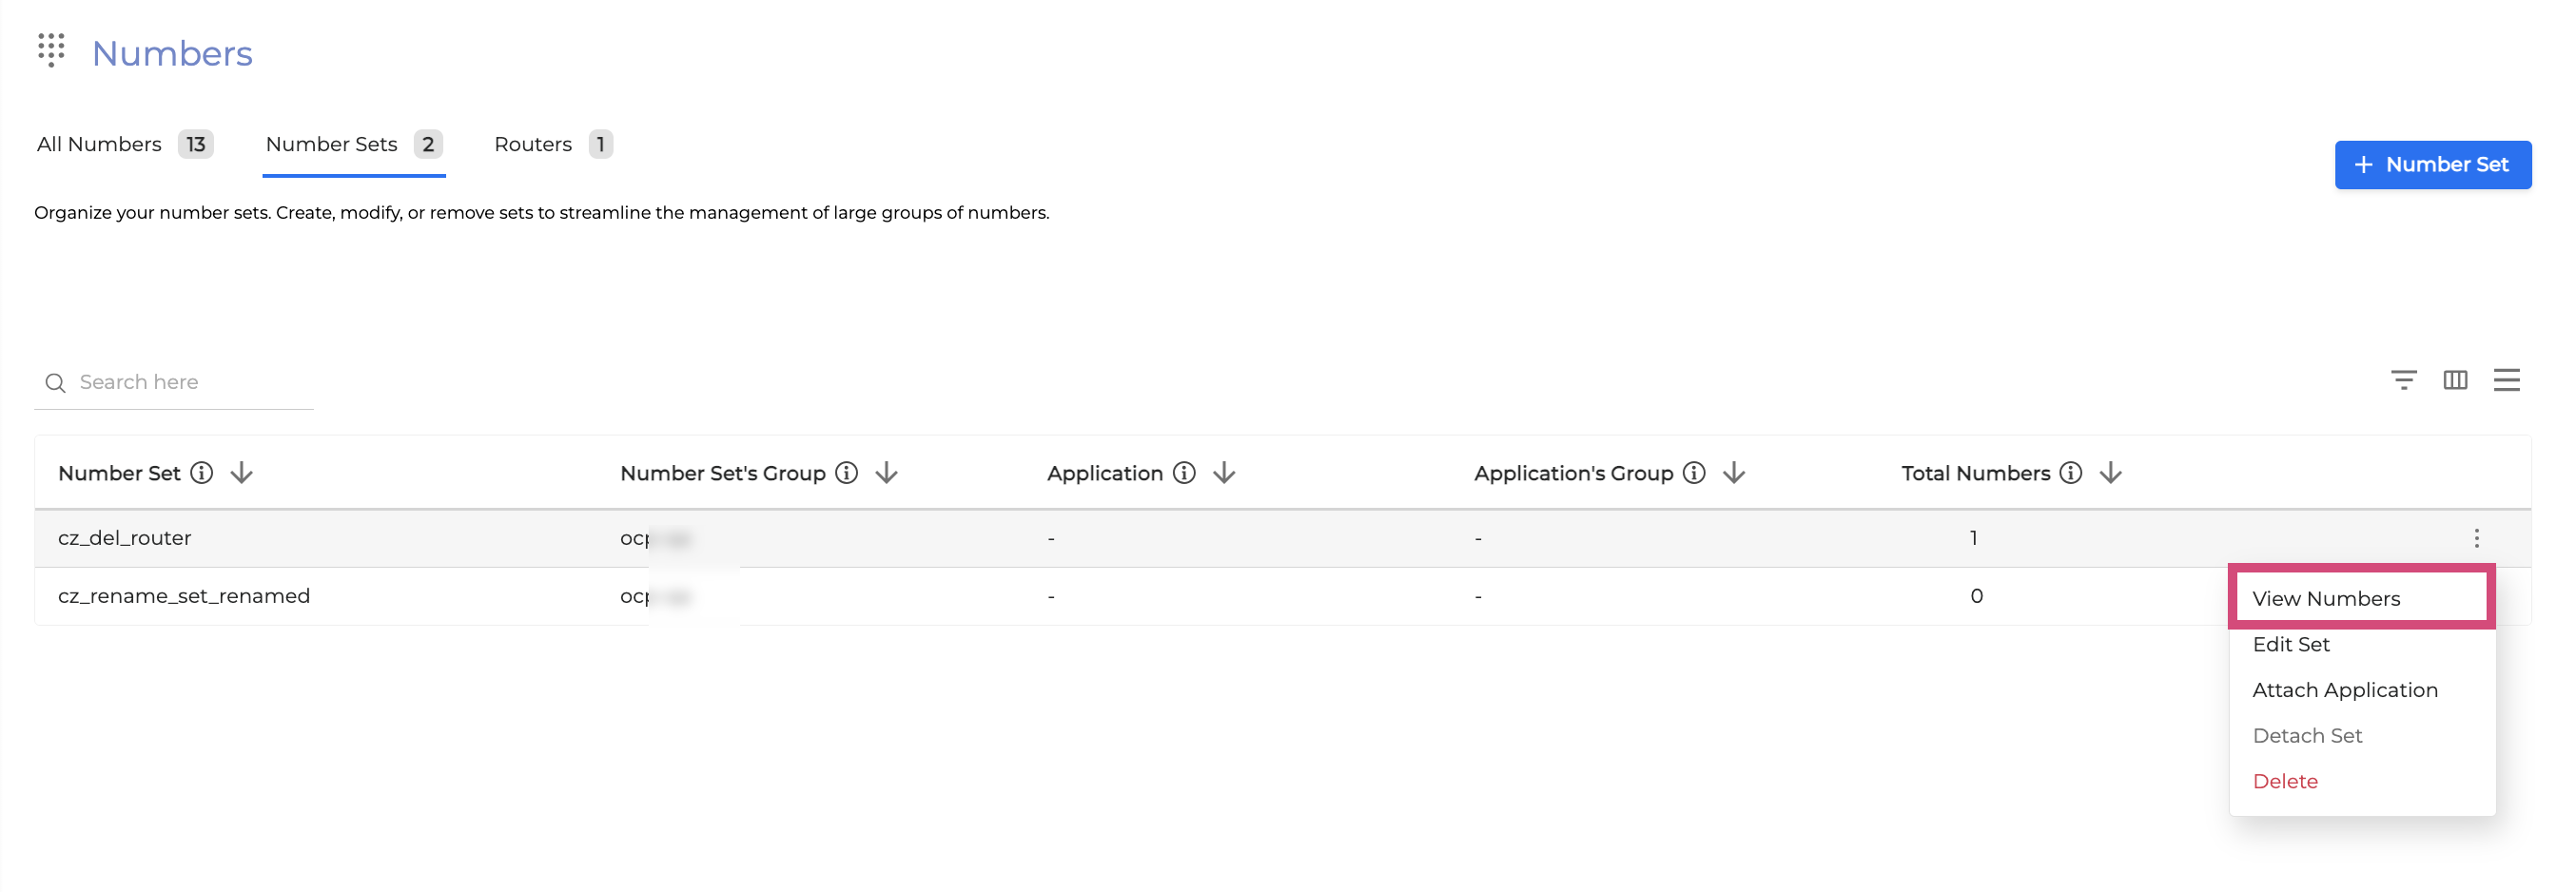
To view the numbers included in a particular number set, follow these steps:
-
Choose the number set you wish to view.
-
Click the Options menu button → View Numbers.
-
You will be redirected to a page displaying the numbers in the selected number set. In the top-left corner, you can see the number set's name, its assigned group, and the total number of assigned numbers. To return to the list of number sets, click the Backward arrow.

Manage the numbers in a number set
You can manage numbers within a number set by adding numbers, attaching or detaching them from applications, and removing numbers. Detailed instructions for each action are provided below:
Add a number to a number set
To add a number to an existing number set, follow the steps below:
-
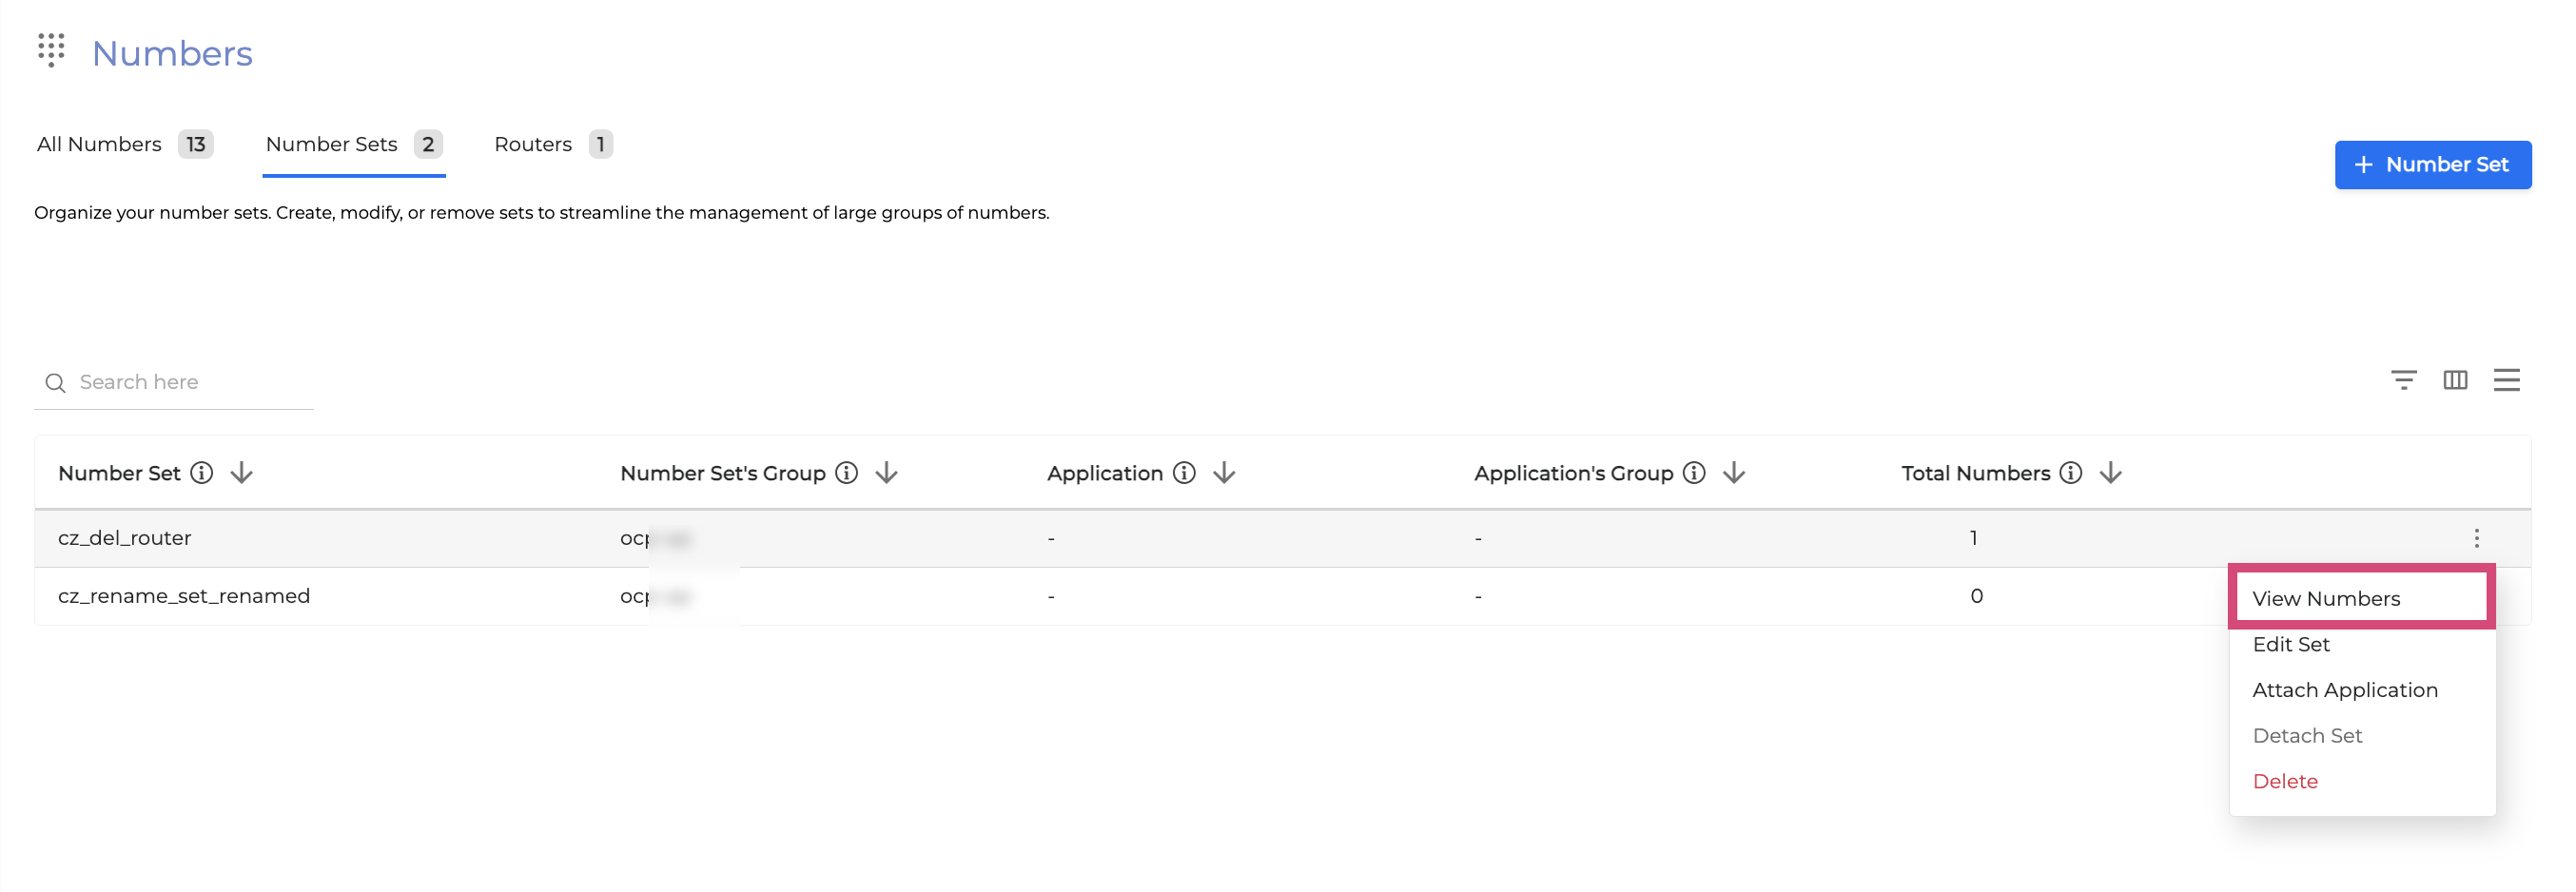
Choose the desired number set and click Options menu → View Numbers.
-
You will be forwarded to the numbers list. Click the + Add Numbers button.

-
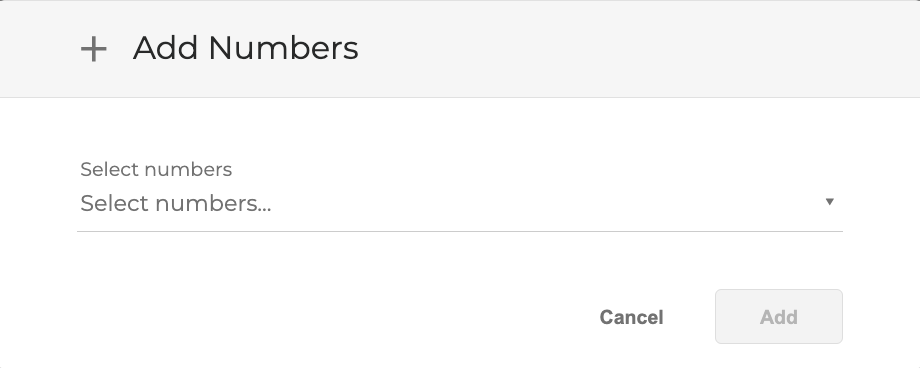
In the dialog box that appears, choose the numbers to be added.
-
Click Add to finalize the action.
All the numbers added to the number set will inherit the application of the set.
If a number is already in another set, it will be moved to this set.
A number’s group will be updated to match the group of the number set.
Remove a number from a number set
To remove a number from a number set, follow the steps below:
Removing a number from a set is a permanent action, but you can add the number back to the set later if needed.
-
Choose the desired number set and click Options menu → View Numbers.

-
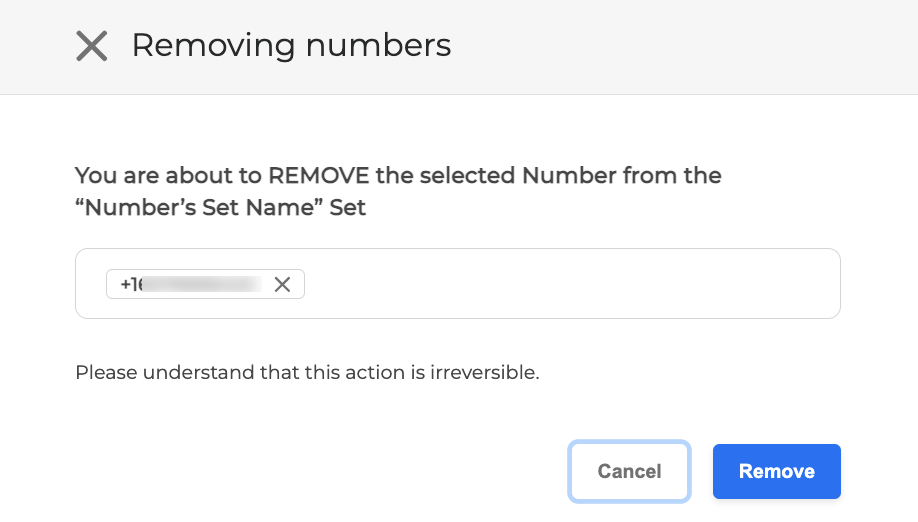
You will be forwarded to the numbers list. Click Options menu → Remove next to the number you want to remove.

-
In the dialog box that appears, ensure the number is correct.
-
Click Remove to finalize the removal.
Attach a number to an application
To attach a number from a number set to an application, proceed as described below:
By attaching a number to an application, you will direct all traffic from the number to that application.
-
Choose the number set and click Options menu → View Numbers.

-
You will be forwarded to the numbers list. Click Options menu → Attach/Re-Attach.

-
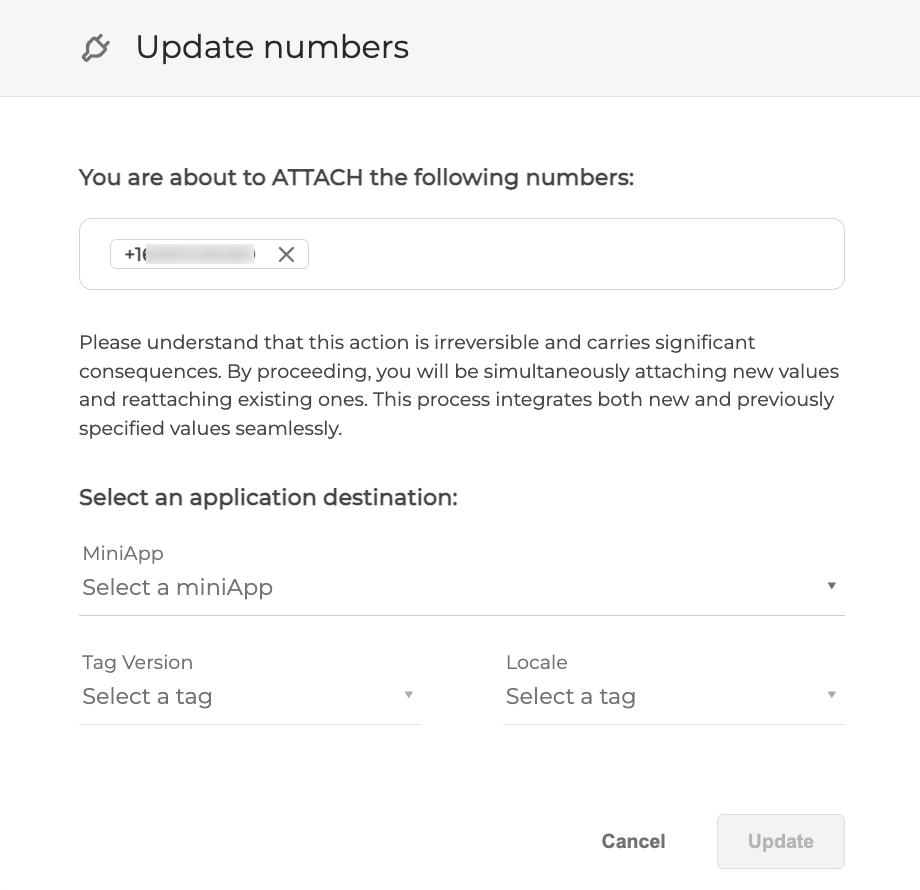
In the dialog box that opens, provide the required information:
-
miniApp: Select a miniApp to attach the number to.
-
Tag: Select an application tag if you need to attach the number to a certain application instance.
-
Locale: Select a locale for your number.
-
Click Update to finalize the operation. The number is now attached to the application,
Detach a number from an application
To detach a number from an application, proceed as described below:
Detaching an application will stop all traffic from that number. Before proceeding, make sure that both selected number and application are correct.
-
Choose the number set and click Options menu → View Numbers.

-
You will be forwarded to the numbers list. Click the Options menu button → Detach.

-
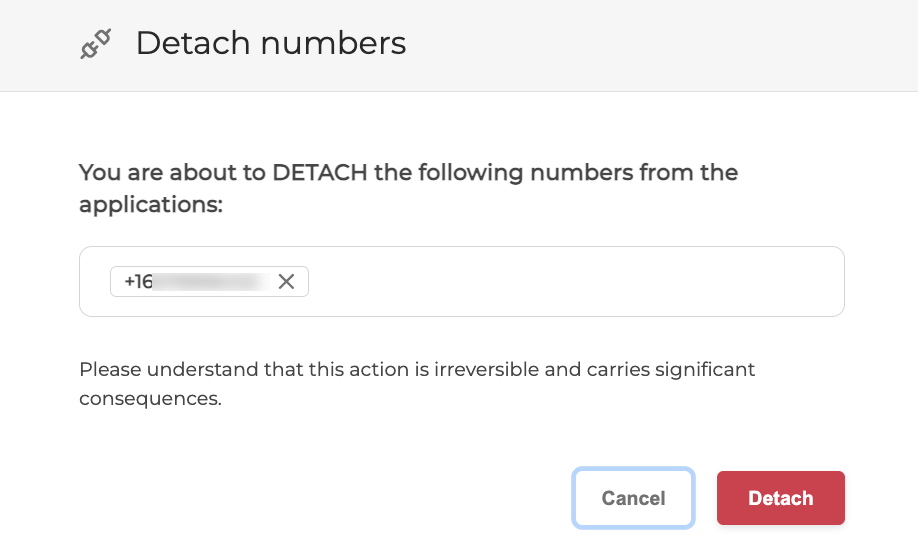
In the dialog box that opens, ensure the correct number is selected.
-
Click Detach to confirm the operation. The selected number is now detached from the application it was previously attached to.
Delete a number set
To delete an entire number set, follow these steps:
Deleting a number set is a permanent action that cannot be undone. Make sure the correct number set is selected and verify the information before proceeding.
-
Choose the number set to be deleted and click Options menu → Delete.

-
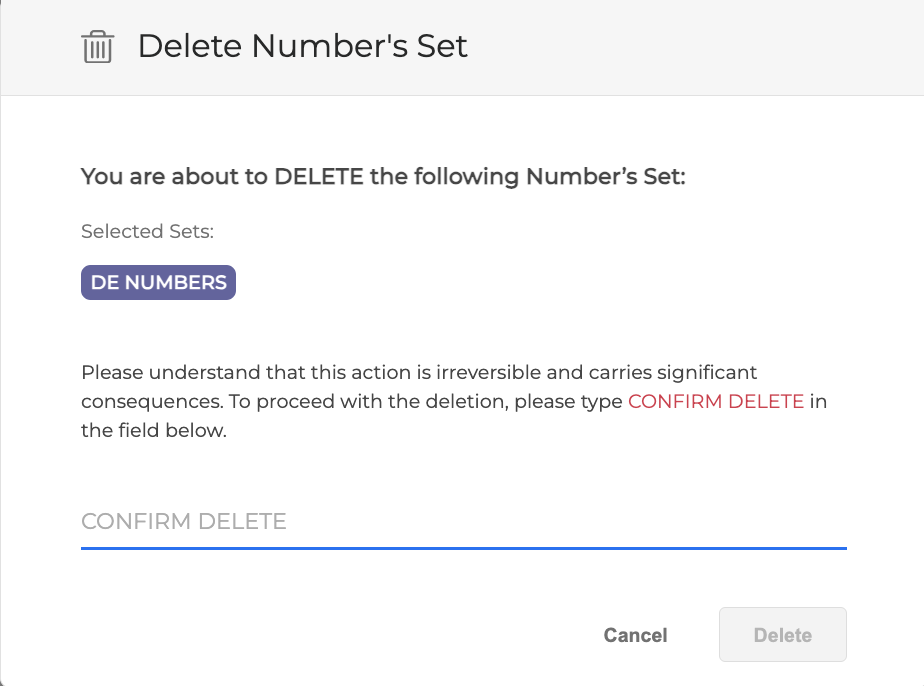
Verify the numbers involved, and to confirm deletion by typing CONFIRM DELETE in the dialog box.
-
Click the Delete button to complete the deletion. The number set is now deleted.