Introduction
This document provides step-by-step instructions on how to successfully integrate voice flow between OCP® and Talkdesk. The configuration process is illustrated based on a sample flow.
Integration steps
Before configuring OCP® voice integration with Talkdesk, make sure you have created a Flow in Orchestrator and a Studio Flow in Talkdesk.
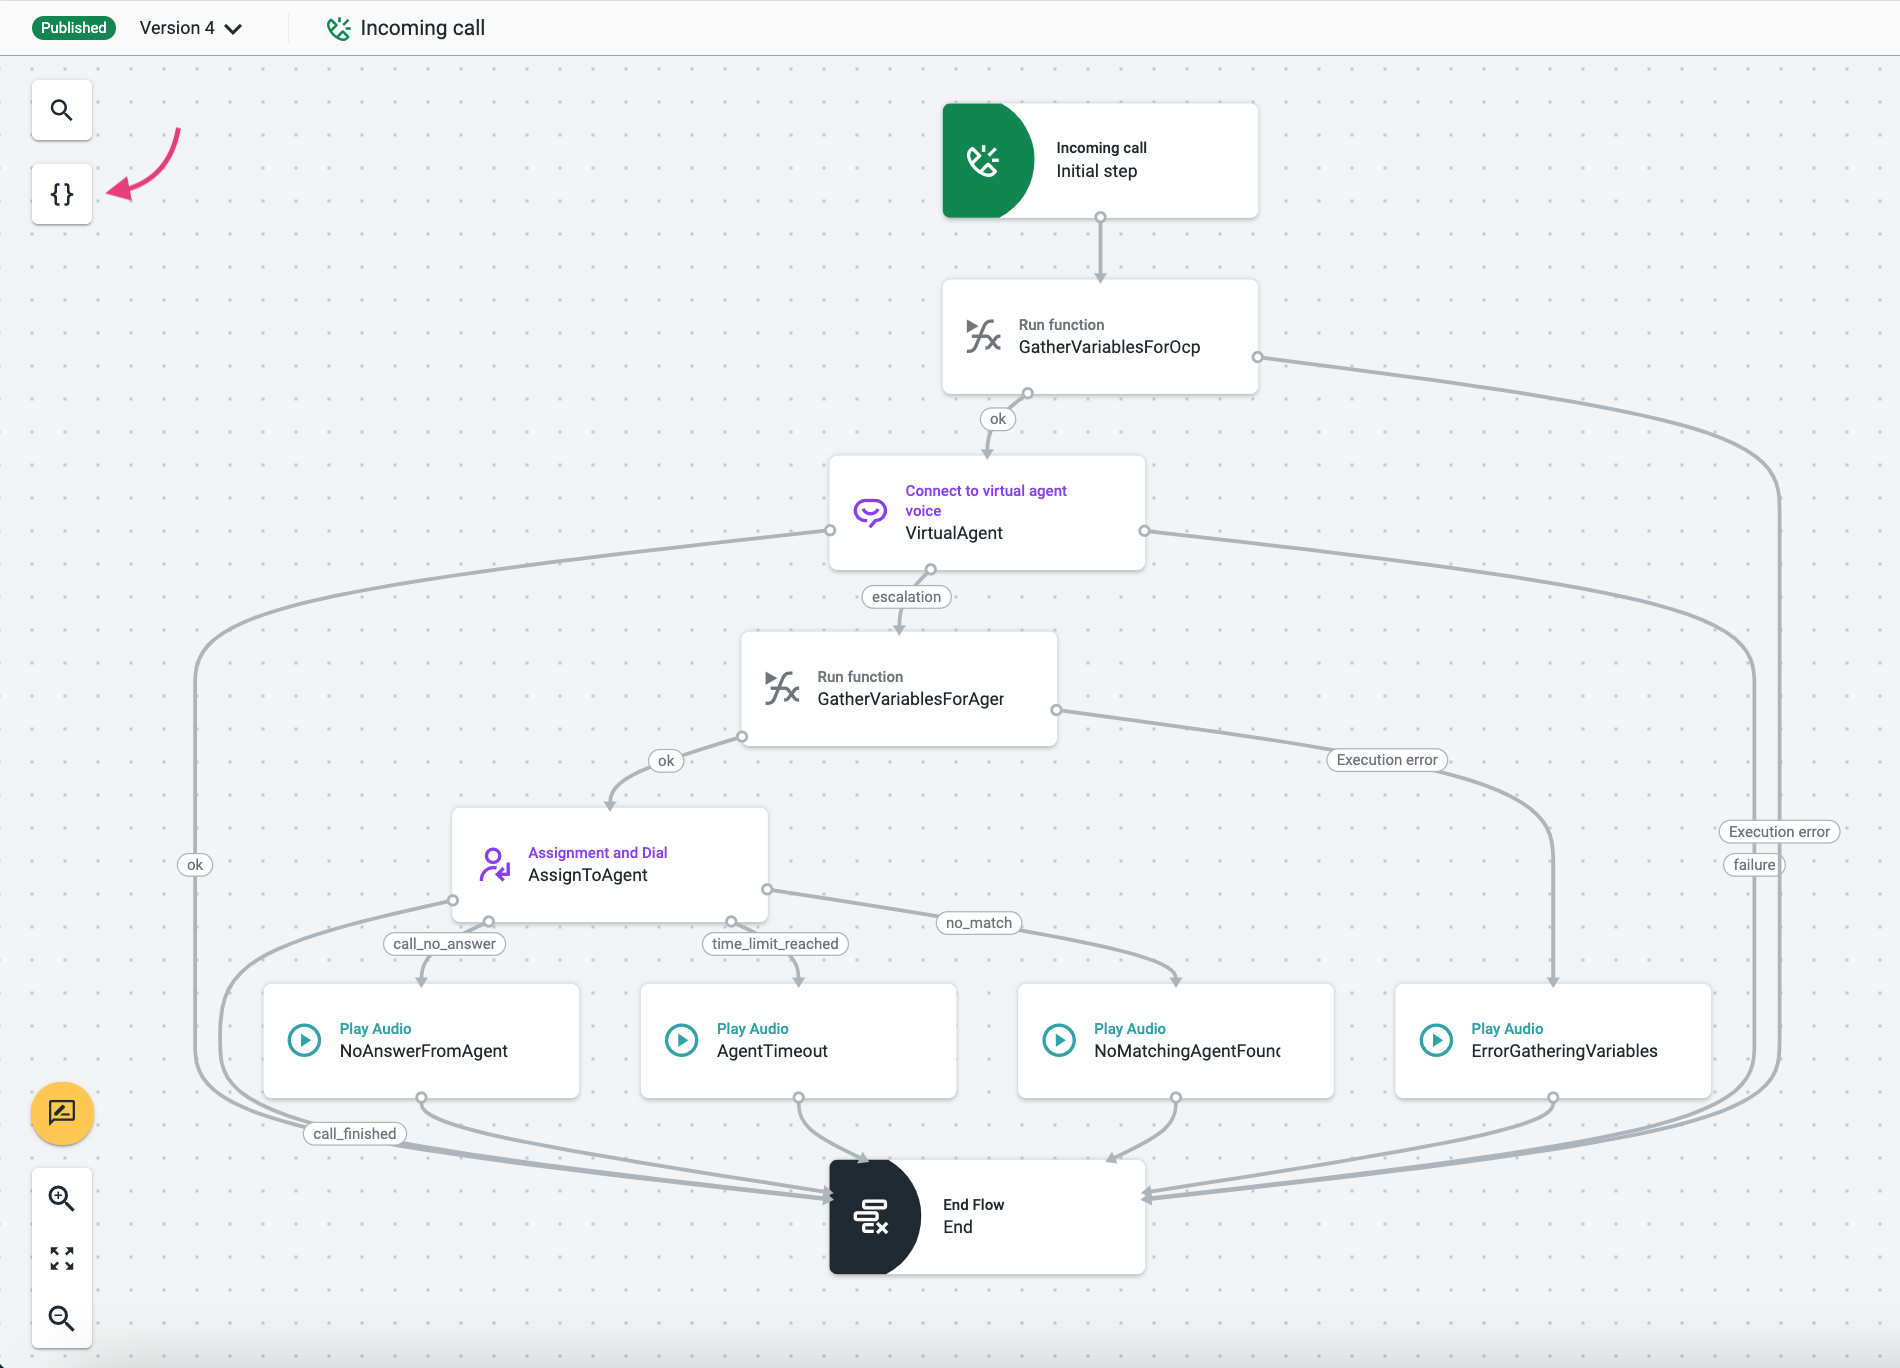
Below you can find detailed instructions on how to streamline the incorporation of Omilia's solution into a Talkdesk voice flow. To make this process more comprehensible, we will be utilizing the following sample flow to demonstrate the step-by-step configuration process:
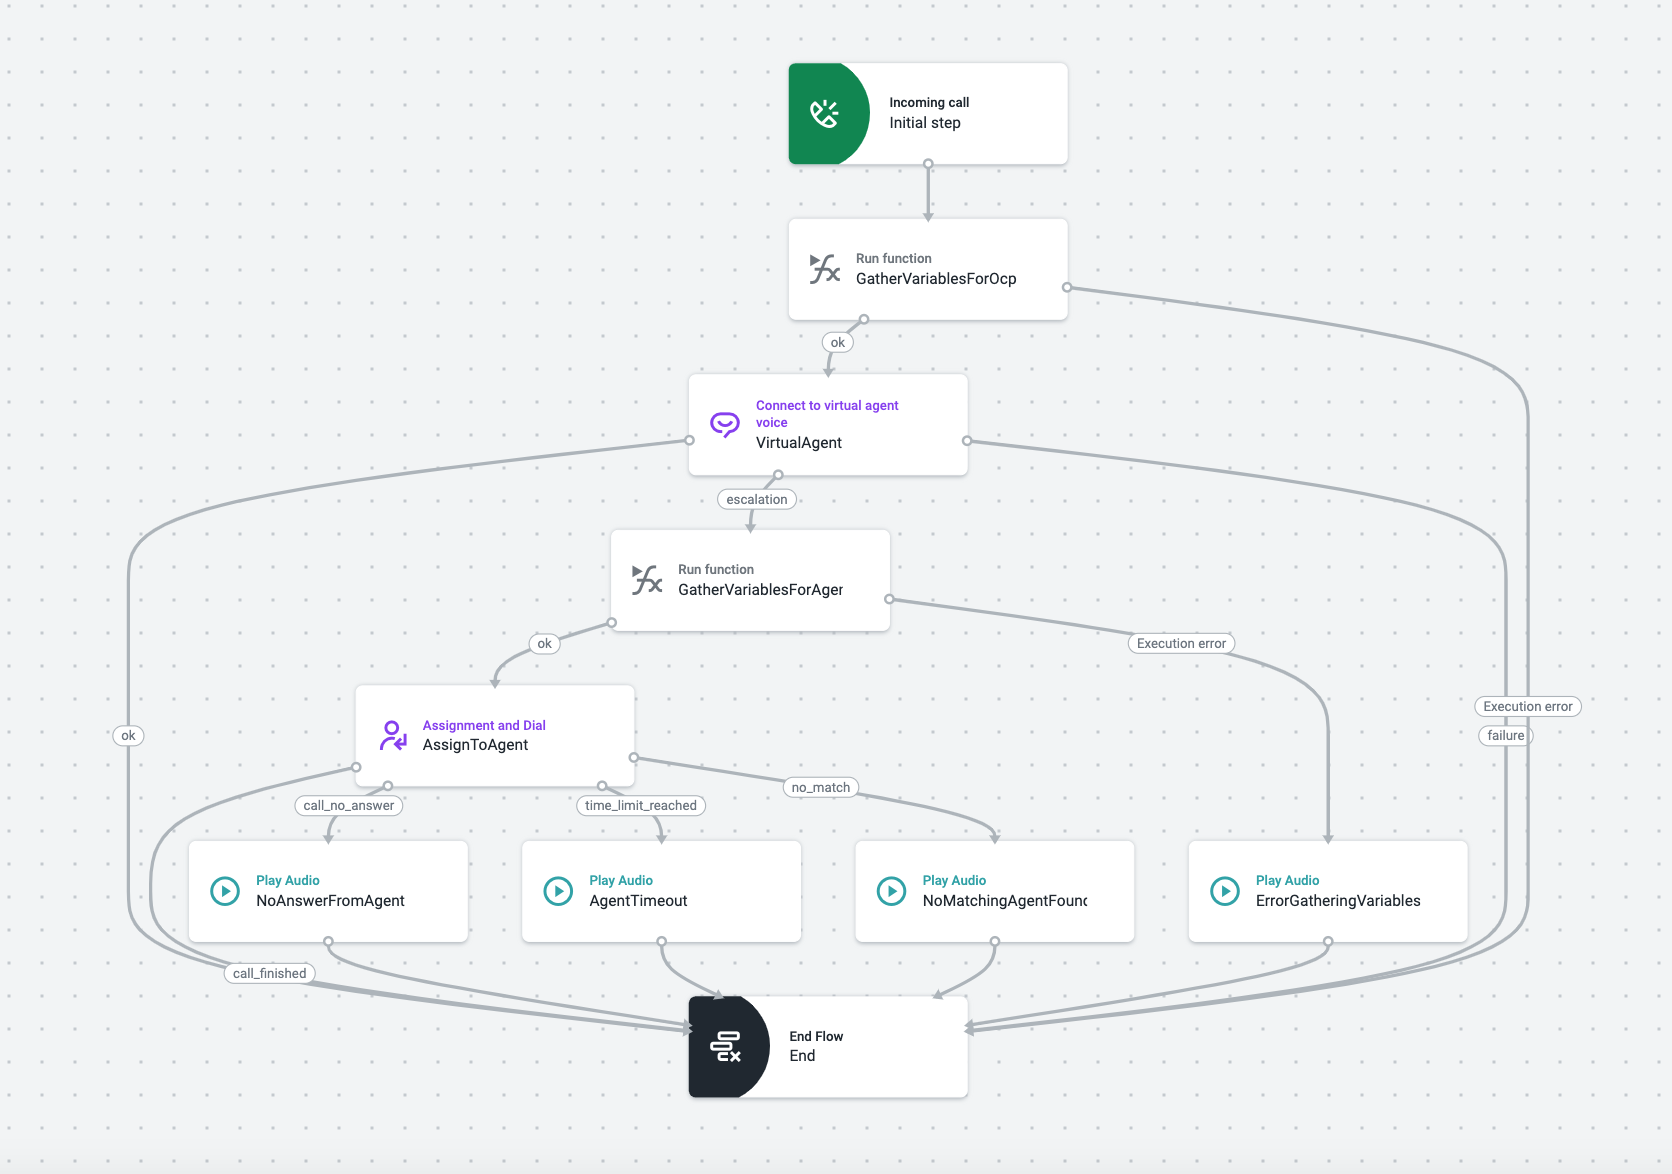
During the configuration process, several updates will be implemented within the Talkdesk flow and two additional functions will be established for utility. Here are the main steps that you would need to take. Below in the text, you will find a detailed description of each step.
Step 1. Configure variables for sending to OCP
To initiate, it's essential to configure variables for transmission to OCP®. Here's how you can proceed:
-
Create the flow variables tailored for transmission to OCP®.
-
Map the Initial step variables with the created flow variables.
Create variables
-
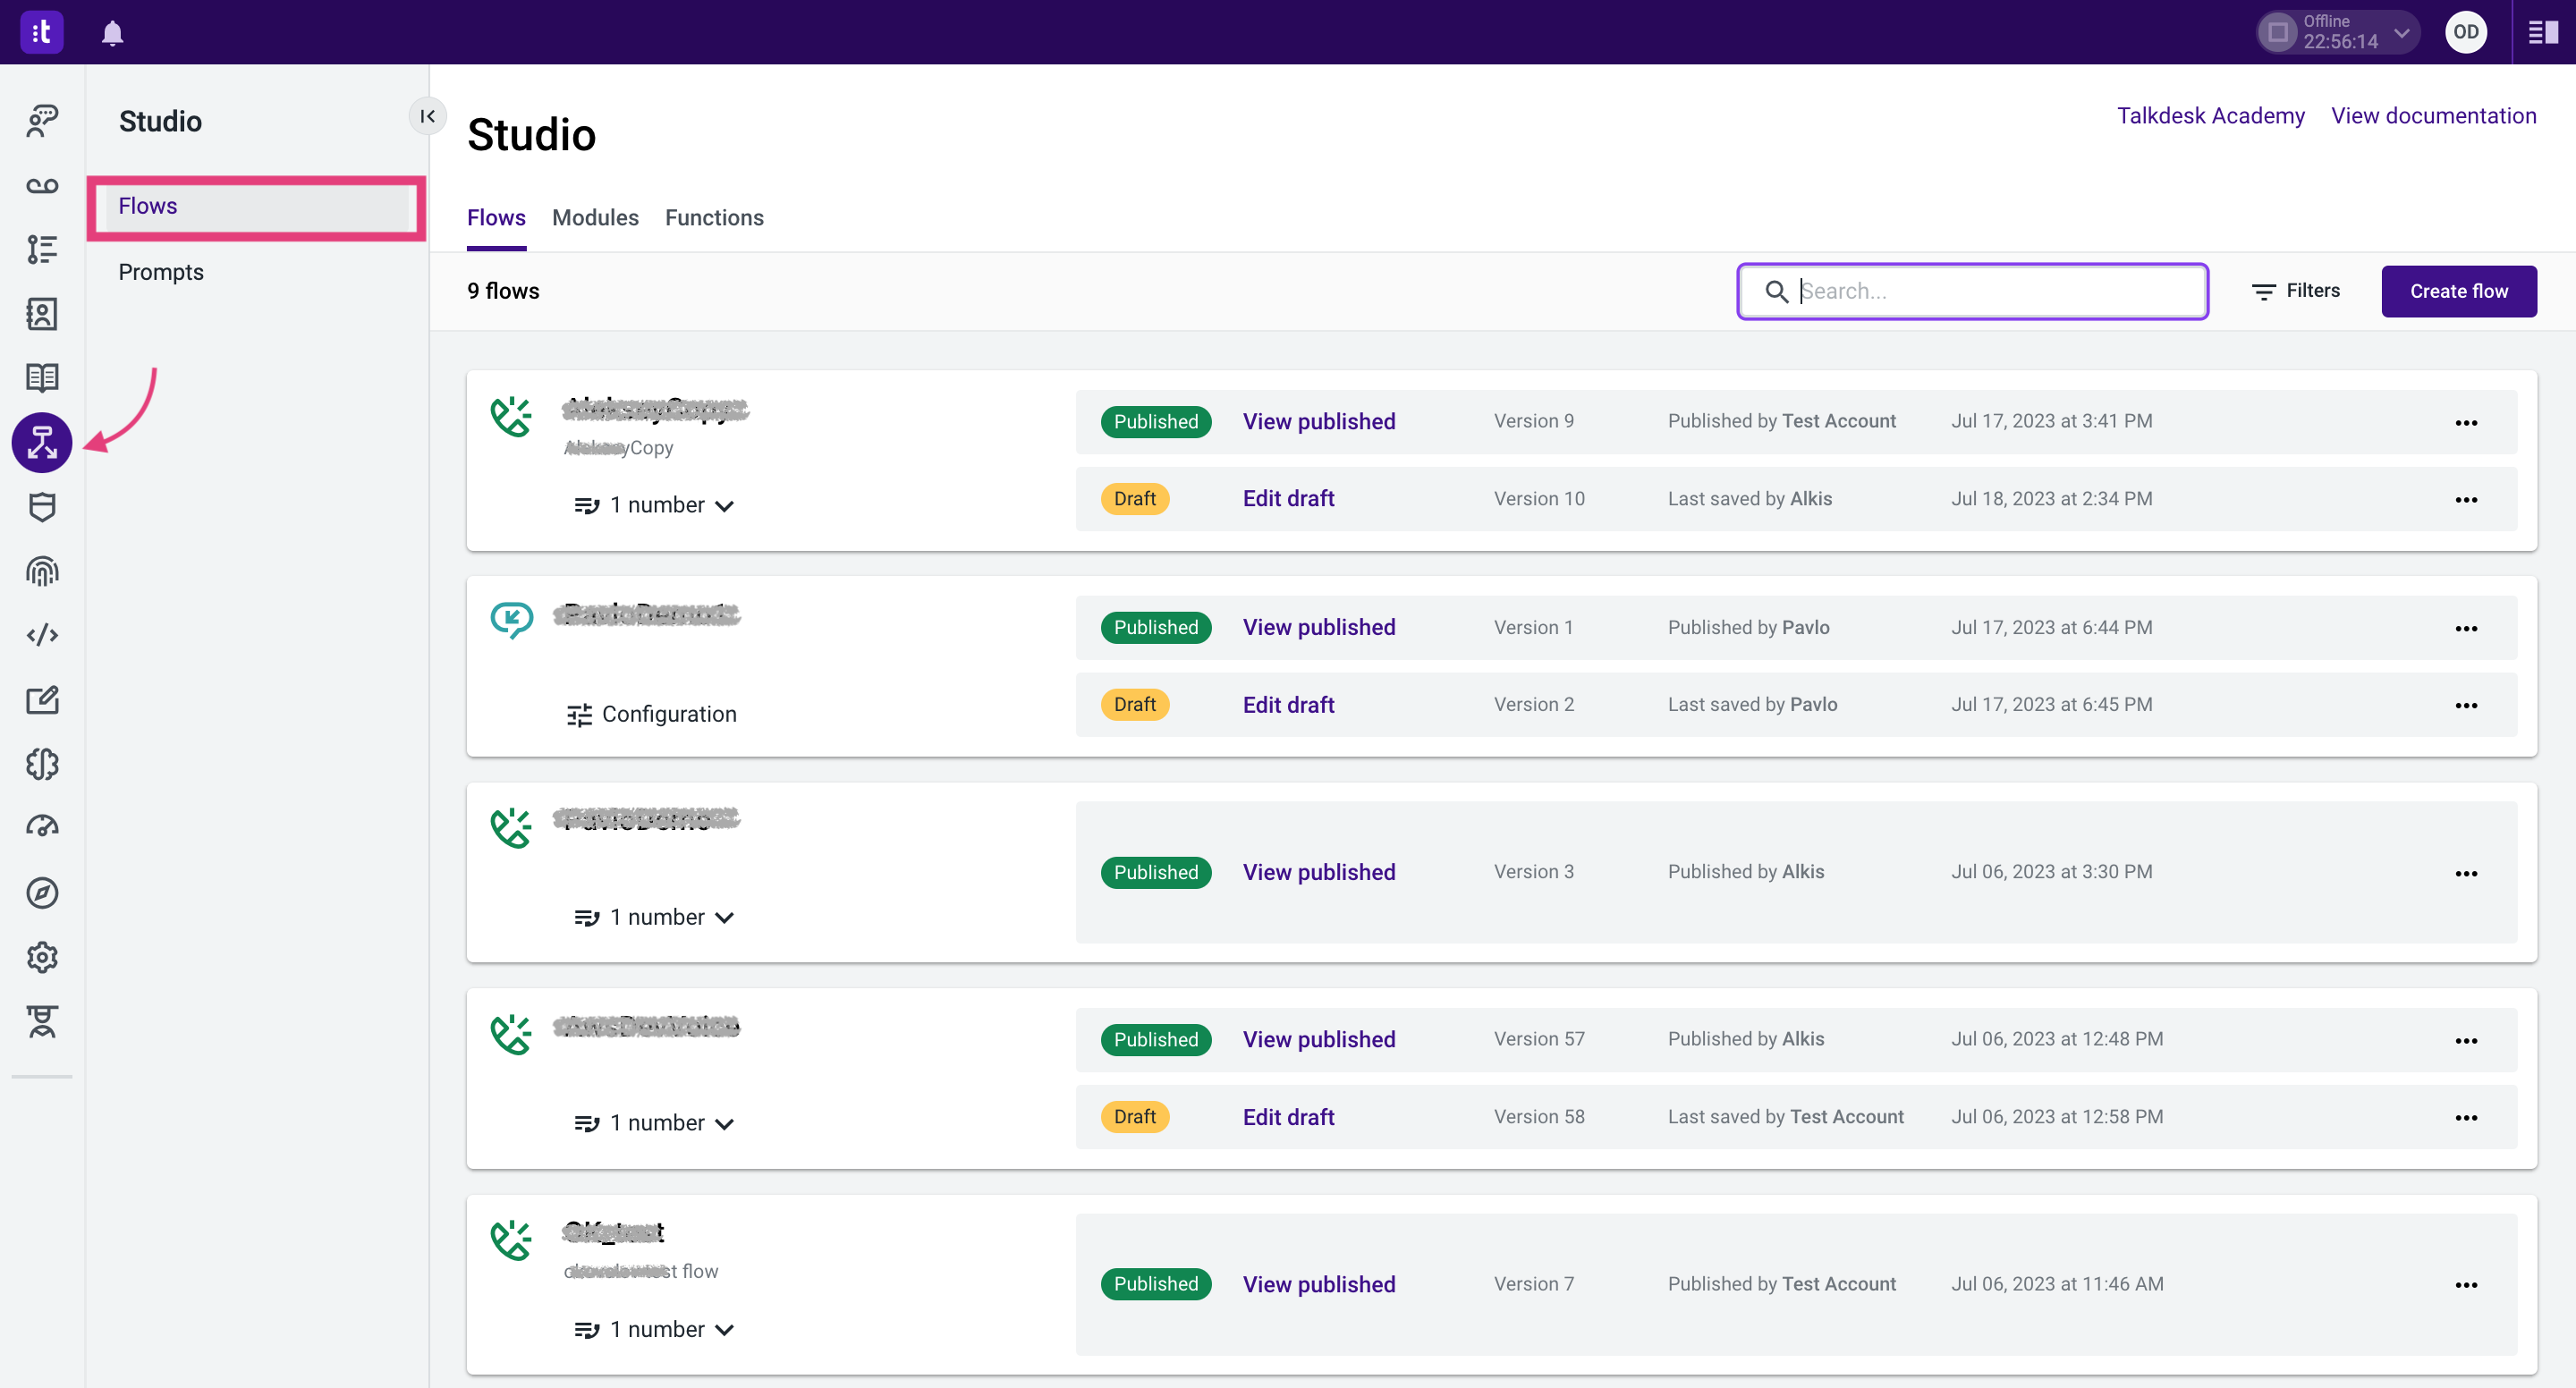
Open your Talkdesk Atlas.
-
Navigate to the Studio tab → Flows.
-
Select a draft flow you are going to configure and click Edit draft.
-
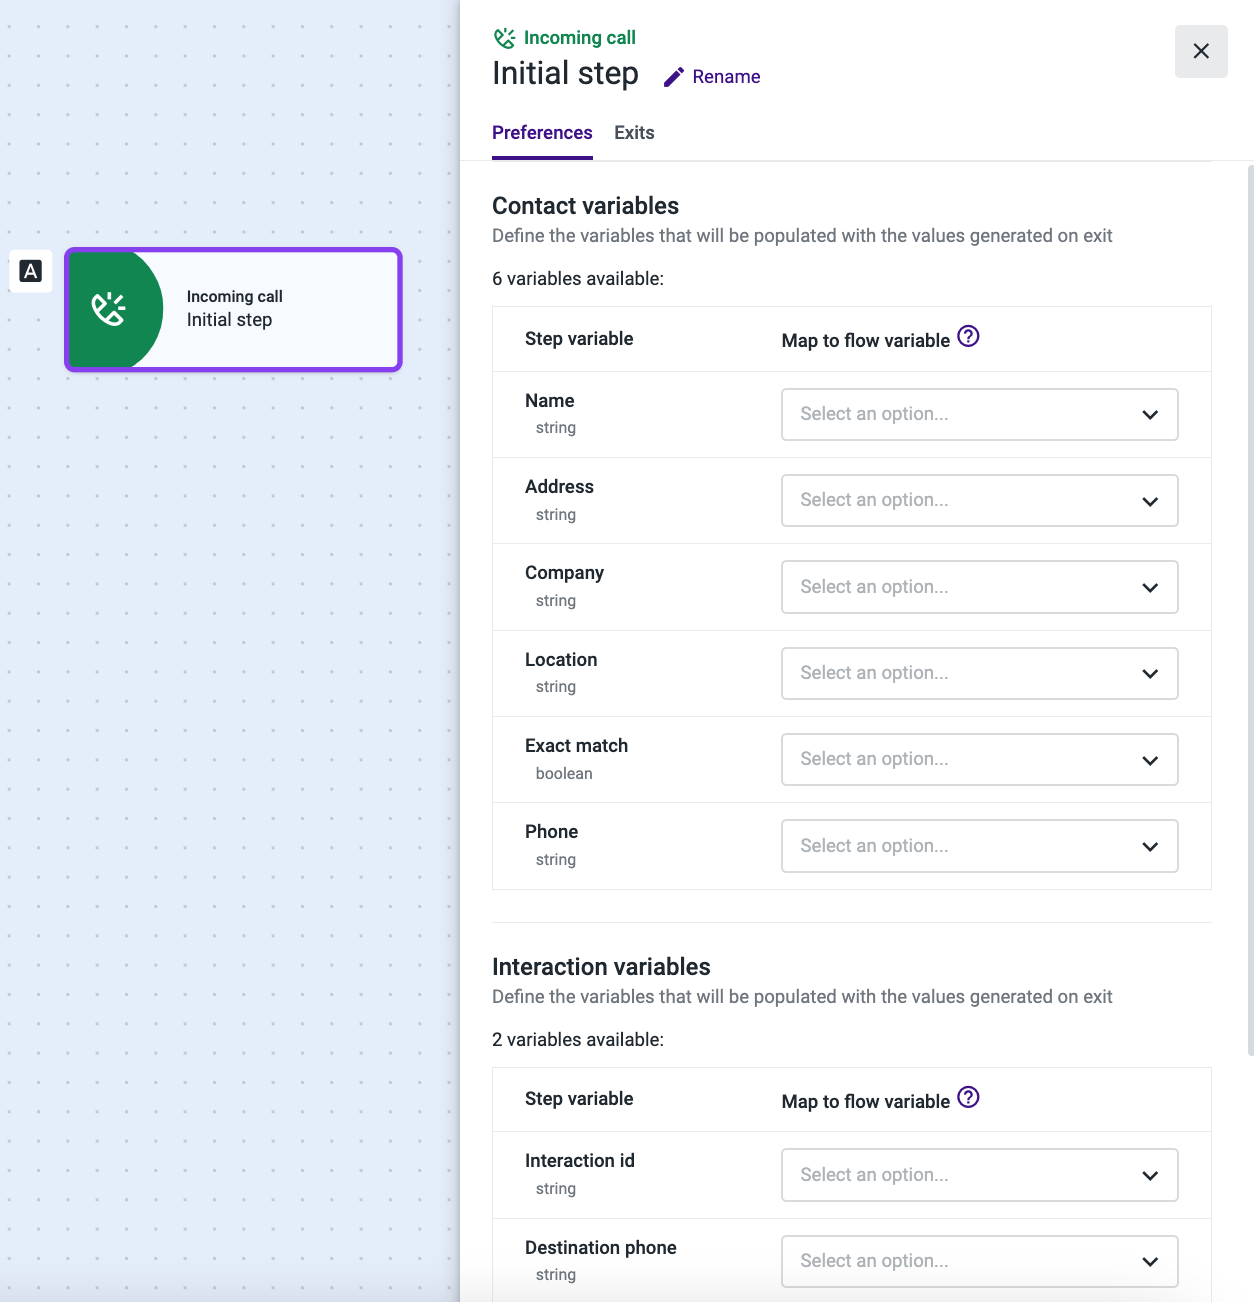
On the flow configuring page, click the Initial step to open the context menu.
-
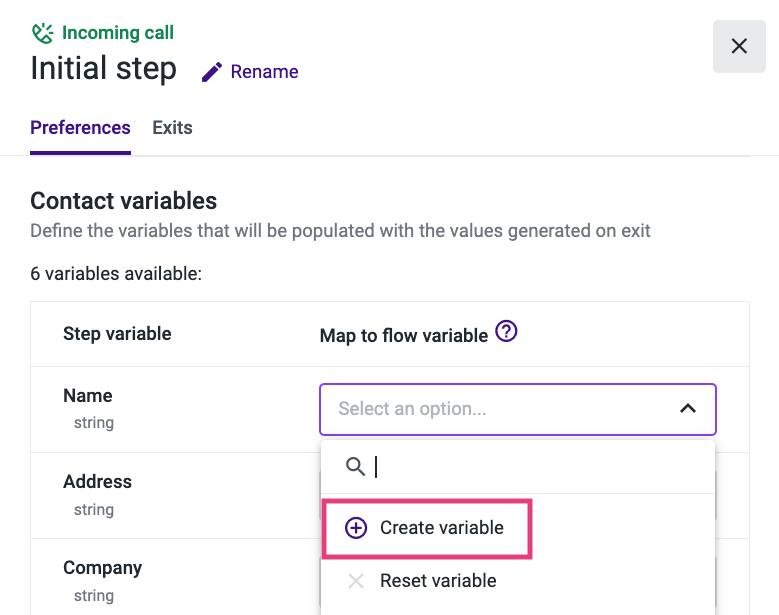
Select any step variable and click on the drop-down.
-
Choose Create variable.
-
In the opened dialog box, enter a variable name.
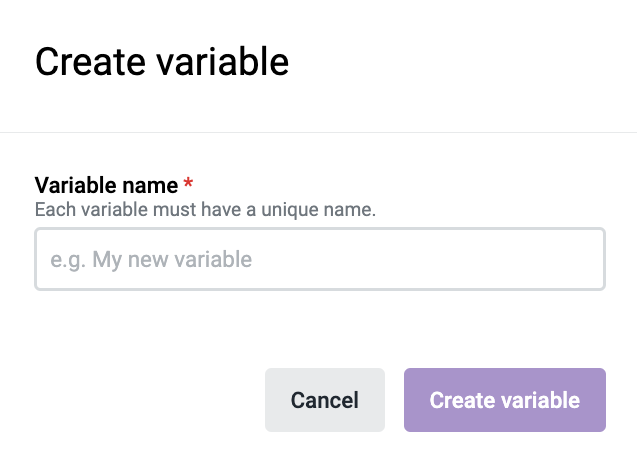
-
Click Create variable to finalize the process. The created variables are listed in the drop-down list.
For our example, we have created the following flow variables: ANI, DNIS, interactionid.
Map the variables
Now you should map the created flow variables with step variables. To do so, follow the steps listed below:
-
Choose a step variable and click on the drop-down adjacent to it.
-
Select a flow variable from the drop-down list. The variables are mapped.
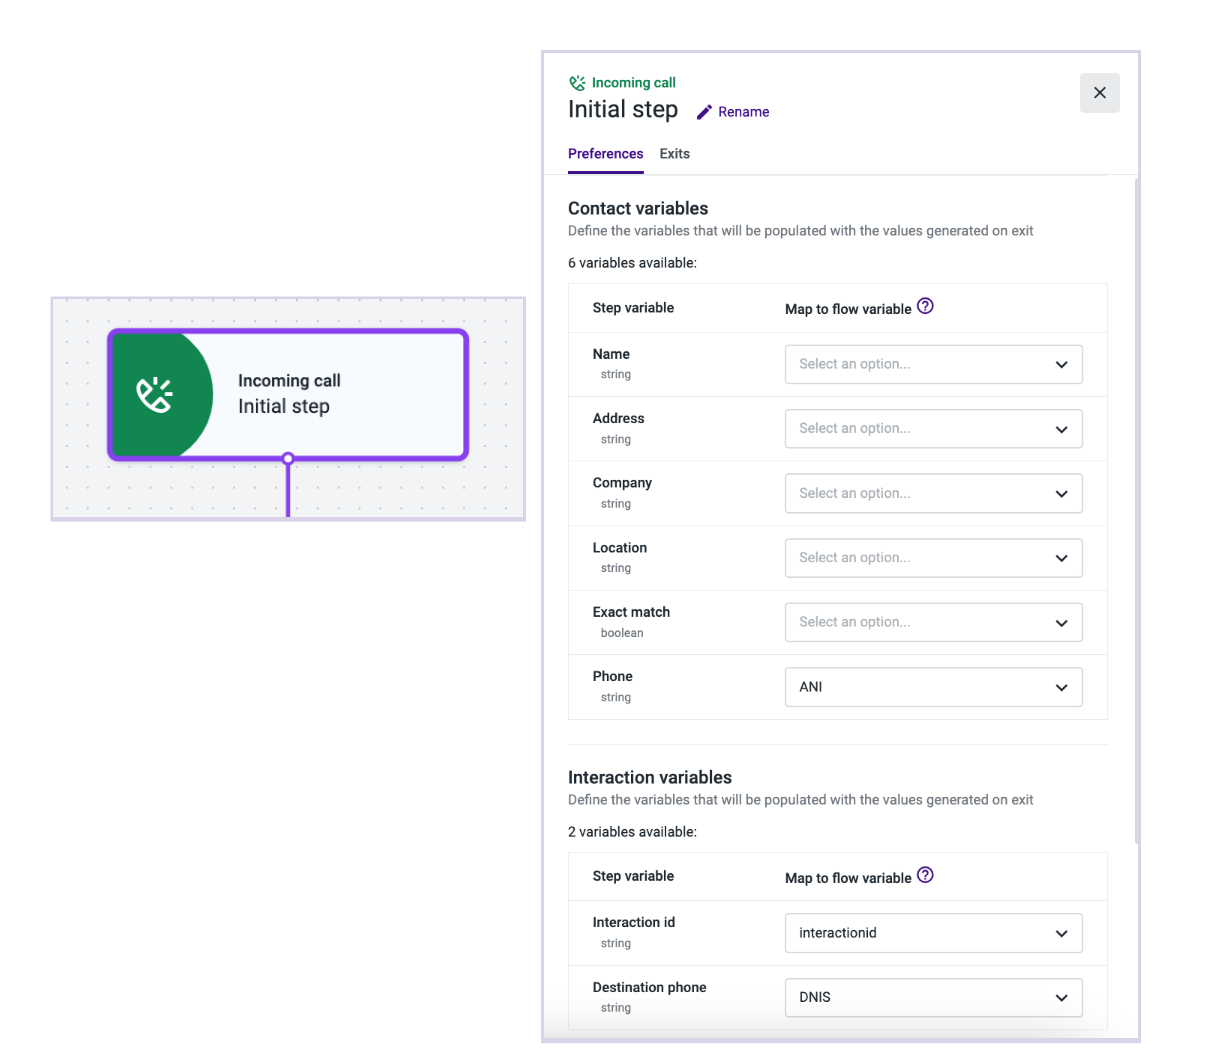
For our example, we have mapped the following variables:
-
Phone - ANI
-
Interaction ID - interactionid
-
Destination phone - DNIS
The mapped variables will provide proper data logging on the OCP® side.
-
Click Save to save the inserted data.
-
Click Publish to enable the changes.
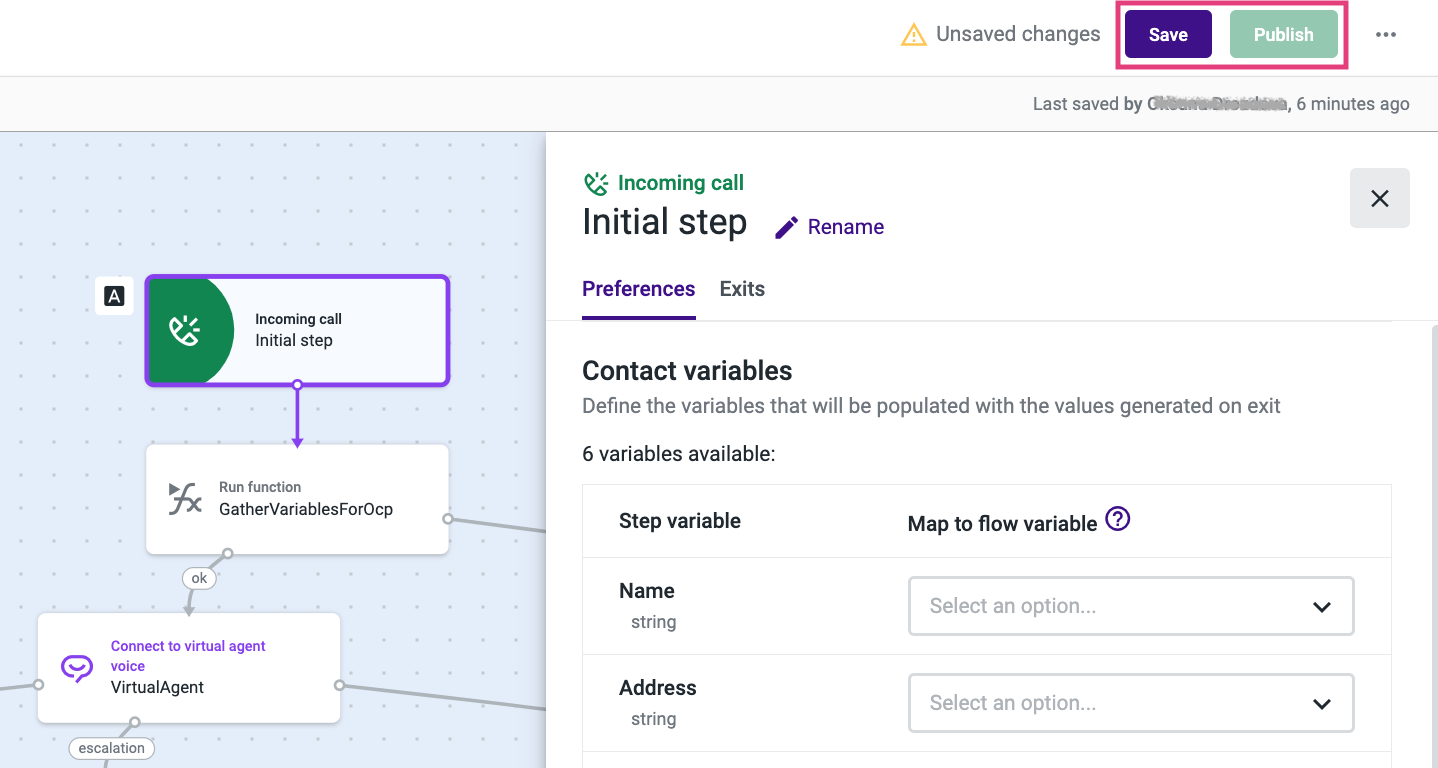
Steps 3 and 4 are optional, however, it is highly recommended to click Save and then Publish after configuring each step. This will ensure that all the data is saved.
Step 2. Collect the internal data
For this action, we need to perform the following steps:
Below you will find detailed instructions on each step.
Сreate a JavaScript function
Below you can find the step-by-step instructions on how to create a function.
For our example, we are going to create a function that will collect the internal data and form a JSON file for sending it to OCP®.
To create a function, follow the steps below:
-
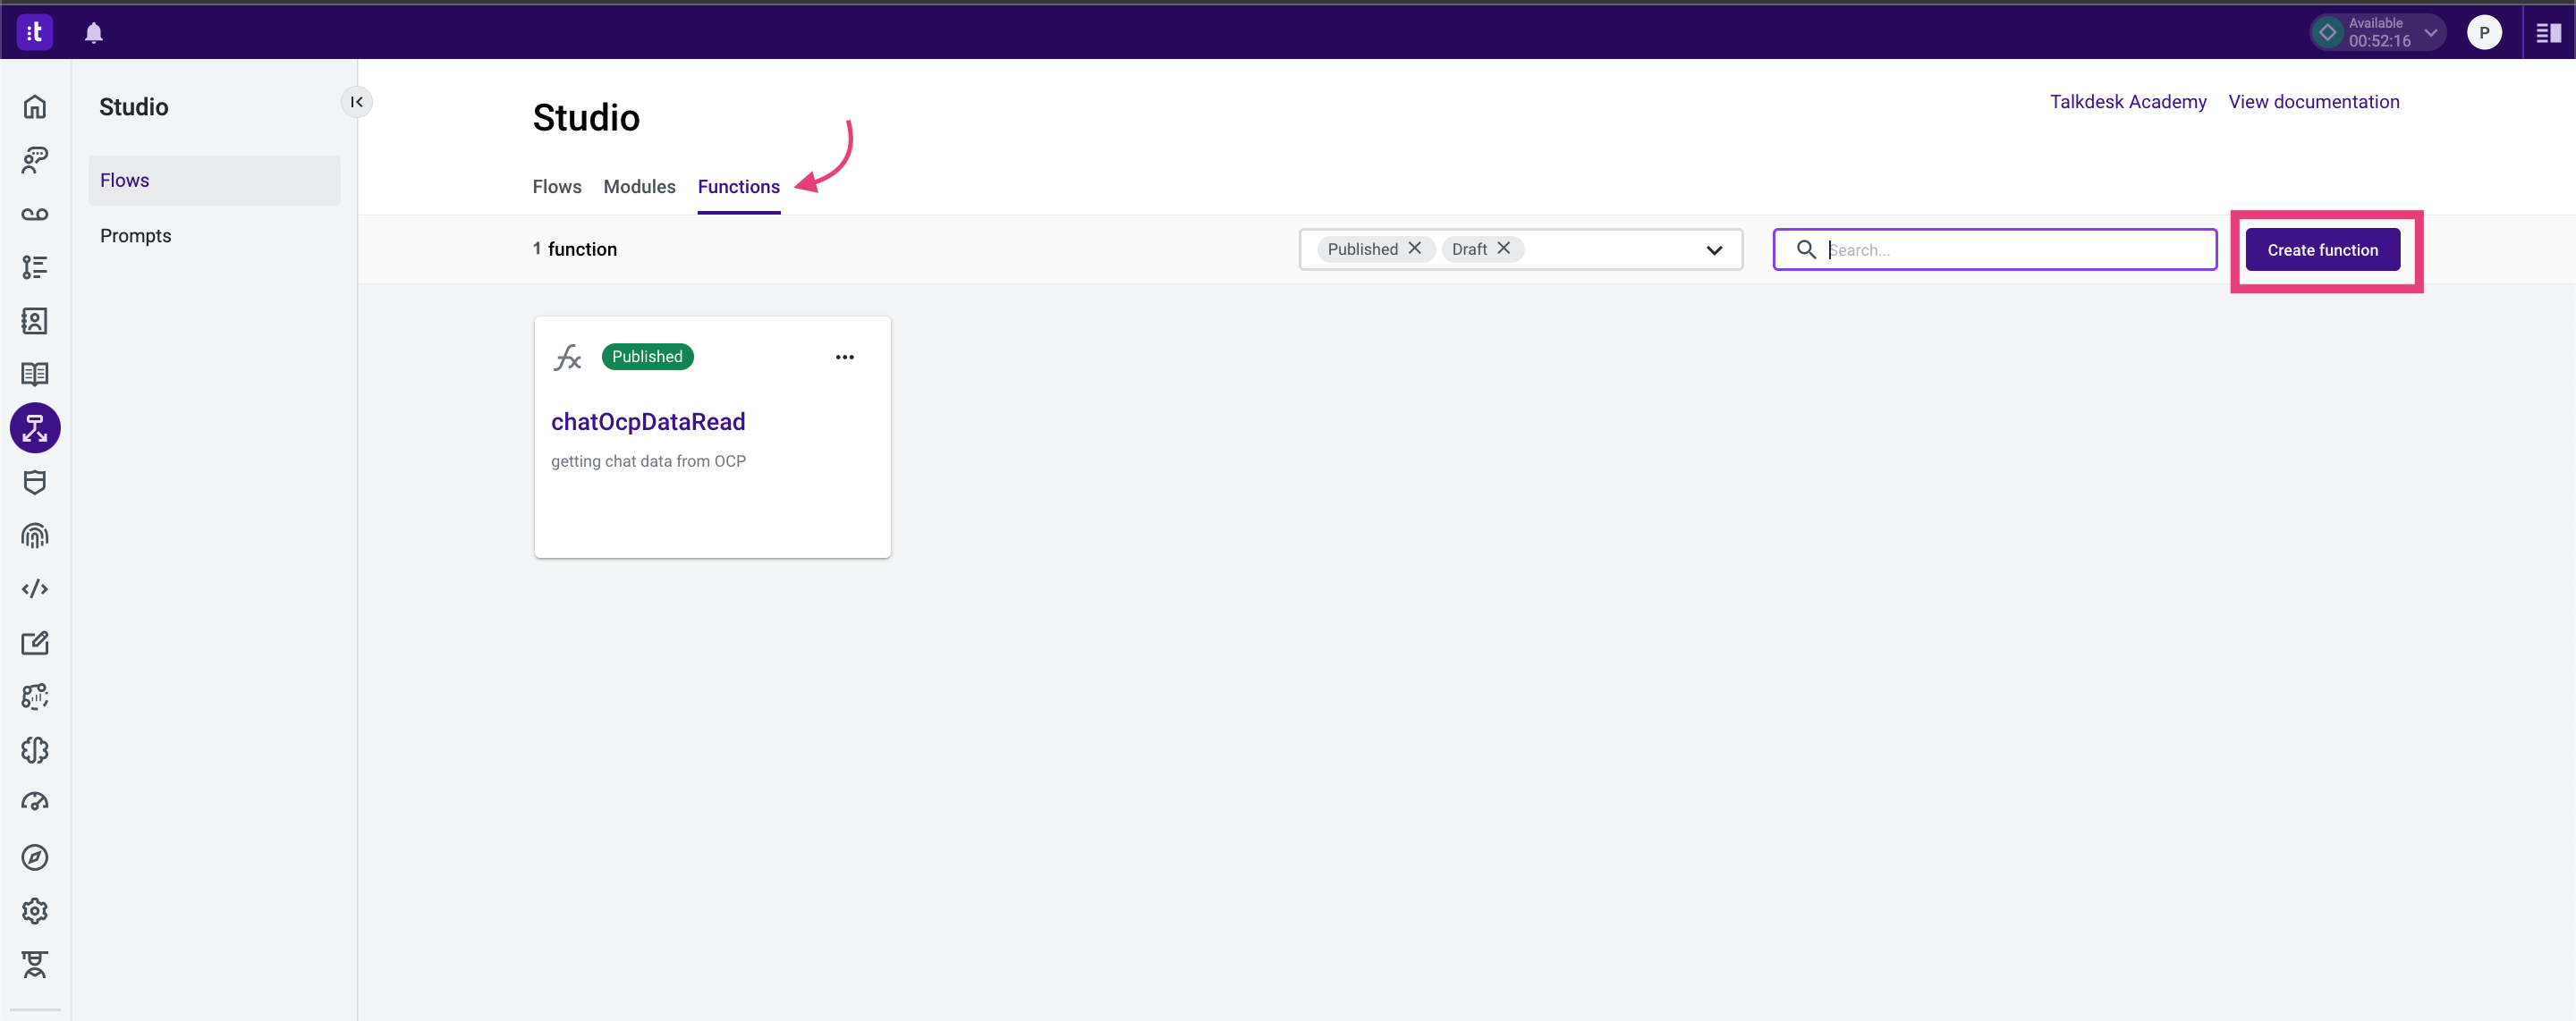
Navigate to Studio → Flows.
-
Go to the Functions tab and click Create Function.
-
On the opened page, fill in the fields as described below.
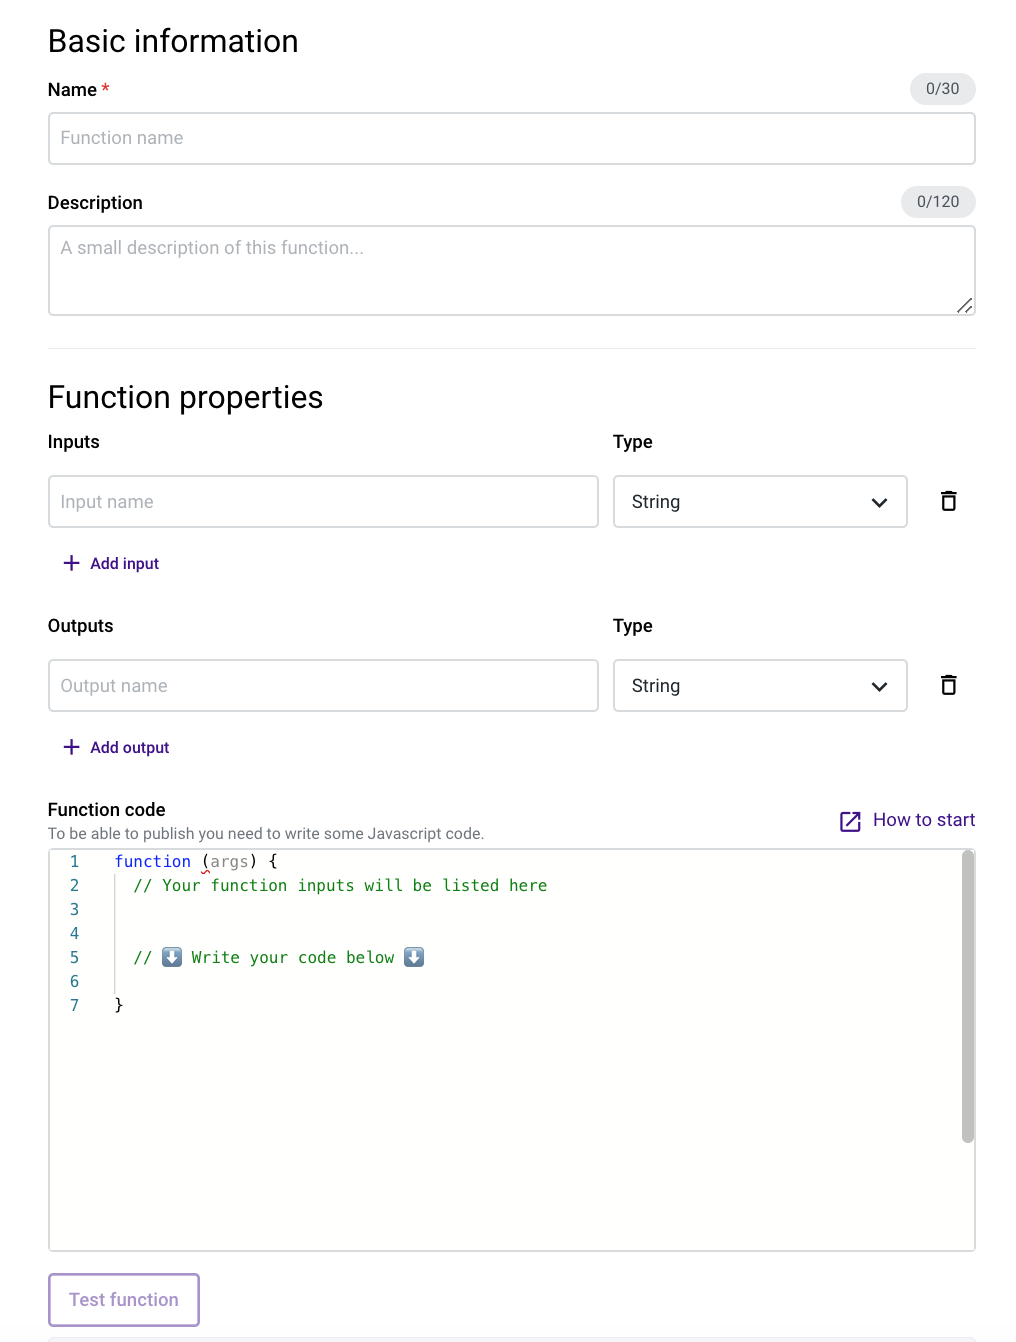
-
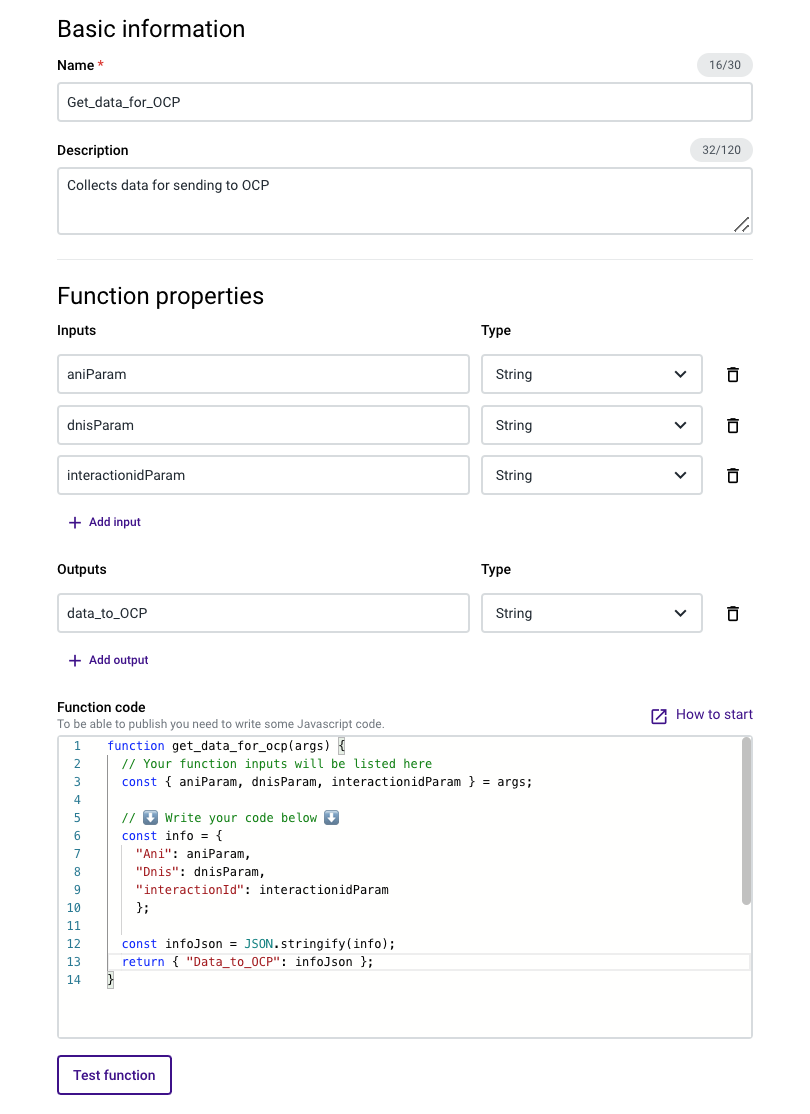
Name: Enter a unique name for the function. For our example, we are using Get_variables_for_OCP.
-
Description: Add a description of the function. This is a short note on the purpose of the function. For our example, we have entered the following description: Collects variables for sending to OCP.
-
Function properties:
-
Inputs: This parameter corresponds to the data that is passed to the external data source.
Use the + Add input button to add more intput values. For our example, we are using the following three values:aniParam,dnisParam,interactionidParam.-
Type: Select the type of input from the drop-down list: String, Boolean, Integer, Number, URI.
For our example, we have set this value to String.
-
-
Outputs: Add the desired output, which will return the results that have been requested through the previous field.
For our example, we are specifying it asJson_data_to_OCP.-
Type: Select the type of output from the drop-down list: String, Boolean, Integer, Number, URI.
For our example, we have set this value to String.
-
-
-
Function code: This field will receive the function’s name and inputs defined above. These lines are created automatically and cannot be changed. The function will also receive specifically one argument, named
args. You will also need to enter additional JavaScript code in this field.
Here is the code for our example:JavaScriptfunction get_variables_for_ocp(args) { // Your function inputs will be listed here const { aniParam, dnisParam, interactionidParam } = args; // ⬇️ Write your code below ⬇️ const info = { "Ani": aniParam, "Dnis": dnisParam, "interactionId": interactionidParam }; const infoJson = JSON.stringify(info); return { "Json_data_to_OCP": infoJson }; }
-
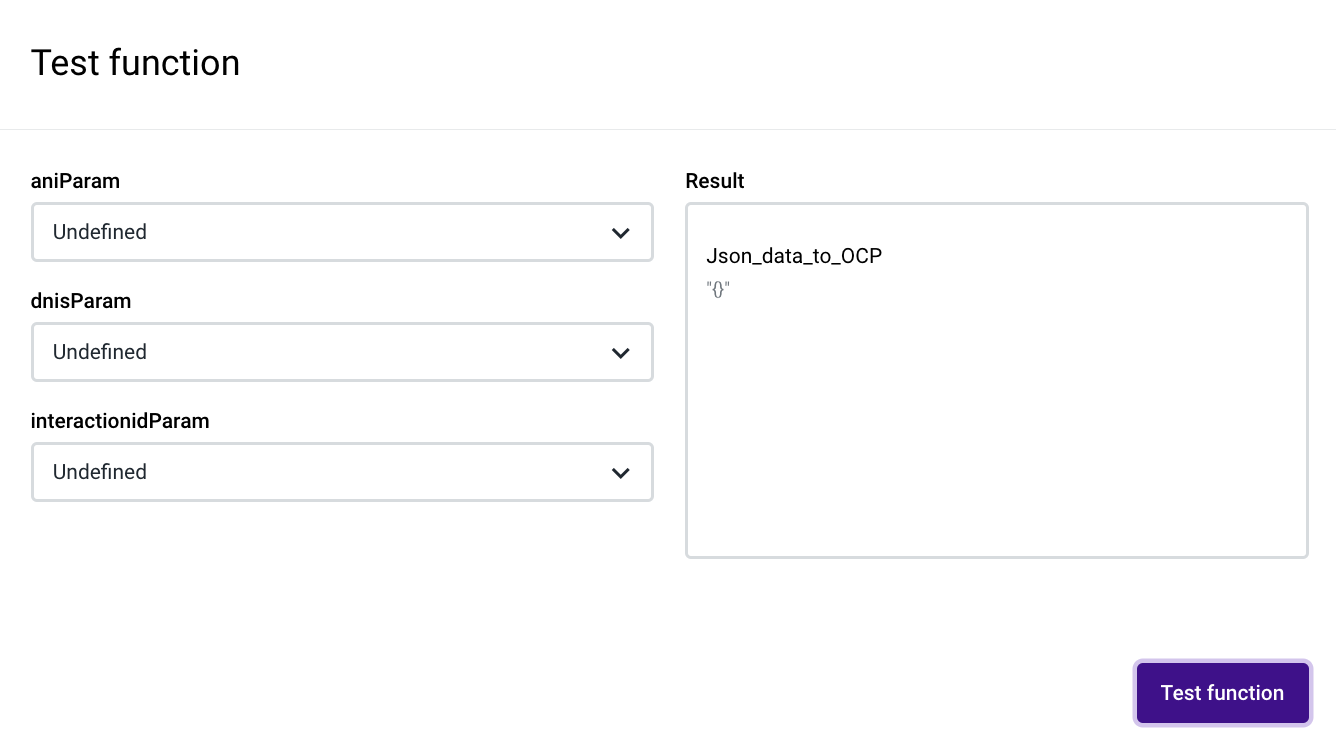
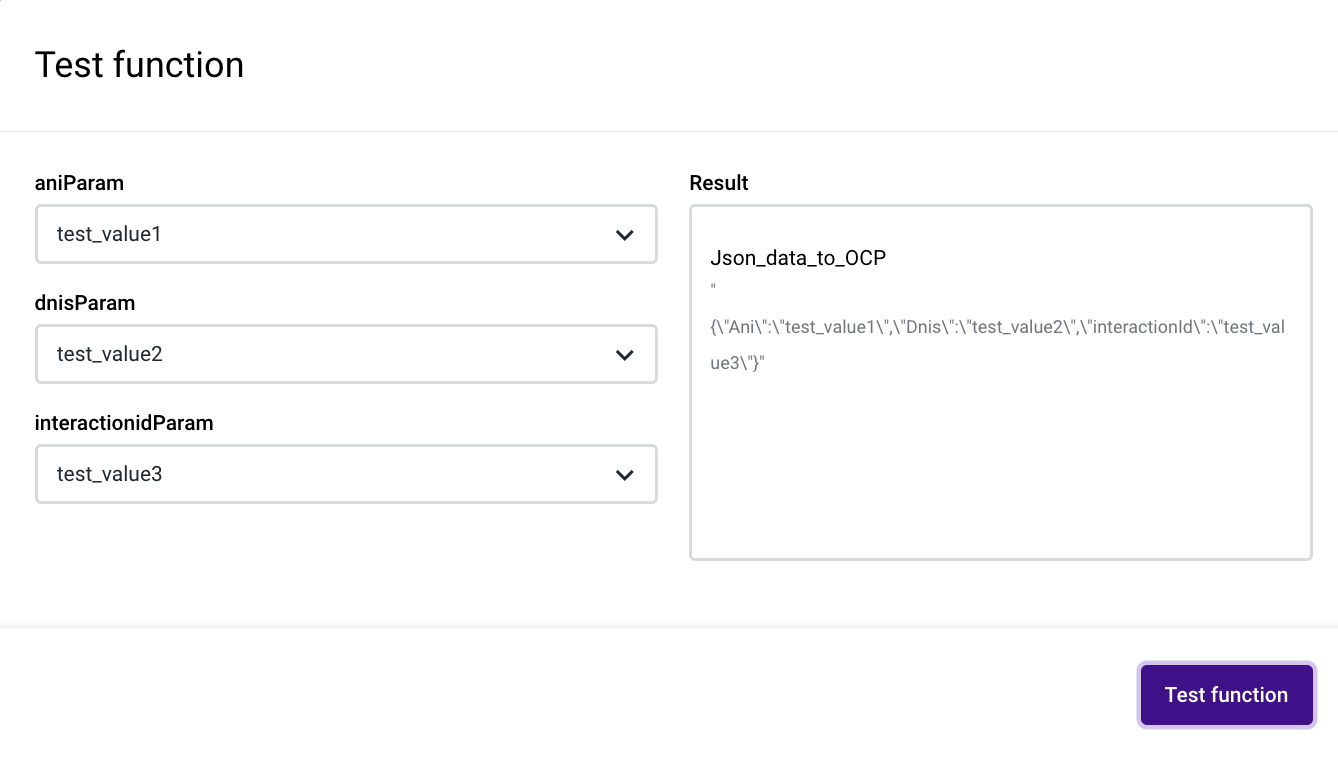
Click the Test function button to test your function.
You can skip steps 4-7, however, it is highly recommended to test your function before publishing it. This way you make sure it functions properly.
-
In the opened dialog box, click on the drop-down and select Undefined.
-
Click Test function to confirm. The result will be displayed in the Result field.
-
Repeat the procedure by selecting Custom value and Empty to test your function over different scenarios. This will ensure that the expected behavior is retrieved successfully.
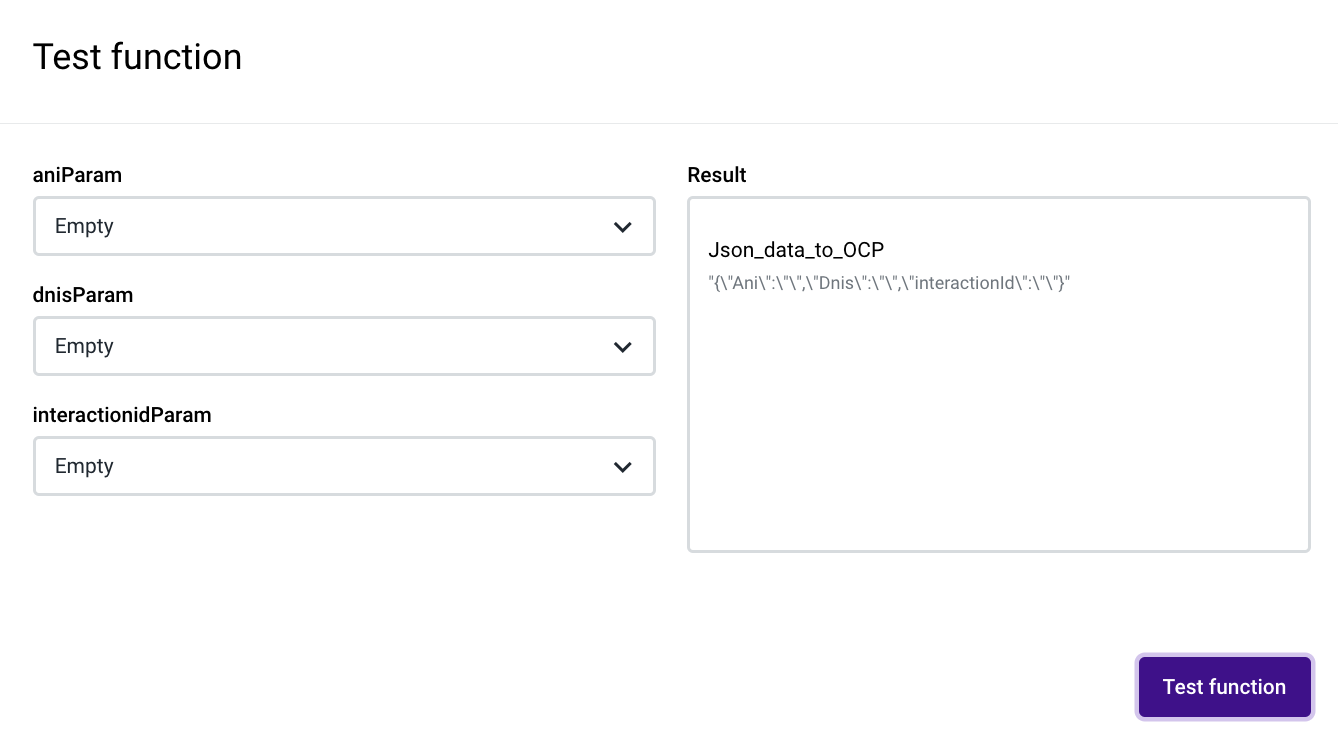
-
If the function behaves as expected, click Save to create a draft version of your function.
-
Click Publish to enable your function.
You have successfully created the Get_variables_for_OCP function.
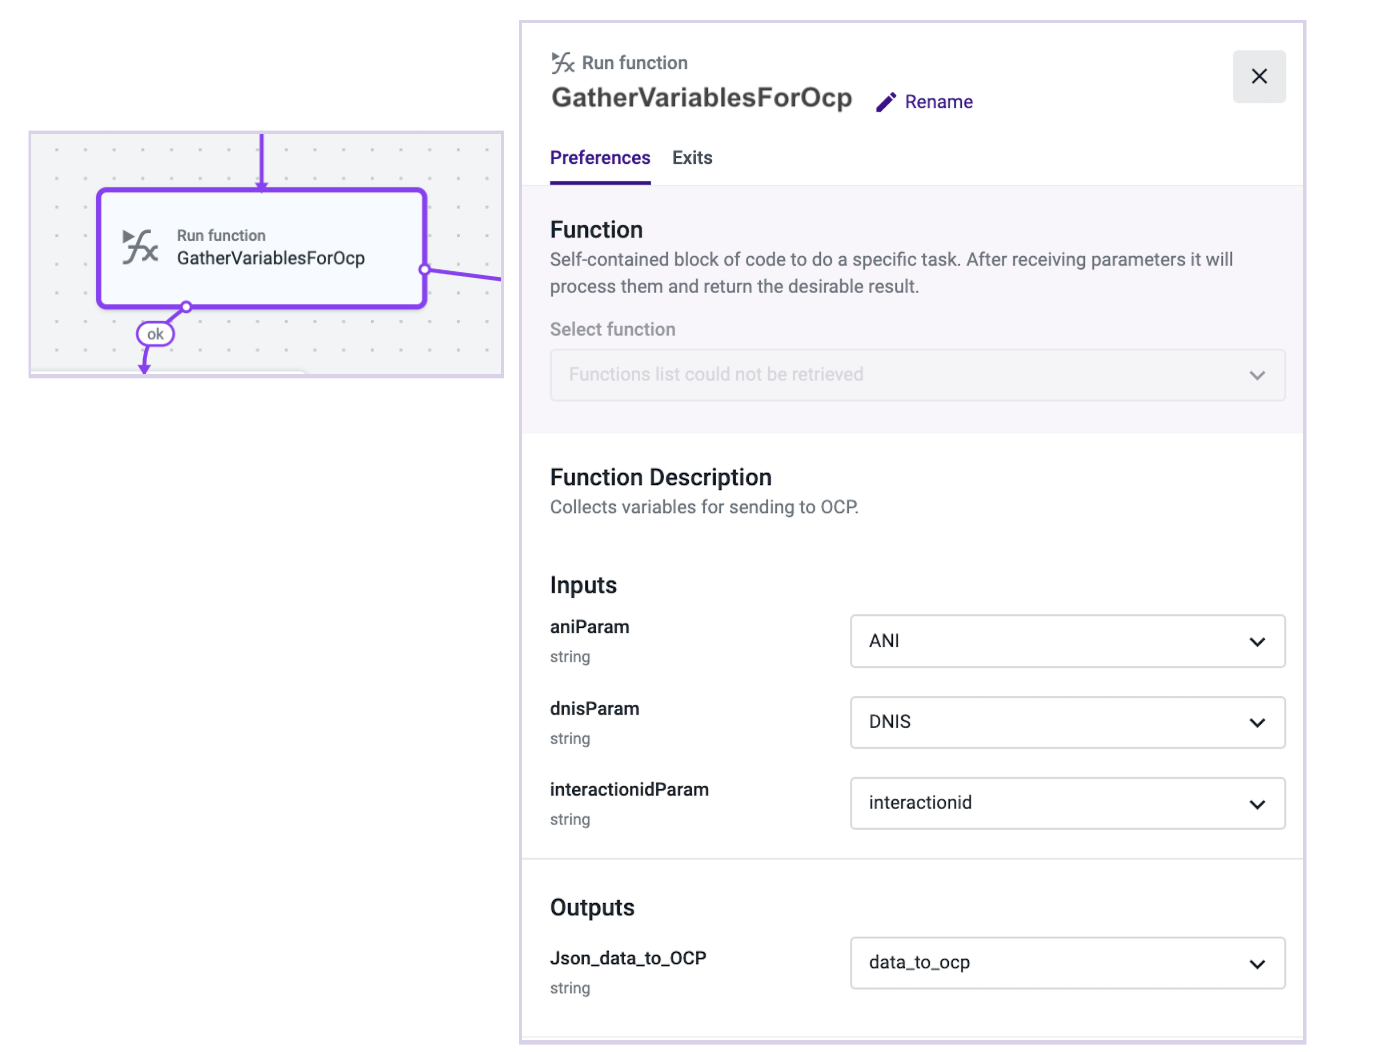
Configure the GatherVariablesForOcp action
As the next step, you should assign the created function to the GatherVariablesForOcp action of your flow. To do so, follow the steps below:
-
Navigate to Studio tab → Flows and open your flow.
-
If you have saved and published your flow’s configuration in the previous step, click Edit to enable editing. Otherwise, omit this step.
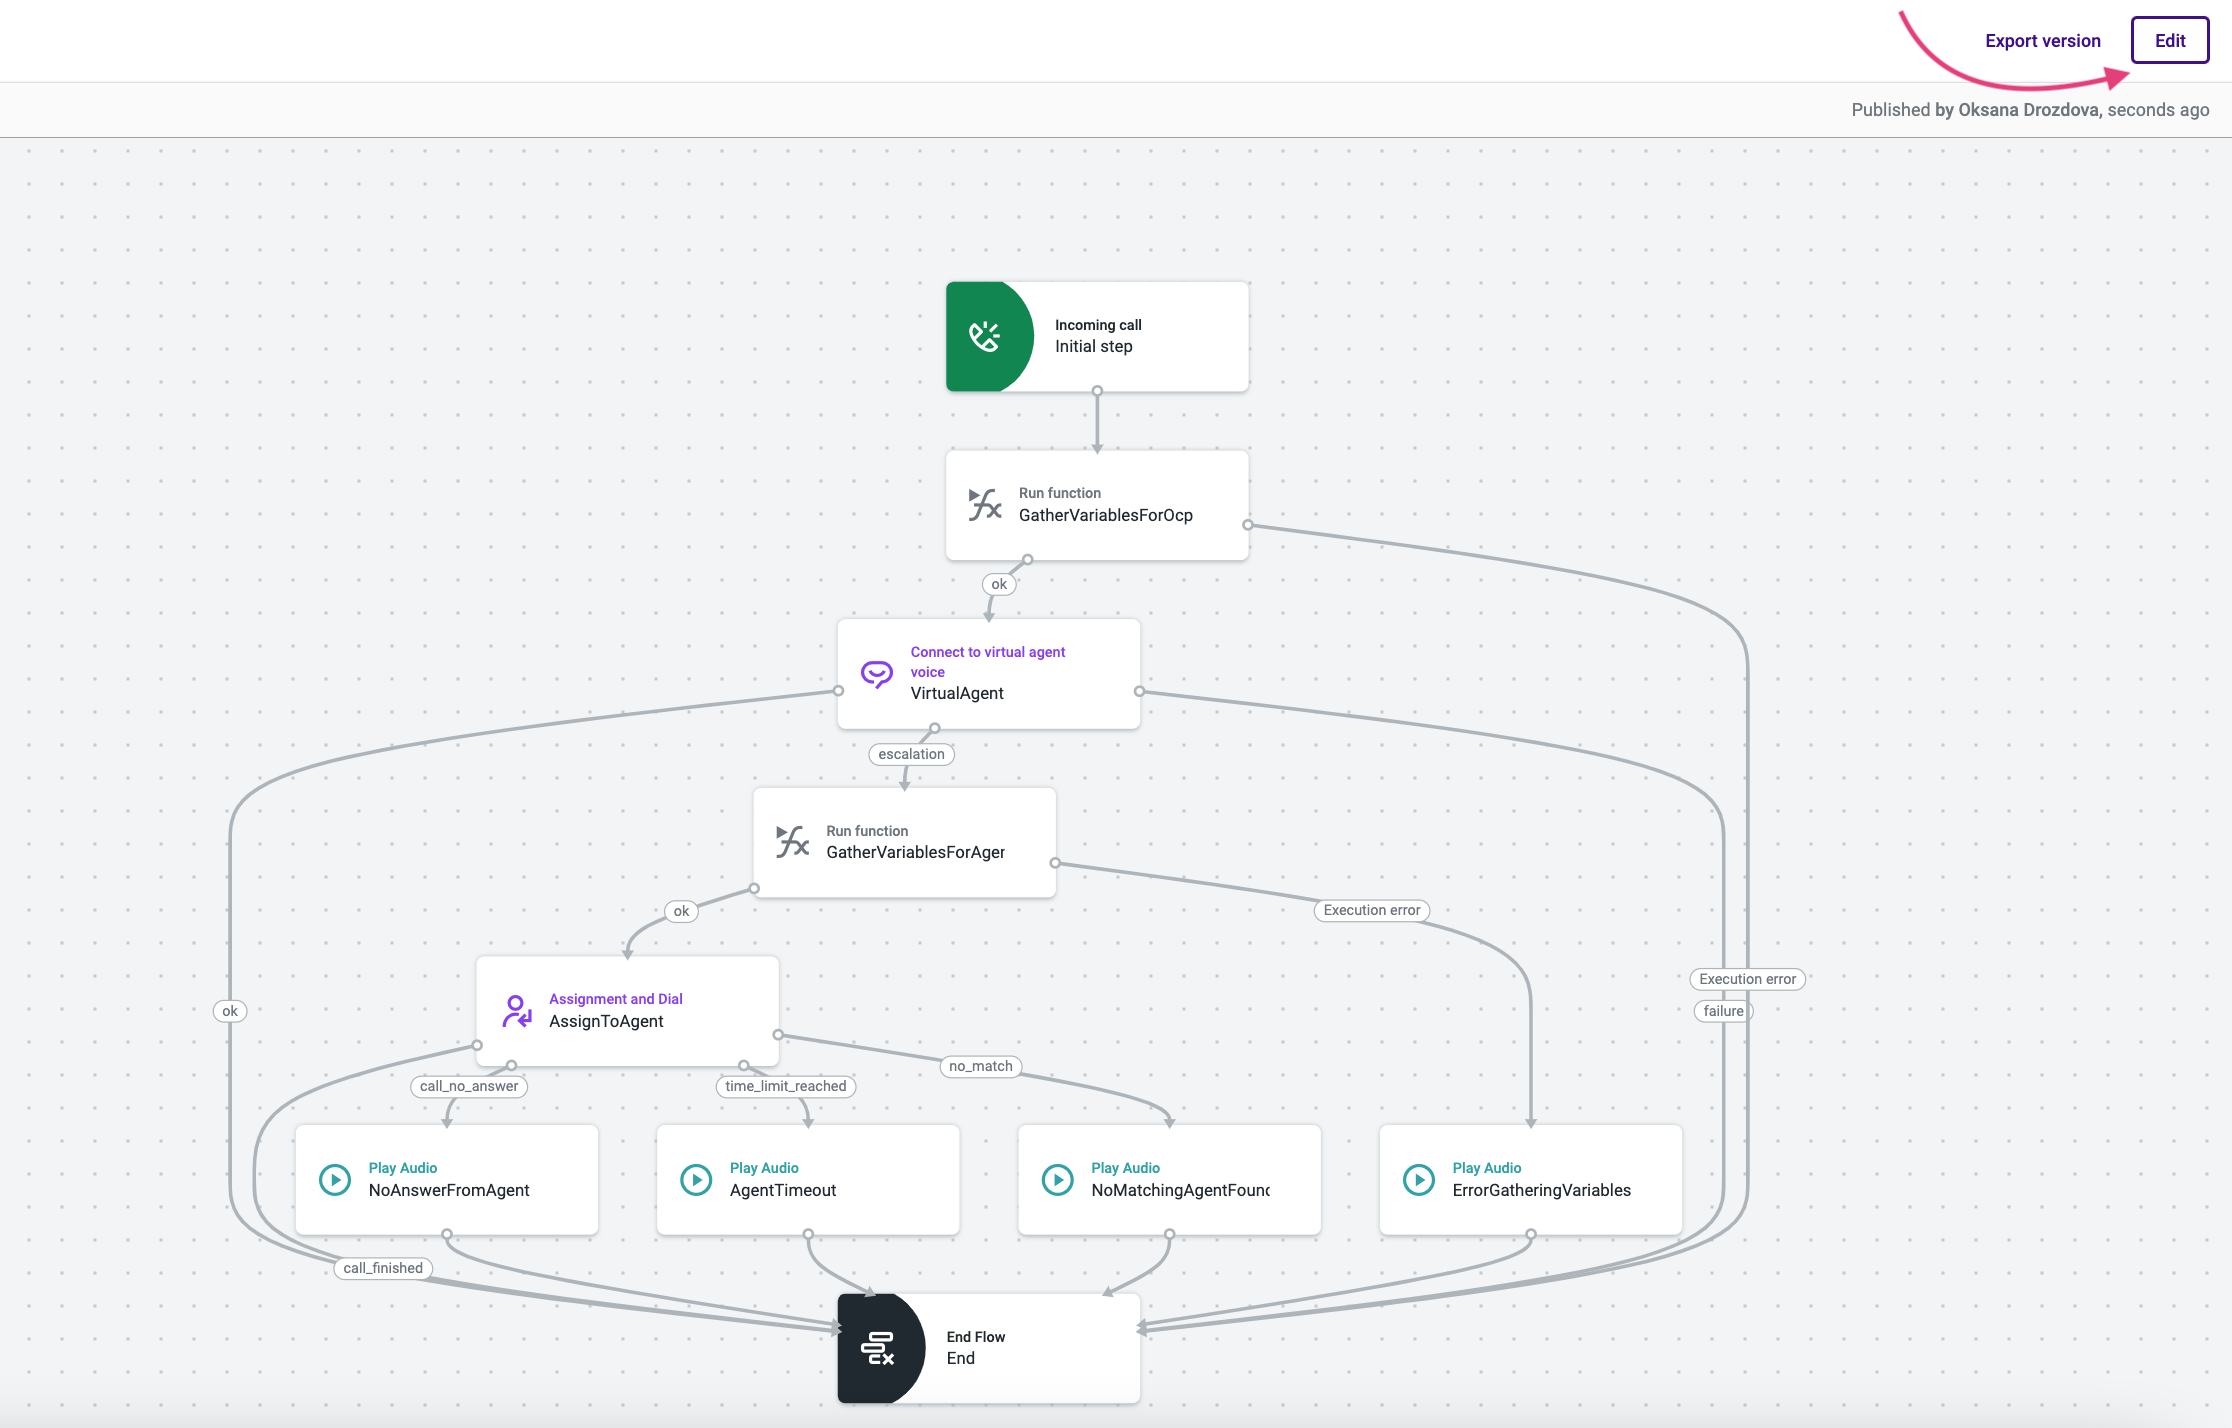
-
Click the Run function action. The following window opens.
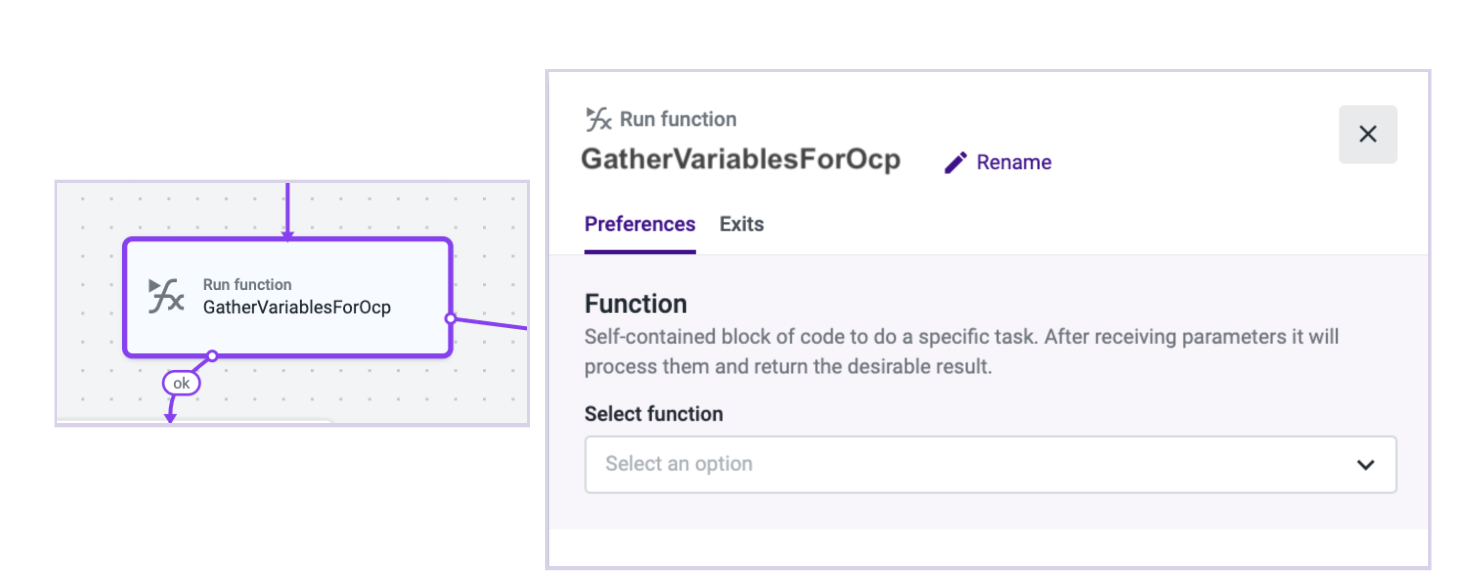
-
Click on the Select function drop-down and select a function created in the previous step. You will see the additional fields appear.
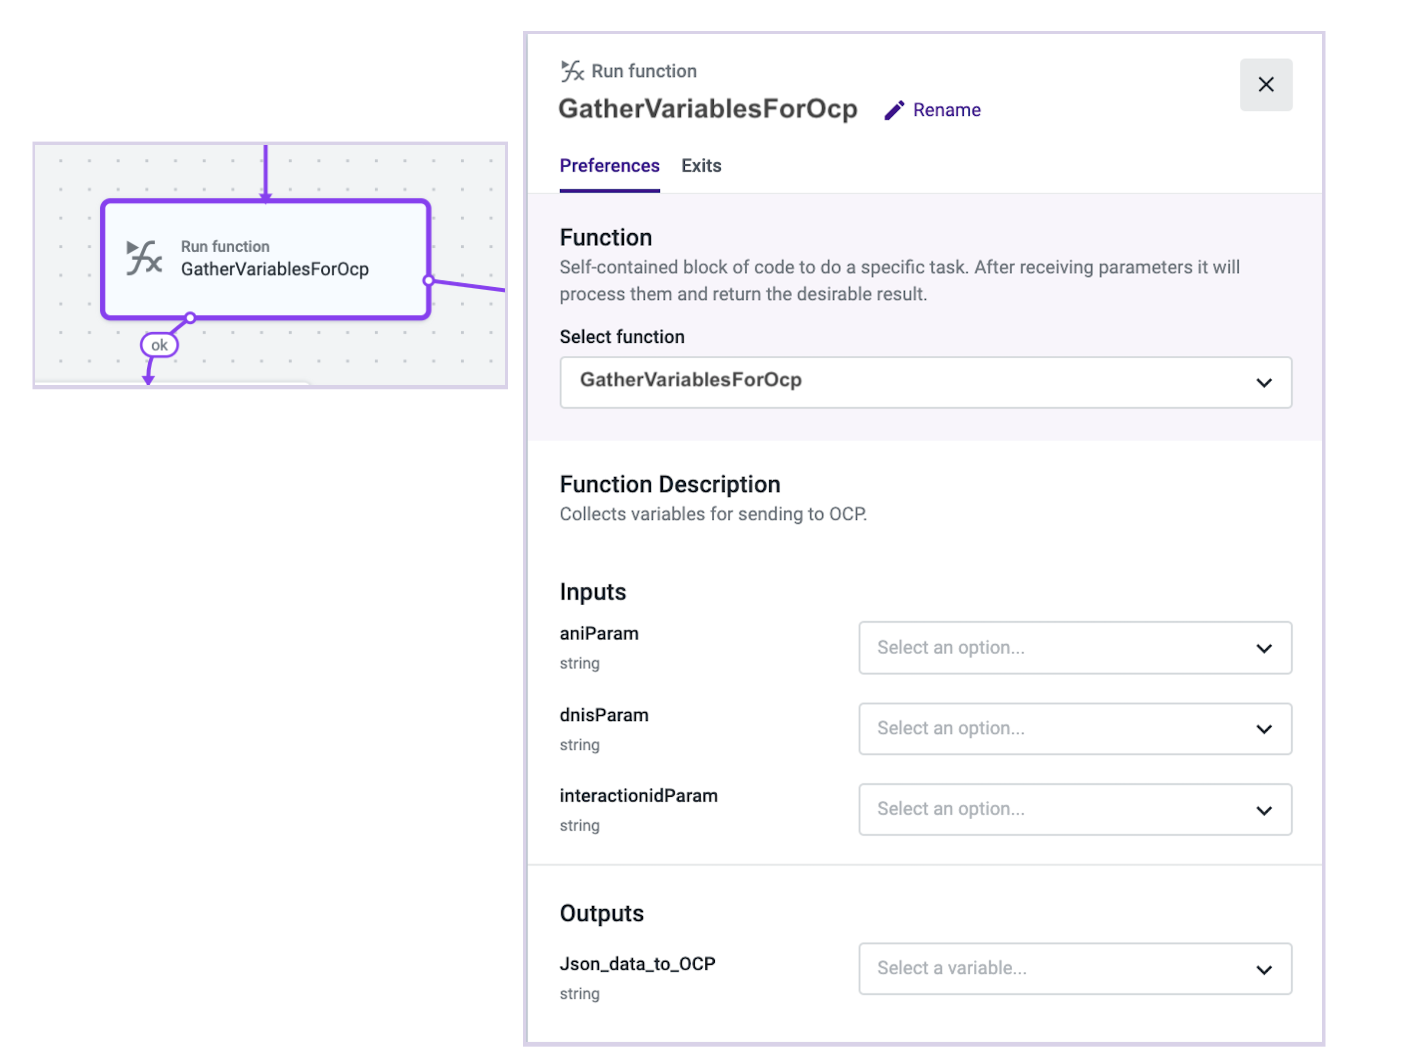
-
Fill in the required fields as described below:
-
Inputs: These are the function’s argument names. For our example, we select the previously defined ANI, DNIS, interactionid.
-
Output: This is the result returned by your function. You should create a flow variable name, which is going to be used during a call to OCP®. How to create a flow variable is described in steps 3-7. For our example, we have created the data_to_ocp variable as shown below.
-
-
Click Save to save the inserted data.
-
Click Publish to enable the changes.
Steps 5 and 6 are optional, however it is highly recommended to click Save and then Publish after configuring each step. This will ensure that all the data is saved.
Step 3. Configure a connection with the Omilia flow
At this step, you need to configure a connection with the Omilia flow and define a local flow variable that will catch data from OCP®.
To do this, follow the steps below:
-
Navigate to Studio tab → Flows and open your flow.
If you have saved and published your flow’s configuration in the previous step, click Edit to enable editing.
-
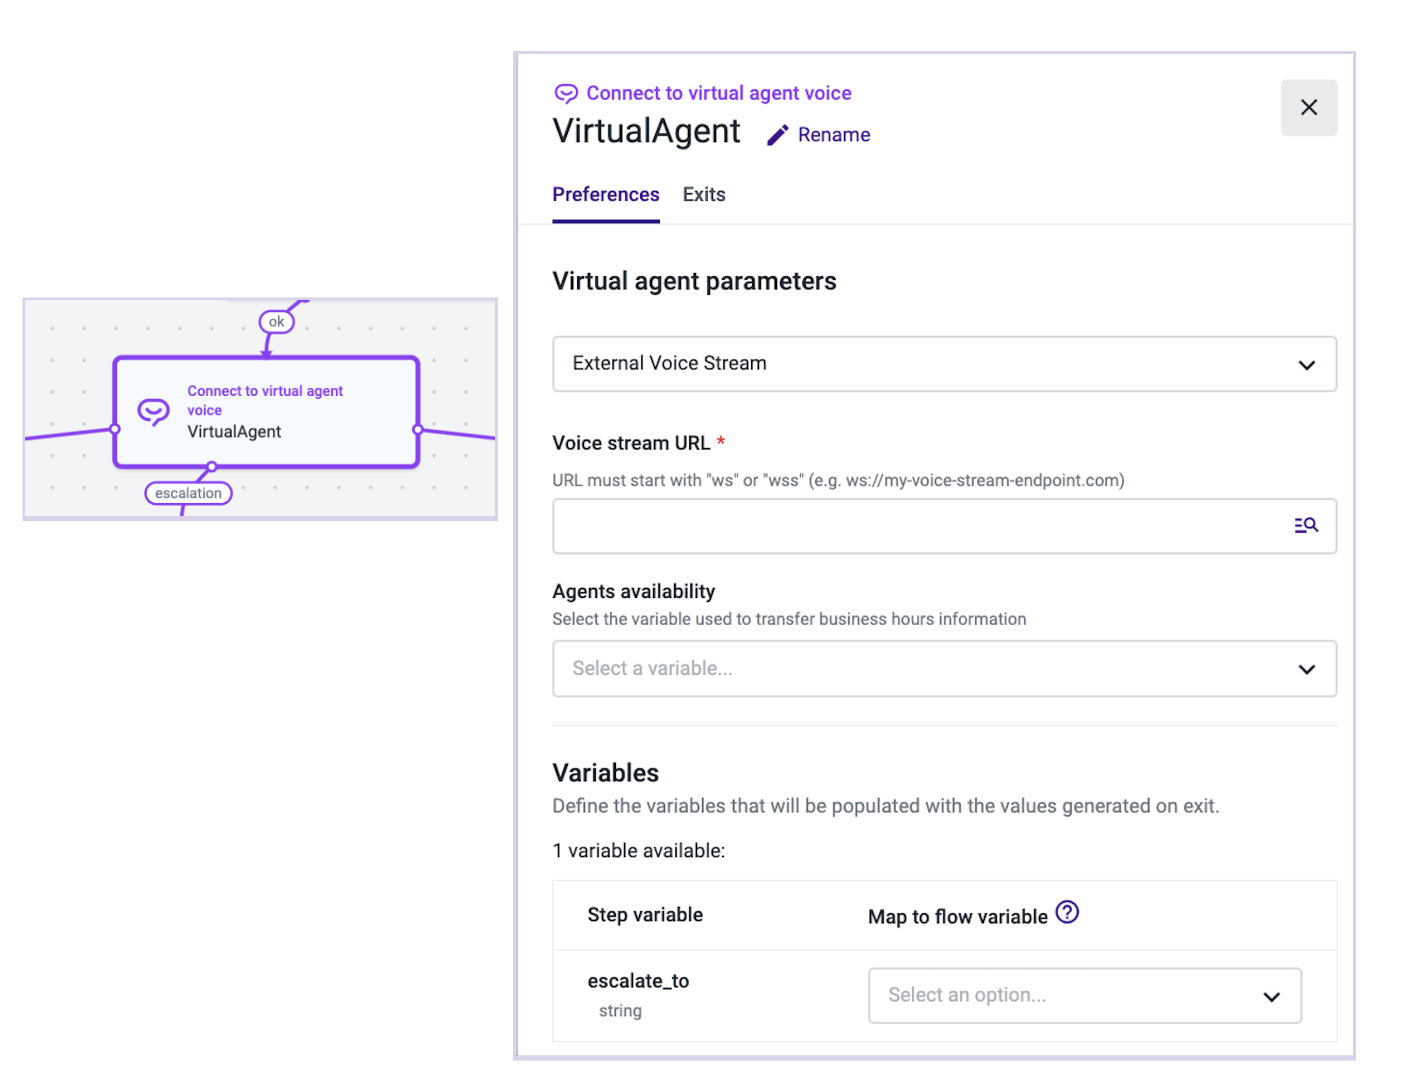
Click the VirtualAgent action.
-
In the opened window, fill in the fields as described below:
-
Virtual agent parameters: select External Voice stream from the drop-down list.
-
Voice Stream URL: Enter the URL using the following pattern: wss://us1-m.ocp.ai/chat/ws/voice/dialogs?apiKey=Your_apiKey. To find your
apiKeyvalue, follow the steps below:-
Navigate to OCP → miniApps → Manage and select your flow.
-
Go to the Chat tab → Chat Widget.
-
Scroll down to the Webchat configuration part and copy the
apiKeyvalue.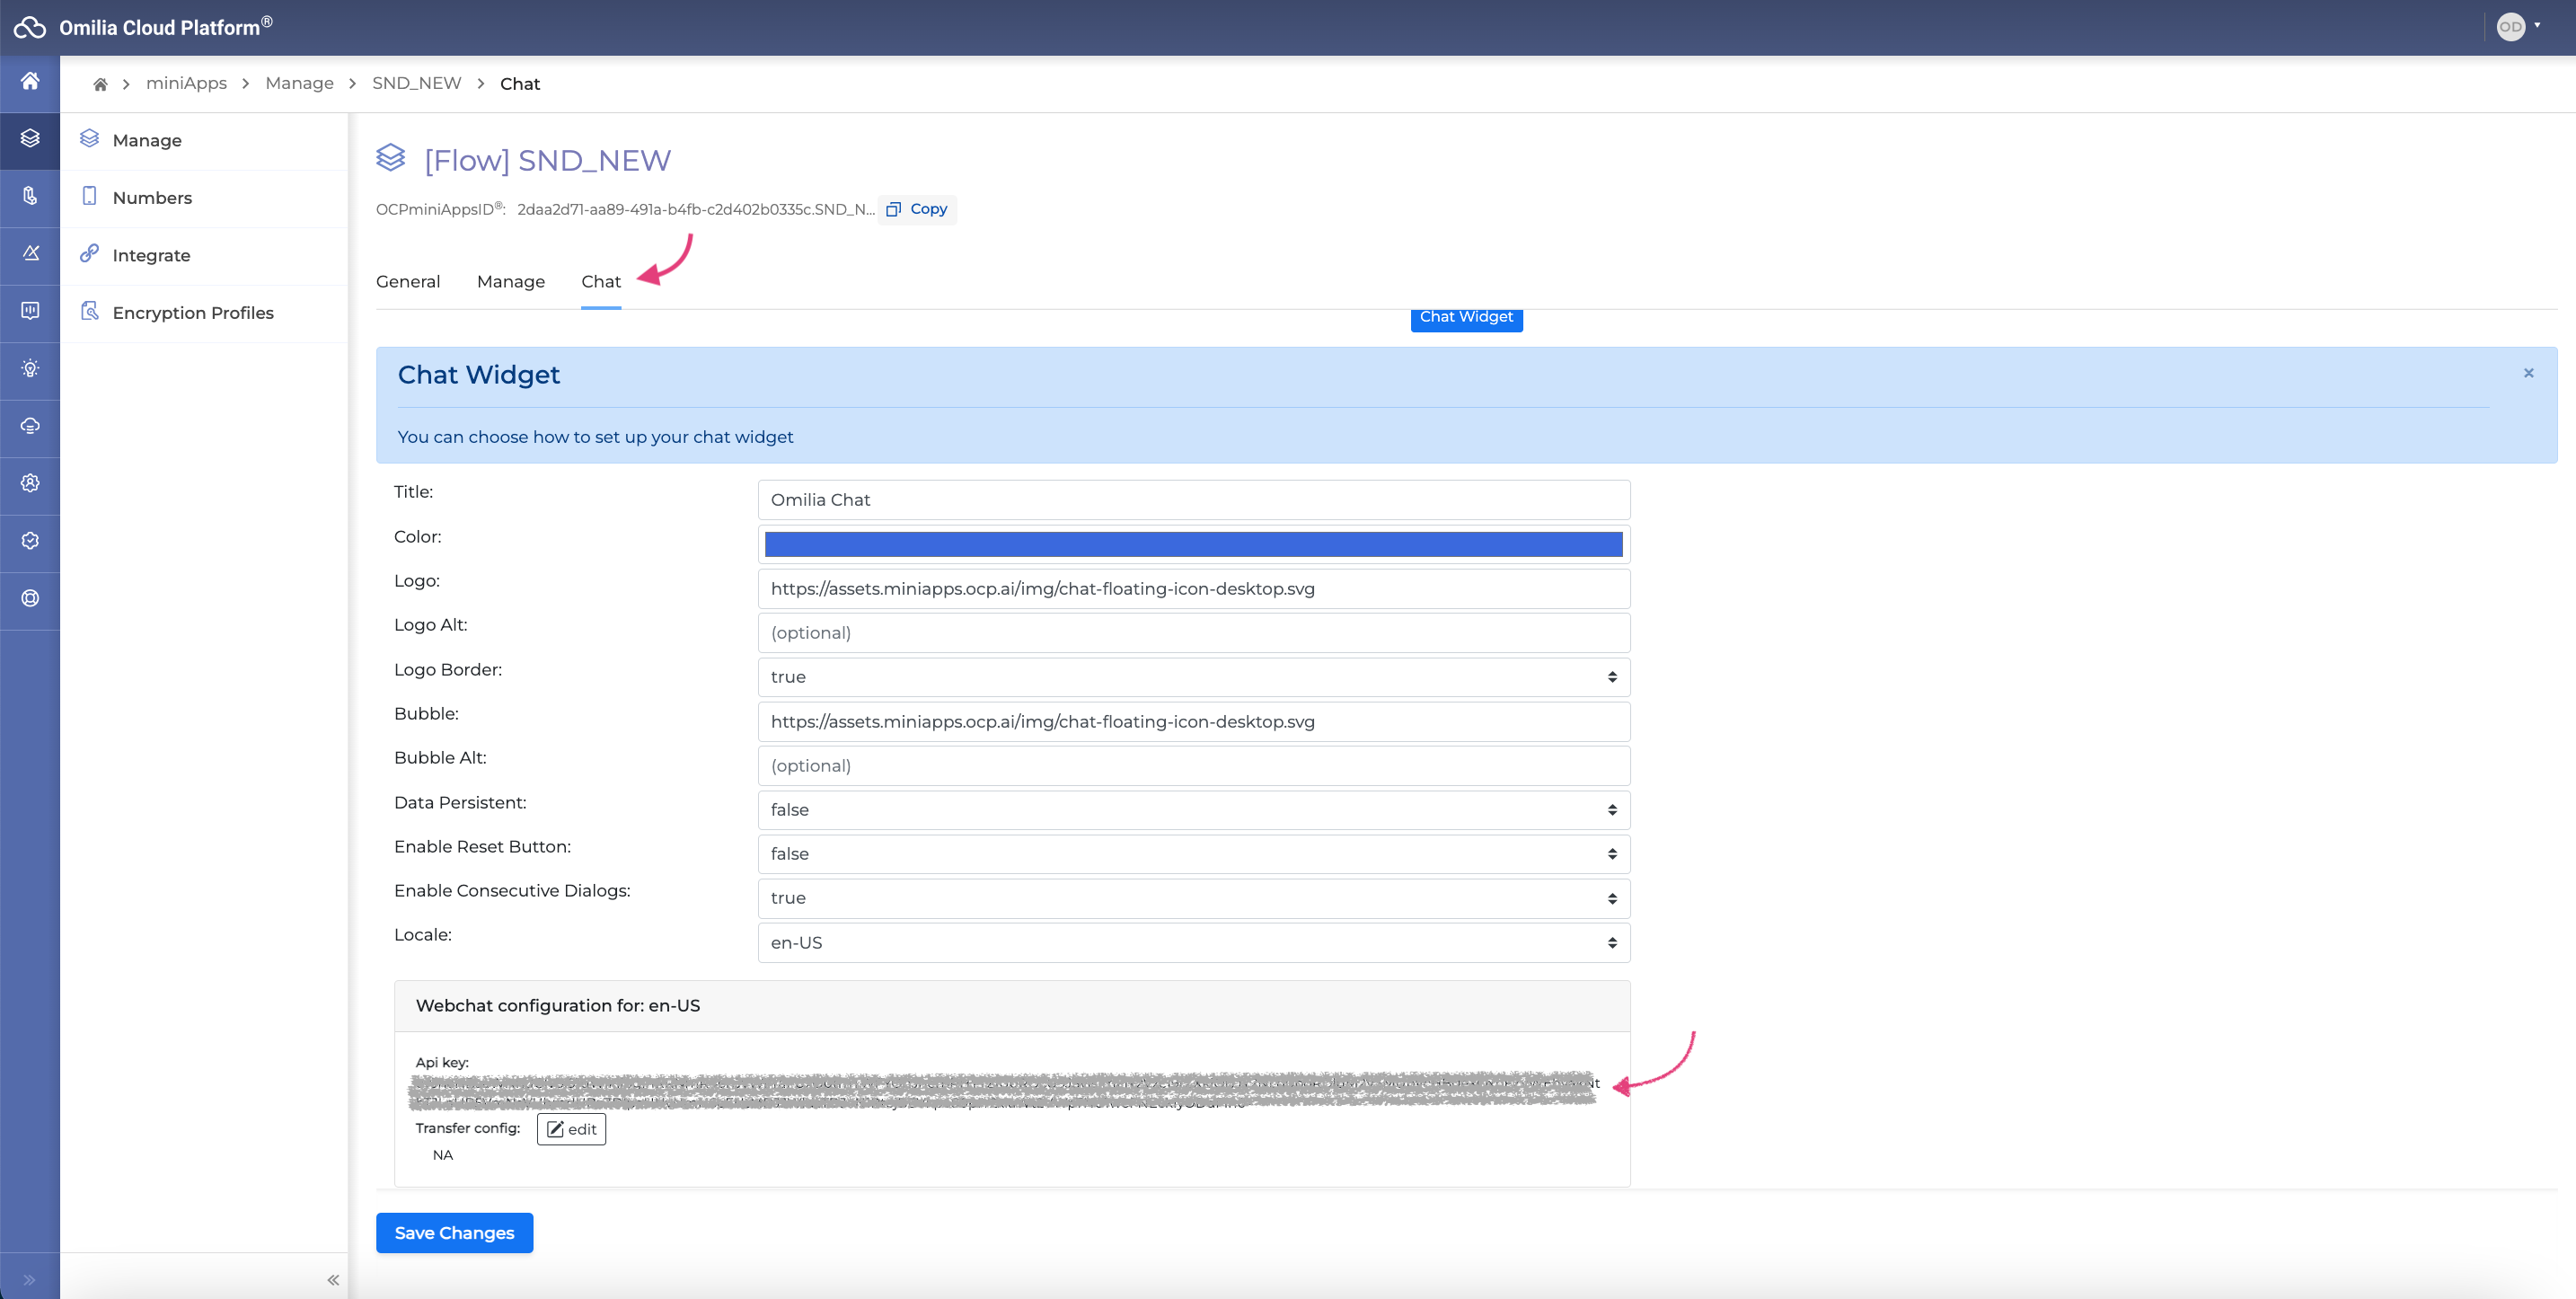
-
-
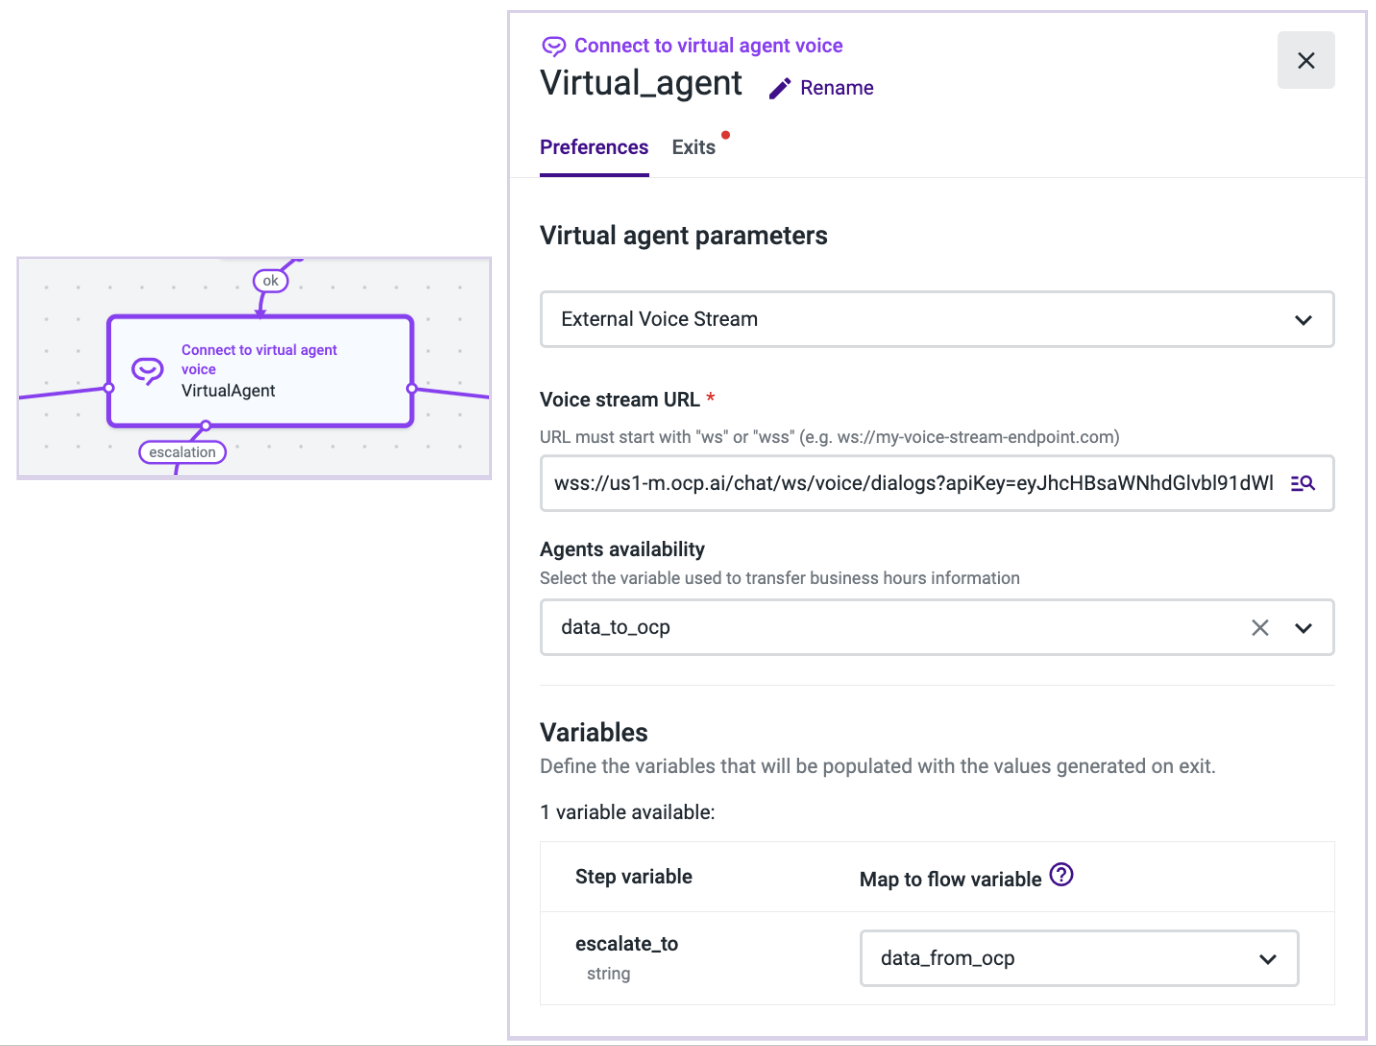
Agents availability: Select the internal flow variable that was created in the previous step. This is basically the result returned by the function that will be sent to OCP® with such a configuration.
For our example, we are using data_to_ocp. -
Variables: Specify the variables that will be filled with the values produced upon exit.
-
escalate_to: This variable is used when the VirtualAgent action performs a call to OCP®. Consequently, OCP® reciprocates by returning a data string. This returned value is saved within this dynamic flow variable. How to create a flow variable is described in steps 3-7.
For our example, we have created the data_from_ocp variable as shown below.
-
-
Click Save to save the inserted data.
-
Click Publish to enable the changes.
Steps 3 and 4 are optional, however it is highly recommended to click Save and then Publish after configuring each step. This will ensure that all the data is saved.
Step 4. Convert the received OCP data
In the upcoming procedure, you will have to perform the following steps:
Create a Javascript function
For this step, we will create a new function designed to transcribe the OCP® data string into more digestible variables within Talkdesk. Subsequently, these transformed variables will be presented to an agent for their use.
To create the function, refer back to the outlined procedure provided in one of the preceding steps. For illustrative purposes, we have selected the following values to be used in our function:
-
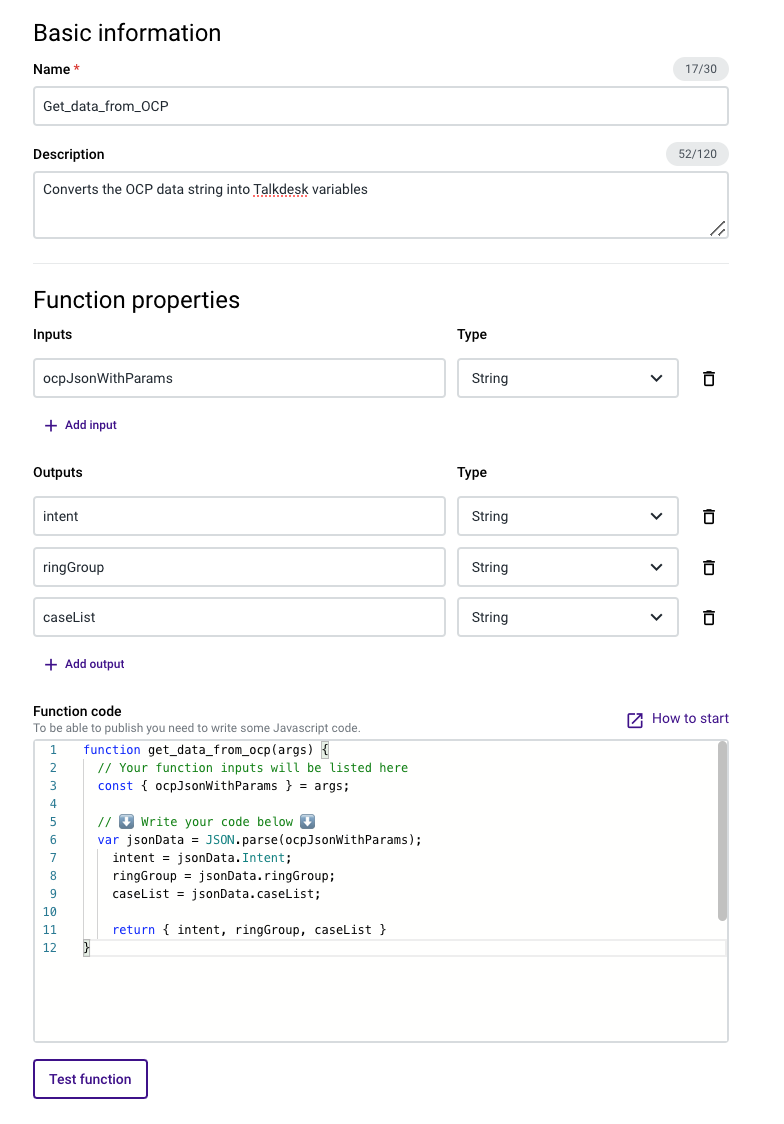
Name: Get_data_from_OCP.
-
Description: Converts the OCP data string into Talkdesk variables.
-
Function properties:
-
Inputs:
ocpJsonWithParams-
Type: String.
-
-
Outputs: Use the + Add output button to add more output values. For our example, we are using the following three values:
intent,ringGroup,caseList-
Type: String.
-
-
-
Function code:
JavaScriptfunction gettingDatafromOcp(args) { // Your function inputs will be listed here const { ocpJsonWithParams } = args; // ⬇️ Write your code below ⬇️ var jsonData = JSON.parse(ocpJsonWithParams); intent = jsonData.Intent; ringGroup = jsonData.ringGroup; caseList = jsonData.caseList; return { intent, ringGroup, caseList } }
Now, test your function as described in steps 4-7 of the preceding chapter. If the function behaves as expected, click Save to create a draft version of your function. Then click Publish to enable your function.
You have successfully created the Get_data_from_OCP function.
Configure the GatherVariablesForAgent action
In the subsequent step, the function you have crafted must be assigned to the Run function action within your flow. To accomplish this, adhere to the following steps:
-
Navigate to Studio tab → Flows and open your flow.
If you have saved and published your flow’s configuration in the previous step, click Edit to enable editing.
-
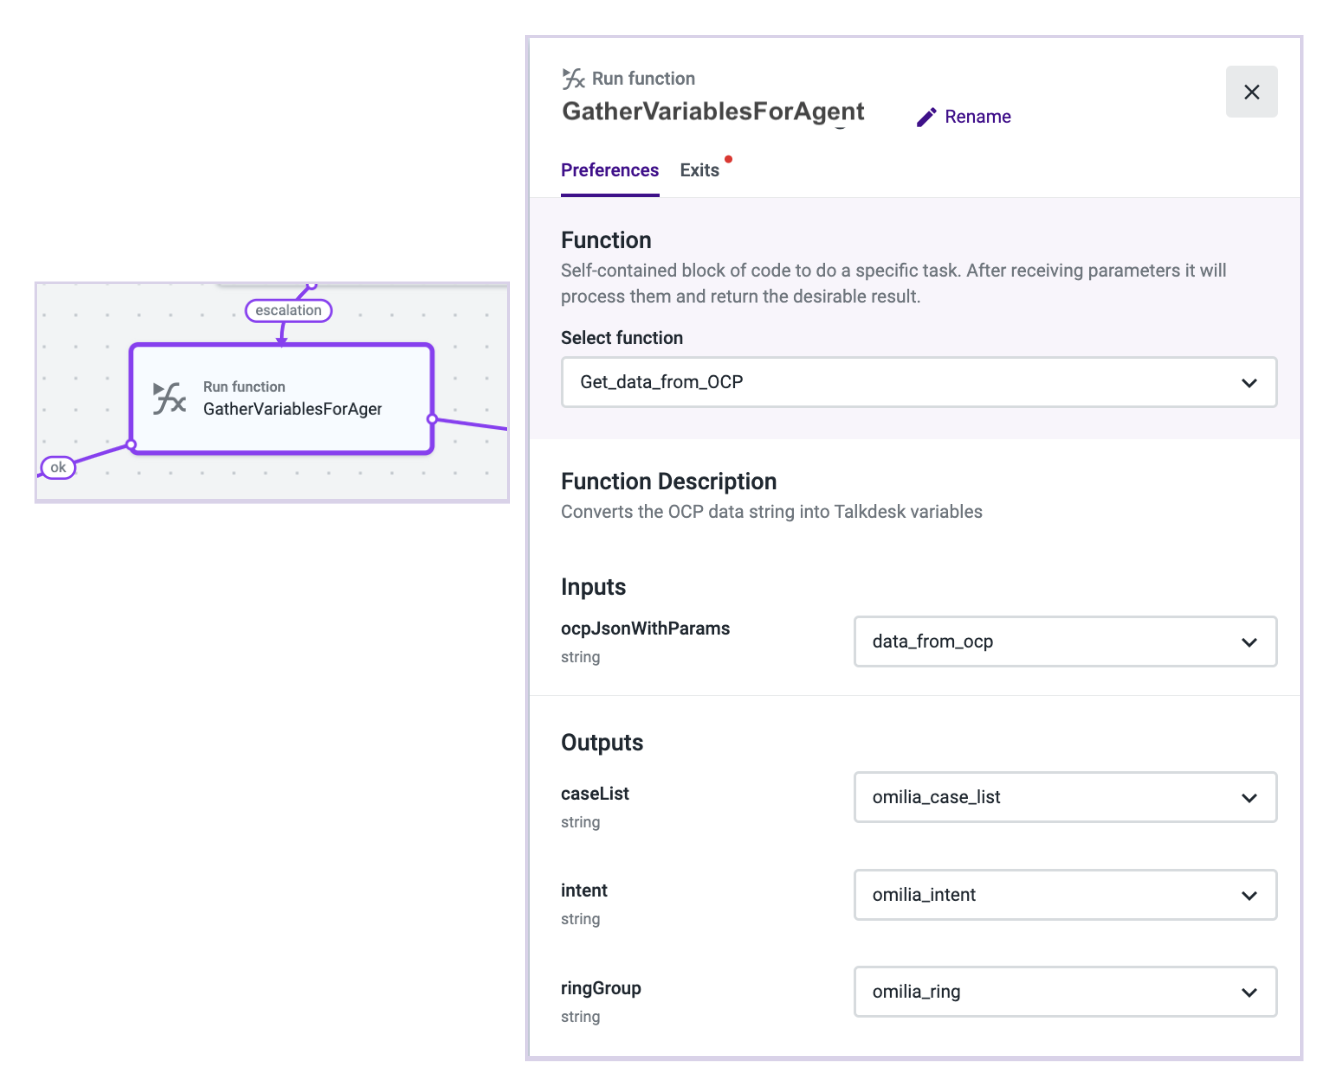
Click the GatherVariablesForAgent action.
-
In the opened window, fill in the fields as described below:
-
Select function: Use the function created during the previous step. In our example, we are using the Get_data_from_OCP function.
-
Inputs: Use the internal flow variable defined during the previous step. For our example, we are using data_from_ocp.
-
Output: In the given scenario, the function is designed to return three output parameters. Please note that this number is project-specific and can change. Here we need to connect each output parameter with the corresponding variable within the flow. This enables us to utilize these outputs in subsequent stages of the process, and, if needed, reveal them to an agent.
For our example, we are using the following variables:omilia_case_list,omilia_intent,omilia_ring.
-
Click Save to save the inserted data.
-
Click Publish to enable the changes.
Steps 4 and 5 are optional, however it is highly recommended to click Save and then Publish after configuring each step. This will ensure that all the data is securely saved.
Display OCP data to agents in Talkdesk
To display data that was obtained as an outcome of the GatherVariablesForAgent function to the agent, proceed as follows:
-
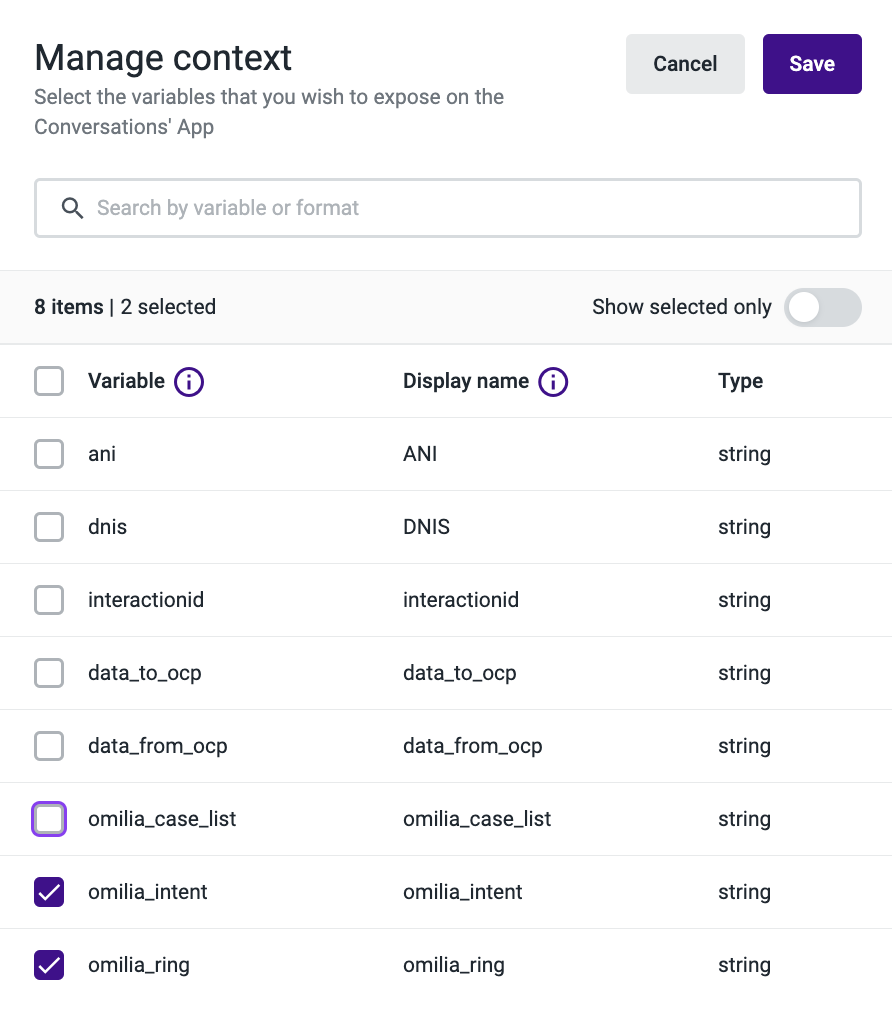
Click the brackets {} button.
-
In the opened window, you will see a list of locally generated variables. For our example, we are going to mark the checkboxes adjacent to the Omilia-specified variables containing useful data for the agent.
-
Click Save.
In the screenshot below, you can see how the data received from OCP® is now visible to the agent in Talkdesk, following the described manipulations.
