An Agent Assist Profile defines how the assistant behaves during a live customer interaction. Profiles can be configured from the OCP Console and are used to link key components such as the NLU model, ASR grammars, VB profile, and Orchestrator flows.
Profiles are required in order to invoke Agent Assist through the NICE CXone integration, GENESYS Pure Cloud integration or other supported CCaaS platforms.
Agent Assist profiles:
-
Custom Profiles – Fully configurable. Suitable for advanced use cases and testing.
Creating a profile is a prerequisite for enabling Agent Assist.
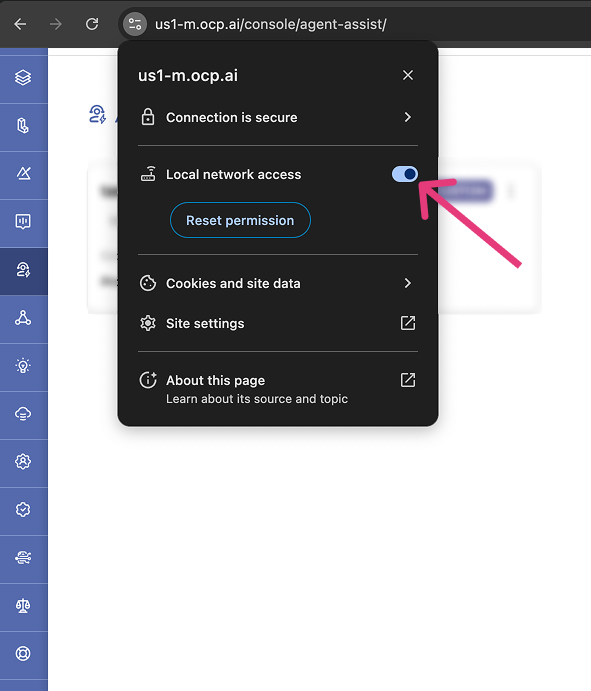
Prerequisite
To ensure Agent Assist works properly in browser, enable the local network access permission:
Create a Custom Profile
-
Log in to OCP® as described in Logging in and logging out.
-
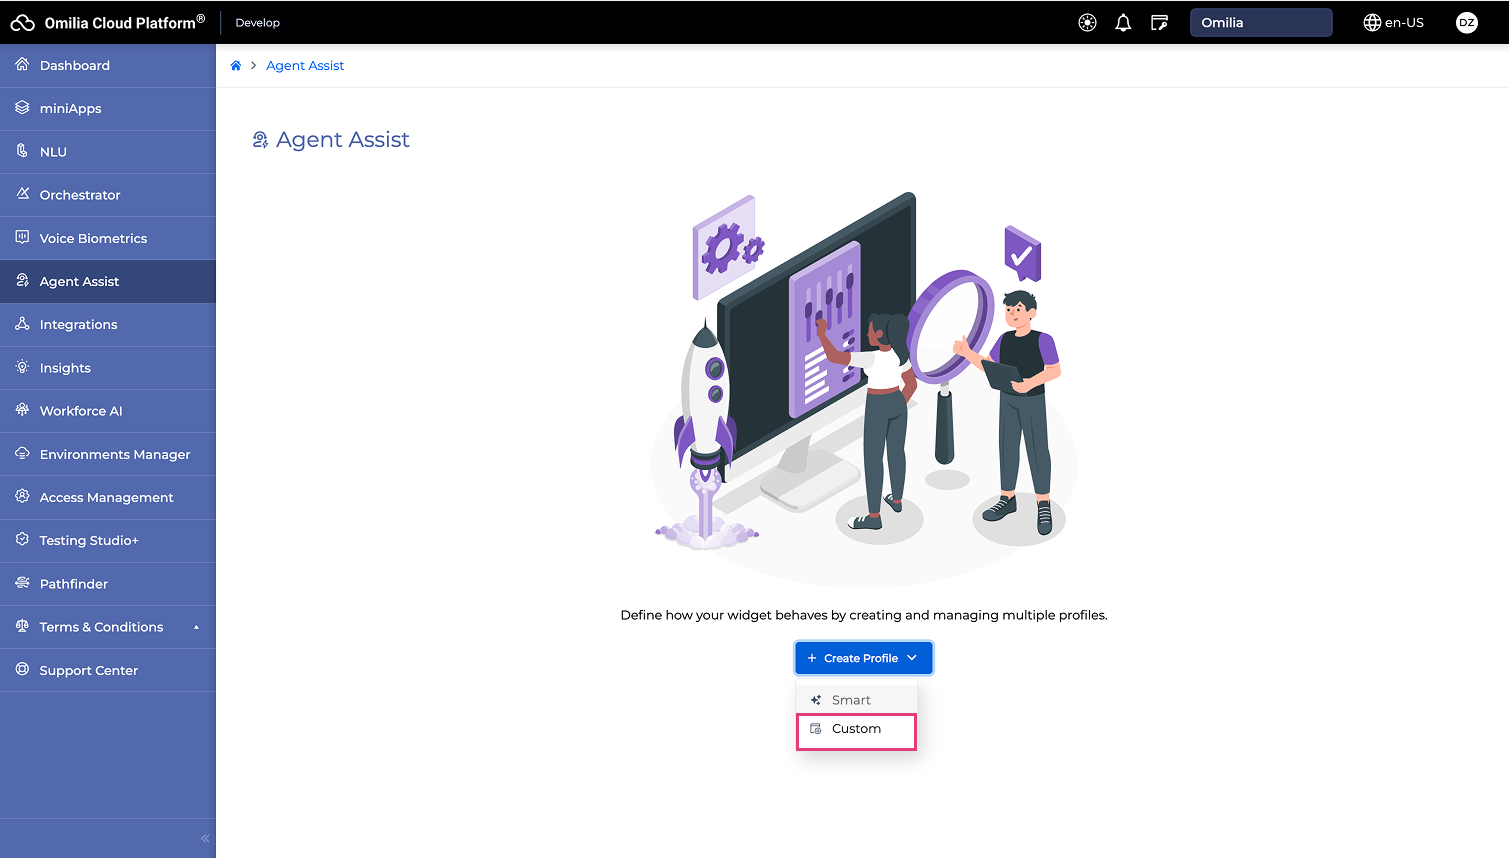
Select Agent Assist on the left sidebar.
-
Click the Create Profile button → Custom.
-
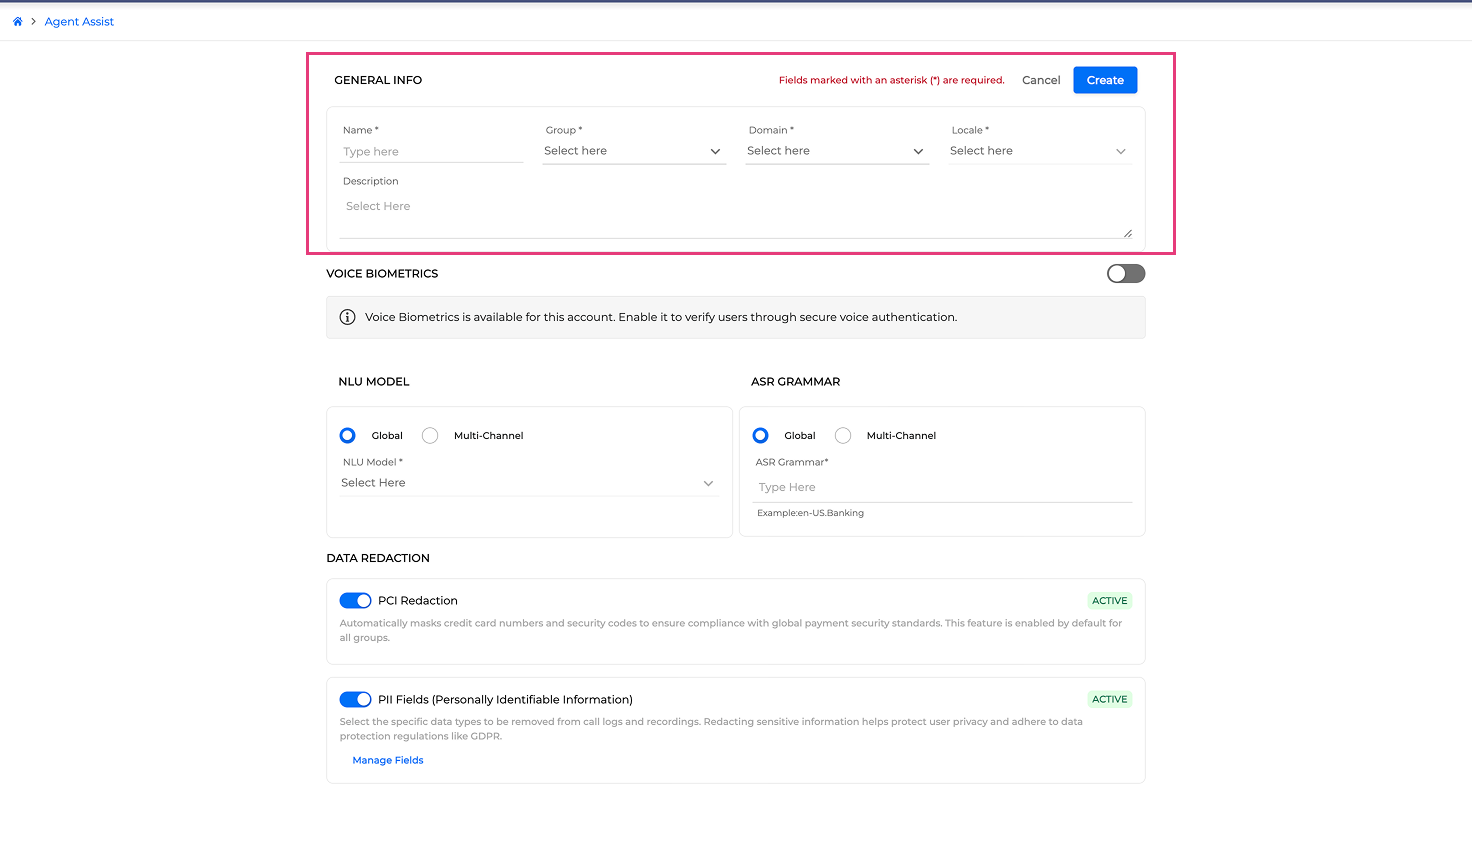
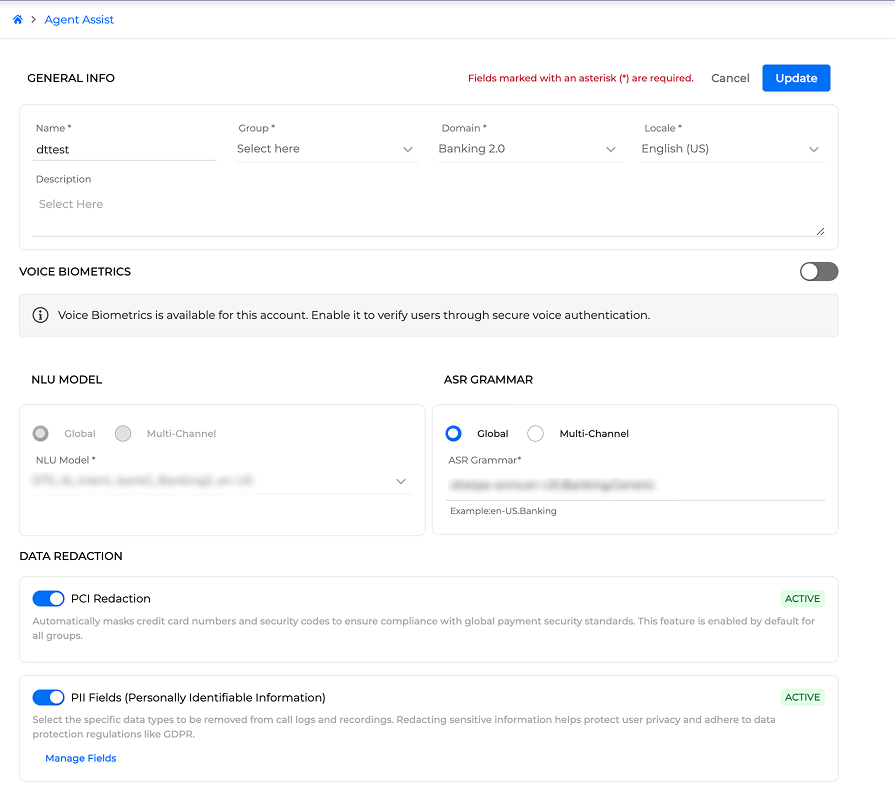
Fill in the General Info settings:
-
Name -Enter a unique profile name.
-
Group - Select the group this profile applies to.
-
Domain - Select the application domain (e.g.,
Banking,Retail, etc.). -
Locale - Select the appropriate locale (e.g.,
en-US,fr-FR). -
Description - Add a short summary of the profile. (Optional)
-
-
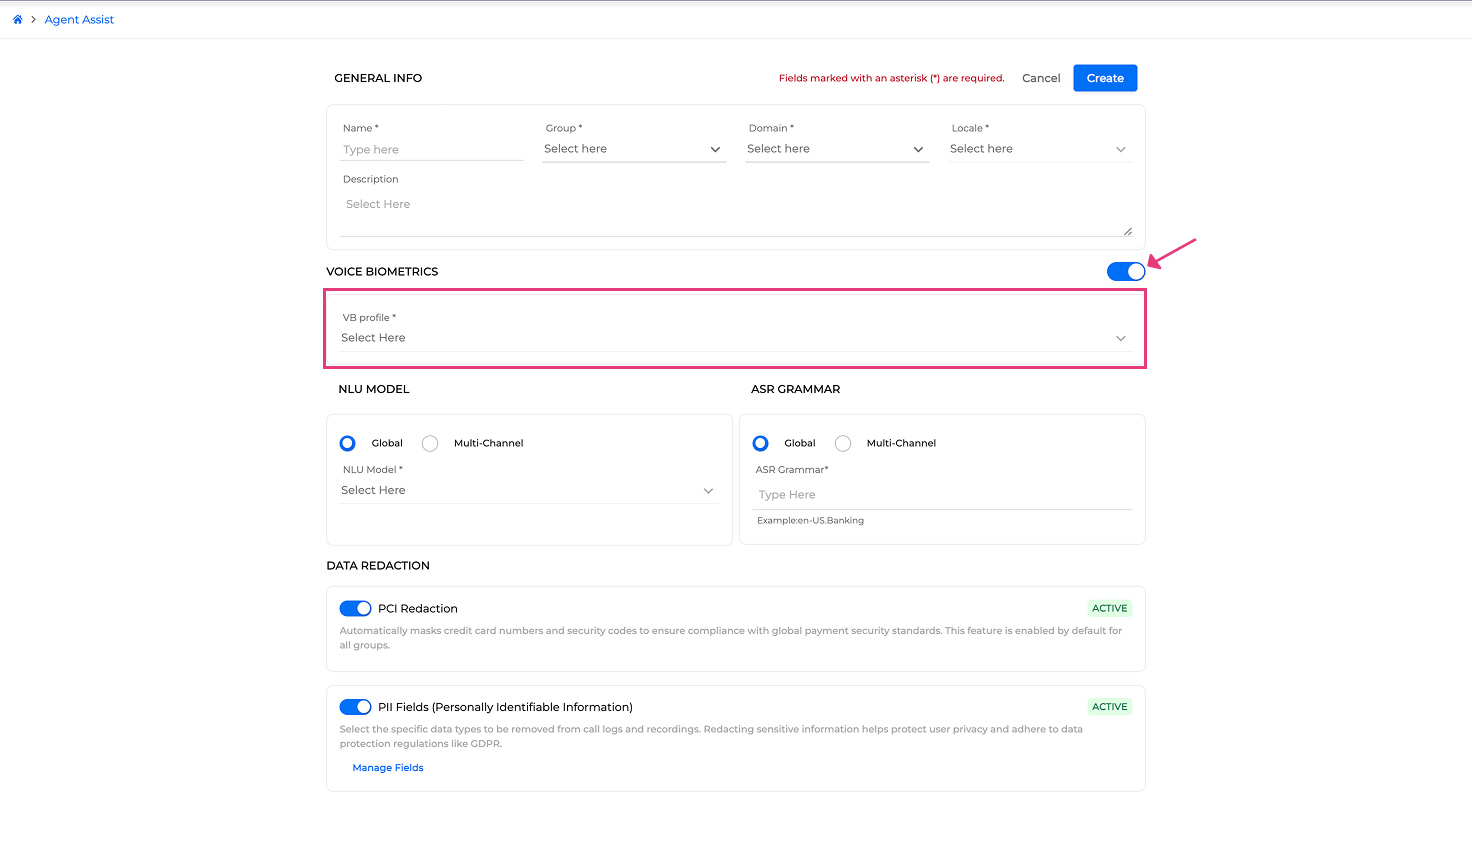
(Optional) Turn the toggle button on to enable Voice Biometrics. You must then select a VB profile from the drop-down list
-
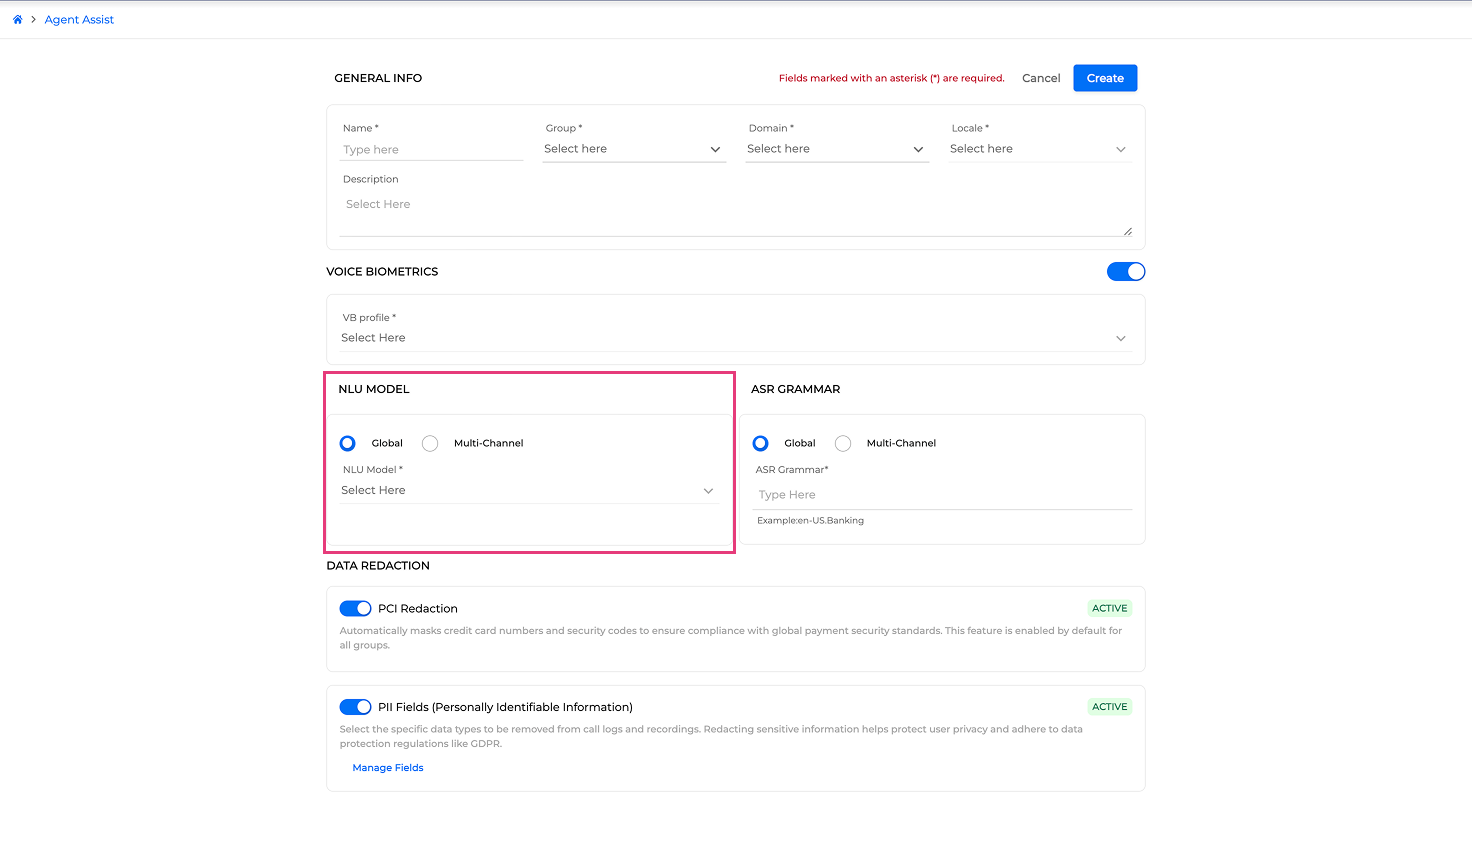
Fill in the NLU Model settings:
-
Select the NLU Model configuration mode:
-
Global - Use a Global NLU model throughout (Default)
-
Multi-Channel - Select a different NLU model for the Caller and the Agent. This may be necessary when we require different NLU annotations for the agent and caller due to business logic.
-
-
-
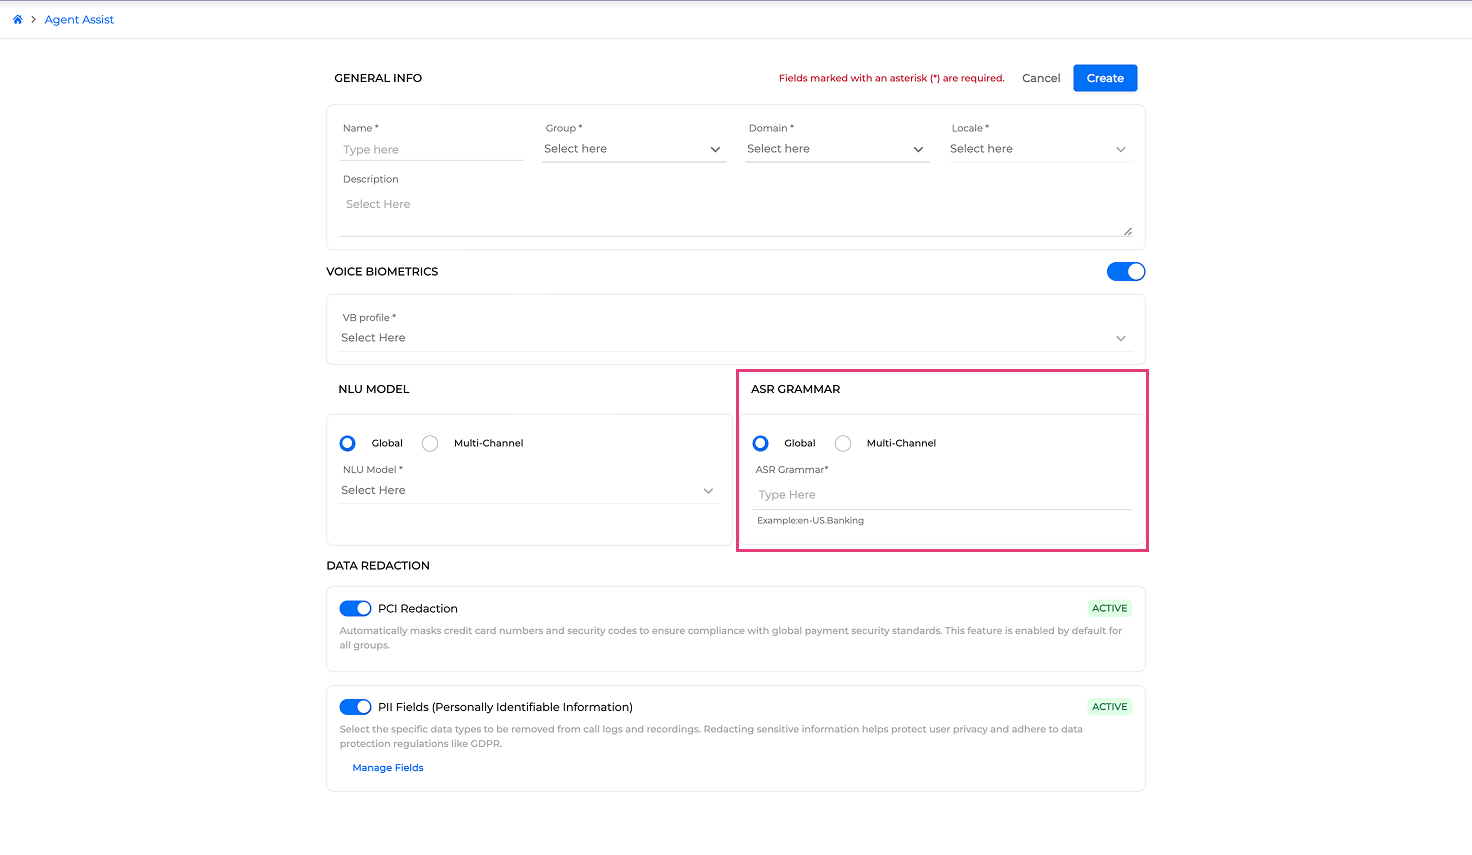
Fill in the ASR Grammar settings:
-
Select the ASR Grammar configuration mode:
-
Global - Use a common ASR Grammar throughout (Default). Type the ASR Grammar name in the corresponding field, for example,
en-US.Banking. -
Multi-Channel - Select a different ASR Grammar for the Caller and the Agent. This may be necessary when we require a different or lighter ASR Grammar for the agent and caller due to business logic
-
-
ASR Grammars are provided by Omilia. Contact the Customer Service Desk if you require a global or a channel specific ASR Grammar.
-
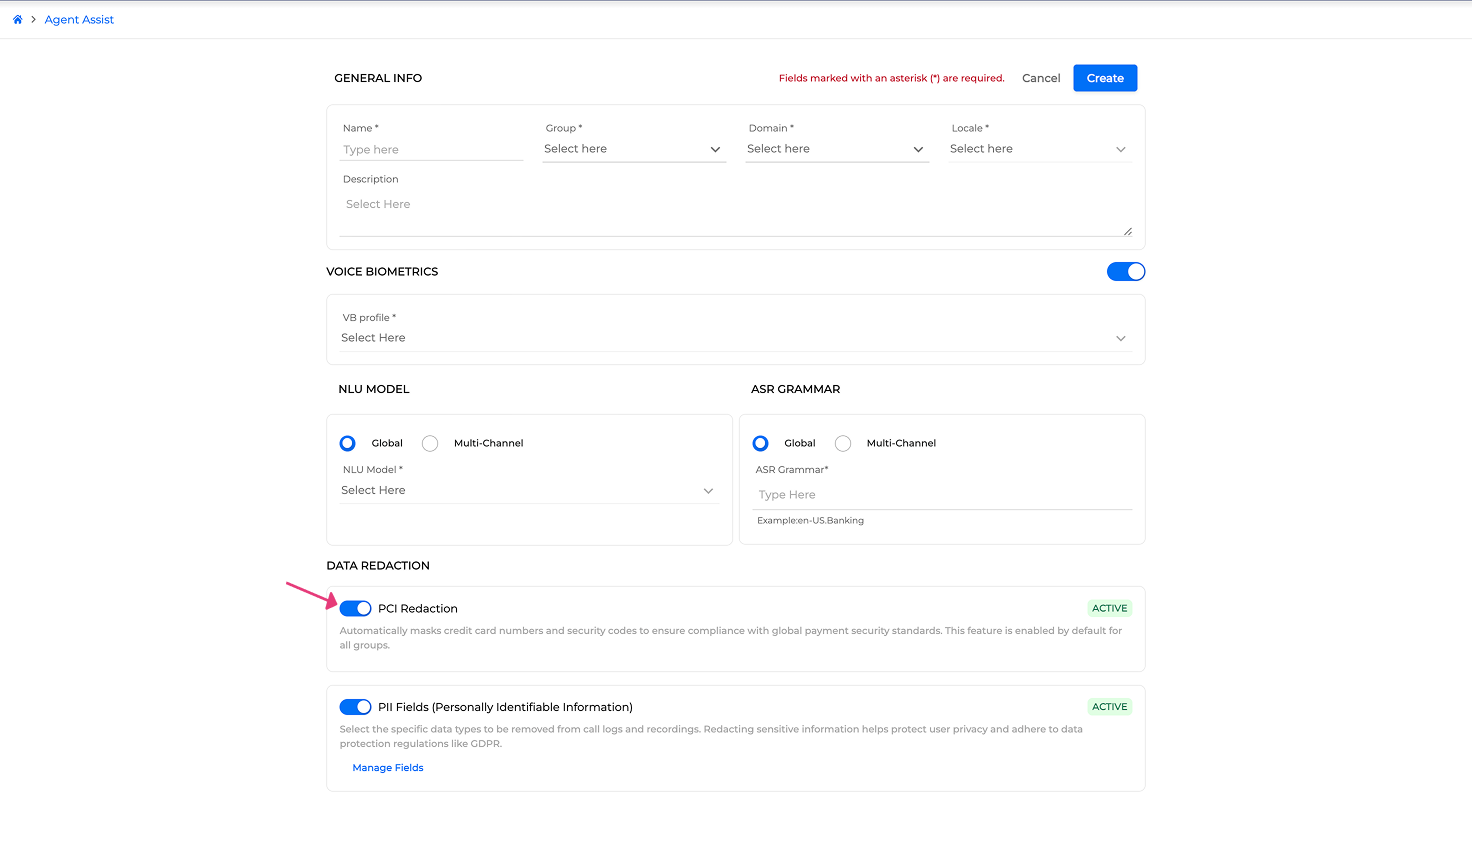
Configure the DATA REDACTION settings.
Both redaction features are enabled by default for all groups to ensure privacy and compliance:-
Leave the PCI Redaction toggle active to automatically mask credit card numbers and security codes.
-
Leave the PII Fields (Personally Identifiable Information) toggle active to remove sensitive data from call logs and recordings.
-
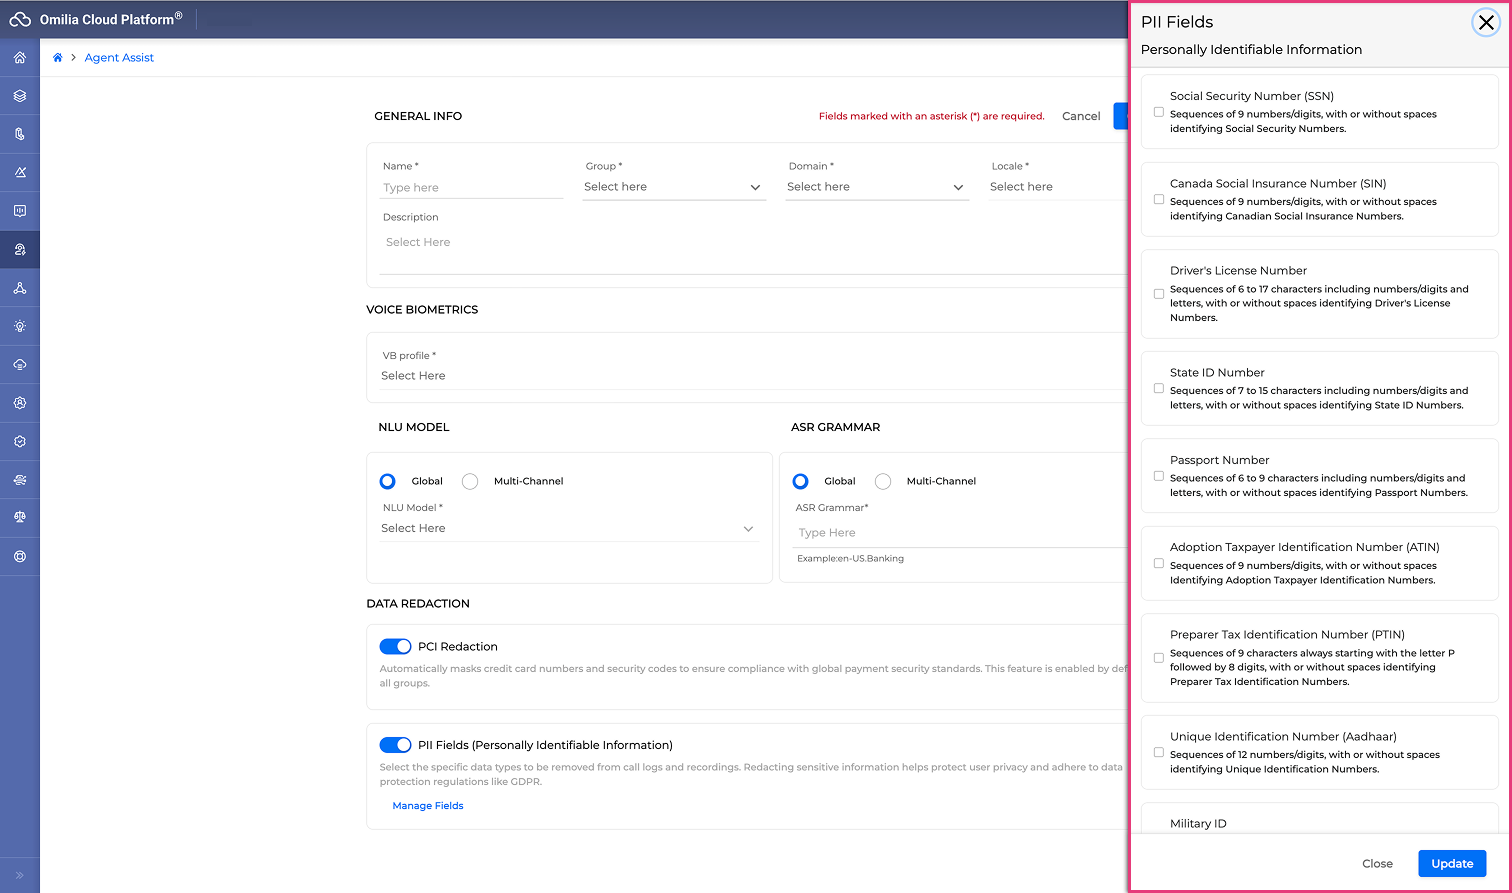
Click Manage Fields to open the PII Fields dialog box.

-
Check the checkboxes for the specific data types you want to redact:
-
Social Security Number (SSN)
-
Canada Social Insurance Number (SIN)
-
Driver's License Number
-
State ID Number
-
Passport Number
-
Adoption Taxpayer Identification Number (ATIN)
-
Preparer Tax Identification Number (PTIN)
-
Unique Identification Number (Aadhaar)
-
Military ID
-
Special Tax Identification Number (NITE)
-
Date of Birth (DOB)
-
Insurance Policy Number
-
Vehicle Identification Number (VIN)
-
License Plate Number
-
Insurance ID
-
Medical Record Number (MRN)
-
Address
-
etc.
-
-
-
If all information is correct, click the Create button to finalize the profile.
To make changes, click Cancel or navigate back using the stepper.
Manage Agent Assist Profiles
Once a profile is created, it is displayed in the list on the Agent Assist page as a card.
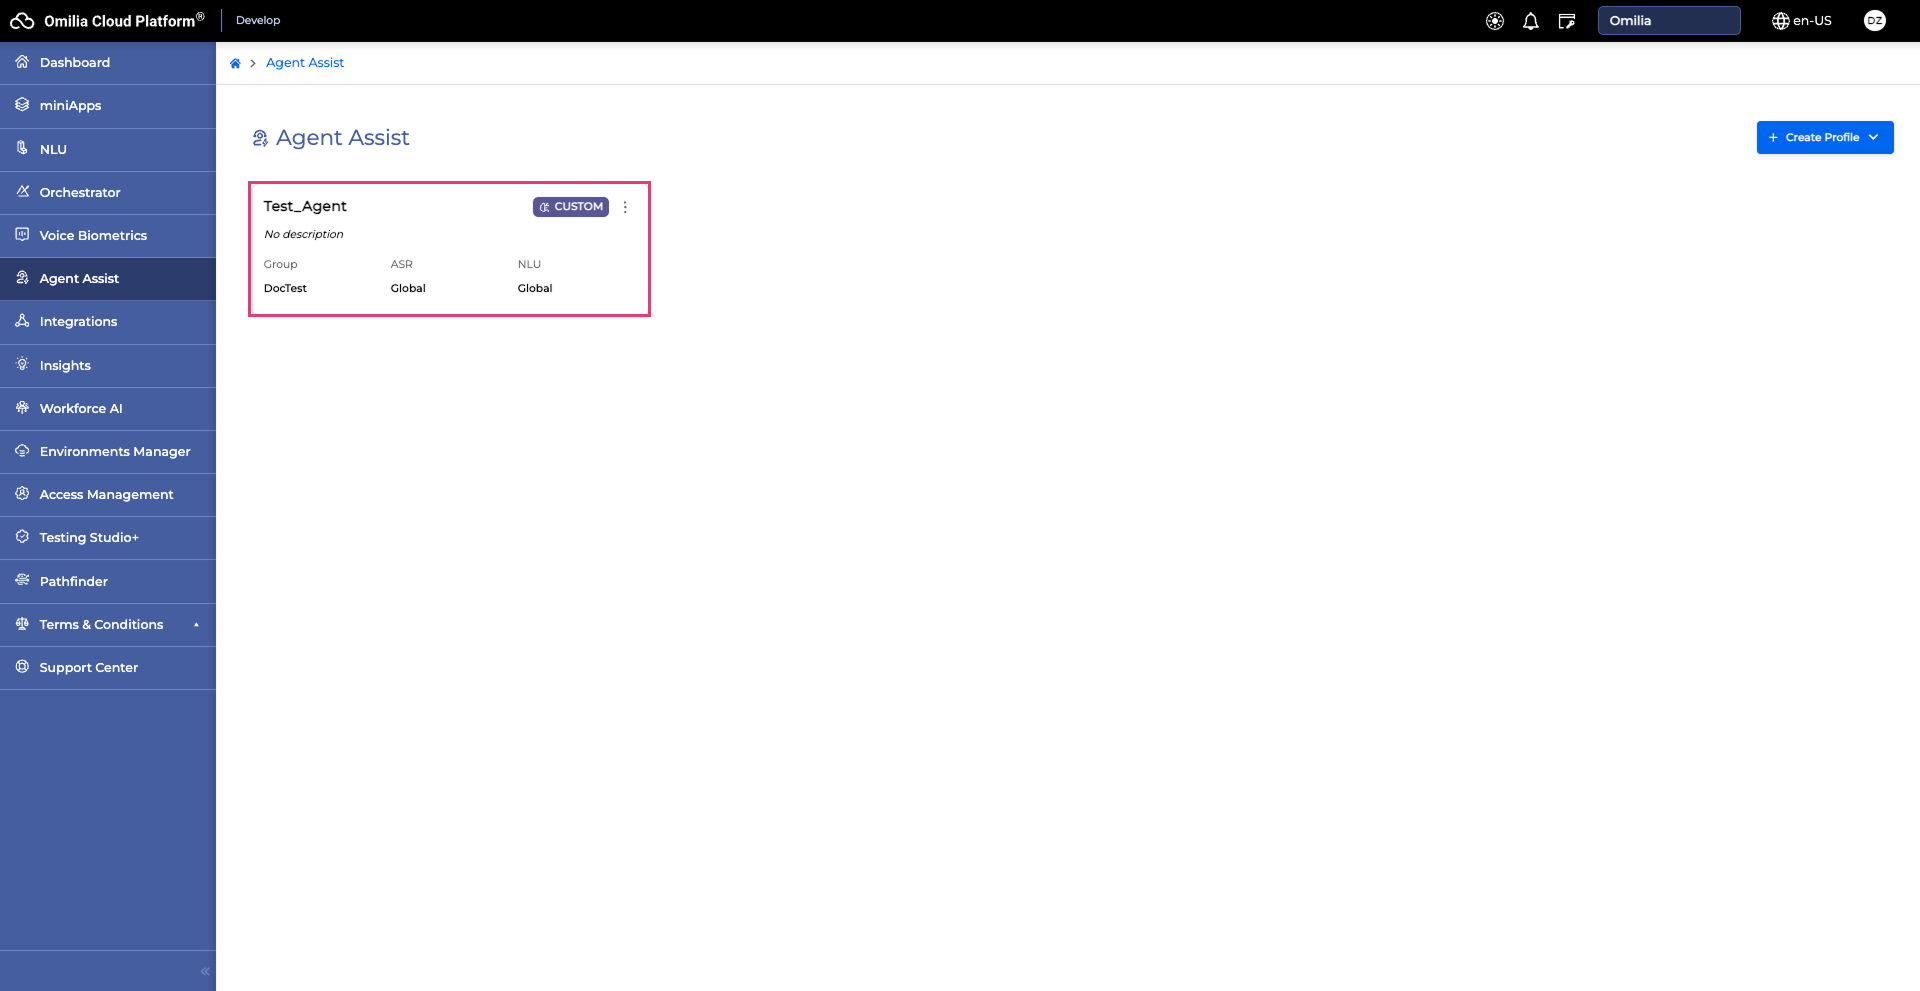
Each profile card includes:
-
Profile name
-
Profile type
-
Group
-
ASR configuration:
GlobalorMulti-Channel -
NLU configuration:
GlobalorMulti-Channel -
Description (OPTIONAL)
Manage Profiles
To manage an existing profile:
-
Click the Menu icon (three vertical dots) on the top right of the profile card.
-
Select an action from the list:
-
Edit – Modify the profile's configuration.
-
Copy ID – Copy the profile’s ID.
-
Delete – Permanently remove the profile.
-
Edit Profiles
Click on the Menu → Edit button of the profile to edit it. The parameters you can edit are:
-
Name of the profile
-
ASR Grammar options
-
Intent Assignment
Click the Update button to apply the changes or the Cancel button to revert to the existing Profile Configuration.
Currently a user is not able the change the NLU model when editing, since if an Intent is missing from a possible NLU assignment the whole Business Logic created and links between previous Intents and Business Flows may break.
Create Additional Profiles
To create another profile:
-
Click the Create Profile button in the top-right corner and select a type of profile.
-
Follow the steps to configure a new Custom profile.