Overview
Voice Biometrics (VB) use profiles that can be easily set up in OCP Console®.
A profile is a set of configurations for Voice Biometrics. A client/group can create and manage multiple profiles if they need to have different VB configurations for different lines of business.
Create a VB Profile
1. Select the Voice Biometrics → Profiles from the Console menu.
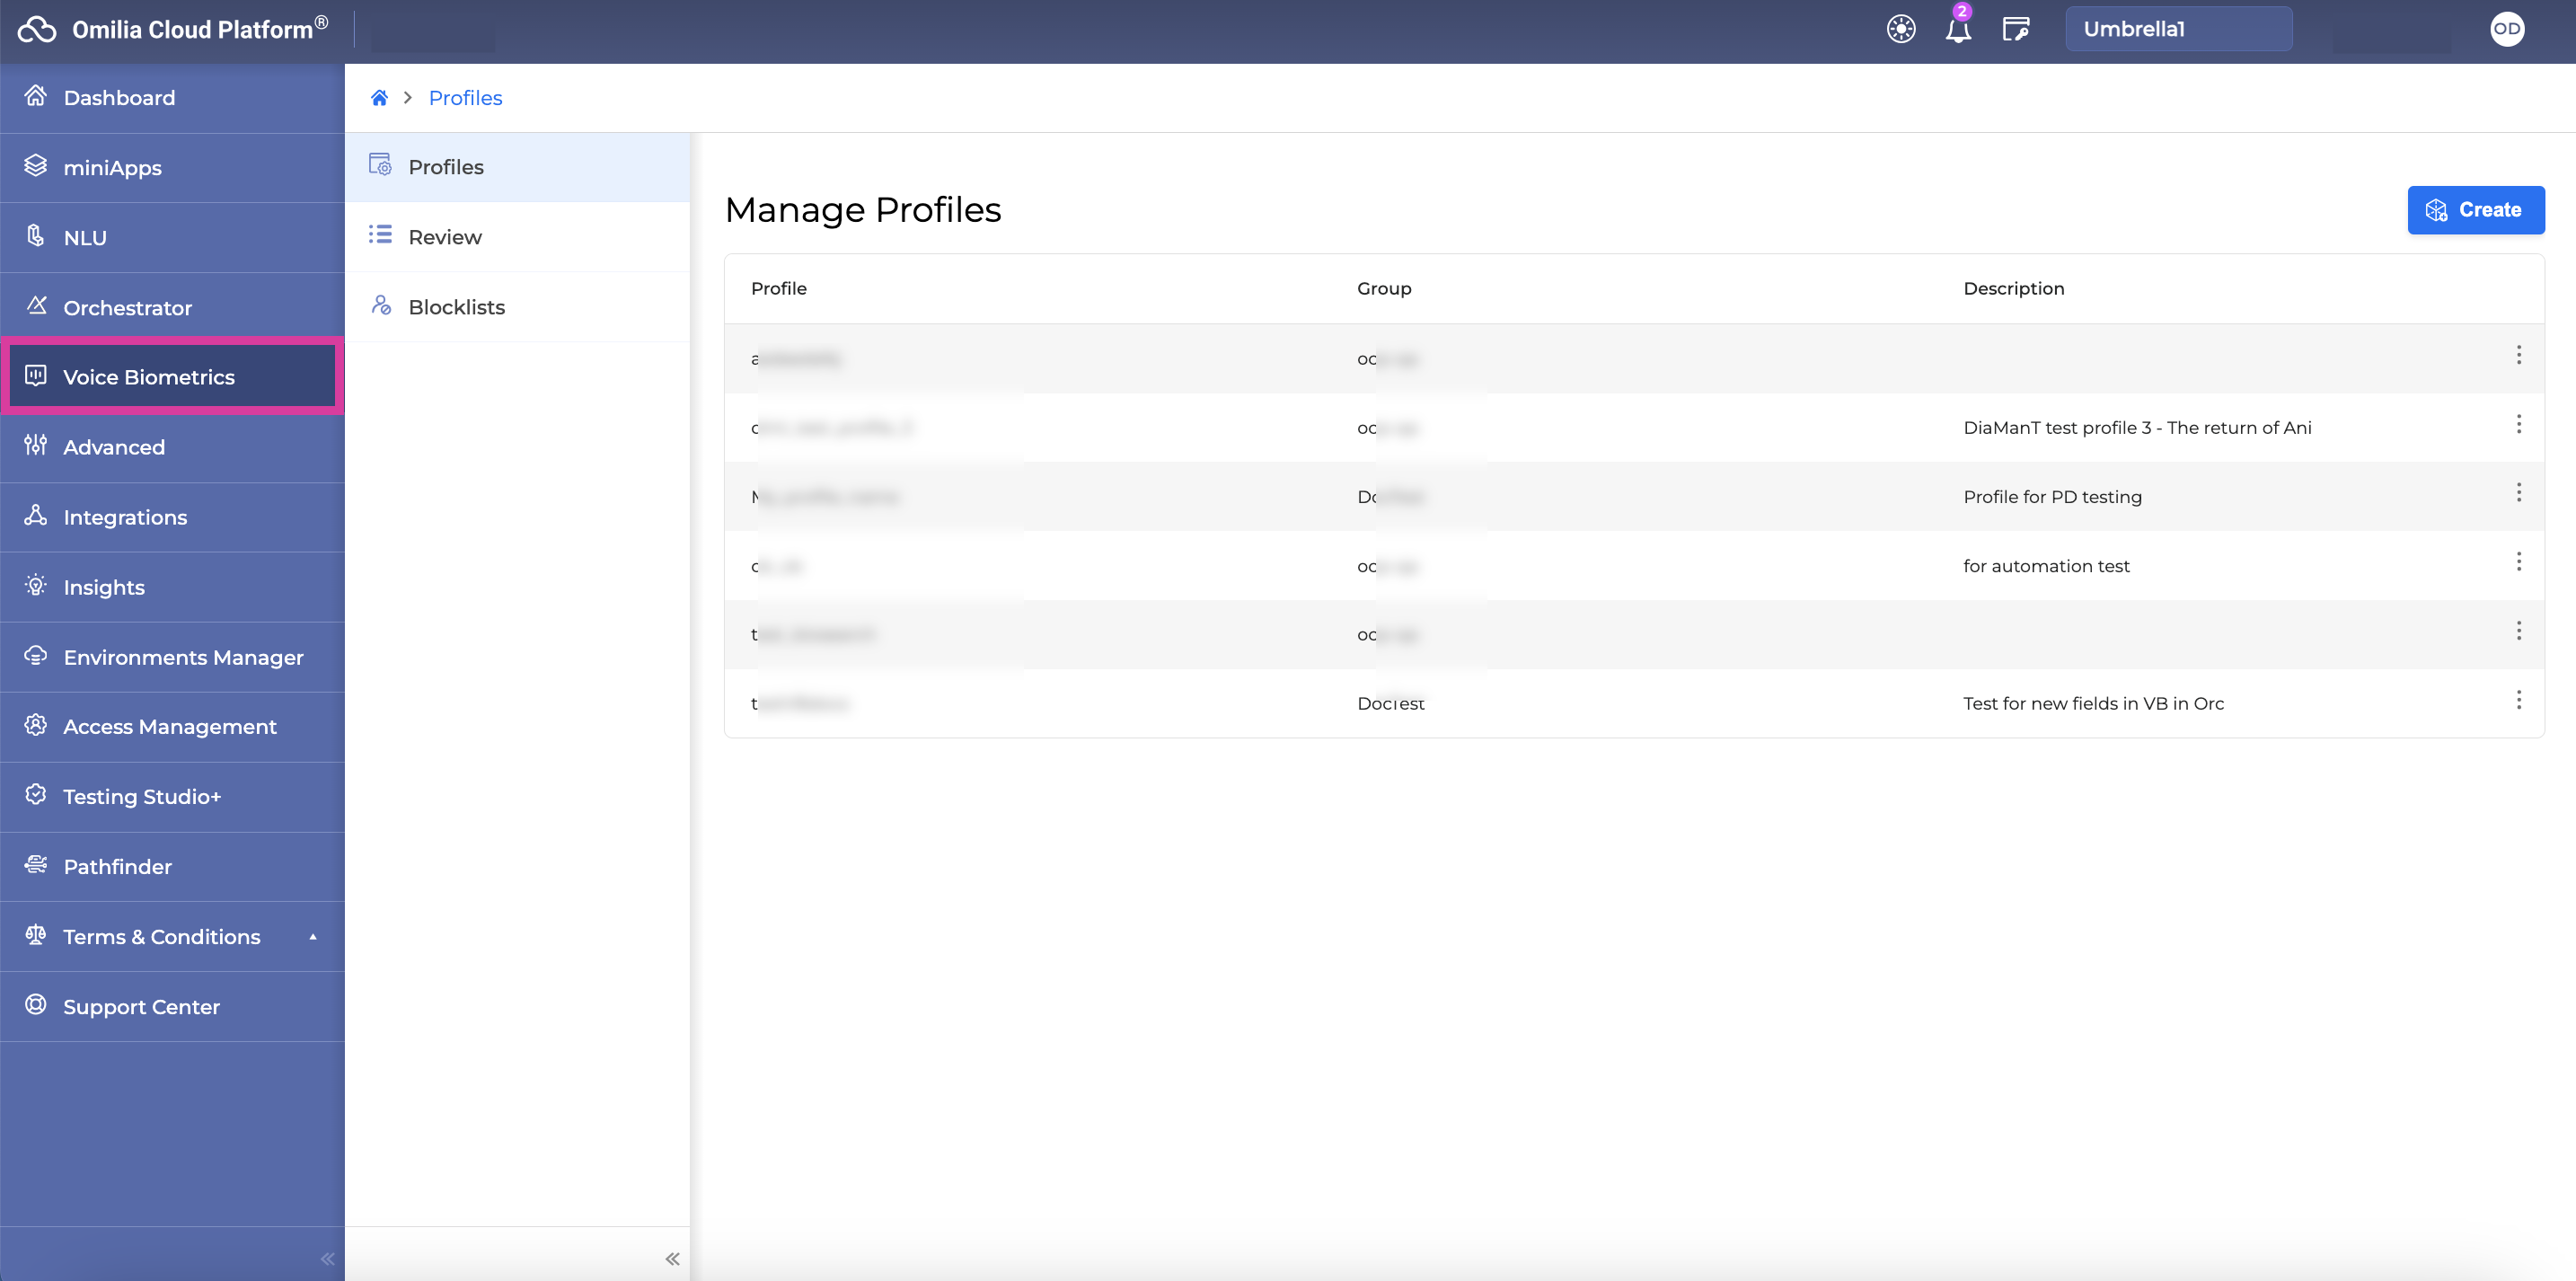
2. Click the Create button.
3. Add the information in the Create new Profile window.
Group name must be selected from the existing Group names.
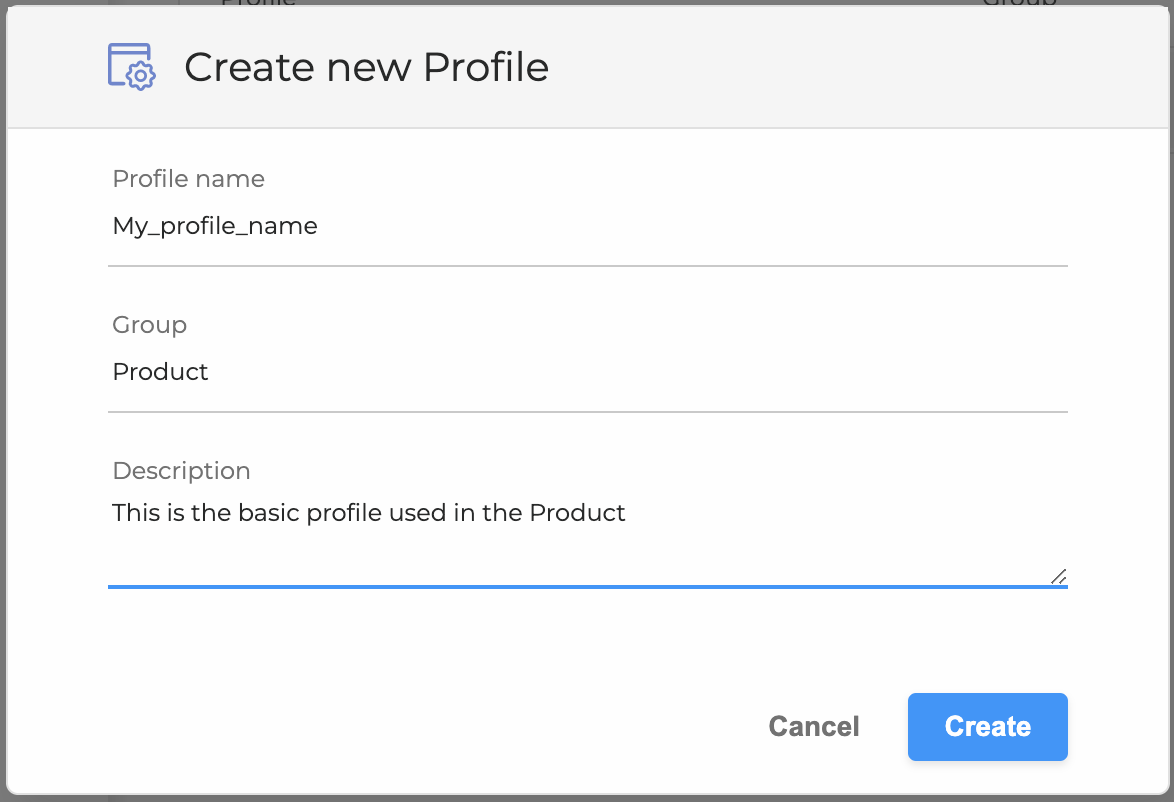
Profile name must not contain any special characters or space.
The only characters allowed are numbers 1-9, letters a-z, A-Z and underscore _ .
4. Click the Create button and the new VB profile will be added to the list of profiles.
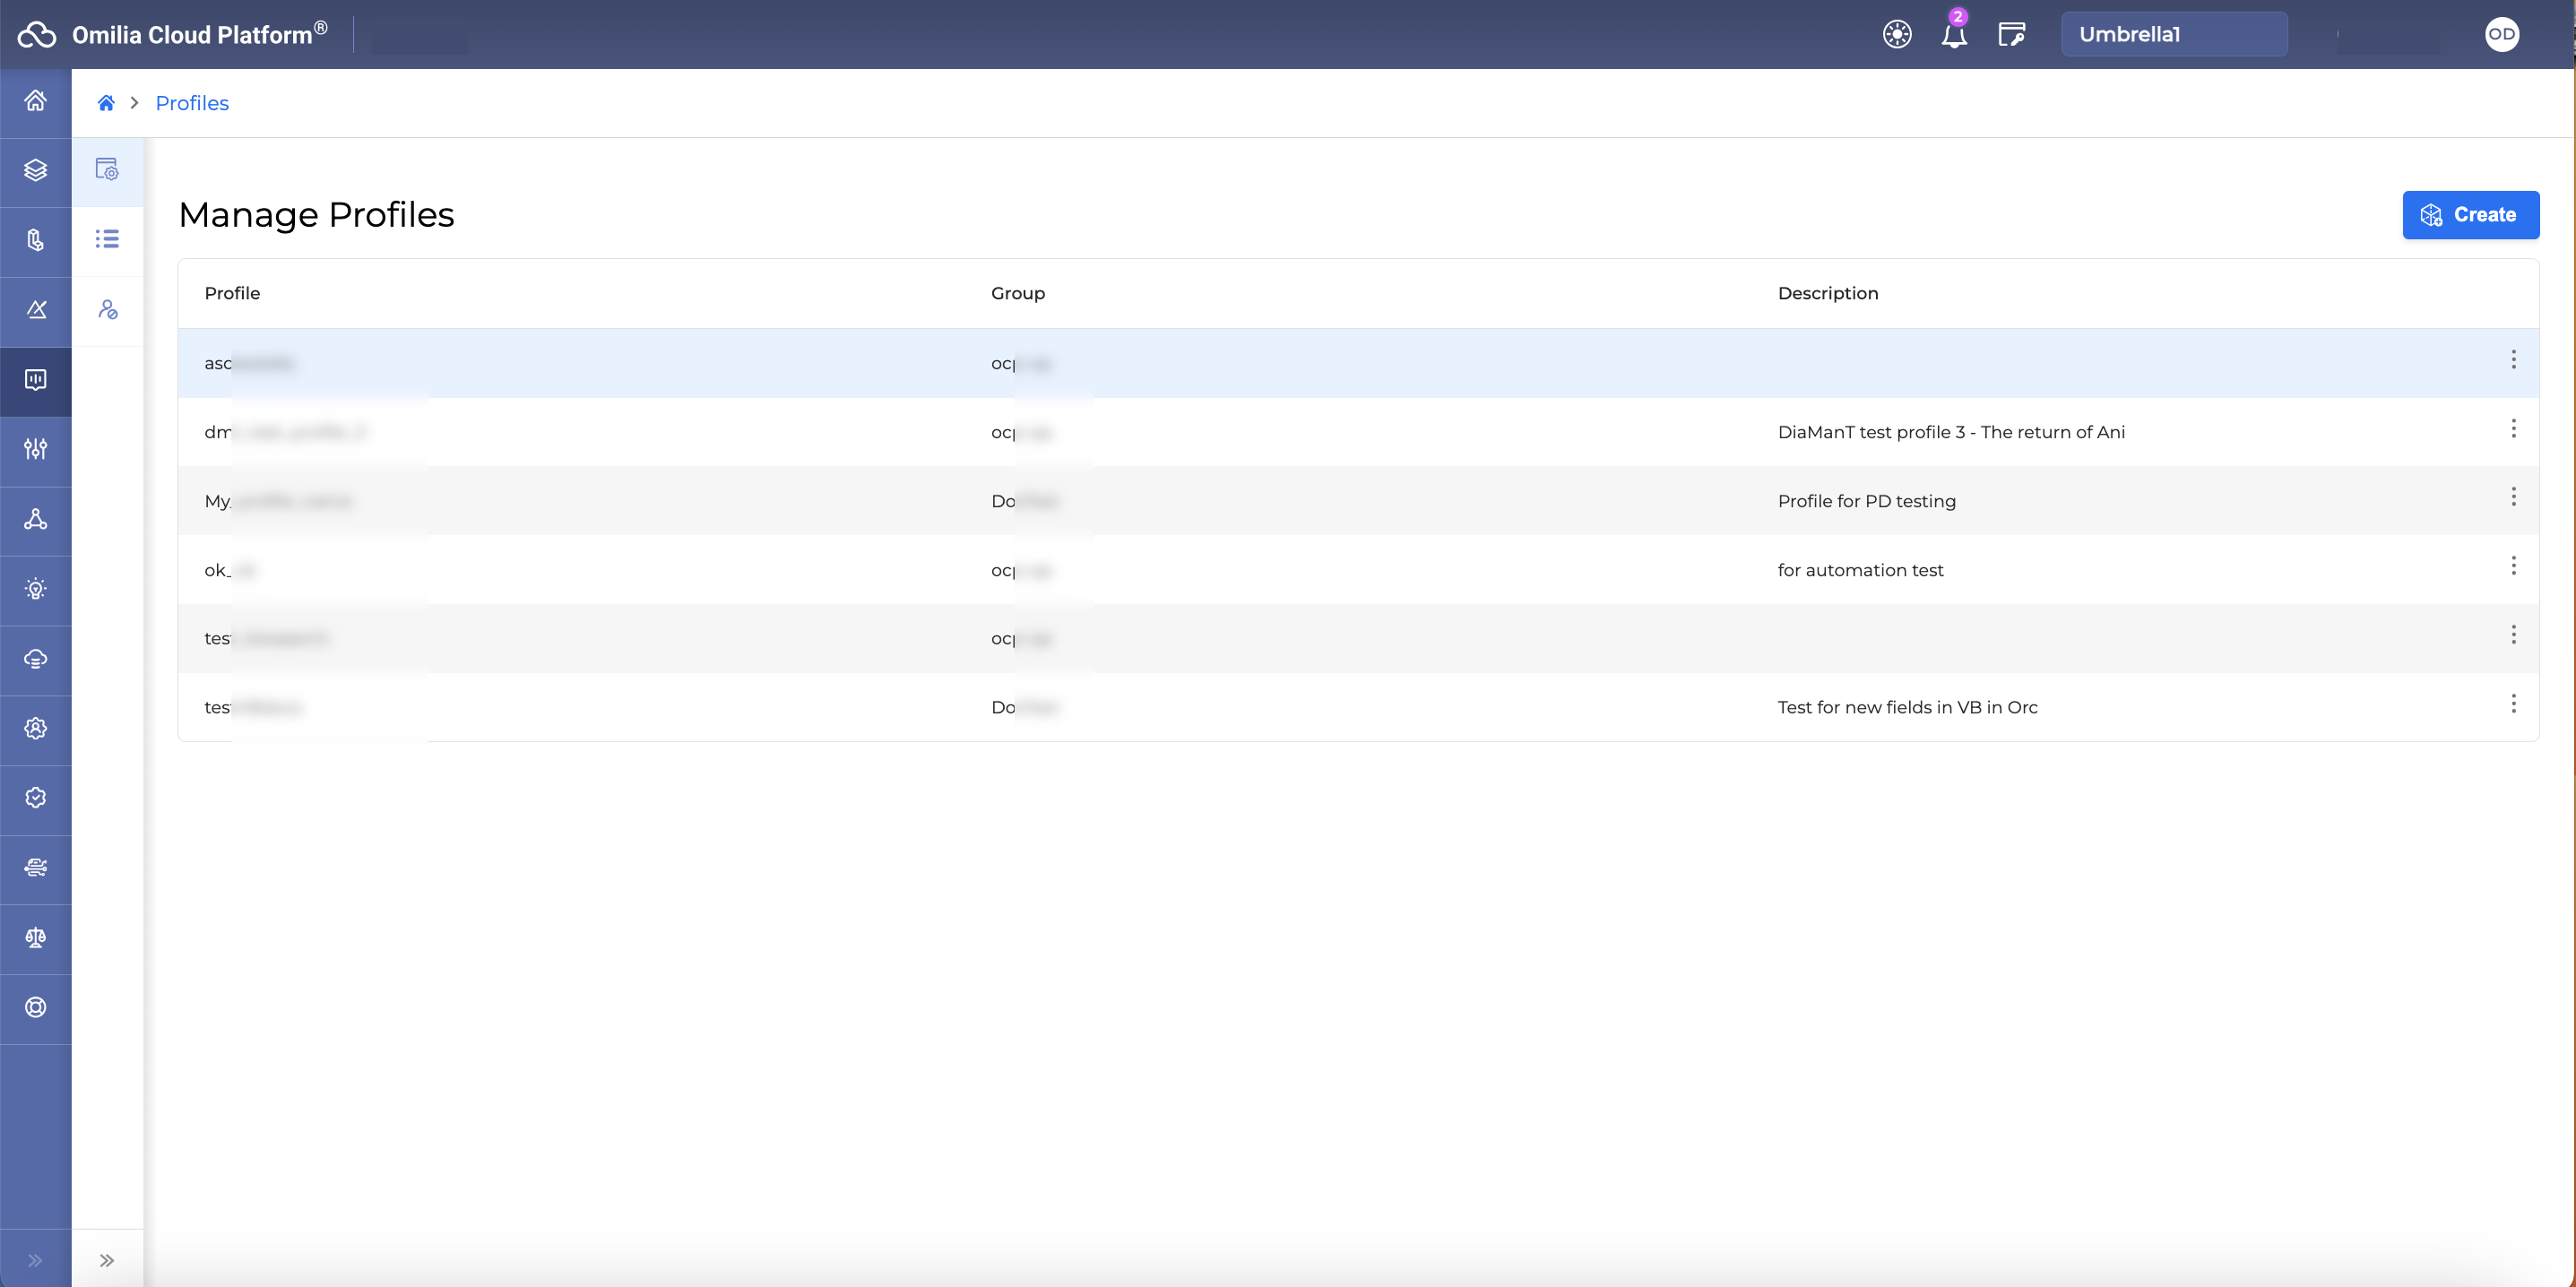
Manage Profiles
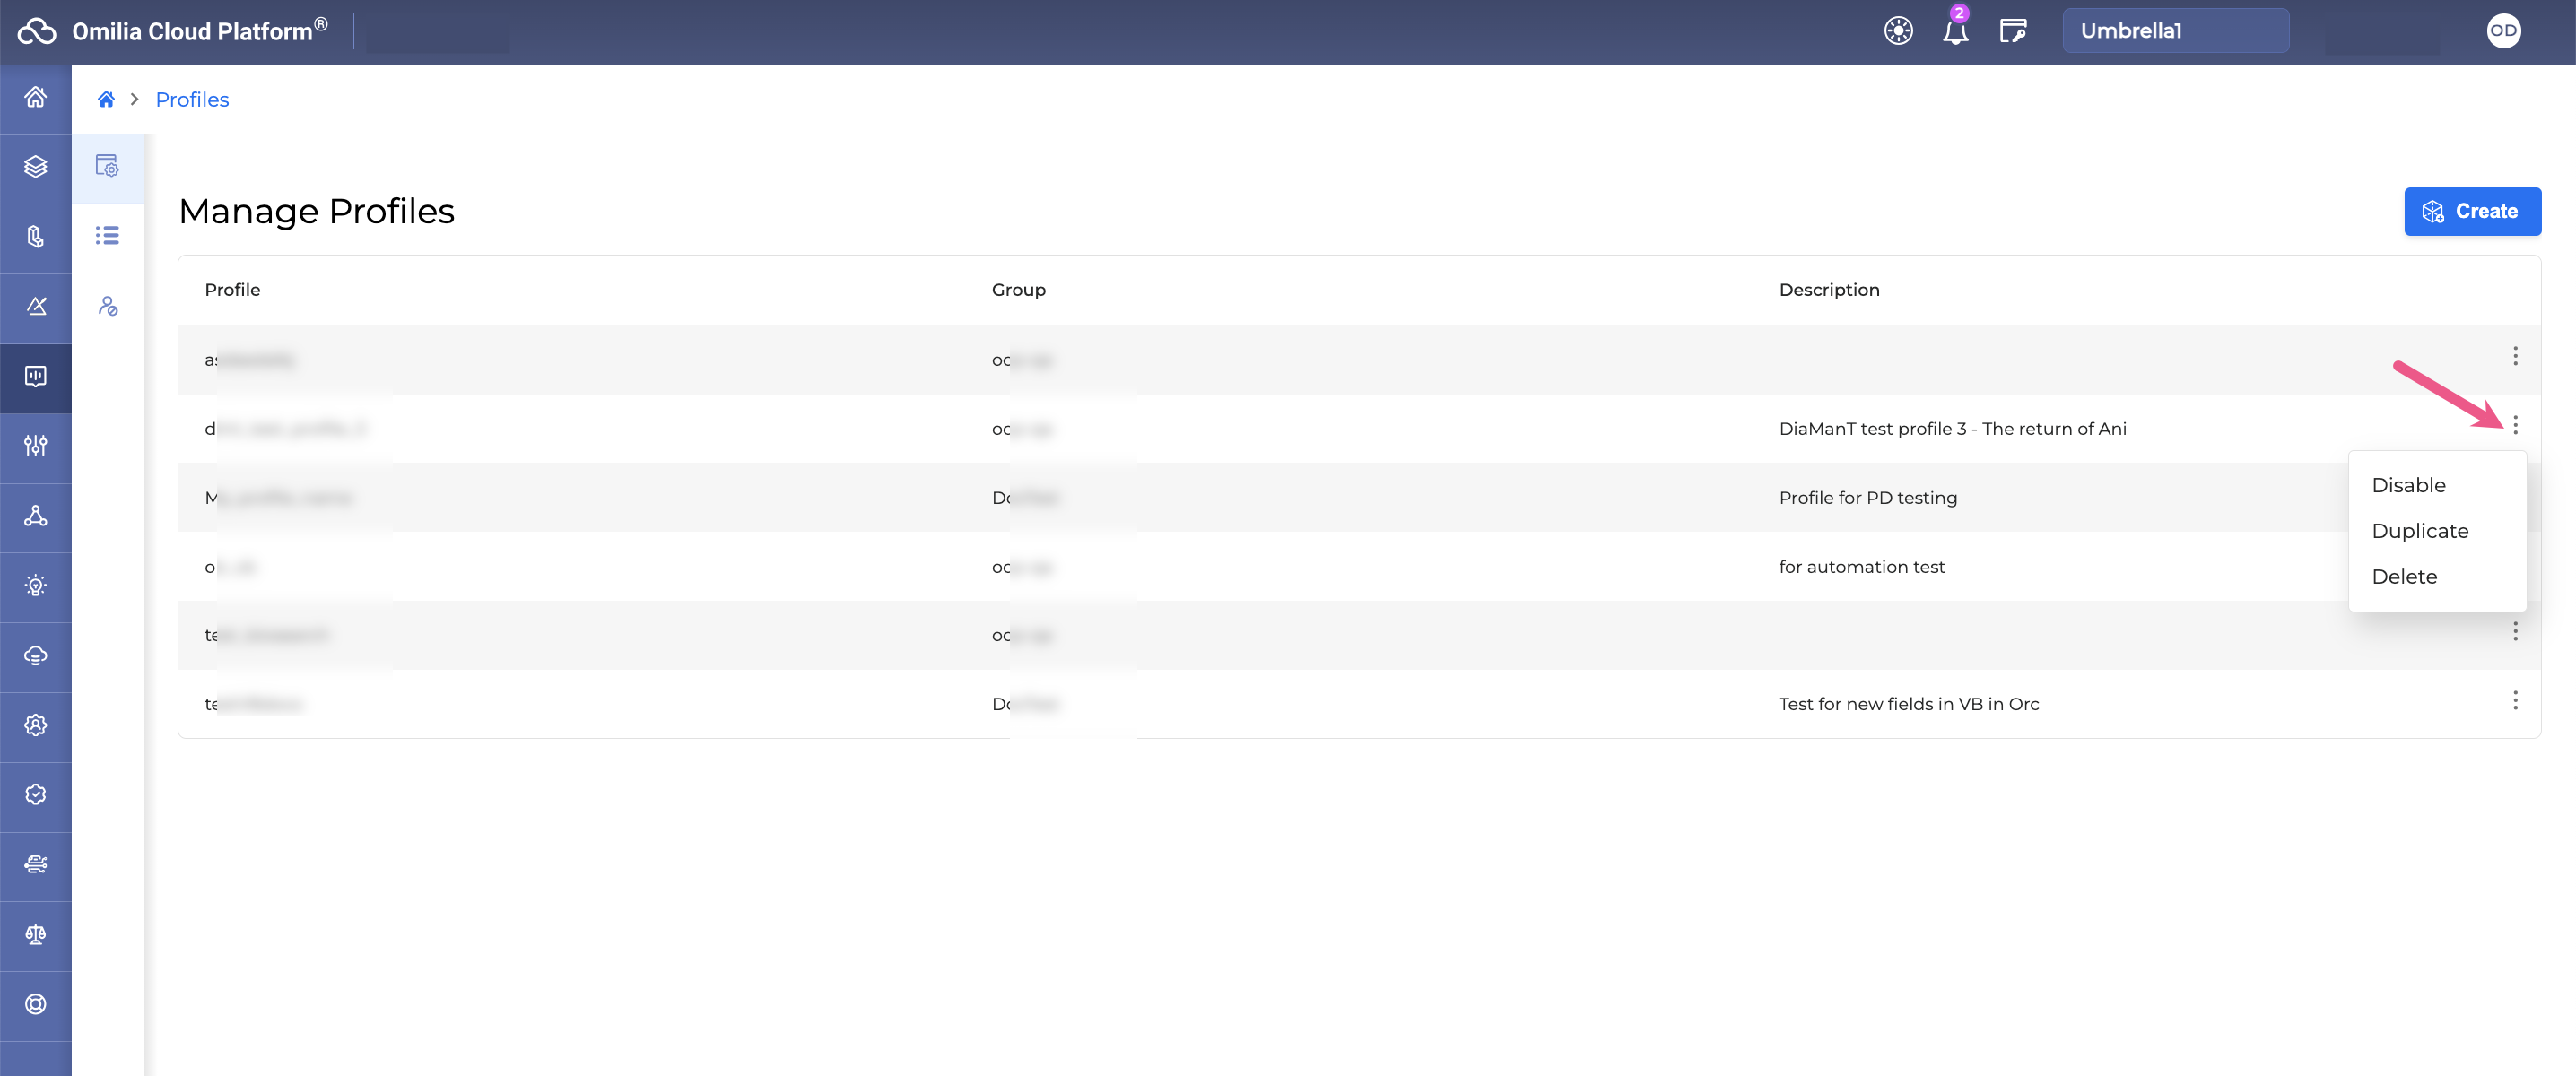
In the Manage Profiles section, click the Menu icon of a profile to select the following actions from the list:
-
Disable/Enable
-
Duplicate
-
Delete
Edit the VB Profile
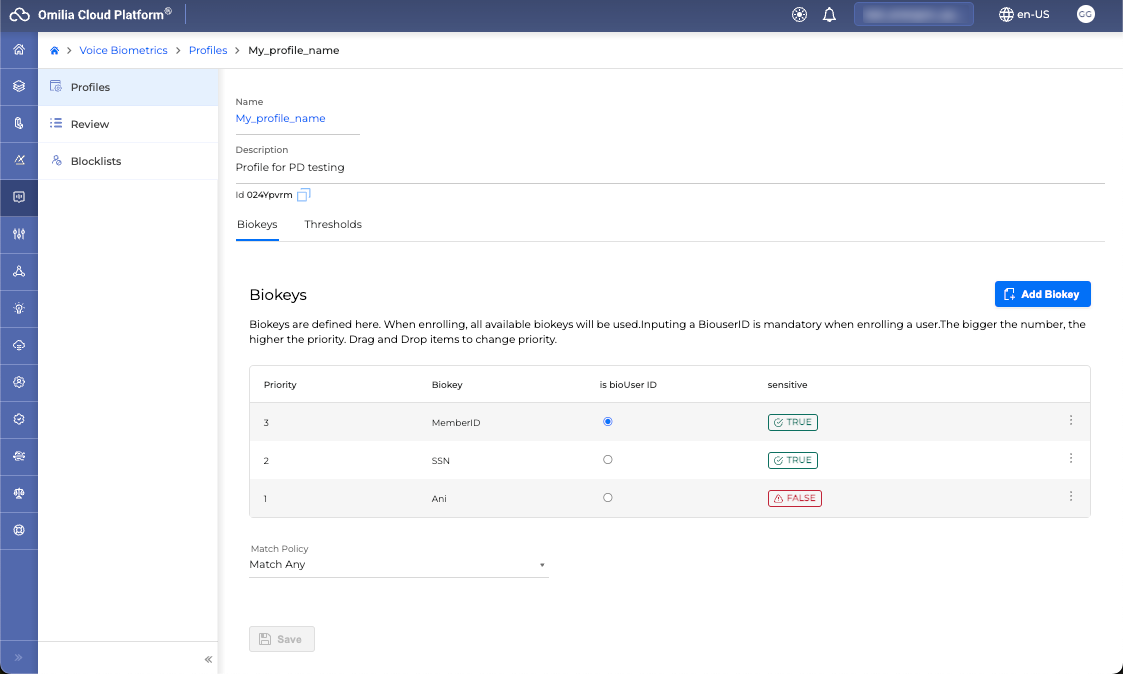
Click on a profile name from the profiles list to edit it. The parameters you can edit to a profile are:
Edit the Biokeys
Biokeys are used to identify a caller. You can set as many biokeys to be used for caller VB recognition but only one can be marked as bioUser ID. The bioUser ID is the ID that uniquely identifies a VB user. The biokey that is marked as bioUser ID is mandatory when enrolling a caller, whereas the rest are not.
In the Biokeys tab, the default biokeys are created. These are user_id and Ani.
Typical biokeys might include caller ID, account numbers, or other personal identifiers that uniquely identify a caller.
Only one biokey in each profile can be set as bioUser ID.
Add a Biokey
To add a biokey, follow the steps:
1. Click the Add Biokey button to open the Create new Biokey window.
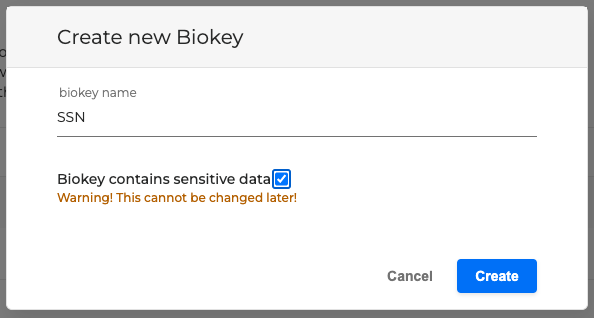
2. Type a biokey name in the corresponding field.
Biokeys' names must not contain any special characters or spaces.
The only characters allowed are numbers 1-9, letters a-z, A-Z and underscore _ .
Biokeys' values must not contain any special characters or space.
The only characters allowed are numbers 1-9, letters a-z, A-Z, underscore _ , plus sign + and dash -.
3. Check the sensitive data box if the selected biokey contains sensitive data.
If the biokey contains sensitive data, it must be declared at this stage as this field is not editable later.
Security Policy is PCI compliant
Biokeys, if marked as sensitive, are hashed before being stored into VB’s database. Otherwise, they are stored in plaintext.
4. Click the Create button and the new biokey will be added to the list of biokeys for the selected profile.
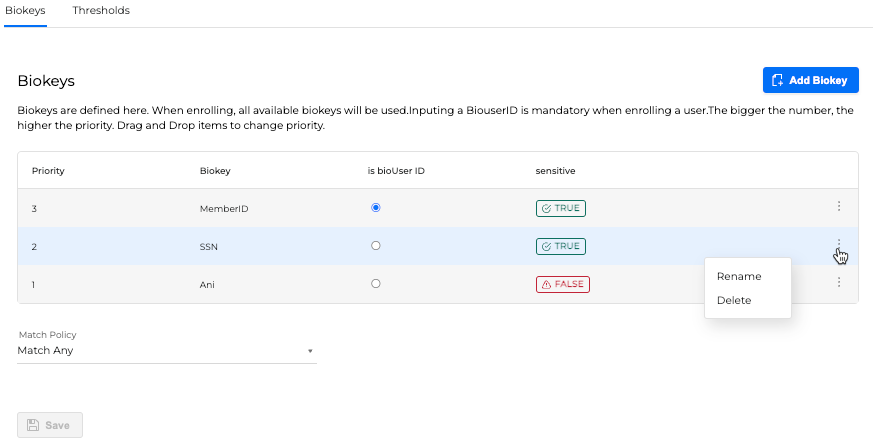
Rename / Delete Biokey
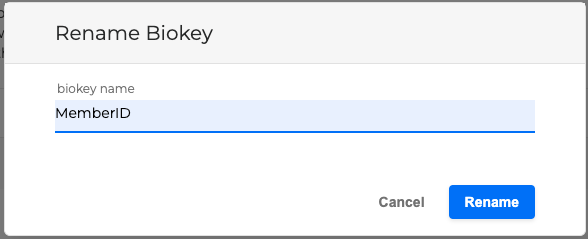
Click the Options menu icon of a biokey to rename it or delete it.
If you choose to rename, add the new biokey name in the popup window and click the Rename button
Change Biokey priority
Drag and drop biokeys in the list to change their priority. In the example below the SSN (Social Security Number) is dropped at the top of the biokeys priority list.
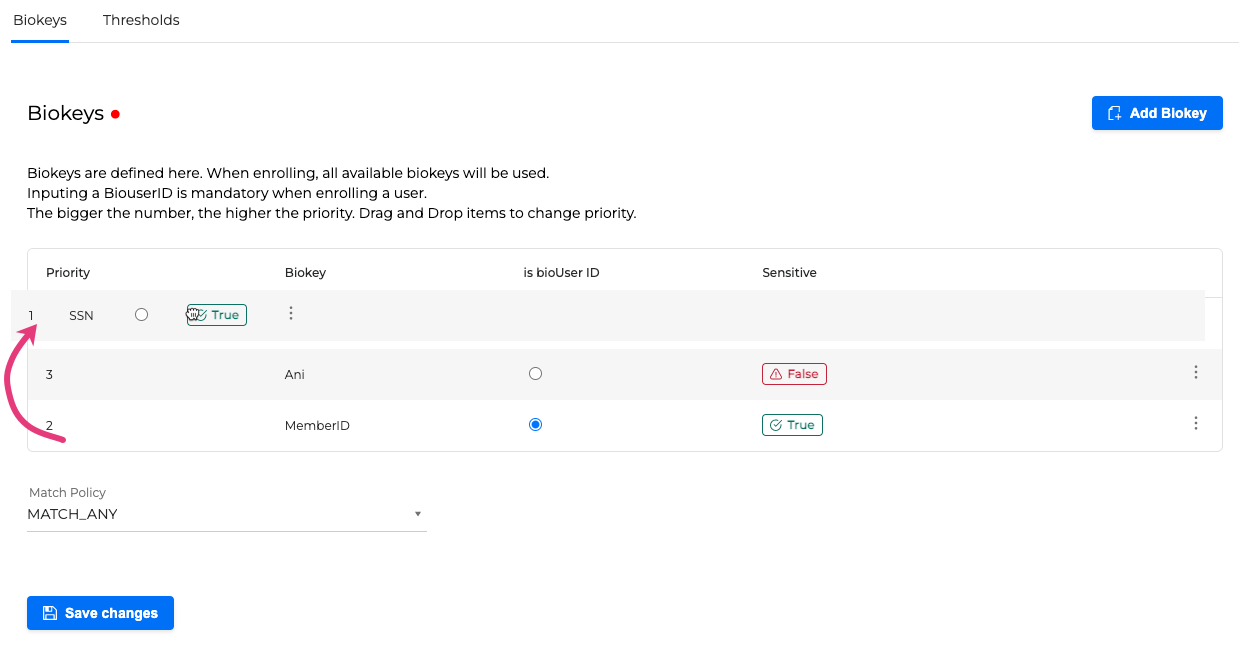
Save changes in order for this change to be effective. The red dot next to Biokeys title, indicates that there are changes that have not been saved.
Match Policy
In case we have multiple biokeys, we set a priority number on each biokey, and use those priorities to sort or limit the search results from the enrolled users.
Select a matching policy from the dropdown menu.
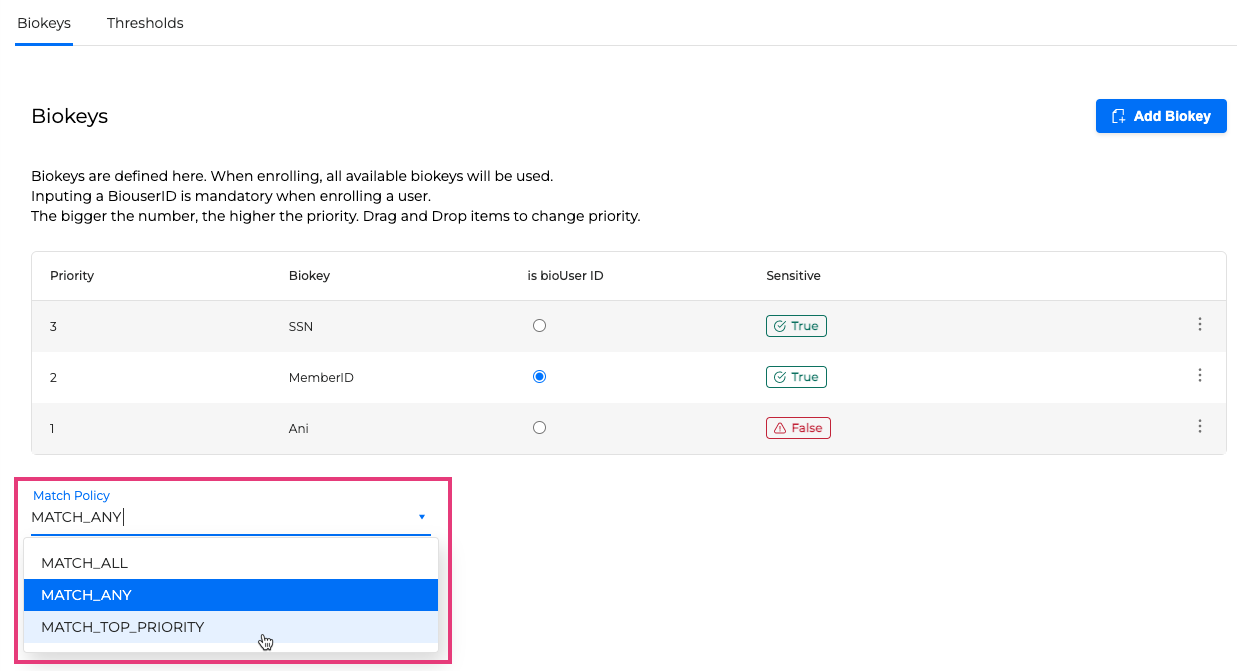
-
MATCH_ALL: Search results contain bio-users that are matching all the biokeys that were used for searching. In case one of the search fields is not filled in, then it will match only all the ones with a value. For example, if we search with an
SSNandMemberID, the results will match cases that contain both values. IfSSNvalue is not available in the database it will get results only for matchingMemberID. -
MATCH_ANY: Search results contain bio-users that are matching any of the biokeys that were used for searching. For example, if we search with an
ANIand aMemberID, the results will match any one of the two values. Then priorities on biokeys are used to sort the results. -
MATCH_TOP_PRIORITY Search results contain bio-users that are definitely matching the top priority biokey with a value, and optionally the rest of the biokeys that were used for searching.
For example, if we search with anSSNandMemberID, the results will match theSSN, but ifSSNvalue is not available the results will match the next available priority which is theMemberID. (Example is based on above screenshot Priorities setup)
Configure verification thresholds
Select the Thresholds tab to manage thresholds. Threshold levels are used for configuring the range of acceptance criteria as well as for measurement of performance metrics.
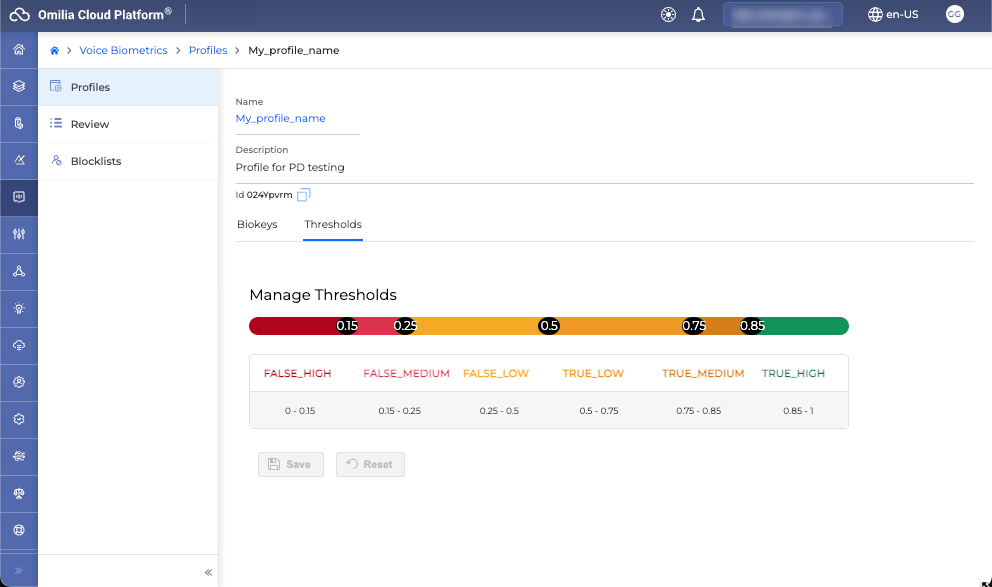
-
Click on any threshold number on the threshold bar and drag it along the bar to change its range.
-
Click the Save changes button to save the setup or the Reset changes button to move back to the previous setup.
Once you save the changes, you cannot reset them.