Introduction
This guide provides step-by-step instructions on how to integrate OCP® with Salesforce. This integration enables a seamless transfer of chat conversations from OCP® to a Salesforce live agent.
Before configuring OCP® integration with Salesforce, make sure you have an active Salesforce account with the necessary administrative privileges, and access to the Application you wish to integrate.
Salesforce Configuration
-
Create a Deployment:
-
Navigate to the deployment setup in Salesforce and create a new deployment.
-
Save the Deployment ID that is provided upon creation.
-
-
Create a Queue:
-
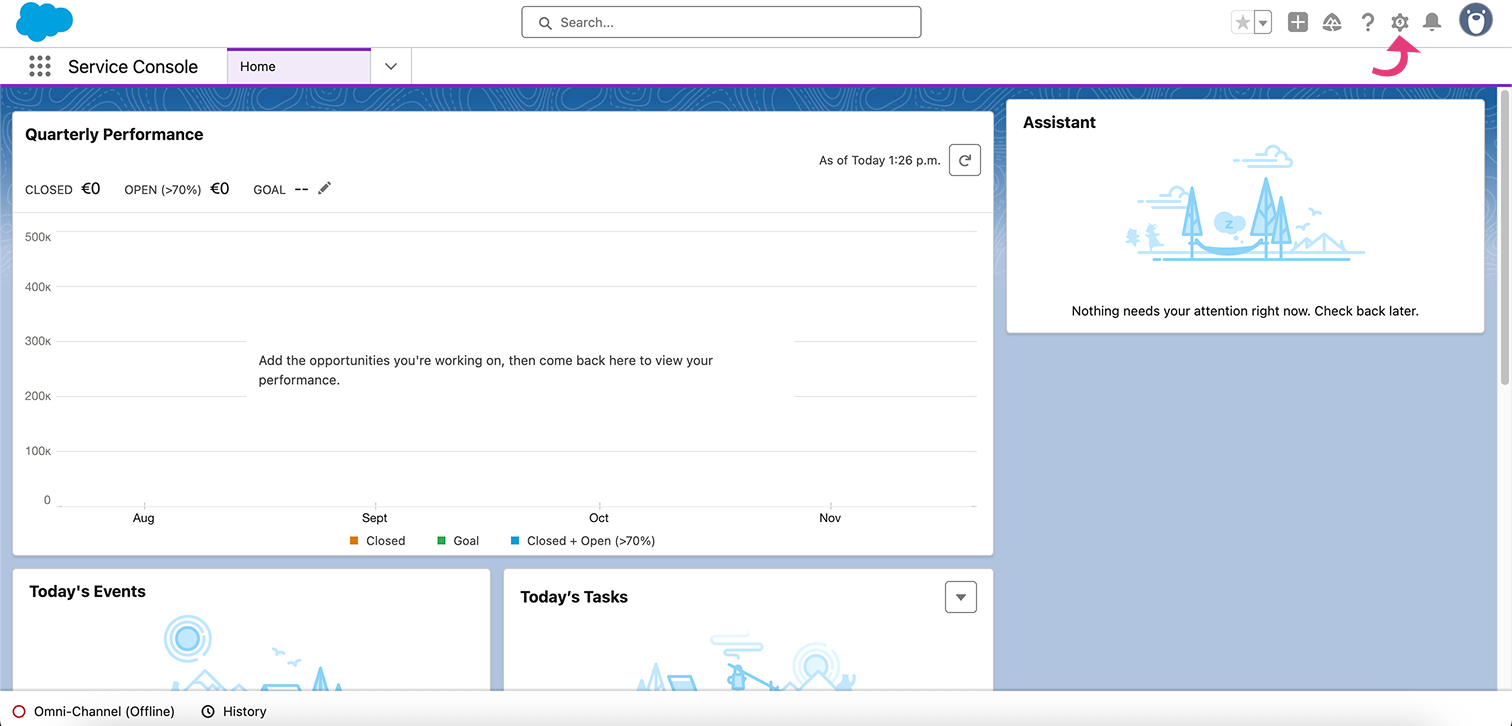
Go to Service Setup by clicking the gear icon in the top right.
-
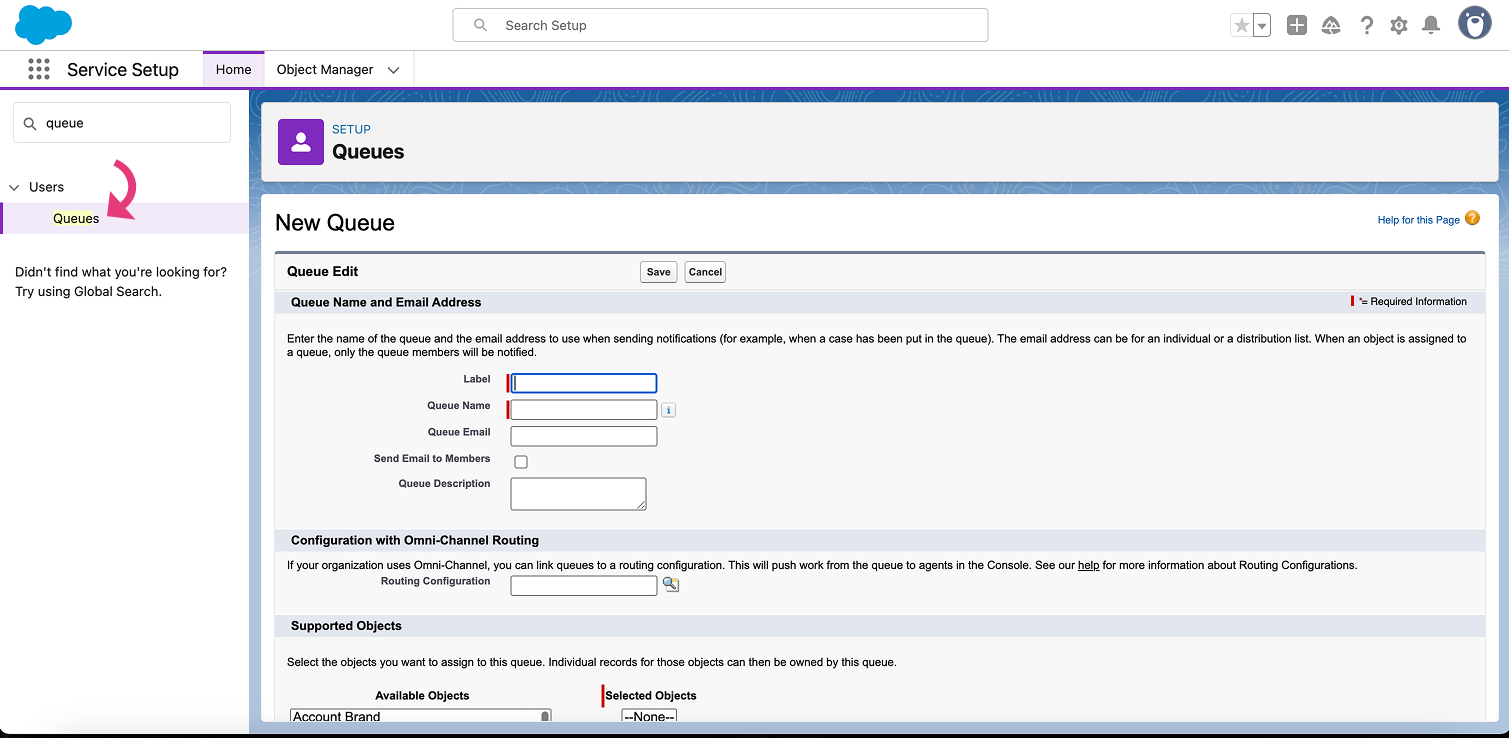
In the quick search, type Queue and create a new queue, or use an existing one.
-
Place the agents to the queue.

-
Ensure the agent's account is assigned to this queue

-
-
Create a Chat Button:
-
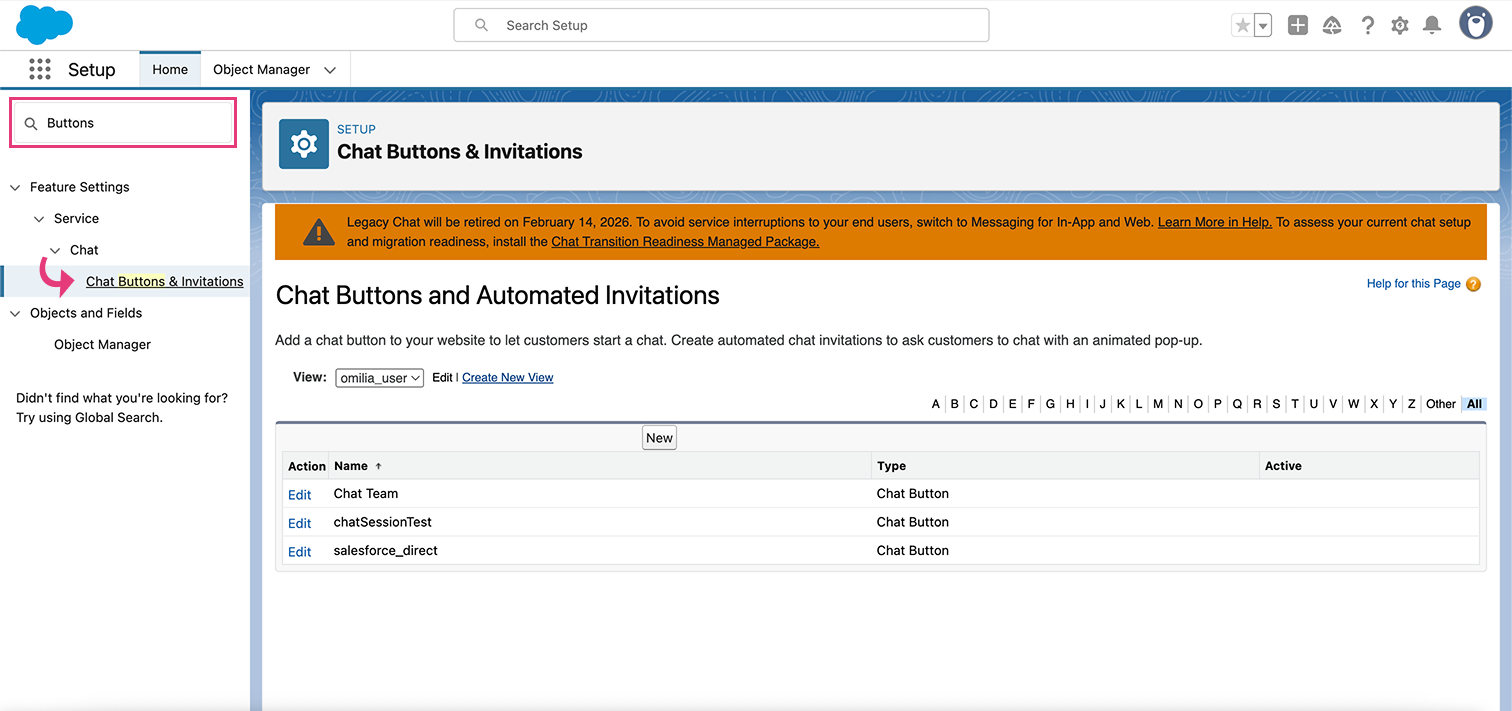
In Service Setup, search for Buttons and select Chat buttons and Invitations.
-
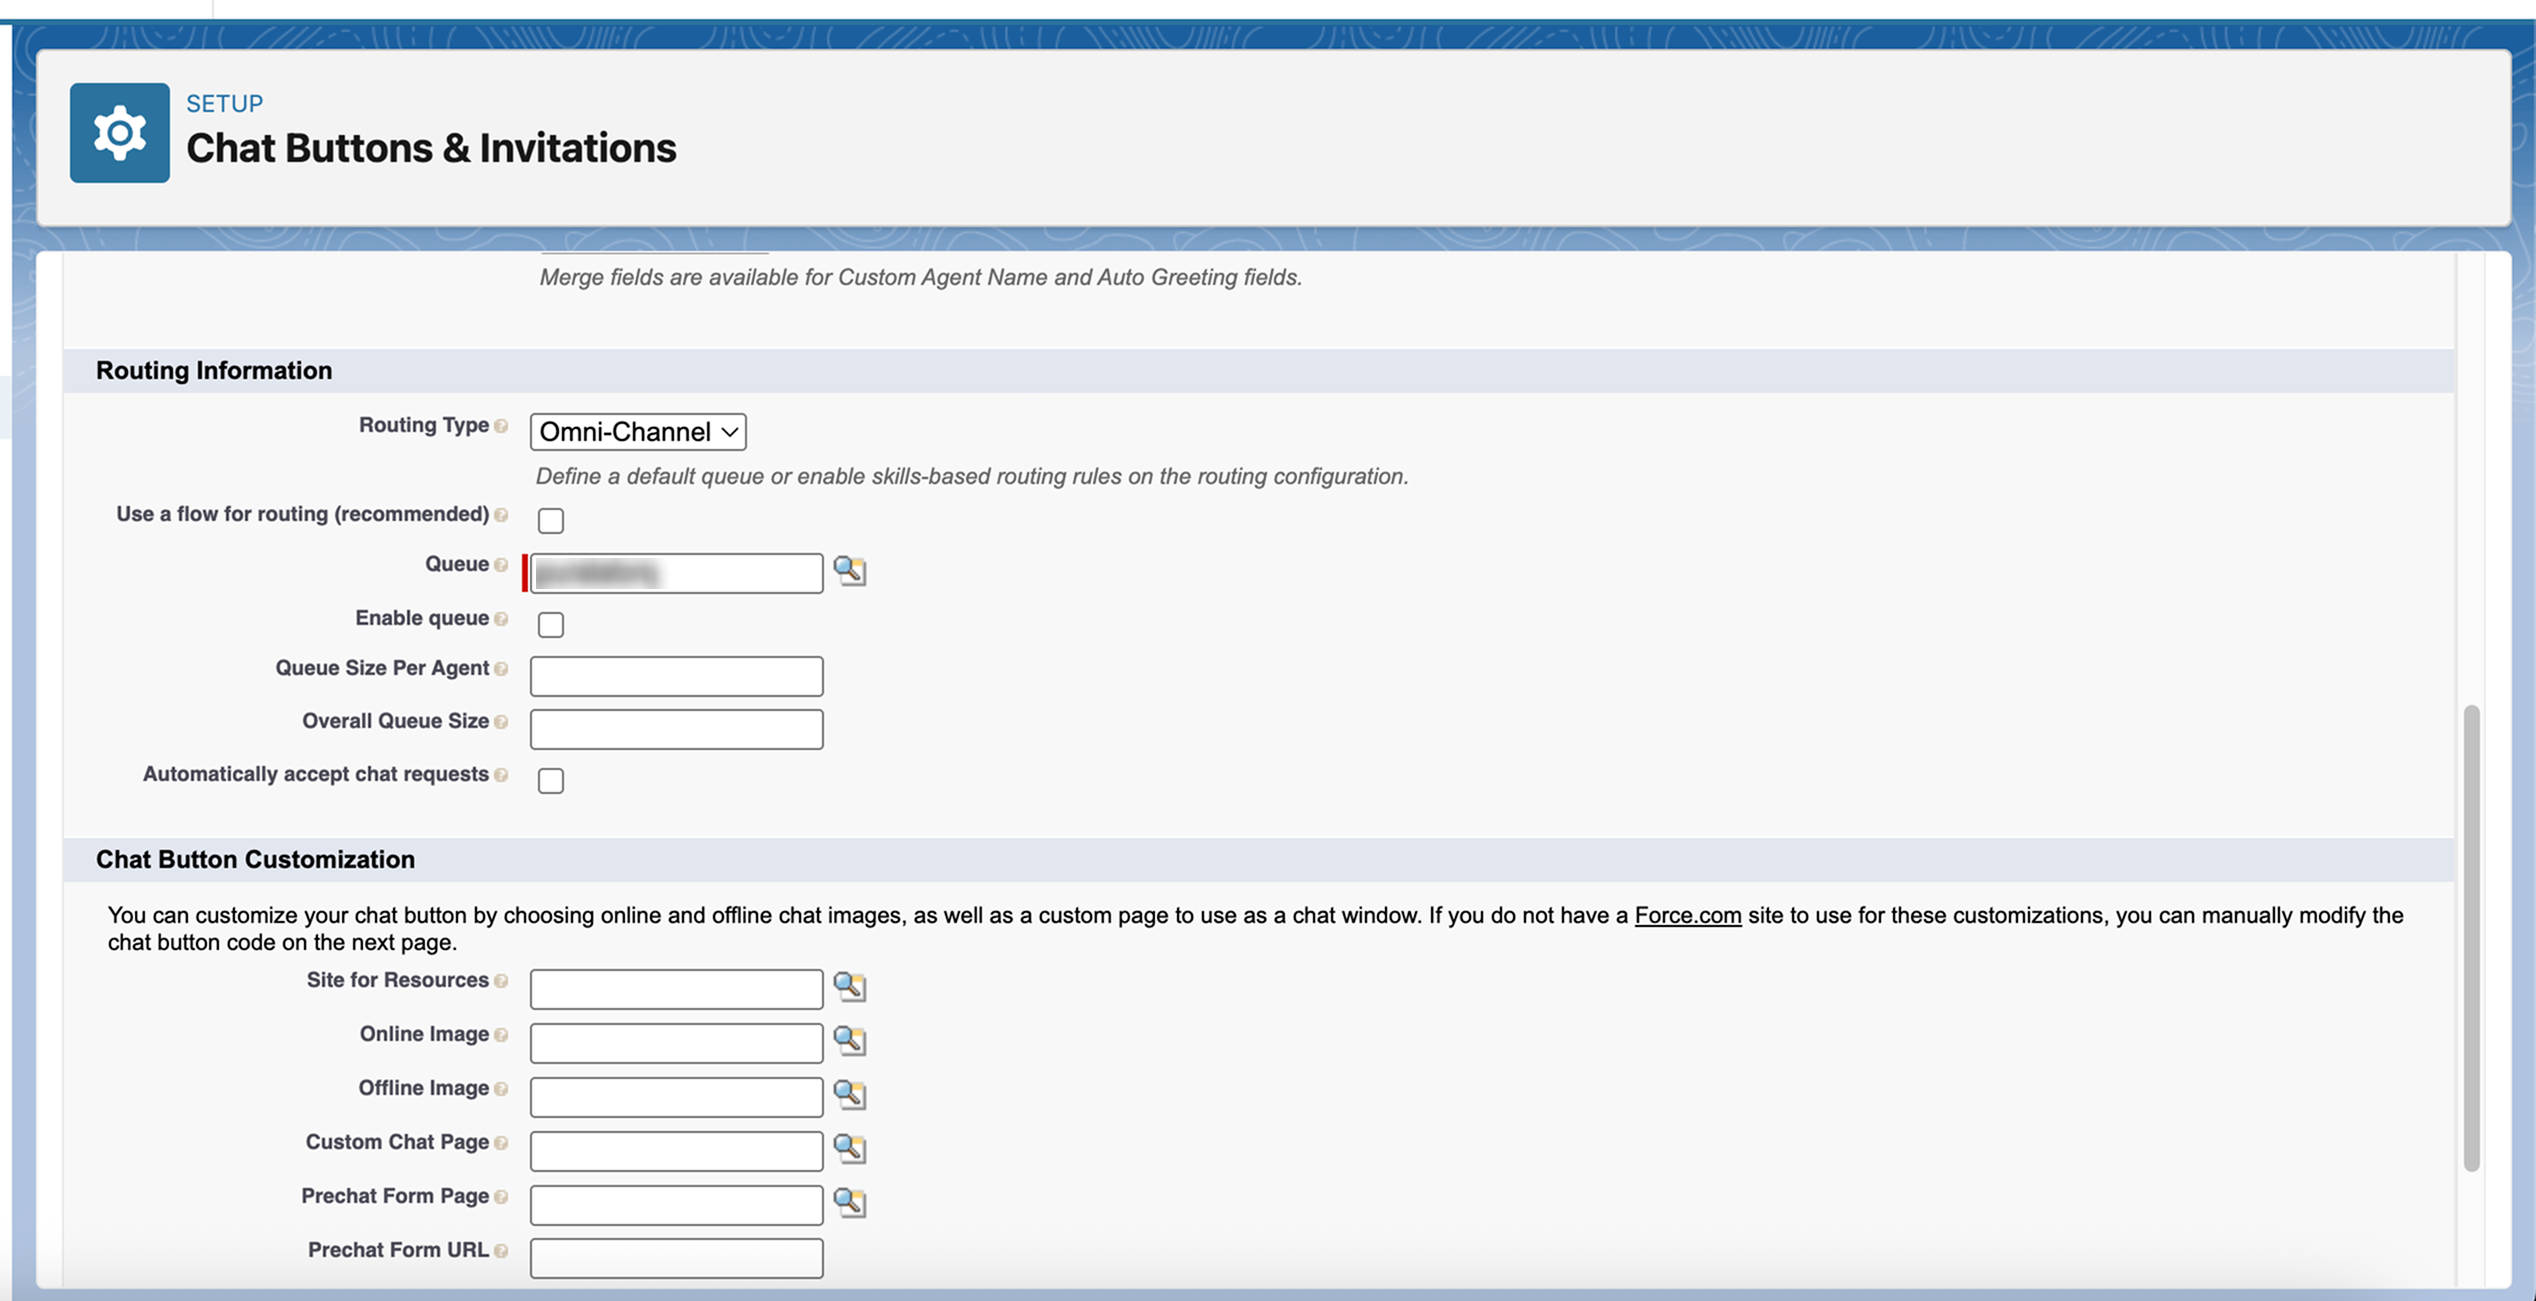
Create a new chat button, selecting Omni-Channel as the routing type and assigning the queue you created in the previous step.
-
After creation, locate the Button ID in the chat button code snippet. This is the ID string found inside the
liveagent.showWhenOnline('YOUR_BUTTON_ID')function call: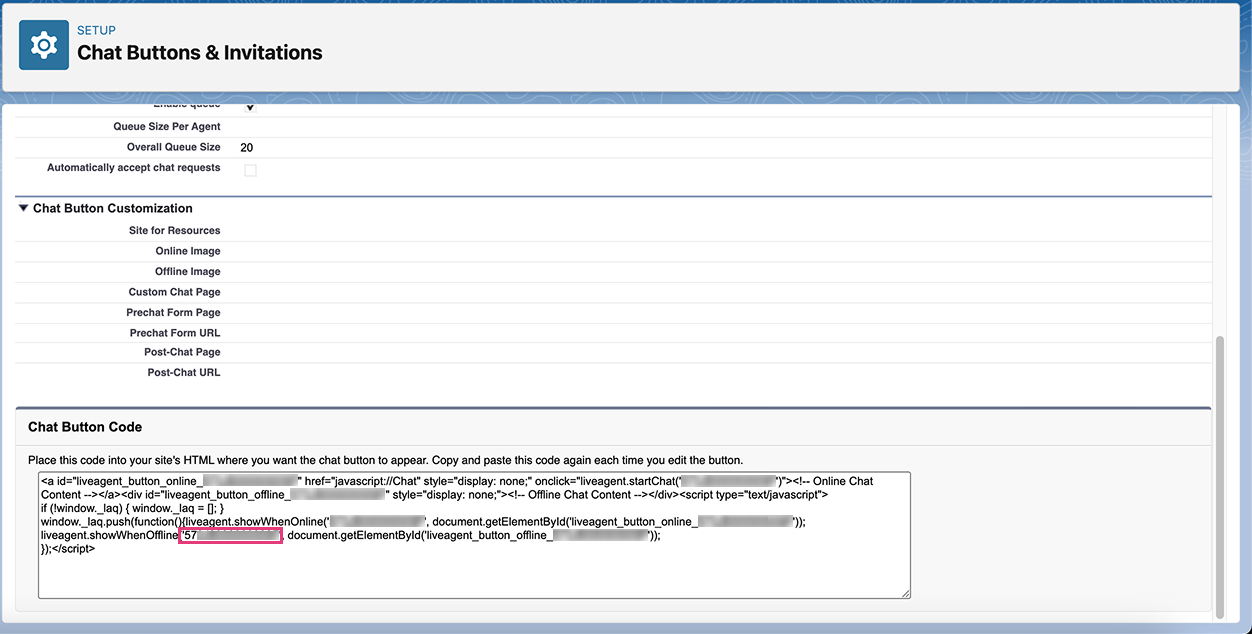
-
-
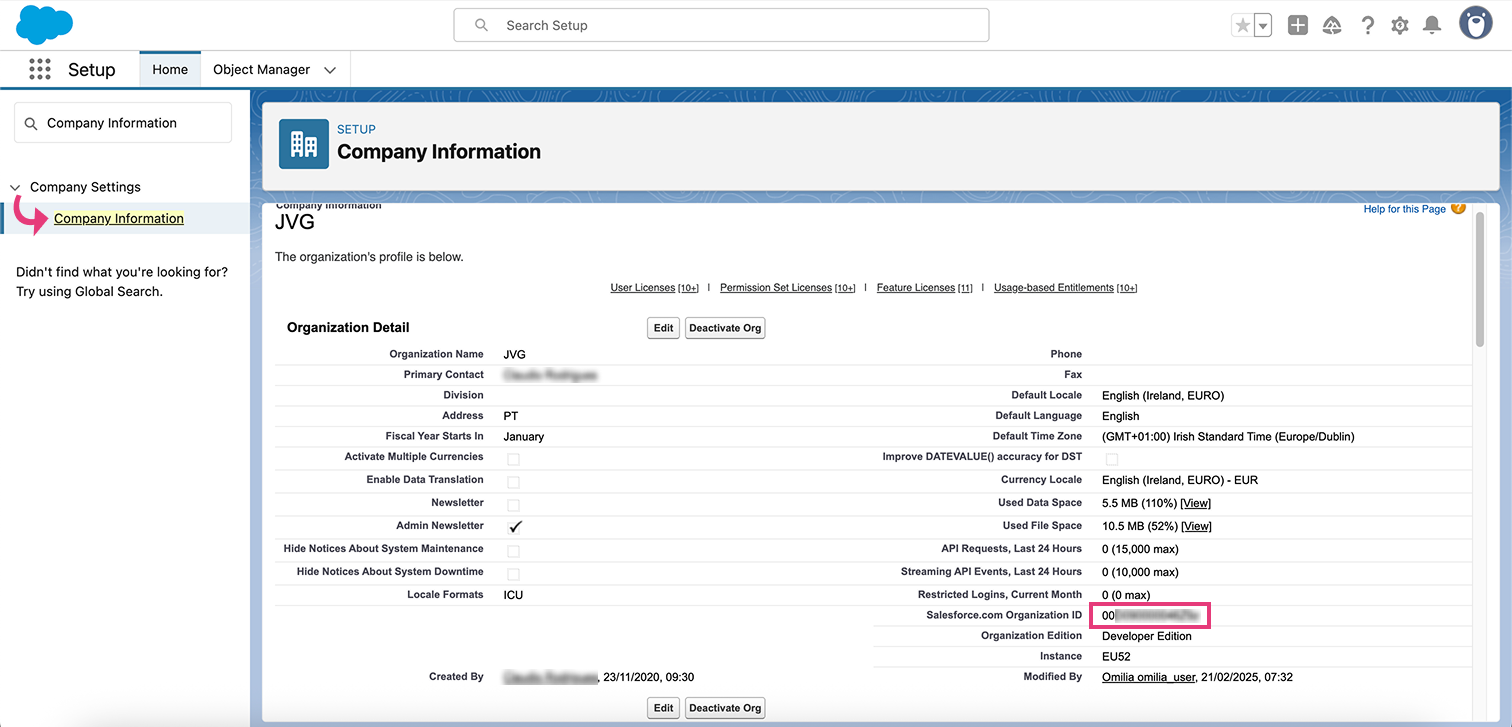
Retrieve Organization ID:
-
Go to Setup and click on Company Information from the left menu.
-
Here you will find the Organization ID.
-
-
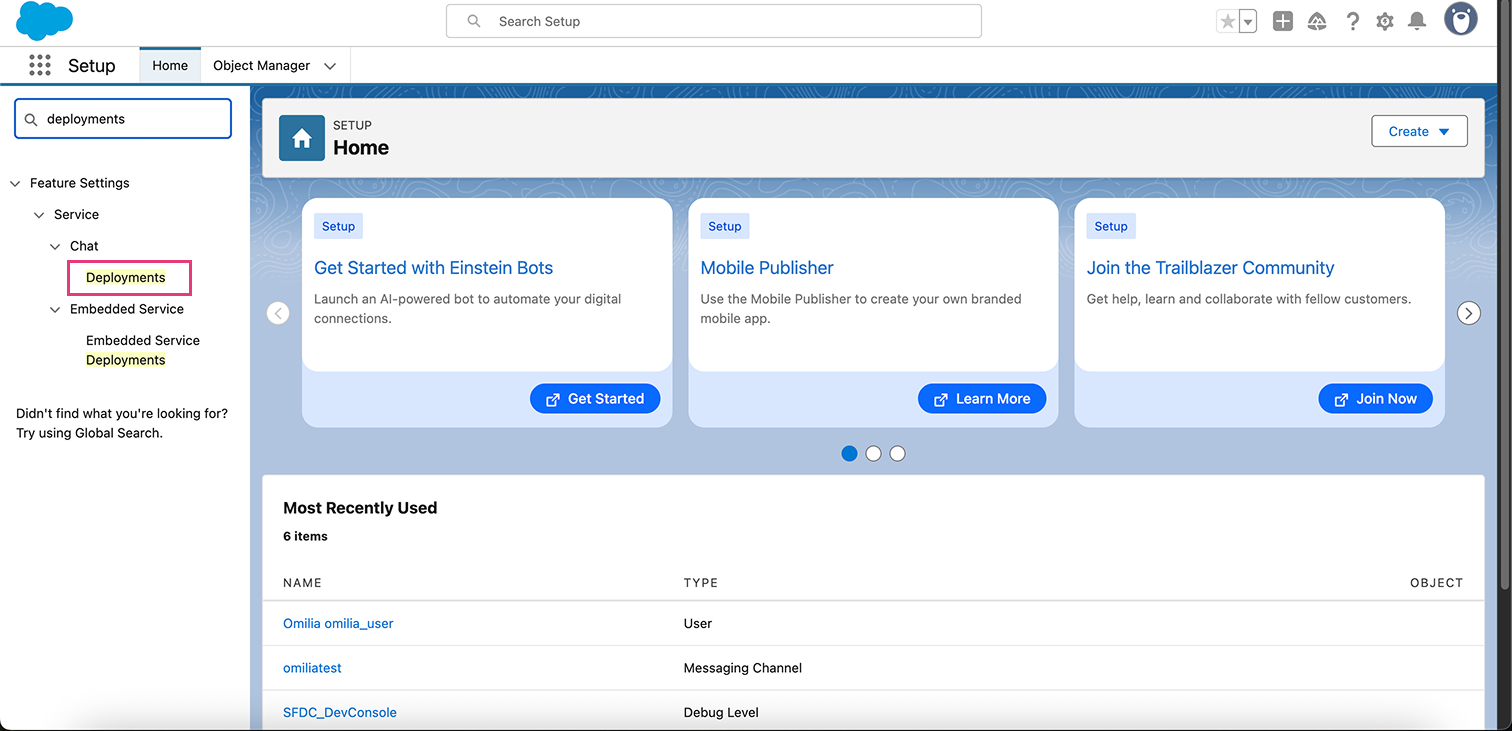
Retrieve Live Agent URL:
-
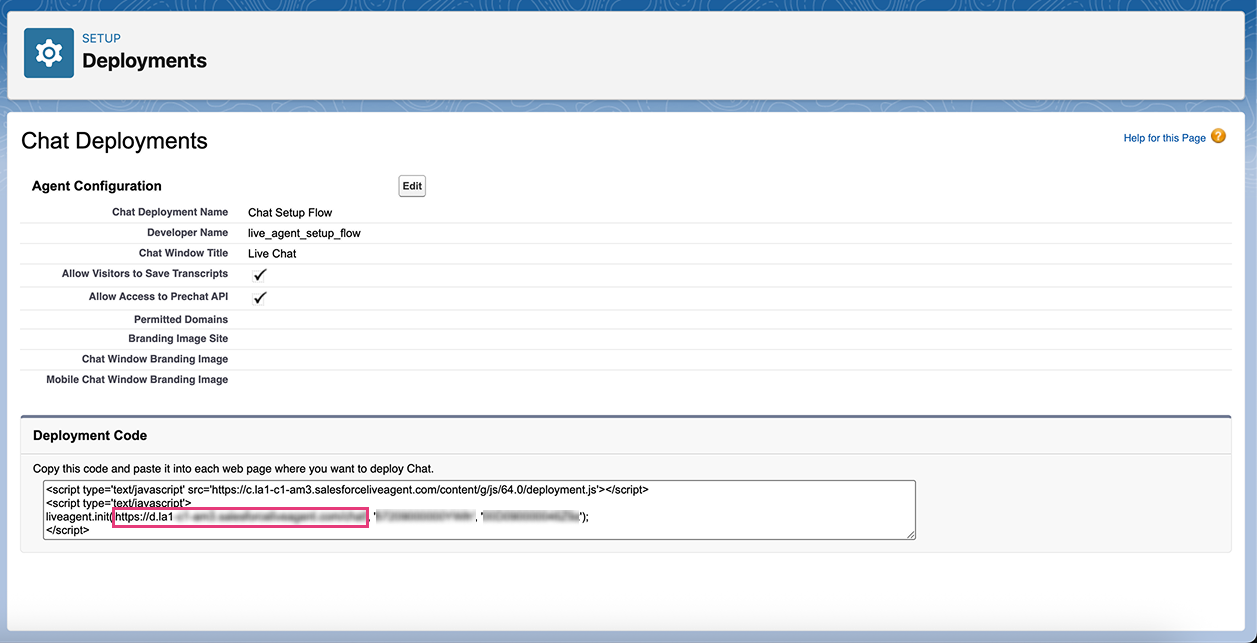
In Setup, search for Deployments.
-
Select your deployment and find the URL within the liveagent.init call in the deployment code snippet. Copy the base URL.
-
After completing these steps, you should have the following information:
-
Deployment ID
-
Organization ID
-
Button ID
-
Live Agent Base URL
OCP MiniApp Configuration
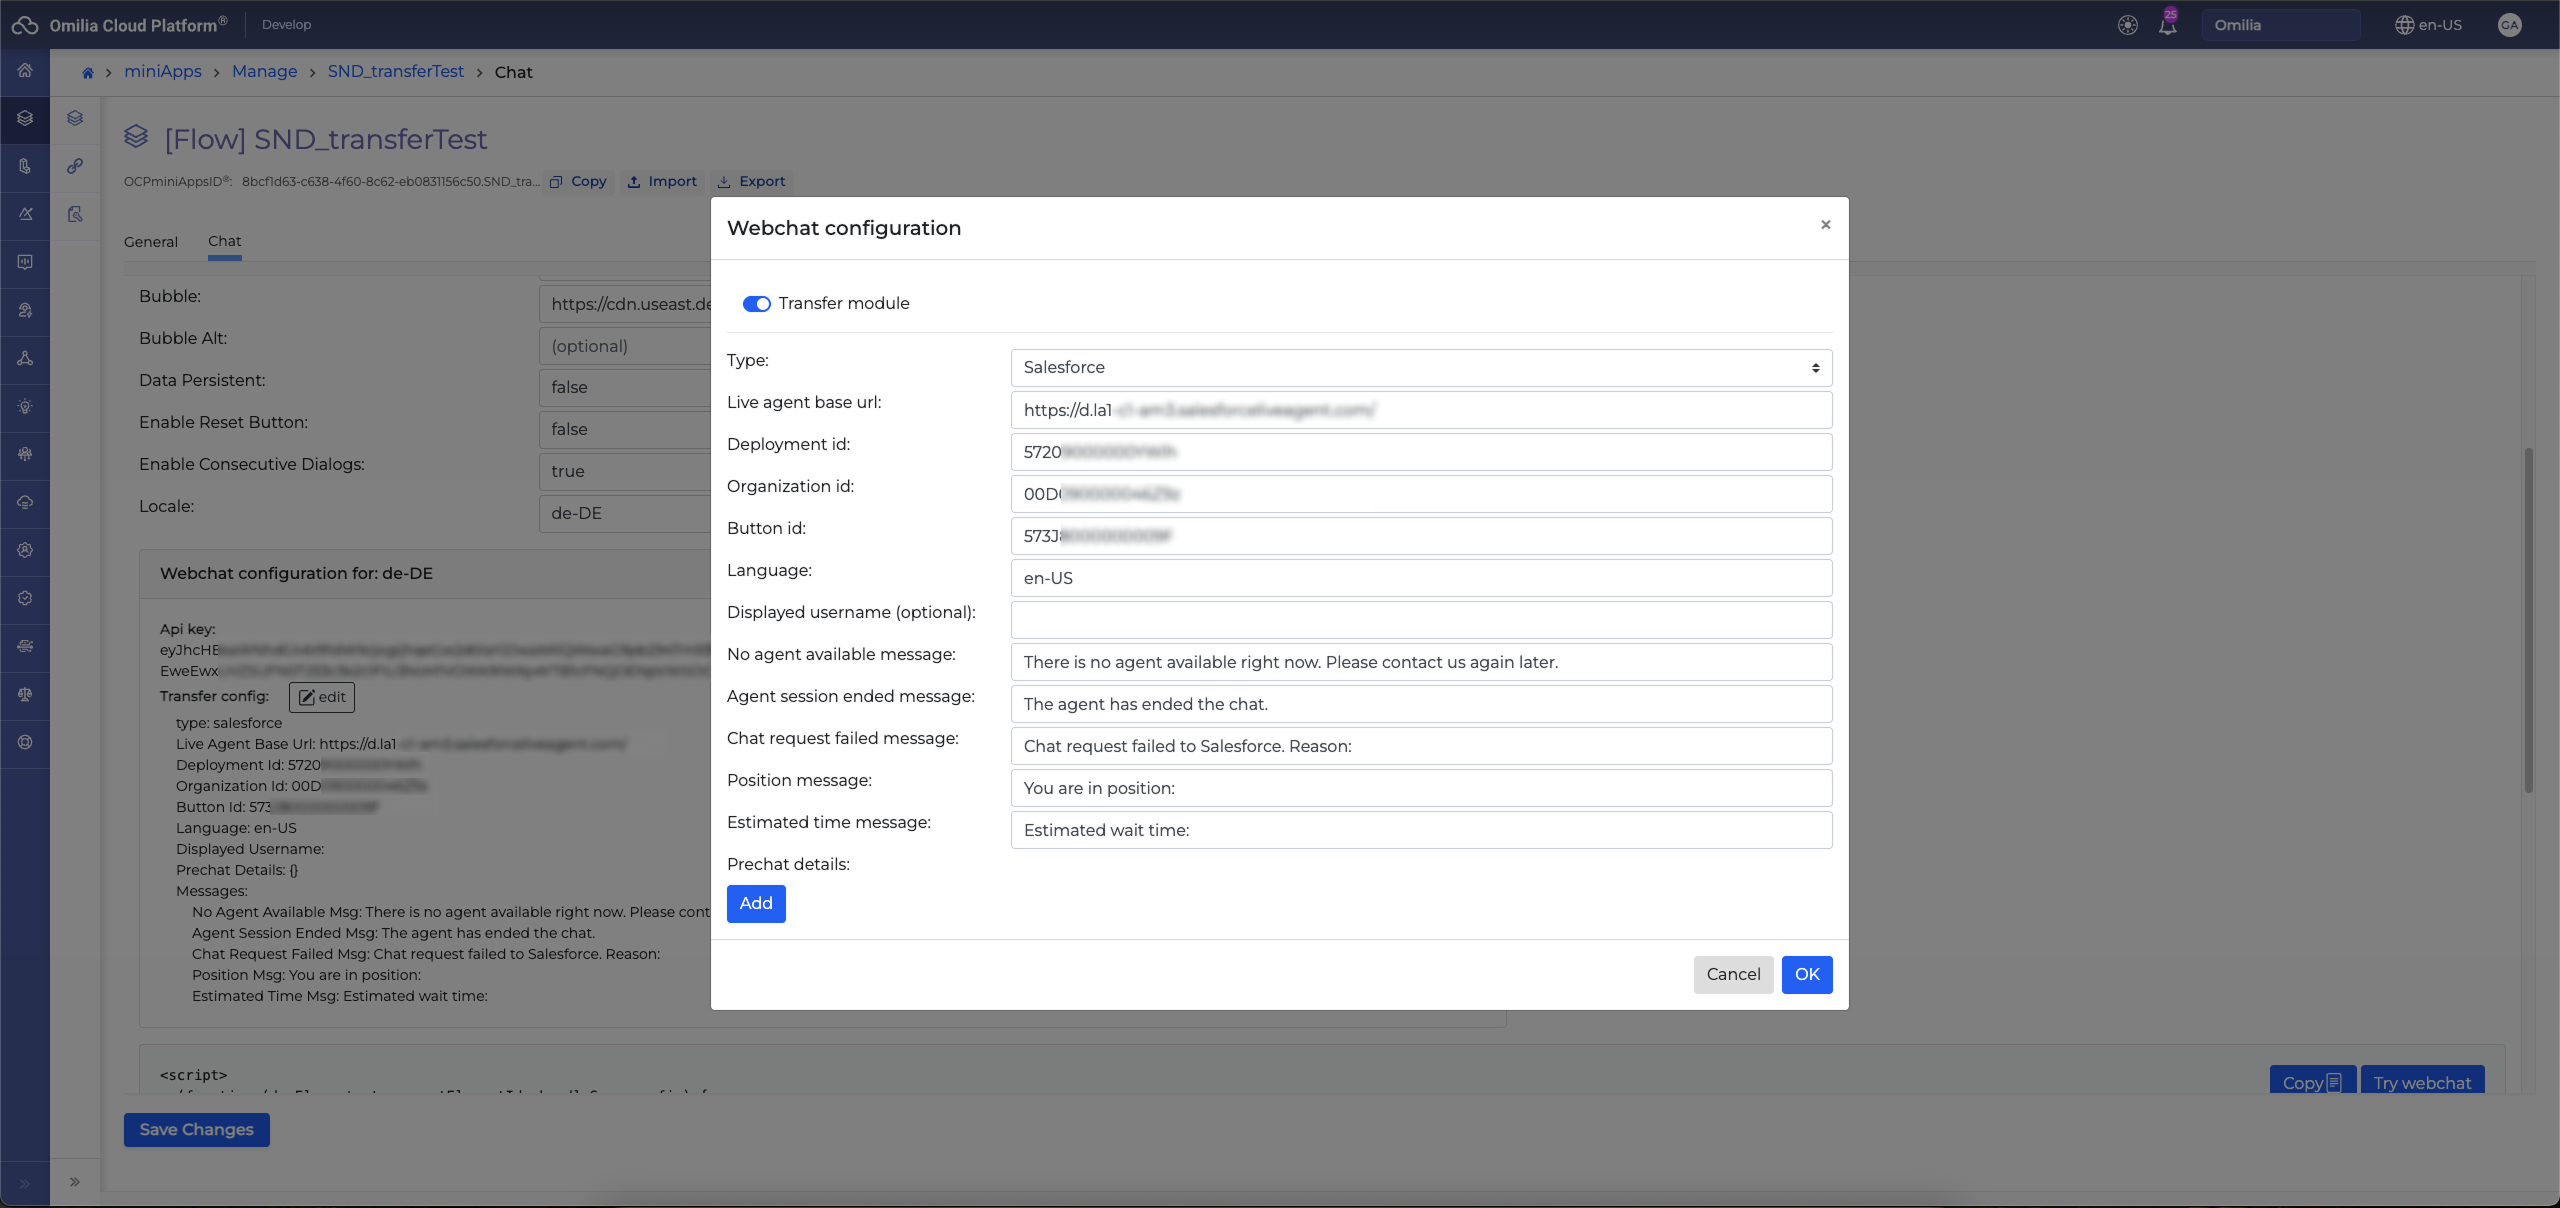
Within the OCP MiniApp where you want the chat transfer to occur, configure the Webchat Configuration under the Chat tab.
Webchat Configuration Fields:
-
Type: Select "Salesforce".
-
Live agent base url: The URL retrieved from your Salesforce deployment.
-
Deployment id: The ID from the deployment you created.
-
Organization id: The ID from your Salesforce company information.
-
Button id: The ID of the chat button you configured.
-
Language: The language for the chat session.
-
Displayed username (optional): The name to be displayed to the Salesforce agent.
-
No agent available message: Message to display when no agents are available. The default is "There is no agent available right now. Please contact us again later.".
-
Agent session ended message: Message to display when an agent ends the chat. The default is "The agent has ended the chat.".
-
Chat request failed message: Message to display if the chat request fails. The default is "Chat request failed to Salesforce. Reason:".
-
Position message: Message to inform the user of their queue position. The default is "You are in position:".
-
Estimated time message: Message to provide an estimated wait time. The default is "Estimated wait time:".
-
Prechat details: These details will only be visible on the agent's side if the corresponding fields have been set up in the Chat Transcript object in Salesforce.
All of these fields can utilize OCP variables using the pattern {{ocpvars:variableName}}.
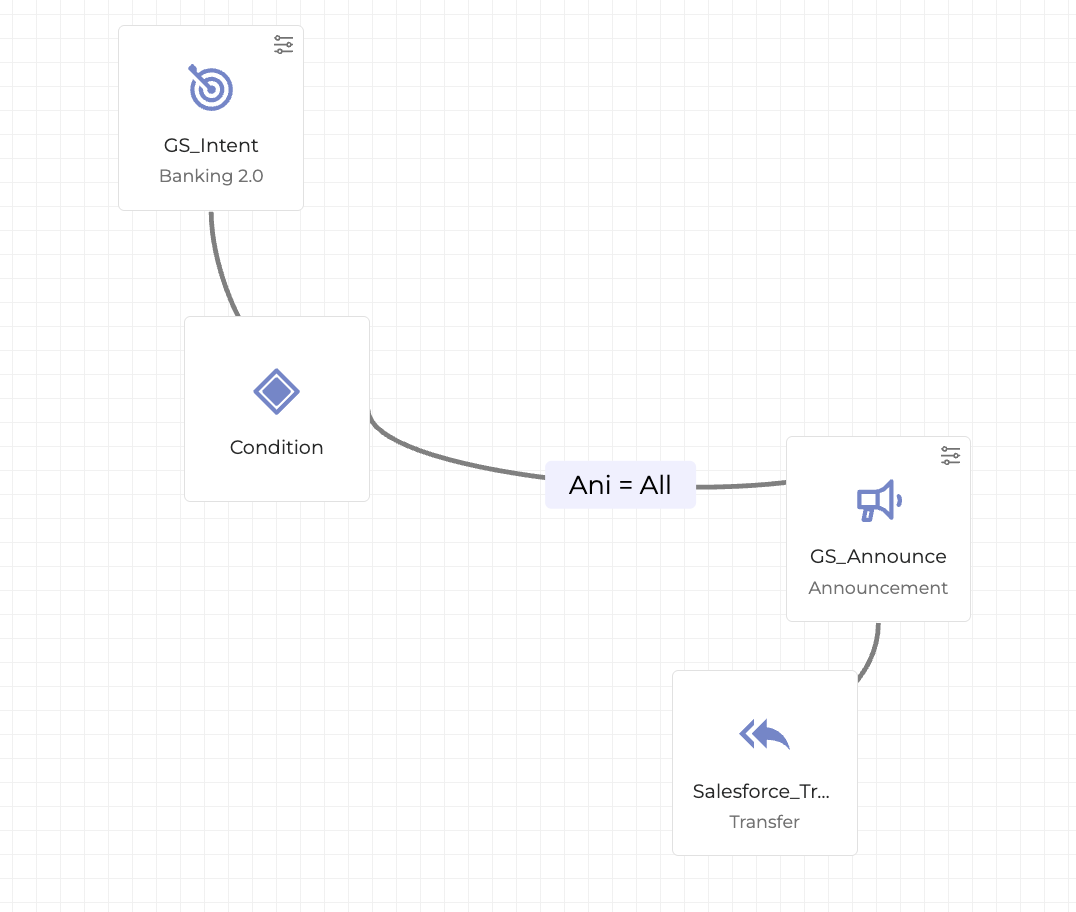
After configuring the Webchat, go to the Orchestrator to create your application logic. Add a Transfer dialog control as the final step in your diagram to initiate the transfer to a live agent.
Retrieving Chat History
To retrieve the chat history, you will need to make an API call to the following endpoint:
|
Method |
Endpoint |
|---|---|
|
GET |
|
The sessionId must be provided as a query parameter. For example: https://{...}.ocp.ai/chat/dialogs/history?sessionId=8ba5fe99-b90a-438c-99c6-8f85aa491770
Authorization
There are two methods for authorization:
-
Bearer Token (JWT): The standard token used by other OCP services.
-
Personal Access Token: This token must be included in the request header as
X-OCP-PERSONAL-ACCESS-TOKEN.