About this tab
The Access Management tab is primarily designed for organization’s admin users, however some features are also available for regular users. Organization’s admin users are OCP® users who have been granted elevated permissions to manage authentication tokens, user groups and roles for their organization. This tab allows organization’s admins to streamline and control access, ensuring that only authorized users can perform specific actions.
To better understand what an Organization is and the responsibilities of its admin user in OCP infrastructure, read the Organizations, Groups, and Roles article.
Under this tab, as an organization’s admin user, you can:
-
Create and revoke personal tokens. This action is available for any user with an activated Token management policy.
-
View and create groups for your organization
-
Add and remove users from your organzation’s groups
-
View and create roles within your organization
-
Assign roles to user within your organization
-
View the list of users assigned to your organization
-
Deactivate users within your organization

Below you can find more details about each of the sub-tabs.
Personal Tokens
A personal token is a string of characters that you can use for authentication when accessing OCP® Console instead of the usual credentials. Personal tokens (PATs) provide a secure and less cumbersome alternative to traditional login credentials.
Any user with an activated Token management policy can create a personal access token. You do not need to be an organization’s admin for this action.
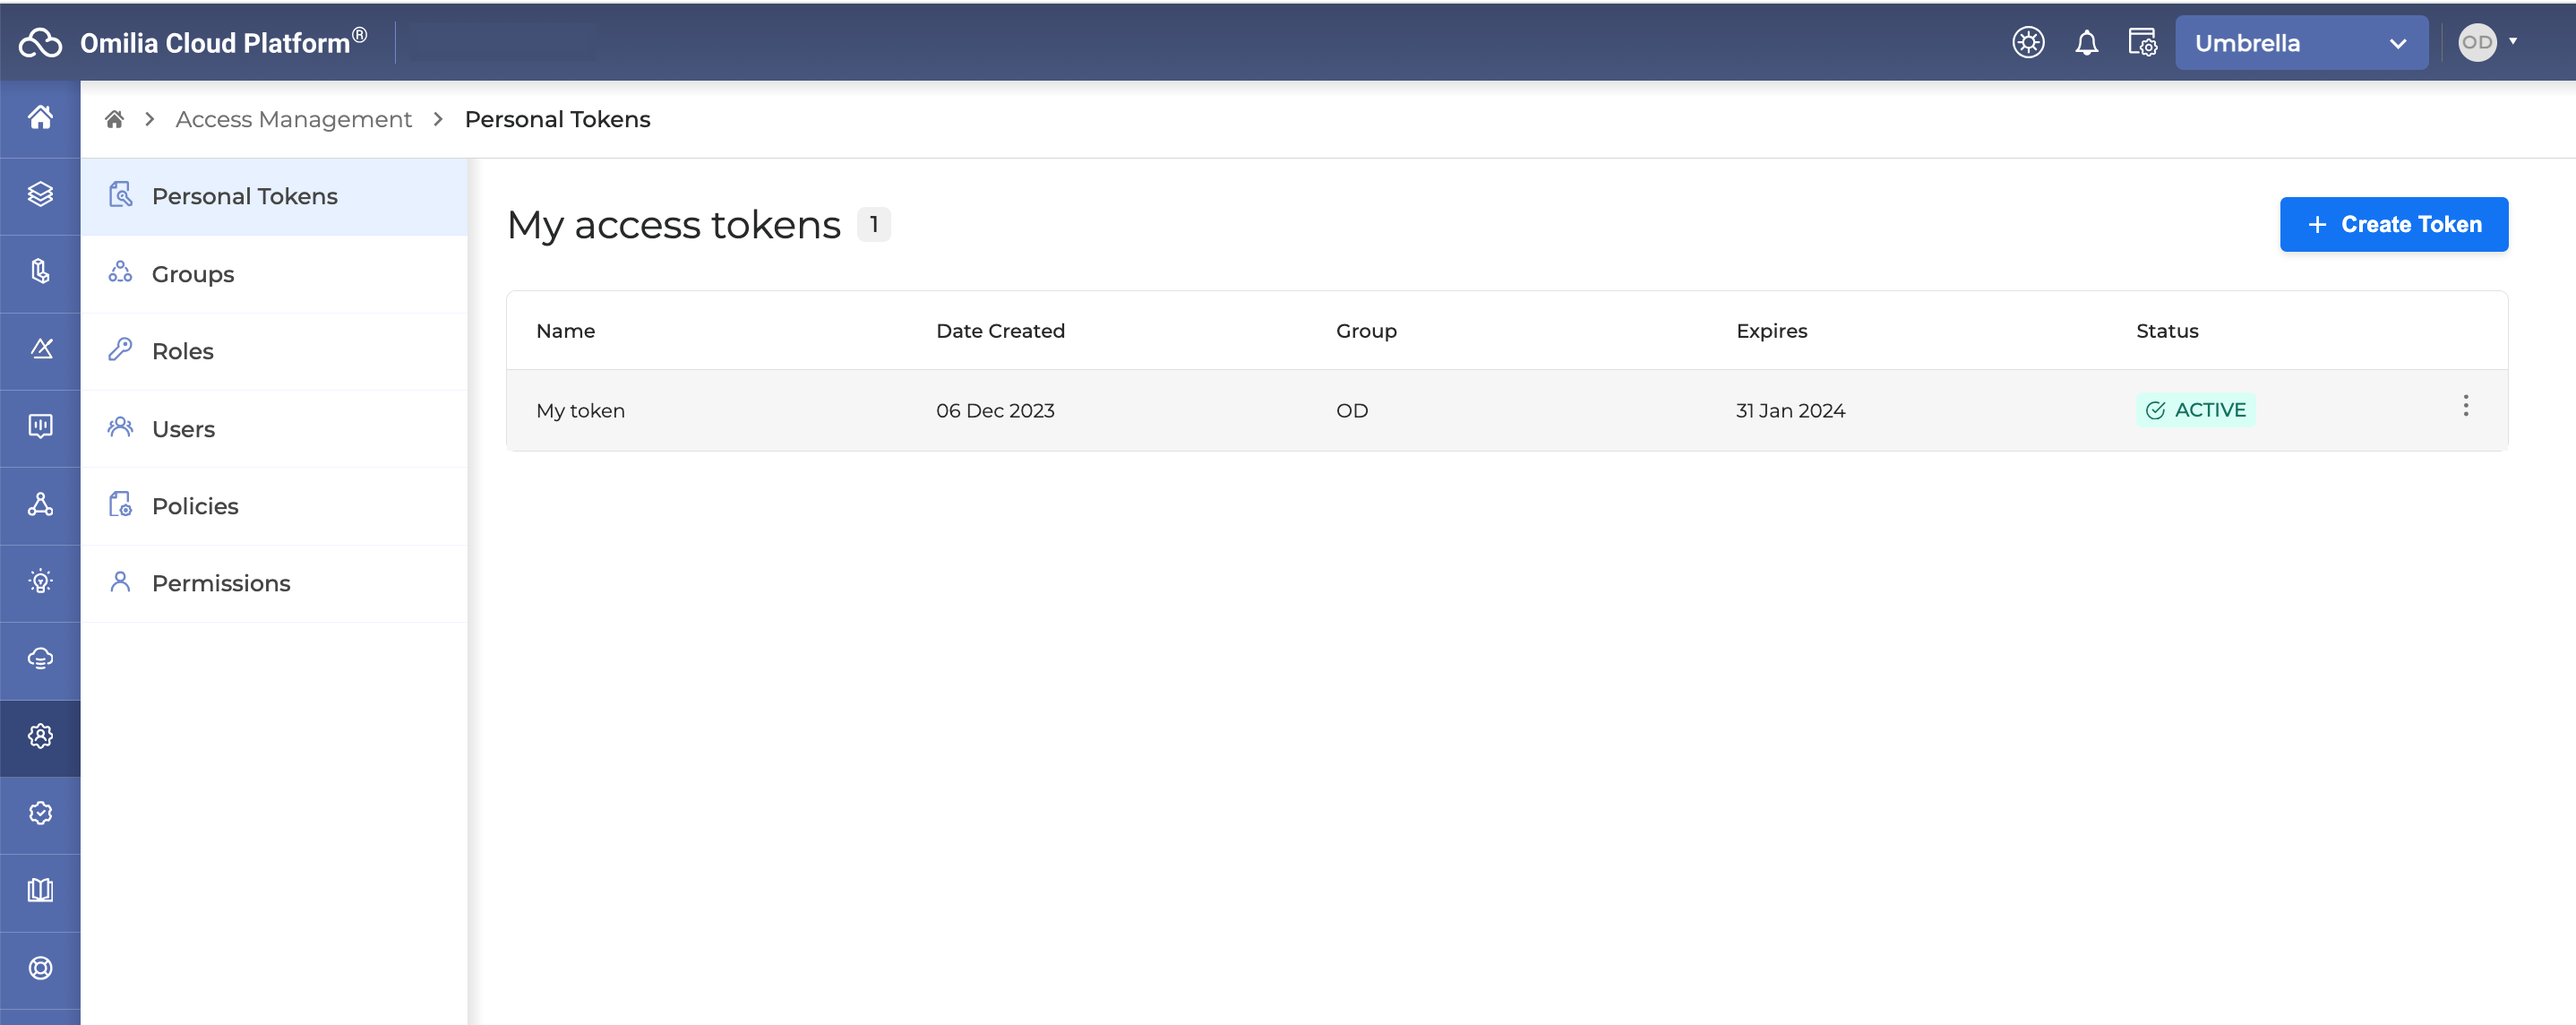
Under the Personal Tokens tab, you can create and revoke personal tokens.
If your account remains inactive for 90 days, it will be deactivated. You will receive reminder emails 14, 7 and 2 days before deactivation. Any authentication activity, including API calls made using a PAT, counts as active use and resets the inactivity timer.

Create a personal token
To create a personal token, proceed as follows:
-
Click + Create Token. The following dialog box opens.
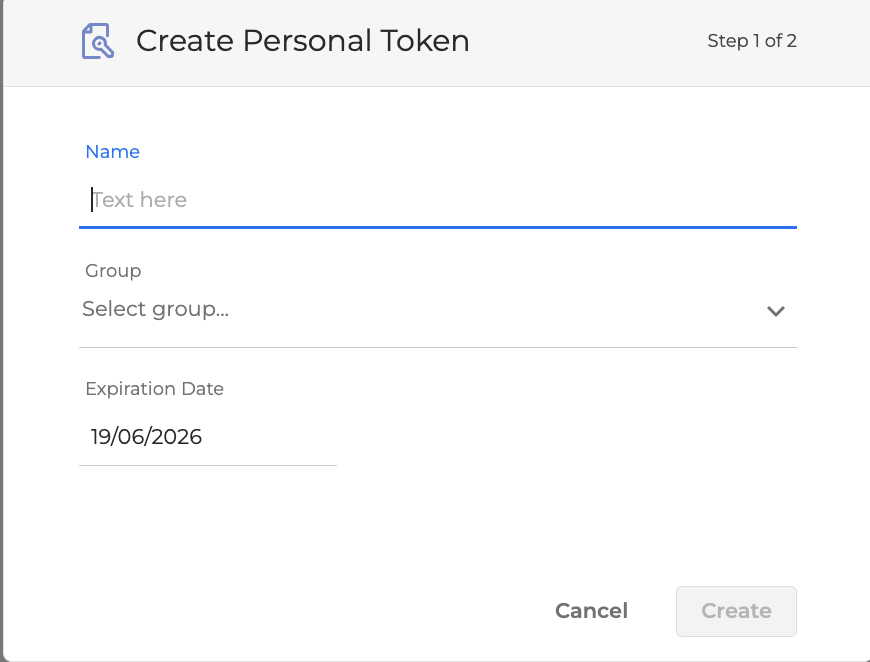
2. Fill in the fields
-
Name: Enter the name for your personal token’s name.
-
Group: Select a group from the drop-down list. If the list is extensive, start typing the group’s name to narrow down the options.
-
Expiration Date: Defines the expiration date of the token. All PATs must have an expiration date, and the maximum allowed lifetime is 12 months from the date of creation. The expiration date cannot be left unset.
PATs that previously had no expiration date have been assigned an expiration date of five months from today. If your integrations use older tokens, we recommend generating a new token and updating your integrations before the old one expires to maintain uninterrupted access.
3. Click Create. The token will be created, and the following dialog box will open:
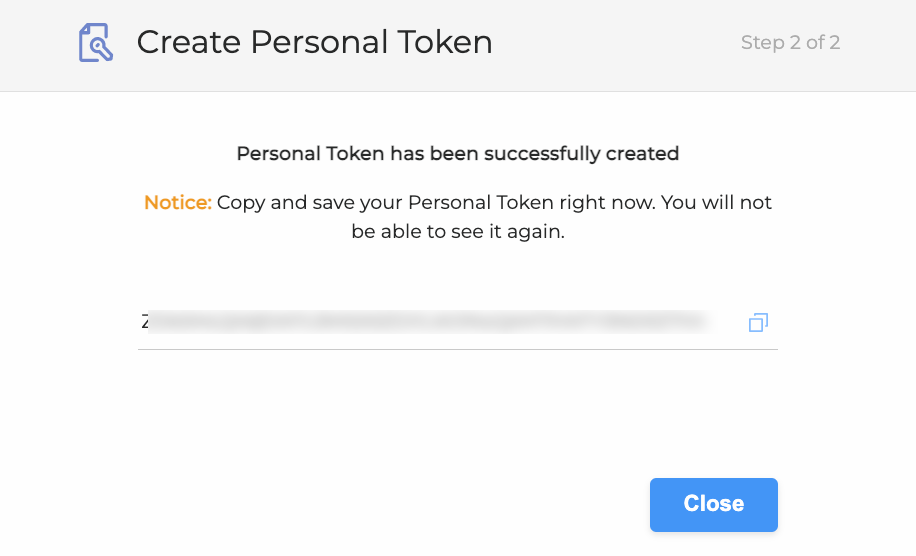
4. Copy and save your token!
Copy and save your token. You will not be able to see it again.
5. Click Close when finished. The created tokens are listed as shown below:
PAT behavior and security
To ensure uninterrupted service, PATs follow specific lifecycle rules regarding account status and password changes:
|
Action |
PAT Behavior |
|---|---|
|
Forgotten Password |
If you forget your password or initiate a password reset, any existing PAT will continue to work until its original expiration time. |
|
Password Expiration |
When your account password expires, the PAT remains valid and will continue to work until it reaches its defined expiration date. |
|
Account Locking |
If your user account is locked due to multiple failed login attempts on the UI, the PAT continues to function for API authentication. |
|
Disabled User |
If a user is manually Deactivated or disabled by an administrator, all associated PATs will immediately stop working. A PAT requires an active user account to authenticate. |
|
Inactivity |
If the account is inactive for 90 days, the account is deactivated and all associated PATs will stop working. You will receive reminder emails 14, 7 and 2 days before deactivation. Using your PAT for access counts as activity and keeps your account active. |
Revoke a personal token
When a personal token expires, its status is changed to Revoked. You can also revoke your token manually. To revoke a token, click the Menu button → Revoke.
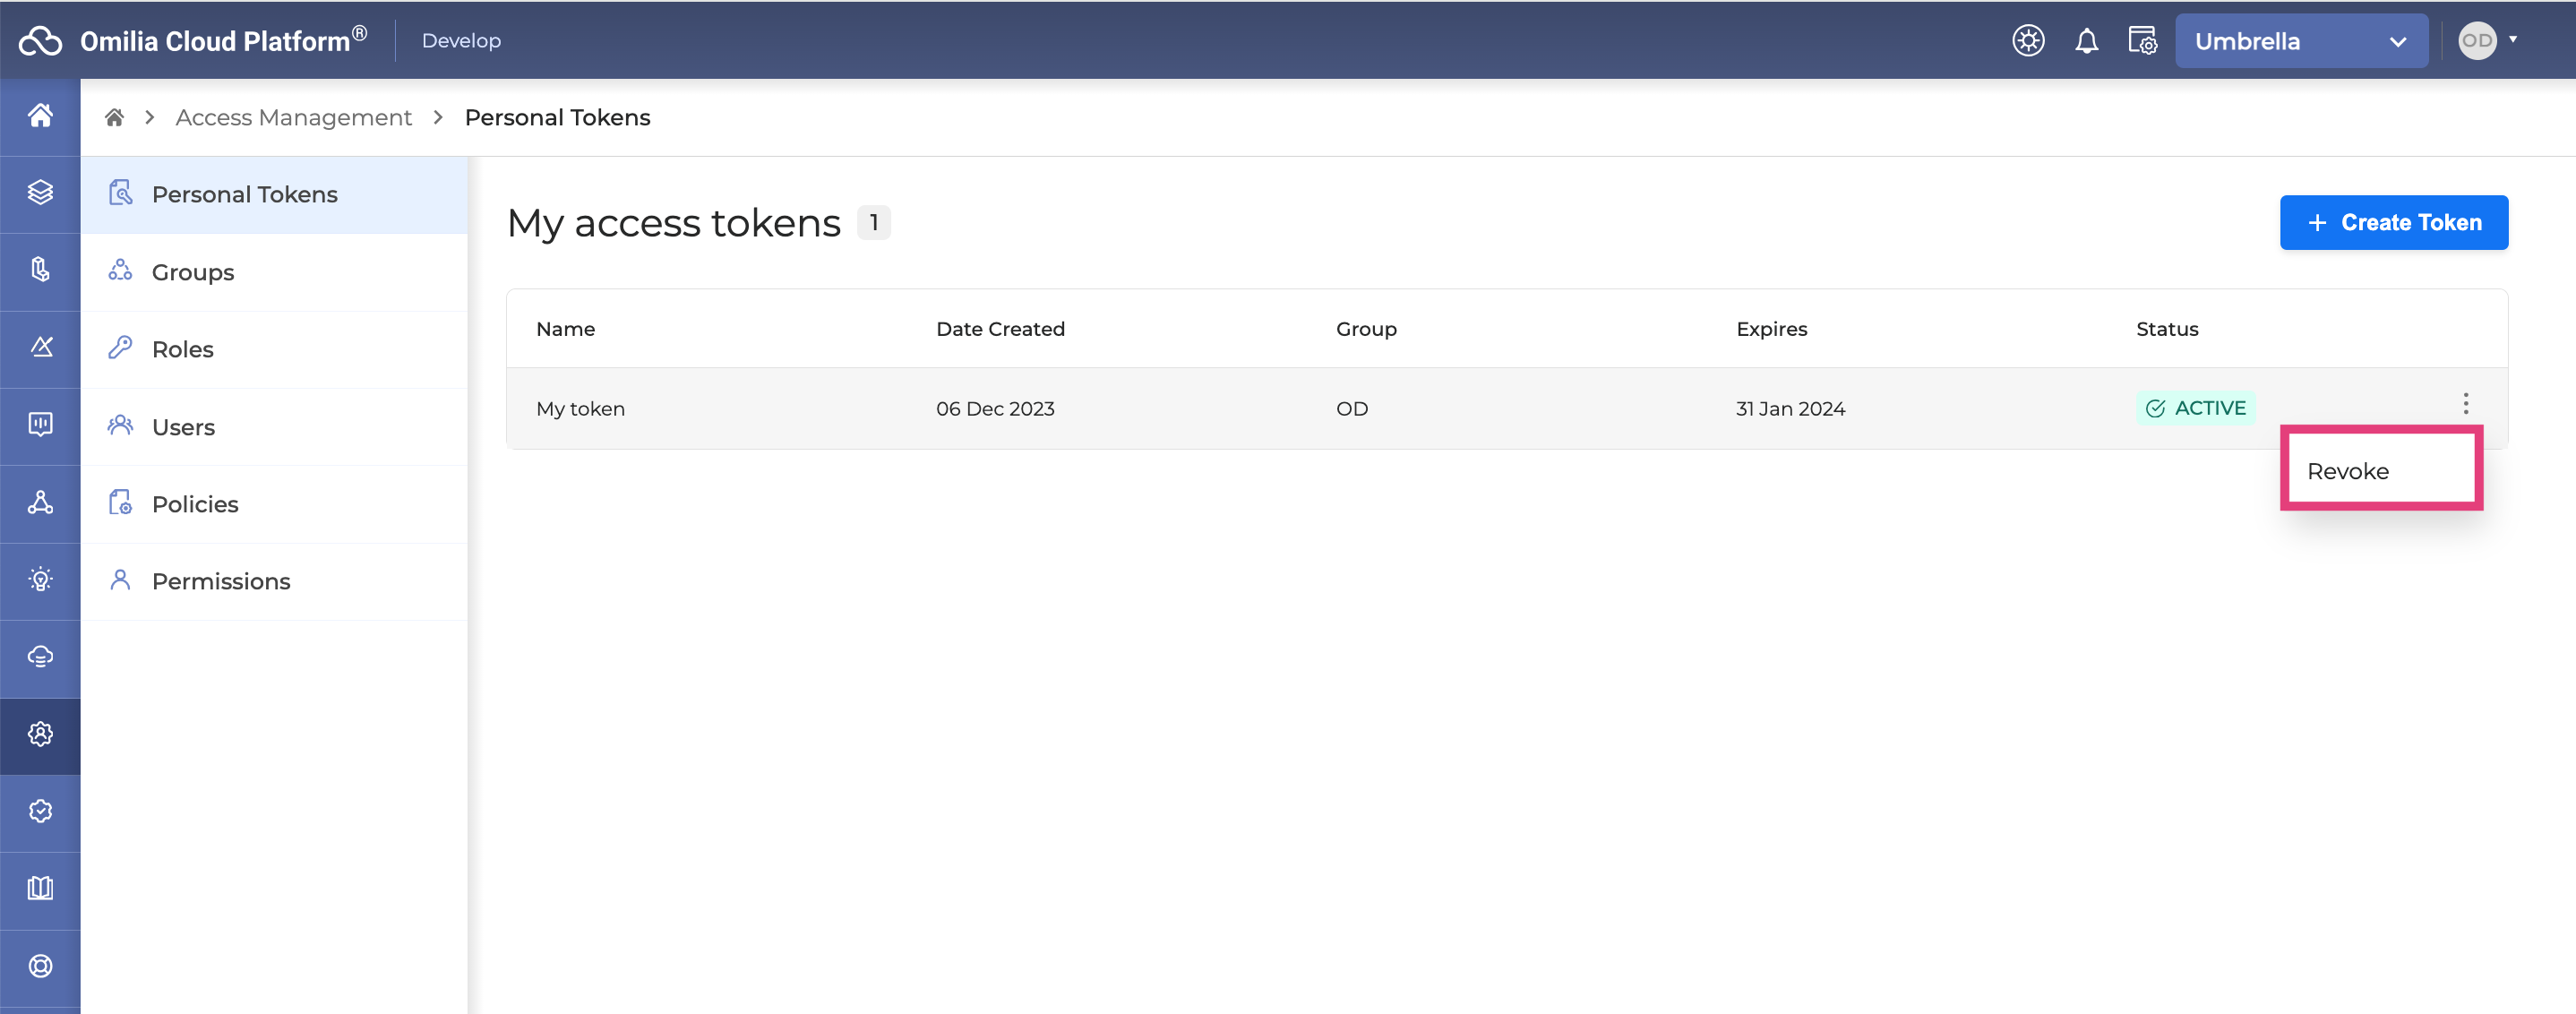
You cannot delete a personal token.
Groups
Under the Groups tab, organization’s admin users are able to view a list of all the groups associated with your organization, as well as have the ability to create new groups.
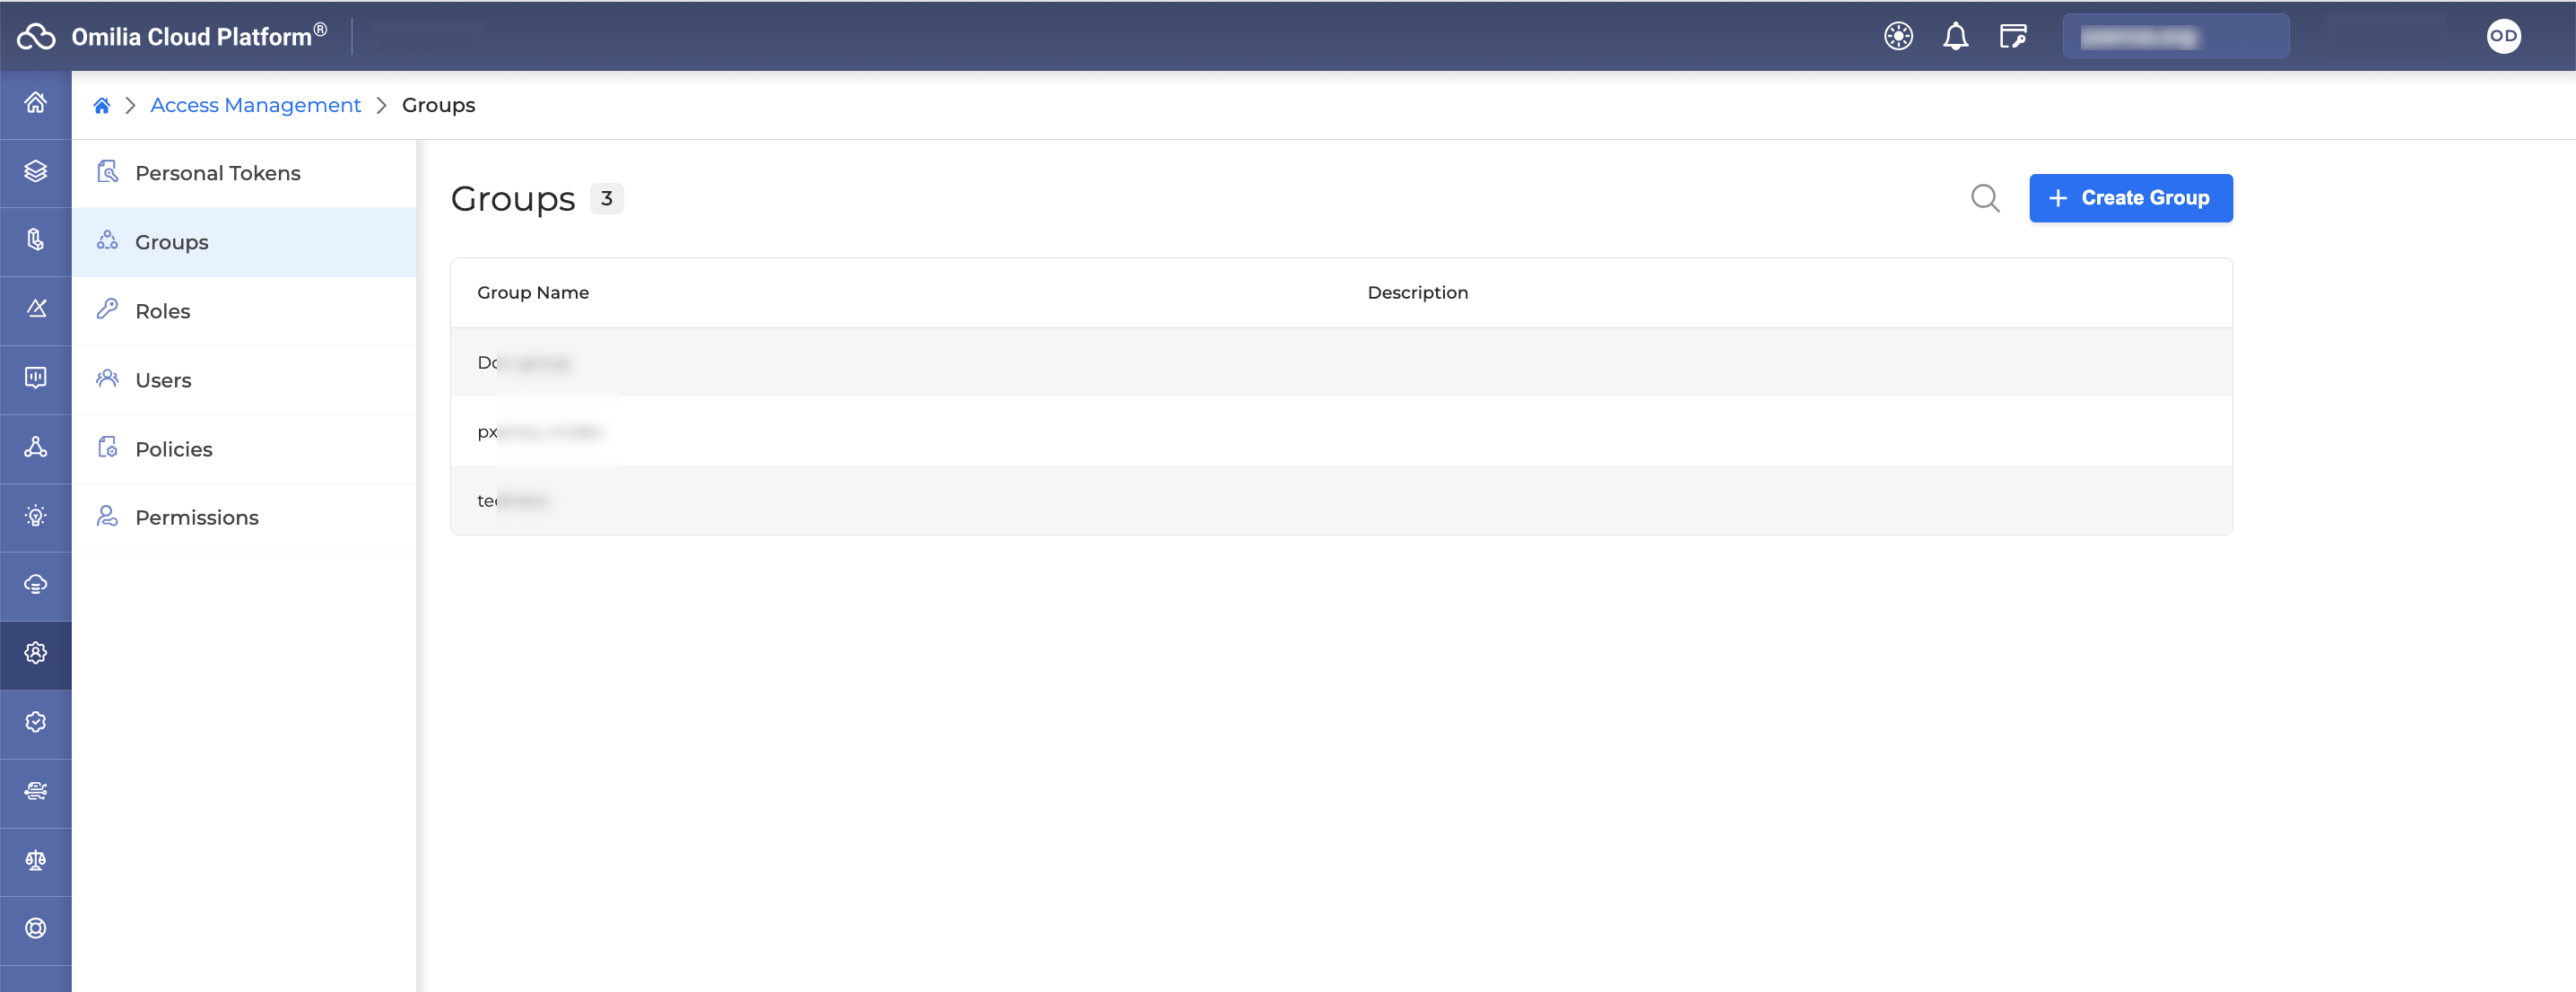
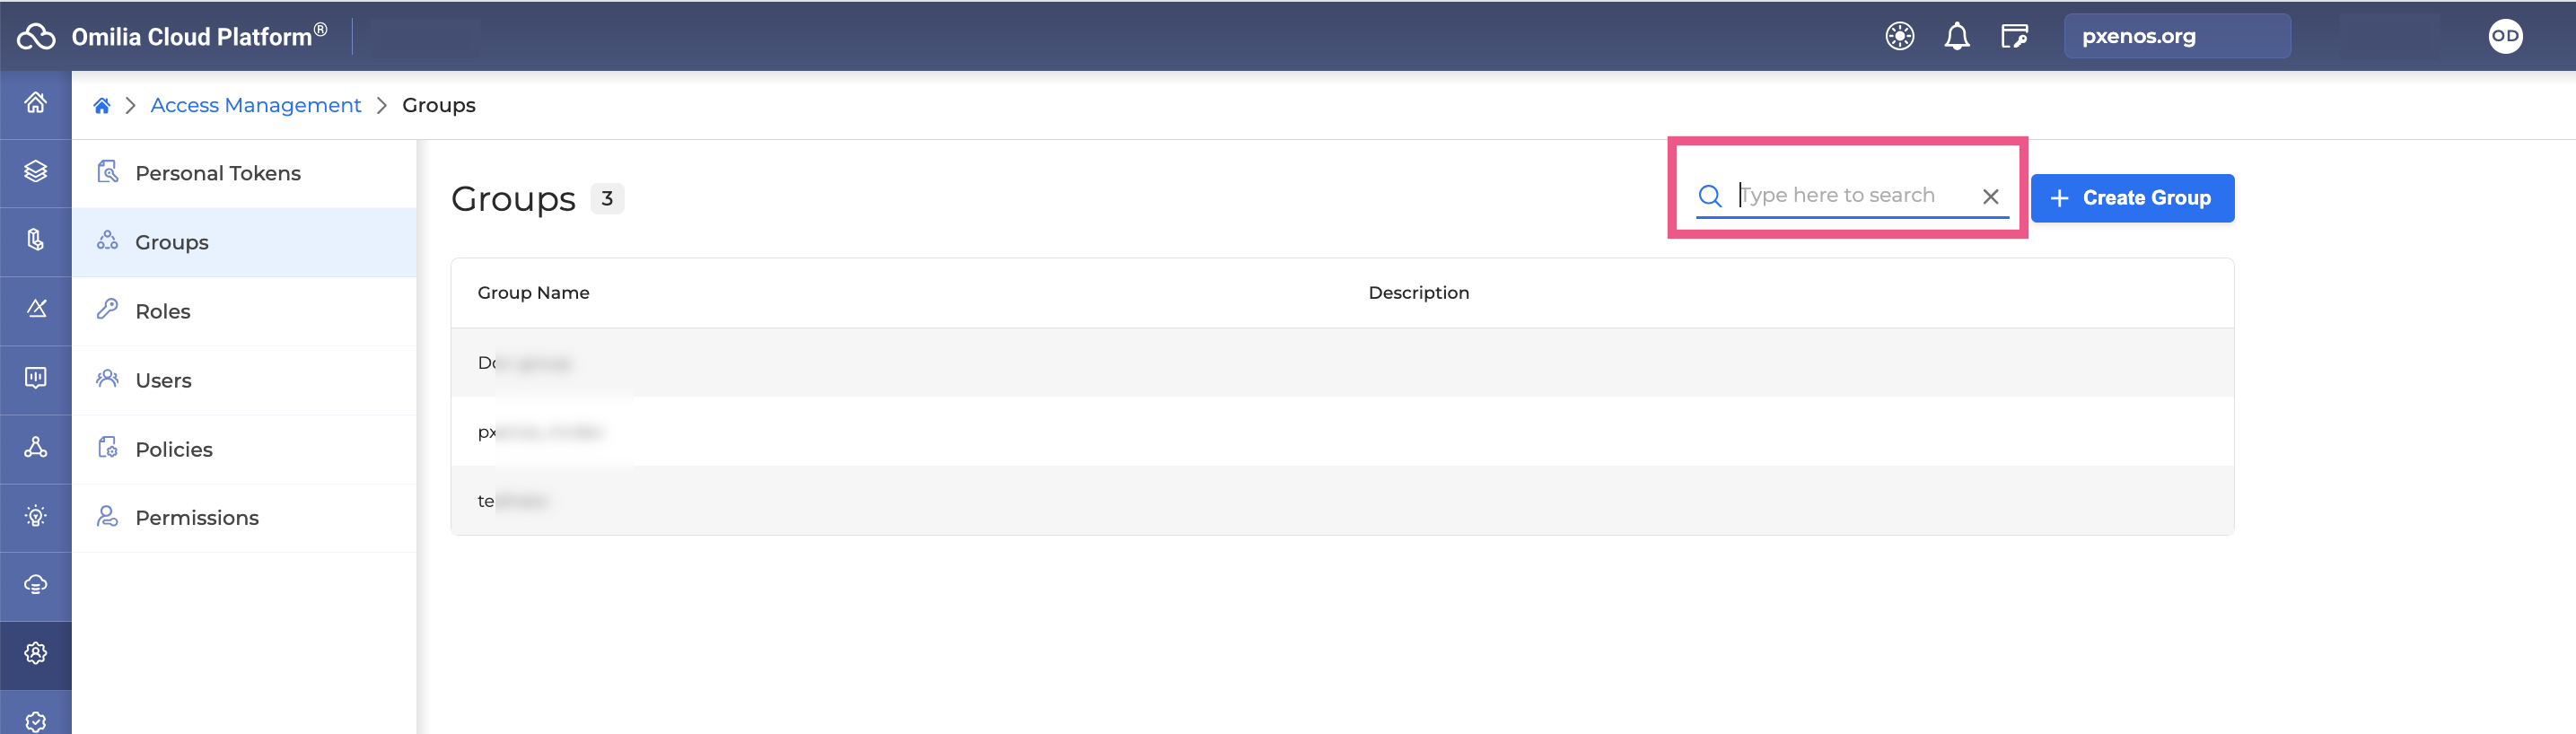
If the list of groups within your oranization is extensive, you can use the Search field for convenience.
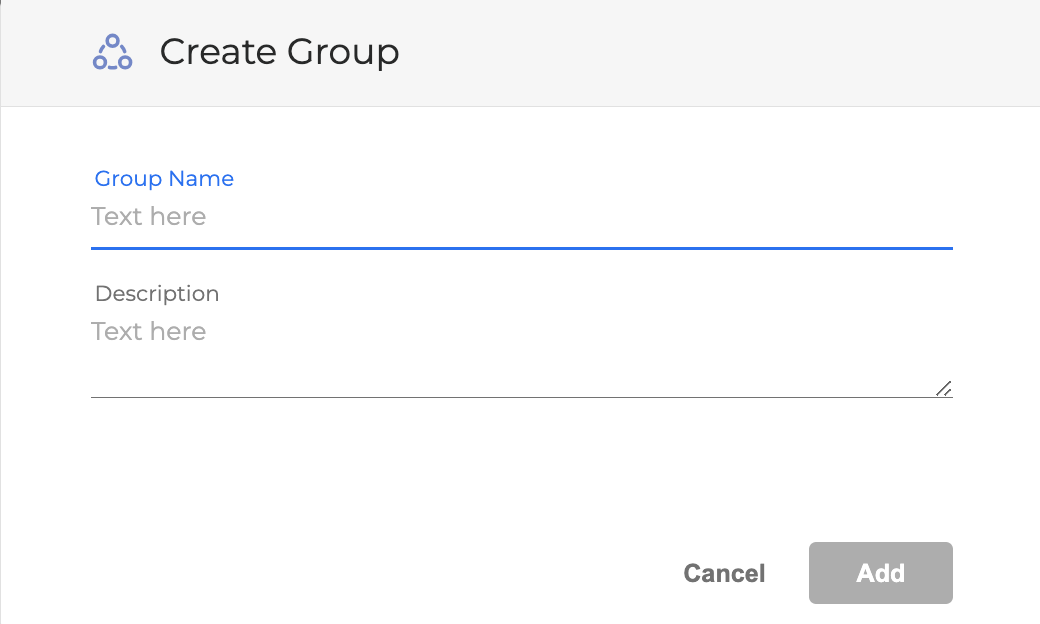
Create group
To create a group in your organization, proceed as follows:
-
Click + Create Group. The dialog box opens.
-
Fill in the fields as described below:
-
Group Name: Your personal token’s name.
-
Description: Optional description for your group.
-
Click Add. The created group will appear in the list of groups.
Add users to group
Once you have created a group, you can add users to this group. To add a user to a group, follow the steps below:
-
Select a group from the available groups list. You will be directed to the page showing the users associated with the selected group.
-
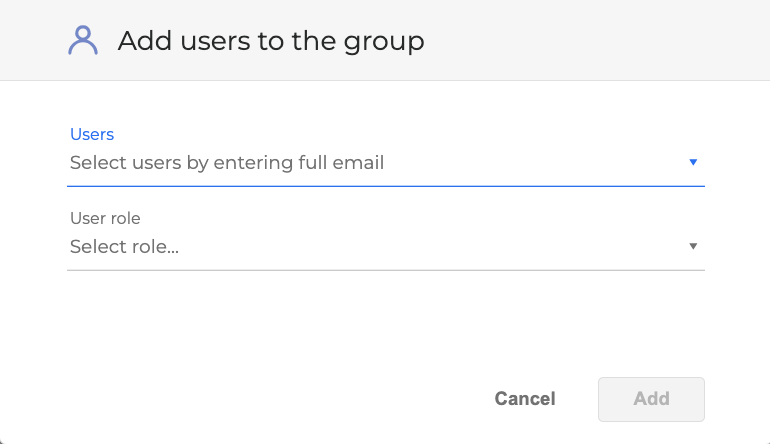
Click + Add Users.
-
In the opened pop-up window, fill in the fields as described below:
-
Users: Enter the user's email address. If the email is valid, it will be displayed in a drop-down menu. Finalize your selection by clicking on the email. You can add multiple users' emails at a time.
You must enter the complete email address of a registered user to be accepted.
-
User Role: Identify the type of user role applicable to this group.
-
Click Add when finished. The newly added users will appear within the list of the group's members.
Remove a user from a group
You have the ability to remove users from any group of your organization. To delete a user from a group, follow the steps below:
-
Select a group from the available groups list. You will be directed to a page showing the users associated with the chosen group.
-
Click on the Options Menu icon → Remove.

-
A pop-up window will appear. Confirm the removal by clicking Delete.
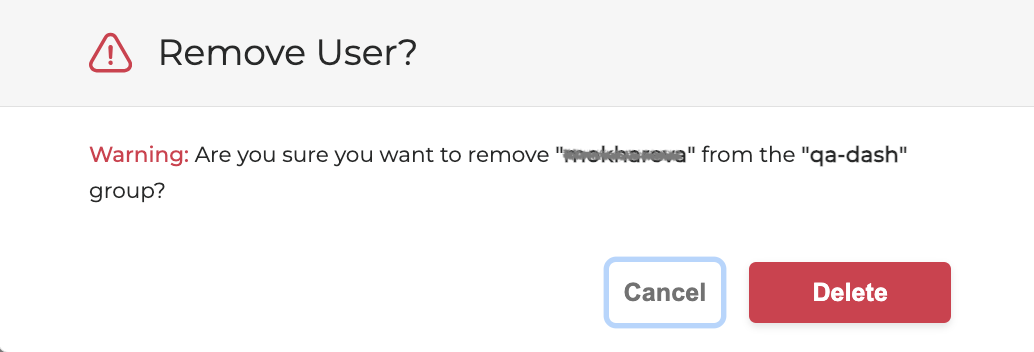
The selected user will be deleted from the group.
Change a user’s role
You have the ability to change the role of any user from your organzition’s groups. To change a user’s role, follow the steps below:
-
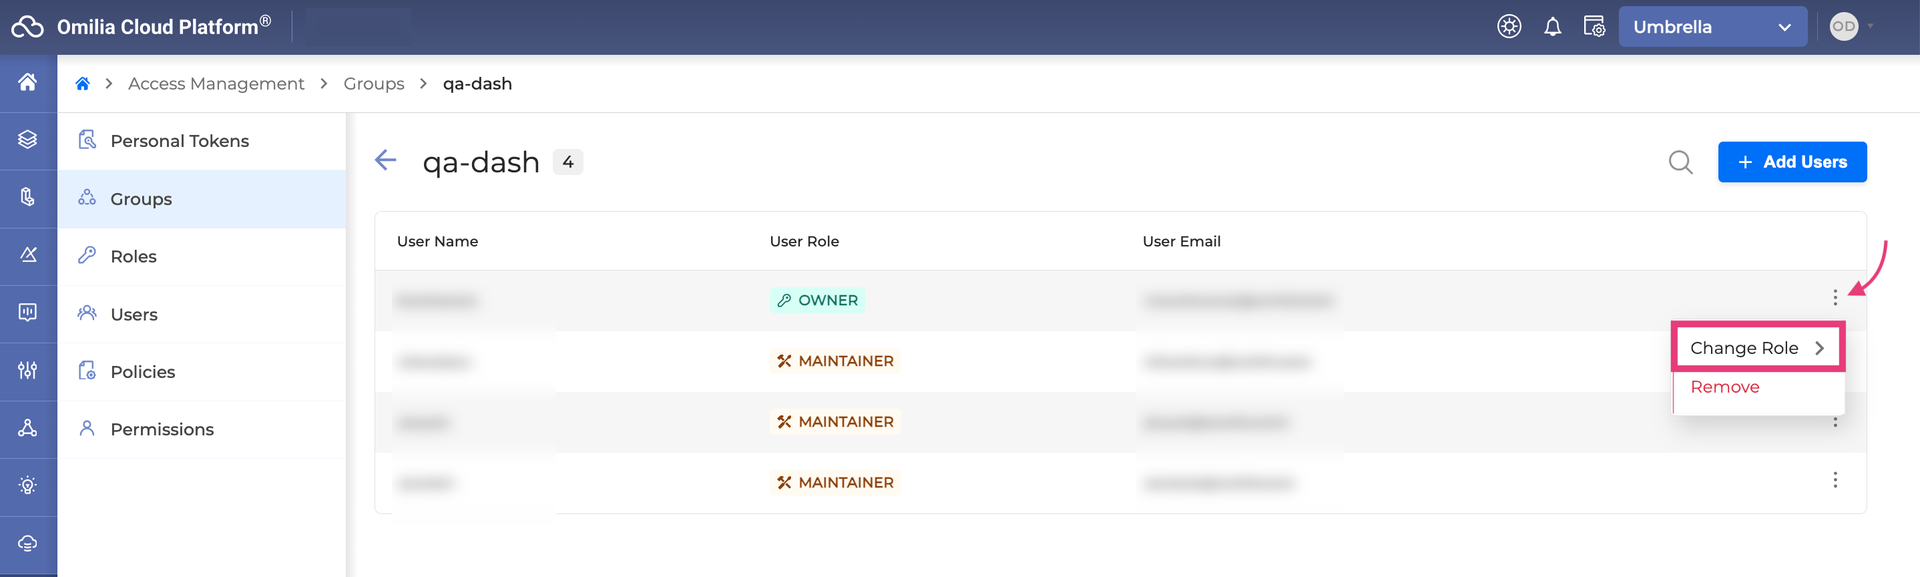
Select a group from the available groups list. You will be directed to a page showing the users associated with the chosen group.
-
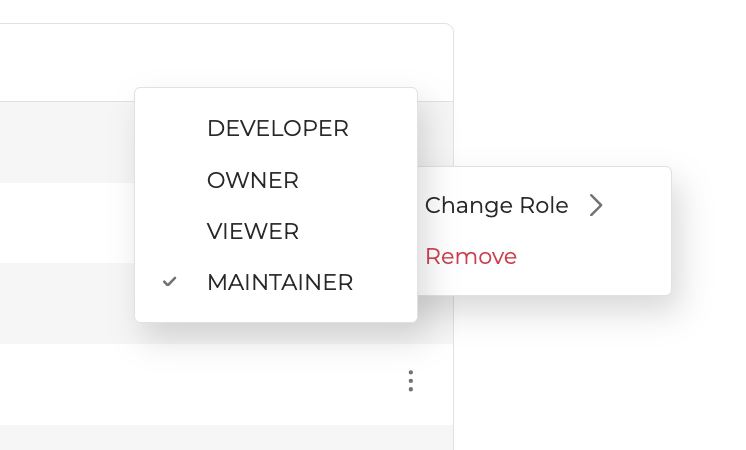
Click on the Options Menu icon → Change role.
-
A list of available roles will appear.
-
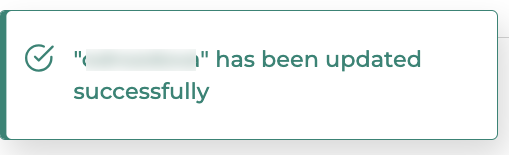
A notification will appear in the top right, confirming the successful update of the user’s role within the group.
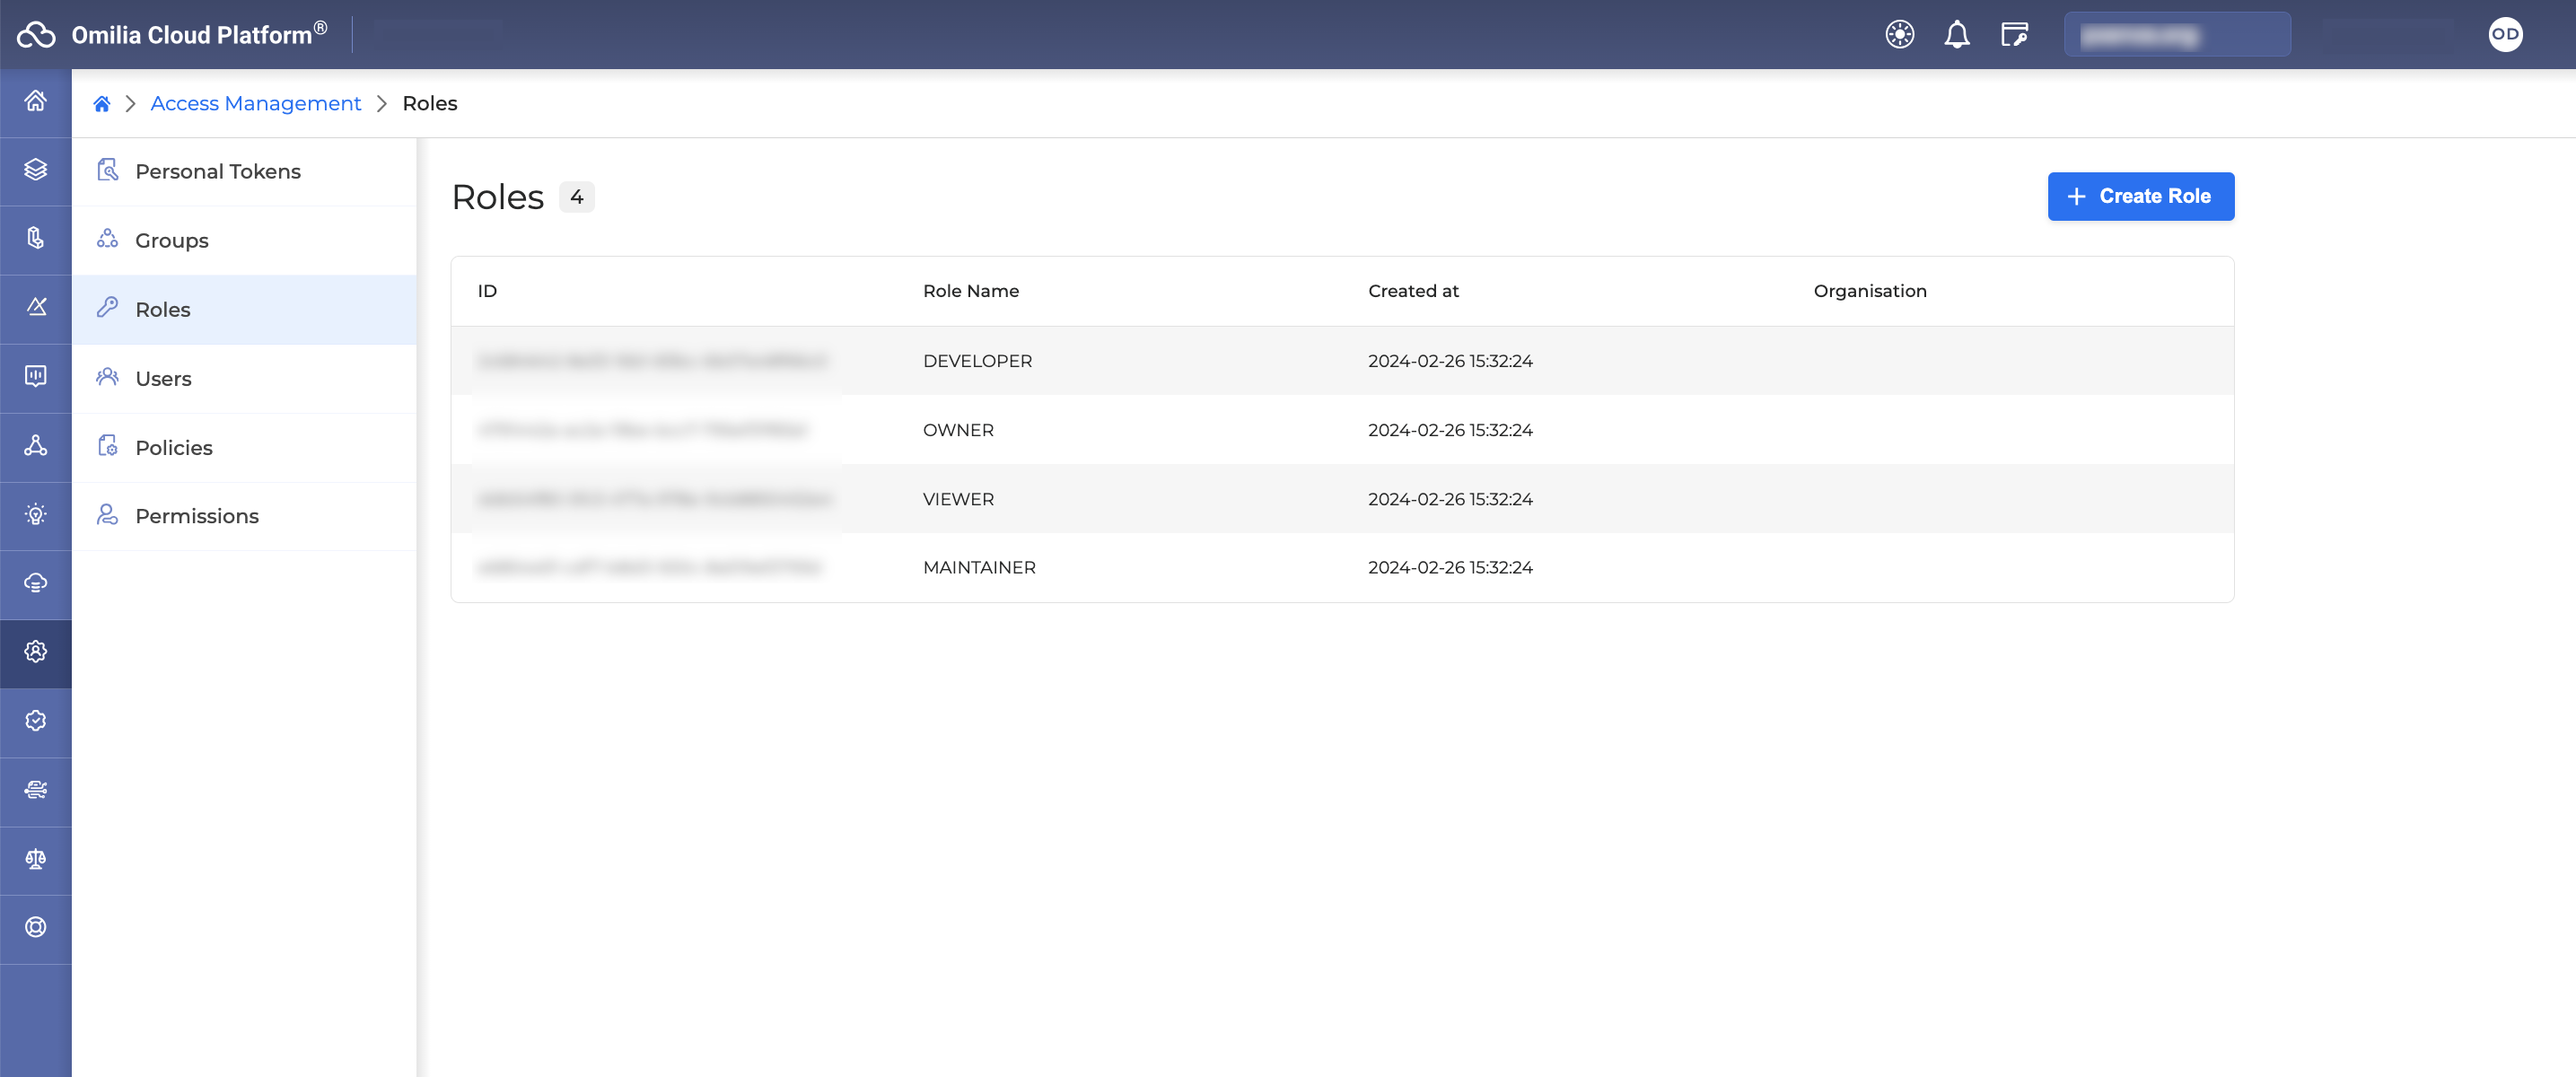
Roles
Within the Roles tab, organization admin users can view existing roles, including predefined ones. This tab also allows creating new custom roles.
The displayed fields for each role include:
-
ID: The unique role ID.
-
Role Name: The specific name of the role.
-
Created at: The exact date when the role was established.
Create role
To create a role, proceed as follows:
-
Click + Create Role. The following dialog box opens.
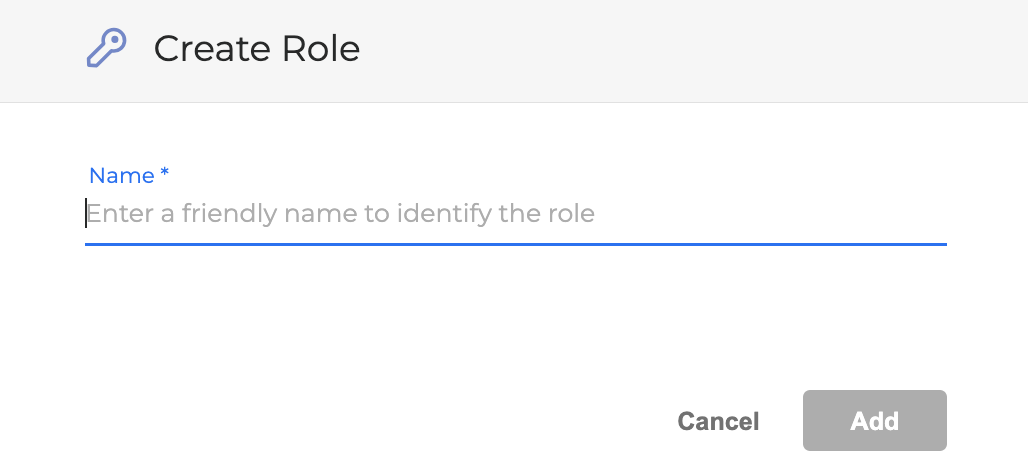
-
Enter a friendly name to identify the role.
-
Click Add. The created role will appear in the list of roles.
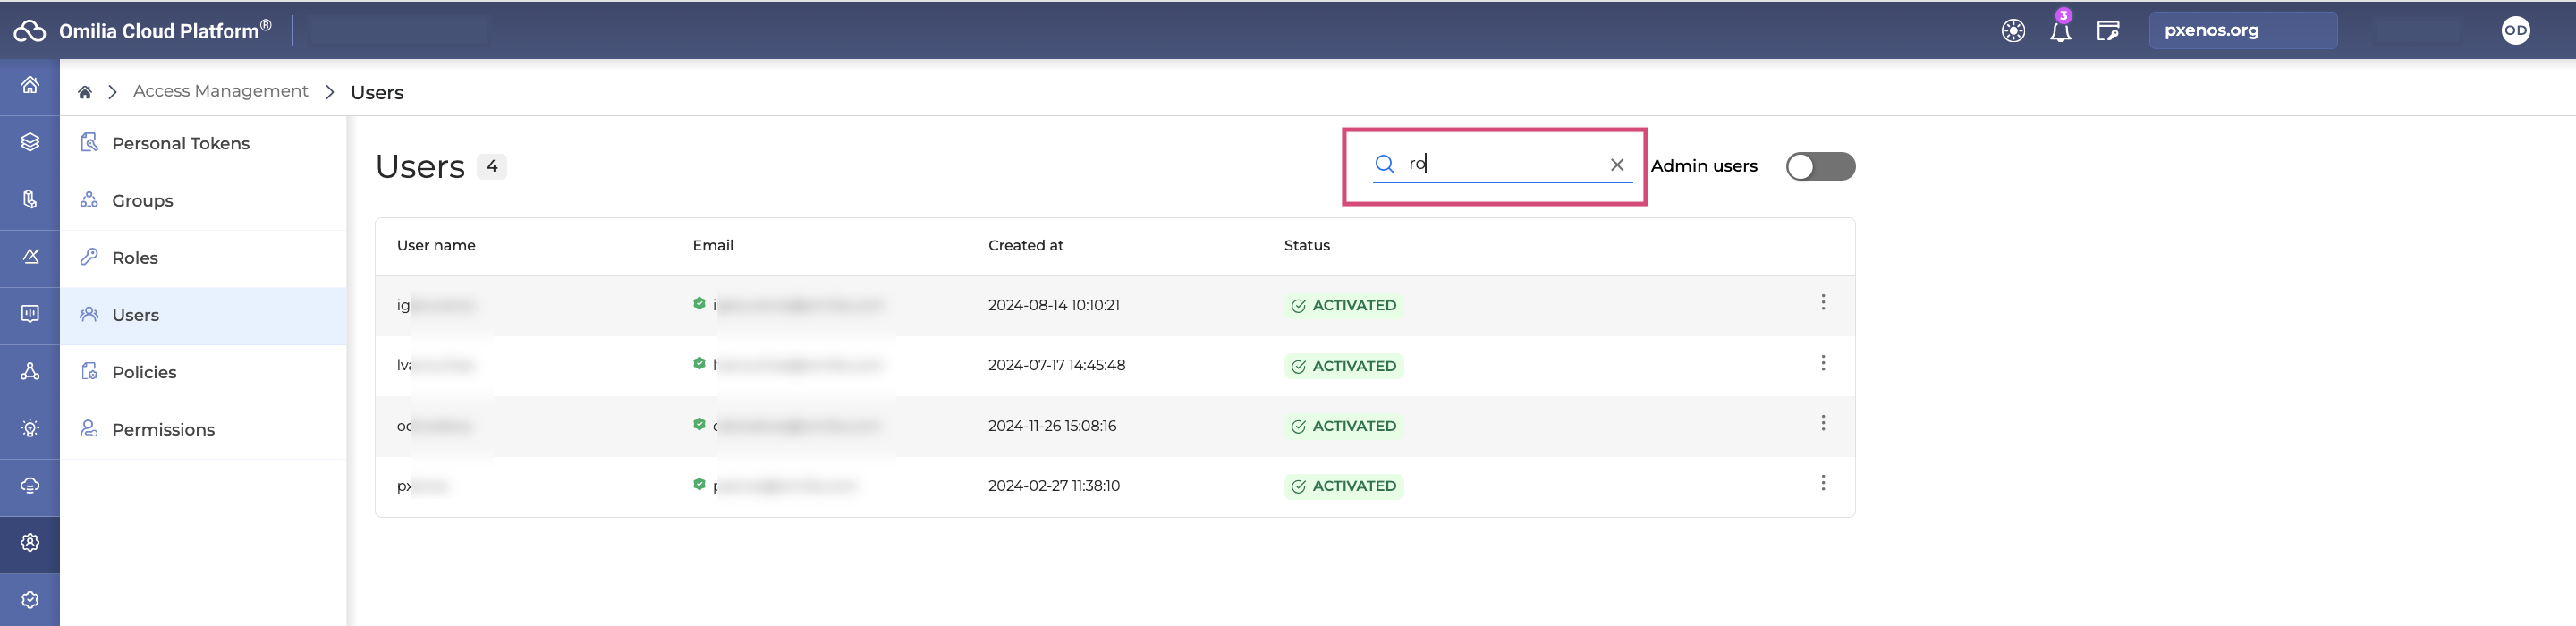
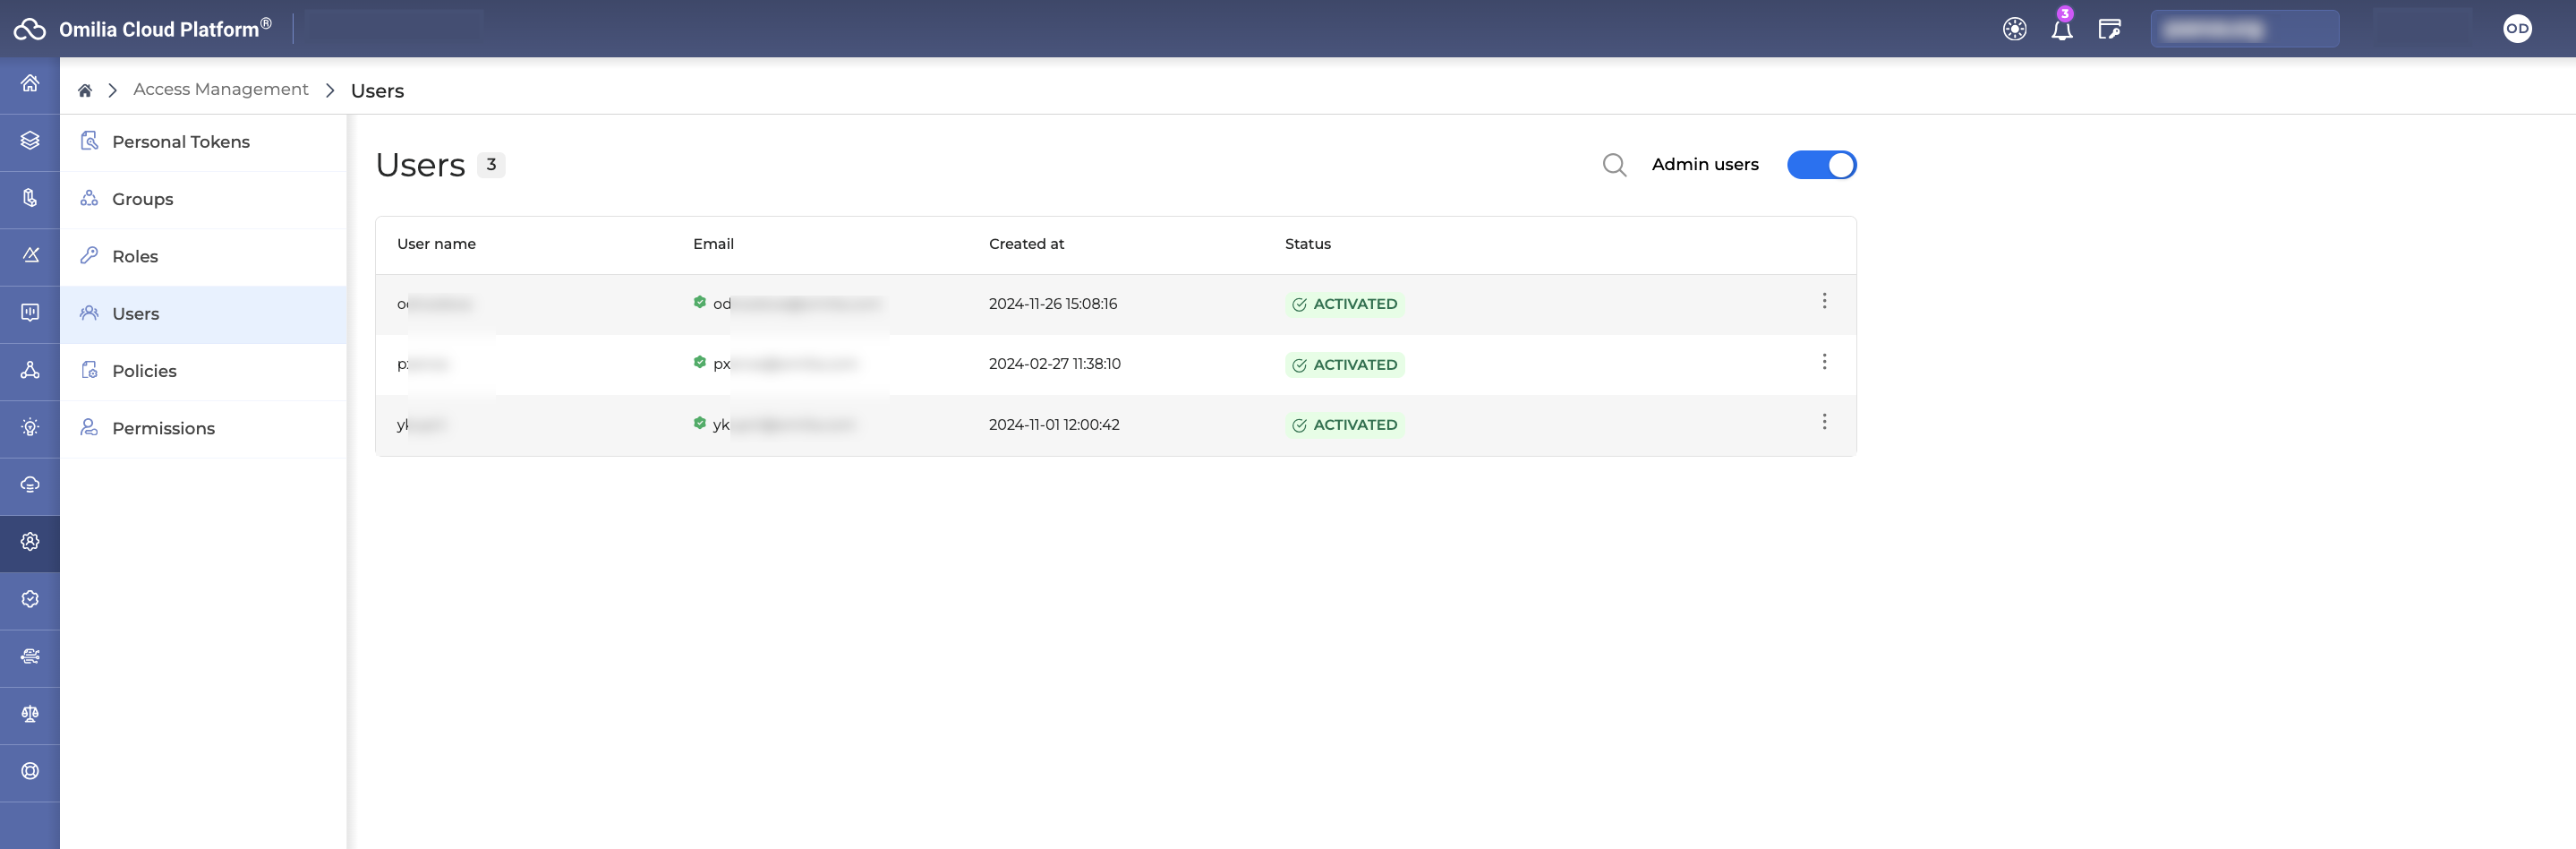
Users
In the Users tab, both organization’s admin and regular users can view an alphabetical list of your organization's users and their details, such as:
-
User Name: The name of the user.
-
Email: The email of the user.
-
Created at: The date of user account creation.
-
Status: The activation status of the user.
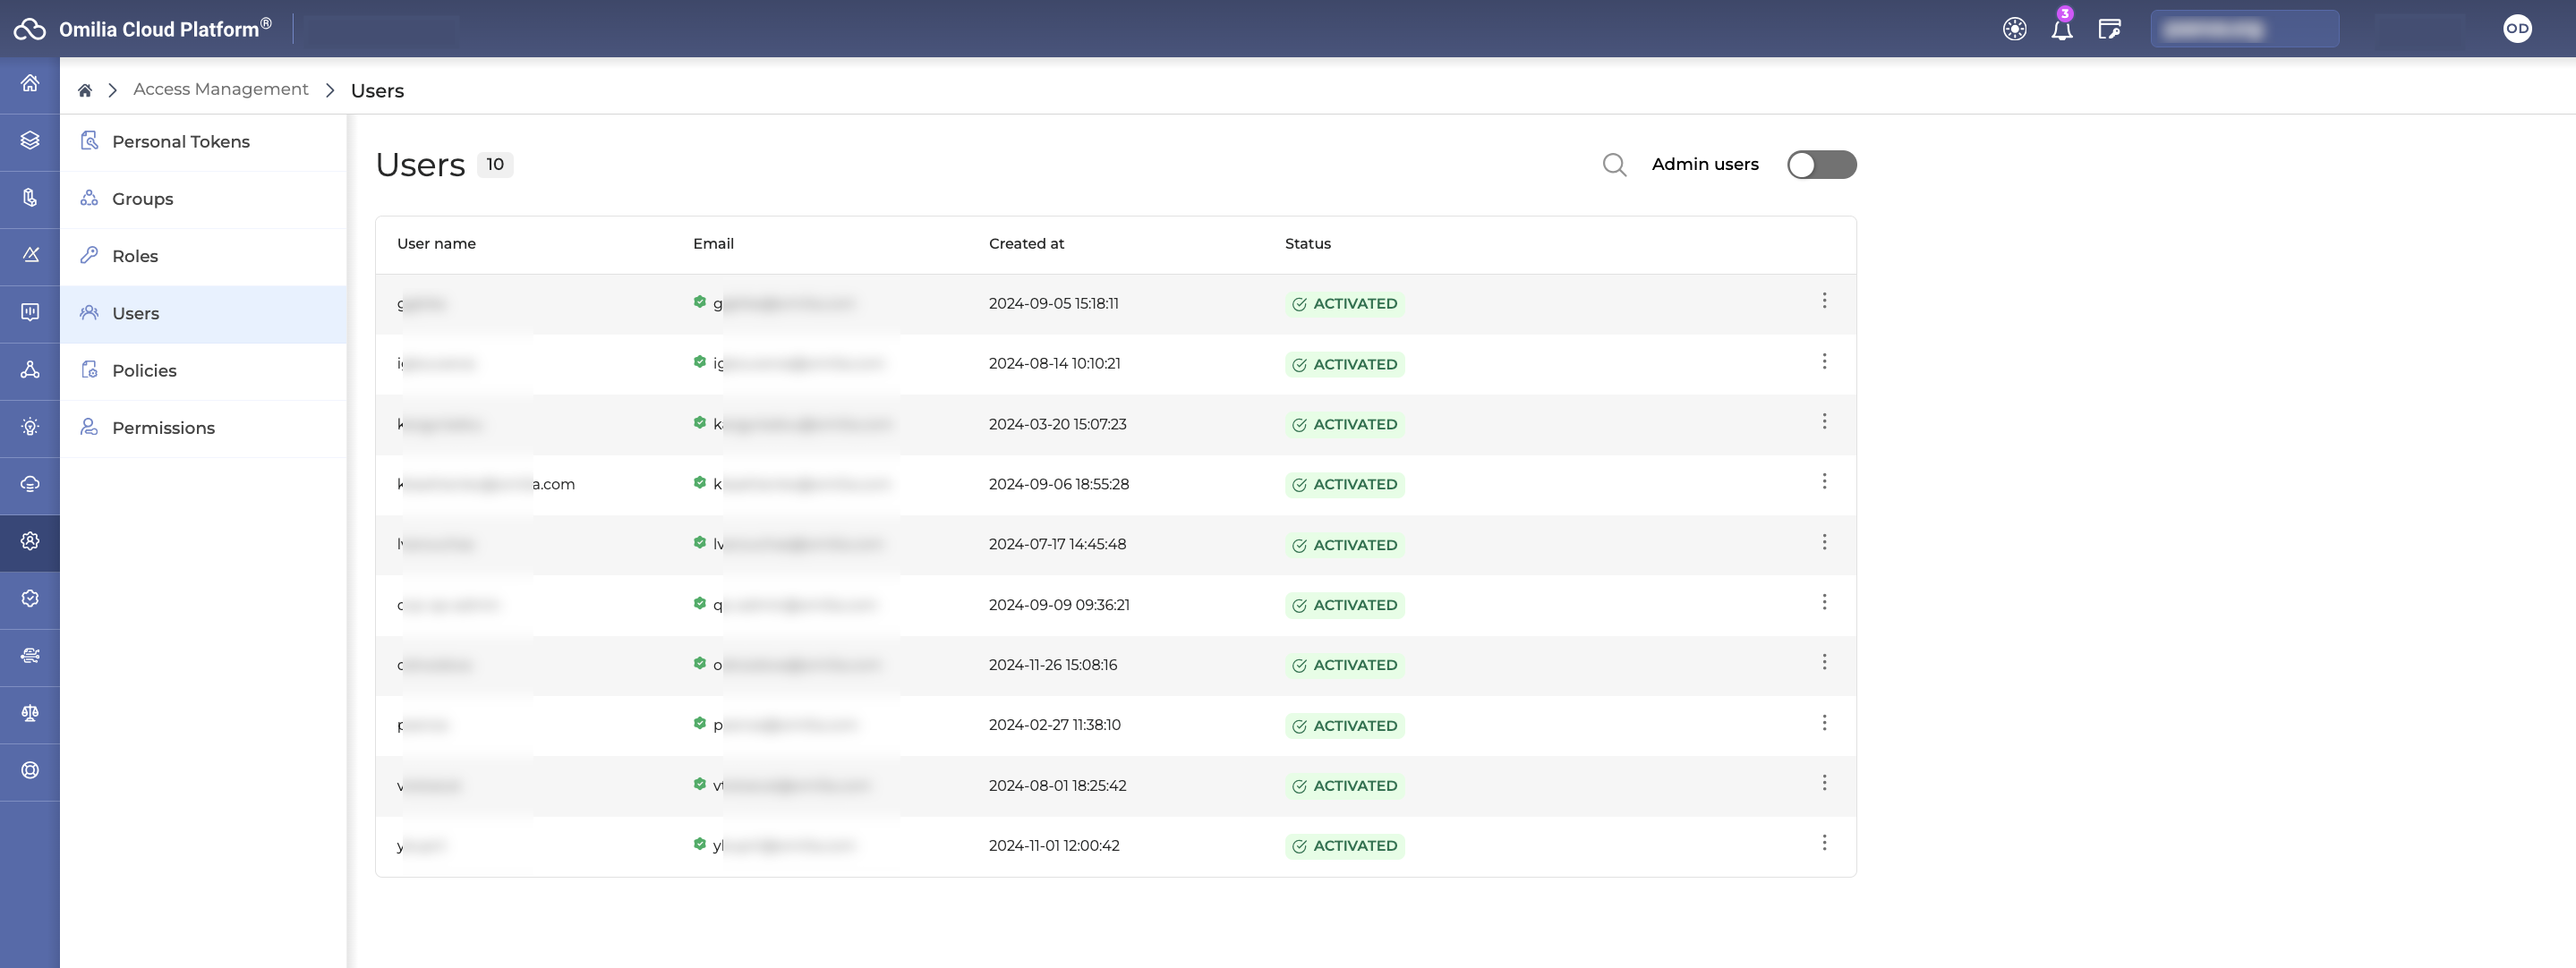
To find a specific user in a large list, use the search field to enter the user’s name or email. The search engine quickly filters results even with just a few letters.
To display only admin users, enable the Admin Users toggle as shown below. Note that the search functionality is not applicable when filtering by admin users.
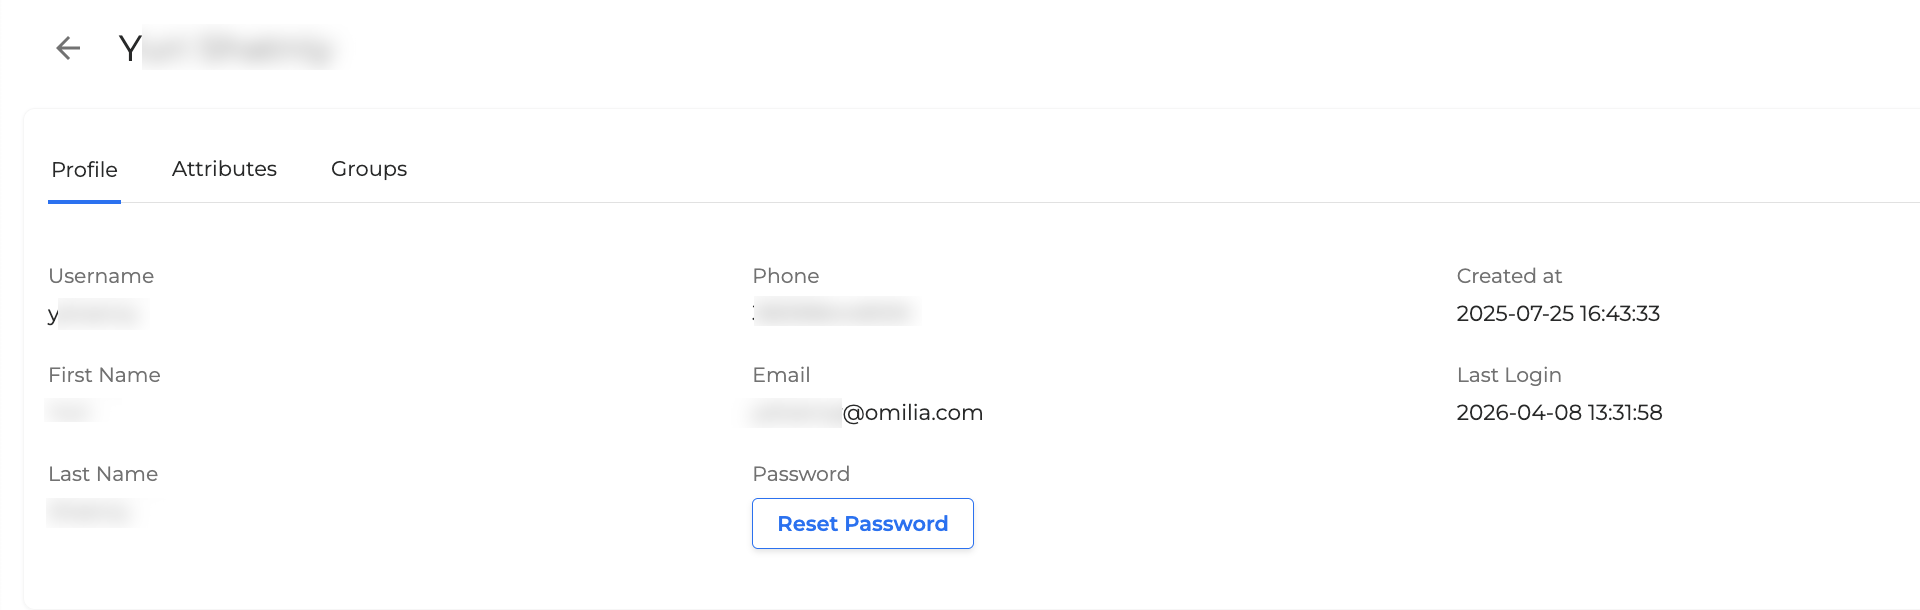
User details
To view the additional details of a user, click on a selected user. This view is only available for organization’s admin users.
The user’s information is split into three sub-tabs:
Profile
In the Profile sub-tab, view general user information: name, phone number, email, creation date, and last login date. You can also reset the user’s password here.
Attributes
In the Attributes sub-tab, the following user information is available:
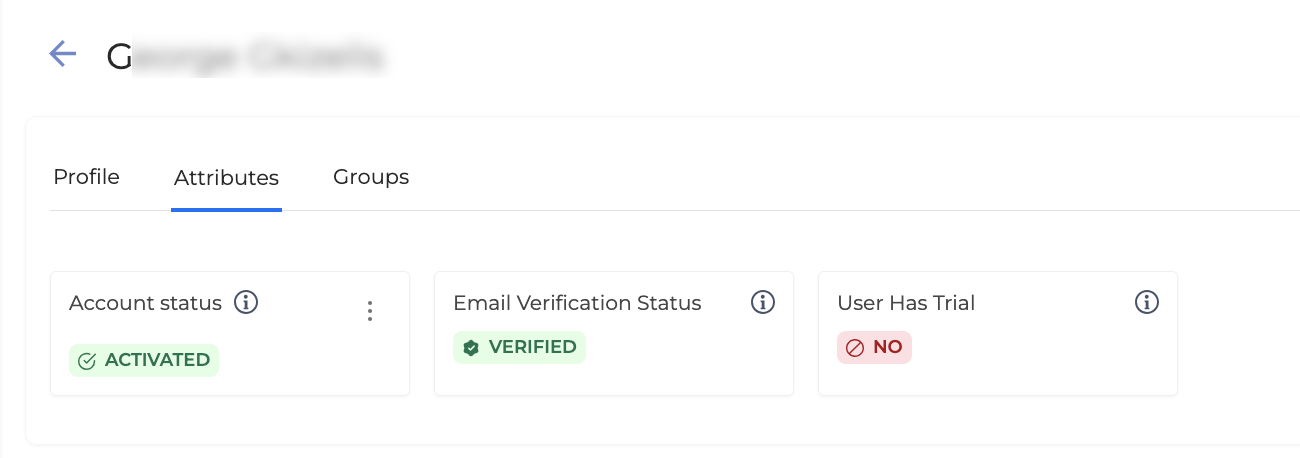
-
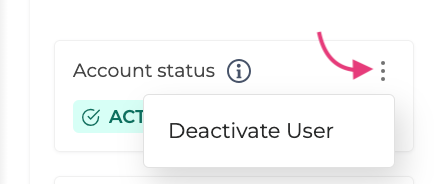
Account status: The status of the user activation profile: Activated or Deactivated. To activate or deactivate a user, click the Options menu button → Activate or Deactivate User respectively. For more information, refer to the Activate a user and Deactivate a user sections
-
Email Verification Status: The status of the user’s email verification: Verified or Unverified.
-
User Has Trial: If the user is using the trial license: Yes or No.
Groups
The Groups sub-tab displays the groups to which the user is assigned.
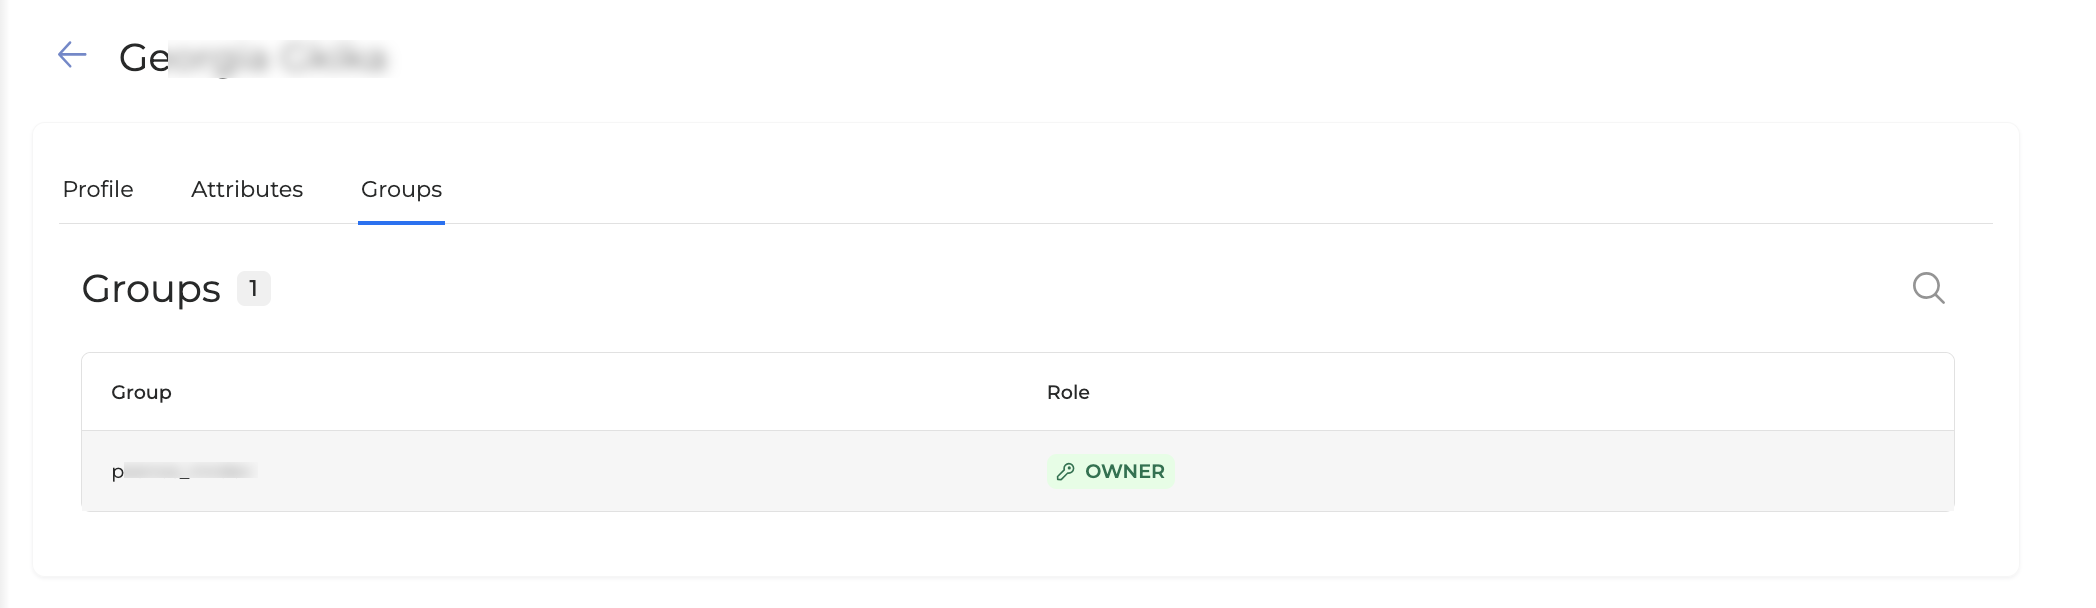
-
Group: Indicates the list of user's associated groups.
-
Role: Shows the user's role within the corresponding group. You can read more about Roles mapping.
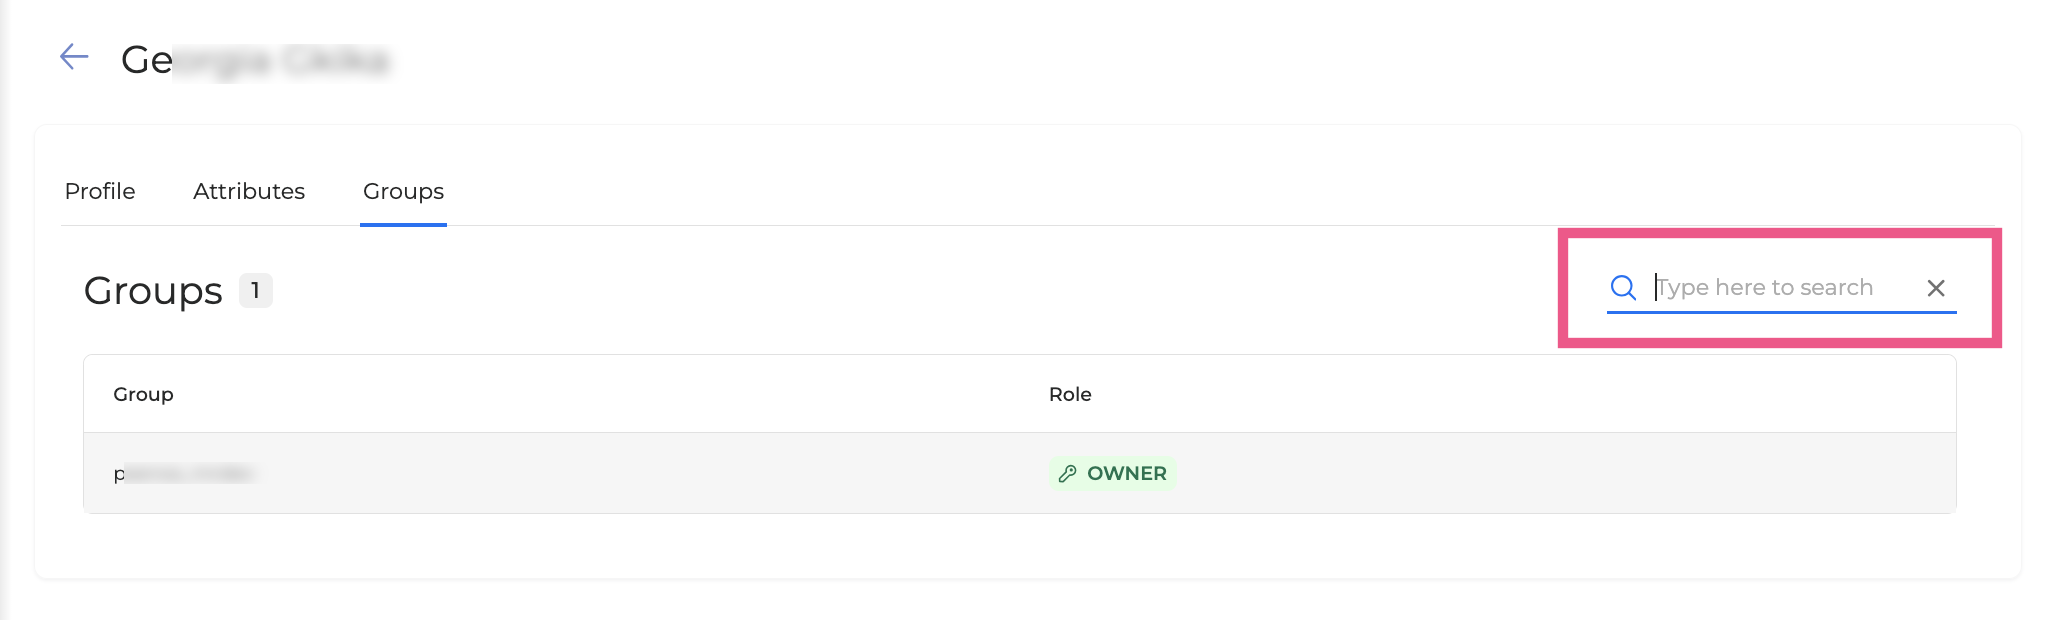
If the list of groups is extensive, you can utilize the search filter to locate the required group.
To navigate back to the user list, click the Arrow icon located next to the user's name.
Reset user’s password
To reset a user’s password, proceed as follows:
-
Click the Context menu next to the user and select Reset Password.
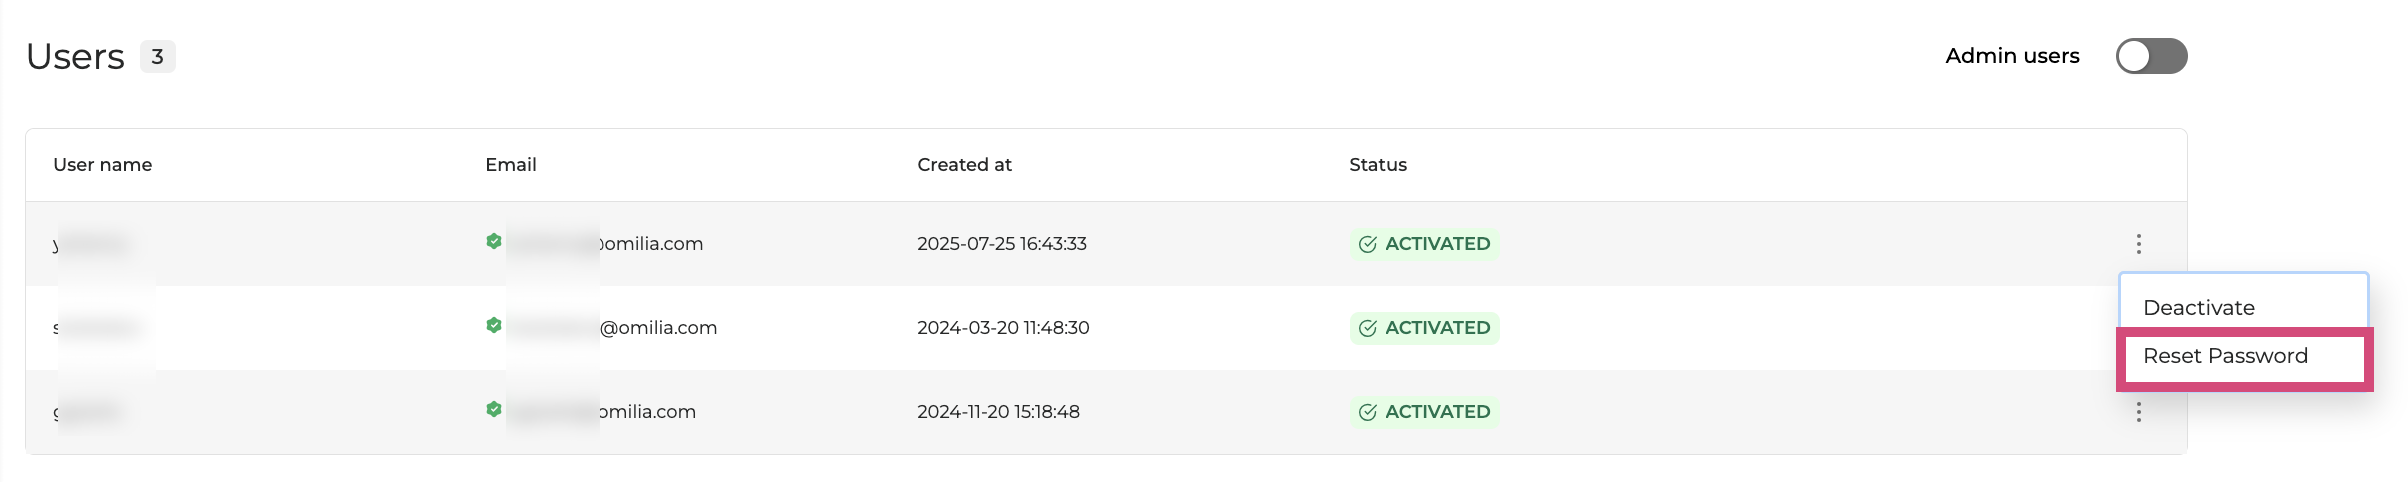
-
In the pop-up window, click Reset to confirm the action.

-
The system will reset the user’s password and send an email containing the reset link.
Deactivate a user
You can deactivate users in your organization. Once deactivated, users are removed and cannot log in to OCP®. The user can be re-activated by an organization's admin, or by contacting the Omilia Service Desk.
However, you cannot fully deactivate a user belonging to multiple organizations; you can only remove them from your organization. They will retain access to OCP®. An organization's admin can re-add the user to the organization and re-activate them at any time.
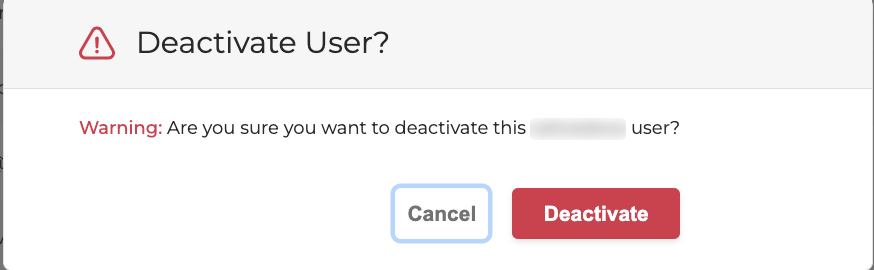
To deactivate a user, follow these steps below:
-
Click the Context menu next to the user and select Deactivate.
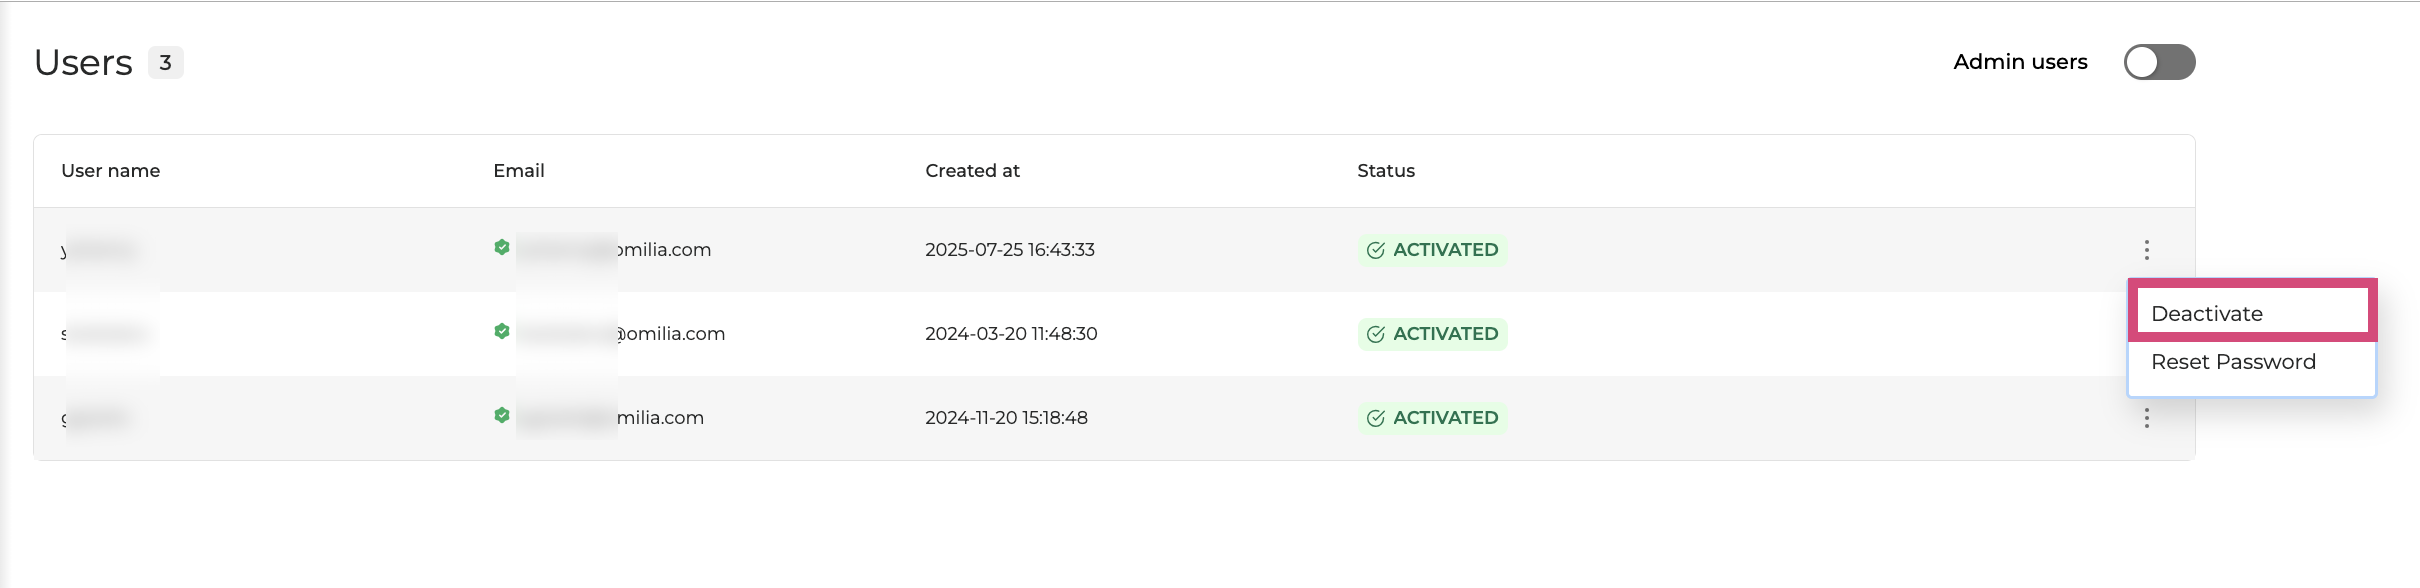
-
In the pop-up window, click Deactivate to confirm the action. The user will be deactivated.
Re-activate a user
You may need to re-activate a deactivated user in the following situations:
-
The user's account expired due to inactivity (no login for more than 90 days).
-
The user was deactivated manually by an organization’s admin.
To re-activate a deactivated user, follow the steps:
-
Click the Context menu next to the user and select Activate.
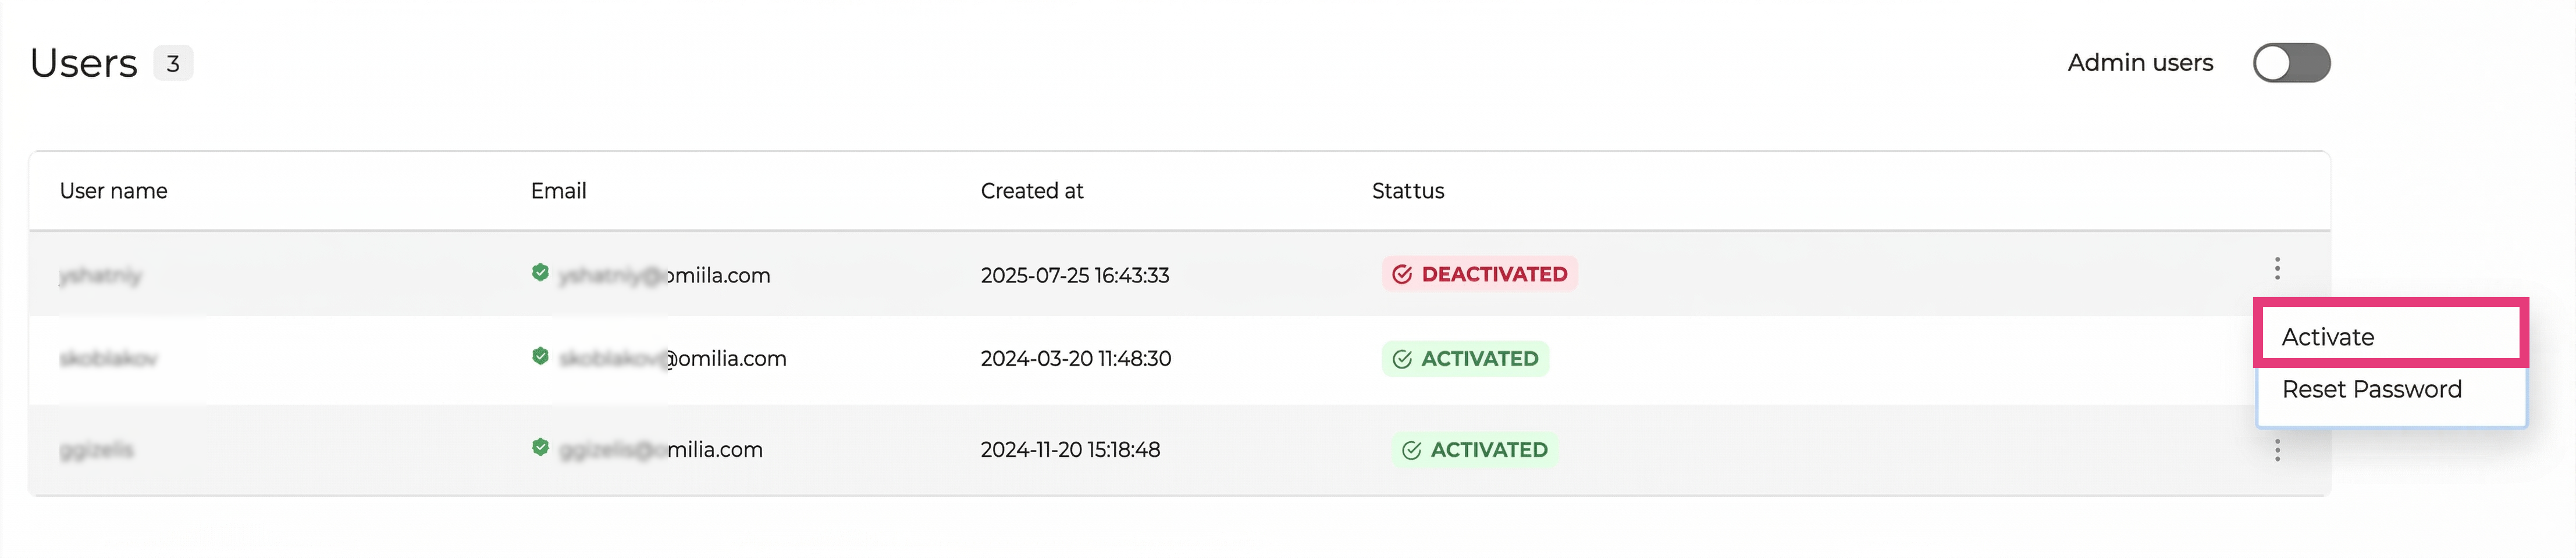
-
The user will be immediately re-activated and can log in again.
Invite a user via email
Public registration can be disabled across environments, preventing users from self-registering. If public registration is disablend, an organization admin can create an account for a user, who then receives a time-limited email with a link to set their password. After setting the password, the user is logged in automatically.
The invitation link expires after 12 hours. If the link expires before the user completes registration, you will need to send a new invitation.
Send an invitation
To invite a new user, proceed as follows:
-
In the OCP Users tab, click the Invite new user button.

-
In the dialog box, complete the fields as described below. Mandatory fields are marked with an asterisk.
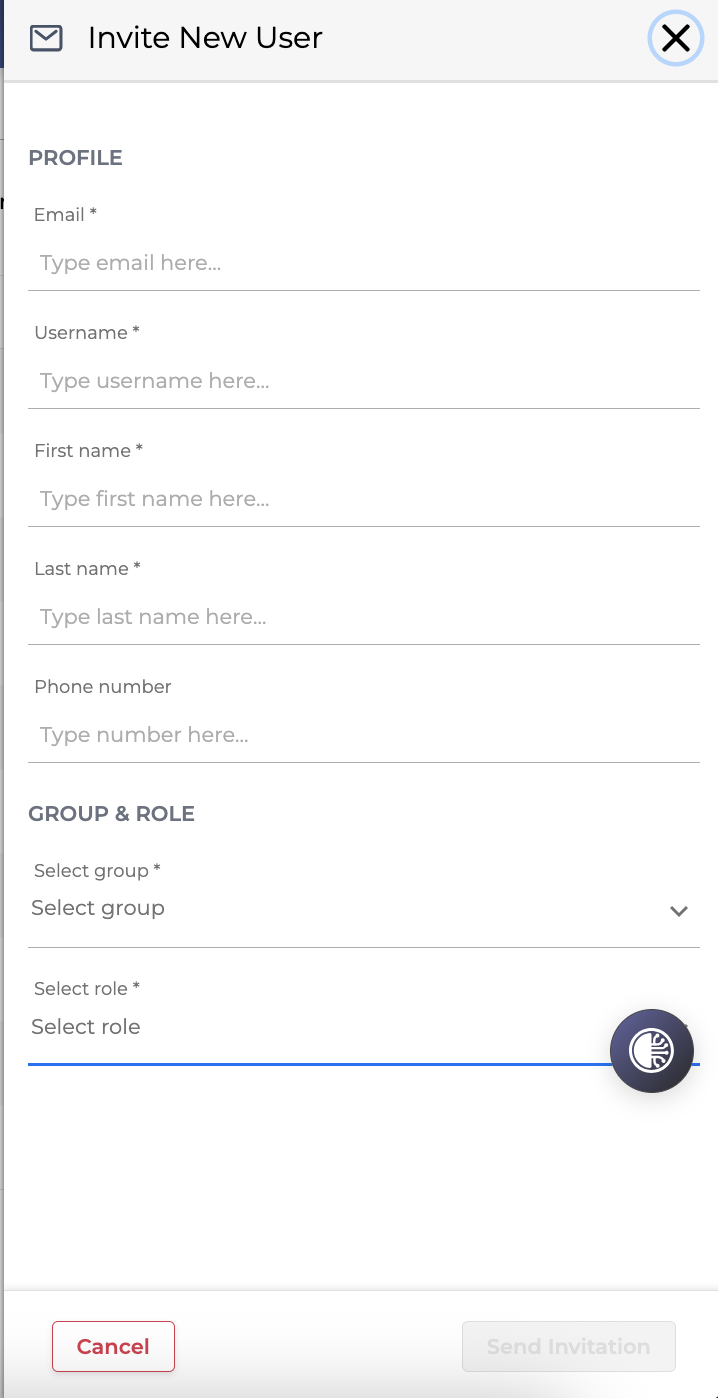
-
Email*: User’s email address.
-
Username*: User’s username.
-
First name*: User’s first name.
-
Last name*: User’s last name.
-
Phone number: User’s phone number.
-
Select group*: Assign user to a group.
-
Select role*: Assign a role to the user.
-
Click Send invitation. The user will receive an email containing a link to set their password.
Once the user clicks the link, they are prompted to create a password. After completing this step, they are automatically logged in.
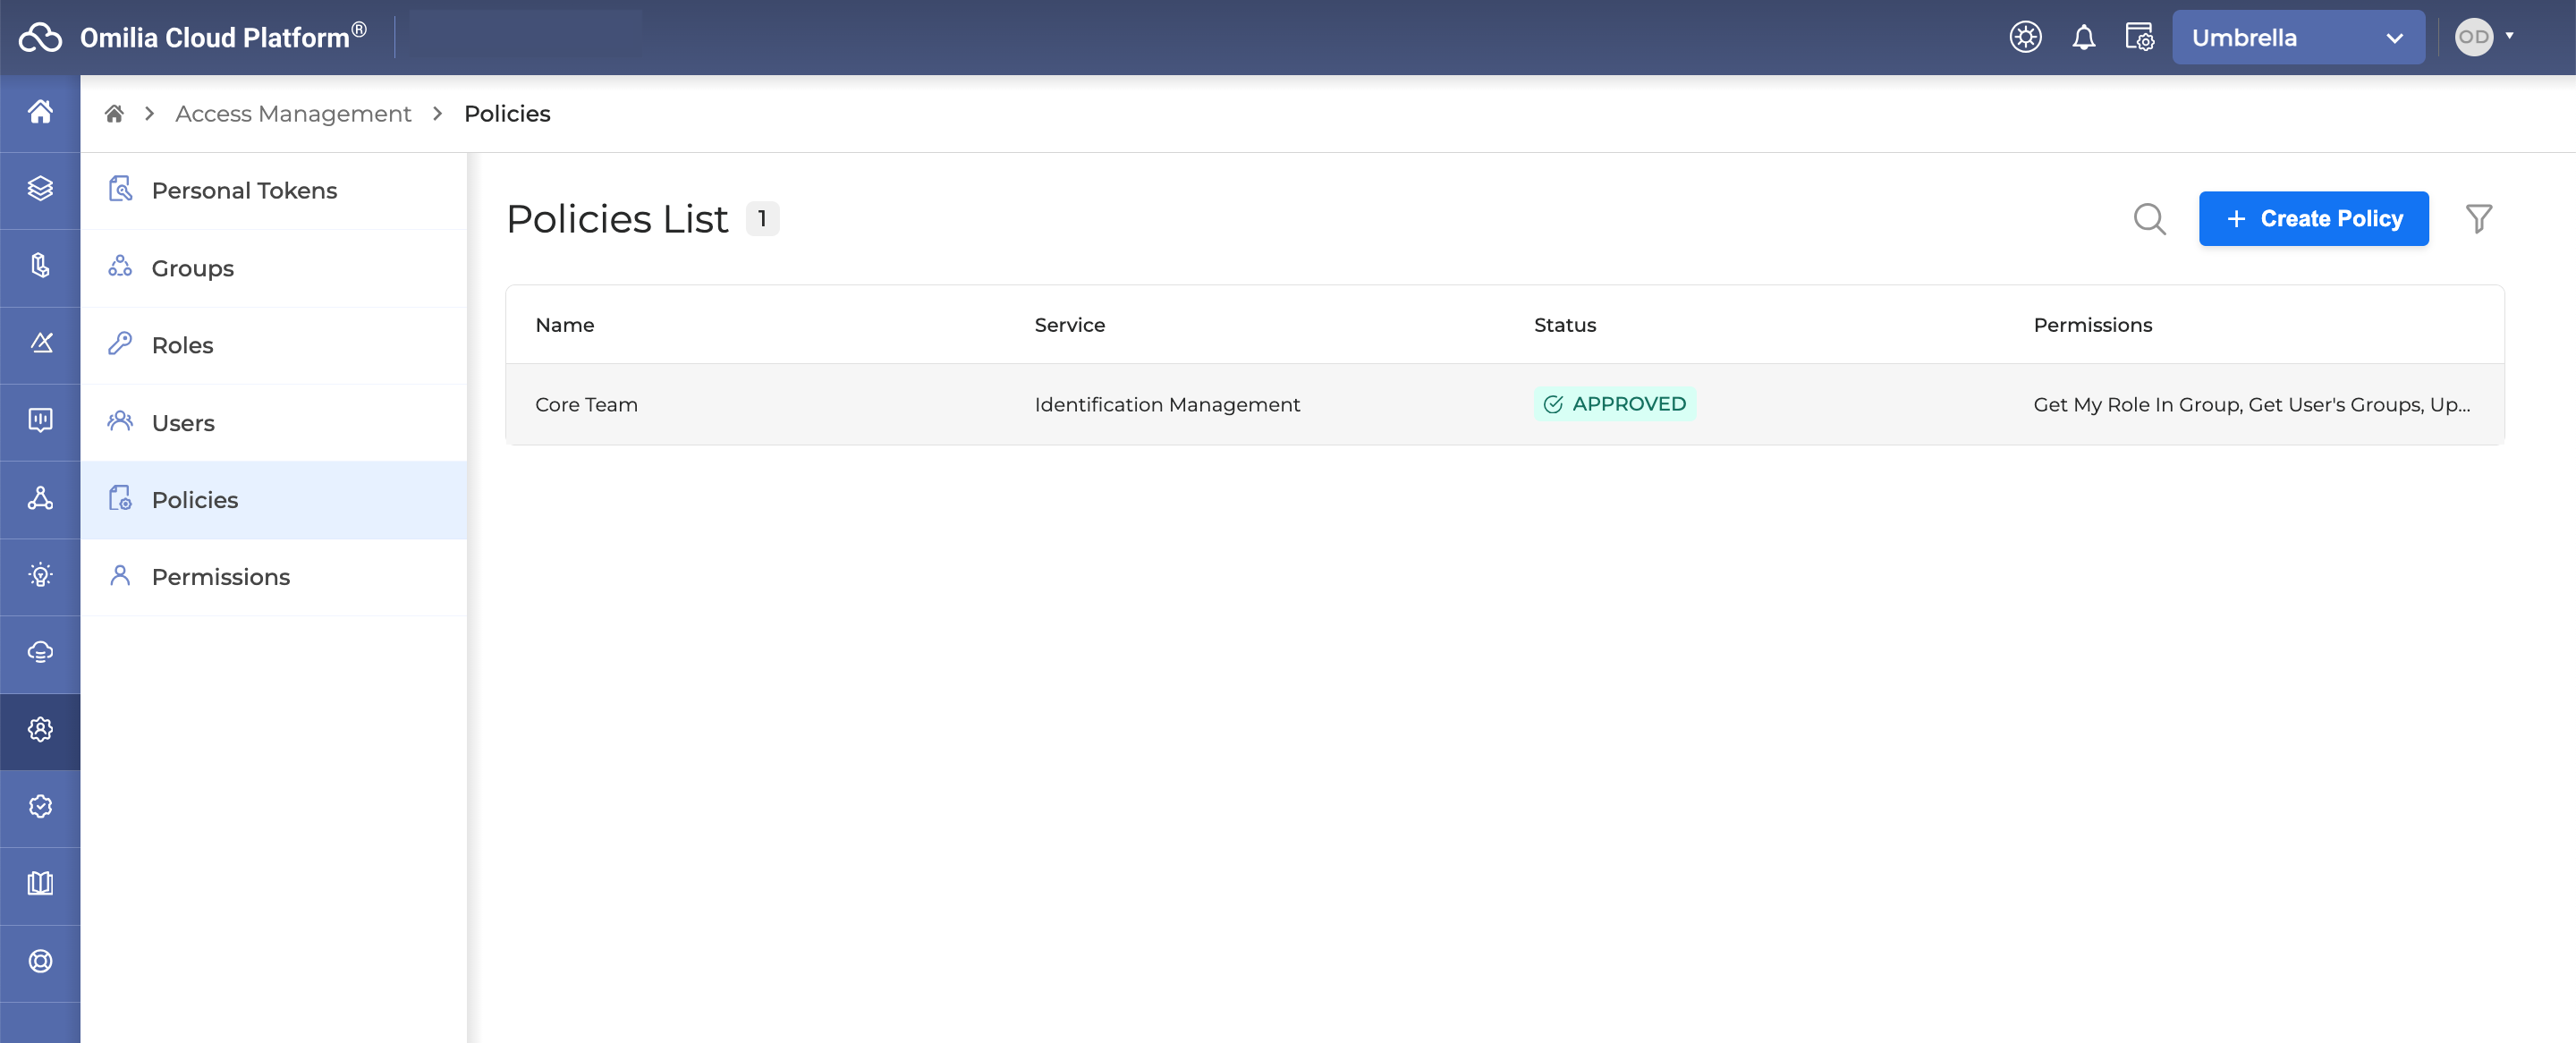
Policies
A policy is a set of permissions that effectively determine the level of access for users or roles within the organization for a more secure and well-managed working environment. In the Policies tab, you can create custom roles to control the level of accessibility and such tasks as who can view, edit, or delete certain data.
Create a policy
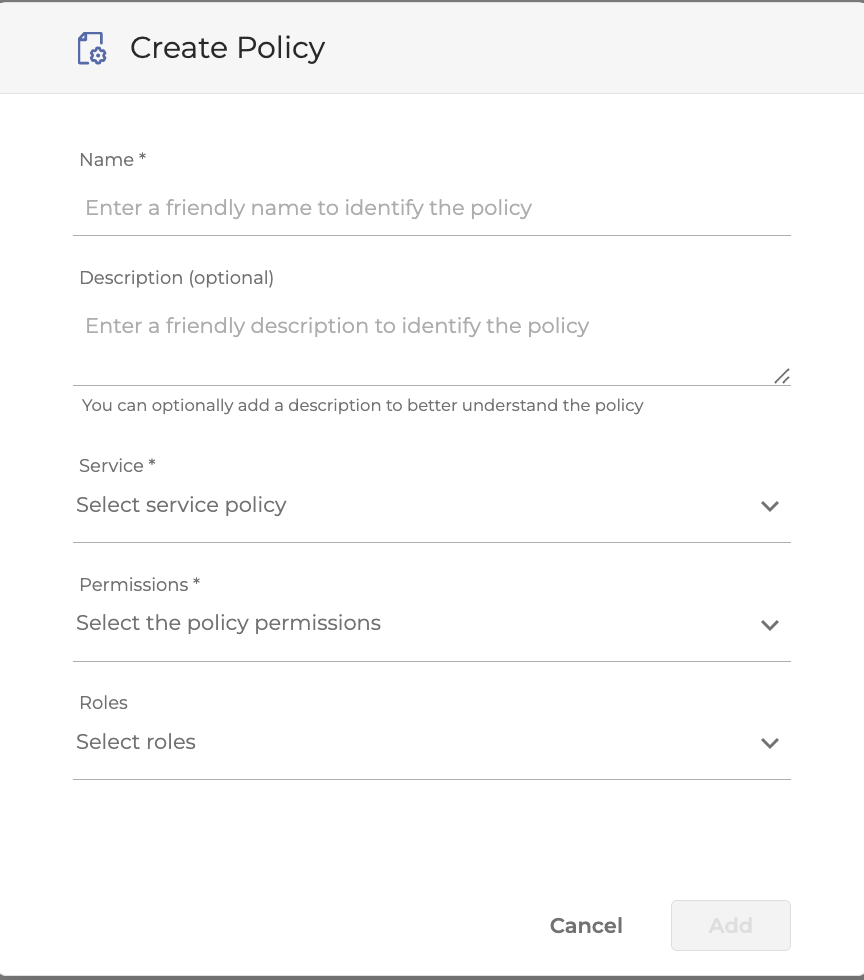
To create a policy, proceed as follows:
-
Click the + Create Policy button. The dialog box opens.
-
Fill in the required fields:
-
Name: Name for the policy.
-
Description: Optional description of the policy for a better understanding of what it does.
-
Service: Click on the drop-down to select the service to which the policy will be applied.
-
Permissions: Select permissions for the policy from the drop-down list. You can only select the permissions that belong to the same service as the policy you are creating.
-
Roles: Select a role to attach a policy to. You can attach a policy to multiple roles (Developer, Owner, Viewer, Maintainer, Custom role).
For higher-level roles requiring lower-level roles' permissions, these permissions must be explicitly linked to all roles. For instance, if all roles need access to the list of apps, each role must be featured. It is hence beneficial to establish a role-permission mapping in advance.
-
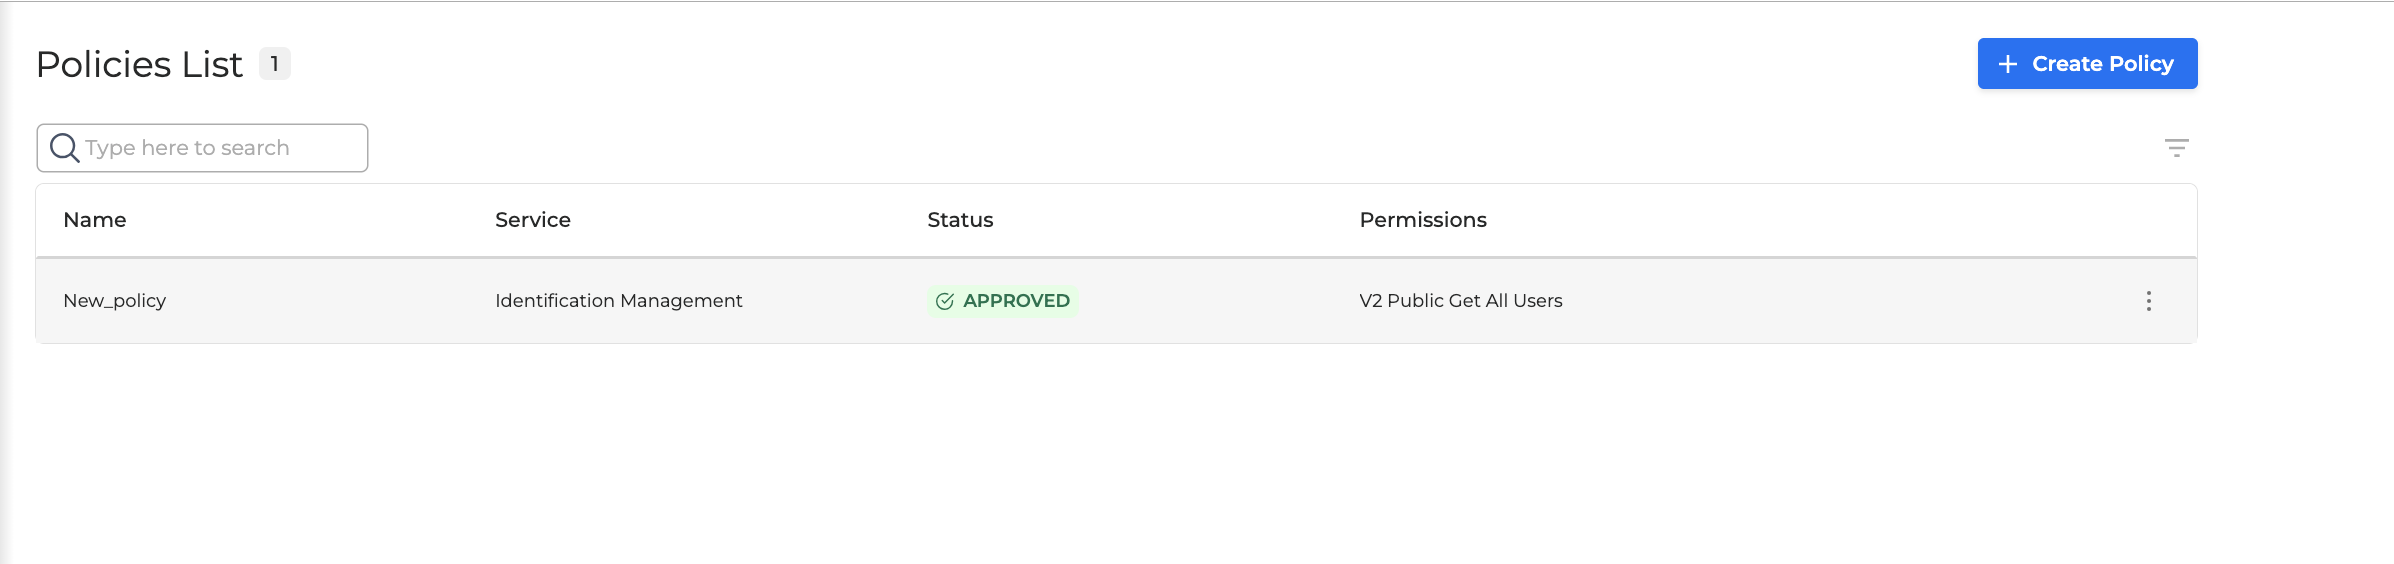
Click Add. The policy will be created and listed.
View a policy
To view a policy's details, follow these steps:
-
Click the Context menu and select View.
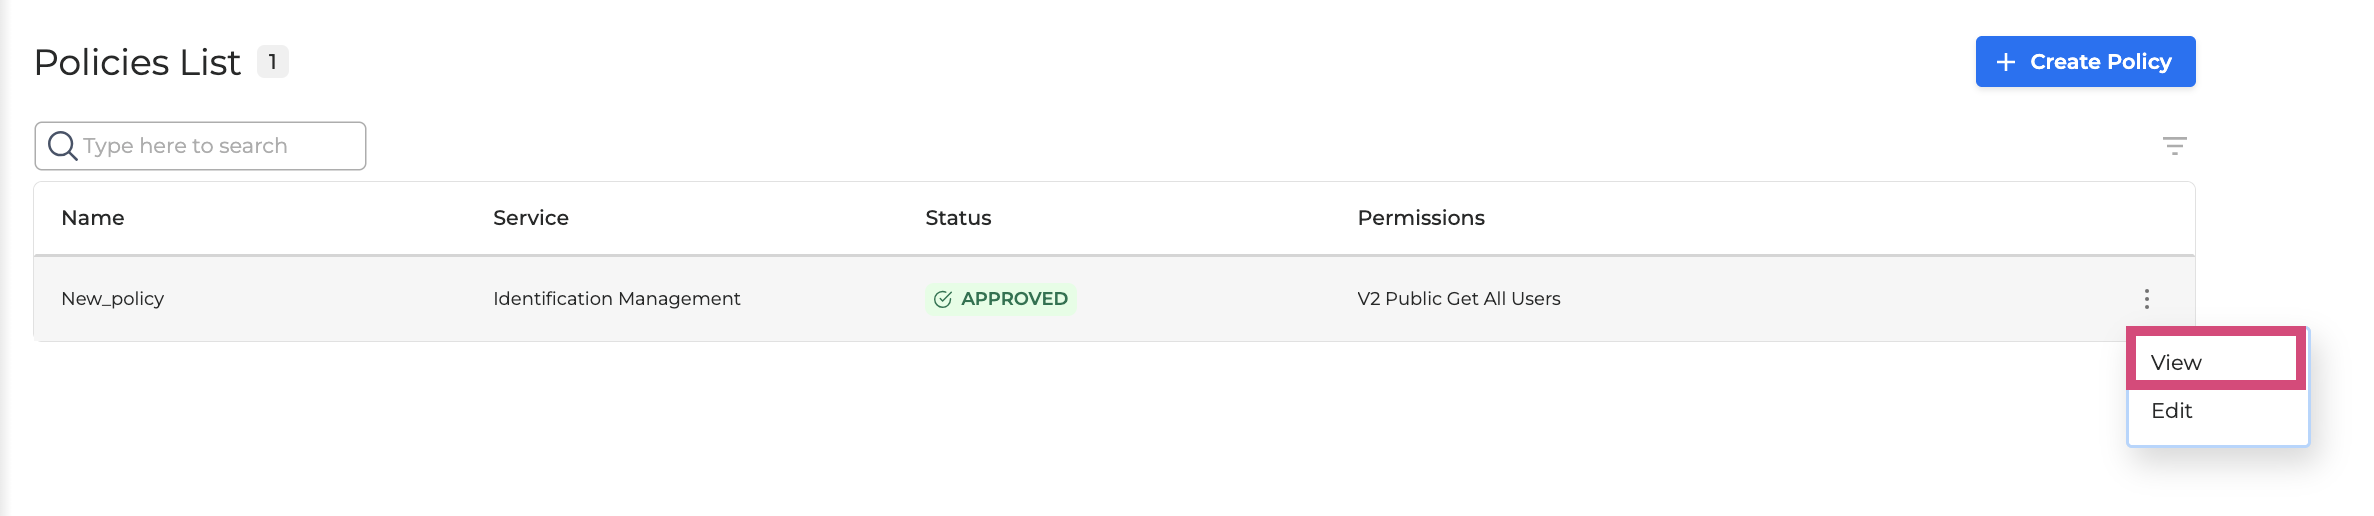
-
The policy details appear in a pop-up window.
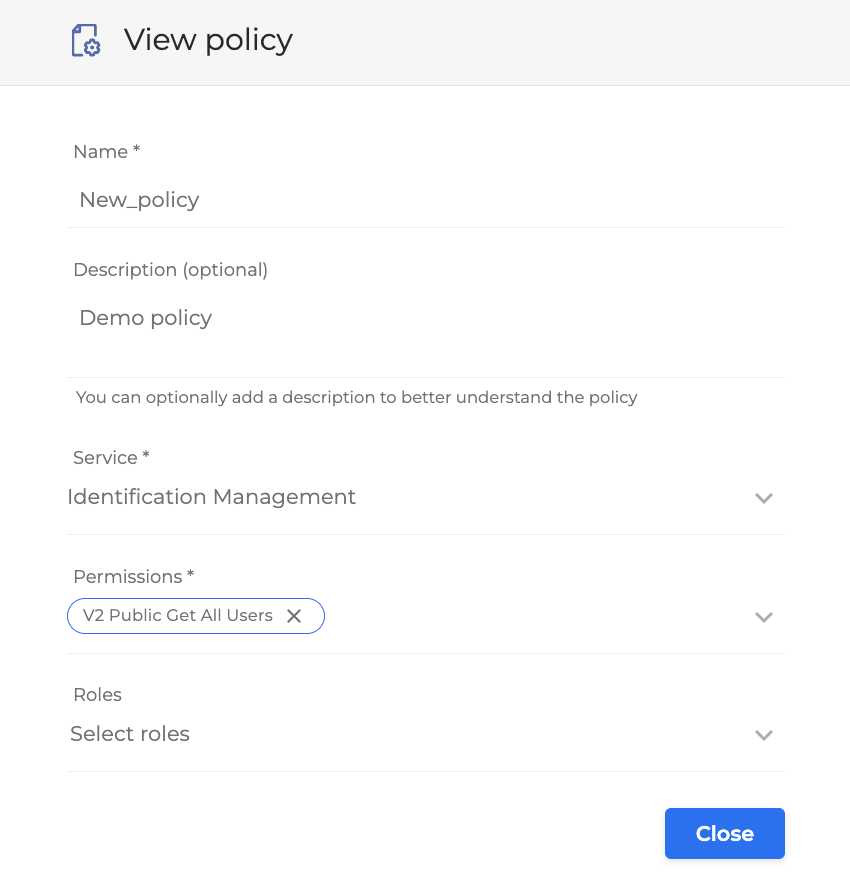
-
Click Close to return to the policies list.
Edit a policy
To edit a policy, follow these steps:
-
Click the Context menu, then select Edit.
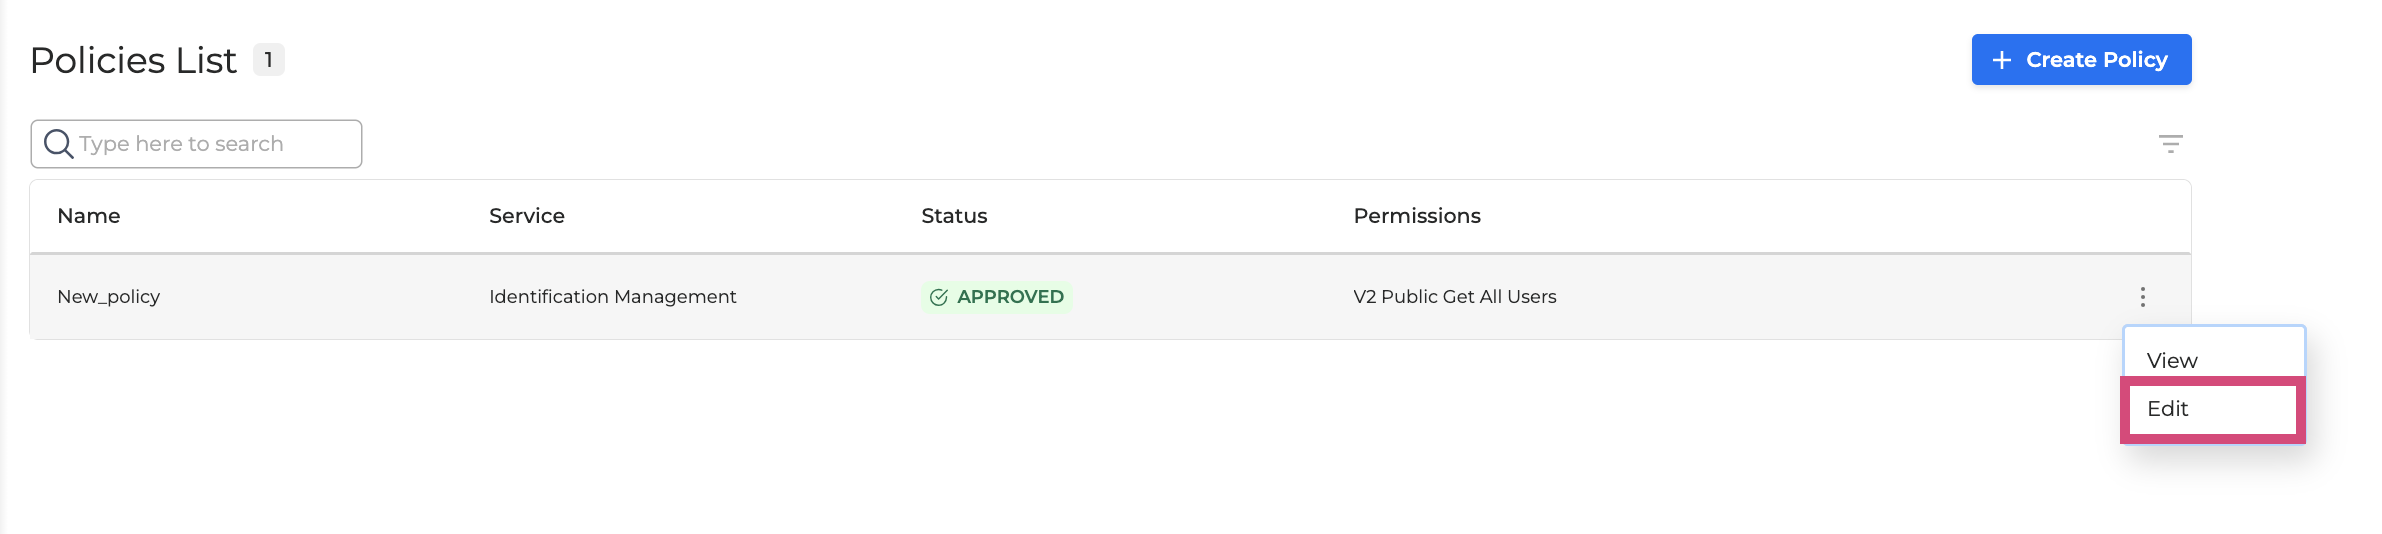
-
In the pop-up window, edit the necessary fields. All fields are editable except the Service field.
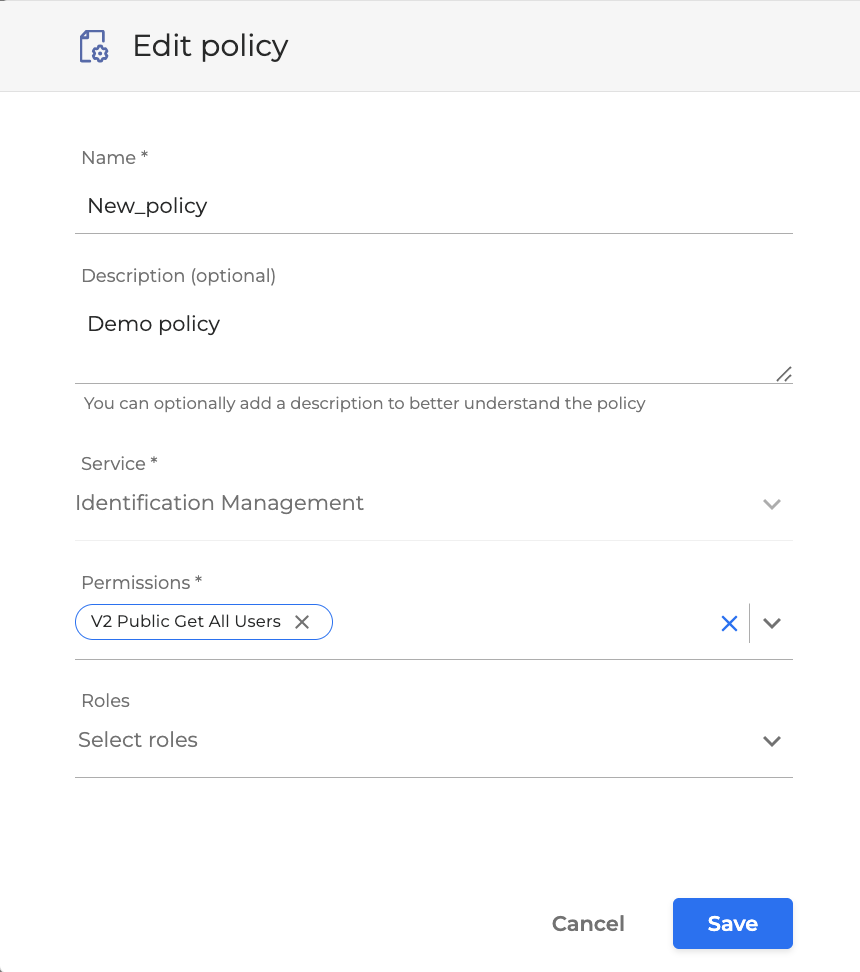
-
Click Save when finished.