A Condition is a building block that allows you to guide the conversation depending on the caller’s answer, or based on either an Intelli or a WebService miniApp response. You can configure it to cover multiple conversation scenarios.
For example, there is a miniApp in the Dialog Application that asks the caller: “Do you want to know more about our service?” The caller may answer yes or no. The Condition building block allows you to drive the conversation based on the caller’s answer by creating multiple scenarios.
The symbols used in Condition scenarios and their meanings are:
-
The
*symbol means any possible value except an empty one can be used. -
The
!=*symbol means not equal to any value (undefined).
Create Condition
Follow these steps to create a Condition:
-
In the Dialog Control panel on the left, drag and drop the Condition building block onto the canvas, and connect it with the miniApp, just like you do with any other building block.
-
Select a miniApp or create one by clicking the Manage button and dragging and dropping it onto the canvas. This
-
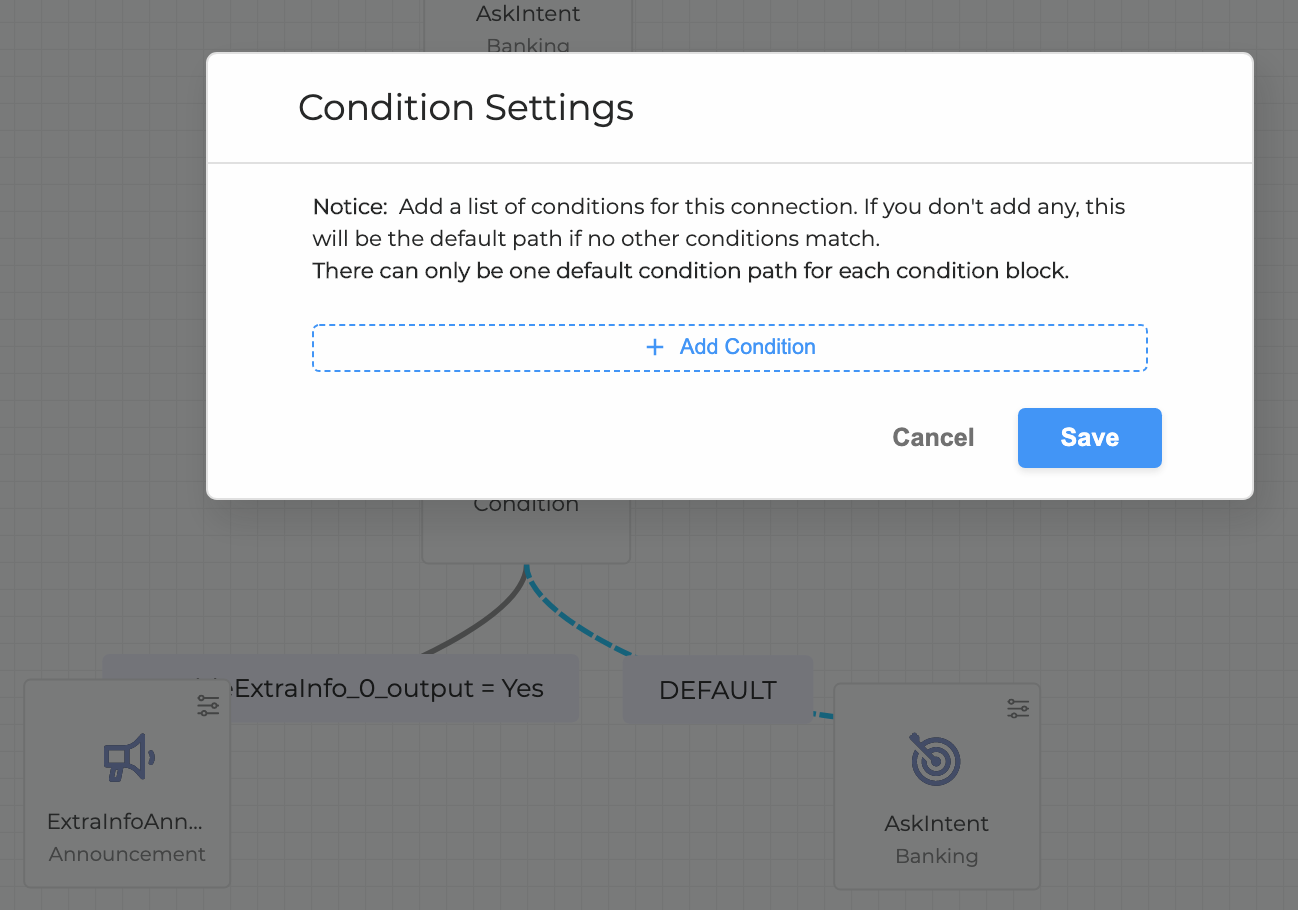
Drag the connectivity node from the Condition block to the miniApp. The condition settings window will open.
-
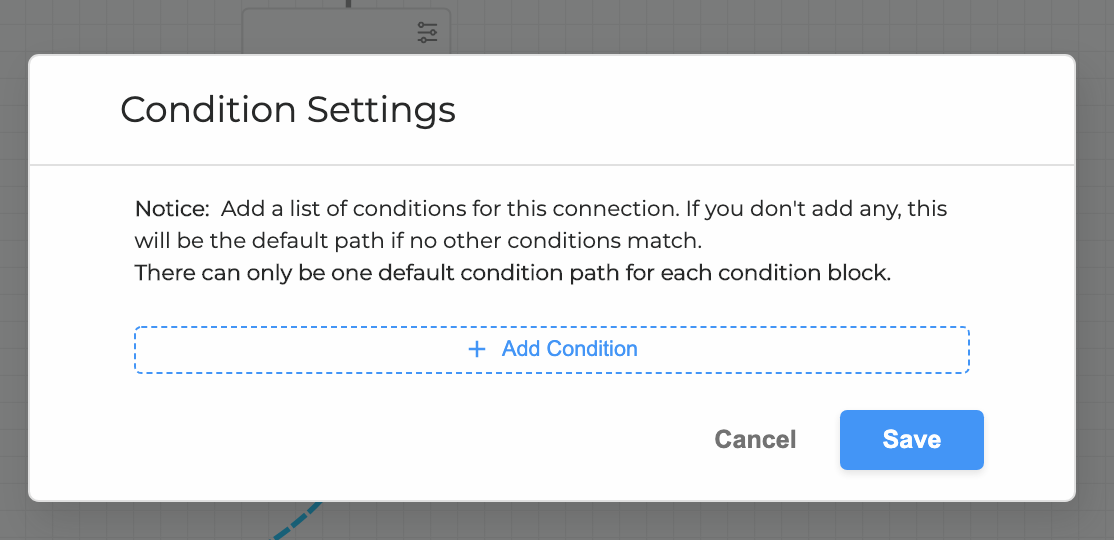
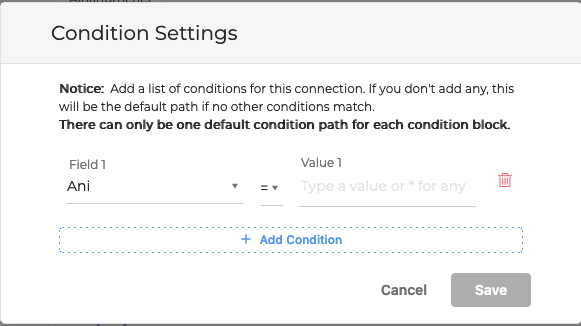
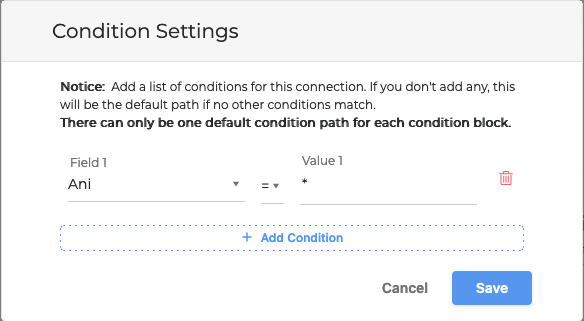
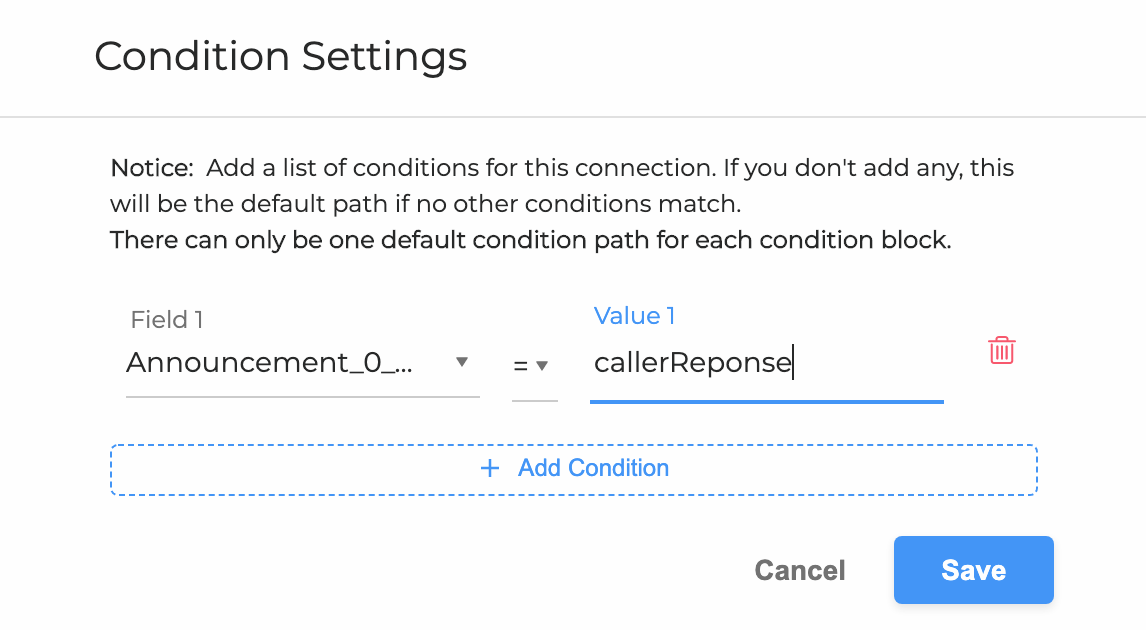
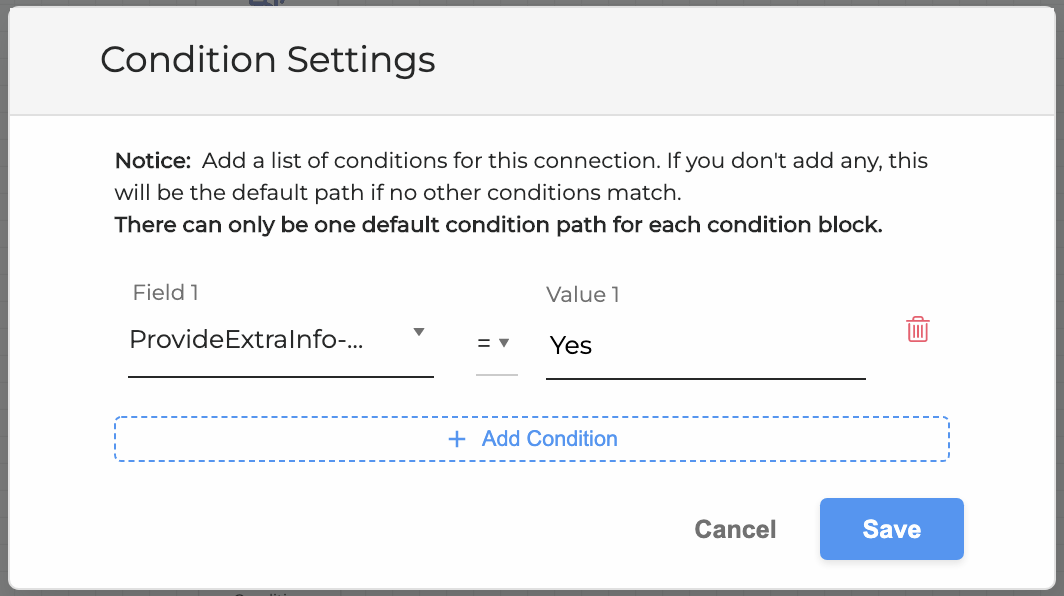
Click + Add Condition.
-
Select the Field 1 value from the dropdown menu. It contains the values of the Output fields of the previous miniApps.
-
Provide the Value 1. This is the name of the field that contains the value of the caller’s answer in the miniApp.
You can also enter*in the Value 1 field to select any possible value except an empty one. When*is used, the predefined condition scenario can match any non-empty value.
-
Click Save when finished.
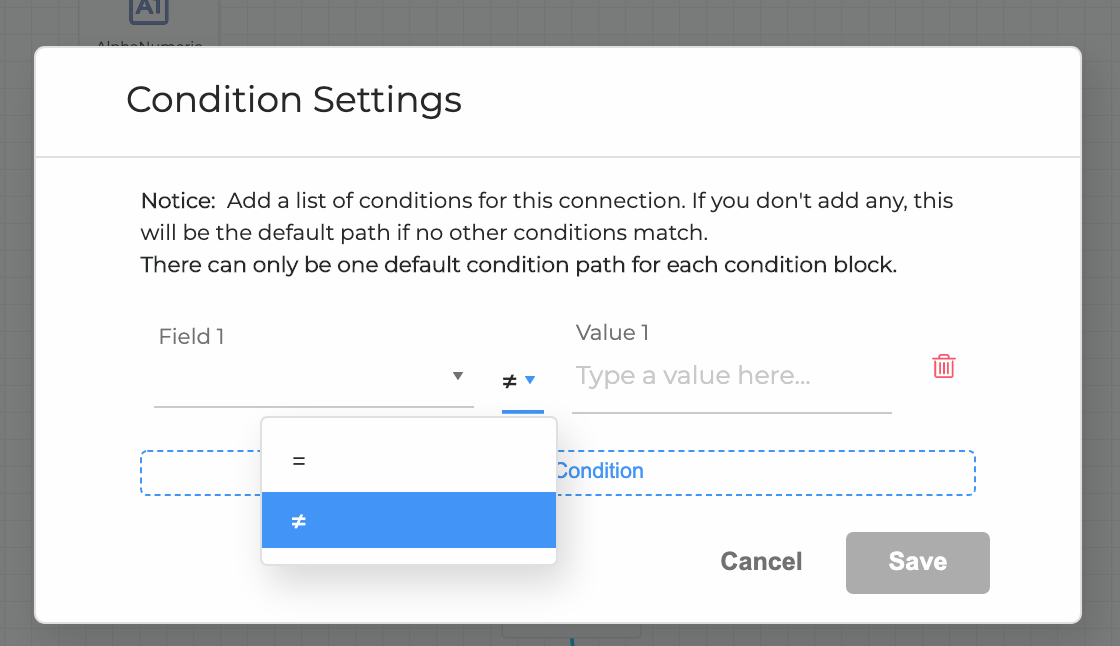
You can also create a scenario where the value of Field 1 is not equal to the value of Value 1.
To do this, click the equals symbol in the Condition Settings area and select the inequality sign.
Configure Default Condition
You can branch the Dialog Application scenarios by using a default condition. When configured, the Dialog Application uses this condition for all possible cases that are not covered by any other condition.
To create a default condition:
-
Select a miniApp from the list, drag and drop it onto the canvas, and connect the Condition block to it (by dragging the node from the Condition block).
-
Once connected, click Save to automatically create the default condition.
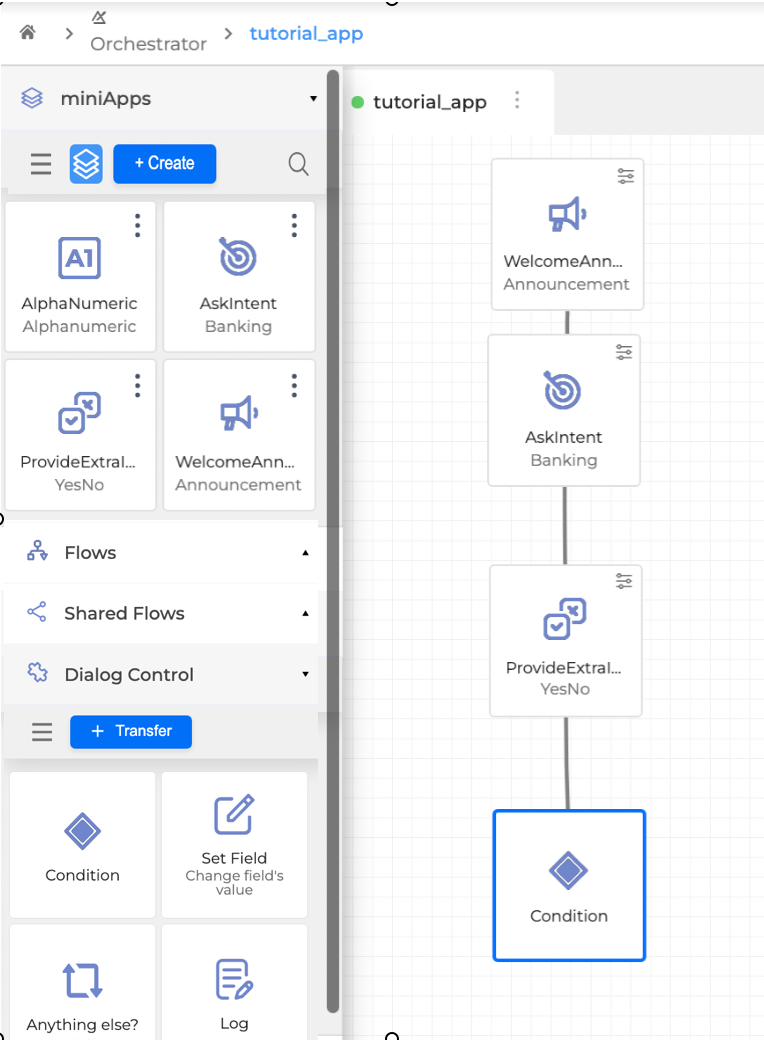
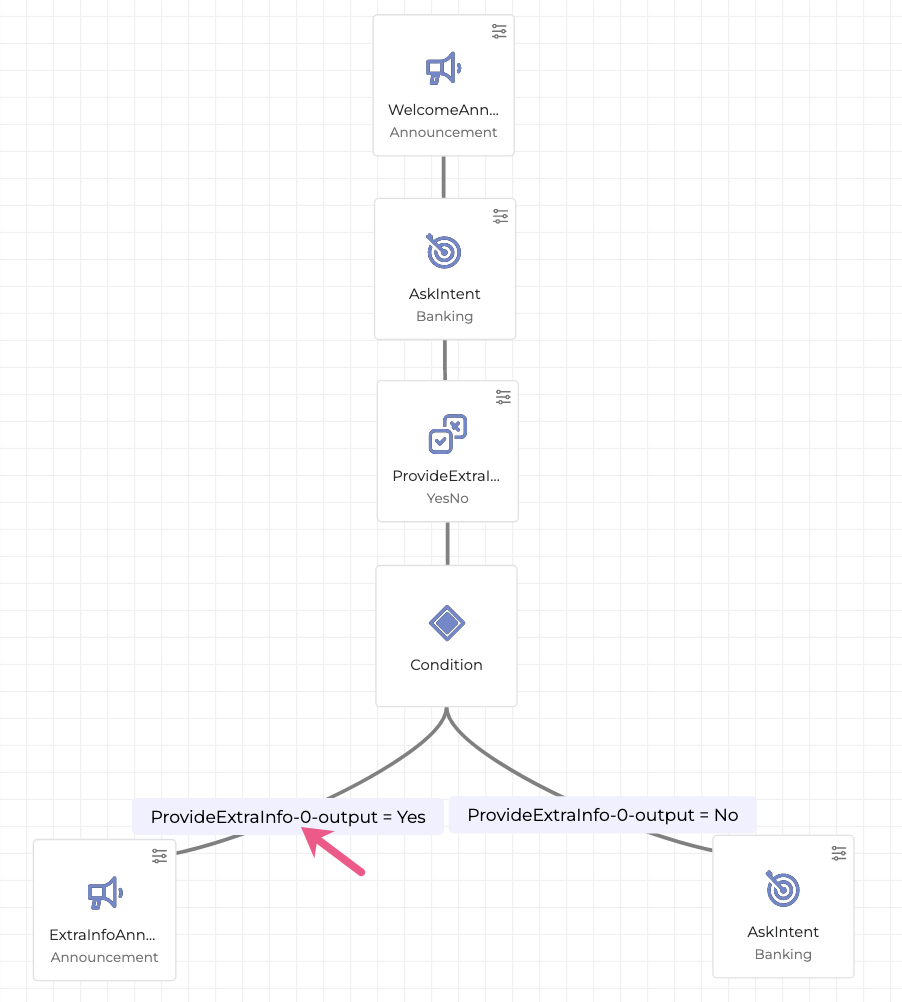
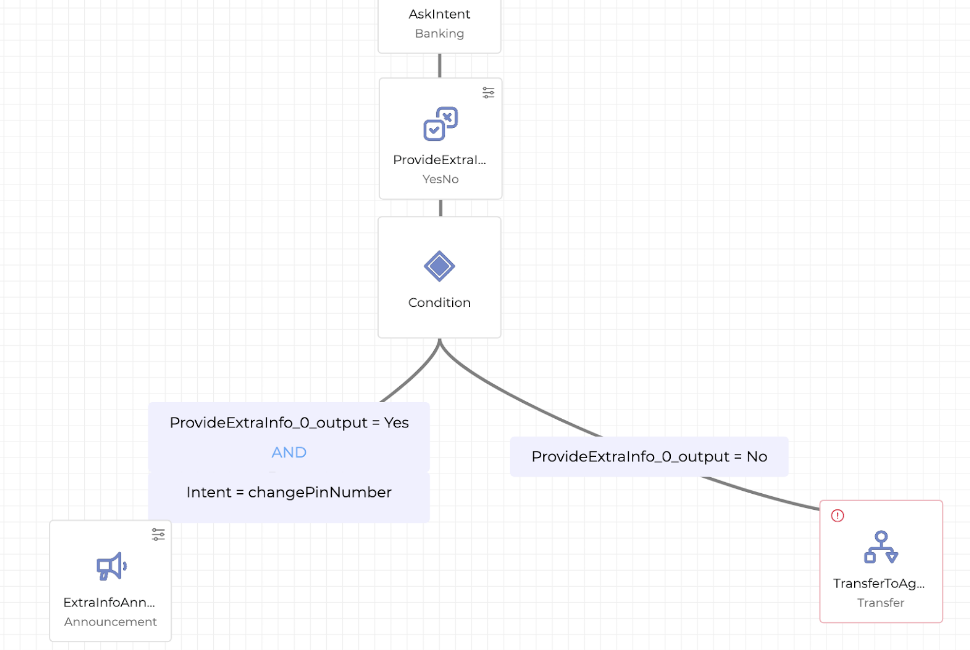
For example, when the default condition is applied, if the caller answers “no” to the yes/no question of the ProvideExtraInformation miniApp, then the default condition that leads to the AskIntent miniApp will be used.
Manage Multiple Conditions
You can use multiple Conditions when:
-
There is more than one condition you need to check at the same time, or
-
You have multiple intents to select from.
You can apply two (or more) conditions simultaneously, or you can define alternative conditions using the AND and OR options.
Conditions are evaluated at every step of the dialog. This means that if a different condition becomes applicable at some point, the dialog will immediately “jump” to that condition branch.
If more than one condition is applicable at the same time, the condition whose branch is placed further to the left on the canvas takes precedence.
Example scenario: caller answers “yes” and wants to change their PIN
-
In the Dialog Application, click the label of the Condition to edit it.
-
Click + Add Condition.
-
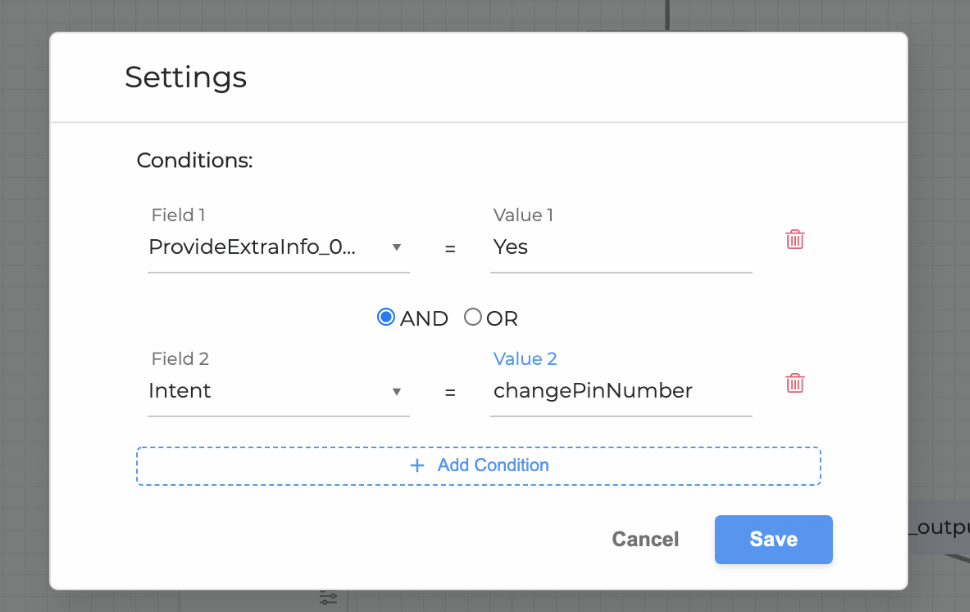
Select the AND radio button to apply another condition.
For example, the caller answers “yes” and has the intent to change the PIN. -
Select the Field 2 value from the dropdown list of available fields, and assign a variable to the Value 2 field. In this example, this is the
changePinNumbervalue. -
Click Save when finished.
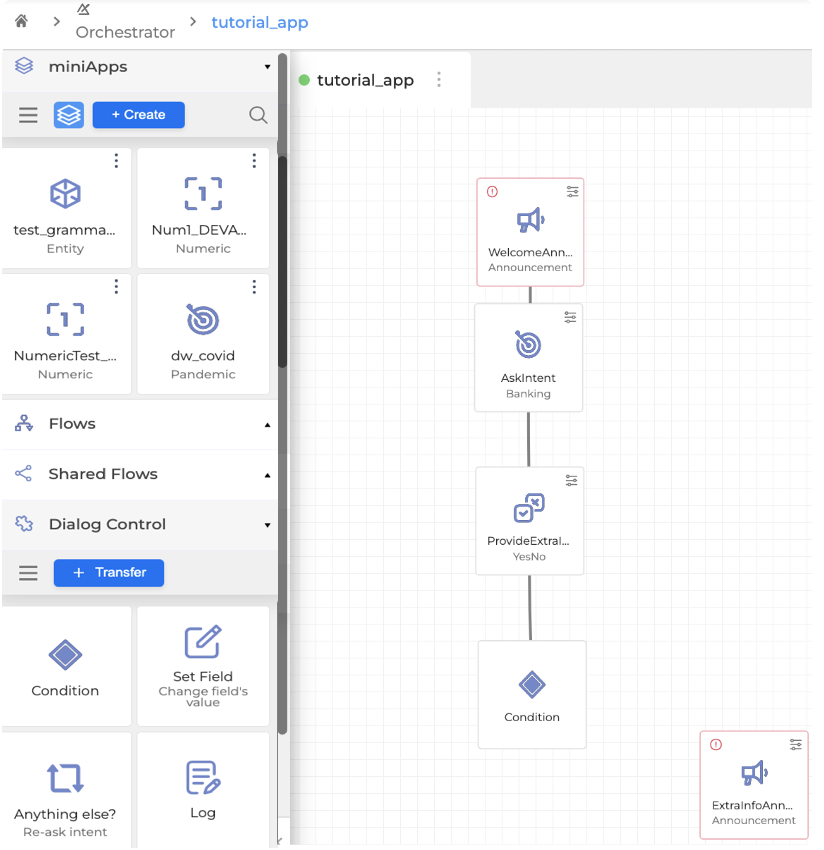
In this Dialog Application flow, if the caller provides the extra information and, at the same time, the intent is to change their PIN code, then the ExtraInfoAnnouncement miniApp will be played next.
Even if the dialog has already progressed past a Condition, later changes to that Condition can cause the dialog to follow a different path of that Condition.
Example: caller answers “no” OR wants to check the balance
-
In the Dialog Application, click the label of the Condition to edit it.
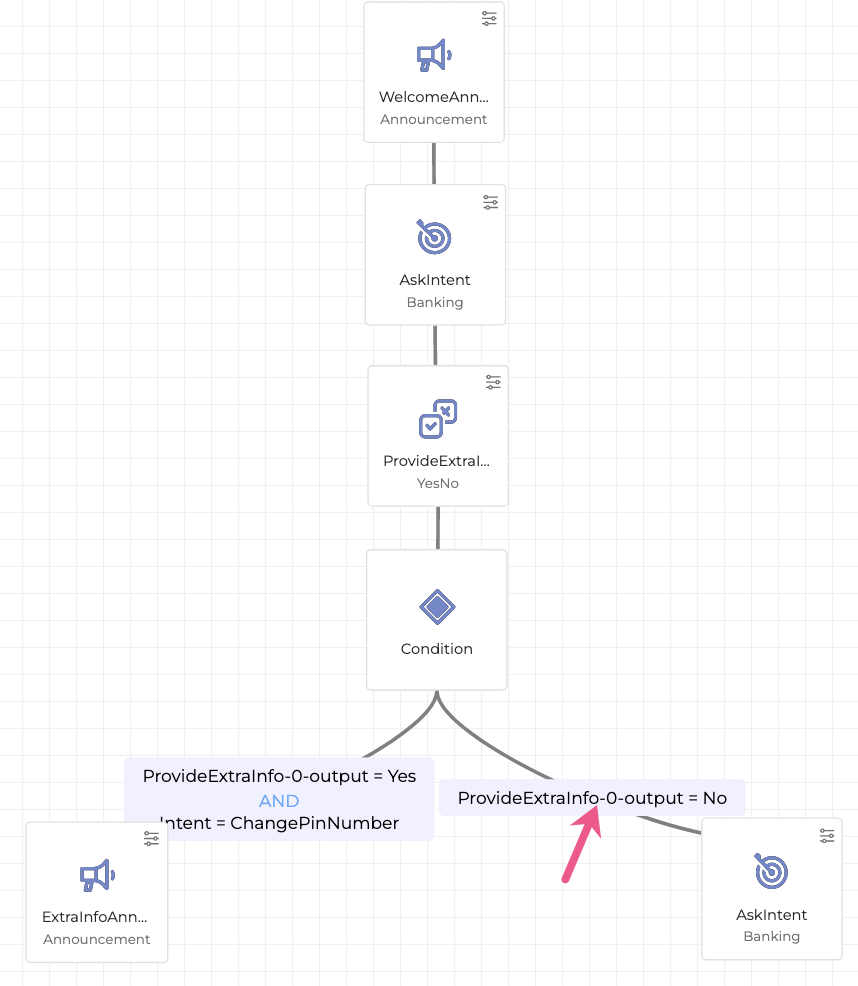
-
Click + Add Condition.
-
Select the OR button.
-
In Field 2, select Intent from the dropdown list, and assign
balanceCheckto Value 2.
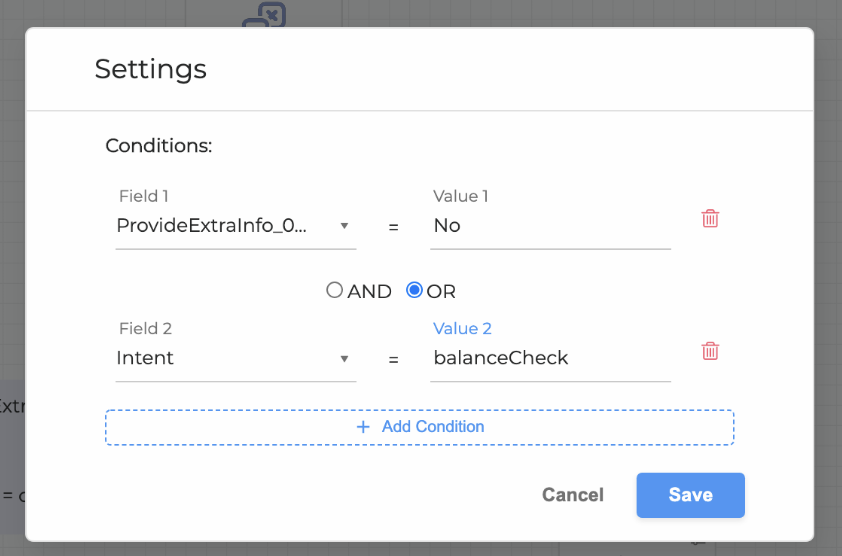
-
Click Save when finished.
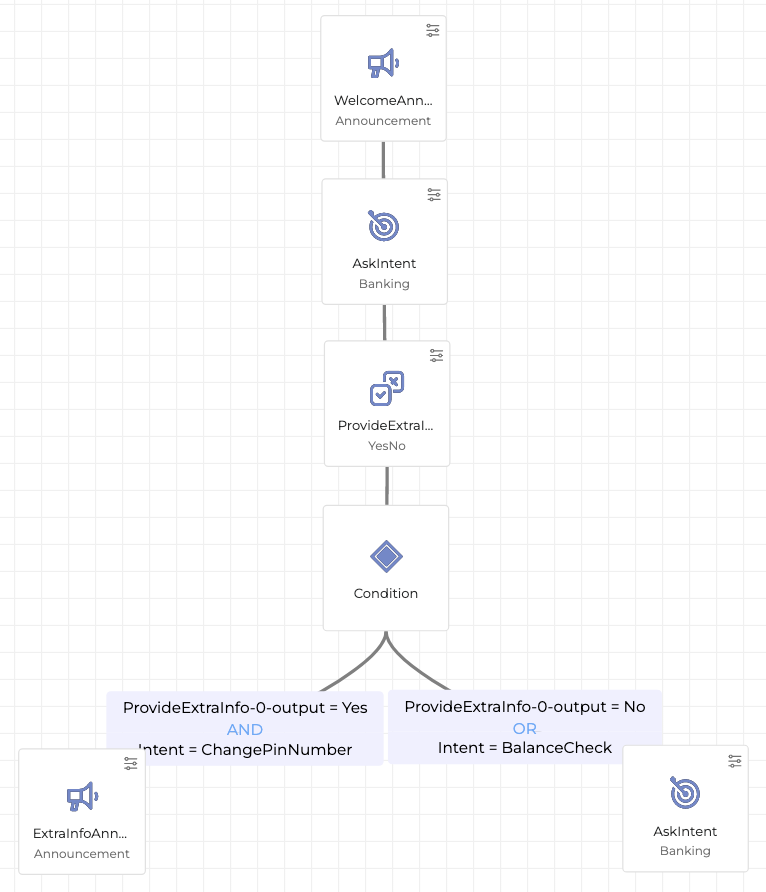
Therefore, if the caller answers “no” and wants to check the balance, the AskIntent miniApp will be played.
If both conditions are met at the same time, the one configured further to the left on the canvas takes precedence.
Configure LastFailReason Field
Configuring LastFailReason allows you to specify the last error that occurred without ending the conversation. If the defined error occurs, it does not trigger any Error Handlers or stop the Dialog Application. Instead, it plays the next miniApp or building block in sequence. This allows the conversation to continue, even though an error occurred.
When the LastFailReason is triggered, all Fail Exit Reason counters are reset to zero (for example, counters for agent requests or no-input events). This functionality is essential if you want to handle specific errors without going to an error handler.
Because it is part of the Condition feature, multiple conditions can be evaluated together with LastFailReason.
For example, if a caller does not have the information requested by a miniApp (which is one of the error types that can normally end a conversation), the conversation will continue if this error is specified as the LastFailReason.
To read more about error types, see Fail Exit Reason.
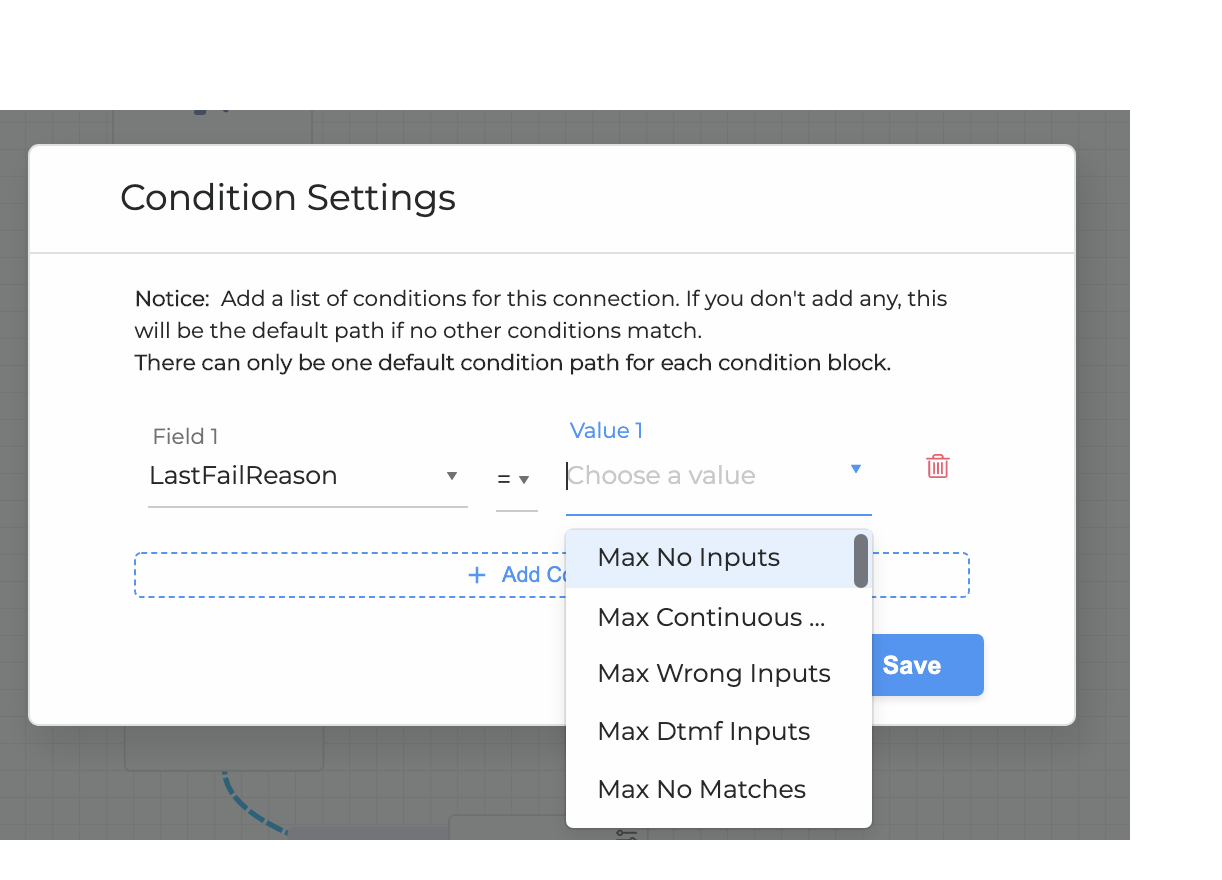
To configure LastFailReason:
-
Select a miniApp from the list, drag and drop it onto the canvas, and connect it with the Condition block.
-
Once connected, click + Add Condition.
-
From the Field 1 dropdown menu, select LastFailReason, and specify the error that can occur in a miniApp but should not stop the conversation or trigger the Error Handler.
The LastFailReason can also be used as an input field in the next miniApp, allowing you to specify the cause of the error.
When the LastFailReason is triggered, all Fail Exit Reason counters are reset to zero.
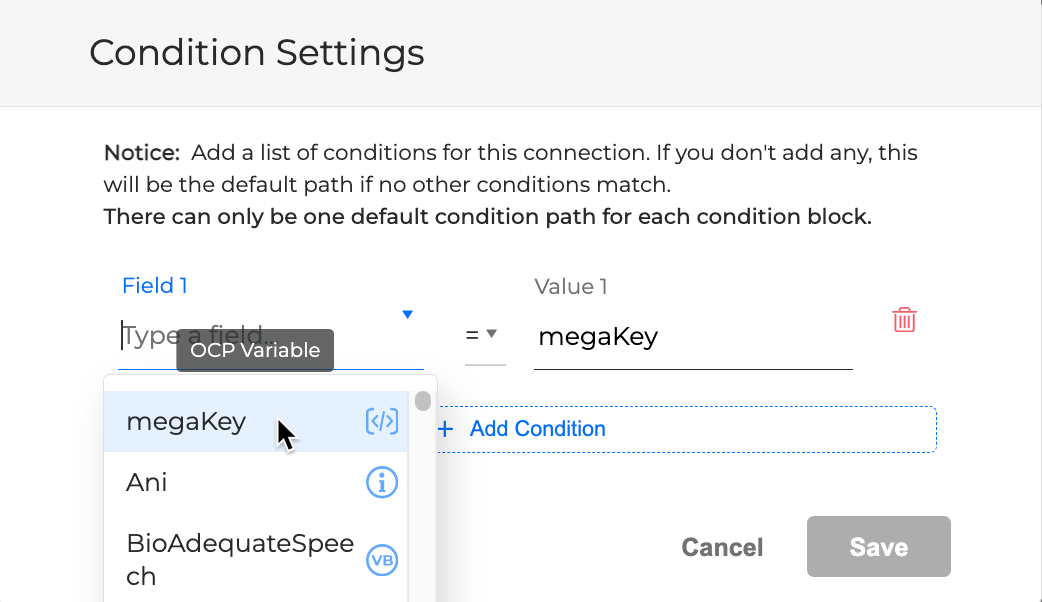
Use OCP Variables in Conditions
You can use OCP variables in Condition blocks. If you are not familiar with OCP variables and Variable Collections, see the Environments Manager User Guide.
Once you create an OCP variable in the Environments Manager, you can select it from the dropdown in Condition Settings, as shown in the screenshot. This allows you to reference the OCP variable stored in the Variable Collection of your application.