Introduction
OCP® customers have the ability to manage and maintain lists of voices associated with Bad Actors. These voices can be categorized into blocklists based on varying levels of risk.
When a bio-enabled call is received, the system checks the call against all active blocklists within the respective OCP group. If a match is found, the system updates a specific field in the Flow Application for handling on the IVR side, or it sends a notification to the Agent for manual intervention on the Agent side.
OCP Voice Biometrics allow you to create blocklists based on voice inputs that are considered a fraud. This enables an additional layer in security.
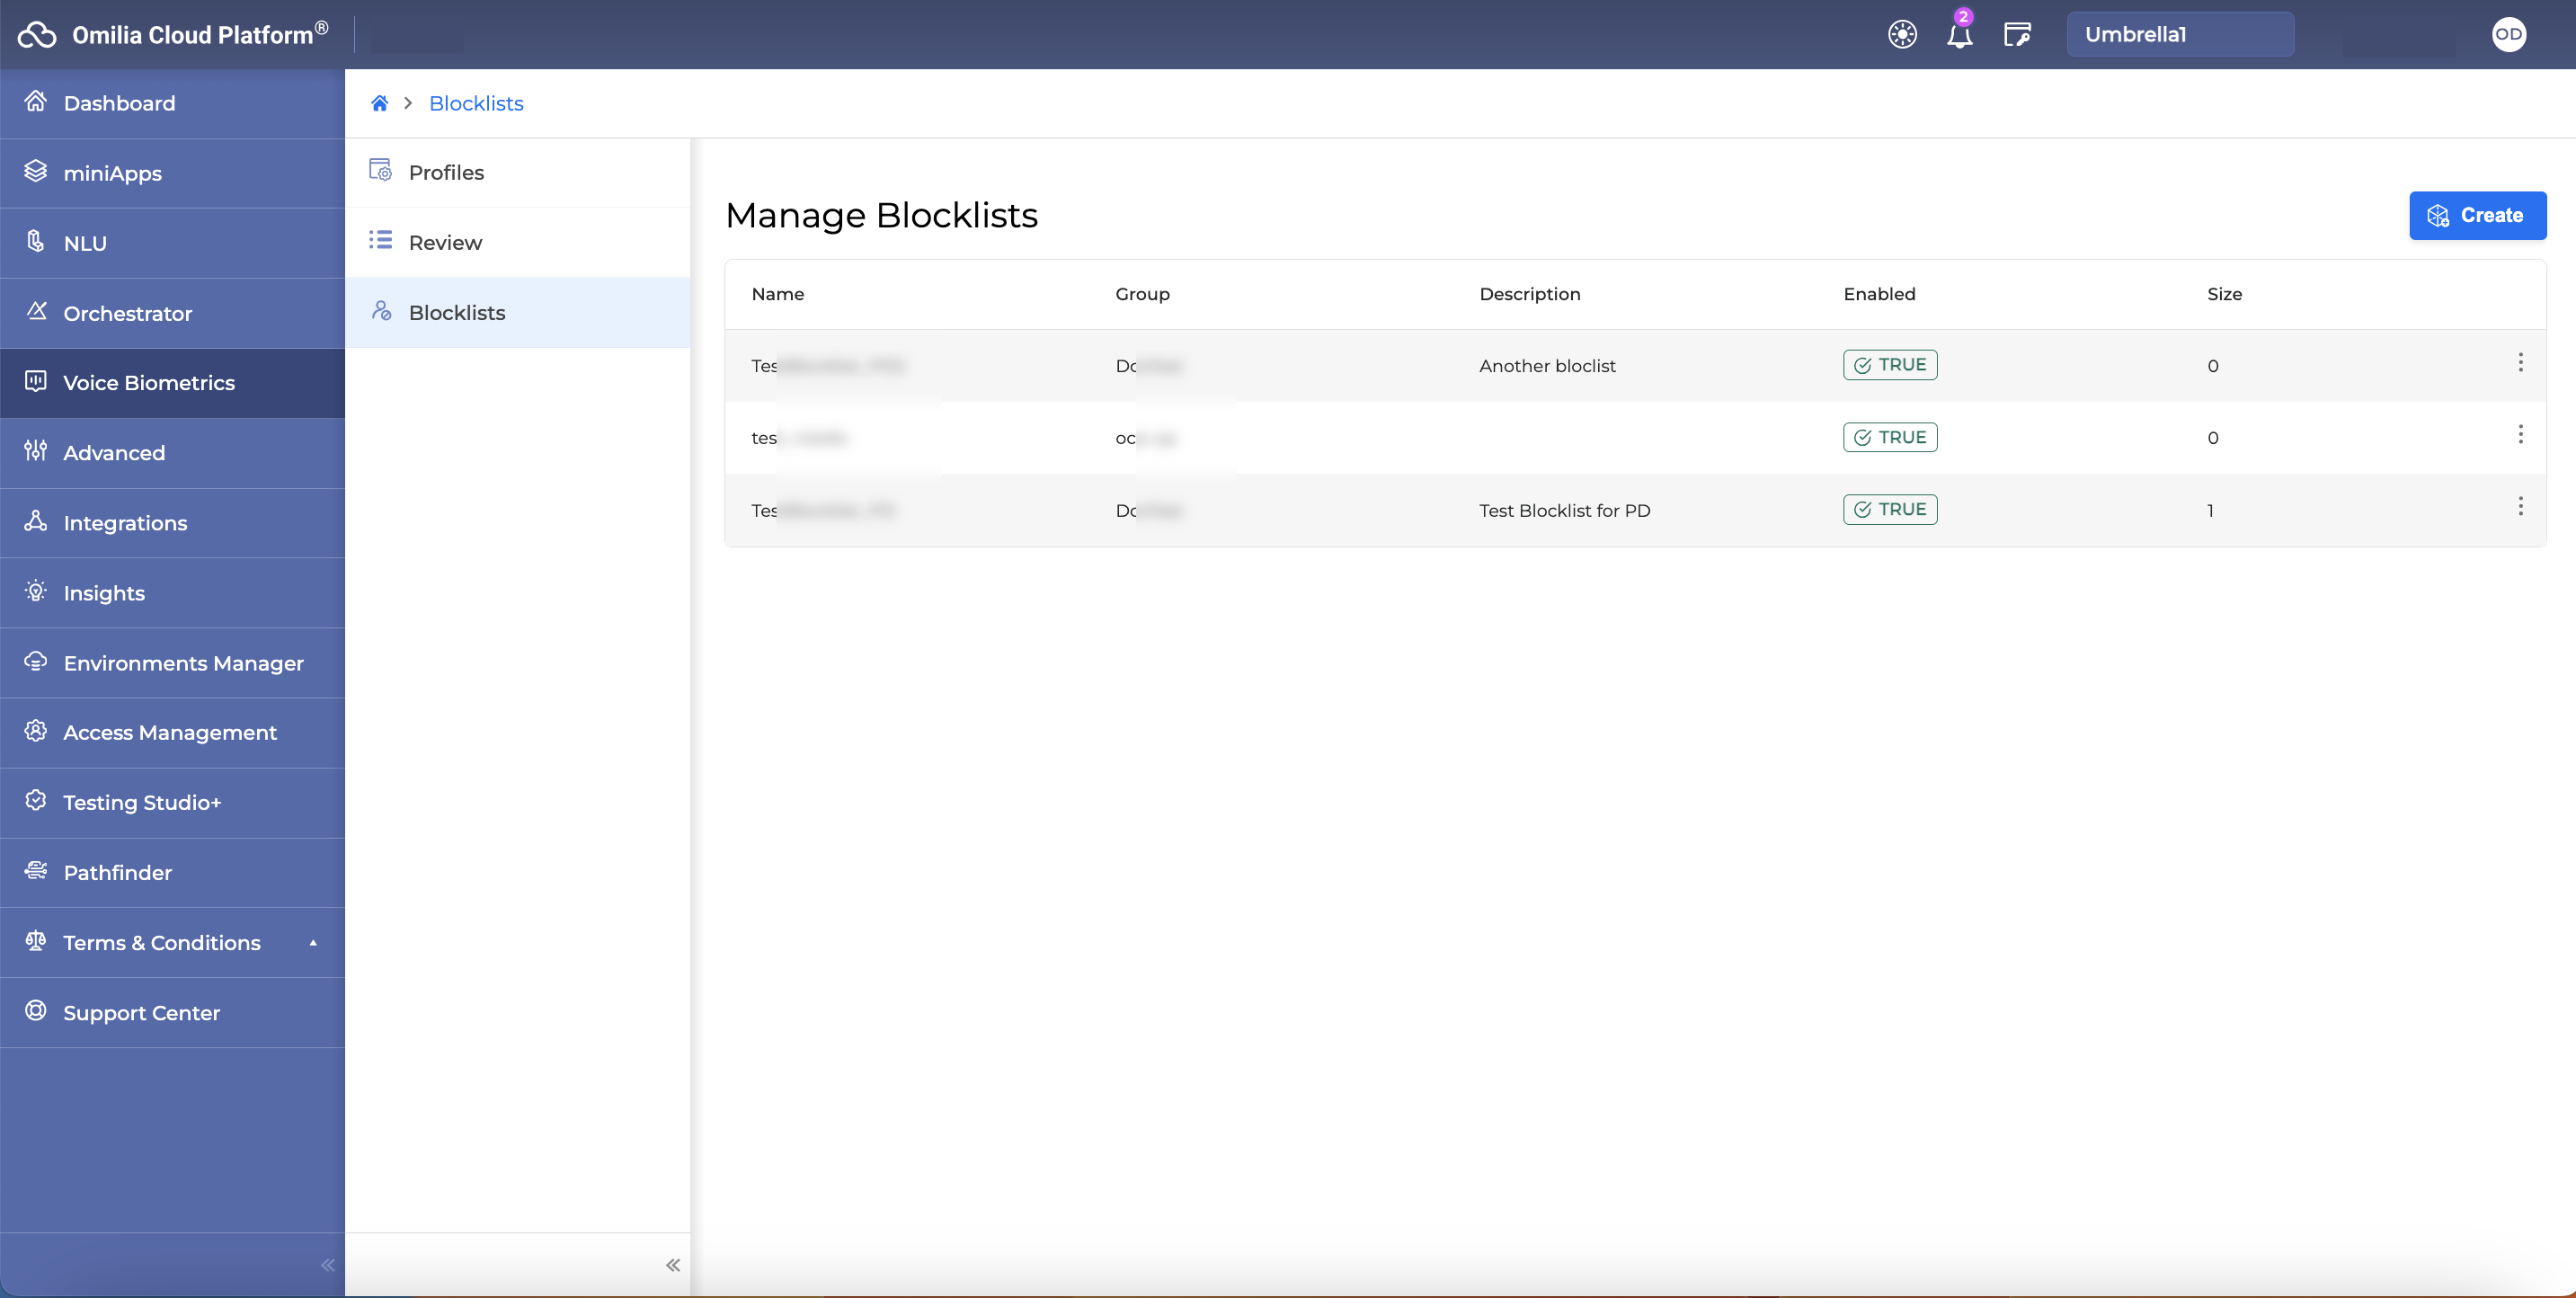
To manage blocklists go to Voice Biometrics → Blocklists menu.
Create a Blocklist
-
Go to Voice Biometrics → Blocklists menu
-
Click the Create button

-
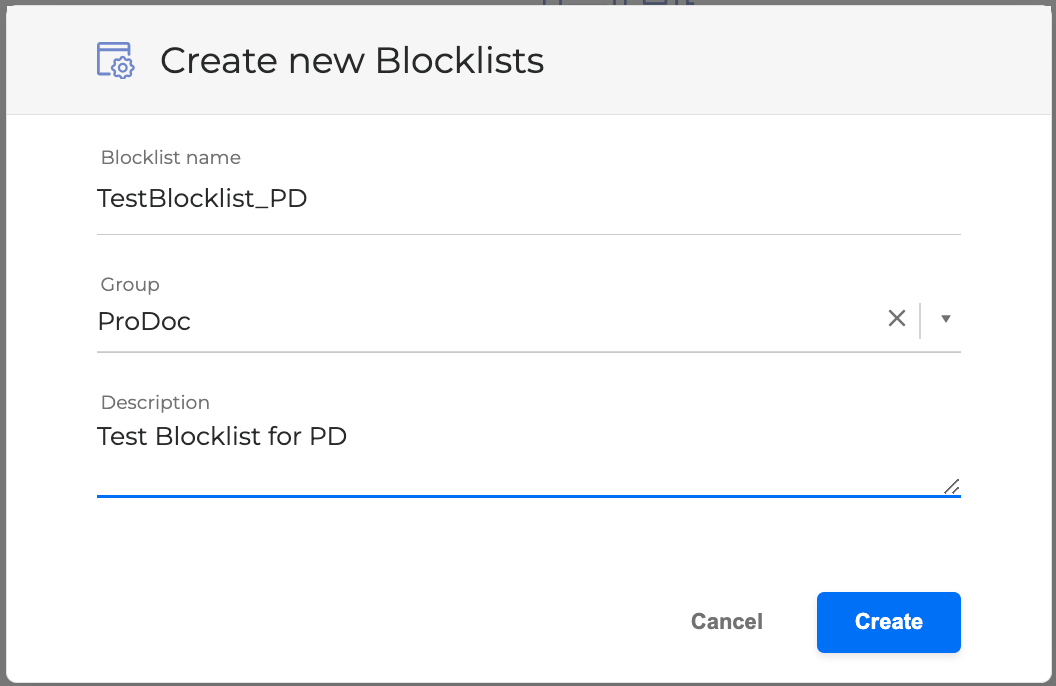
In the Create new Blocklists window fill in the requested information:
-
Blocklist name
-
Group. The Group the blocklist will be added to
-
Description. Optional description to help with the blocklist content
-
-
Click the Create button and the new blocklist will be added in the Manage Blocklists menu

Manage Blocklists
In the Manage Blocklists menu you can disable/enable, duplicate or delete a blocklist from its kebab menu.

Edit Blocklists
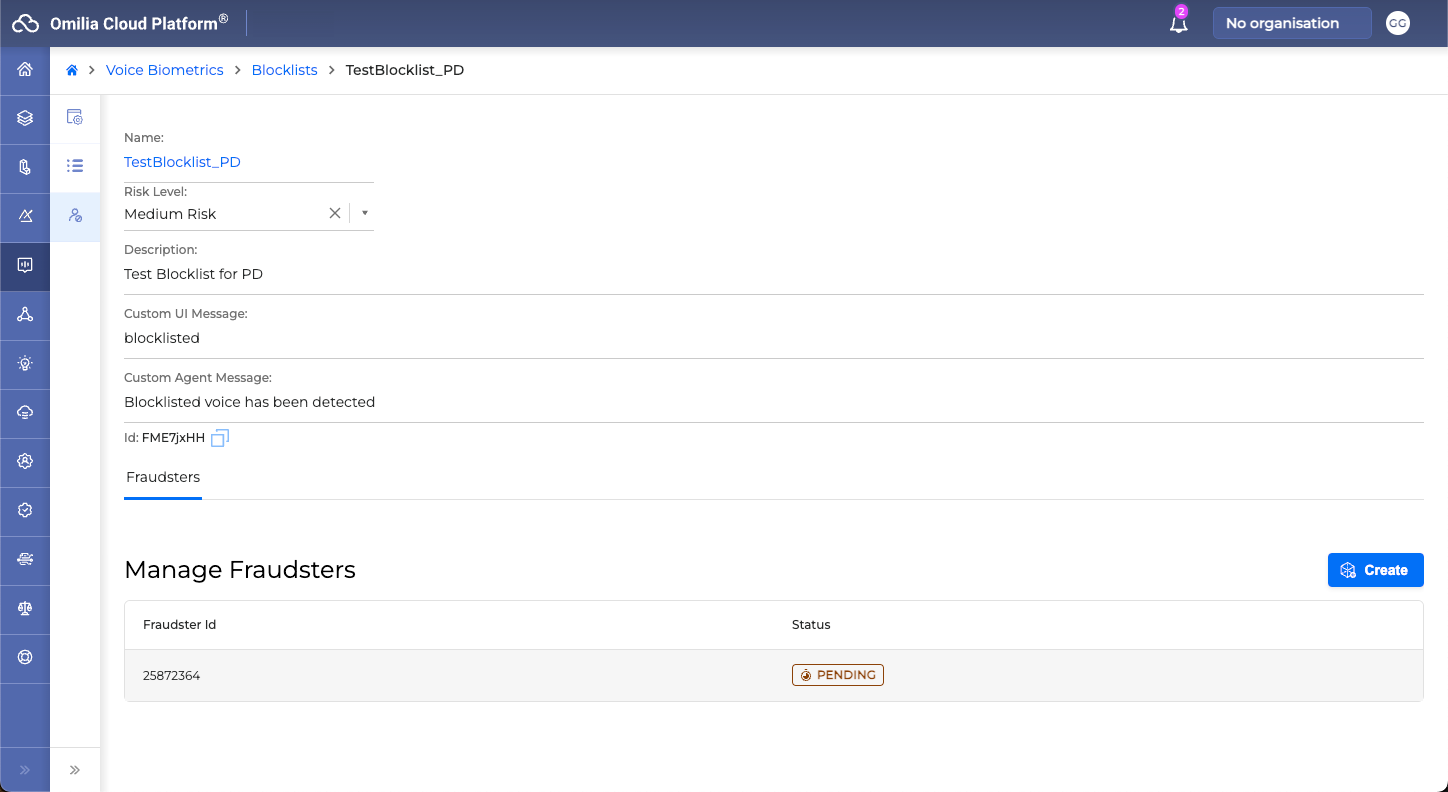
Click on a Blocklist line to open its edit menu. In the edit menu you can perform the following actions:
-
Edit the Blocklist’s name
-
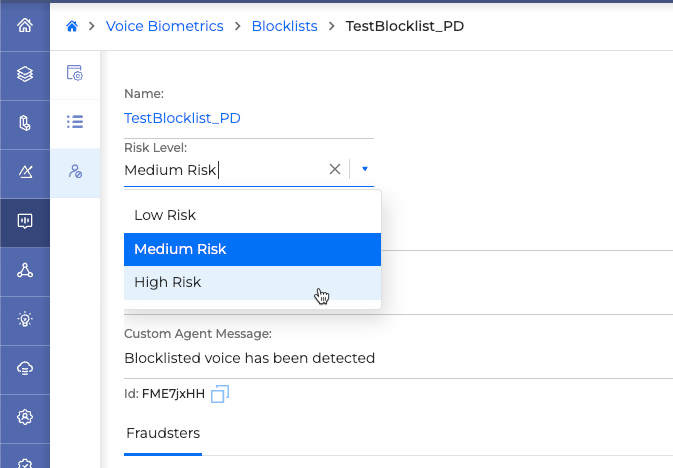
Edit the Risk level: Select a value from the dropdown list, Low Risk, Medium Risk, High Risk
-
Edit the description
-
Edit a Custom UI message. This is the message that will be displayed to the UI
-
Edit a Custom Agent message: This is the message that will be displayed to the agent if the blocklist is triggered during a call.
-
Copy its ID
-
Create, edit and delete Fraudsters: Fraudsters are the wav files that are used to trigger the blocklist.
Create Fraudsters
Managing a blocklist of fraudsters is crucial for maintaining security and preventing unauthorized access. A fraudster's profile in the blocklist is typically created using specific audio data.
The primary requirement for creating a fraudster entry is an audio file. This file should ideally contain a clear sample of the fraudulent caller’s voice.
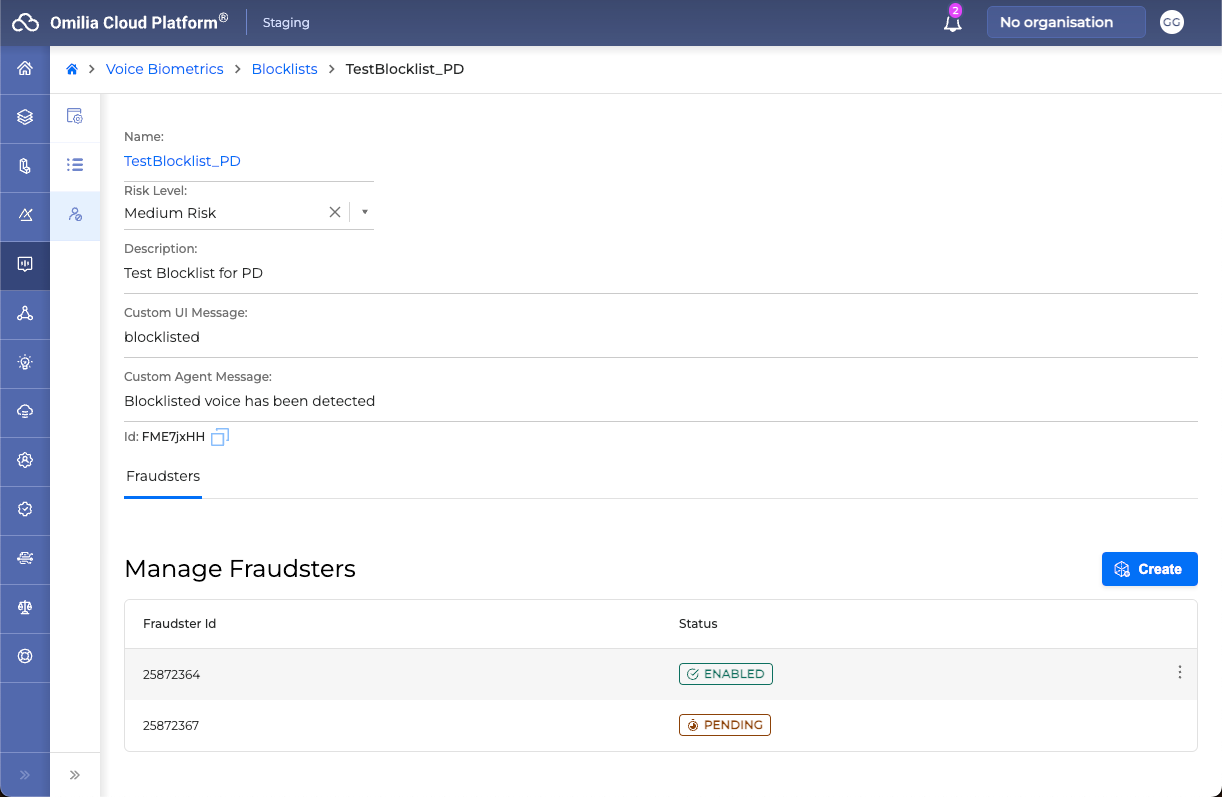
To add a new Fraudster:
-
Click the Create Fraudster button

-
Add a .wav audio file. You can browse or drag and drop the file to the Create Fraudster window.

In order for the audio file to be accepted it must have the following specifications:
-
Format: WAV
-
Channels: mono
-
Frequency : 8khz
-
Precision: 16-bit
-
Sample Encoding: 16-bit Signed Integer PCM
-
Duration: minimum 10sec of speech
-
Click the Create button and the new Fraudster will be added to your blocklist.
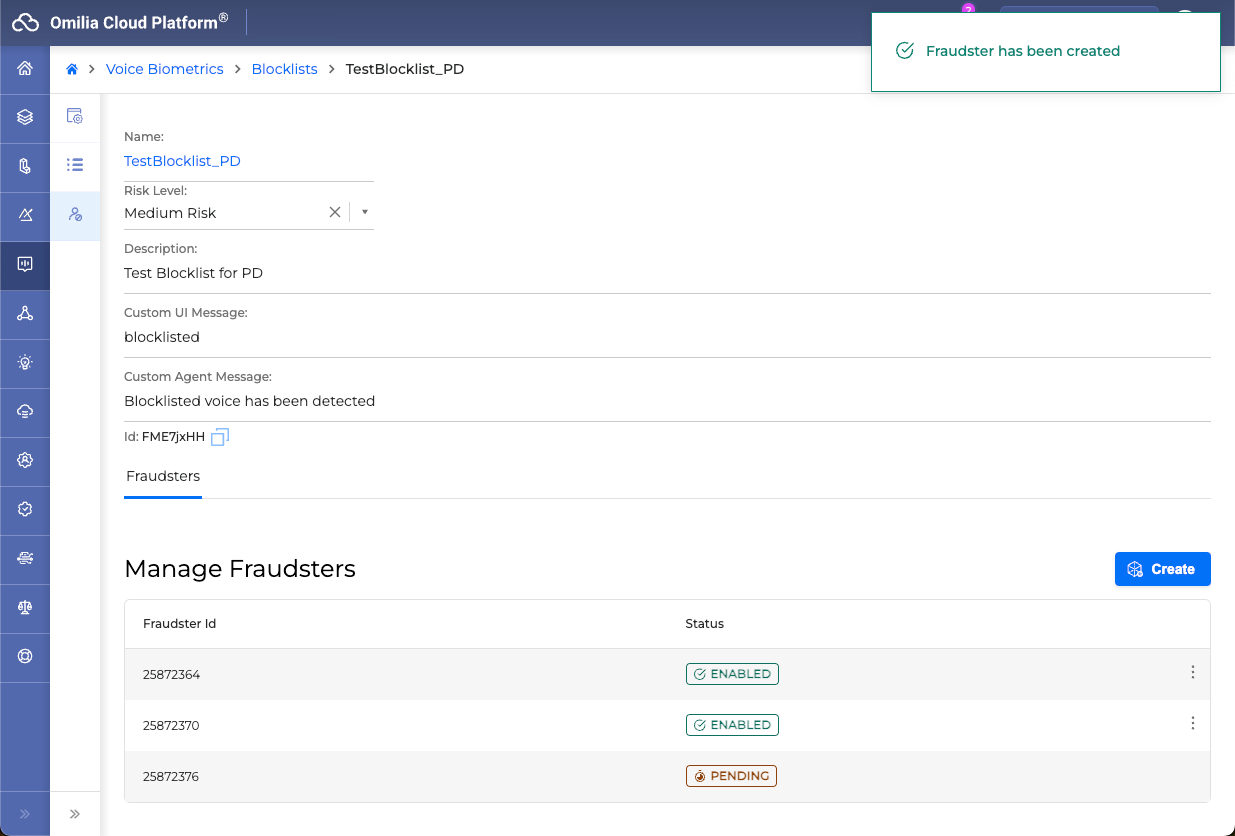
It takes approximately 45 minutes, in total, for the fraudster voiceprint to be enabled after the .wav file has been uploaded. Until then the status will remain PENDING.
-
Once the voiceprint has been created and the status is turned to ENABLED, you can disable/enable, or delete a Fraudster ID from its kebab menu.
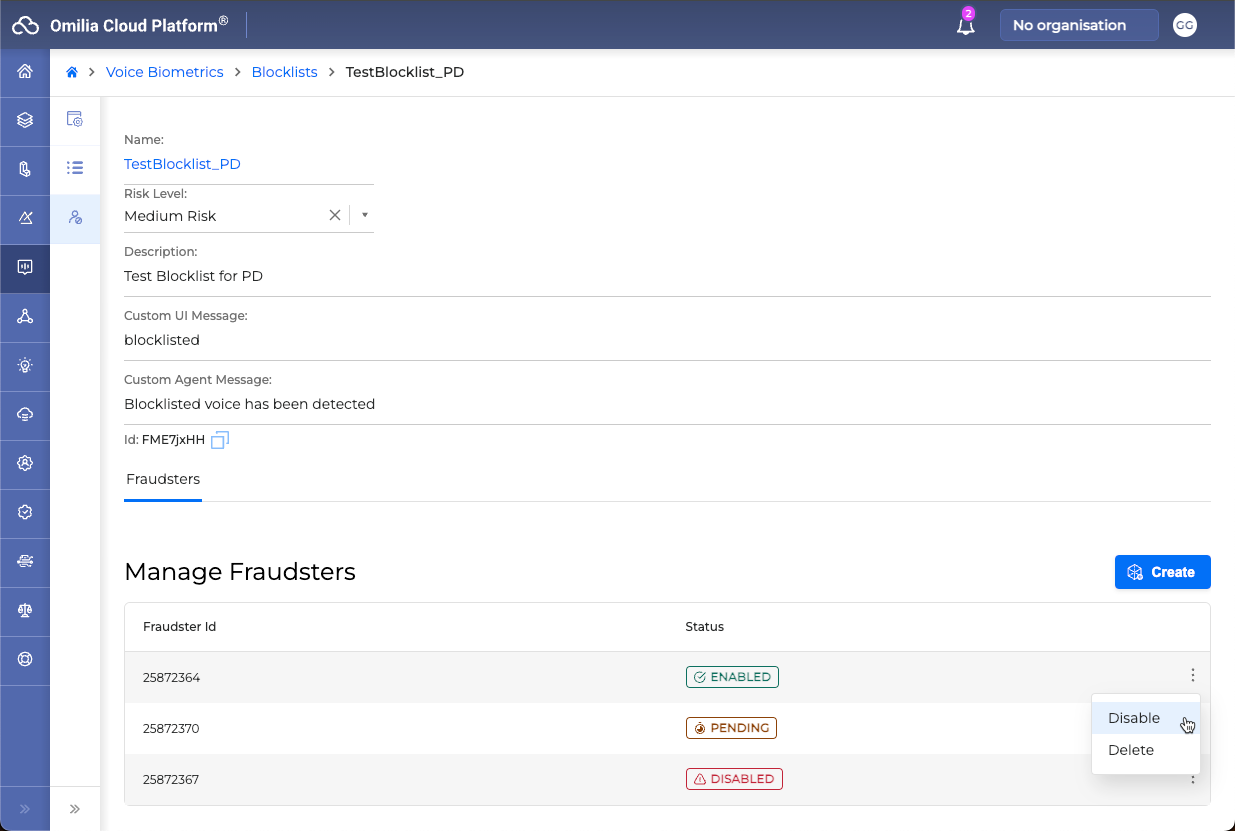
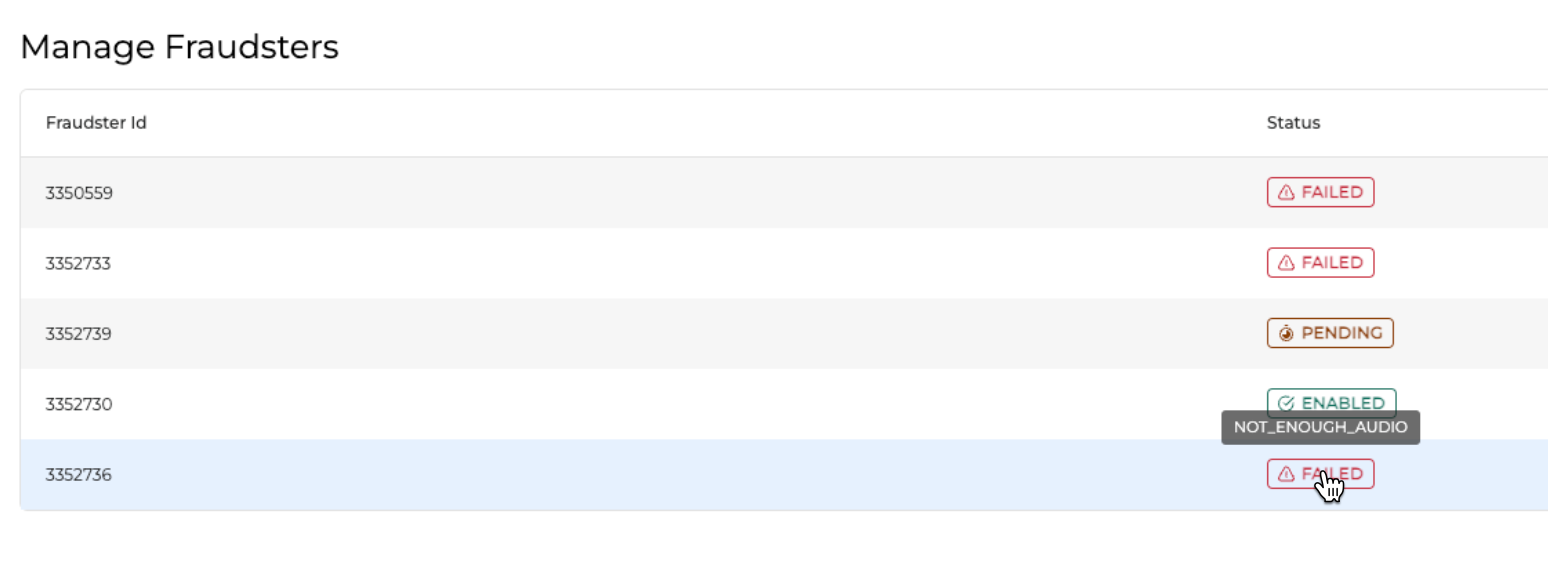
Fraudster Status
Fraudster status can have the following values.
PENDING: After creating a new Fraudster ID, it remains pending until the voiceprint is created.
It takes approximately 45 minutes, in total, for the fraudster voiceprint to be enabled after the .wav file has been uploaded. Until then the status will remain PENDING.
ENABLED: The Fraudster ID is active.
DISABLED: The Fraudster ID is not active.
FAILED: The Fraudster ID is created with an unsuccessful voiceprint.
If a Fraudster ID is created with an unsuccessful voiceprint, its status will be displayed as FAILED, and the user will have the option to only delete it from the list.
Hover over the FAILED status to show the failed reason. Example values are NOT_ENOUGH_AUDIO, NOT_ENOUGH_SPEECH_FRAMES.
