Logging in
To enter Testing Studio+™, follow the steps below:
-
Log in to OCP® as described in Logging in and logging out.
-
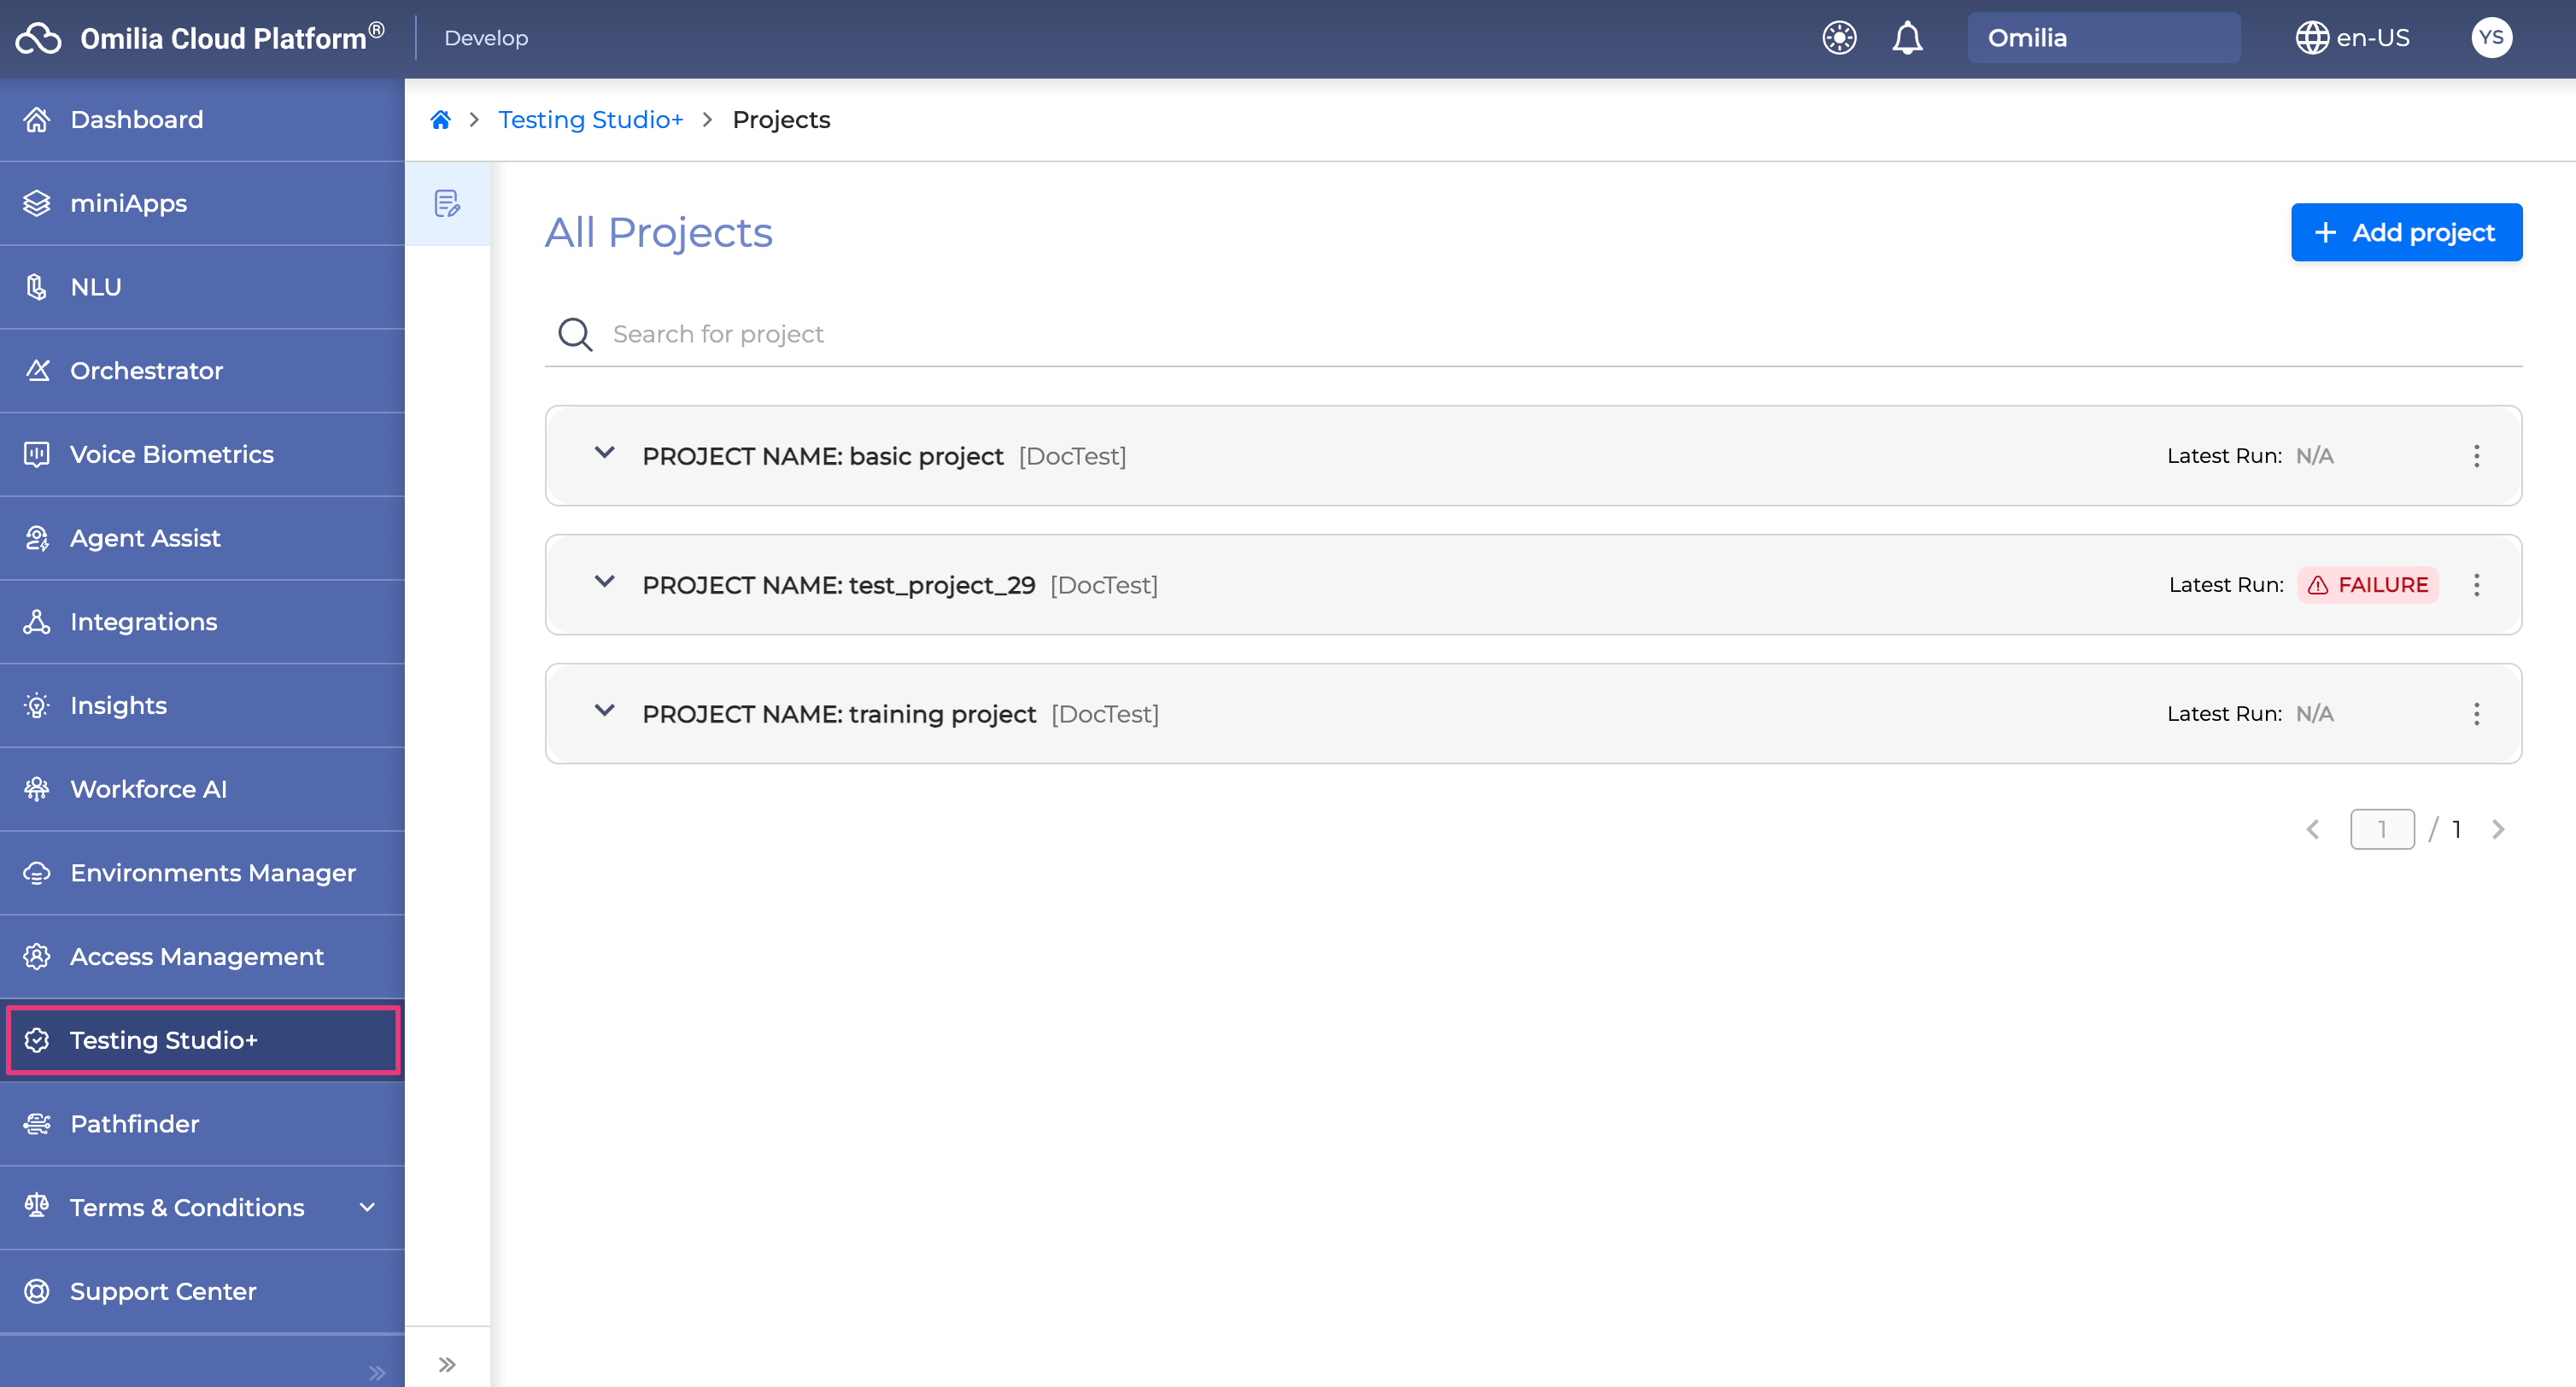
Click Testing Studio+ in the left sidebar.
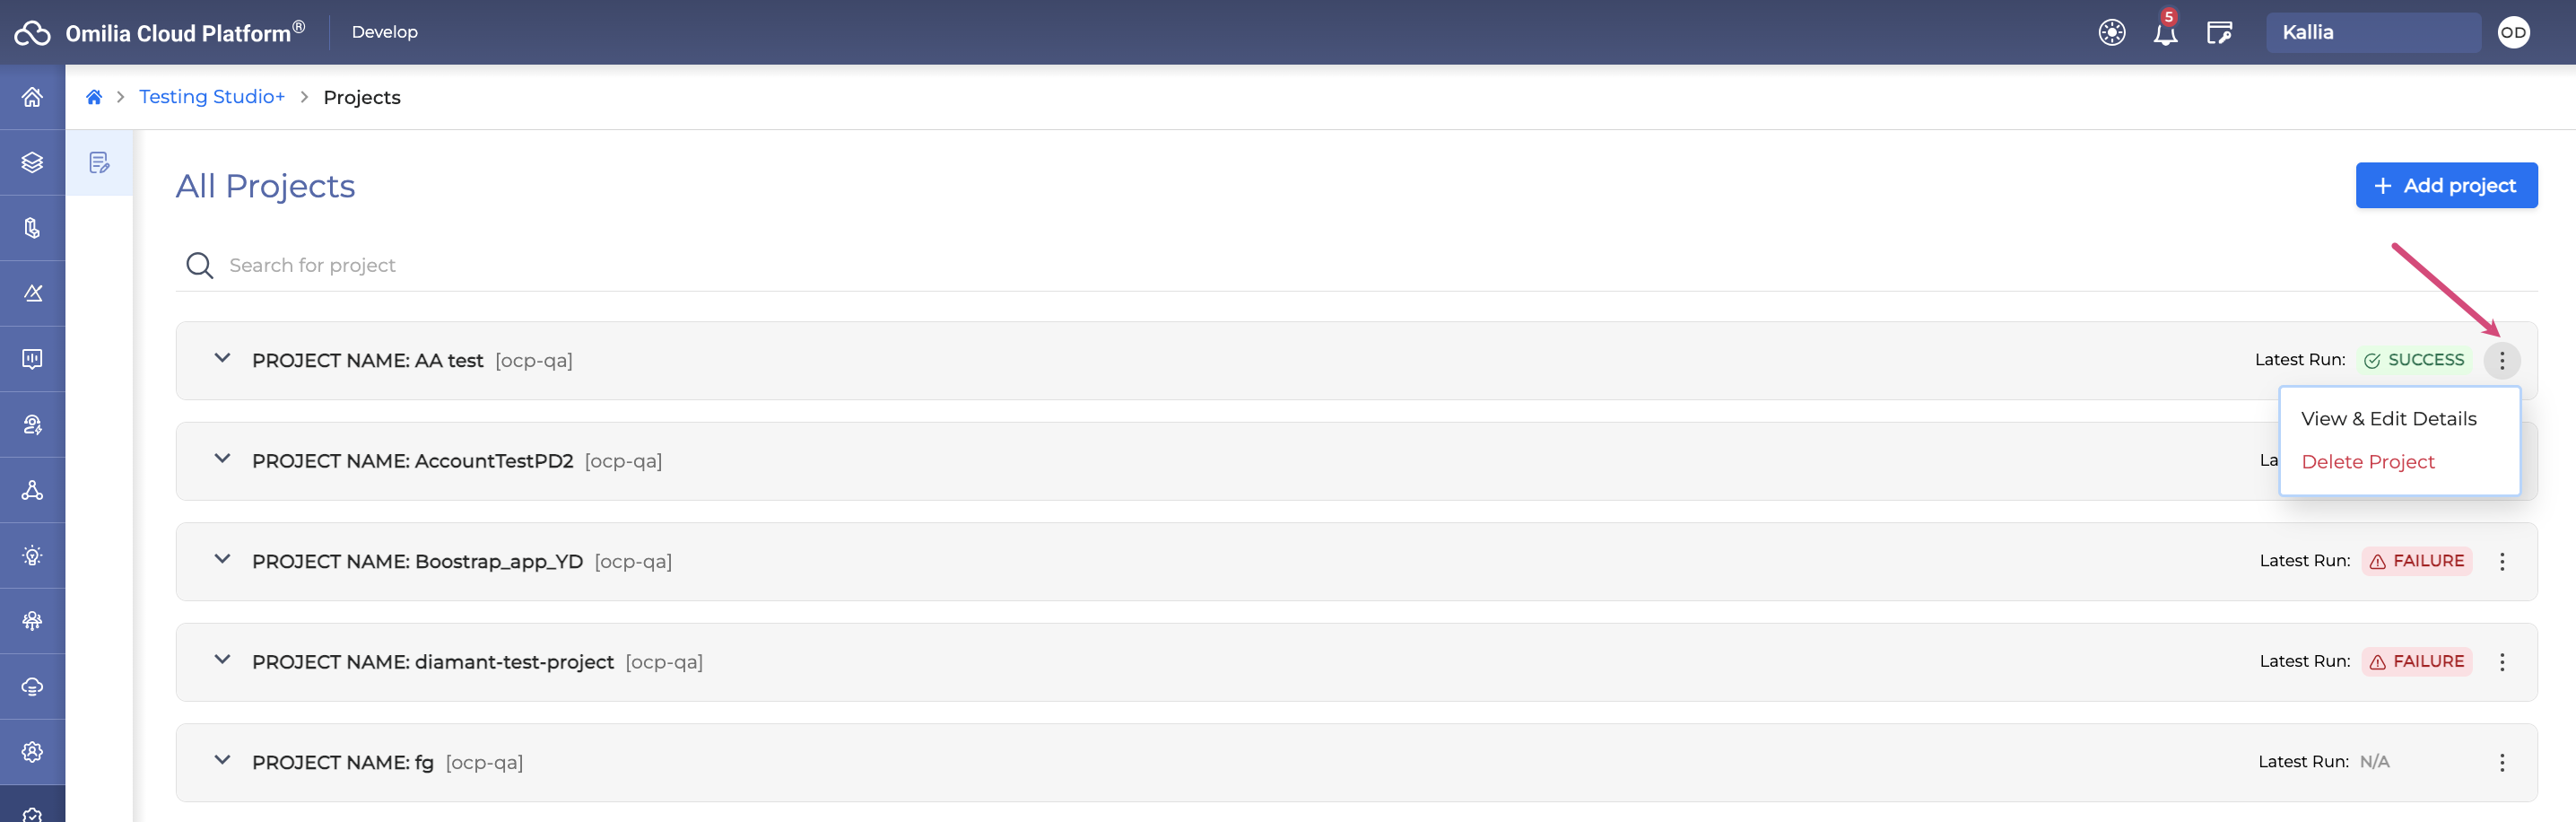
Managing Projects
Projects page shows a list of all the created projects. A project is a remote repository where test cases reside.
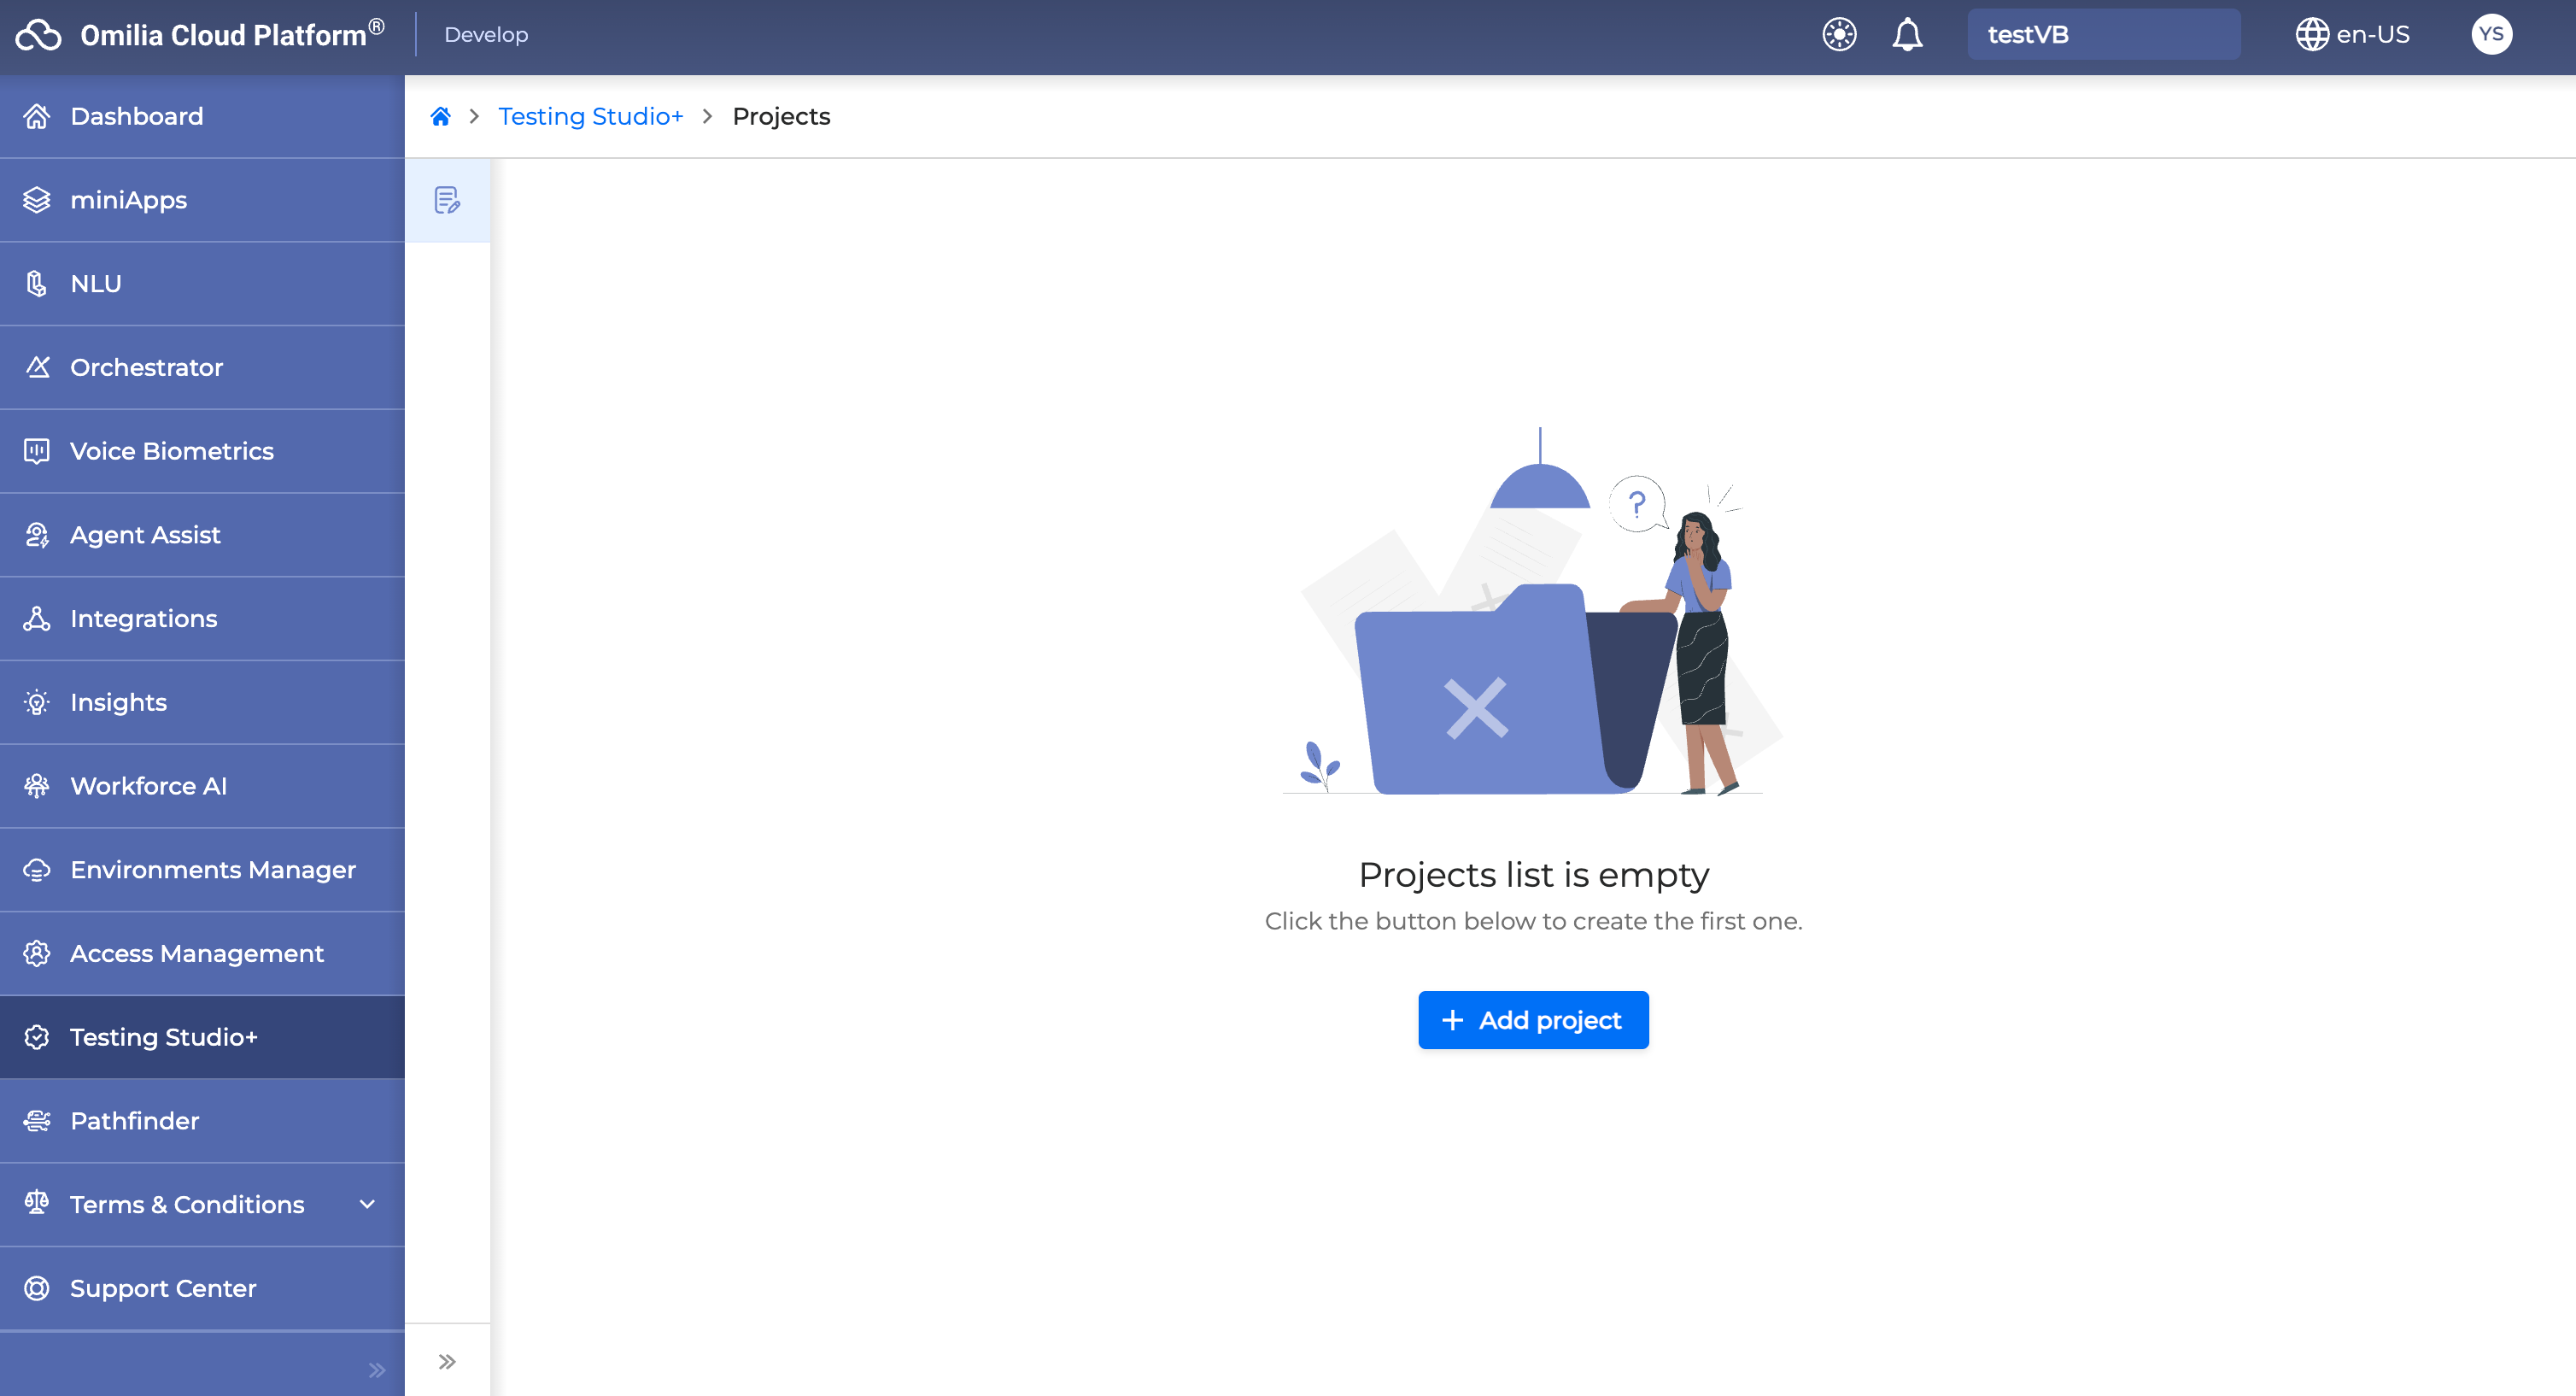
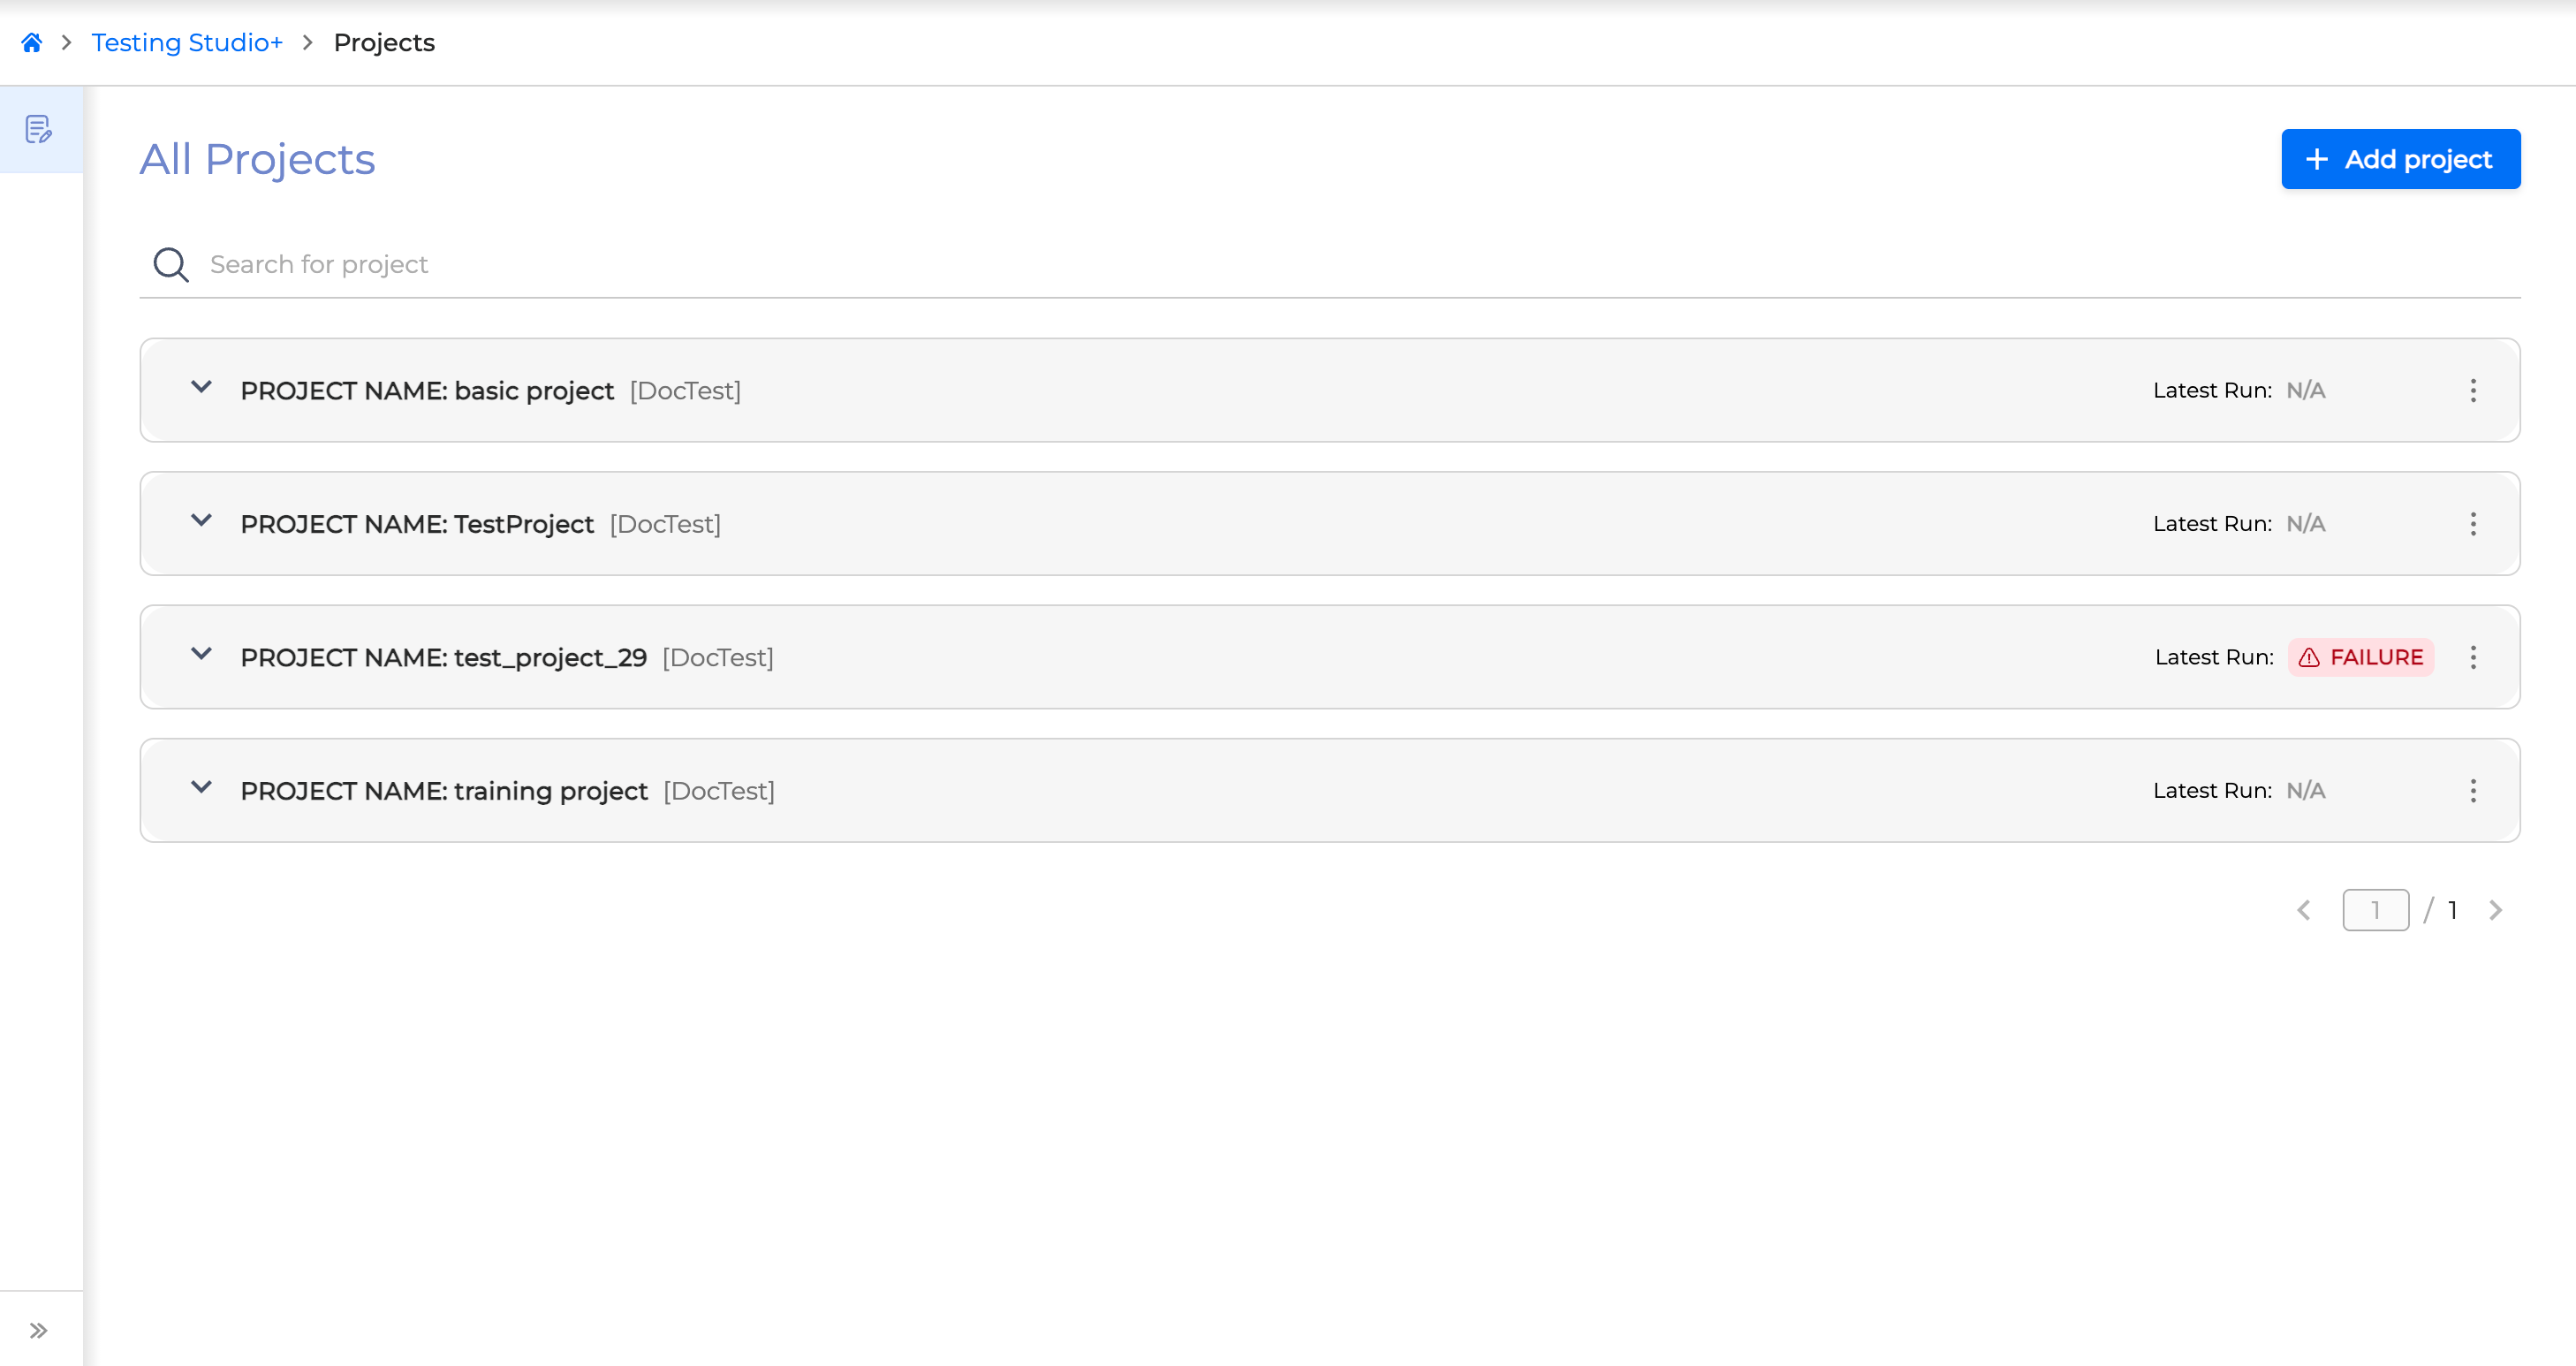
At your first login to Testing Studio+, the Projects page is empty and looks as follows:
Create a Project
To create a new project:
-
Click + Add Project.
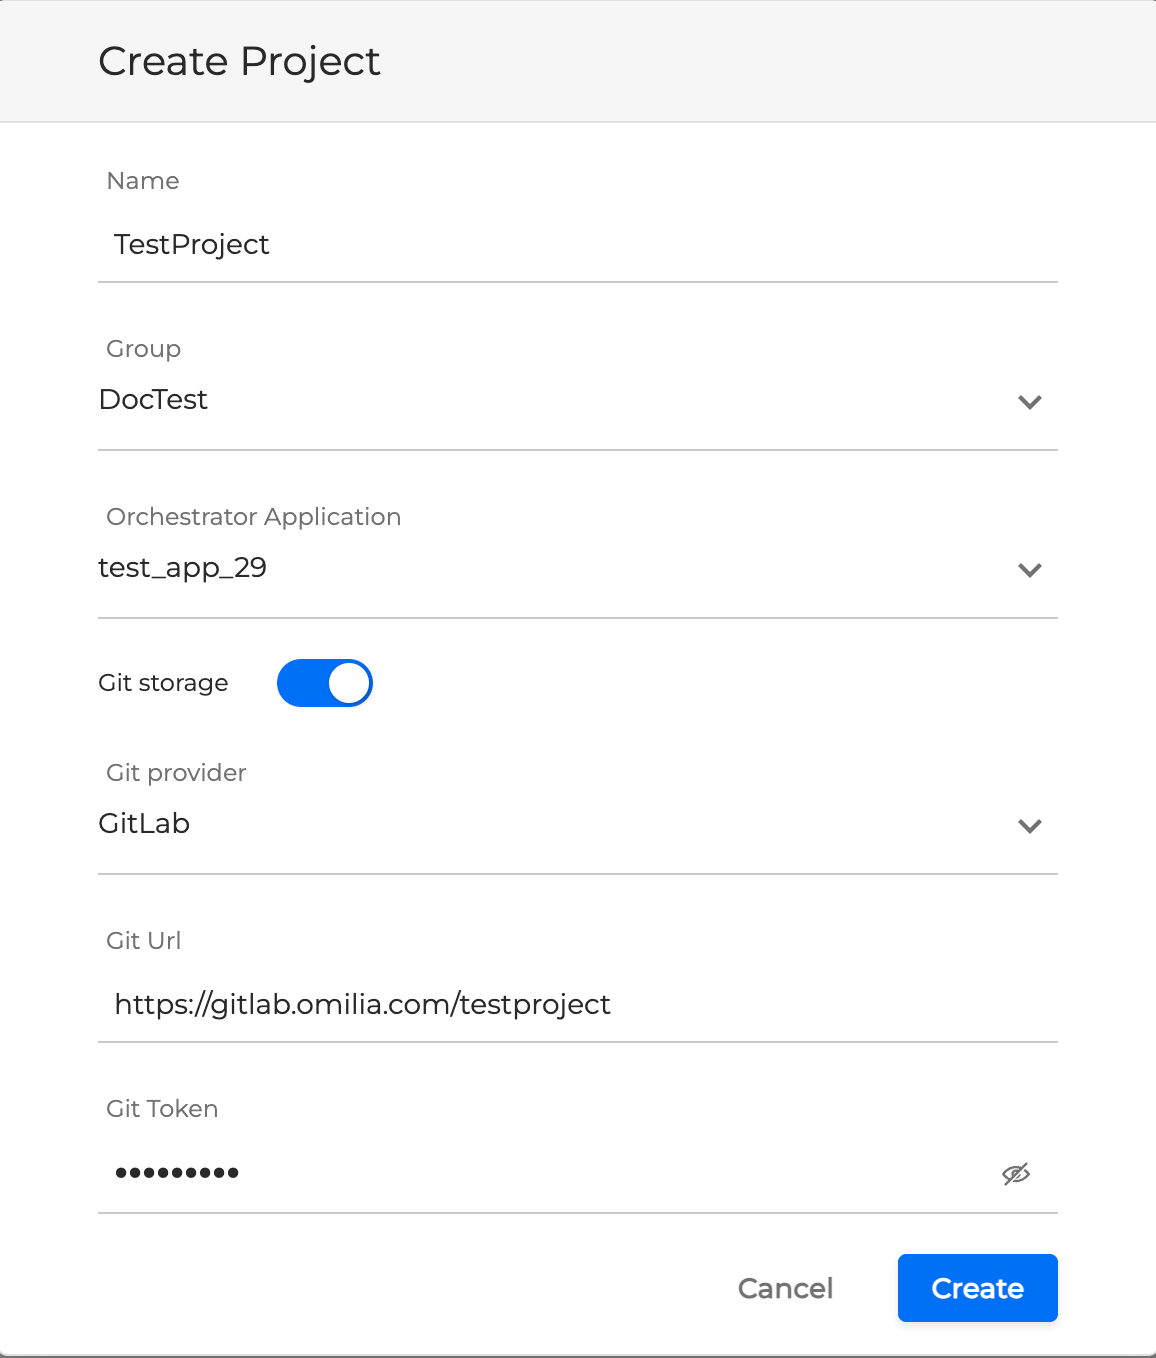
2. Fill in the project information in the dialog box.
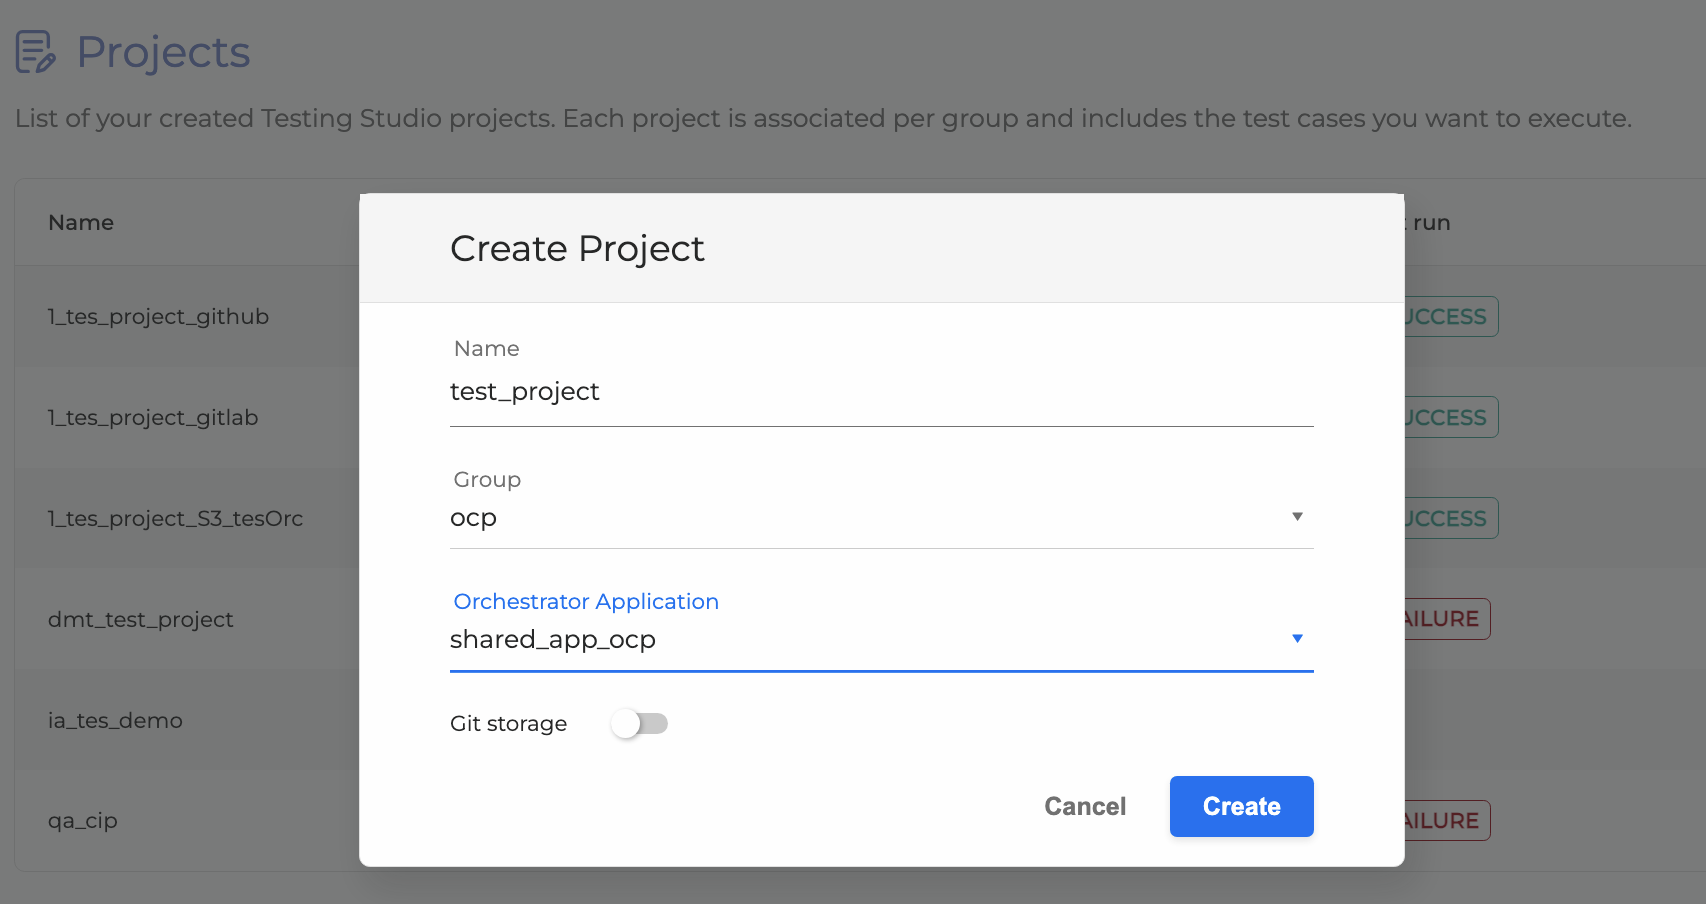
By default, the project is stored in the Cloud storage. If selecting Cloud, the Test Suites can be uploaded to the cloud directly there. In the case of GitLab, the Test Suites are stored in the GitLab repository.
-
Name: The name of your project.
-
Group: The group the project belongs to.
-
Orchestrator Application: The application created in Orchestrator that you will use for your project.
The list of available Orchestrator Applications is based on the group the user has selected, so selecting the group first is necessary.
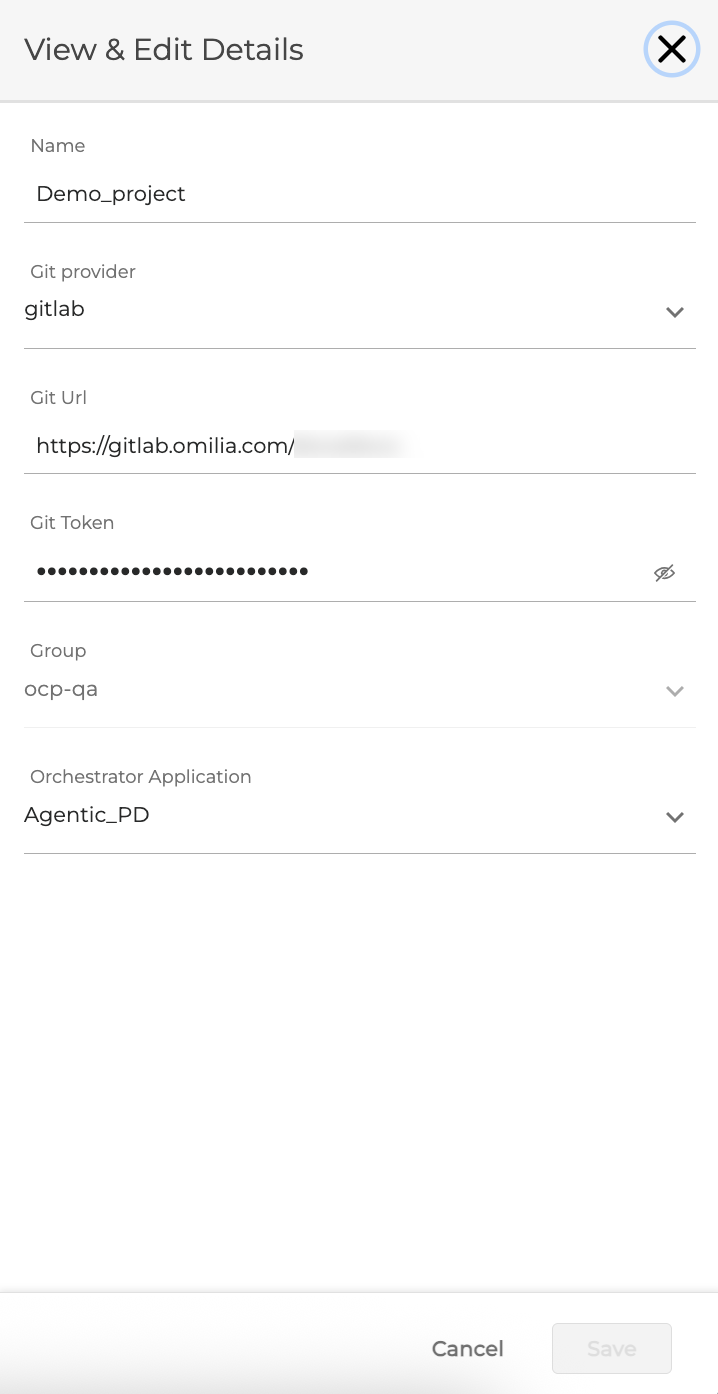
If you want to store it in a Git provider (GitLab, GitHub), toggle the bar accordingly and fill in the following information.
-
Git provider: Select GitLab or GitHub as your Git provider
-
Git URL: The URL of the remote repository with tests. Omilia currently uses GitLab
-
Git Token: An access token to GitLab
For further instructions on generating an access token, refer to the original GitLab documentation.
3. Click Create. Your created projects are listed accordingly.
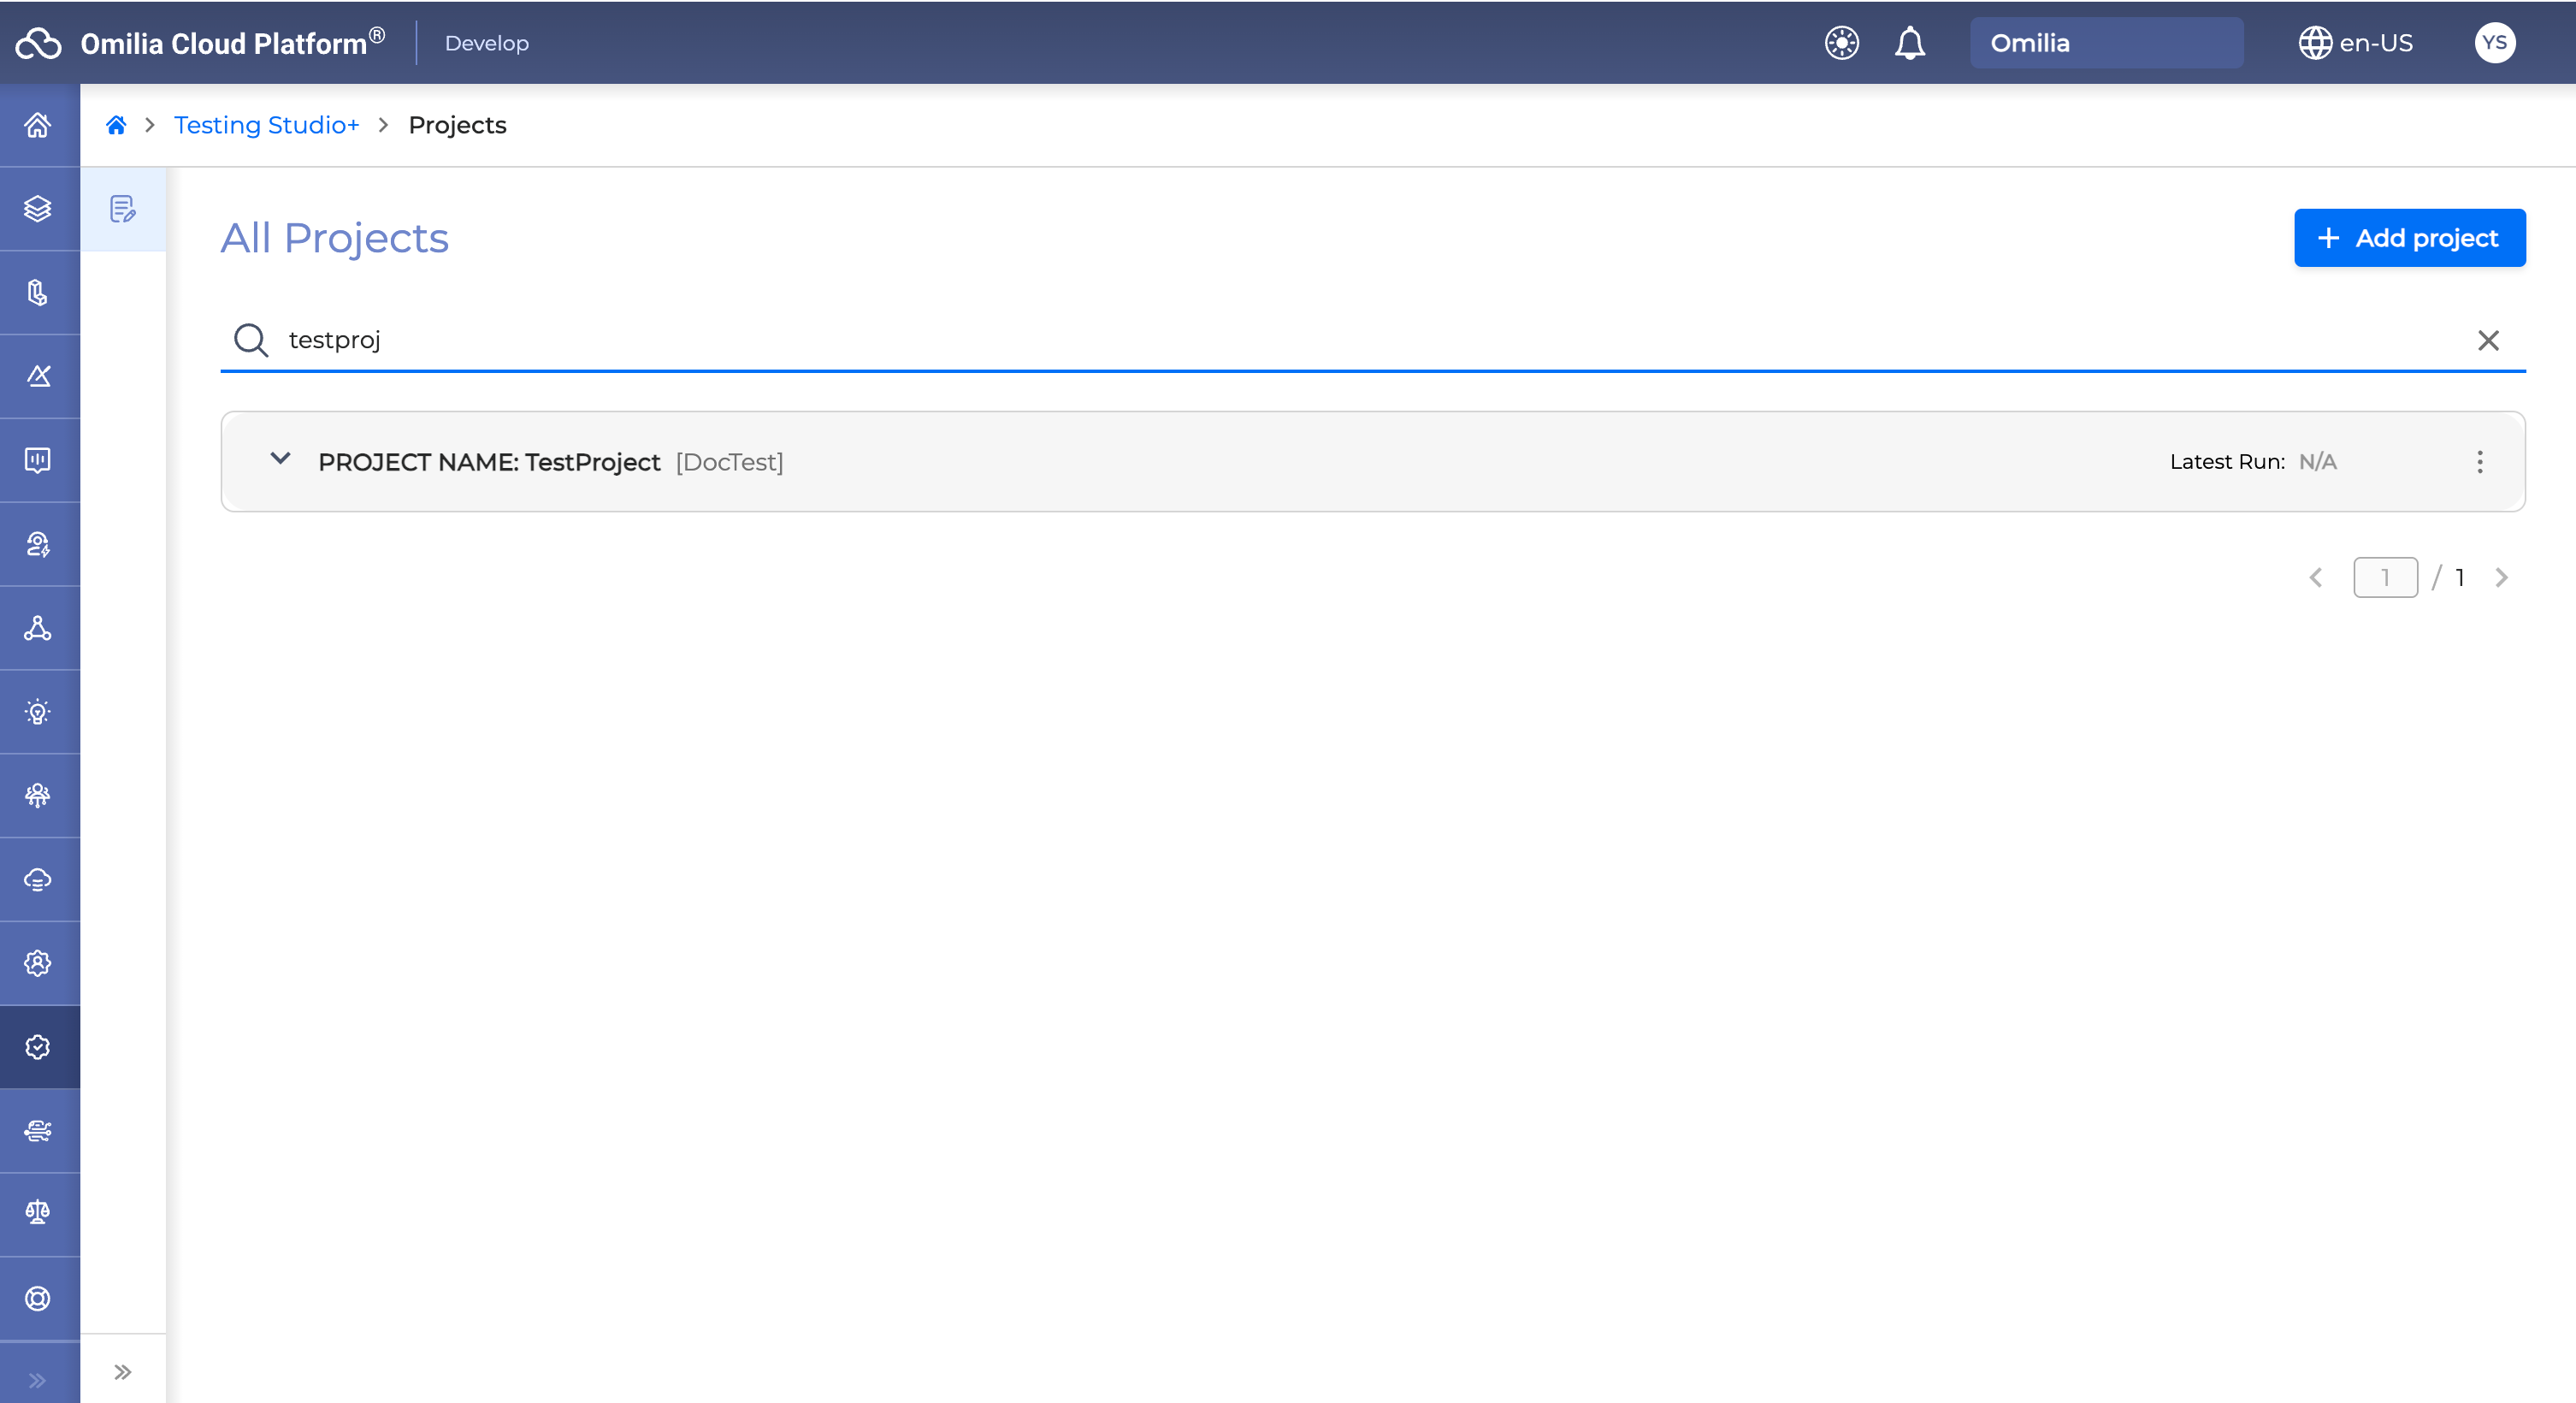
To filter out a lengthy project list, utilize the Search field by typing the name of the project or the group:
Delete a Project
To delete a project, follow the procedure below:
-
Open the Projects page.
-
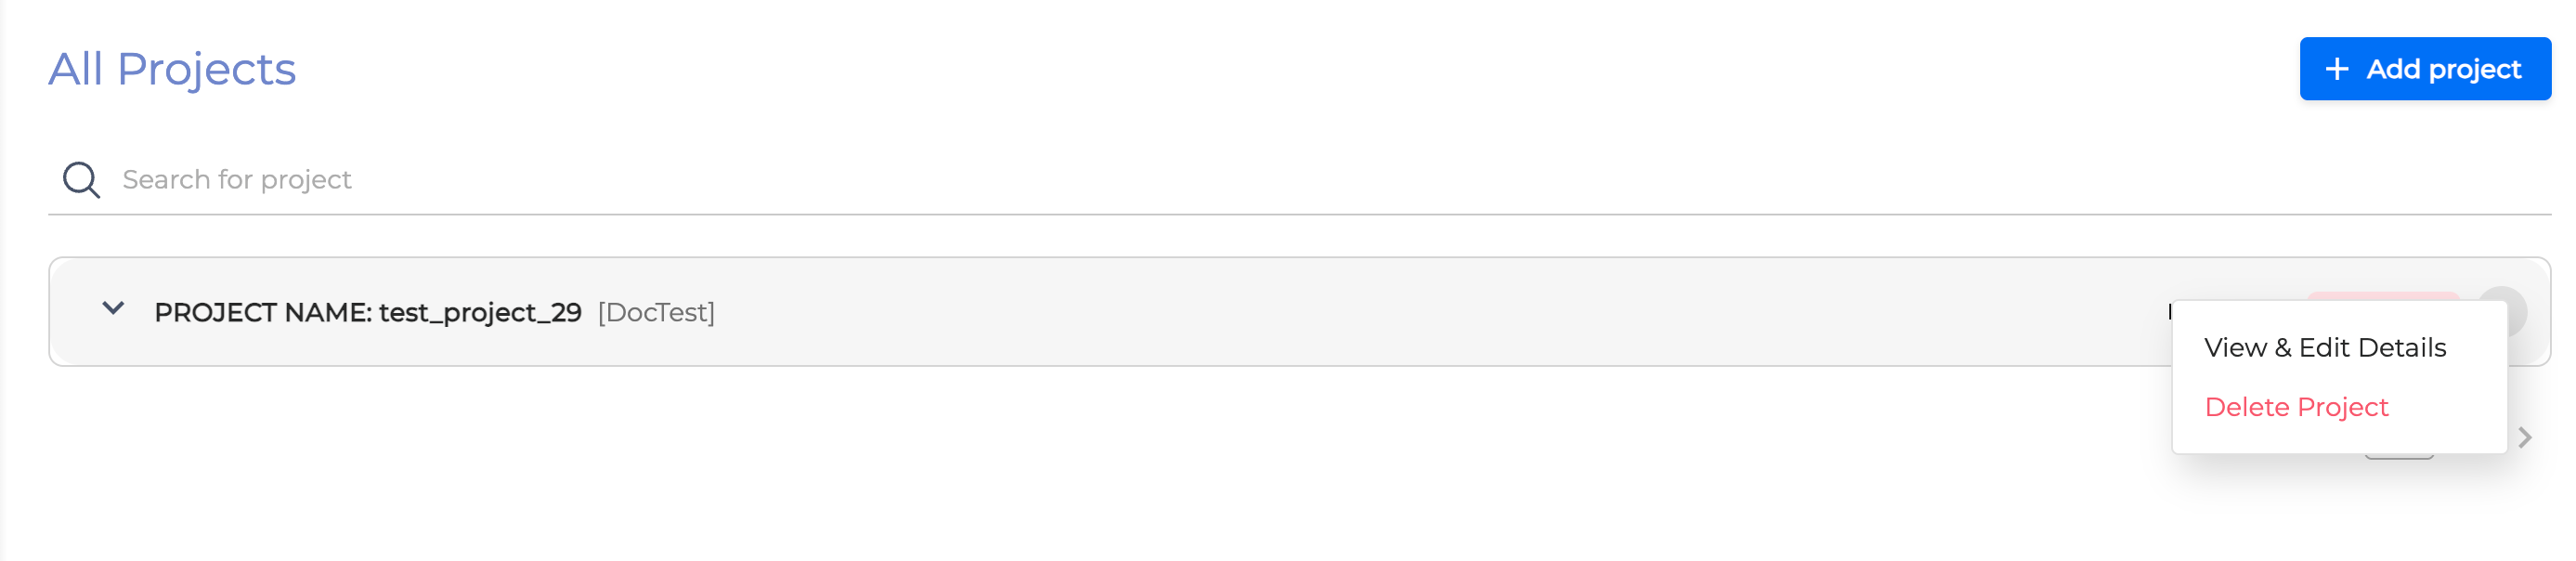
Select a project to delete and click the three dots icon.
3. Once clicked, confirm the deletion as requested below.
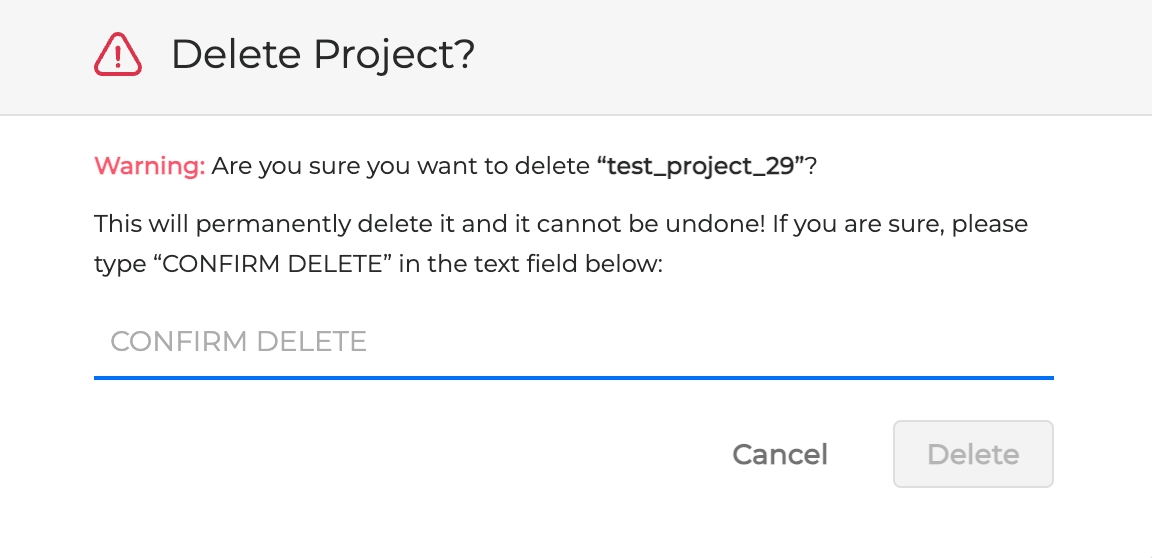
The project is deleted from the projects list.
Project Overview
To open a project, just click on it.
When you open a project, you can navigate through the following tabs:
-
Test Suites (only for Cloud storage)
The Insights section is located under the Run History tab.
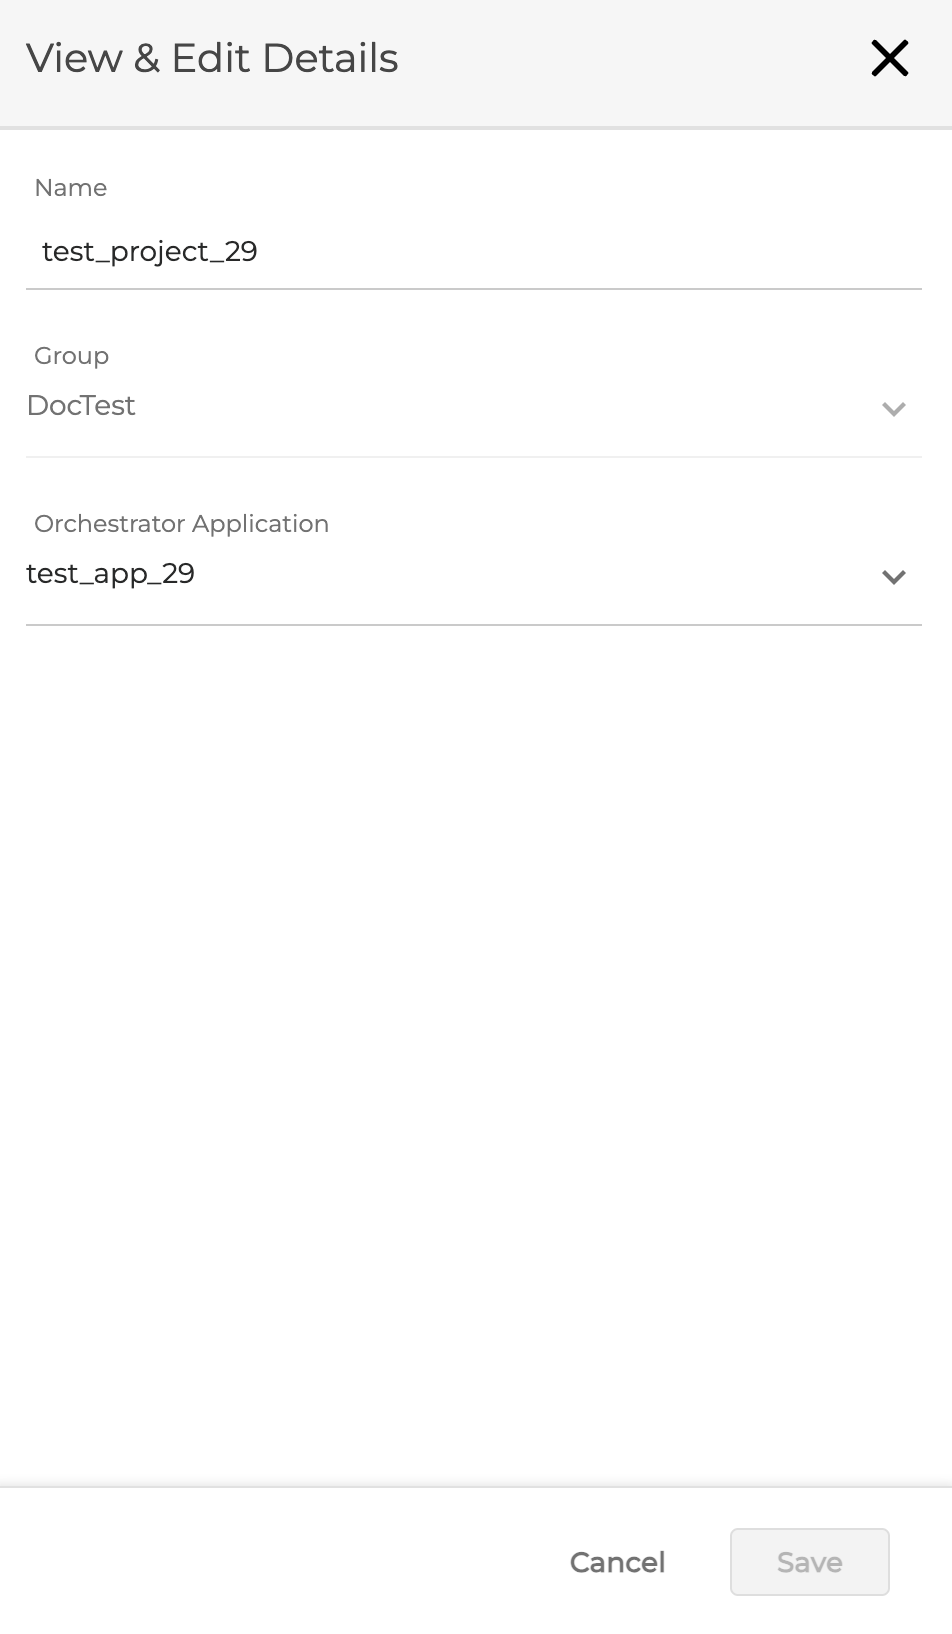
View & Edit Details
-
Click the Options menu on the right of the project name → select View & Edit Details.
-
The following dialog box opens.
-
This menu displays the general information about a selected project, such as its name, the remote repository URL and the access token. This is basically the information you’ve entered when creating the page.
-
You can modify the project general information any time. Click Save to save the changes if modified.
Test Suites
A Test Suite is a collection of test case files grouped together for test execution purposes. In the Test Suites tab, you can upload and download a Test Suite, view the content of a test file, edit, create, and delete test files and folders.
Upload a Test Suite
You can upload your collection of test case files as a ZIP file from your computer to Testing Studio.
If you are using macOS, compress the Test Suite folder into a ZIP file using the Terminal before uploading to Testing Studio+, as other methods of compression may result in file rejection.
To compress via Terminal, enter the following command:
zip -r {output_file} {folder}
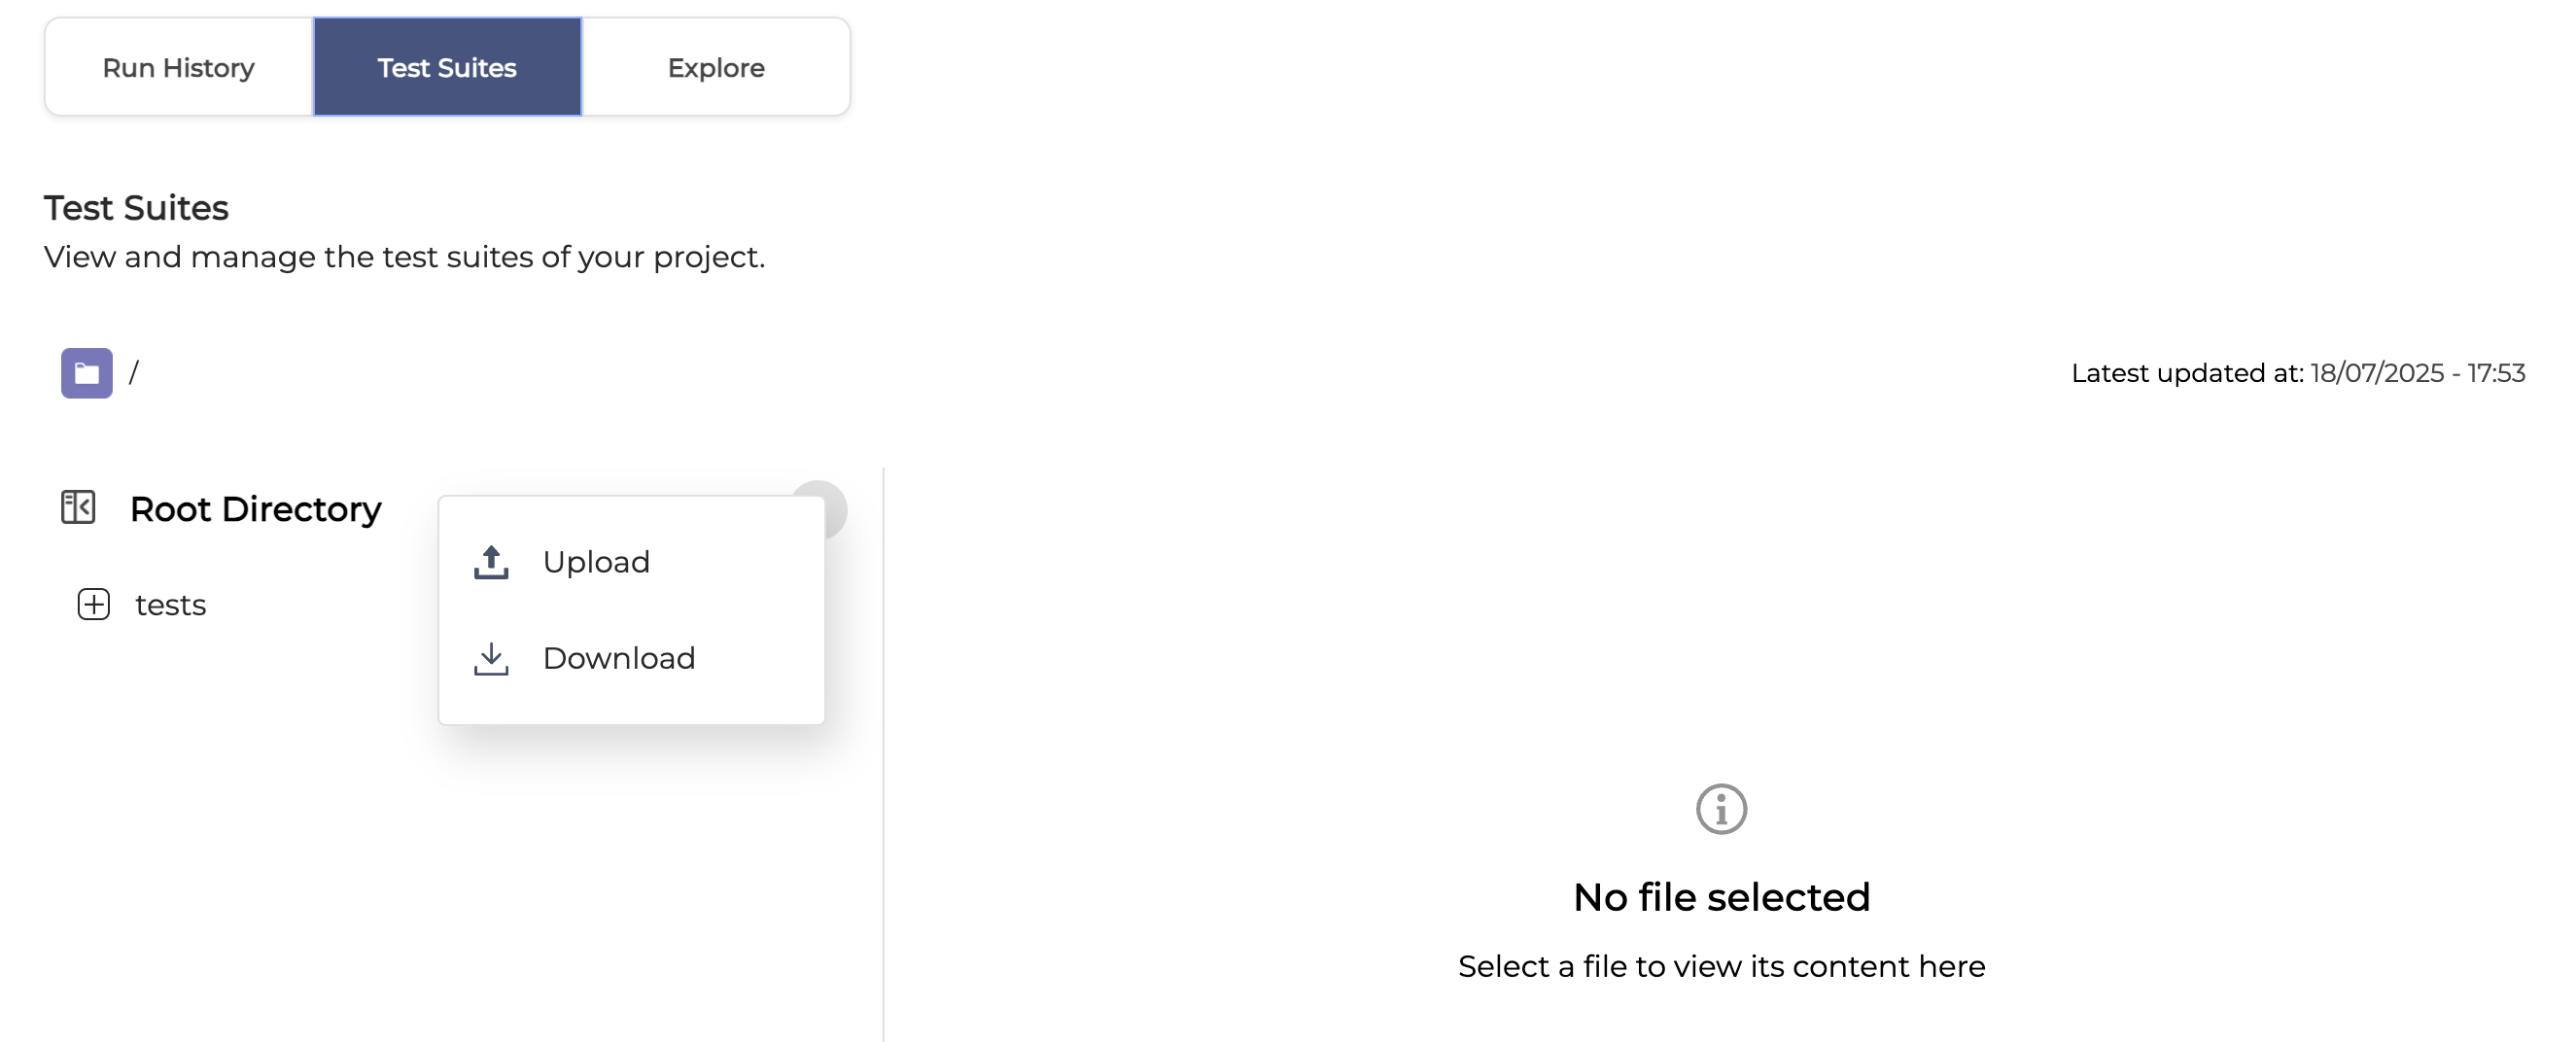
To upload a Test Suite, follow the steps below:
-
In the Test Suites tab, click the Options menu next to the Root Directory and select Upload.
-
Drag and drop the ZIP file onto the drop zone, or click Browse Files and select your file.
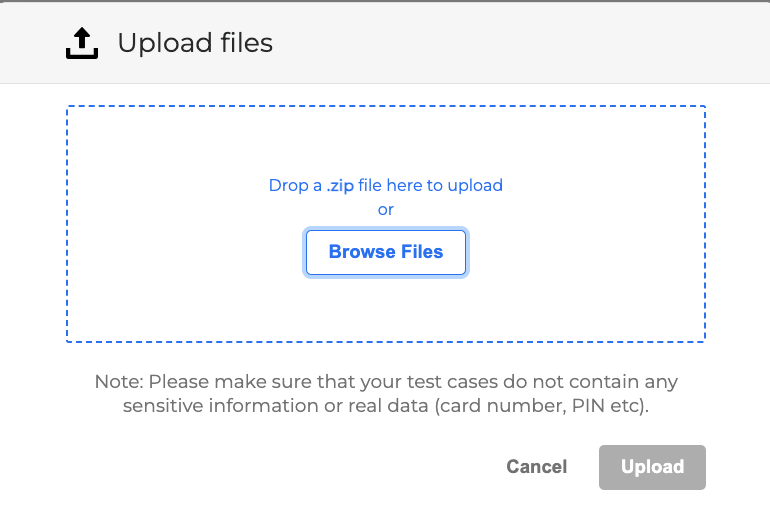
3. Click Upload to confirm. When the upload starts, you will see this pop-up notification.
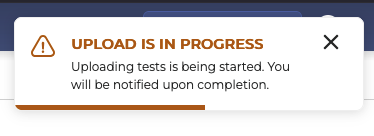
-
As soon as the upload is over, you will see this message in the right upper corner.
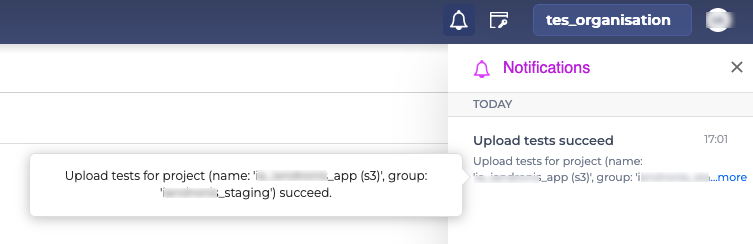
-
The uploaded Test Suite will appear in the list.
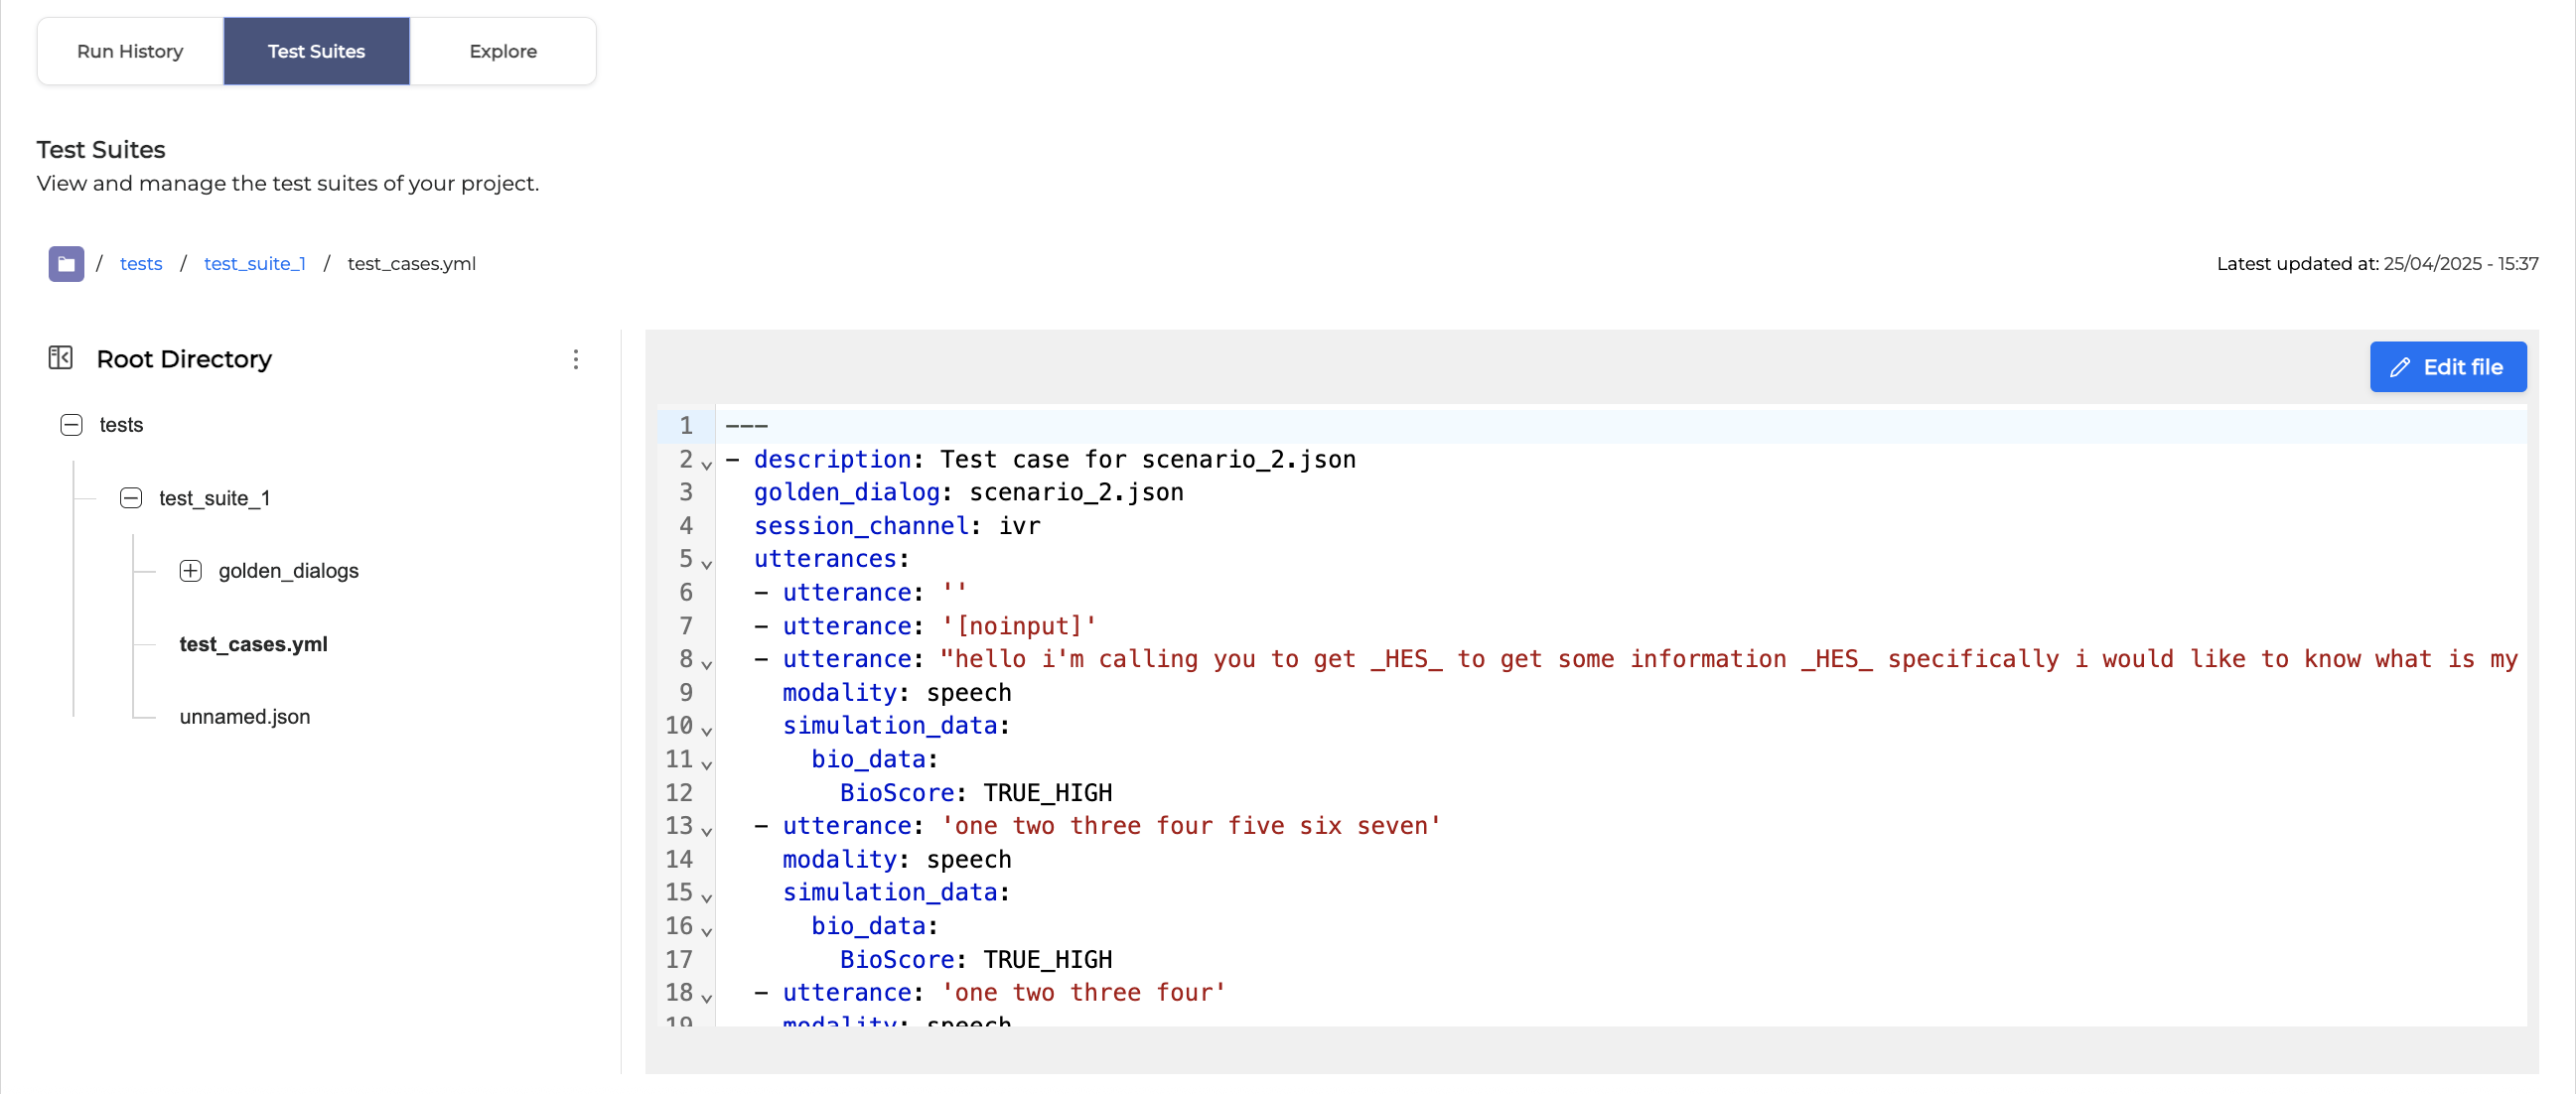
View a test file content
You can view the content of a test file directly within the Test Suites tab: simply select the file you want to view and click on it to display the content.
Edit a test file
You can edit a test file directly in Testing Studio. To do so, follow the instructions below:
-
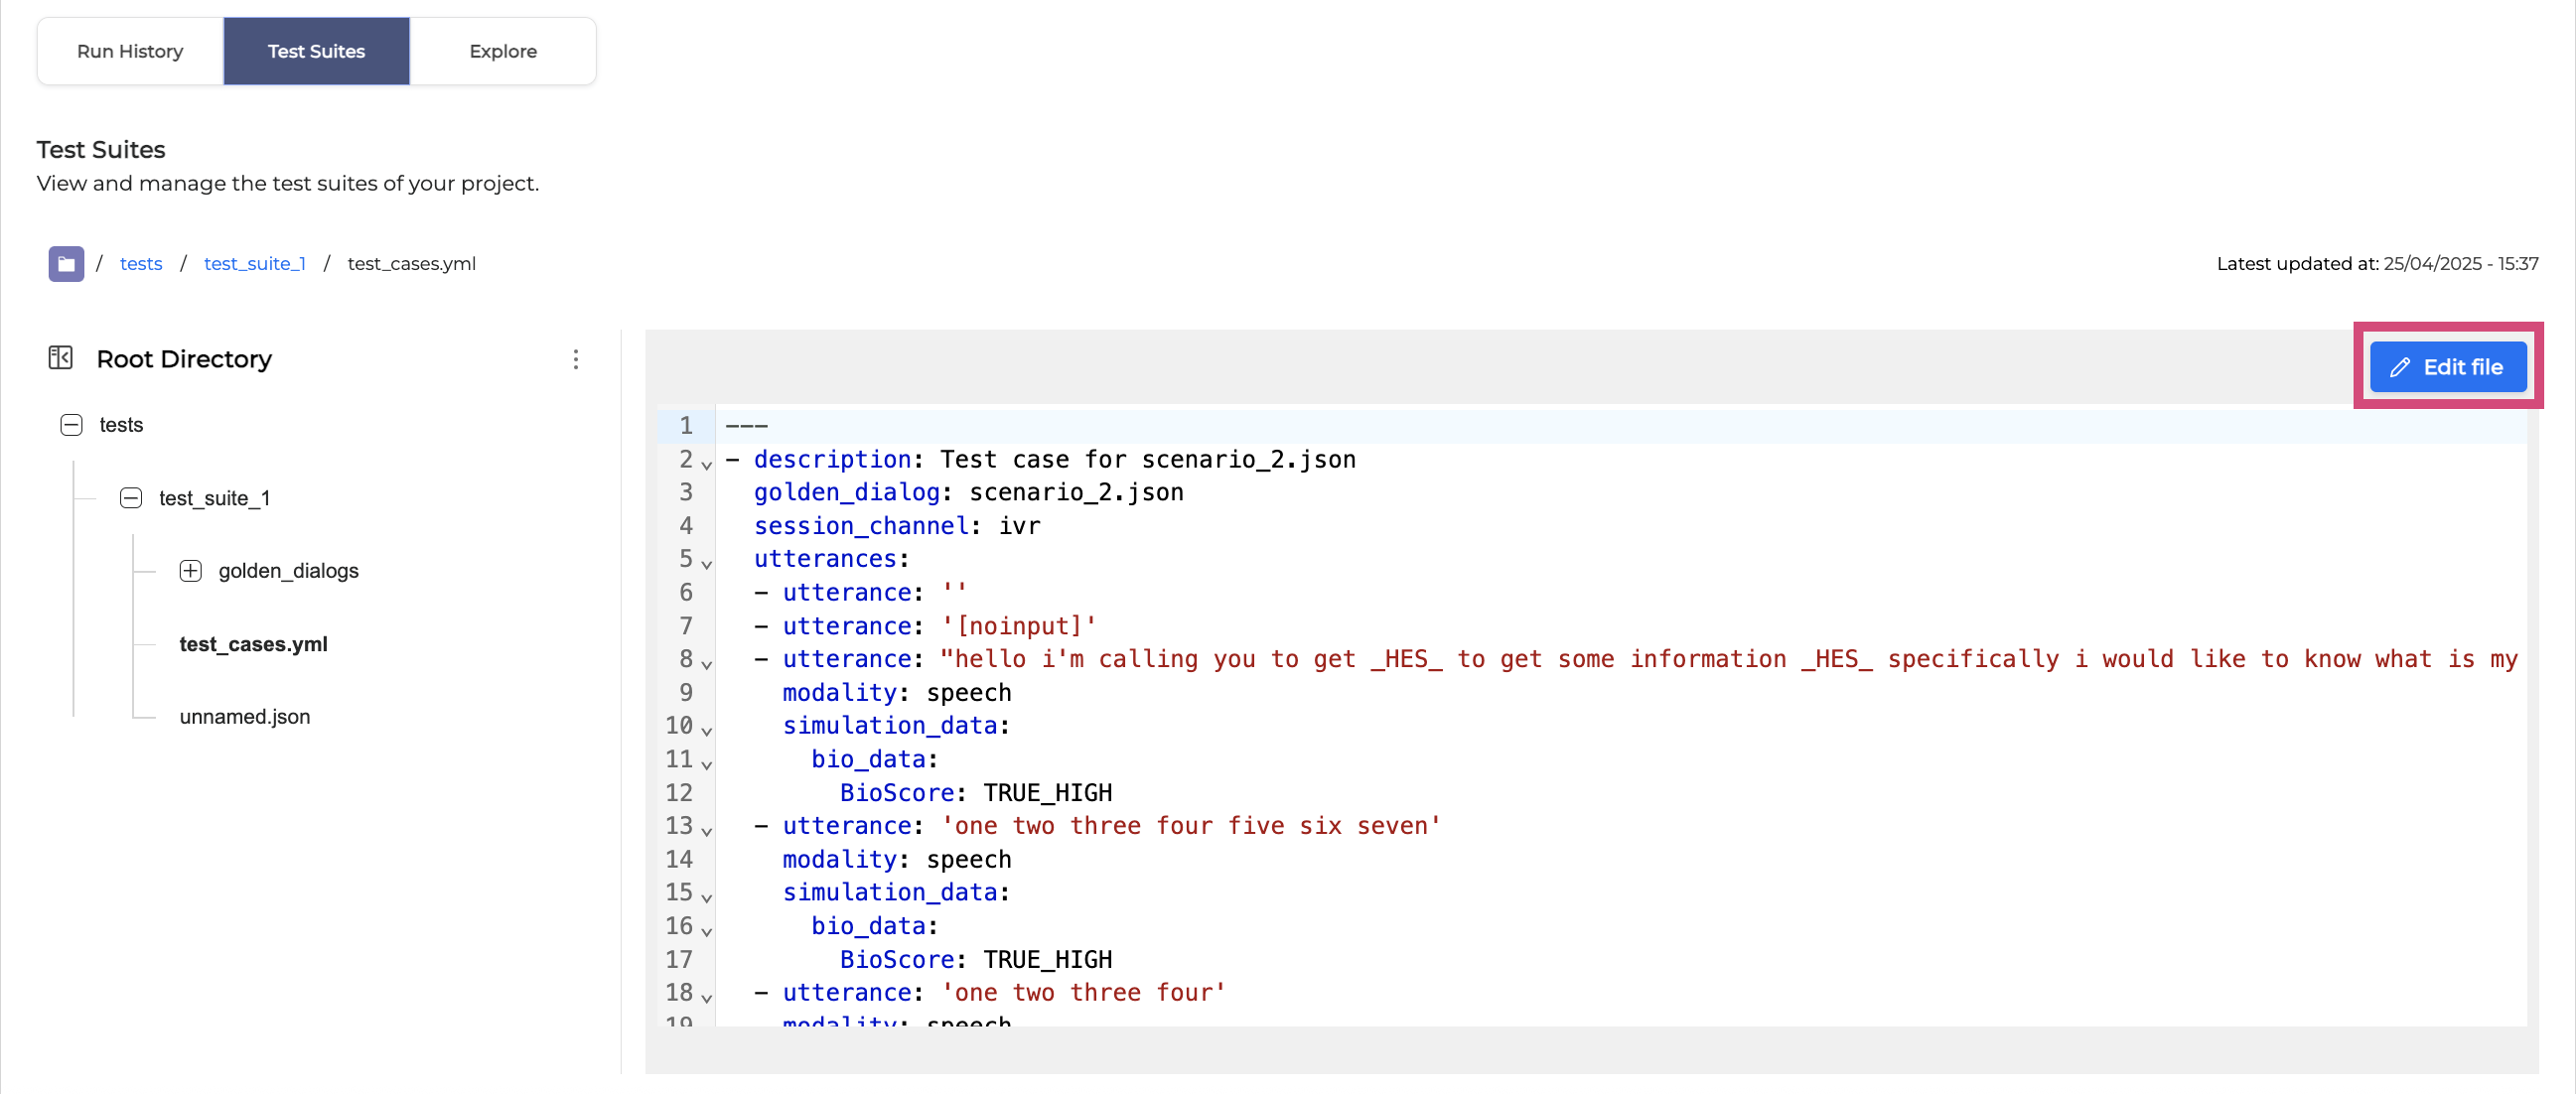
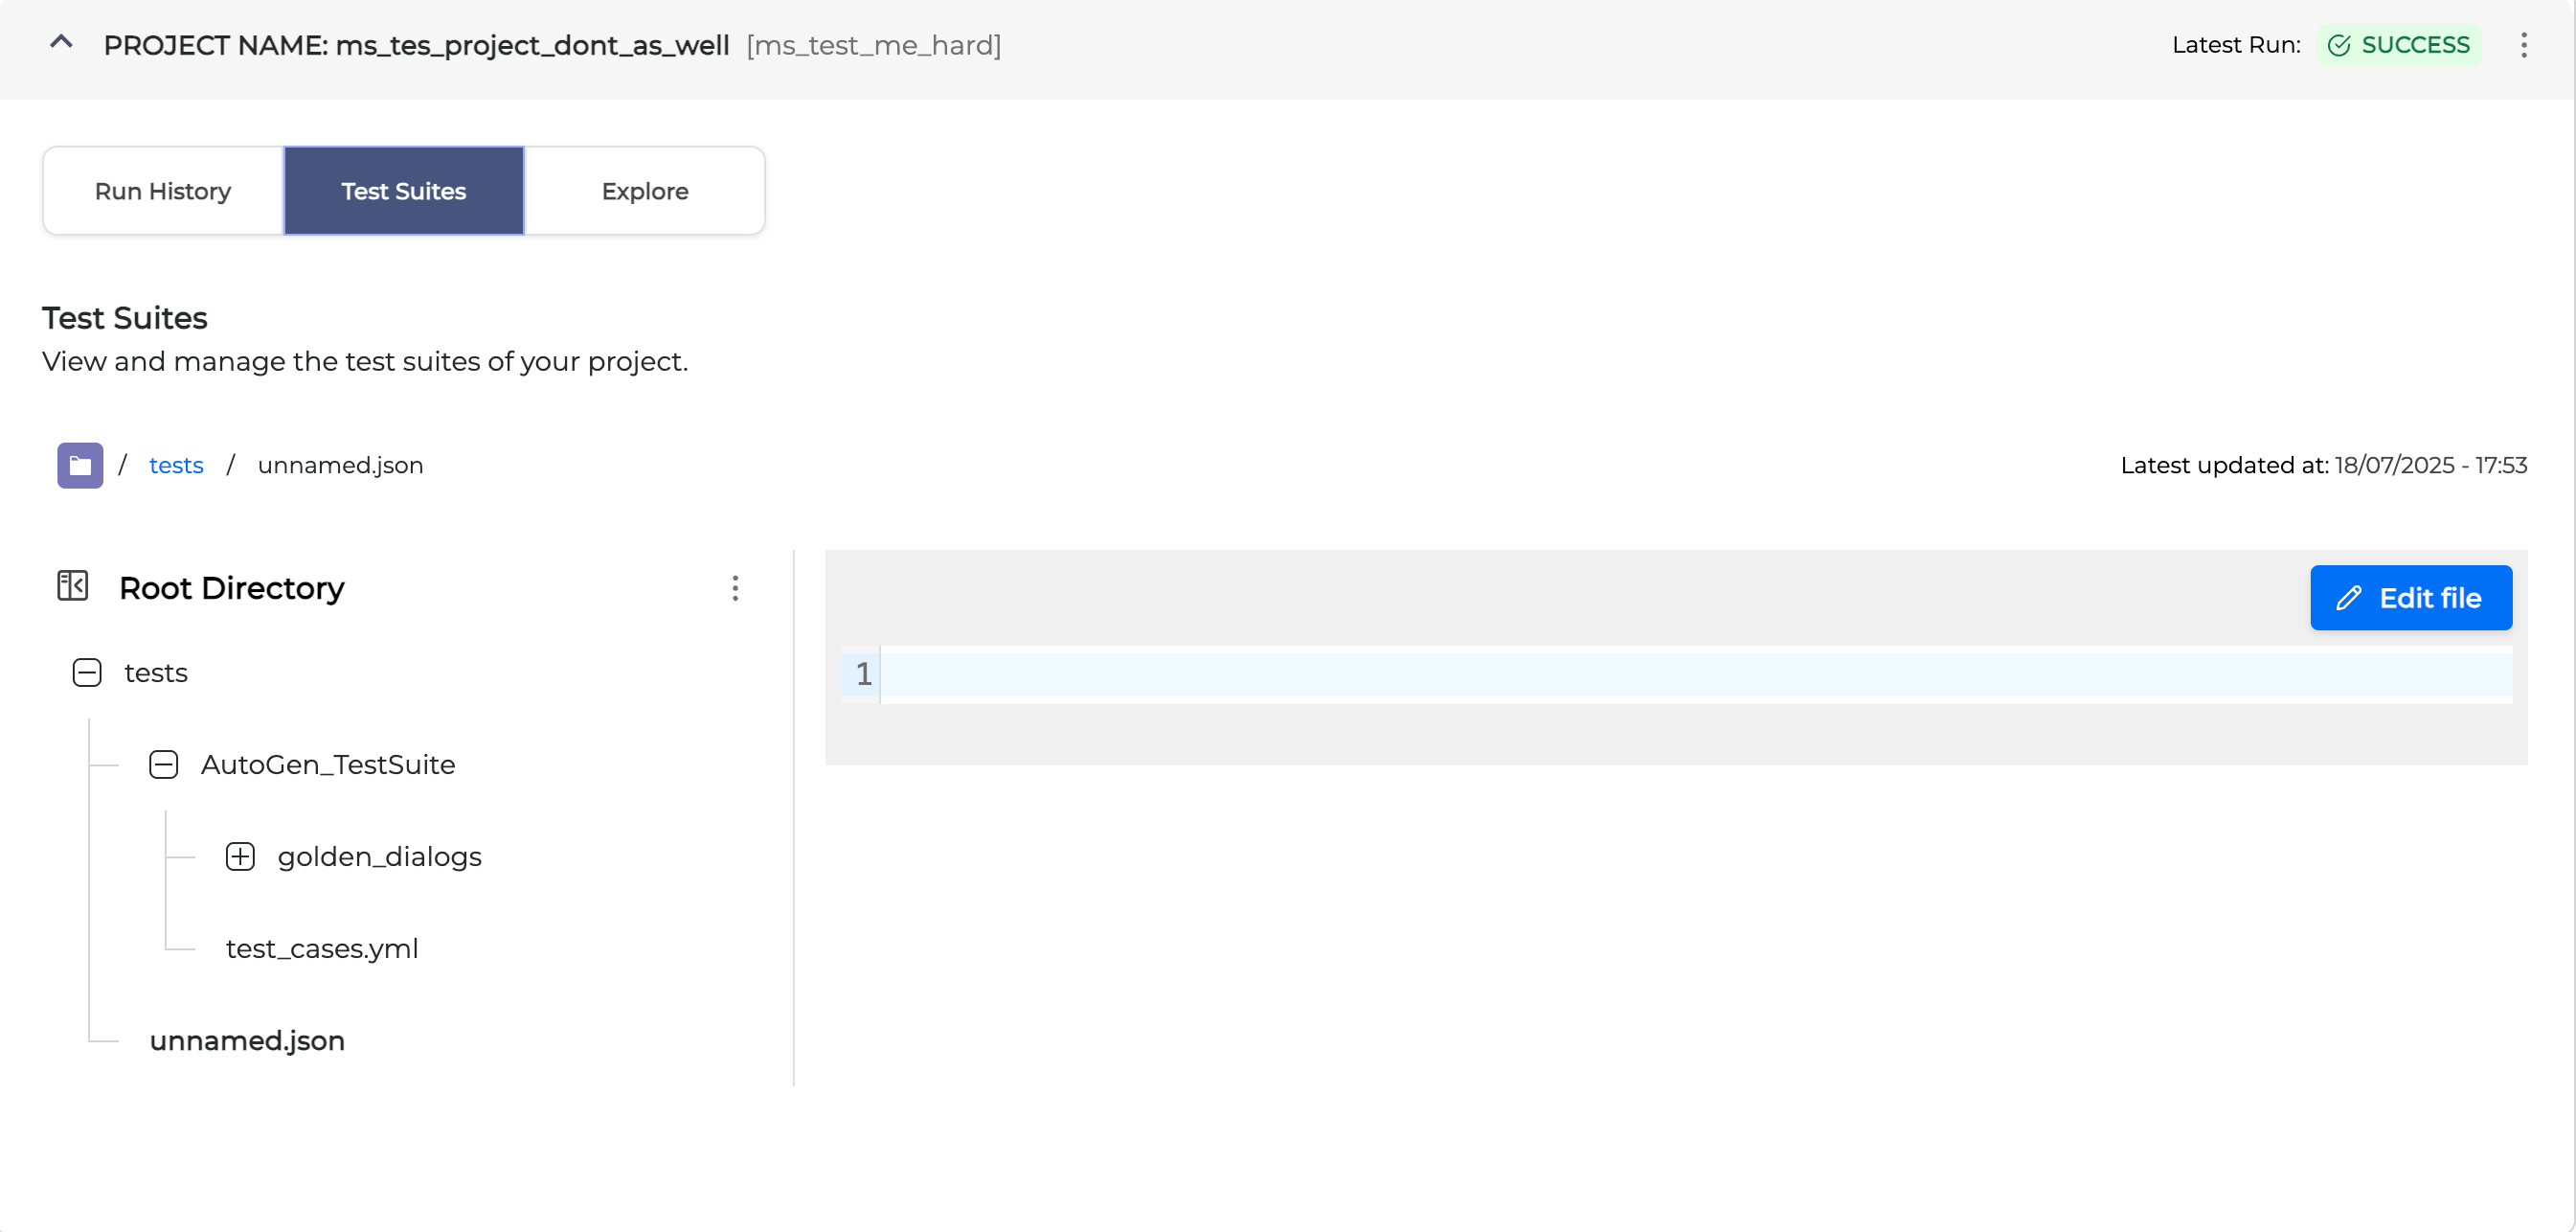
In the Test Suites tab, select the file you want to edit and click it to open.
-
Click Edit file to start editing. Note that only one user can edit a file at a time.
-
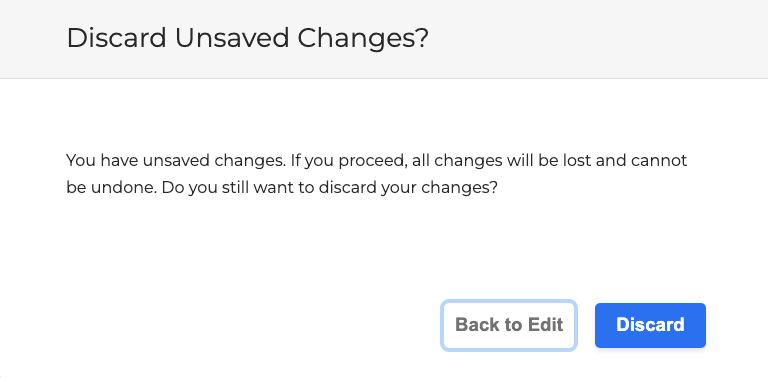
Click Save Changes to apply your edits, or Cancel → Discard to discard them.
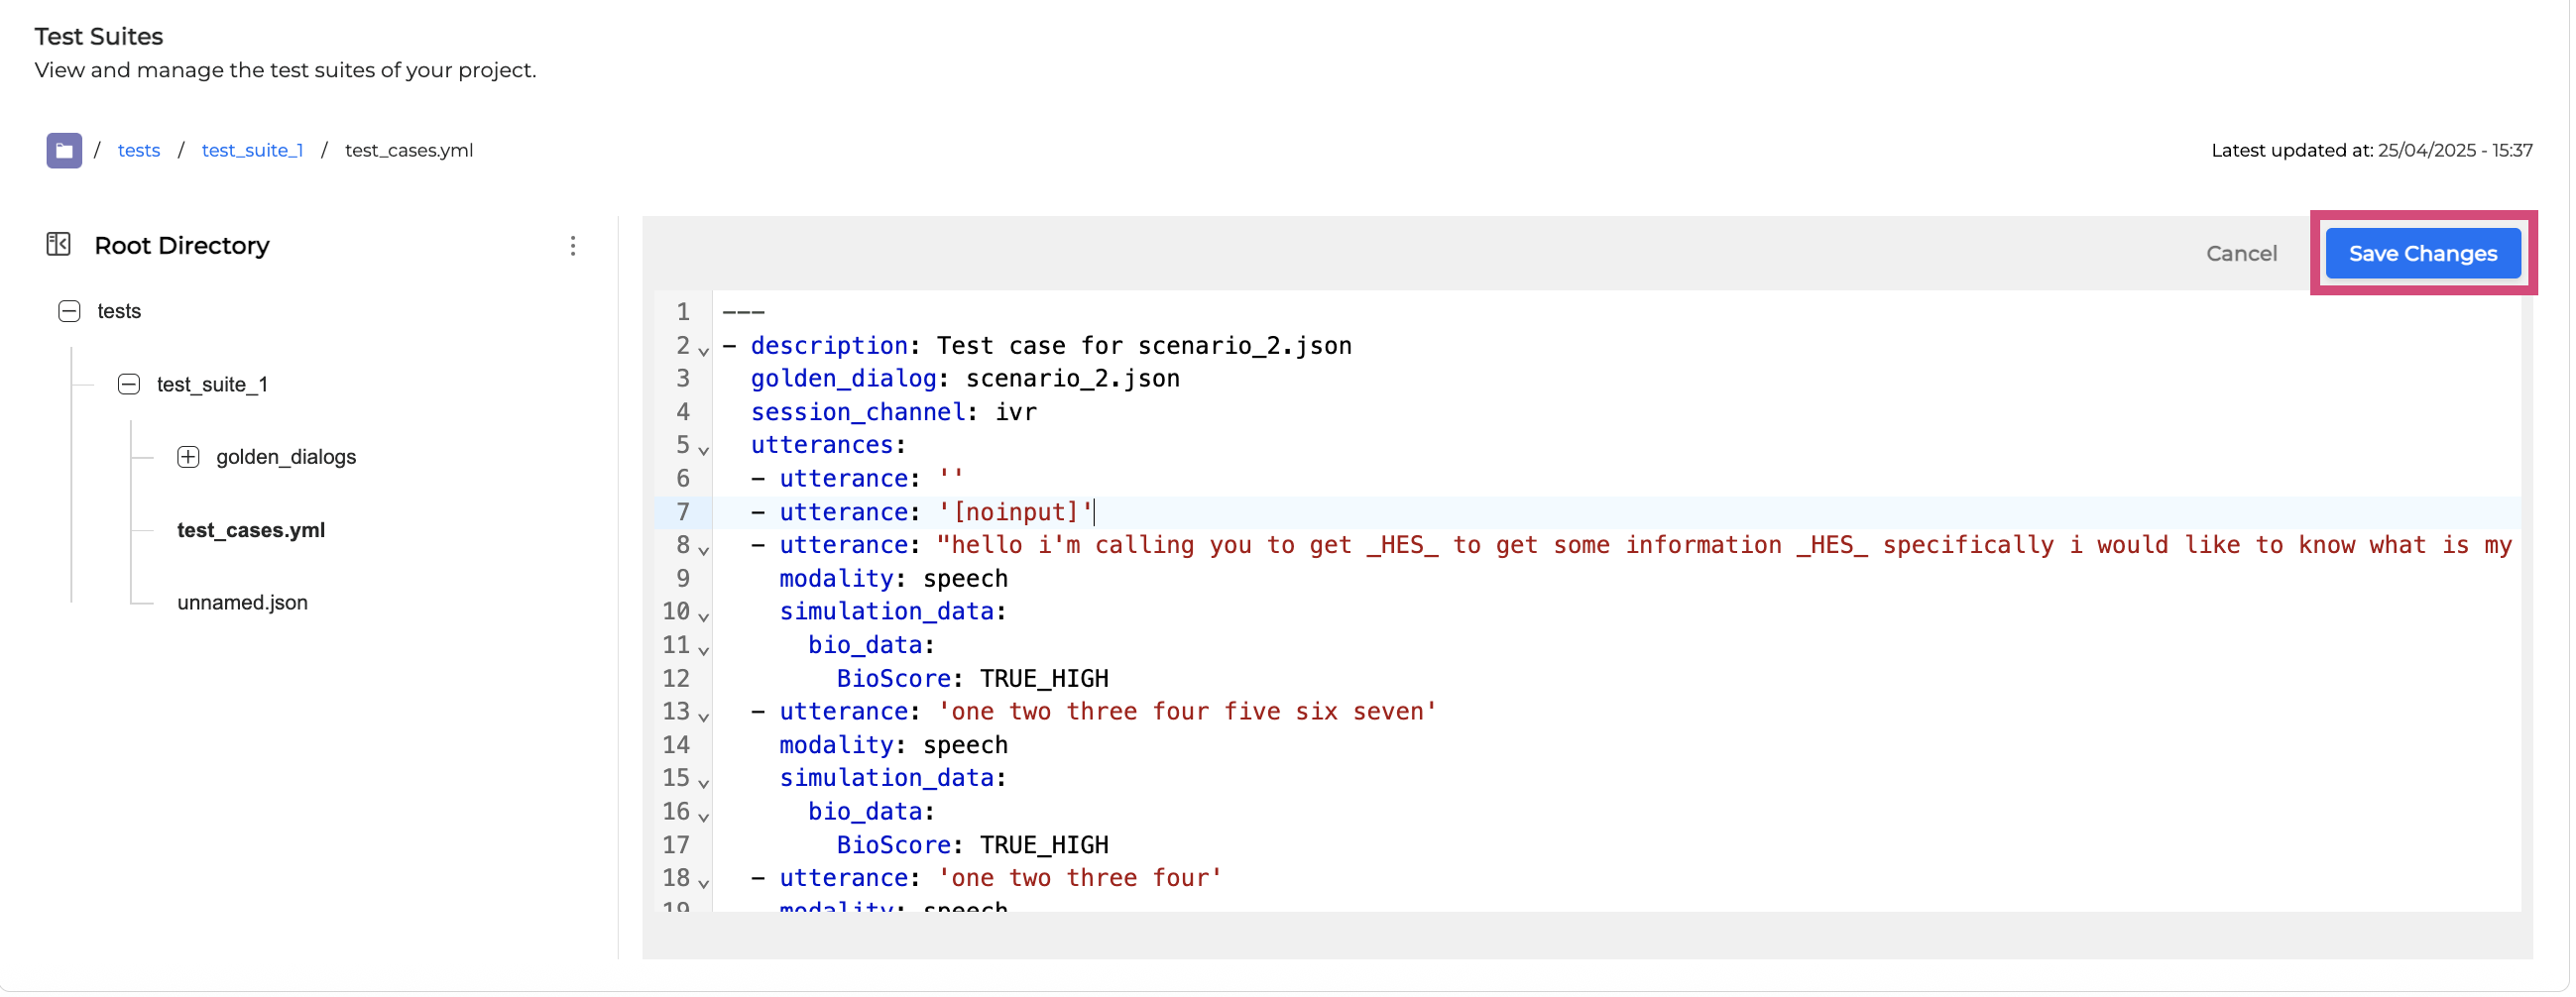
One user can edit the file at a time; if additional users want to edit at the same time, the Edit file button will be disabled for them.
Create a test file
To create a new test file, proceed as described below:
-
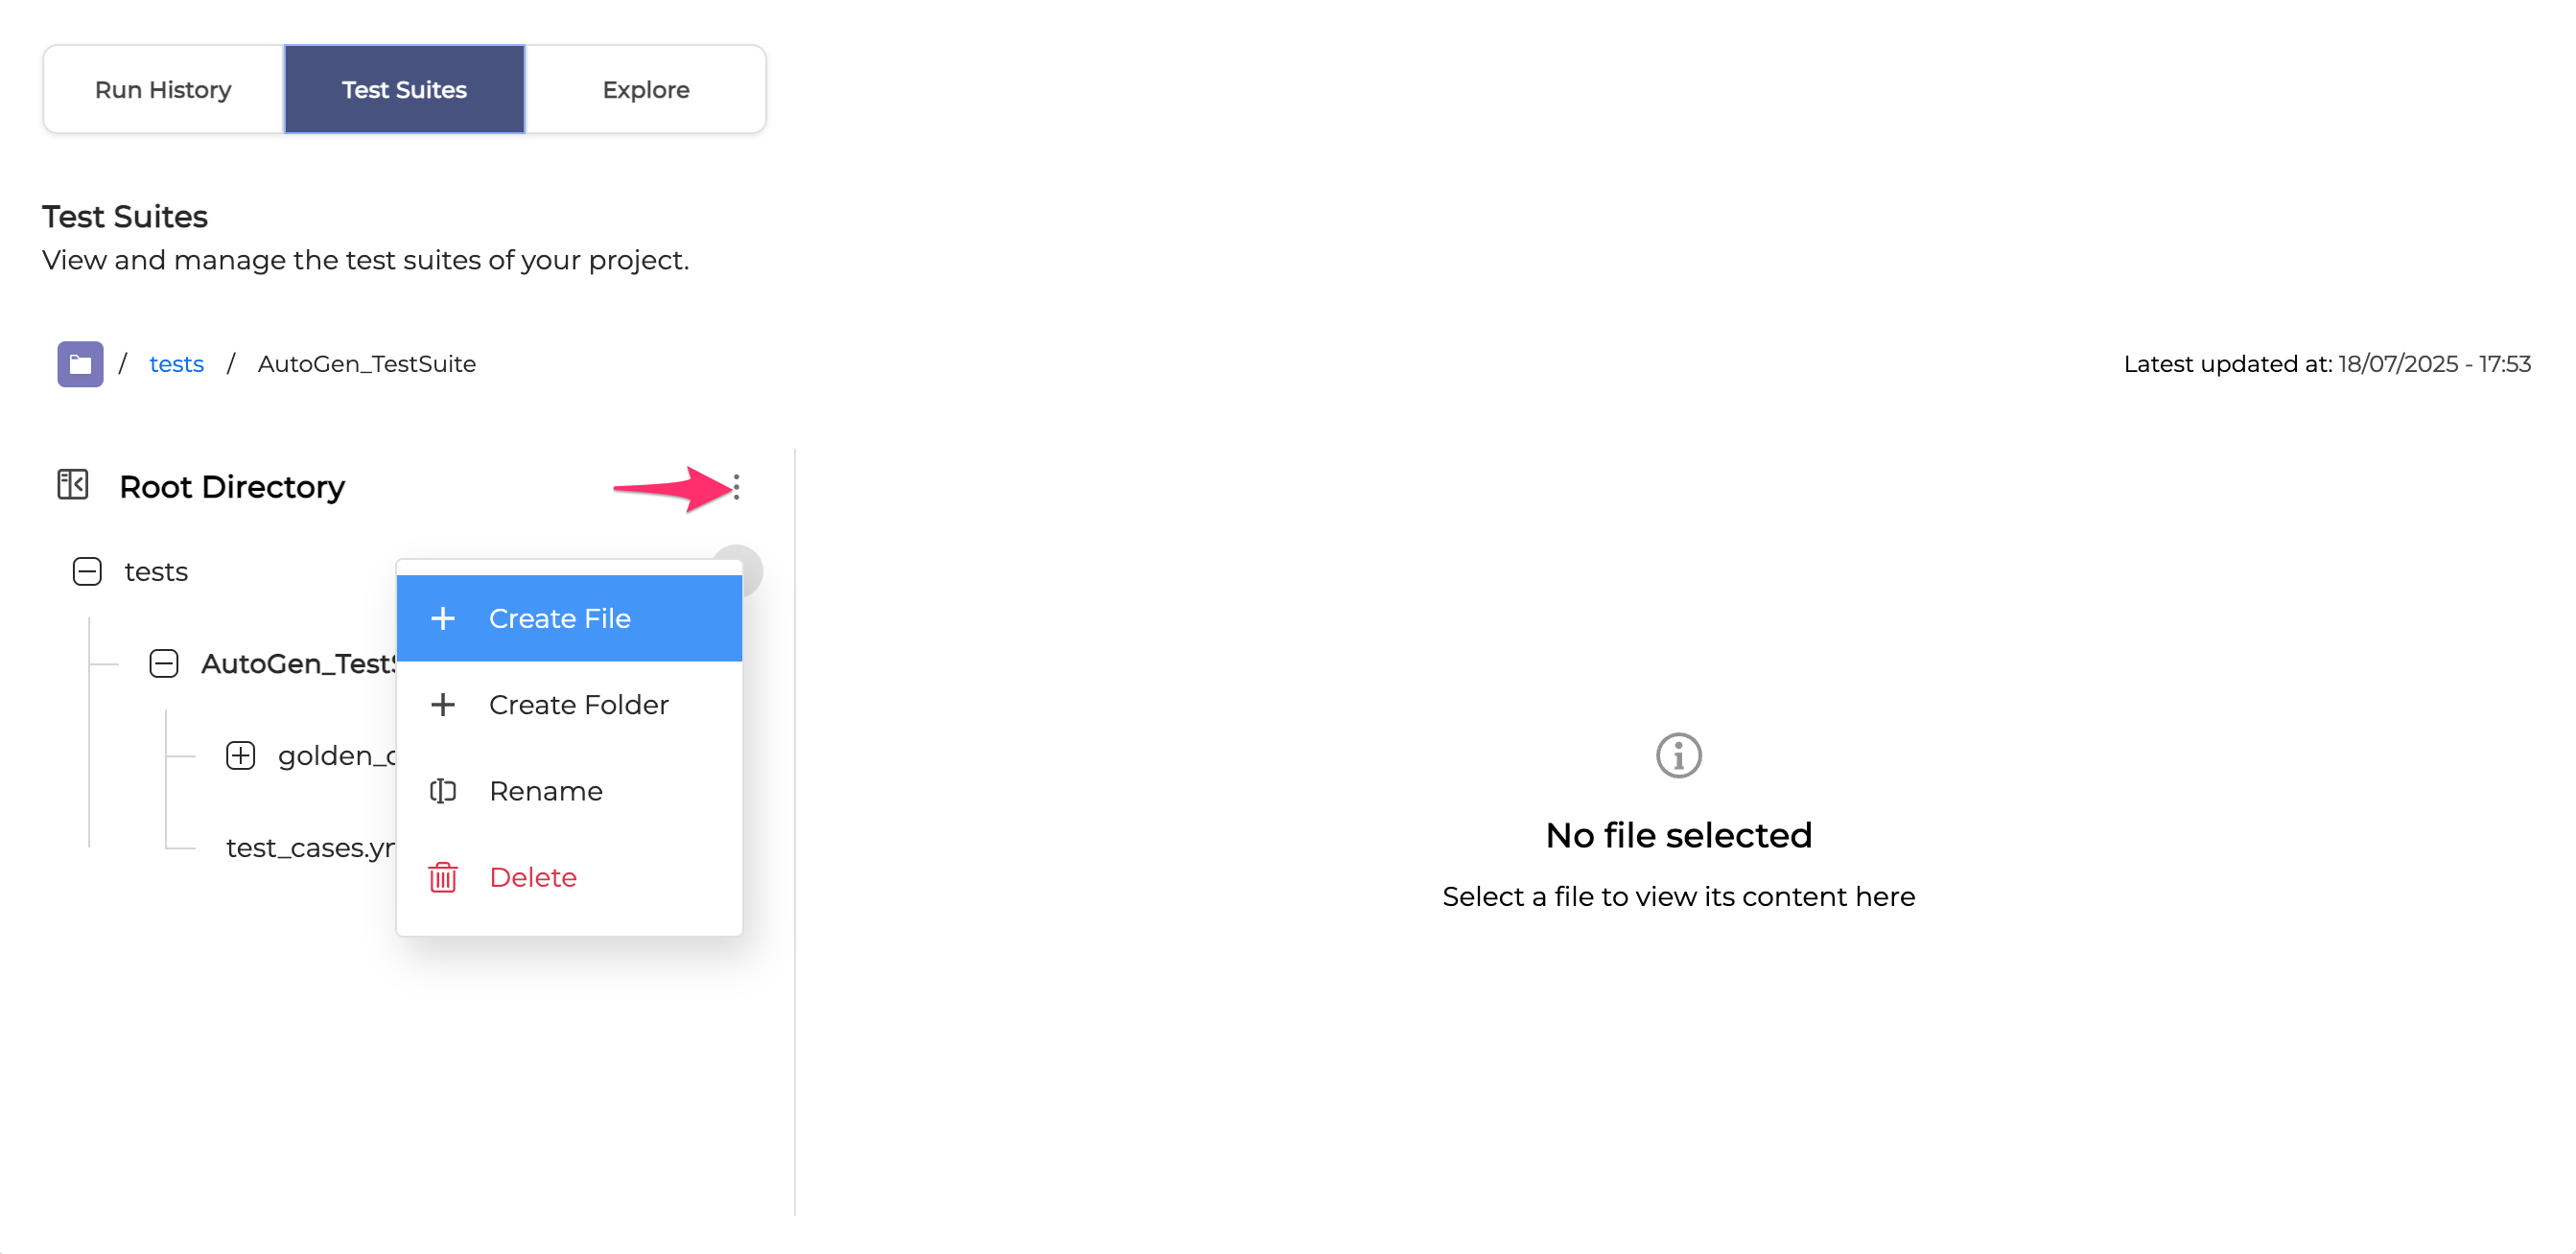
In the Test Suites tab, click the Options menu next to the folder where you want to create the file, then click Create File.
-
A new empty unnamed.json file will be added to the selected folder.
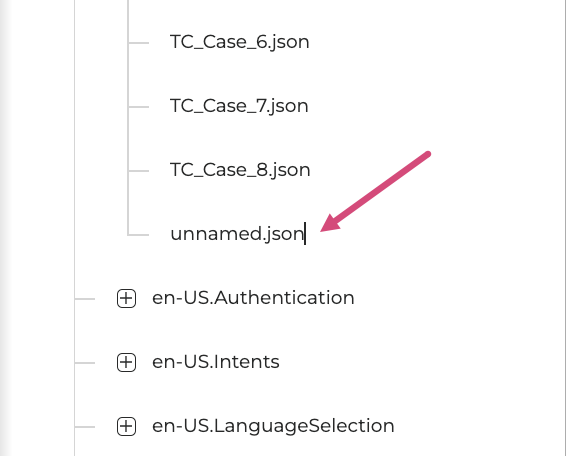
-
You can enter a new file name at this step or Rename your test file later.
Test files should be in either JSON or YAML format.
A file name may only include the following characters: a-z, A-Z, 0-9, underscores, and non-continuous dots.
-
Click the created test file to open it. You can now edit this file as described in the Edit a test file section.
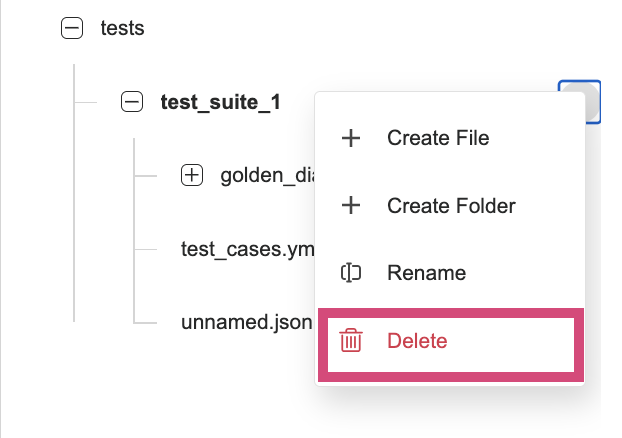
Create a folder
To create a new folder, proceed as described below:
-
In the Test Suites tab, click the Options menu next to the folder that will contain it, then click Create Folder.
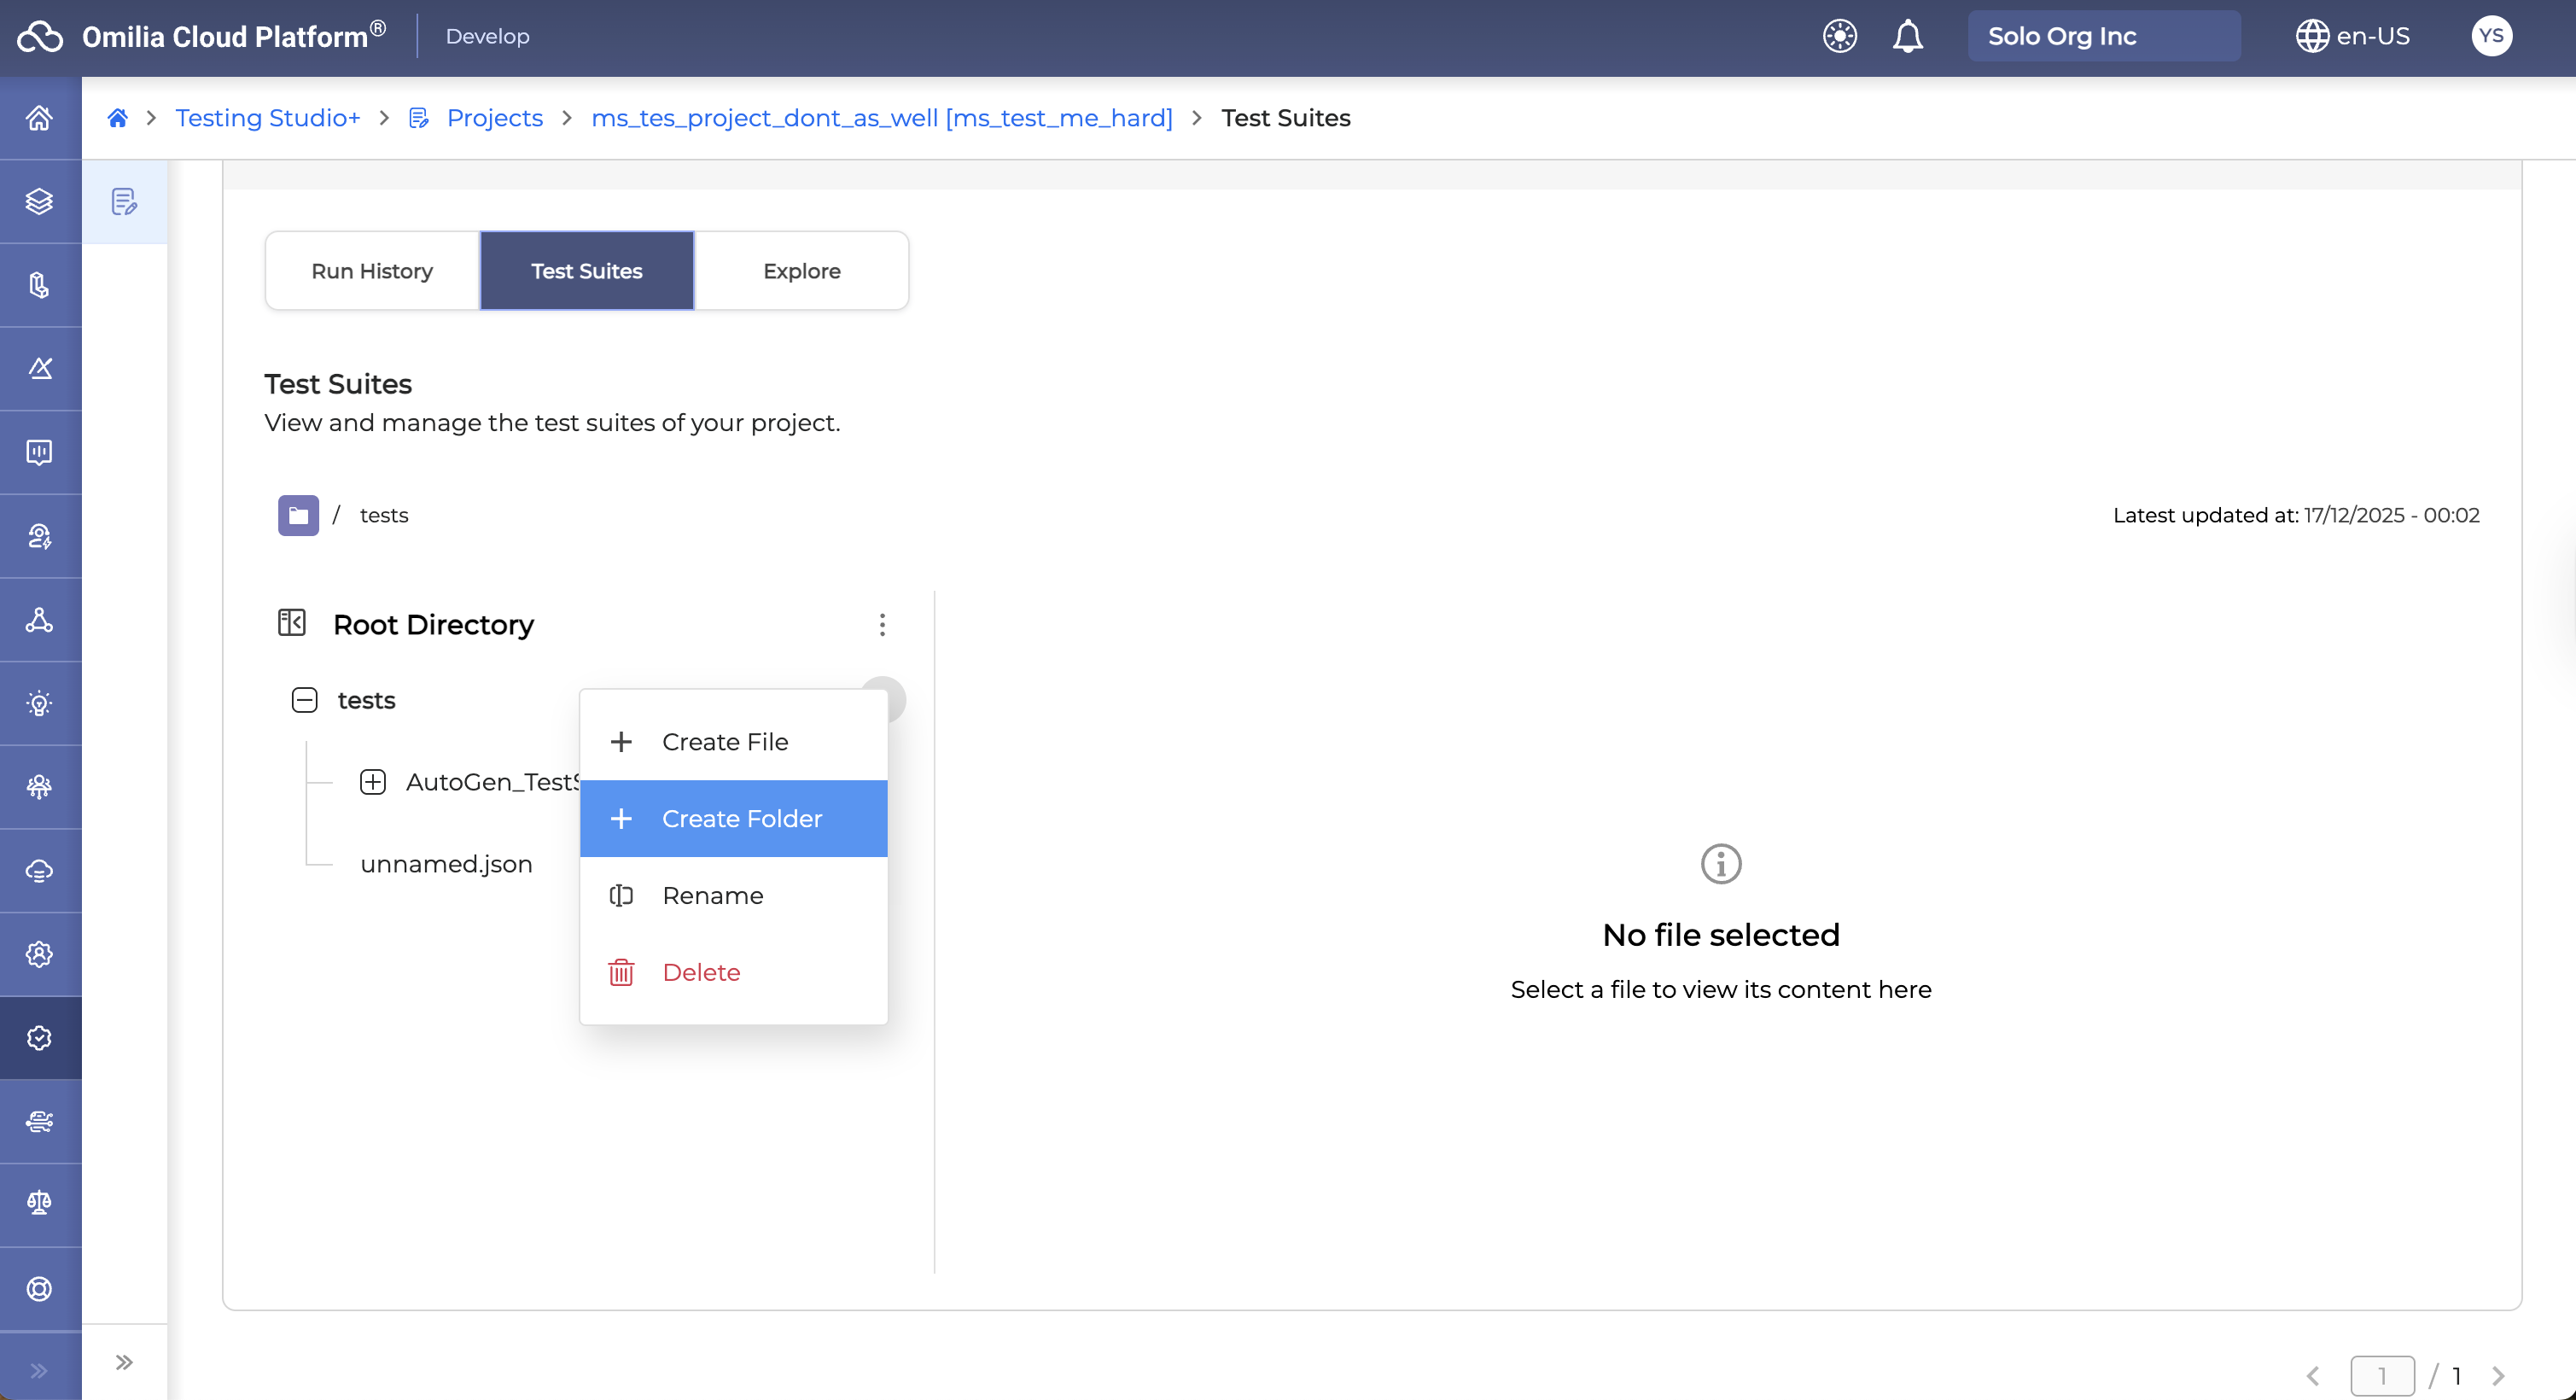
-
A new empty unnamed folder will appear.
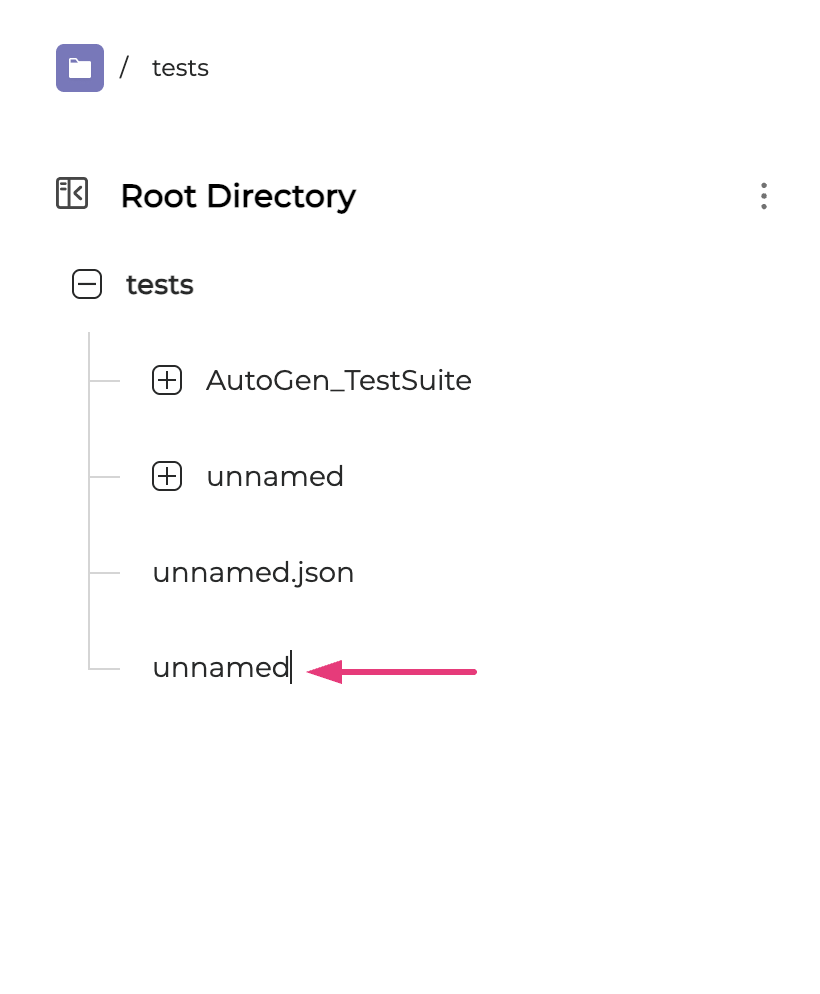
-
You can enter a new folder name at this step or Rename your folder later.
A folder name may only include the following characters: a-z, A-Z, 0-9, underscores, and non-continuous dots.
Download a test file
To download a test file, follow the guidelines below:
-
Locate the test file you want to download.
-
Click the Options menu and select Download.
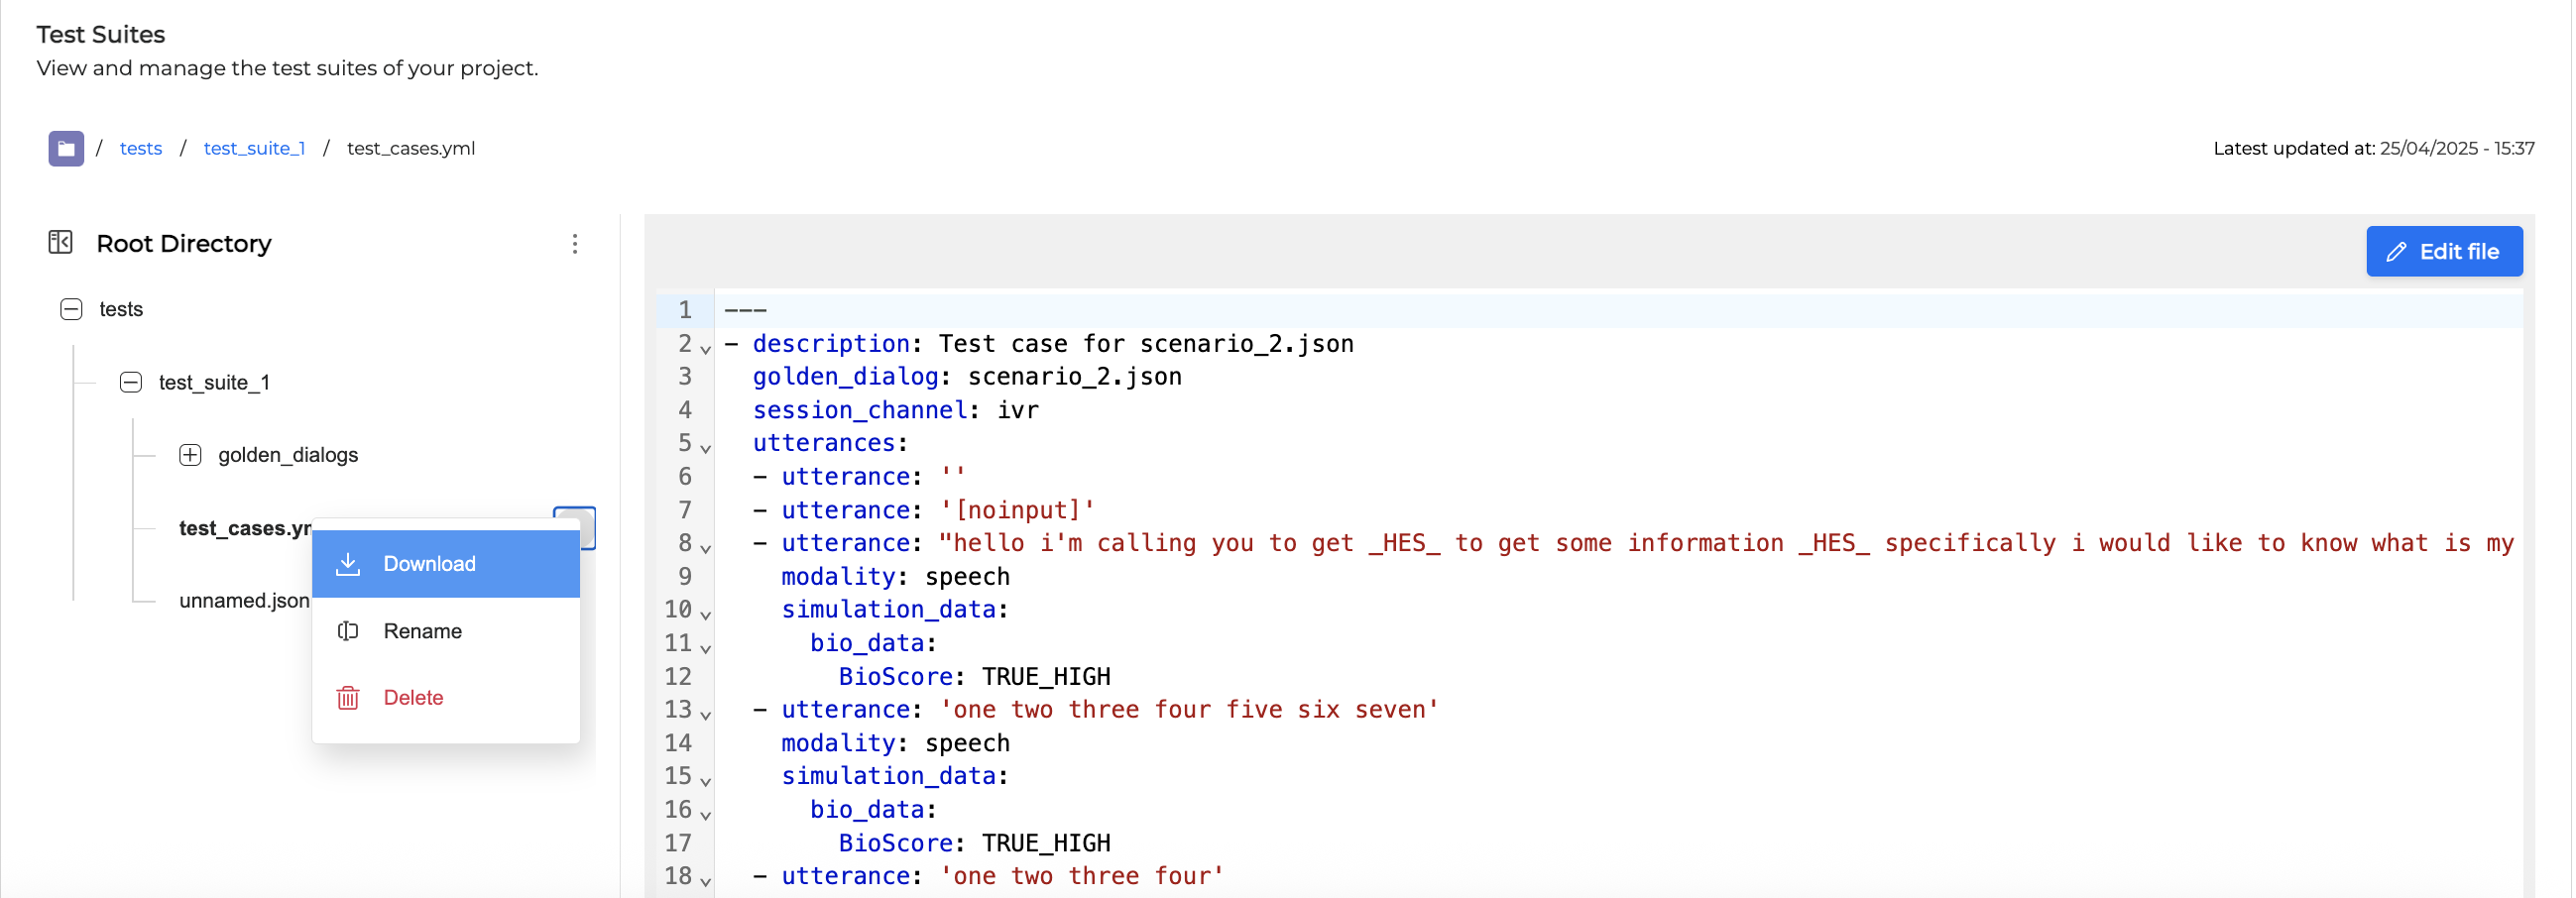
-
The selected file will be downloaded.
Rename a test file/folder
To rename a test file or a folder, follow the guidelines below:
-
Locate the test file or folder you want to rename.
-
Click the Options icon and select Rename.
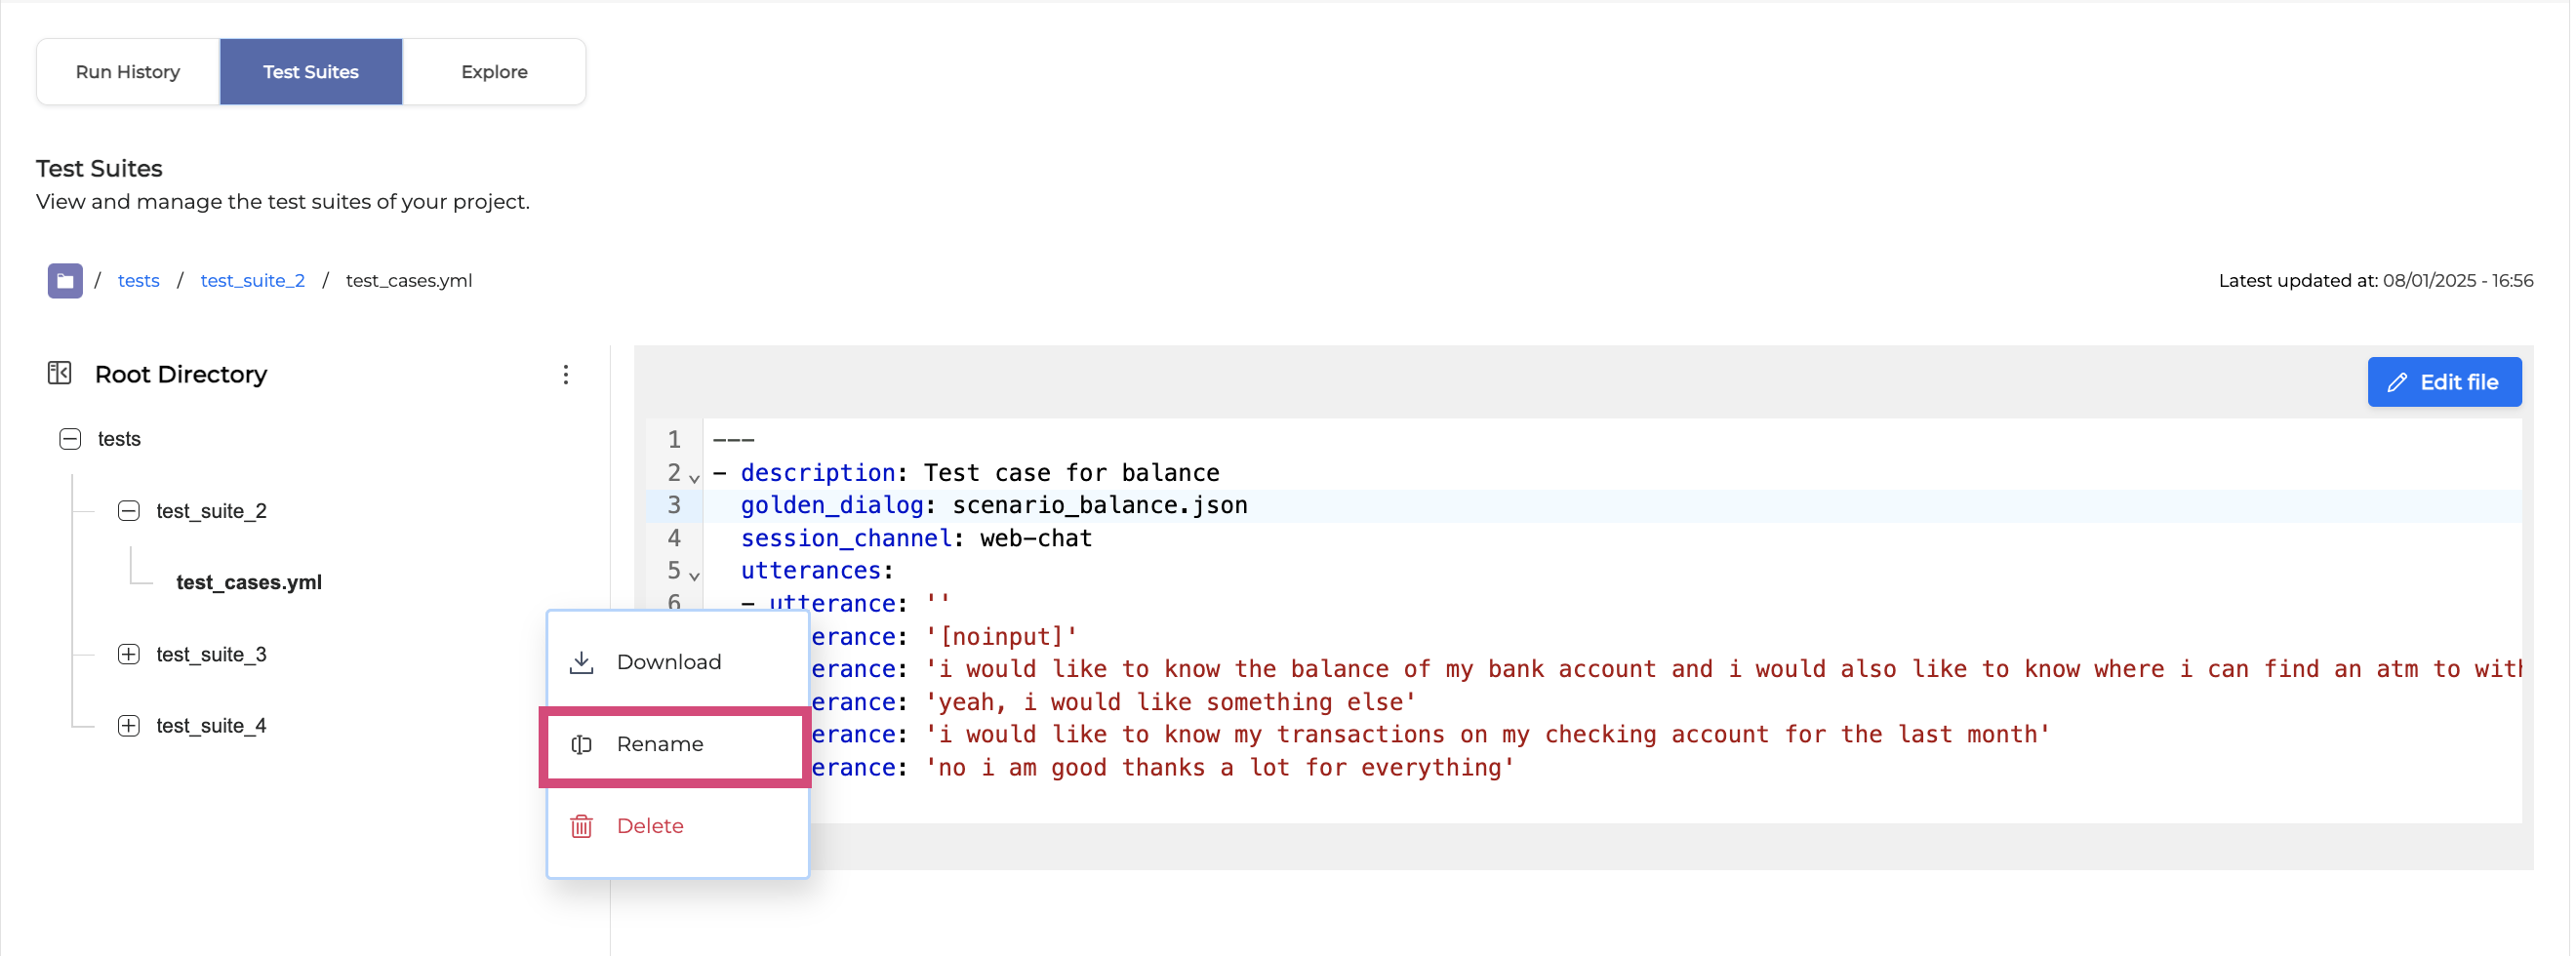
-
Enter a new file or folder name and press <Enter>. The file/folder name will change accordingly.
A file or folder name may only include the following characters: a-z, A-Z, 0-9, underscores, and non-continuous dots.
Delete a test file/folder
To delete a test file or a folder, click the Options menu and select Delete.
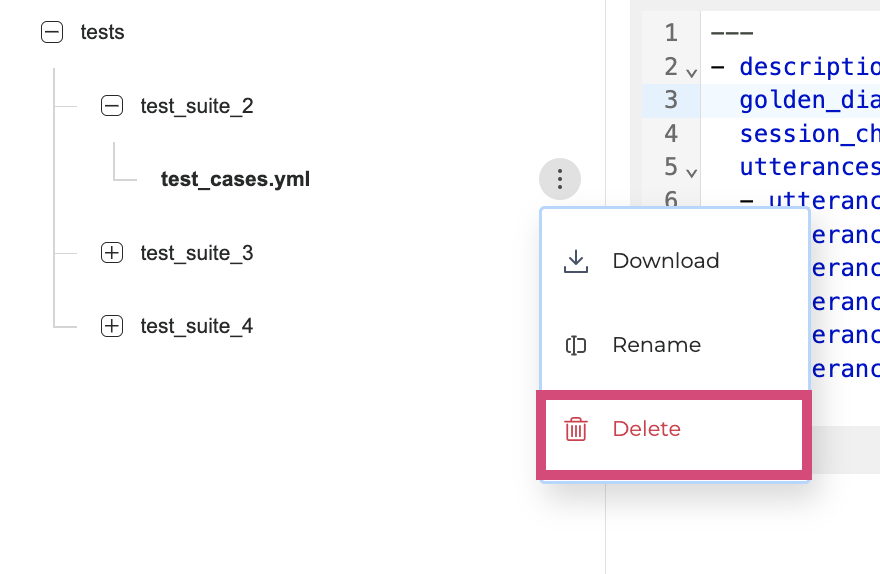
Deleted files and folders are permanently removed. Ensure you have selected the correct item before deletion.
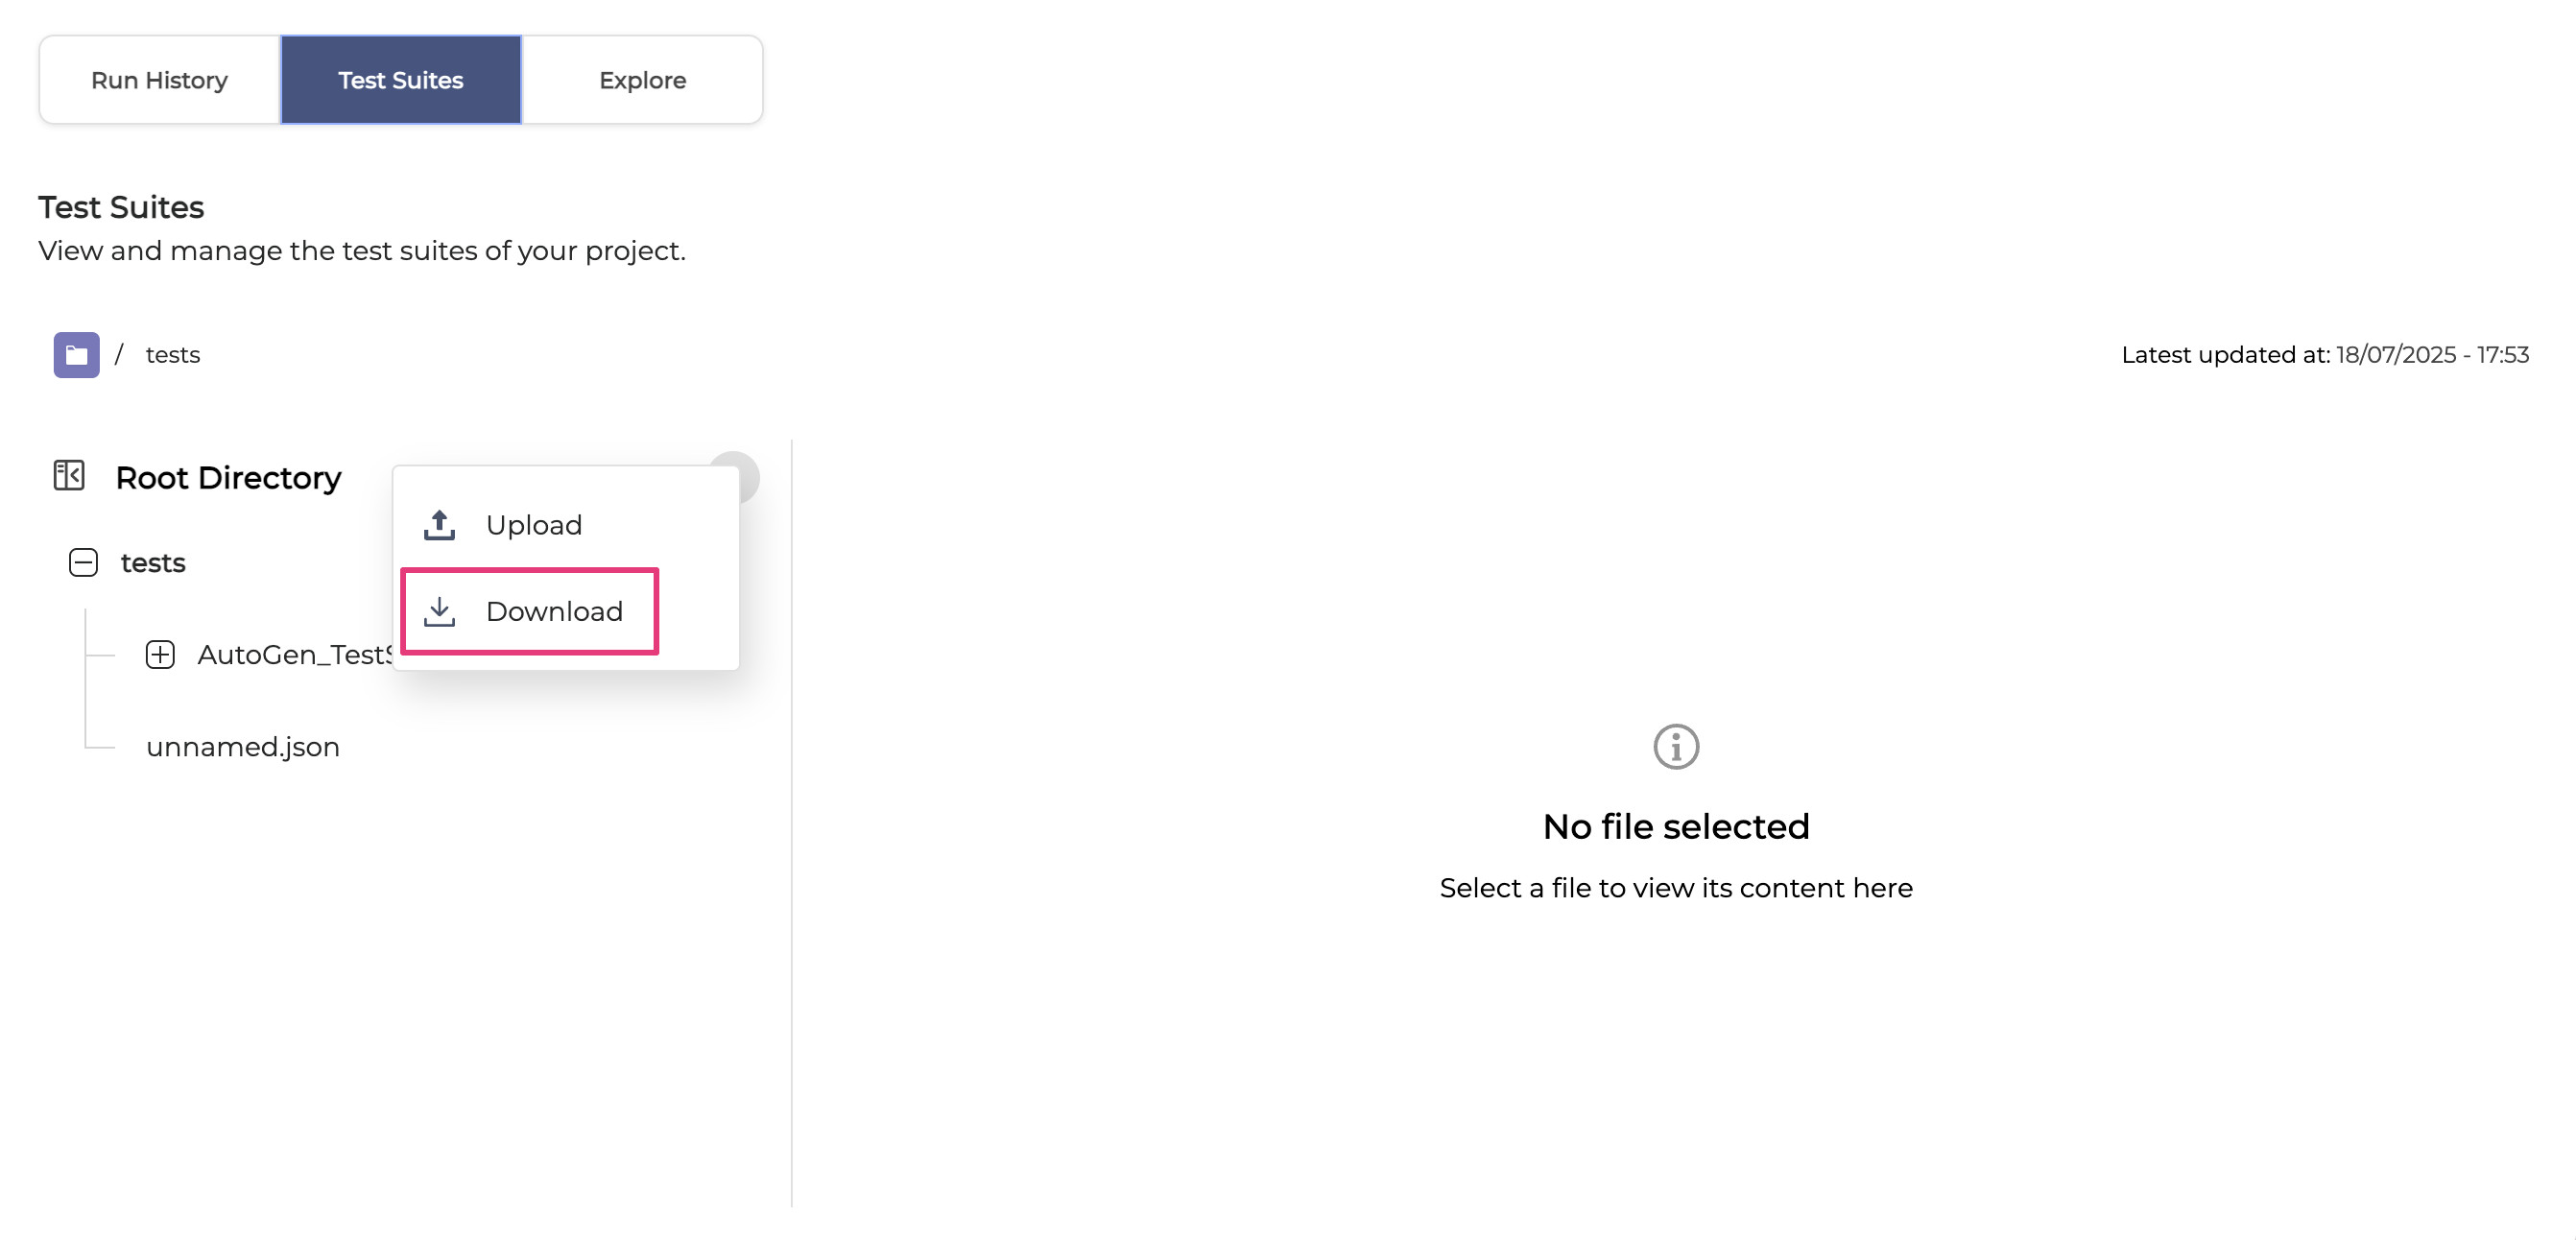
Download a Test Suite
You can download your collection of test case files from Testing Studio to your computer.
To download a Test Suite, follow the steps below:
-
In the Test Suites tab, click the Options menu next to the Root Directory and select Download.
-
The Test Suite will be downloaded as a ZIP file to your computer.
Create a test file from Ochrestrator
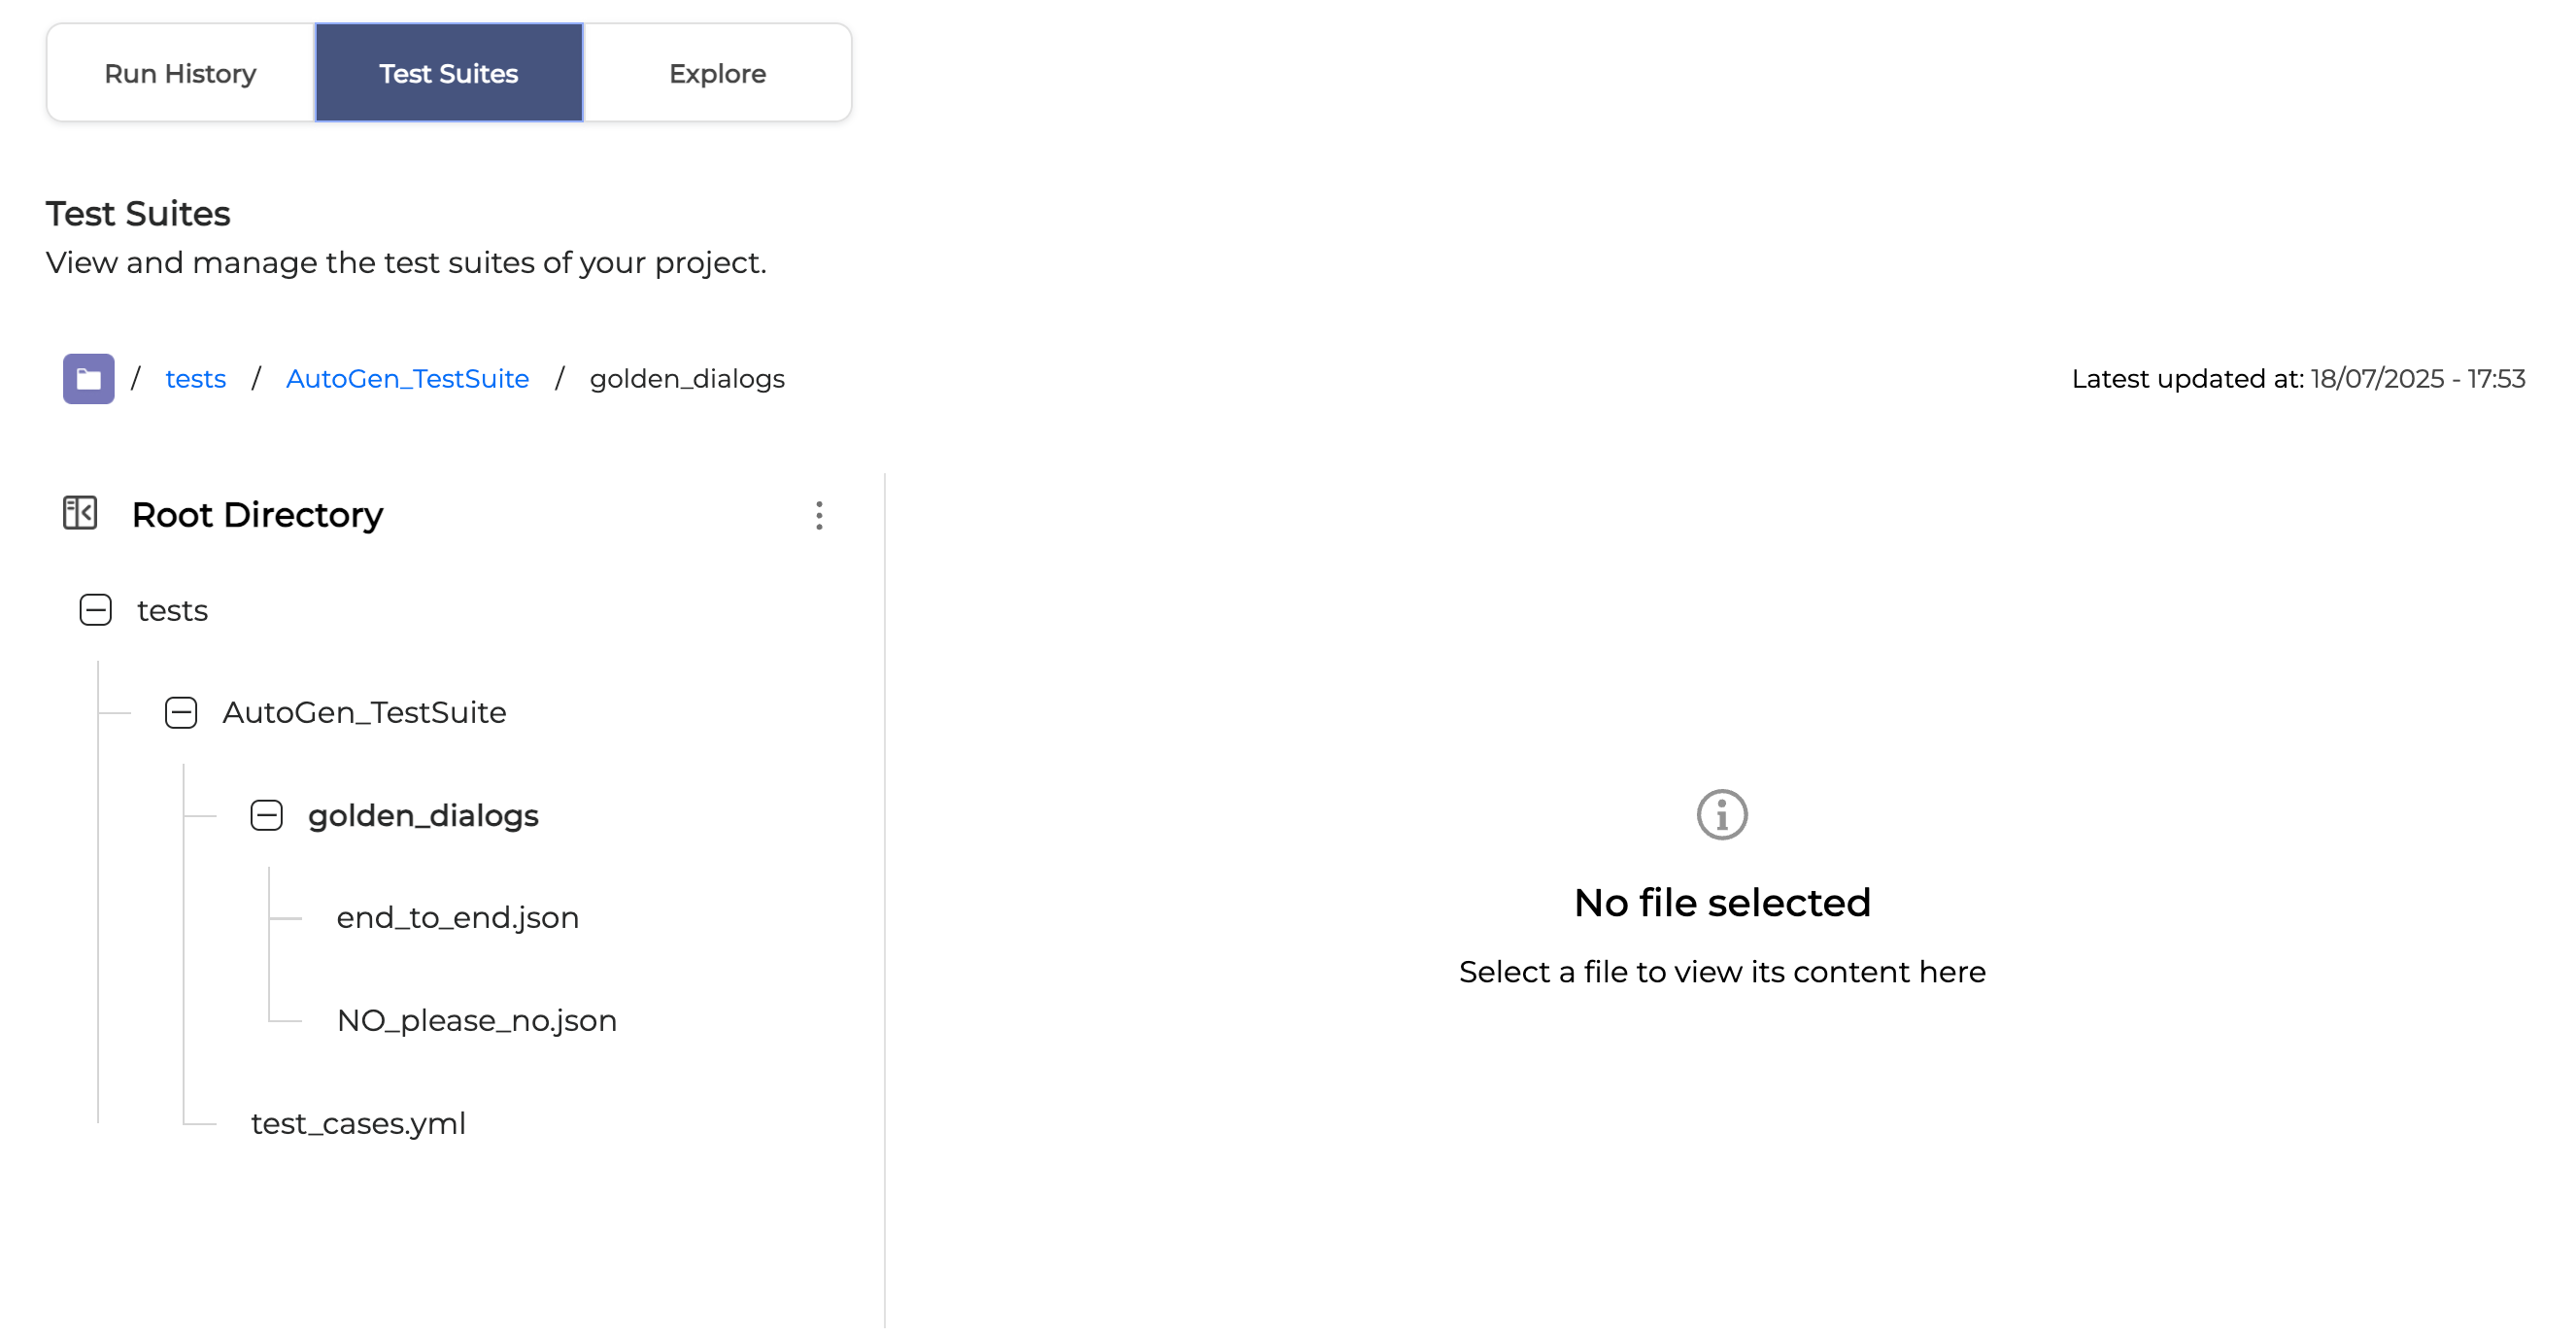
You can create test files directly from the chat session in Orchestrator, and they will automatically be added to the AutoGen_TestSuite folder in Testing Studio.
This feature is only available for Cloud-type projects!
To create a test case in Orchestrator, follow the guidelines outlined below:
-
Navigate to Orchestrator and select a dialog application you want to test.
-
Open the Orchestrator Chat and click the three icon menu button and then select Create Test Case:
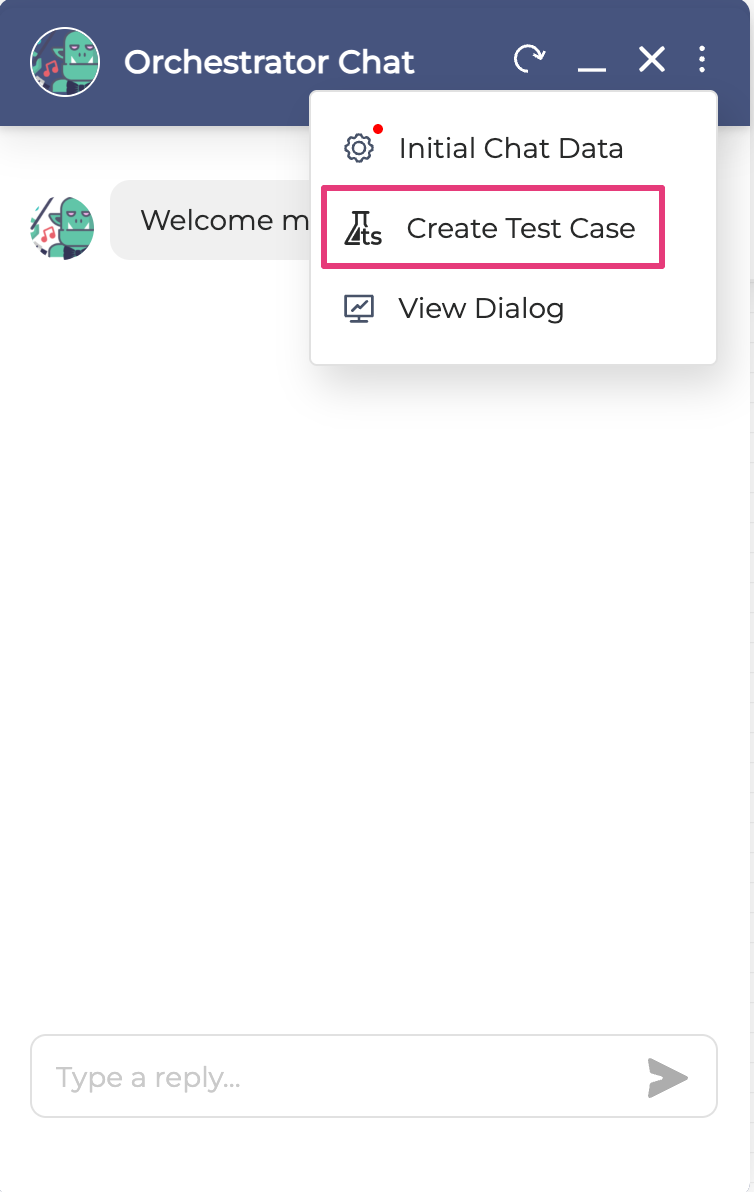
-
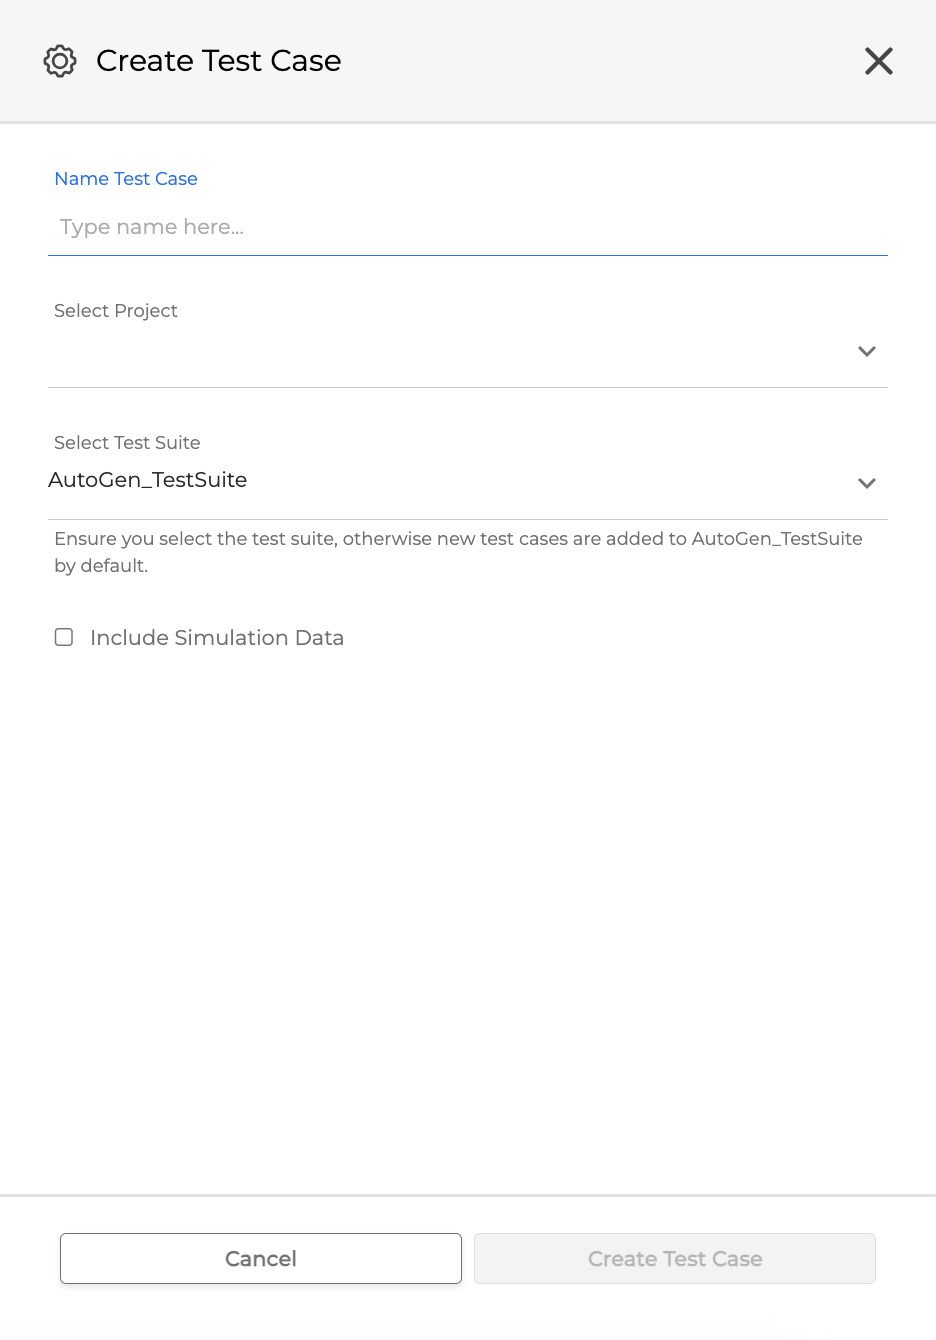
In the dialog box that opens, fill in the fields as described below:
-
Name Test Case: Enter a unique name for the test case you are creating.
-
If a test case name already exists, it cannot be reused.
-
The name is restricted to the following characters: a-z, A-Z, 0-9 and underscores.
-
Select Project: Choose a Testing Studio project where you would like to add the test case.
-
Select Test Suite: Select a test suite folder to add the test cases. If none is selected, the generated test cases will be added automatically to the AutoGen_TestSuite folder in Testing Studio.
-
Include Simulation Data: If marked, simulation data will be added.
-
Click Create Test Case. The generation will start and the test case will automatically be added to the AutoGen_TestSuite folder in Testing Studio.
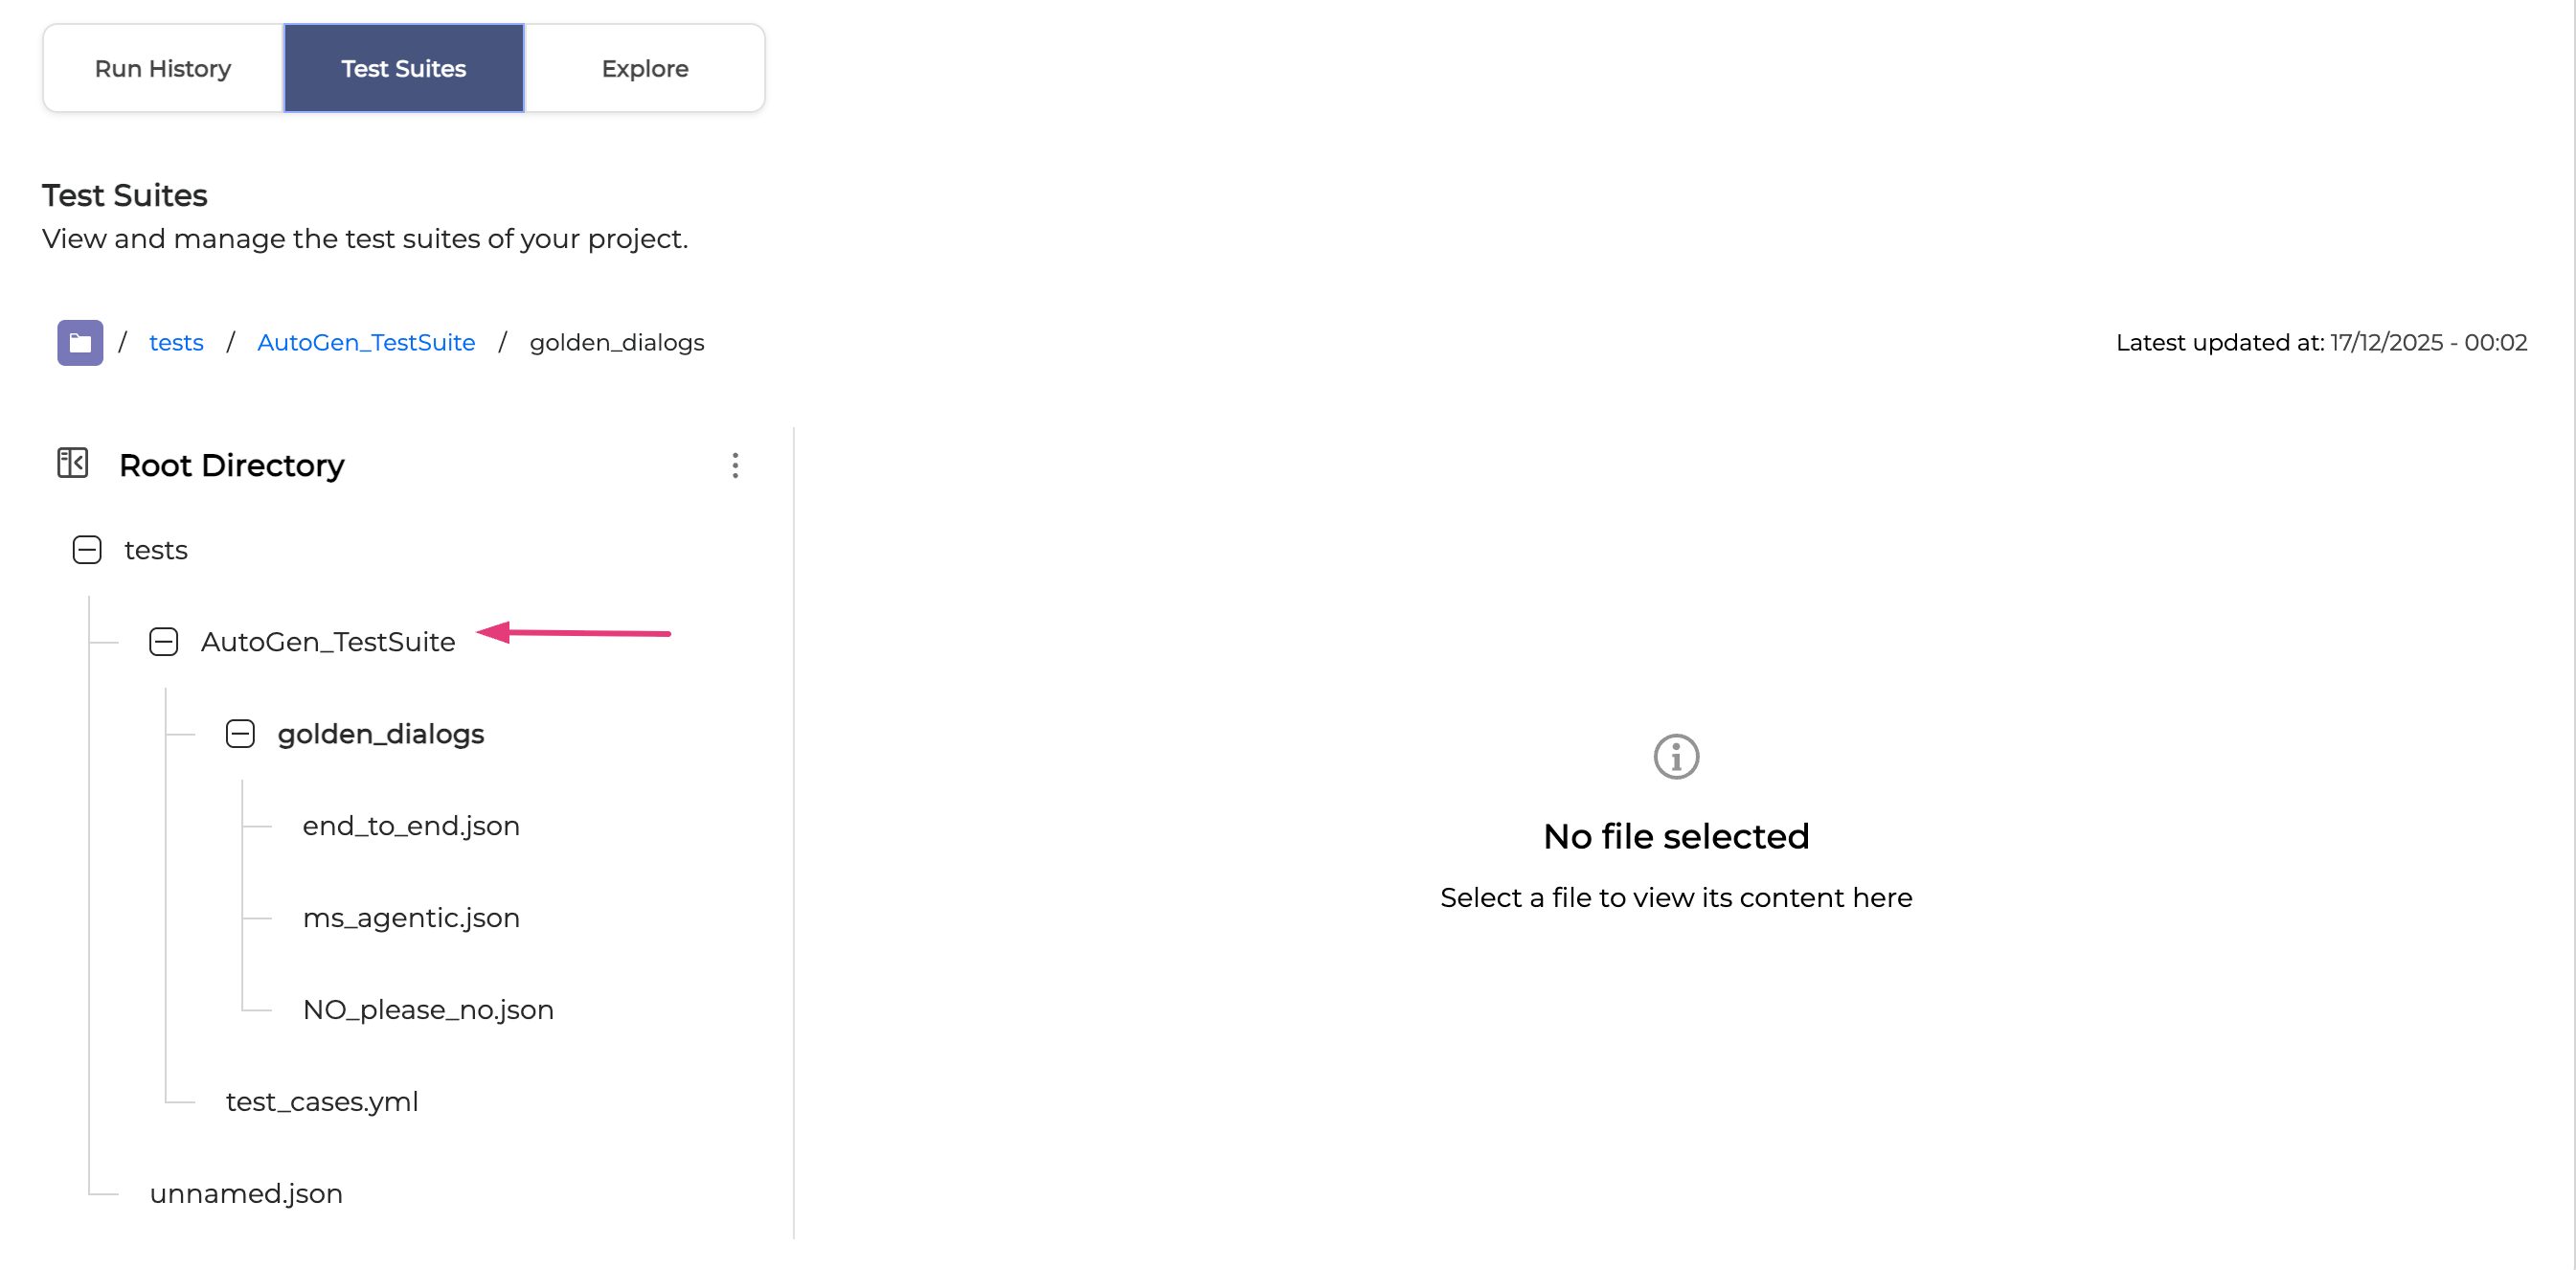
Now, you can view the content of the created test file, edit, create, and delete test files as necessary.
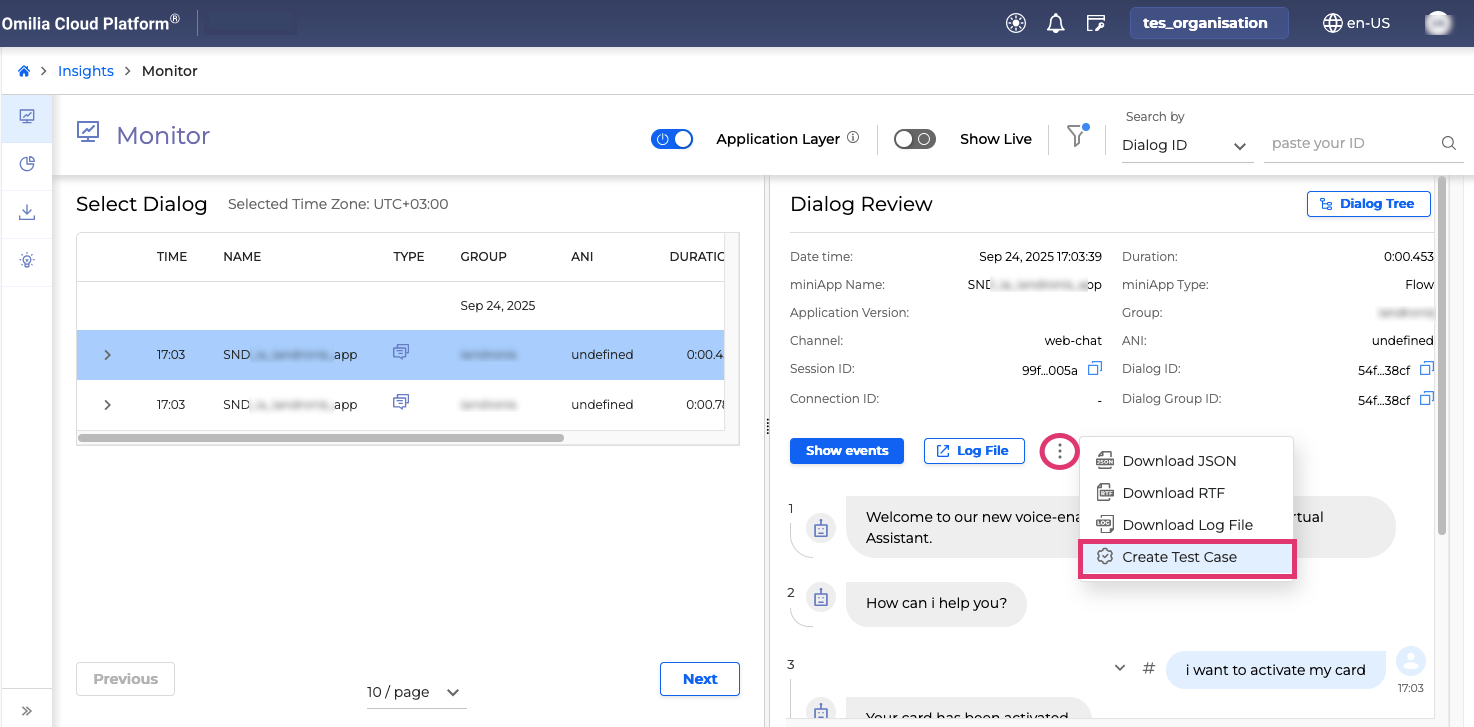
Create a test file from Monitor
You can create test files directly from Monitor, and they will automatically be added to the AutoGen_TestSuite folder in Testing Studio.
This feature is only available for Cloud-type projects!
To create a test case in Monitor, follow the guidelines outlined below:
-
Navigate to Insights → Monitor and select a dialog you want to test.
-
In the Dialog Review section, click the Options menu and select Create Test Case.
-
In the dialog box that opens, fill in the fields as described below:

-
Name Test Case: Enter a unique name for the test case you are creating.
-
If a test case name already exists, it cannot be reused.
-
The name is restricted to the following characters: a-z, A-Z, 0-9 and underscores.
-
Select Project: Choose a Testing Studio project where you would like to add the test case.
-
Select Test Suite: Select a test suite folder to add the test cases. If none is selected, the generated test cases will be added automatically to the AutoGen_TestSuite folder in Testing Studio.
-
Include Simulation Data: If marked, simulation data will be added.
-
Confirm by clicking Create Test Case.
Now, you can view the content of the created test file, edit, create, and delete test files as necessary.
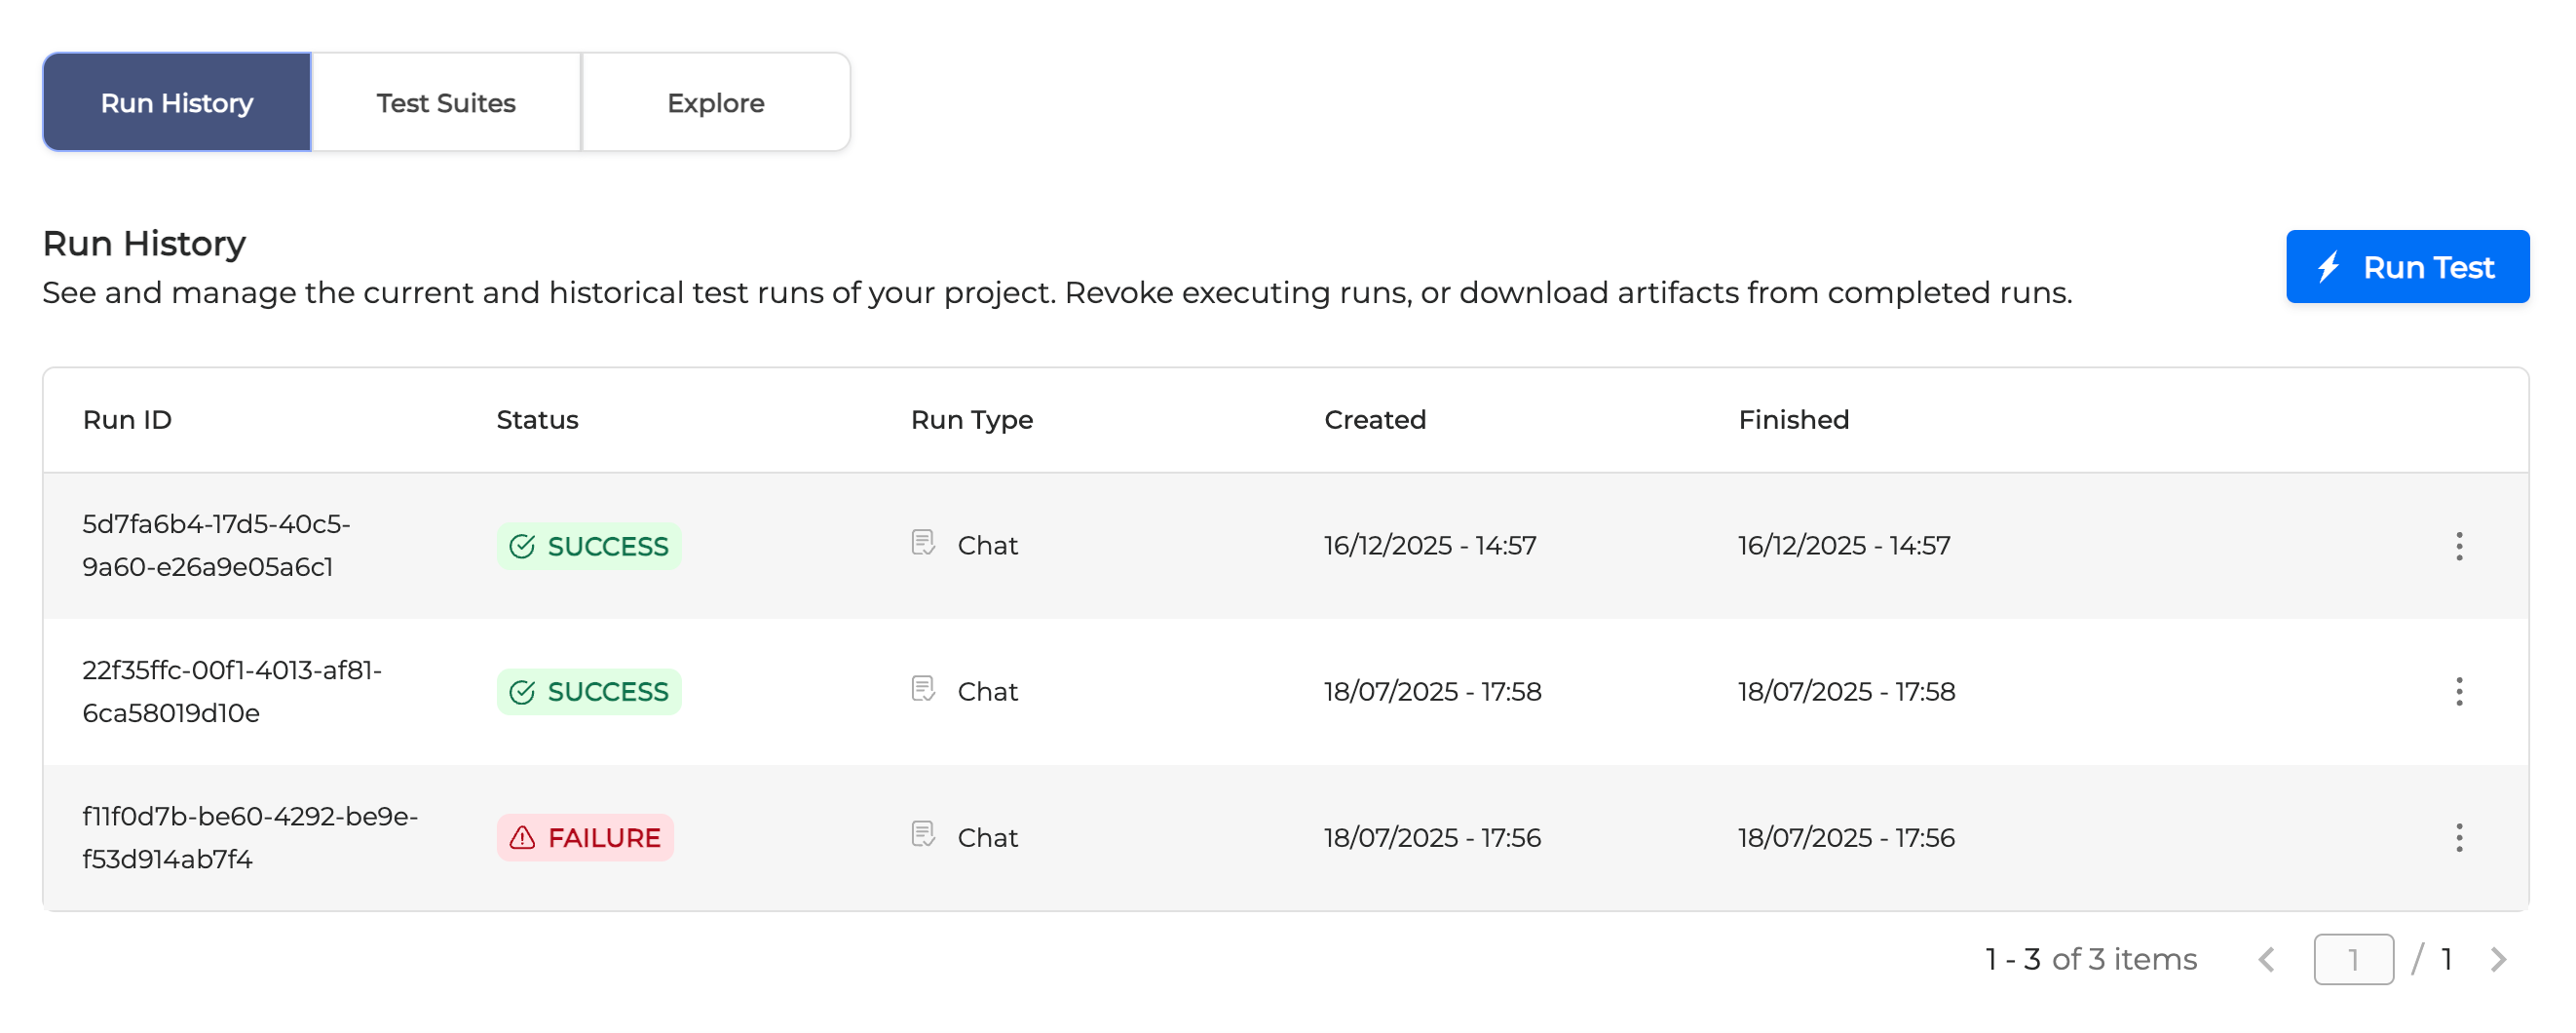
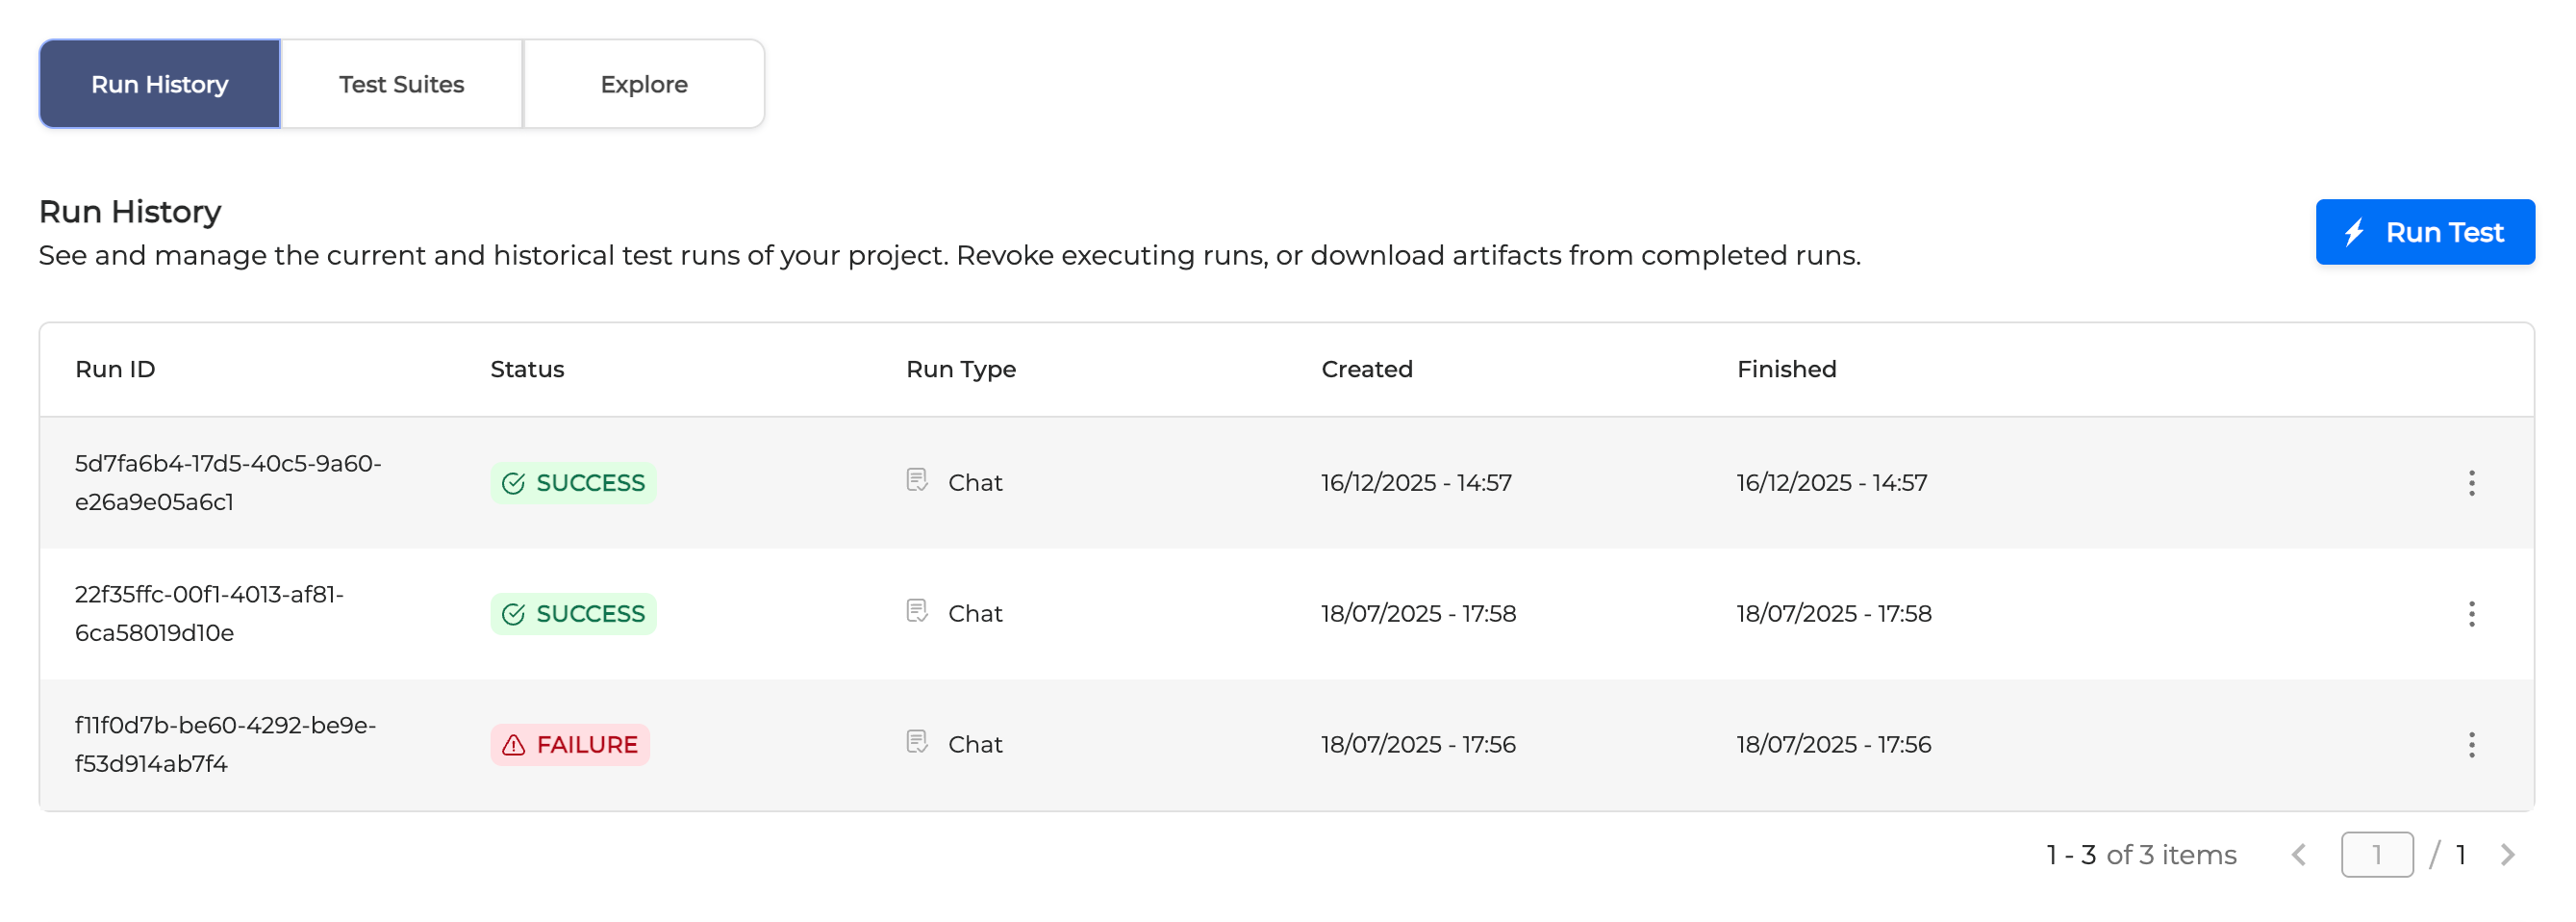
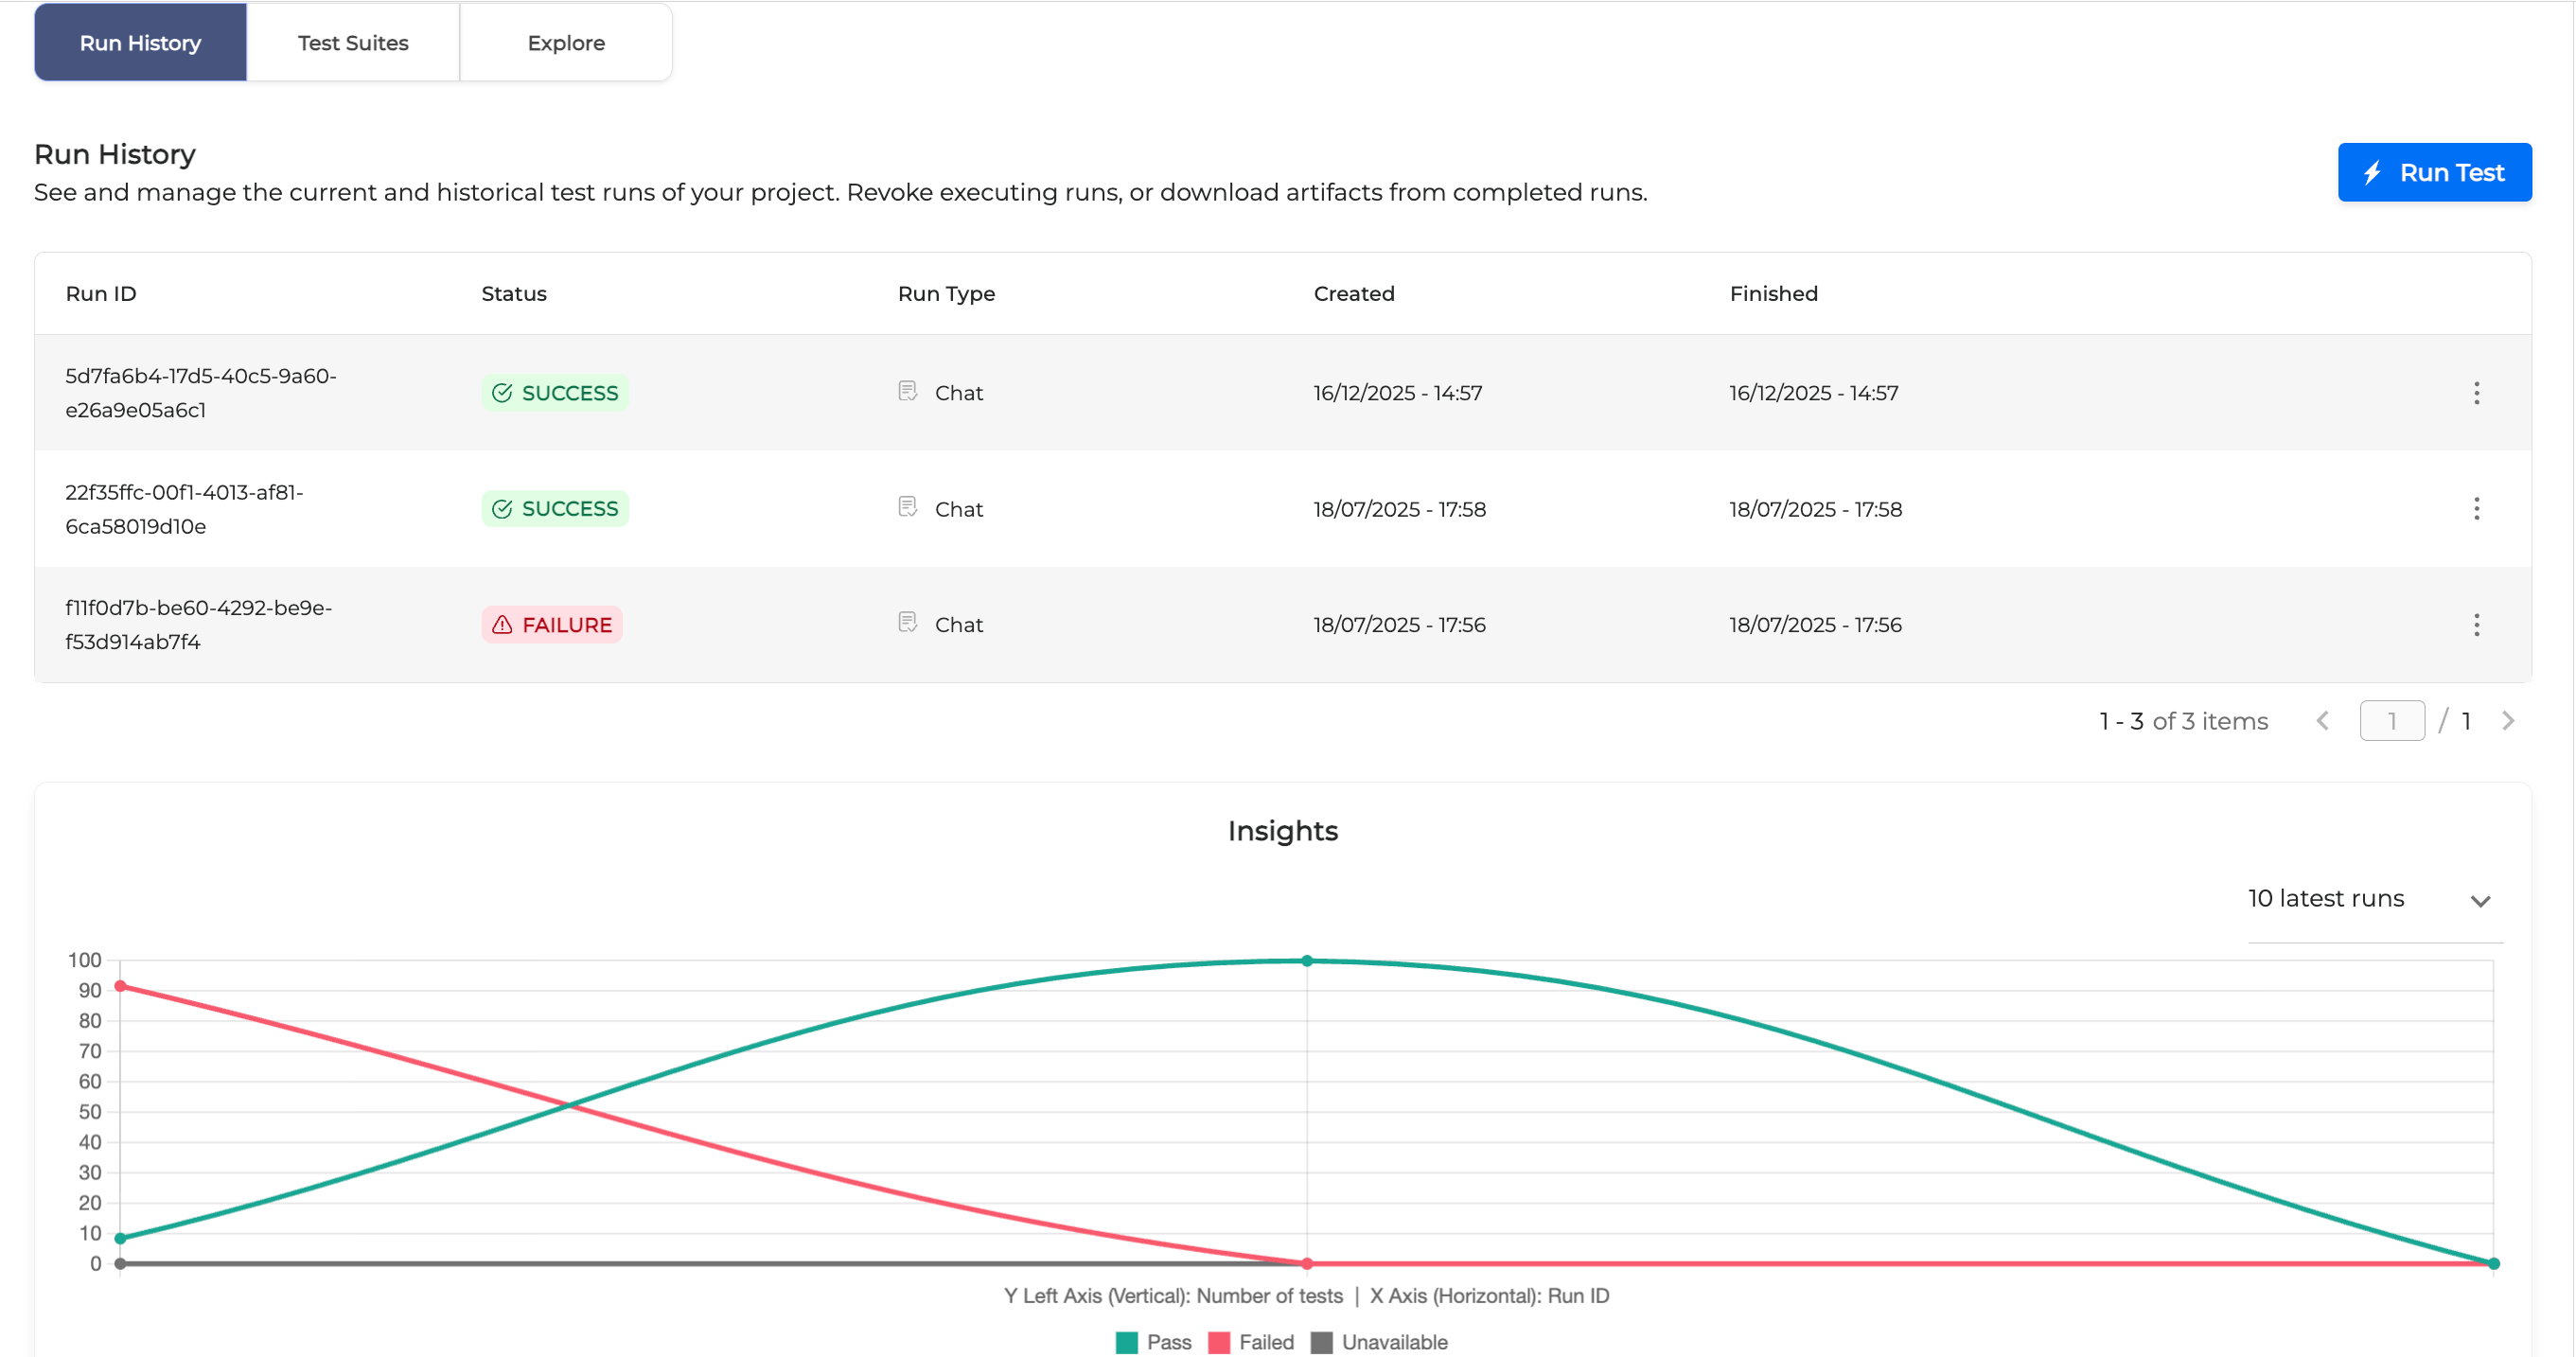
Run History Tab
The Run History tab displays the current and historical test runs of the project.
-
Run ID: Test case unique identifier
-
Status: Test case run status. The following statuses are possible:
-
Started: The test case is currently running
-
Pending: The test case is pending. This might happen if there are no free workers for the test execution.
-
Revoked: The test case has been cancelled
-
Success: The test execution was successful
-
Failure: The test case failed to run
-
-
Run Type: Defines the type of the test case - Classic for regular test cases or Augmented for test cases which use LLM.
-
Created: The test case creation timestamp (starting date)+
dd/MM/yyyy - HH:mm:e.g.: 21/07/2020 - 17.32 -
Finished: the test case completion timestamp (ending date)
dd/MM/yyyy - HH:mm:e.g.: 21/07/2020 - 17.39
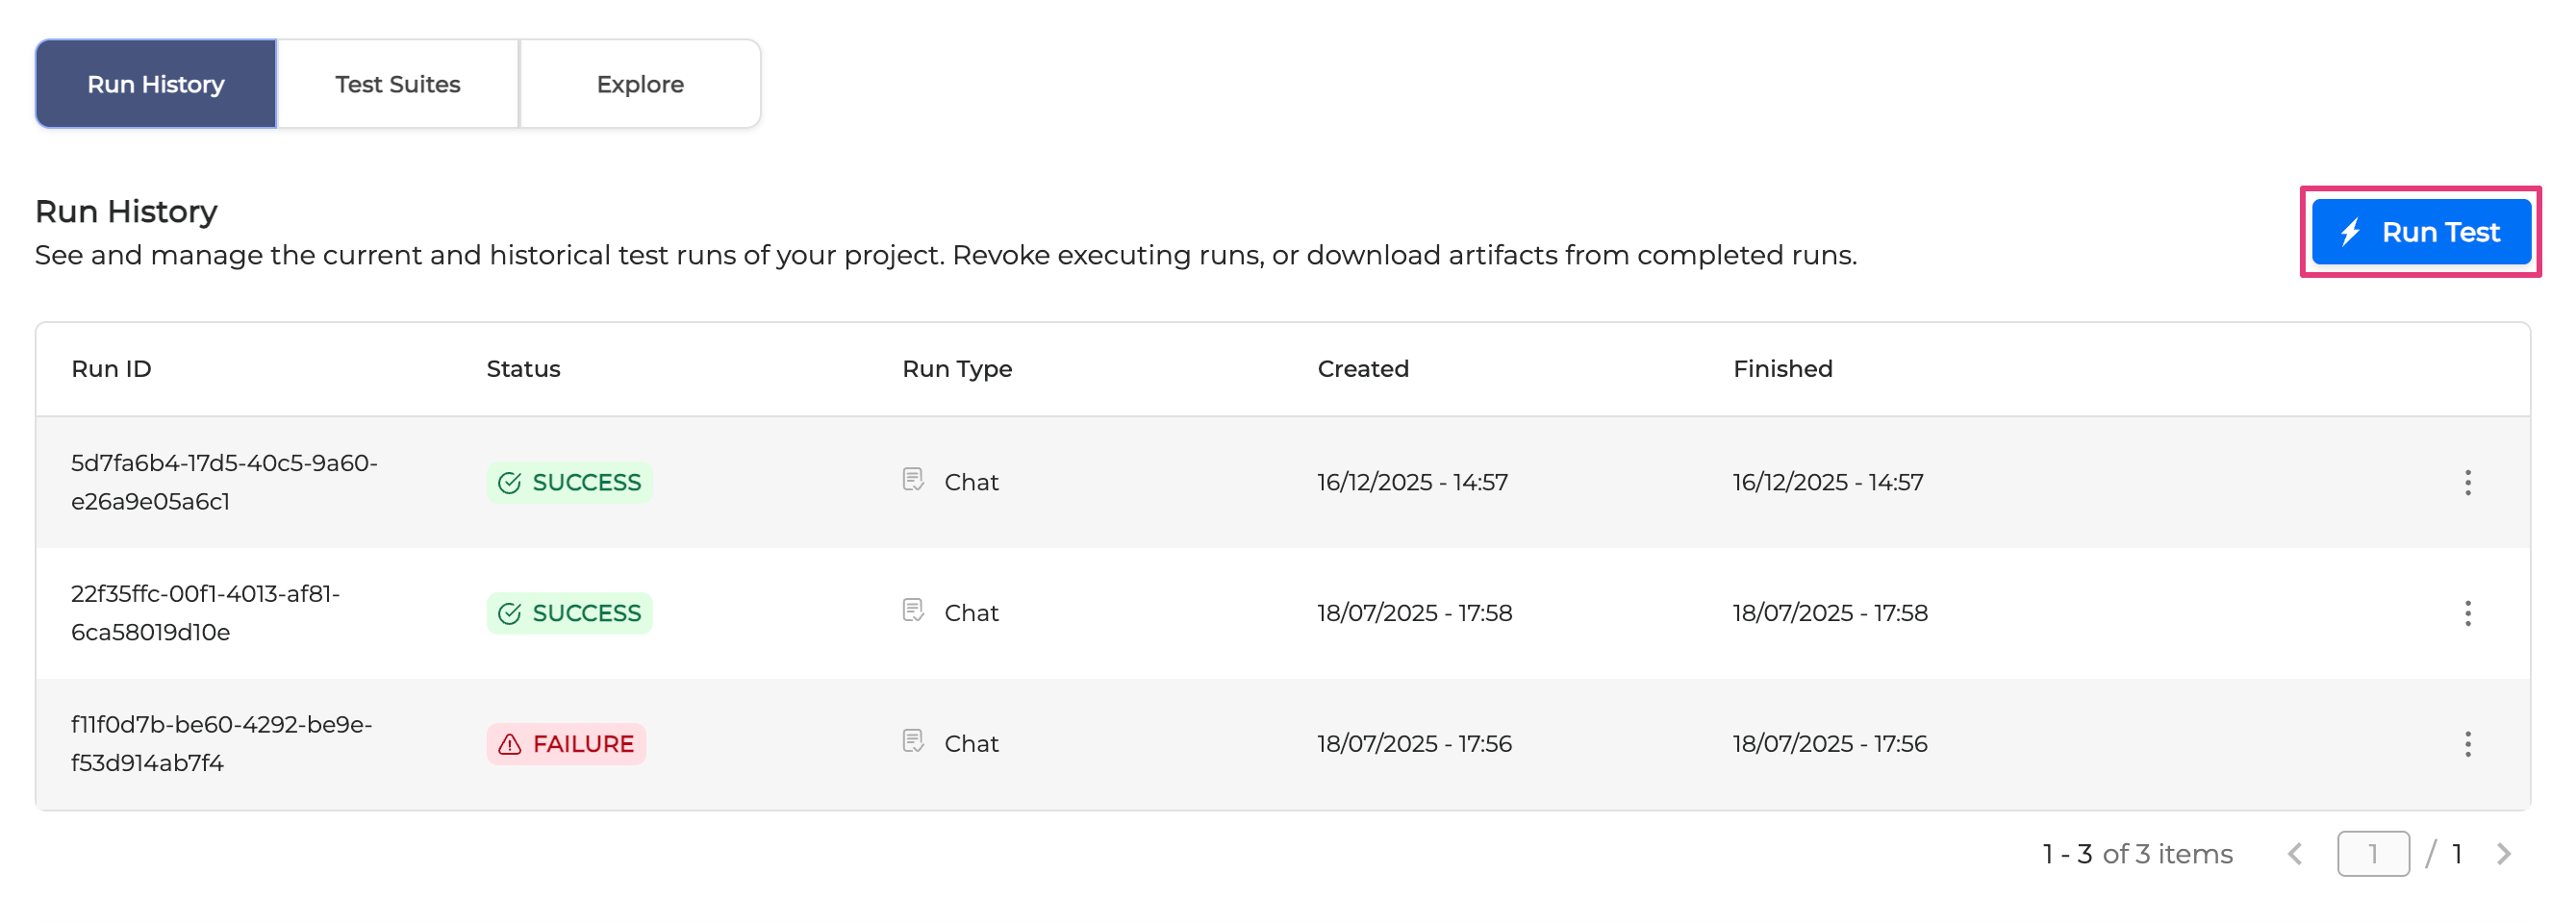
Run test cases
In the Run History tab, you can execute test cases. You can choose between two types of test cases:
-
Classic: Regular test cases.
-
Augmented: AI-enhanced test cases that generate alternative inputs.
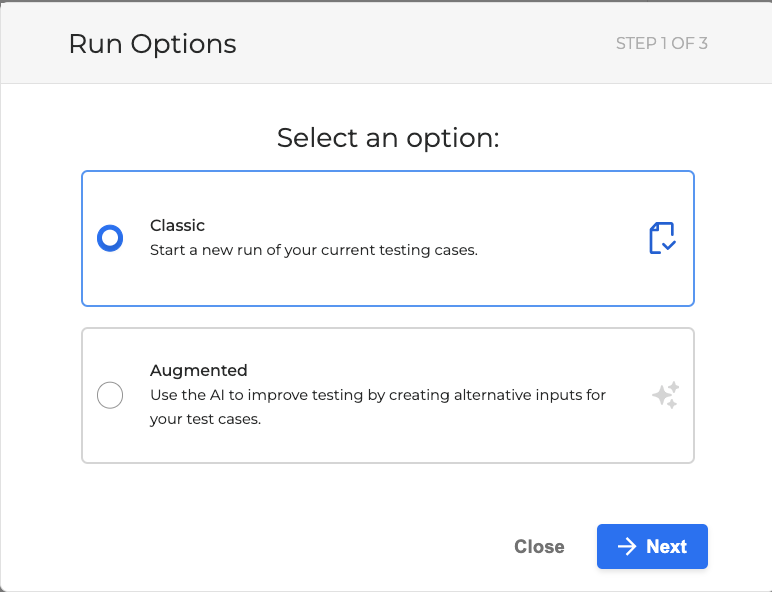
Run a regular test case
To run a regular test case, follow the guidelines below:
-
Open a project and click Run Test.
-
In the dialog box that opens, choose Classic and click Next.
-
In the following dialog box, you can filter the test cases using the available attributes. All the fields are optional.
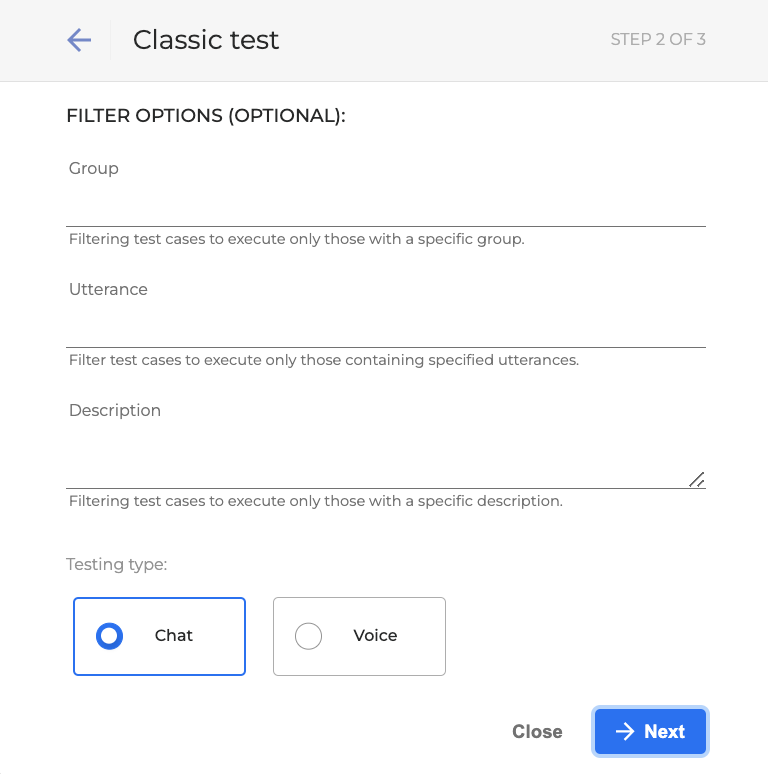
To run the whole project (which is basically the entire list of test cases), leave all the filter fields blank.
-
Group: A group the test case belongs to. Group basically serves as a tag.
-
Utterance : Utterances included in a test case.
-
Description : Test case description.
-
Testing type: A type of the test to run.
-
Chat: Simulate a chat-based test.
-
Voice: Simulate a voice call, noting that the duration will match the actual call length. For call durations, visit Insights → Monitor → select a call and navigate to the Dialog Review section. Click the Play button, the dialog gets played out. Every voice test operates by replicating each dialog in a similar manner.
-

Filtering supports the % symbol as a filter wildcard. For example:
-
balance%: matches all test cases starting with the word balance.
-
%card%: matches all test cases containing the word card.
-
%description: matches all test cases which ending with the word description.
Filter is case insensitive. The filter value desc% will match Desc, desc and DESC.
When multiple filters are provided, the behavior is that of an AND boolean expression. The filtered test cases are the ones that meet all the filter criteria.
-
Click Next to proceed.
-
In the dialog box that opens, fill in the following fields to further define your test case execution:

-
Assertions: Choose one or multiple assertions, or click Clear Selections to unmark all.
-
Action name: Action name of the dialog step.
-
Intent: Intent of the dialog step.
-
Annotation: Annotation of the dialog step
-
Destination URI: Destination URI of the dialog
-
KVPs: Key-Value Pairs.
-
Grammar: Grammar of the dialog step.
-
End type: The end type of the dialog.
-
Target name: Target name of the dialog step.
-
Transfer line: Transfer line of the dialog.
-
Dialog events: Events of the dialog.
-
-
Prompt: The prompt of the dialog step.
-
Prompt threshold: The lowest limit for the similarity of prompts. Allowed values are 0 to 1, the default value is set to 0.8.
-
Prompt ignore pattern: A text field that used as a regex to ignore prompts. For example, if you want to ignore dates like 2021-11-10, you can simply add \d{4}-\d{1,2}-\d{1,2}.
-
-
Click Run when all criteria are set. The test case will be executed per your selected filters and then appear in the Run History board with the corresponding run type.
Run an augmented test case
Running an augmented test case allows to expand the number of test case utterances by using different variations of them in order to cover more variants of utterances in scope of existing test cases. These variations are produced by AI which takes the original utterance and creates different versions of it, and then returns new utterances to the dialog.
For instance, if your original utterance is "What is my balance?", the LLM can formulate different versions of it, such as:
-
"Could you please tell me the amount in my account?"
-
"Could you please provide my current account balance?"
-
"What amount do I have in my account?"
-
"What's the current status of my account?"
To run an augmented test case, proceed as follows:
-
Open a project and click Run Test.
-
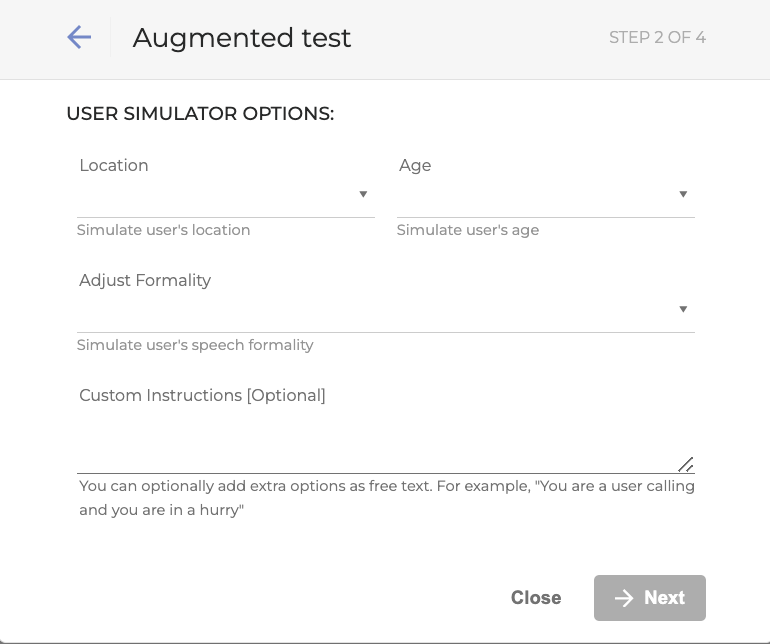
In the dialog box that opens, choose Augmented and click Next.

-
In the dialog box that opens, fill in the fields as described below. This will provide context for AI to make your request more precise.
-
Location: Select the user’s location from the dropdown list.
-
Age: Define the user’s age threshold from the dropdown list.
-
Adjust Formality: Choose how formal the utterances should be: Informal, Normal, Formal.
-
Custom Instructions: Add some extra information AI should take into account while creating new utterances.
-
Click the Next button.
-
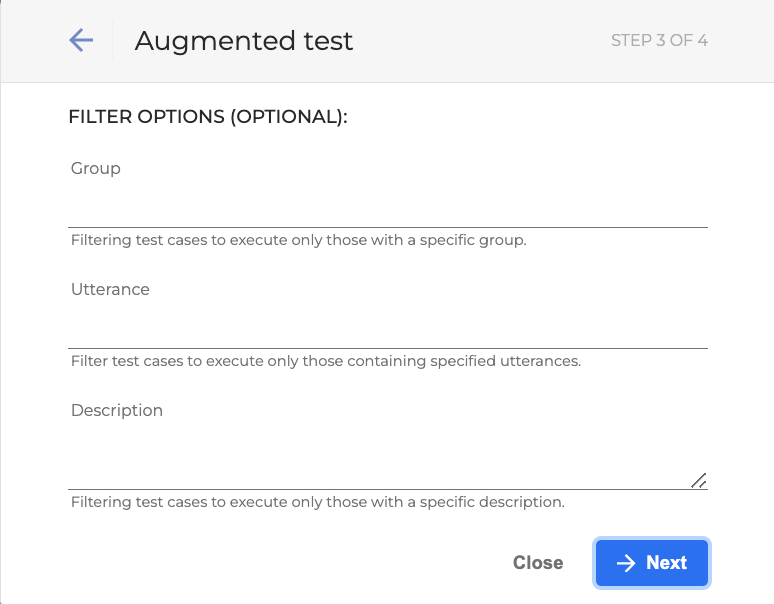
In the following dialog box, you can filter the test cases using the available attributes. All the fields are optional.
-
Group: A group the test cases belong to. Group basically serves a tag.
-
Utterance: Utterances the test case contains.
-
Description: Test case description.
Filtering supports the % symbol as a filter wildcard. For example:
-
balance%: matches all test cases starting with the word balance.
-
%card%: matches all test cases containing the word card.
-
%description: matches all test cases which ending with the word description.
Filter is case insensitive. The filter value desc% will match Desc, desc and DESC.
When multiple filters are provided, only those test cases will be executed that meet all the filter criteria at once.
-
Click Next to proceed.
-
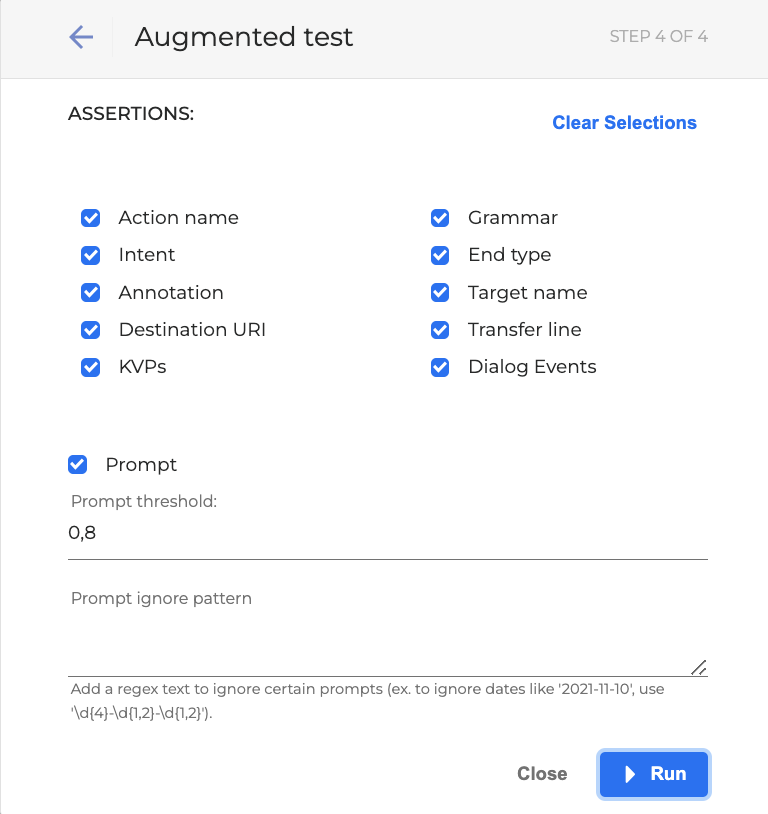
The following dialog box opens. Fill in the fields as described below:
-
Assertions: Choose one or multiple assertions, or click Clear Selections to unmark all.
-
Action name: Action name of the dialog step.
-
Intent: Intent of the dialog step.
-
Annotation: Annotation of the dialog step
-
Destination URI: Destination URI of the dialog
-
KVPs: Key-Value Pairs.
-
Grammar: Grammar of the dialog step.
-
End type: The end type of the dialog.
-
Target name: Target name of the dialog step.
-
Transfer line: Transfer line of the dialog.
-
Dialog events: Events of the dialog.
-
-
Prompt: The prompt of the dialog step.
-
Prompt threshold: The lowest limit for the similarity of prompts. Allowed values are 0 to 1, the default value is set to 0.8.
-
Prompt ignore pattern: A text field that used as a regex to ignore prompts. For example, if you want to ignore dates like 2021-11-10, you can simply add \d{4}-\d{1,2}-\d{1,2}.
-
-
Click Run when all criteria are set. The augmented test case will be executed per your selected filters and then appear in the Run History board with the corresponding run type.
Test Execution Description
Testing Studio+ asynchronously runs test cases located in the /tests folder of the master branch of your git repo.
Make sure that /tests folder is located under the root folder of your git repo or upload ZIP file.
The way that the test cases are executed during a run is the following:
-
All test cases in a test suite are loaded and set to run.
-
All test cases both with and without a golden dialog start executing:
-
The test cases with golden dialogs are asserted and validated normally.
-
Test cases without golden dialogs are not asserted and defined as unavailable.
When loading test cases, Testing Studio+ does not distinguish between scenarios created by users inside scenarios.yml, individual test cases or test cases in test_cases.yml. If a generated test case is missing a golden dialog file (no matter if moved accidentally or deleted), it is treated as unavailable.
If an unavailable test case execution fails because of the other side (DiaManT closed the dialog unexpectedly), the test case is considered failed.
3. After execution has finished:
-
Unavailable test cases are stored inside output/Unavailable folder placed under the test suite directory.
-
Failed test cases are stored inside output/Failed directory, placed under the test suite directory.
-
The dialog that has executed the most steps is the one that gets written in the file. The equivalent validation error message is reported.
-
Report files contain successful, failed as well as unavailable test cases. All of them can be downloaded as Artifacts.
Download Test Run Artifacts
The test run details created after the run has been completed are called Artifacts. Testing Studio+ allows for downloading the artifacts to check the outcome of the run in detail.
To download artifacts of a selected test run, follow the steps below:
-
Open a project.
-
Click on a test run to open the run page.
3. Click Download Artifacts. The download starts.
Artifacts are downloaded as a ZIP file containing results folder with two CSV files.
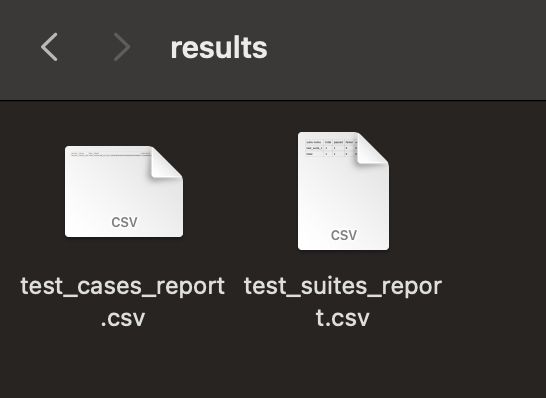
-
test_suites_report.csv: results report for each test suite. For example:
suite name,     total,  passed, failed, unavailable,  status
Test suite 1,   10,     10,     0,      0,             pass
Test suite 2,   20,     0,      10,     10,            fail
....
total,          30,     10,     10,     10,            fail
-
test_cases_report.csv: results report for each test case. For example:
test suite, test case,  status,        dialog id,  golden dialog id,  message
suite 1,    dialog 1,   pass,          dialogid1   1234,
suite 1,    dialog 2,   unavailable,   dialogid2   Unavailable,
suite 2,    dialog 3,   fail,          dialogid3,  123,               error message
...
suite x,    dialog x,   fail,          dialogidx,  12345,             error message
-
Output folder: created after each test run for every test suite. The
outputfolder contains candidate golden_dialog.json files for failed test cases or for unavailable ones (which means they have no golden dialogs).
test_suite
└── output
   ├── Failed
   └── Unavailable
You can goldenize Failed and Unavailable test cases directly from the Results tab (see Goldenize a Test Case). Alternatively, you can manually transfer the generated golden dialog file from output to the golden_dialogs folder within the appropriate test_suite directory.
Before every new run, the output folder gets deleted. Make sure you handle generated data before starting a new test case execution.
Insights
The Insights tab offers an intuitive representation of the test results of your project.
By default, the result of 10 latest runs are shown. You can can change this option by selecting 20 or 30 latest runs from the dropdown list:
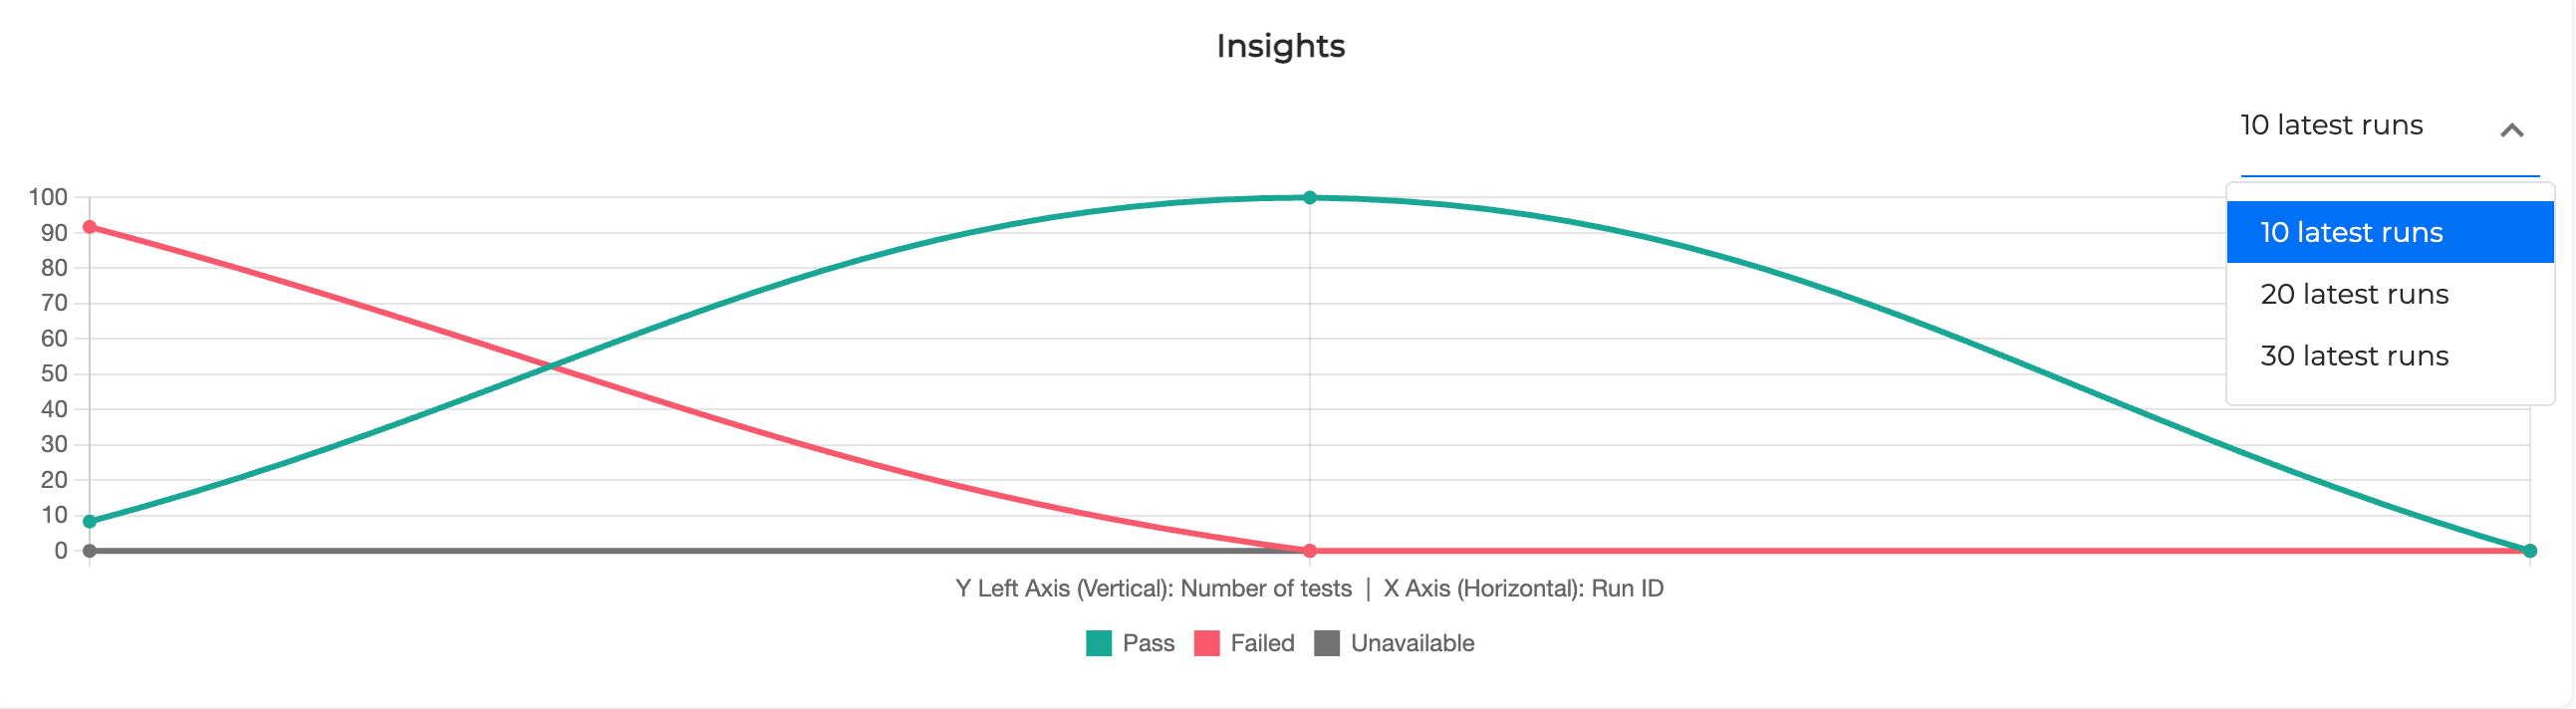
Hover over a graph to see a percentage information:
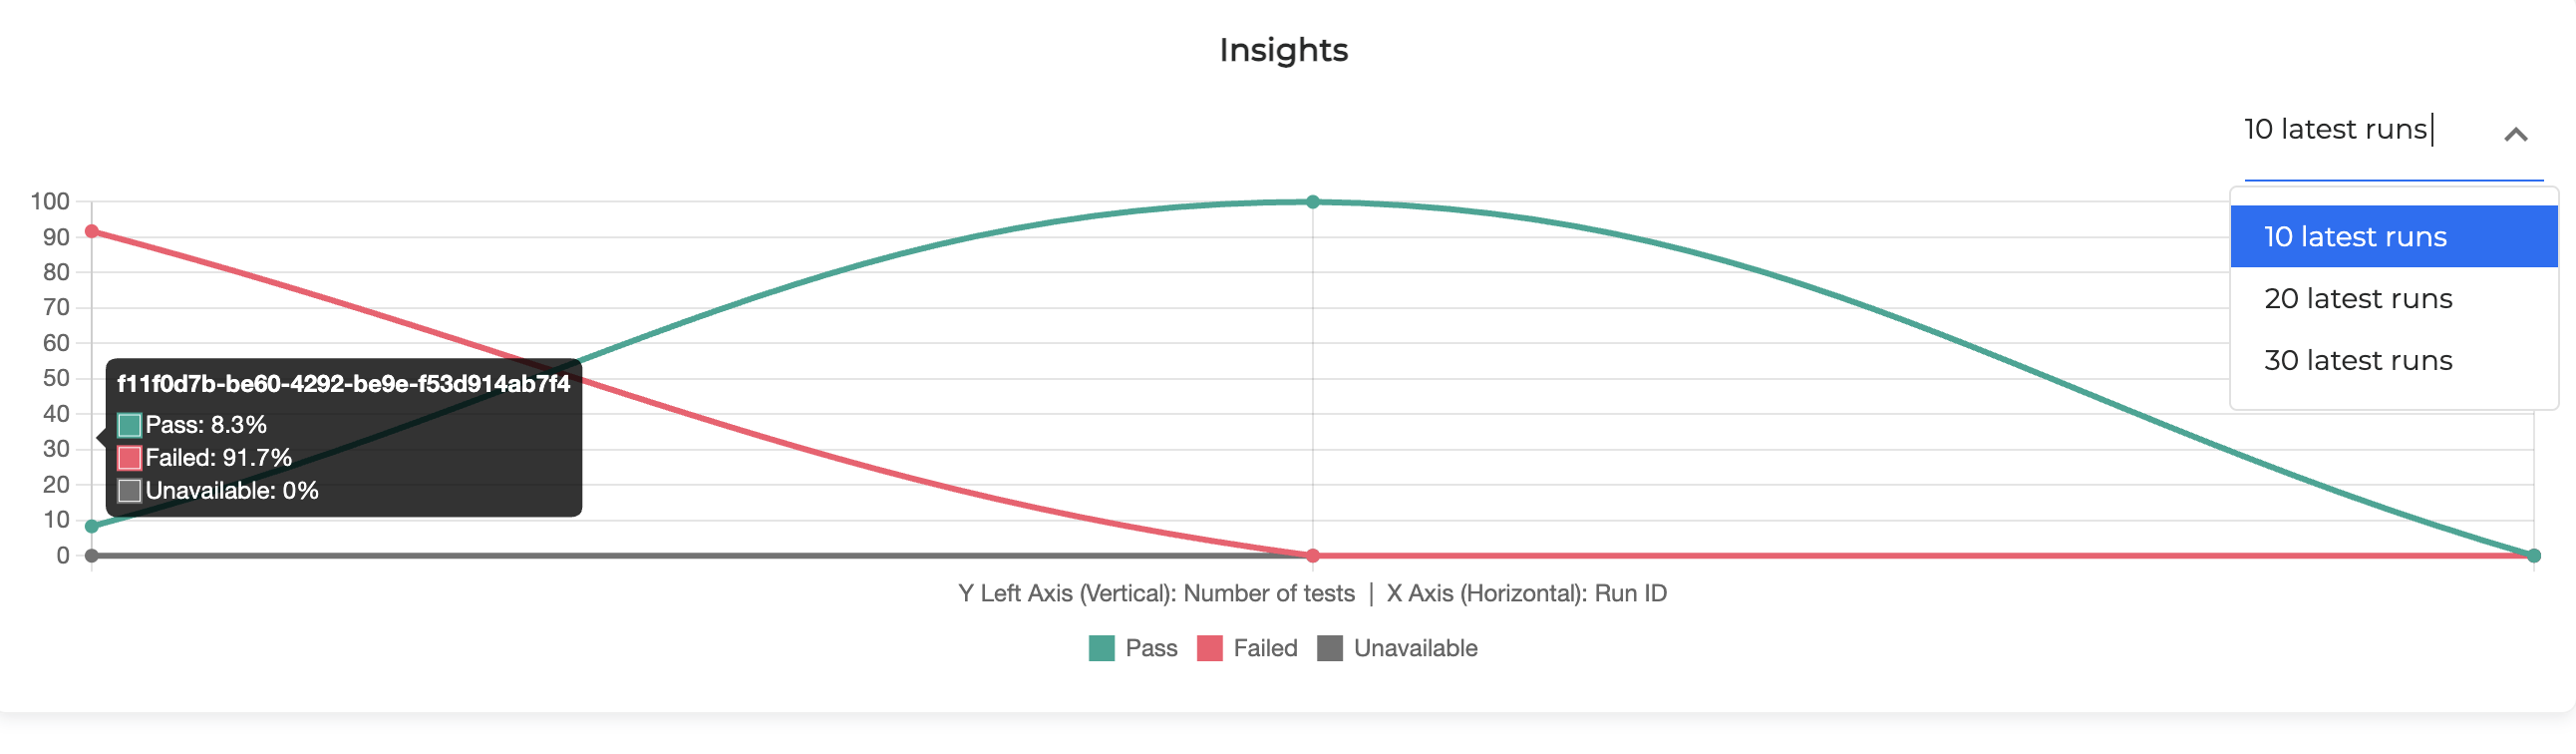
By default the following test cases are included into the graph results:
-
Passed: Successfully executed test cases
-
Failed: Test cases that failed to run
-
Unavailable: Test cases generated by Testing Studio+ and having no golden dialogs
The Pending or Revoked test cases are not included into this statistics.
The graph gives you a visual idea of the test execution trend.
The goal to strive for is to have all test runs green (successfully passed) and none grey or red.
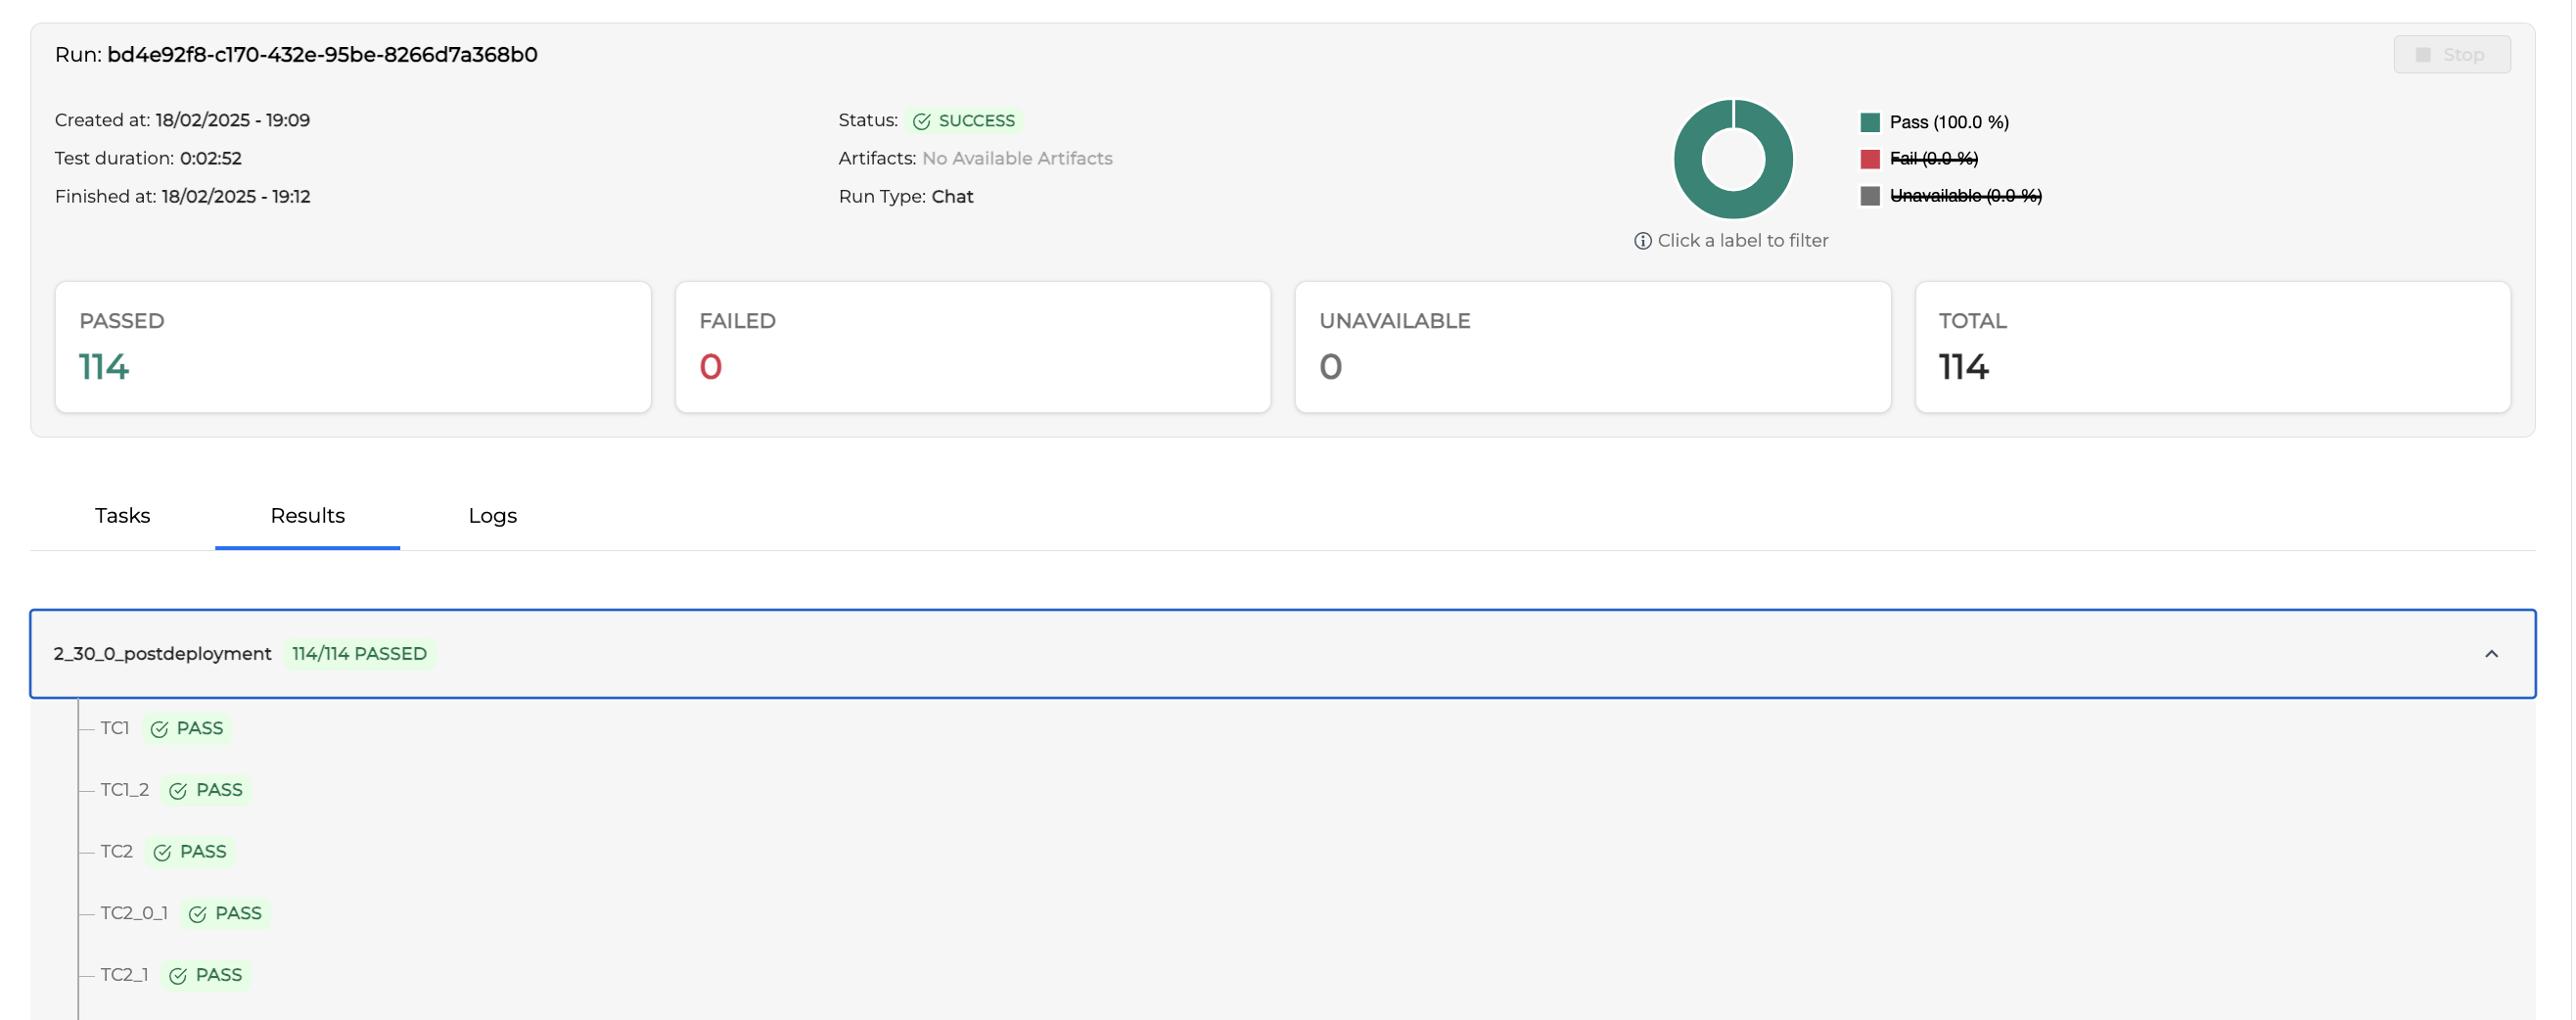
You can exclude some of the test cases from the result by clicking on its status as shown below:
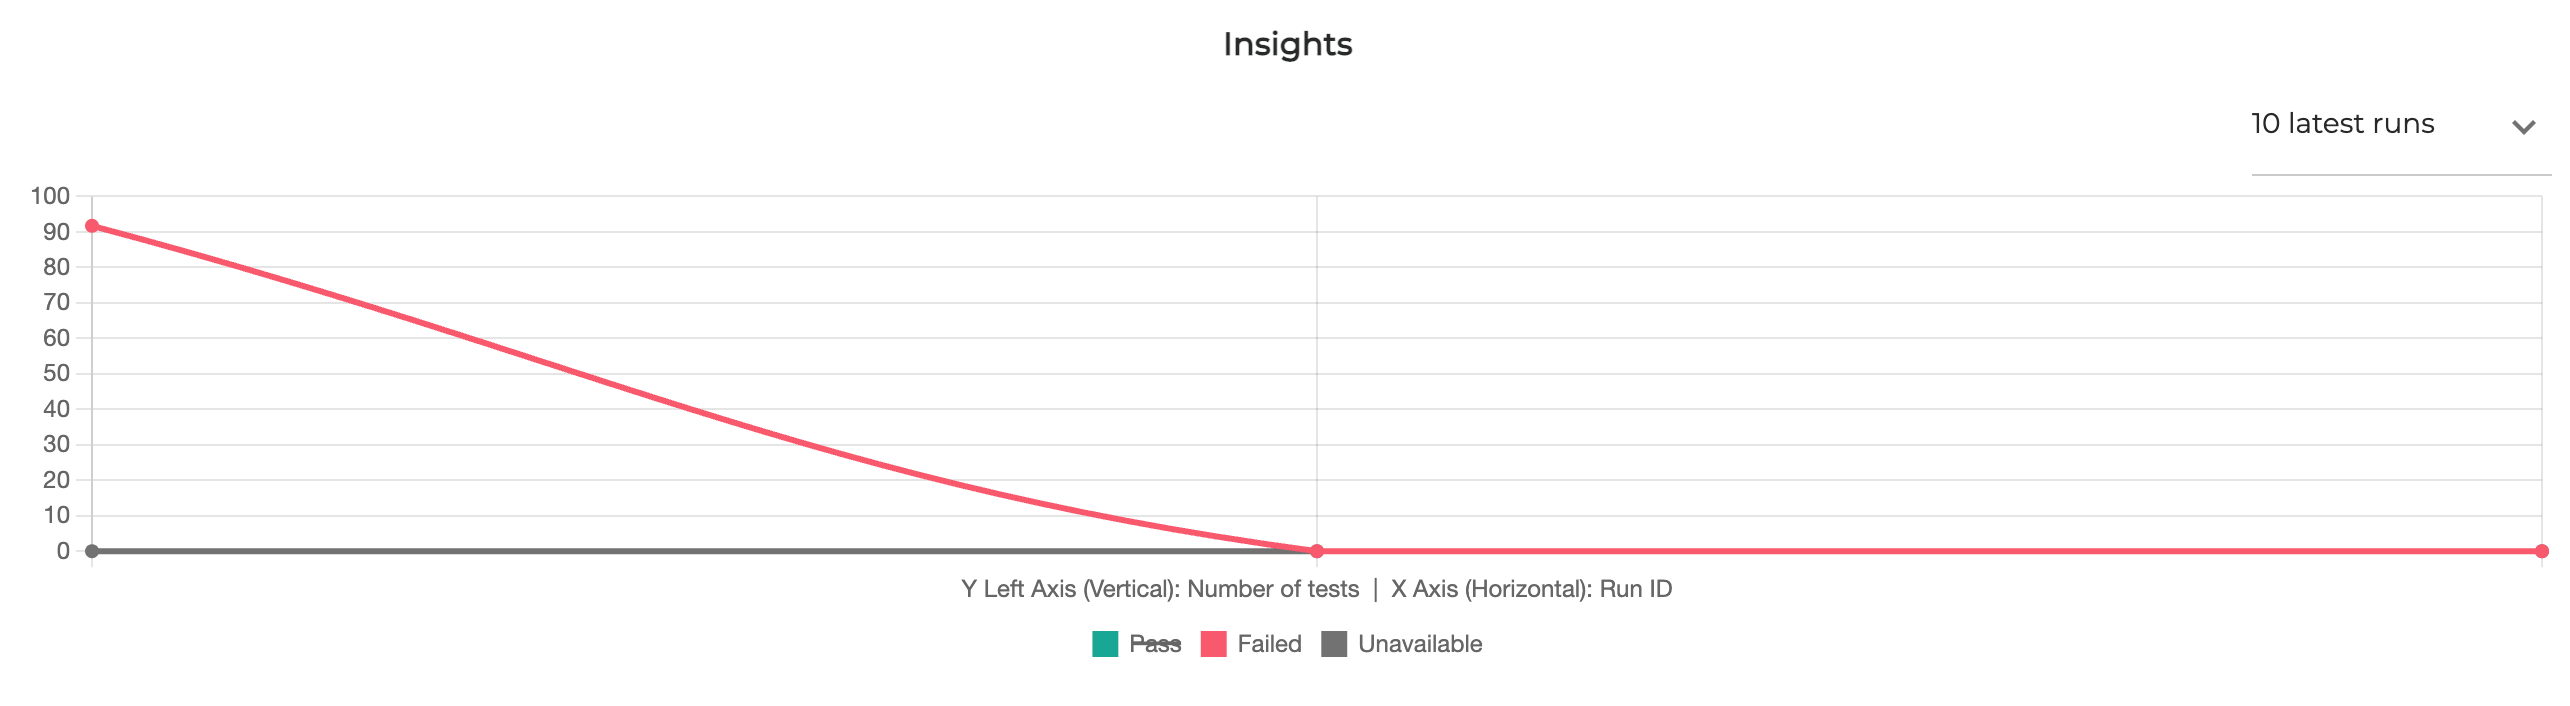
As you see, the Pass test cases are not included.
To get a detailed information about a test run, click on it and the corresponding Test Run page opens.
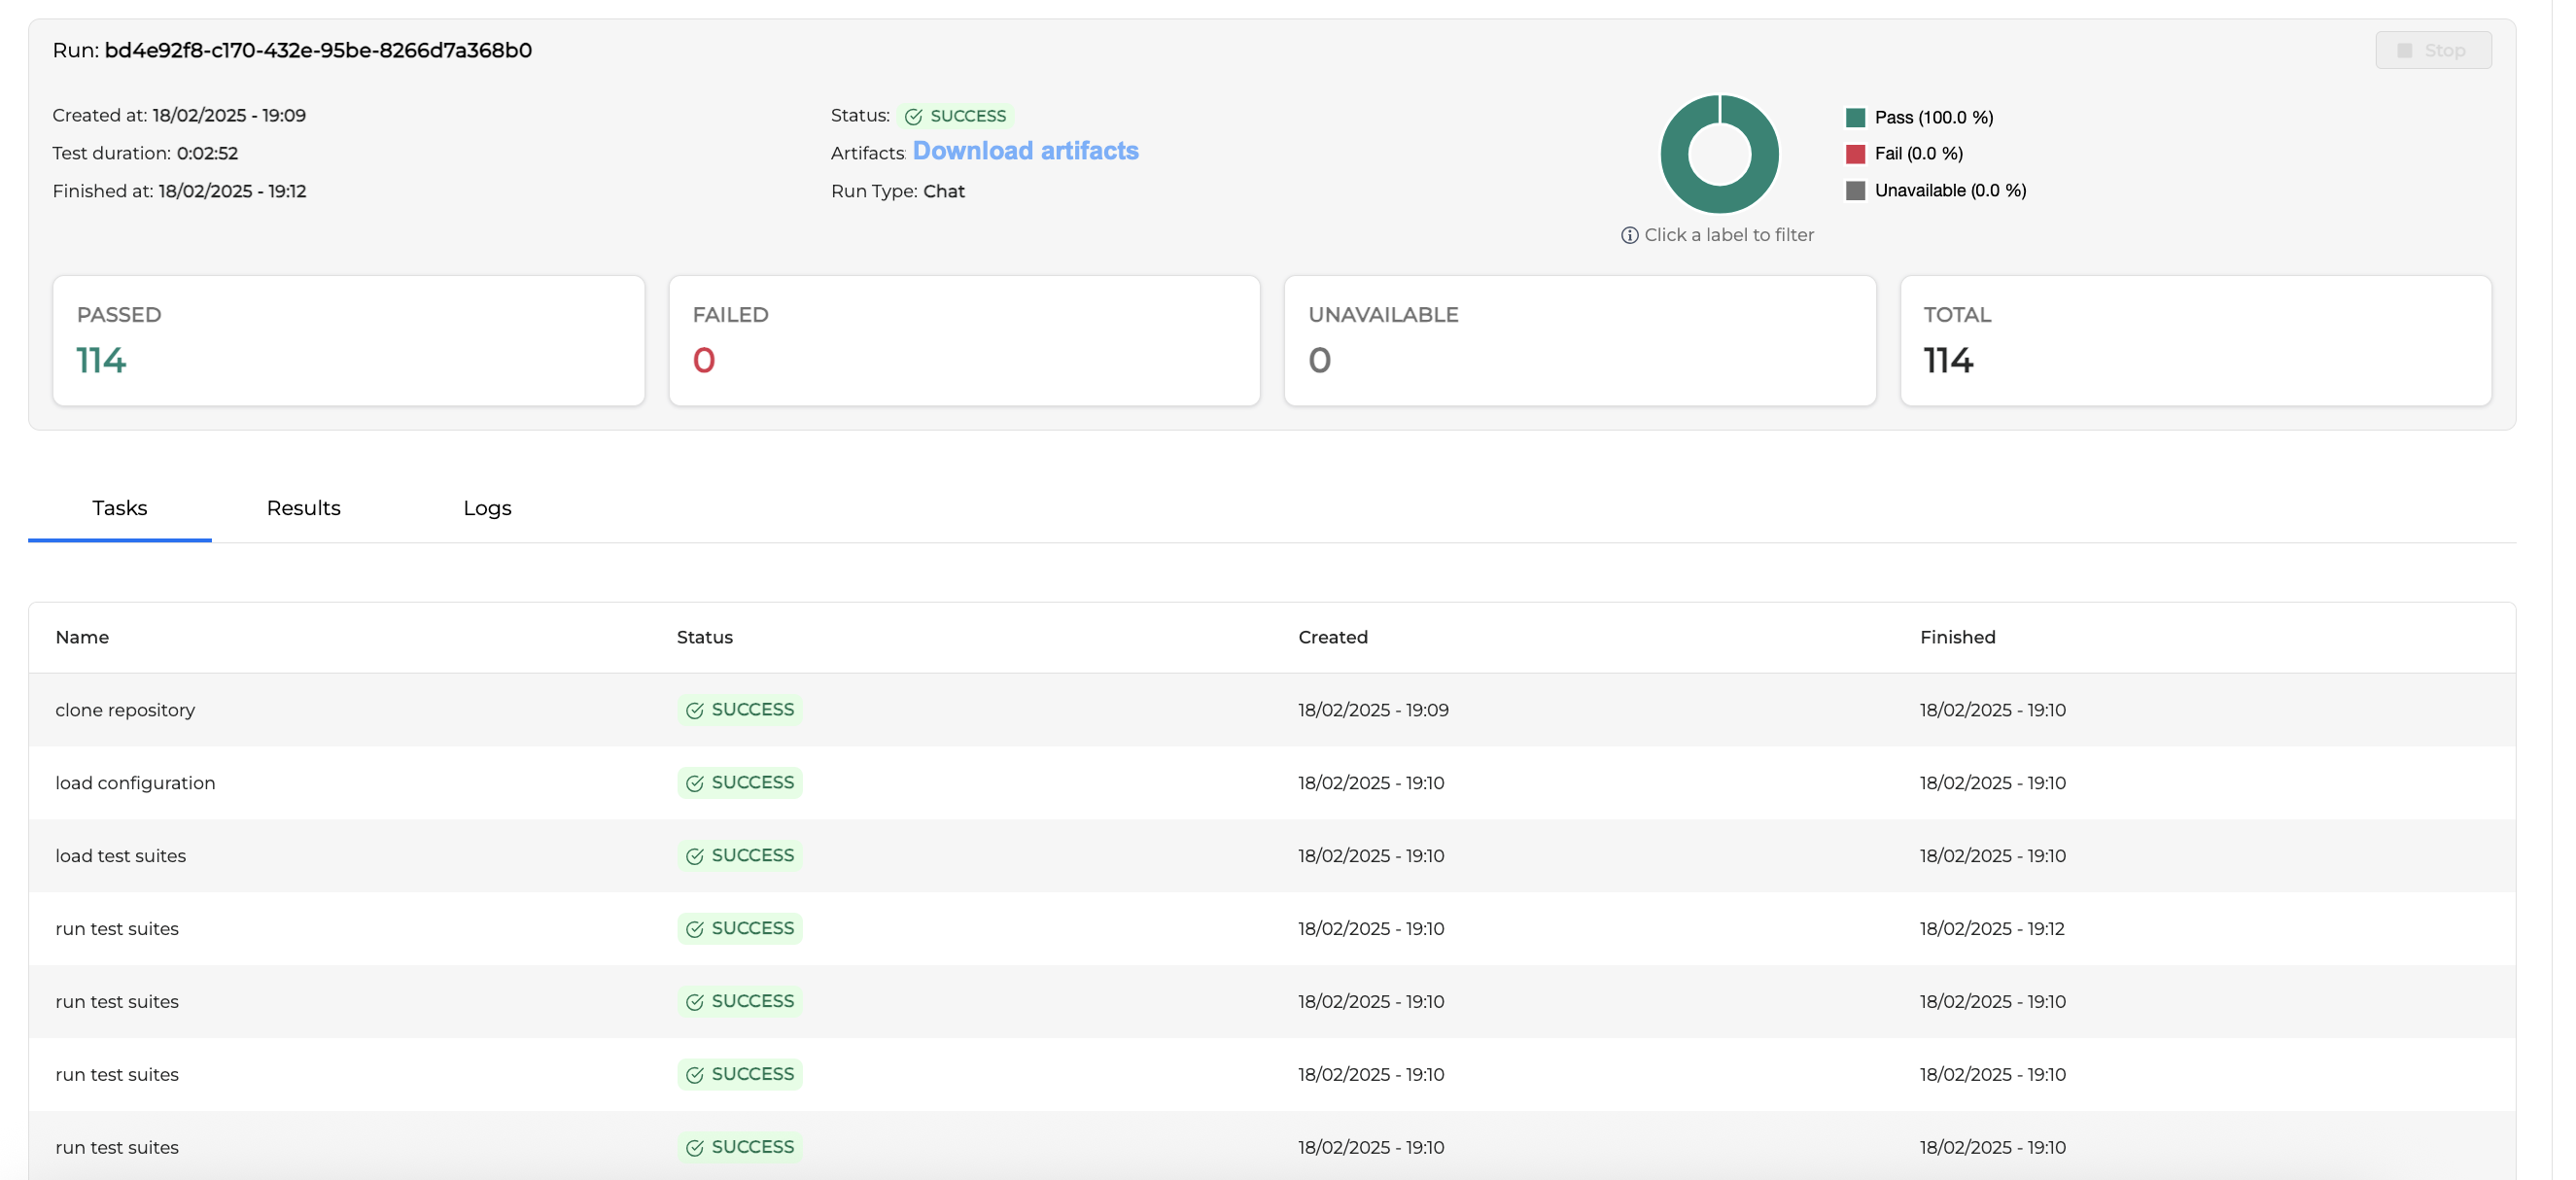
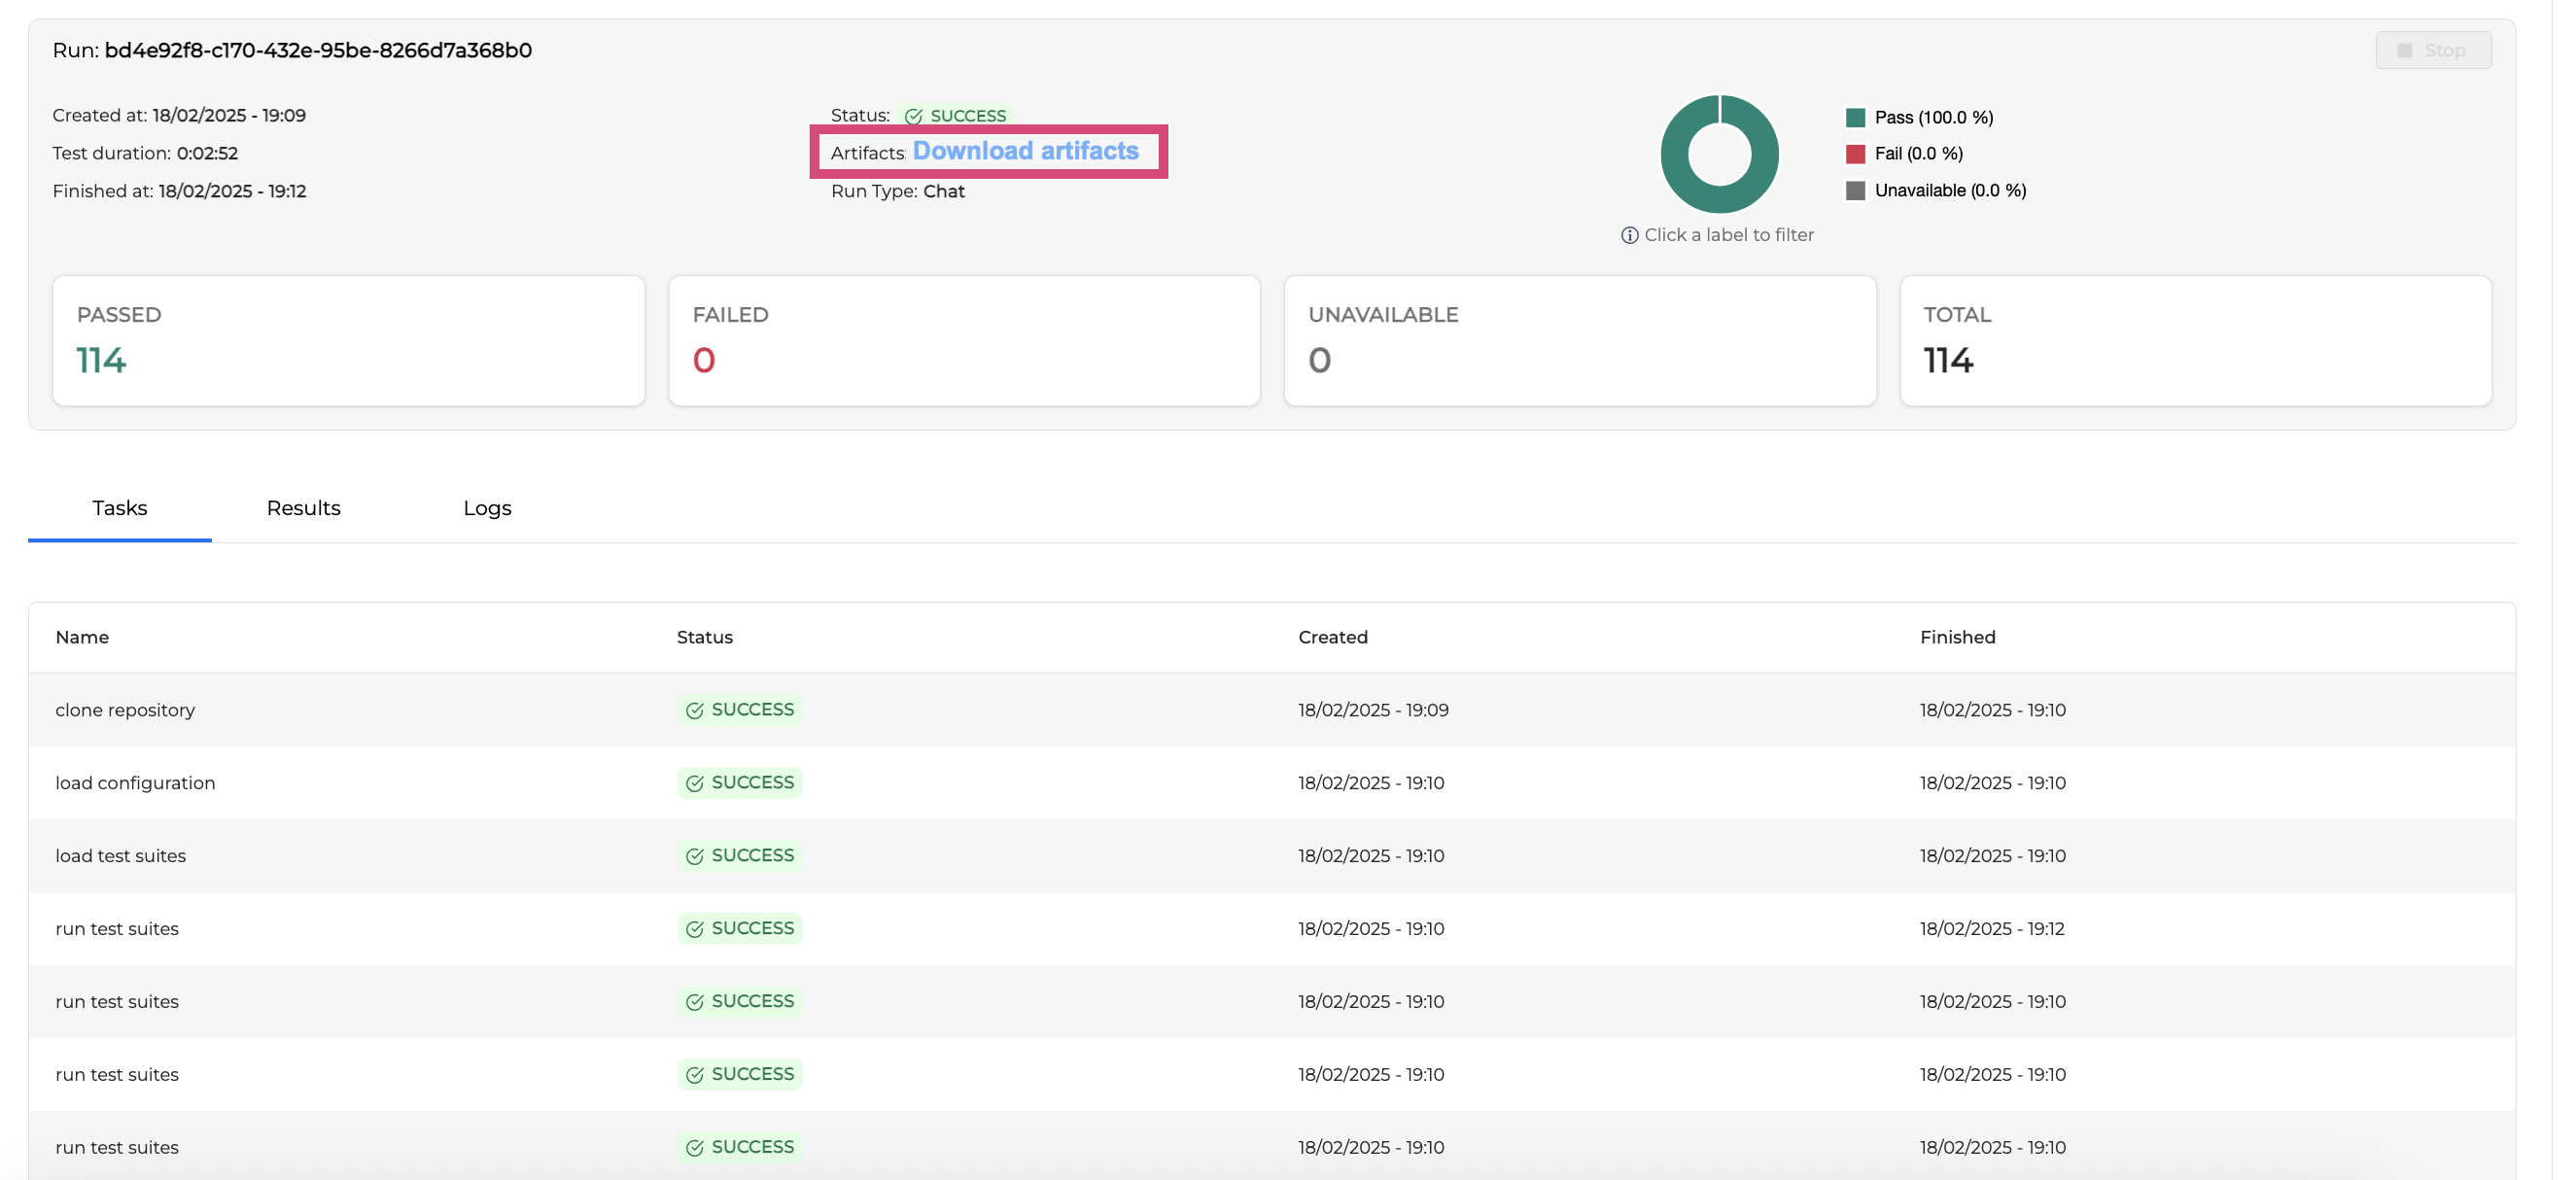
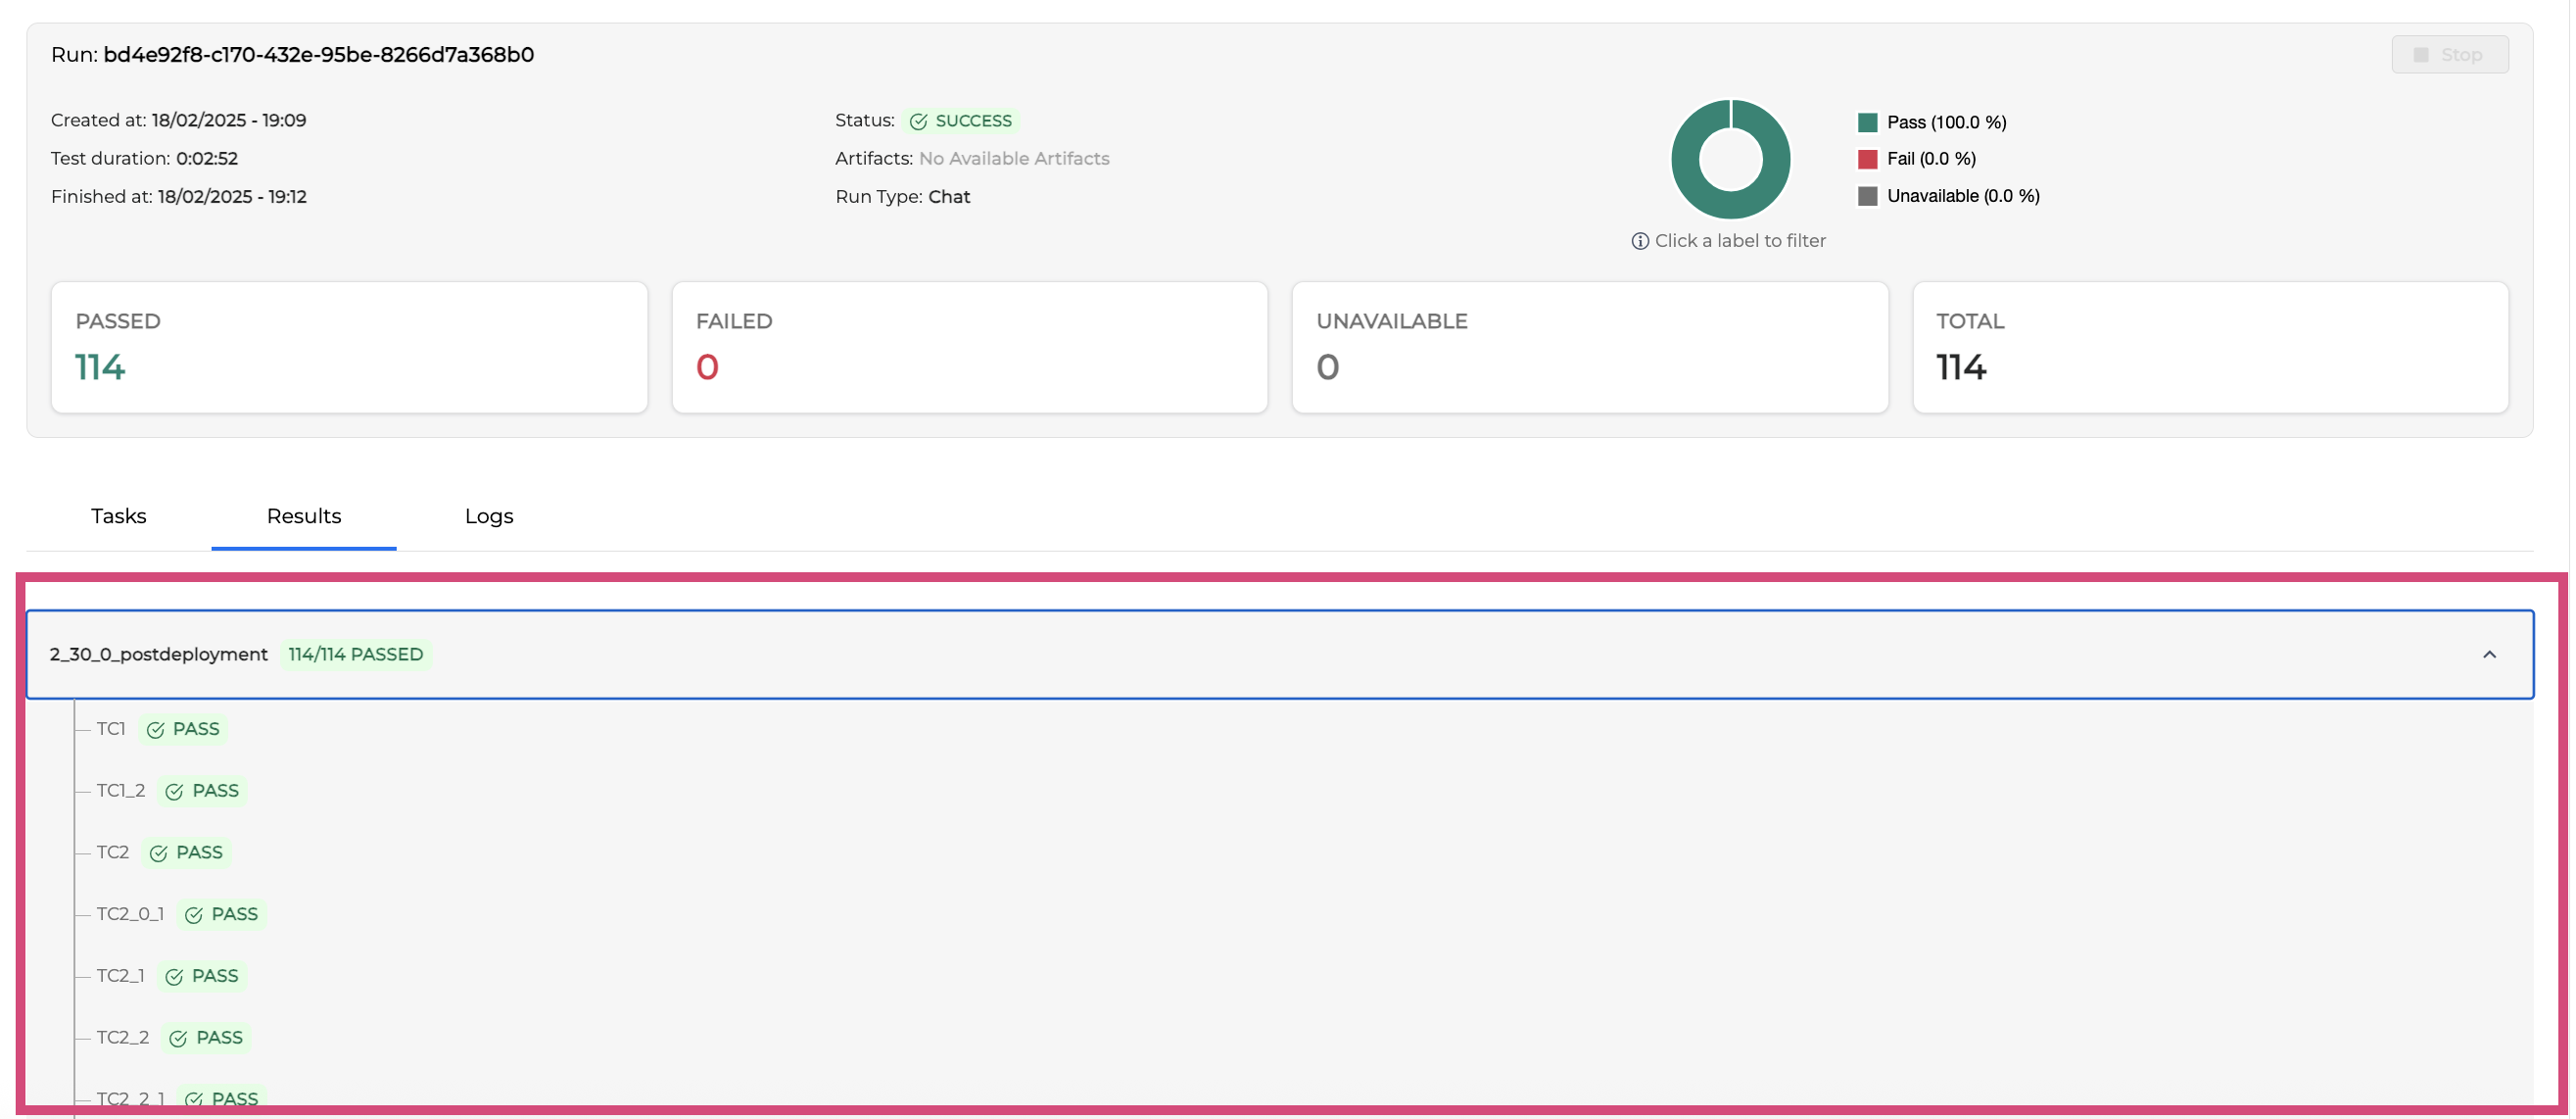
Test Run Details
The page header contains a detailed information about a selected test run.

-
Run number: Test run ID number
-
Created at: Test run creation timestamp
-
Test Duration: Test run duration
-
Finished at: Test run completion timestamp
-
Status: Test run status
-
Download Artifacts: This button allows for downloading Artifacts. You can read more about Artifacts.
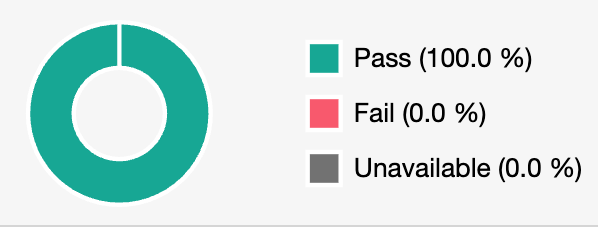
The graph in the header shows a brief statistics on the executed test cases:
-
Passed: The percentage of successfully executed test cases
-
Failed: The percentage of test cases that failed to run
-
Unavailable: The percentage of test cases having no golden dialogs
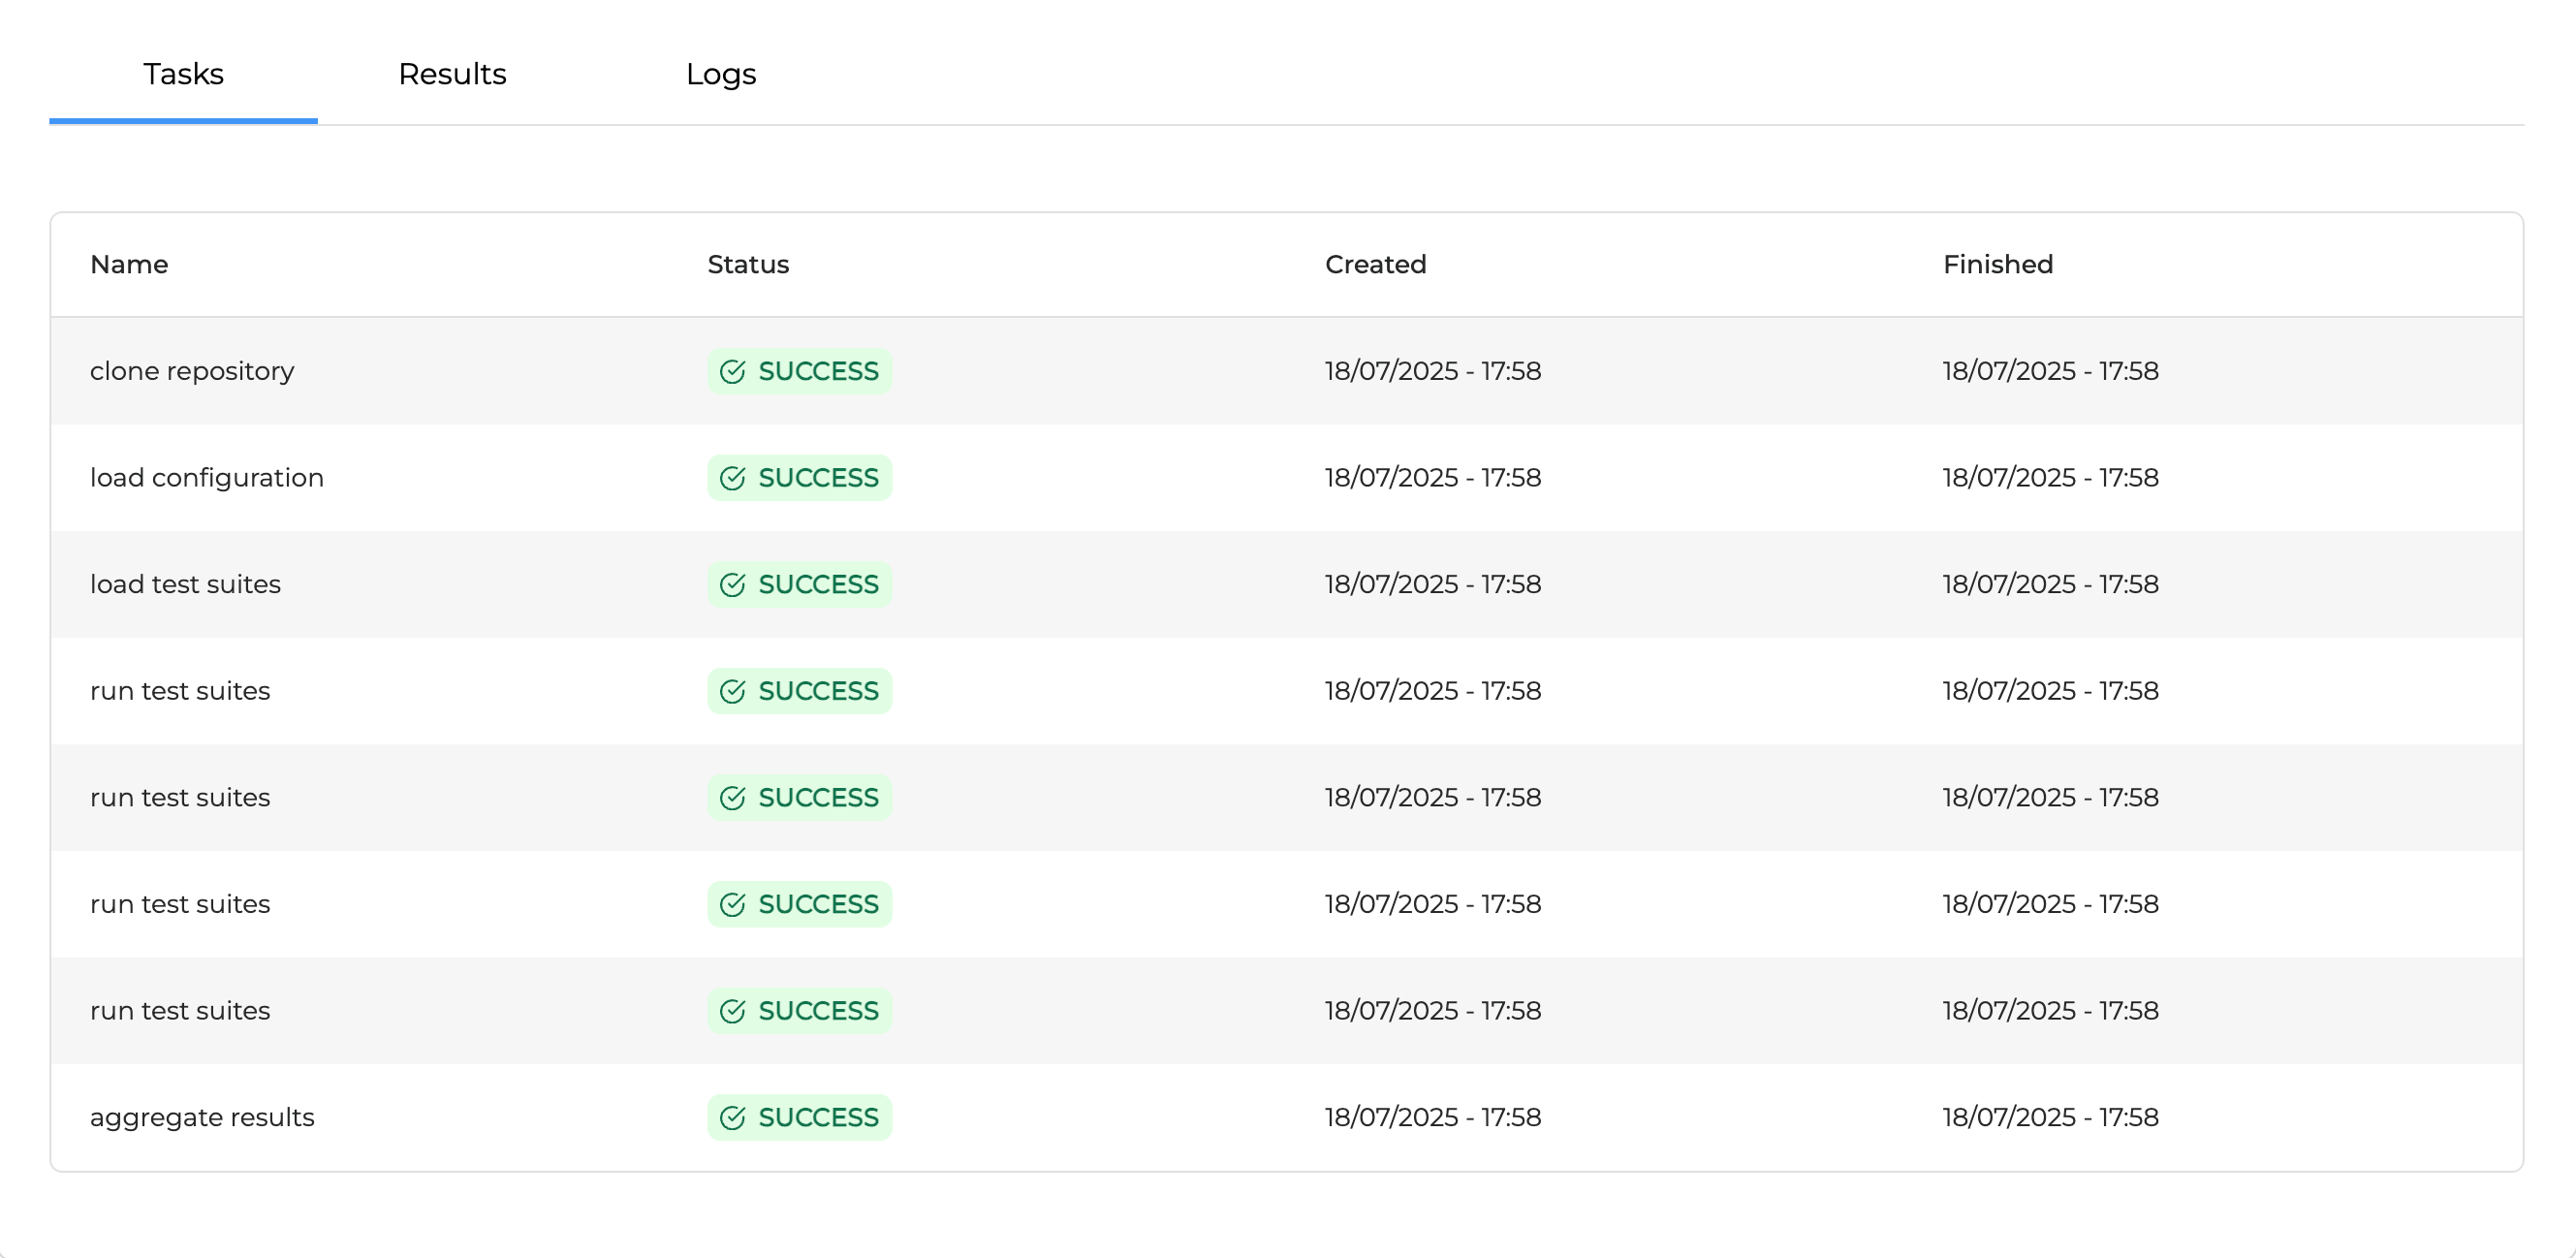
Tasks Tab
The Tasks tab displays the tasks list performed during a test run.
-
Name: Tasks names performed during a test run. Each task has a detailed log which is available in the Logs tab. The following tasks are usually executed:
-
Clone repository
-
Load configuration
-
Load test suites
-
Run test suites
-
Aggregate results
-
-
Status: Status of a task
-
Created: Task creation timestamp
-
Finished: Task completion timestamp
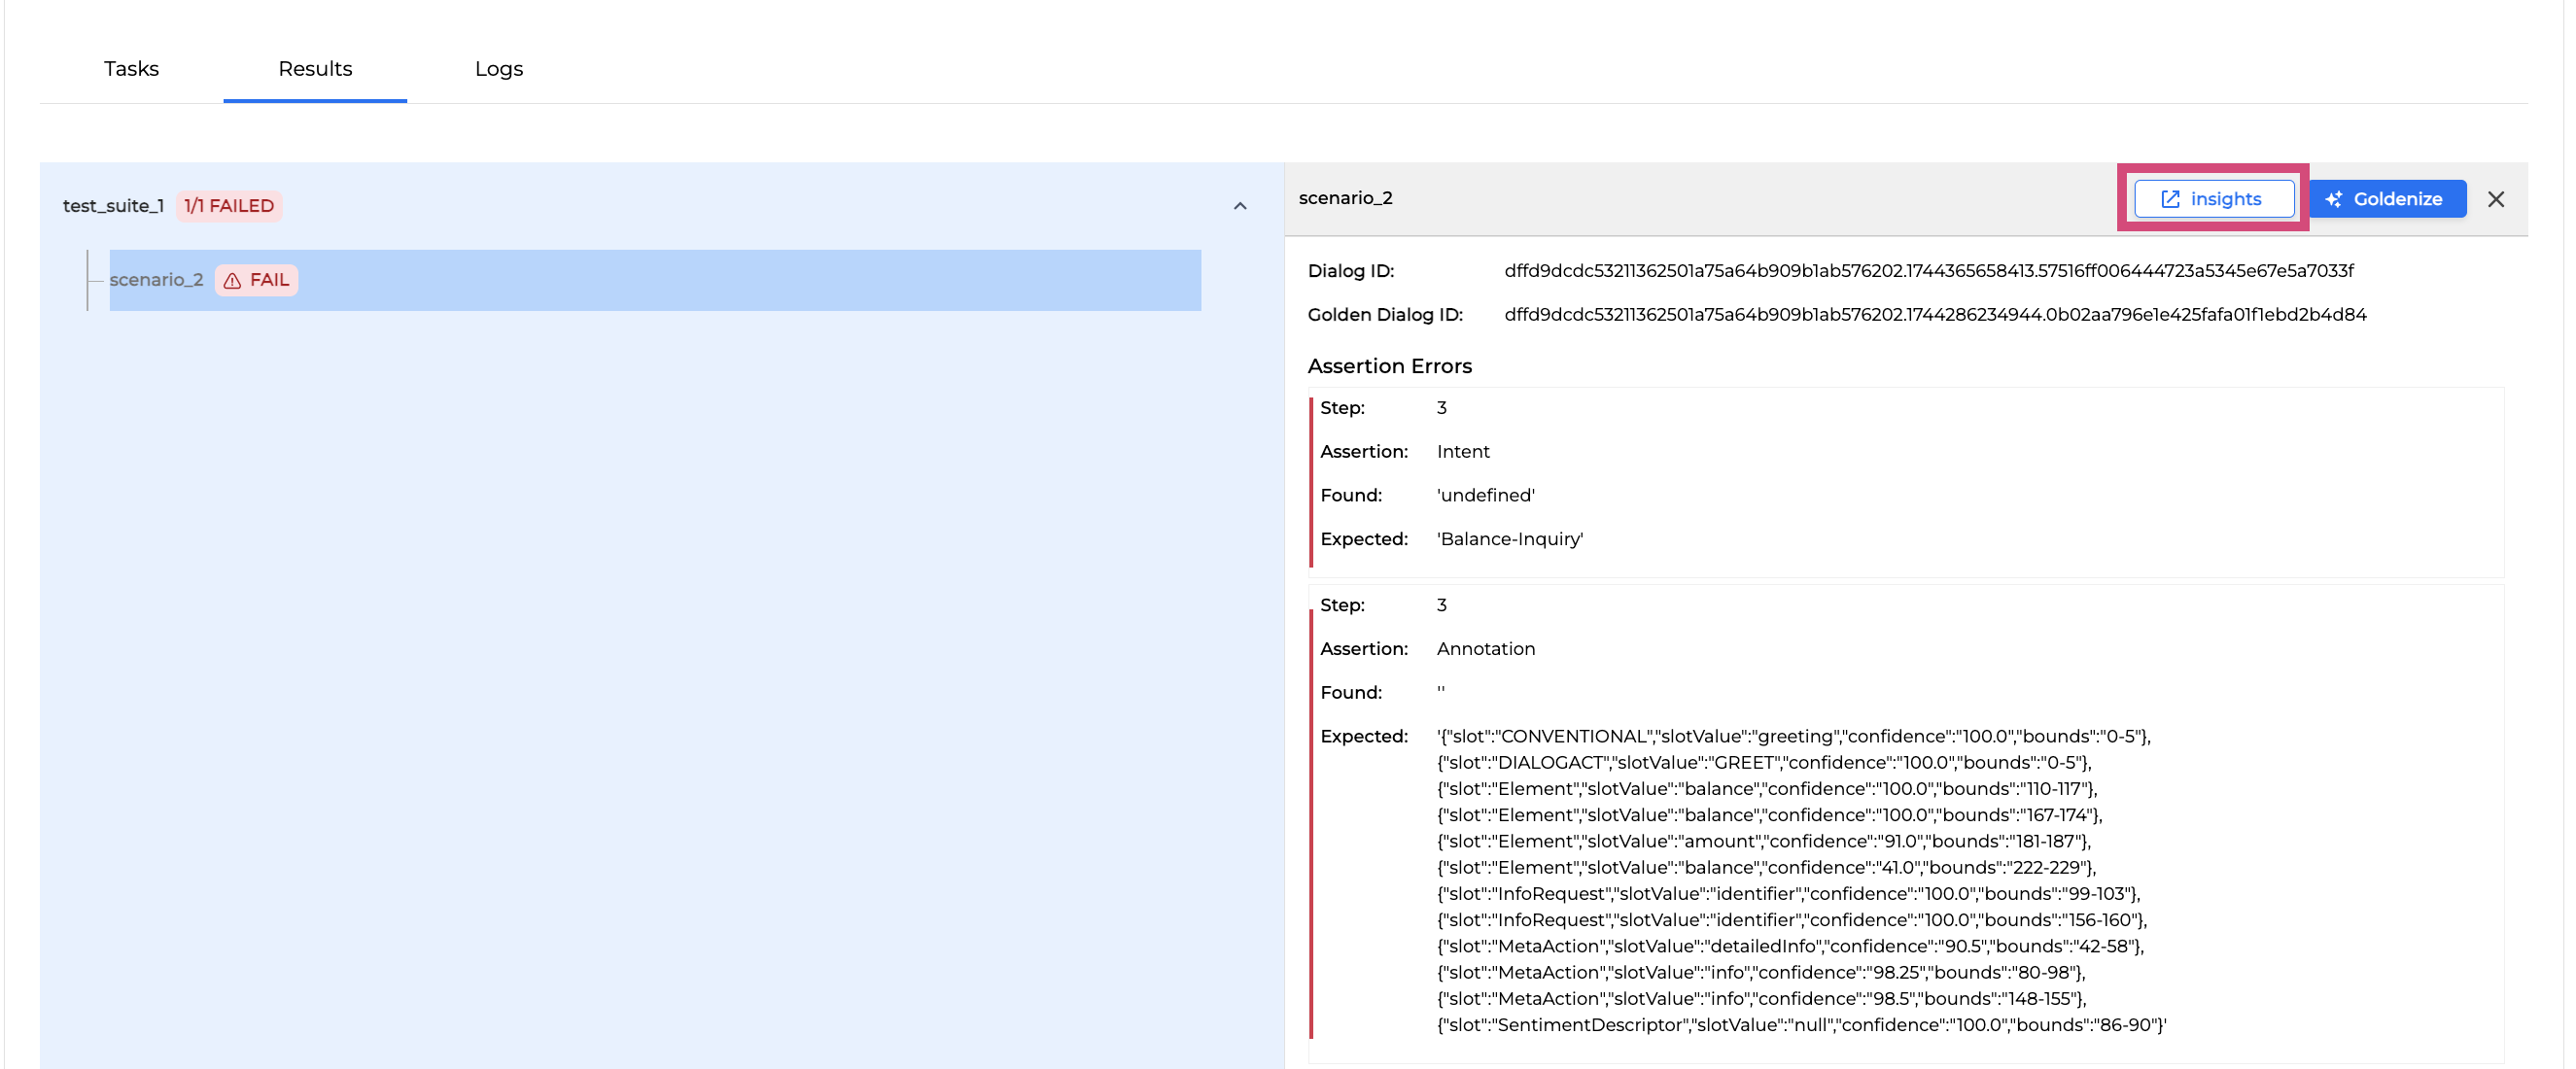
Results Tab
The Results tab displays the information about all test cases (Succeeded, Failed, Unavailable) per each test suite.
You can filter out cases by clicking on the Pass, Fail and Unavailable to display only the desired results.

The same information is contained in the output folder of artifacts.
Click on a selected test suite to unfold the information about the test cases. Then click on a test case to get the test result information as shown below:
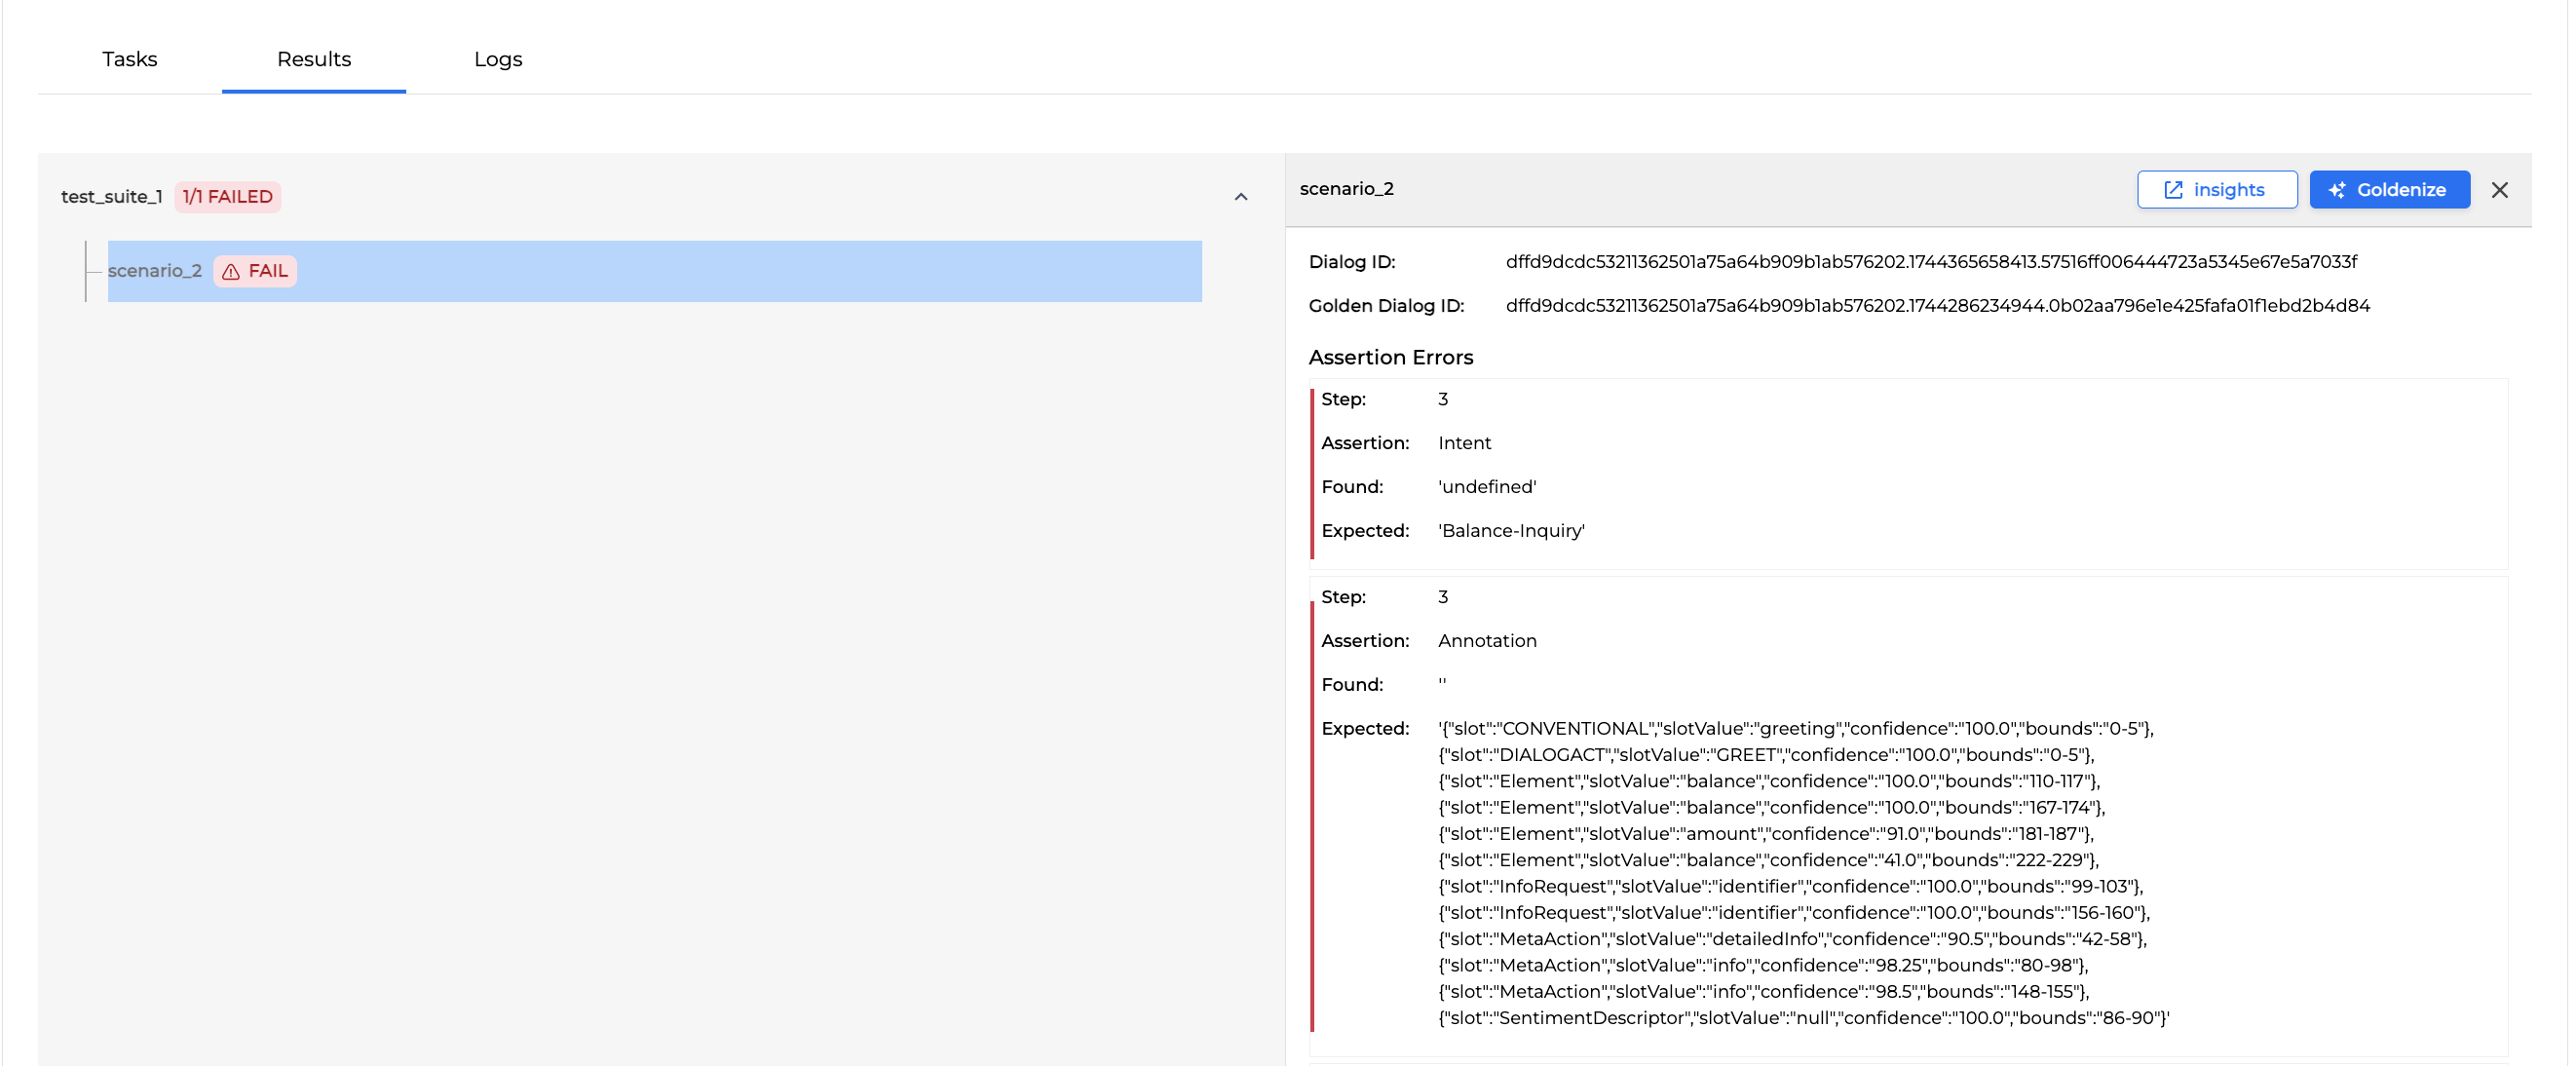
The test result may contain the following information:
|
Property |
Description |
|---|---|
|
Dialog ID |
The dialog ID number |
|
Golden Dialog ID |
The golden dialog ID number |
|
Assertion Errors |
Errors occurred during asserting the expected and return outcome. The following error information is available:
|
|
General Errors |
Errors occurred due to the system failures. E.g. The dialog unexpectedly ended. The following error information is available:
|
|
Warnings |
May contain warnings, e.g. a delay warning due to the system high load |
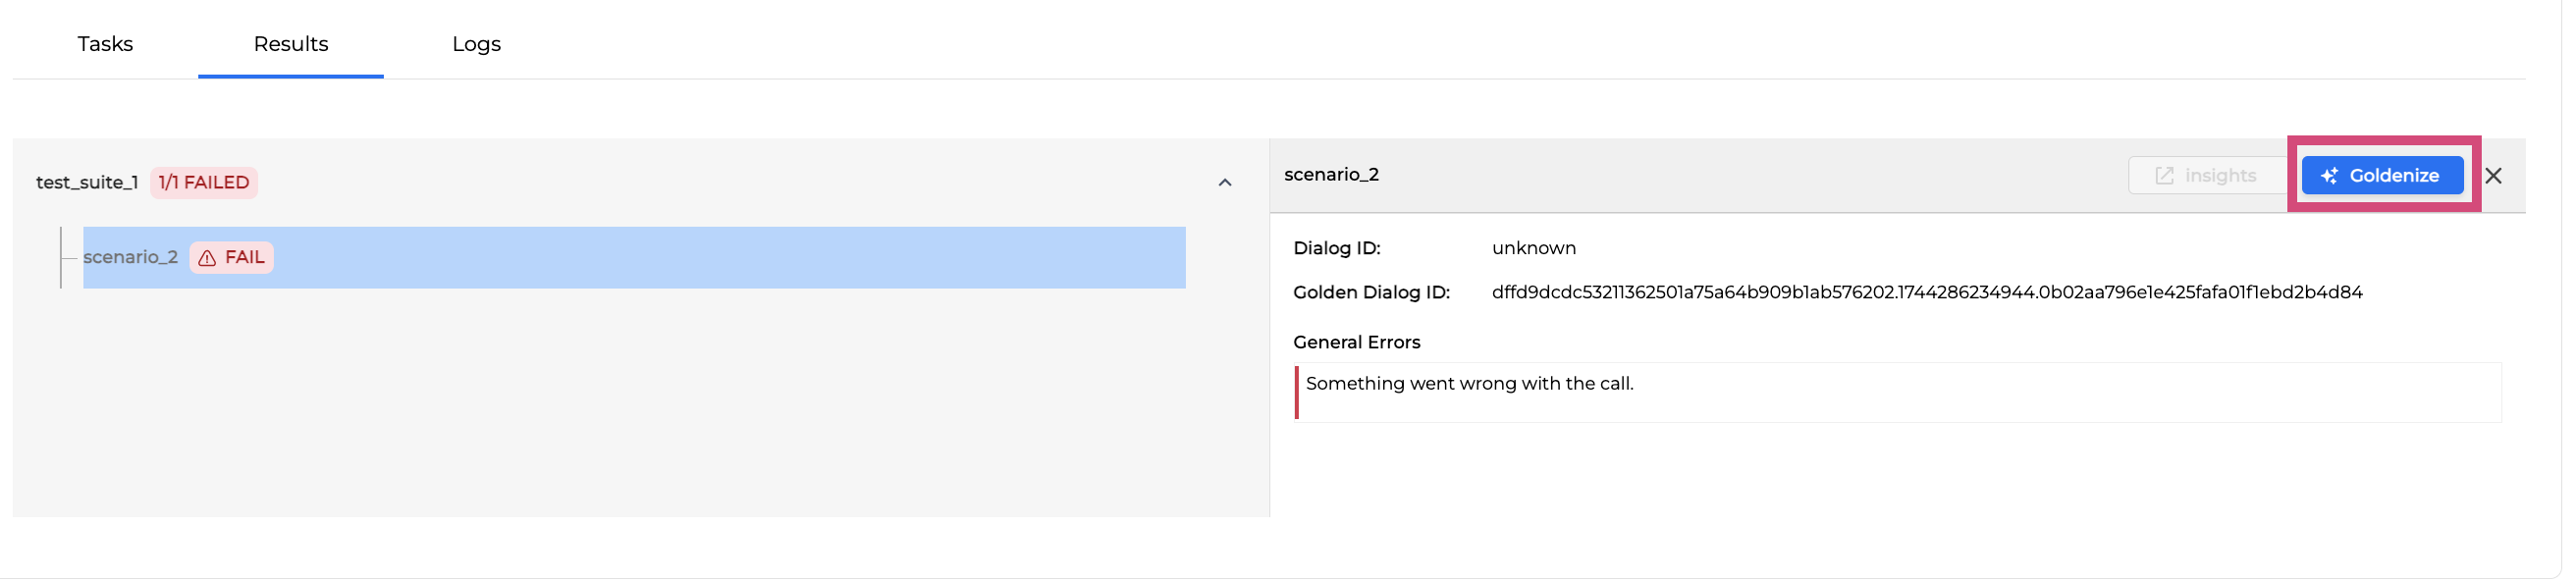
Goldenize a Test Case
You can goldenize a Failed or Unavailable test case directly from the Results tab, without manually moving files from the output/ folder.
Goldenizing a test case promotes the dialog produced during the run to the golden dialog for that test case. Once goldenized, the test case will use this dialog as the reference for all future test runs.
To goldenize a test case, follow the steps below:
-
In the Results tab, locate the Failed or Unavailable test case you want to goldenize.
-
Click the Goldenize button.
-
Confirm the action when prompted.
The selected dialog is saved as the new golden dialog for the test case. The test case status will change from Unavailable or Failed to active on the next run.
Only Failed and Unavailable test cases can be goldenized. Successfully passed test cases already have a valid golden dialog.
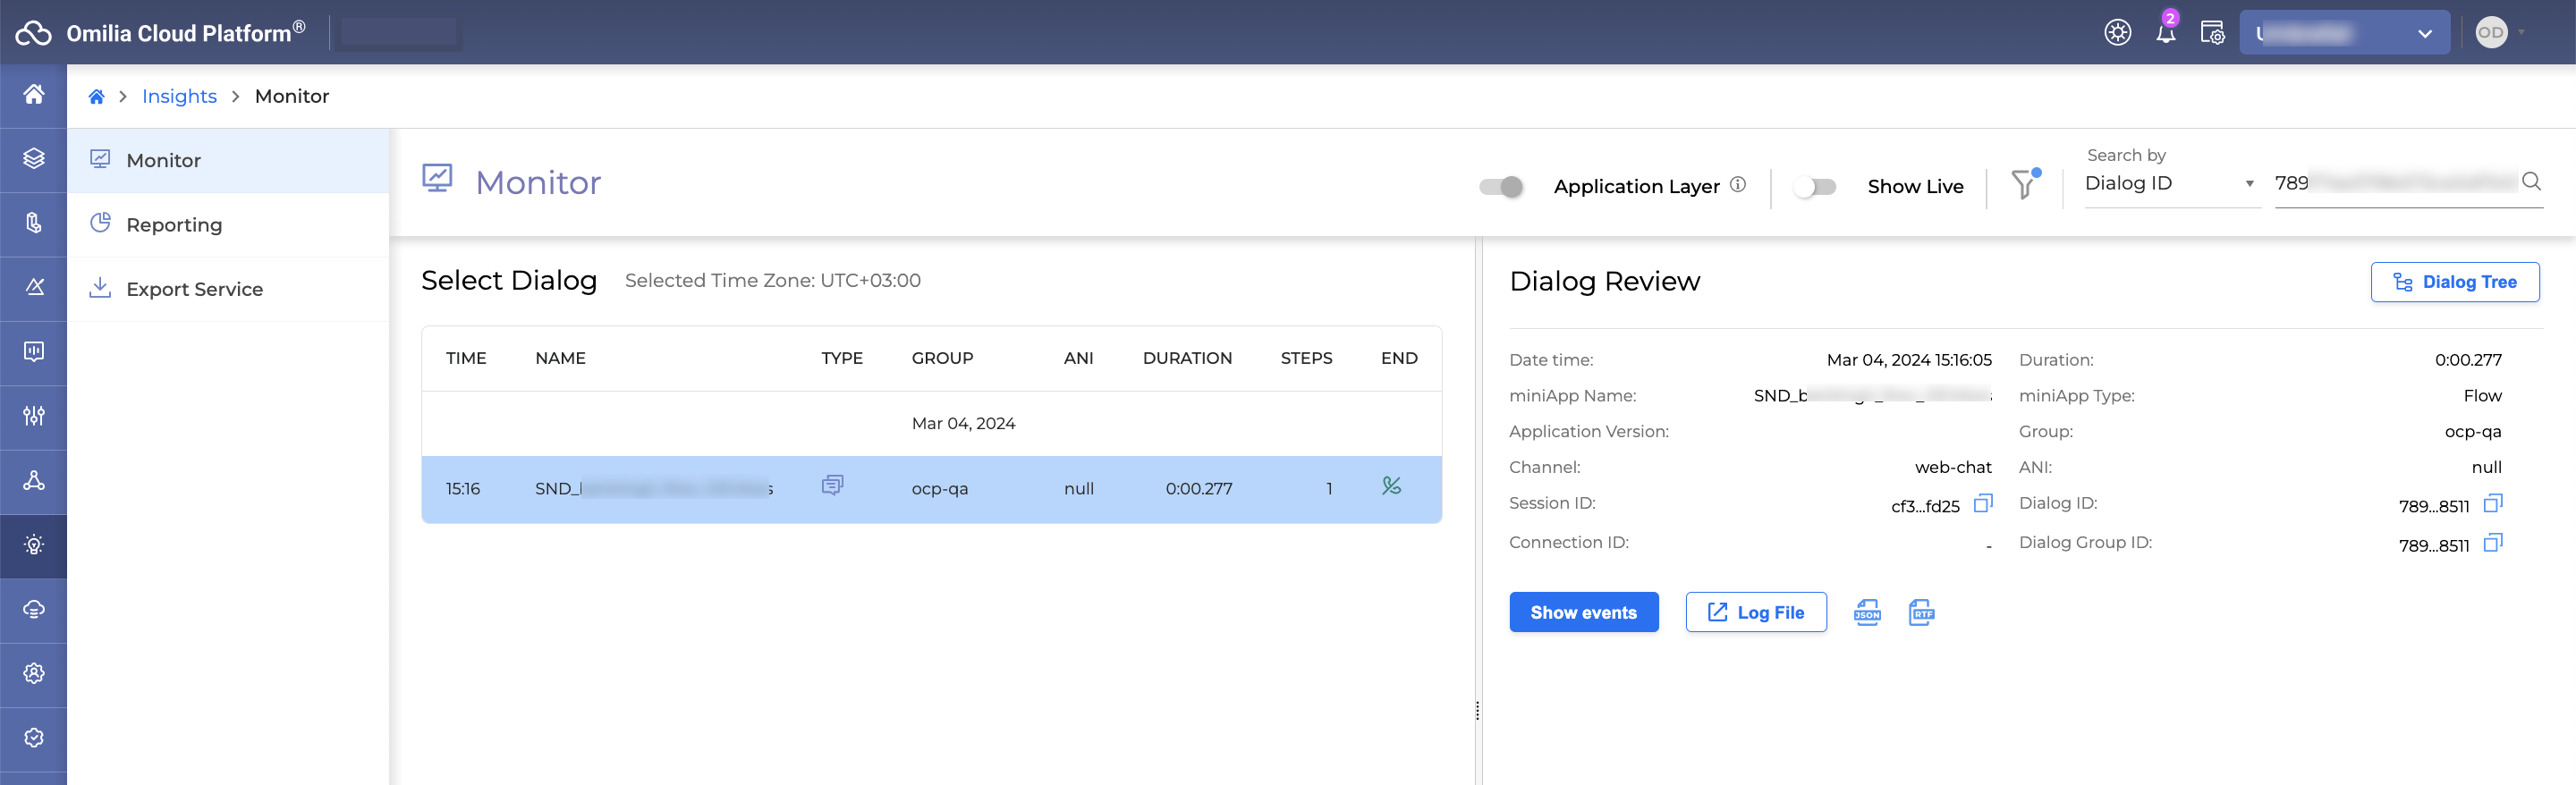
Dialog Review Insights
To check a detailed information about the dialog used in the selected test case, click the Insights button.
Thus, you will be forwarded to the Dialog Review in Monitor as shown on the image below. For more information, check up Monitor User Guide.
Logs Tab
Tests are run outside Testing Studio+ by distributed workers. The Logs tab allows you to see detailed logs of each task executed during a test run.
The tasks' names are marked in green. The task logs are written in white.
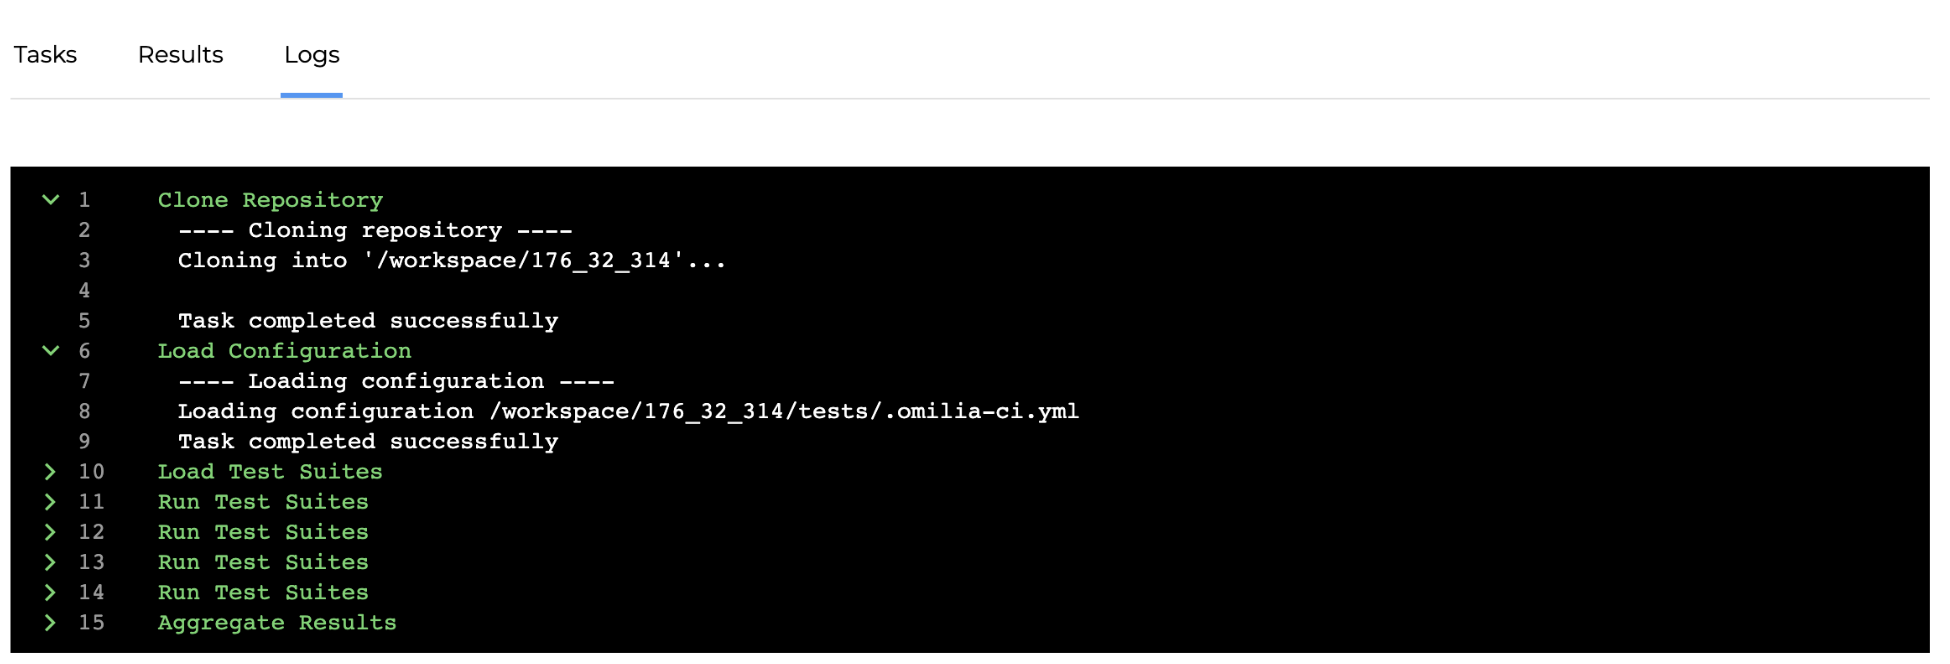
The information in the Logs tab becomes available right after the test run starts and is updated in the real time.
Explore
The Explore feature allows you to simulate a conversation between your dialog application and LLM to explore your application’s boundaries by identifying areas that might not be yet supported or possible issues. This enables you to prevent potential problems while using the dialog application in a real conversation.
Start Exploration
To create an exploration session, follow the steps below:
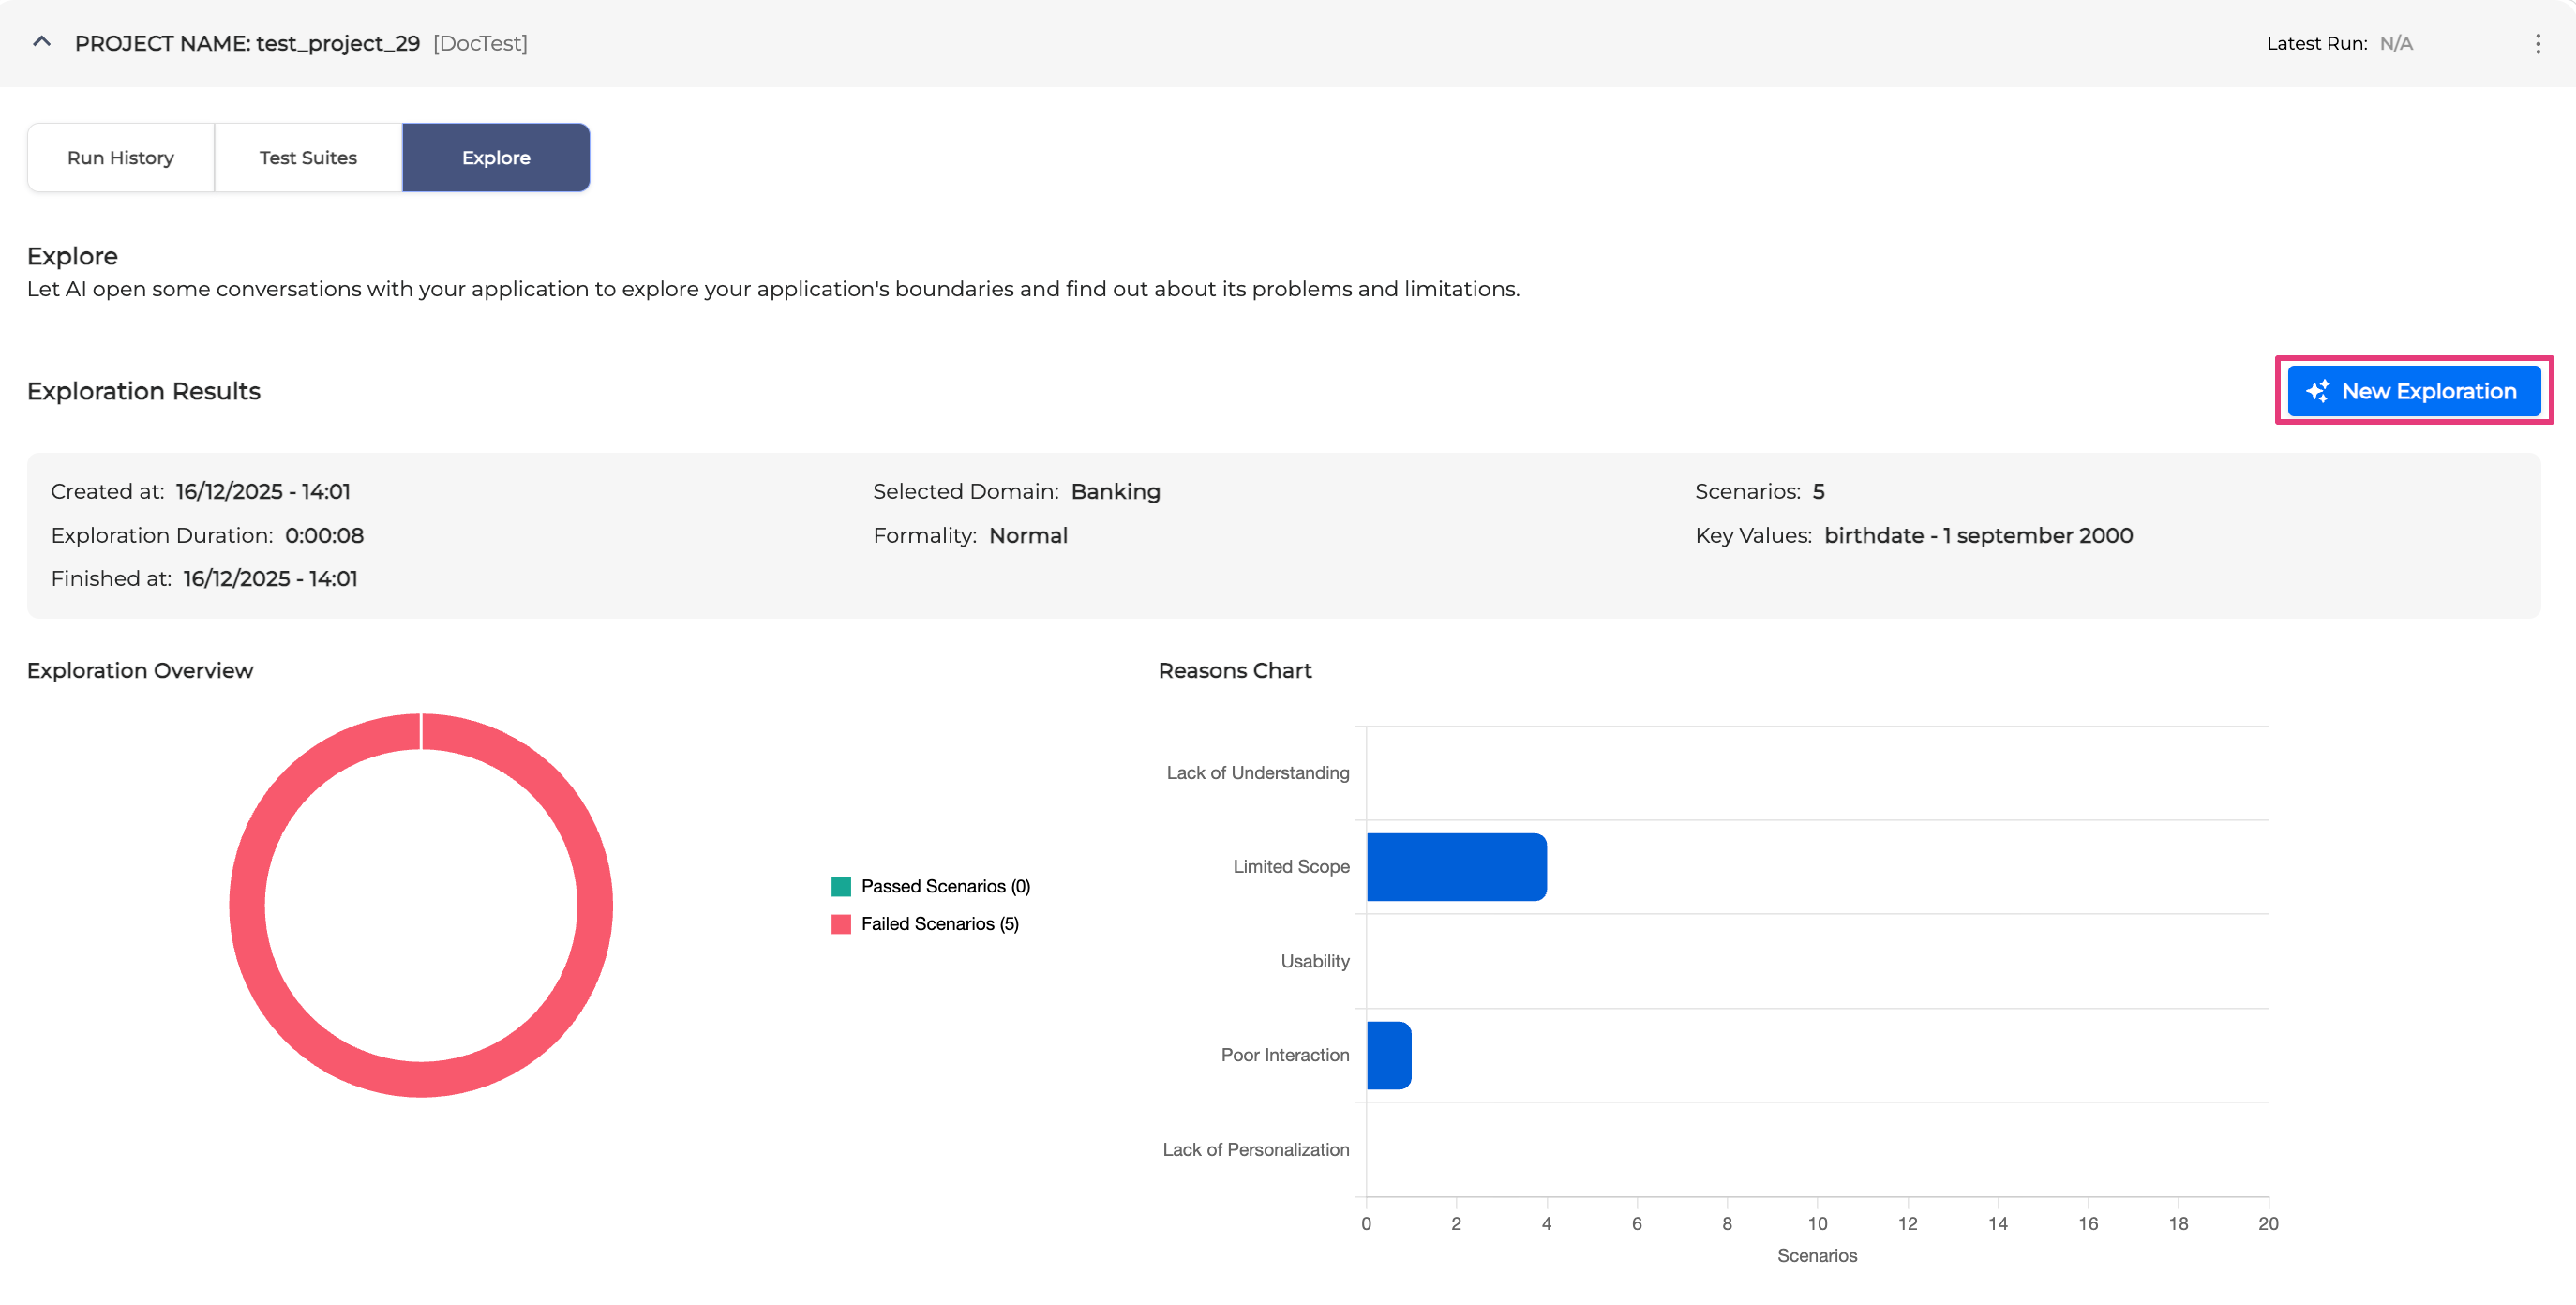
-
Click the New Exploration button in the upper right.
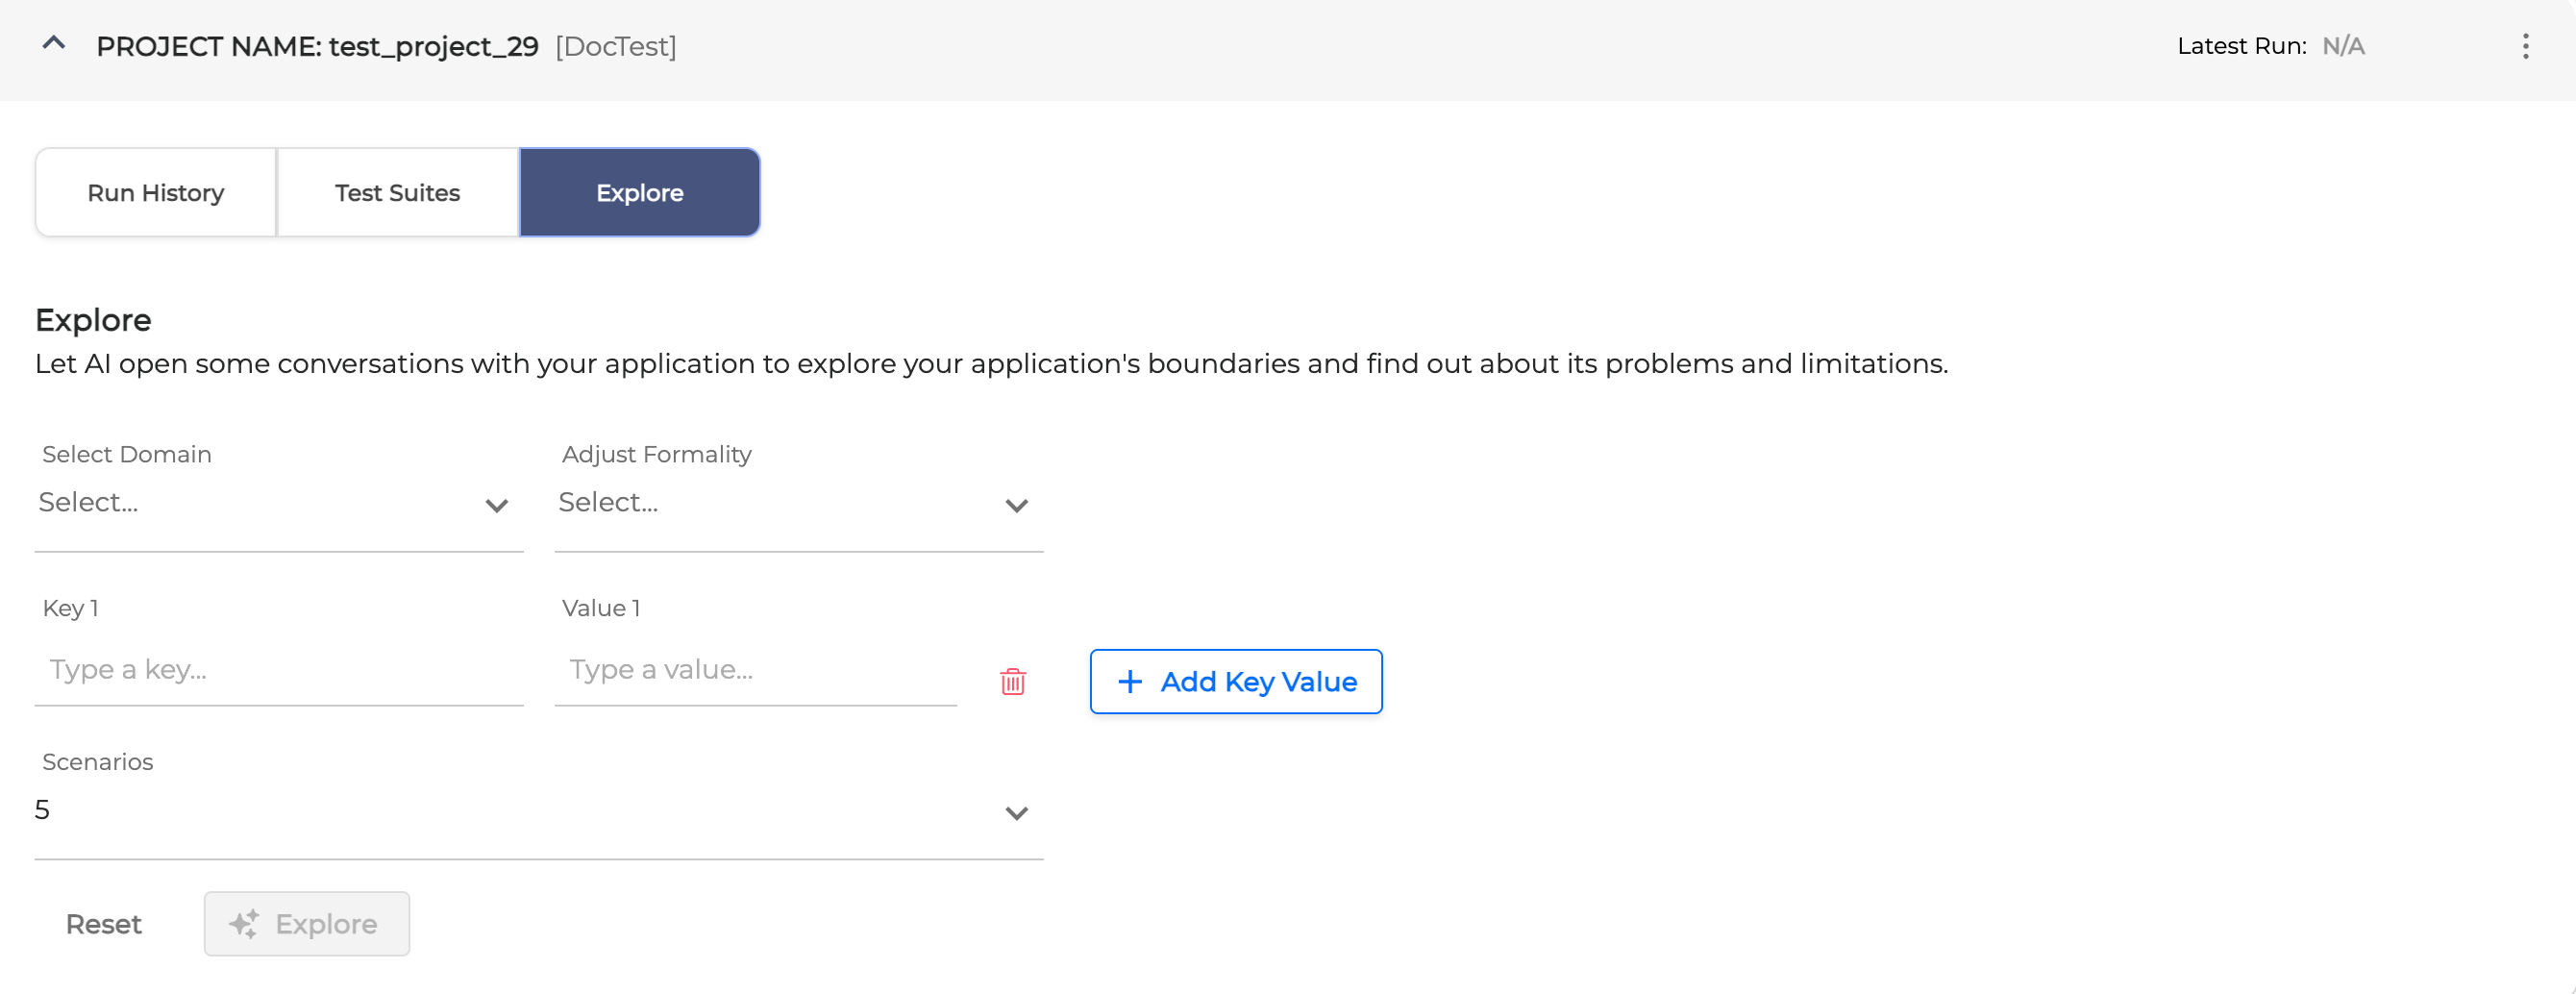
-
Fill in the form and hit the Explore button when finished:
-
Select Domain: choose the domain from the dropdown list. For example, pick Banking (mandatory).
-
Adjust Formality: select the formality level from the dropdown list. The formality level could be Informal, Normal or Formal (mandatory).
-
Key-Value: add the Key-Value pair to provide the additional information as a birth date or card PIN that the app may ask (optional).
-
Scenarios: define the number of scenarios LLM will run to check the dialog application.
-
After clicking the Explore button, it might take some time for LLM and dialog application to communicate.
-
Once finished, you are redirected to the Exploration Results chart.
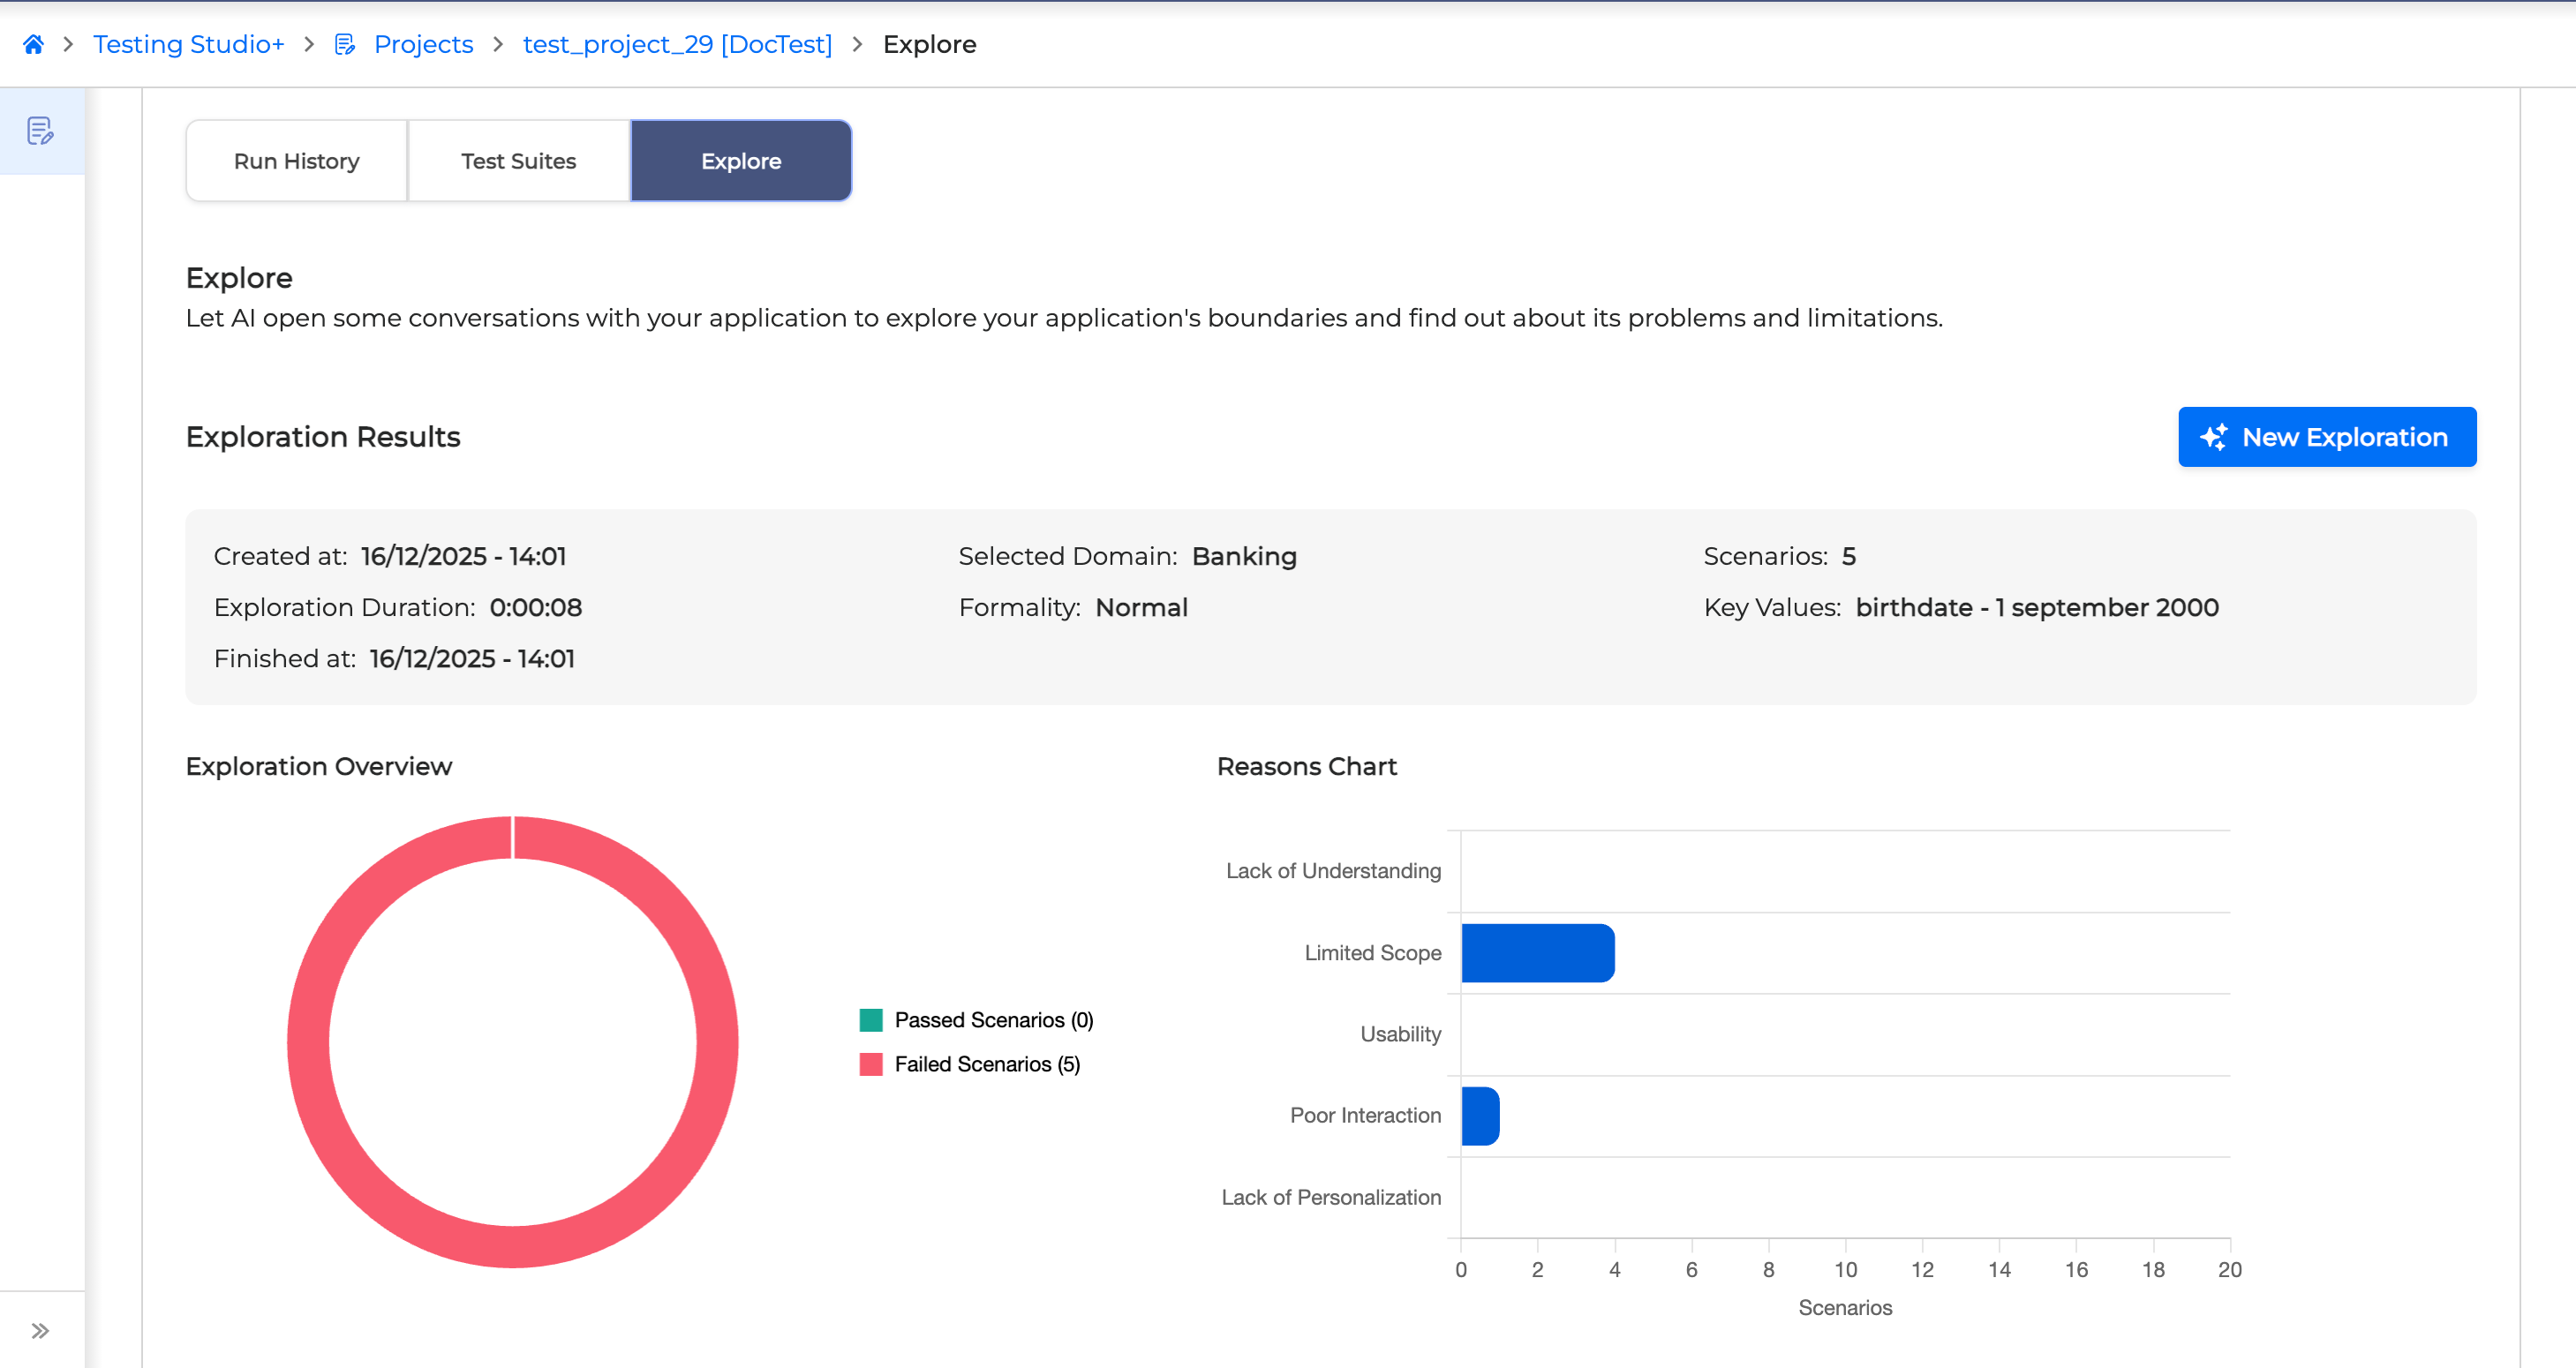
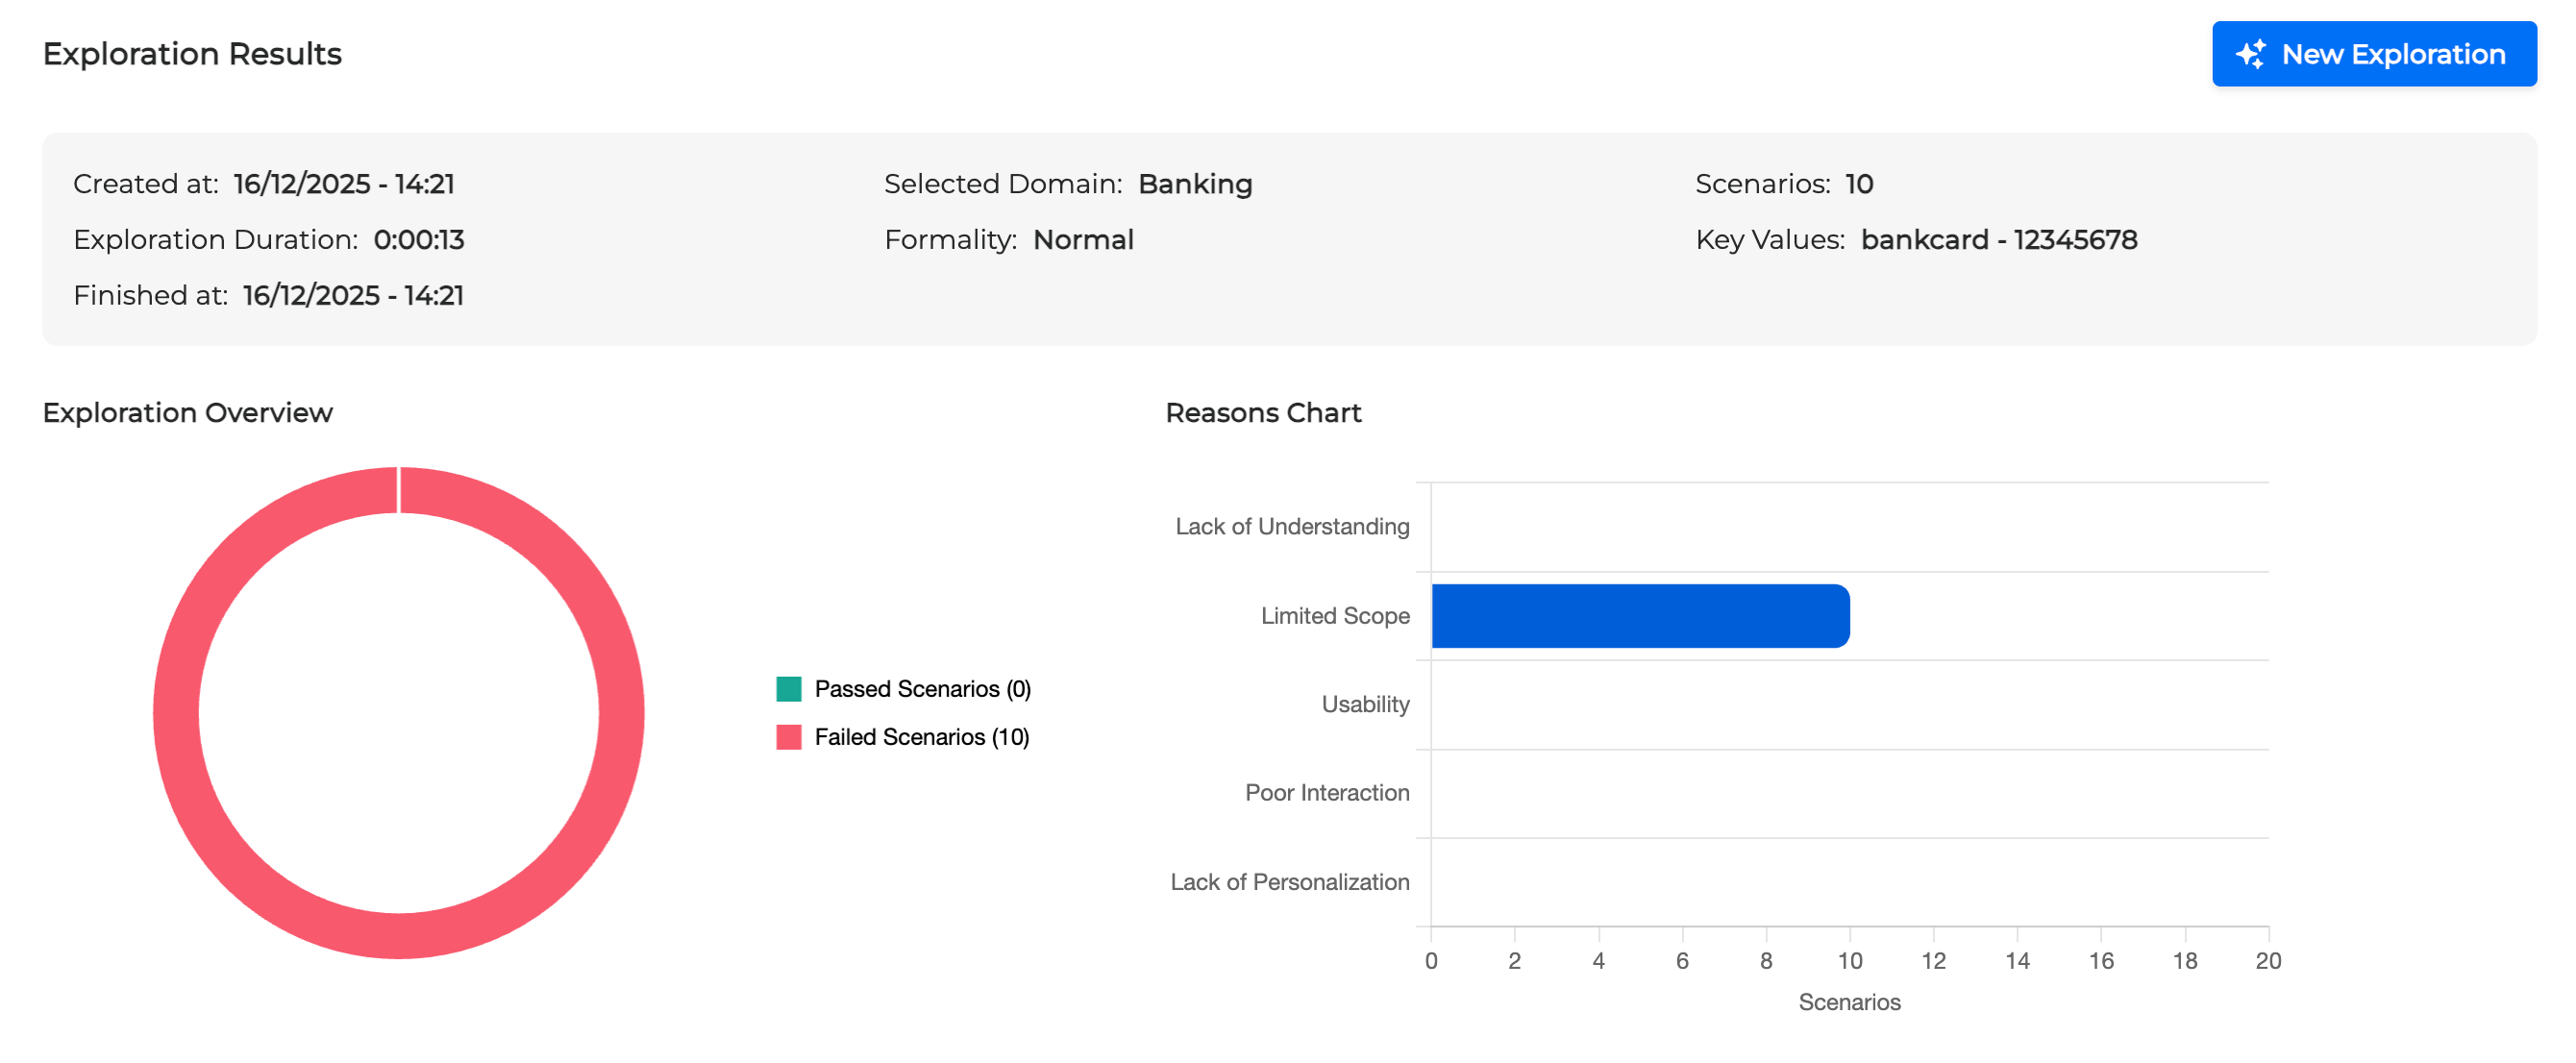
Exploration Results
The Exploration Results provide a summary of the exploration sessions, offering detailed information about the conversation between the LLM and your application in a chart view. It allows you to assess the comprehensiveness of the dialog application and identify any potential failure reasons.
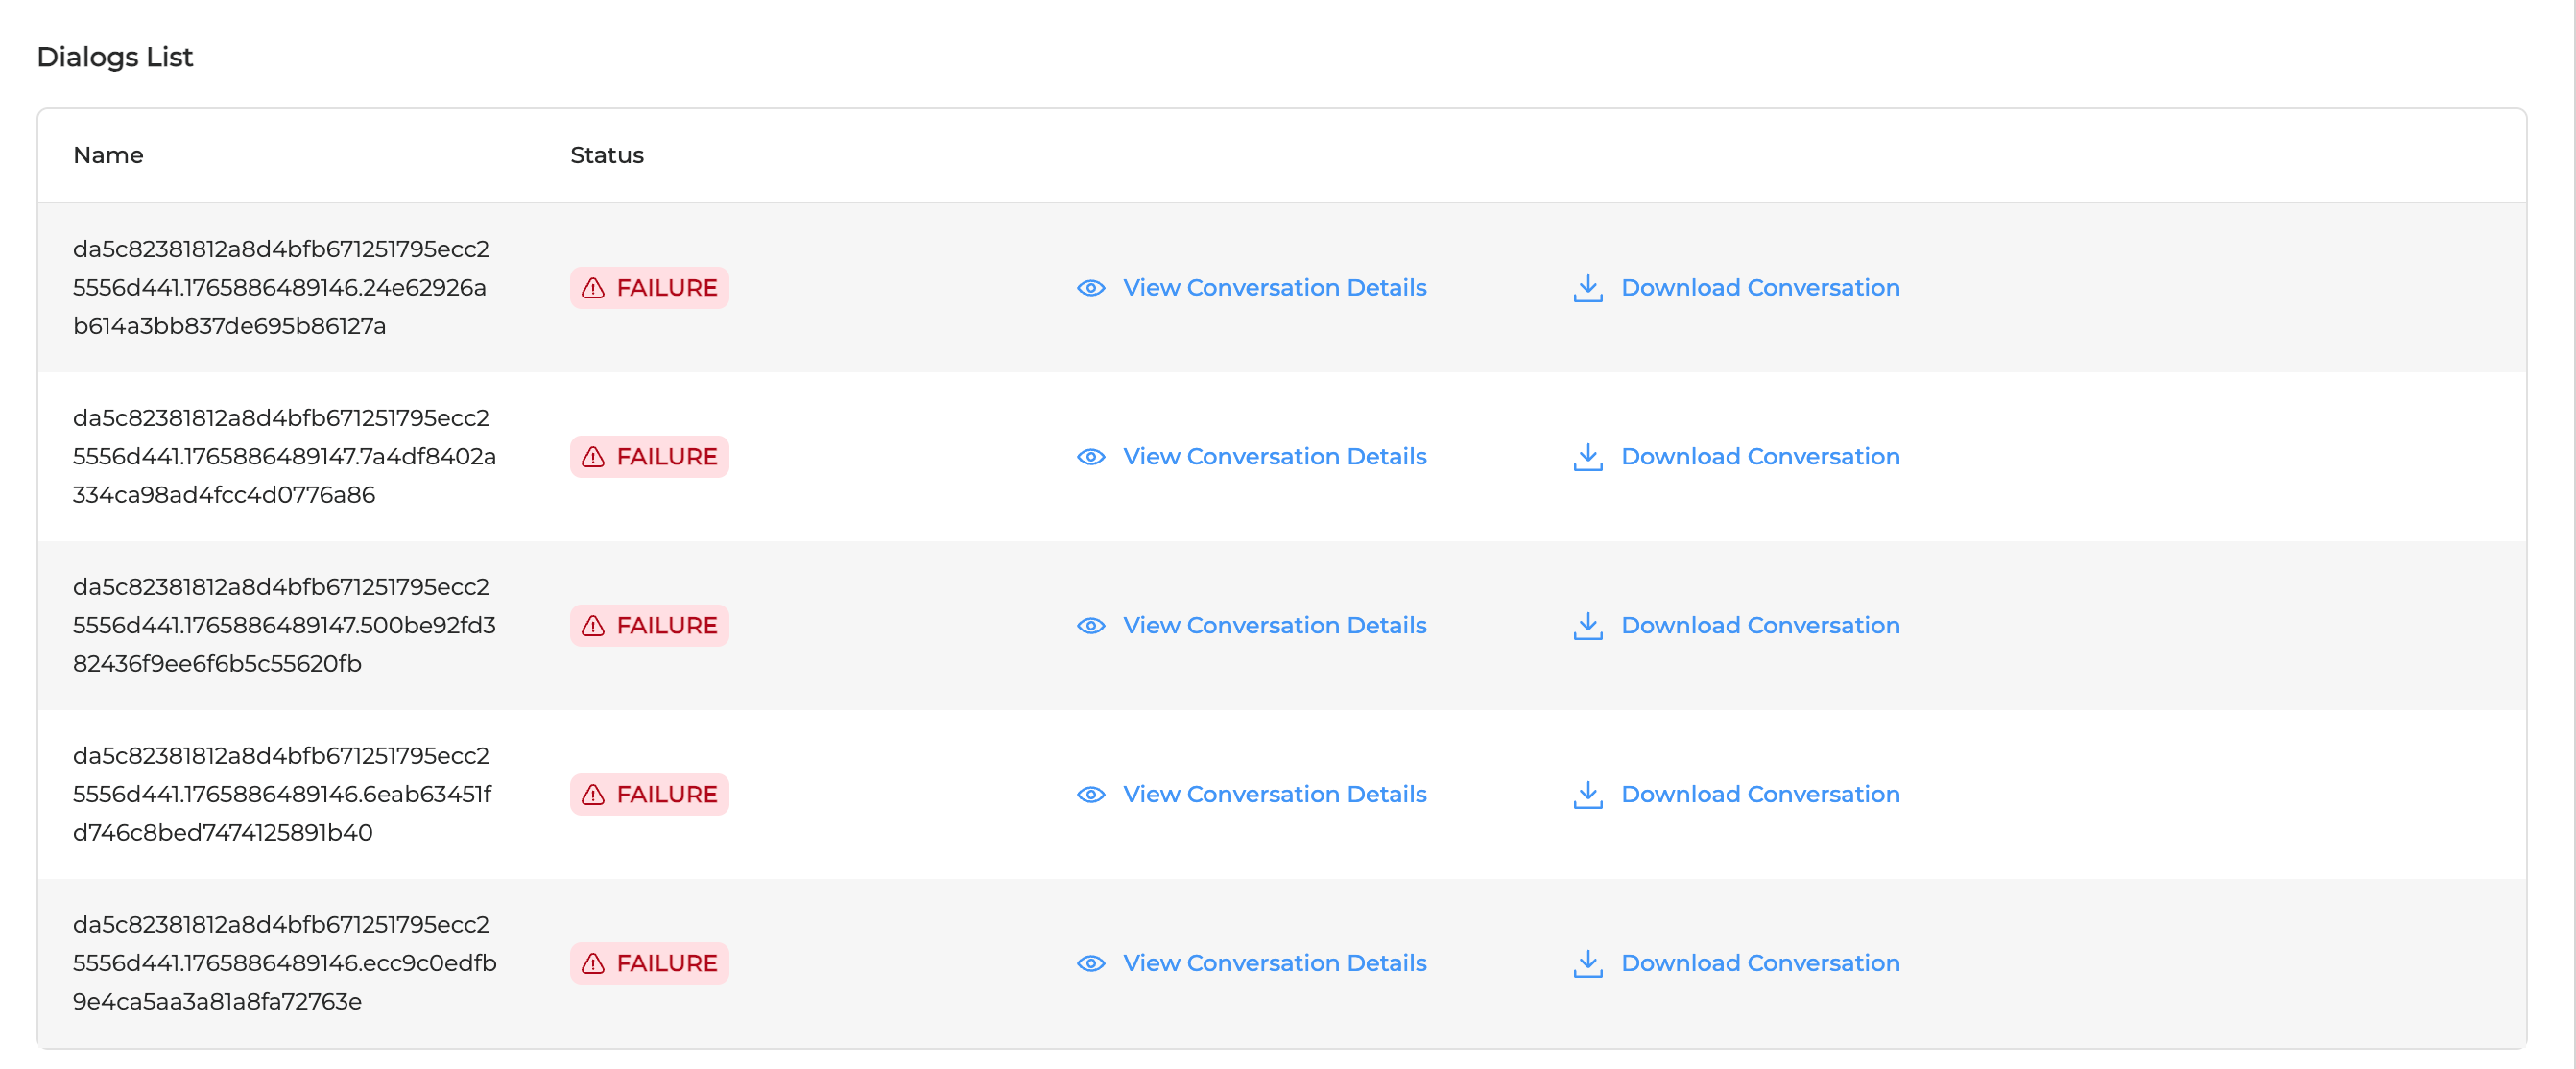
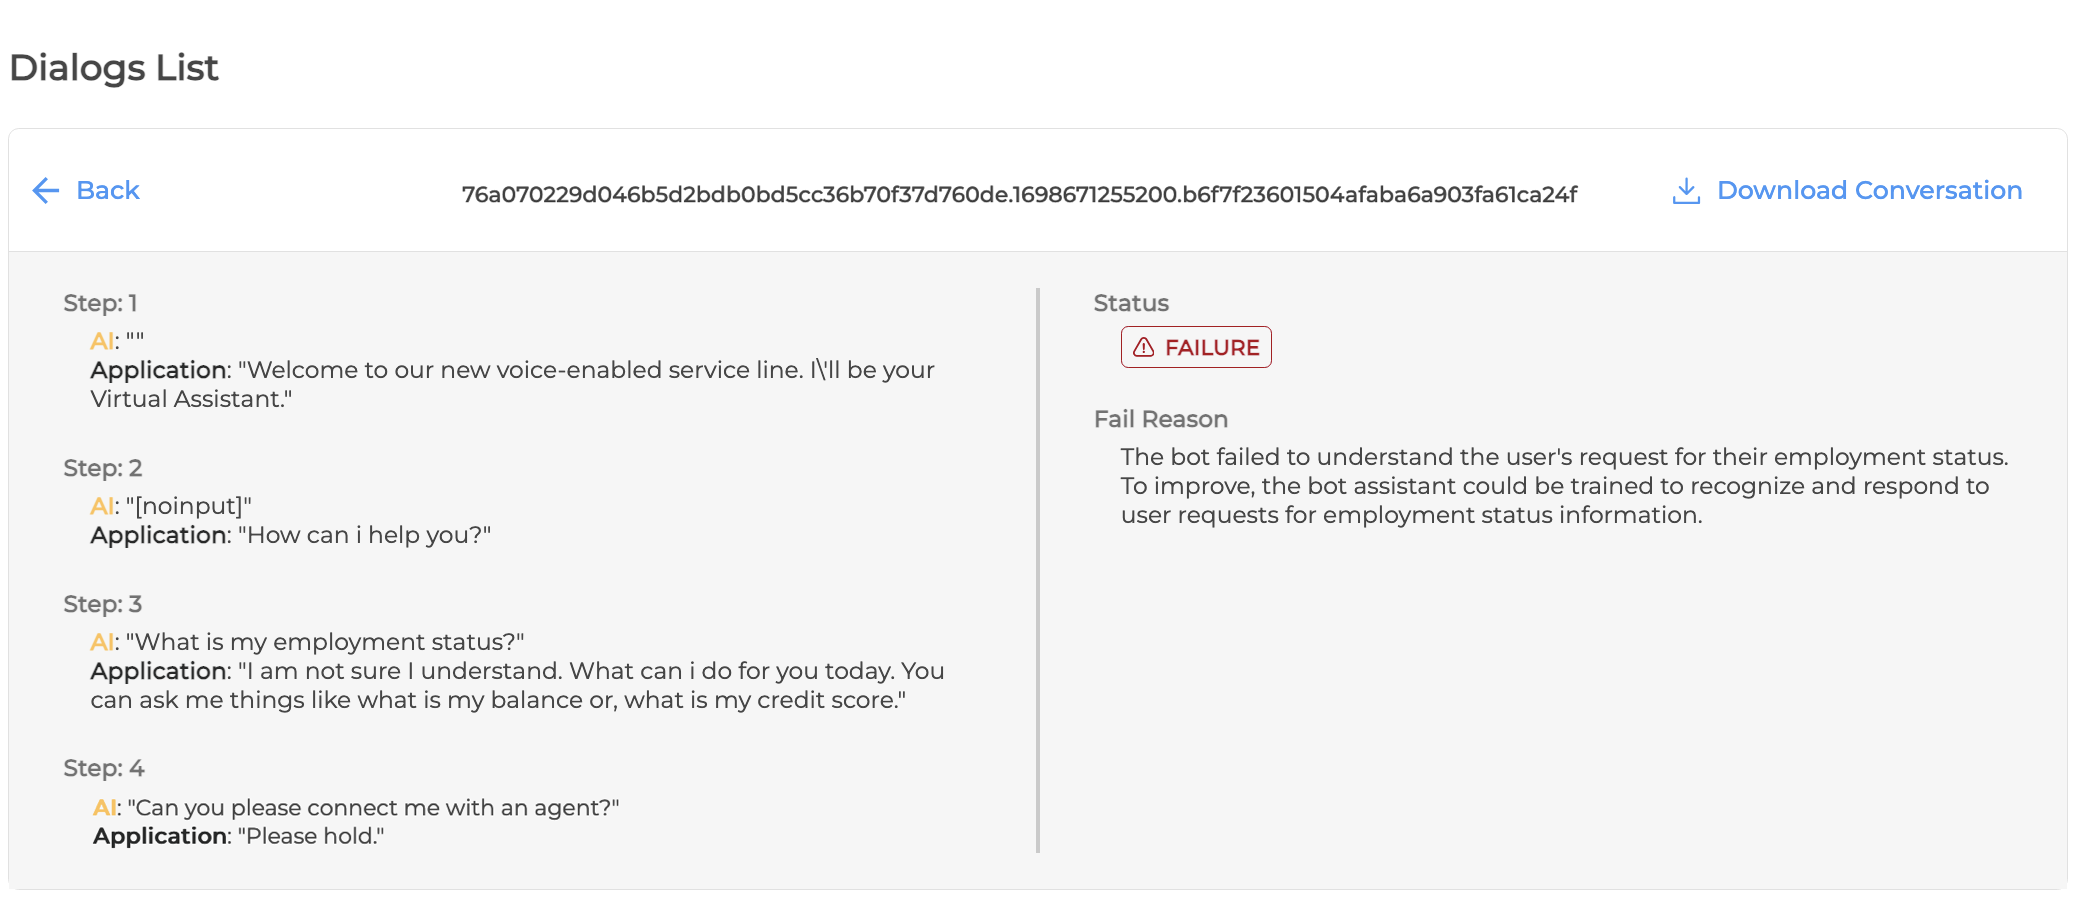
Dialogs List
The Dialogs List comprises the conversations that have taken place between your dialog application and LLM.
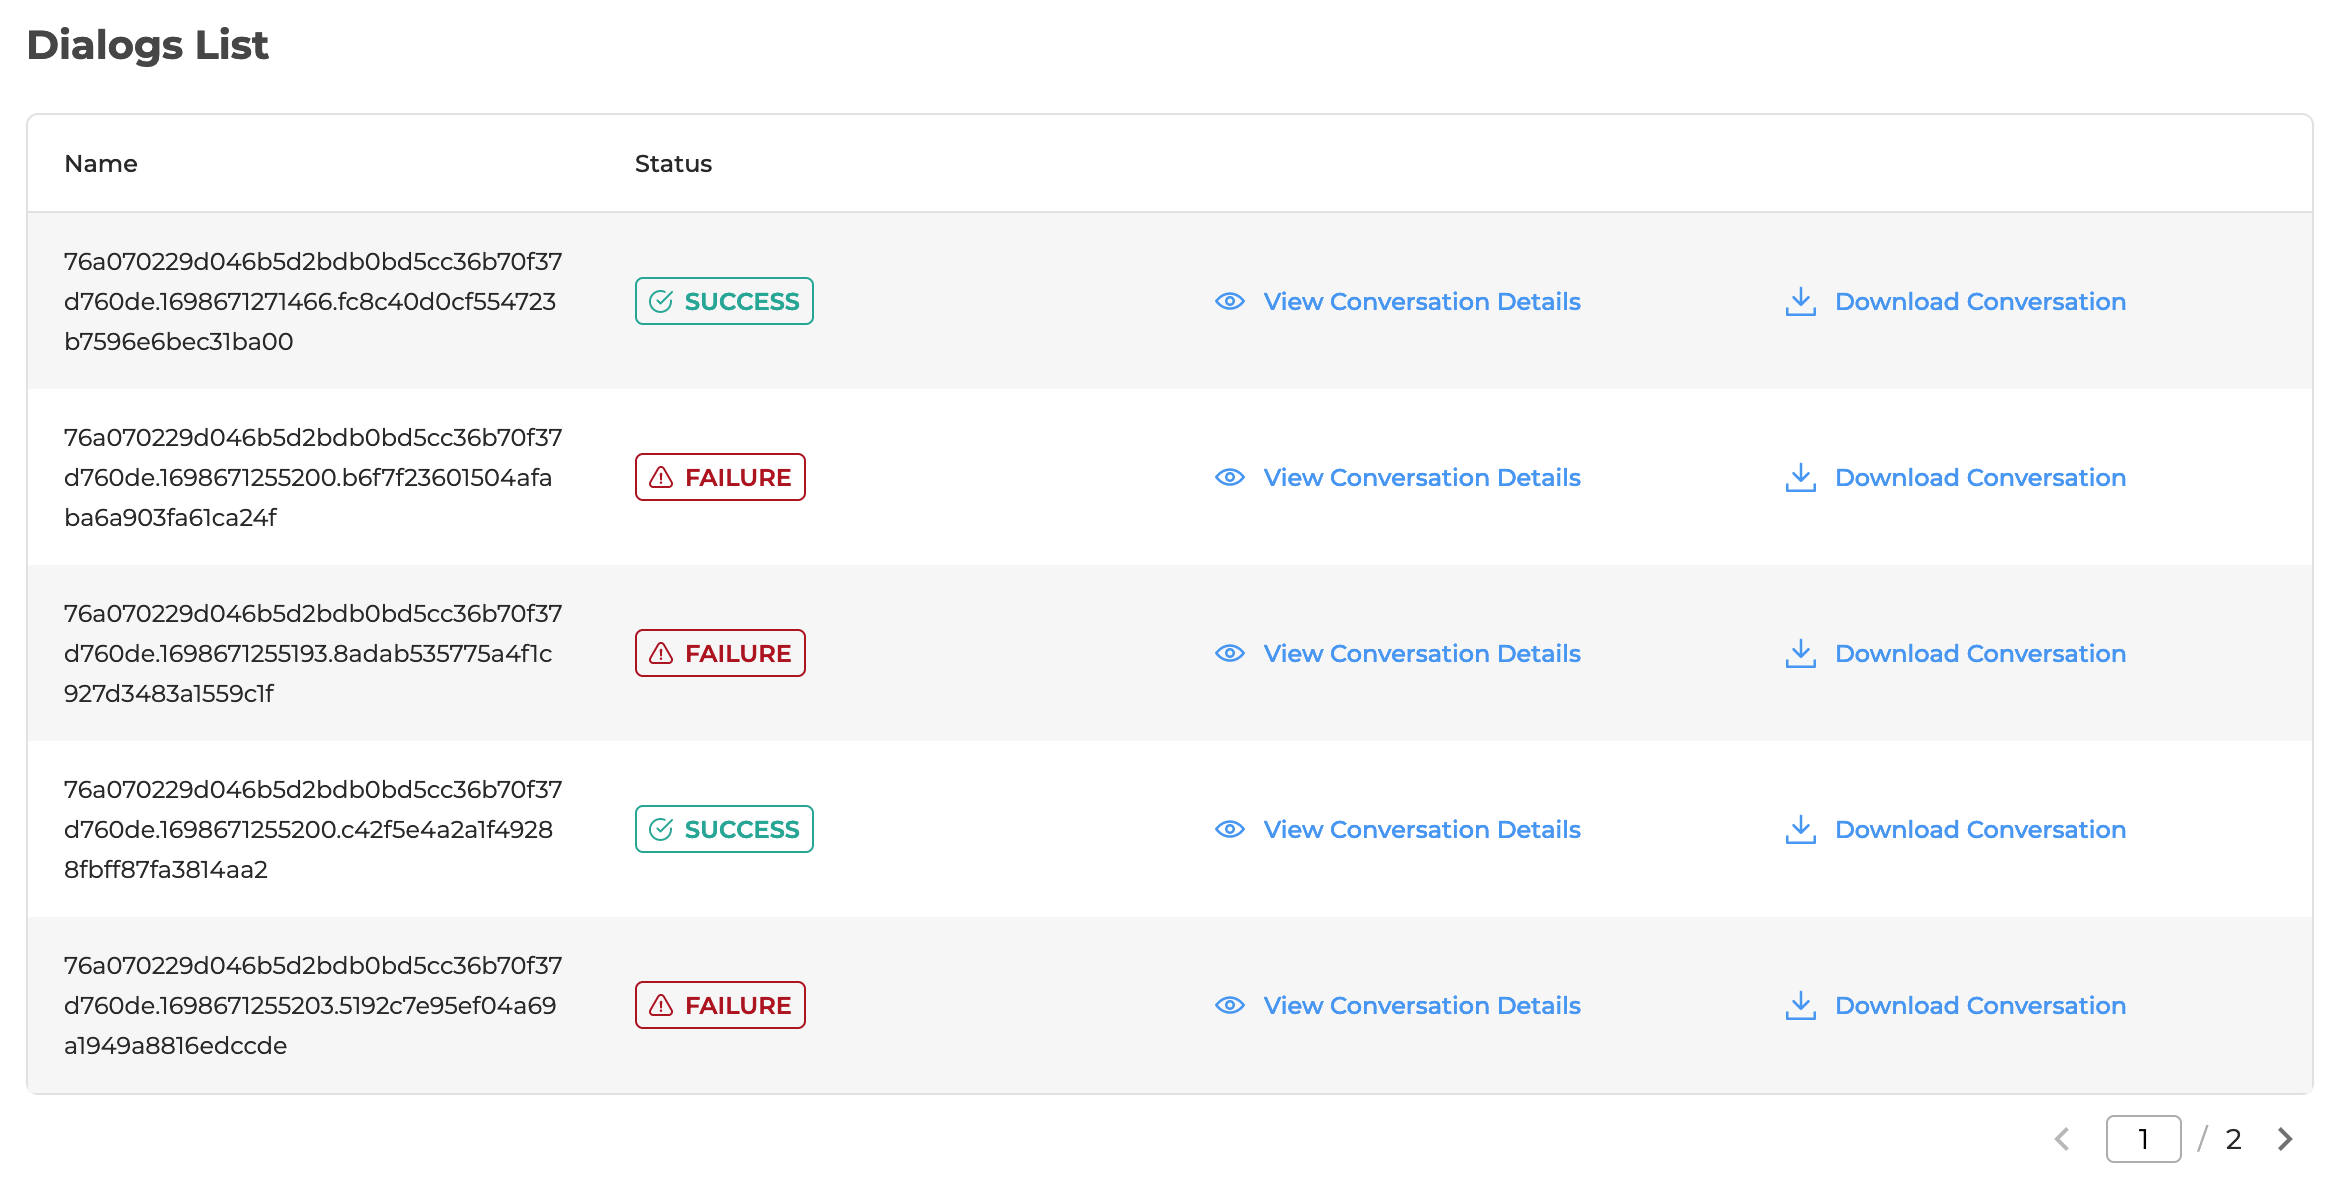
In this section you can perform the following actions:
-
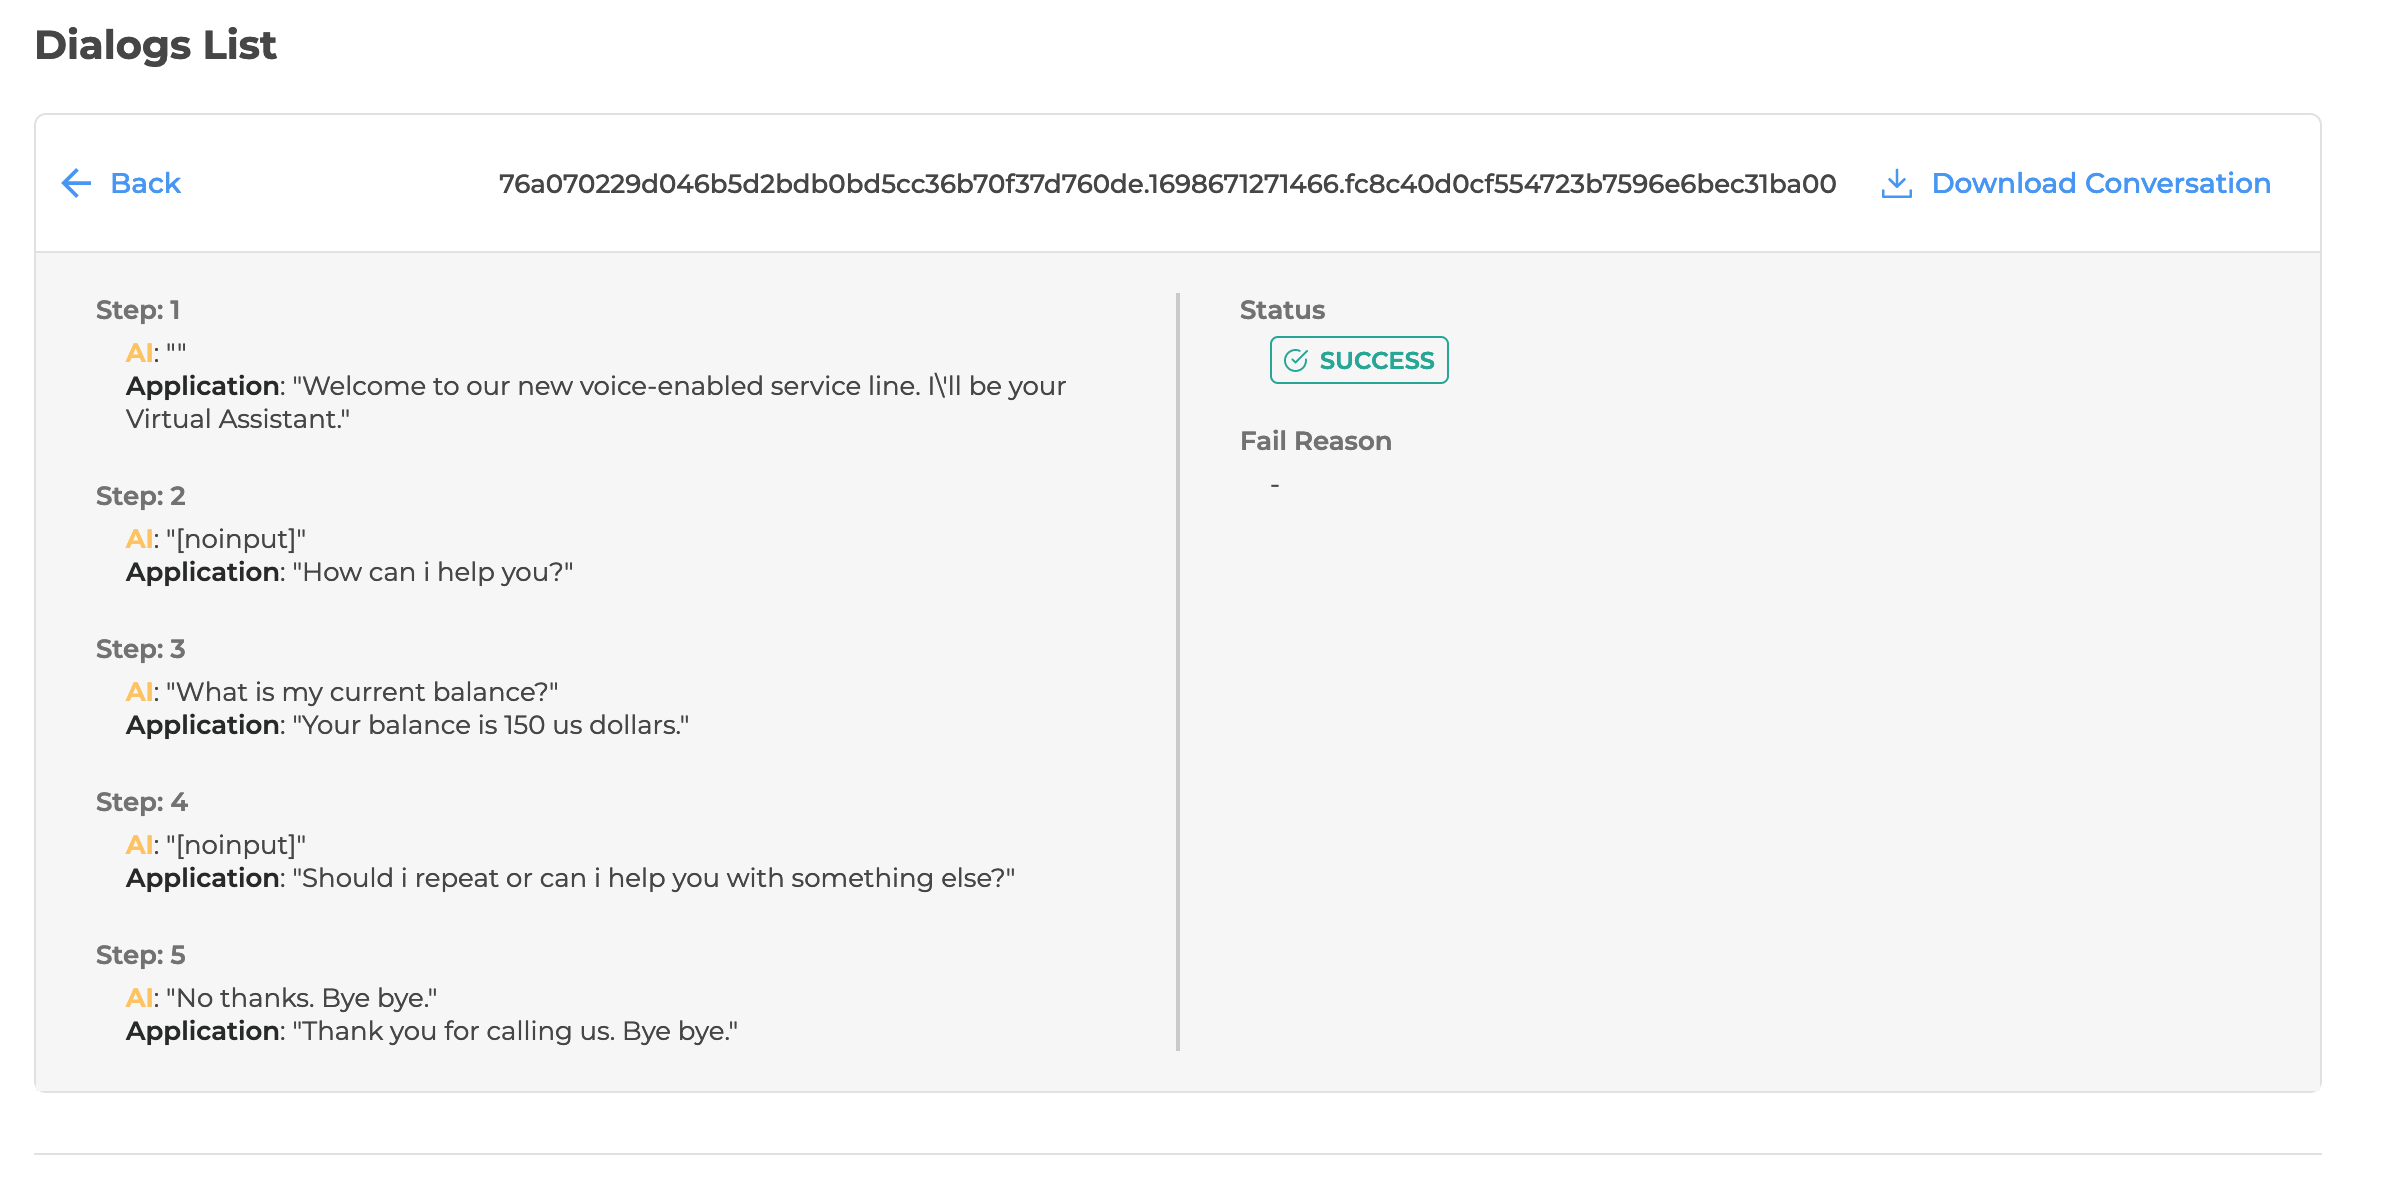
Click the View Conversation Details button to assess the actual conversational steps between your dialog application and LLM, its status (Success or Failure), and find out the detailed failure description with some suggestions.
-
Download the conversation by hitting the Download Conversation button.
Log out from Testing Studio+
To log out from Testing Studio+, click the User icon and select Log out: