Introduction
This user guide provides information about the integration of NICE CXone with Omilia’s text virtual agent. This integration offers enhanced customer service capabilities by programming bots to handle routine communications tasks, making it possible to interact more efficiently with customers across various platforms. The implementation will reduce agent workload and improve customer experience significantly.
Prerequisites
Before completing the tasks on this page, be sure that the prerequisites for the integration have been met.
Prerequisite: Your business unit is added to Nice CXone’s controlled release for Virtual Agent Hub and Omilia Cloud Platform integration.
Logging in
To log in to your NICE account, proceed as described below:
-
Open Nice CXone web page.
-
Enter your username and click Next.
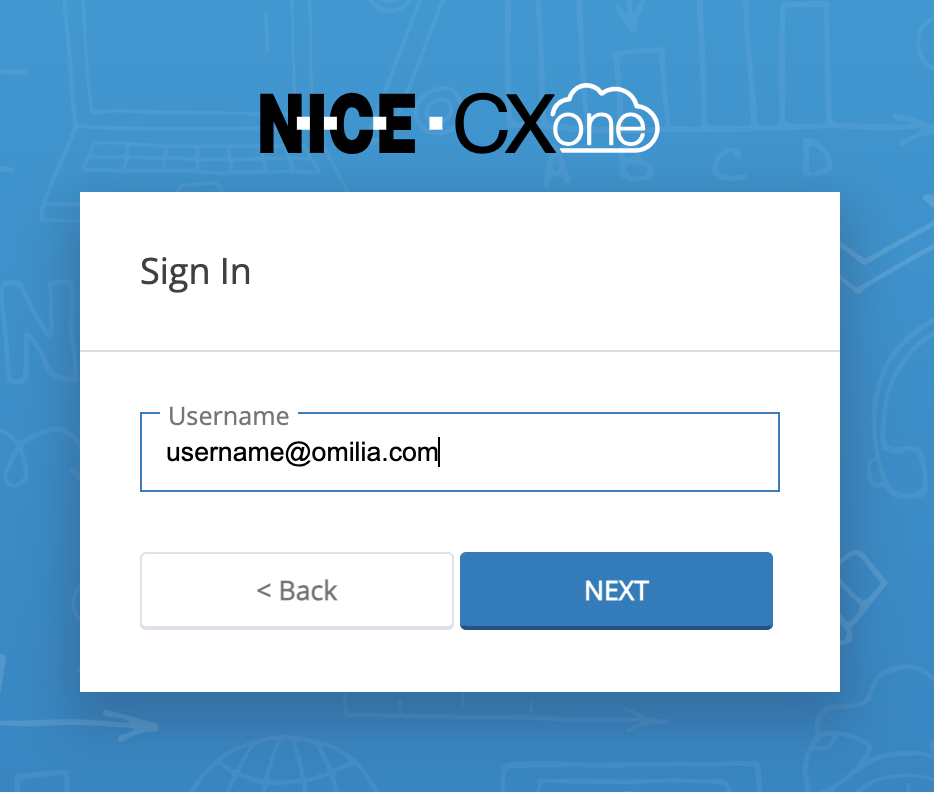
-
Enter your password and click Sign in.
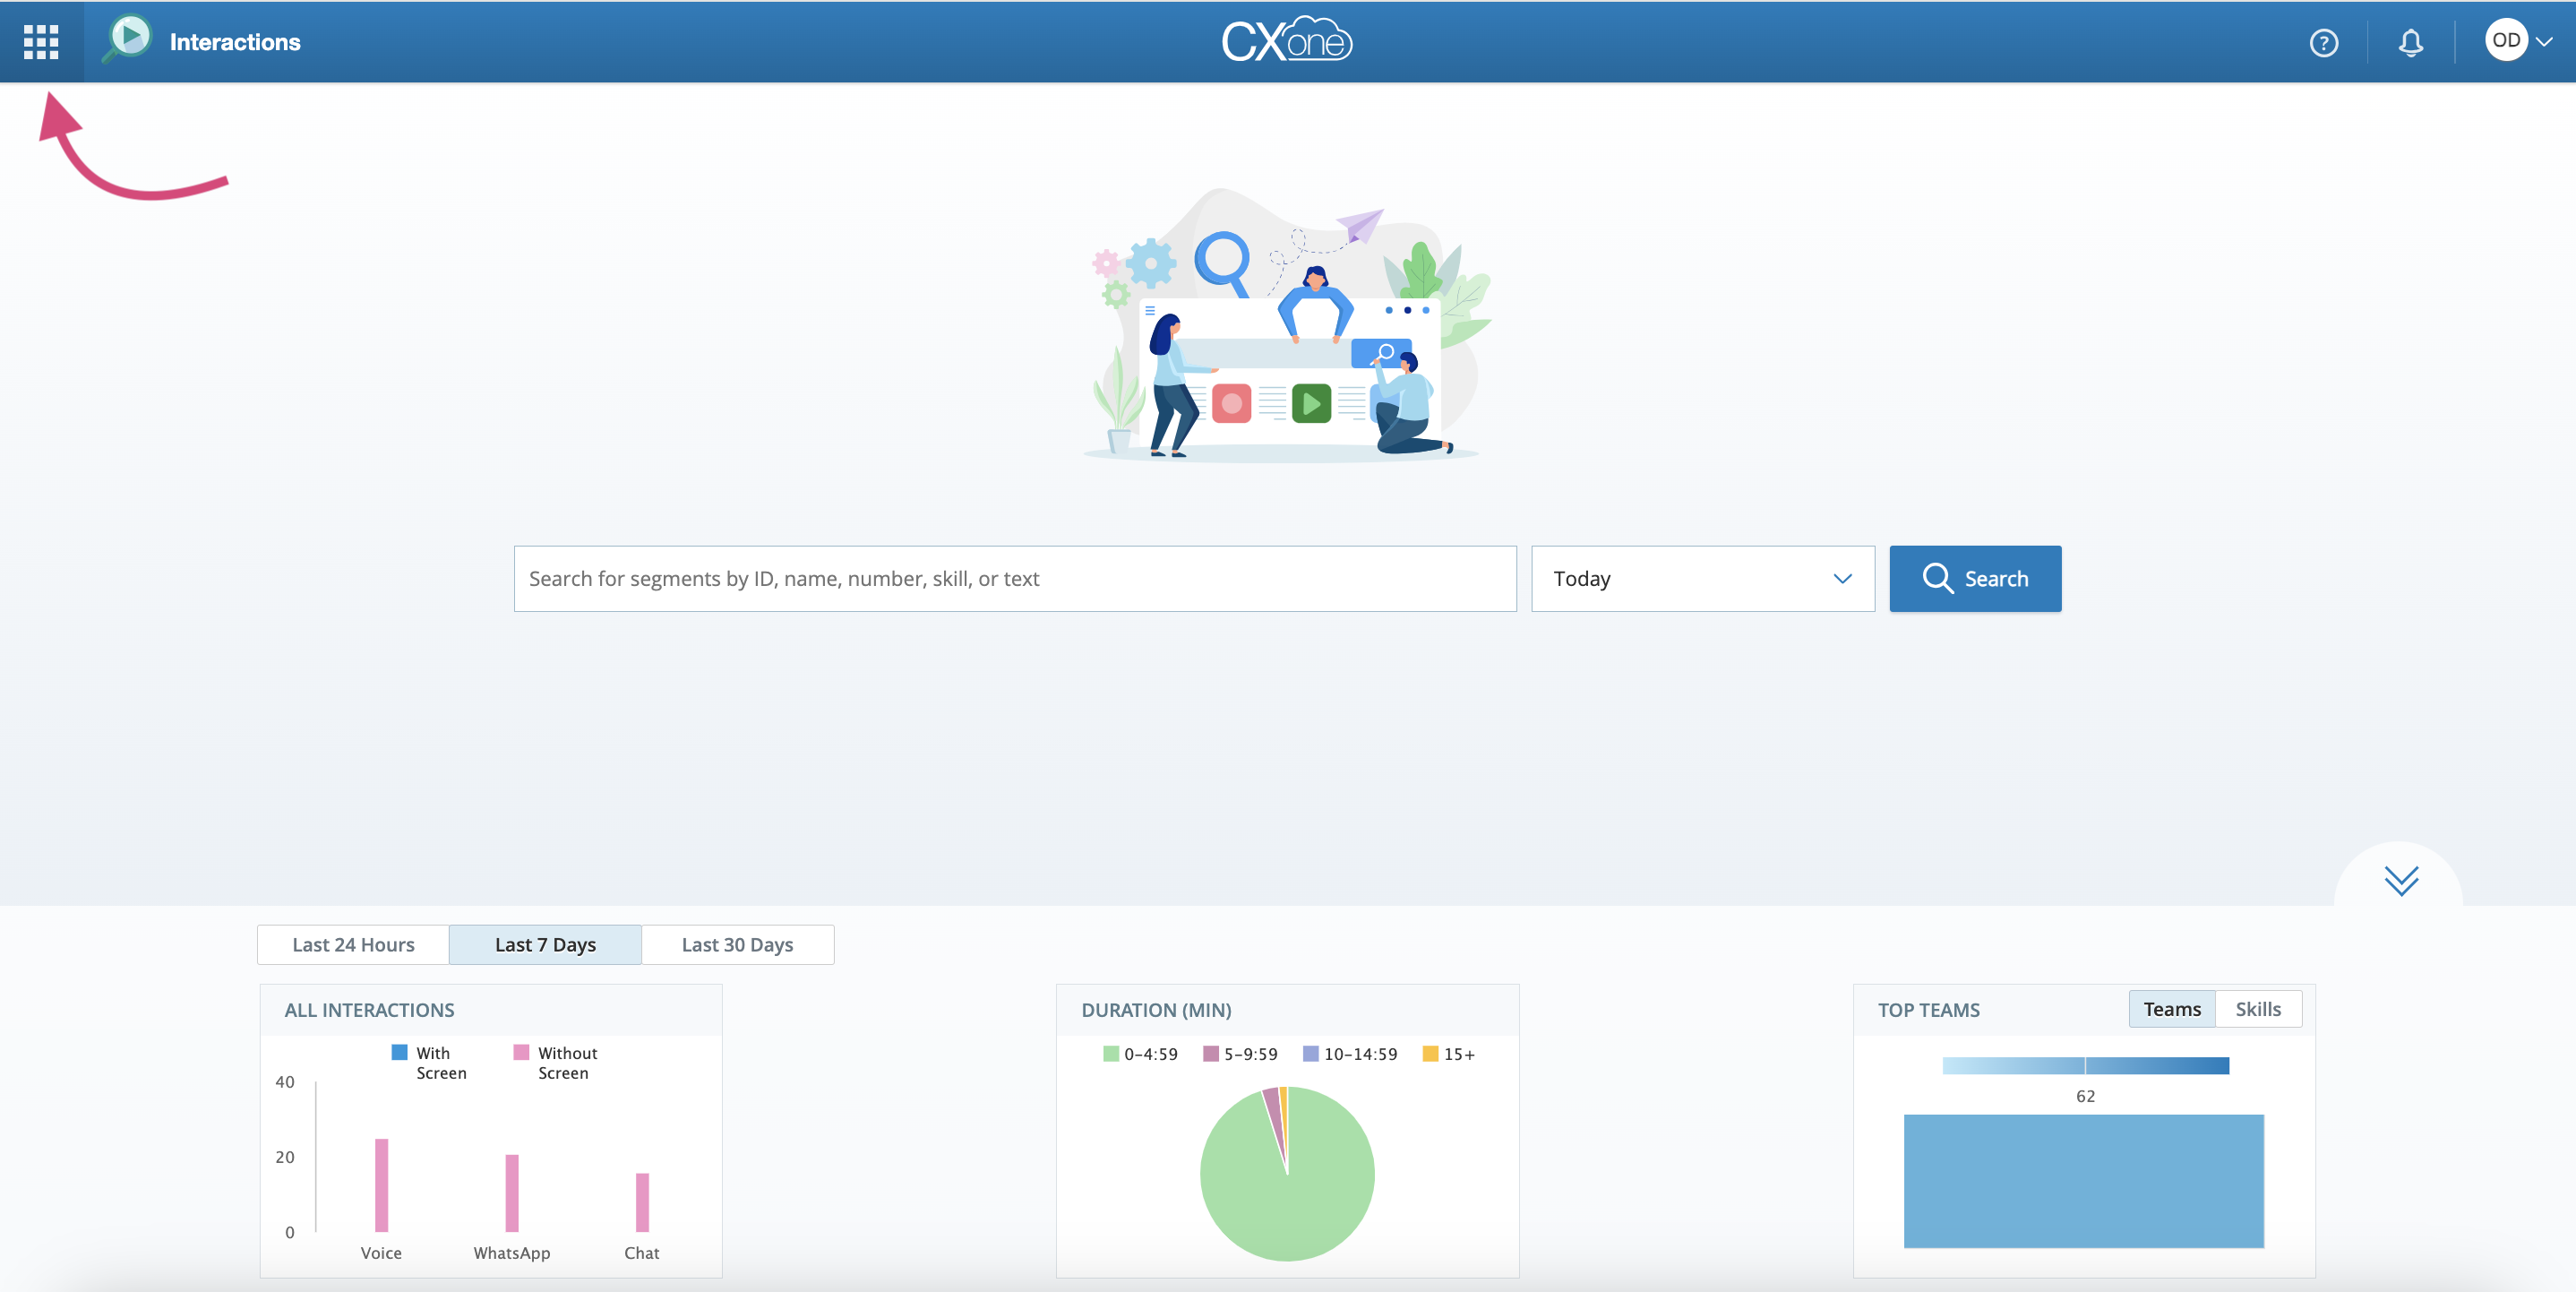
If the credentials are correct, you will be forwarded to the landing page.
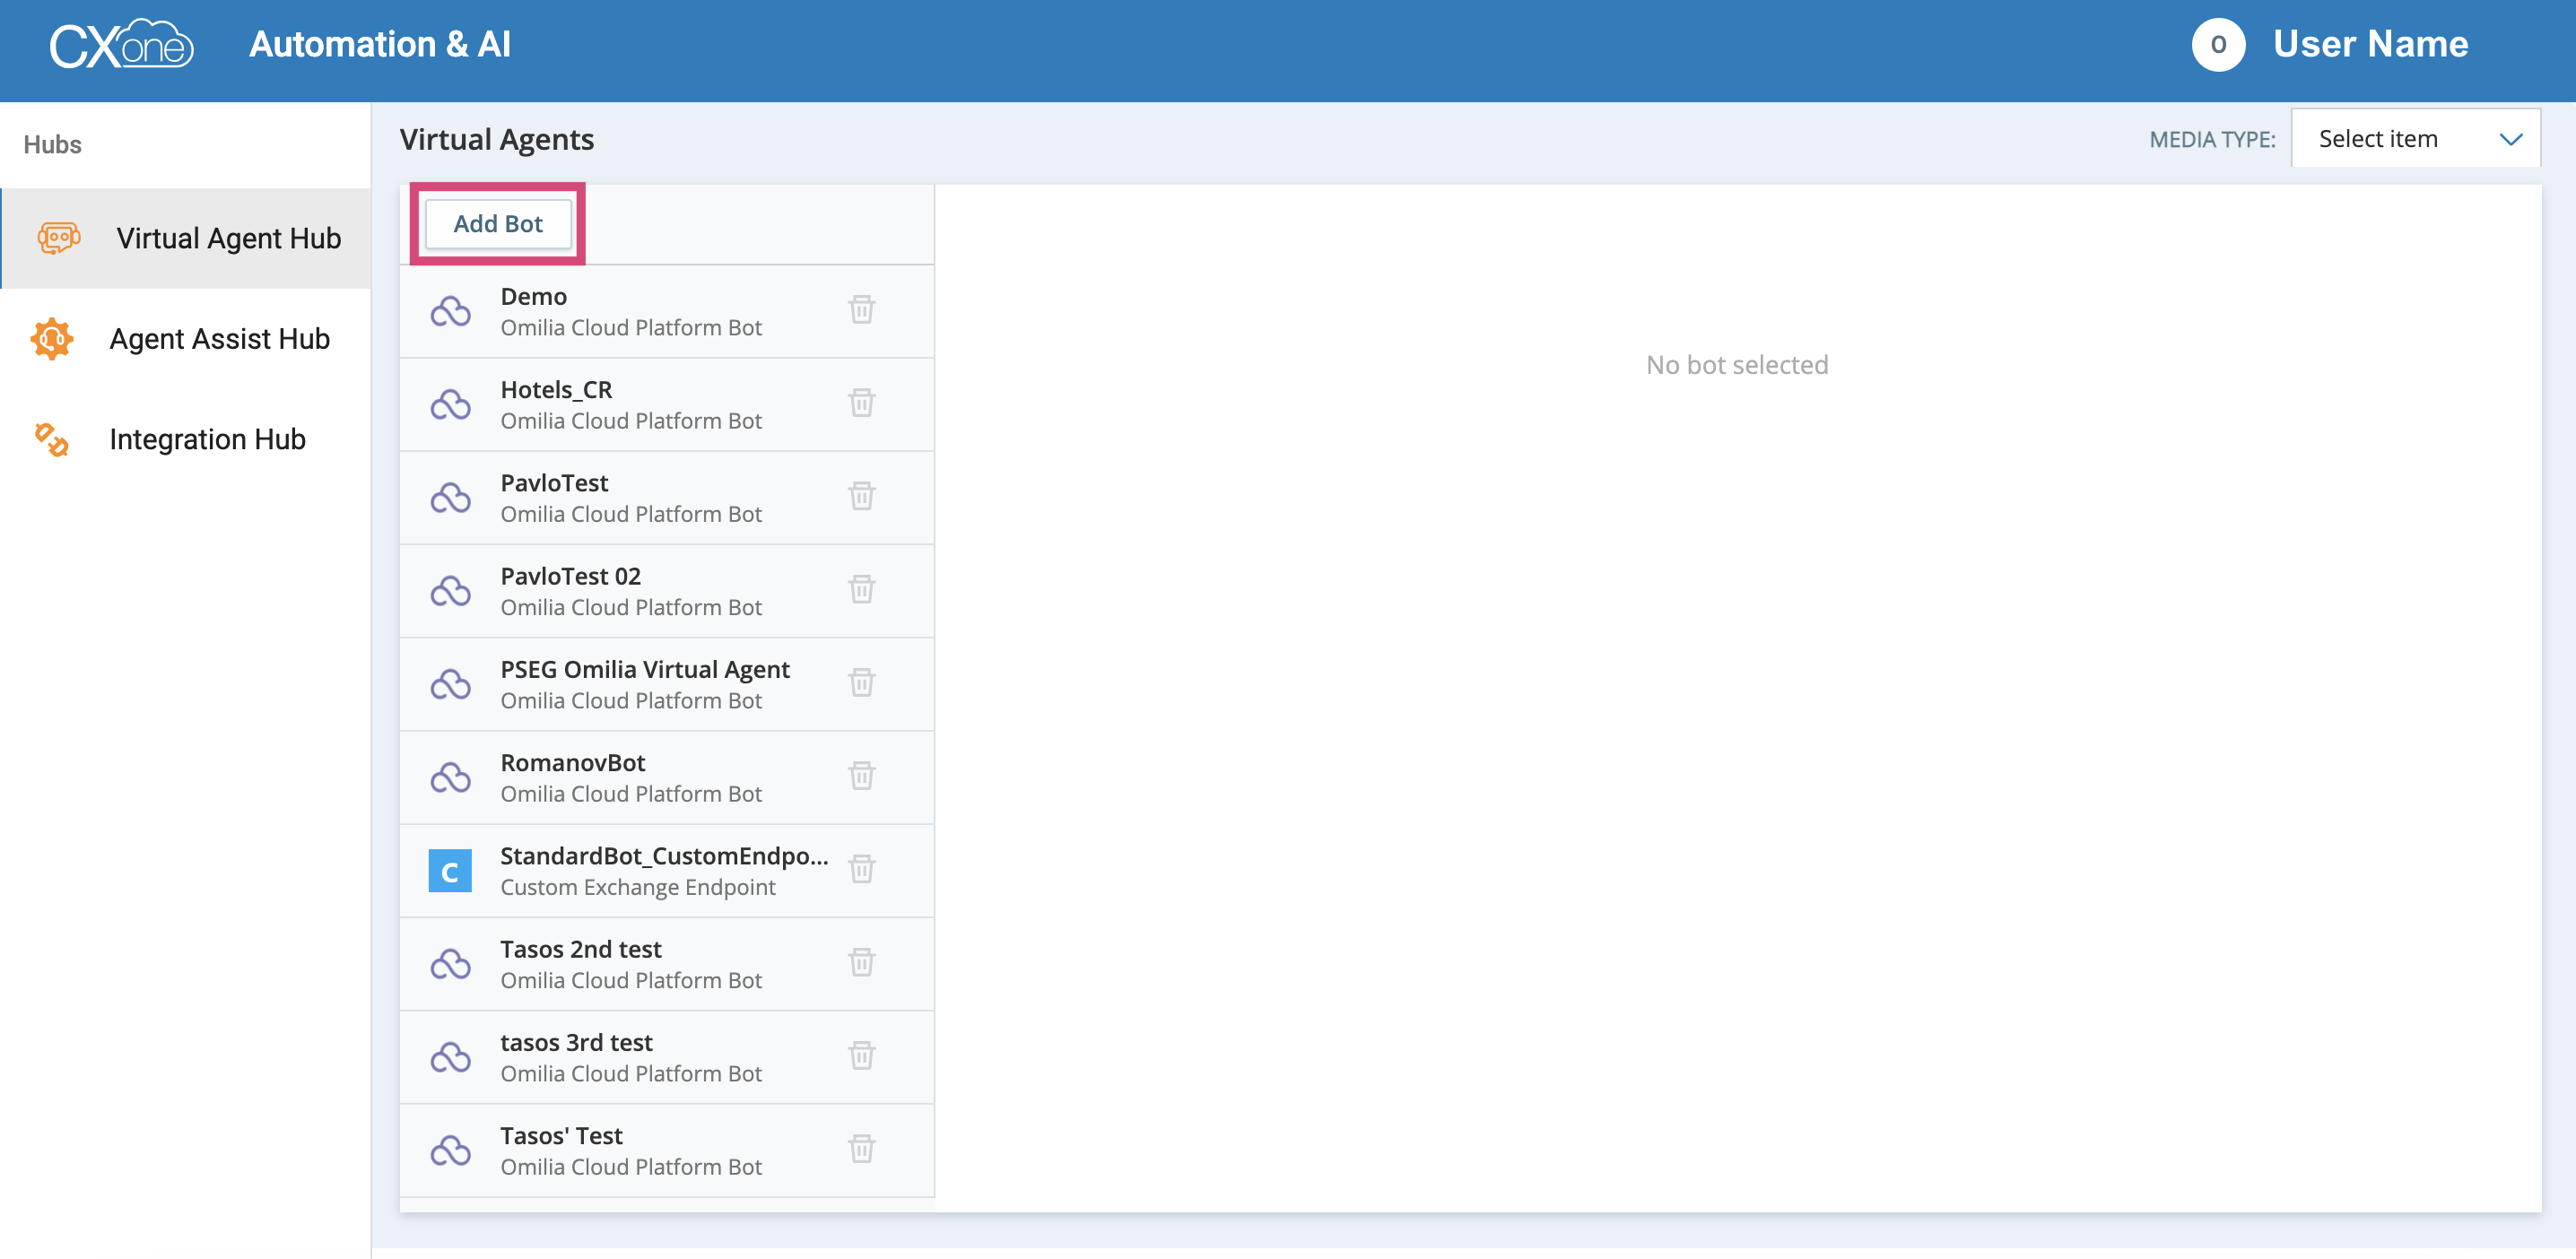
Add your application to Virtual Agent Hub
To establish the connection between CXone and Omilia’s text virtual agent, you should add your application to Virtual Agent Hub.
Virtual Agent Hub is a platform for managing AI bots, the so-called virtual agents that can automate customer conversations and enhance customer service. The hub allows your to create new AI bots, link them to various communication channels, and monitor and improve their performance. For more information, refer to the Virtual Agent Hub article.
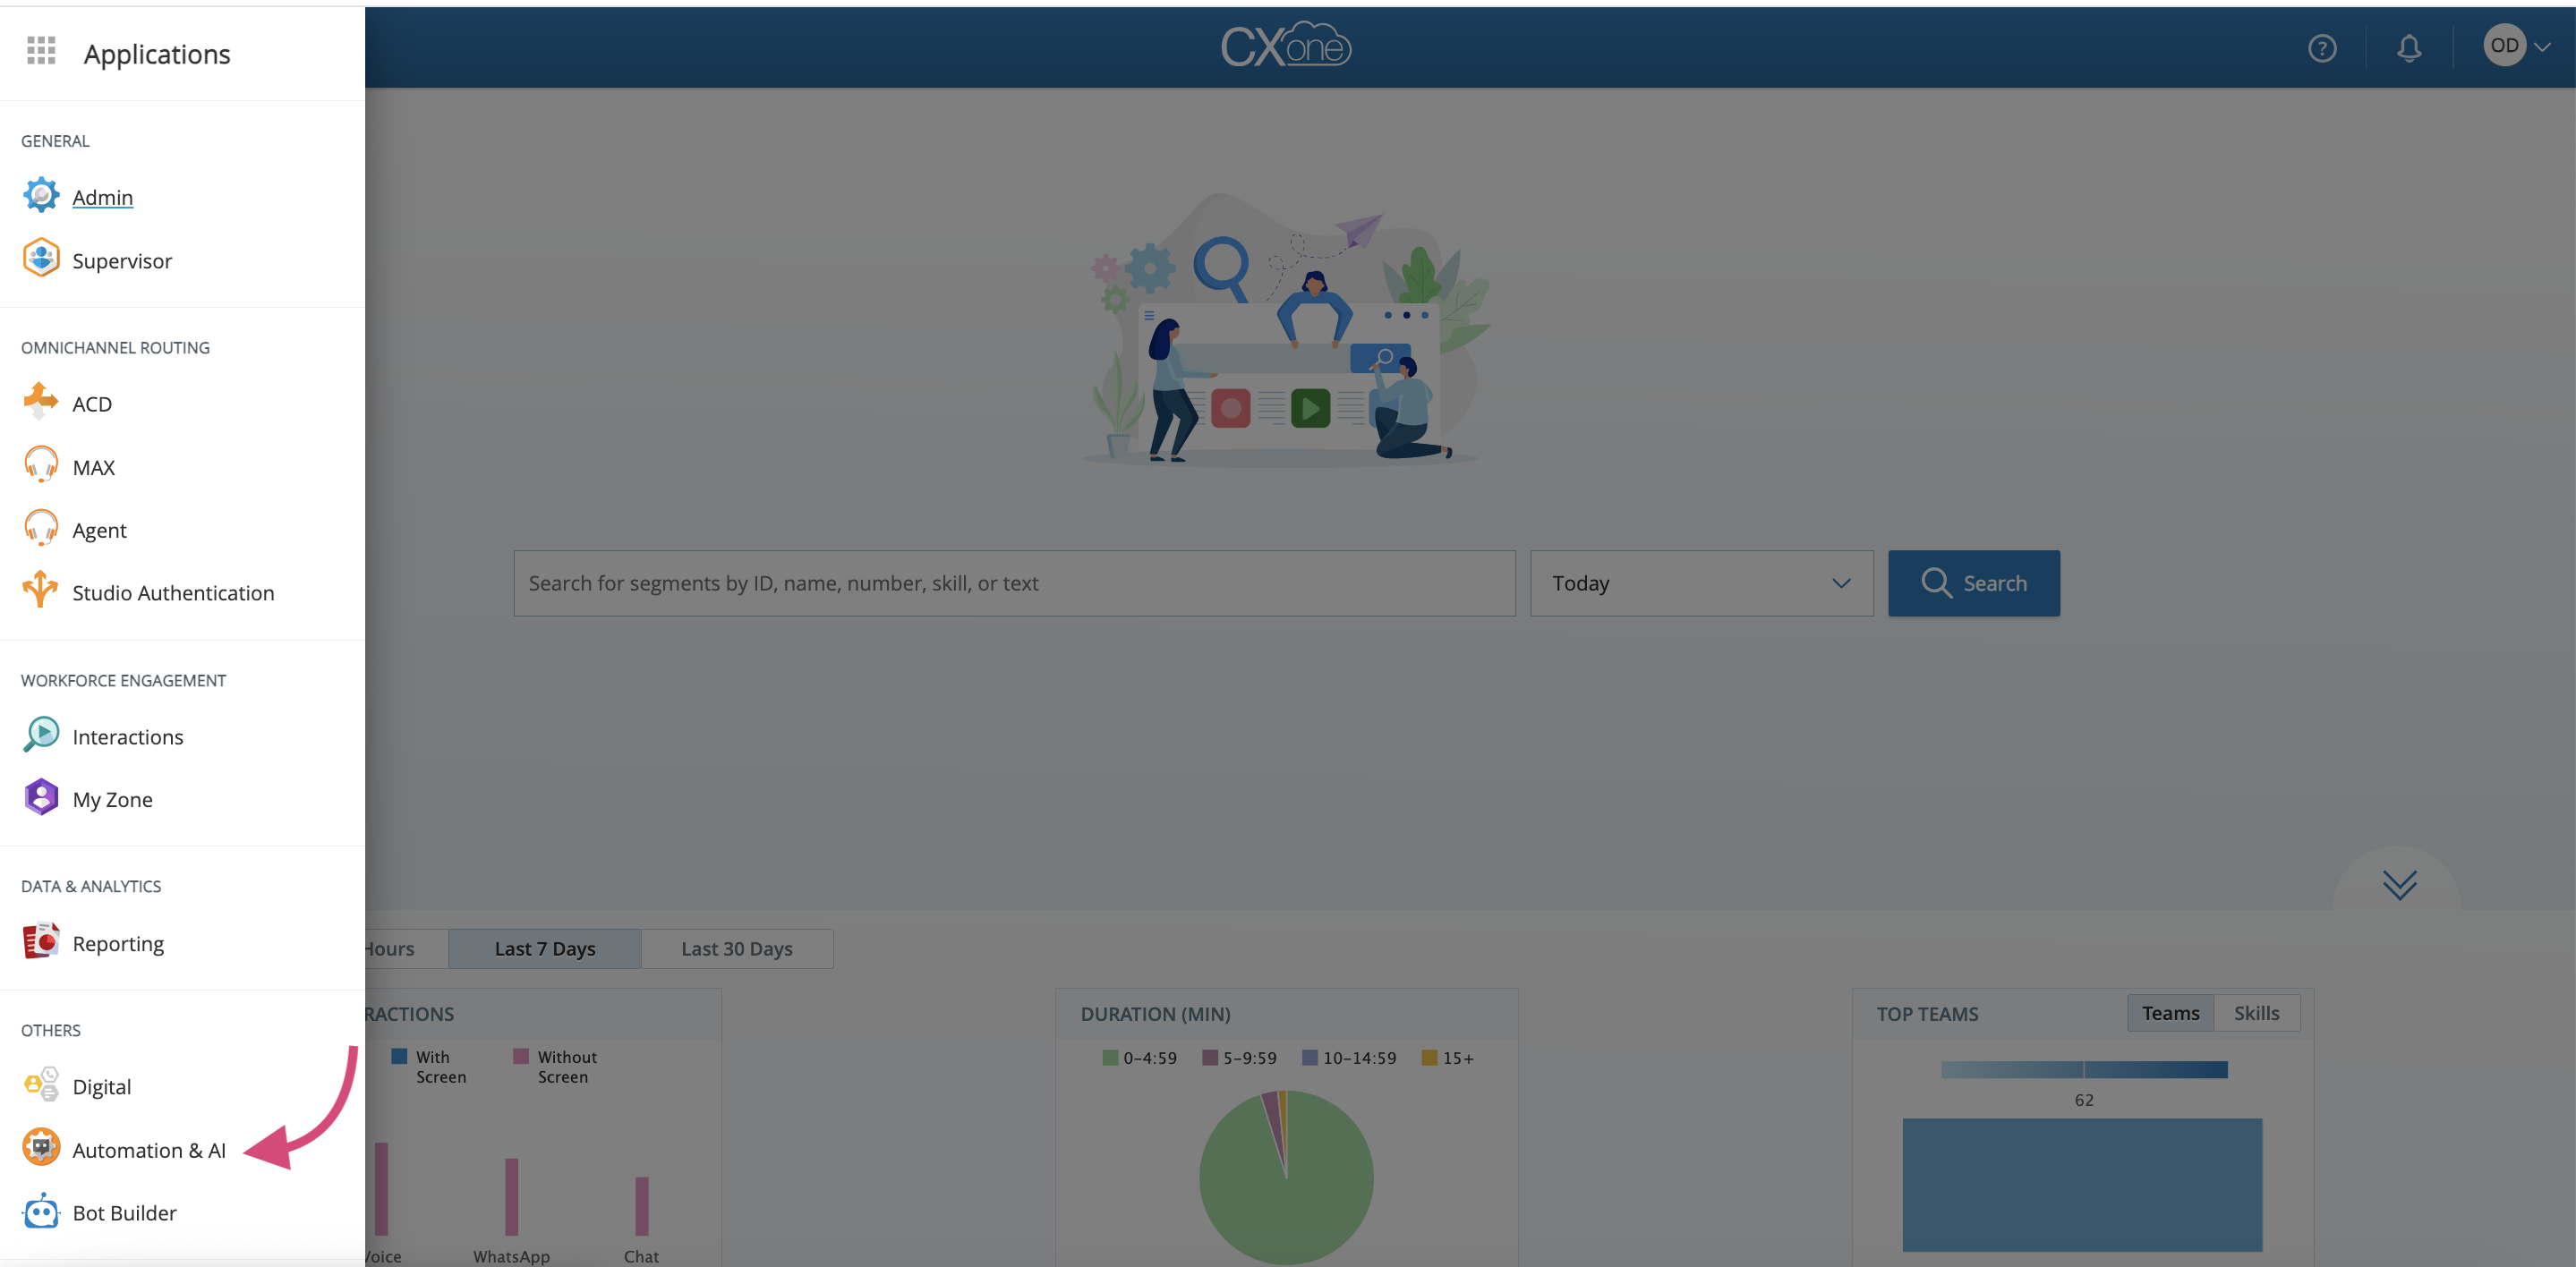
To add your application to Virtual Agent Hub, proceed as follows:
-
Click the Applications icon.
-
Select Others - Automation & AI.
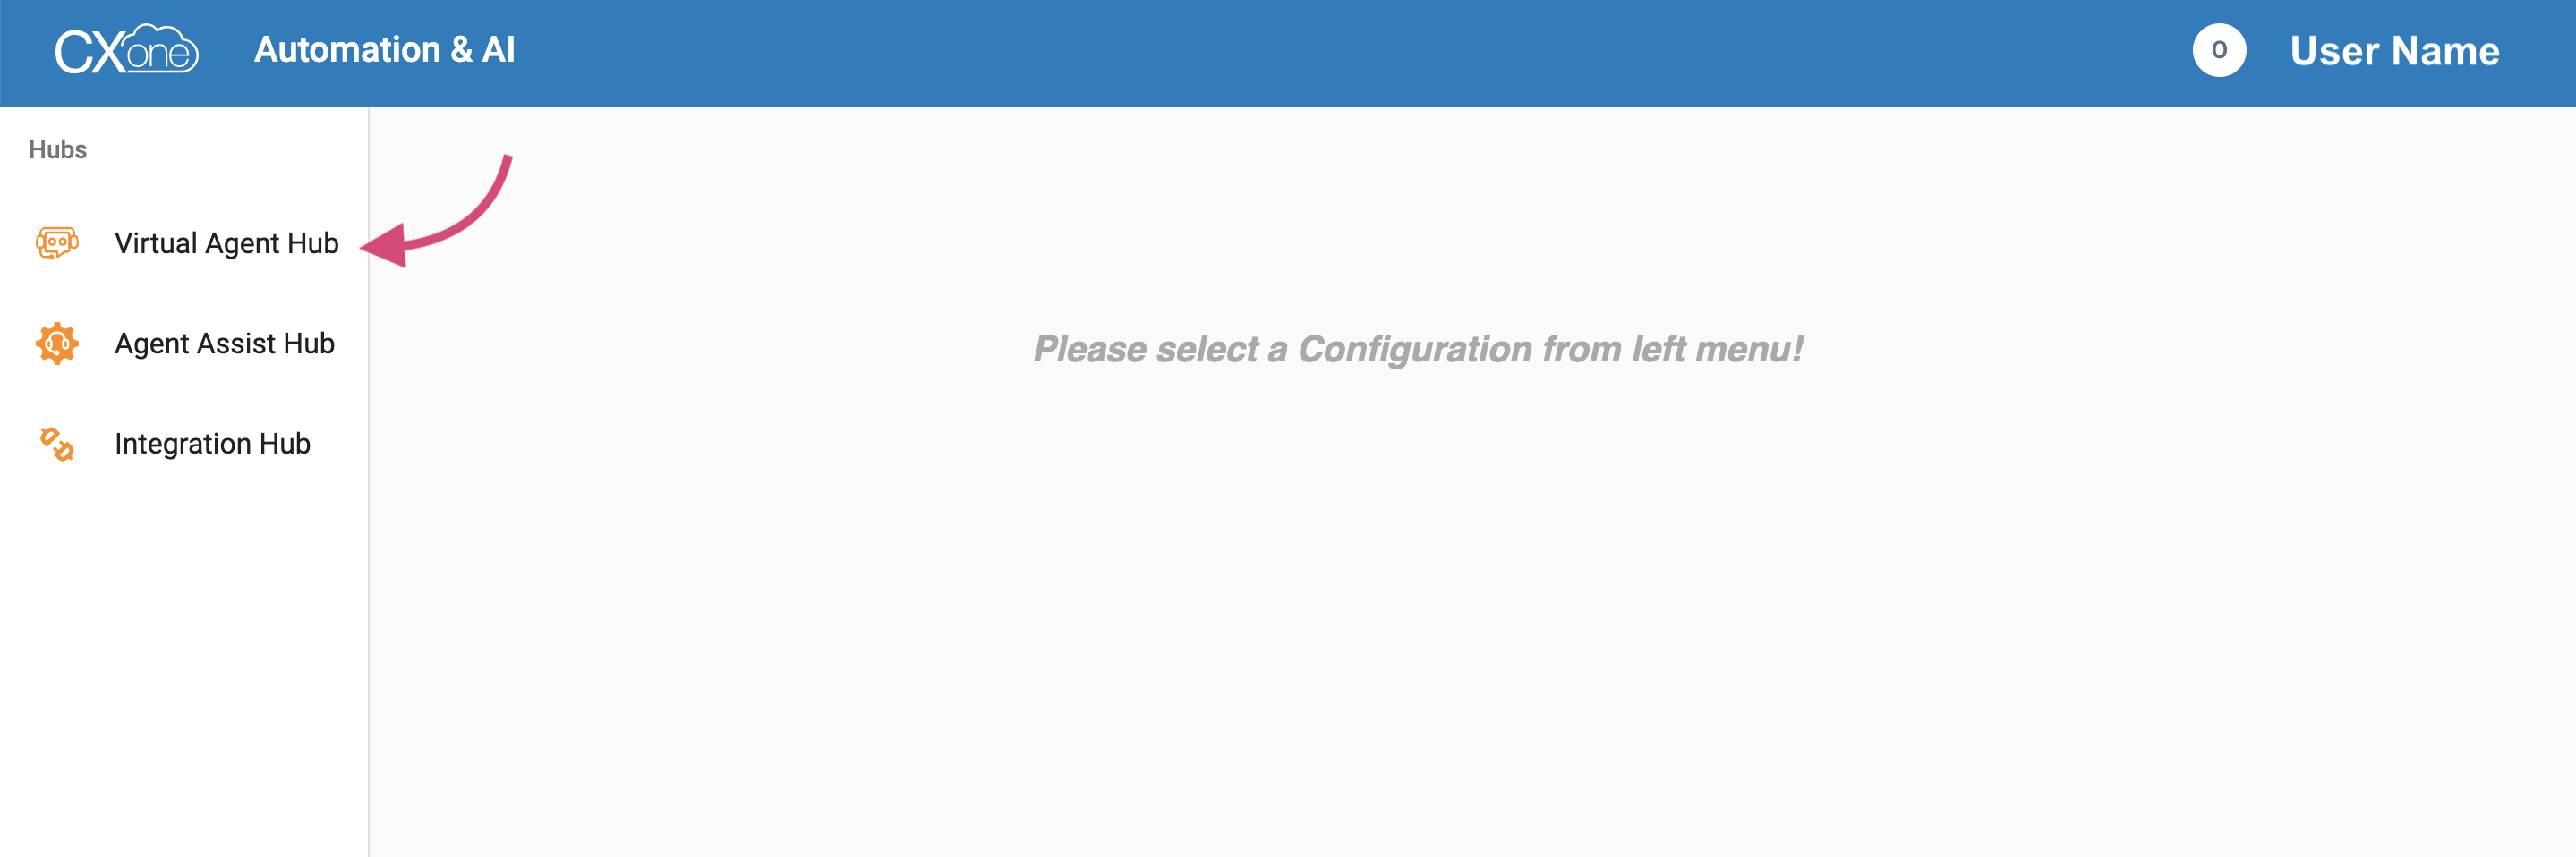
-
In the opened window, select Virtual Agent Hub.
-
Click Add Bot.
5. Fill in the required fields as described below:
-
Virtual agent (bot) name: Provide a name for your virtual agent.
-
Select bot provider: Select Omilia Cloud Platform Bot.
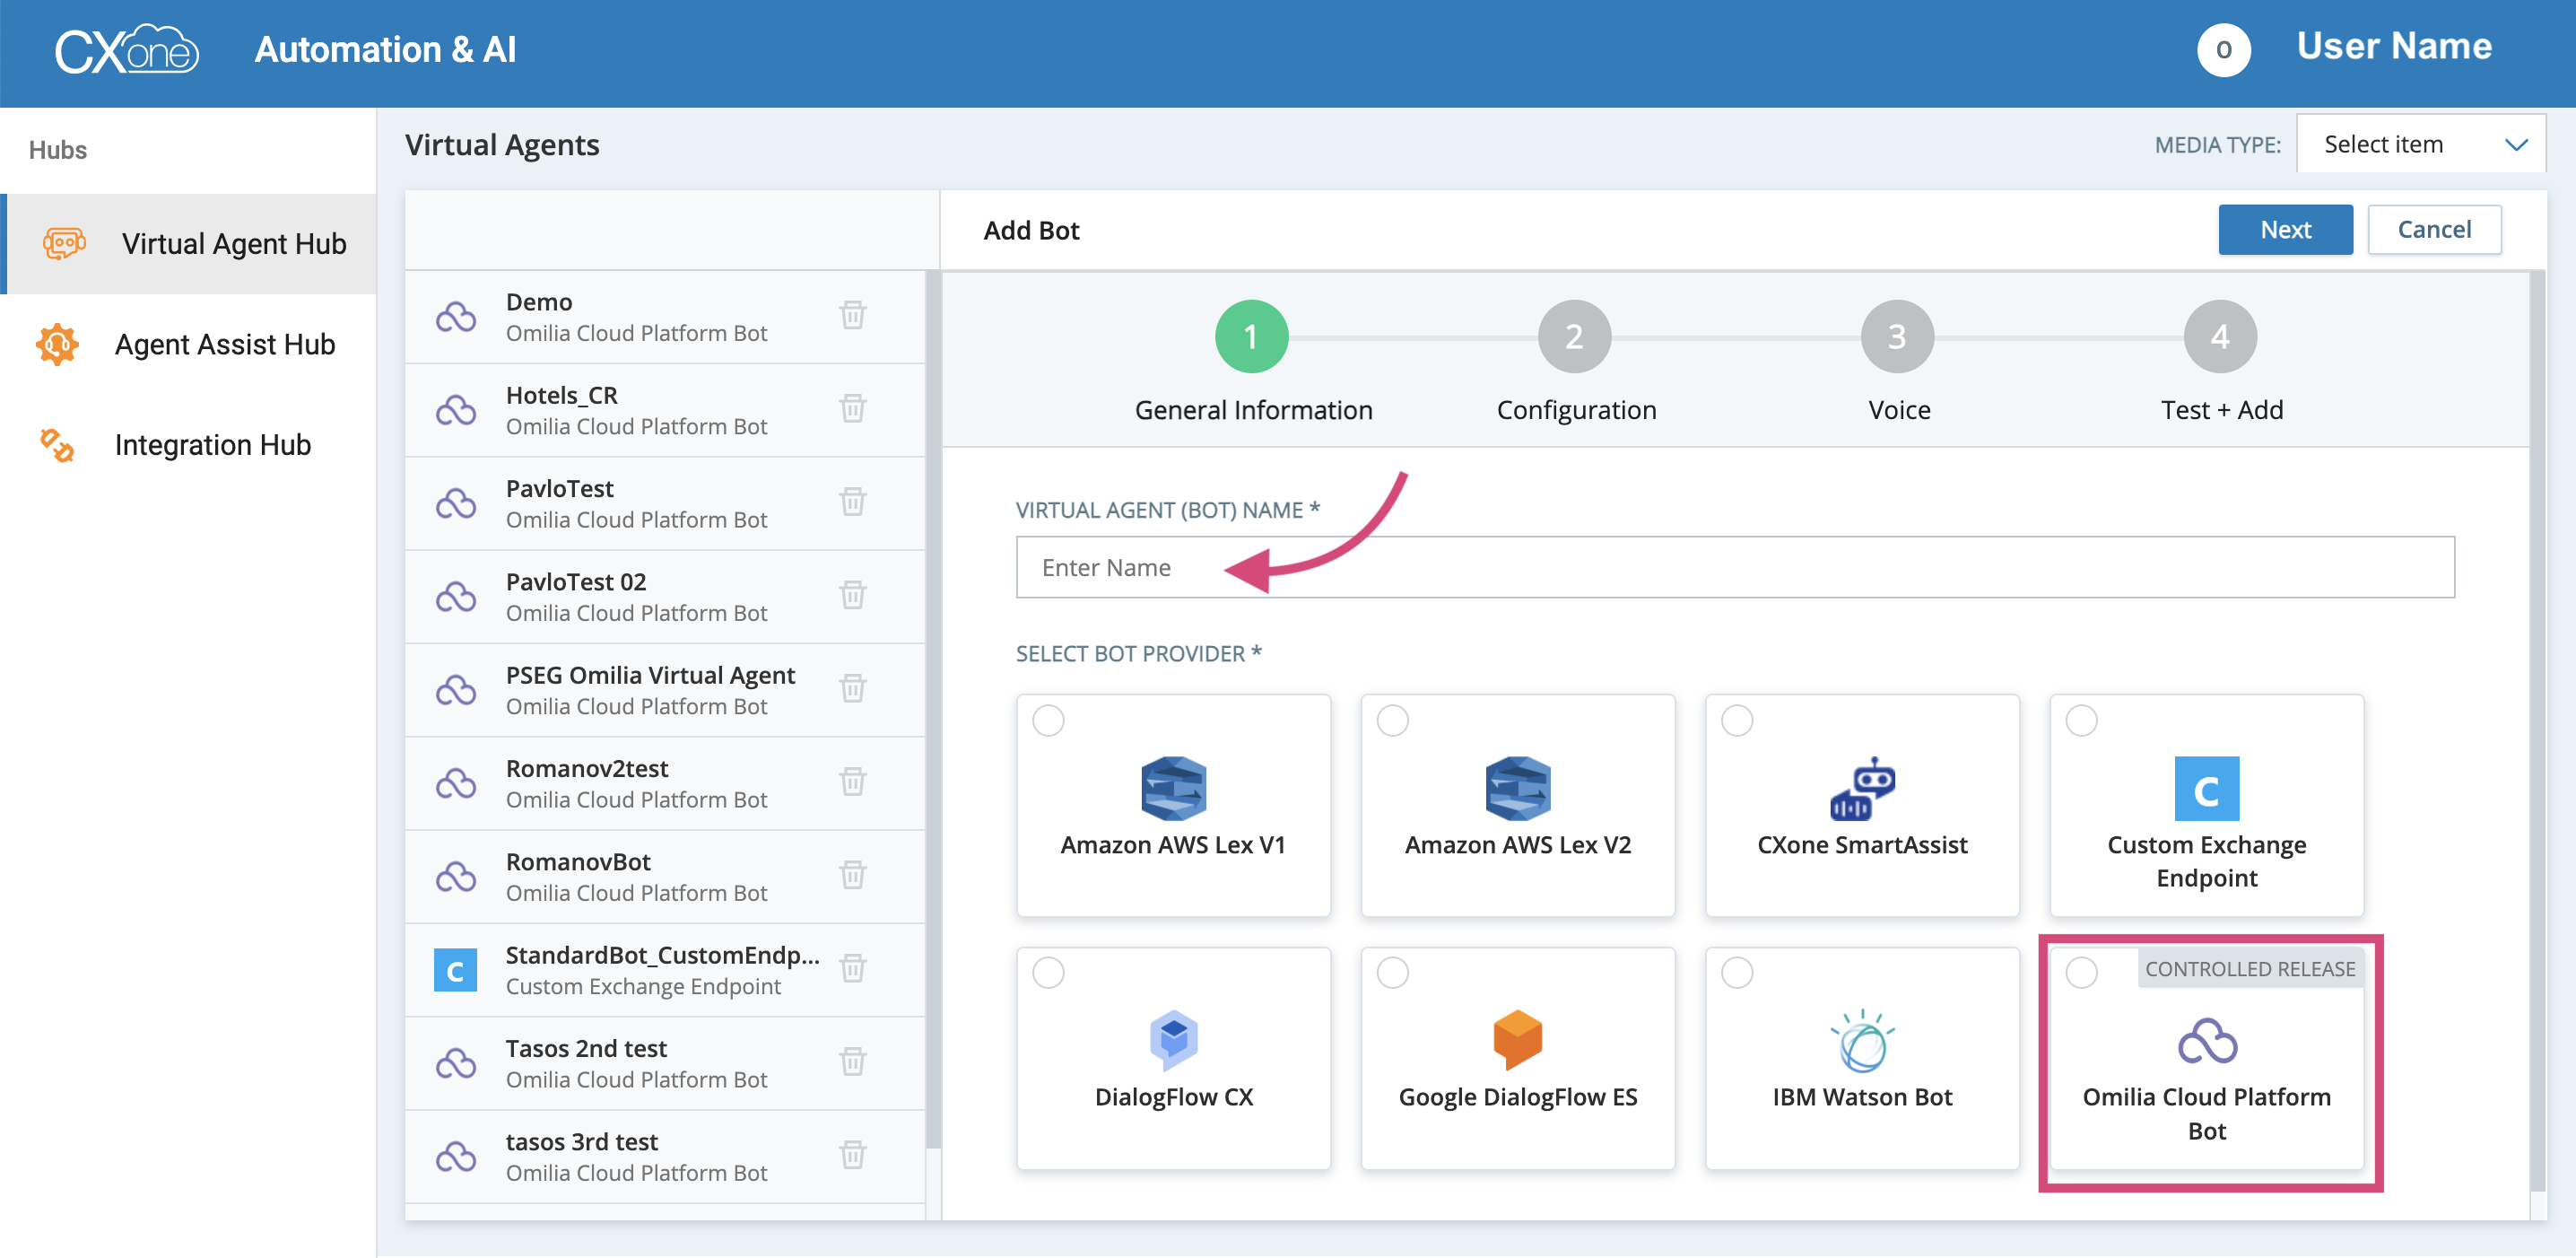
-
Click Next:
-
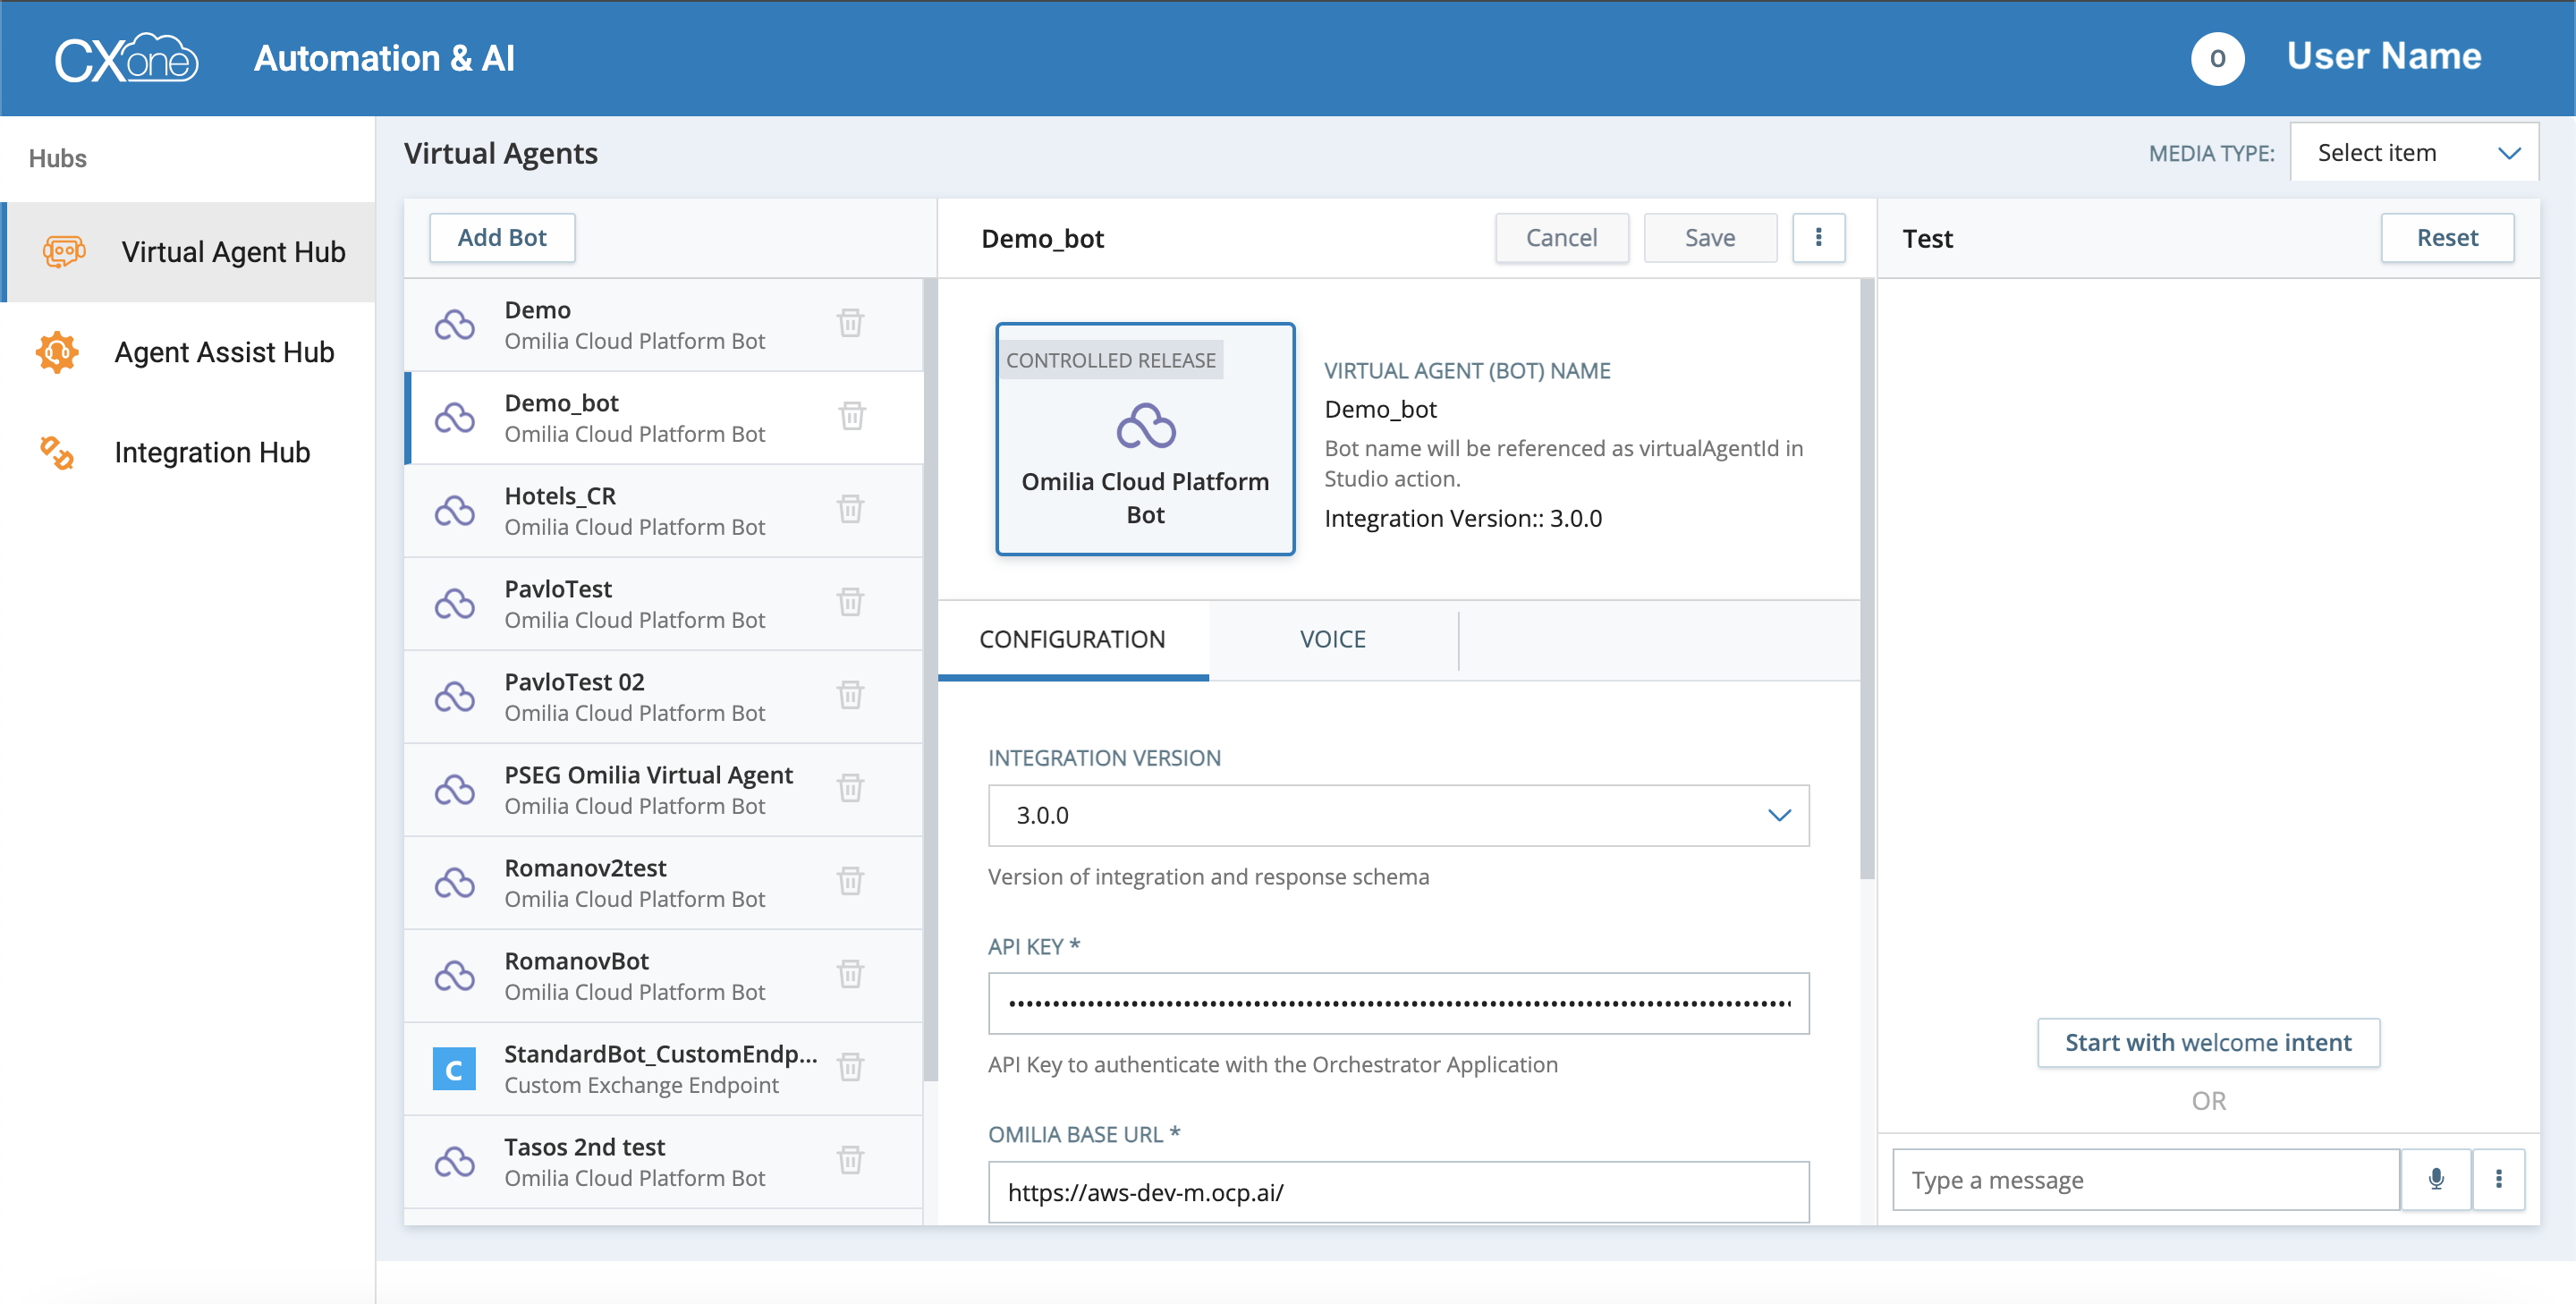
In the opened page, fill in the required fields as described below:
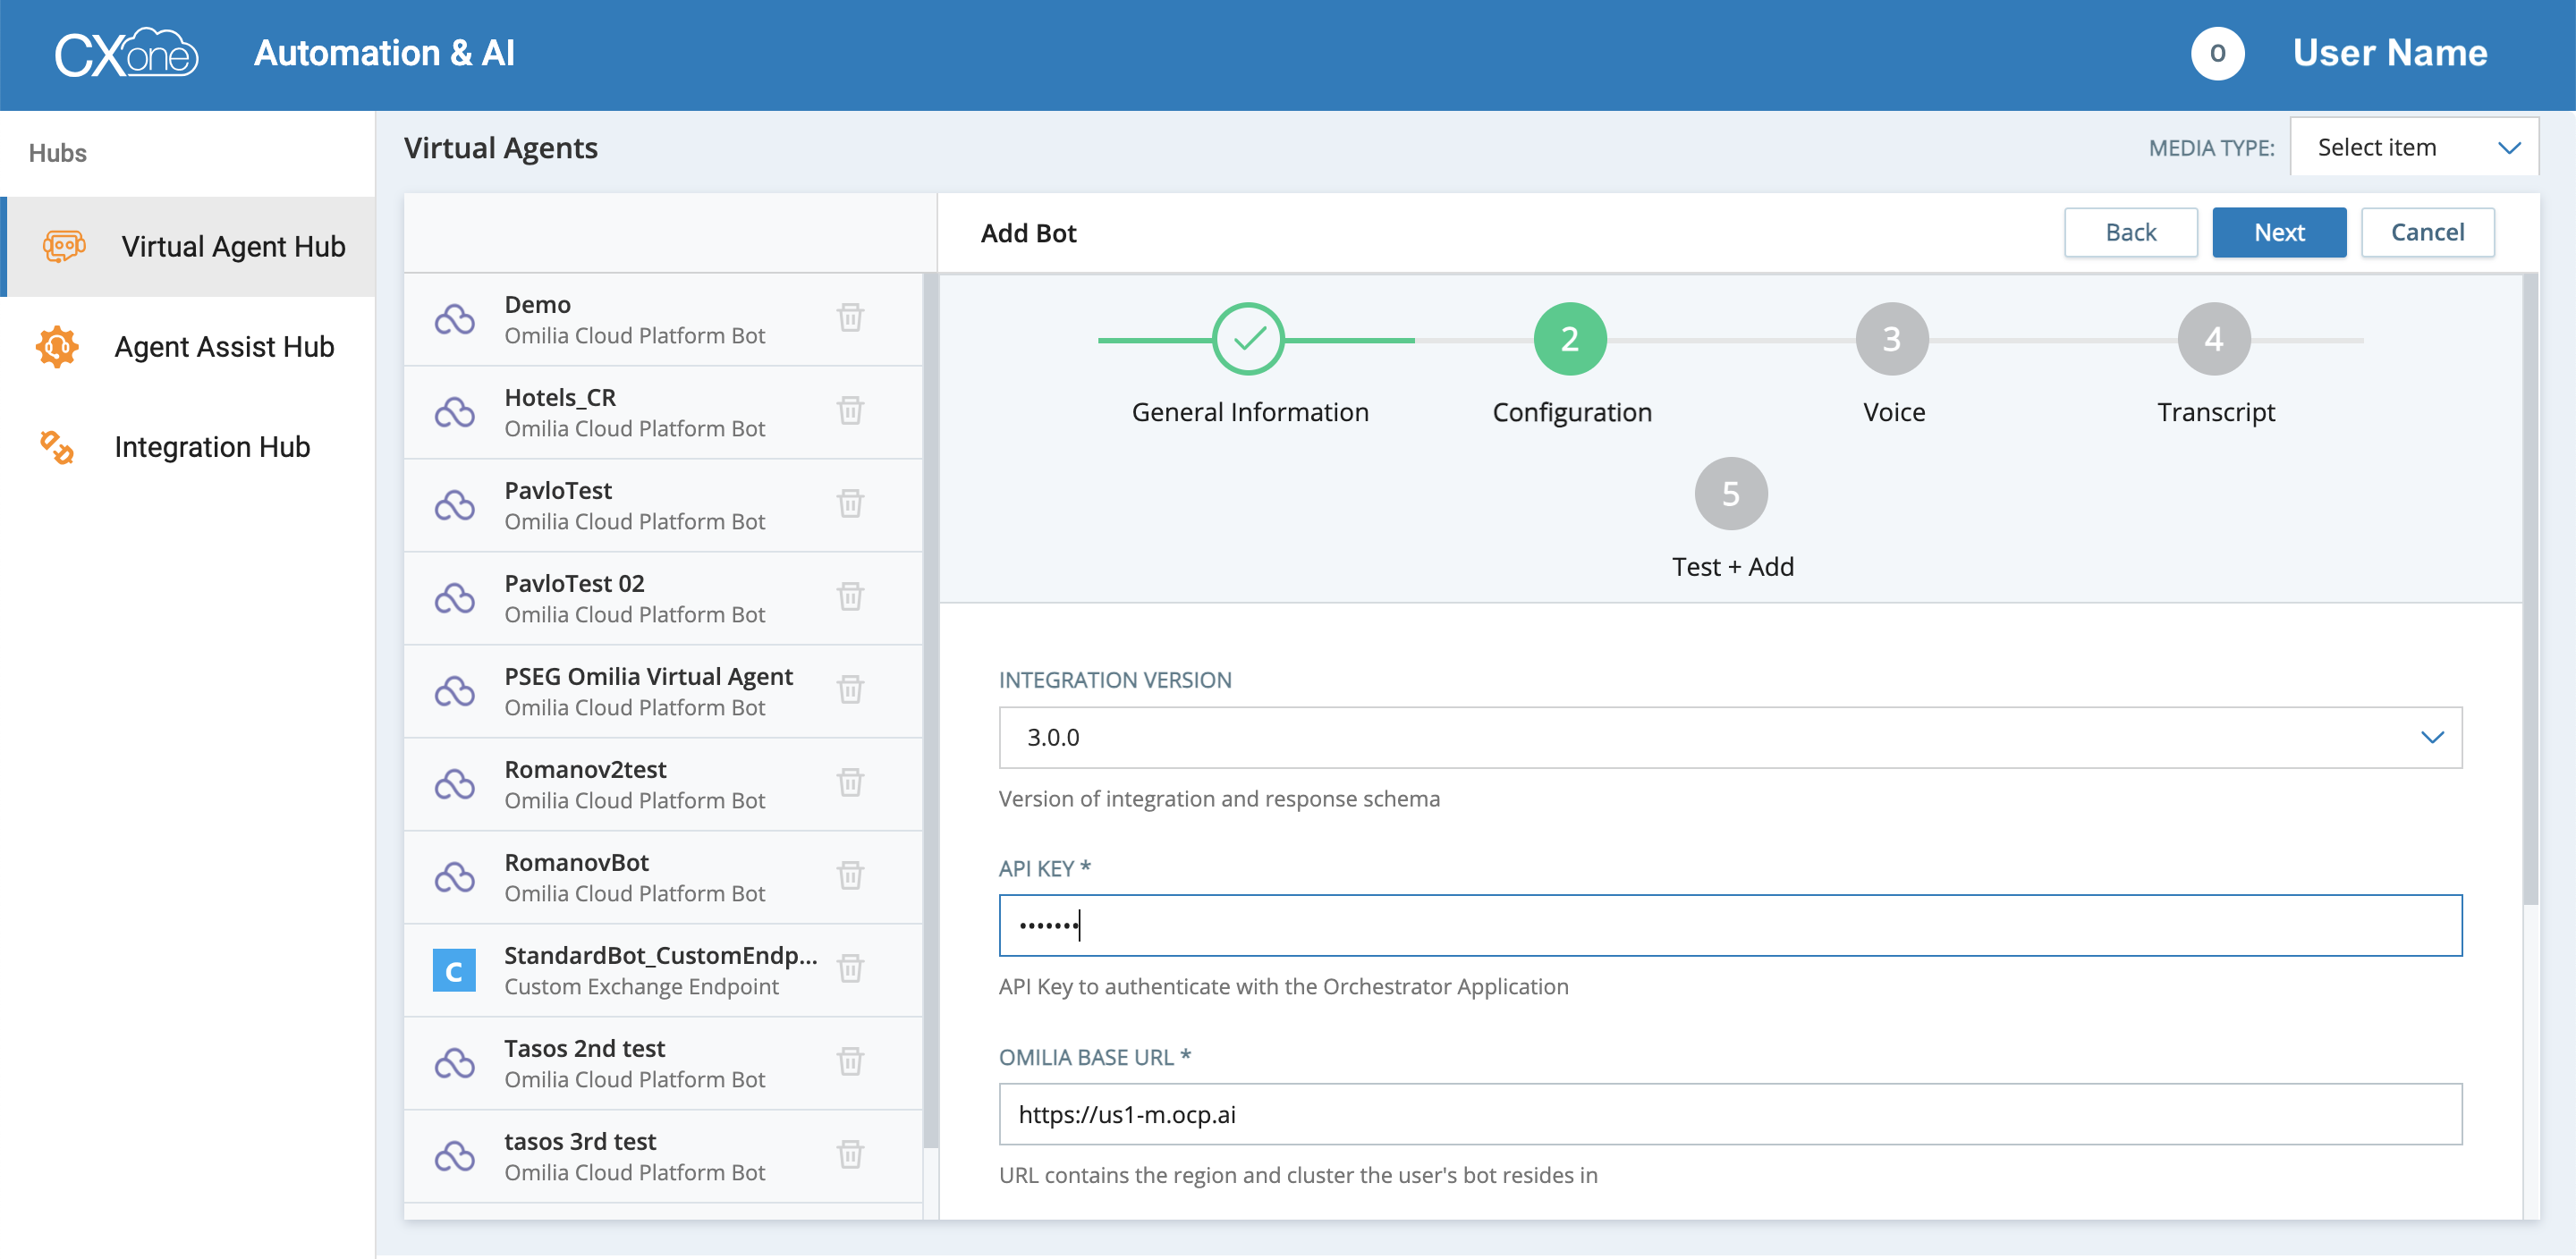
-
Integration Version: Select the integration version. By default, the latest version 3.0.0 is selected.
-
API Key: This is a required field. Paste in your Omilia API key for Omilia that you can find in Omilia Cloud Platform console under miniApps. To find your API key value, follow the steps below:
-
Navigate to OCP → miniApps → Manage and select your flow.
-
Go to the Chat tab → Chat Widget.
-
Scroll down to the Webchat configuration part and copy the API key value as shown below:

-
-
Omilia Base URL: Enter the regional OCP Console URL that you are using:
-
For US East: https://us1-m.ocp.ai
-
For Europe North: https://eu1-m.ocp.ai
-
-
Timeout Intent: Enter the name of the intent you want the Omilia virtual agent to use when a timeout occurs. This field is optional.
-
Fall Back Intent: Enter the name of the intent you want the Omilia virtual agent to use for a default intent. This is used when the virtual agent doesn't recognize the contact's input. This field is optional.
-
Click Next.
-
In the opened window, under Voice Integration Options, choose Text only (No Voice Support).
If you need to set up a voice virtual agent, contact your CXone Account Representative.
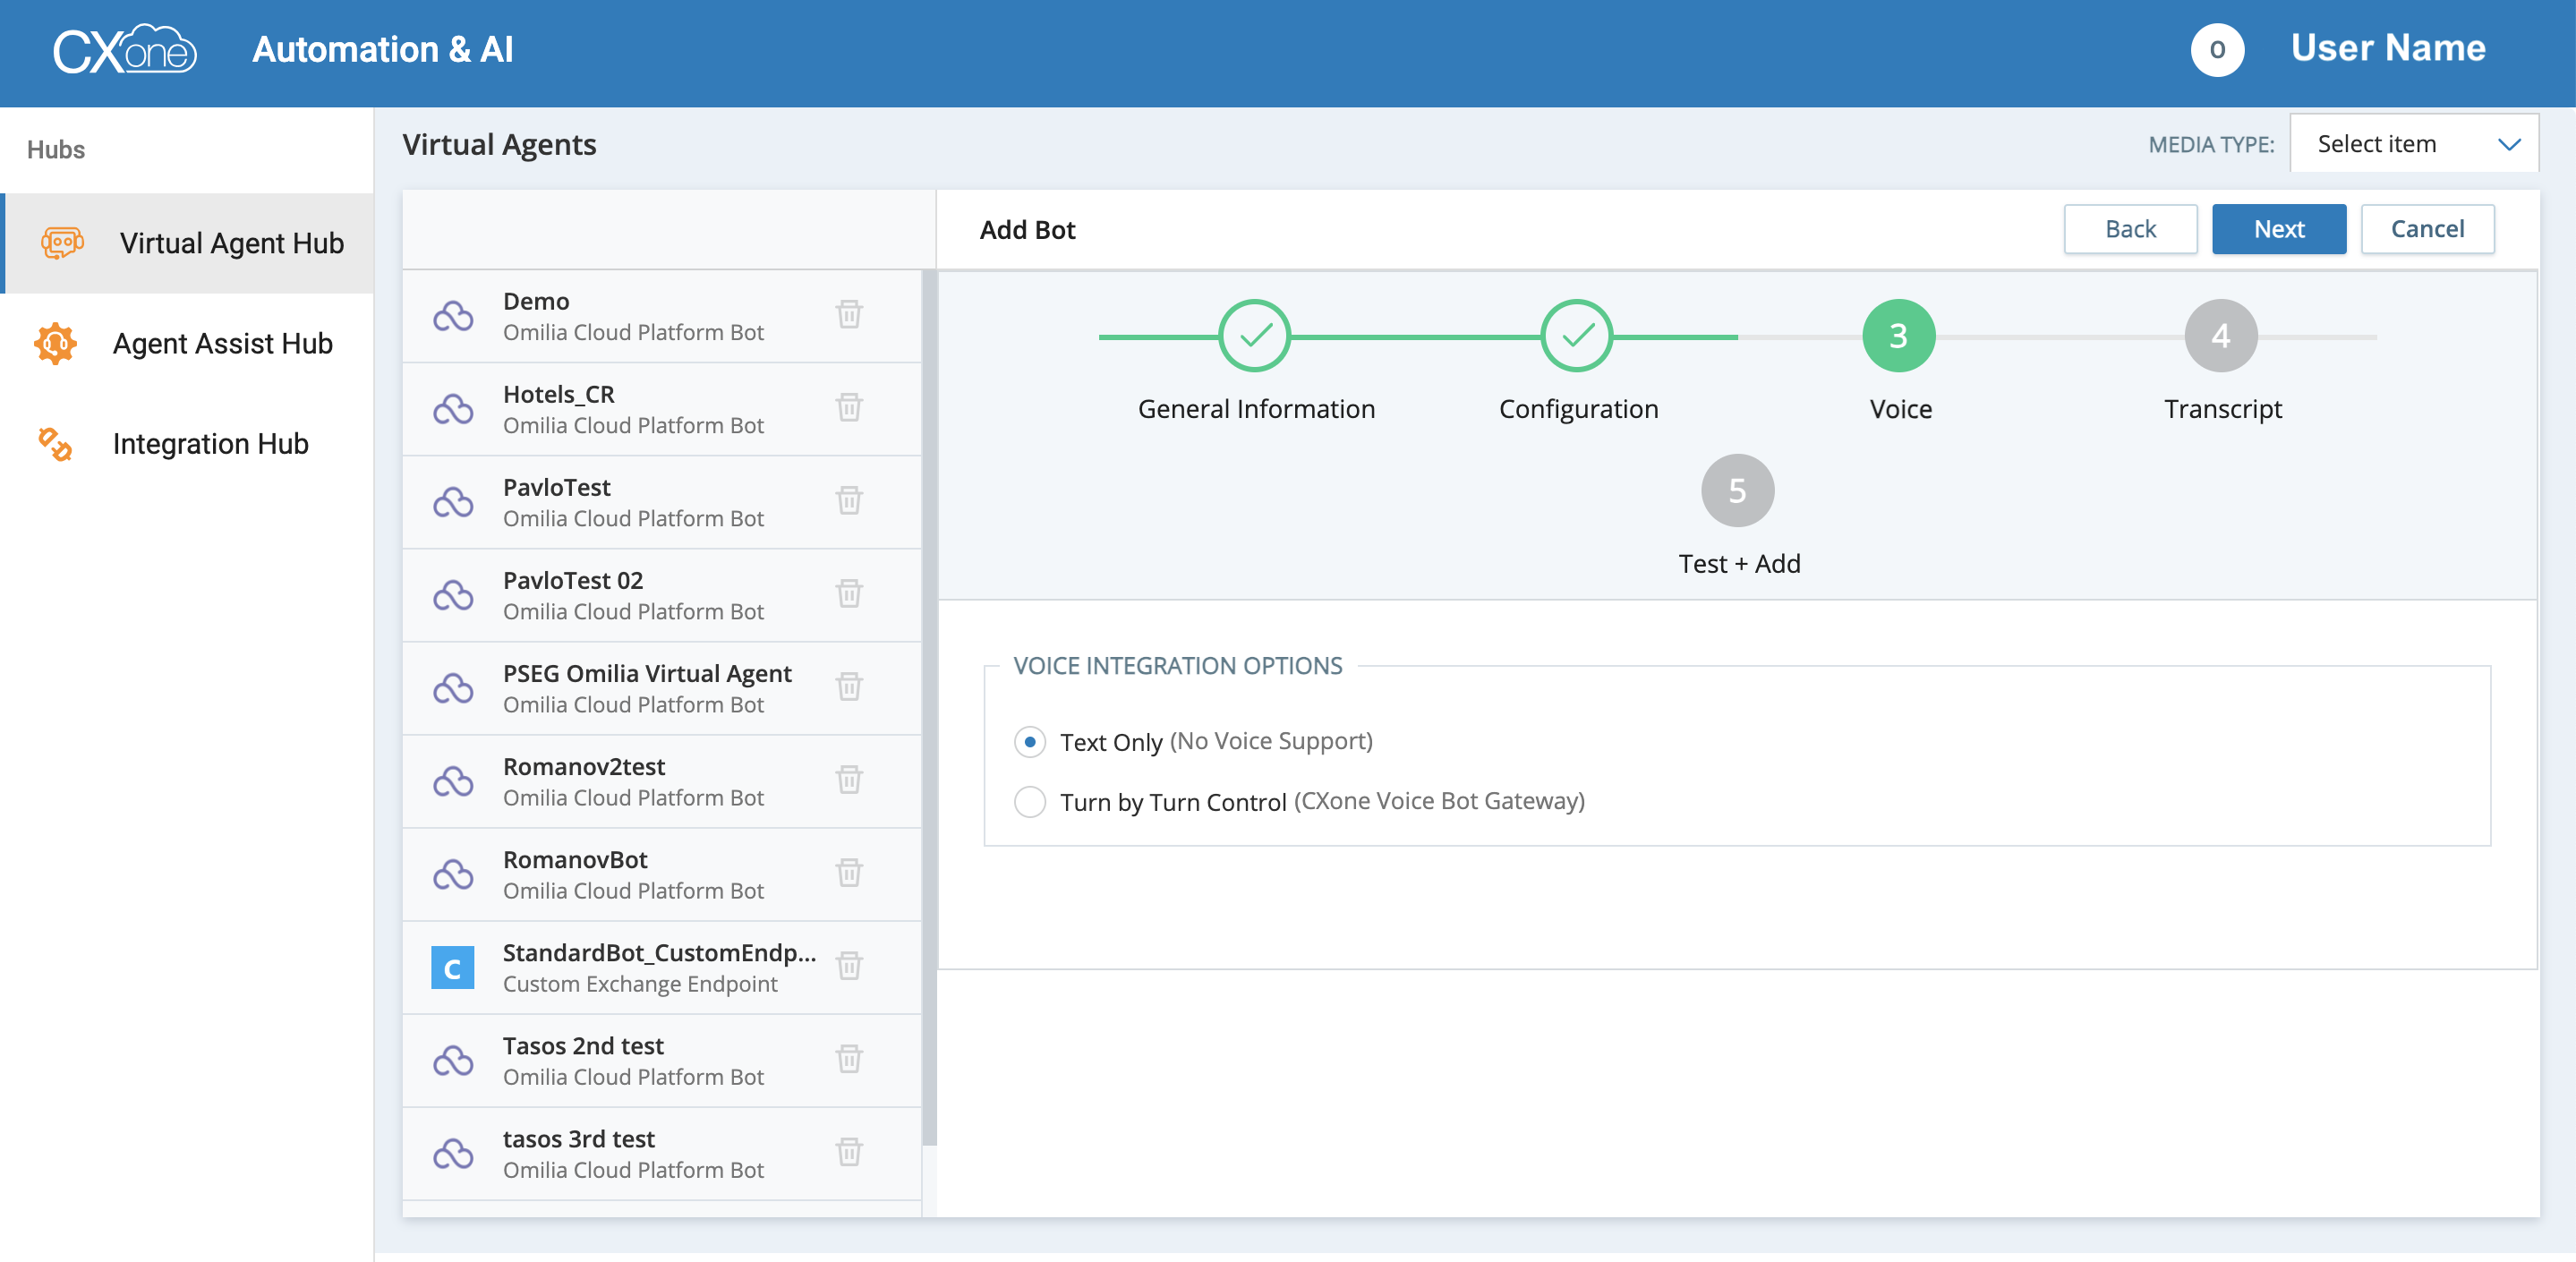
-
Click Next.
-
In the opened page, select the option for whether you want the conversation transcript and intent information captured. By default, captured data is stored only for the duration of the interaction.
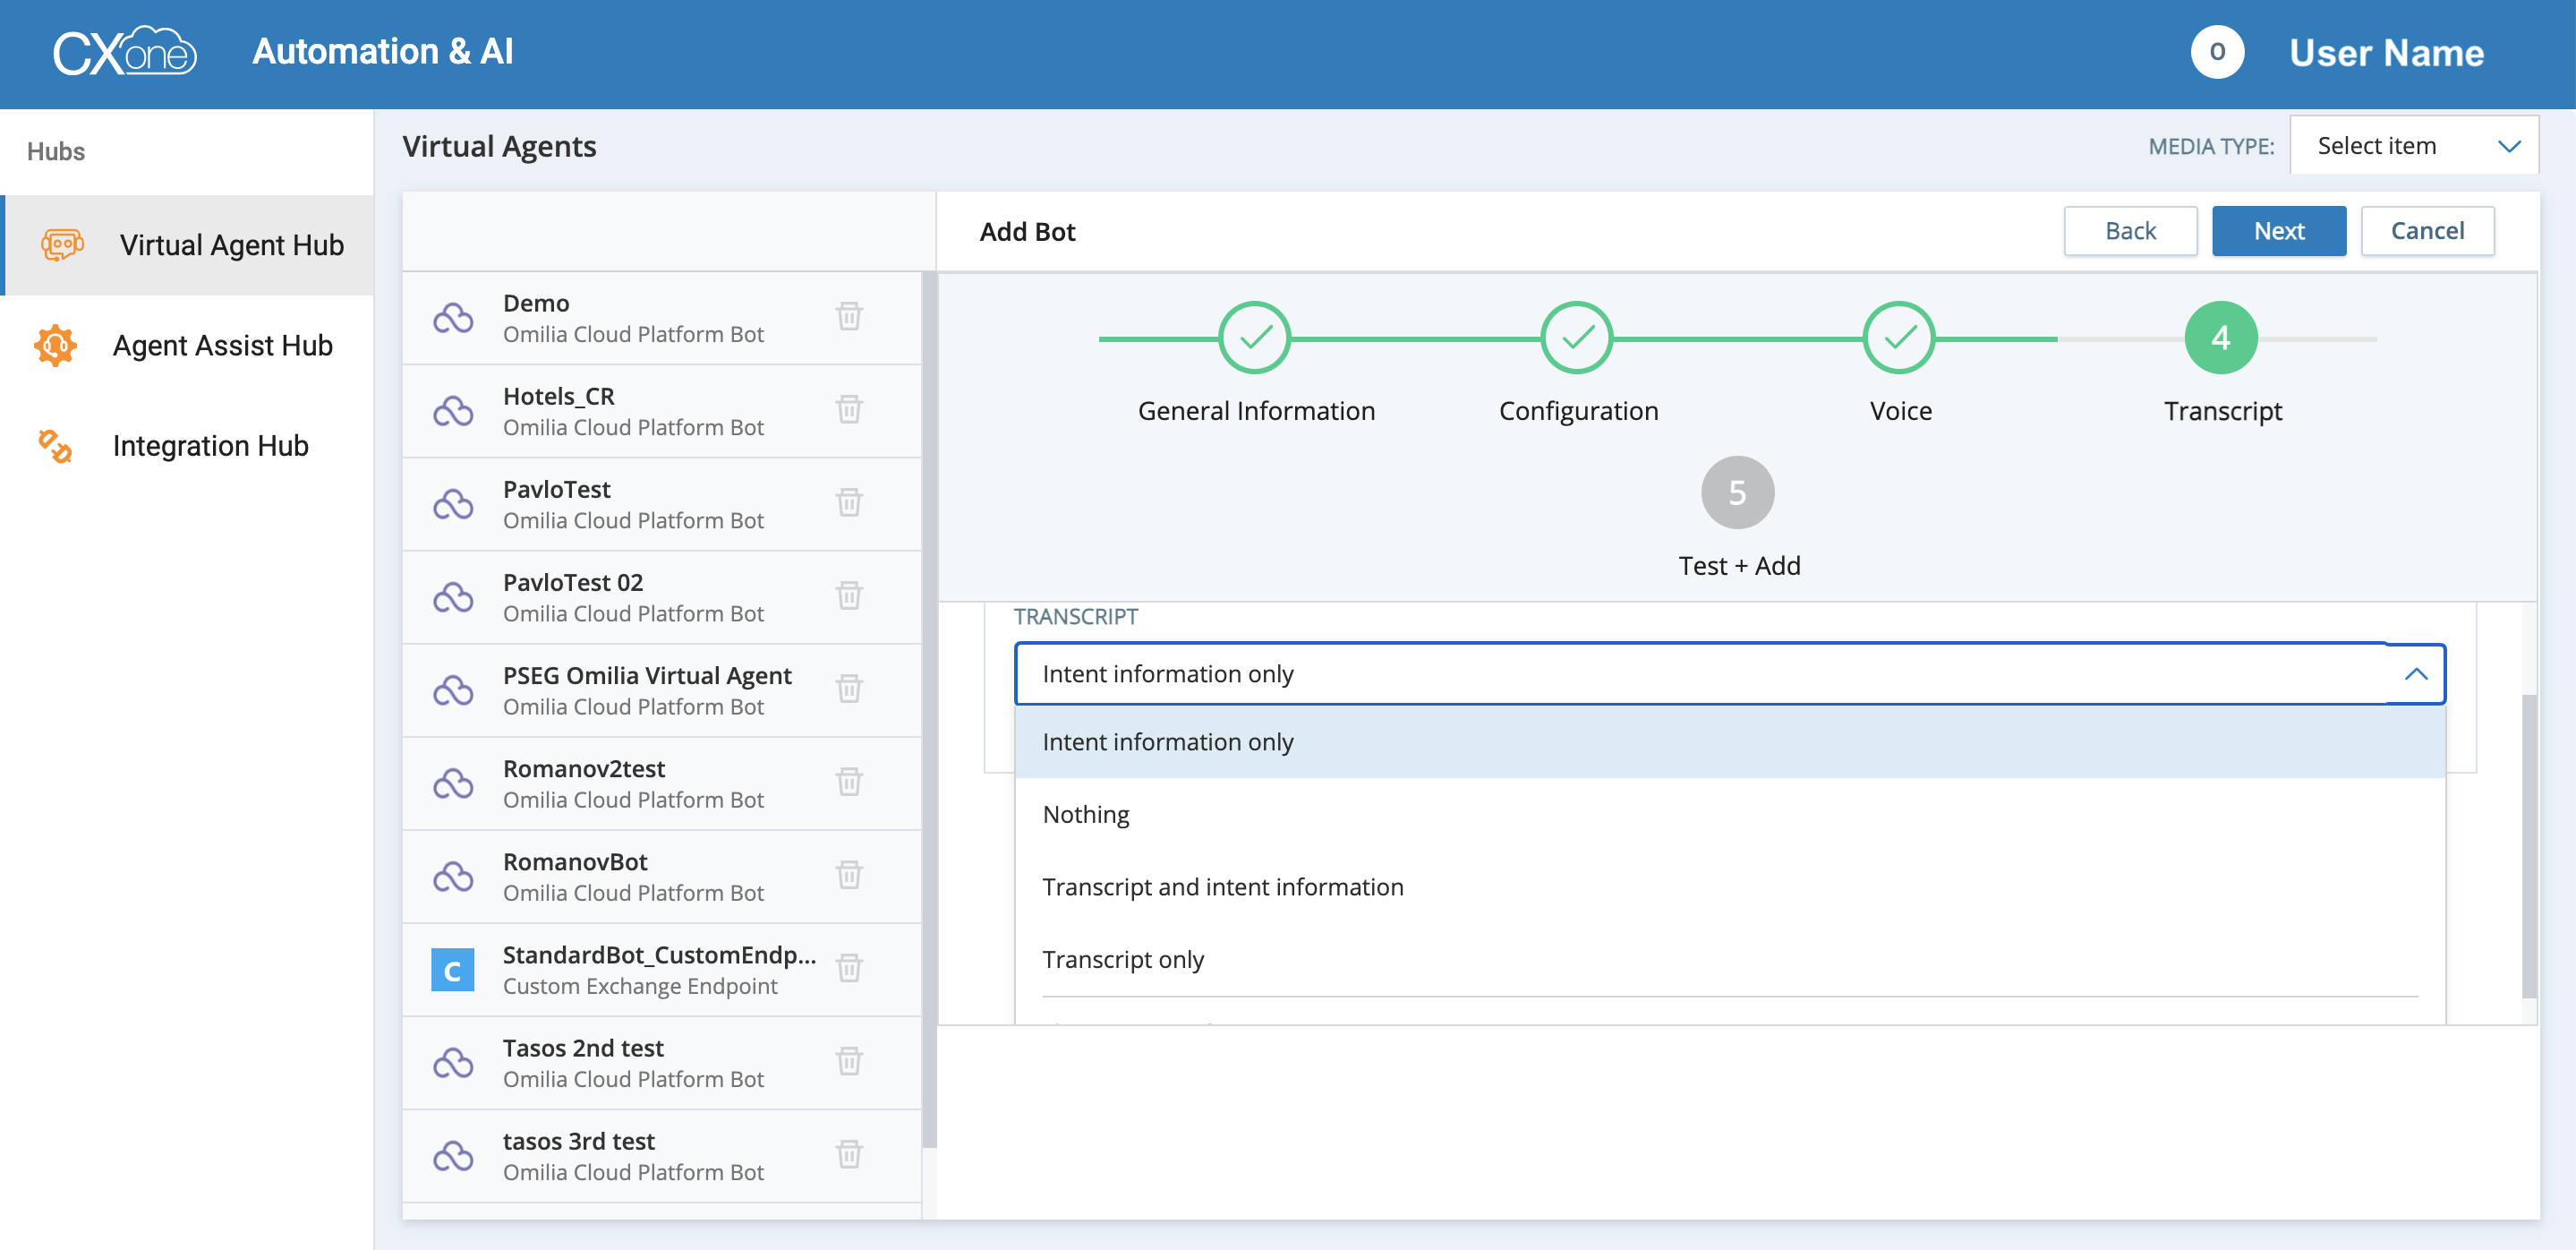
-
Intent Information Only: If selected, the intent information only will be captured.
-
Transcript and Intent Information: If selected, both transcript and intent data will be captured.
-
Transcript Information Only: If selected, the transcript data only will be captured.
-
Nothing: If selected, no conversation transcriptions or intent information will be captured.
-
Click Next.
-
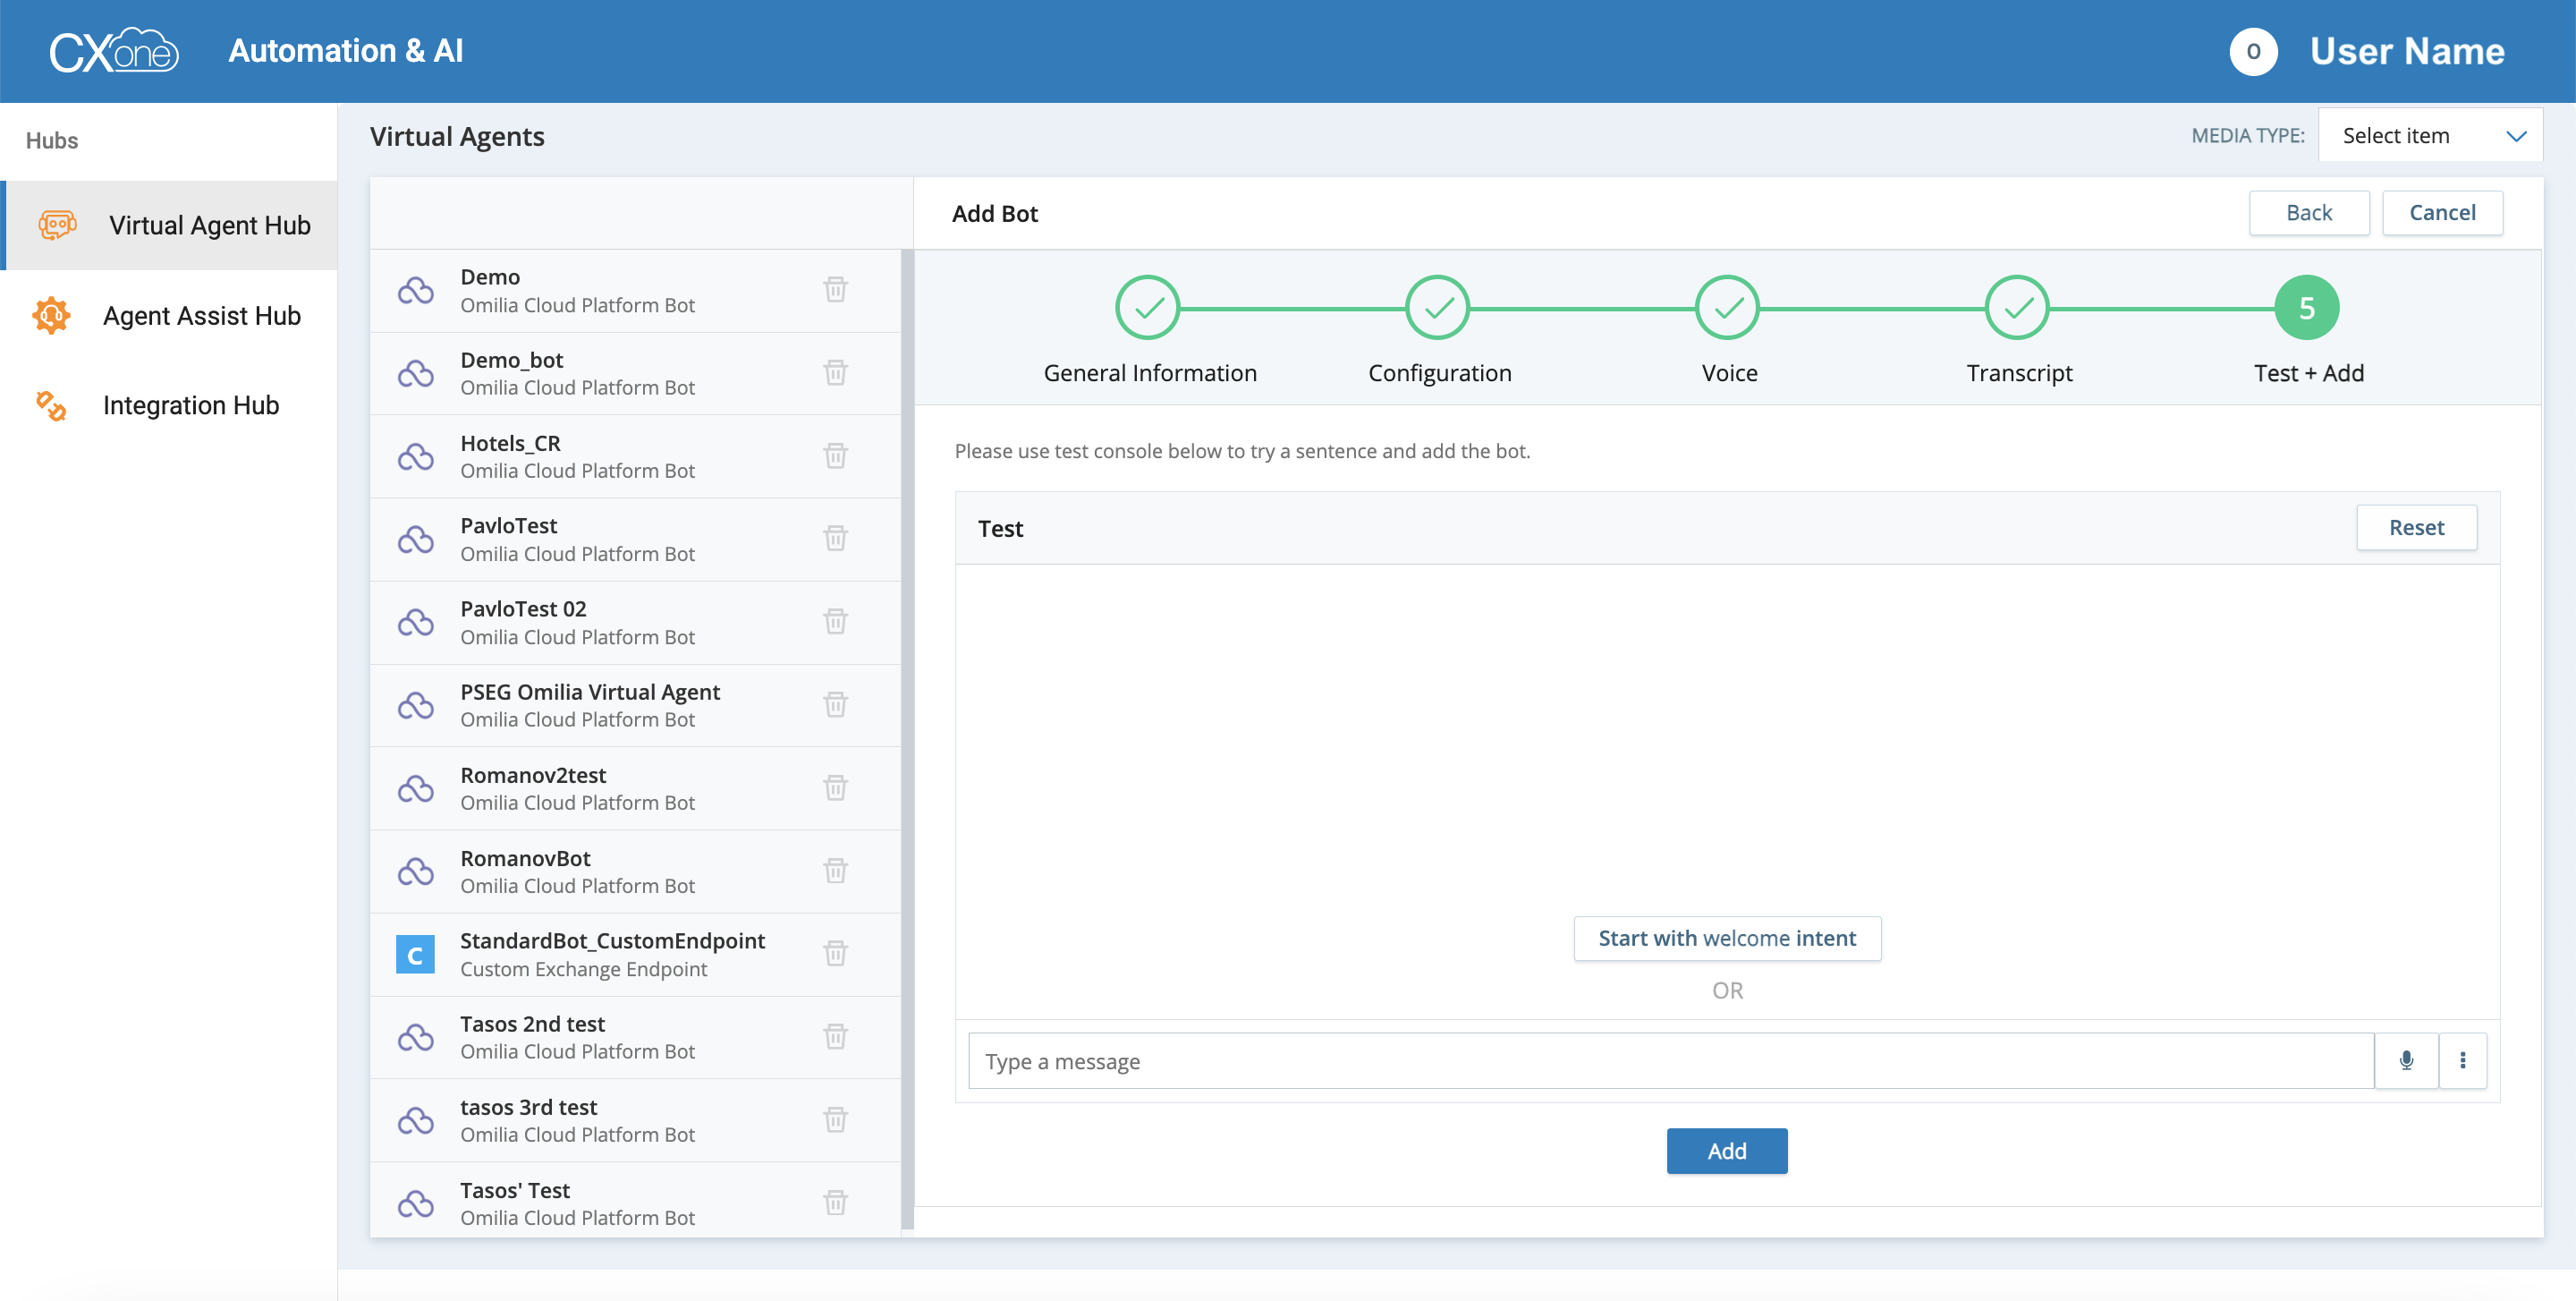
Test your bot's connection by sending text prompts. If your test messages don't work, click Back to return to configuration settings and verify them.
-
Click Add. The text virtual agent has been successfully added to Virtual Agent Hub.
Additional links
You may find the following articles helpful: