Open the application and click the Application Options Menu button on the right to access the following options:
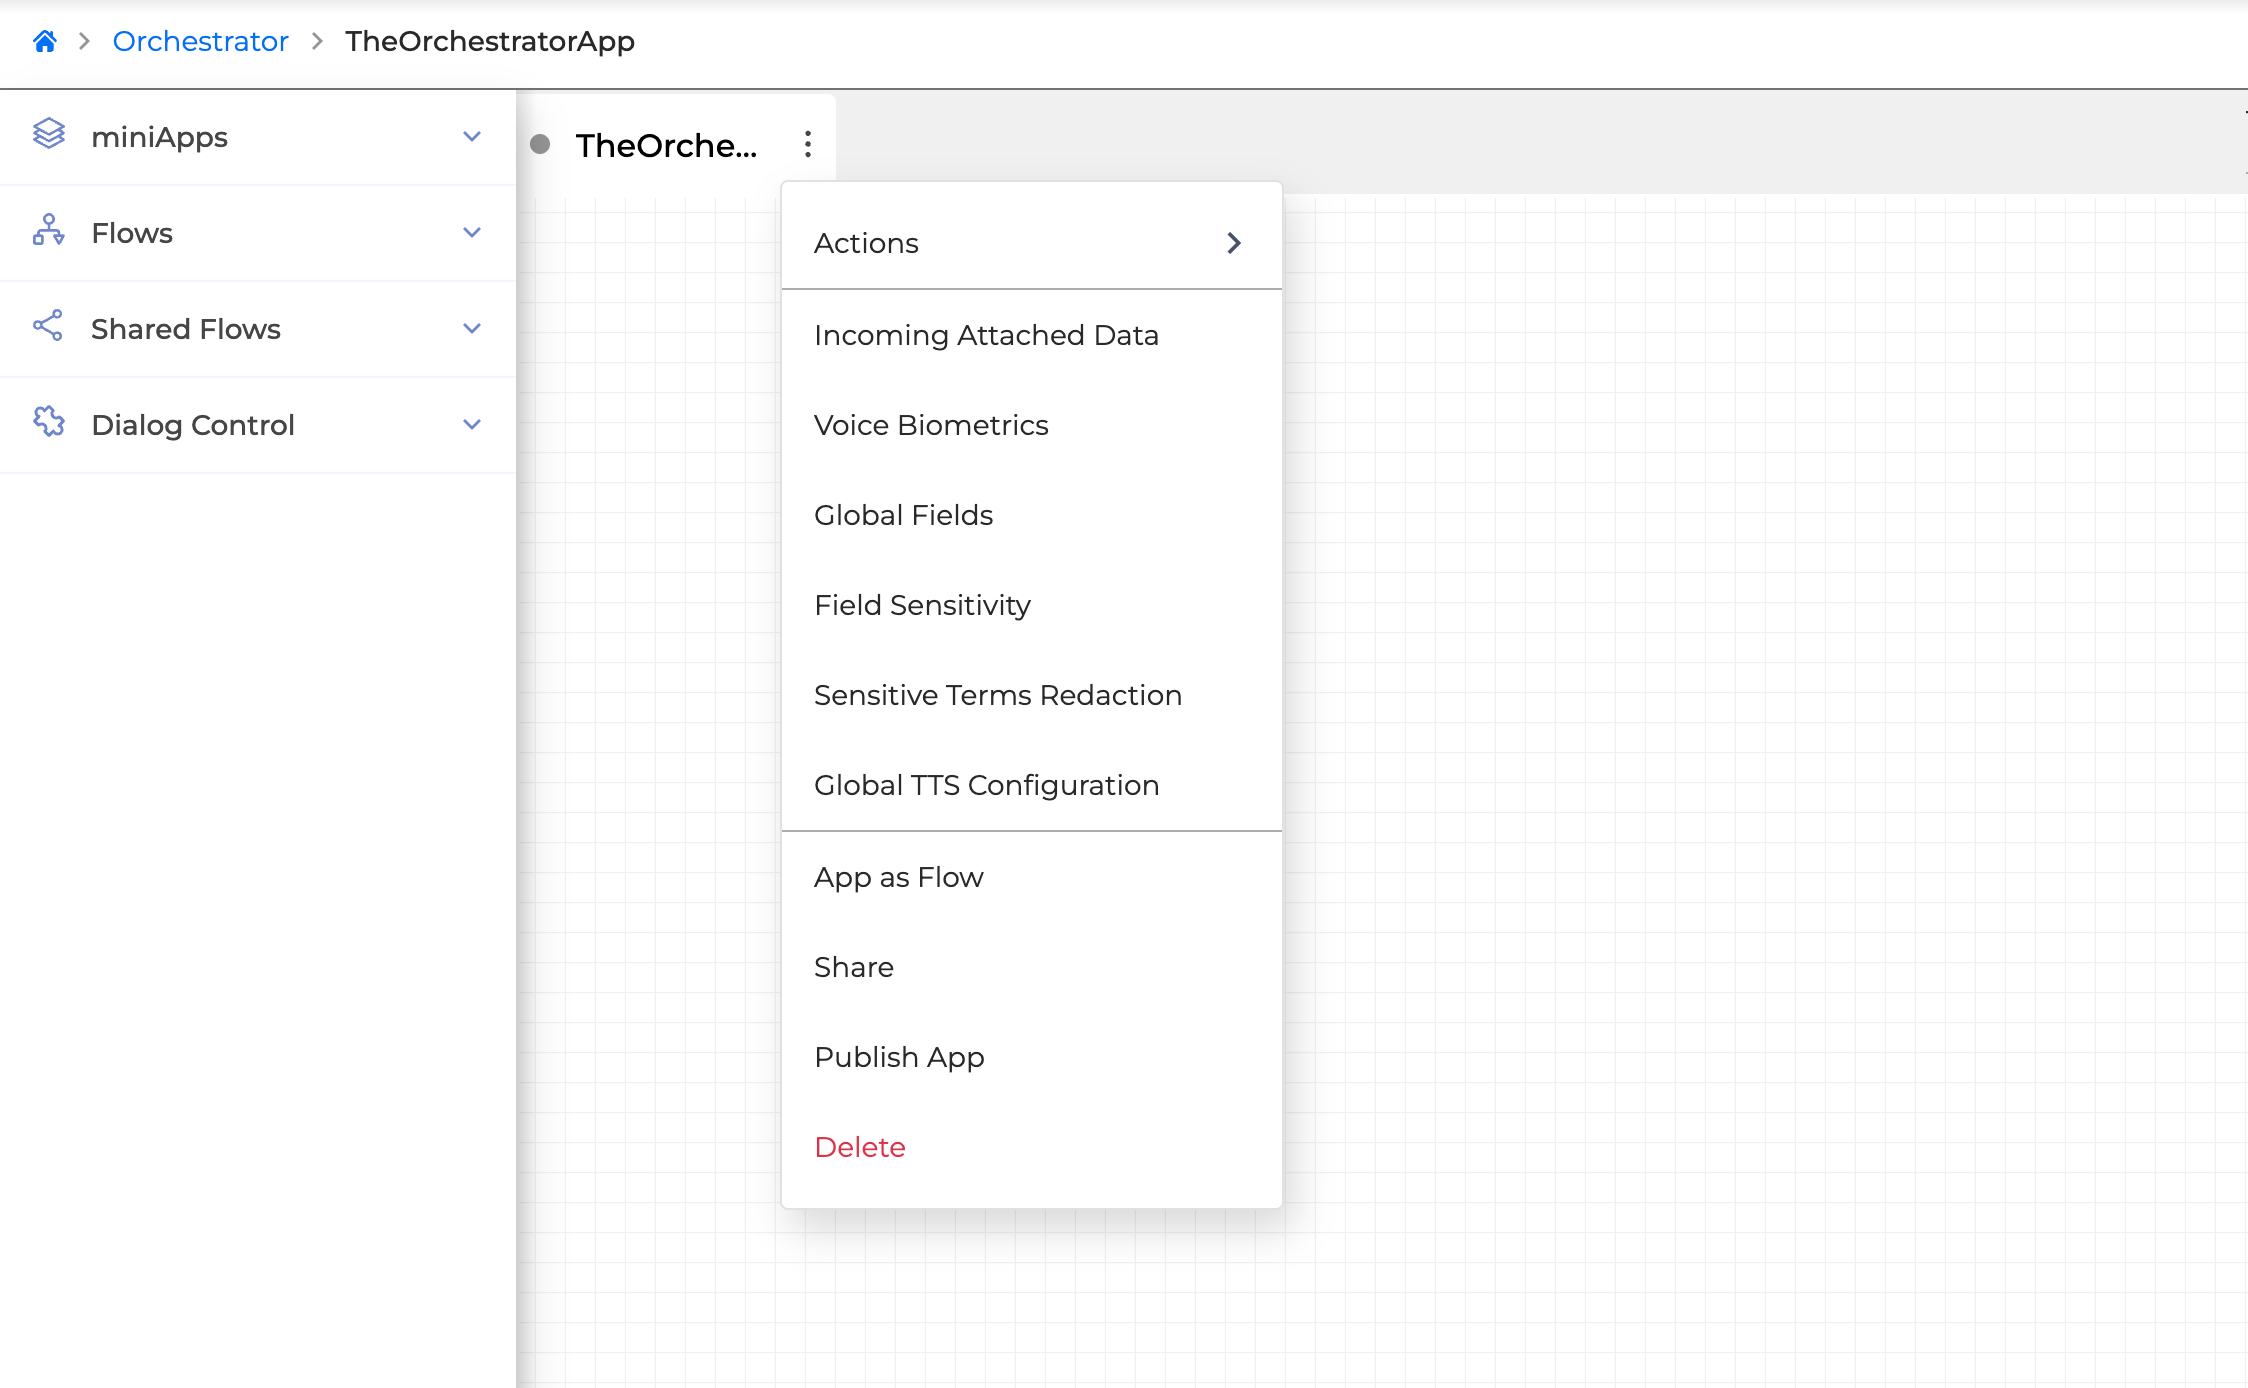
Actions Menu
The Actions Menu provides common actions such as copying, pasting, and deleting building blocks and nodes on the canvas, similar to Getting Started with Orchestrator | Orchestrator Keyboard Functions.
To access these actions:
-
Select the building block or node on the canvas.
-
Open the Application Options Menu.
-
Click Actions.
Incoming Attached Data
For more information about this feature, see the Configure Incoming Attached Data page.
Voice Biometrics
For more information about this feature, see the Voice Biometrics in Orchestrator page.
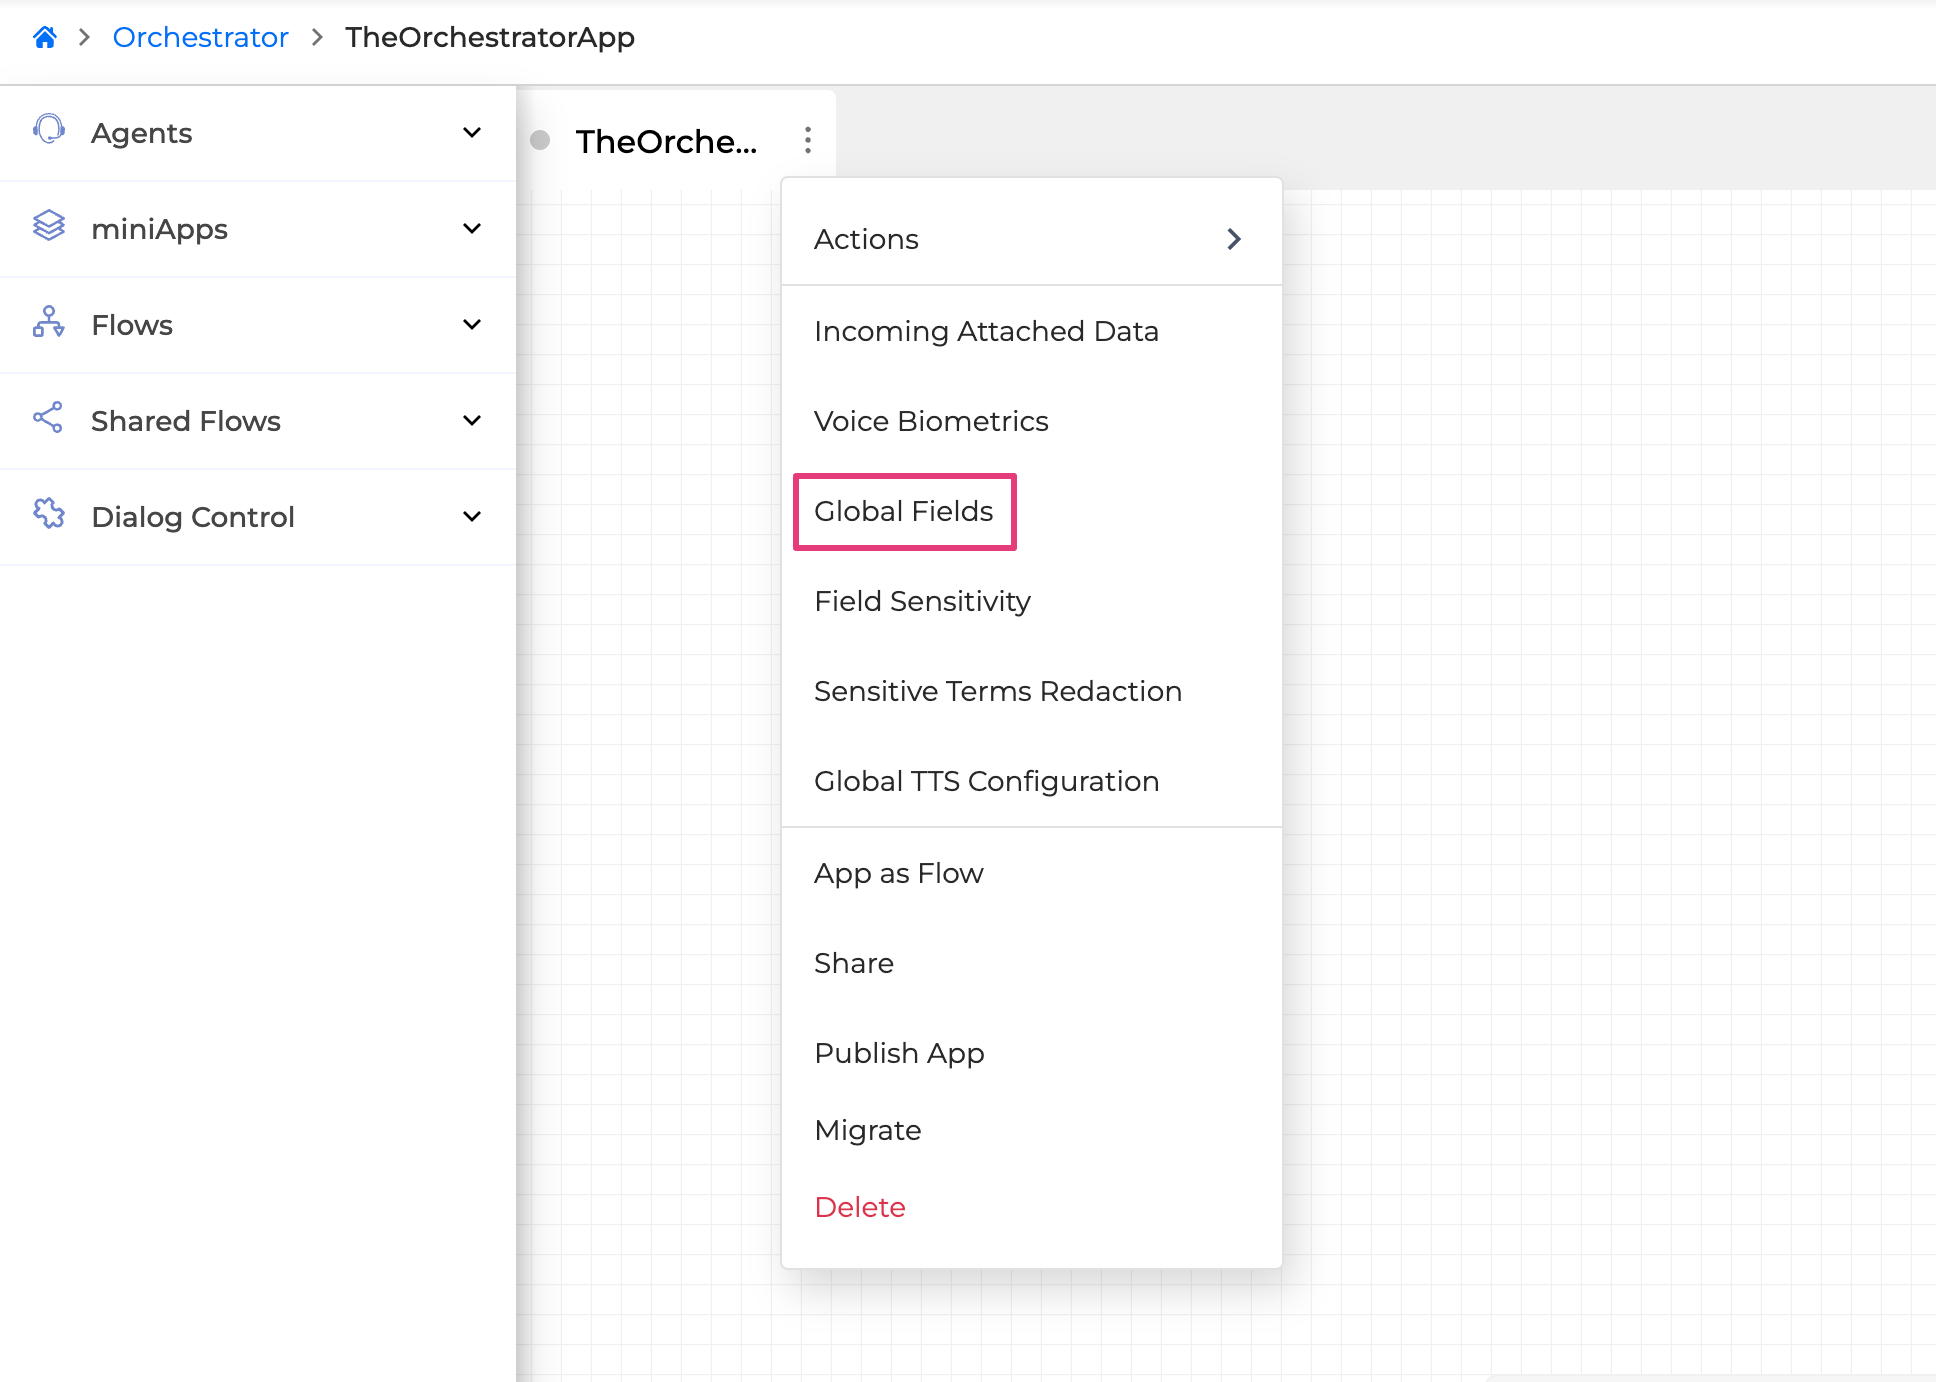
Global Fields
You can set specific fields as global. Global Fields are reusable across all miniApps and Flows within the Application. They can be used without repeatedly configuring them as inputs or outputs in each building block. Using Global Fields helps optimize the interaction between Orchestrator and external services.
The built‑in fields (for example, ANI, DNIS, and so on) cannot be set as global fields.
Do not use any reserved names for global fields. For more information, see the Reserved Field Names article.
Masked and encrypted data fields are automatically treated as Global Fields.
To configure Global Fields:
-
Open the Application Options Menu and click Global Fields.
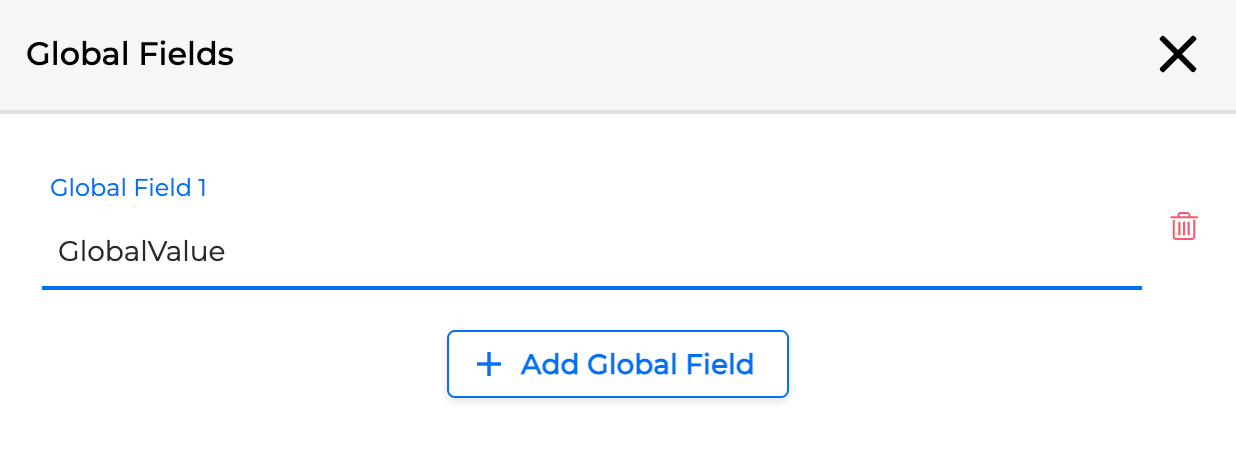
-
In the dialog, type the name of the Global Field and click + Add Global Field.
-
You can add multiple fields.
-
Click Save to finish.
-
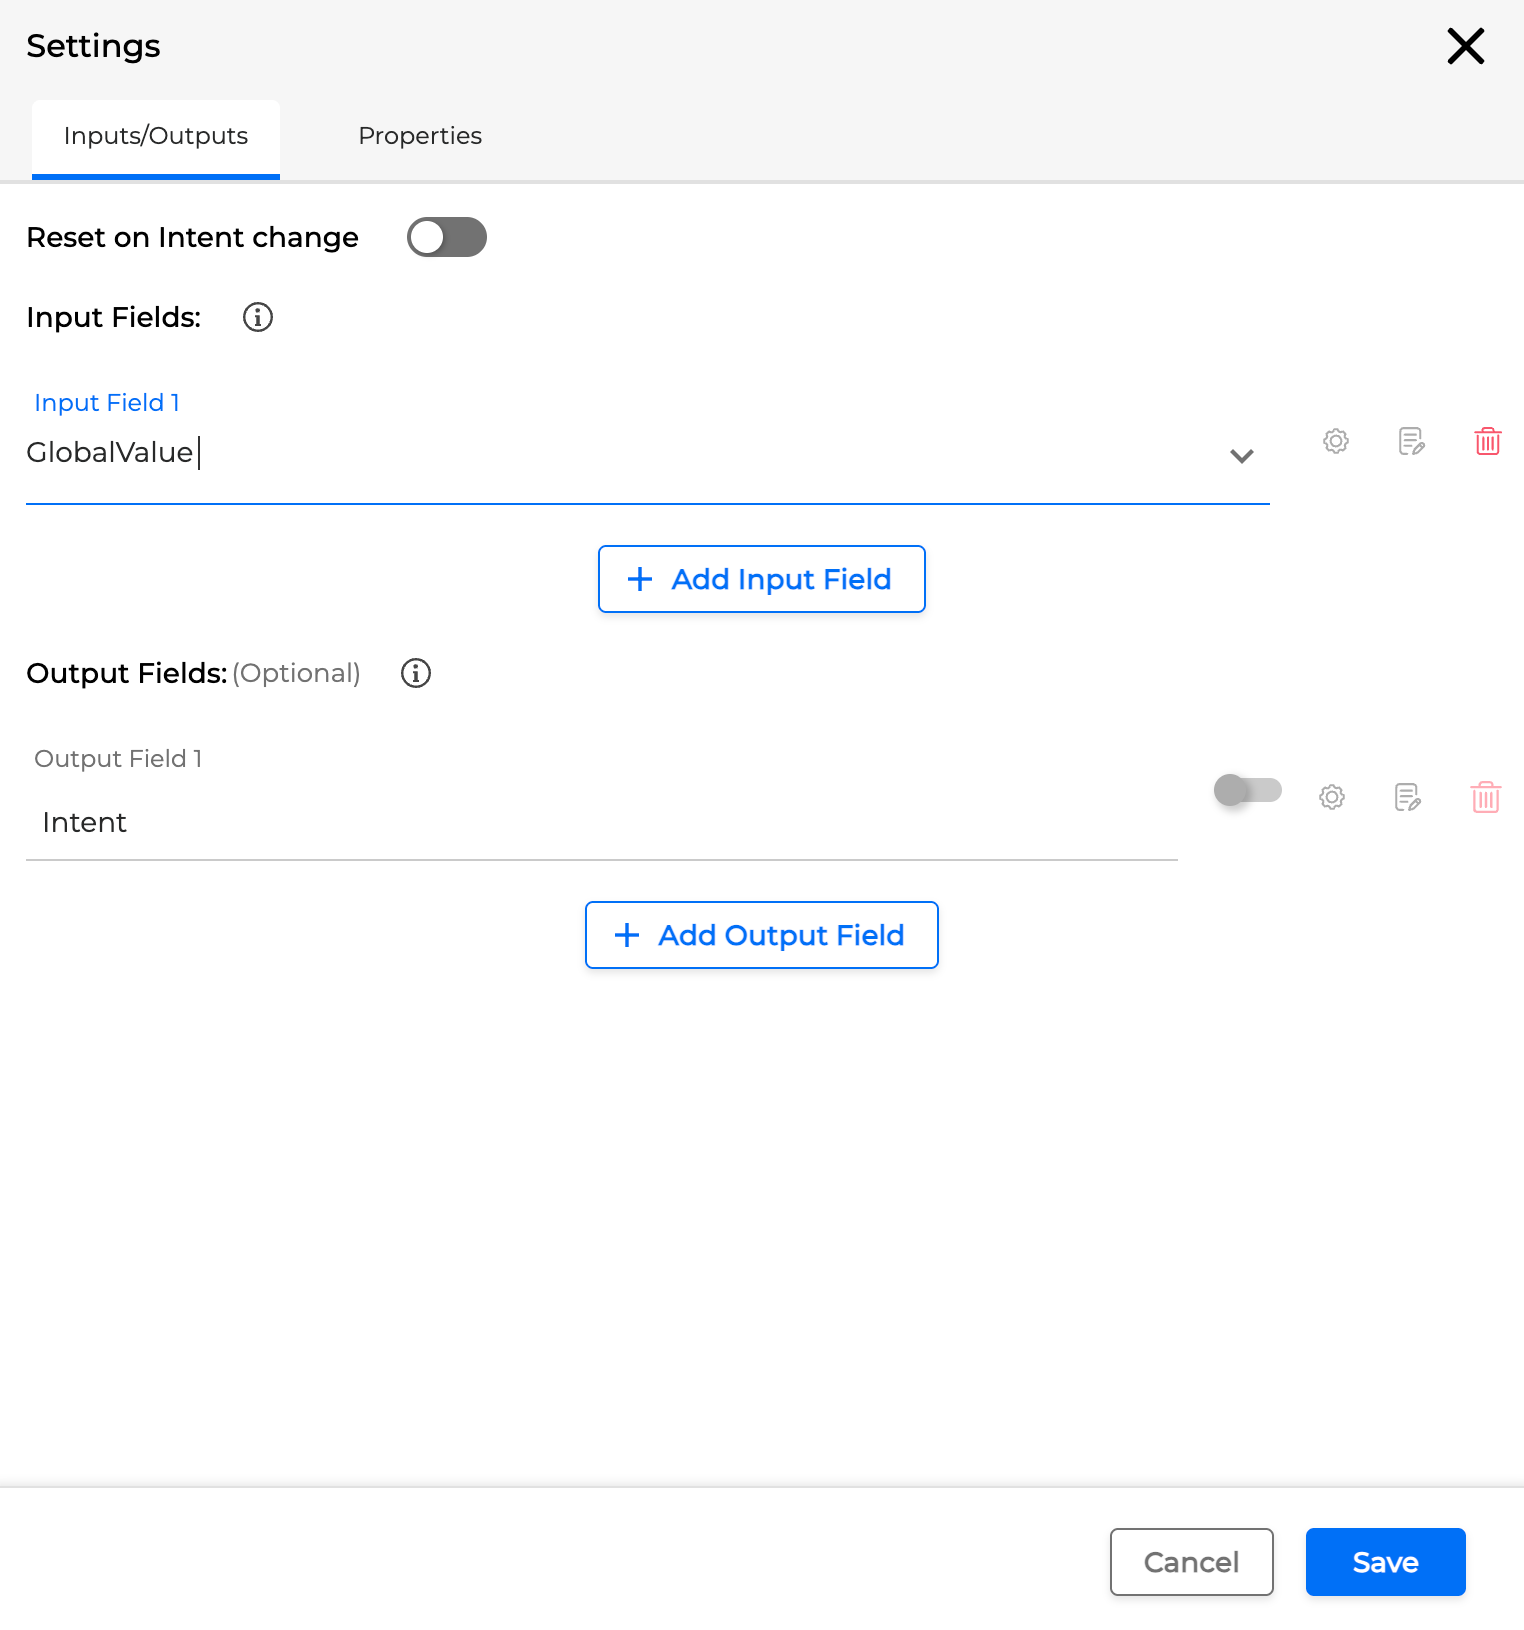
-
Select a miniApp, open its Settings, and choose GlobalValue from the list of Input Fields.
Since Flows are reusable across multiple Applications, Global Fields defined in a Flow can be fetched in any Application where that Flow is used.
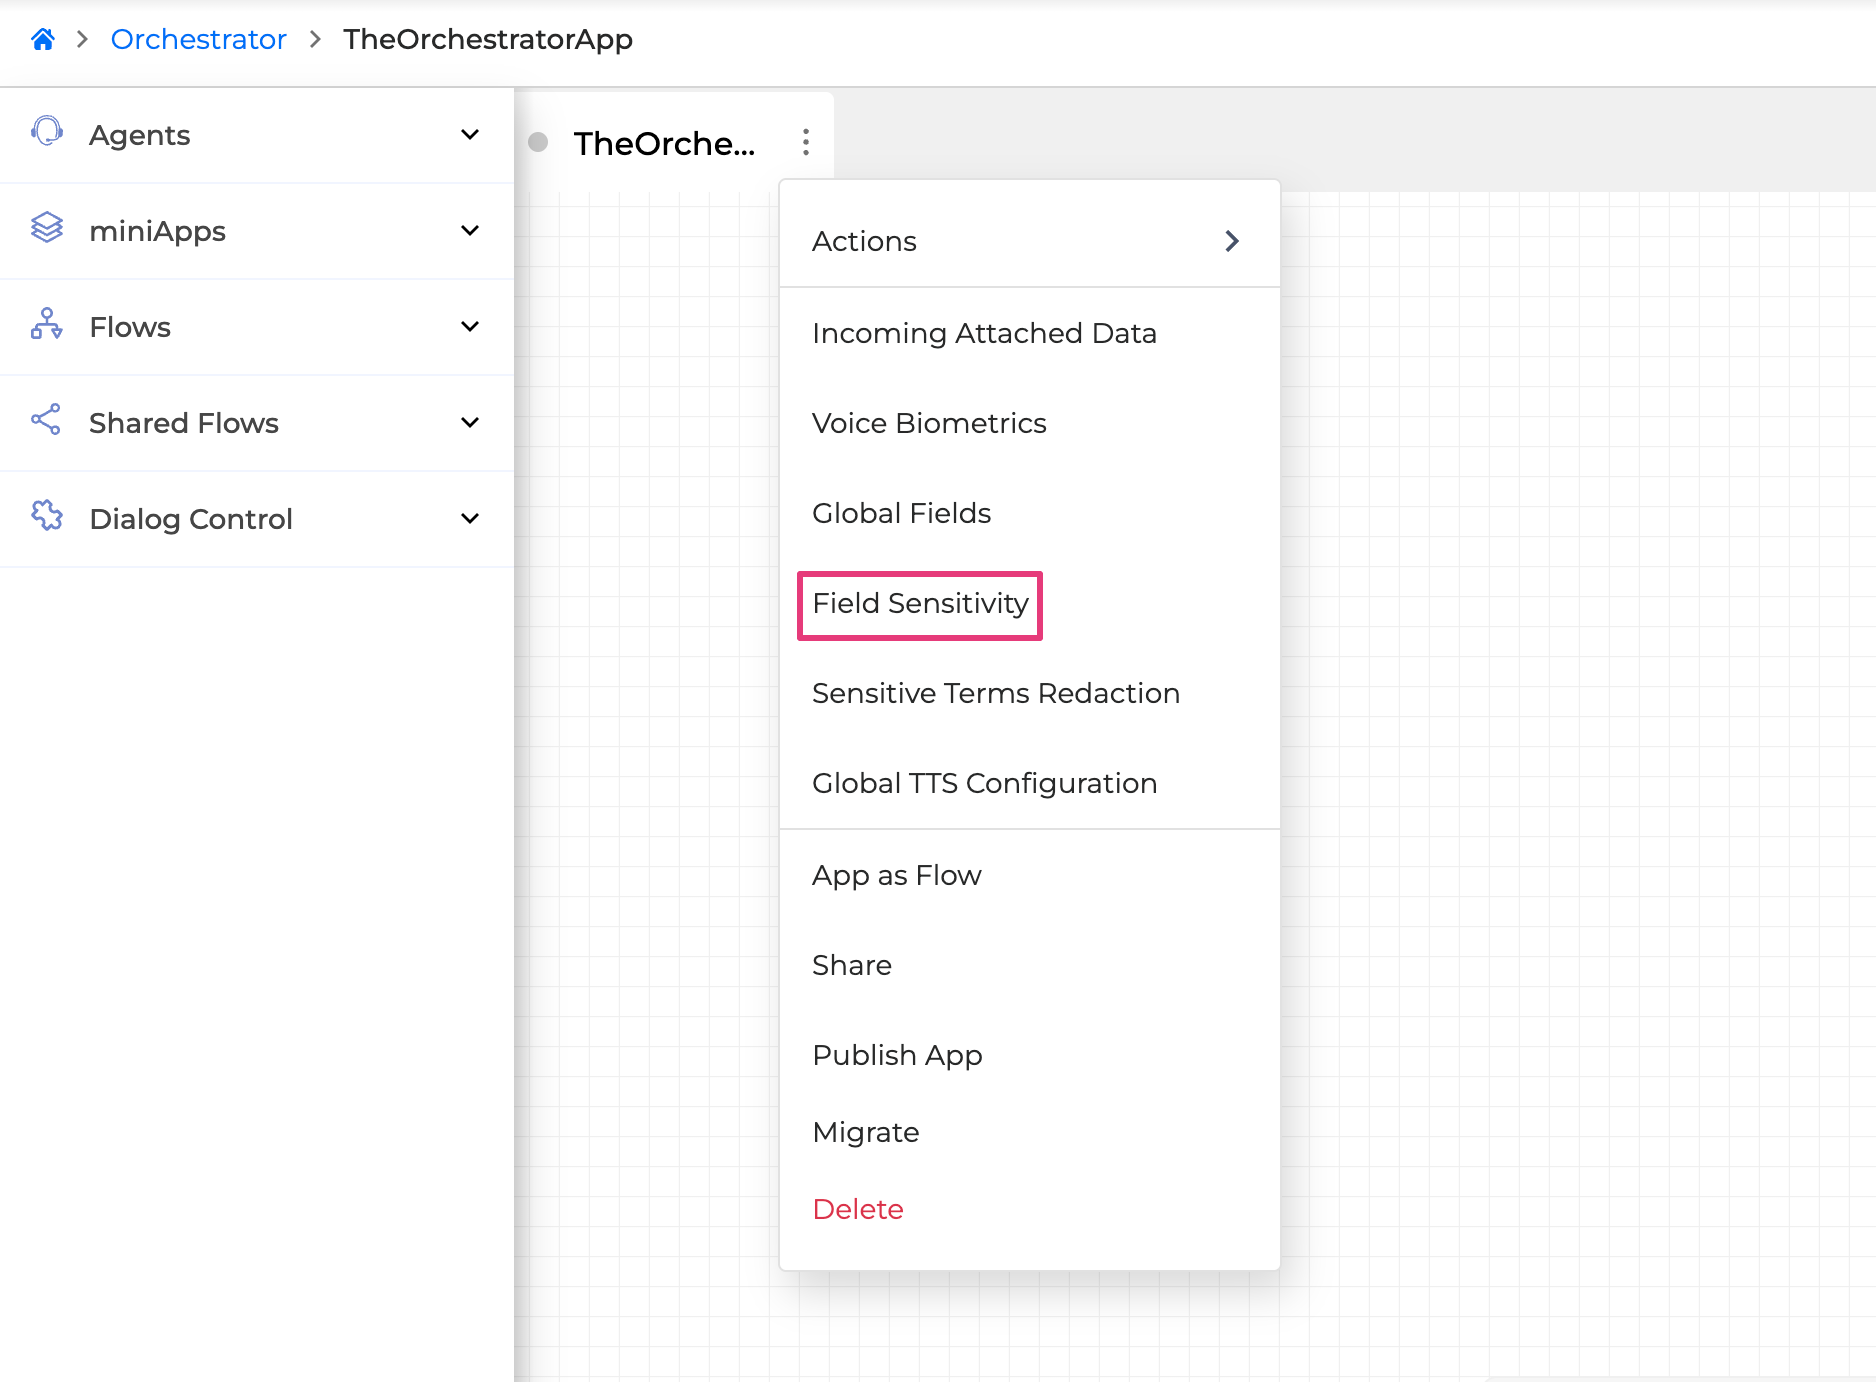
Field Sensitivity
The Field Sensitivity feature in Orchestrator enables you to manage sensitive and non-sensitive data within a single application. It allows you to define which fields require protection so that sensitive data is stored and handled securely.
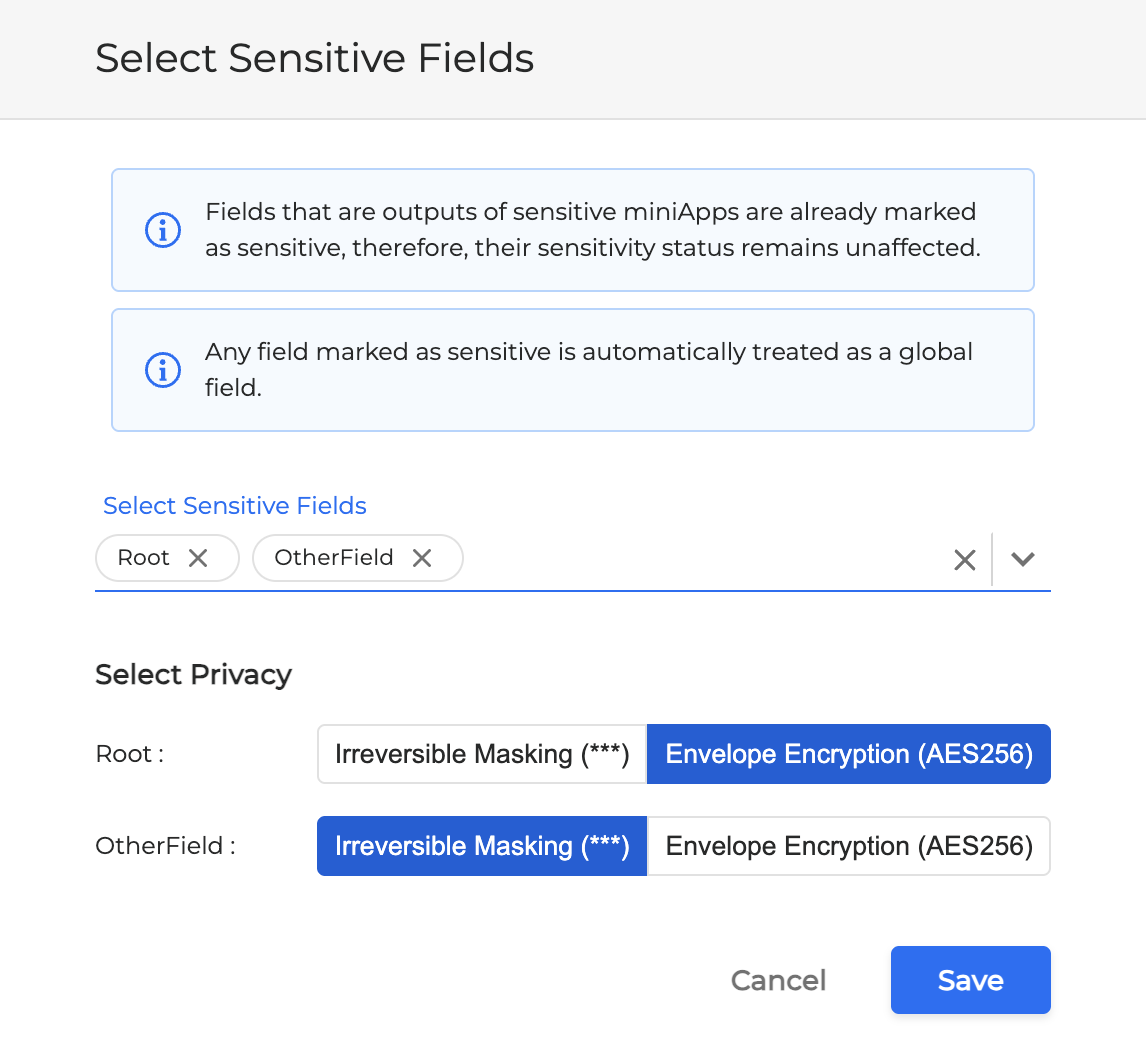
Sensitive data fields become Global Fields automatically.
Fields that are outputs of sensitive miniApps are already marked as sensitive and do not need to be reconfigured.
To configure field sensitivity:
-
In the Application tab, click the Options menu button and select Field Sensitivity.
-
In the Select Sensitive Fields drop-down, choose any field from the list.
If the required field is not listed, first add it as a global field.
-
In the Select Privacy menu, choose how the data in this field should be protected:
-
Irreversible Masking (***): the data is stored as masked text and becomes permanently inaccessible.
-
Envelope Encryption (AES 256): the data is stored in encrypted form; only administrators in the user’s organization can decrypt it.
-
-
Click Save.
-
Deploy the miniApp to apply the changes.
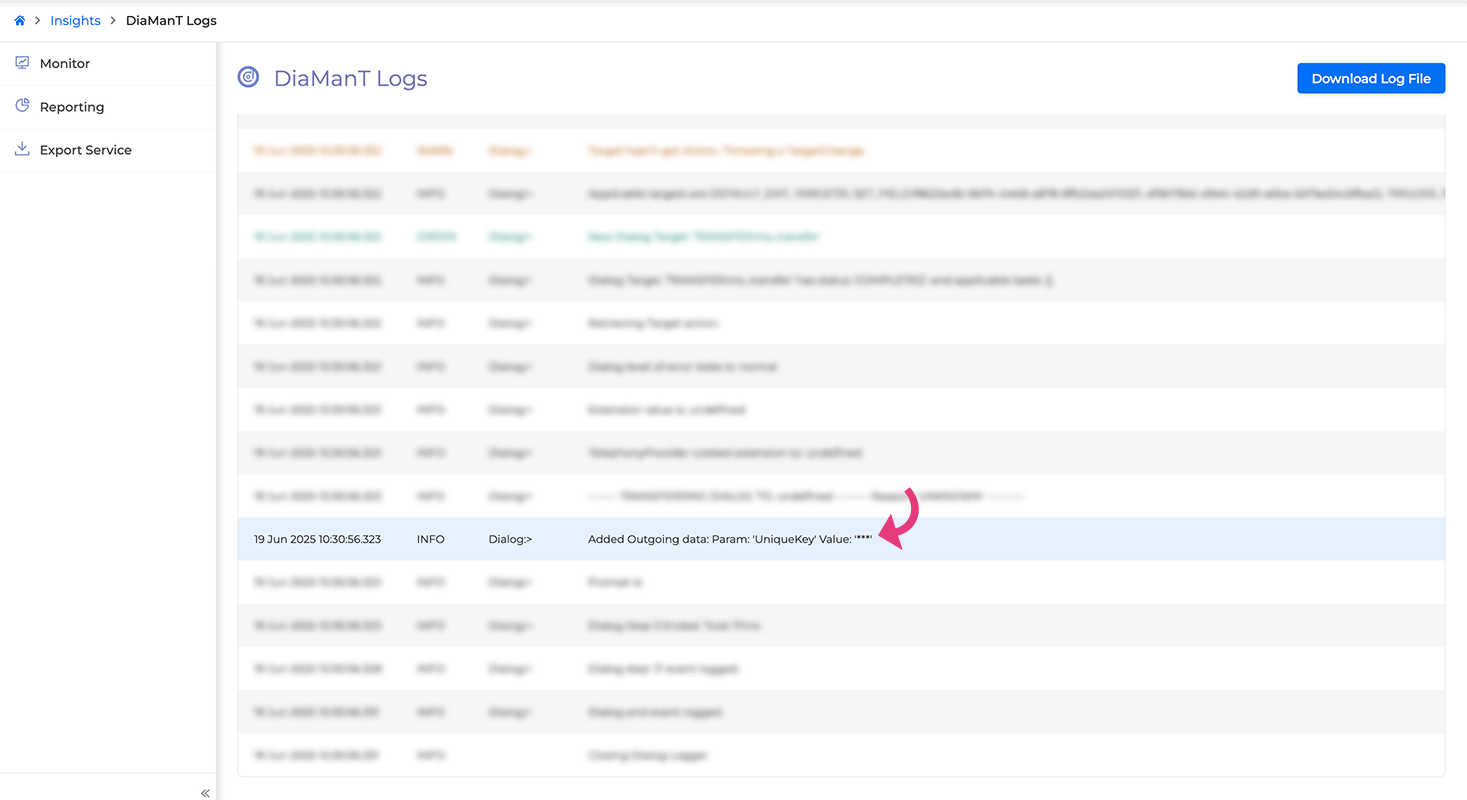
To verify the changes:
-
Access the DiaManT log file of the required dialog following the
https://learn.ocp.ai/guides/ocp-monitor-user-guide#OCP%C2%AEMonitorUserGuide-DialogReviewdialog_review. -
Locate the field you marked as sensitive. The value of this field will be masked with
***.
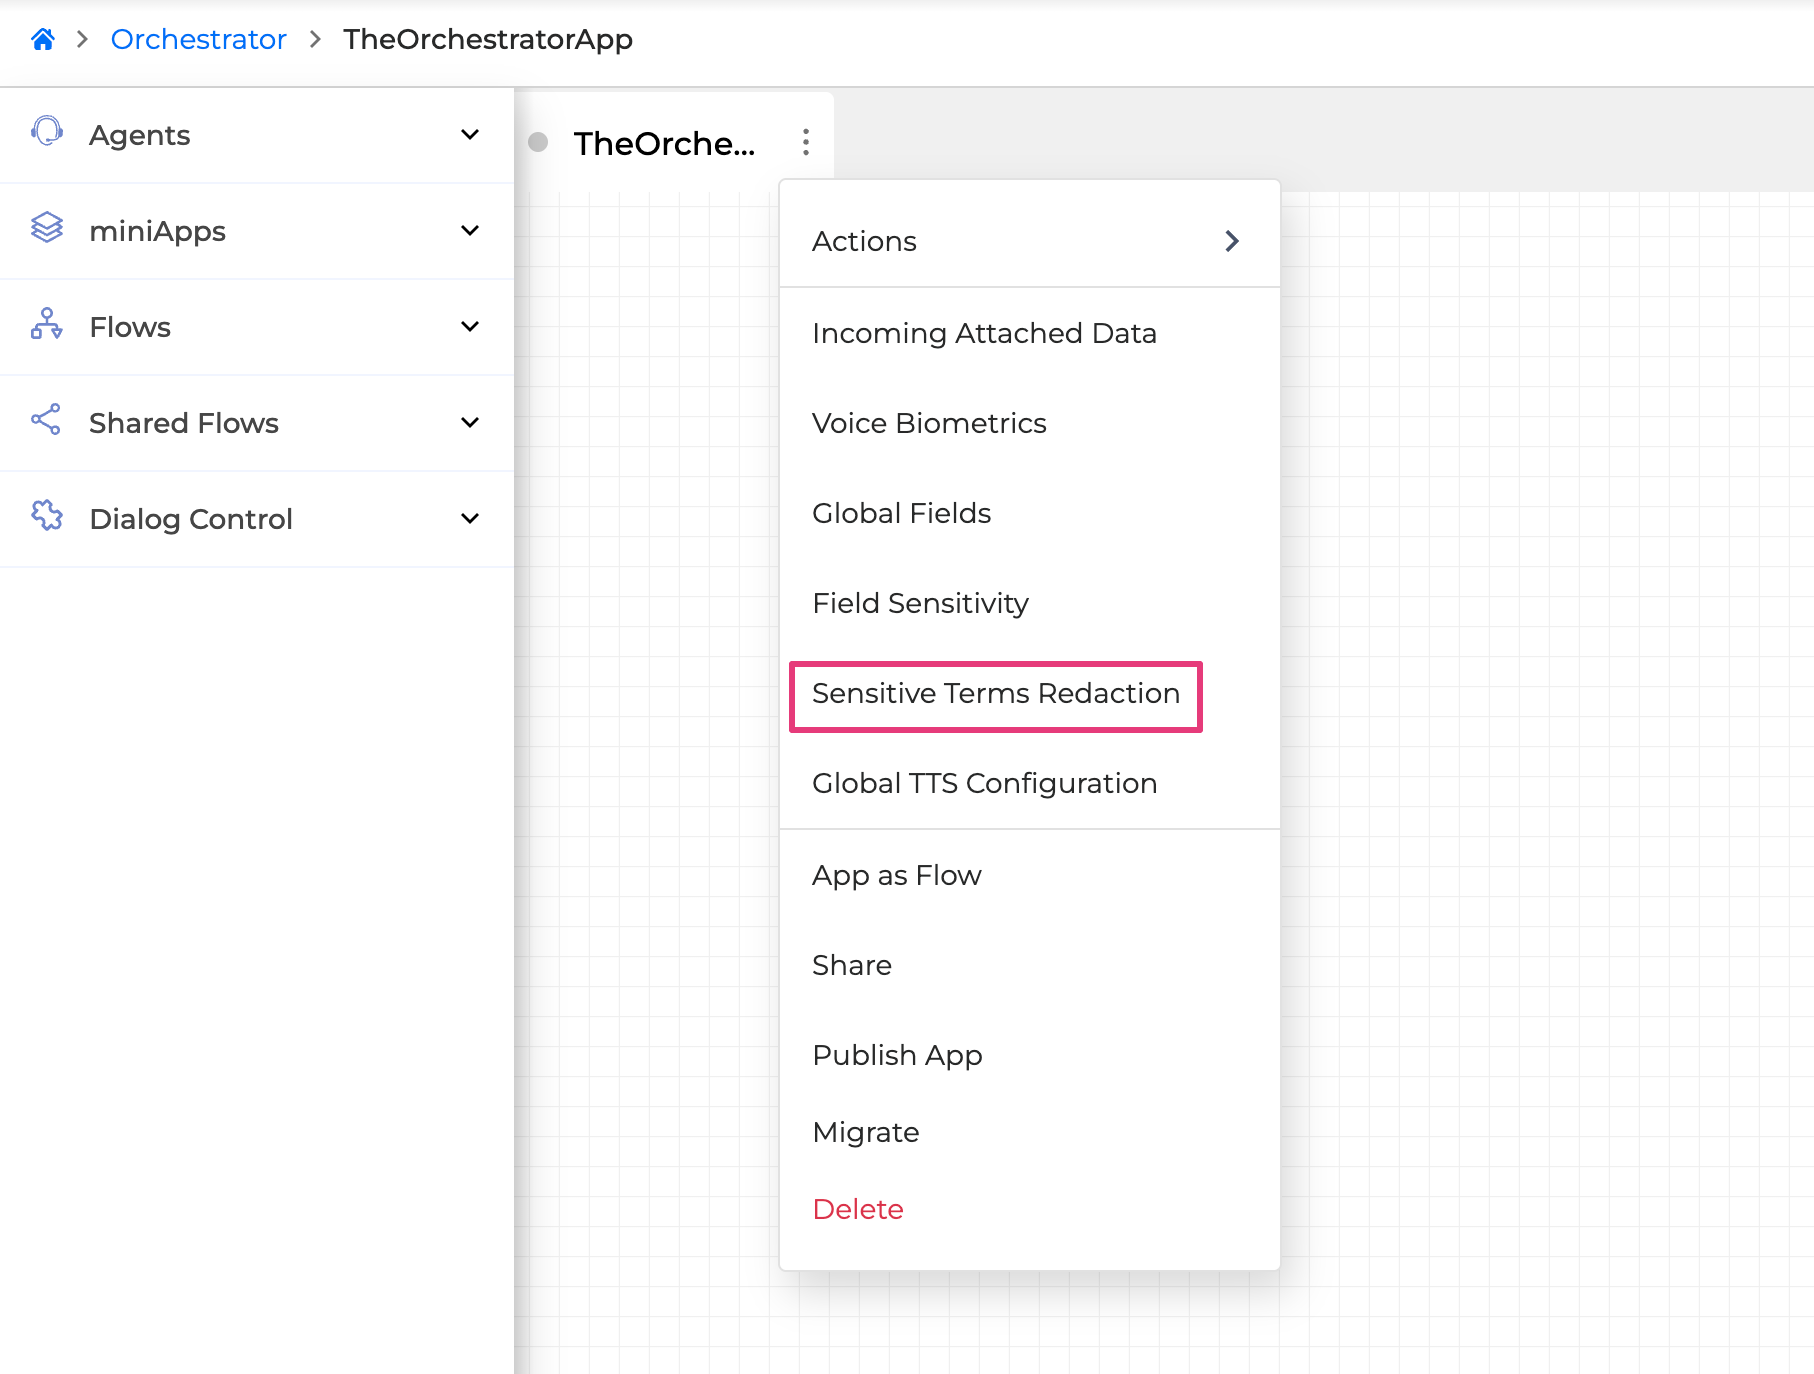
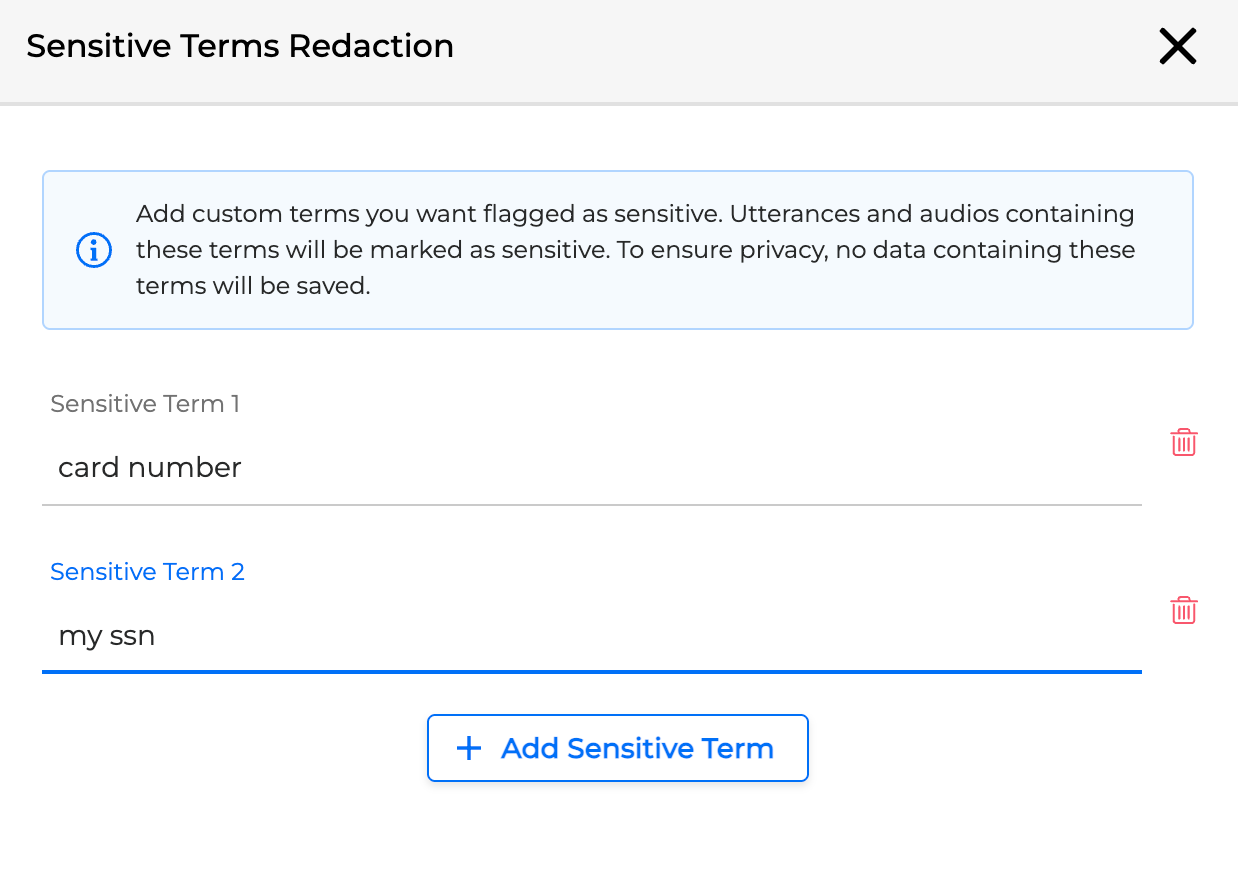
Sensitive Terms Redaction
Use the Sensitive Terms Redaction feature to specify words or phrases that must be masked in logs and transcripts during dialog execution. This helps ensure compliance with privacy policies by preventing storage of utterances and audio data that include user-defined sensitive terms.
Sensitive terms are managed per Application and behave similarly to Global Fields: once defined, they are automatically applied across all miniApps in the Application.
Terms marked as sensitive are masked (replaced with ***) in:
-
DiaManT logs
-
Call Detail Records (CDRs)
-
Transcripts (if applicable)
To configure Sensitive Terms Redaction:
-
In the Application tab, click the Options Menu button and select Sensitive Terms Redaction.
-
In the pop-up modal, enter the terms you want to flag as sensitive.
-
Add each term in a separate input field.
-
Click + Add Sensitive Term to add more terms.
-
-
Click Save to apply the changes.
To configure Sensitive Terms Redaction:
Audio files and utterances containing sensitive terms are not saved. Only the masked versions appear in system logs and exported records.
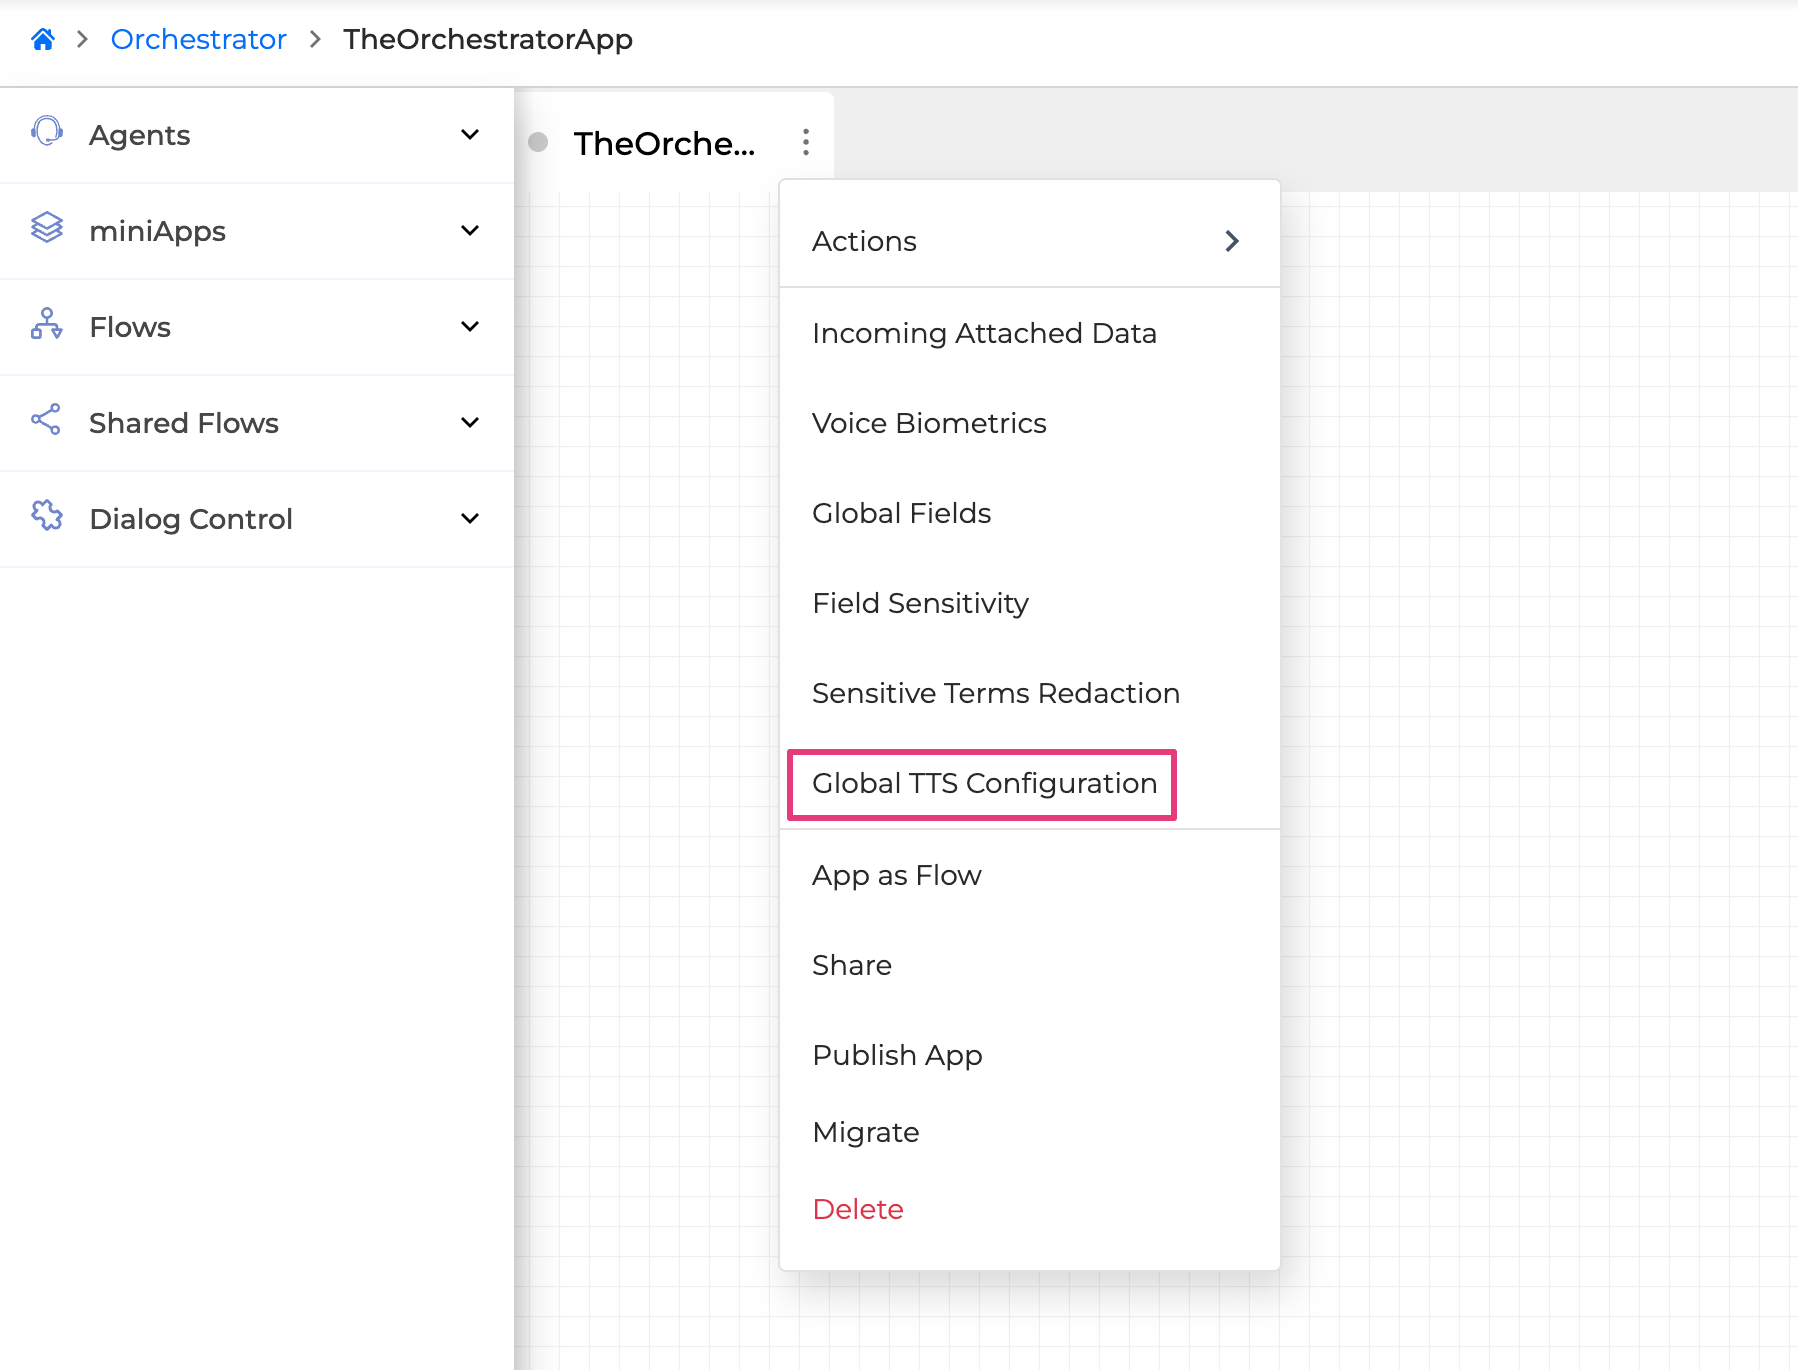
Global TTS Configuration
The Global TTS Configuration feature allows you to configure the text-to-speech (TTS) engine that your Application uses. This configuration overrides any TTS settings defined within individual miniApps used in your Application.
To configure TTS globally:
-
In the Application tab, click the Options Menu button and select Global TTS Configuration.
-
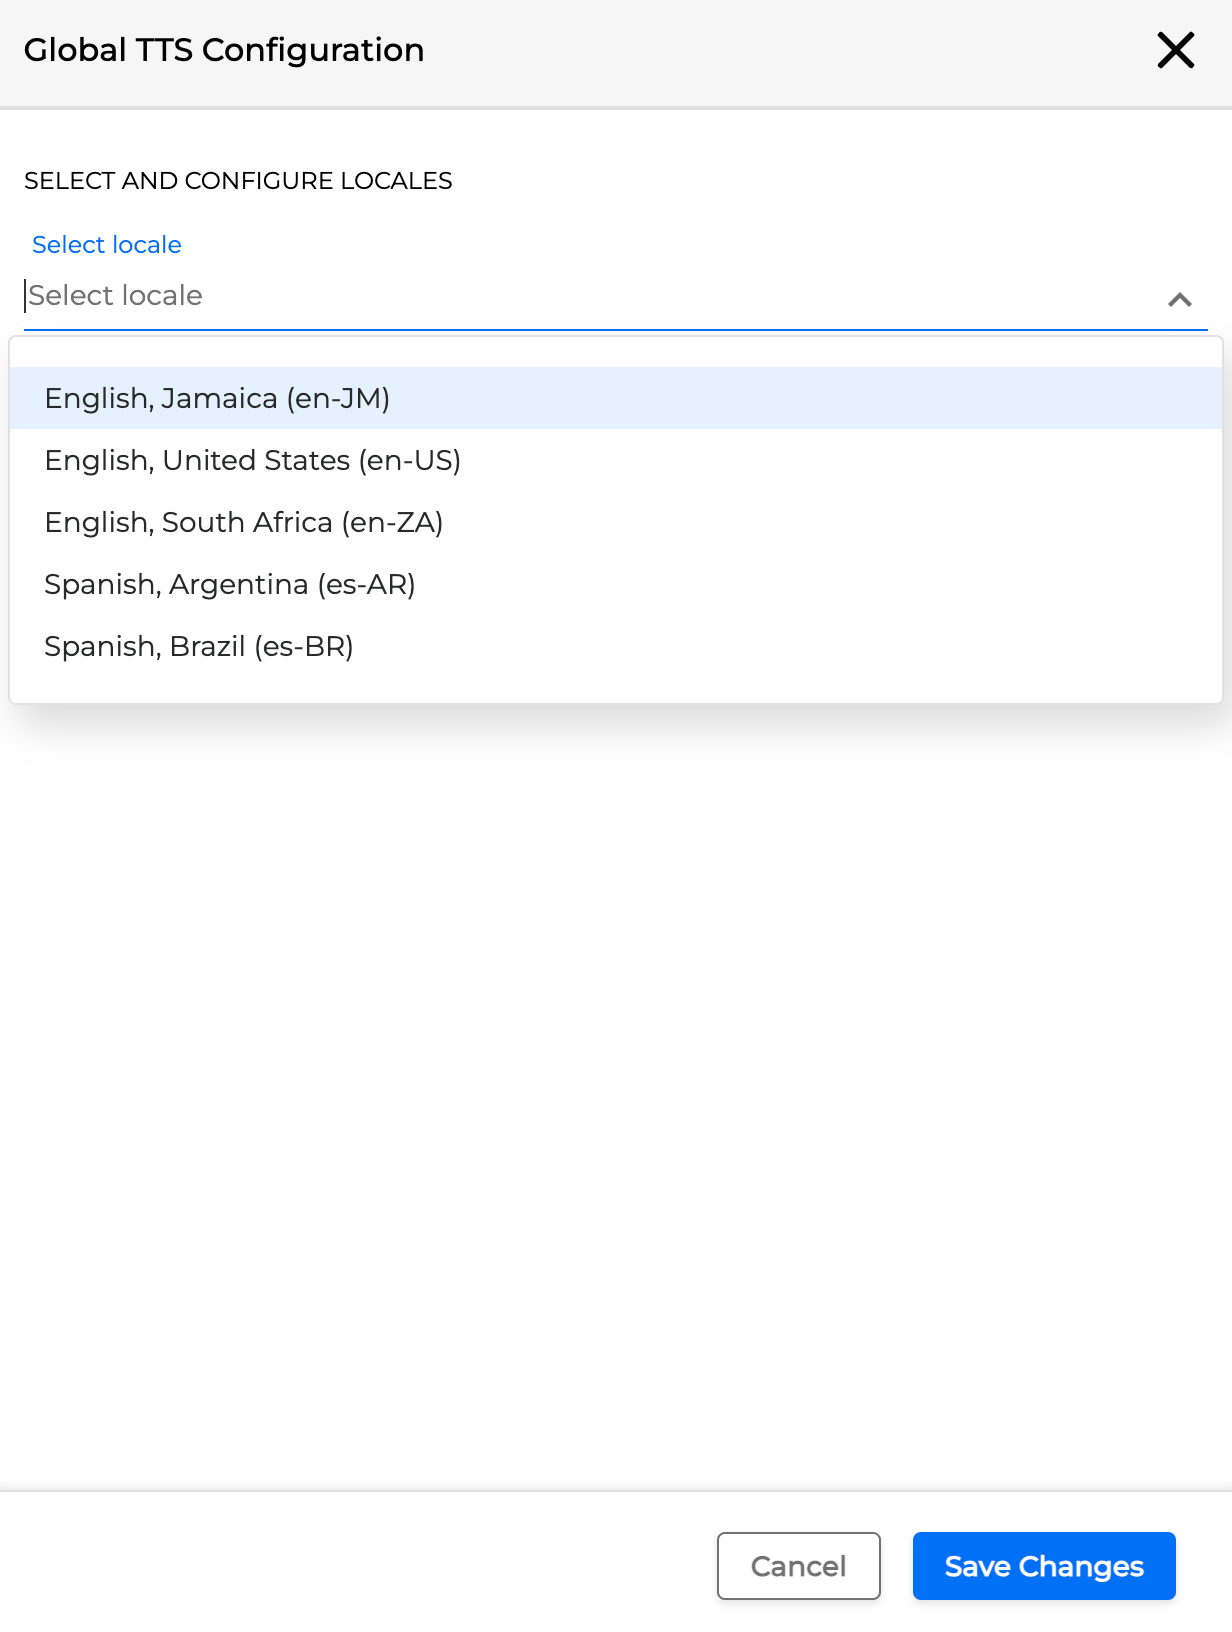
Start typing a language name to find the corresponding locale, or choose it from the drop-down list. You can select multiple locales.
-
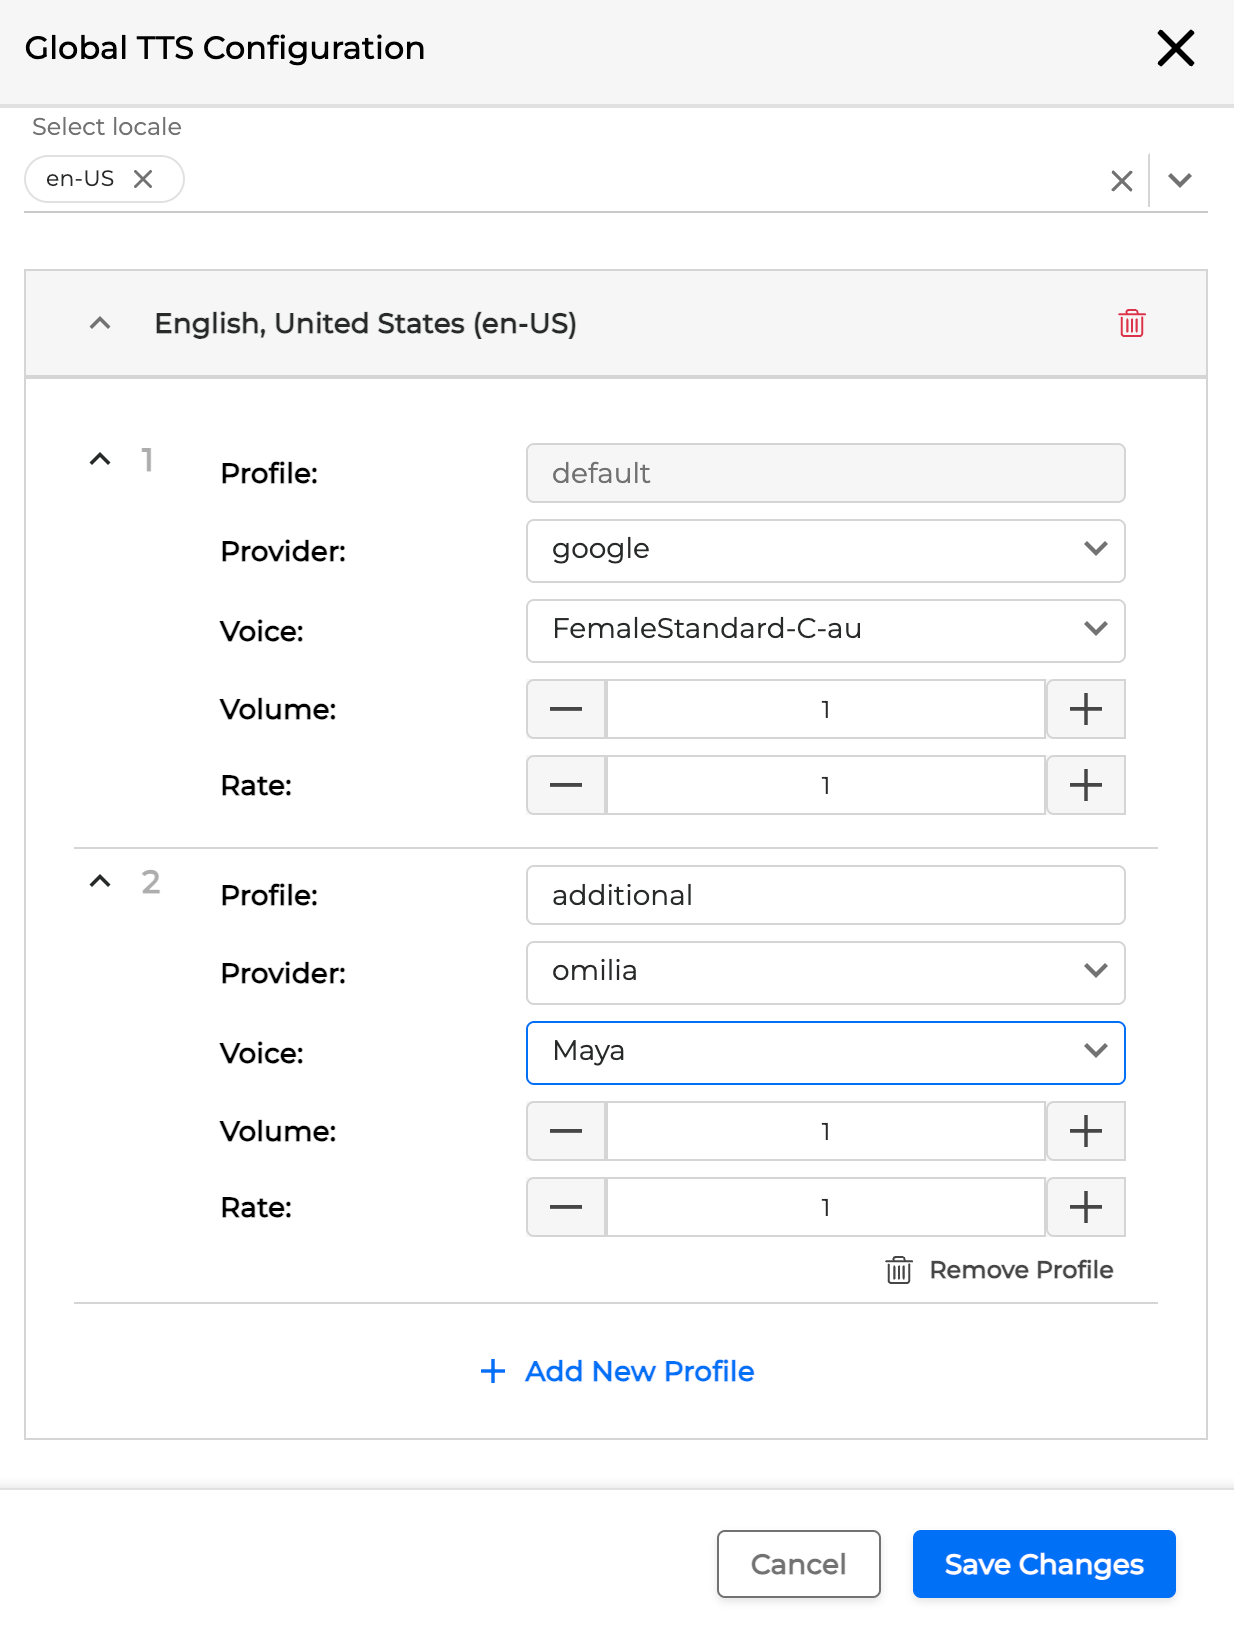
For each locale, you can add multiple profiles with different providers.
-
The first profile is set as the default.
-
To add another profile, click Add New Profile.
-
-
For each profile, configure:
-
Profile name
-
Provider
-
Voice
-
Volume
-
Speech rate
Then click Save Changes to store your TTS configuration.
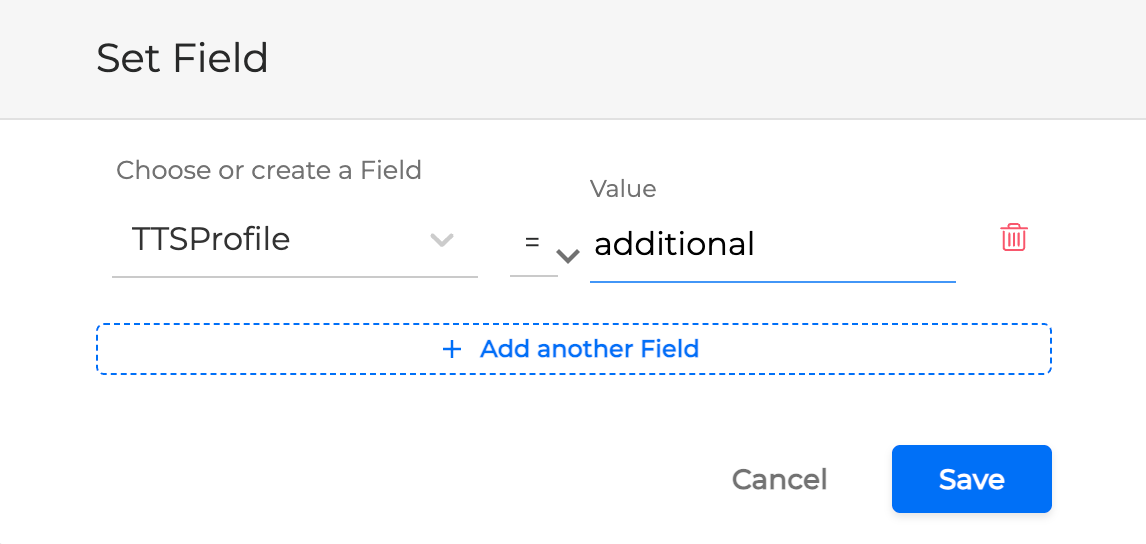
-
To switch from the default TTS profile to another one within your Application, use a Set Field building block:
-
Field name:
_TTSProfile_ -
Field value: the name of the TTS profile you want to use
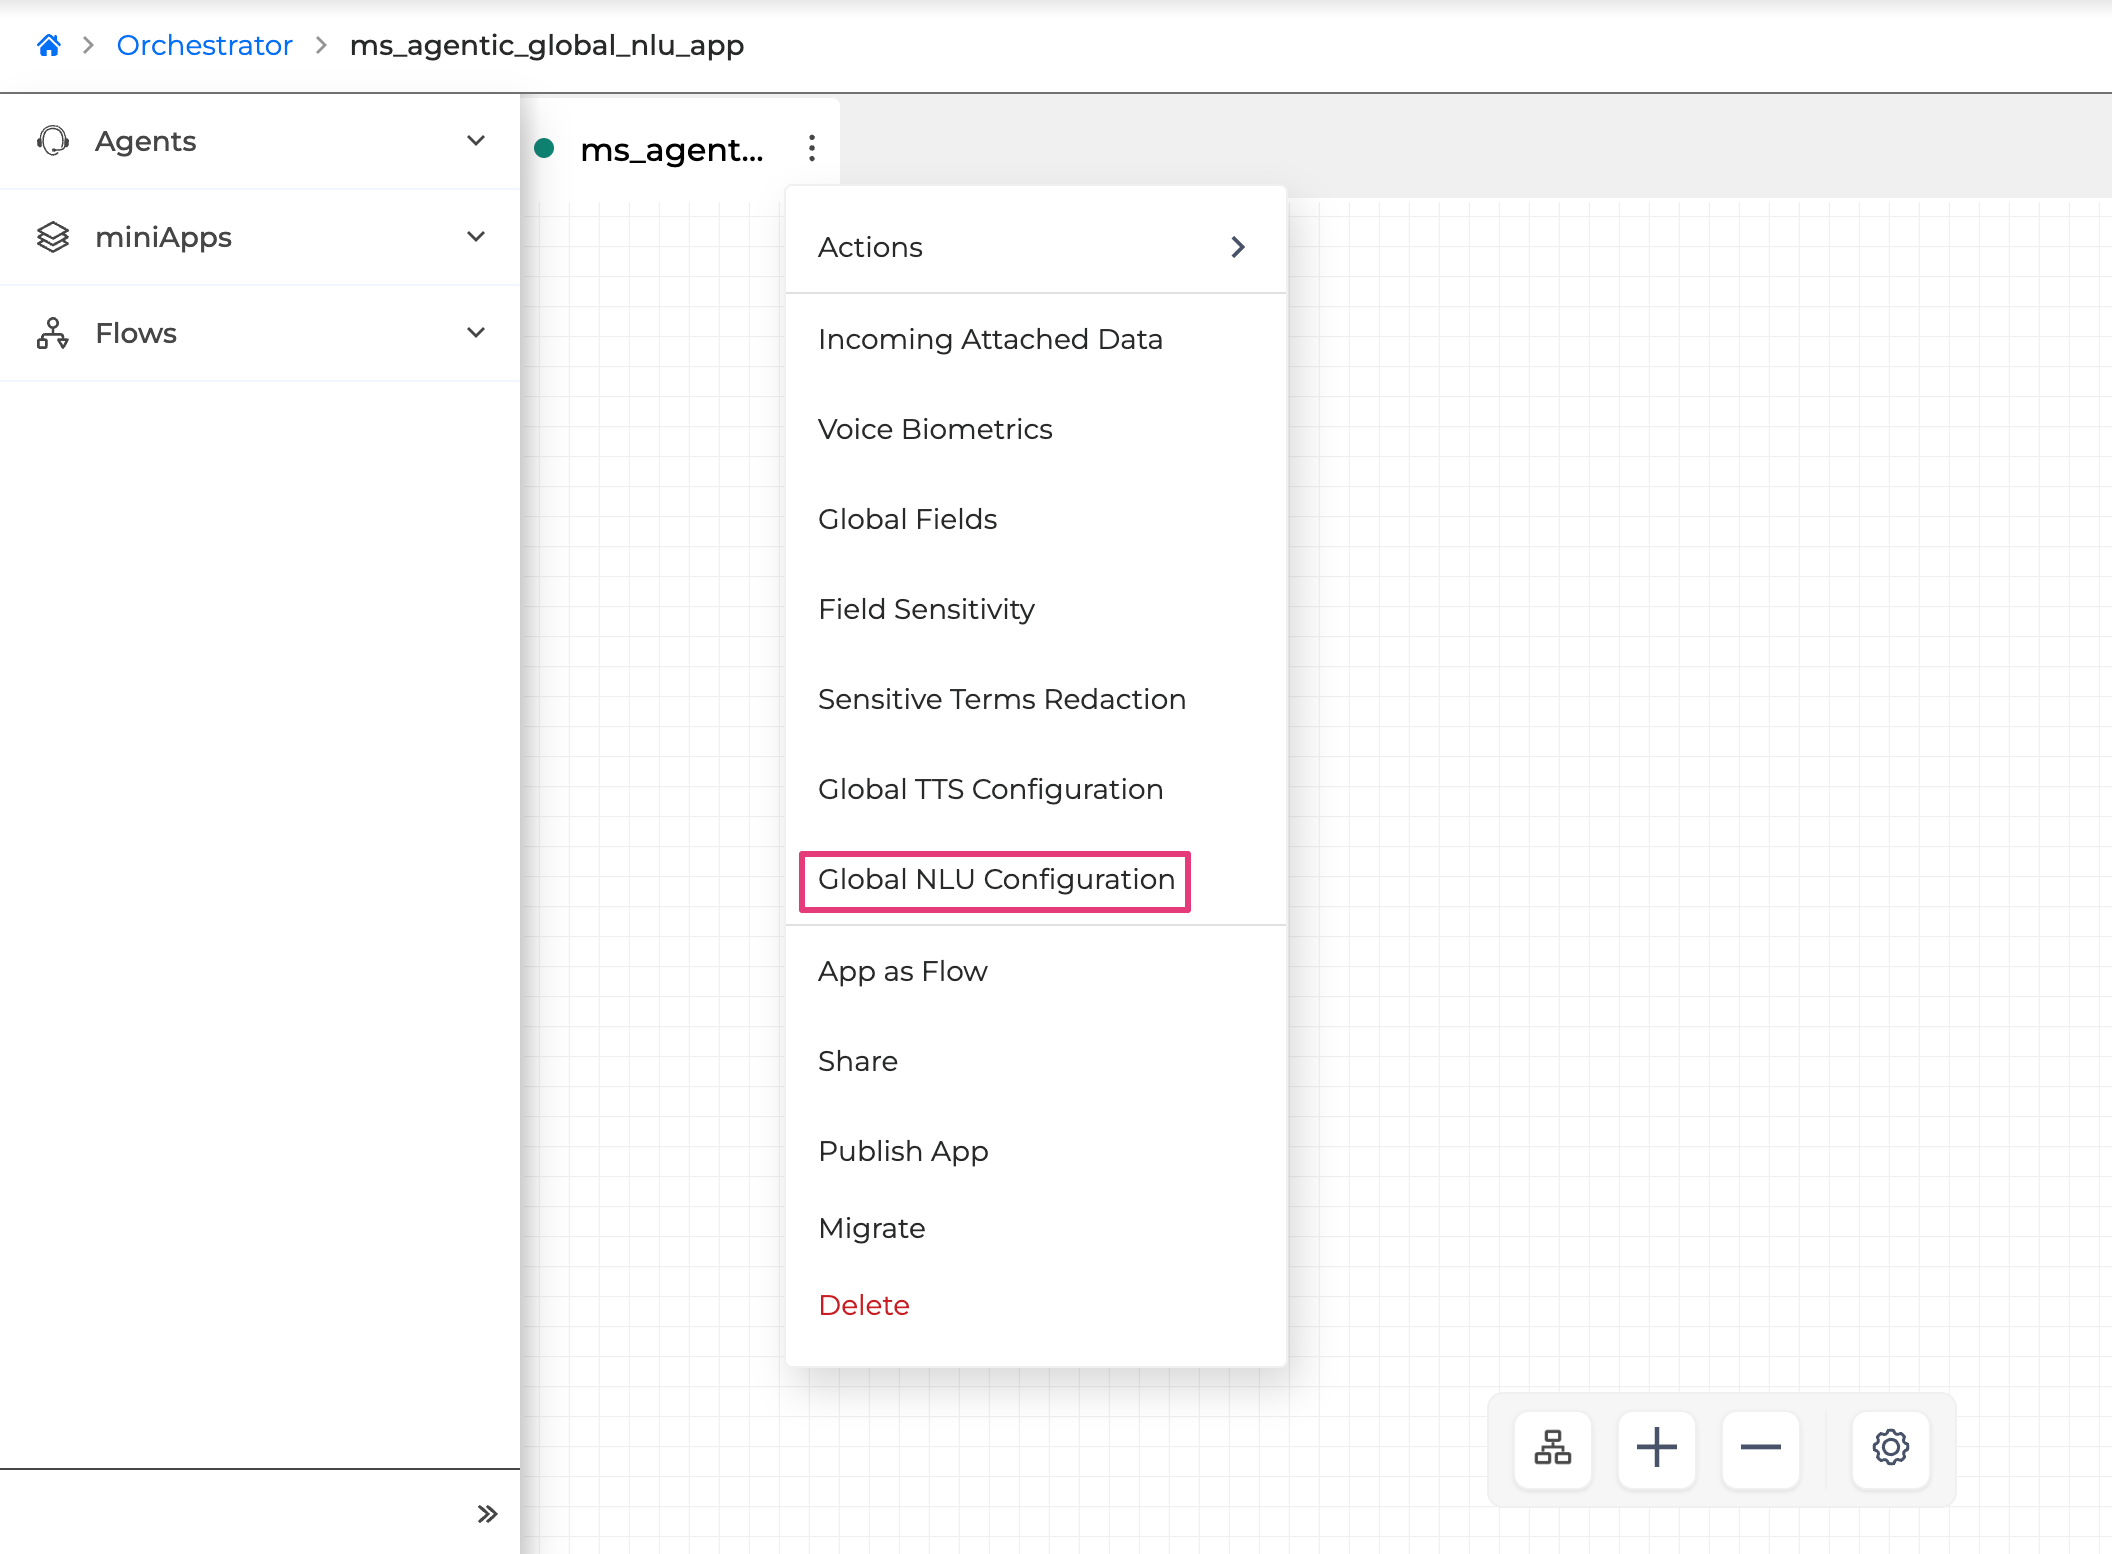
Global NLU Configuration
This feature is not yet available in all environments.
The Global NLU Configuration feature allows to configure NLU models for the entire Orchestrator application, instead of configuring the NLU model separately for each miniApp or Flow.
For the new applications, users will select the domain of the application upon creation. Based on the domain of the application and the selected language, users can choose from the NLU models available for the corresponding group.
To configure NLU globally:
-
In the Application tab, click the Options Menu button and select Global NLU Configuration.
-
Start typing a language name to find the corresponding locale, or choose it from the drop-down list. You can select multiple locales.
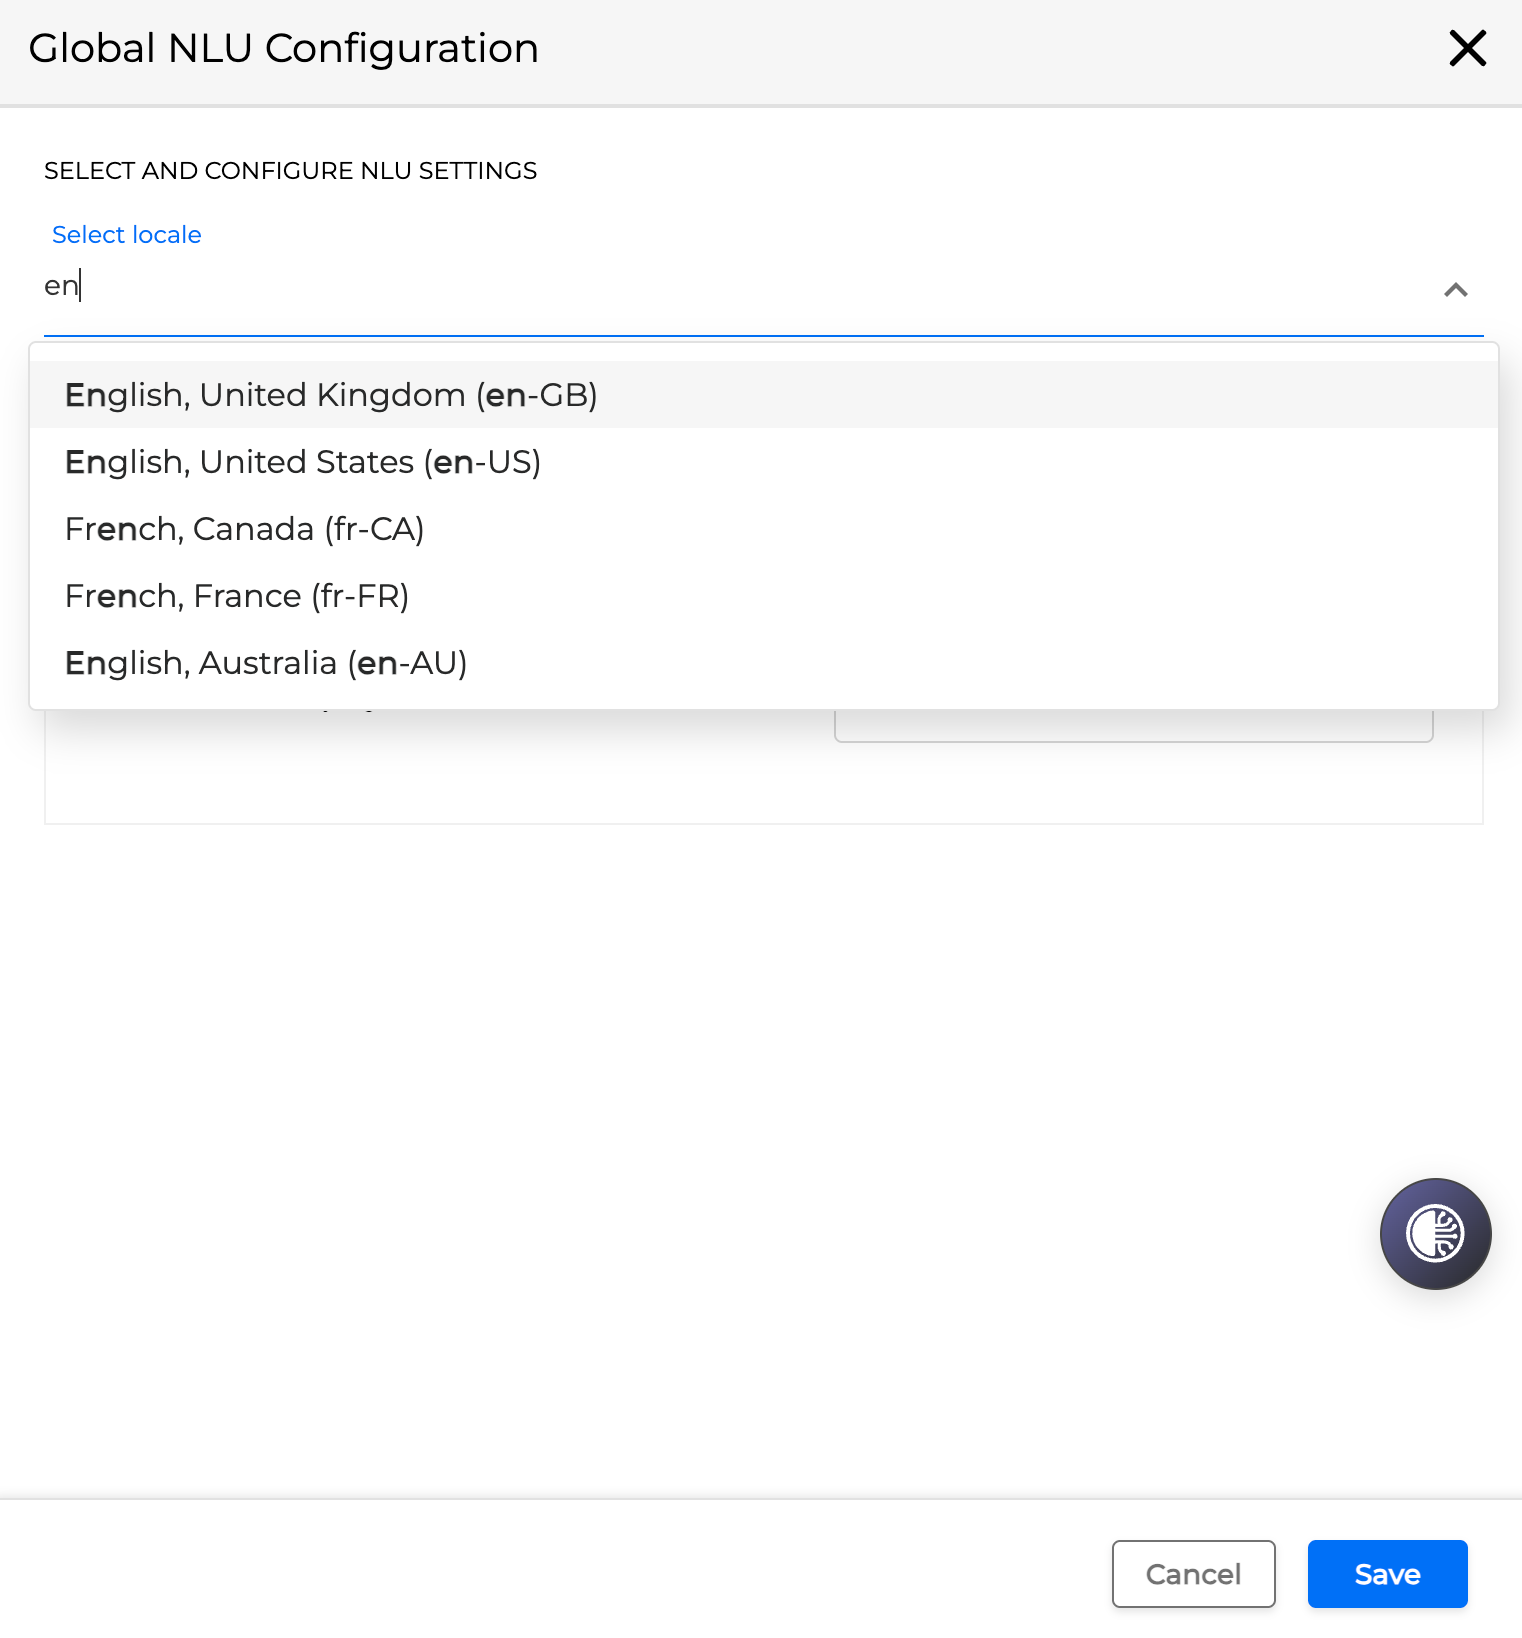
-
For each locale selected, the menu will show the domain that was chosen during the creation of the Orchestrator application and the dropdown list with NLU models available for the group to which the application belongs. Start typing the name of the model or select one from the list.
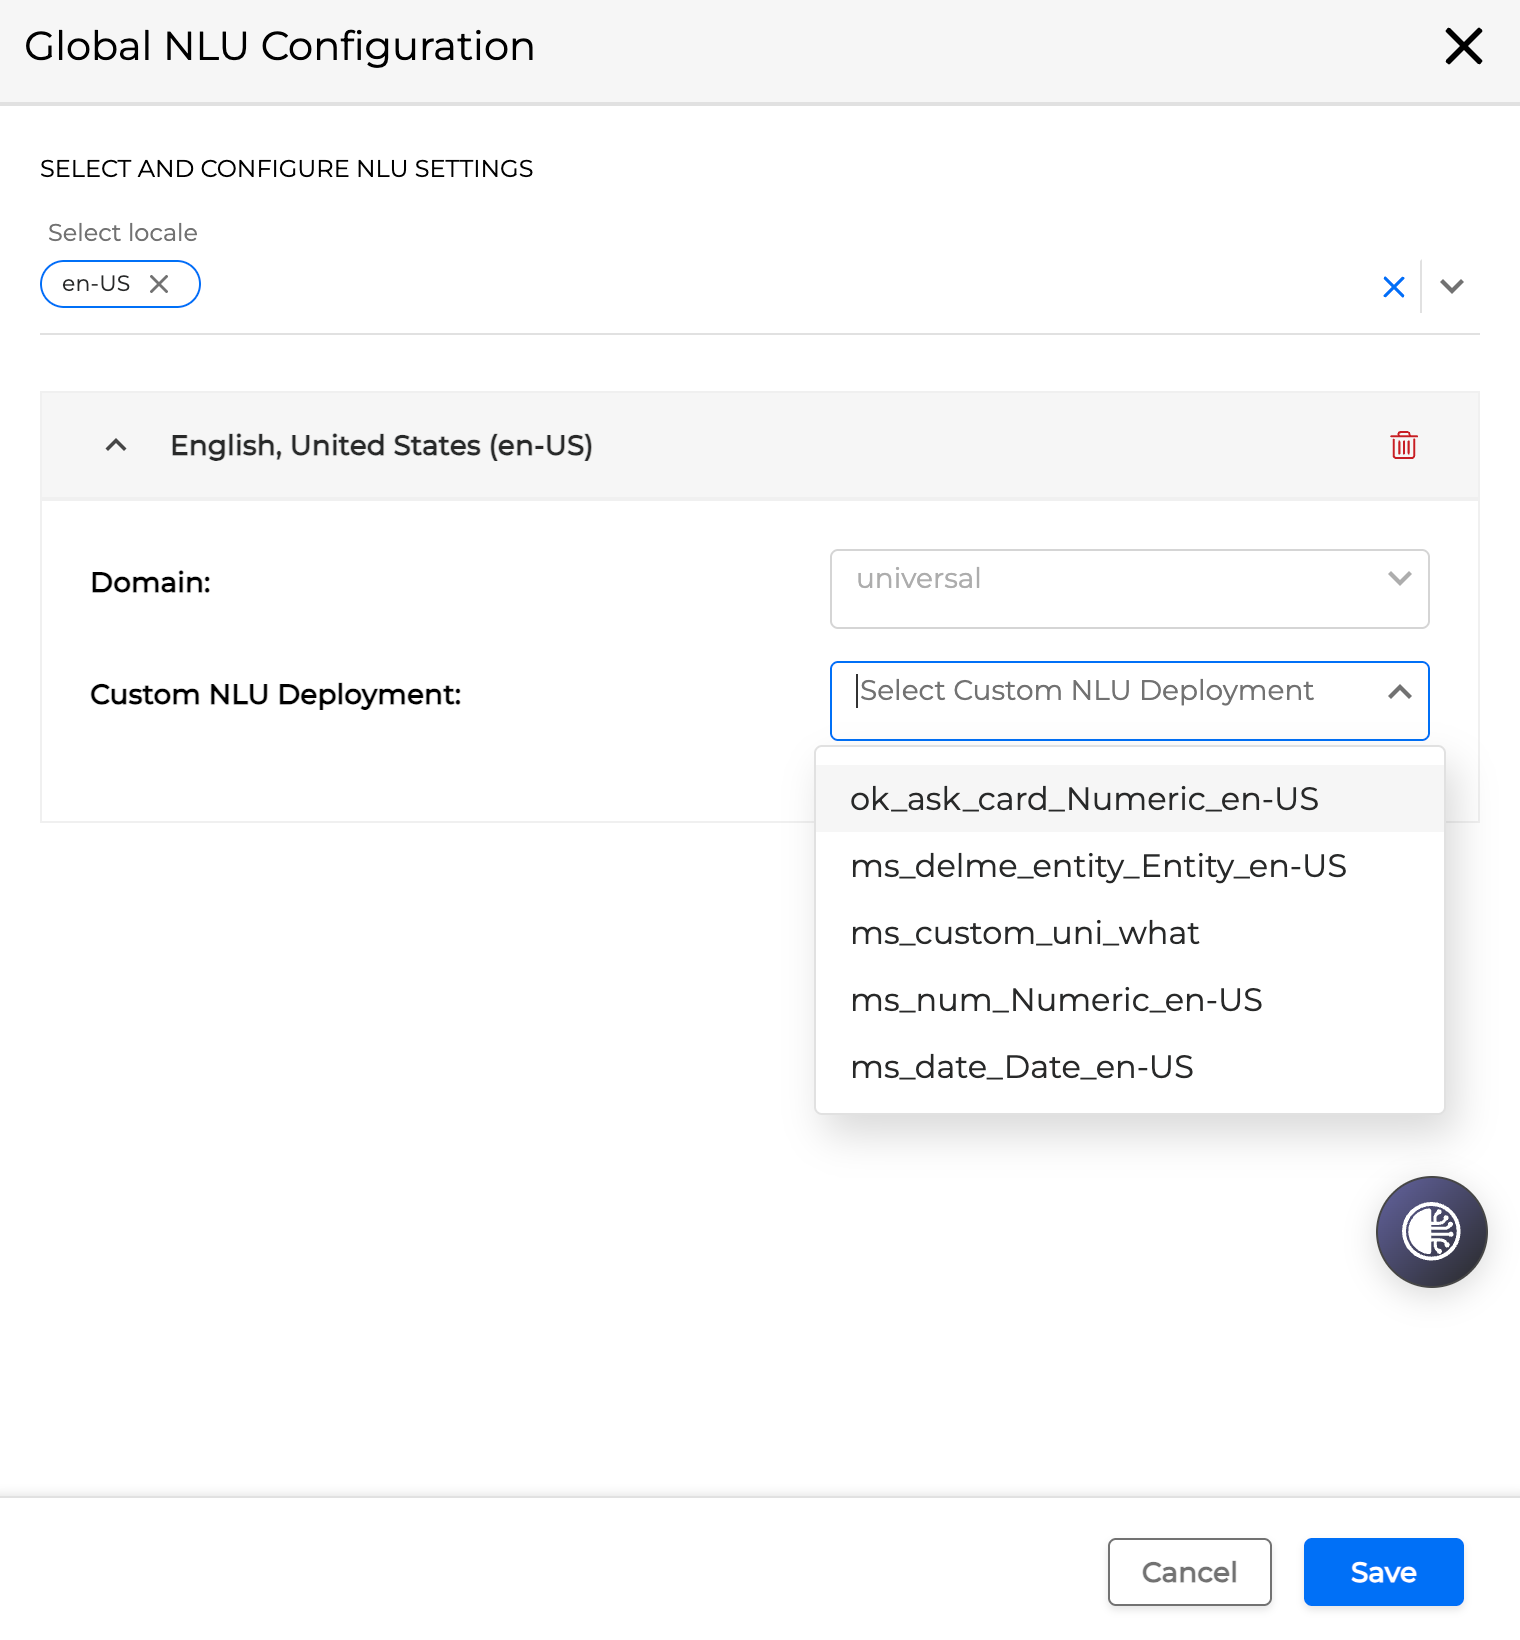
-
After you select the NLU model, click Save.
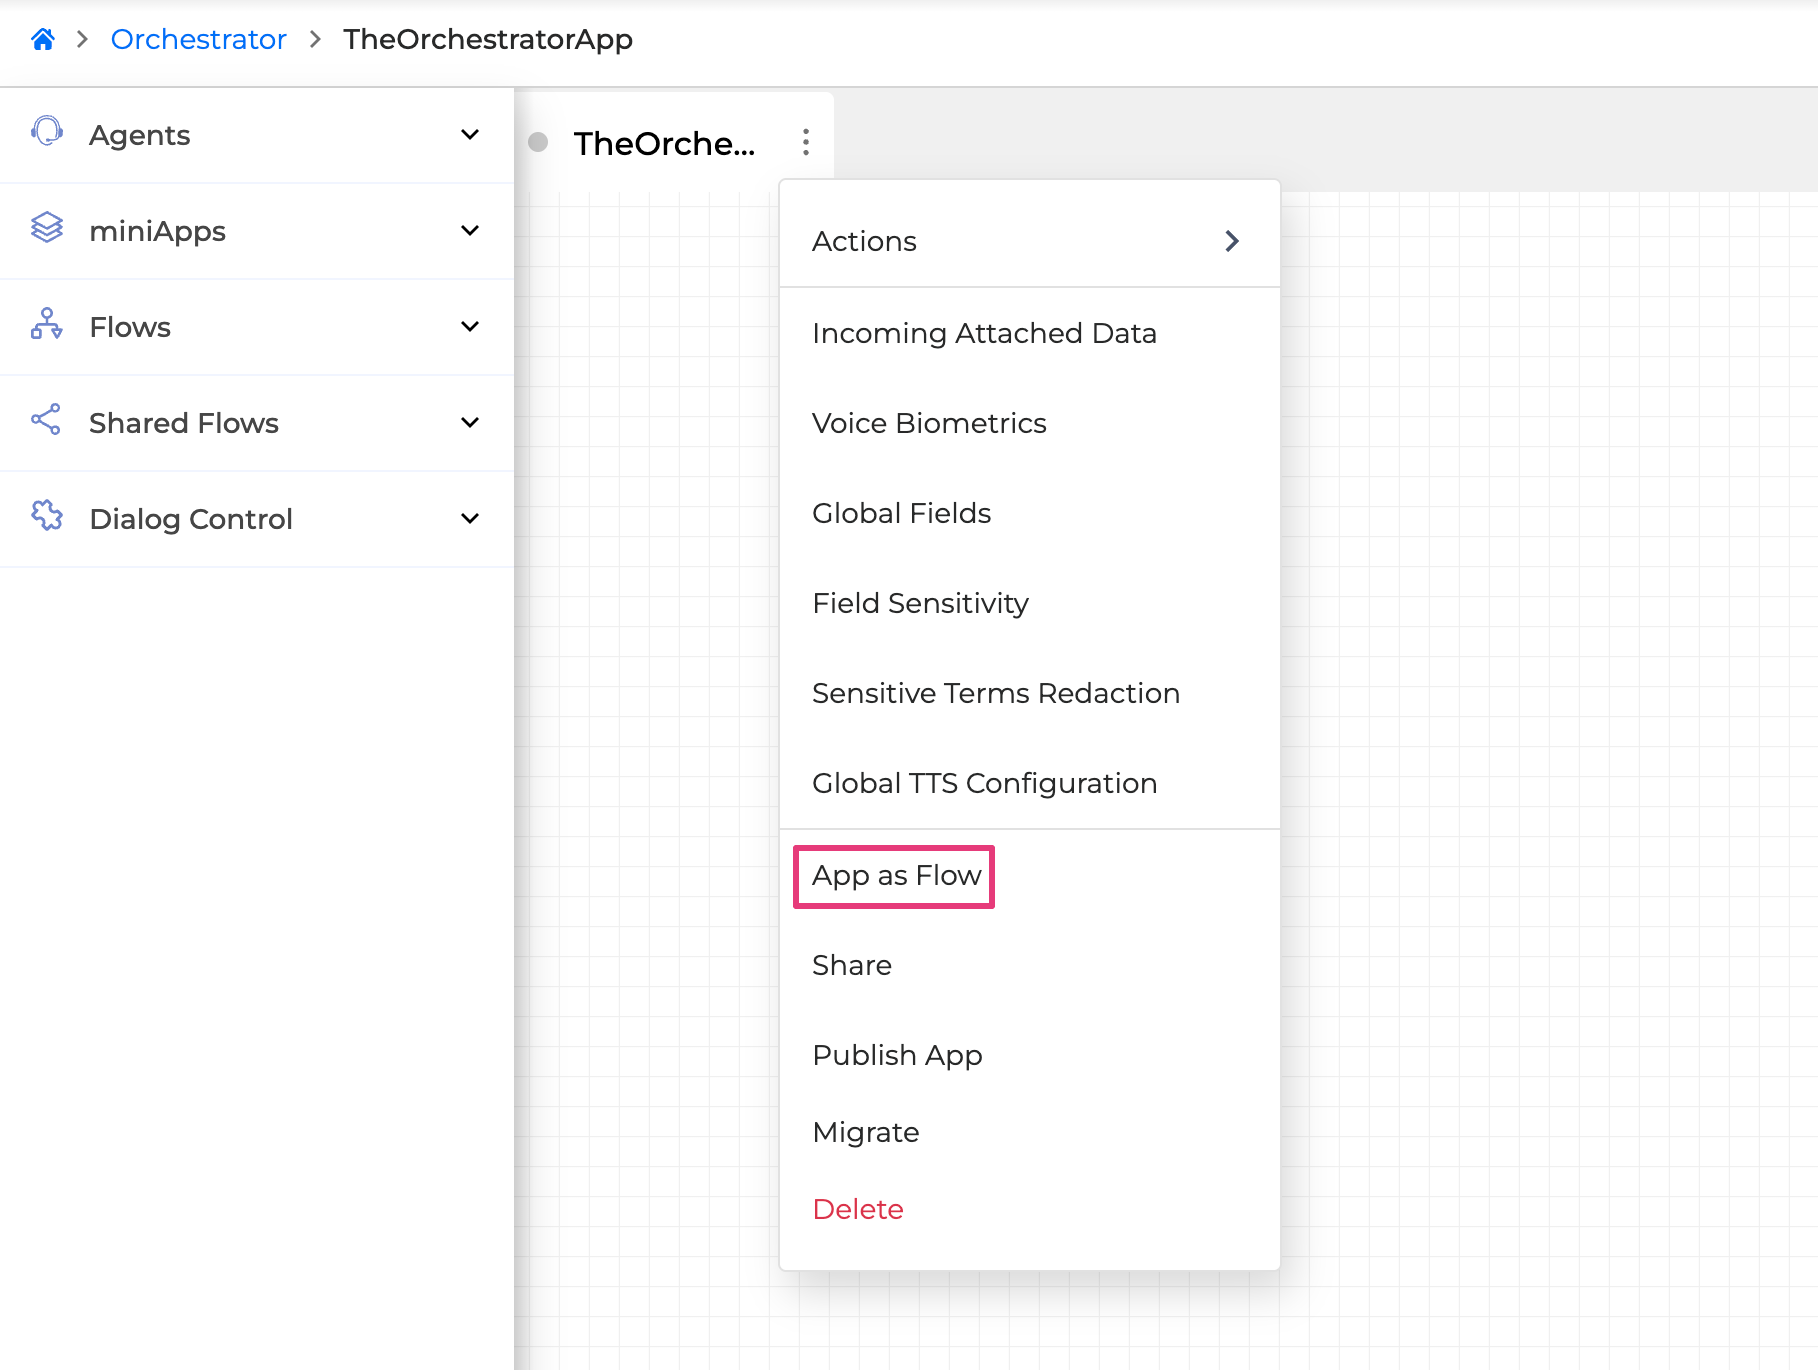
App as Flow
This feature is not yet available in all environments.
The App as Flow feature allows you to reuse Applications created by others, in the same way you reuse Flows. The Application can have configured Inputs and Outputs to receive or send values before or after the shared Application is executed as a sub-dialog.
Inputs and Outputs can be configured even before the Application is shared. For more details, see Configure Settings of miniApps and Flows.
The Application becomes visible as a Shared App after you set the groups in the Share dialog, even if no Inputs or Outputs are configured.
To use the App as Flow option:
-
In the Application tab, click the Options Menu button and select App as Flow.
-
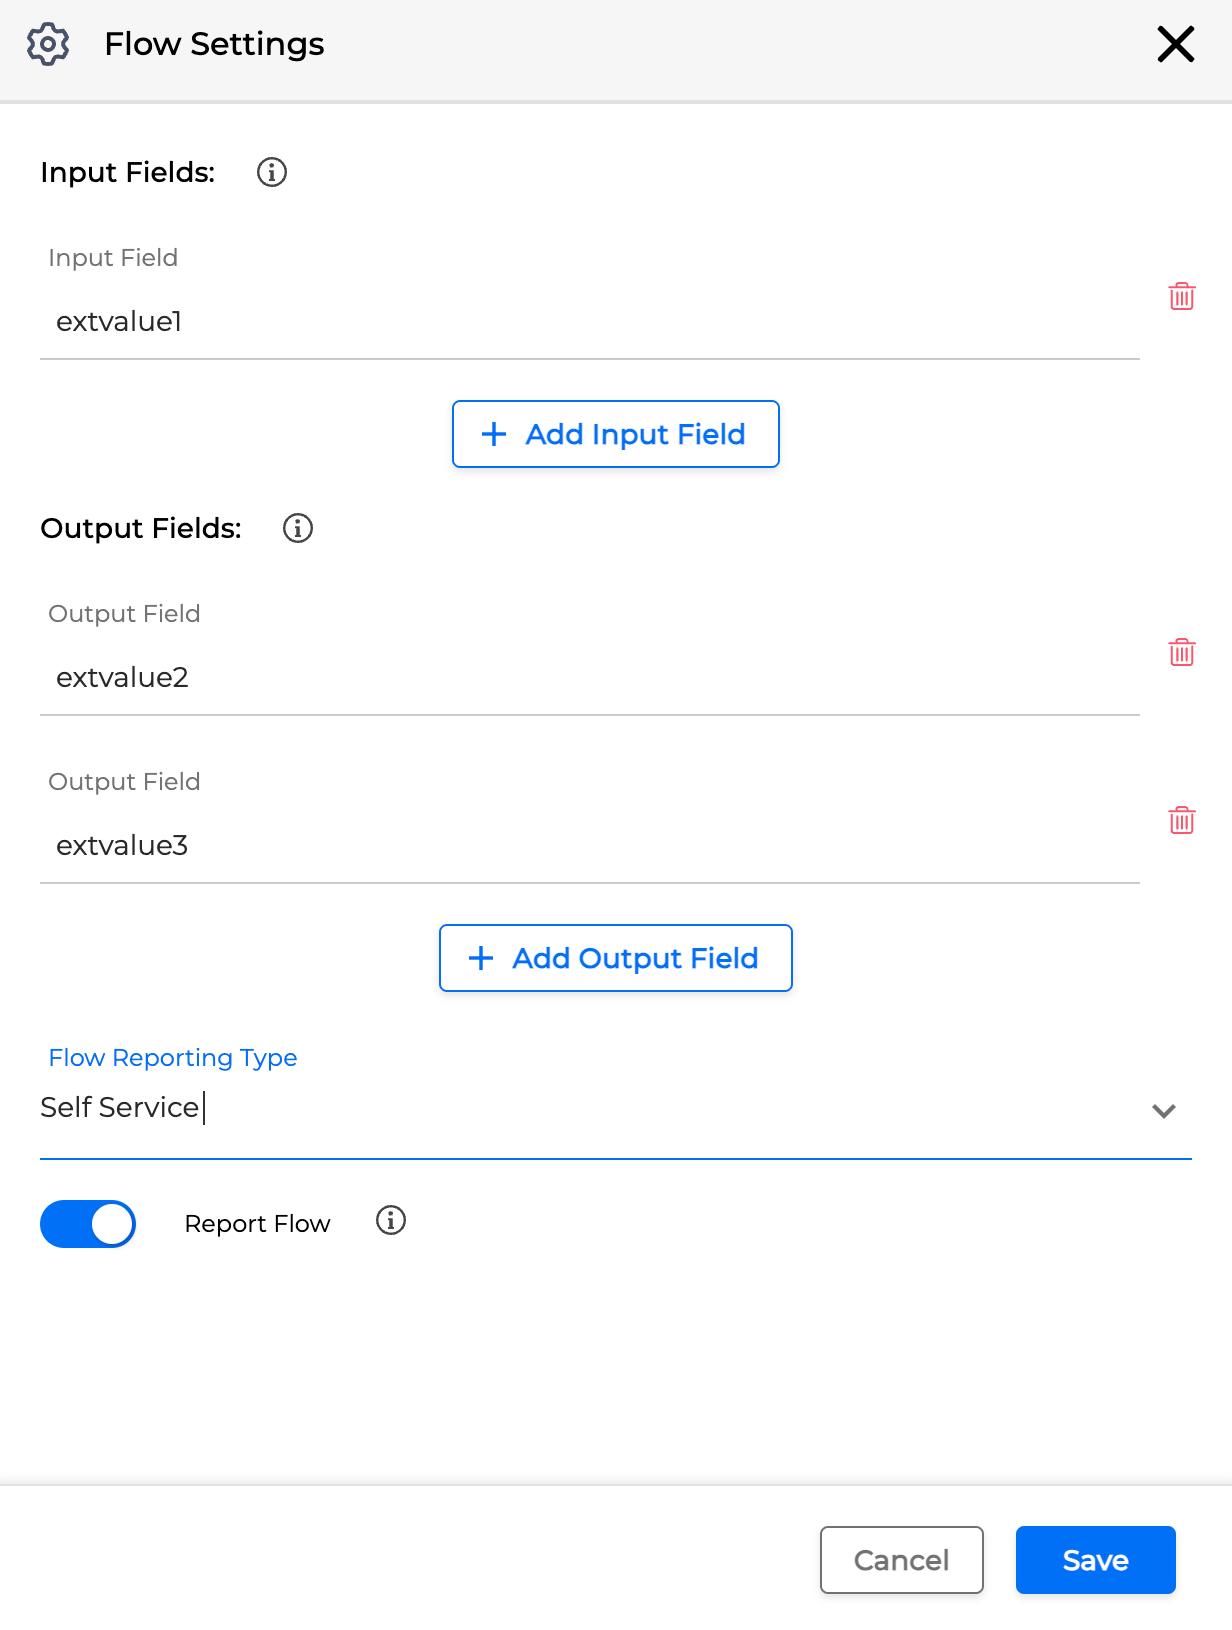
Configure the Input Fields and Output Fields as described in the Configure Settings of miniApps and Flows section.
-
You can assign multiple values.
-
Optionally, toggle Report Flow and select the reporting type for this Application/Flow. For more details, see Manage Flows.
-
Click Save when finished.
-
-
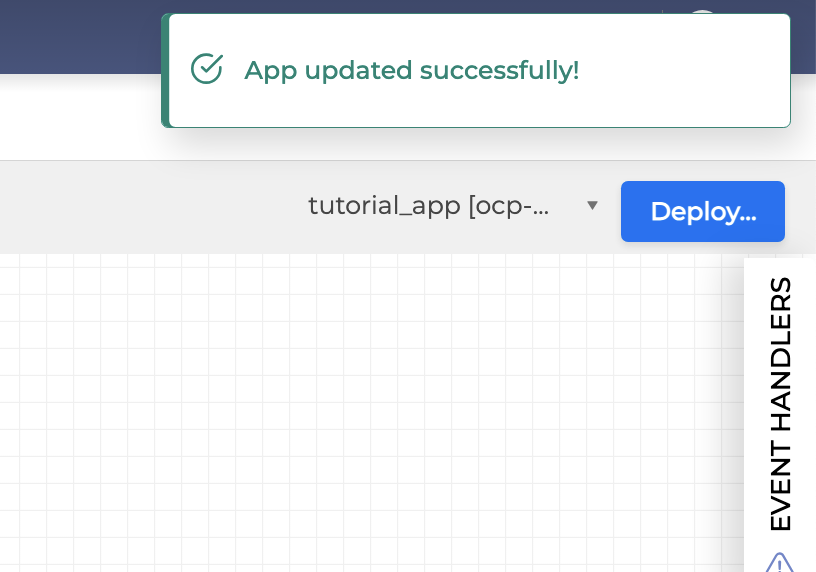
A success message appears when the configuration is completed.
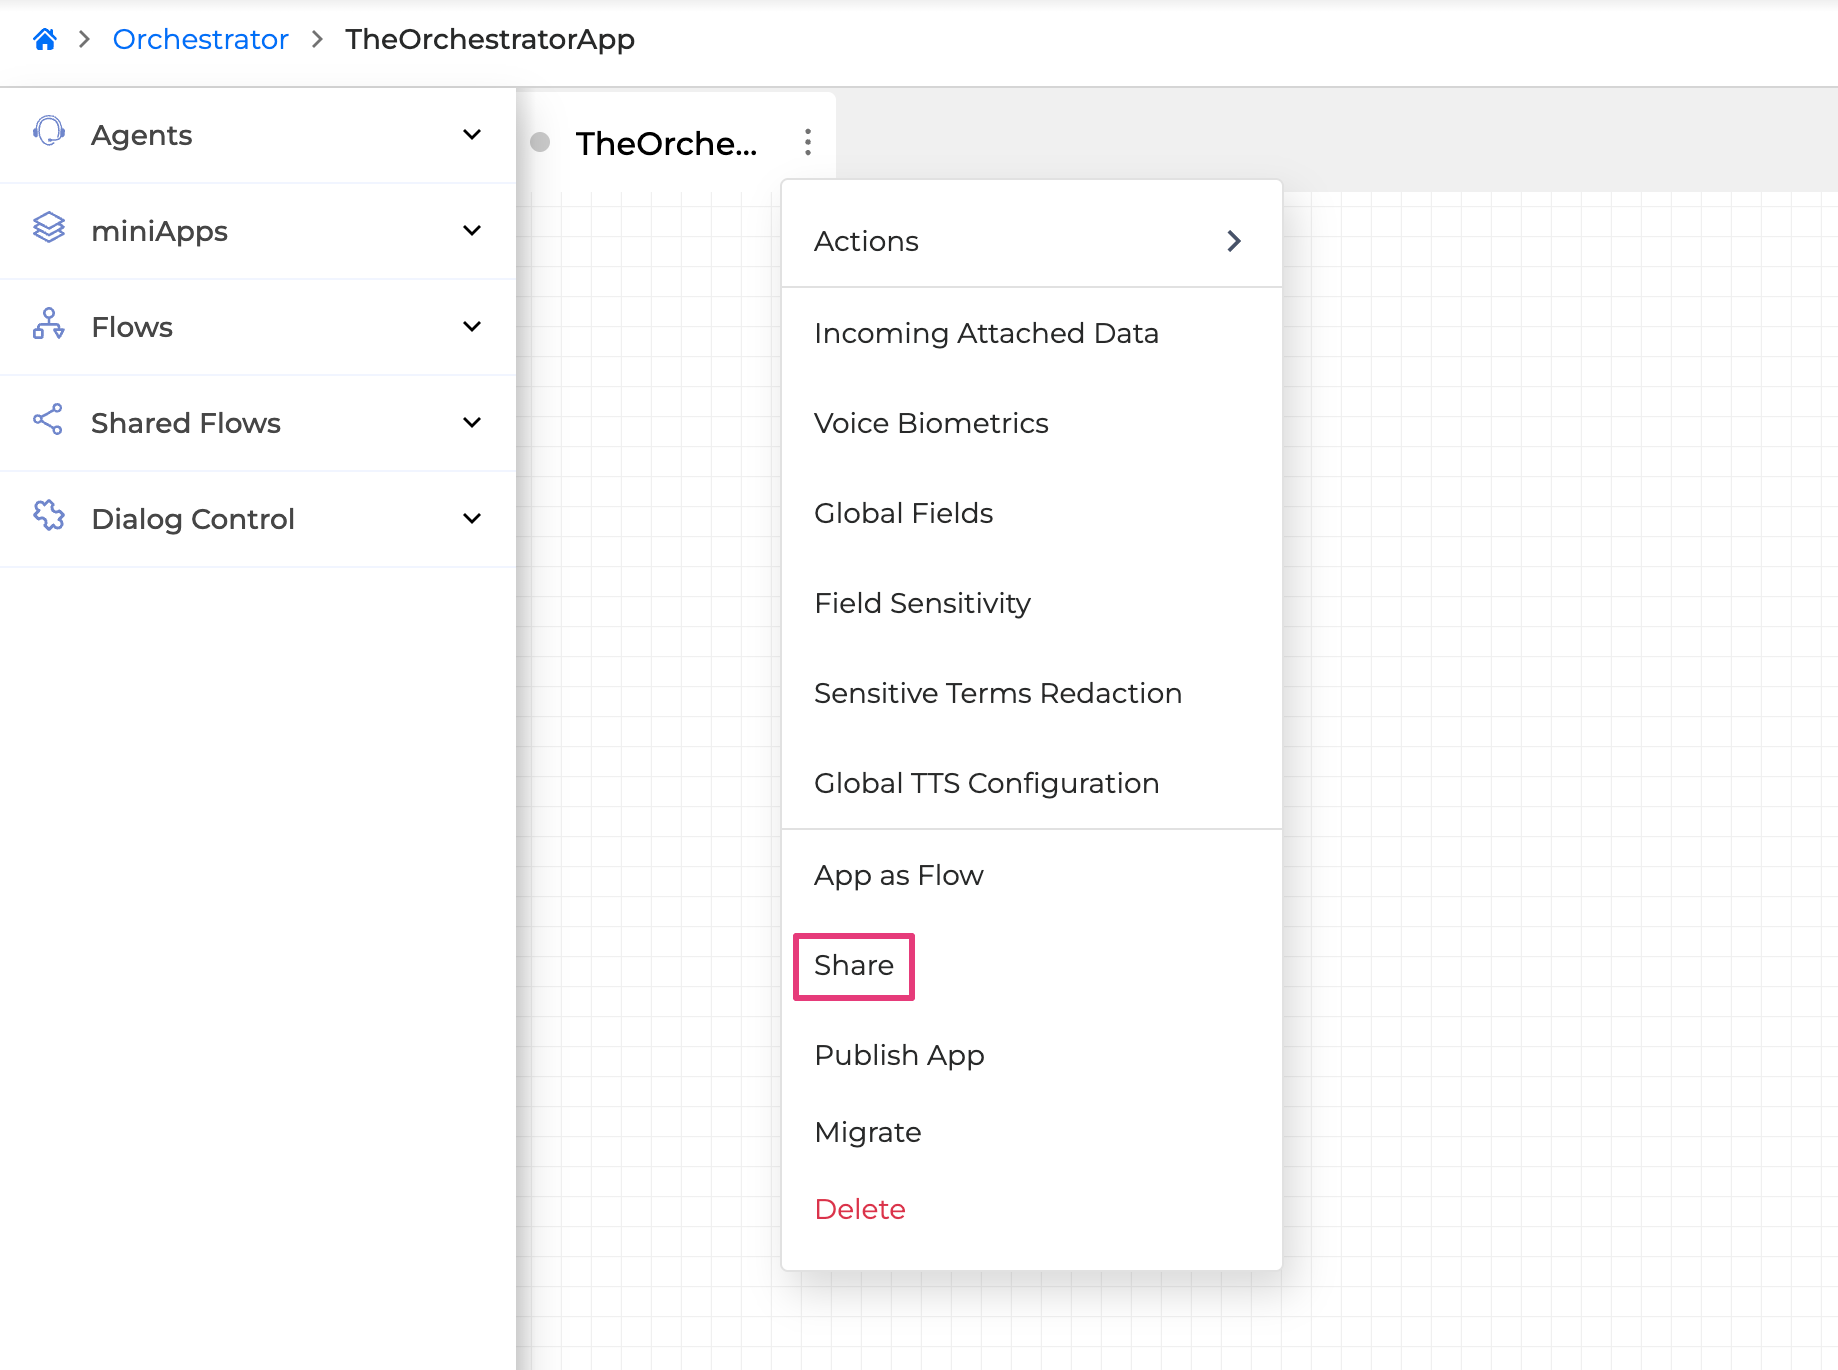
Share Application
This feature is not yet available in all environments.
The Share option allows you to share the Application with other groups so that users outside your group can still use it. You can select multiple groups.
Once shared, the Application becomes available in Shared Flows and can be used as a sub-flow within other Applications.
When working with Shared Flows, note the following:
-
Certain elements and settings from the original Application are not transferred automatically.
-
When a Shared Flow is integrated into a different Application, it adopts the Global Settings of the host Application rather than those of the original Application.
-
This ensures each Application retains its own configuration, which may be required due to differing requirements or operational contexts.
The following settings are not transferred when sharing an Application:
-
Global settings:
-
Errors
-
Error Handlers
-
Dialog End Handlers
-
Incoming Attached Data
-
Voice Biometrics Configuration
-
Global Fields
-
When integrating a Shared Application that includes Transfer Actions into a new Application, you must replicate these Transfer Actions within the new Application.
Recreating Transfer Actions with the same names is crucial for:
-
Correct functionality of the Shared Application in the new environment
-
Preserving workflow integrity
-
Ensuring the intended application behavior.
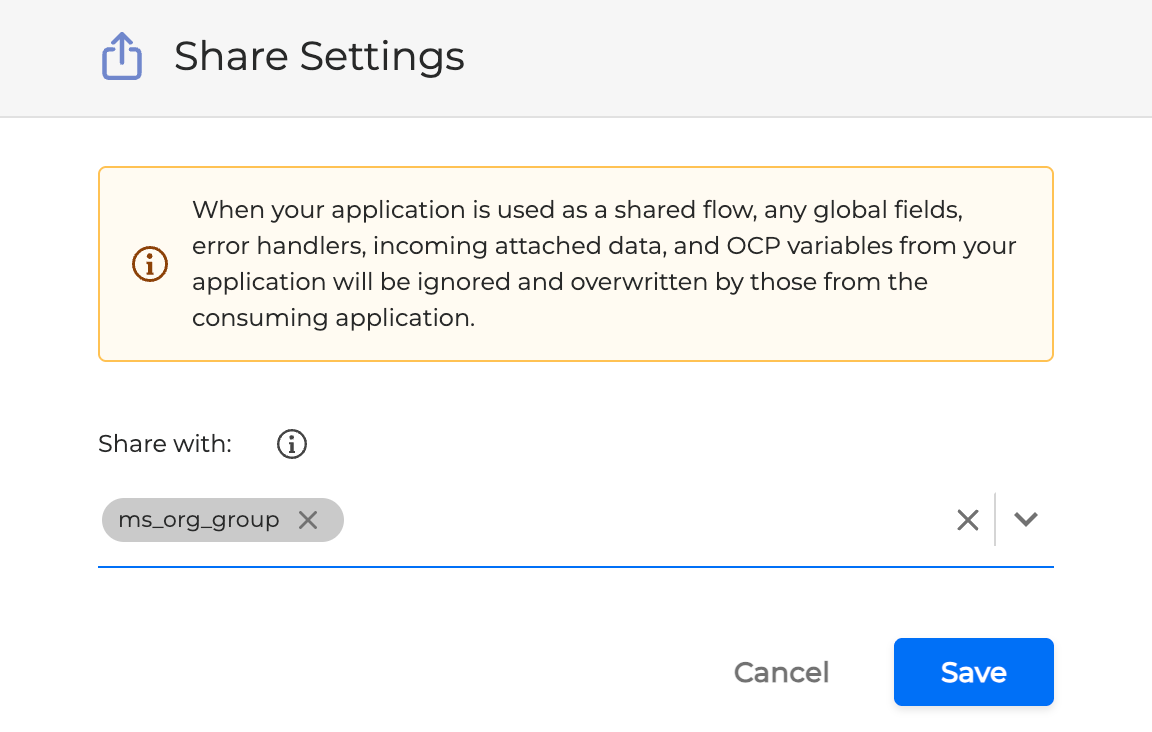
To share the Application:
-
Click the Options menu button on the Application name tab and select Share.
-
In the dialog, select one or more groups to share the Application with from the drop-down list.
-
Click Save.
After sharing:
-
The Application appears in the Shared Flows section.
-
You can drag and drop Shared Flows onto the canvas and manage them like regular Flows. For more details, see Manage Flows.
Publish Application
This feature is not yet available in all environments.
Publishing allows you to capture and preserve the current state of the Application by creating application instances called Application tags. When you create a new Application instance:
-
The system also creates new instances of the miniApps and Flows used in the Application.
-
Each of these is marked with a configuration tag that matches the Application tag.
-
All Applications and Flows are compiled so that sub-dialogs can use a specific instance of a miniApp as needed.
Different application instances can be used to:
-
Run tests on the Application
-
Deploy the Application for live traffic
-
Roll back to a previous instance by selecting an older tag
All application instances and their tags are stored in a database.
After creating an Application and clicking Deploy, that Application is considered a draft version.
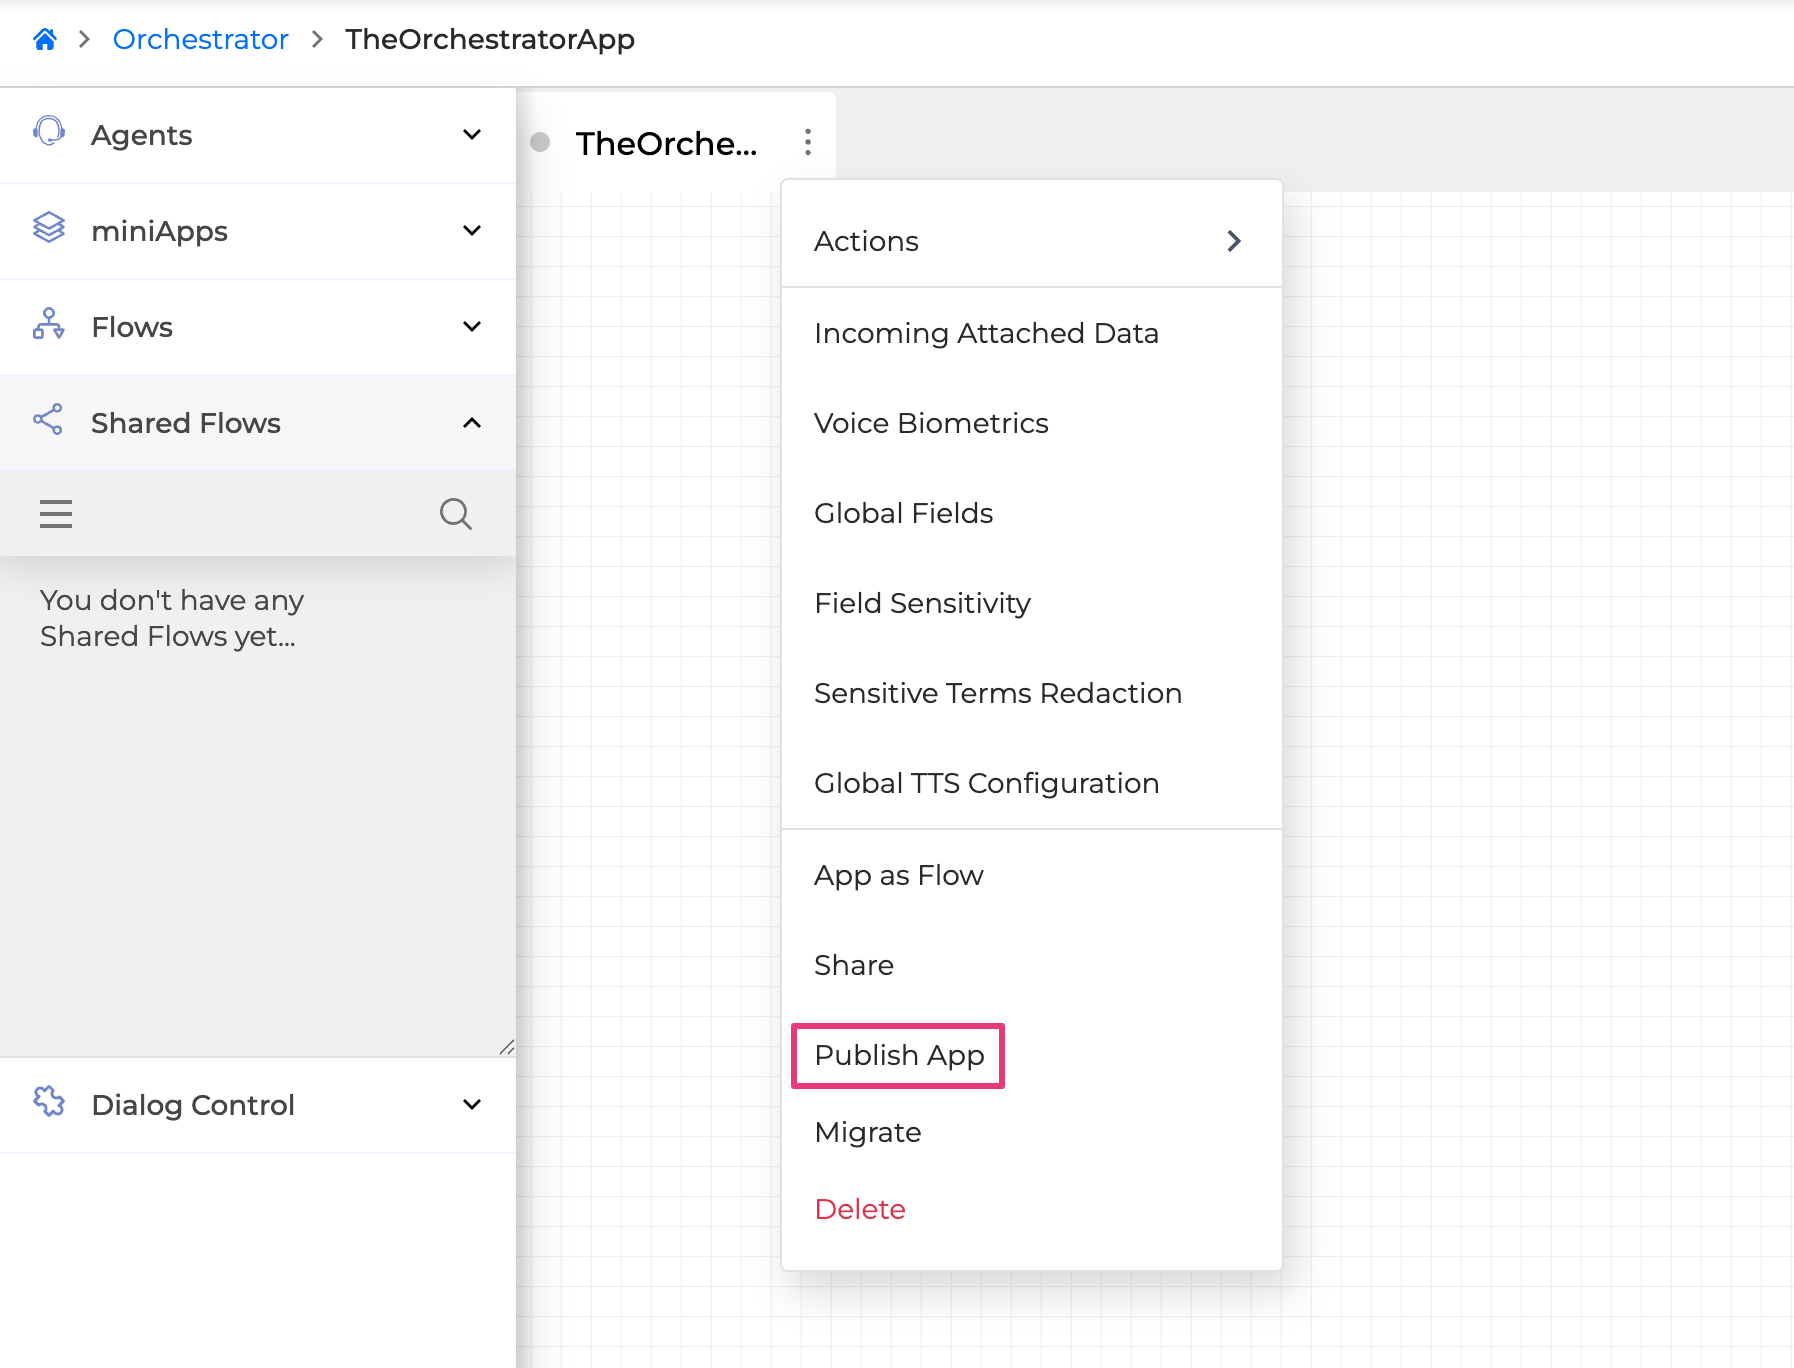
To create a new application instance for an already deployed Application:
-
In the Application Options Menu, click the Options menu button and select Publish App.
-
Enter a tag name to identify your Application.
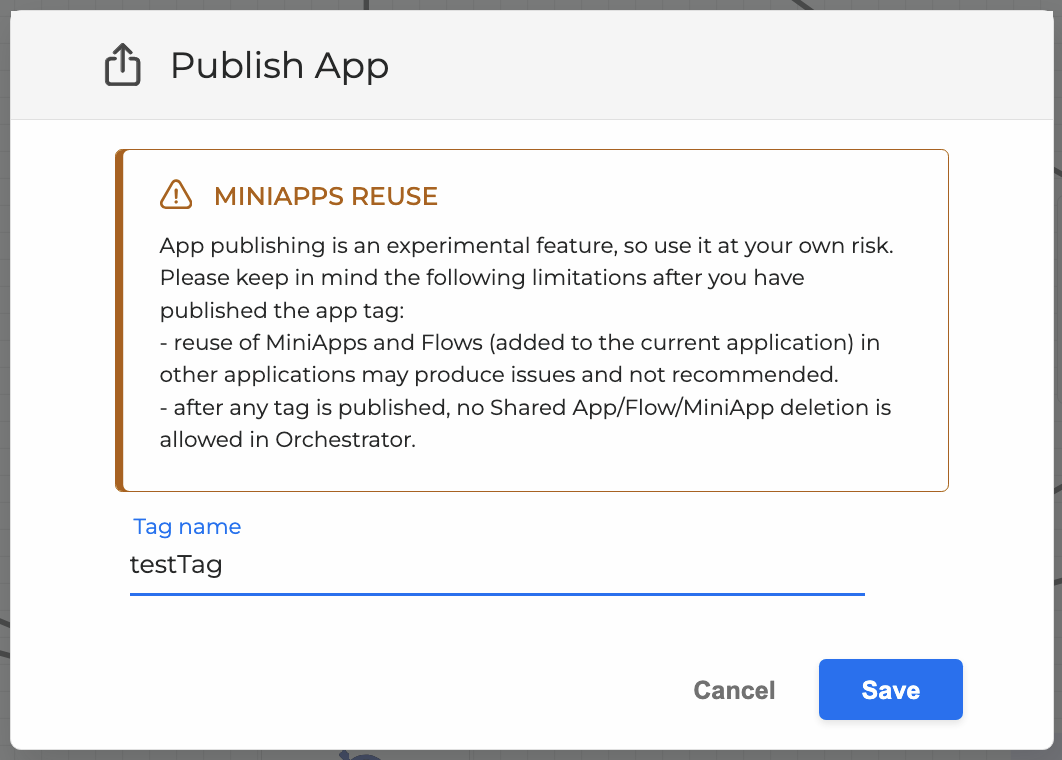
-
Click Save.
When you publish the Application:
-
All Flows and miniApps used by the Application are marked with the same tag you entered in the pop-up window.
Shared Flows behave differently:
-
They already have their own tags created by their owners and were published with those tags.
-
When you add a Shared Flow to the canvas, you can only reference an existing tag or the draft version of that Shared Flow.
For example:
-
Go to Shared Flows.
-
Select the Flow and place it onto the canvas.
-
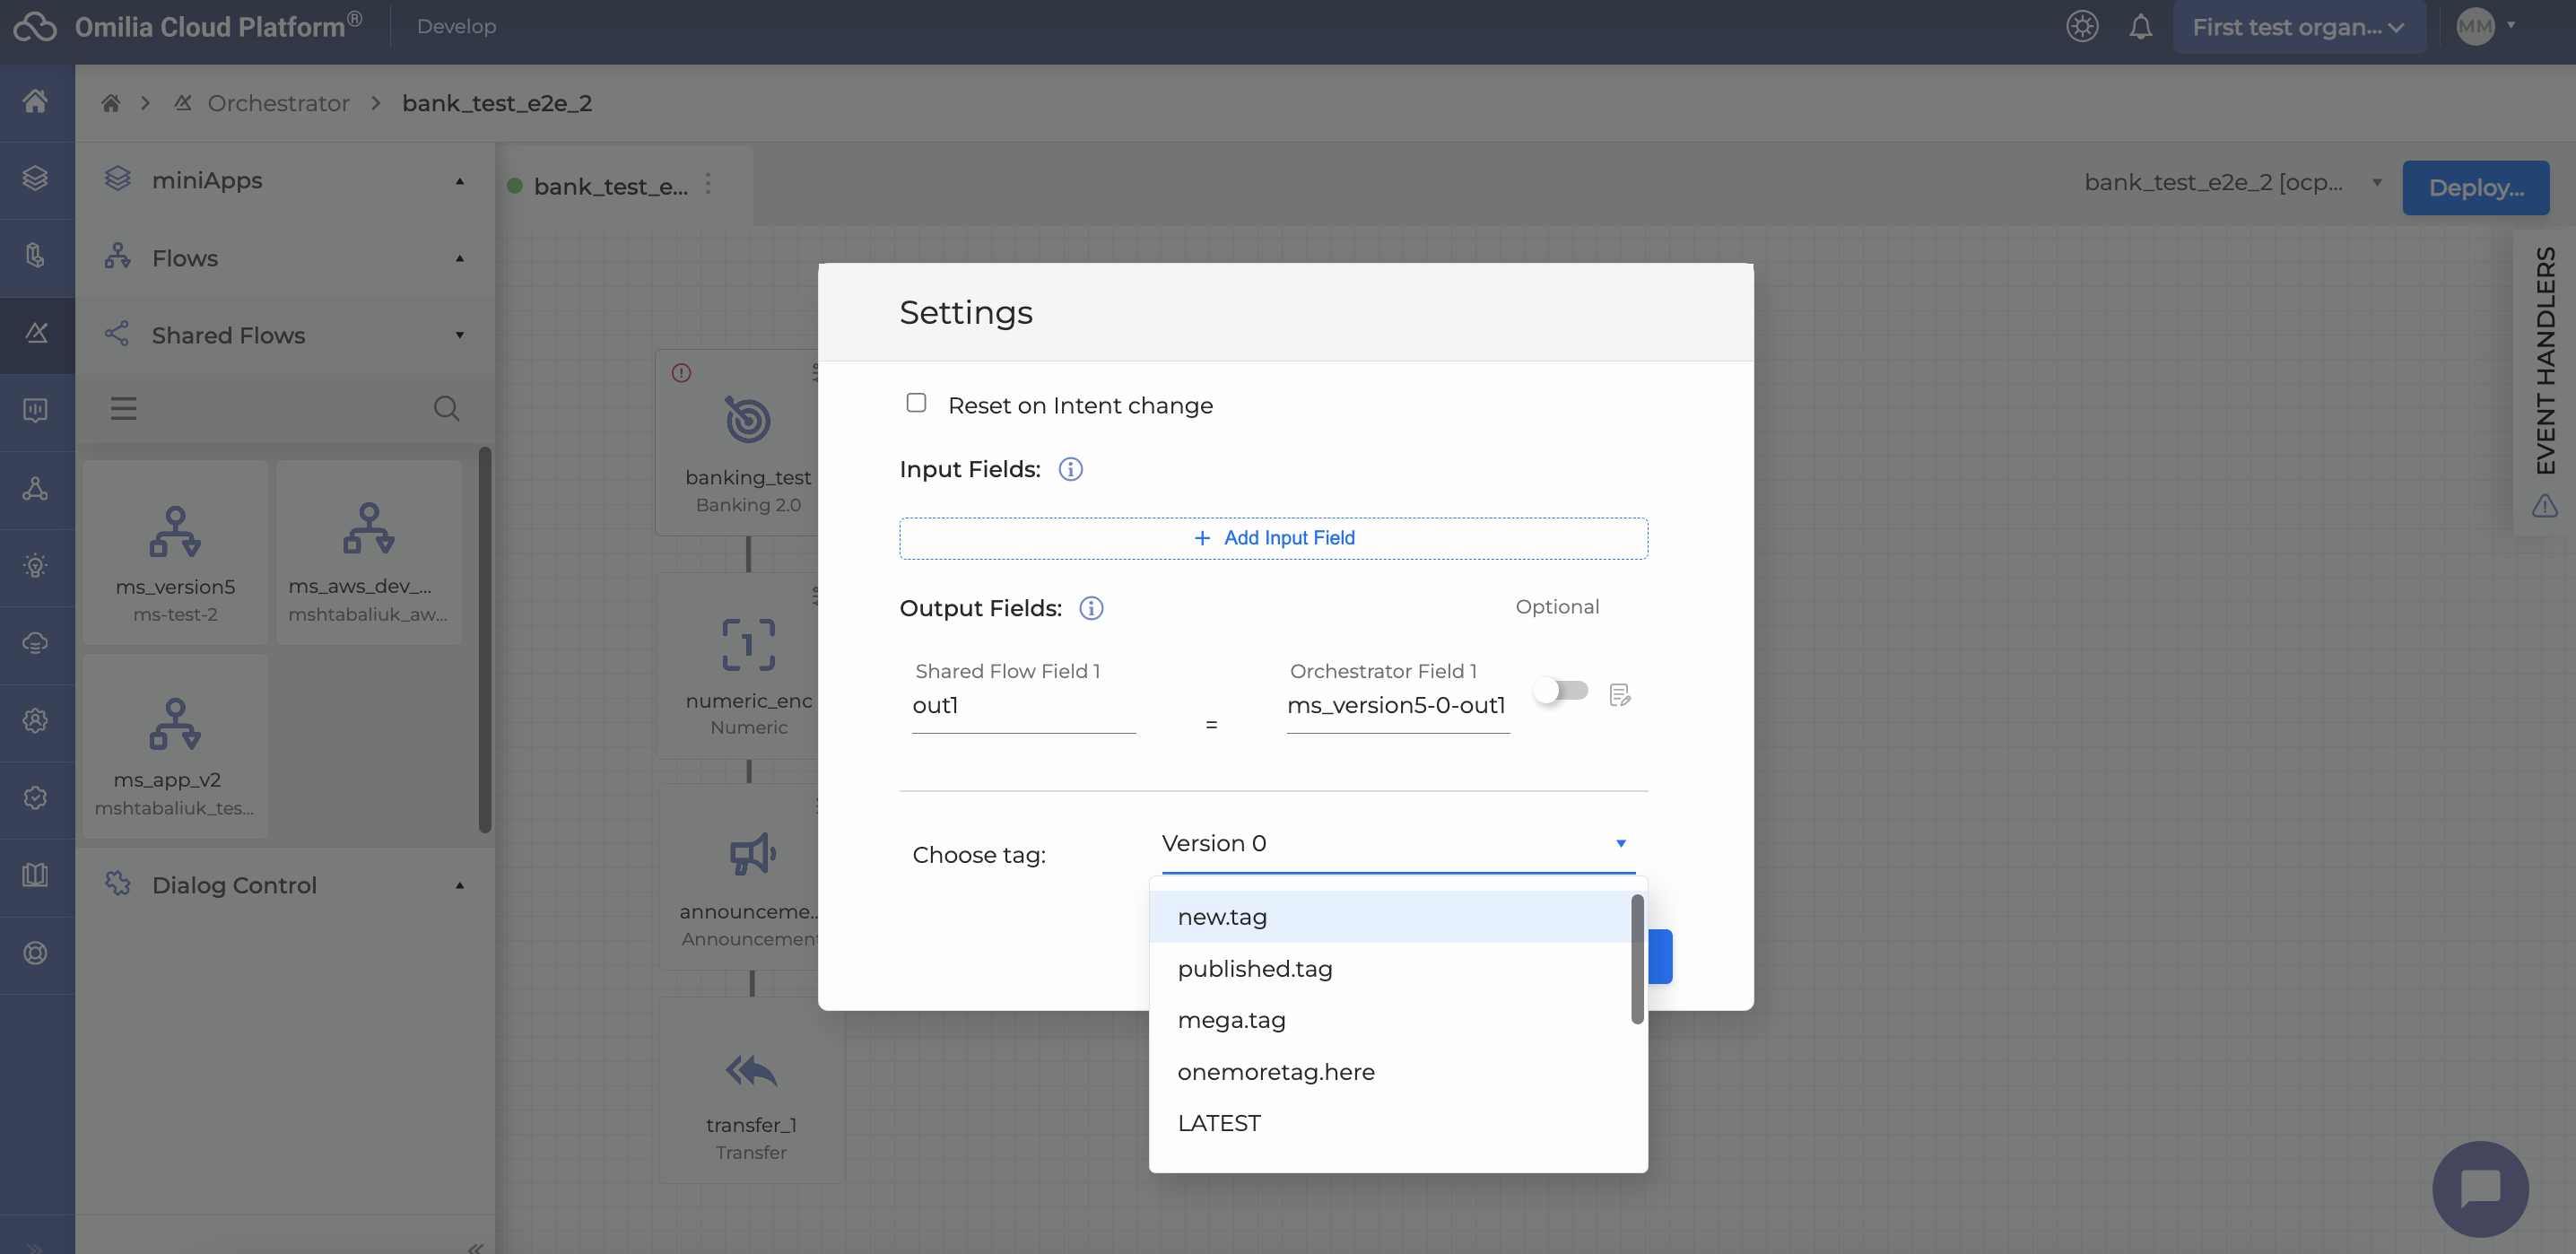
Click the Options menu in the upper-right corner of the Flow.
-
Select the tag for the instance you want that Flow to use.
Important constraints:
-
If a Shared Flow on the canvas is configured to use its draft version (no tags), the Application cannot be published.
-
It is prohibited to use draft versions of Shared Flows when publishing an Application.
-
You must reconfigure all used Shared Apps to use tagged versions before publishing.
-
-
If Shared App Inputs/Outputs (I/O) are reconfigured after their tag is published, the configuration shown in the UI will not reflect these changes.
-
Developers are advised to avoid updating the I/O configuration of their Shared Apps after publishing.
-
Delete Dialog Application
To permanently delete a Dialog Application:
-
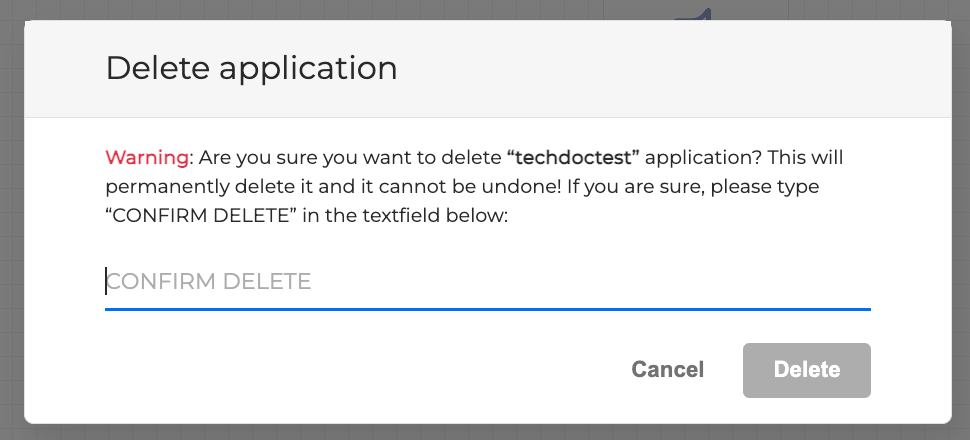
Select the Dialog Application you want to delete, open the Application Options Menu, and choose Delete to open the confirmation window.
-
In the confirmation window, type CONFIRM DELETE in the confirmation field.
-
Click Delete to finish.
Once deleted, the Dialog Application cannot be restored.