Introduction
This guide explains how to configure RingCX to route calls to an Omilia virtual agent via a SIP connection using the standard IVA integration method.
Prerequisites
Before starting the configuration in RingCX, ensure you have the following information and components from both systems:
RingCentral Components
-
Admin Access: Access to the RingCX Admin Portal: https://ringcx.ringcentral.com/voice/admin/home
-
RingCentral Channel/Number: An active inbound phone number (channel) configured within RingCX, designated for this Omilia workflow.
Omilia Components
-
Configured Omilia miniApp: A fully set up miniApp in OCP, including the miniAppResult handling.
-
SIP URI: The full SIP URI pointing to your Omilia miniApp. It combines the RC_Channel and the Omilia FQDN:
sip:<RC_Channel>@<OCP_FQDN>.
For example:sip:+1XX1Y406XY1@us1-s.ocp.ai
-
The RC_Channel is added to OCP by Technical Support and mapped to an application by Owner or Maintainer.
-
FQDN for Omilia environments is listed in Environments and FQDN or available from the omIVR team.
Integration Steps
This guide is current as of December 2025. For the latest interface changes, refer to the official Ring Central's integration guide.
For questions about RingCentral account configuration or dashboard errors, contact the RingCentral Support team directly.
STEP 1. Create the Omilia IVA Integration
First, register the Omilia solution as a virtual agent gateway (IVA) in your RingCX account using the provided SIP URI. Follow these steps:
-
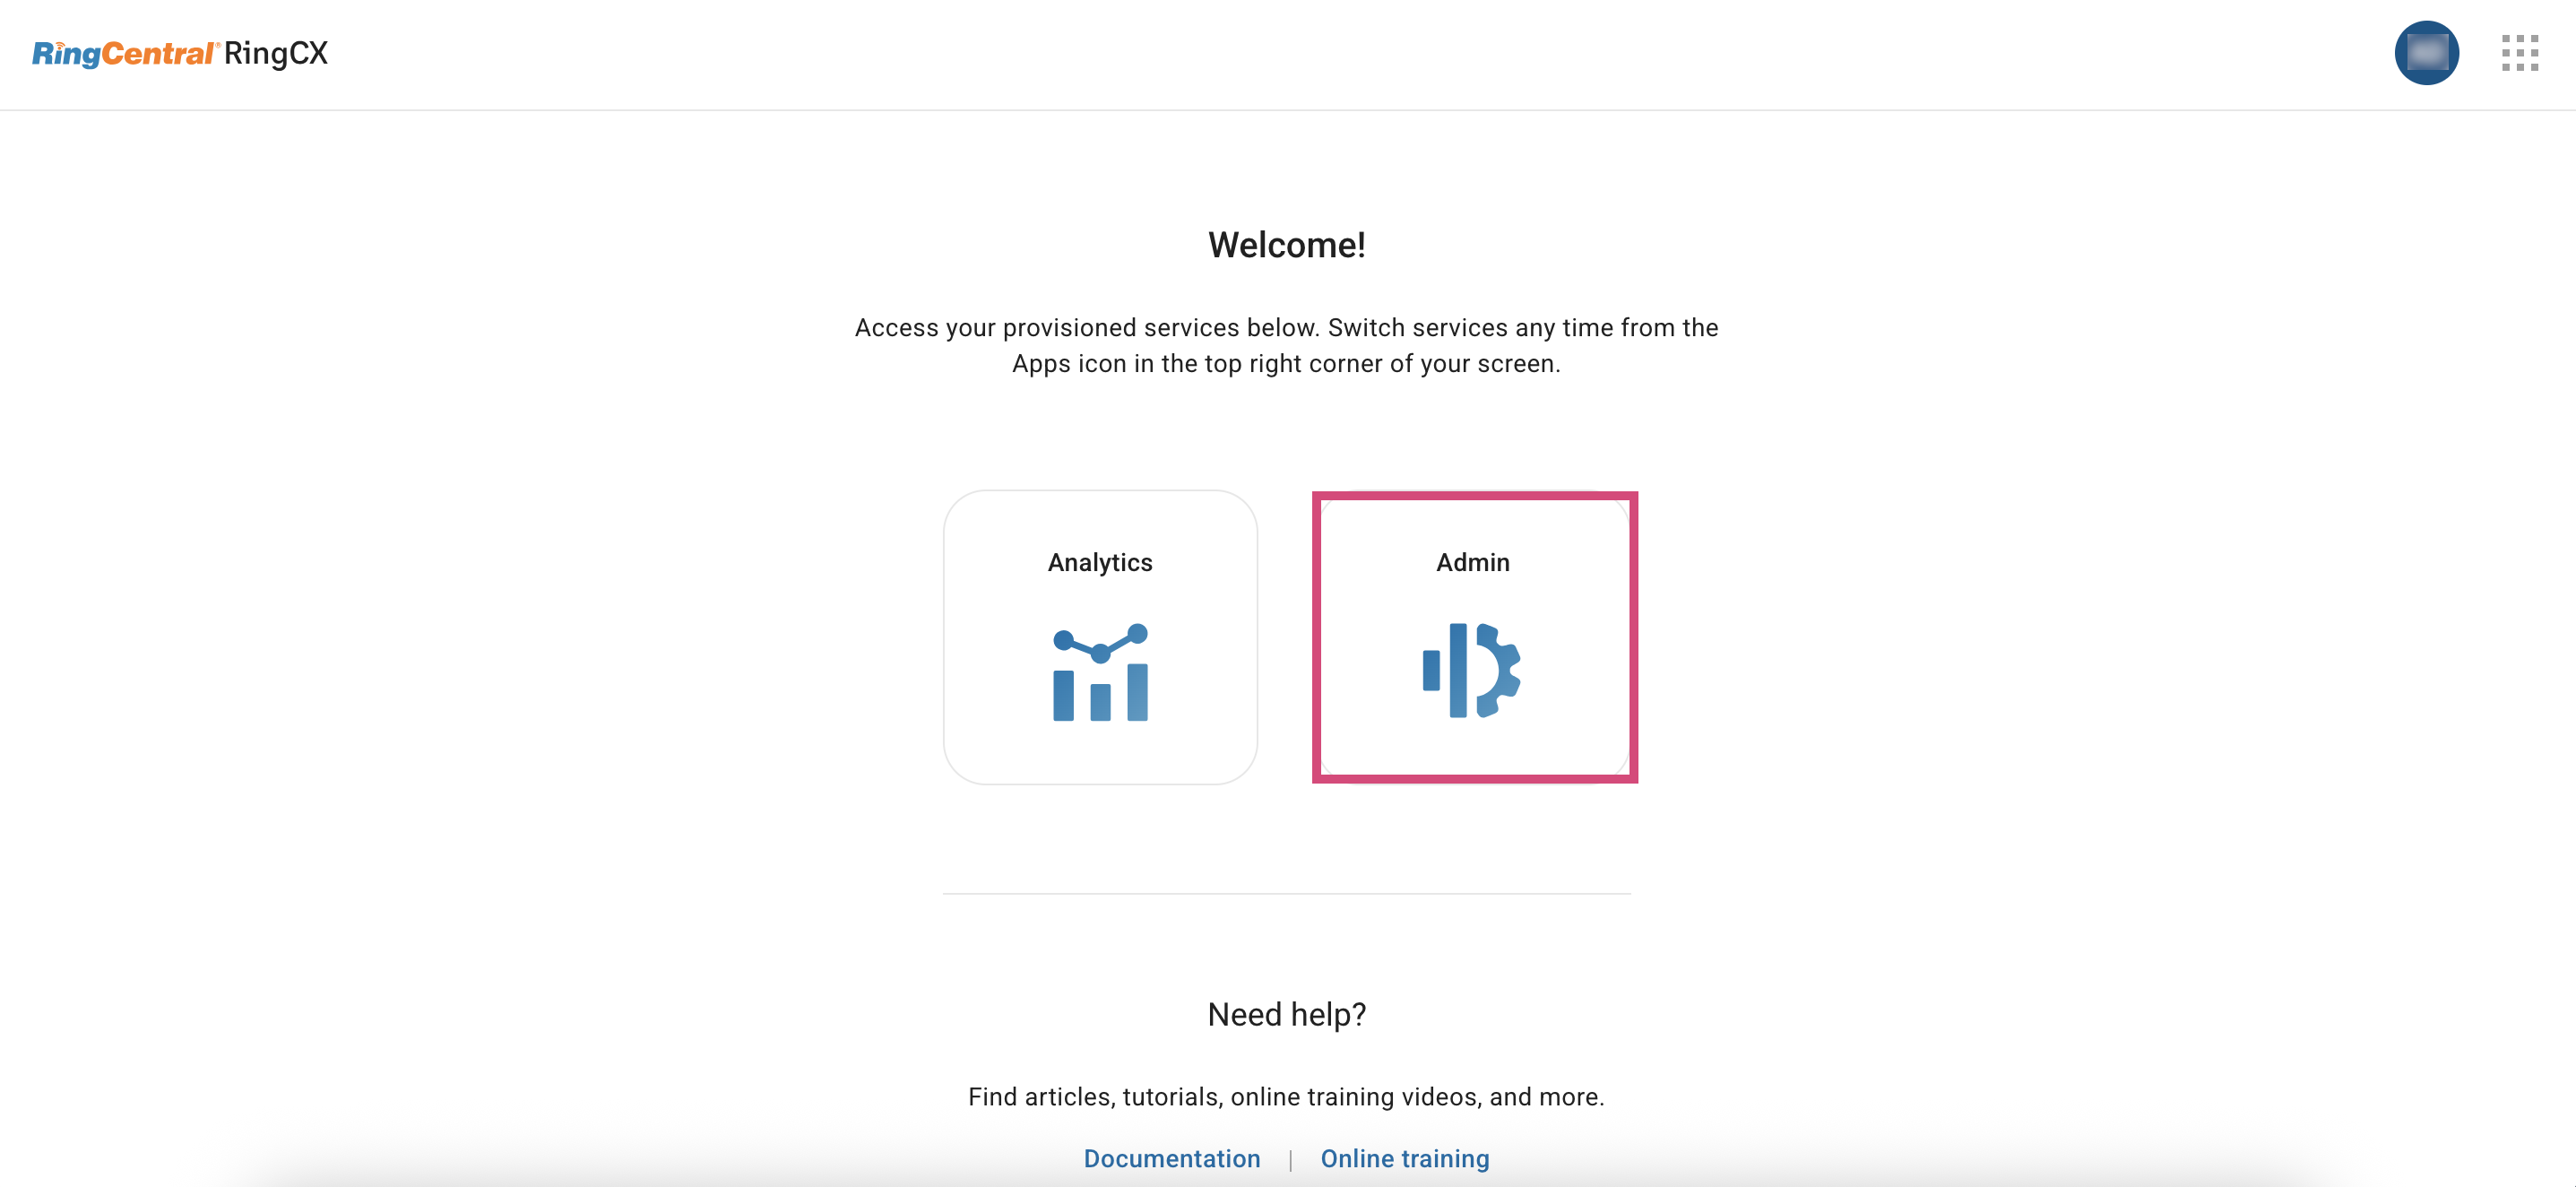
Sign in to RingCX and select the Admin tile.
-
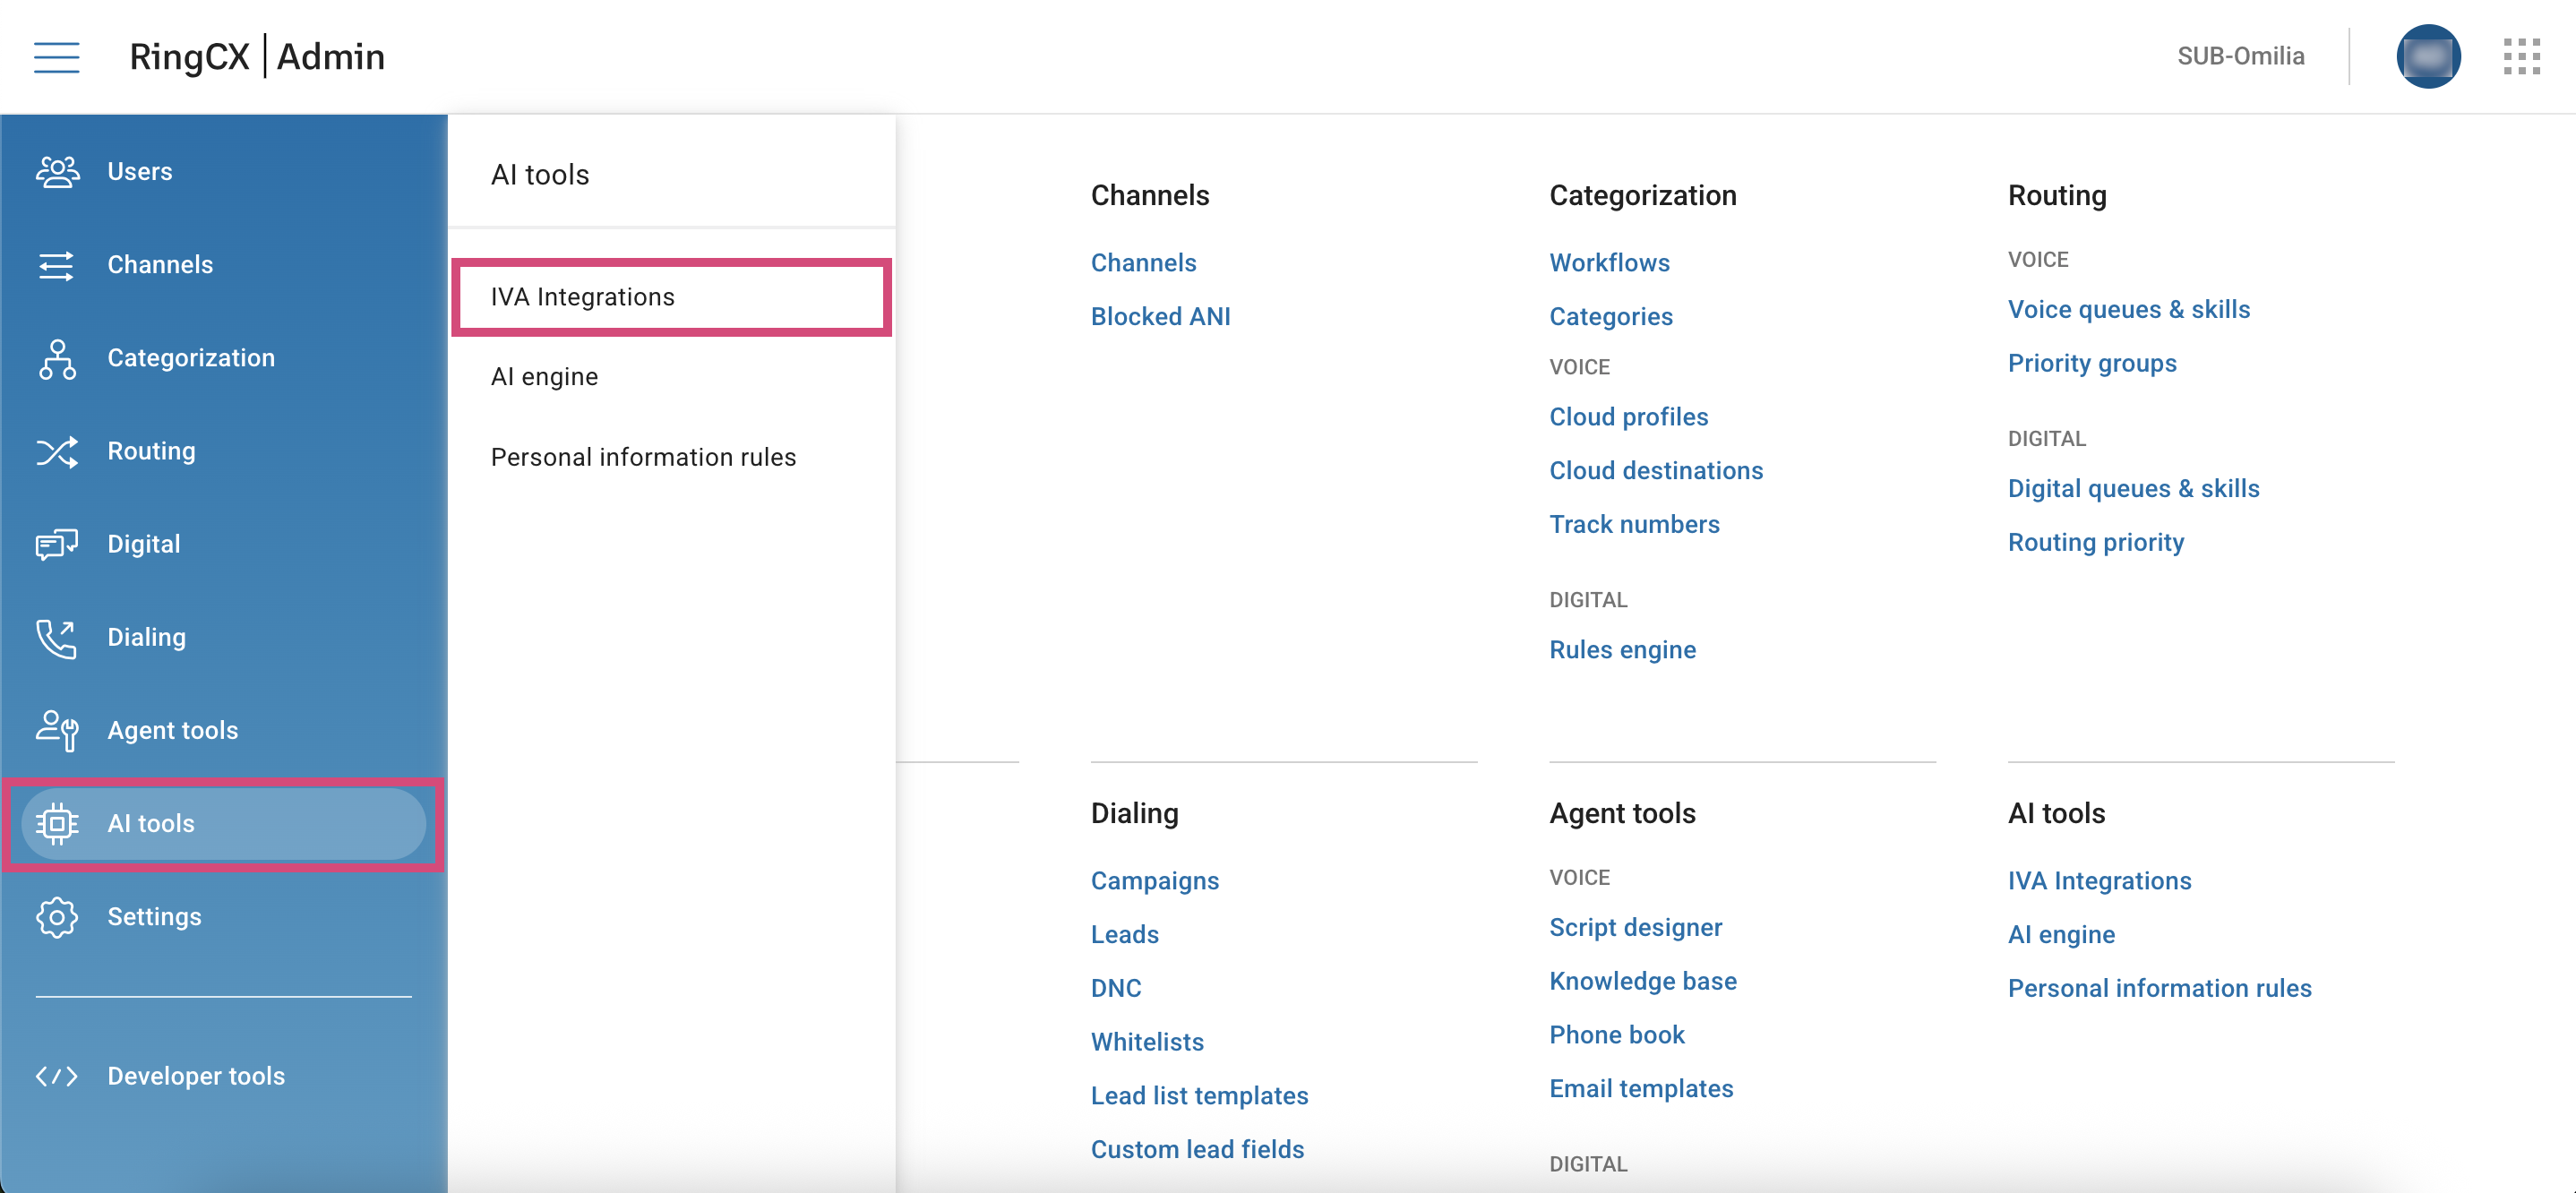
Go to AI Tools → IVA Integrations.
-
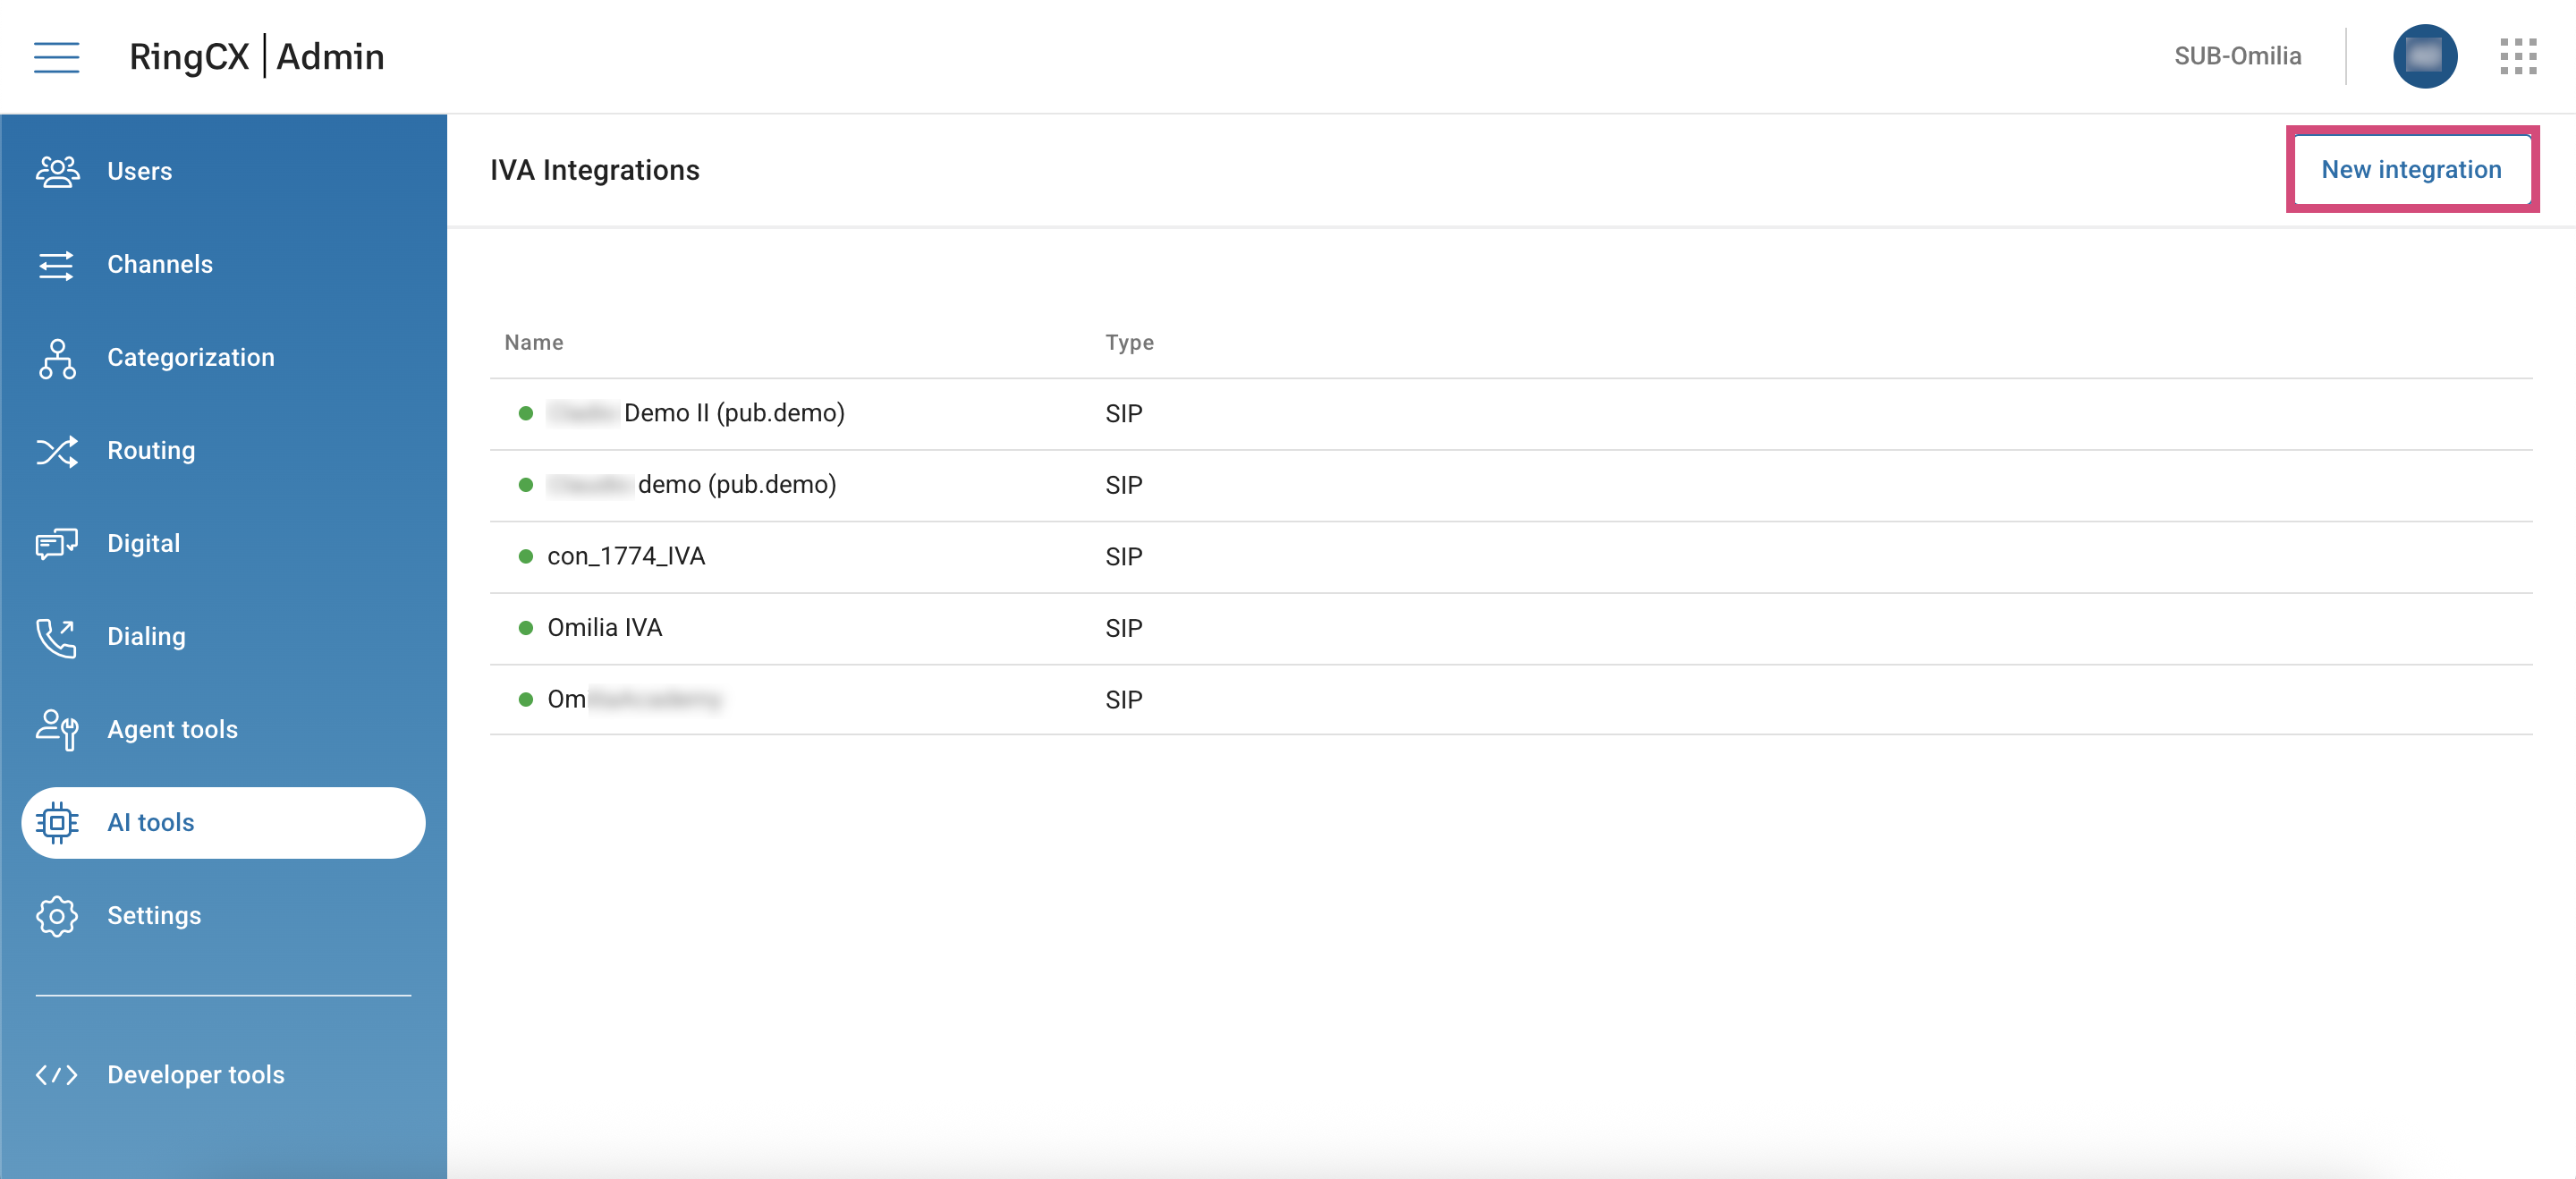
Click the New Integration button.
-
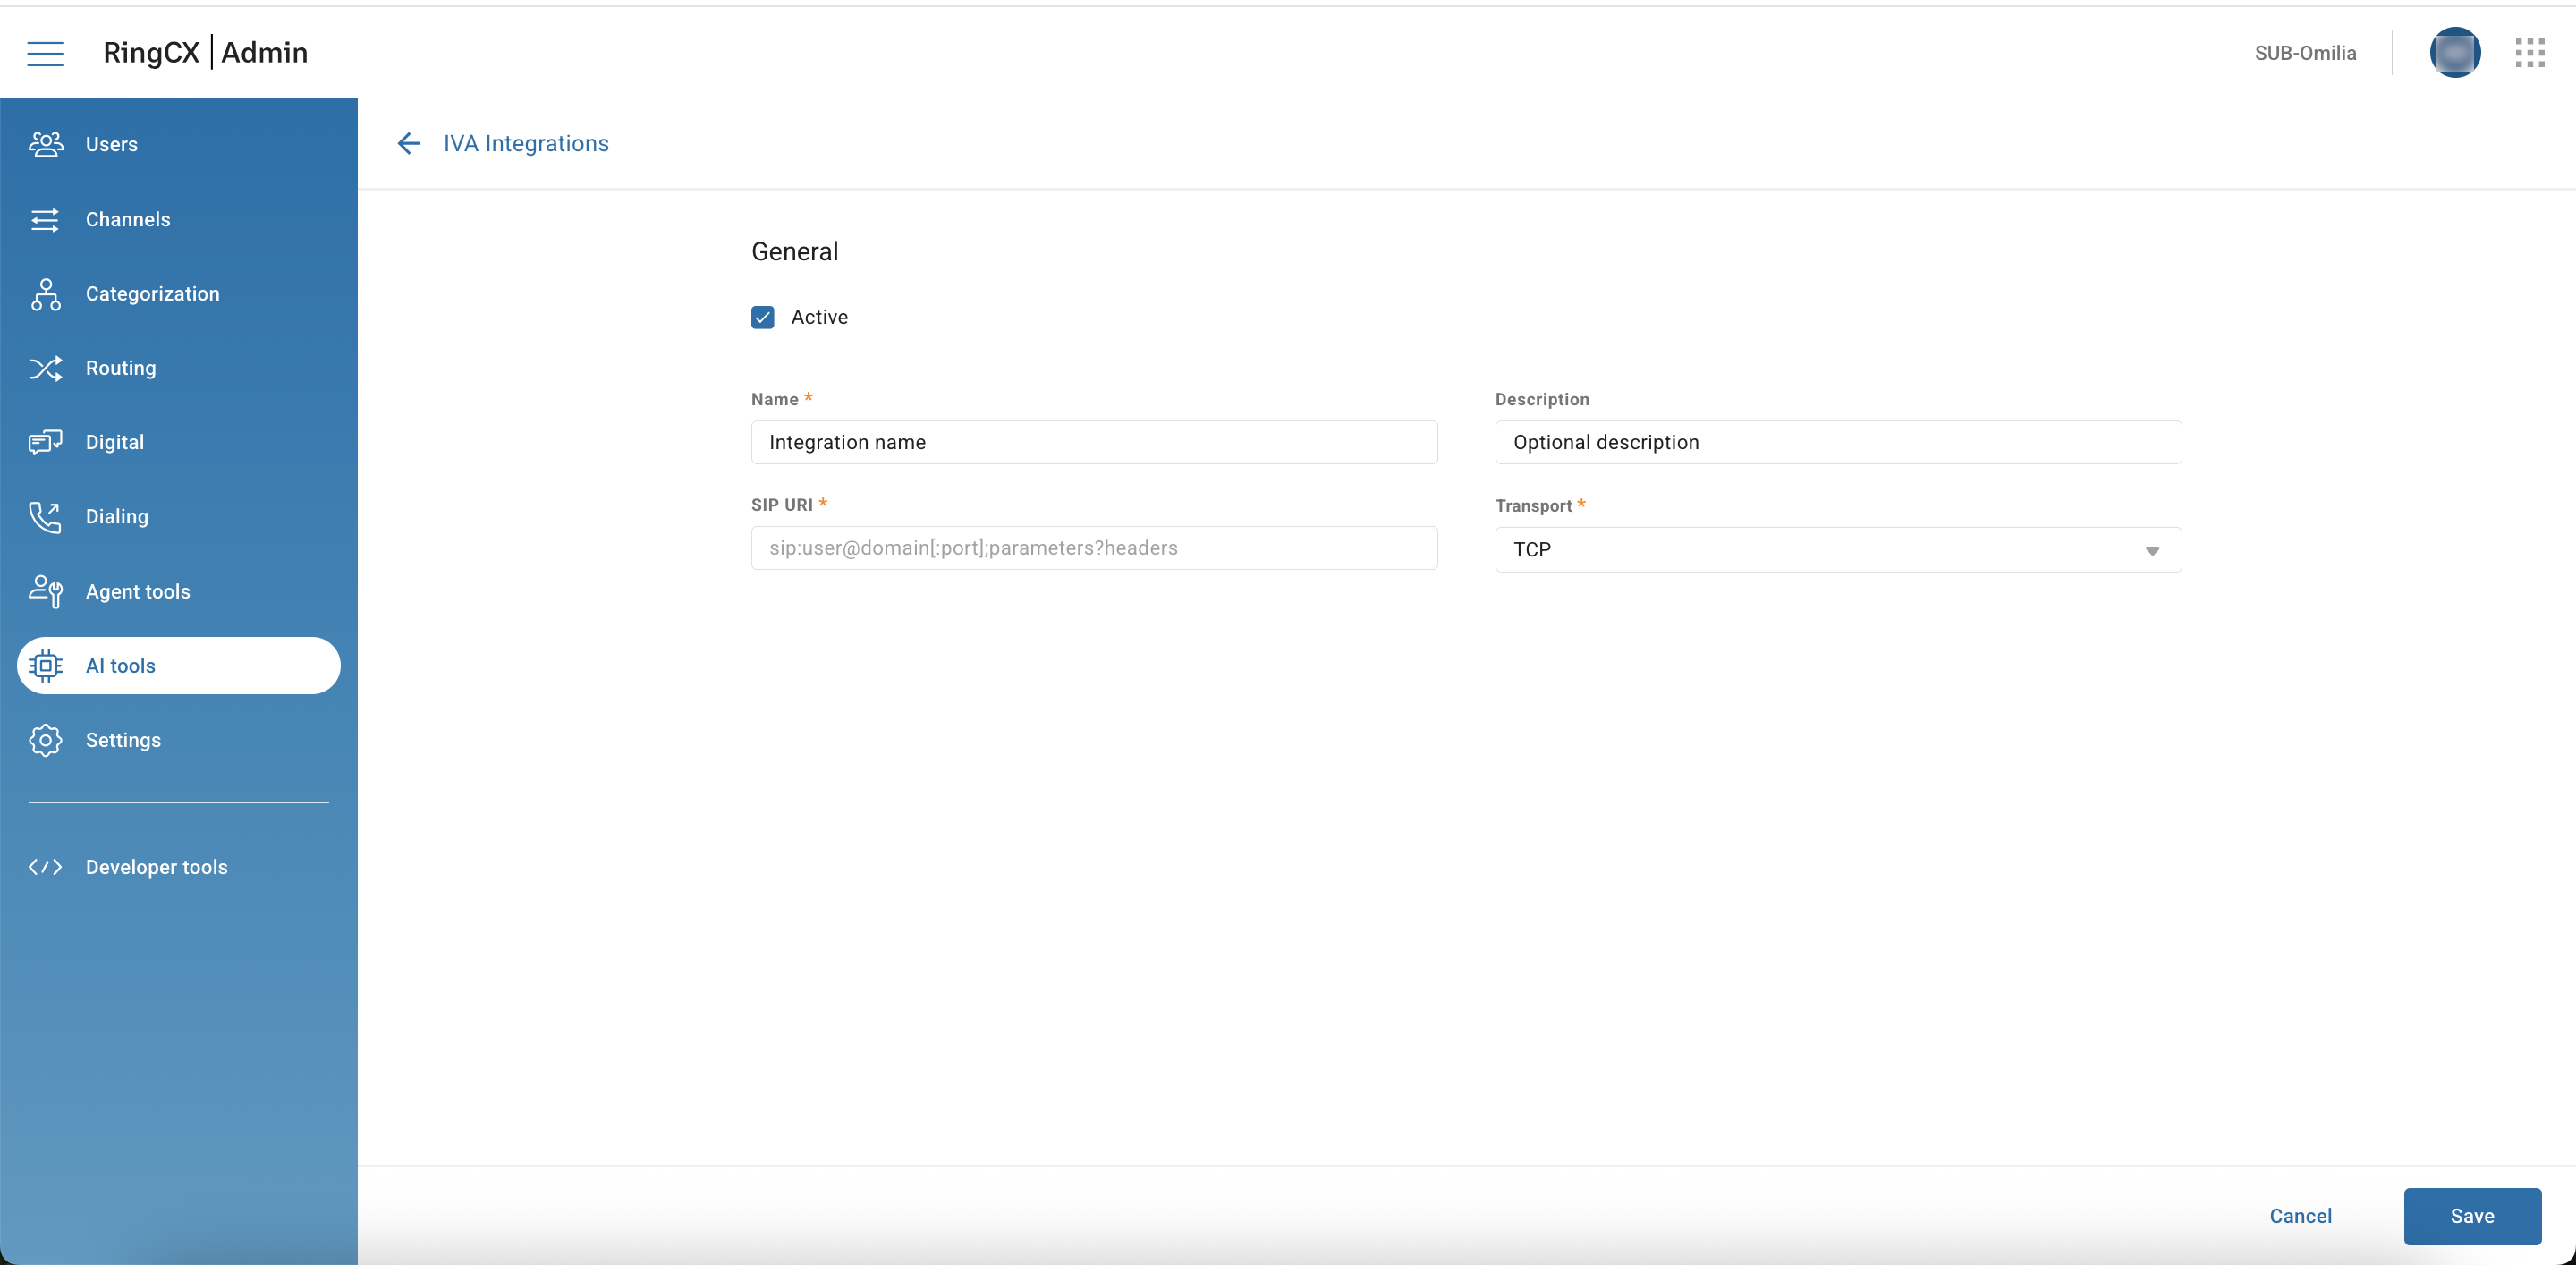
In the page that opens, fill in the fields as described below:
-
Active: Mark the checkbox.
-
Name: Enter a descriptive name.
-
Description: Enter an optional description.
-
SIP URI: Insert the complete SIP URI from the prerequisites (for example,
sip:+1XYX12406X11@us1-s.ocp.ai). -
Transport: Select the transport protocol: TCP.
-
Click Save.
STEP 2. Add the IVA Integration to a Workflow
At this step, create a workflow to direct calls to the Omilia IVA node and configure data exchange. Follow these instructions:
-
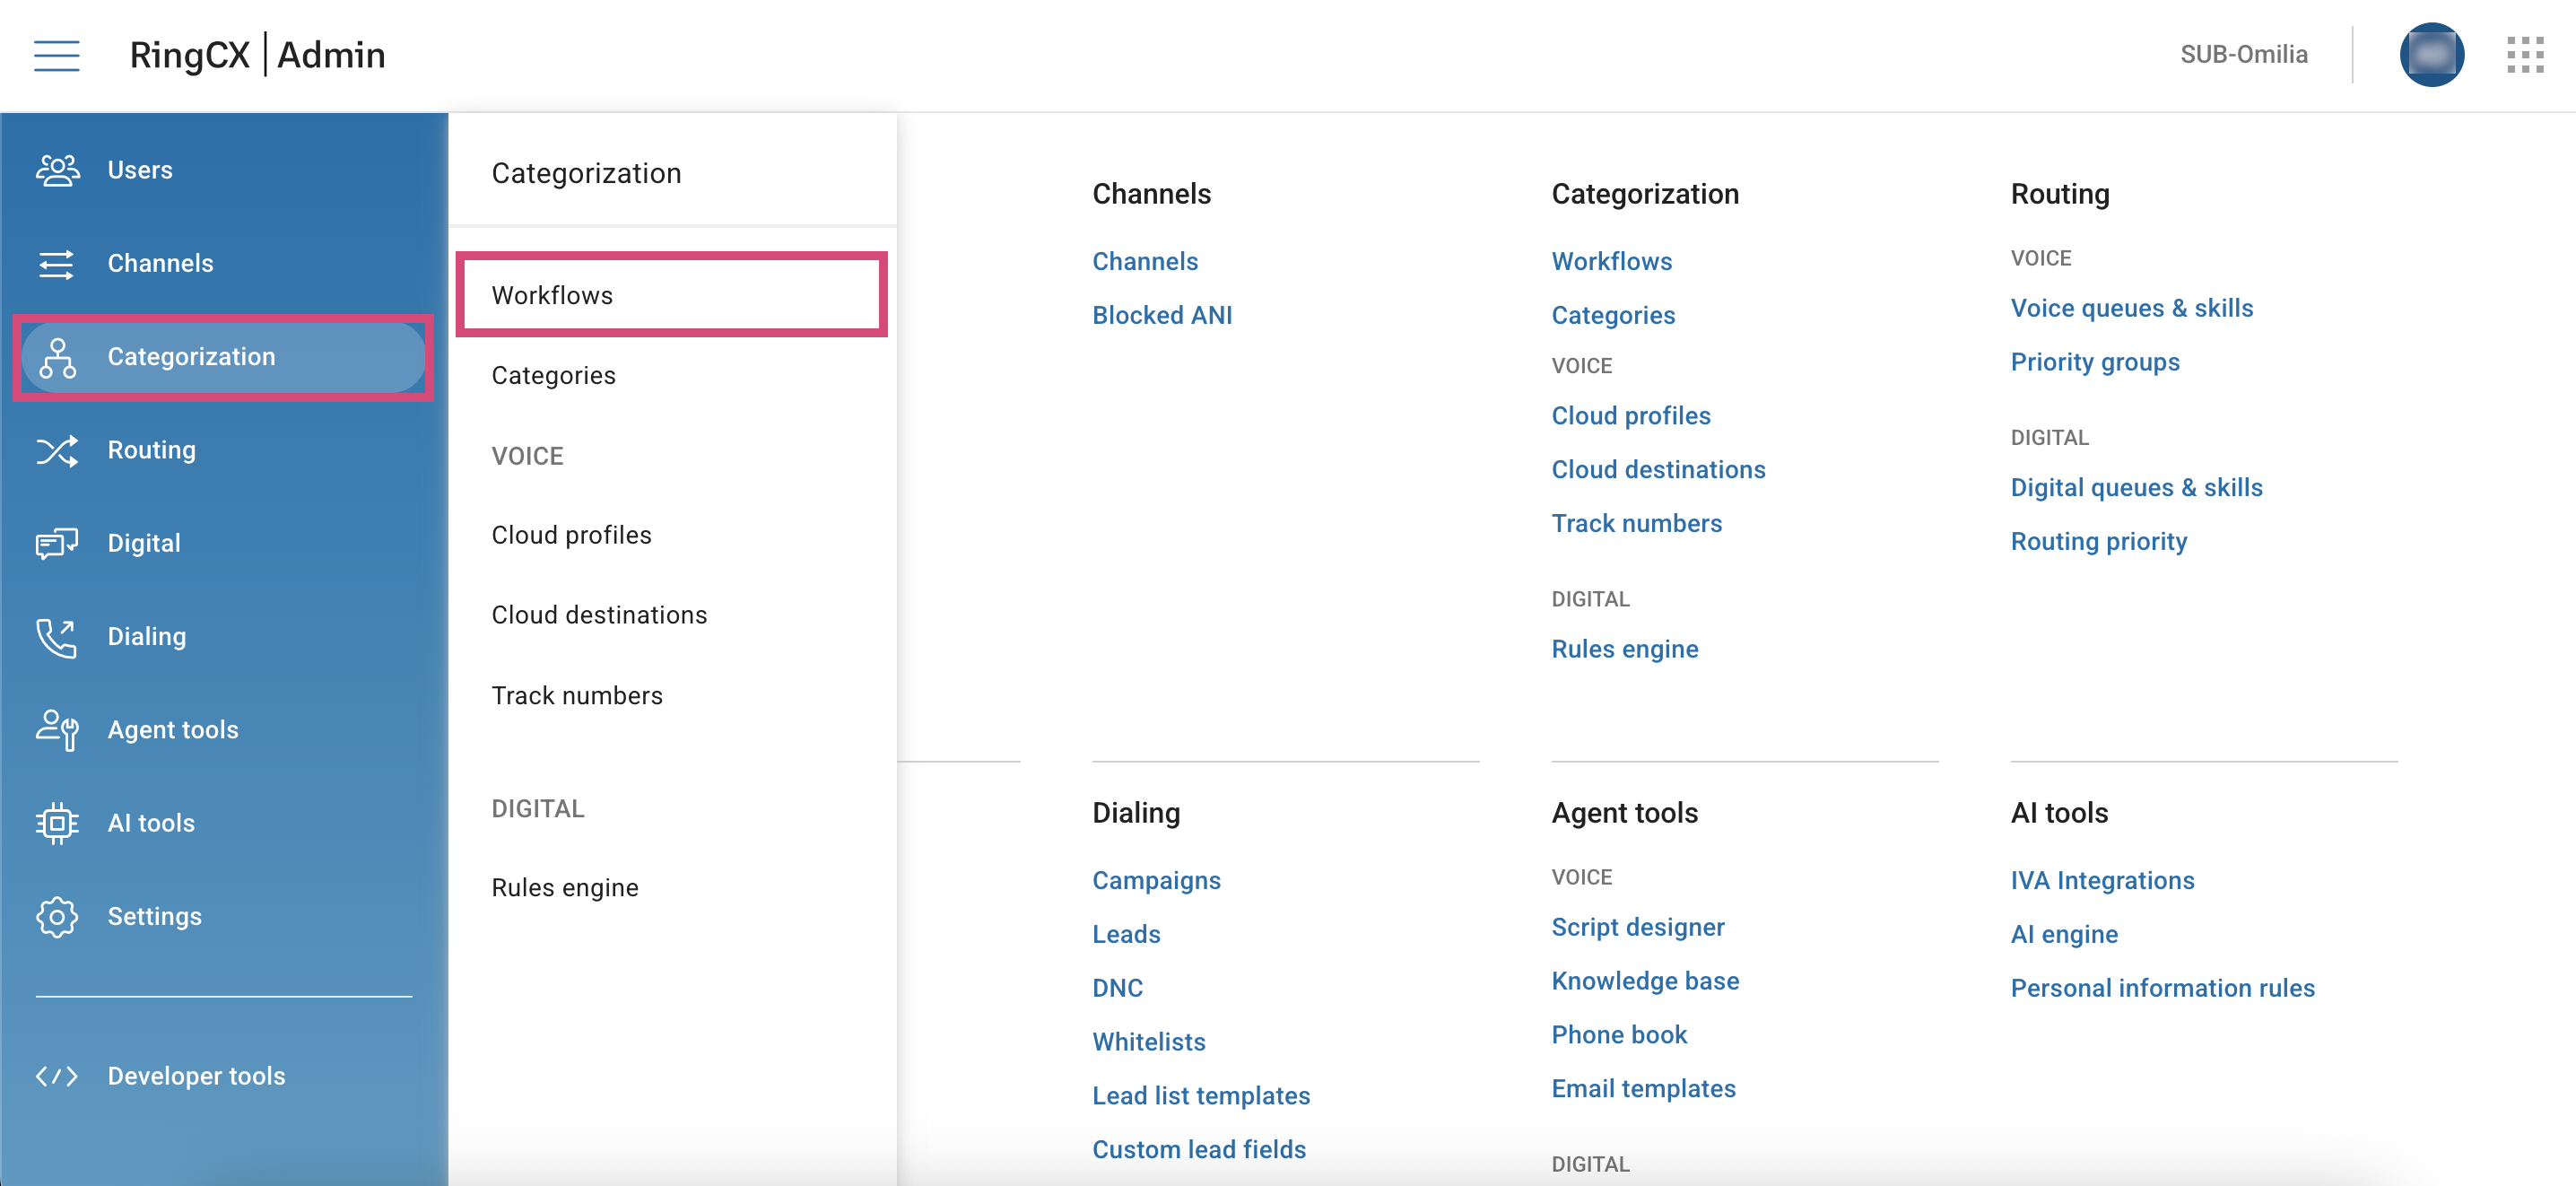
In your RingCX account, go to Categorization → Workflows.
-
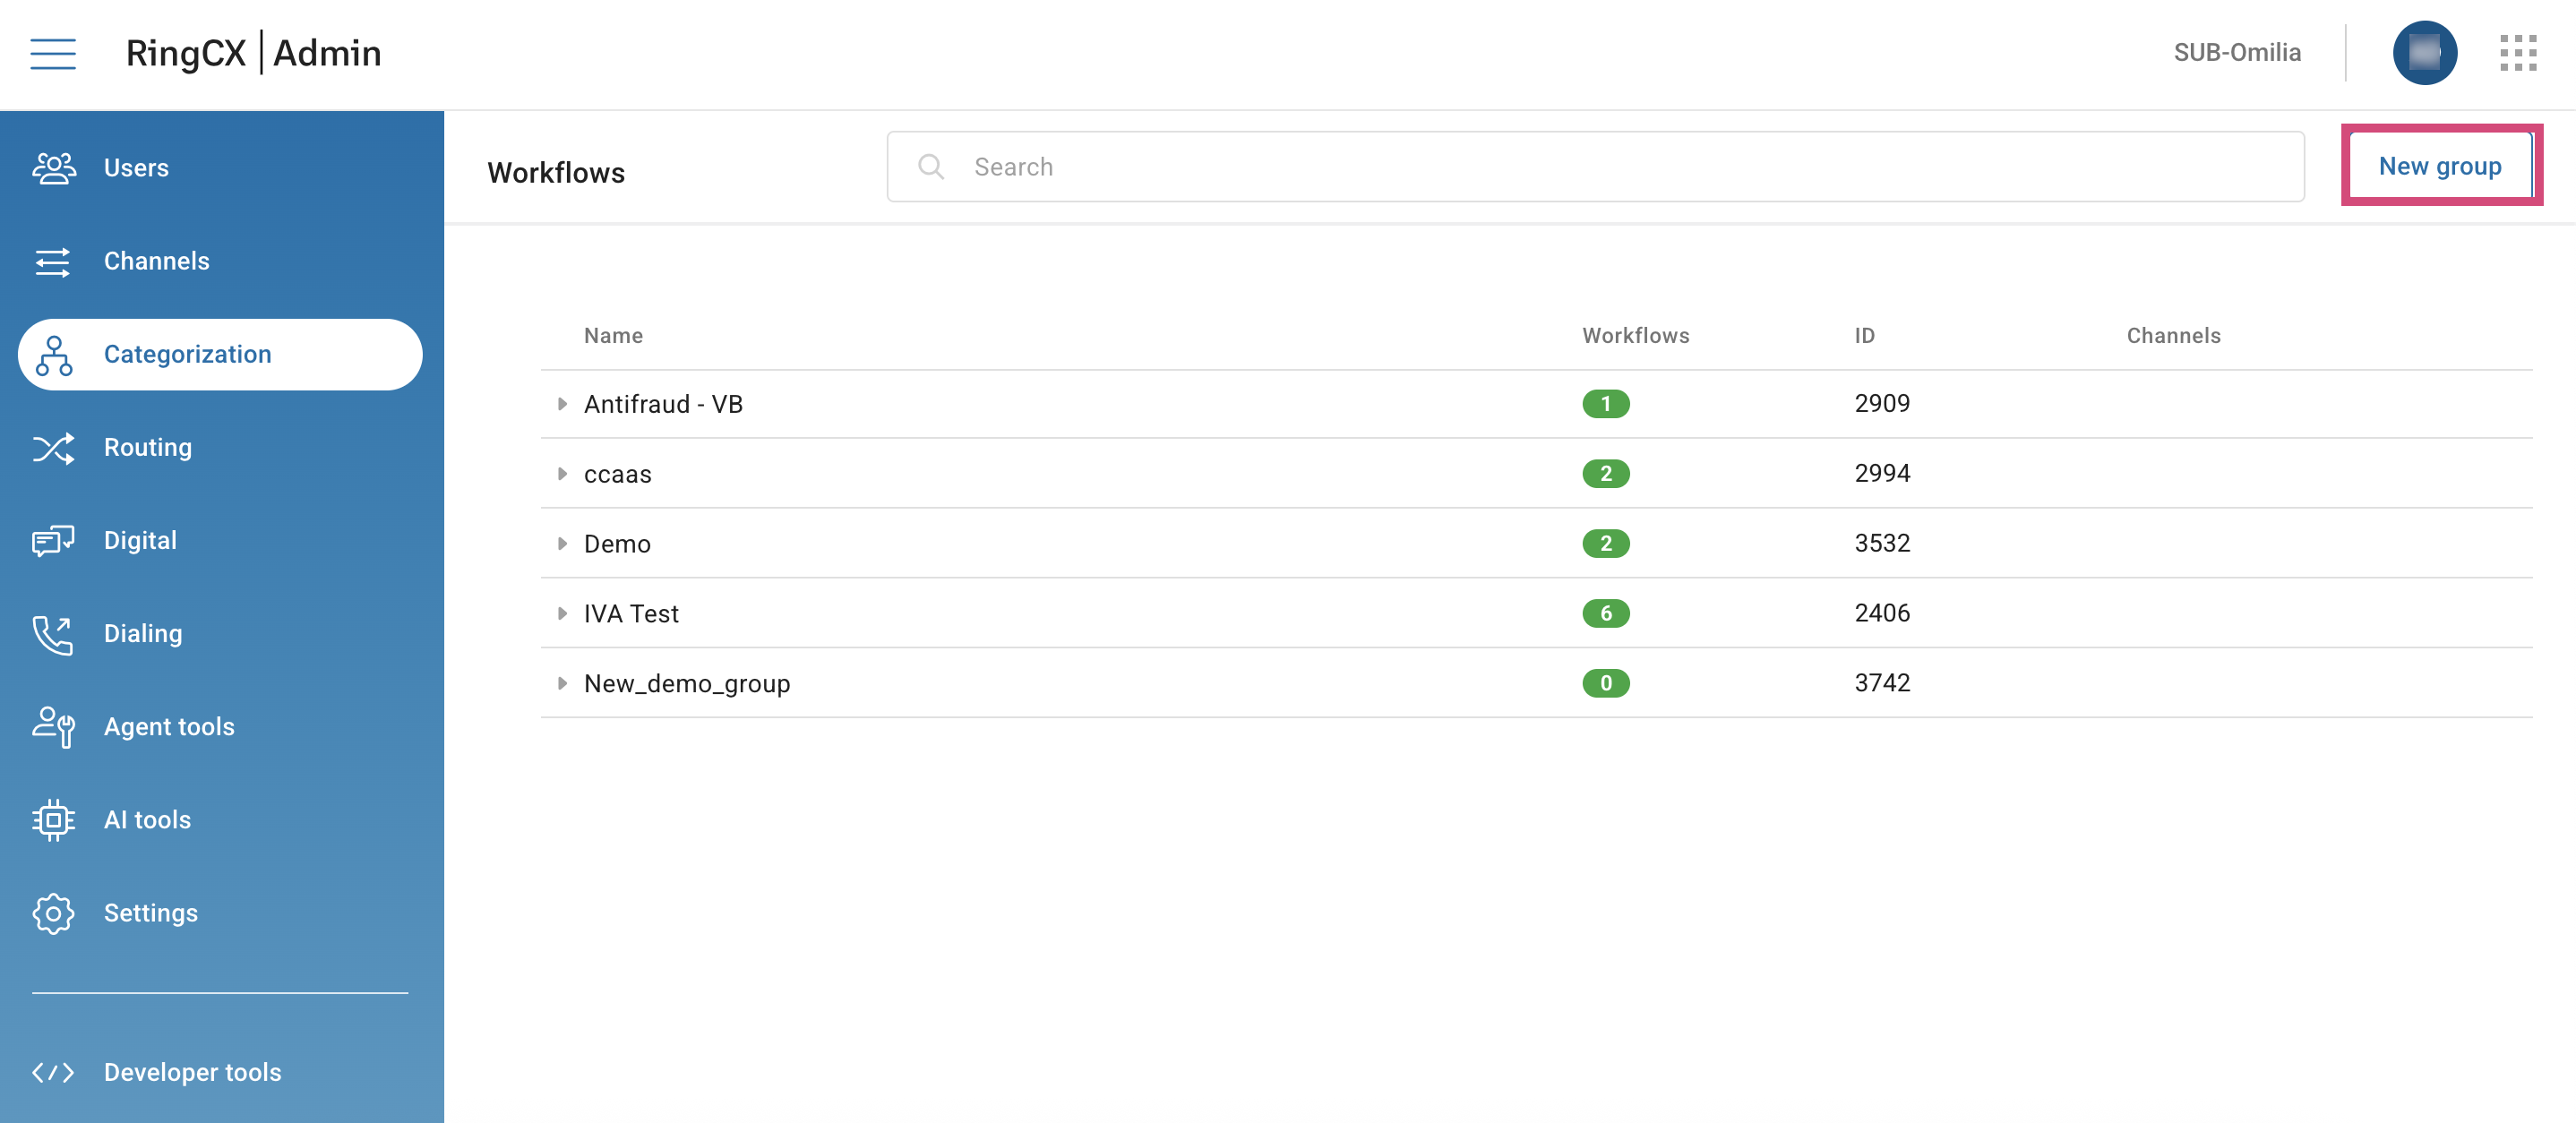
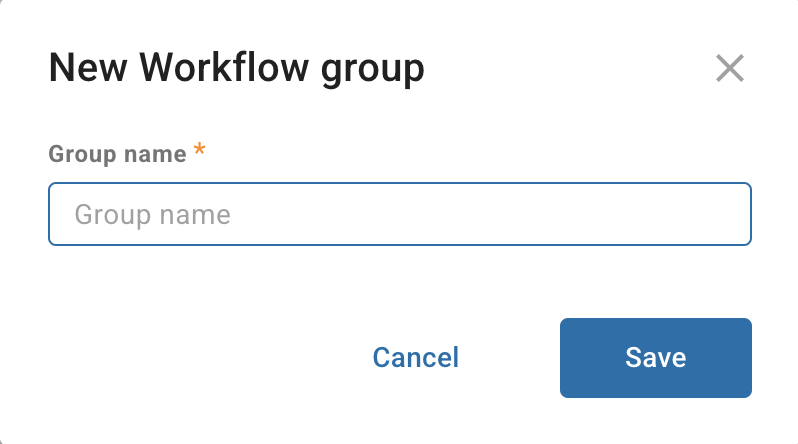
Click the New group button, then enter the group’s name. You can skip this step if you already have available groups.
-
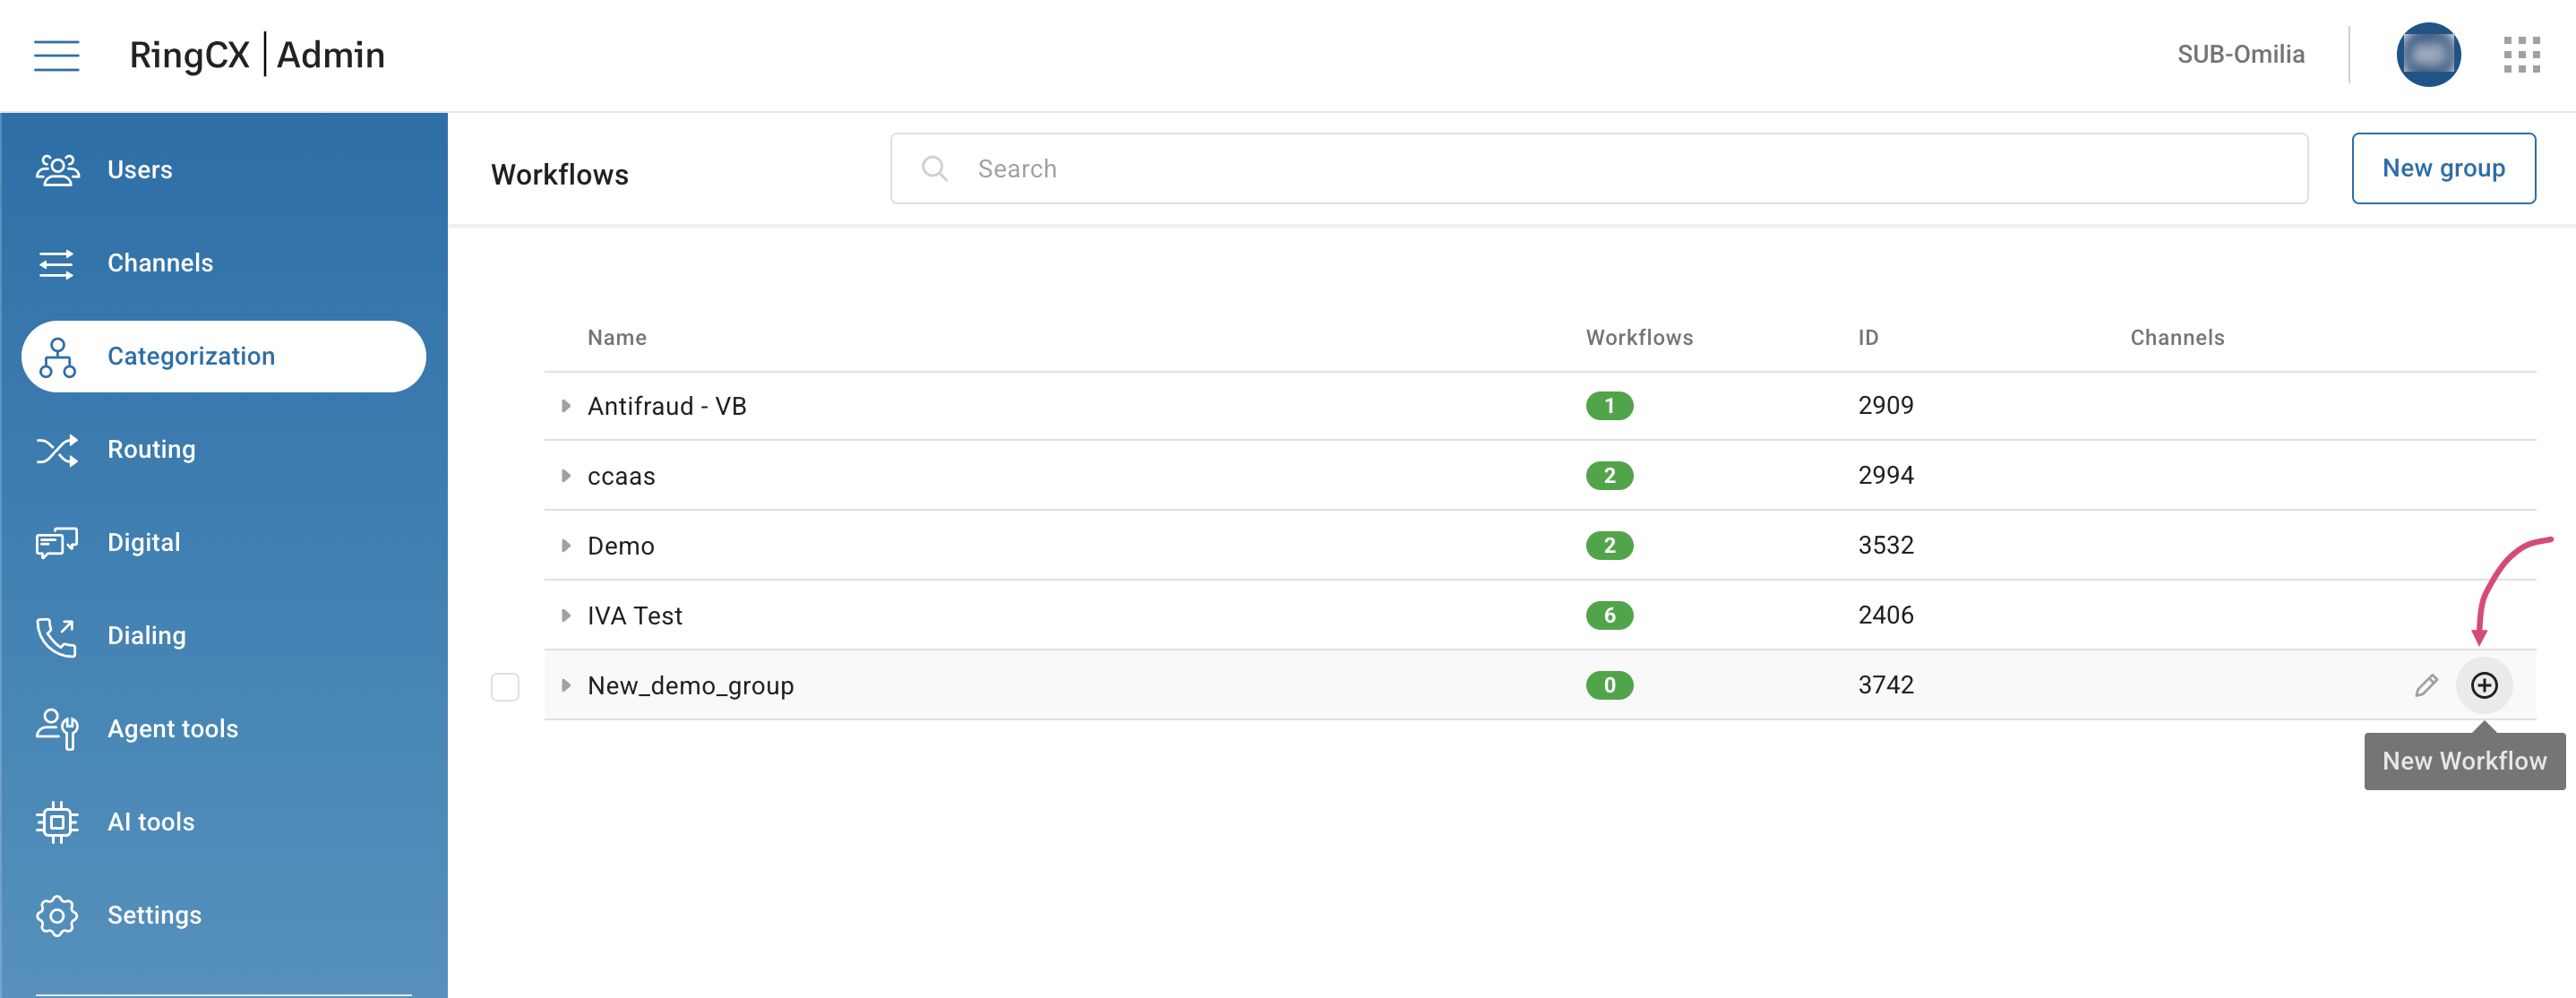
Hover over the group to which you want to add a new workflow and click the Plus icon.
-
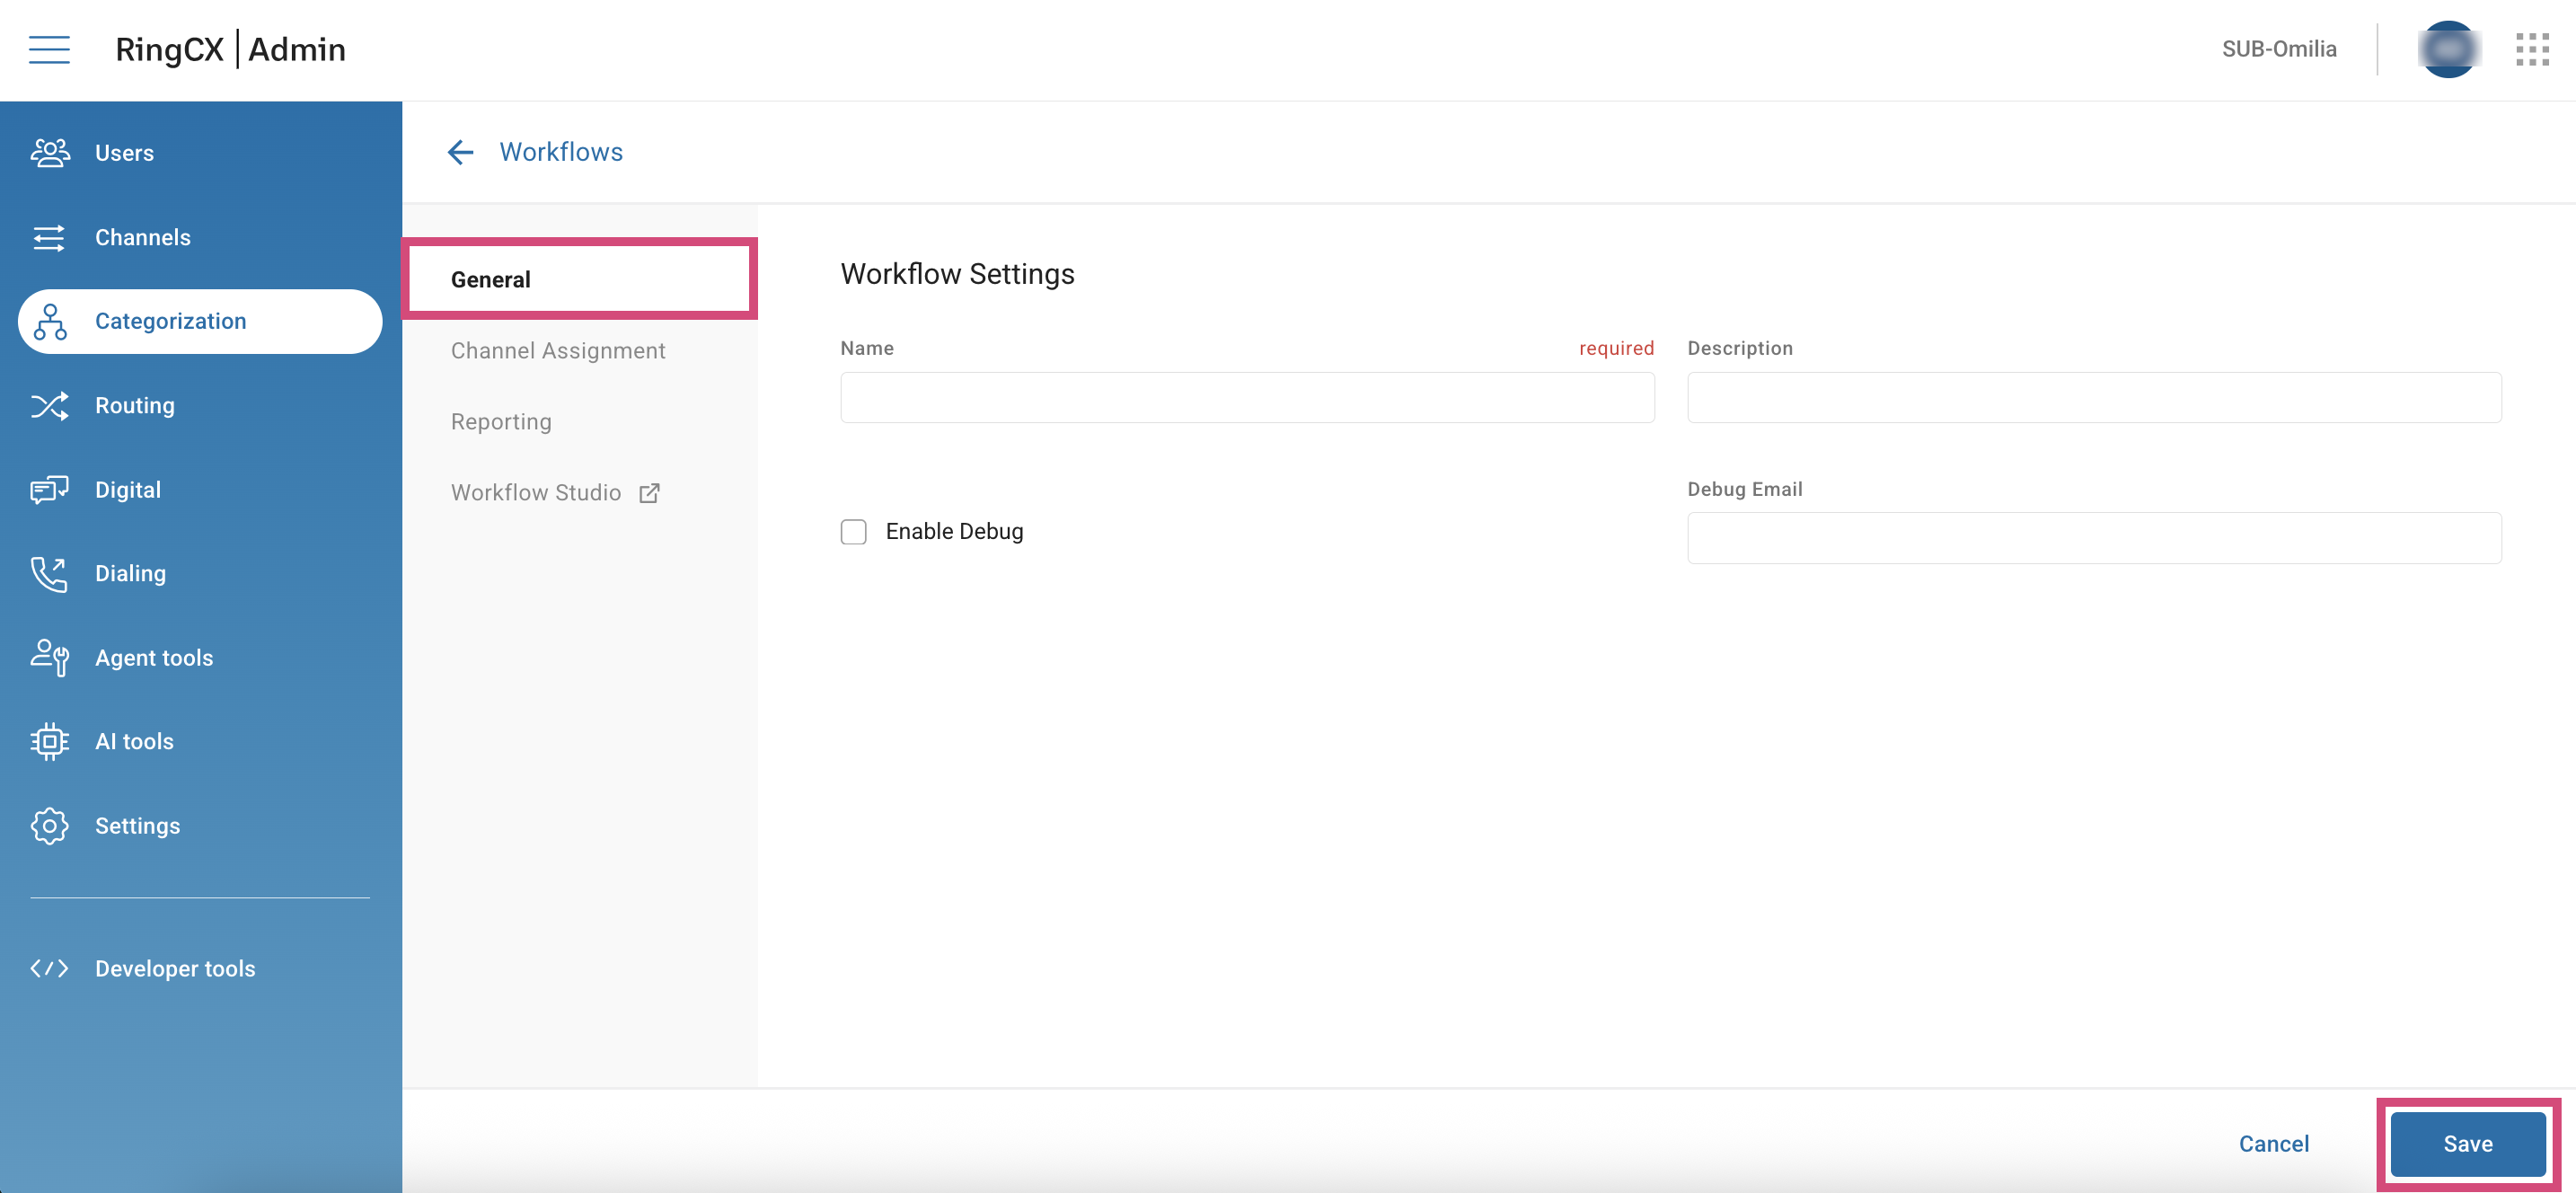
You will be forwarded the workflows setup page. In the General tab, fill in the fields as described below, then click Save.
-
Name: Enter a name for your workflow.
-
Description: Enter an optional description for your workflow.
-
Enable Debug: Mark this checkbox to receive an email after each workflow interaction. Debug emails provide a step-by-step analysis to help identify issues.
-
Debug email: Enter your email to receive debug messages.
-
-
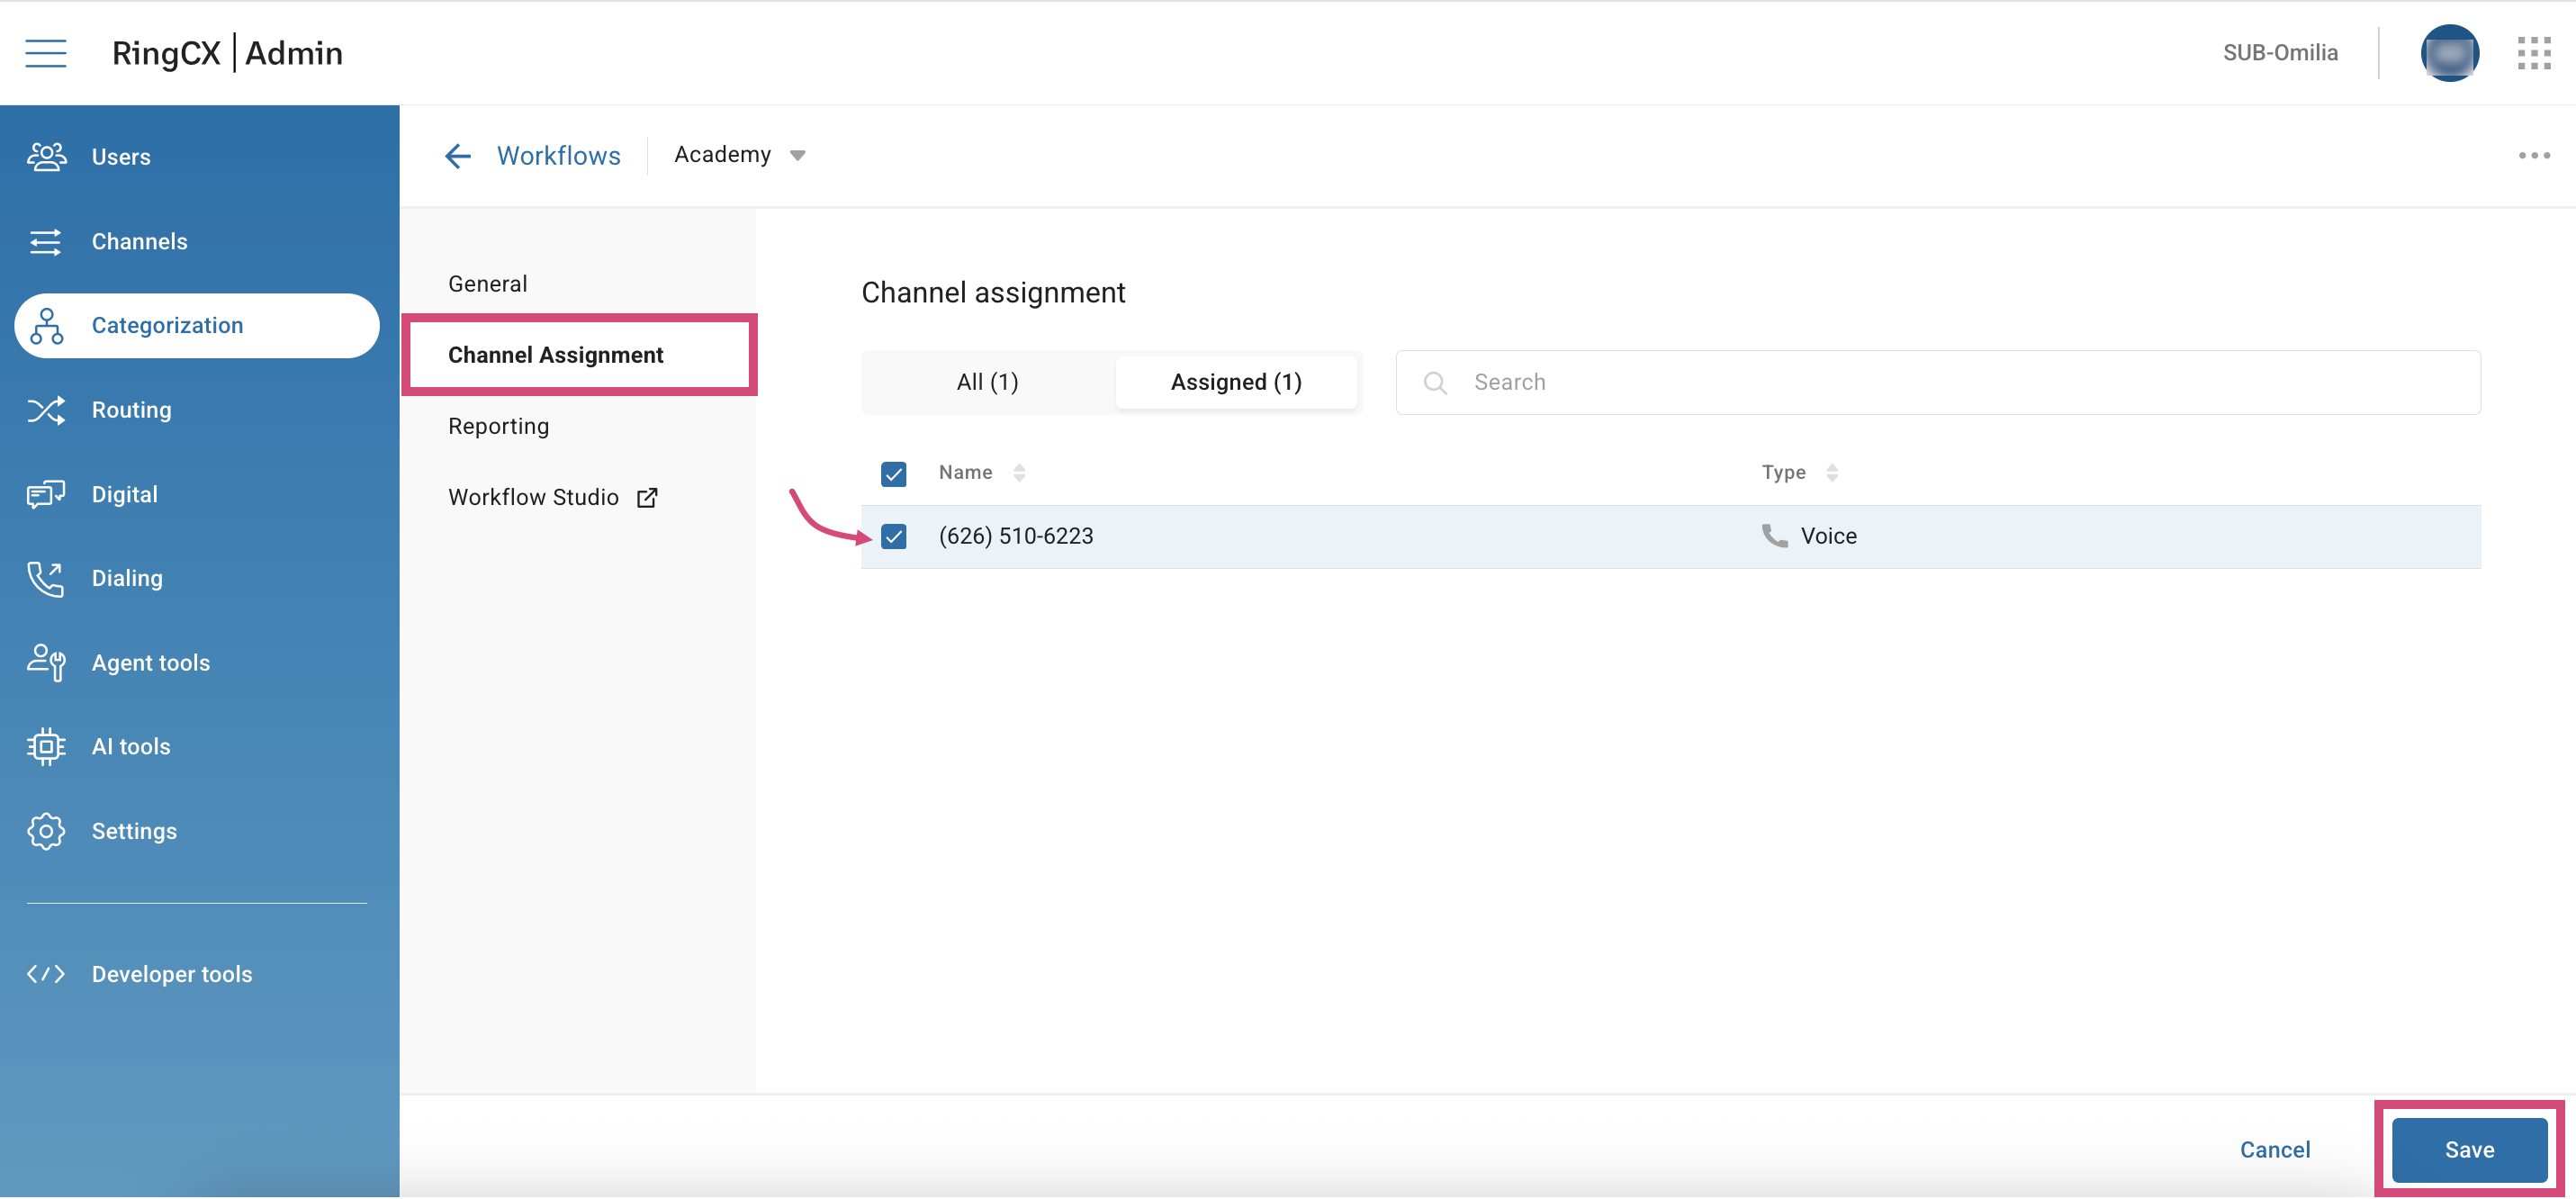
Now, go to the Channel Assignment tab. Mark the channel you want to assign as the IVR channel and click Save.
-
Next, click Workflow Studio.

-
You will be forwarded to Workflow Studio. Follow the steps below to set up your workflow.
Workflow Studio Setup
You can find detailed instructions for using Workflow Studio in RingCentral’s guide: Building workflows in RingCX.
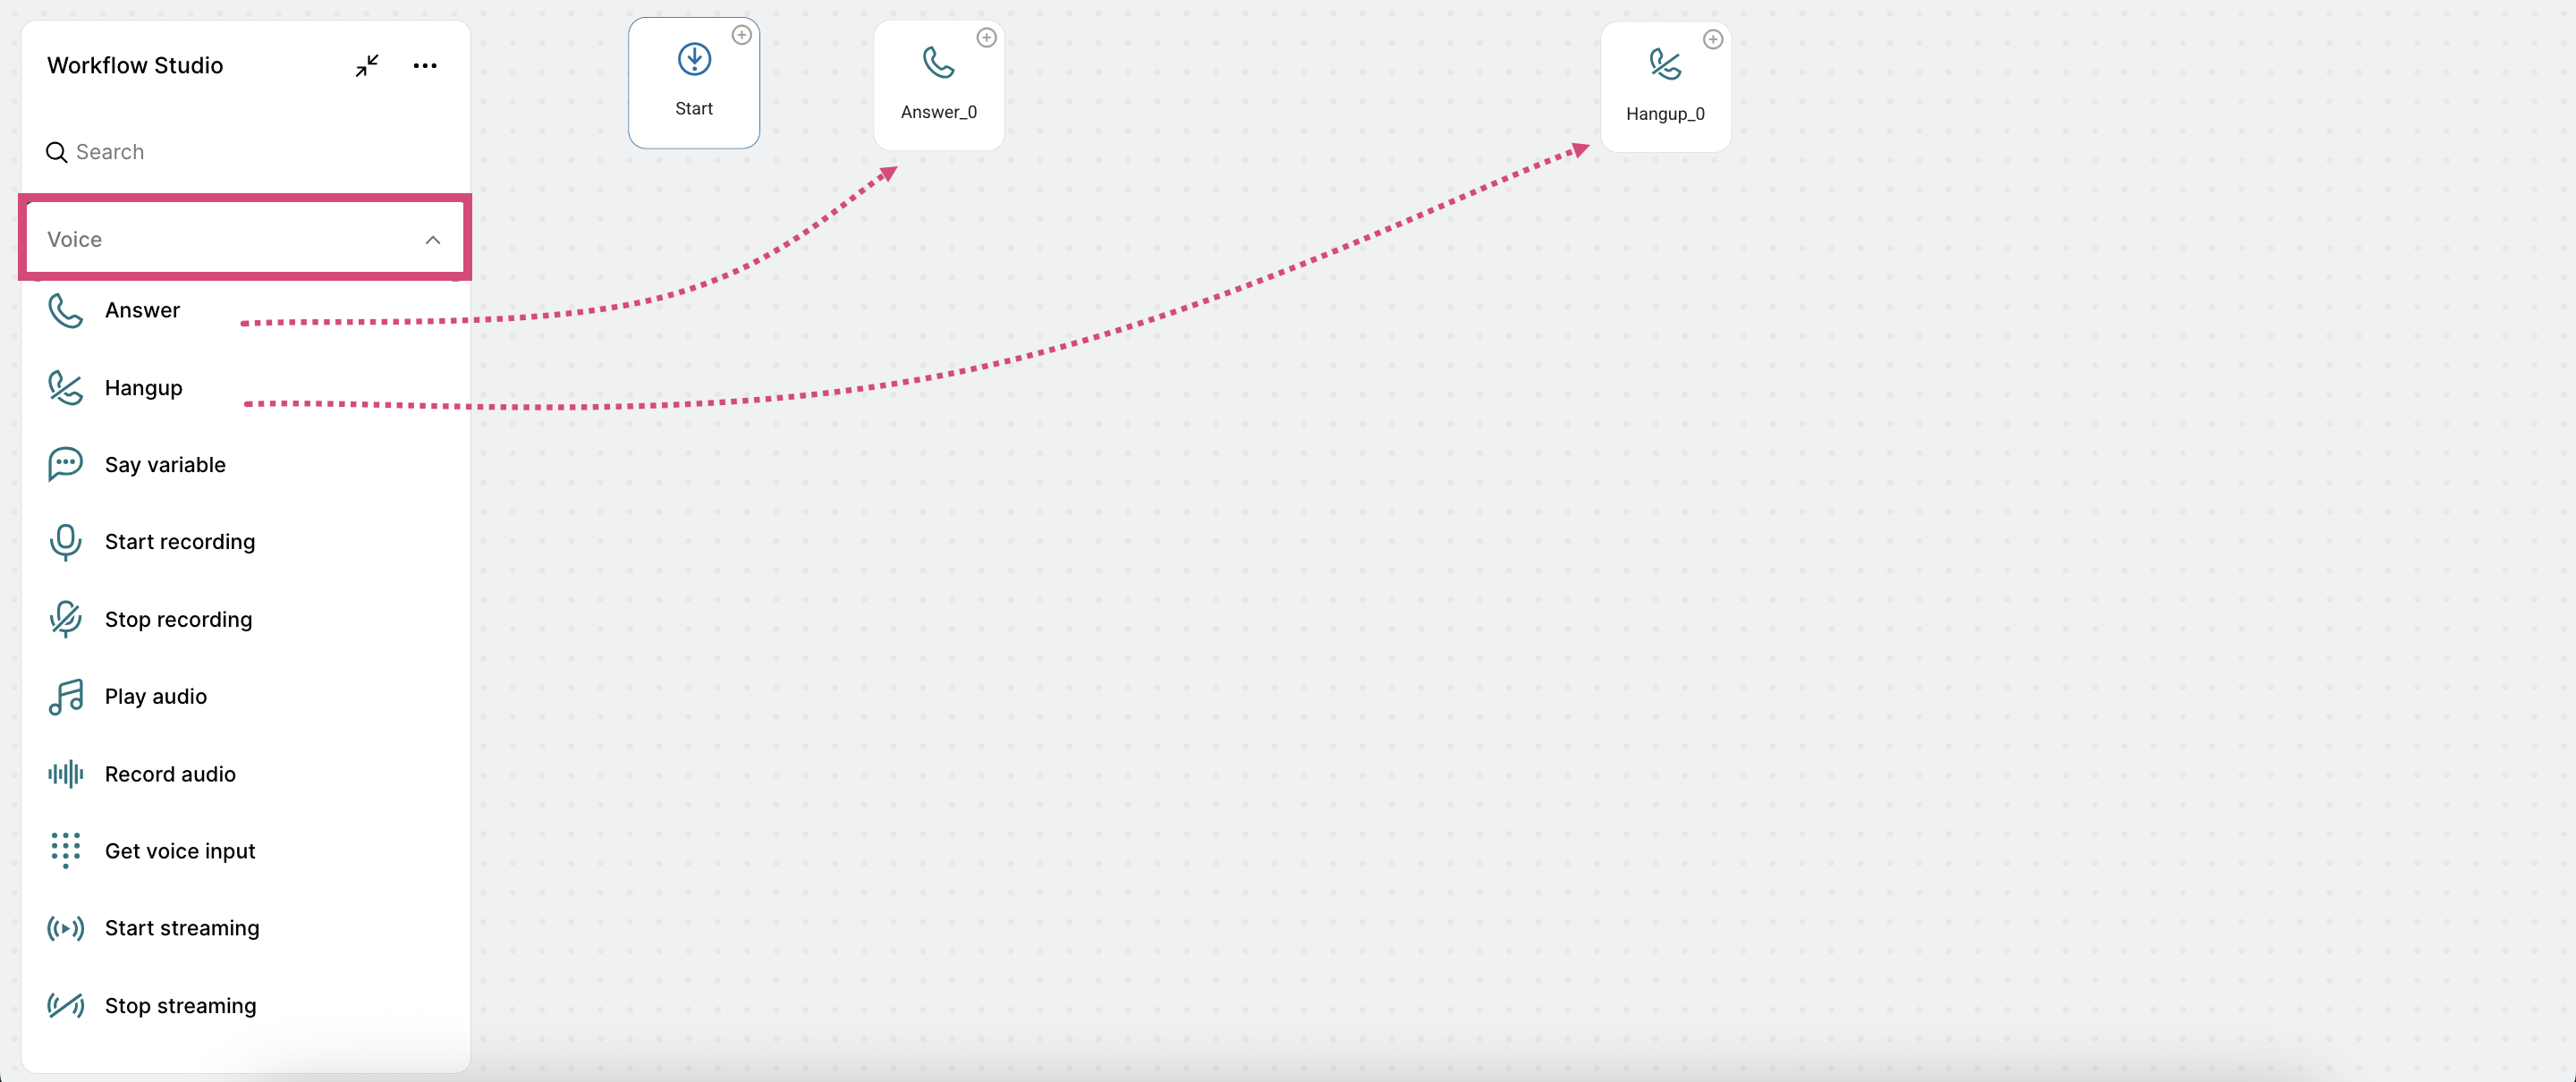
At this step, set up your workflow as follows.
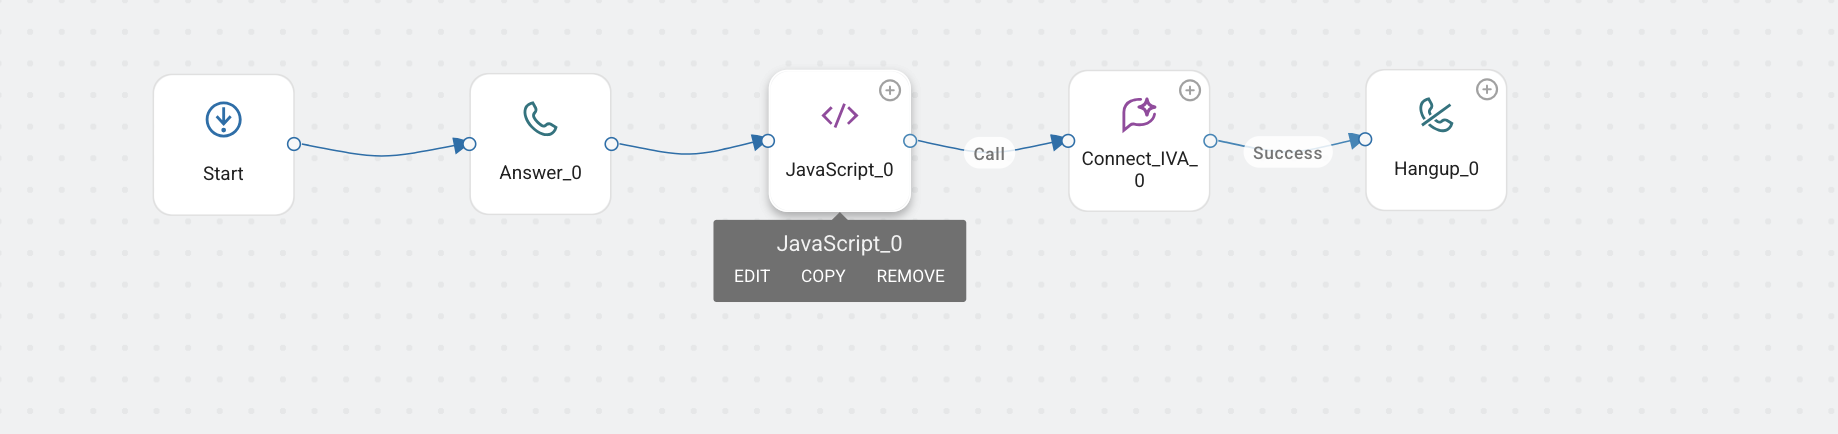
-
From the Voice category, drag the Answer and Hangup tiles onto the canvas.
-
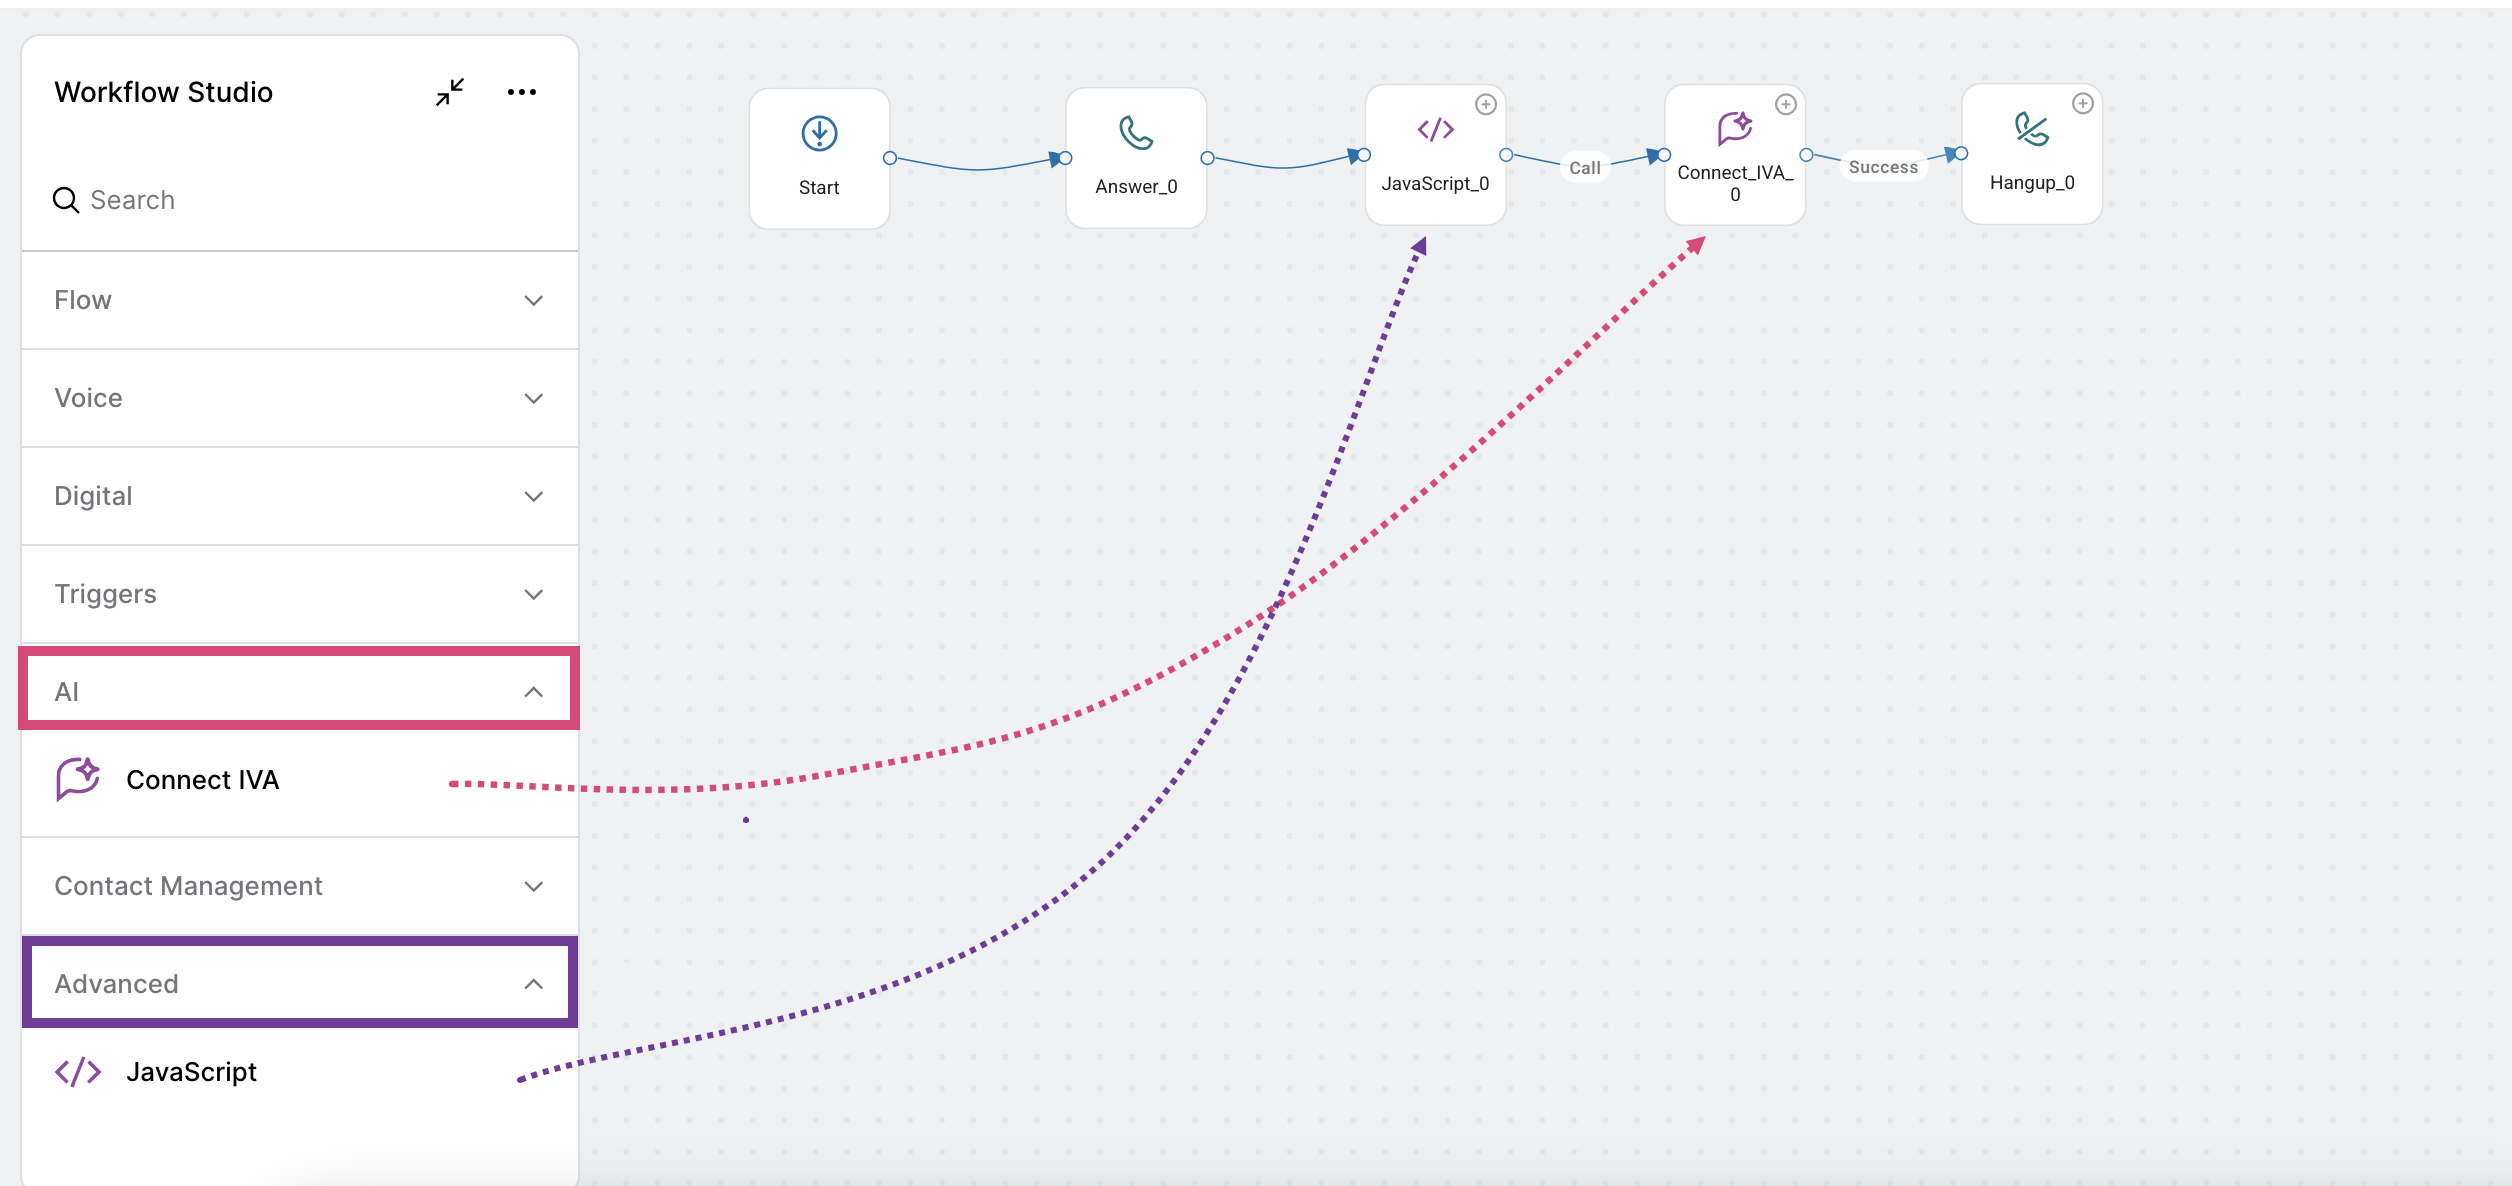
From the AI category, drag the IVA (integration with Omilia) node.
-
From the Advanced category, drag the JavaScript (Fields setting) node.
Configure IVA Node and Custom Headers
Below are instructions to configure the IVA node and custom headers.
The required custom fields will be sent in a map under the X-Bot-Context header. The signal must be set using a JavaScript Node immediately before the IVA Node. In the following example, we indicate which part of the JSON will be sent by specifying the object in the IVA Node → Context Filter Field. For example, visibleData.
First, configure the JavaScript node code as follows:
-
Hover over the JavaScript node, then click Edit.
-
In the dialog box, enter the required JS script.
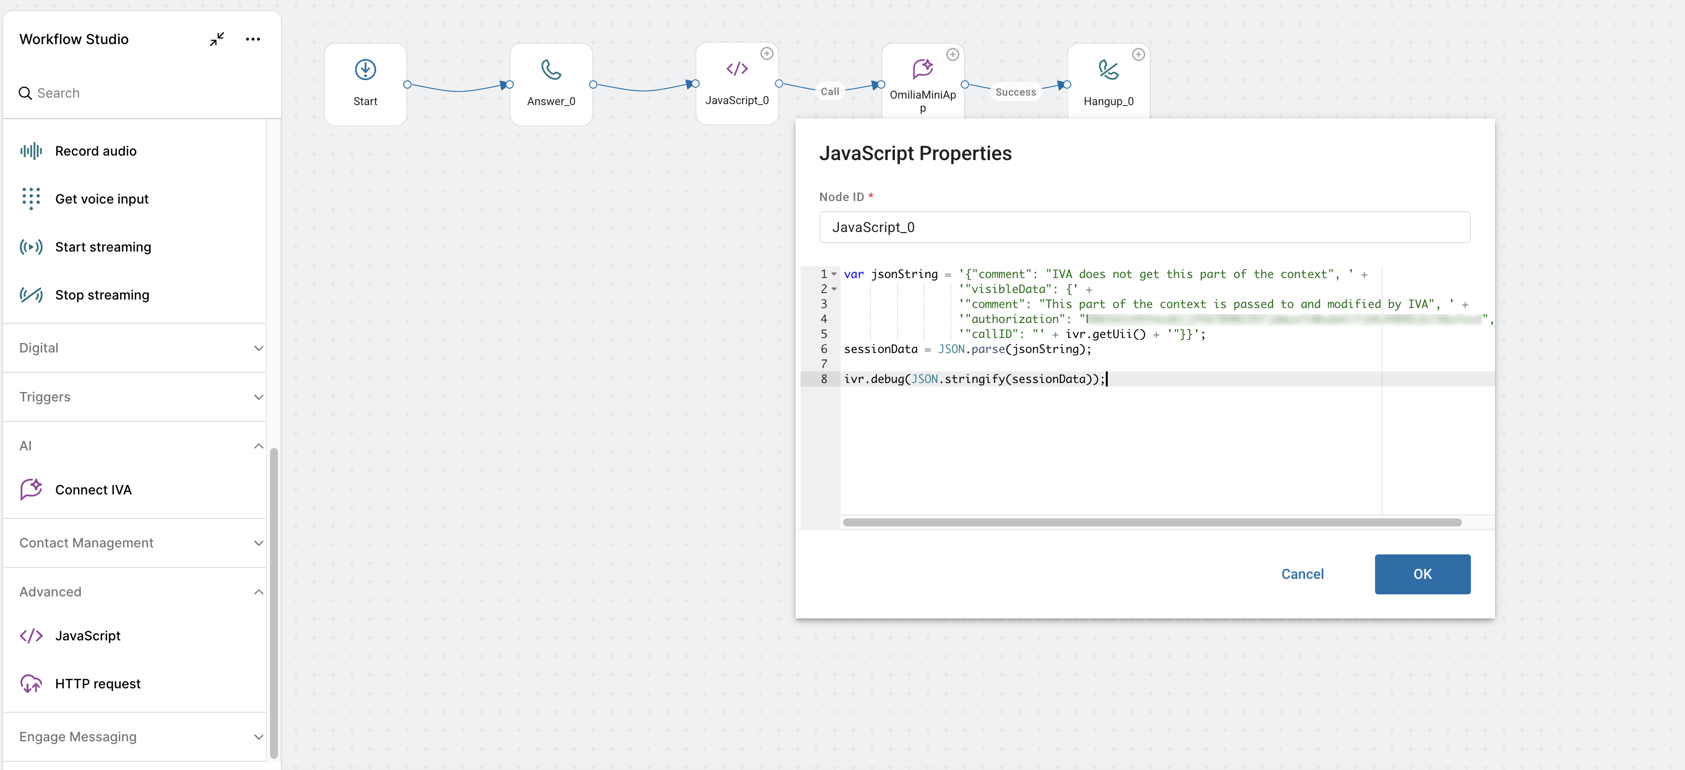
Here is a code example:
var jsonString = '{"comment": "IVA does not get this part of the context", ' +
                 '"visibleData": {' +
                 '"comment": "This part of the context is passed to and modified by IVA", ' +
                 '"authorization": "Token_value", ' +
                 '"callID": "' + ivr.getUii() + '"}}';
sessionData = JSON.parse(jsonString);
ivr.debug(JSON.stringify(sessionData));
-
If you have enabled debug in the workflow, use the
ivr.debug()function.
Find more JS functions in RingCX JS Functions.
-
Click OK to finish. JavaScript node code is configured.
Now proceed to IVA node configuration and follow these steps:
-
Hover over the IVA node, then click Edit.
-
In the dialog box that opens, complete the fields as described below.
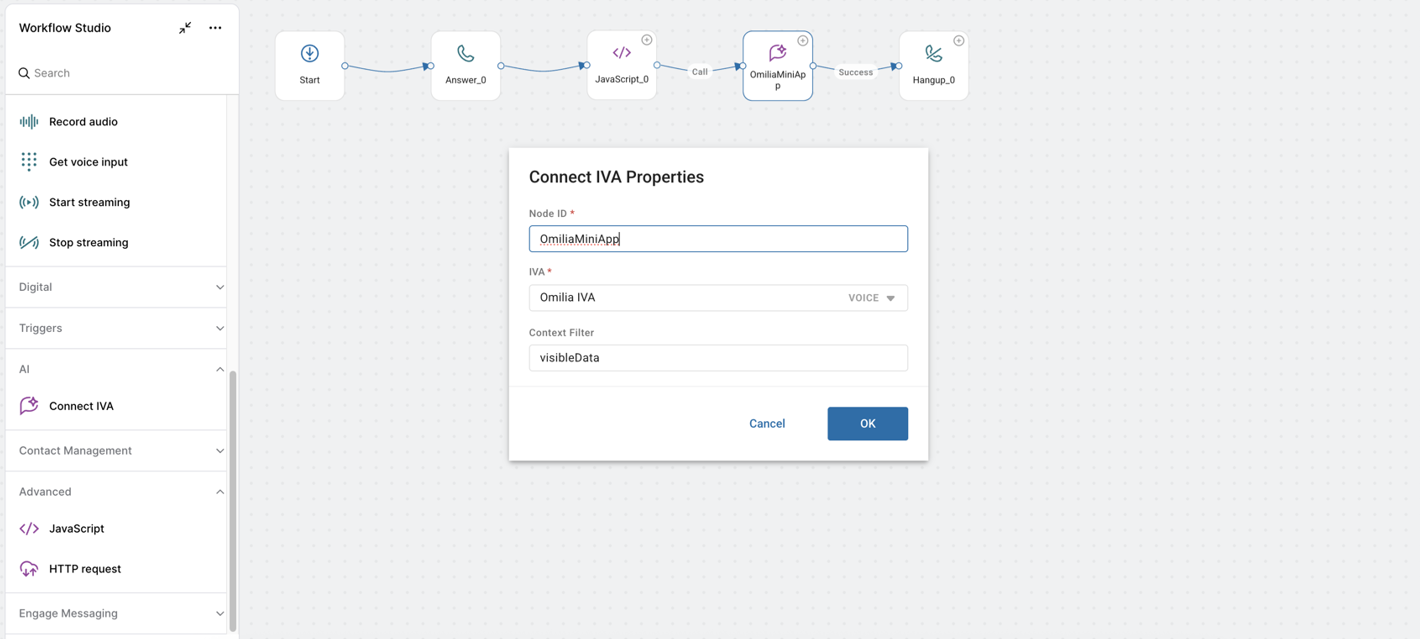
-
Node ID: Enter the node name.
-
IVA: Select the IVA you created (Omilia IVA).
-
Context Filter: Define the specific part within the overall
$sessionDataobject that should be passed to and updated by the IVA node during the interaction. For our example, we’ve selectedvisibleData.
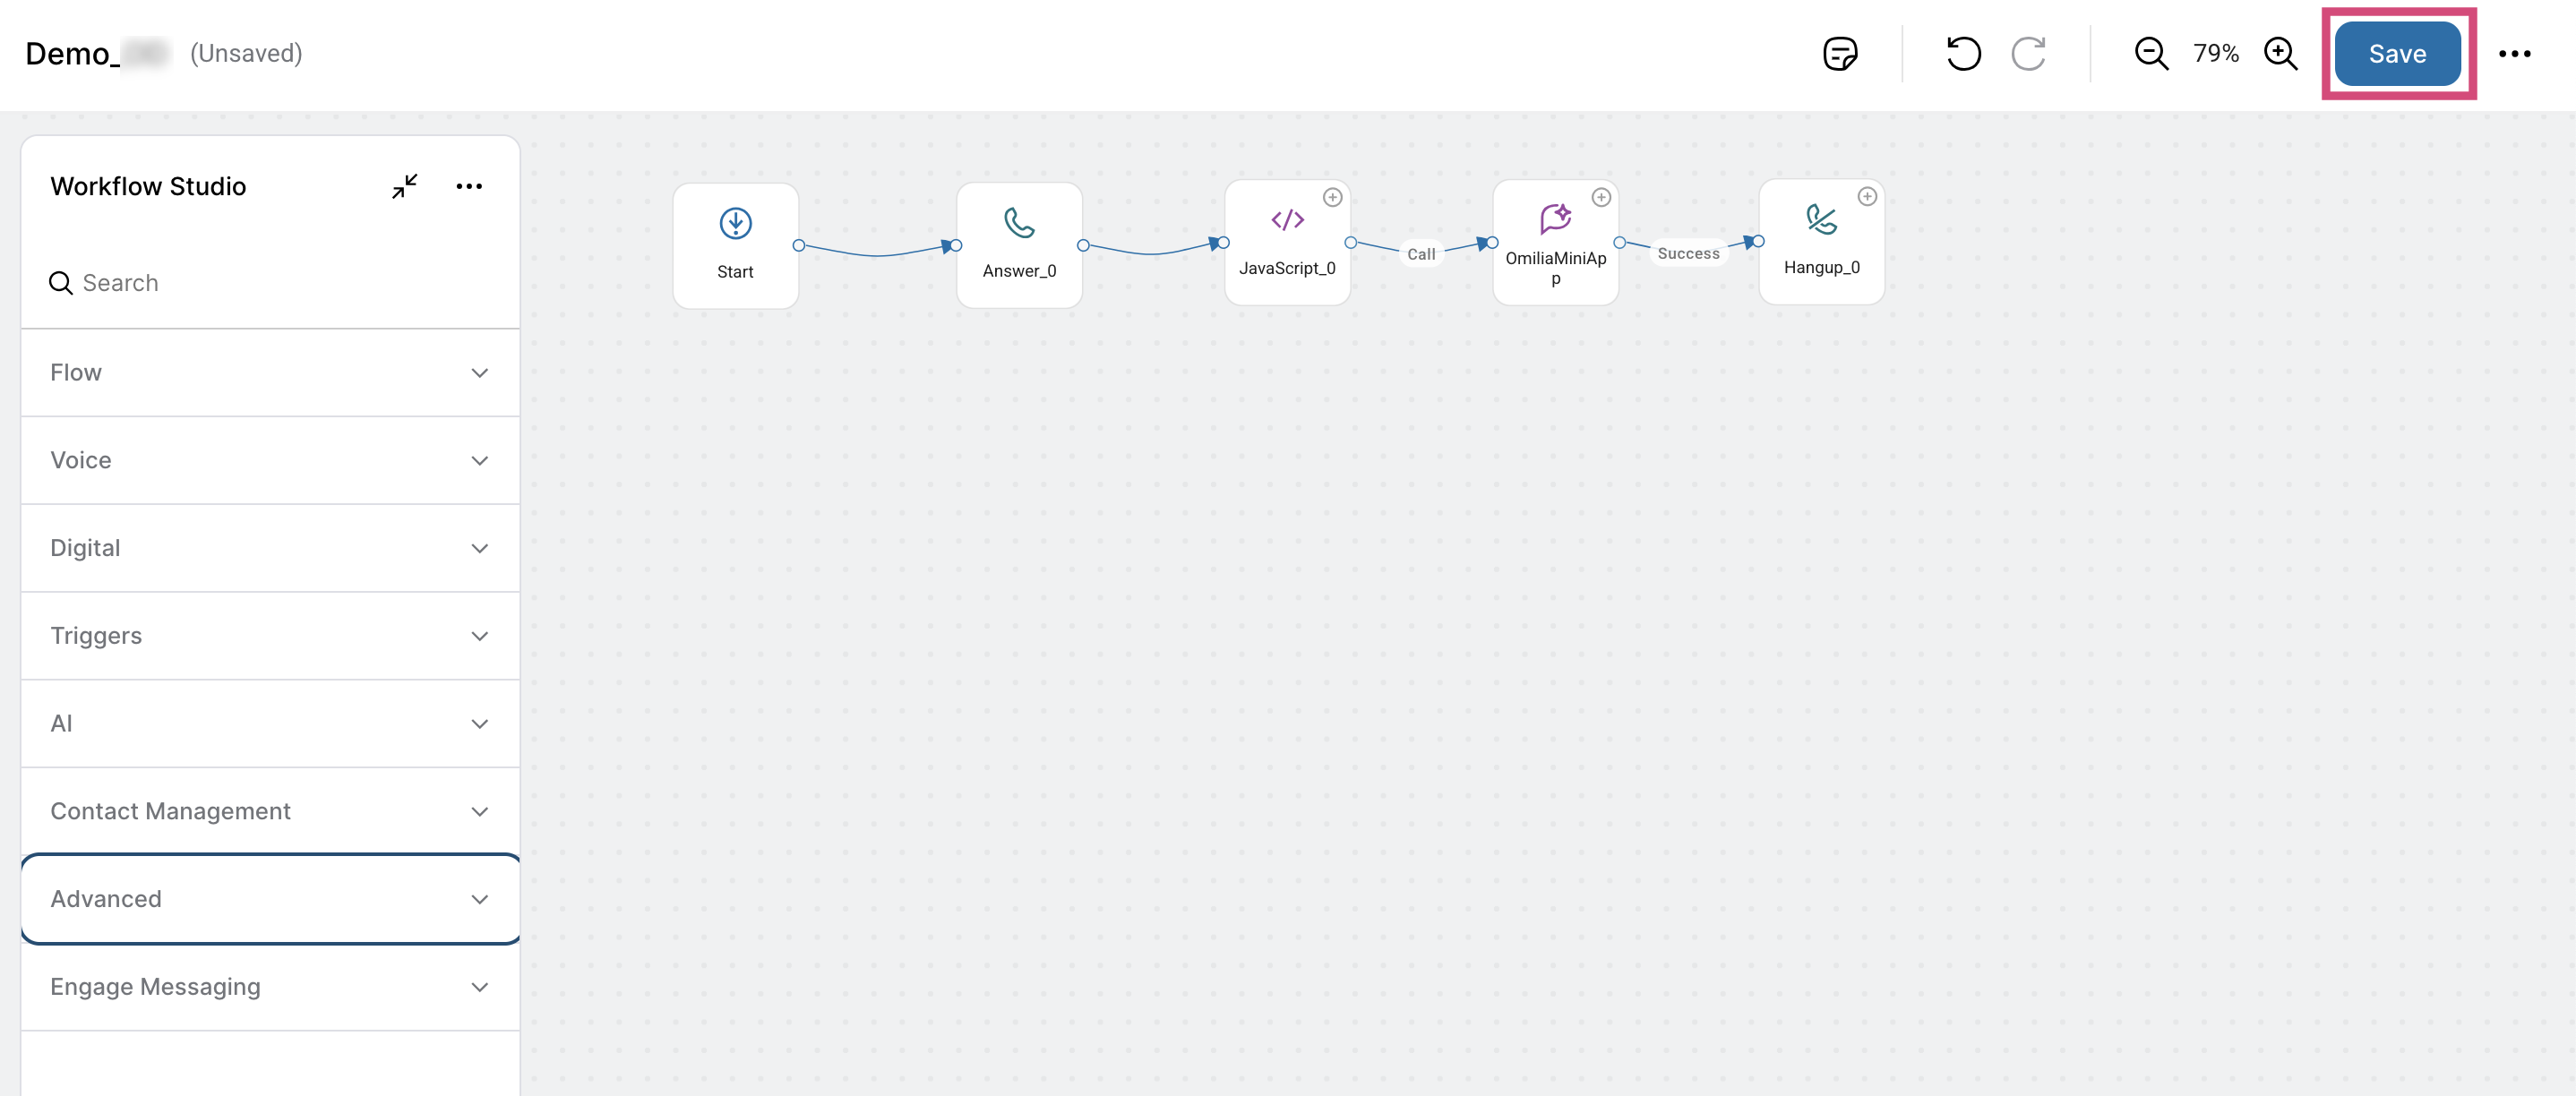
-
Click Save to deploy the changes in the workflow.
STEP 3. Display OCP data back in Ring Central
To retrieve the miniApp result from OCP, use an additional JavaScript node. Follow these steps:
-
Drag another JavaScript node onto the canvas as you did before.
-
Hover over the node, then click Edit.
-
In the dialog box, enter the JS script.
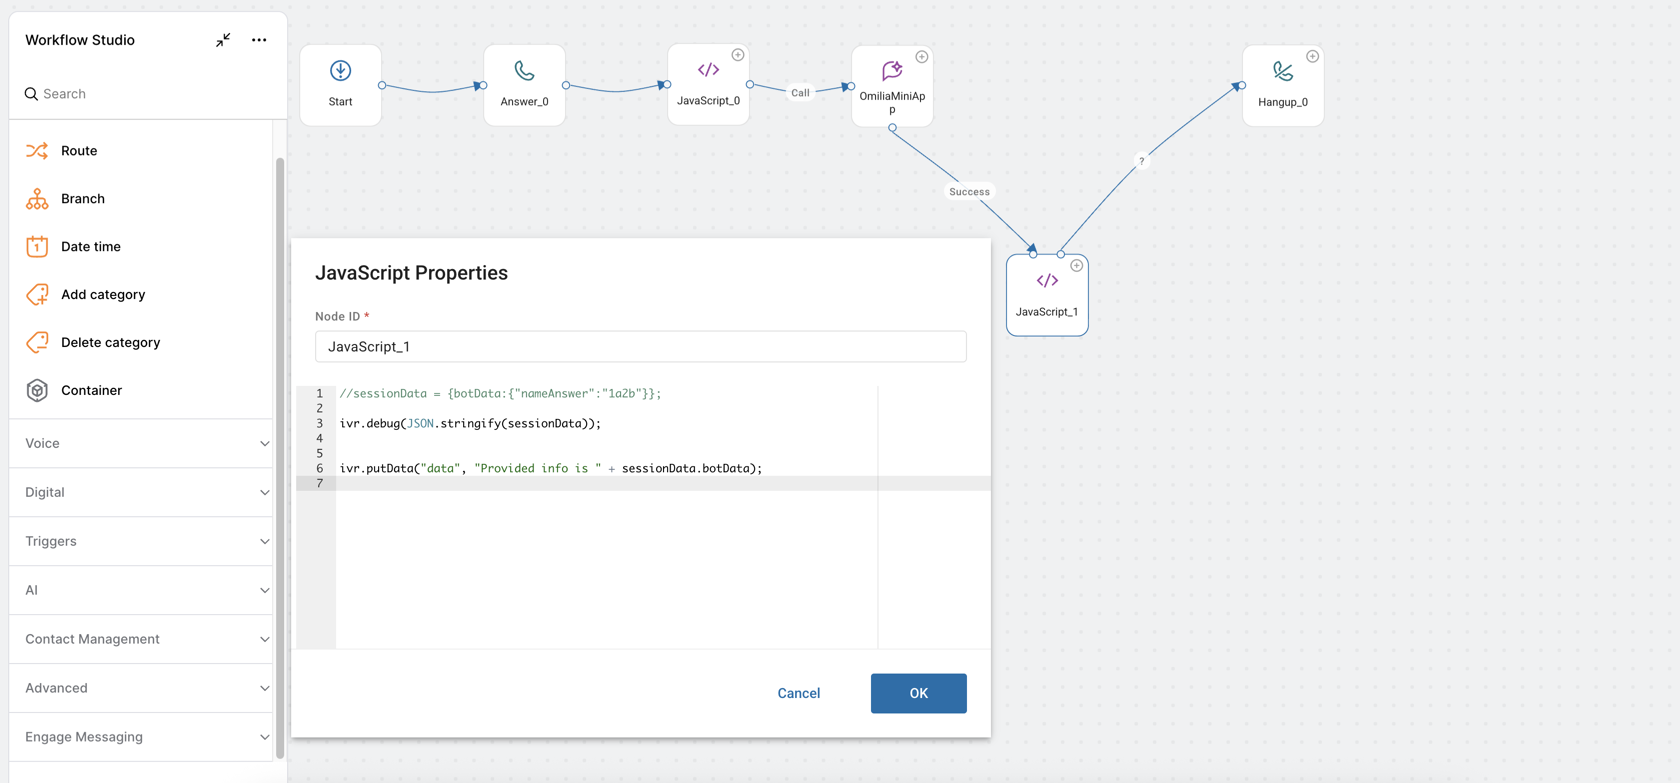
Here is a script example:
ivr.debug(JSON.stringify(sessionData)); // for debugging
var resultObject = sessionData.visibleData.result.input_value;
ivr.putData("data", "Provided info is " + resultObject);
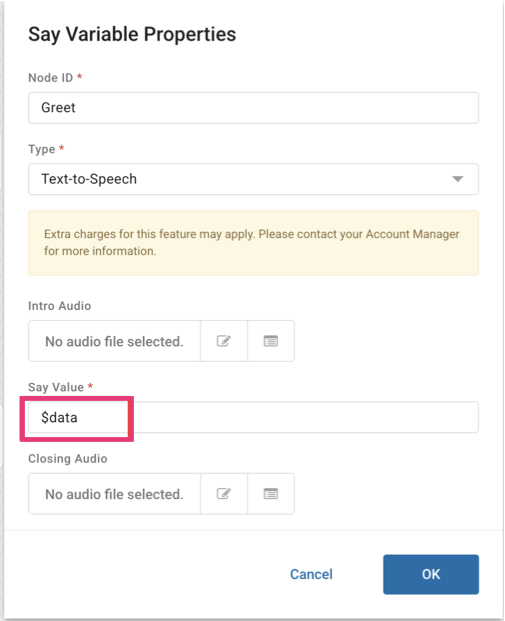
This example stores the user input in a $data variable for use in later nodes. For example, in the next Say variable voice module.
-
Click Save to save the workflow changes.
STEP 4. Connecting to an Agent
At this step, create a voice queue and establish the connection to an agent. Follow the instructions below.
-
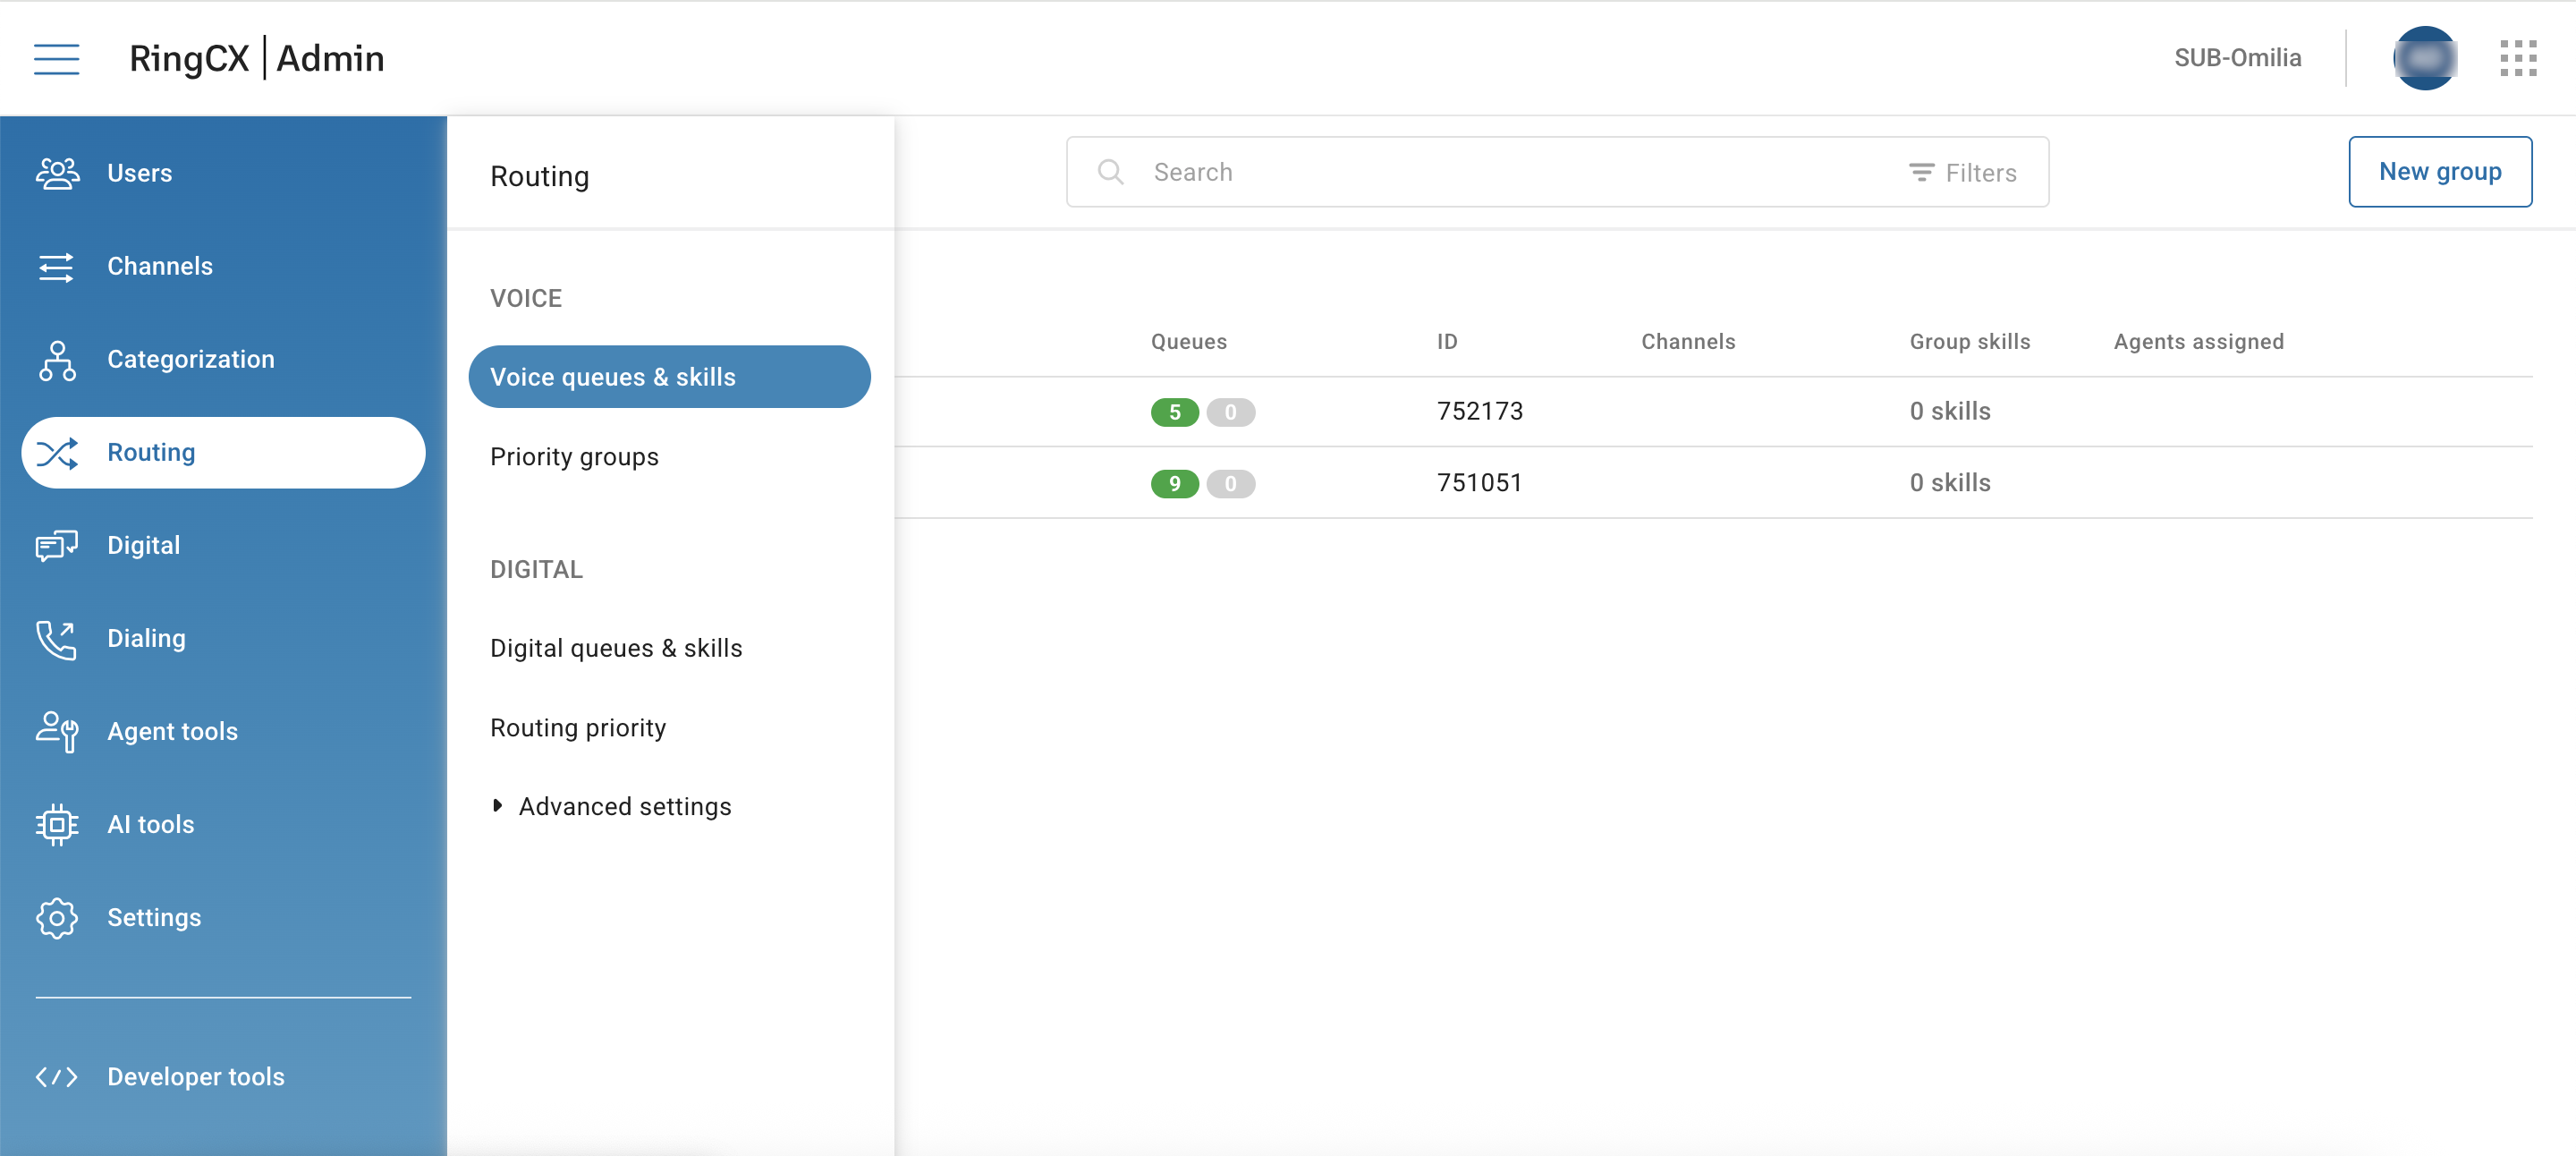
Navigate to the Admin panel.
-
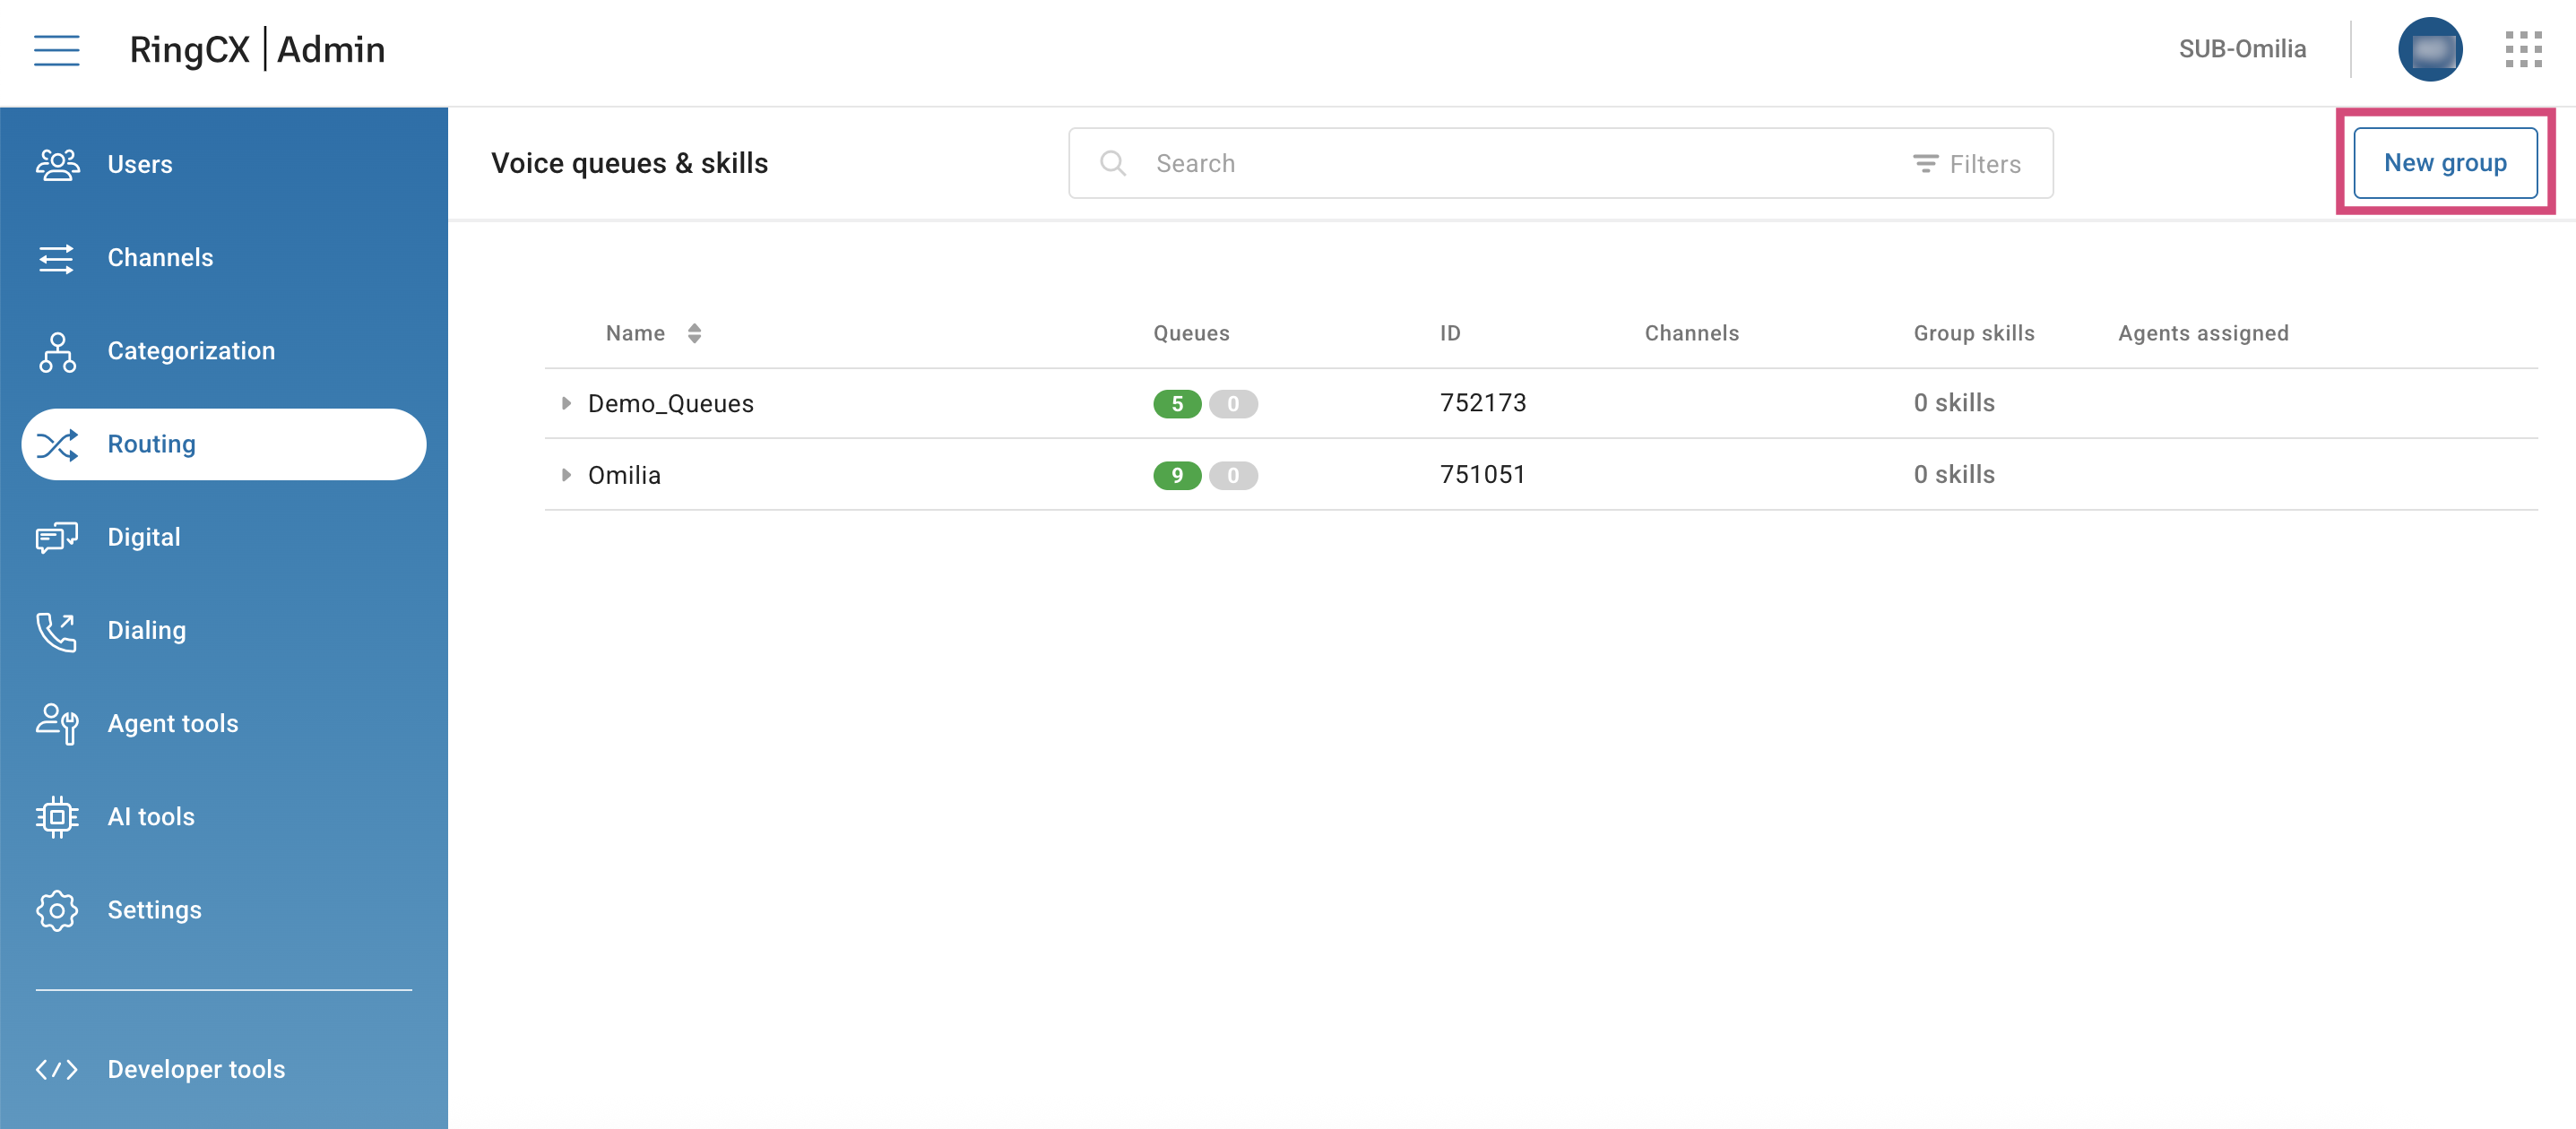
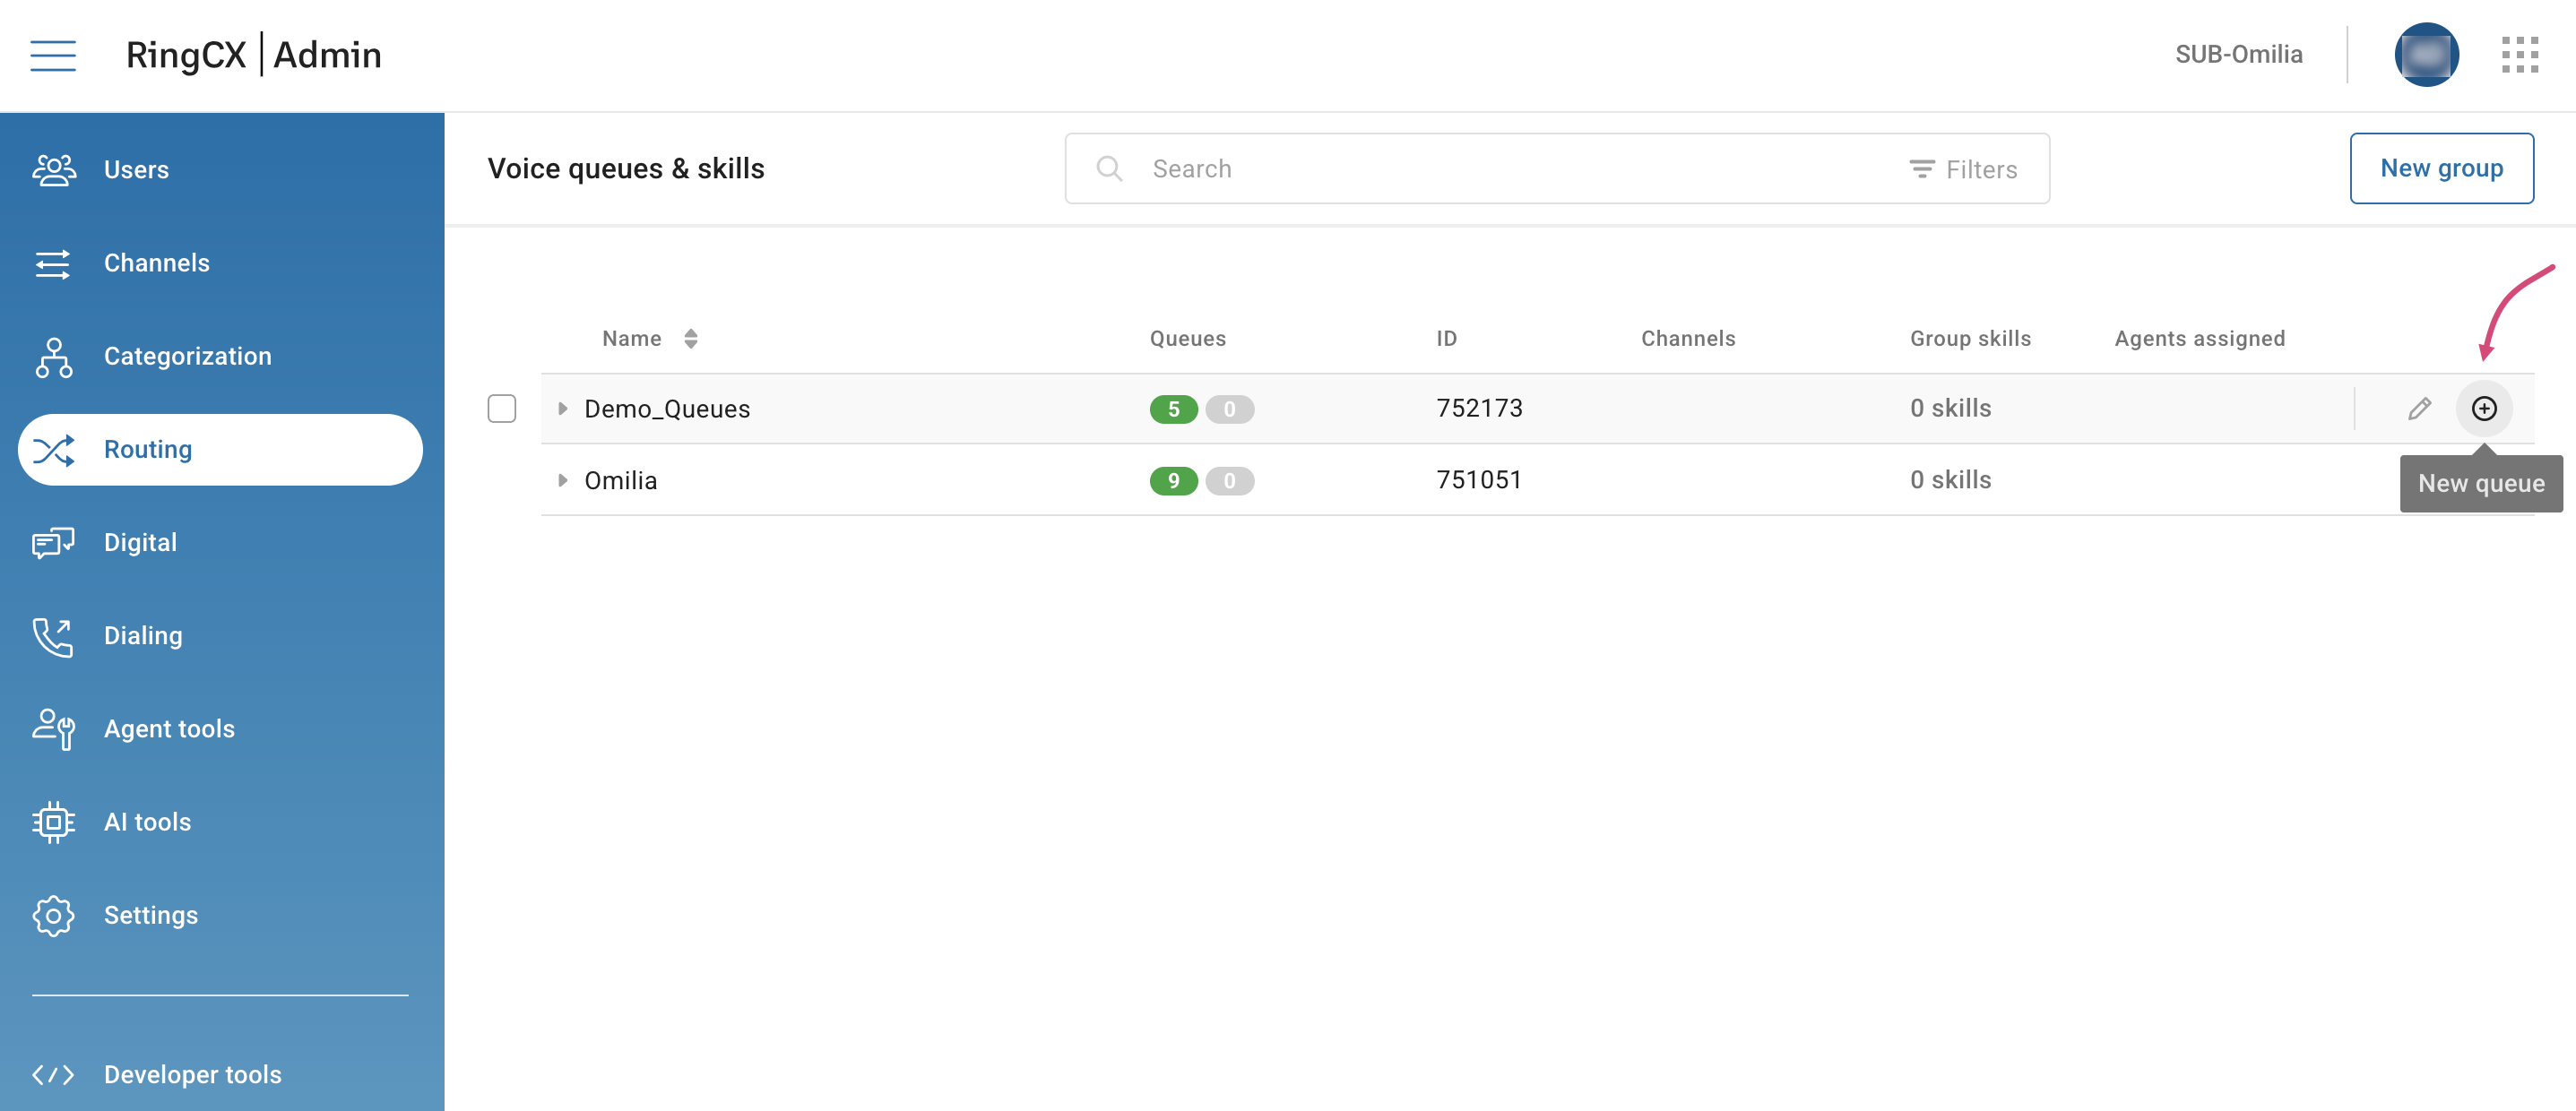
Go to Routing → Voice queues & skills.
-
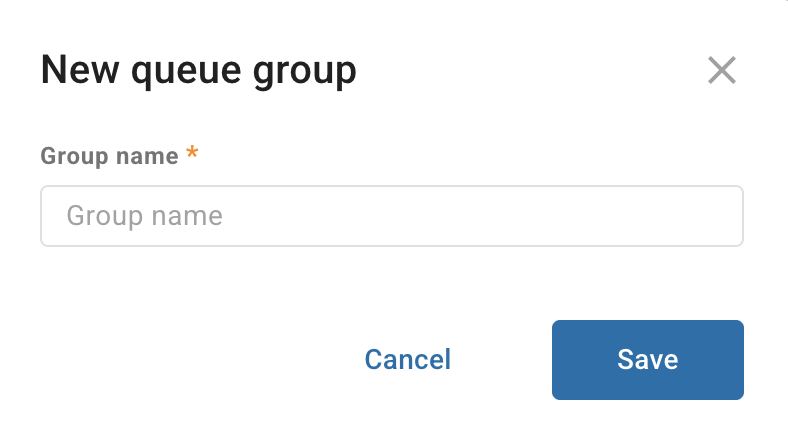
Click New group, then enter the group’s name. You can skip this step if you already have available queue groups.
-
Hover over the group to which you want to add a new queue and click the Plus icon.
-
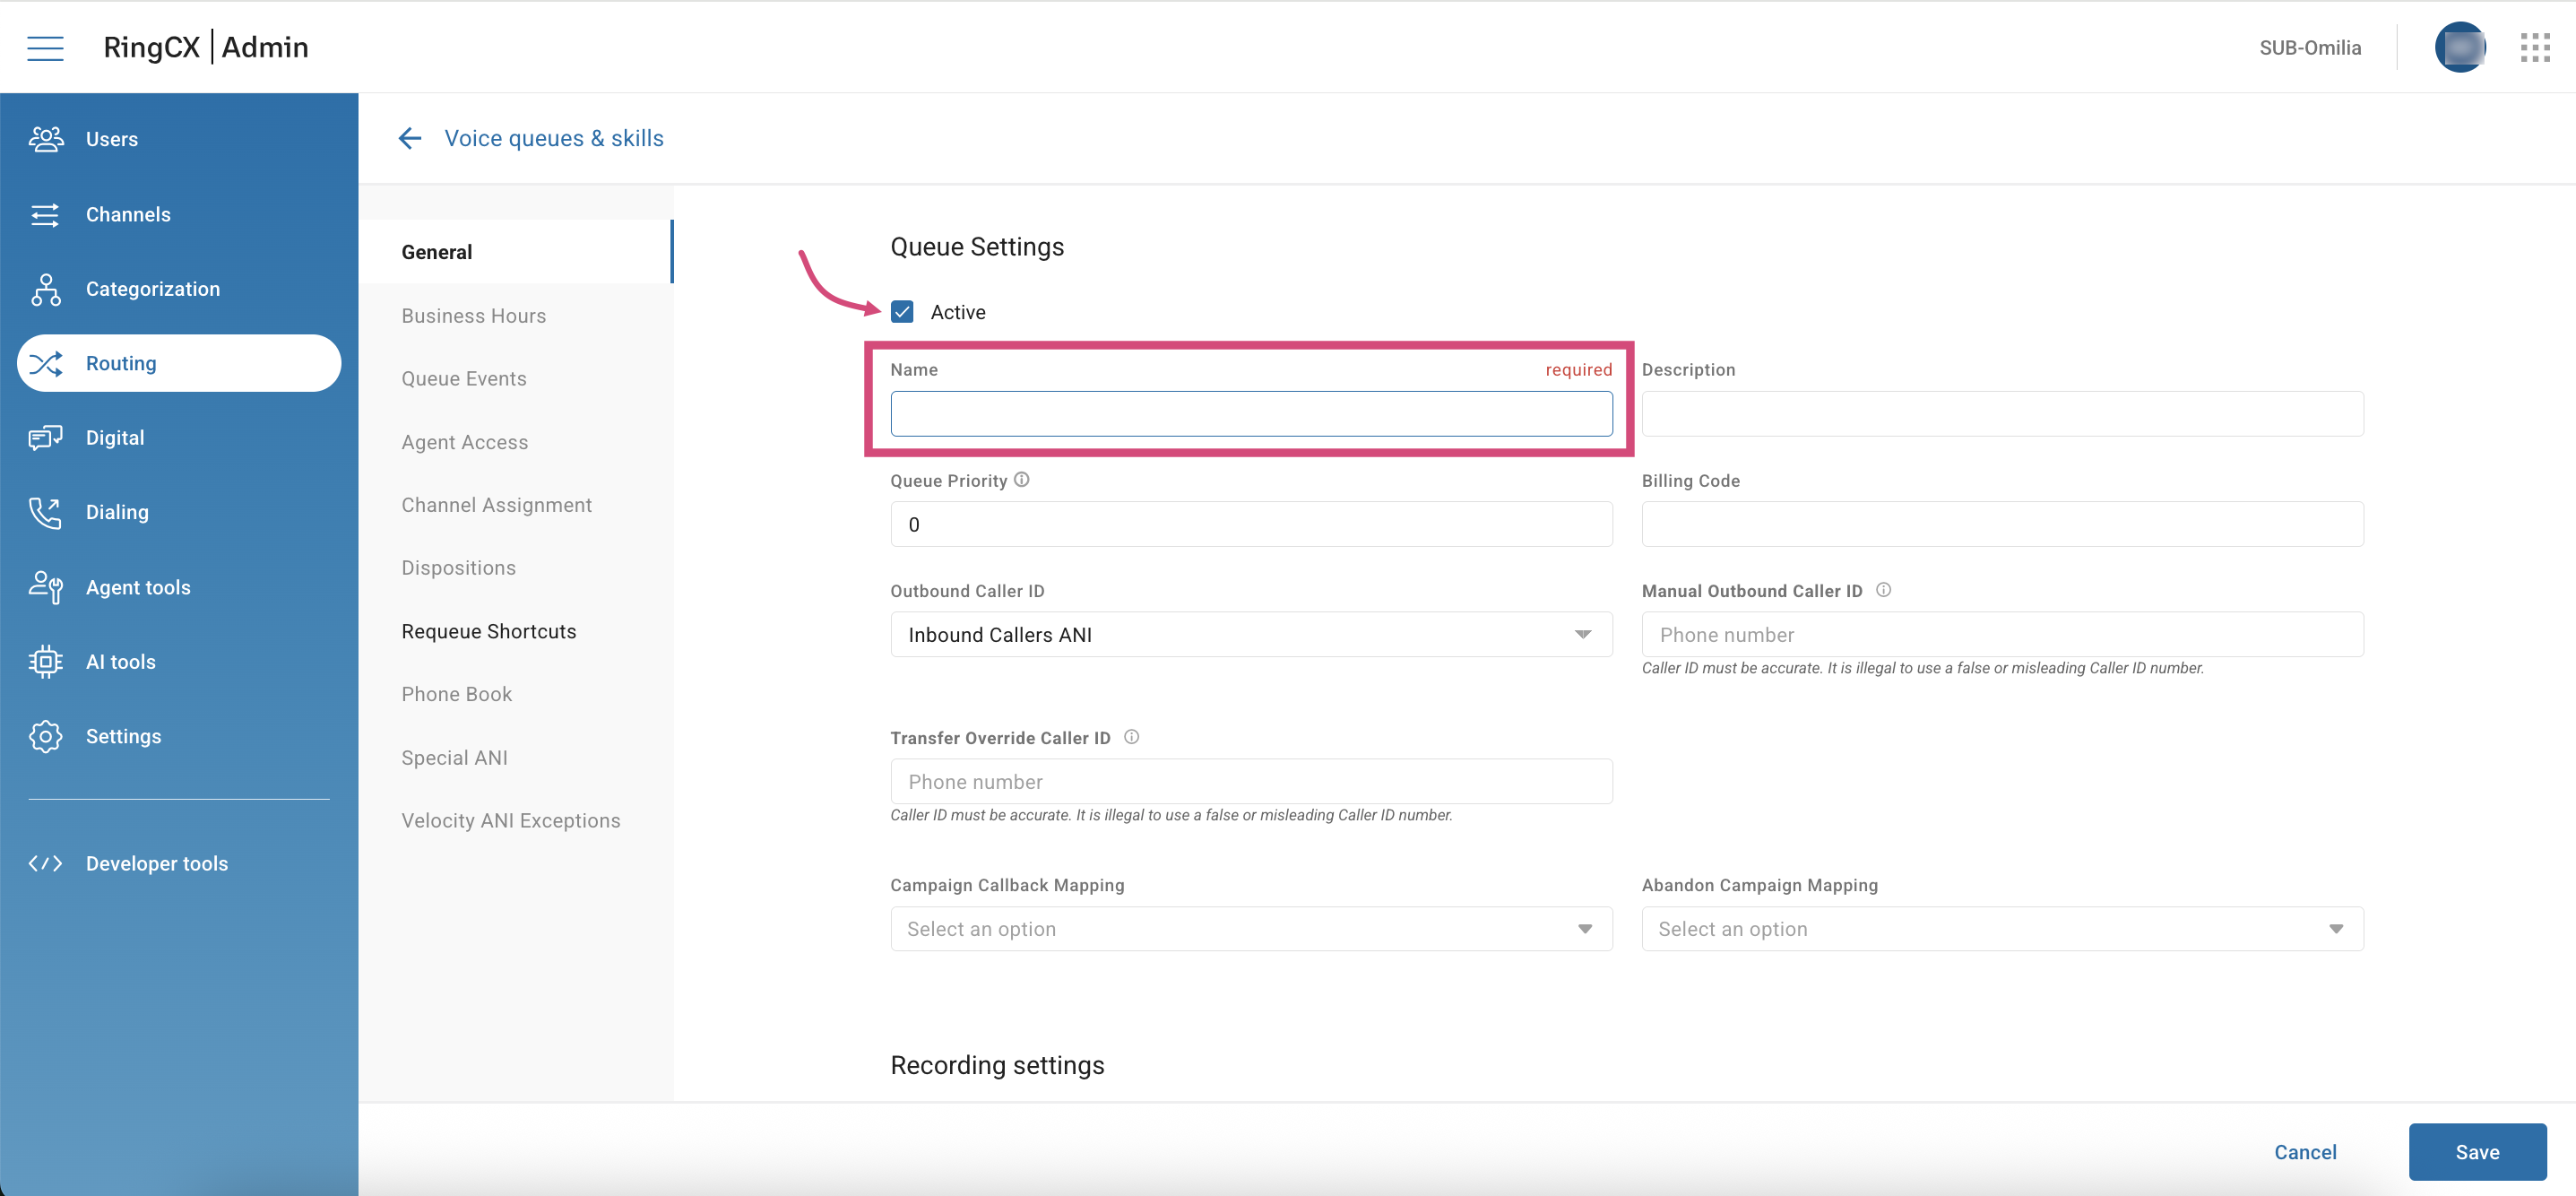
In the queue setup page, enter the queue name and mark the Active checkbox. You can keep other parameters at their default or adjust them as you need.
-
Click Save.
-
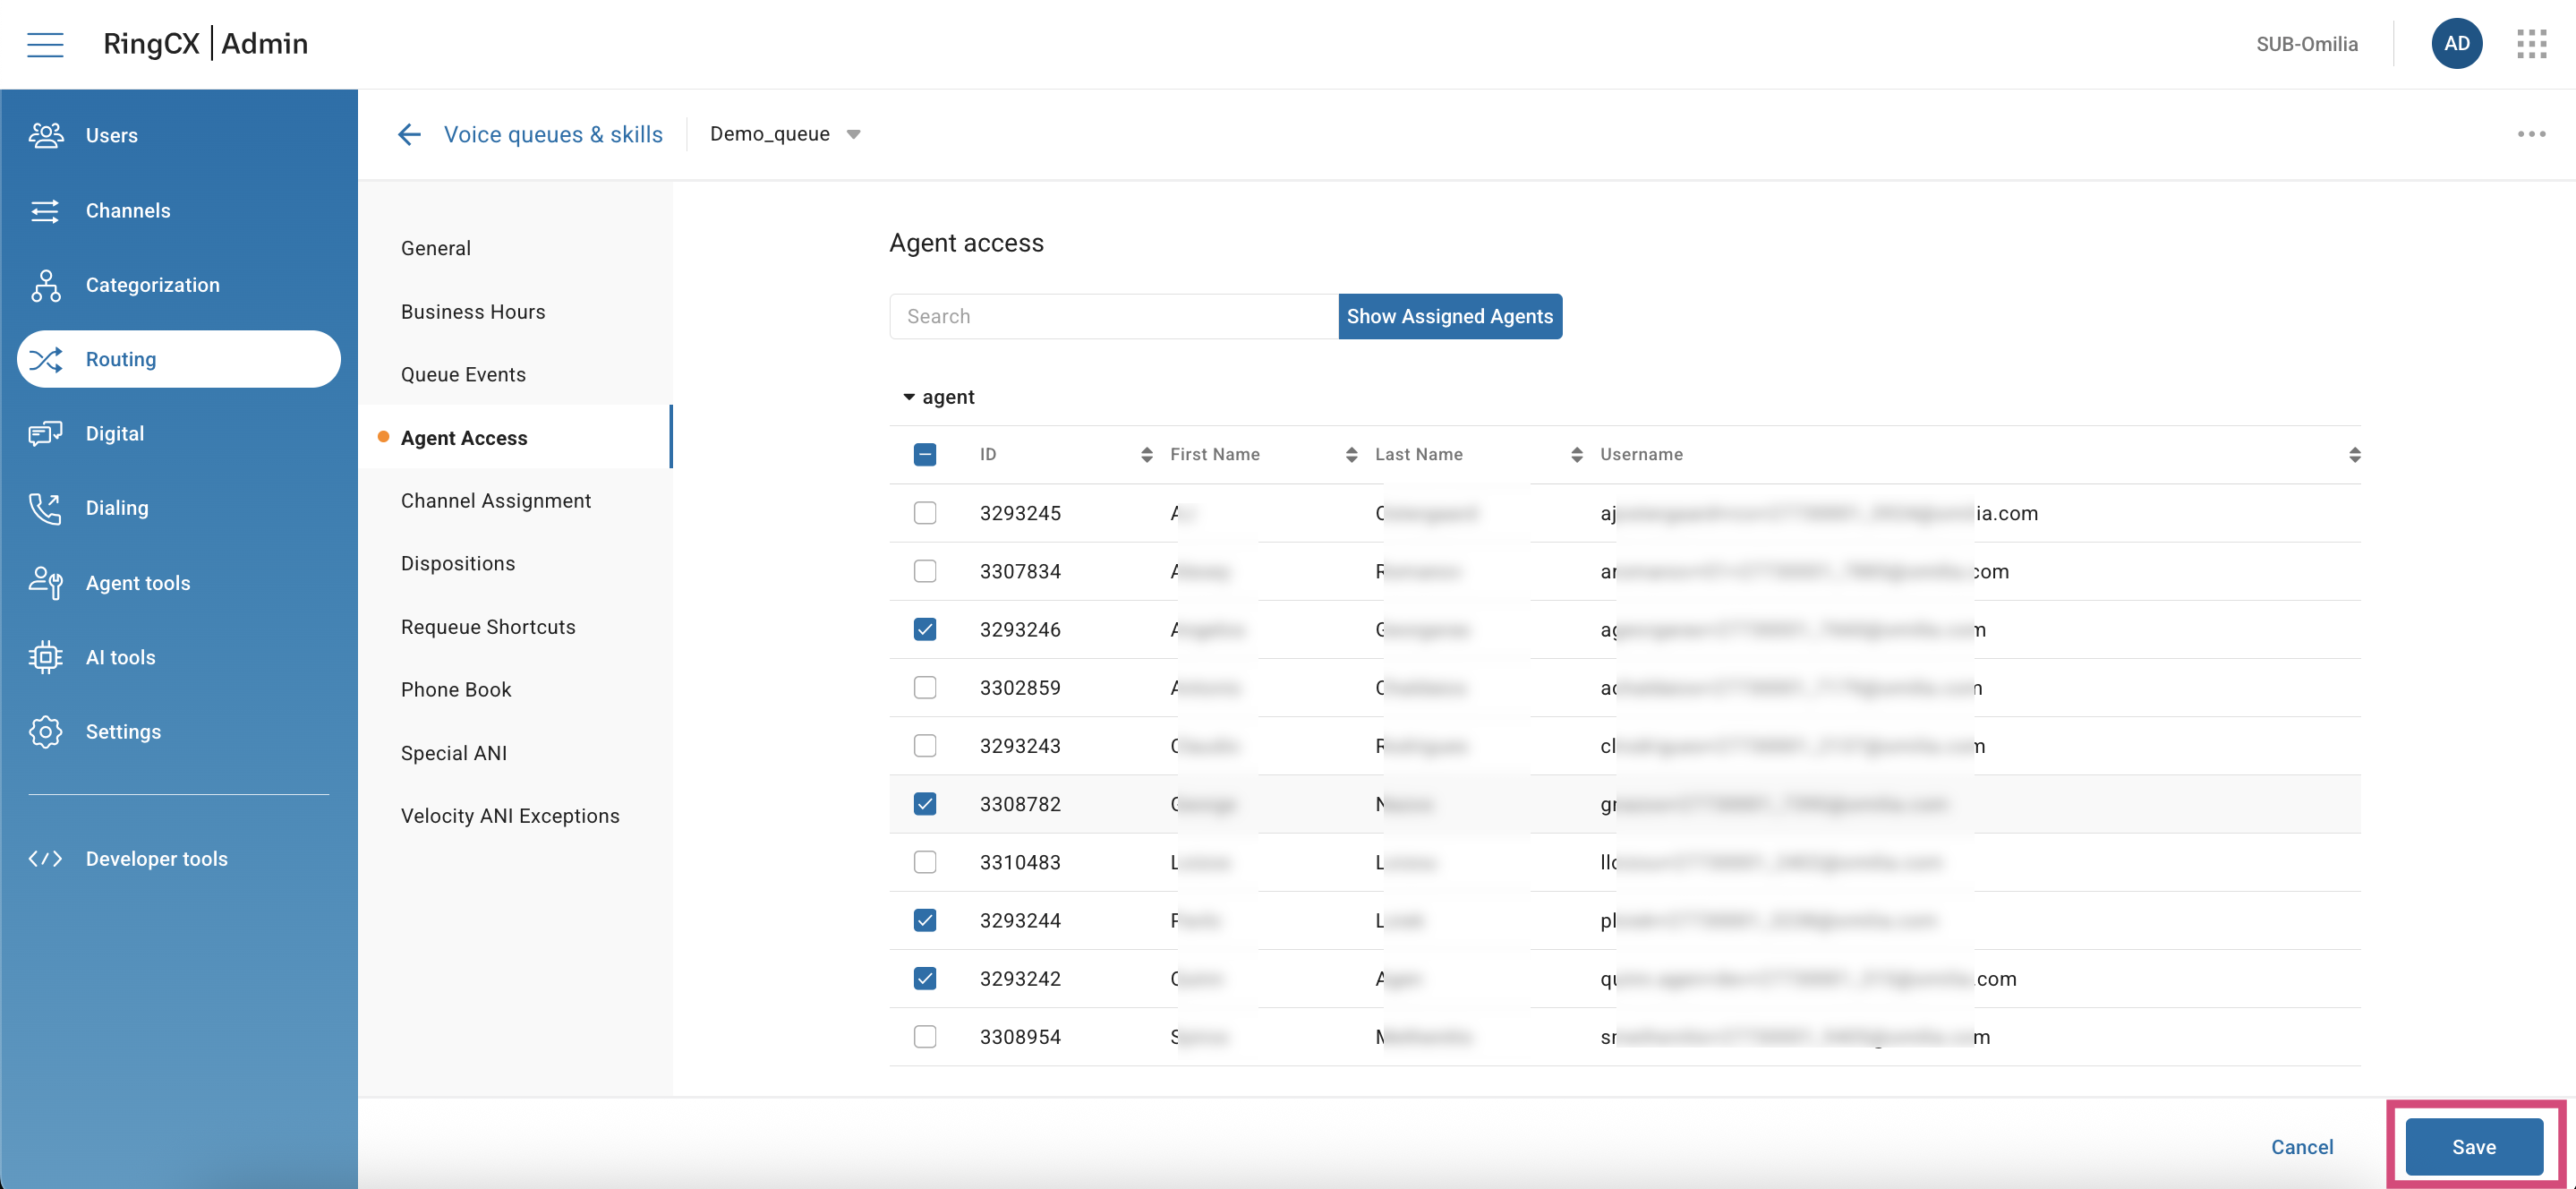
Next, go to Agent Access and select agents that will have access to the created queue.
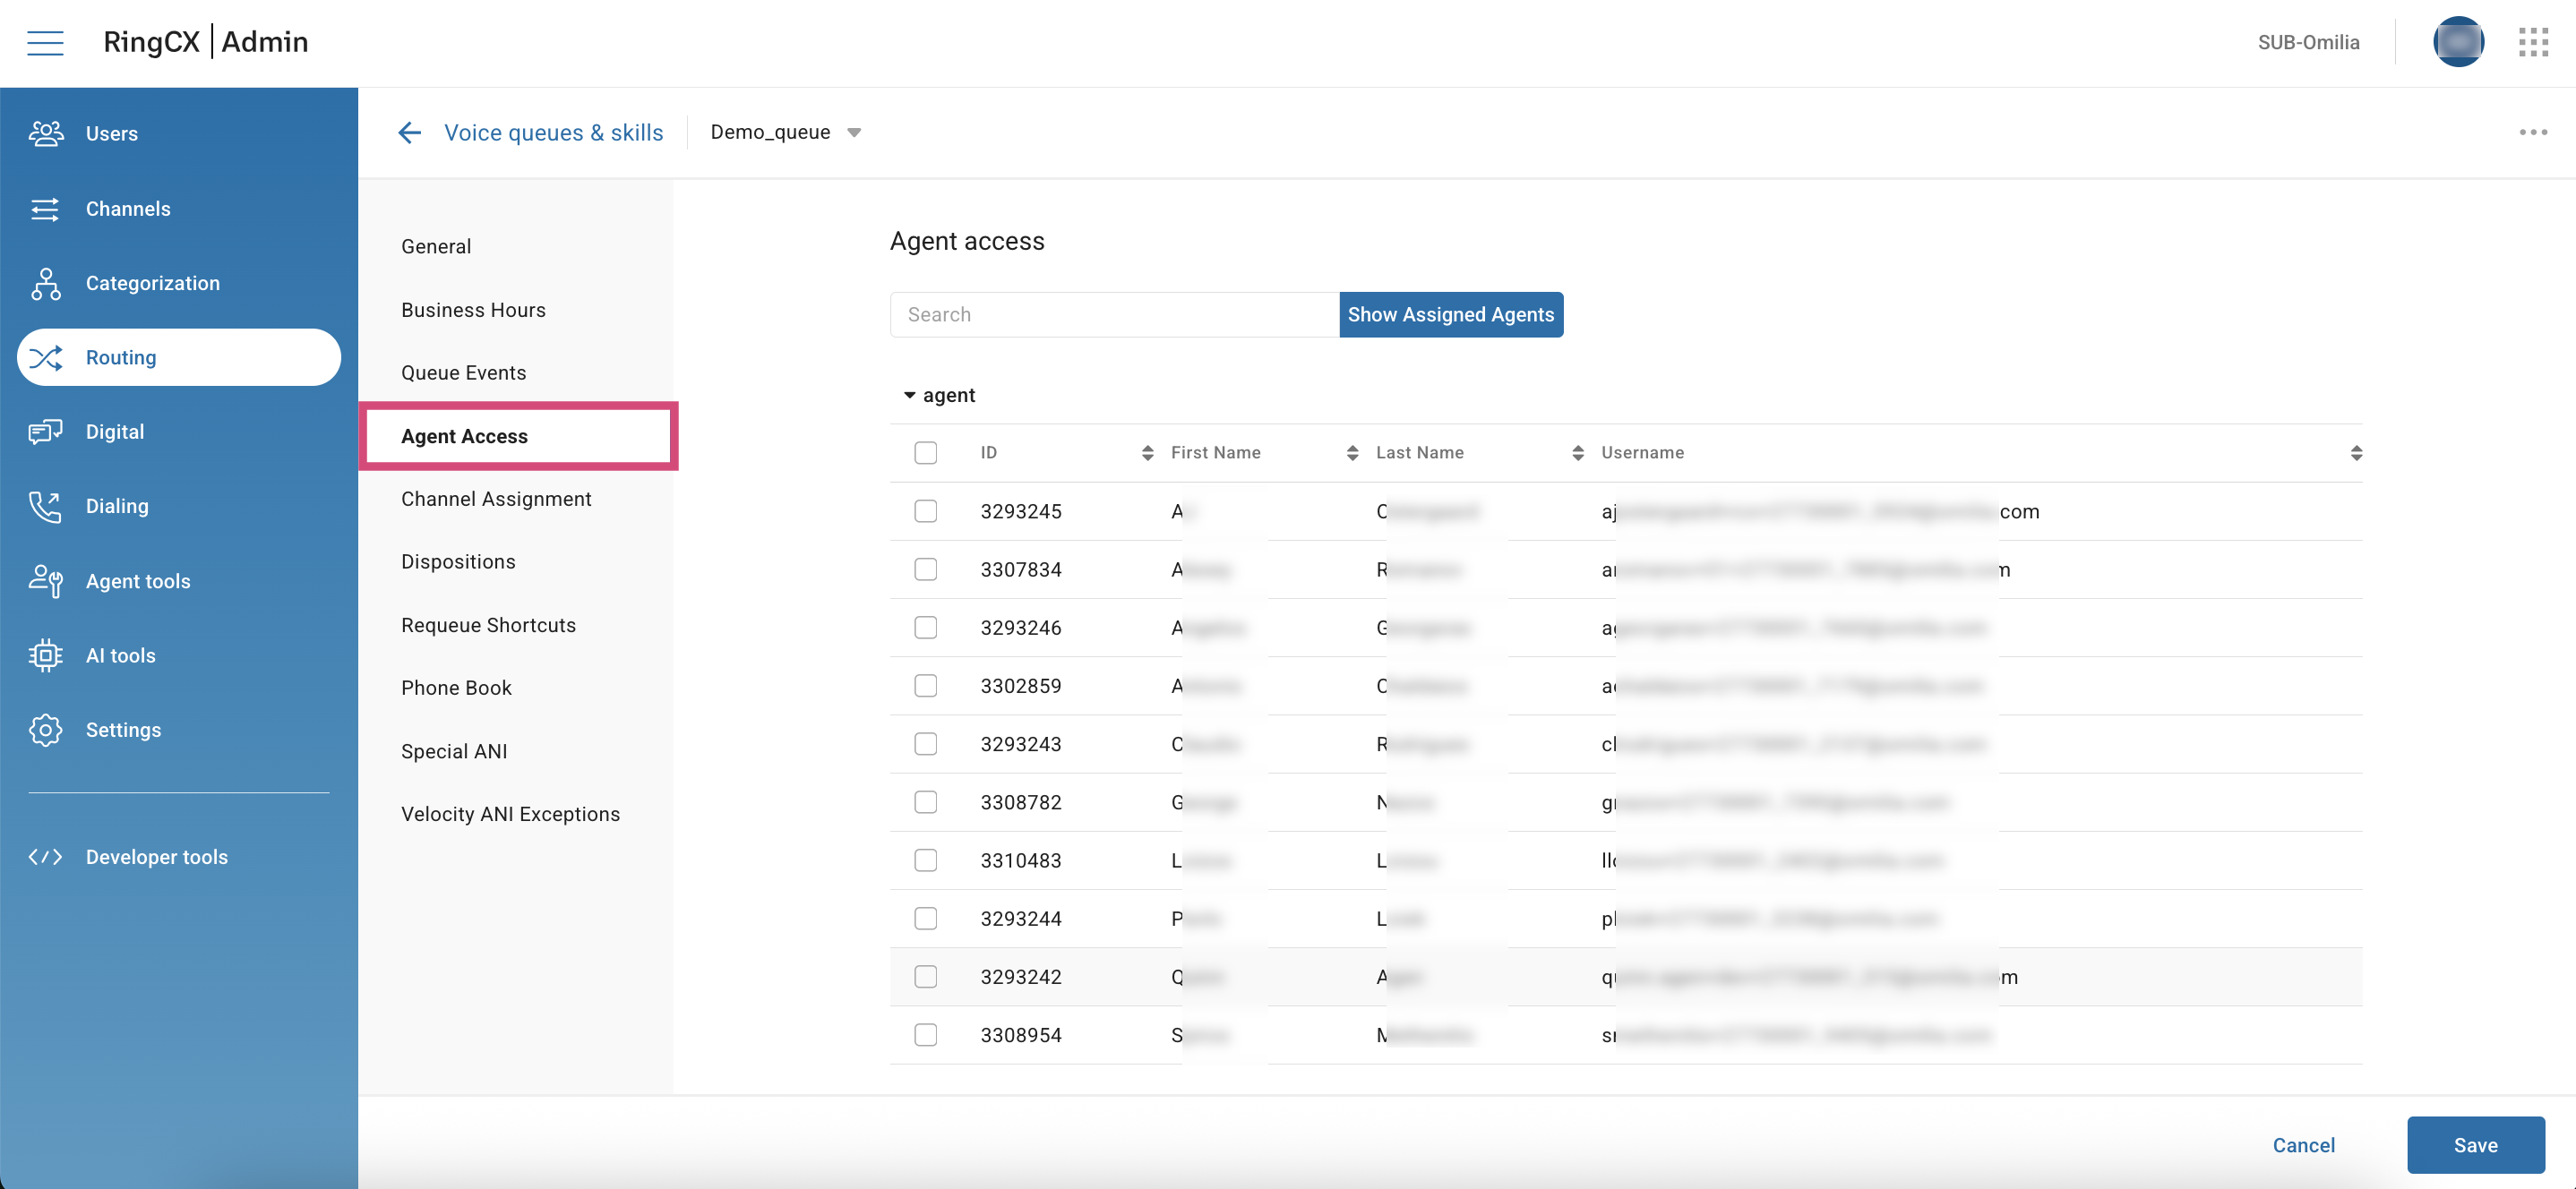
7. Click Save.
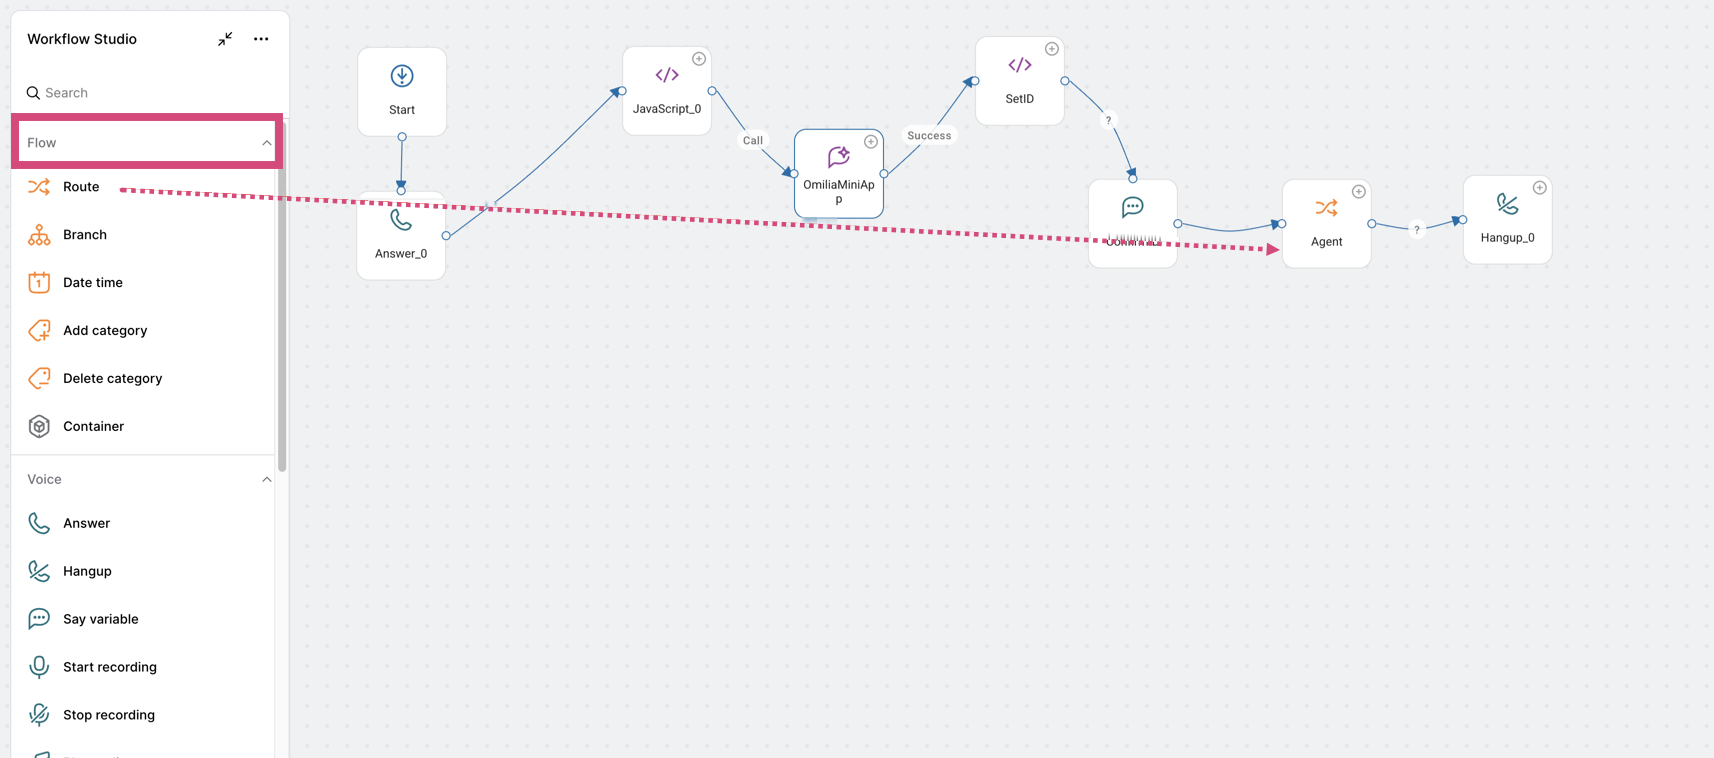
-
After that, navigate to Workflow Studio and add a Route node from the Flow category onto the canvas.
-
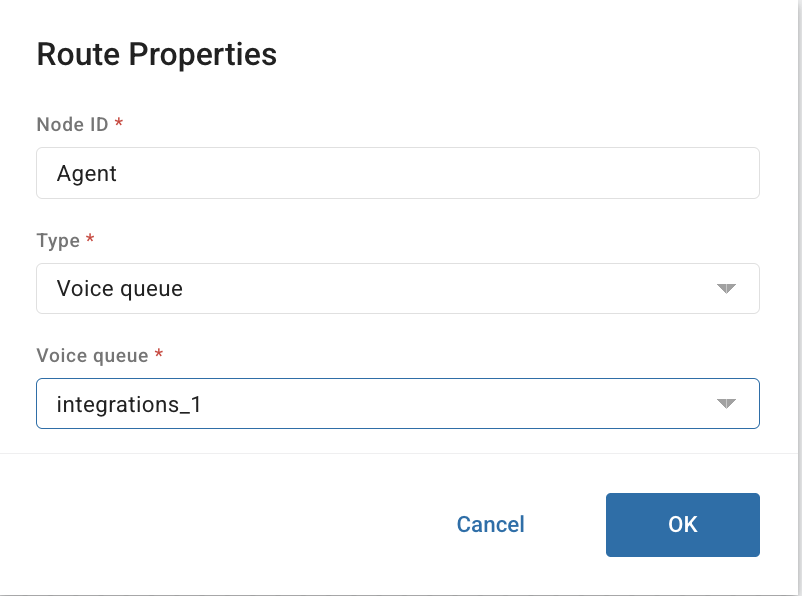
Hover over the Route node, then click Edit.
-
In the dialog box, complete the fields as described below.
-
Node ID: Enter a name.
-
Type: Select Voice queue from the drop-down.
-
Voice queue: Select the newly created queue.
-
Click Save when finished.
This guide is current as of December 2025. For the latest interface changes, refer to the official Ring Central's integration guide.