How to create an NLU model
To create a new model, proceed as follows:
-
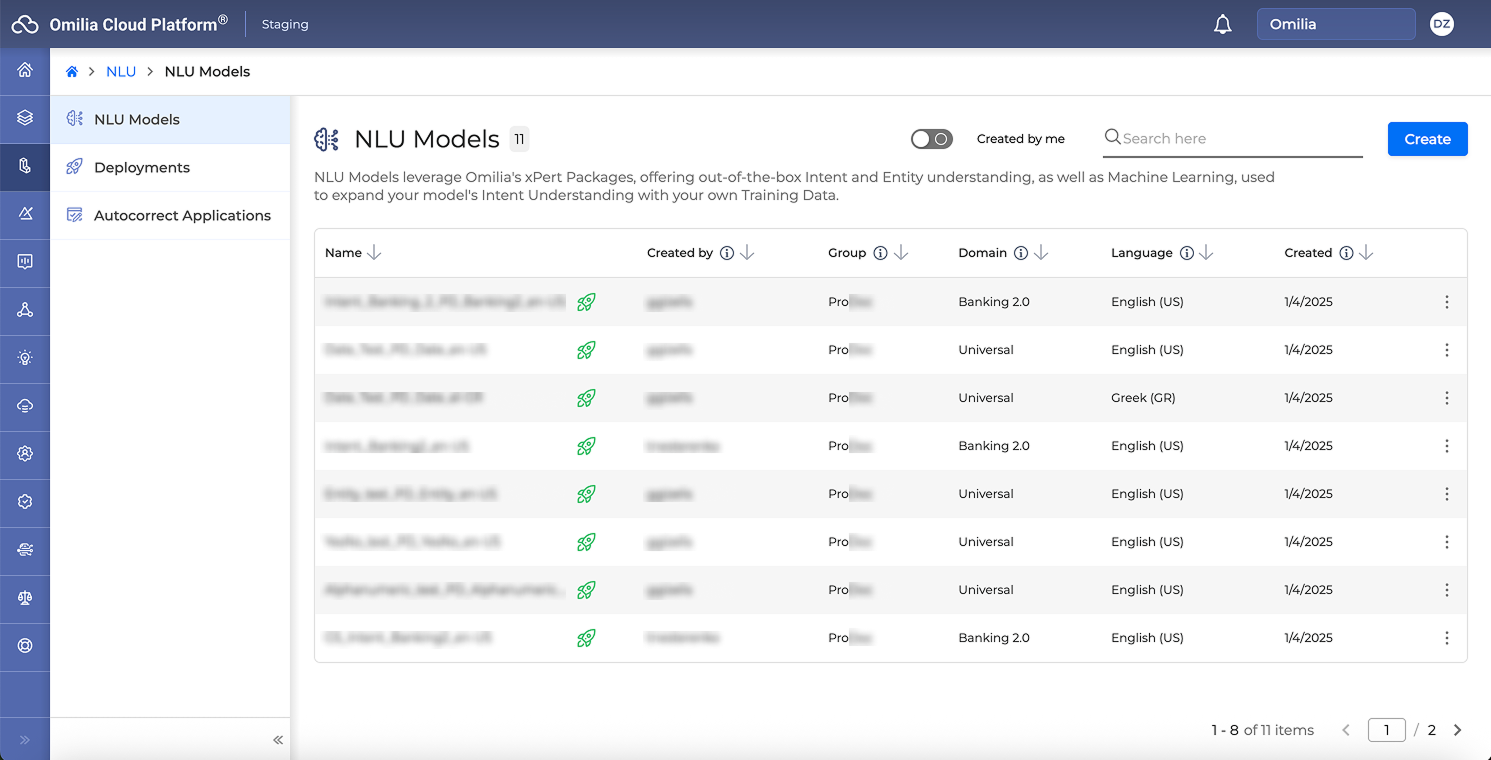
Navigate to NLU → NLU Models section.
-
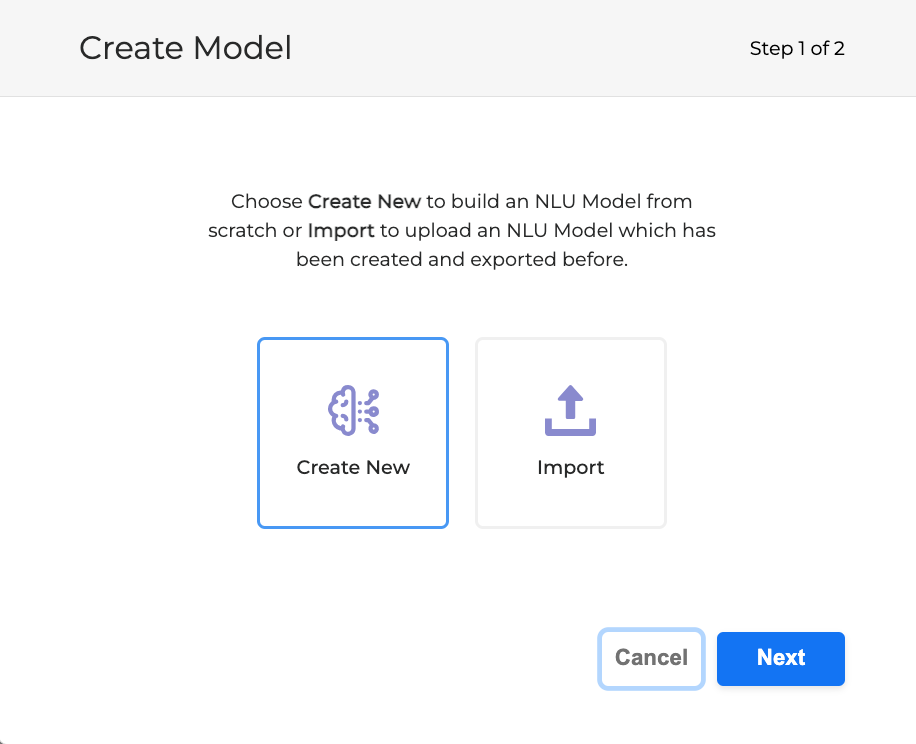
Click Create in the right upper corner. The following dialog box opens:
-
Click Create New → Next. The following dialog box opens:
-
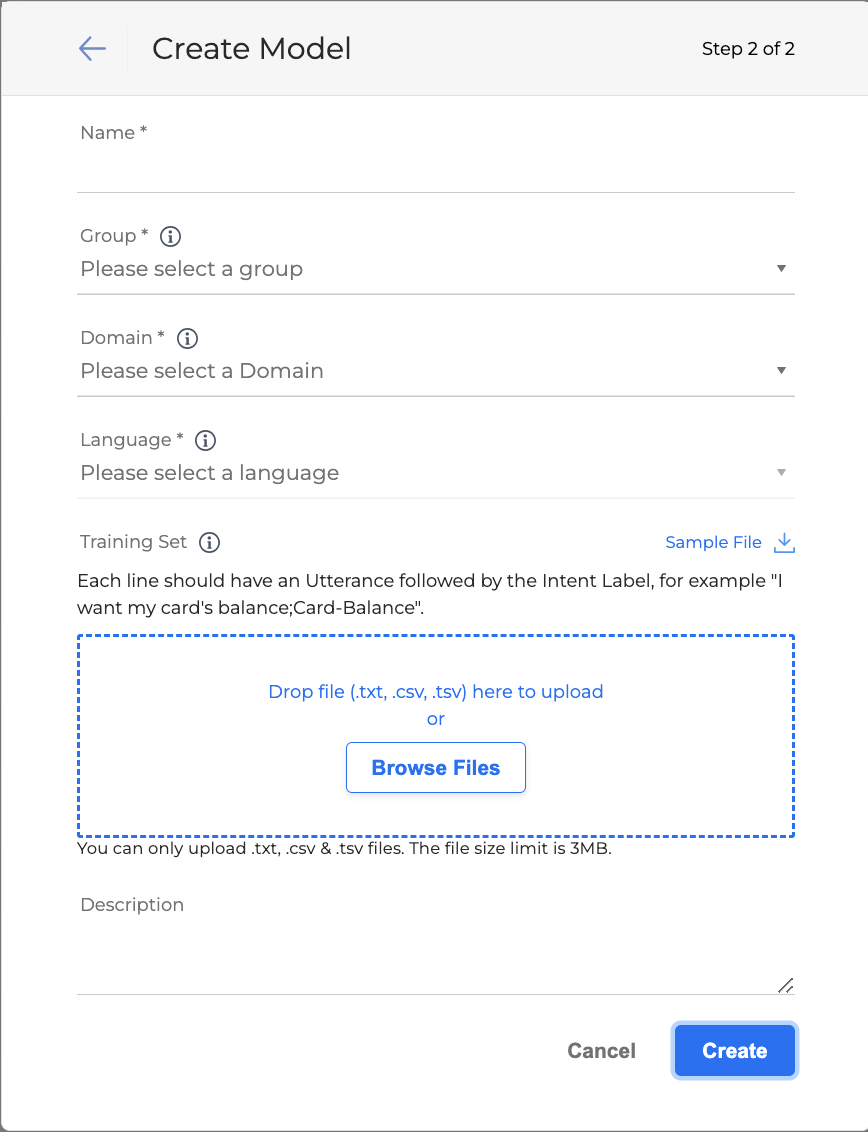
Fill in the fields below:
-
Name: Model name.
-
Group: A group of users who can access the model.
-
Domain: Based on your chosen domain, Omilia’s pre-tuned xPacks provide a ready-made understanding of intents and entities. Regardless of the domain selected, you can enhance your model's capabilities by incorporating your own data using machine learning techniques. The available domains include:
-
The Universal domain offers pre-built entities understanding only. In case you want to also include intents, you can build your own fully custom intent understanding.
-
Enable UK Addresses add-on: This checkbox is available for the Universal domain for en-GB models. Select this option to activate the UK Addresses add-on for your model.
-
-
The Universal 2.0 domain offers pre-built entities that are not linked to any specific domain. This means that you can use it for any domain you might want to work with and you want to take advantage of this domain’s entity variety.
-
Enable US Addresses add-on: This checkbox is available for the Universal 2.0 domain only. If marked, the US Addresses add-on will be activated for your model.
-
-
The Custom domain has no pre-built understanding and you can fully customize it by adding your own data and uploading your own custom NLU Logic.
-
The Generic domain provides pre-built intents that cover multiple domains. It comes pre-trained and can be deployed as is, allowing for immediate use without additional customization.
-
The Banking 2.0 domain provides pre-built intents tailored for financial services. Explore the complete list of intents.
-
The Car Retail domain provides a set of pre-built intents designed for the automotive sector. Check the complete list of intents.
-
The Energy domain includes pre-built intents tailored for the energy industry. View the complete list of intents.
-
The Telecommunications domain offers pre-built intents specifically crafted for communication services. Find the entire list of intents.
-
-
Language: The NLU model’s Language. Out-of-the-box understanding is for the language you select.
-
Enable Multiple Intent Recognition: This checkbox is available for English(US) and English(GB) models. If checked, it allows handling scenarios where a single user input might involve more than one intention. For more information about this feature refer to the Double intent recognition section.
-
-
Training Set: Add a file with training data in TXT, CSV, or TSV. It allows you to add your own custom training data to augment the model’s intent understanding using machine learning. This is an optional field.
-
Click the Sample File button to download an exemplary training set.
-
-
Description: Provide a short description of the NLU model. This field is optional.
-
Click Create to confirm. The model is created and shown in the NLU Models list.
The Machine learning software version of a created model is automatically set to the latest one. However, you can import pre-trained models of previous versions if needed.
A model that is not the latest version is indicated with an exclamation icon, as shown below:

The maximum number of models you can create varies by environment.
Model drill-down page
After having created a model, you are forwarded to the model drill-down page. Depending on the model domain, the drill-down page may look different:
-
For models with a specific domain, you will see the automatically loaded out-of-the-box intents and entities, labeled as RB-XP. By default, all models also include the OutOfScope Default intent, regardless of whether they have a specific or custom domain. This intent serves as a fallback for unmatched user queries and allows you to add utterances that the model should ignore, ensuring it selects only explicitly defined intents.
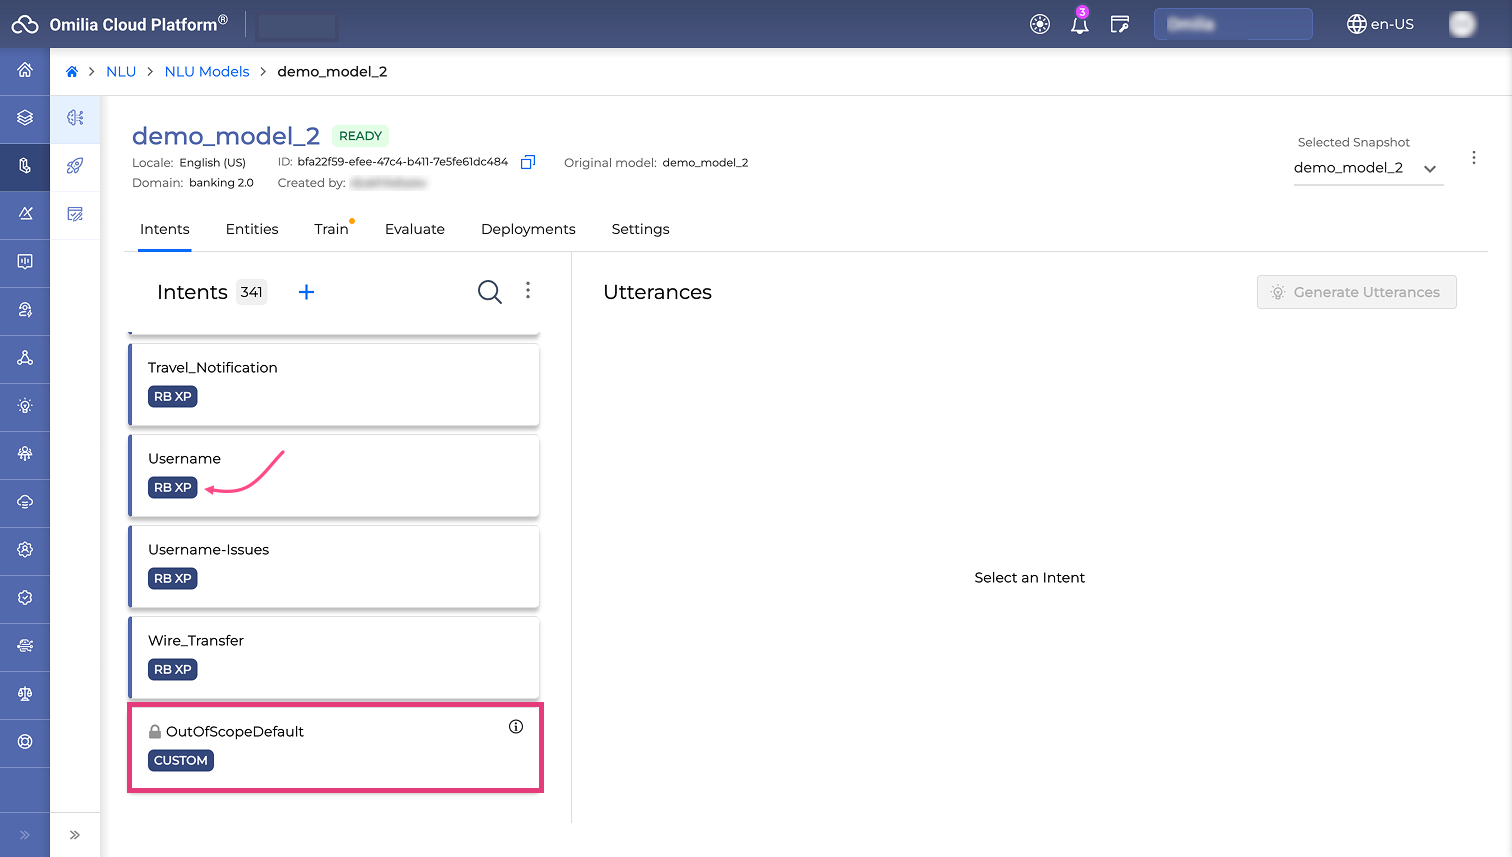
To streamline configuration, you can disable all rule-based (RB) intents at once by switching the Disable all RB intents toggle switch. When this is enabled, all RB intents are deactivated, which is useful when you want to rely exclusively on machine learning (ML) intents. This option is only available for non-custom domain models.

-
For a custom domain model, you will not see any out-of-the-box data, except for the OutOfScope Default intent.
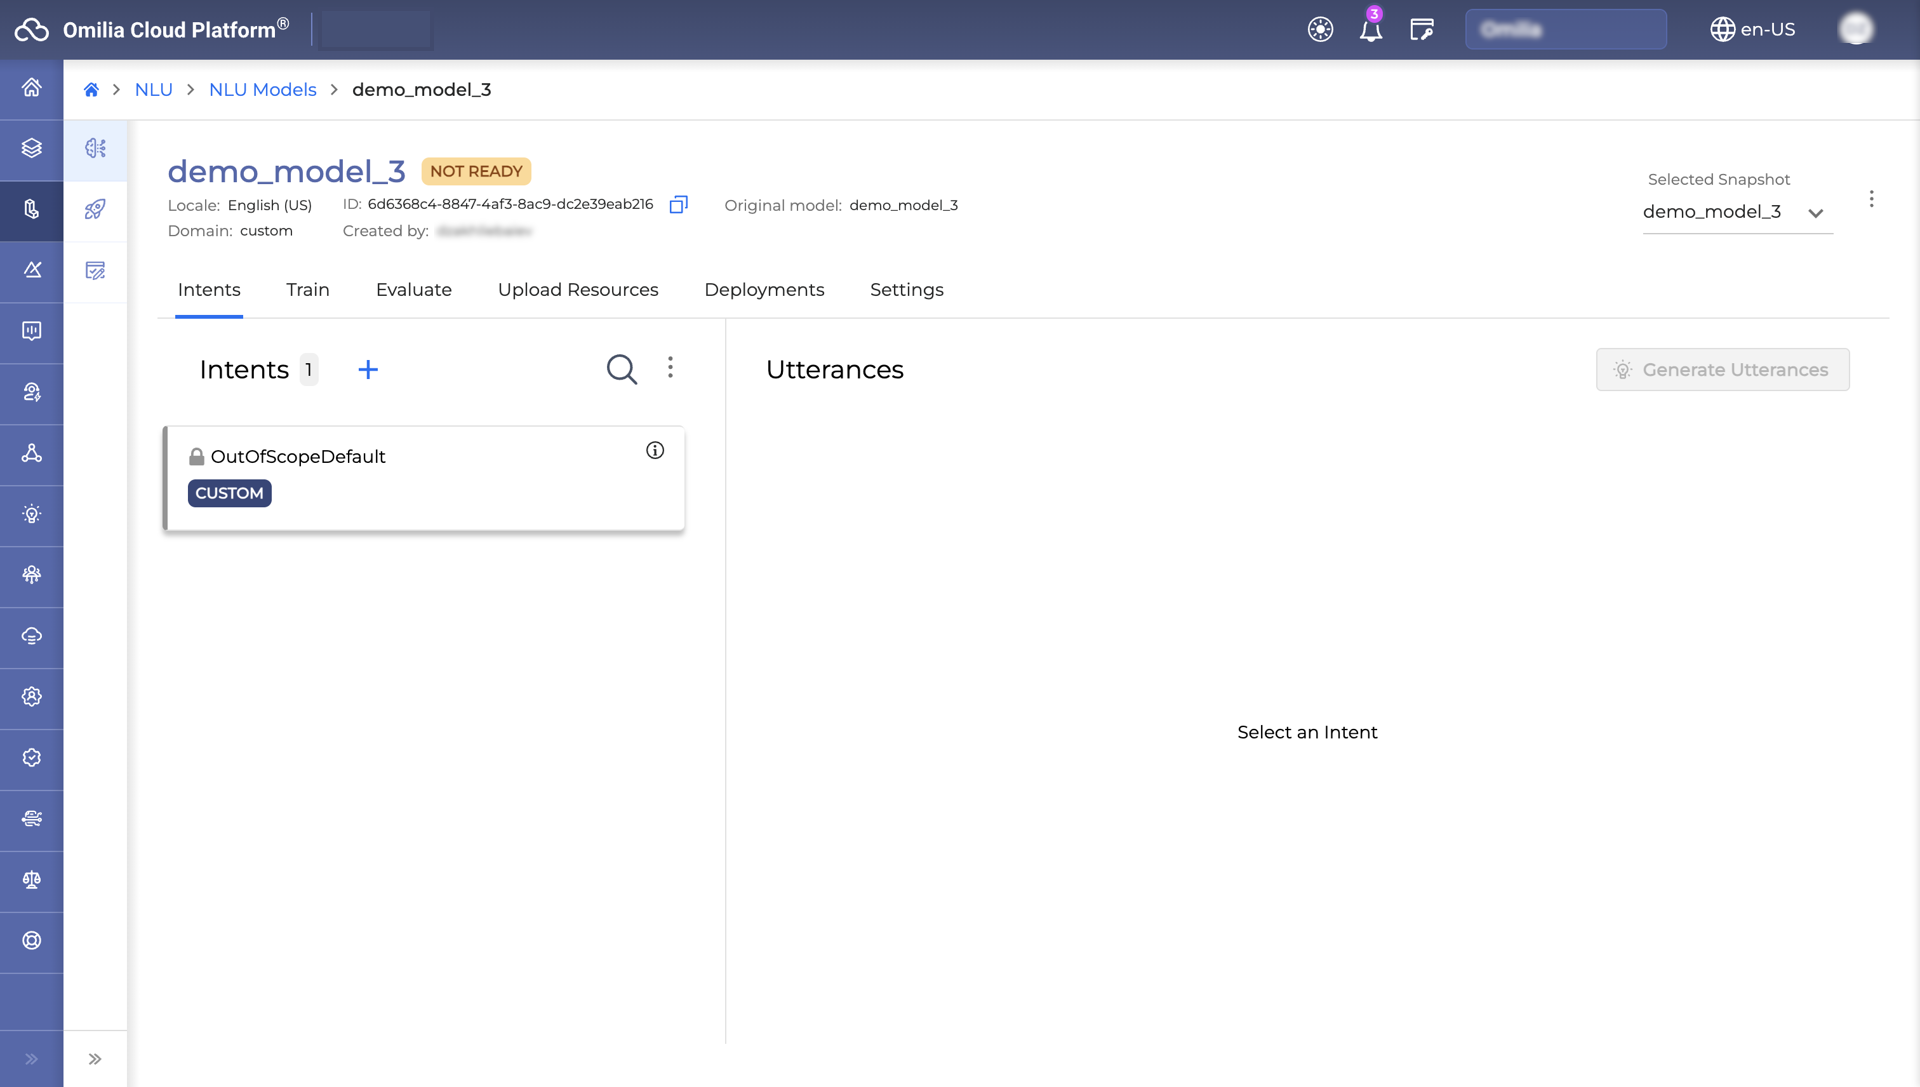
The drill-down page header reveals the following information about the model.

|
Element |
Description |
|---|---|
|
1 |
The model name. |
|
2 |
The Rocket icon, if present, shows that the model has been deployed. |
|
3 |
The language selected for the model. |
|
4 |
The model domain. |
|
5 |
The model identification number. To copy the ID to the clipboard, click the Copy icon. |
|
6 |
The name of the user the model was created by. |
|
7 |
The model status. The following statuses are possible:
|
|
8 |
The name of the original model from which the snapshot (a newer version of the model) was created. |