Set Field Block
Set Field is a building block that contains the configurable data from the caller (a field and a value) that can be transferred to other miniApps or building blocks and channel the conversation. The value of the Set Field building block can substitute the value of a previously used miniApp or building block. For example, the user can configure the Set Field building block by creating a field or choosing the available one from the list, and providing a value that contains the information from the caller. This allows the use of the data from the Set Field building block instead of configuring and using complex miniApps or Flows.
To add and configure a Set Field building block, follow the steps:
-
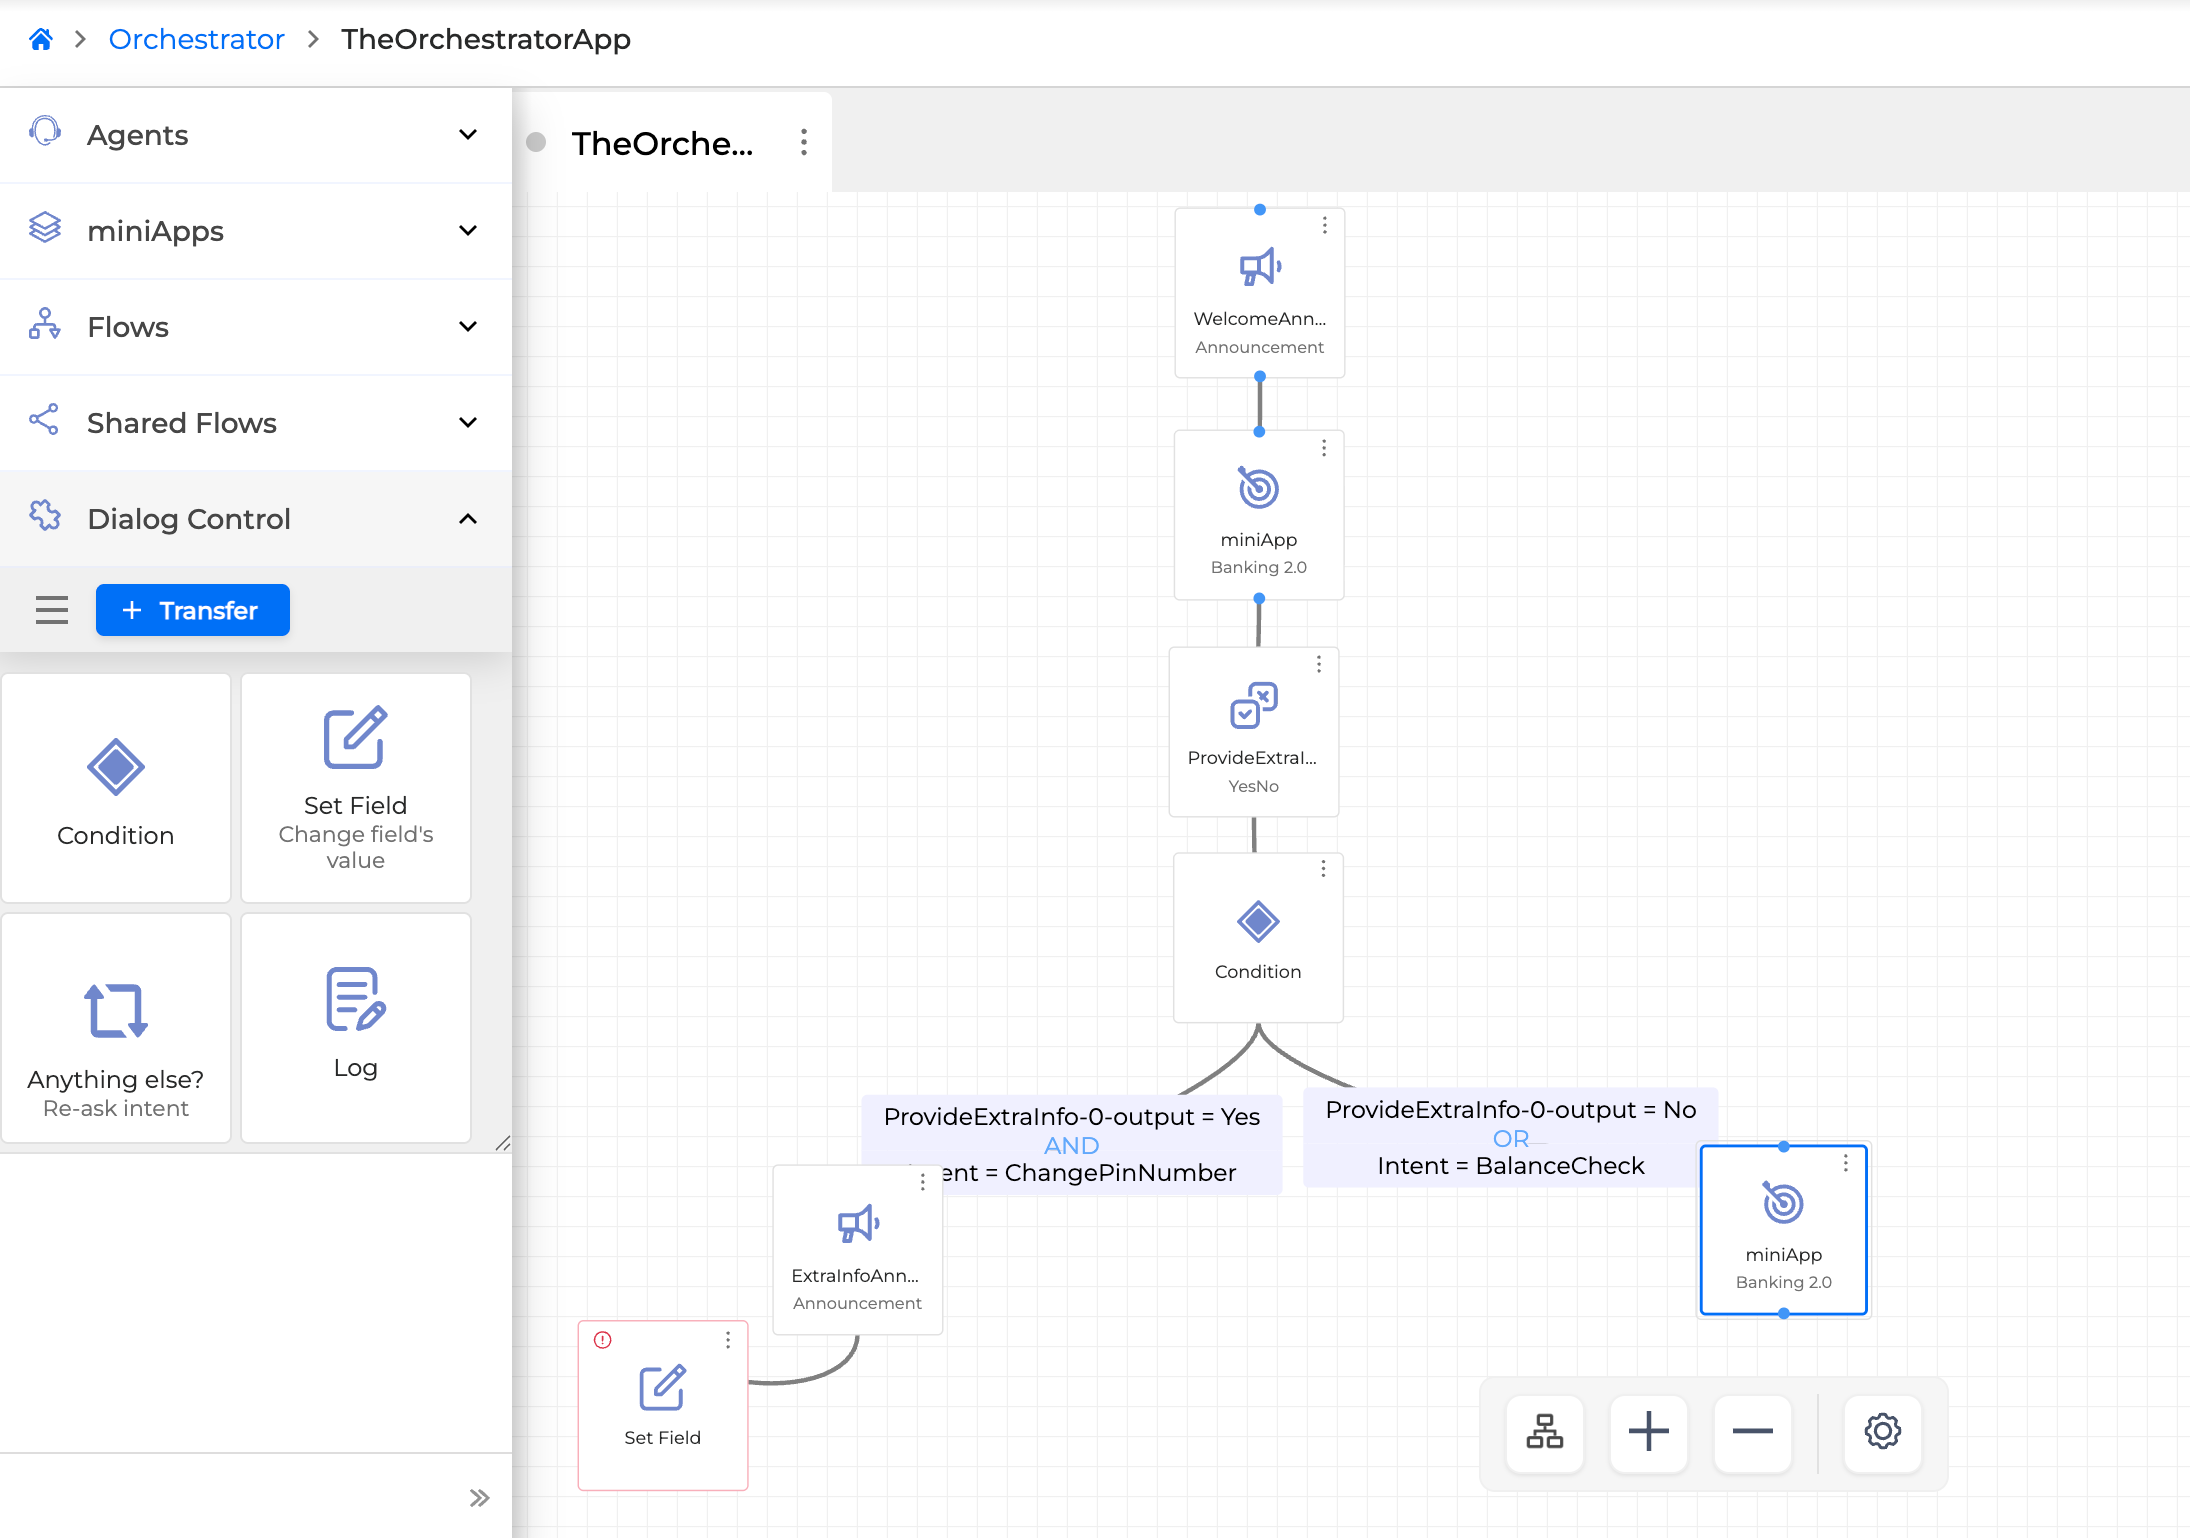
Choose the Set Field building block from the left panel, drag and drop it onto the canvas, and connect it with another building block, for example, the ExtraInfoAnnouncement miniApp.
-
Click the Settings icon in the upper-right corner of the Set Field building block to configure it.

-
Click the + Add a Field to change button first.
-
Type a field name to create a new one, or select one from the dropdown menu of the available ones; these are the fields previously used in the conversation.
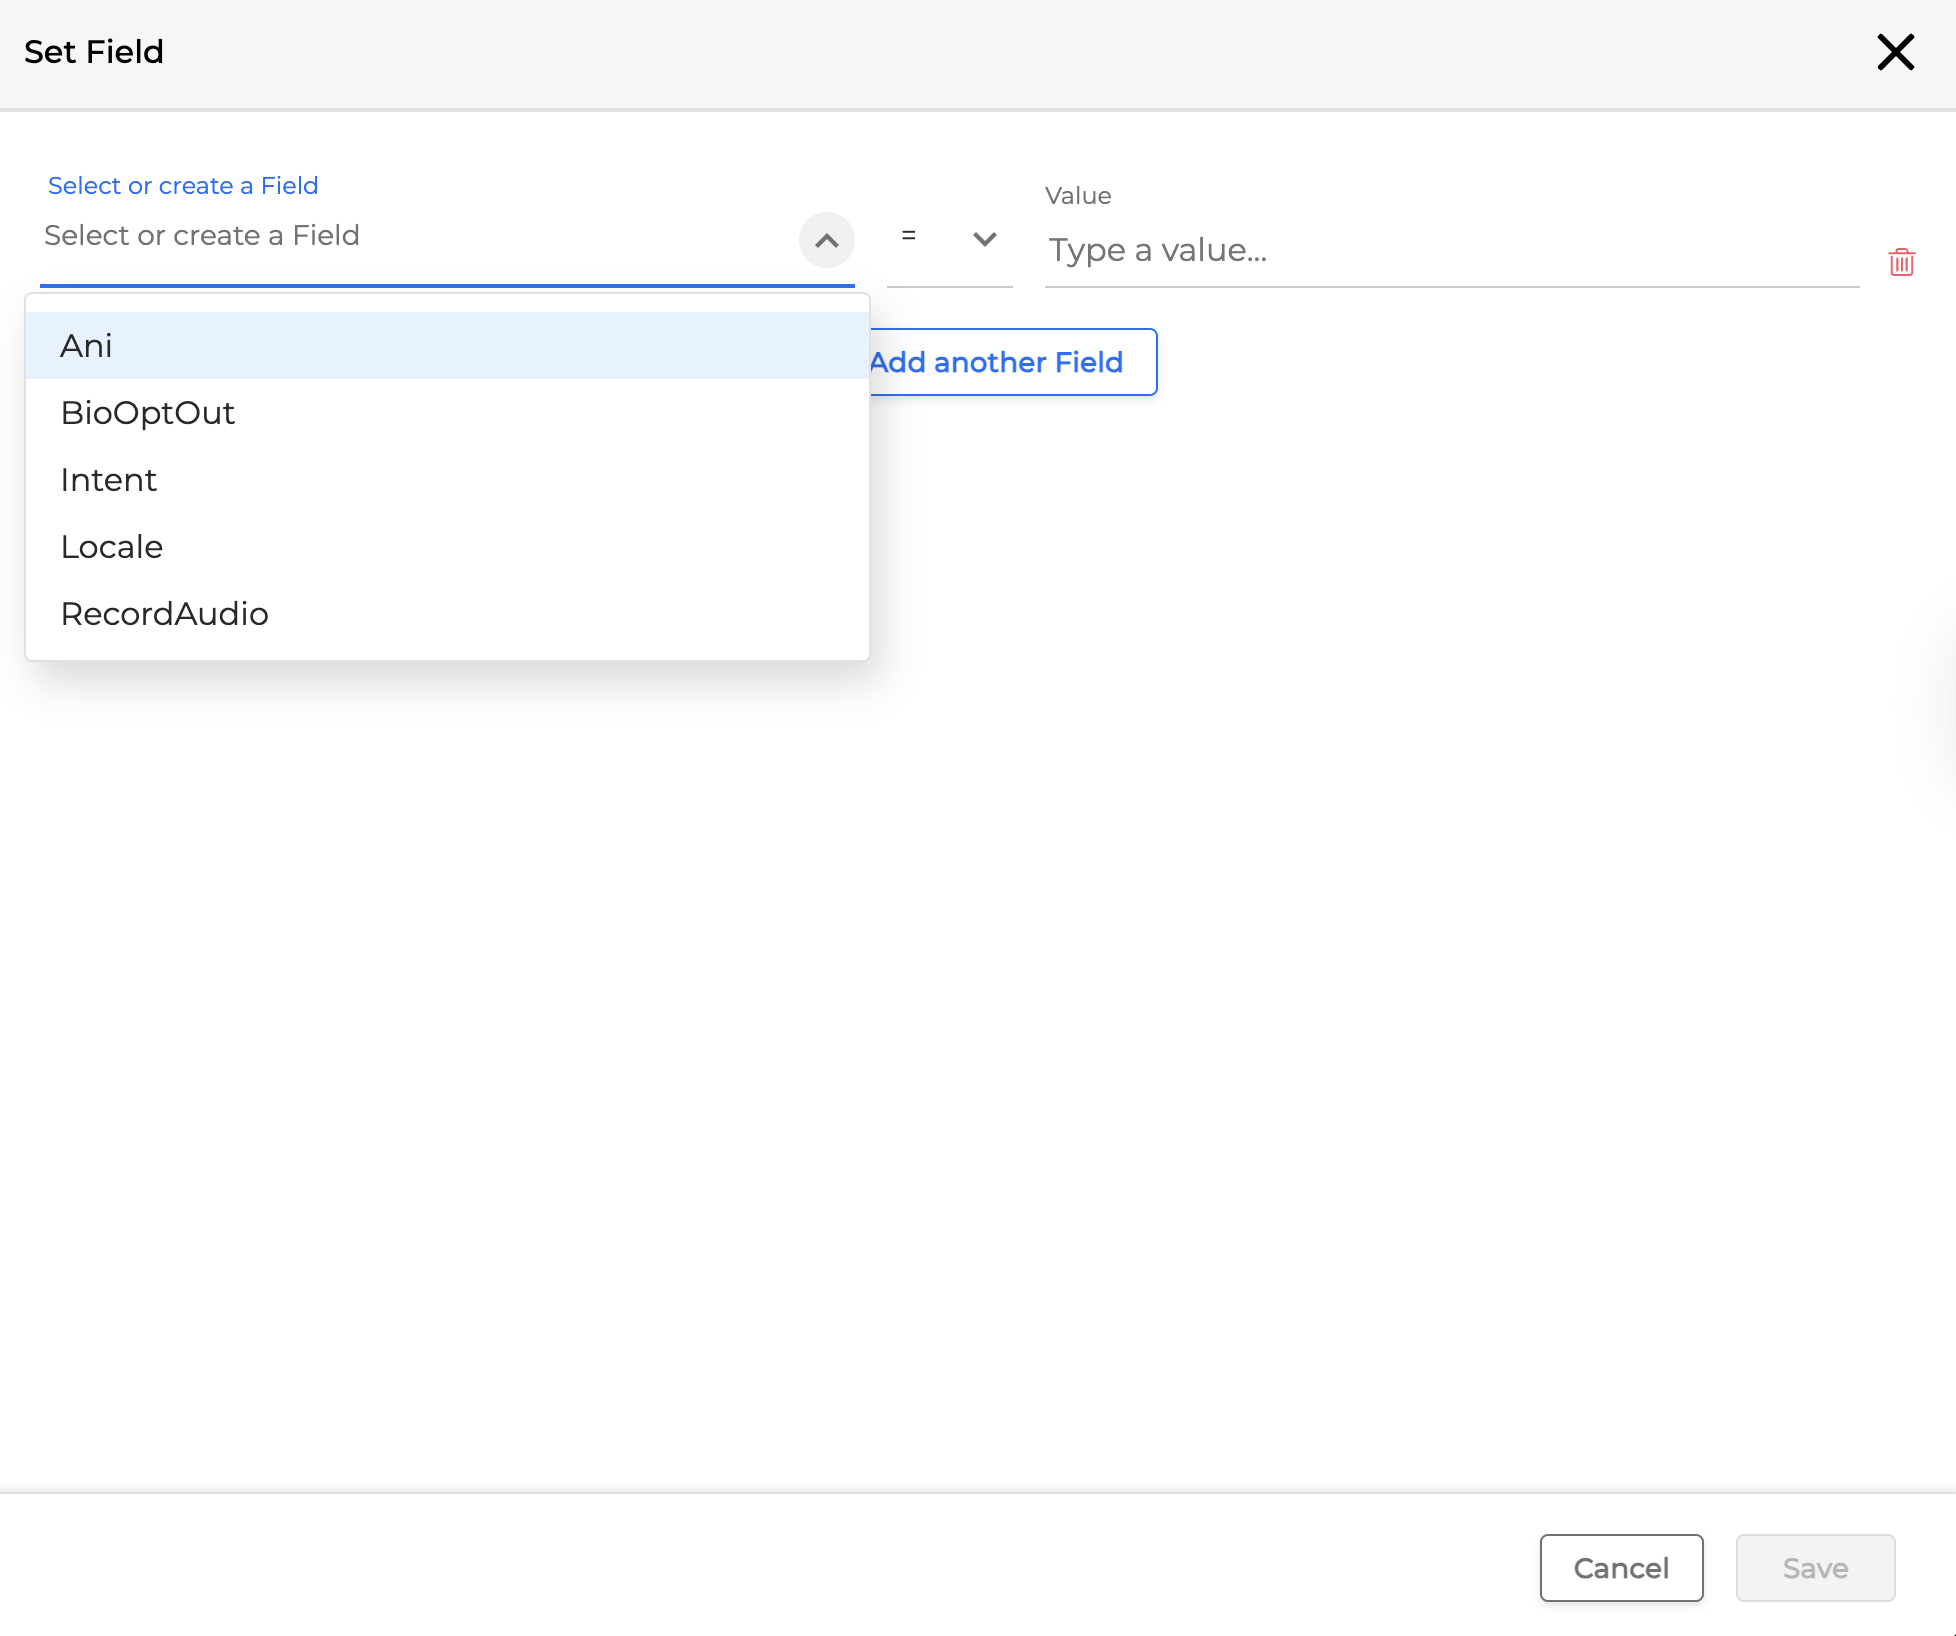
5. Enter a value that can be received from the caller, and click Save when finished.

Do not use any of the reserved names for fields in this building block. For more info, see the Reserved Field Names article.
If the Value field is empty (undefined), the previous miniApp or any other building block will be played again. For example, if Intent is selected as a field, and cardNumber is selected as a value in the Set Field building block, cardNumber will be used instead of the value from the ExtraInfoAnnouncement miniApp.
It is possible to add a counter-type field for the Set Field block (covers the function of the Intelli miniApp). For example, the counter value can be passed as an input to other building blocks, so it can track how many times an error has occurred during the course of a dialog and take special actions once a specific threshold has been exceeded.
To add a counter, select the plus equals sign from the dropdown so it increments the value of the Value field. In this case, the Value field can contain any positive or negative number.

Entity suggestion
The Set Field building block provides a possibility to suggest an entity with the obtained information at a later step of the dialog. It allows the system to use the value that has already been obtained in a dialog and to preconfigure it as output of the upcoming miniApp. For example, the following scenario illustrates the usage of entity suggestion:
- Hello, how may I help you?
- I’d like to make a monthly payment.
- Ok, would you like to pay 500$ as in previous month?
- Yes, please.
- Got it. So to confirm…
The system looks up the user's profile and detects the value that has been previously used as a monthly payment and suggests it
Currently, entity suggestion can be used as a miniApp output in the following miniApp types: Alpha, Alphanumeric, Numeric, Date, Amount, or Text.
To configure the entity suggestion, follow the steps below:
-
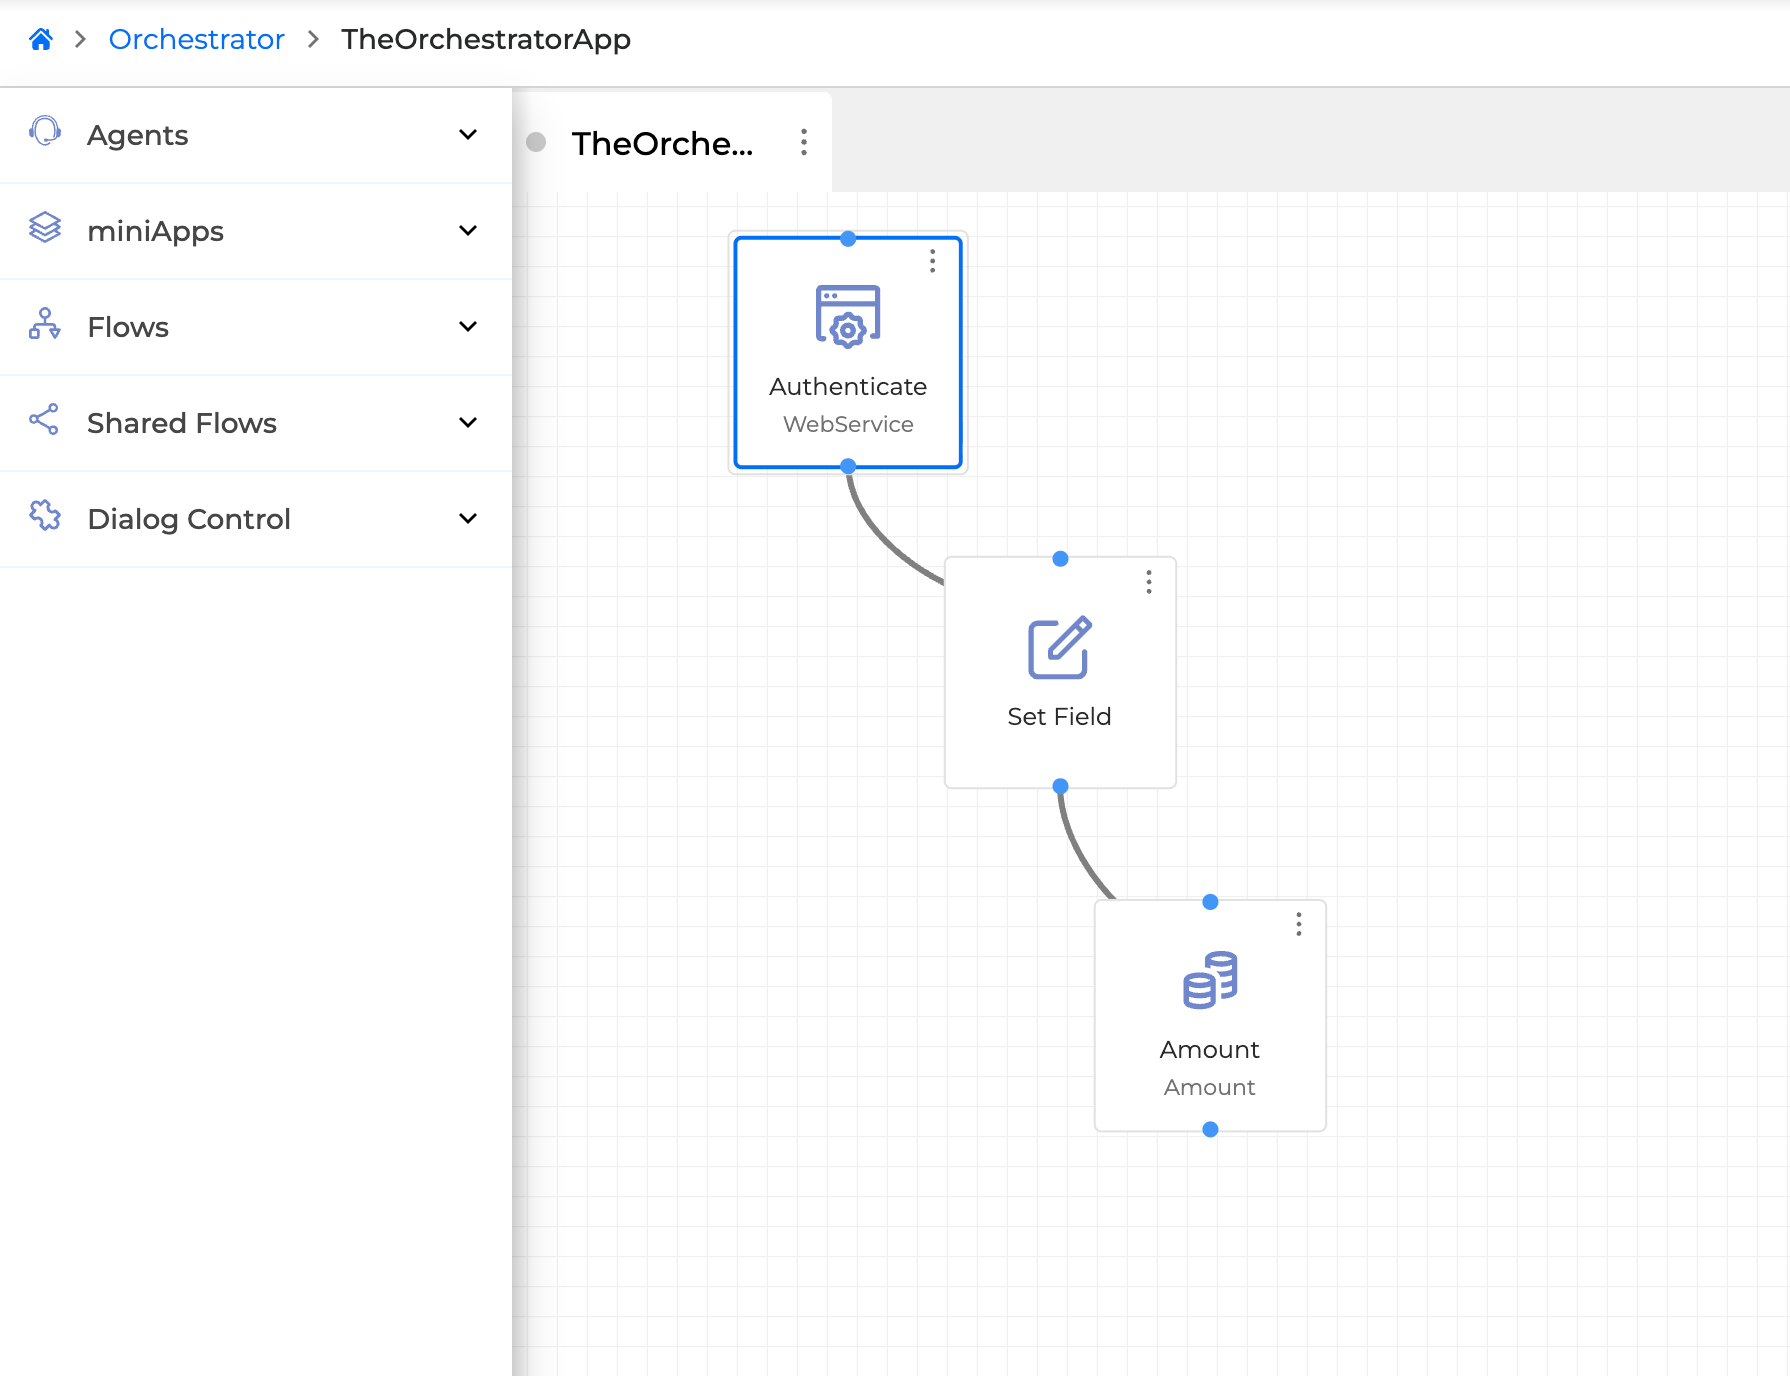
Configure miniApps (for example, the WebService and Amount types) to enable entity suggestion, and place them onto the canvas to create a conversation.
-
Select the Set Field block to drag and drop it onto the canvas. Connect with the miniApps to run a dialog.
-
Configure miniApps as follows:
a. WebService miniApp: create the value for Orchestrator Field 1 of the Output Fields. For example, MonthlyAmount.
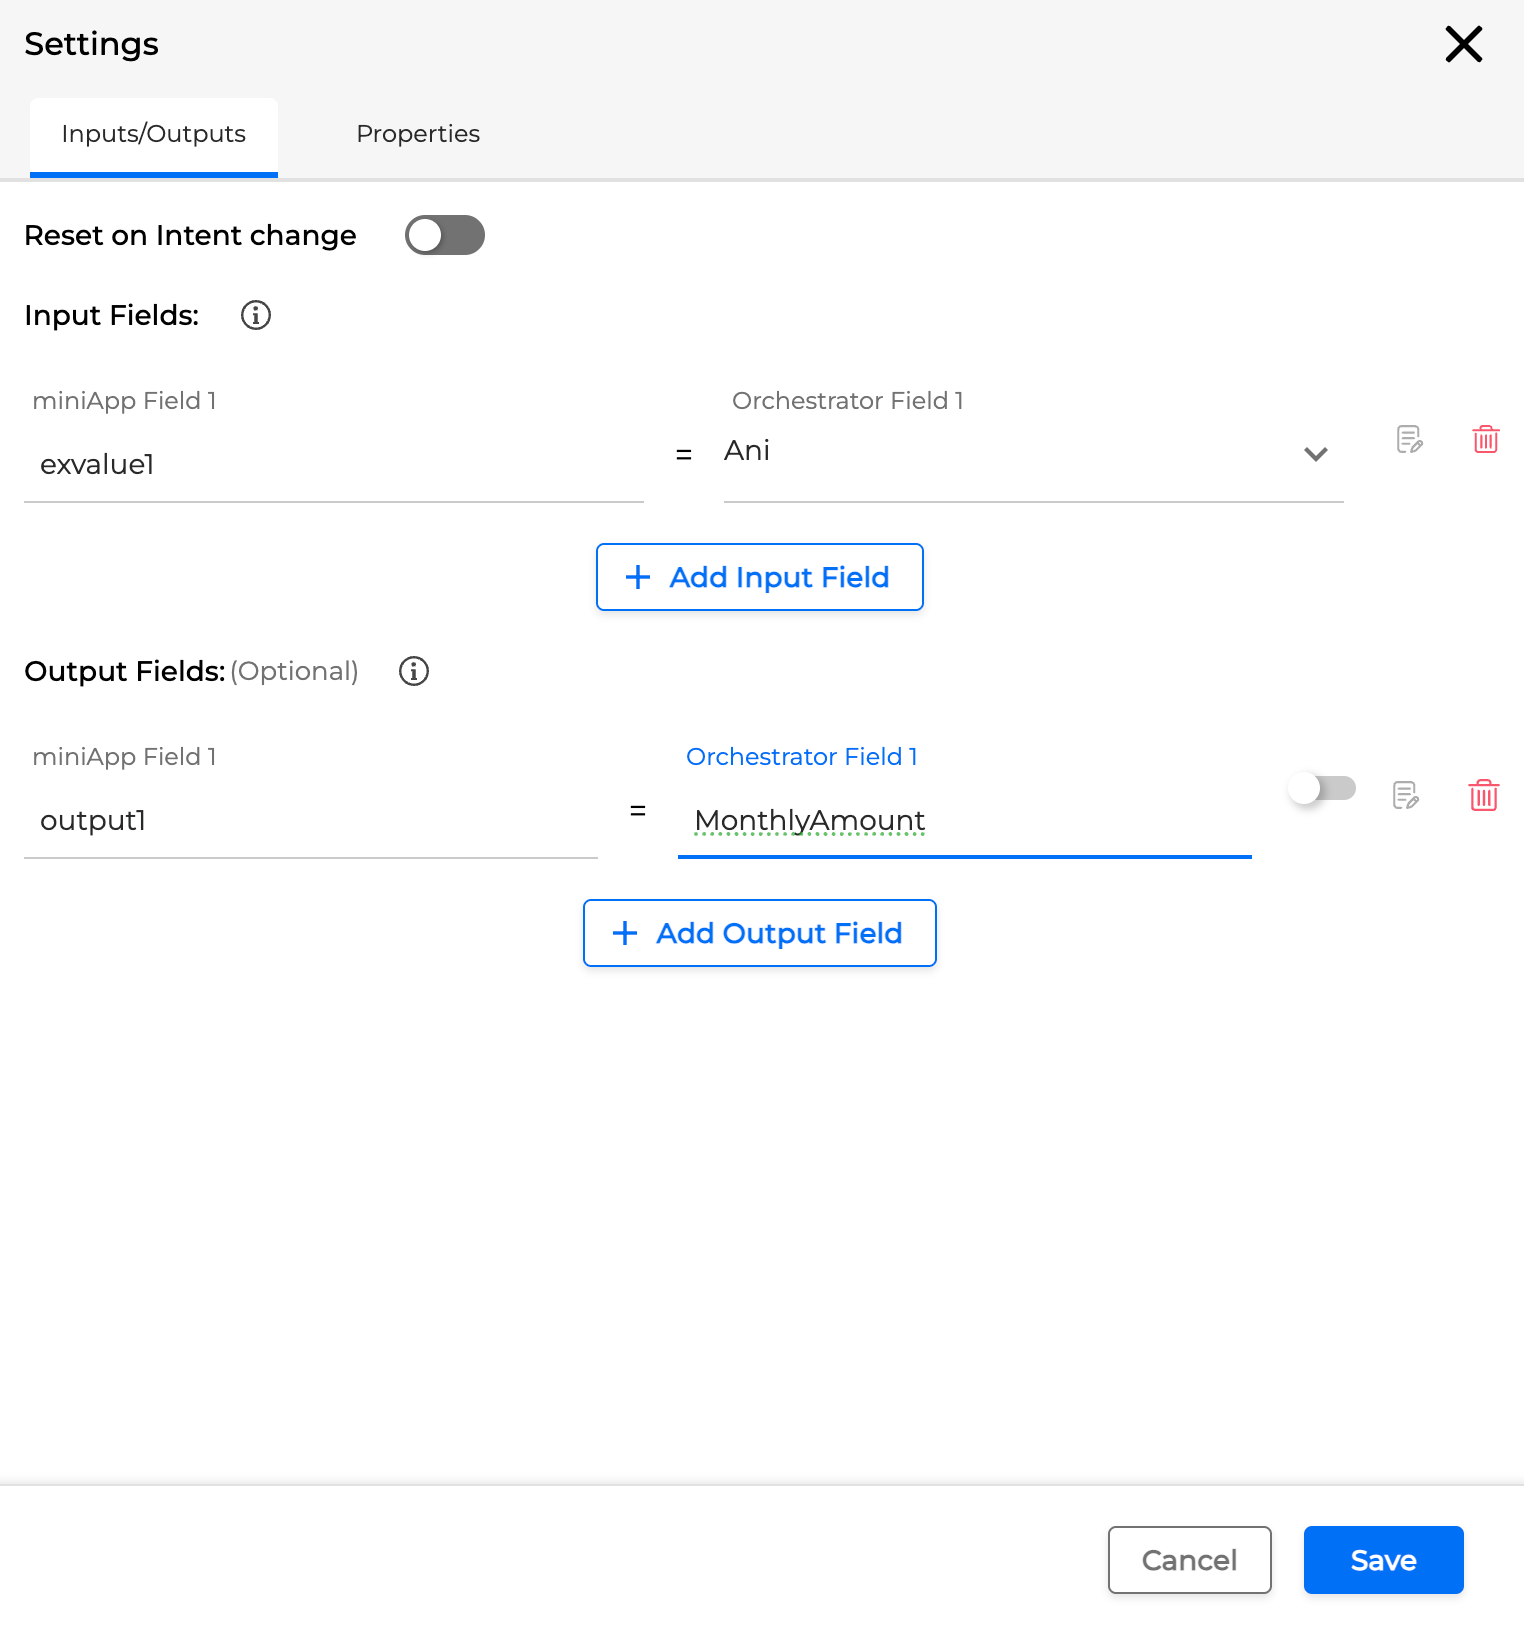
b. Amount miniApp: create the value for Orchestrator Field 1 of the Output Fields. For example, PaymentAmount.
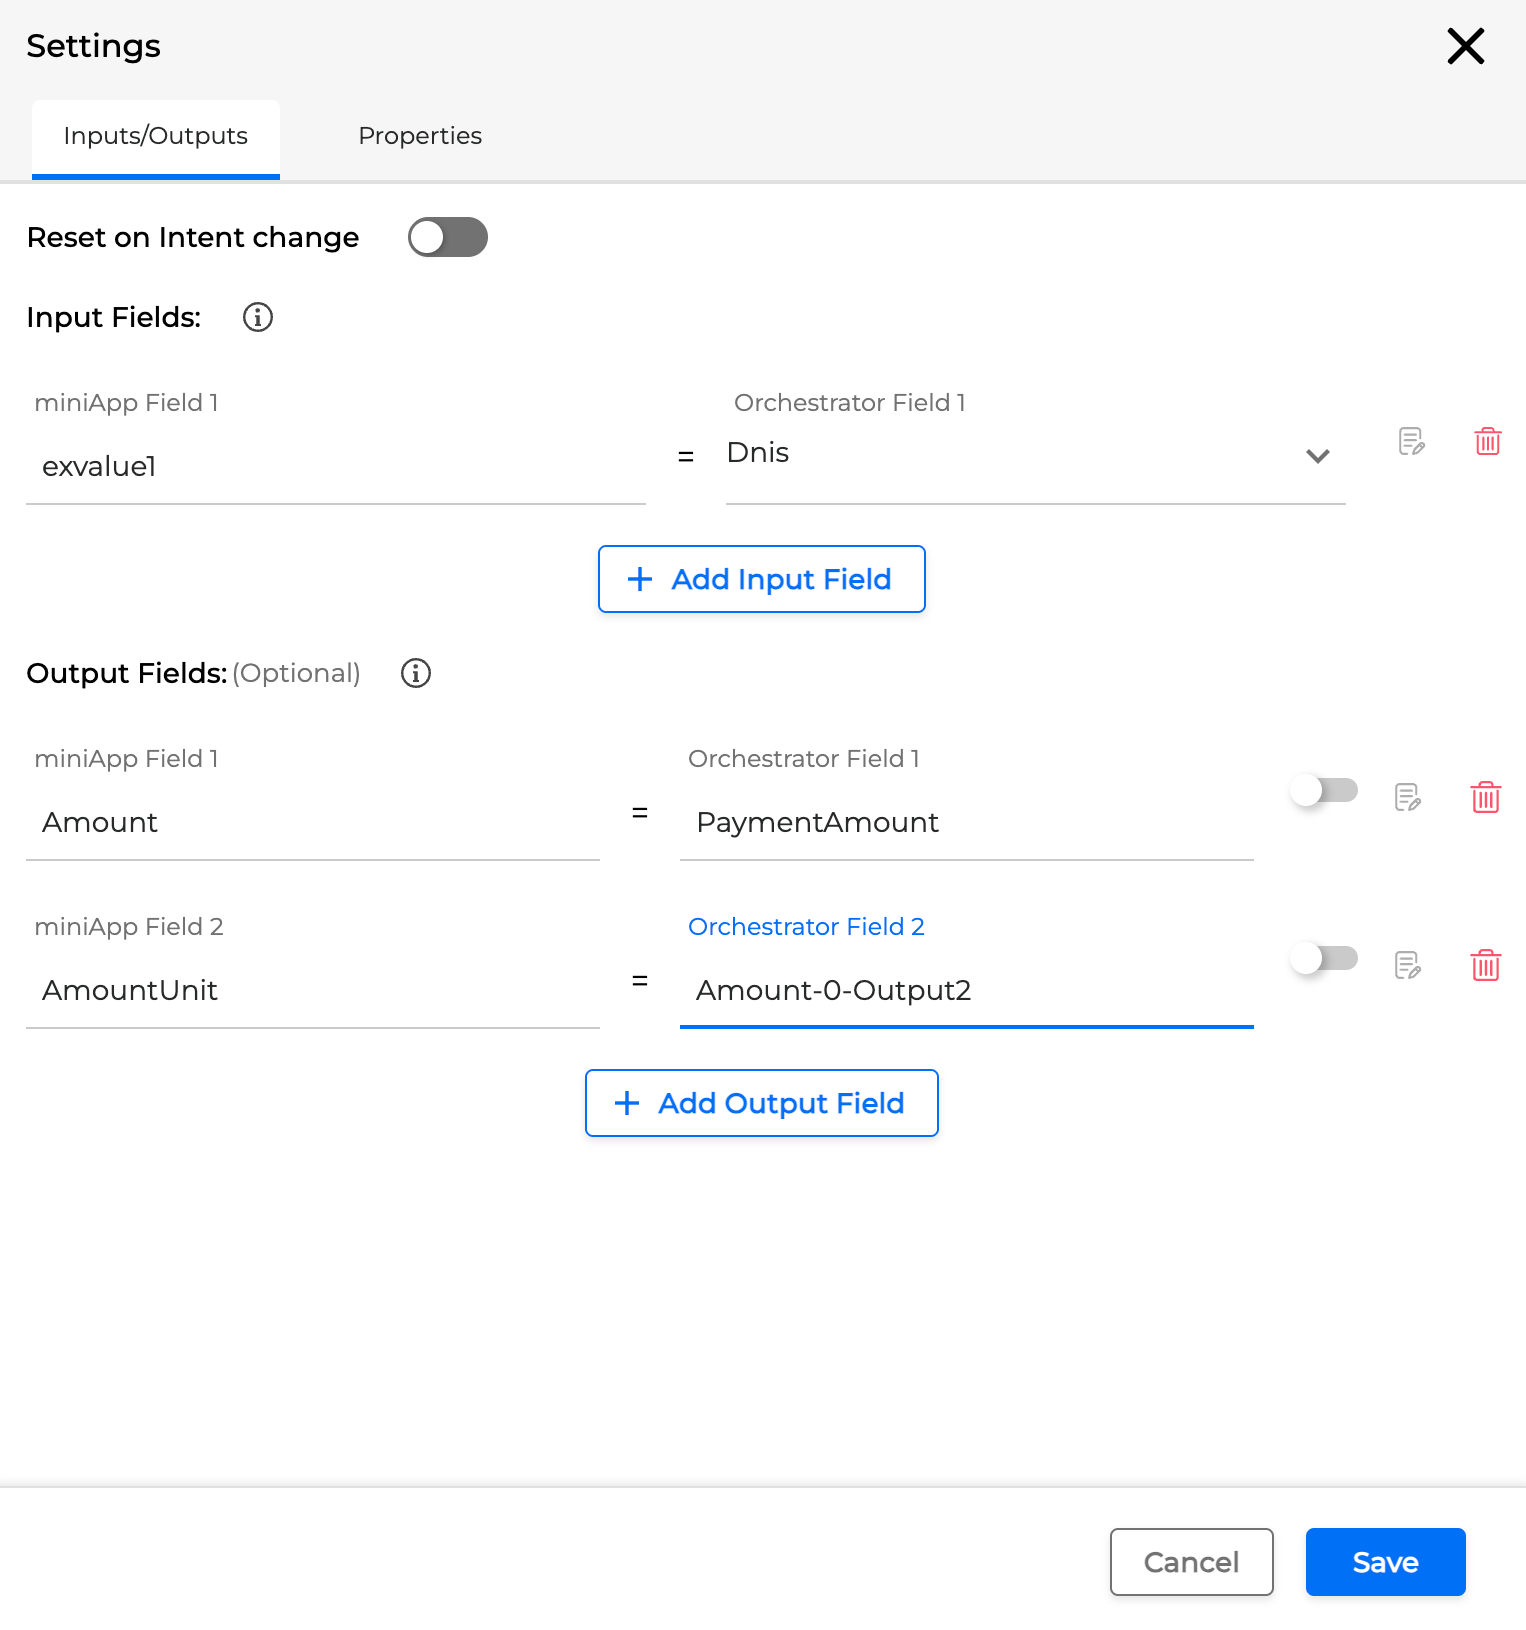
-
Click the Options menu of the Set Field and select the ?= operator.

-
Select the PaymentAmount field (as in the Amount miniApp) and attach it to the MonthlyAmount value (as in the WebService miniApp) so that the system suggests the value of the MonthlyAmount as an entity for the PaymentAmount.

-
The final part of the conversation that contains entity suggestion in a dialog looks as follows:
.png?cb=250e5bb87f2427691d9116d6590a08d2)
JS API isolation mode
To improve the security of the JS API, you can run user scripts in safer, isolated environments. You can select if the JS API will run as usual or select the Isolated Mode.
-
Legacy Mode: Retaining standard behavior, wherein scripts are executed within a single node environment.
-
Isolated Mode: Implementing script execution within isolated environments.
To enable Isolated Mode, you can use a Set Field as shown below:
-
Add a Set Field in your Application with the Field js-isolated-mode = true.

-
On the following miniApp connected to the Set Field, add js-isolated-mode as Input Field 1 and click Save. The output is what you would like to get from this miniApp, as usual.
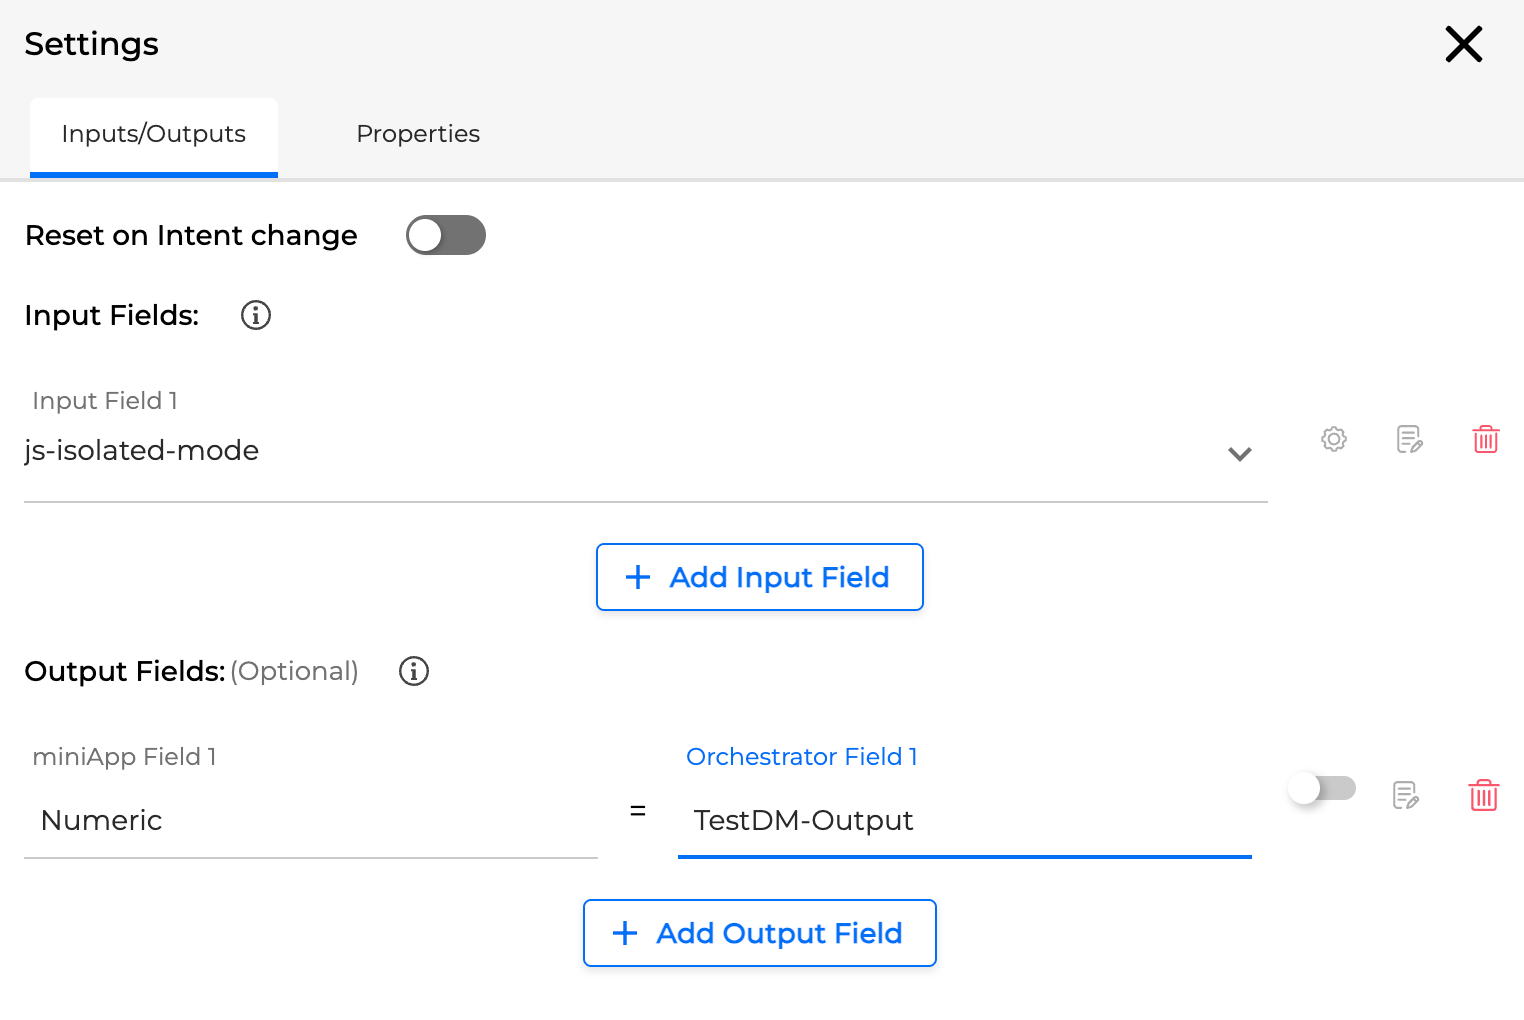
The connected miniApp in the flow will execute JS in Isolated Mode. To test the outcome of Isolated Mode, please follow the steps described in JavaScript Functions in miniApps page.