.svg)
Introduction
The Routers tab is accessible via your OCP → Integrations → Numbers.
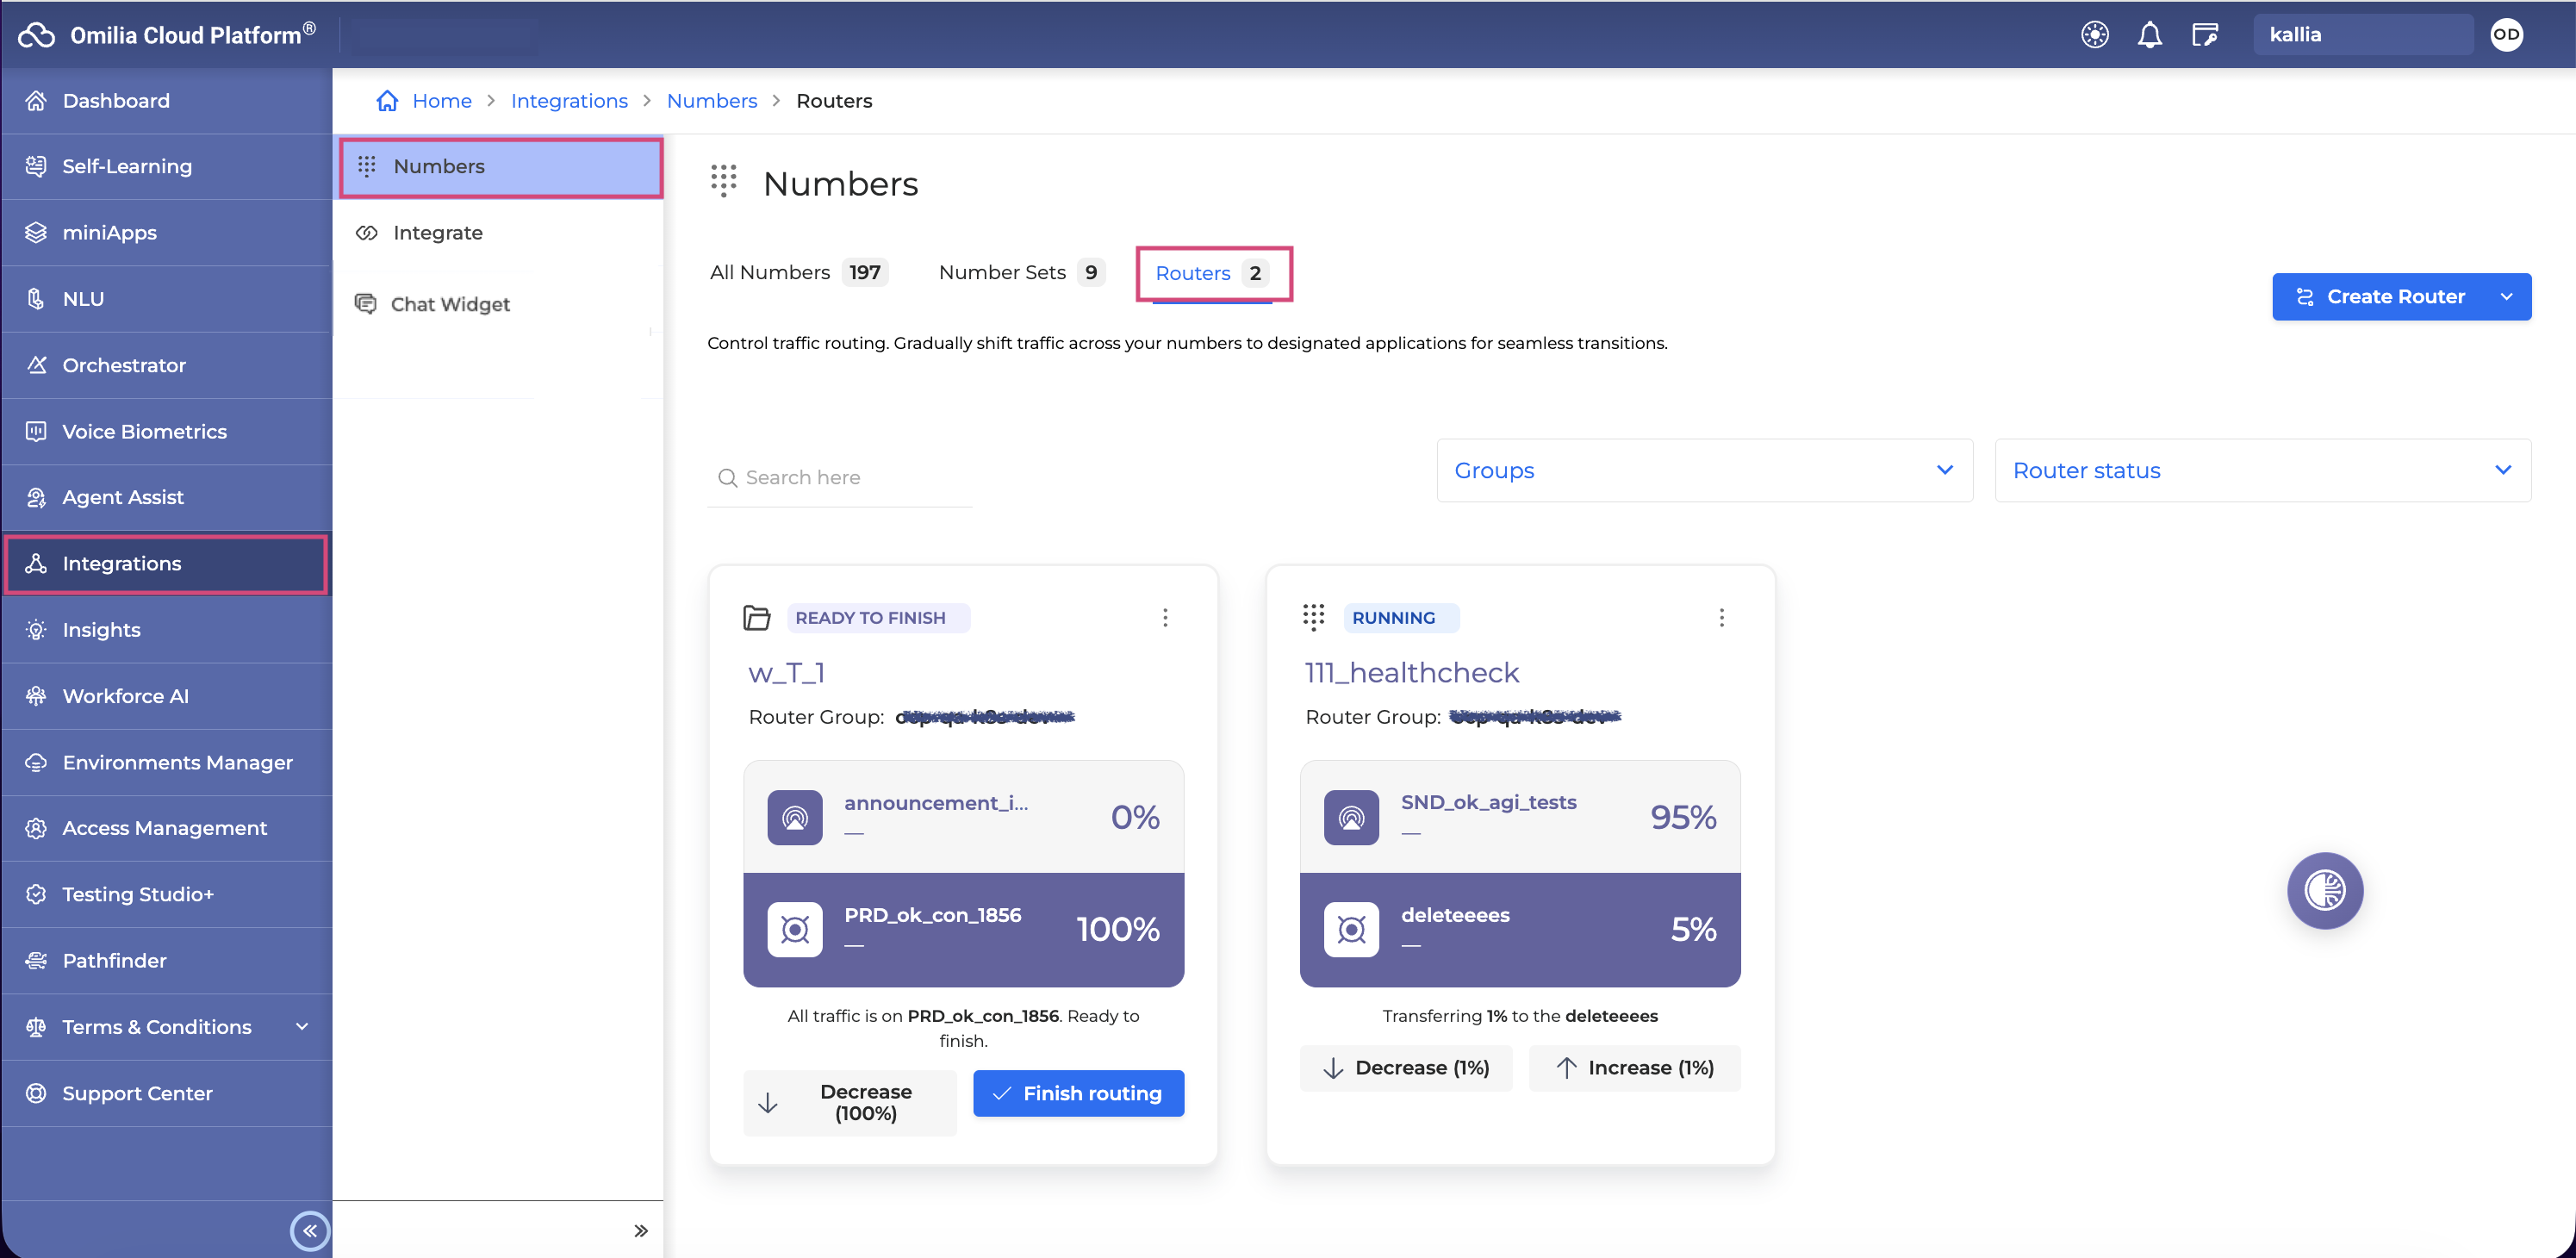
This tab allows you to create routers that will assign your traffic gradually from one application to another. This can be particularly useful for testing, transitioning between applications, or handling exceptional cases where staggered deployment is necessary.
While a router is active – even when target traffic allocation reaches 100% – the Numbers and Number Sets tables still show the original Source Application.
-
The router controls traffic, so 100% of calls reach the target application.
-
The direct application in the Numbers table updates permanently only after you complete the router (for details see the Transfer Traffic section, step 6 ).
Routers for gradual traffic assignment can be created for miniApps, flows, application tags, SND, and PRD applications. Below, you will find detailed instructions on how to set up and effectively manage routers for gradual traffic assignments.
Navigation and layout
Before exploring the features of the Routers tab, here are some basic navigation tips to help you make the most of its functionalities.
Search filters
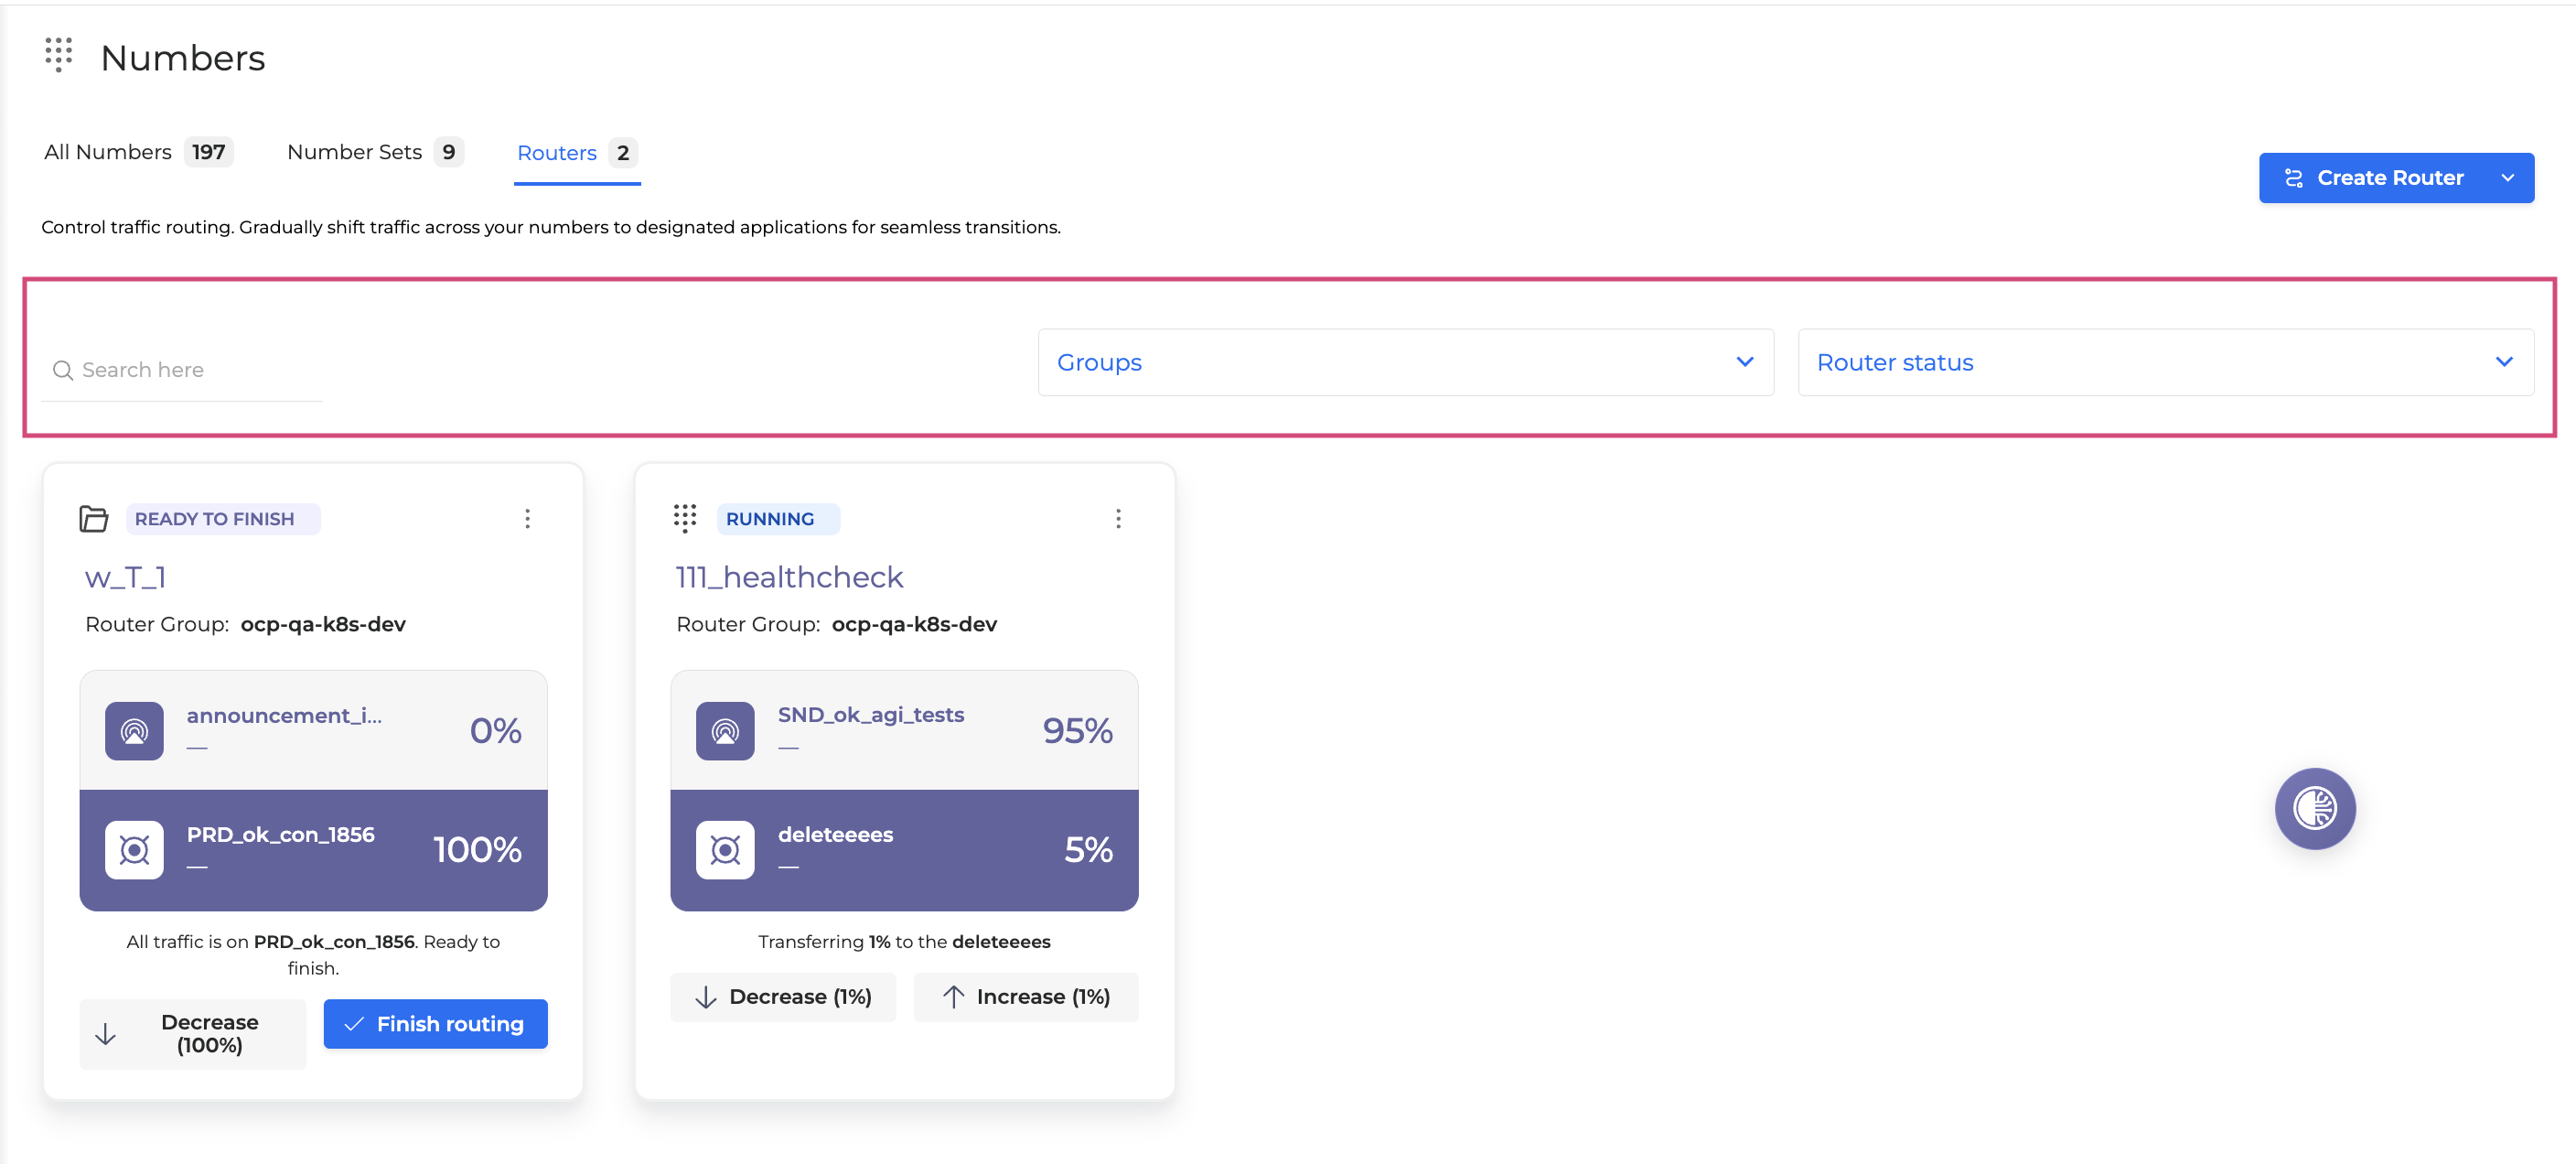
The search filters enable you to quickly locate specific routers without the need for endless scrolling.
-
Search here: Locate a specific router swiftly by entering the corresponding phone number.
-
Groups: Narrow down your search by selecting a group from the drop-down menu.
-
Router status: Filter routers based on their current status. You can choose from the following options: Running, Inactive, Confirmation Pending.
-
Progress: Identify routers based on their progress status. The available options include: Not started, In Progress, Completed.
Create Router
To create a new router, follow the steps below:
-
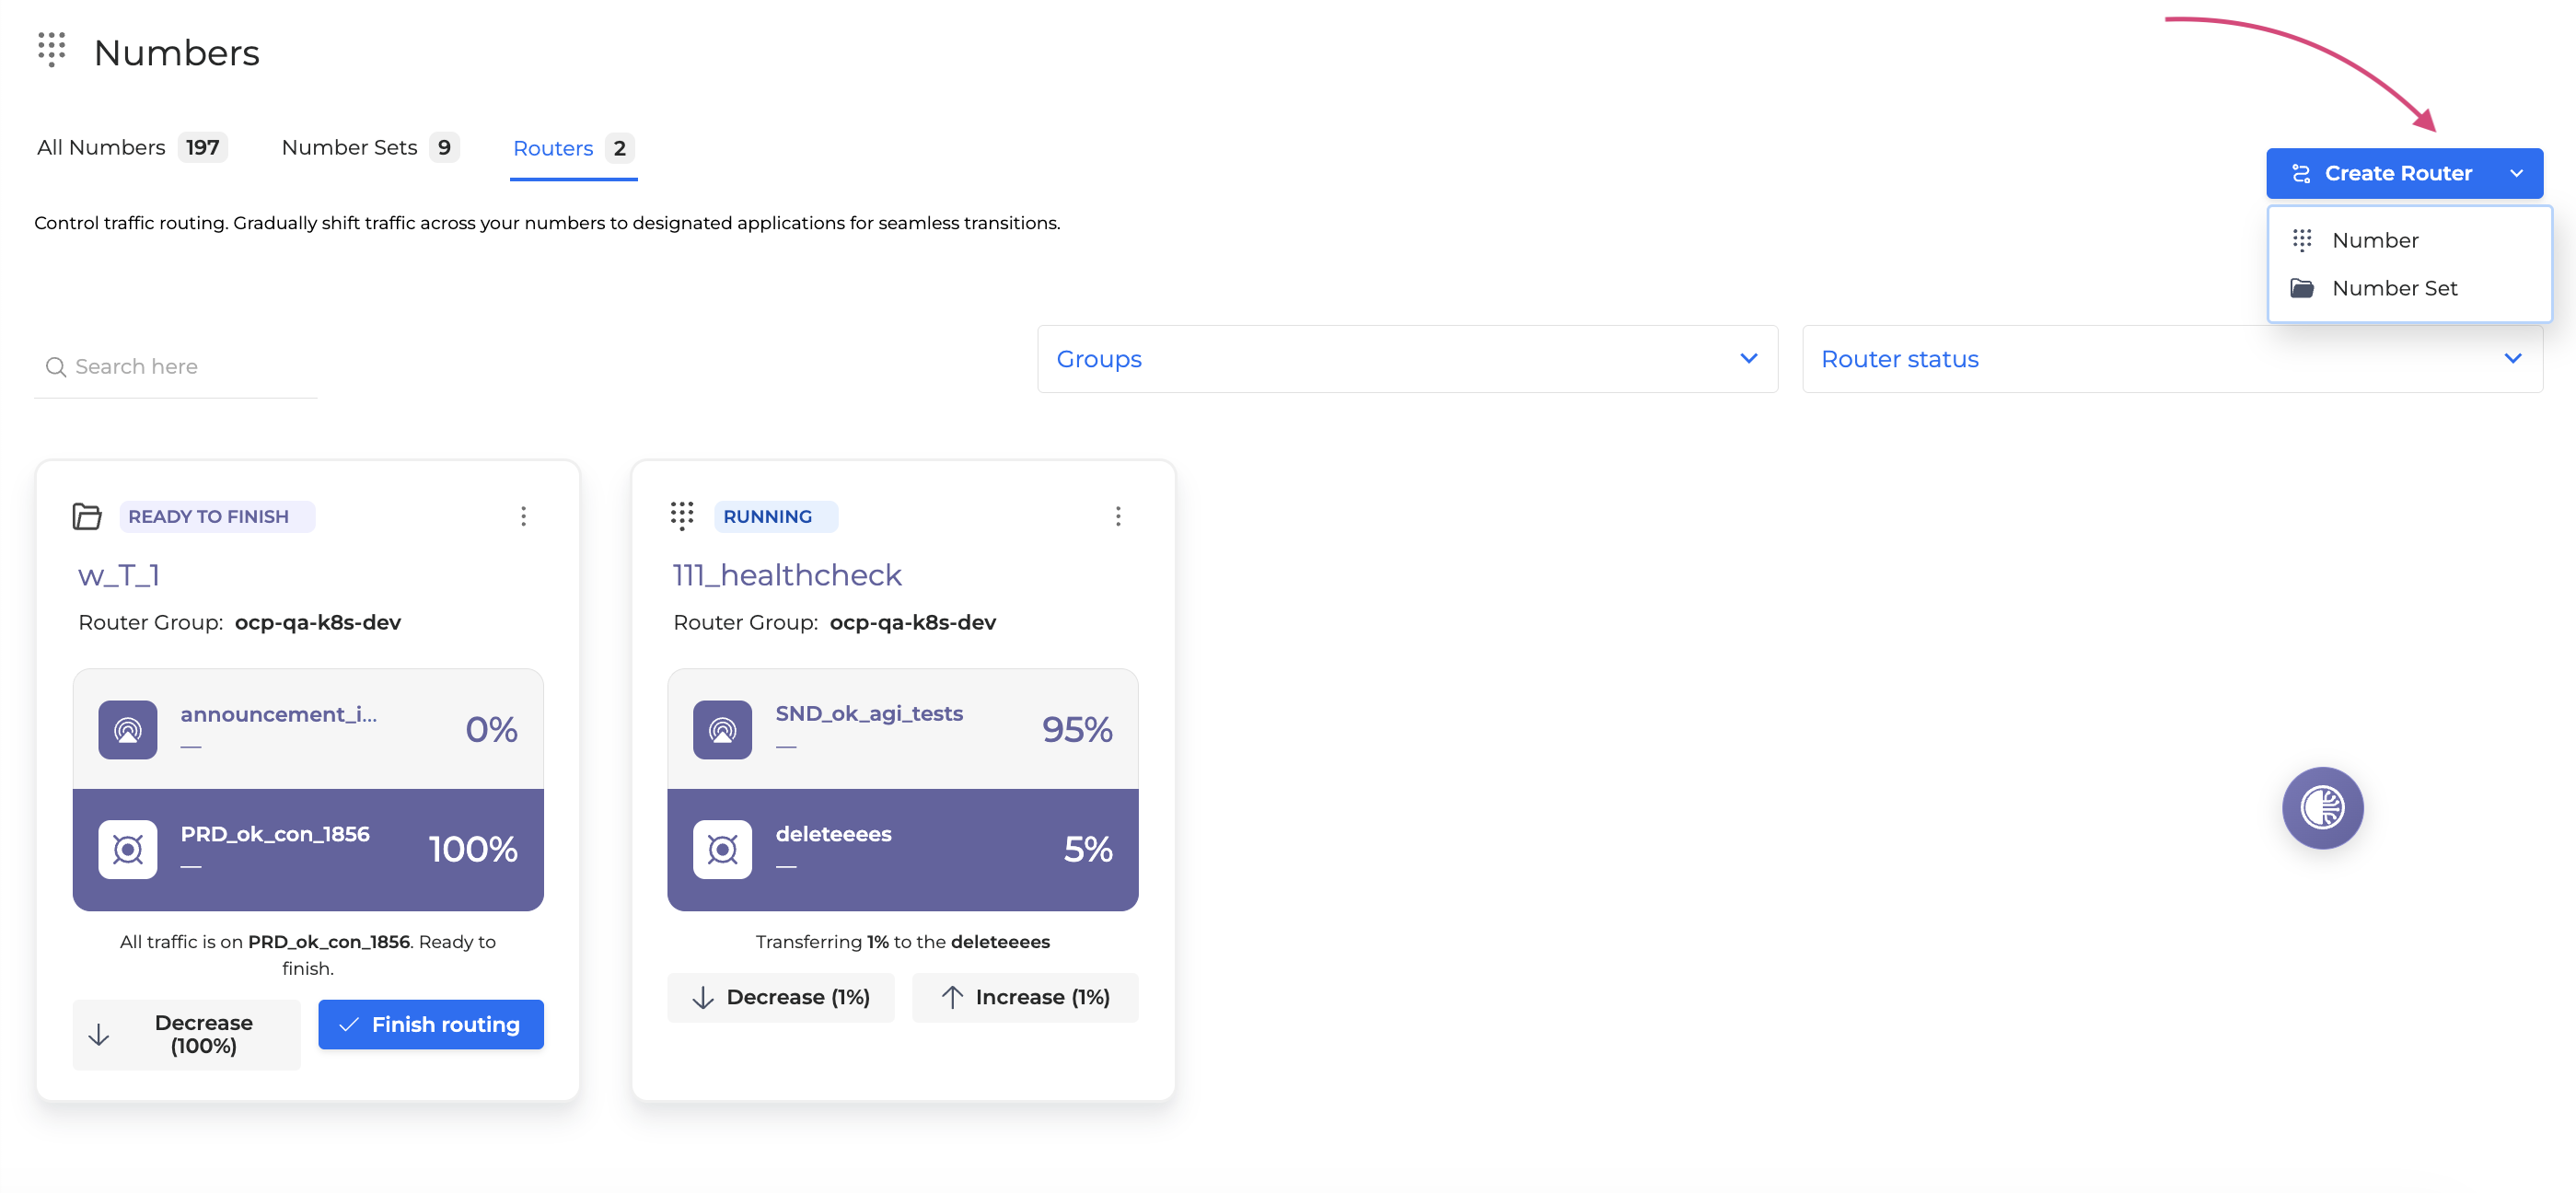
Click the Create Route button.
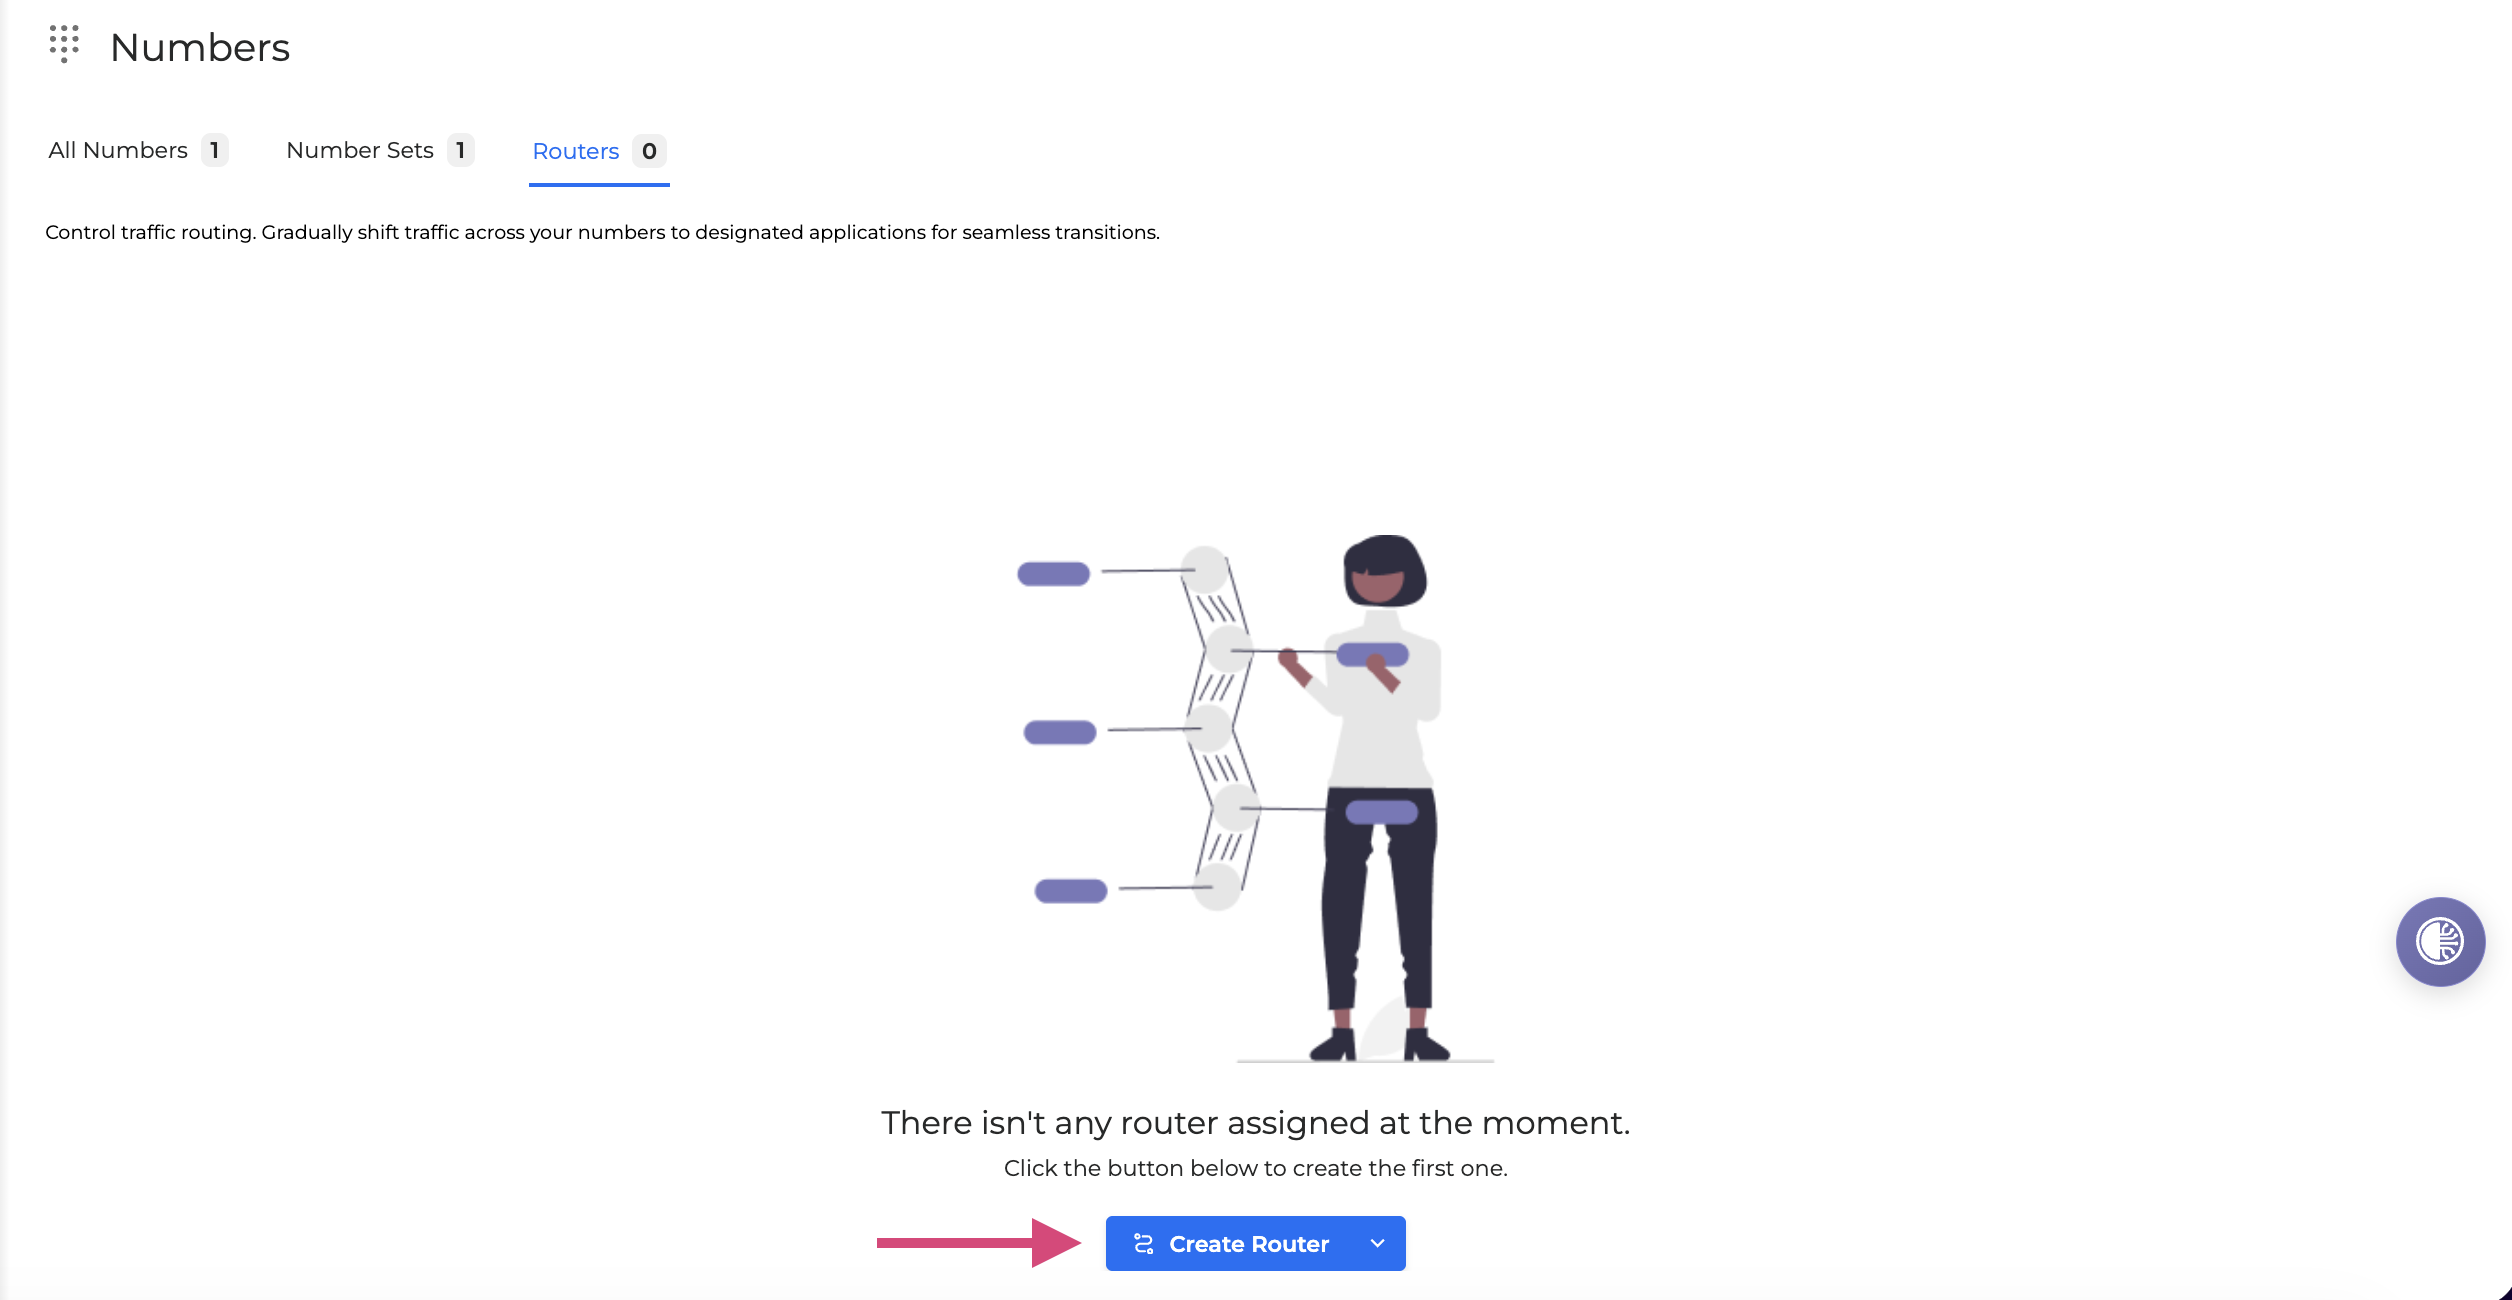
If no routers have been created, the page will appear as shown below:
-
Select Number to create a router for a number, or Number Set to create a router for a number set.
-
In the dialog window that opens, fill in the fields as described below:

-
Number: Select a phone number or a number set from the drop-down list. You can only select either one number or one number set, respectively. The following fields below will be filled in automatically based on the selected number.
-
Number Group: The group the number is initially attached to.
-
Source Application: The application to which the number is initially attached.
-
Version Tag: The tag of the source application if applicable.
-
Application Group: The group the application is assigned to.
-
-
Target application:
-
Application Name: Select a new application from the drop-down list to which the phone number will be attached.
-
Tag Version: Optionally select a tag of the new application to attach the phone number to. It allows to distribute calls between several versions of the same application.
-
Group: The group of the target application that will be set automatically based on your previous selection.
-
-
Percentage: The percentage value of the step that increments the amount of traffic transferred from the source application to the target application. Allowed values are 1-100.
-
Click Create to finalize the process. The router for traffic transfer is now created, and it will appear in the routers list.
Transfer traffic
Now that your router is set up, you can begin gradually shifting traffic from one application to another. To transfer traffic, follow these steps:
-
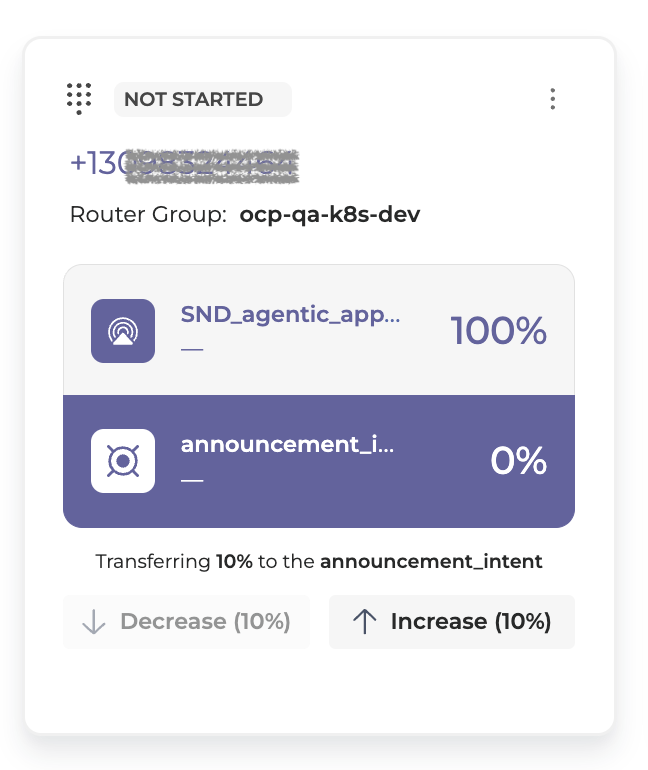
Navigate to the router you intend to use for traffic transfer. Its status is indicated as NOT STARTED.
-
The grey Traffic Usage bar indicates the percentage of traffic being used by the source application.
The purple Traffic Usage bar indicates the percentage of traffic being transferred from the source application to the target application. -
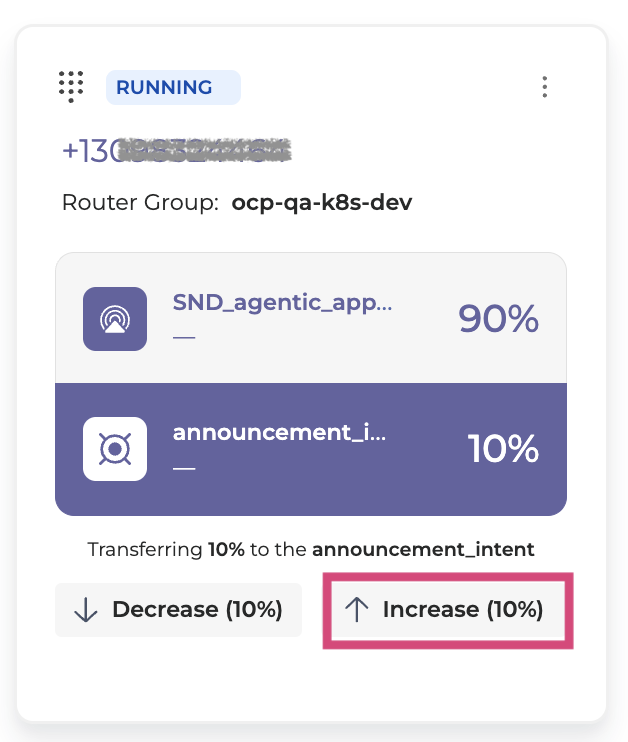
Click the Increase button. This action will start transferring a part of the traffic to the target application. The status will change to RUNNING.
-
Initially, 10% of the traffic will be transferred, as indicated by the percentage in parenthesis on the Increase button. This number is determined by your router's step settings. For example, in the image above, ten iterations will be required. You can modify the step settings at any time if needed.
-
When you are ready to transfer more traffic, continue by clicking Increase. Repeat this step until the Traffic Usage progress bar reaches 100%, fully transferring all traffic to the target application.
-
If you need to reduce the traffic already sent to the target application, click Descrease. This decreases the traffic split, letting you roll back gradually.
-
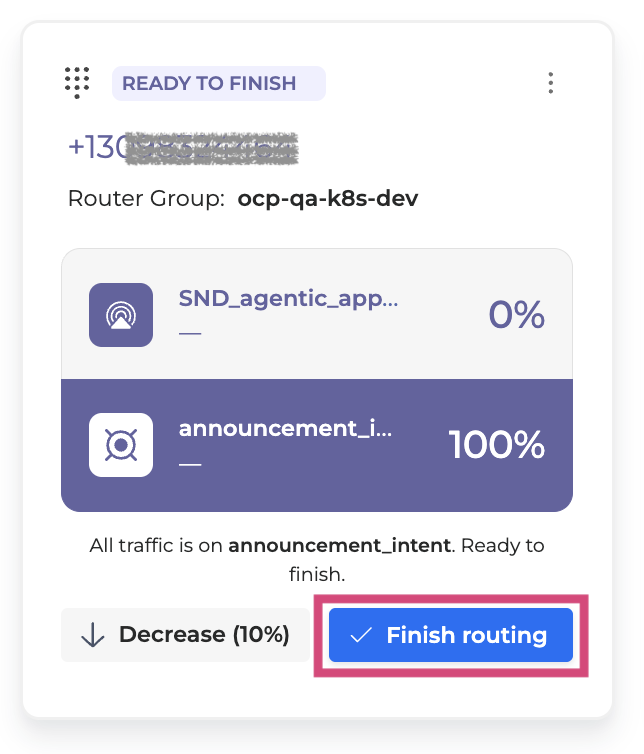
Once the Traffic Usage bar indicates 100% completion, the router’s status will change to READY TO FINISH. To finalize the traffic transfer, click the Finish Routing button.
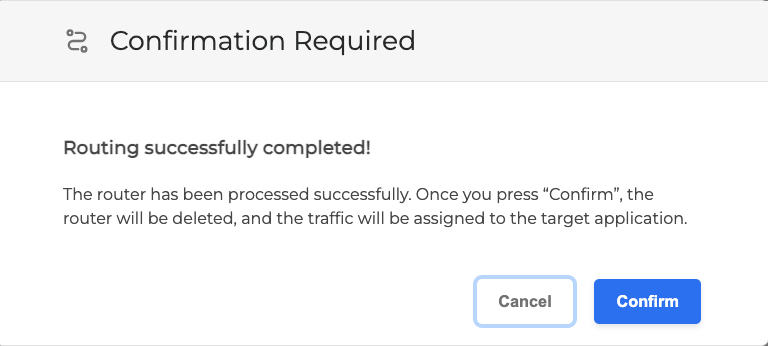
7. A dialog box will appear. In the dialog box, click Confirm to complete the process.
-
Upon confirmation, the router will be deleted, and all traffic will be routed to the target application.
What happens upon confirmation:
-
Permanent reassignment: The phone number or number set is permanently assigned to the target application.
-
UI update: The Numbers / Number Sets table updates to reflect the target application as the assigned application.
-
Router decommission: The router is deleted, and calls route directly without router evaluation.
If you do not click Finish Routing, the router remains active in the READY TO FINISH state. Deleting the router in this state will revert 100% of traffic back to the source application.
Edit steps
The step setting dictates what portion of traffic will be transferred from the source application to the target application at each step. You may occasionally need to adjust this step setting to better suit your needs. Follow these steps to modify the traffic transfer step:
-
Navigate to the specific router you intend to edit and click Options menu → Edit steps.
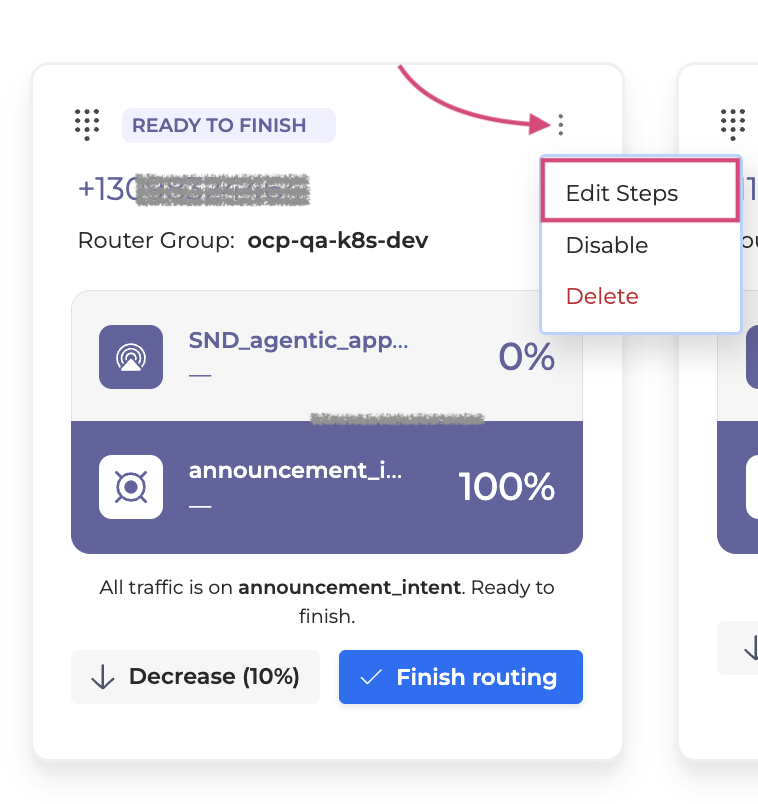
-
In the dialog window that appears, modify the traffic usage step to your desired percentage value.
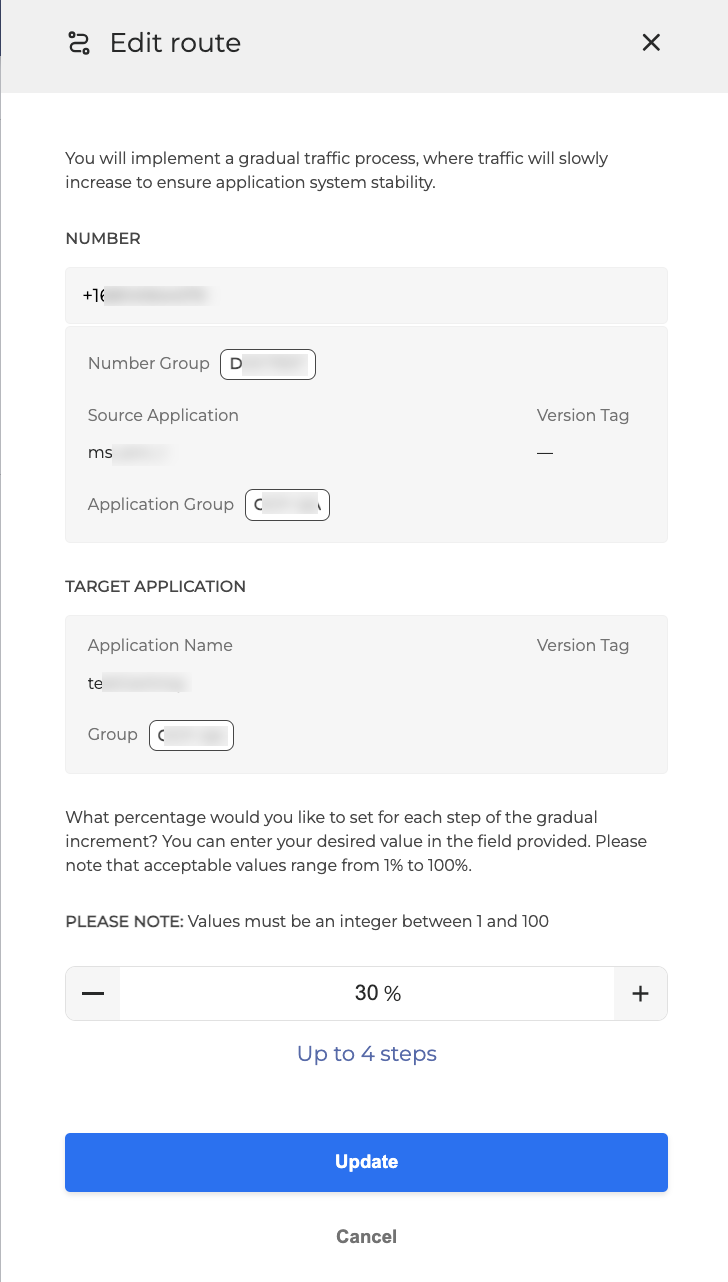
-
Click Update to finalize. The traffic usage step is now updated, and future traffic transfers will follow this new increment setting.
Router status
The status of a router provides important information about its current operational state. Here are the possible statuses for a router:
-
Not started: Indicates that the router has been created by the traffic transfer has not started yet.
-
Running: Indicates that the router is either prepared to transfer traffic or is currently in the process of transferring traffic between applications.
-
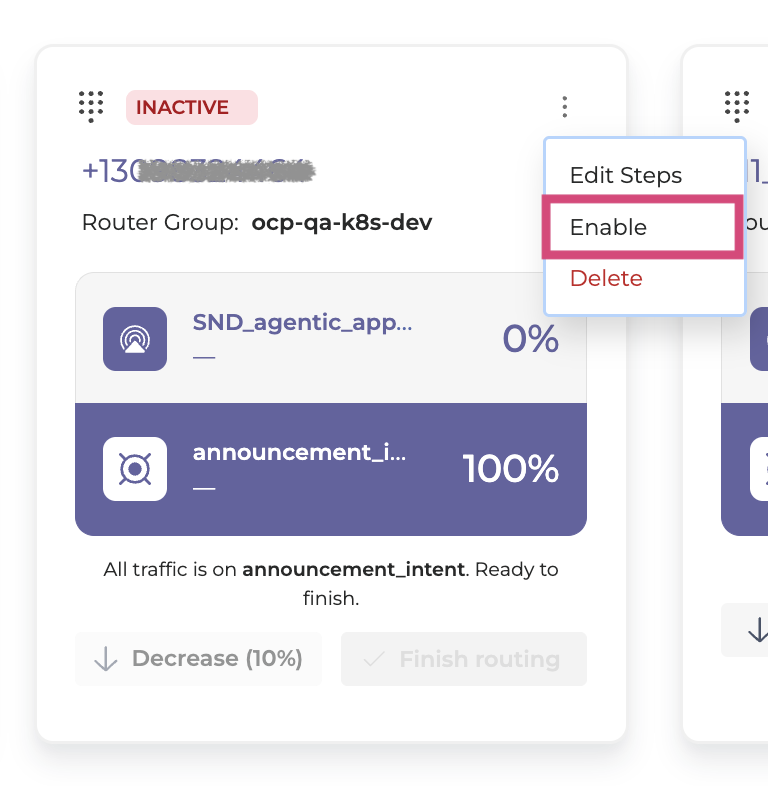
Inactive: Indicates that the router has been temporarily disabled and the traffic transfer has been paused. Once re-enabled, the router will switch back to the Running status and continue its traffic transfer operations.
-
Ready to finish: Signifies that the traffic transfer has reached 100% to the target application and is awaiting confirmation. In this state, all incoming traffic is reaching the target application, but the direct number binding in the Numbers table still points to the source application. Once confirmed via Finish Routing, the permanent binding is switched to the target application and the router is removed.
Disable a router
To disable a router, proceed as follows:
-
Navigate to the router you wish to disable and click Options menu → Disable.
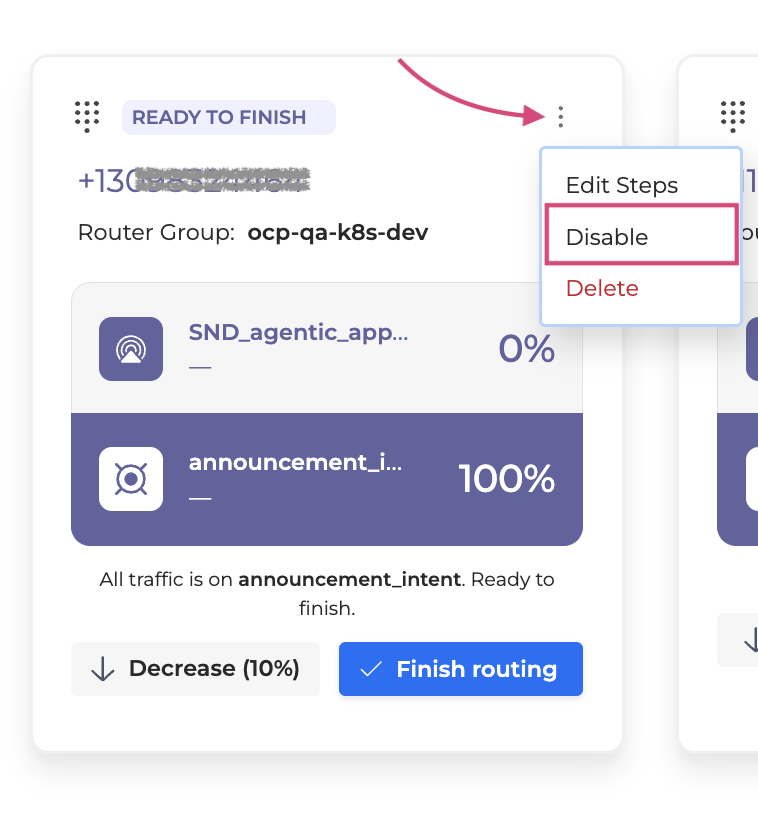
-
A confirmation message will appear in the top right corner of your screen, and the router status will update to INACTIVE.
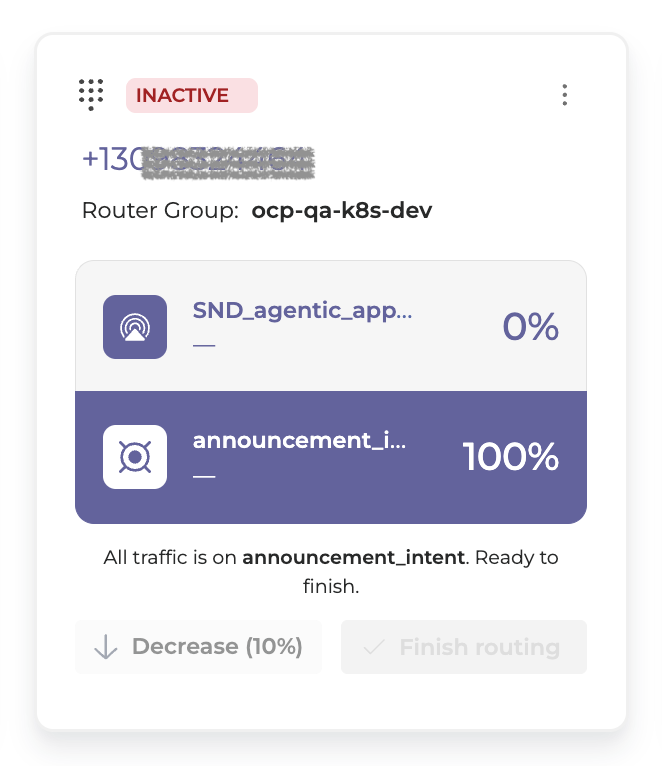
The selected router is now disabled. If you need to reactivate it in the future, you can do so by following the instructions below.
Enable a router
To enable a router, proceed as follows:
-
Navigate to the router you wish to enable and click Options menu → Enable.
-
A confirmation message will appear in the top right corner of your screen, and the router status will update to RUNNING.
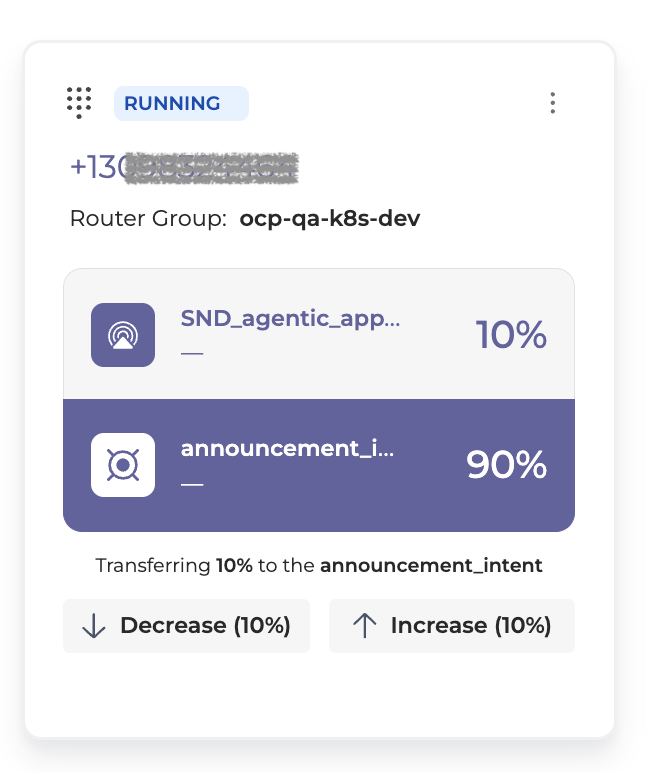
The router is now enabled and is ready to resume its traffic transferring functions.
Router and number set limits
-
A router is bound to exactly one number or one number set. A number set can only have one active router at a time.
-
Multi-set support (one router spanning multiple sets) is not currently planned. If you need to route several sets together, either consolidate the numbers into a single set, or create one router per set.
-
There is no enforced maximum on how many numbers a single set or router can handle.
Delete a router
To delete a router, follow the steps below:
-
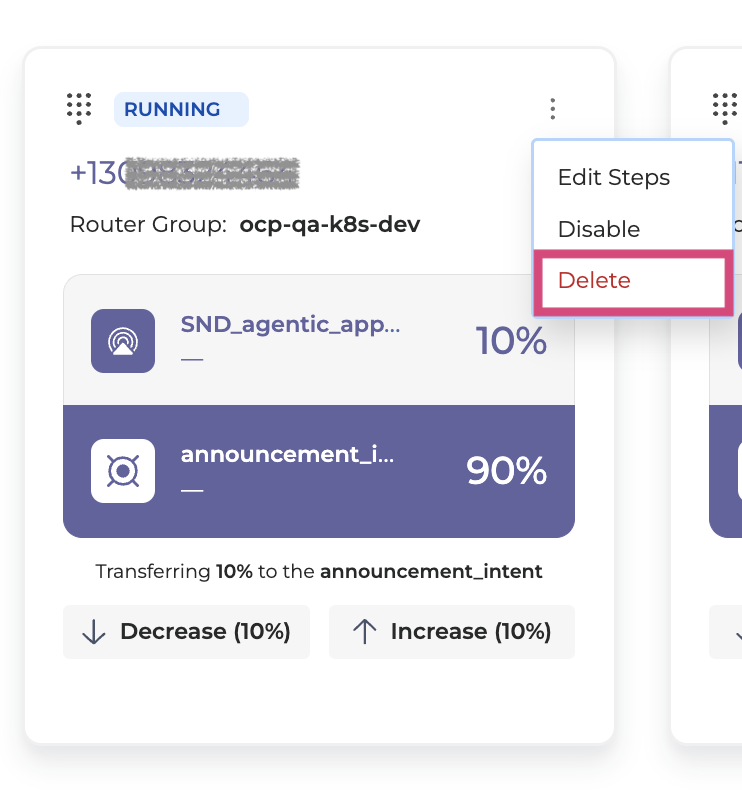
Navigate to the router you wish to delete and click Options menu → Delete.
-
In the dialog box that opens, type CONFIRM DELETE to confirm the deletion.
Once the router is deleted, all traffic will revert to the source (original) application within approximately one minute. This applies regardless of the current traffic split, including when the target application has reached 100% but Finish Routing/Confirm has not been clicked - the switch is only permanently committed once confirmed. Deleting beforehand always reverts to the source.

-
Click the Delete button to finalize the deletion. The router will be deleted.
Deleting a router is always treated as a rollback; to permanently switch traffic to the target application, use the steps described in Transfer traffic instead.