Introduction
Creating an OAuth client to access API data requires specific permissions, such as selecting a role.
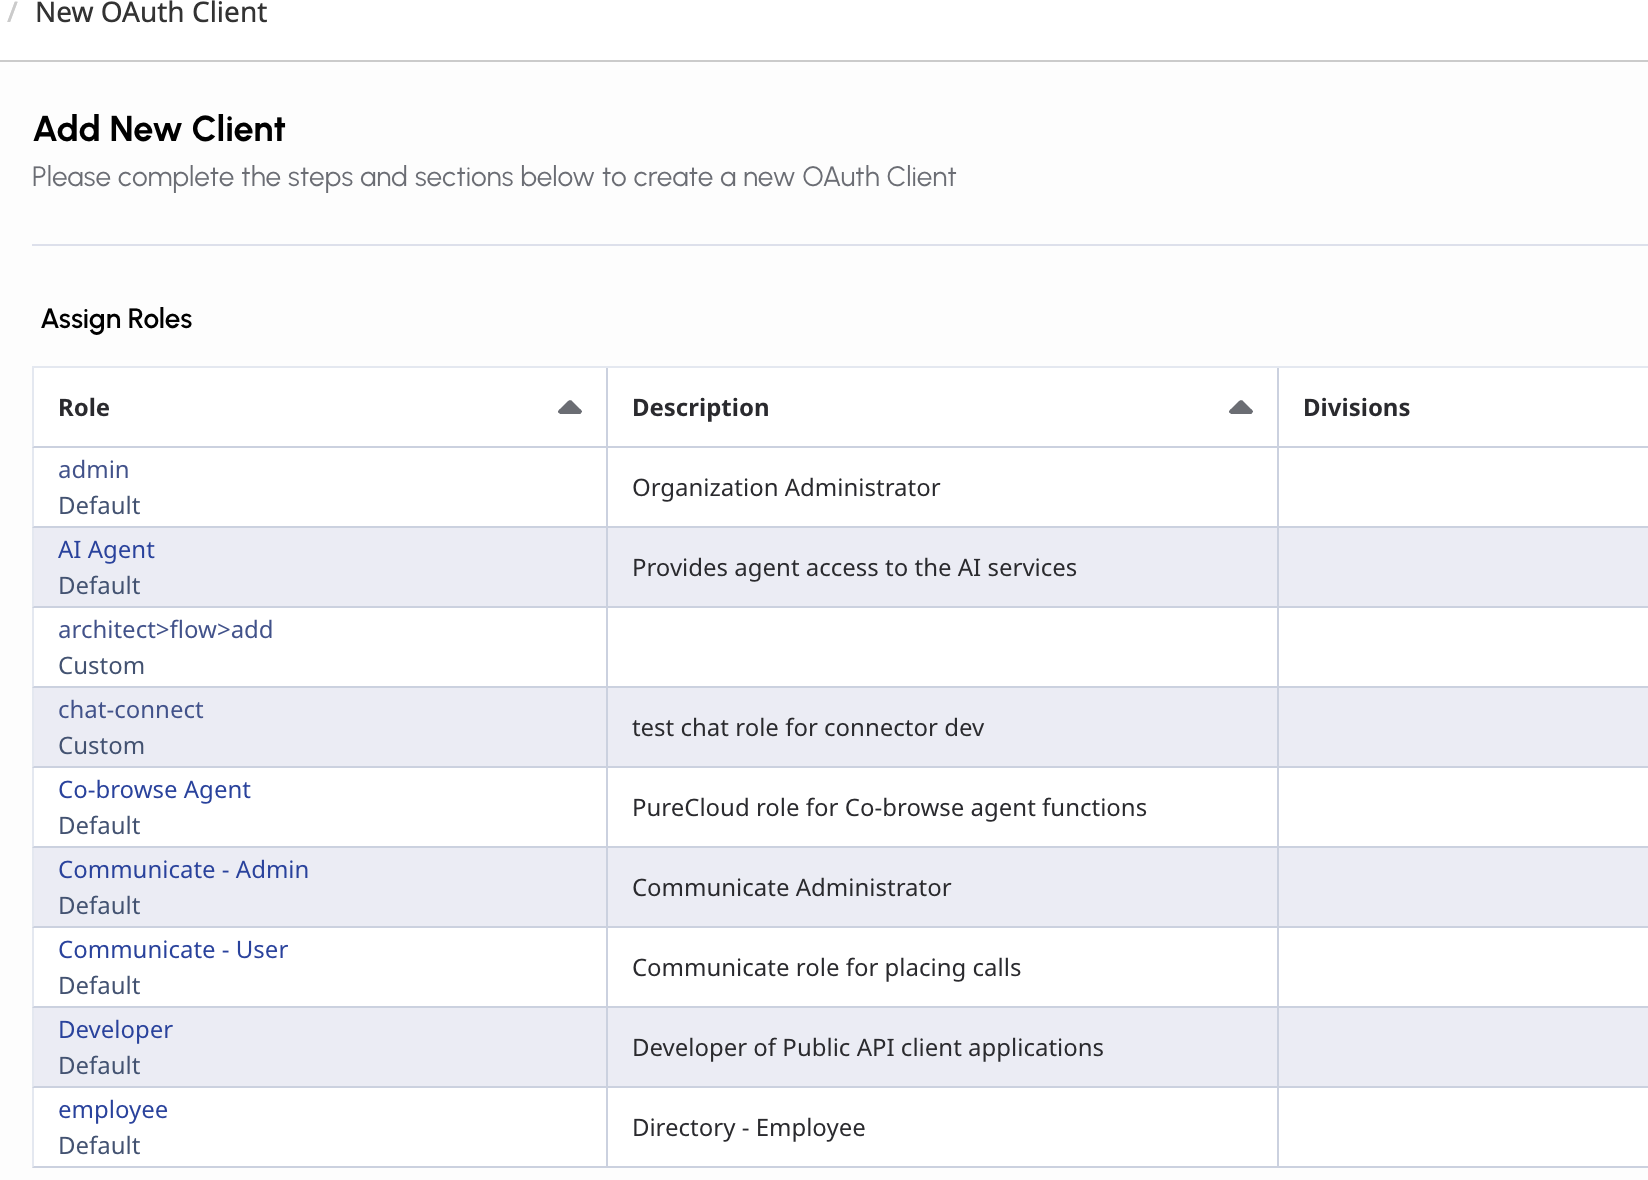
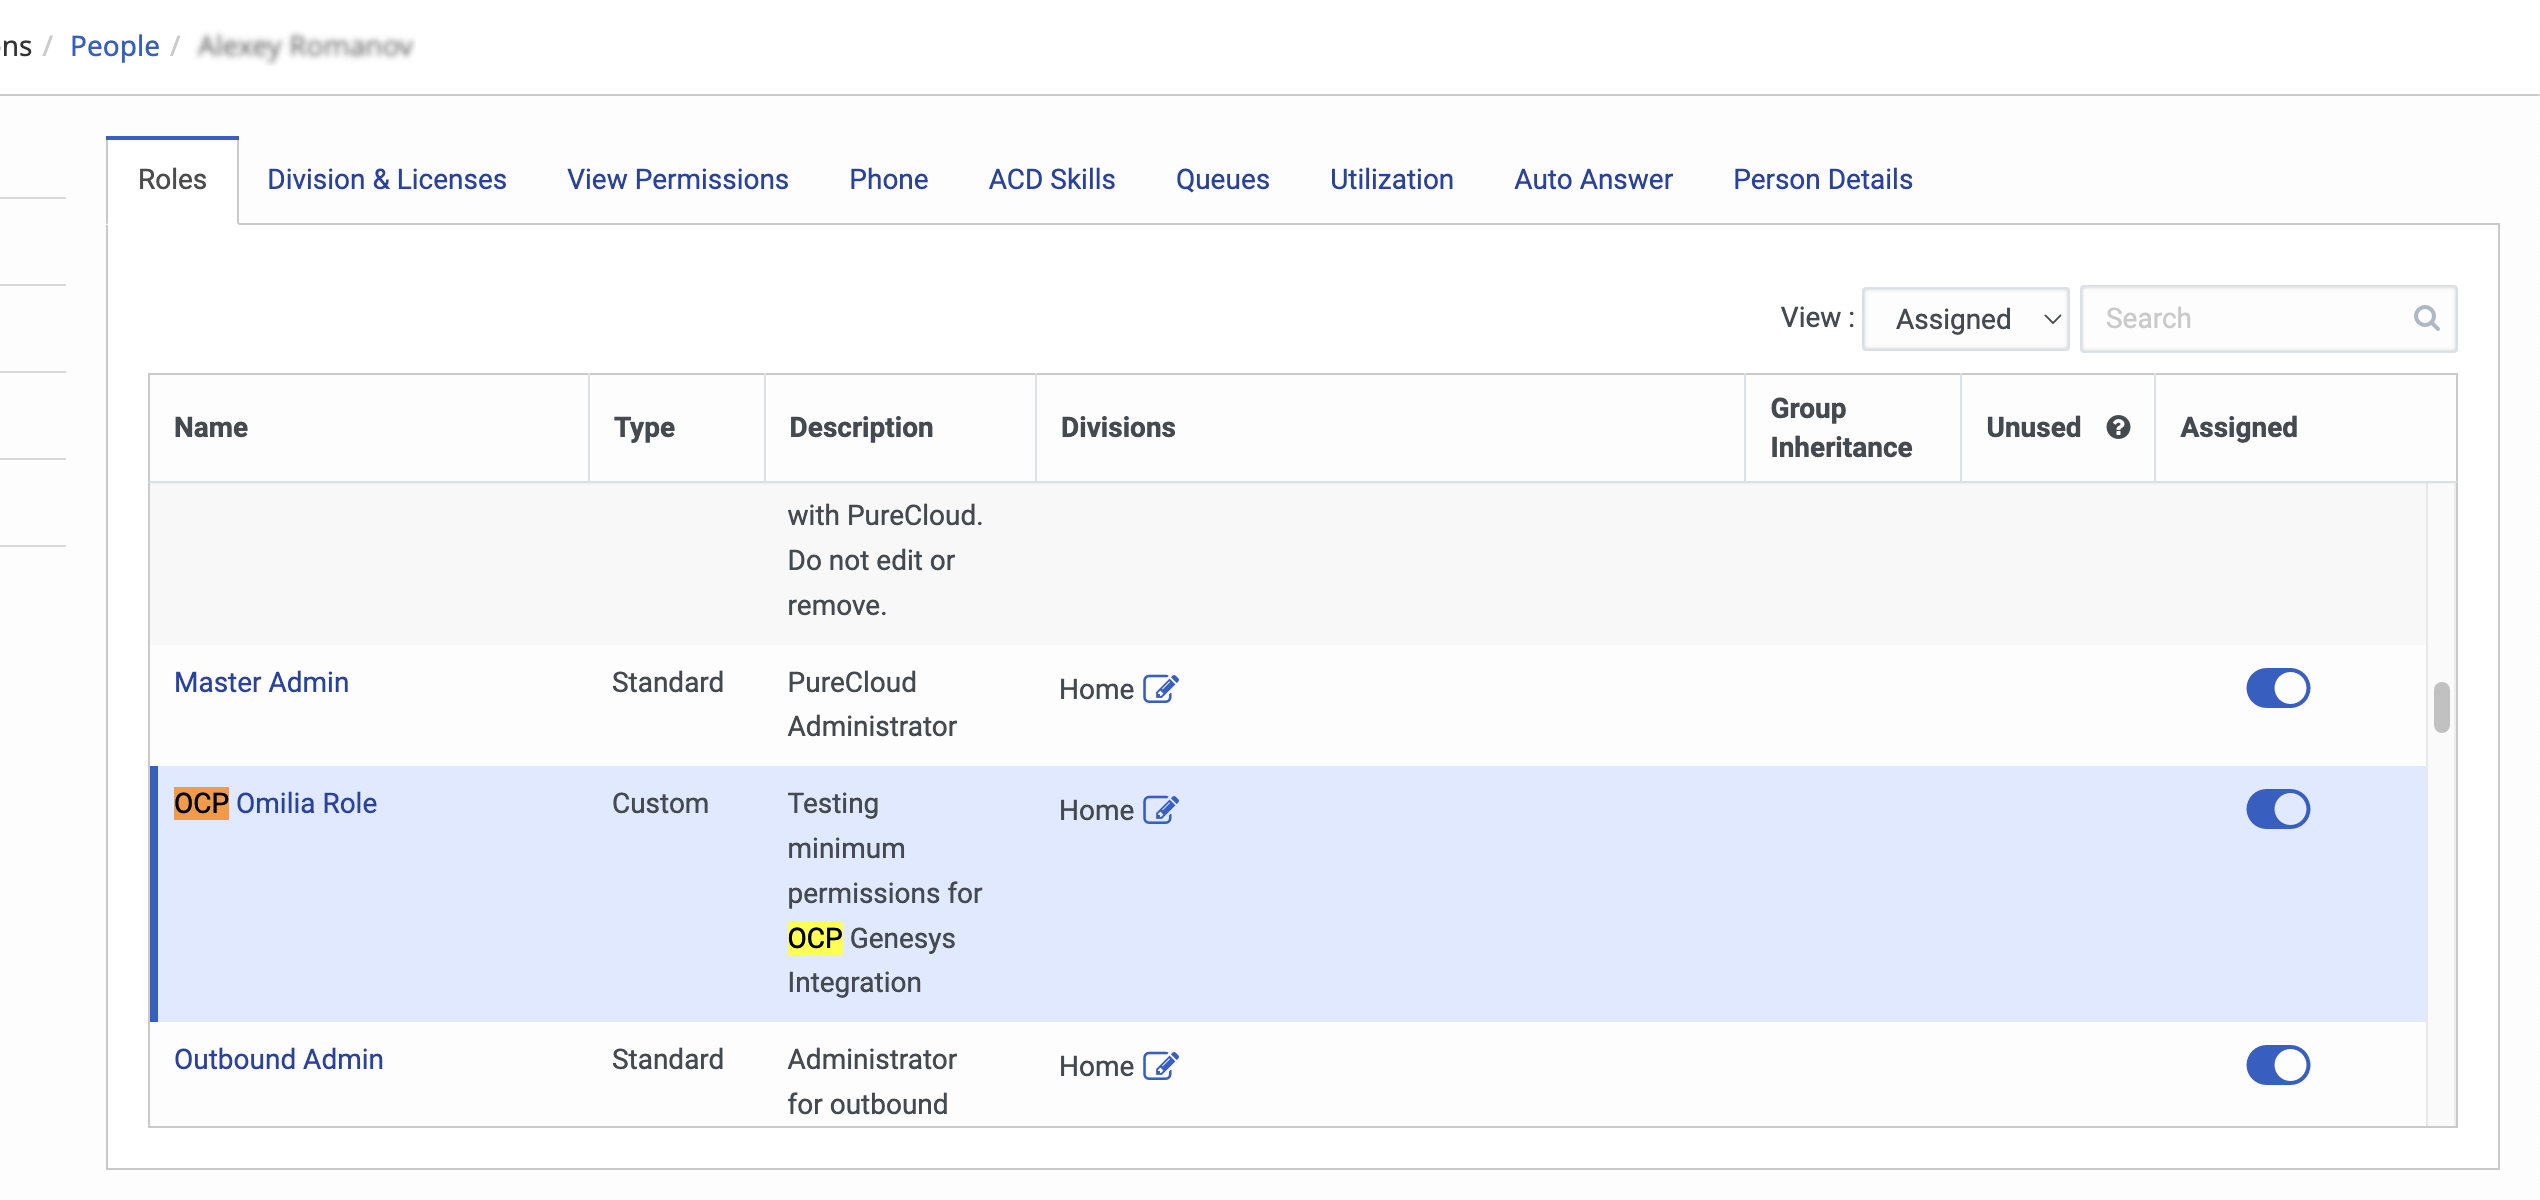
Under the Roles section you will find a list of default roles as shown below.
However, our project customers typically assign custom roles to their OAuth clients. A custom role with limited permissions ensures the OAuth client can only access the data it needs for the Audiohook functionality.
This guide outlines the steps required to access API data:
Create a custom role
To create custom role with the minimum required permissions for Audiohook functionality, proceed as described below:
1. Navigate to Admin → People & Permissions → Roles/Permissions.
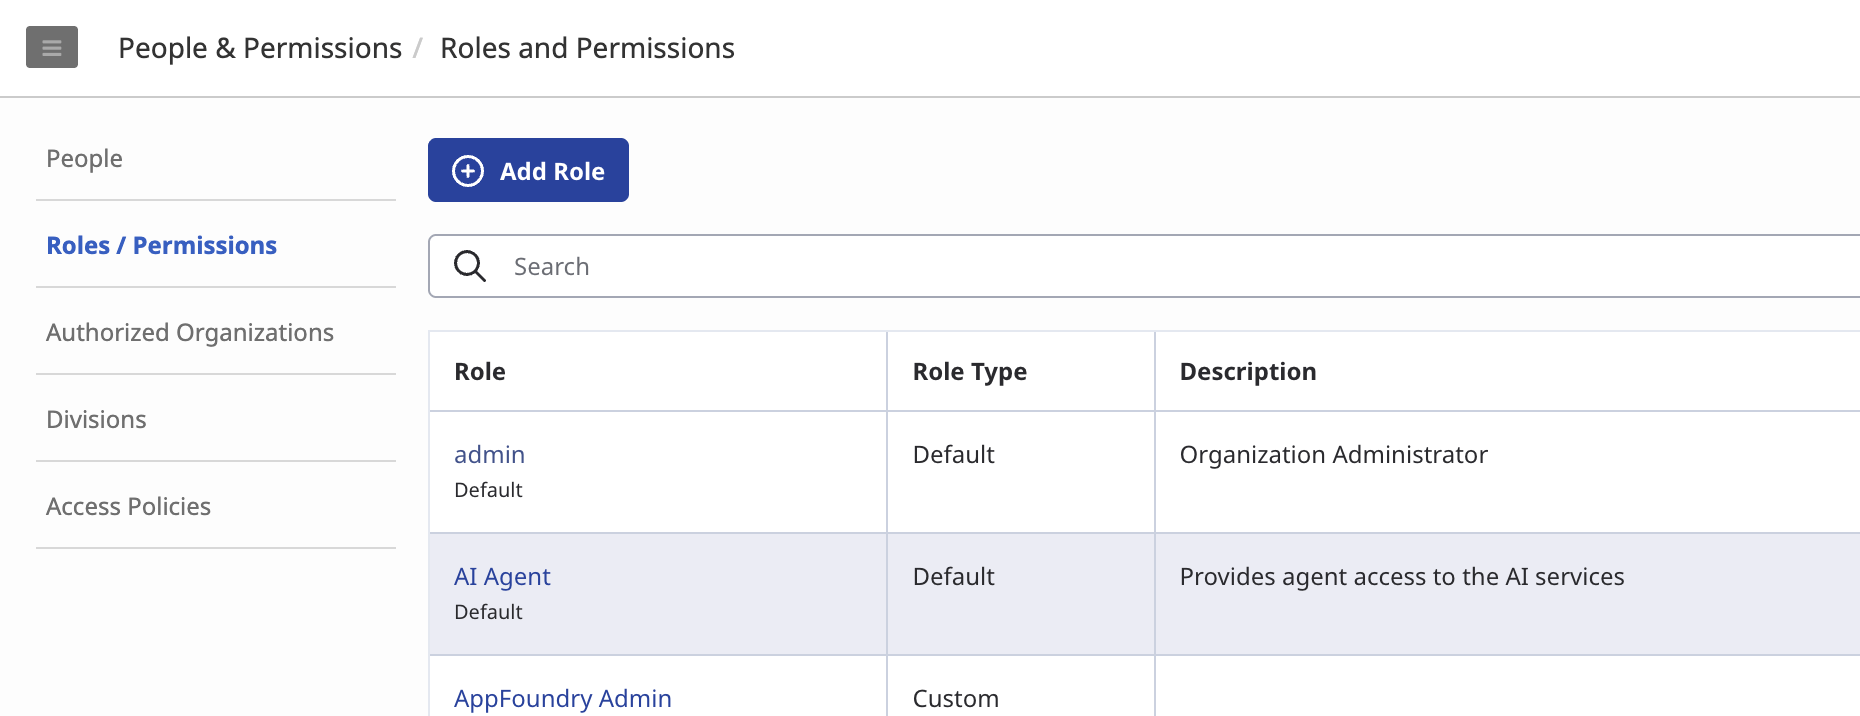
2. Click Add Role.
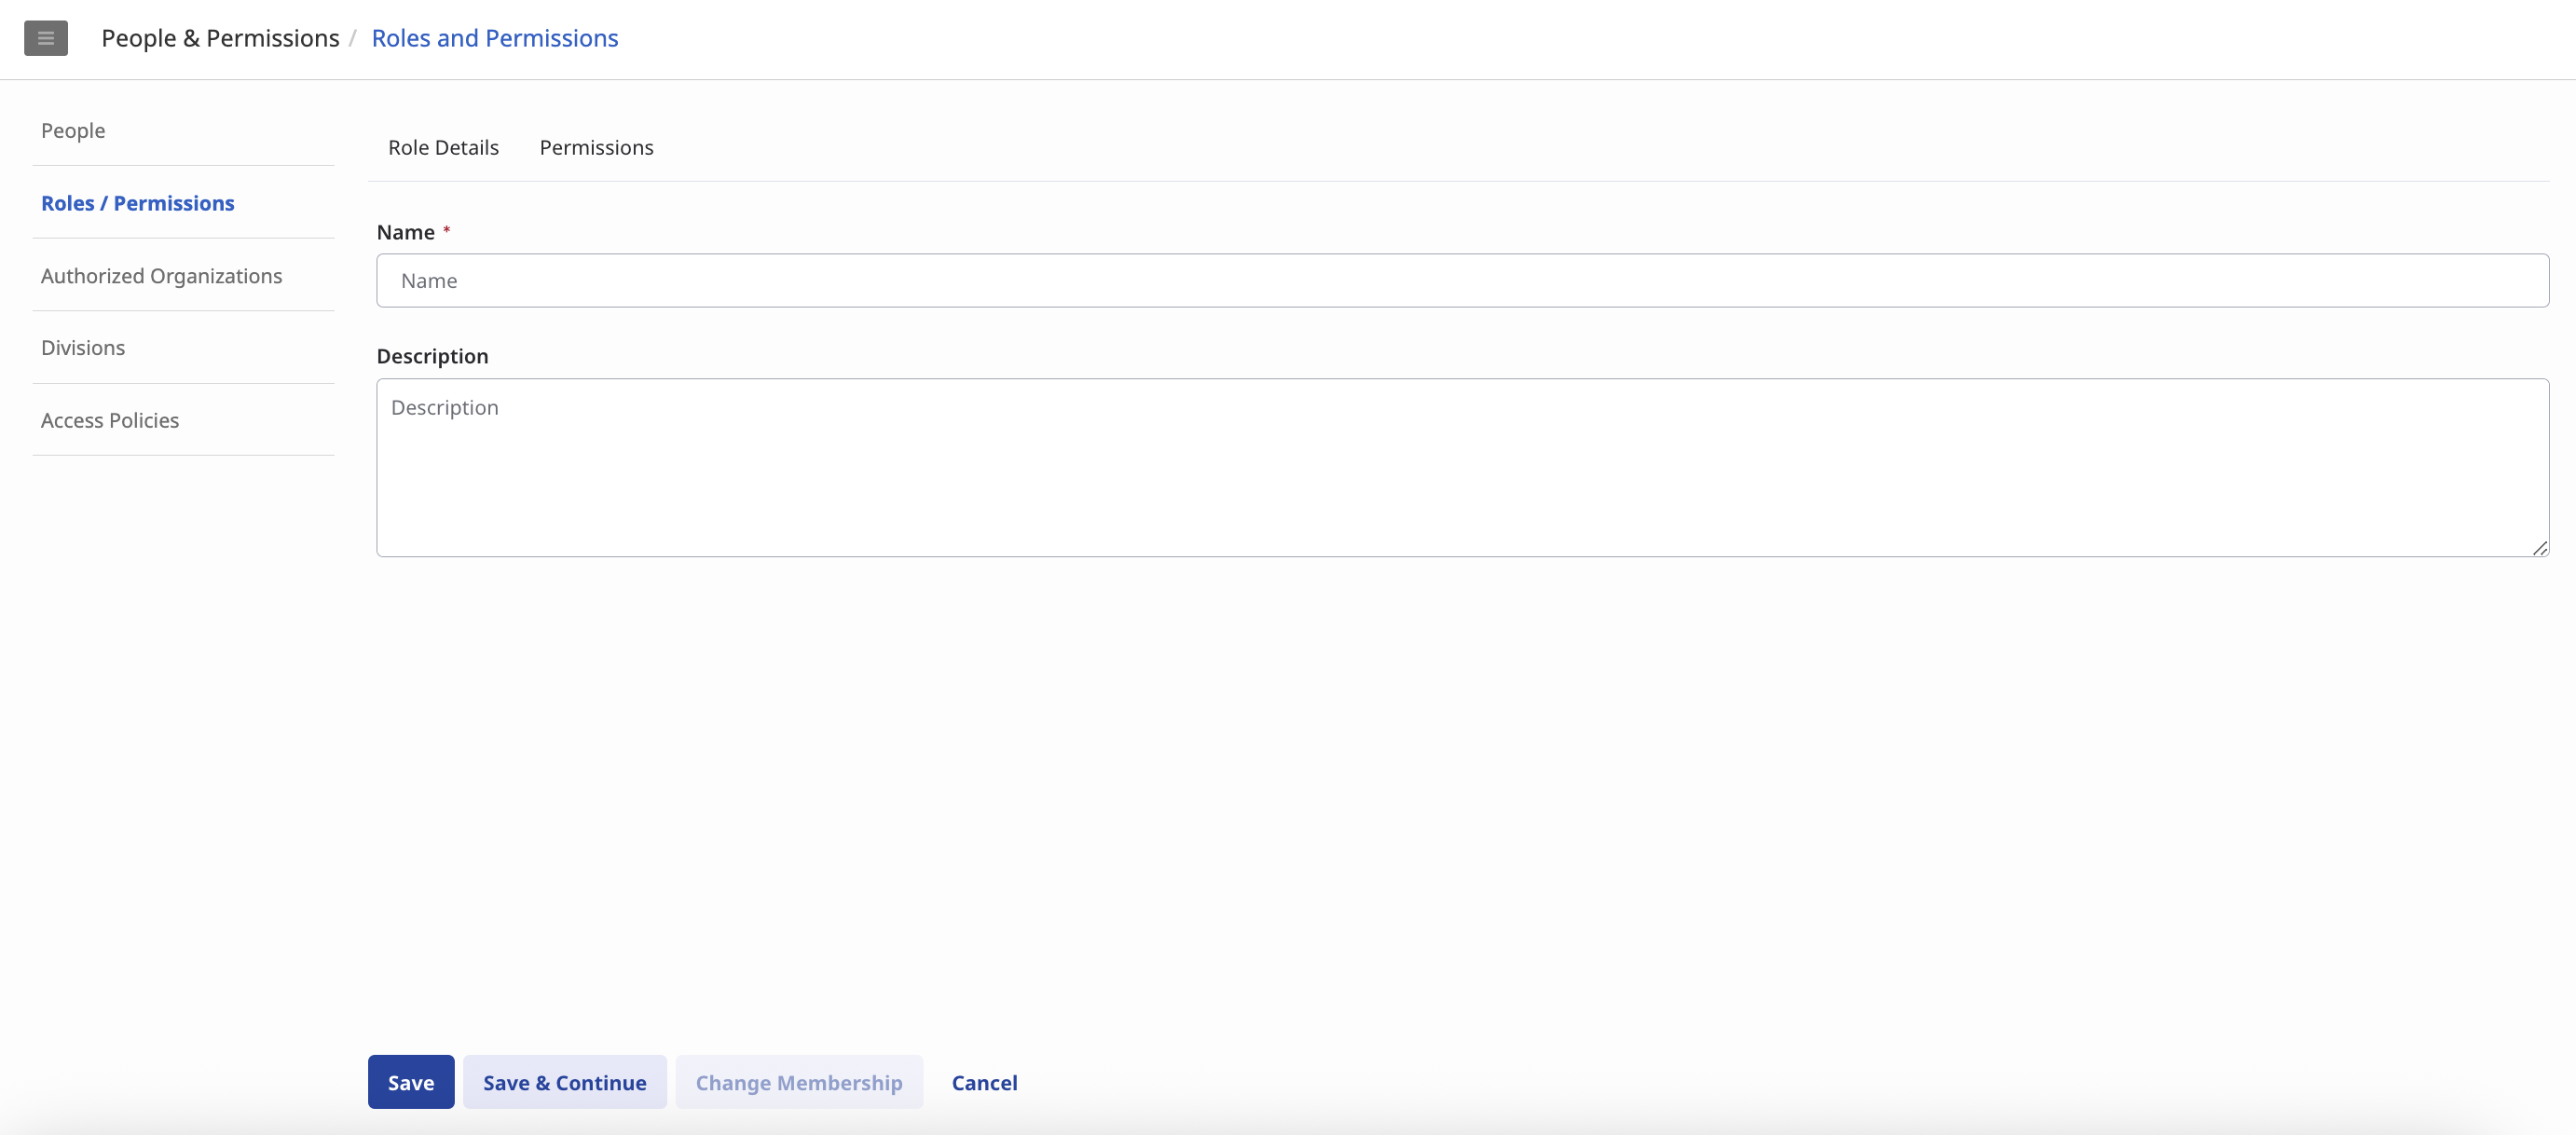
3. Complete the fields in the screen that opens:
-
Name: Enter your role name (for example, OCP Omilia Role).
-
Description: Enter an optional description.
-
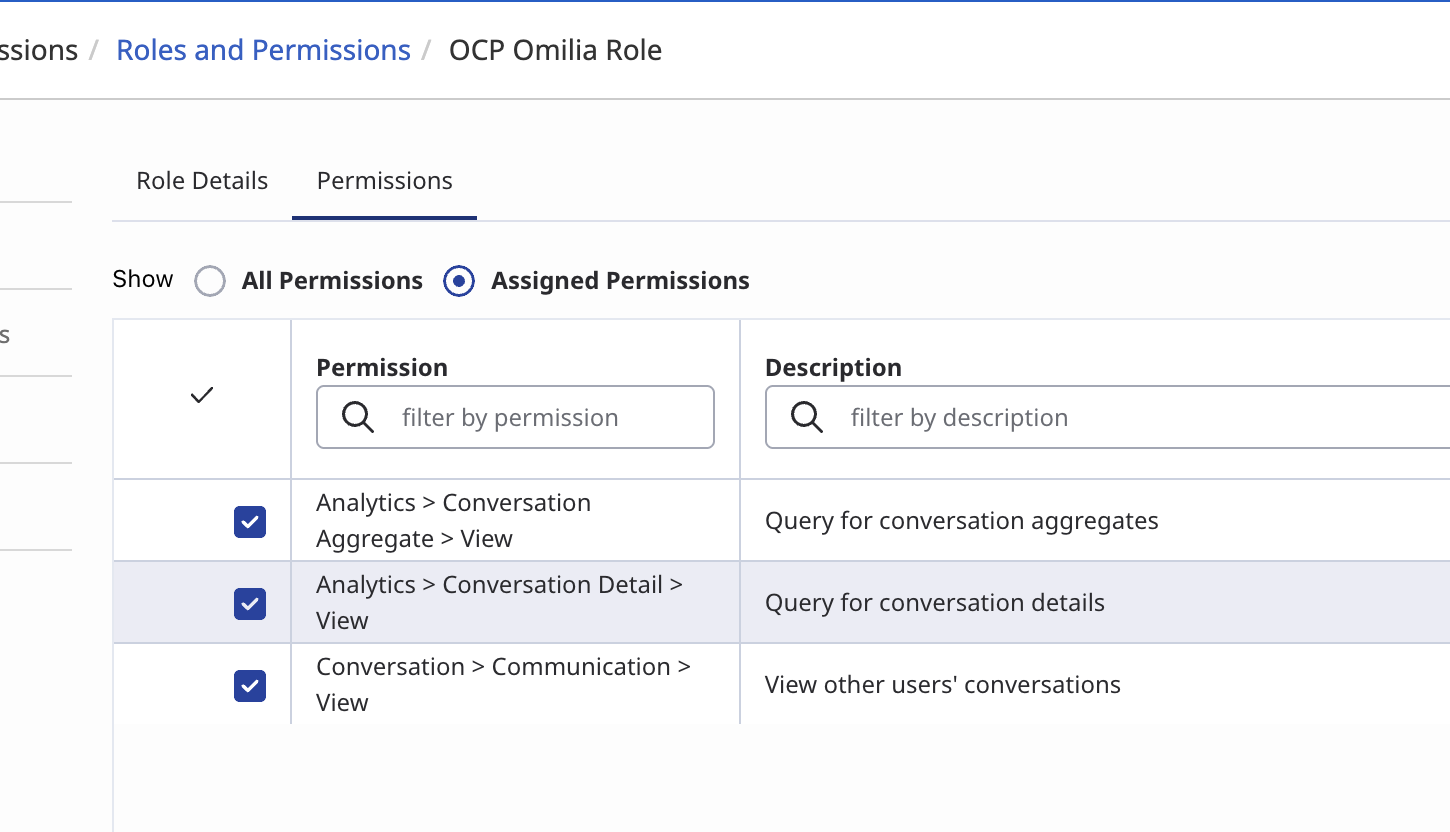
Go to the Permissions tab and select the minimum required permissions:
Analytics > Conversation Aggregate > View
Analytics > Conversation Detail > View
Conversation > Communication > View
5. Click Save.
Assign a custom role
After creating the role, you need to assign it to your user profile. This makes the new role available to you when you create the OAuth client.
To assign a custom role to your user, follow the instructions below:
-
Go to Admin → People.
-
Find and click your name.
-
On the Roles tab, enable the custom role.
-
Click Save. The custom role will now appear in the list of available roles when you create an OAuth client.
Now, we have the required prerequisite for an OAuth client creation.
Create the OAuth Client
With the custom role assigned, you can now create the OAuth client to get the Client ID and Client Secret, which are necessary for API access.
-
Navigate to Admin → Integrations → OAuth.

-
Click the Add client button.
-
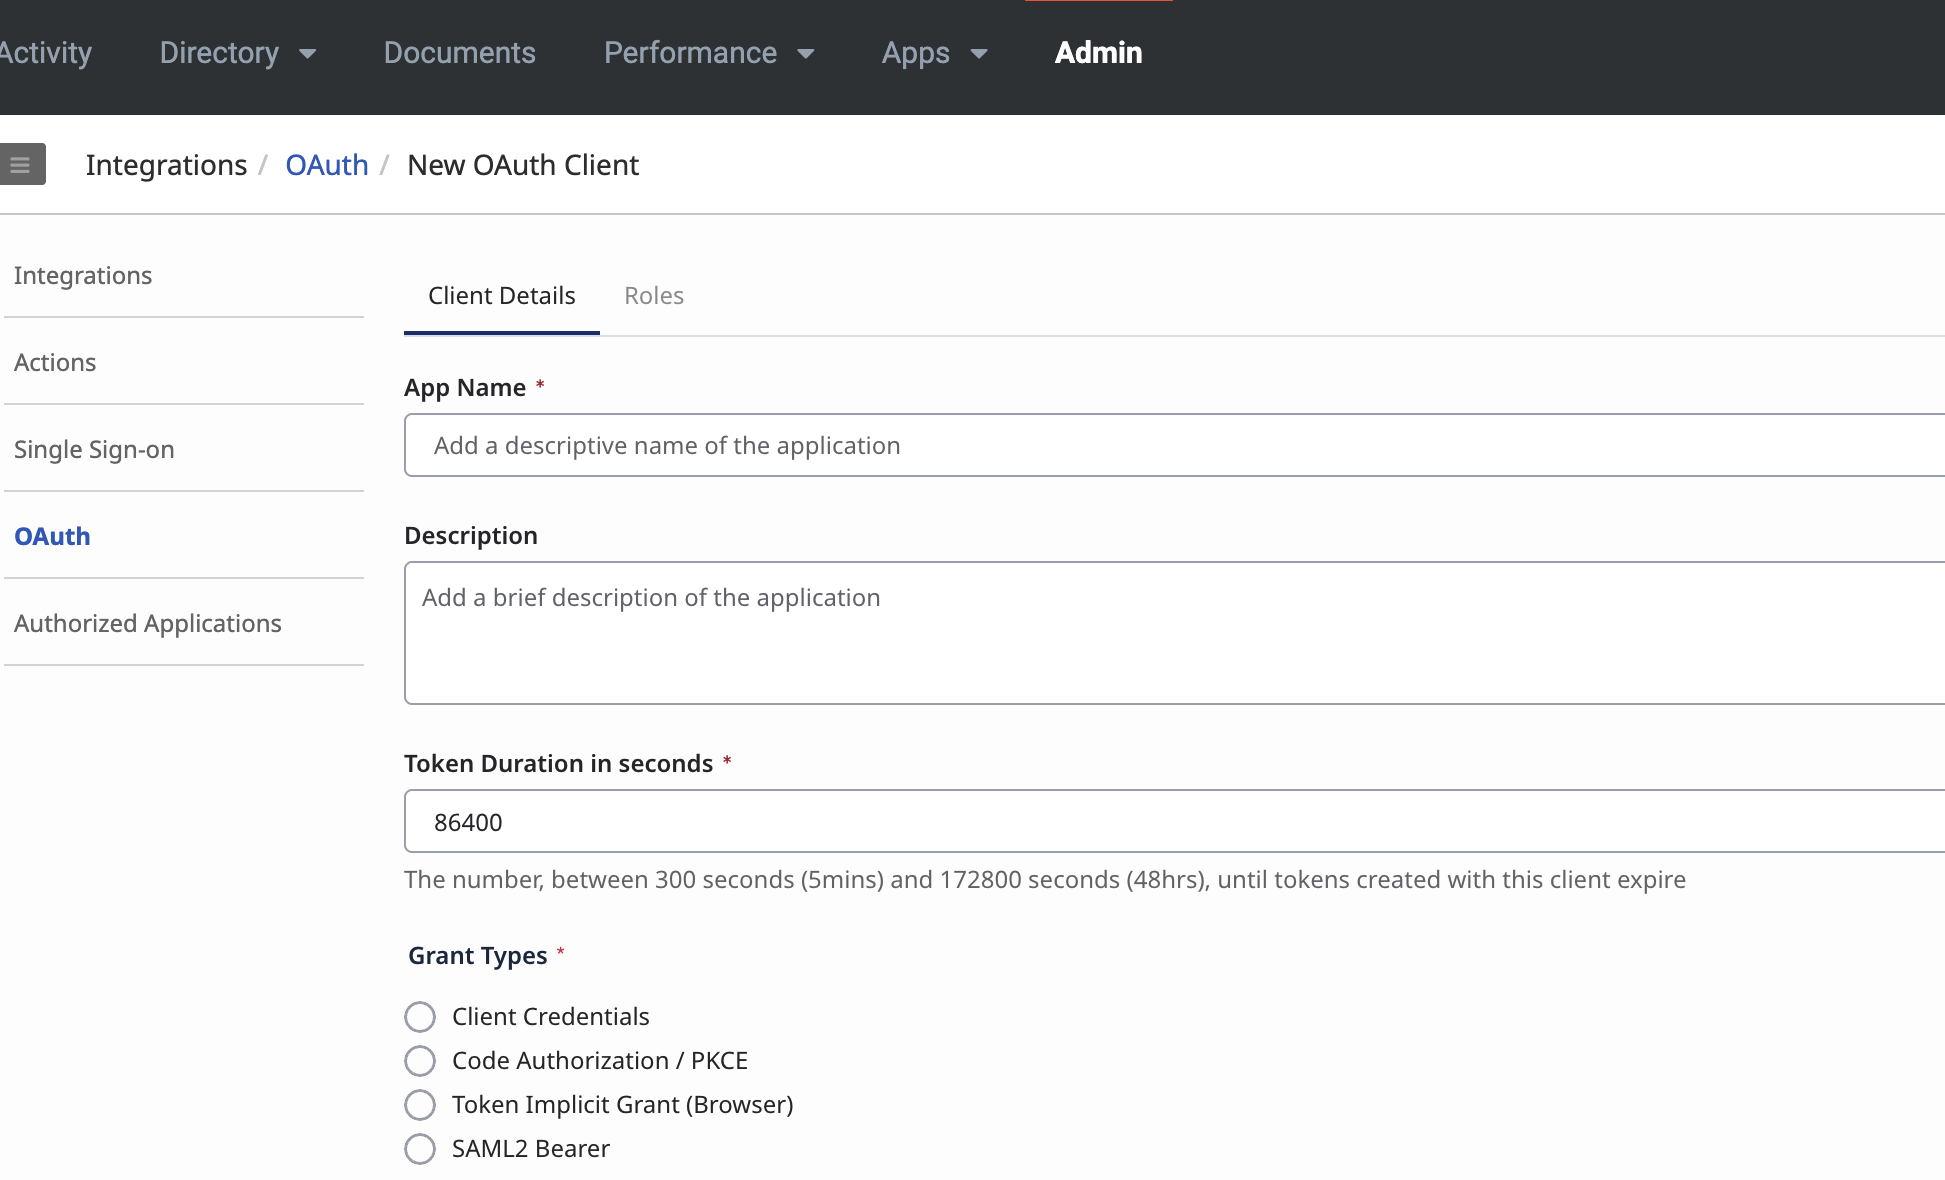
On the Client Details tab, fill in the following information:
-
App name: A name for your client.
-
Description: An optional brief description.
-
Token duration in seconds: Keep the default value of 86400.
-
Grant type: Select Client Credentials.
-
Go to the Roles tab and enable the custom role you created earlier.

-
Click Save.
Retrieve Client ID and Secret
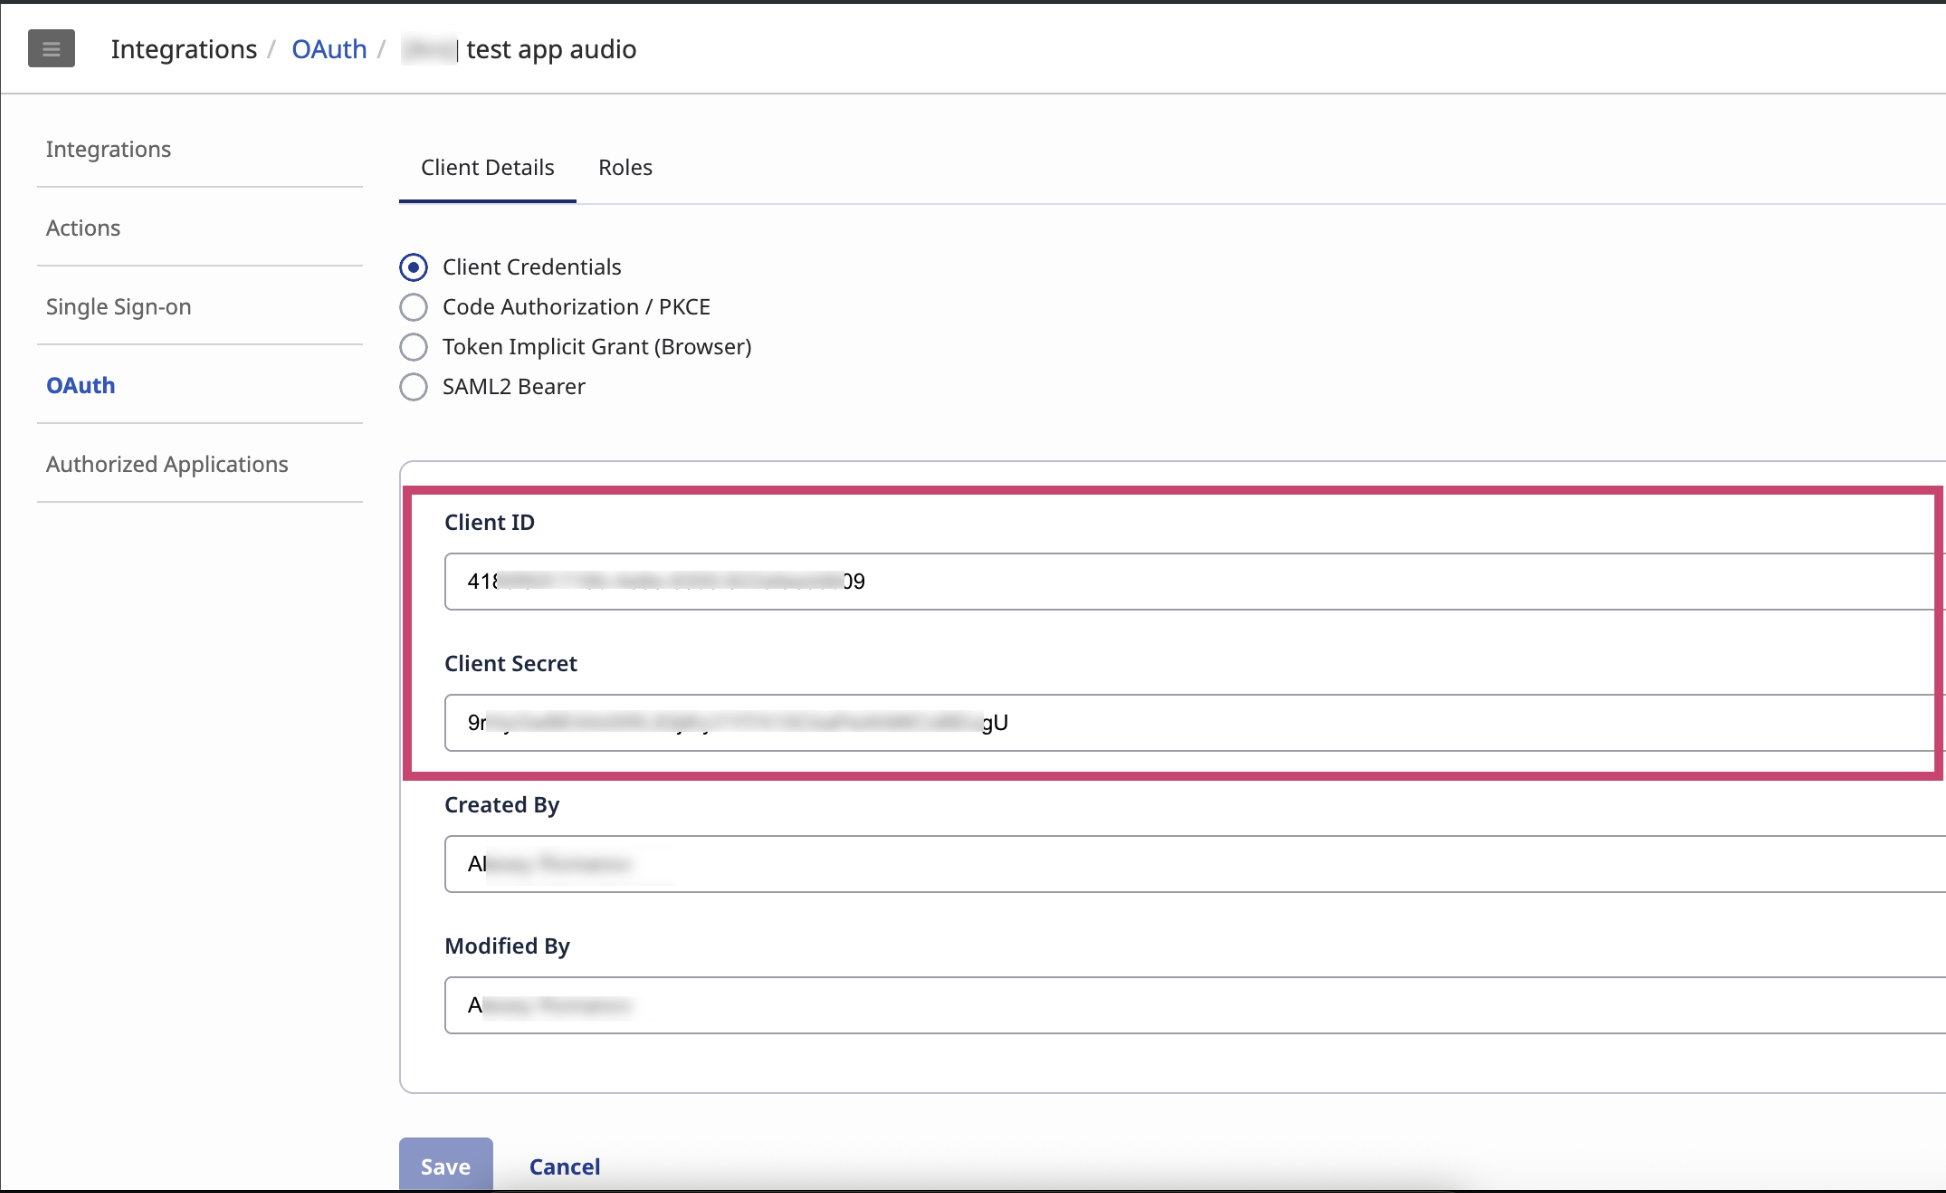
Once the OAuth client is saved, you need to retrieve its unique credentials.
-
Return to the Client Details tab for your newly created client.
-
Scroll down to find the Client ID and Client Secret.
-
These two values are what you'll use to authenticate and get API data for your project. Now you can use this data for this step.