Introduction
The All Numbers tab is accessible via your OCP → Integrations → Numbers.
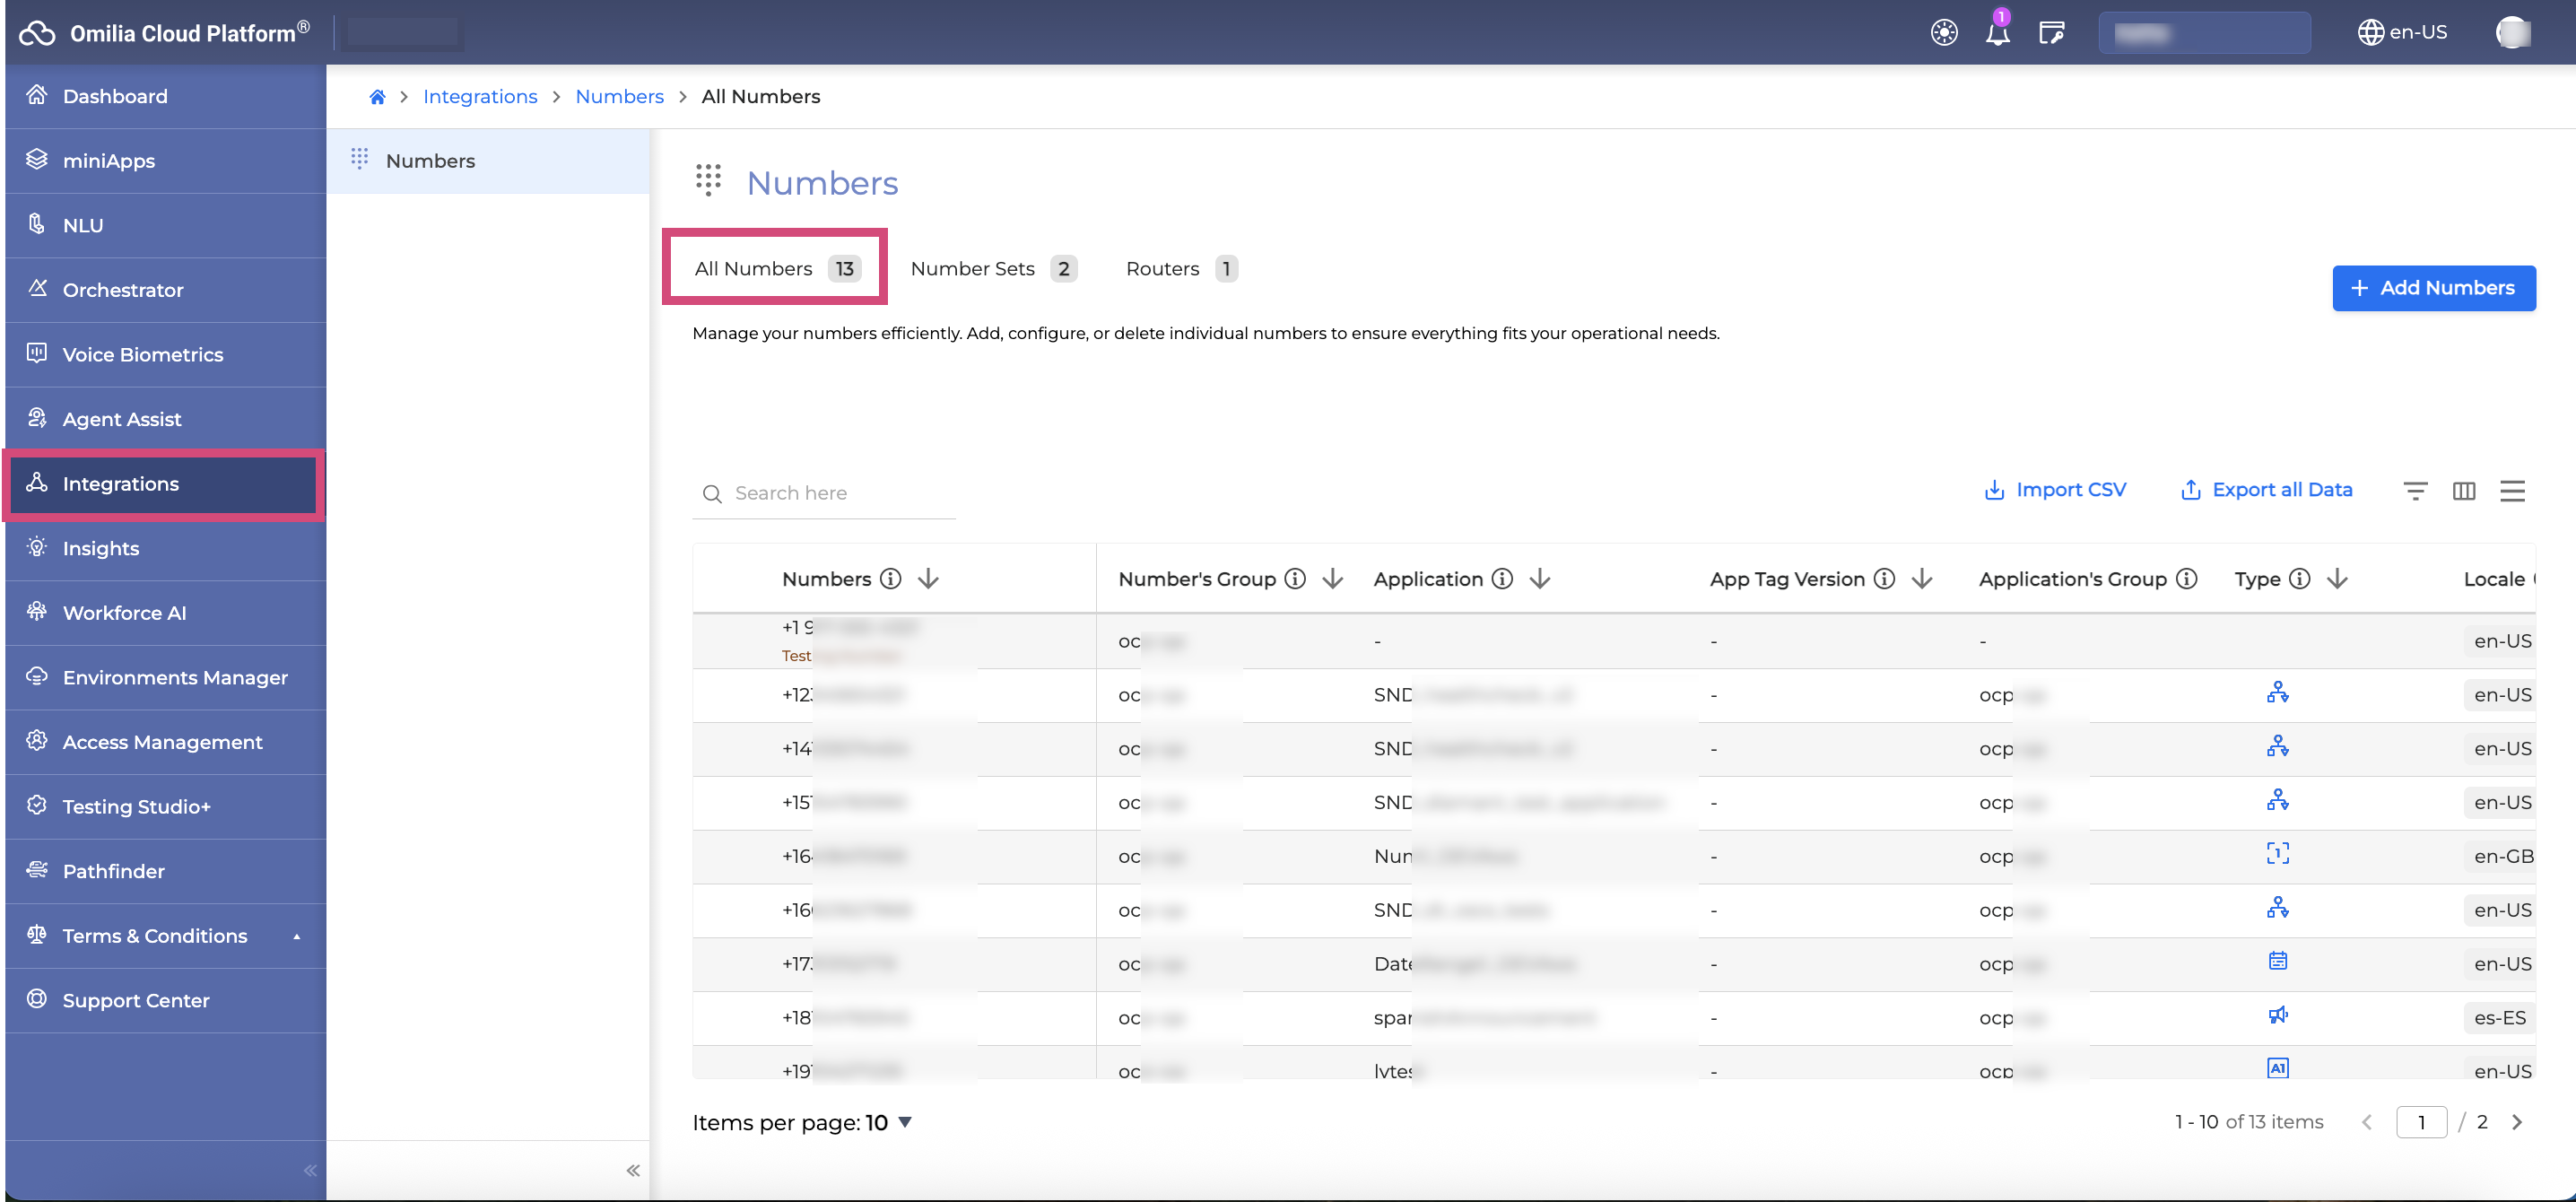
It enables you to efficiently manage the telephone numbers associated with your applications by performing the following functions:
Below you can fiind a detailed guide to navigating and utilizing the features on this tab.
Navigation and layout
Before exploring the features of the All Numbers tab, here are some basic navigation tips to help you make the most of its functionalities.
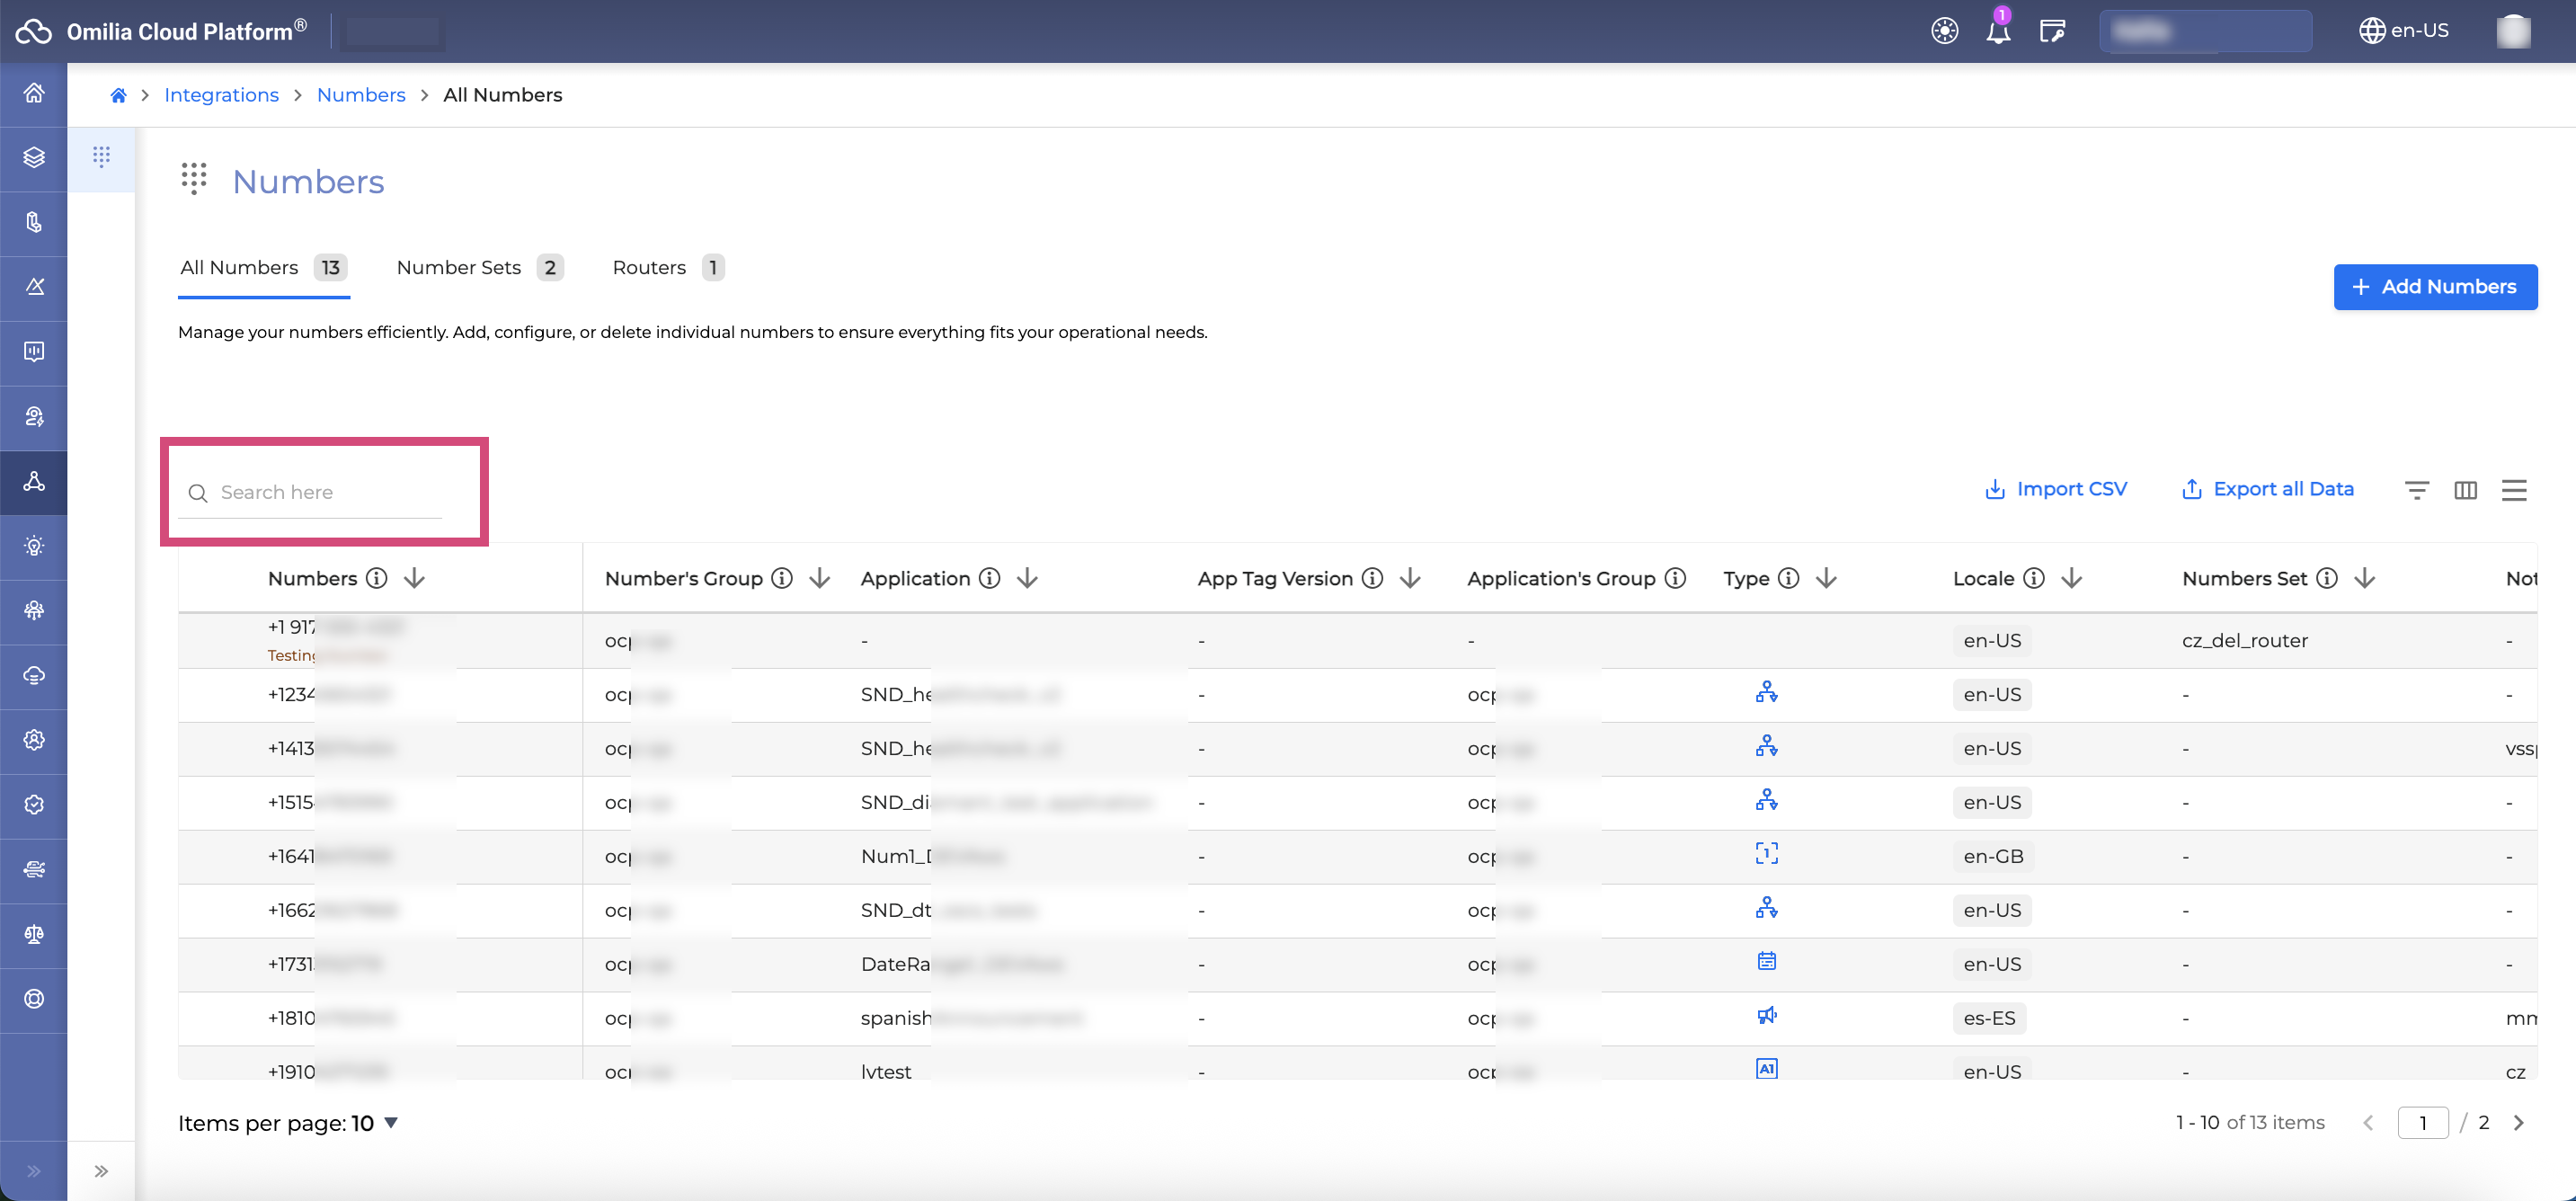
Search field
Use the Search field to filter the numbers associated with the text in the filed.
The search engine will scan all elements related to a number, such as miniApp name, locale, type, and more.
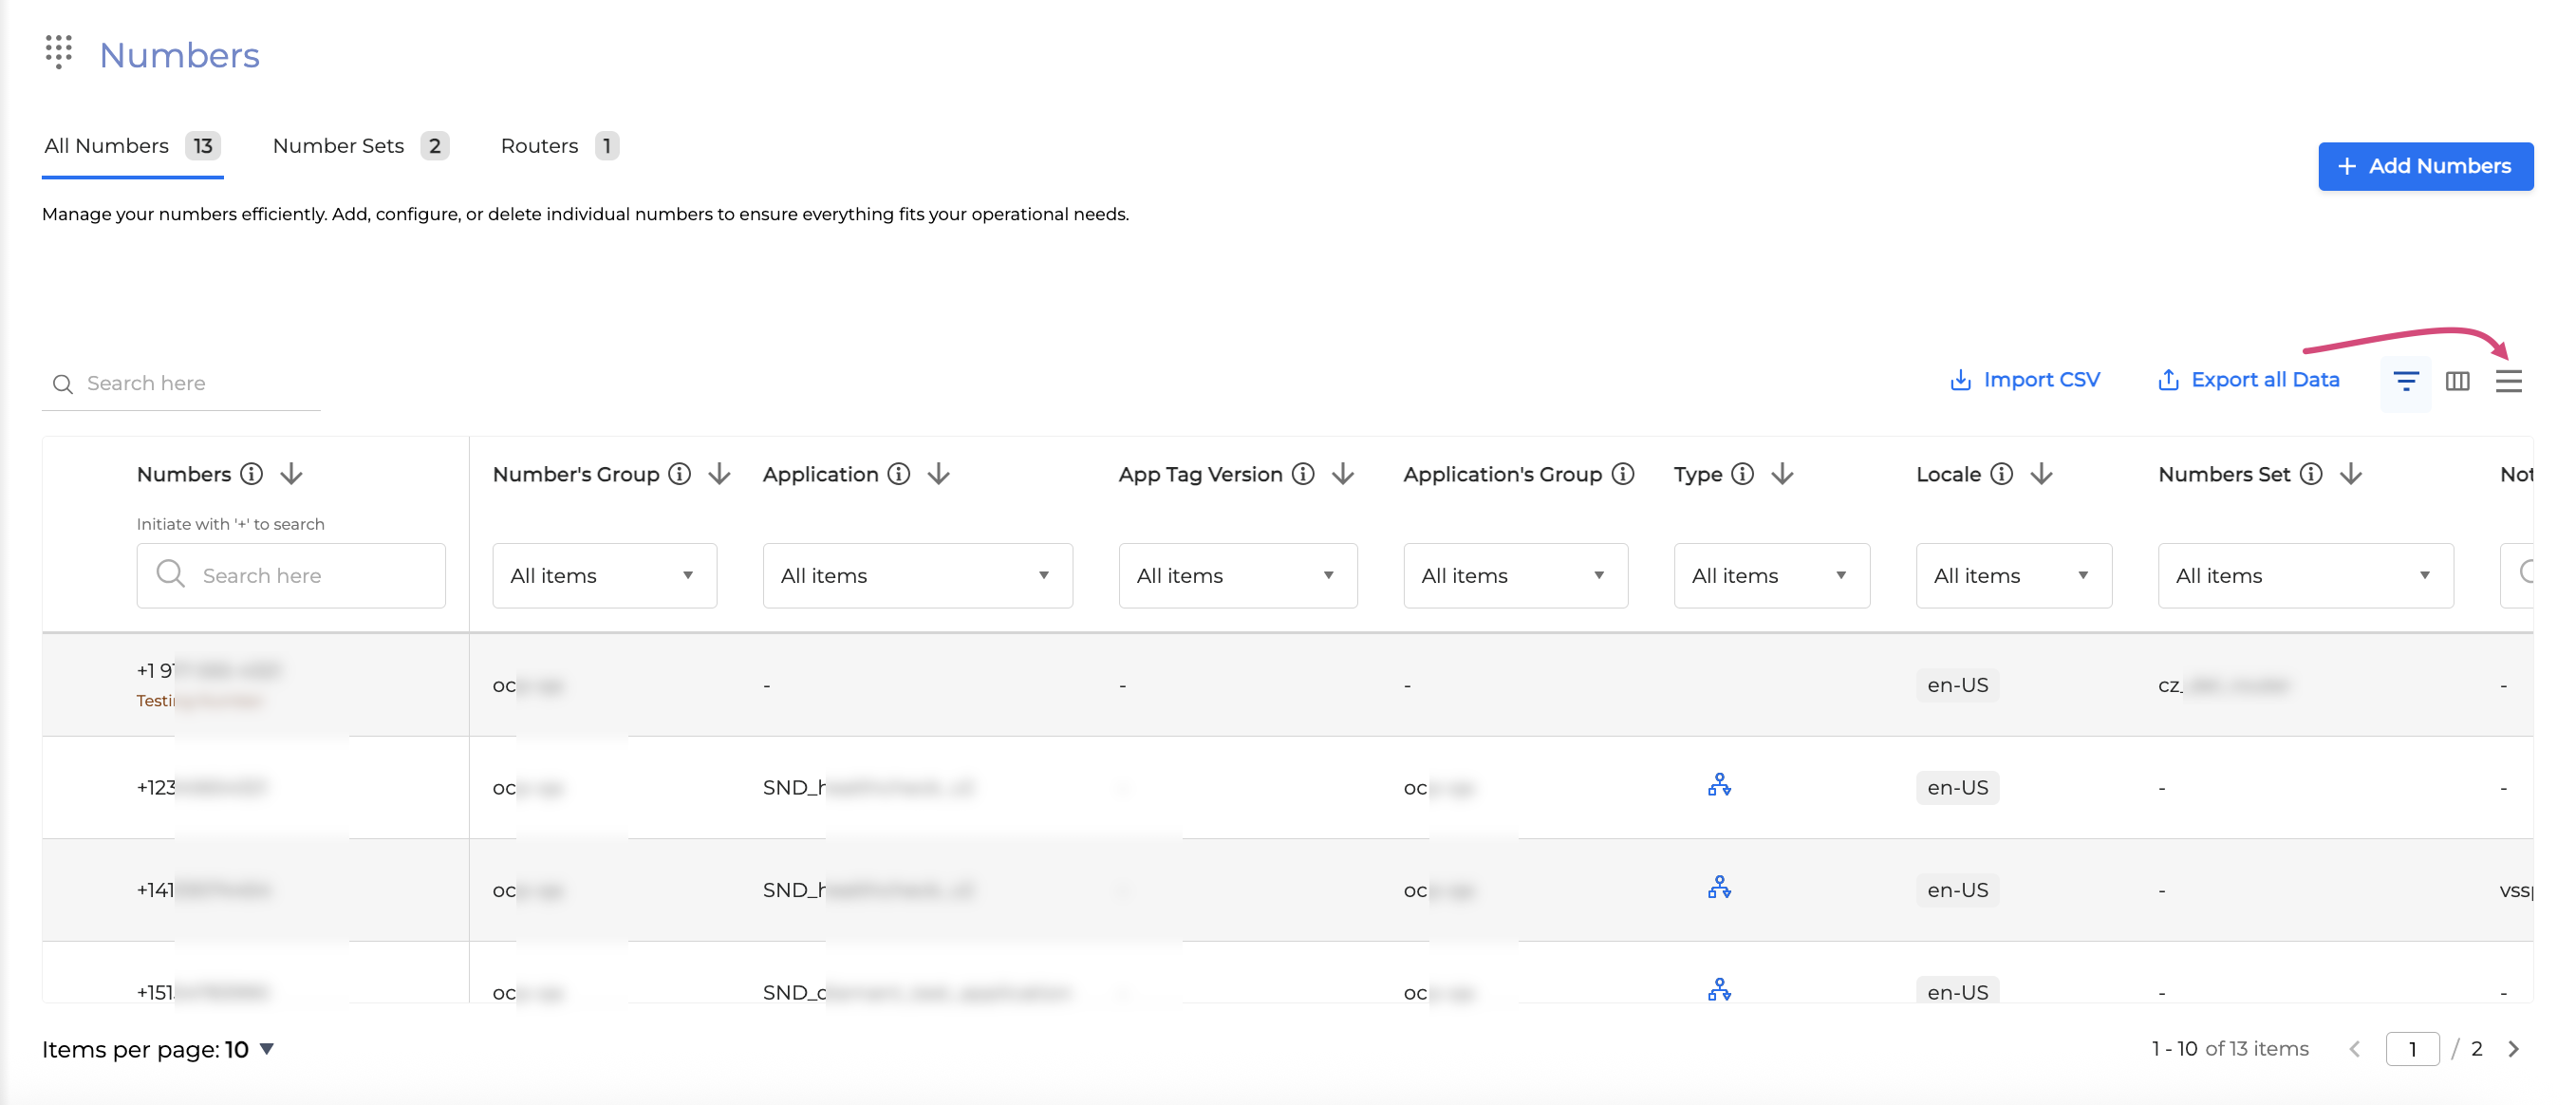
Search filters
The search filters provide flexibility by allowing you to select multiple items from the list. When dealing with extensive lists, these filters include a convenient search field to streamline your selection process, enabling you to quickly locate specific items without the need for endless scrolling.
To open the search filters, click the Filter icon.

It's important to note that if you have selected certain numbers and subsequently apply filters that conceal these selections, the tool will notify you with the following message:

You can click the Clear Filters button to uncover the hidden numbers. This feature ensures you are always aware of the numbers currently being filtered out.
Columns view
You can adjust the viewable columns by selecting / deselecting them in the view columns menu.
To open the menu, click the Columns View menu button.
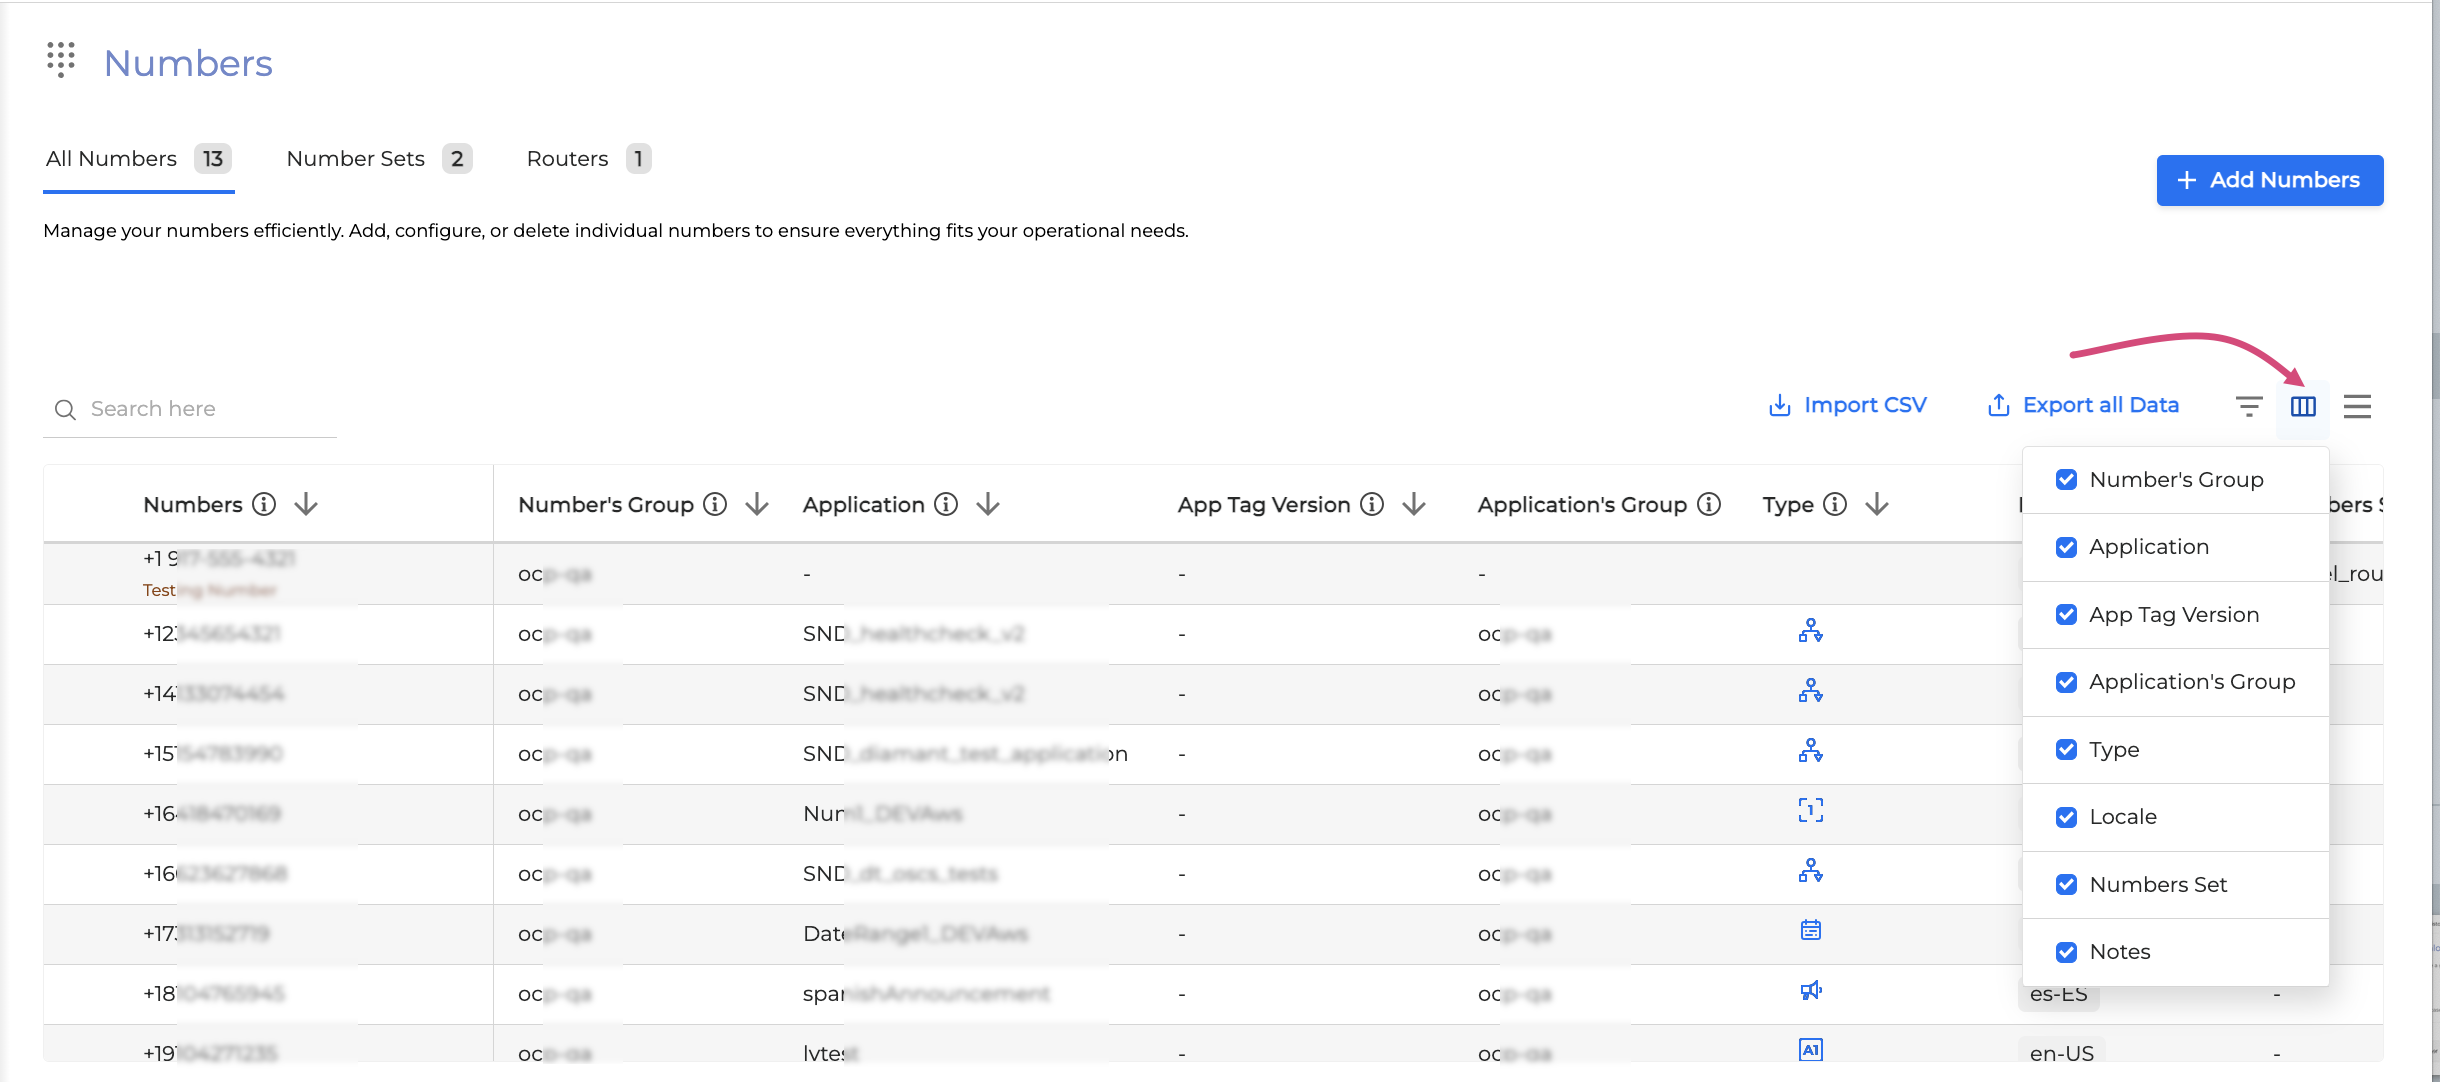
Each column is described below.
-
Number’s Group: Shows the number's group.
-
Application: Shows the application linked to the number.
-
App Tag Version: Displays the application's tag version, which is the chosen version of the application attached to the number.
-
Applications’s Group: Shows the group to which the application belongs.
-
Type: Indicates the application domain associated with the number.
-
Locale: Shows the locale of the application in which the number is intended to be used
-
Number Set: Displays the collection of numbers grouped for shared configuration.
-
Notes: Optional notes.
Rows height
You can adjust the height of the rows by clicking the Rows Height button.
Manage numbers
Get a number
To get a number, follow the steps below:
-
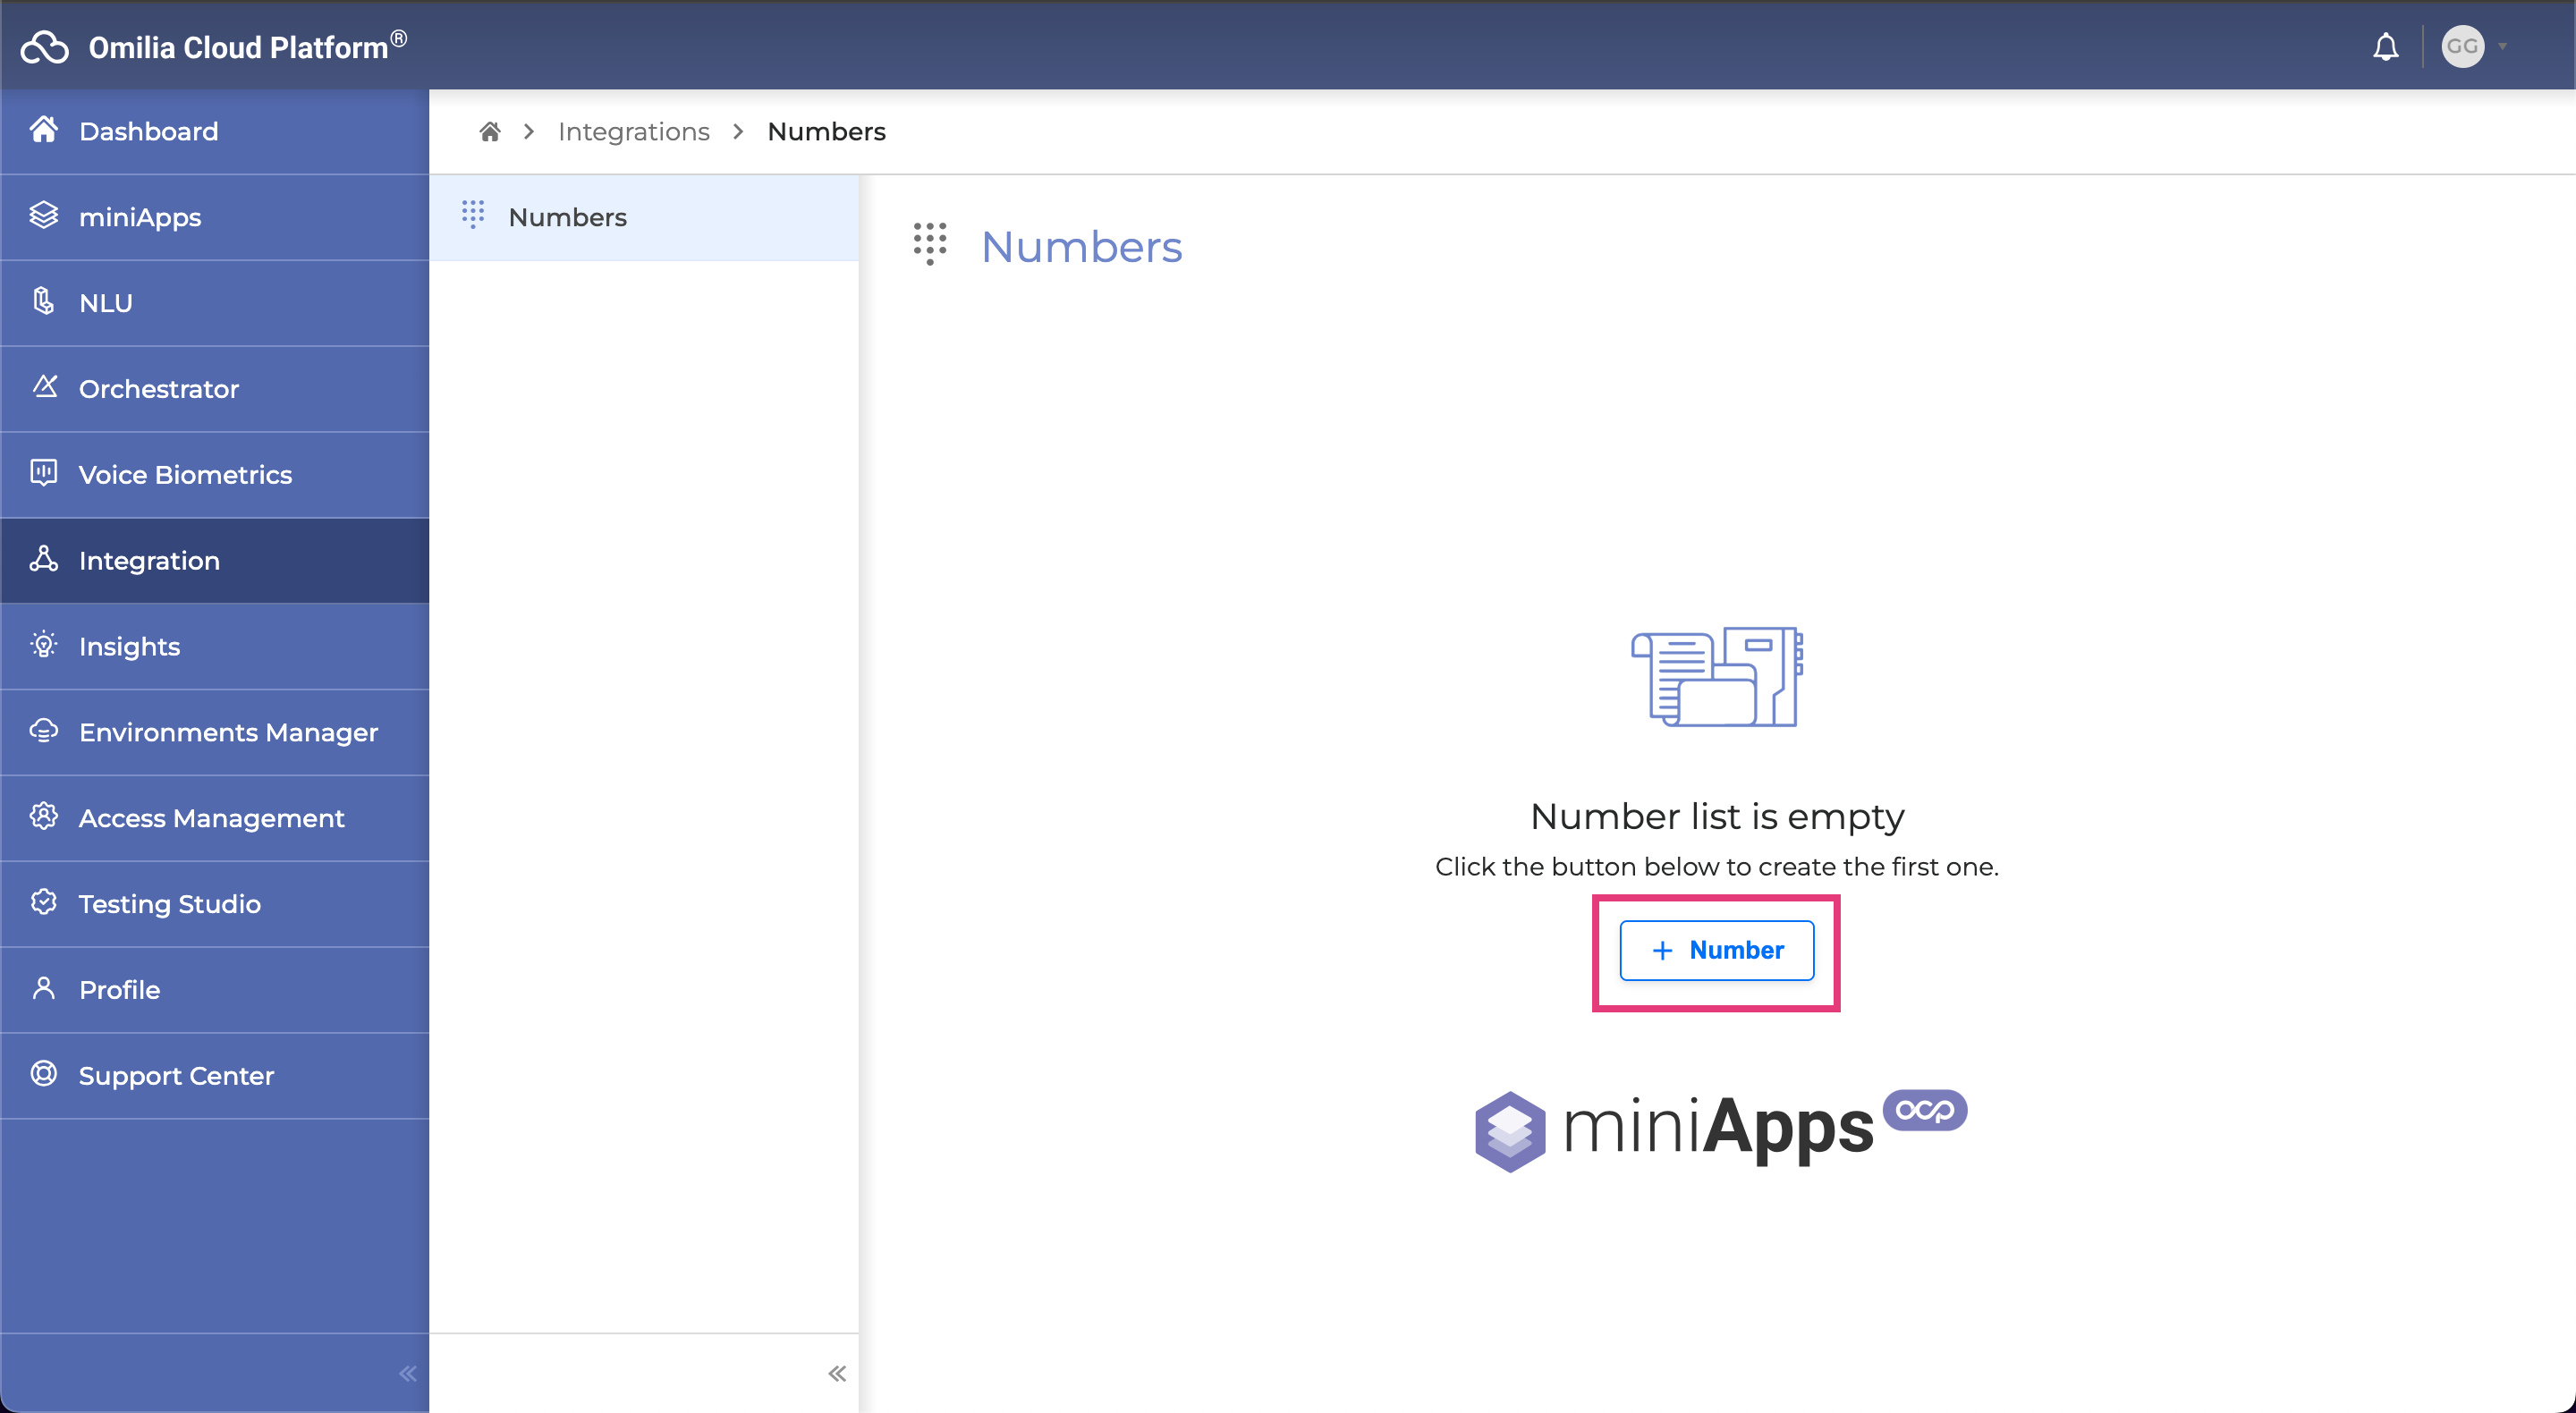
Navigate to the All Numbers tab and click the + Number button.
-
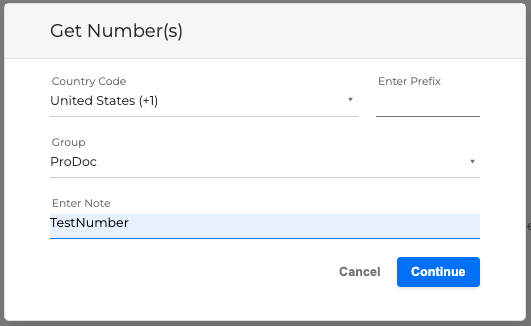
In the opened dialog box, fill in the fields as described below and click Continue.
-
Country Code: Choose the country associated with your number.
-
Enter Prefix: Input the prefix, or leave this field blank if not applicable.
-
Group: Choose the group to which the number will be assigned.
-
Enter Note: Add an optional description or note for the number.
-
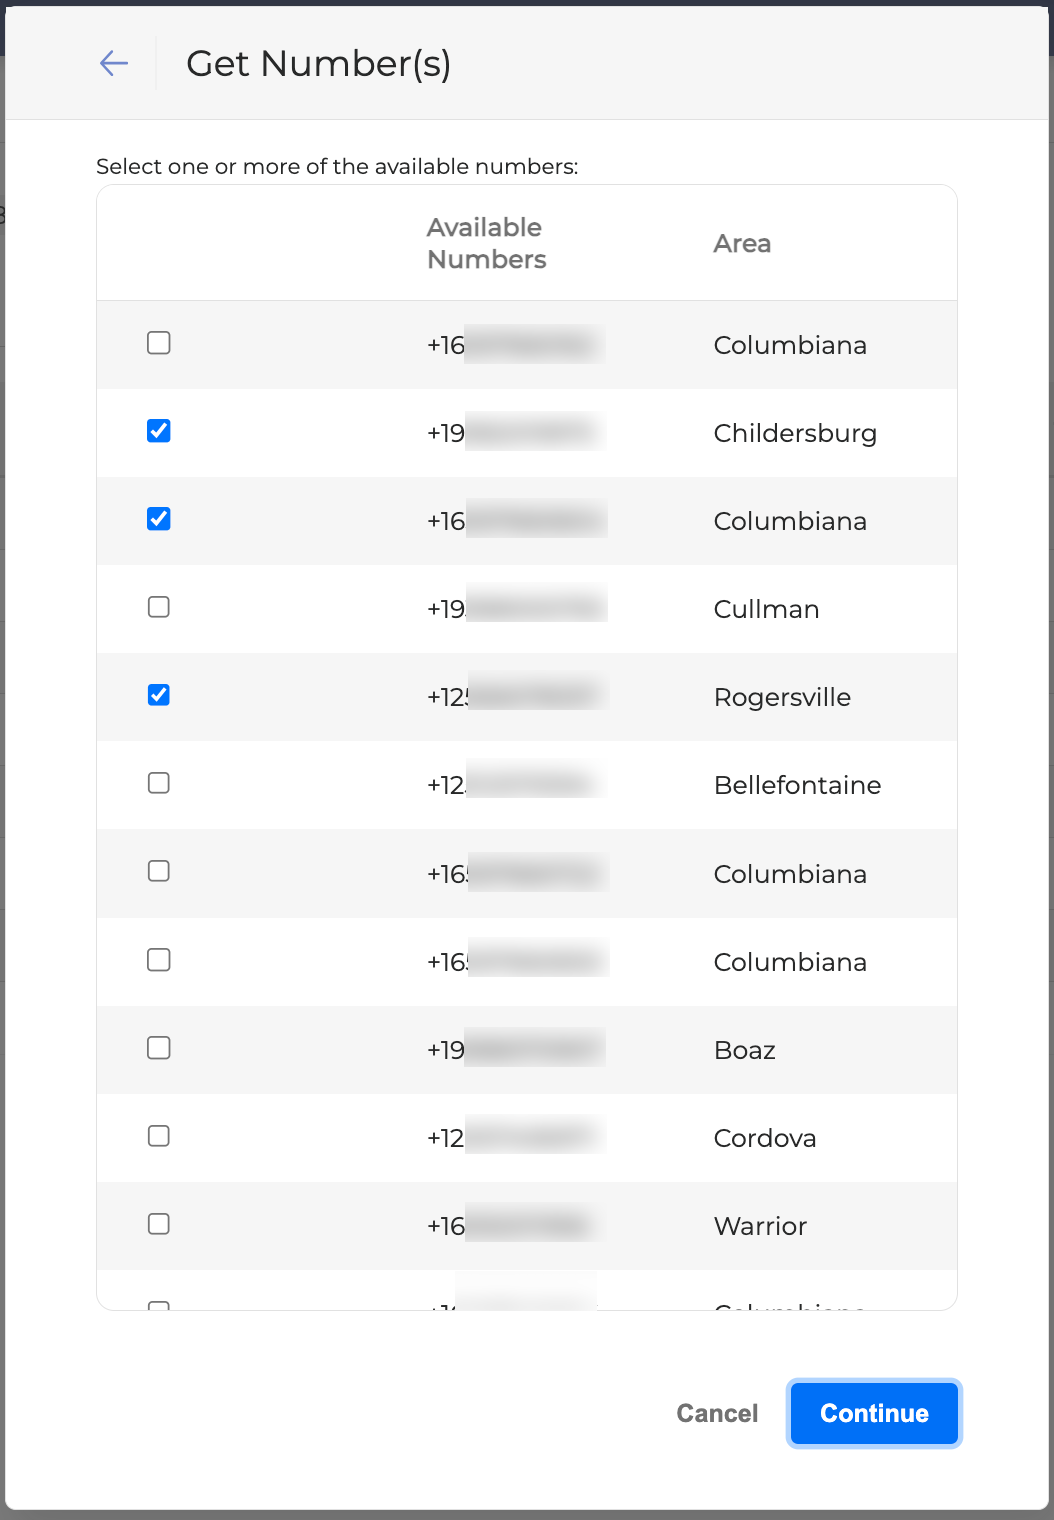
You will be presented with a list of available numbers and their associated countries. Select a number you wish to add and click Continue. You can select multiple numbers.
To get a European number, you need to have your physical address confirmed first.
If you face any problems getting a number, contact Omilia Care using any convenient means.
If your group does not have any available numbers, you will receive the following message:

If your group is not authorized to get numbers, you will receive the following message:

-
In the dialog box that opens, verify the accuracy of the numbers, then click Get to complete the process.
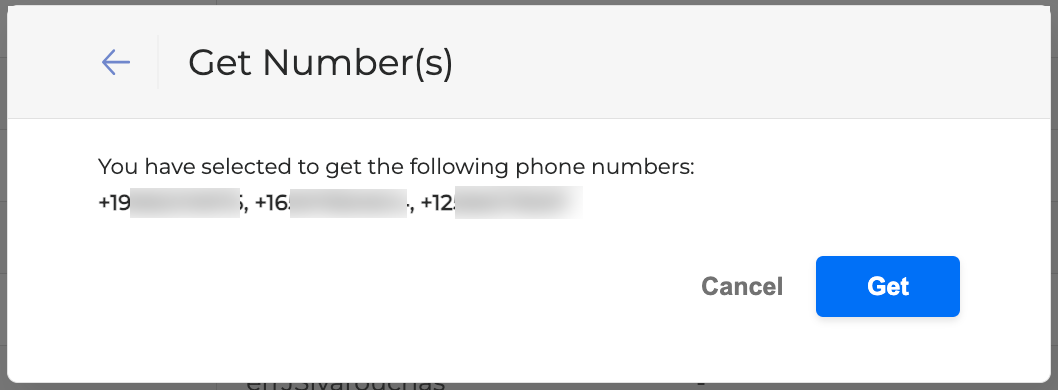
The selected numbers will be added to the selected group and listed in the Numbers tab.
Attach a number to an application
Once you have acquired a number, you can attach it to an application. When a number is attached to an application, the application will be used when this number is called. To attach one or more numbers to an application or a miniApp, follow the steps below.
By attaching a number to an application, you will direct all traffic from the number to the application. Make sure the correct number and application are selected!
-
Select a number you want to attach to an application and click the Attach/Re-Attach button. You can select multiple numbers.

-
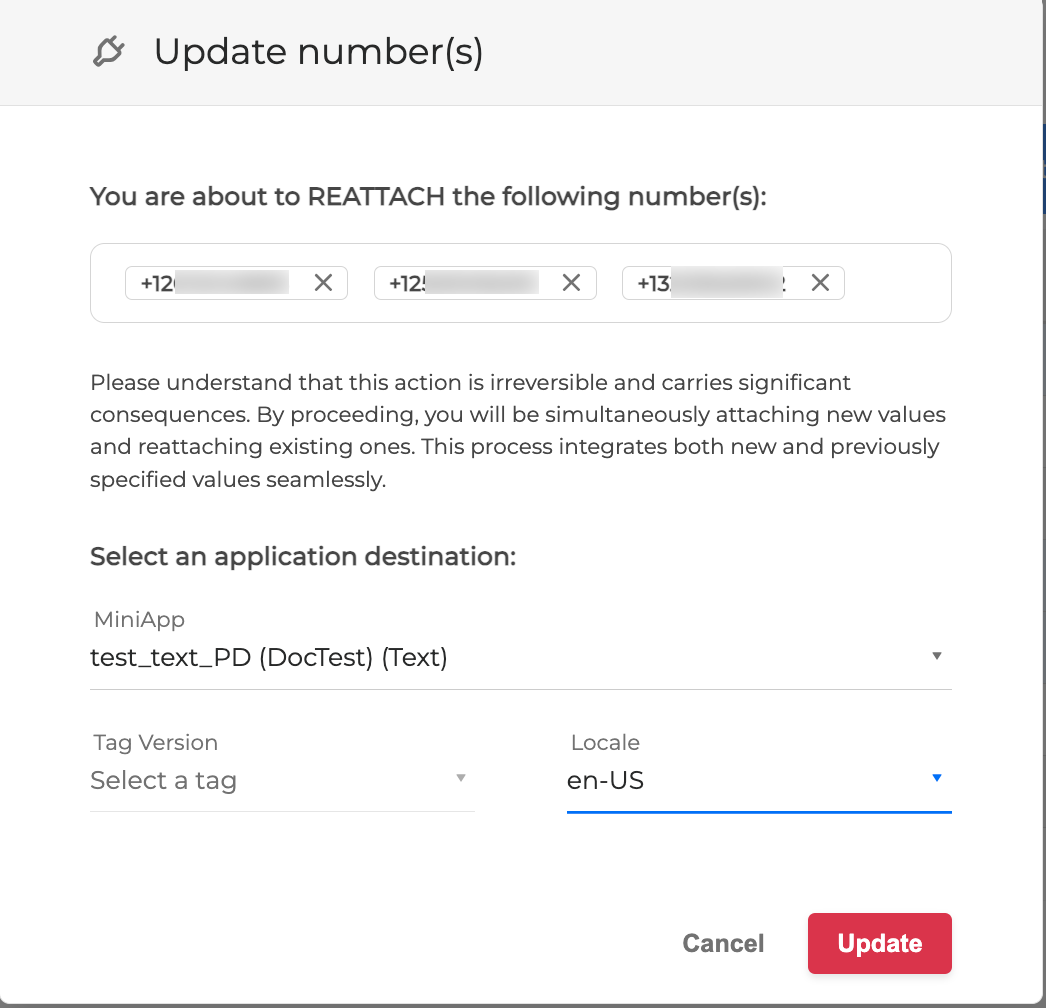
In the opened dialog box, fill in the fields as described below:
-
MiniApp: Select a miniApp from the drop-down list.
A number may not be linked to multiple applications simultaneously, except during the gradual traffic assignment process.
-
Tag Version: If the application has a tag, select a needed app instance from the list.
-
Locale: Select a locale for the application.
-
Click the Update button to complete the action. The selected number has been attached to the application.
Detach a number from an application
Detaching a number from an application makes the number available for other users to select it and use it as required.
Detaching an application will stop all traffic from the associated number. Once detached, the number will be available for other users to attach to their applications. Before proceeding, make sure that both the selected number and application are correct.
To detach a number from an application or a miniApp, follow the steps below:
-
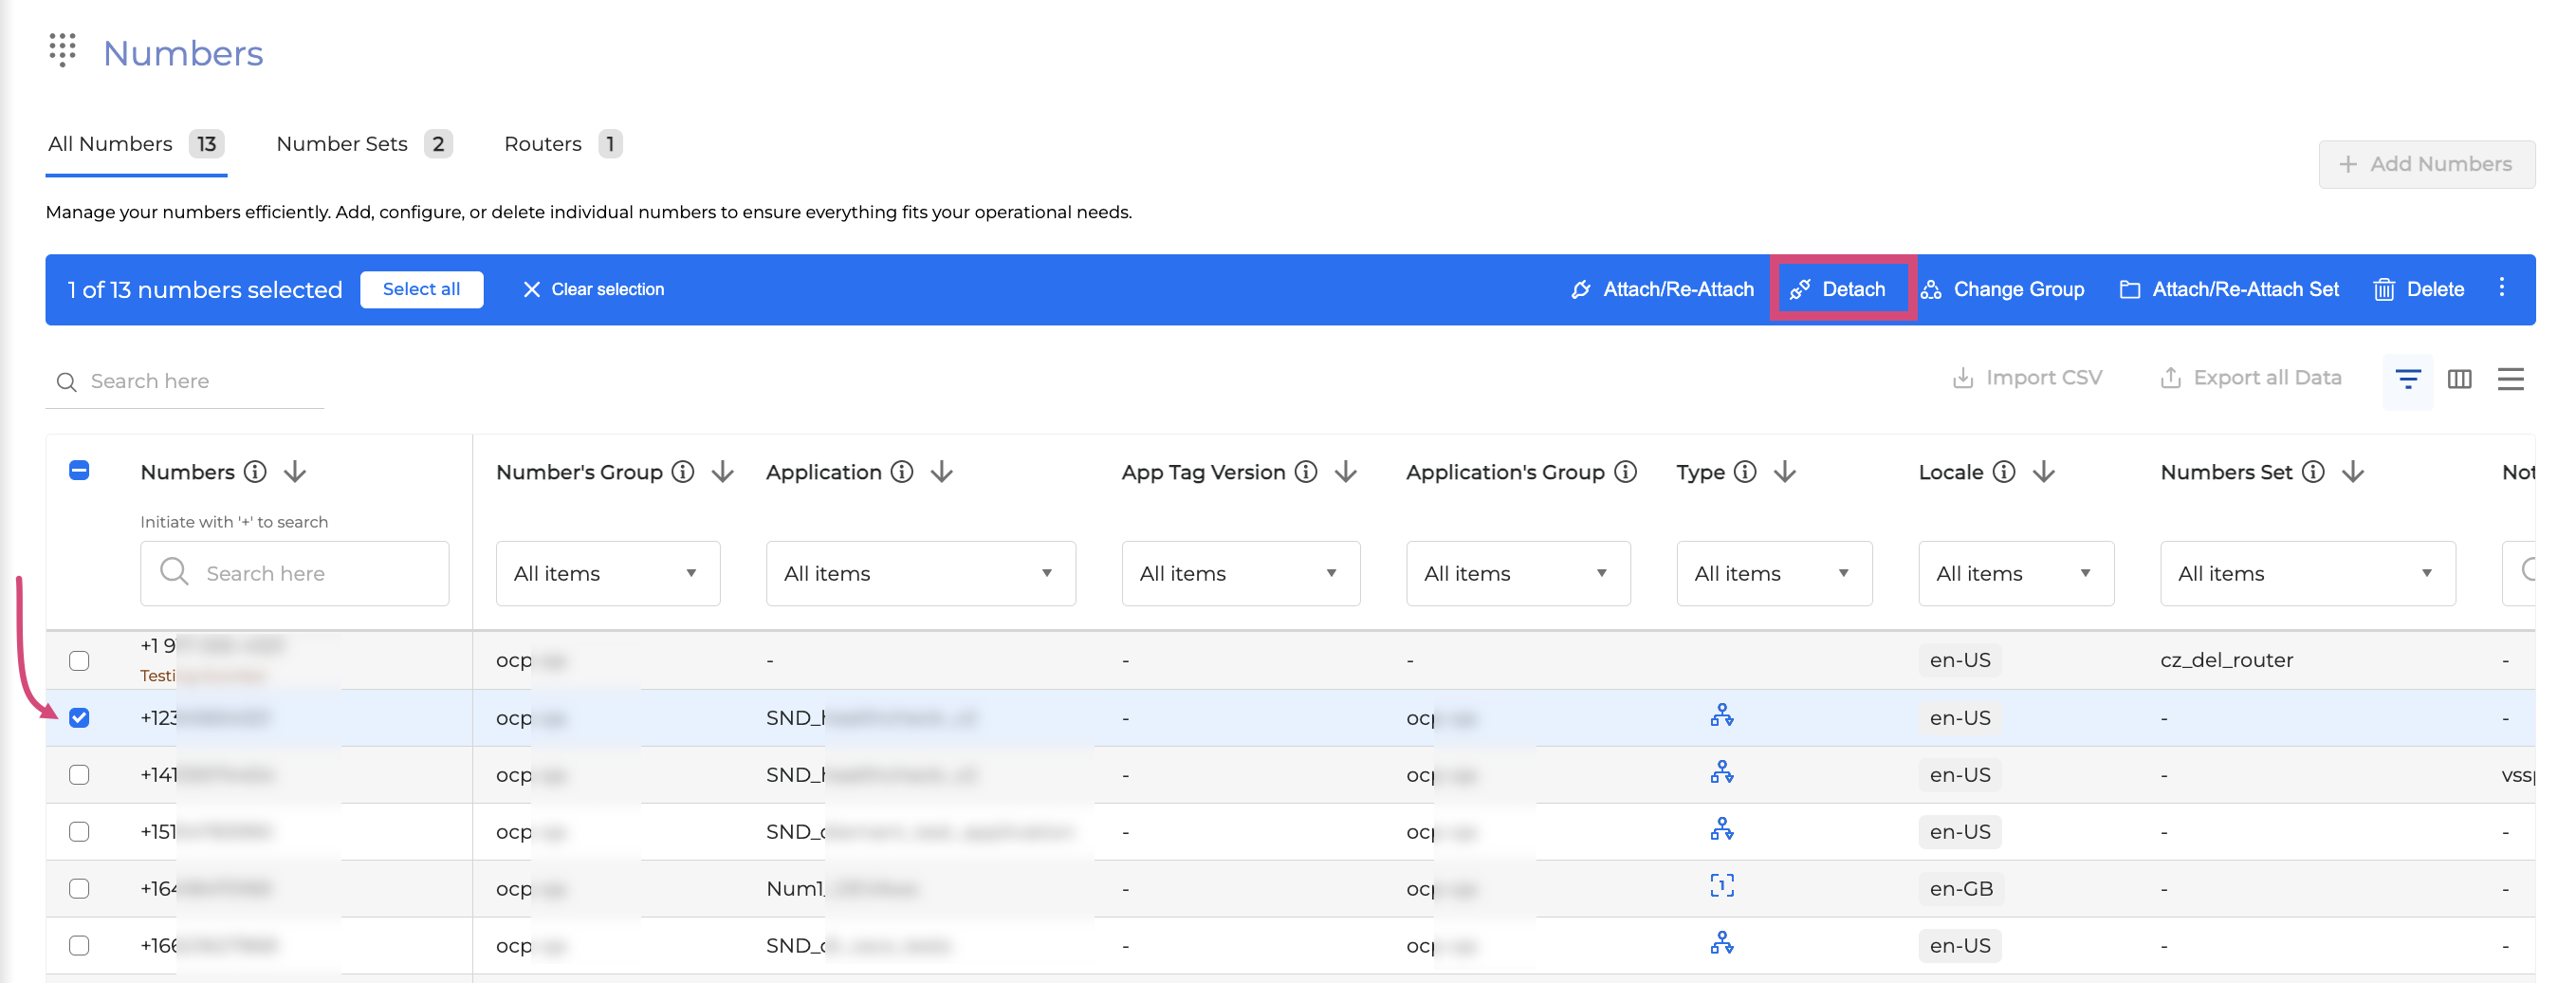
Select the number you want to detach from an application and click Detach. You can select multiple numbers.
-
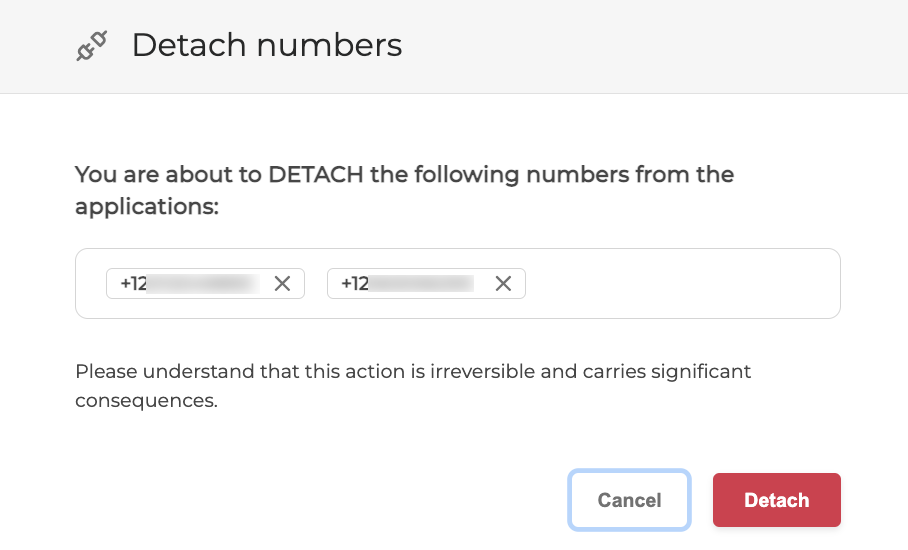
A confirmation dialog box will open.
-
Click the Detach button to complete the action. The selected number has been detached from the application.
Assign a number to a new group
You can reassign the number to a different group to allocate numbers as needed.
Select the new group carefully before proceeding!
By adding the numbers to a different group, you will also remove these numbers from the associated Number Sets.
To change a group of a number, follow the steps below:
-
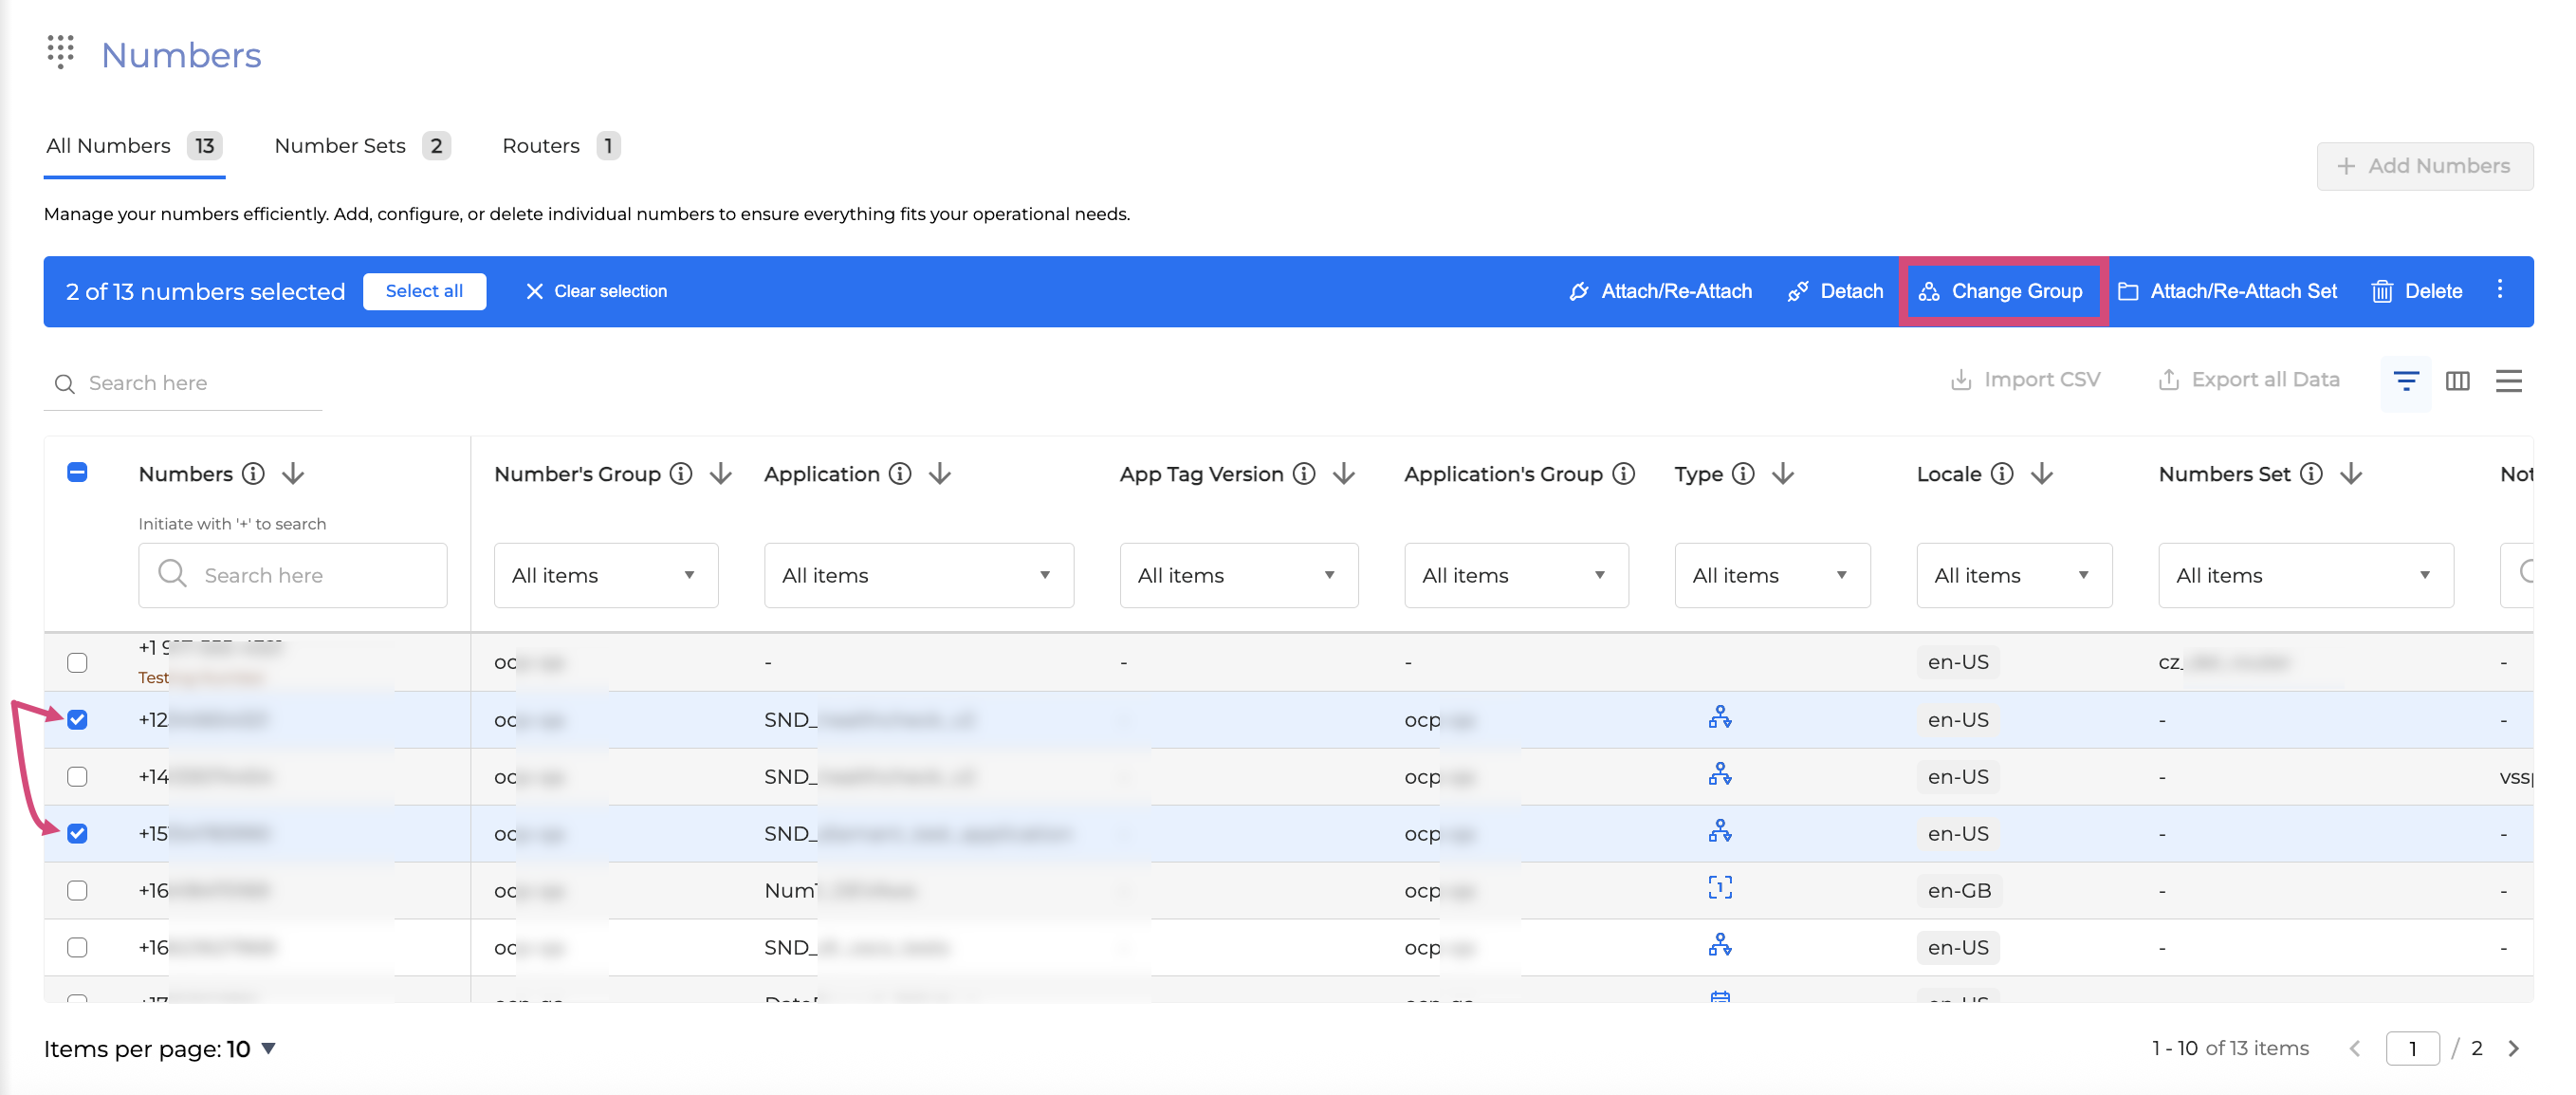
Select the number you need to change the group for and click the Change Group button. You can select multiple numbers.
-
In the opened dialog-box, select a new group from the drop-down list.

3. Click the Update button to complete the change. The selected number has been re-assigned to a new group.
Attach a number to a number set
After creating a number set, you can attach or re-attach numbers to it.
Attaching a number to a number set may impact how numbers are organized and accessed. Make sure the numbers are correct before proceeding.
Follow these steps to attach or re-attach numbers to a number set:
-
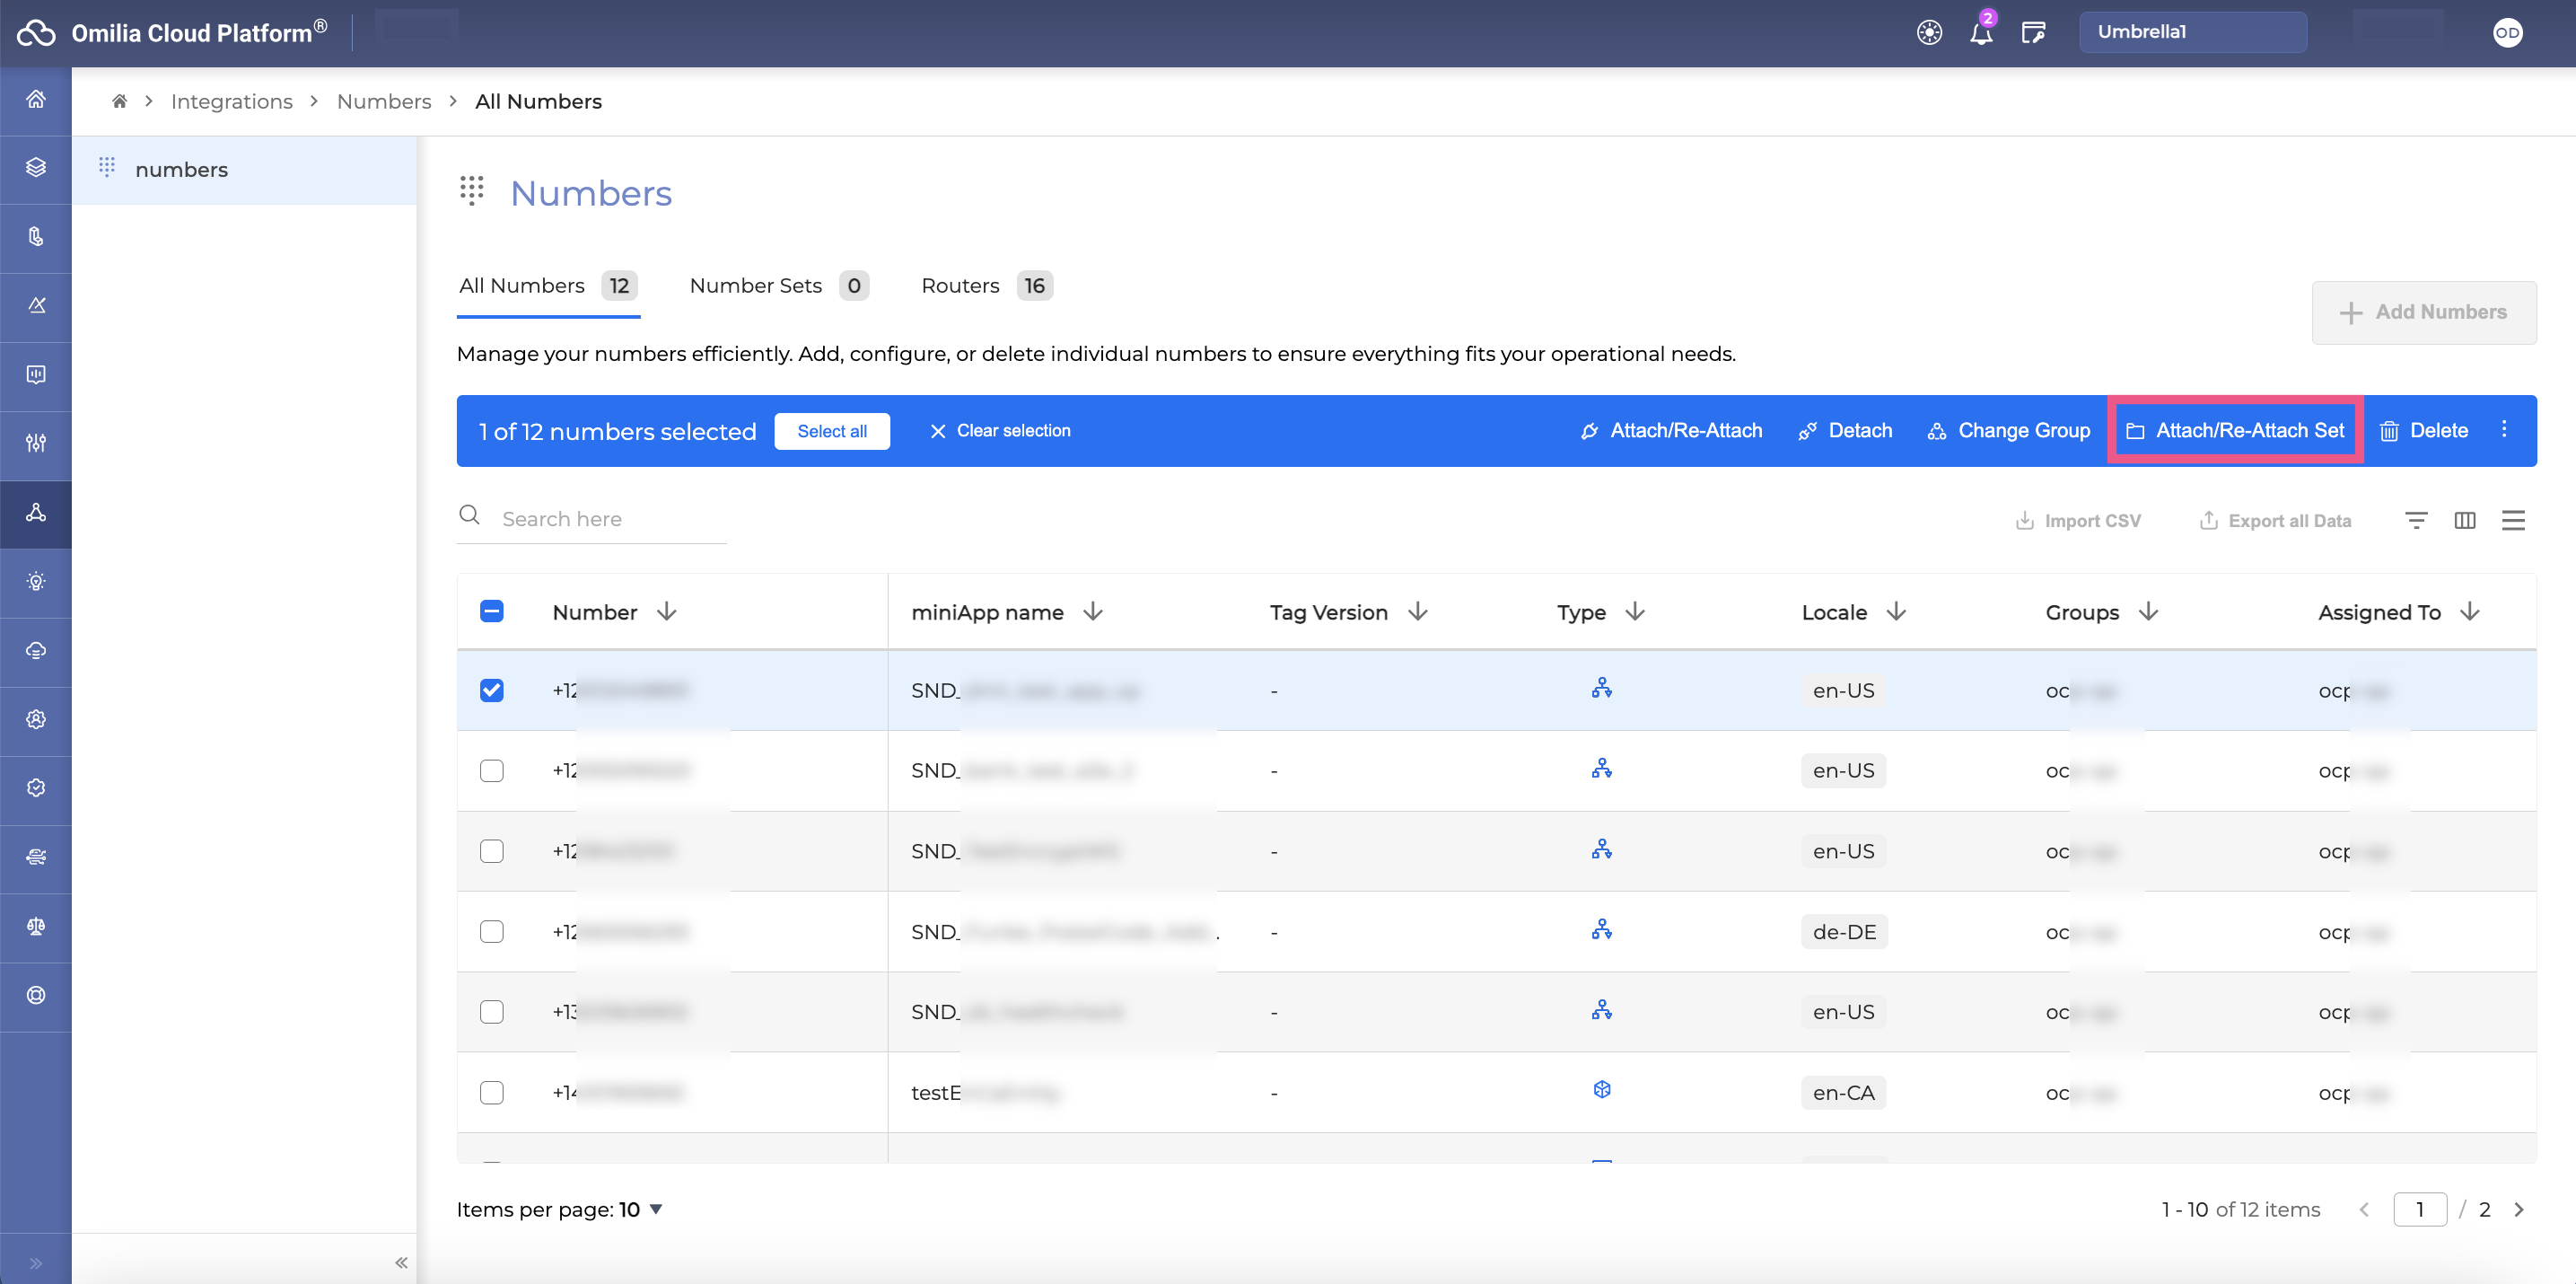
Select a number you want to add to a number set and click the Attach/Re-Attach Set button. You can select multiple numbers.
-
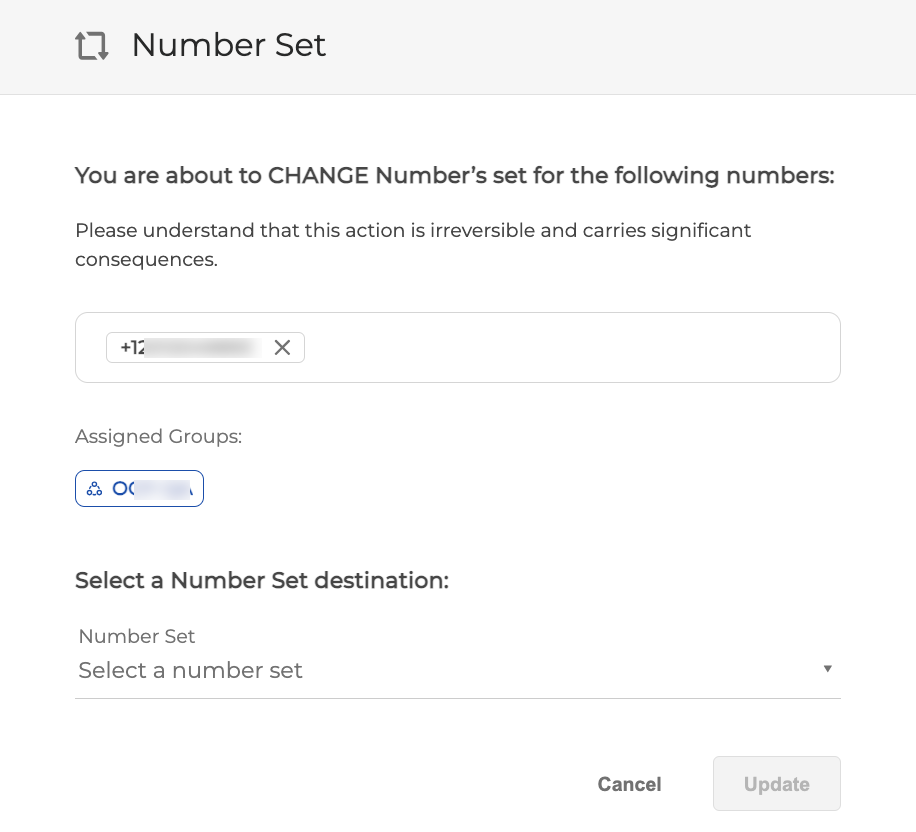
Select a number set from the drop-down list of available number sets.
-
Click the Update button to complete the action. The selected number is added to the number set.
Detach a number from a number set
You can remove a number from a number set by following the steps below:
Detaching a number from a number set will impact how numbers are organized and accessed. Make sure the numbers are correct before proceeding.
-
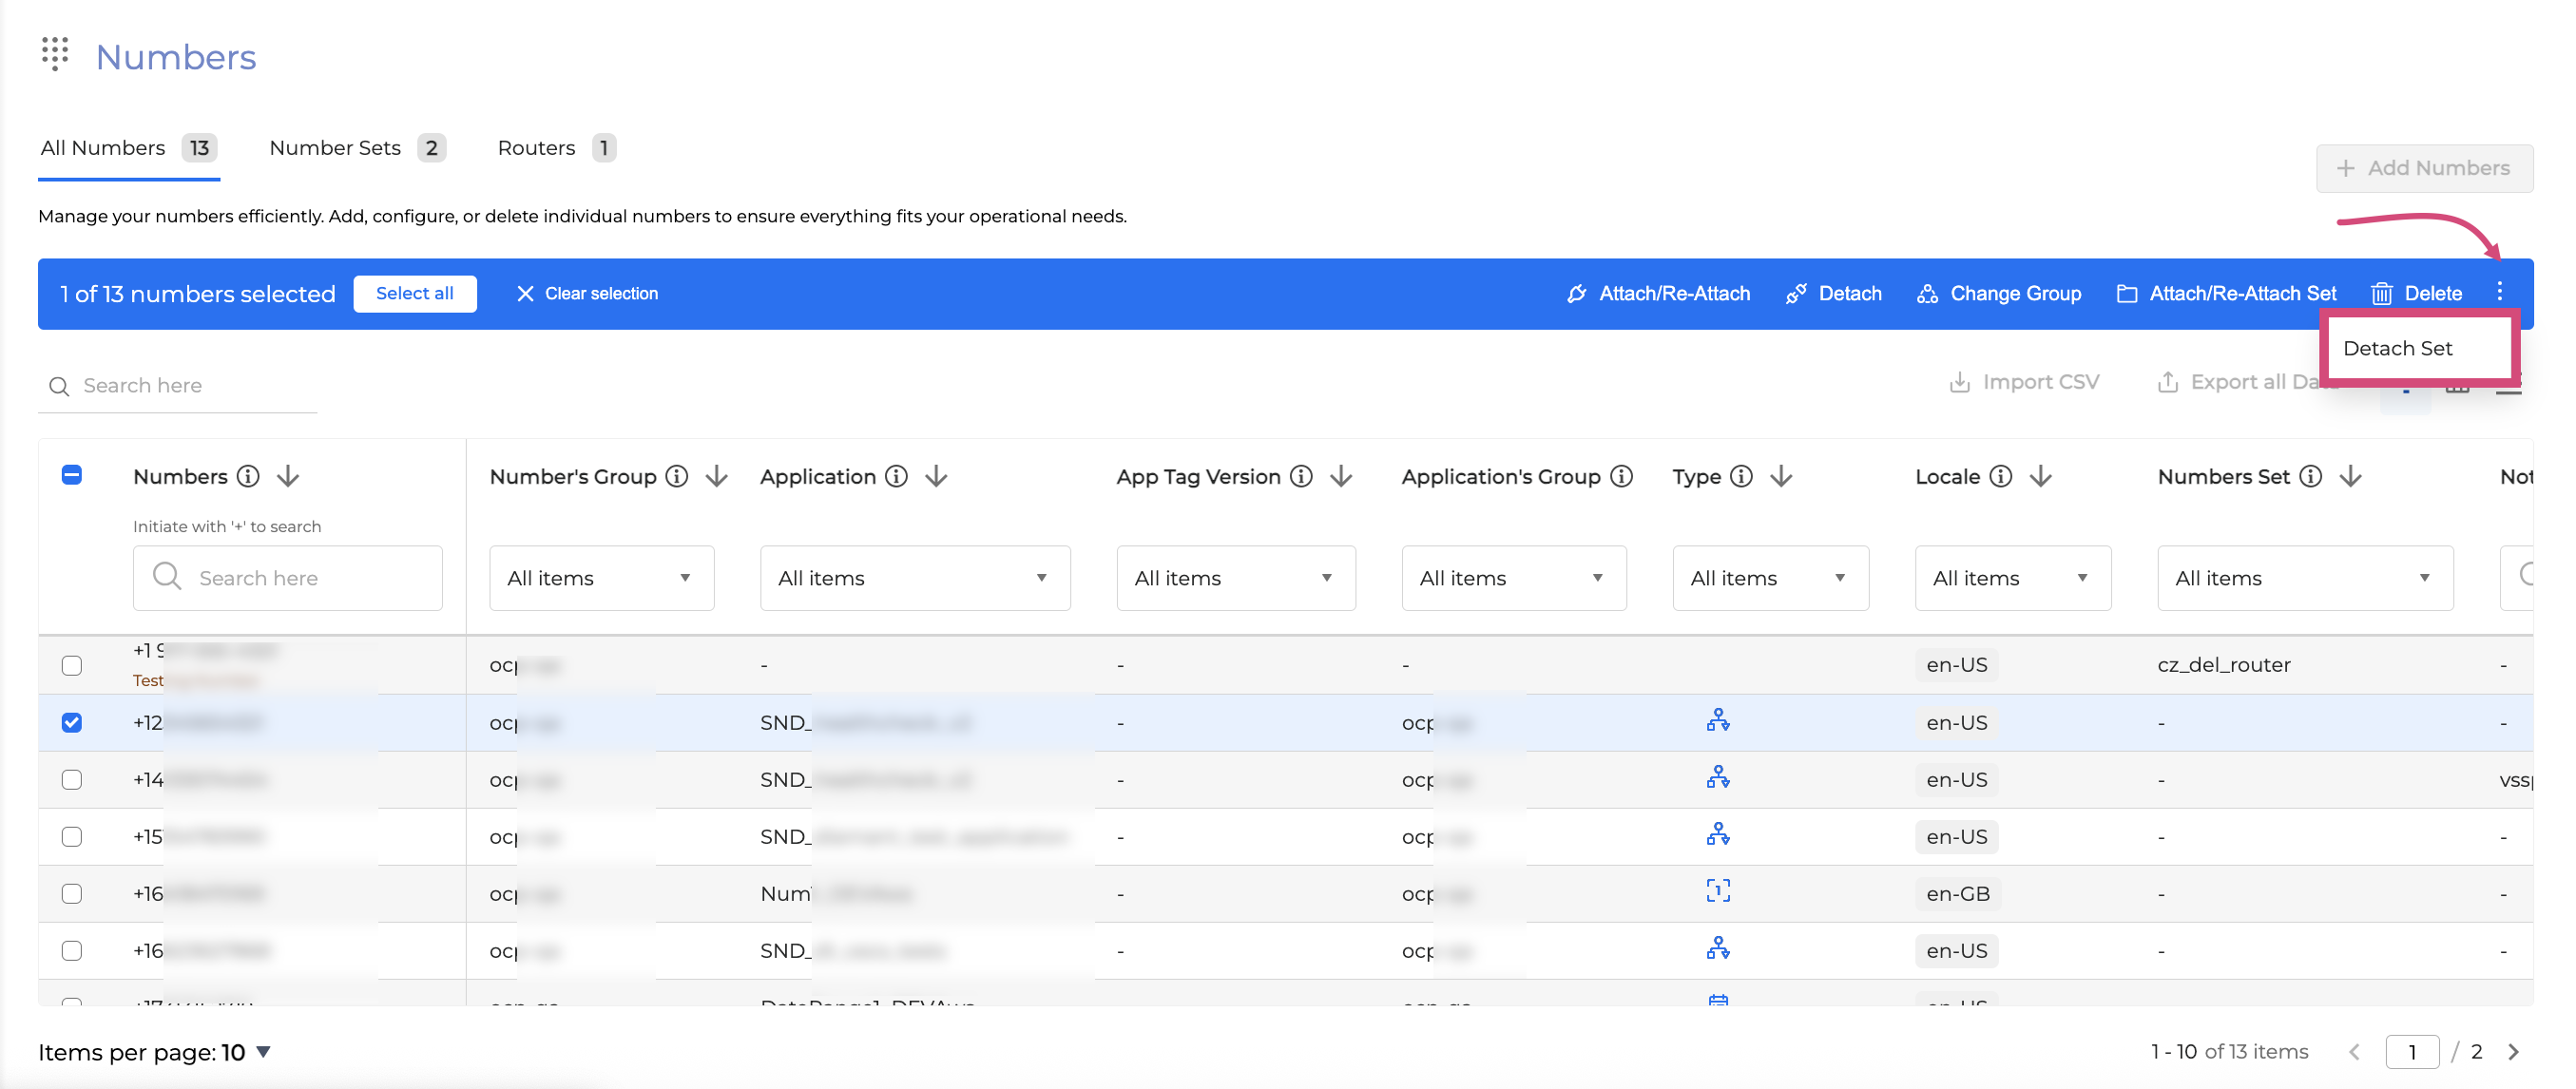
Select a number you want to detach from a number set and click the Options Menu button → Detach Set. You can select multiple numbers.
-
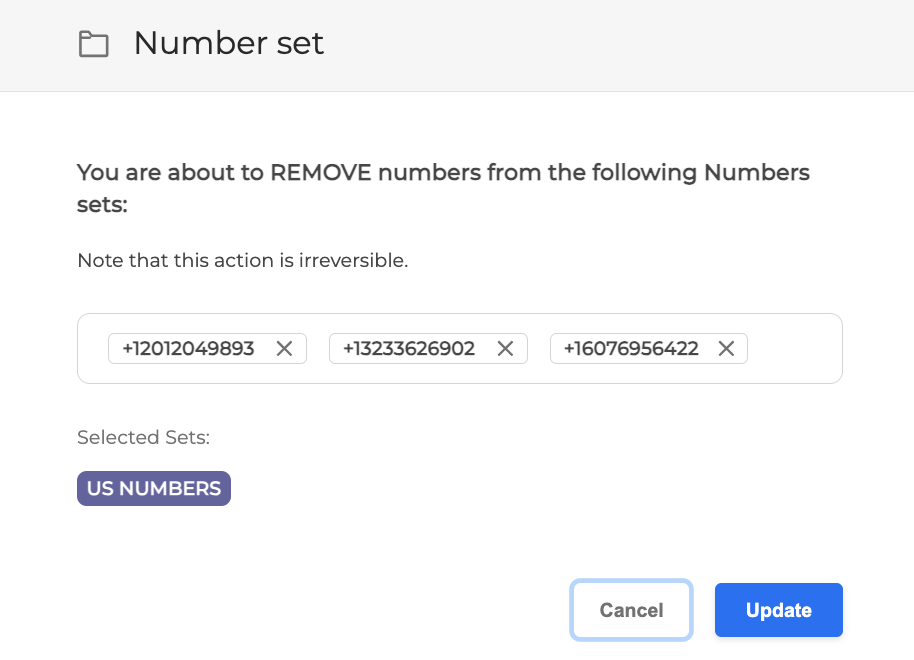
In the dialog box that opens, carefully review the selected numbers to ensure they are correct.
-
Click Update to finalize the action. The selected numbers will be detached from the number set.
Delete a number
You can remove a number from your account by deleting it through the Numbers Control Panel.
Deleting a number from your account is a permanent action and cannot be undone. Ensure the selected numbers are correct before proceeding!
You can select up to 10 numbers to delete at a time.
To delete a number, follow the steps below:
-
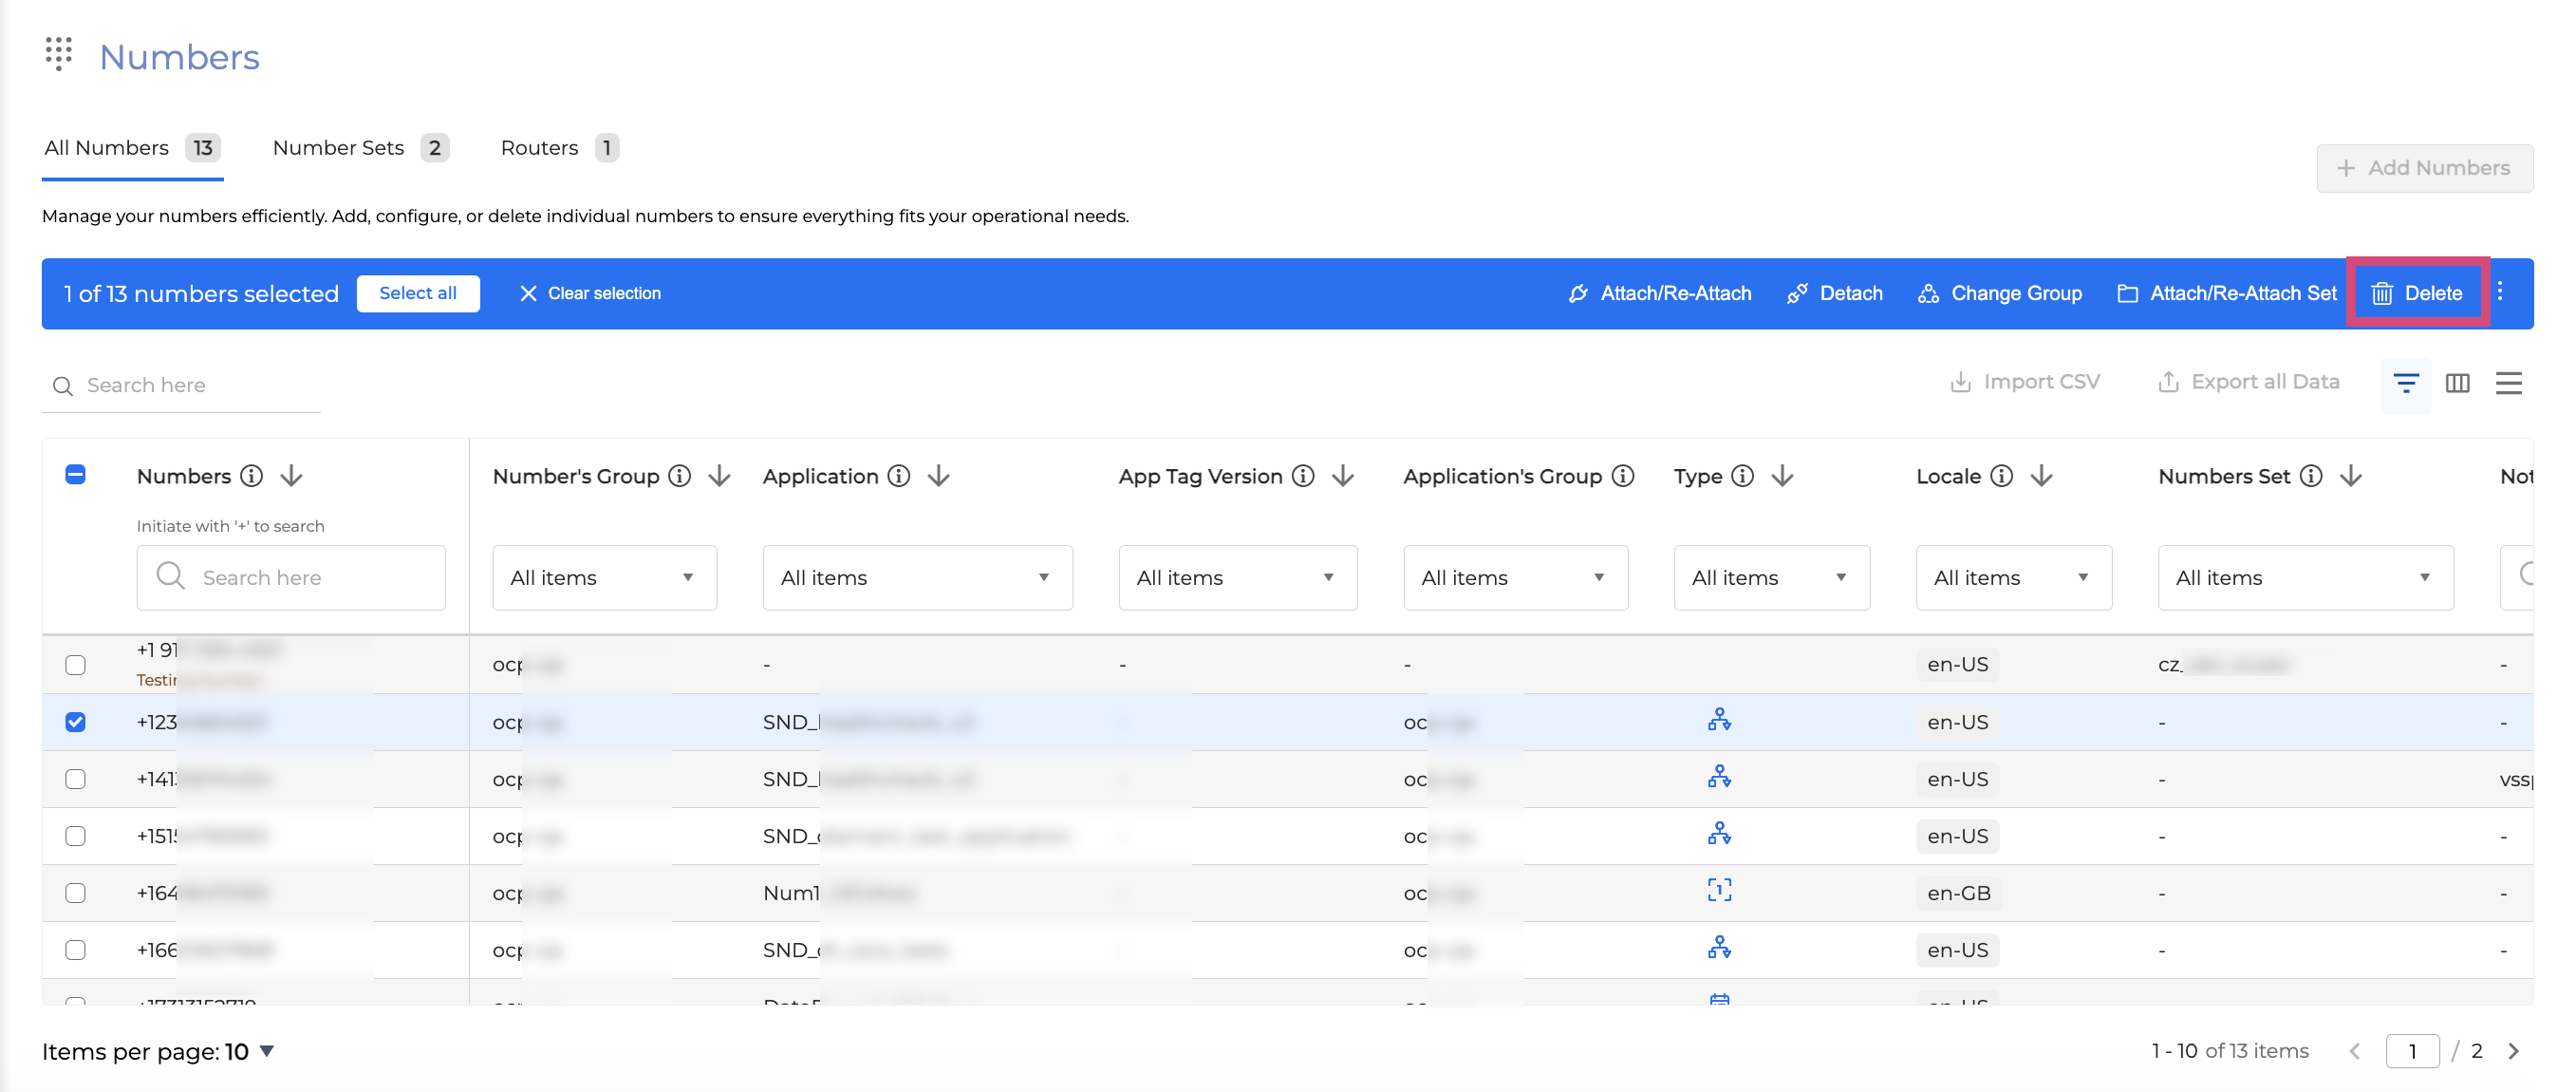
Select a number you want to remove from your account. You can select multiple numbers.
-
Click the Delete button.
-
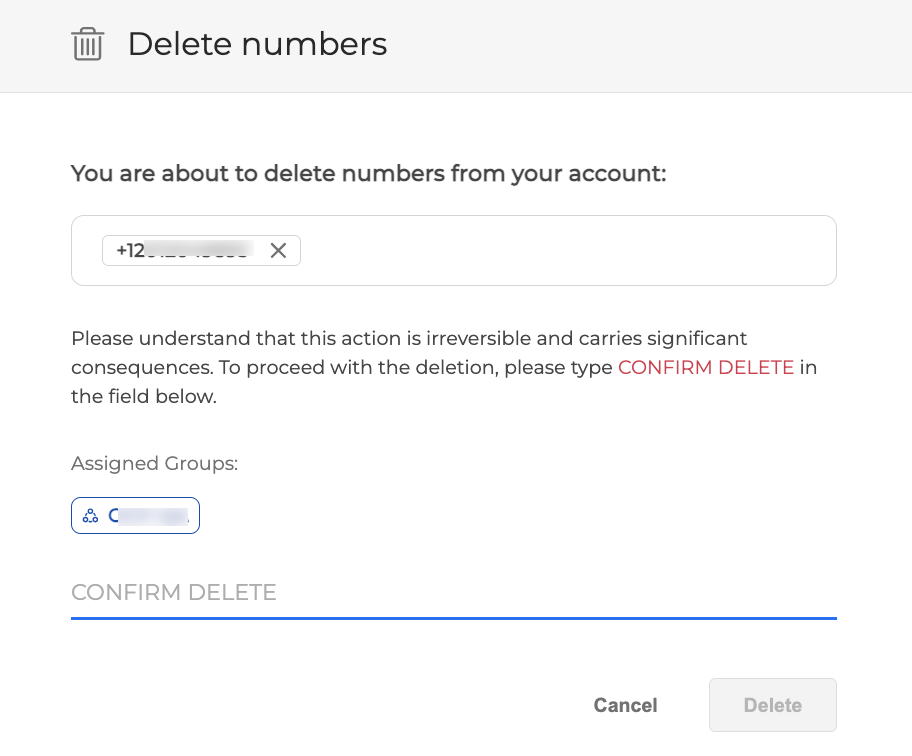
Make sure the numbers you want to delete are correct and type CONFIRM DELETE in the opened window.
-
Click the Delete button to complete the deletion. The selected number has been deleted.
Import numbers as a CSV file
You can efficiently manage your number sets through a CSV file using it for different operations, such as Create, Update, Attach, Detach, and Delete.
To find more information about the numbers management through a CSV file, read How to manage batch numbers through CSV.
To import a CSV file, proceed as follows:
-
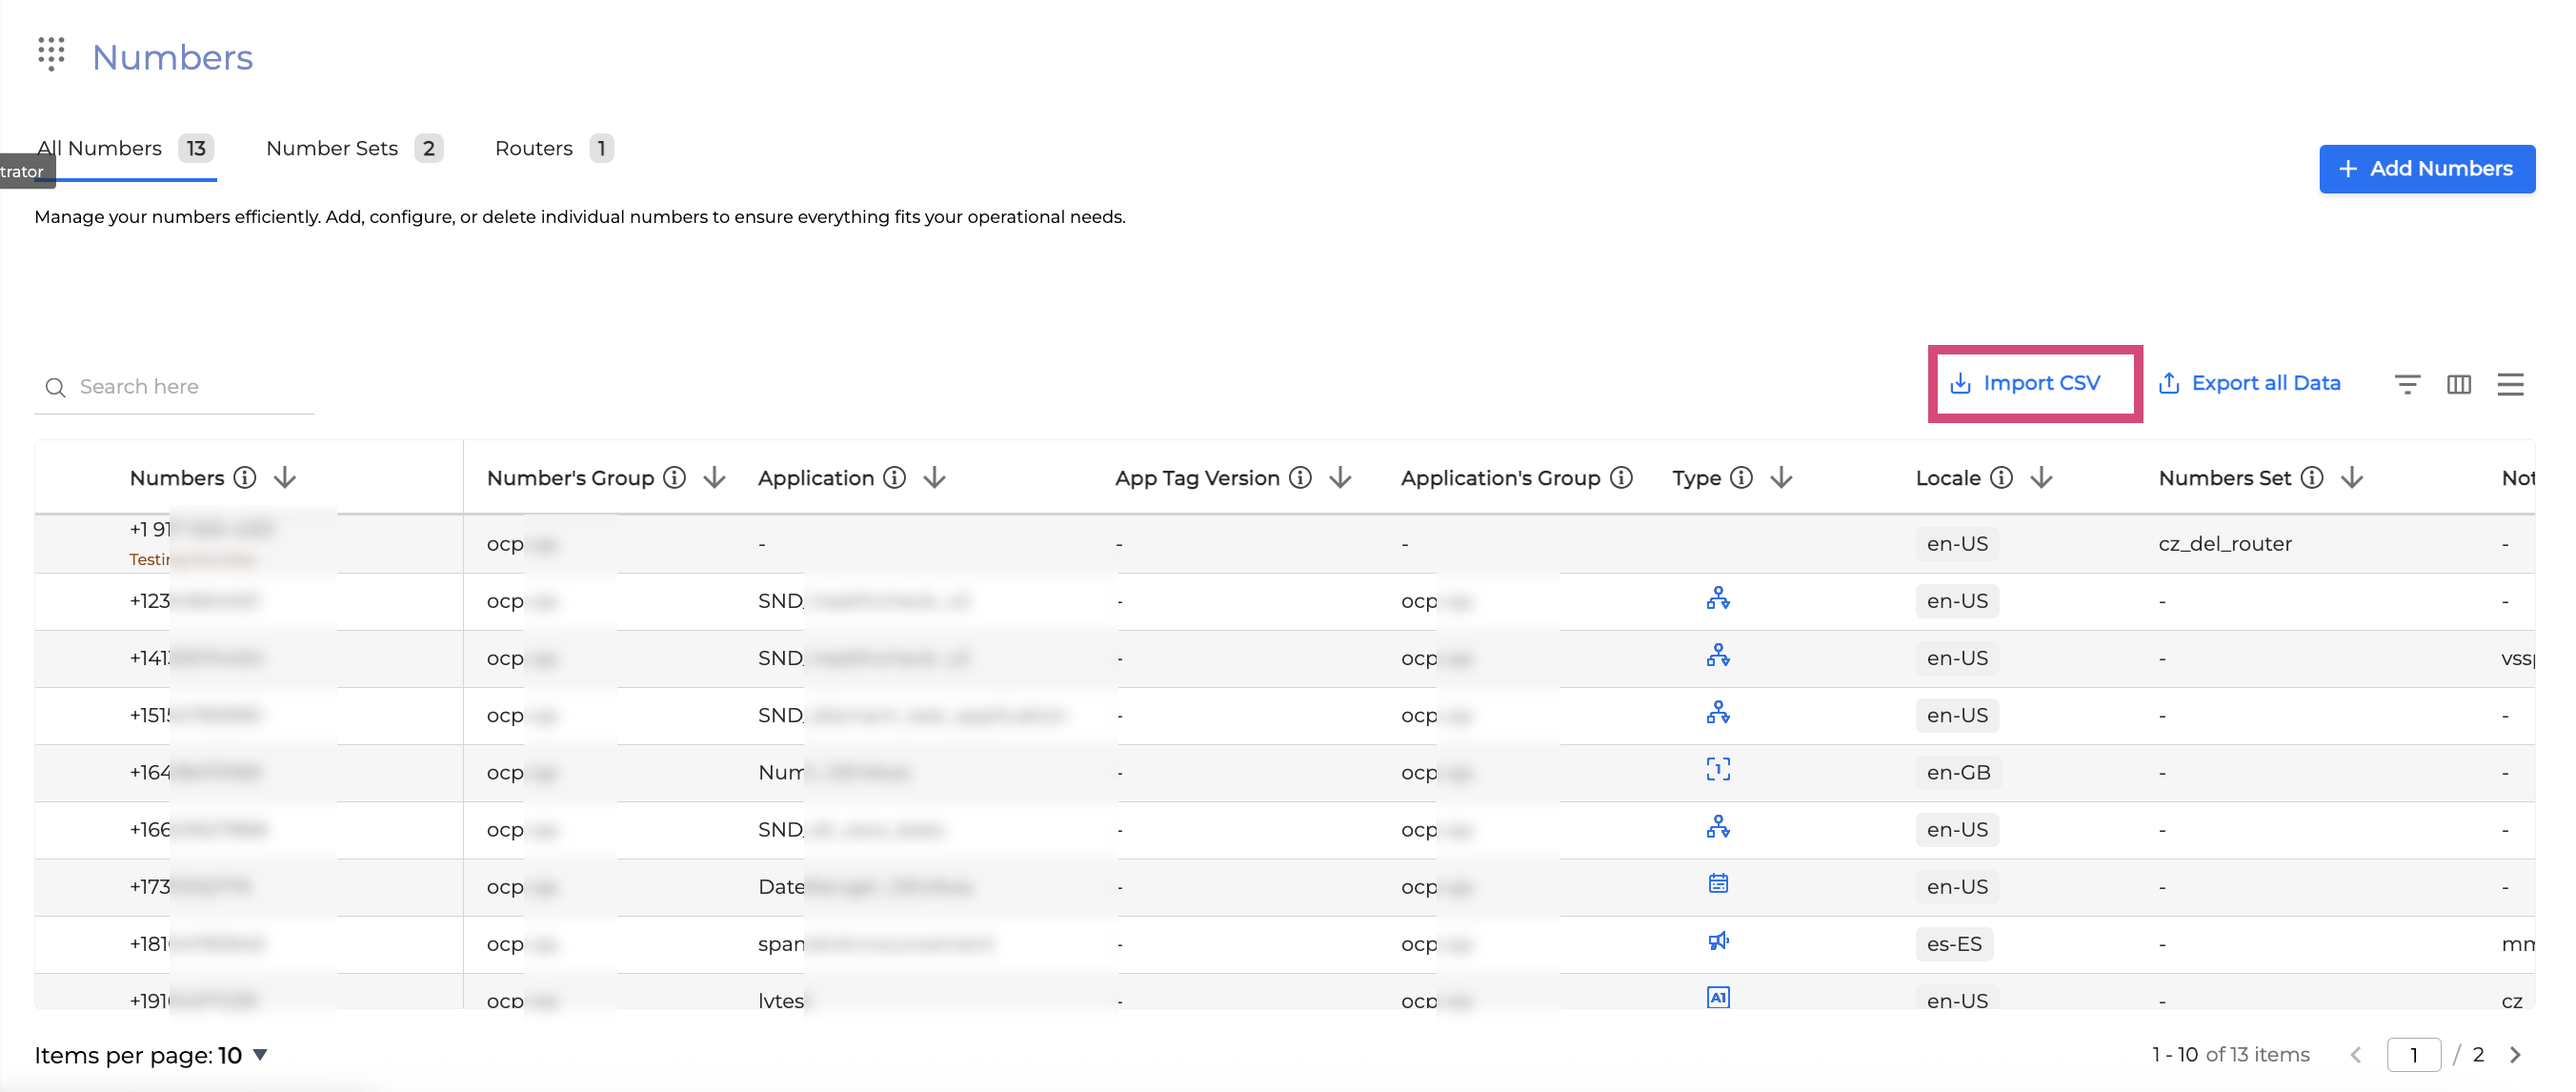
Click the Import CSV button.
-
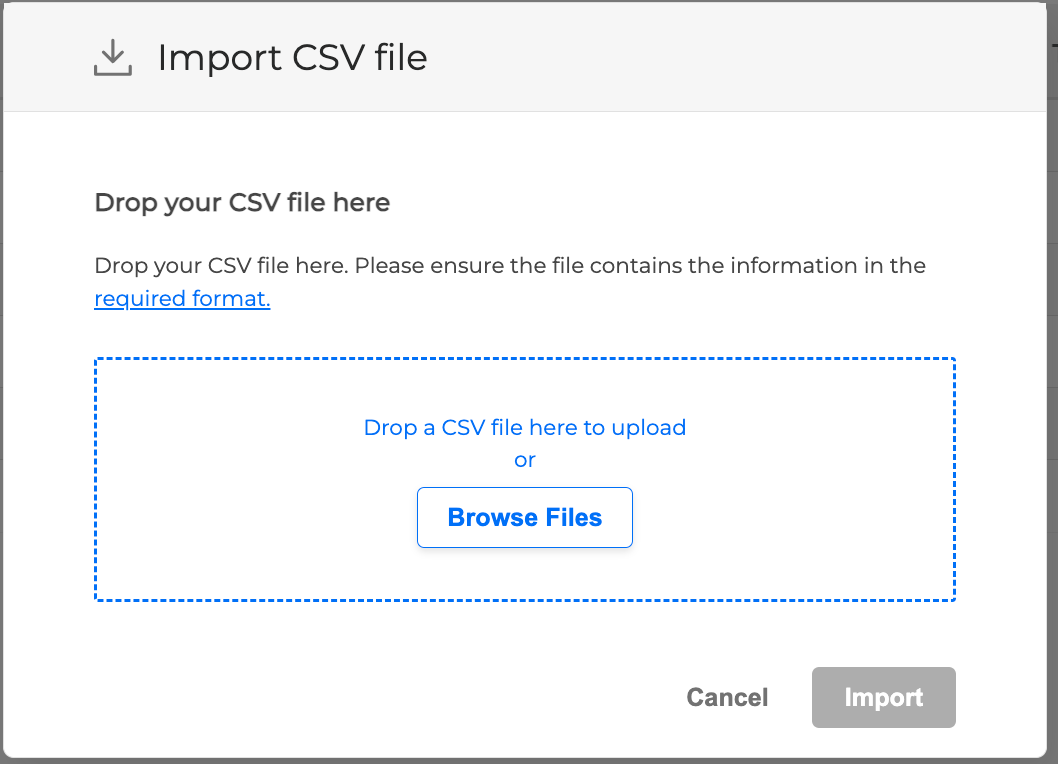
In the Import CSV file dialog box, you can either drag and drop a CSV file or browse to select one for uploading. Read more about the required file format.
-
Click the Import button to finalize the action.
Export All Data
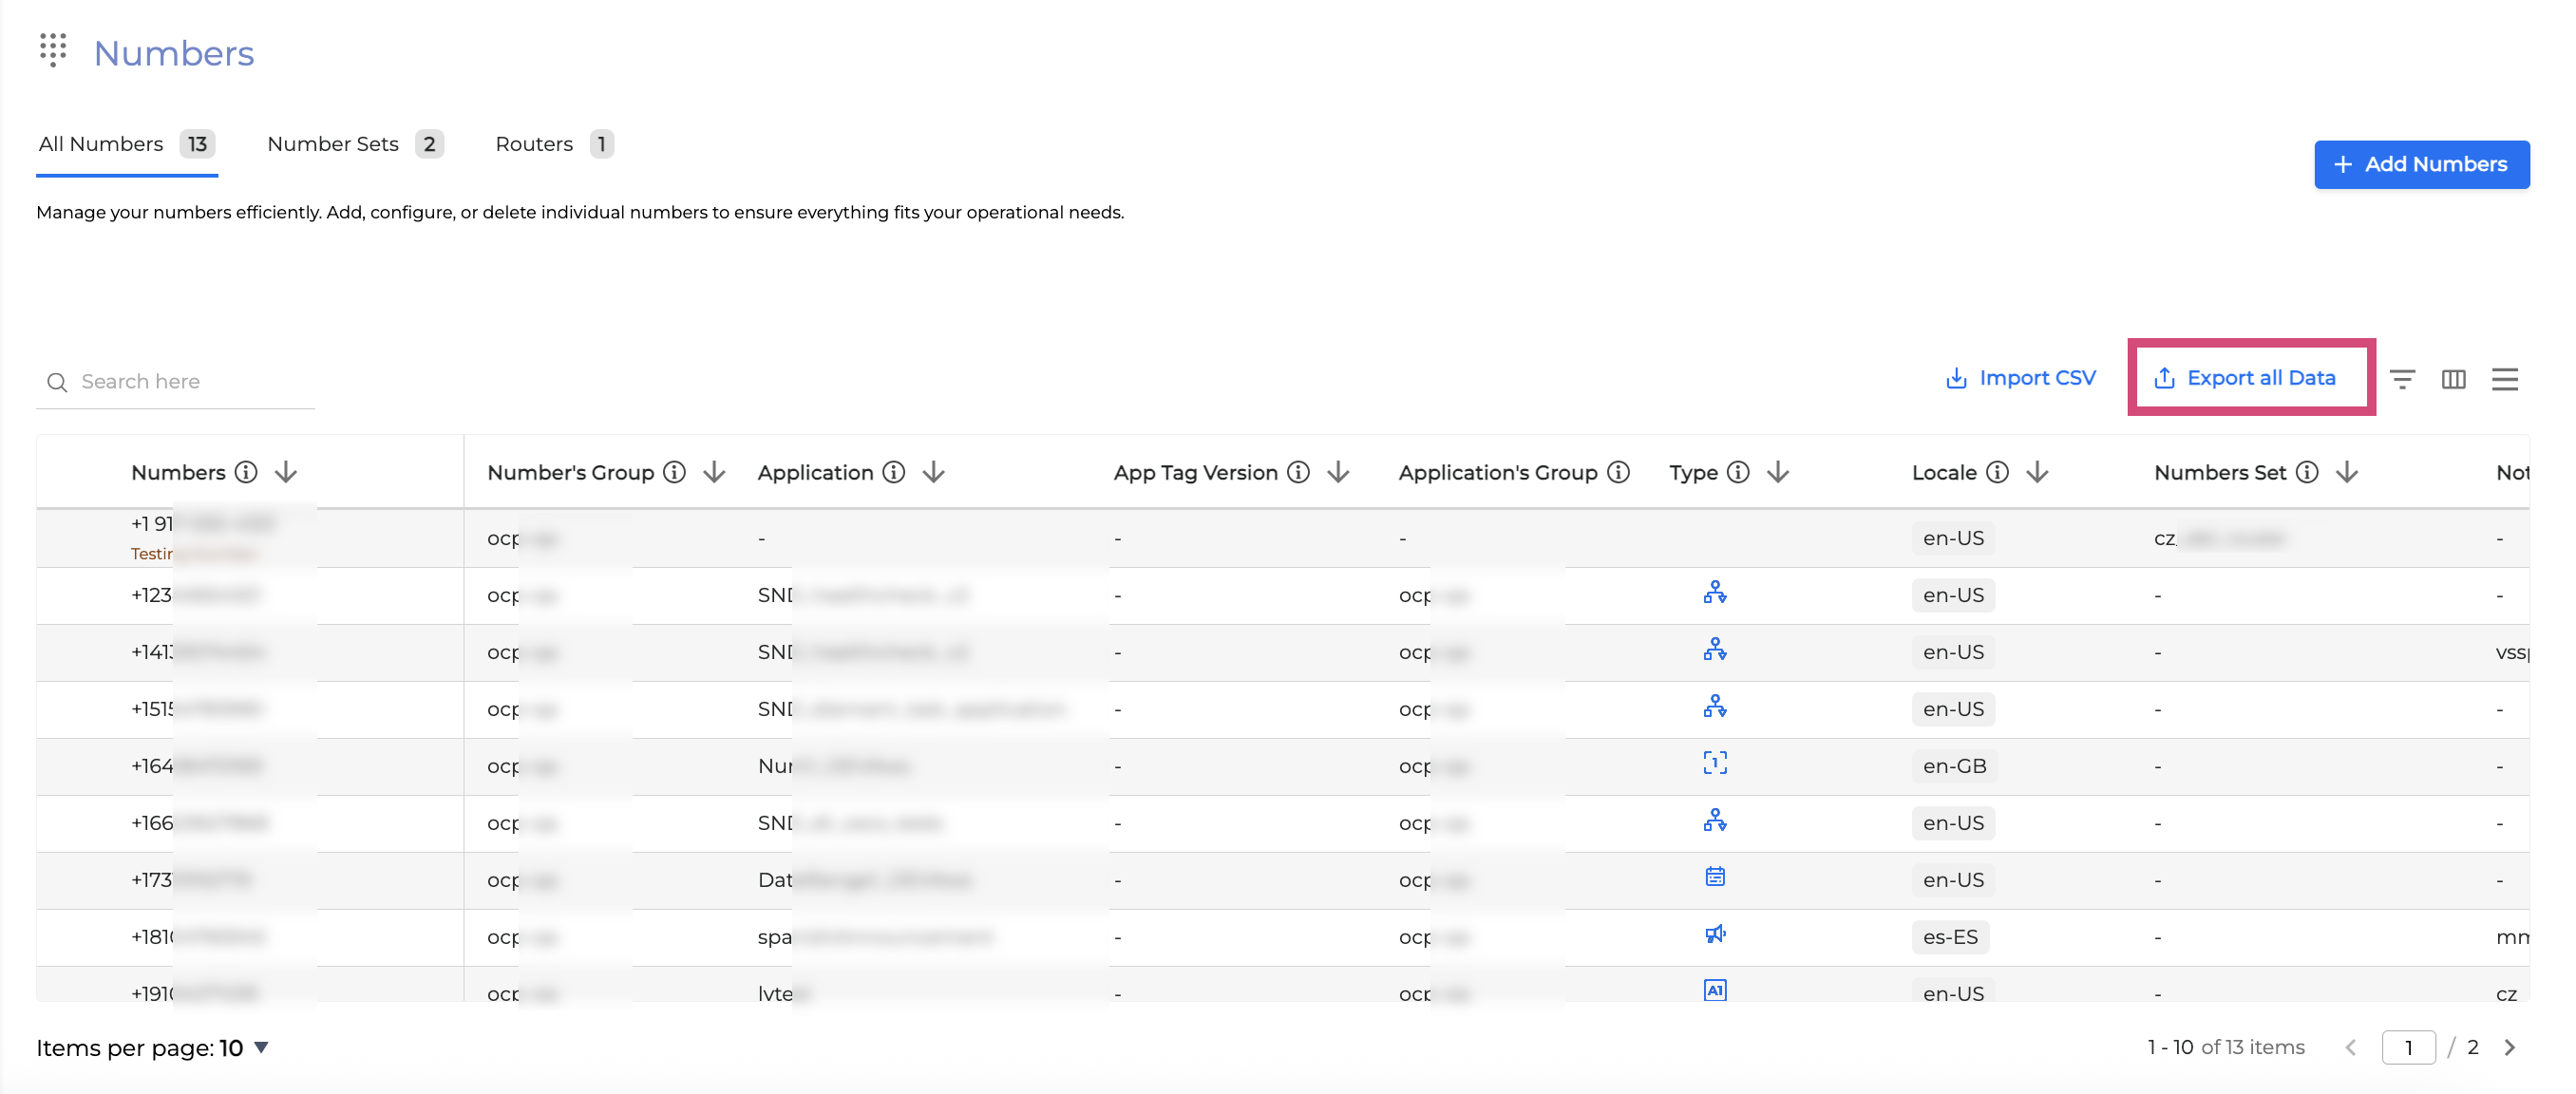
You can export all the numbers and their associated data as a CSV file by following the steps below:
-
Click the Export All Data button.
-
A CSV file with the numbers data will be uploaded to your computer.