.svg)
A Transfer is a building block that defers the conversation to a human agent, a chatbot, or another conversational system. The Transfer saves all conversation data up to that point so the agent can access it and the caller need not repeat the request.
When a caller must reach a human agent – for example, in a bank call center – add a Transfer to the flow.
To add a Transfer, follow the steps below:
-
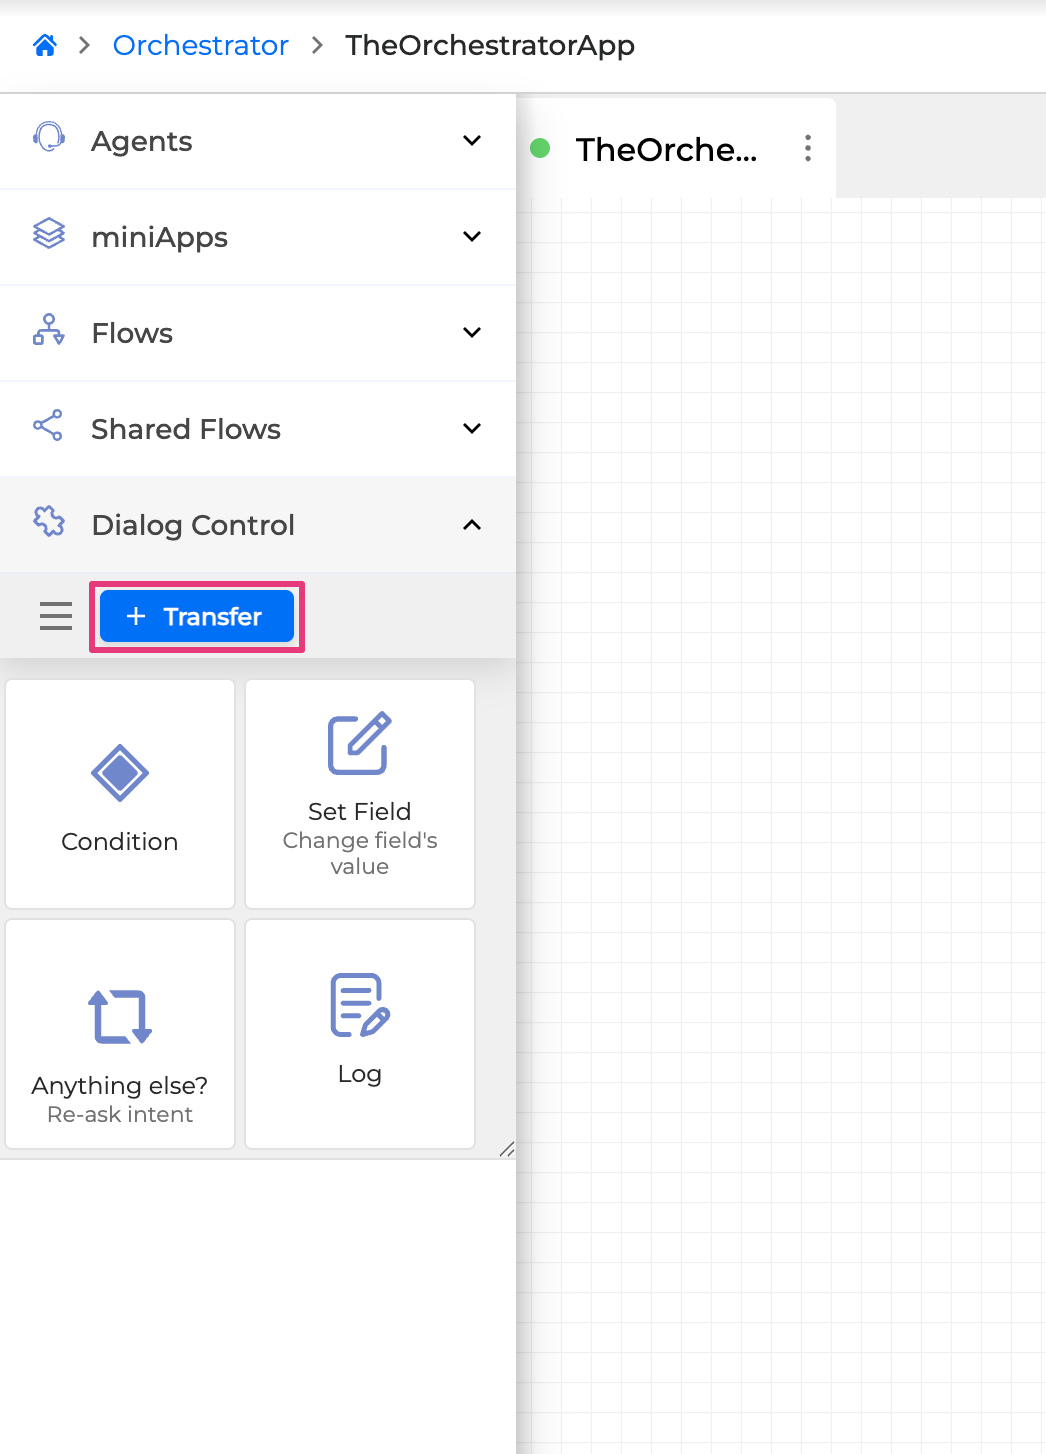
Open the panel on the left and click the + Transfer button:
-
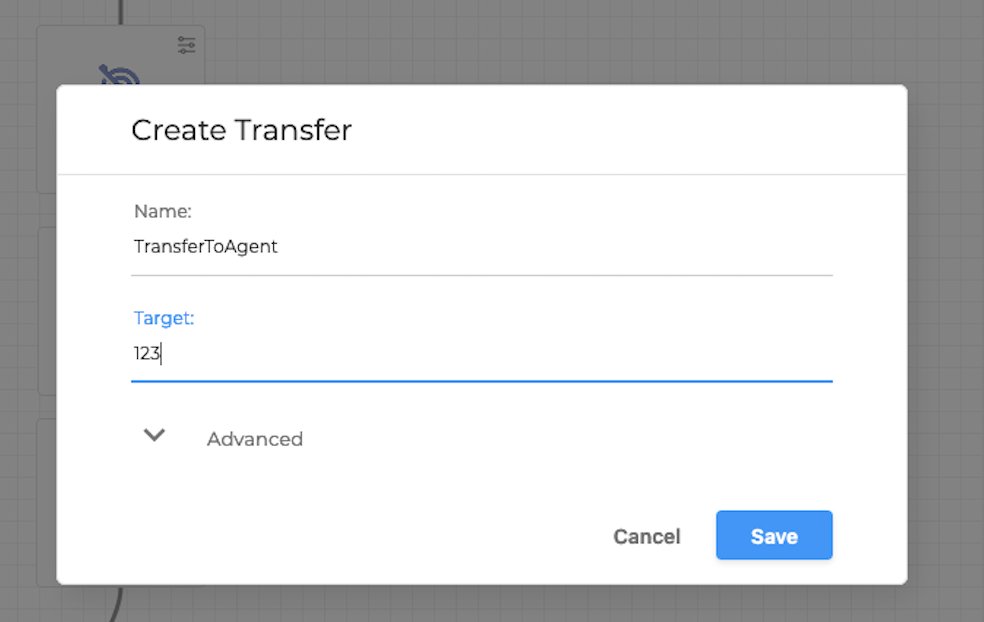
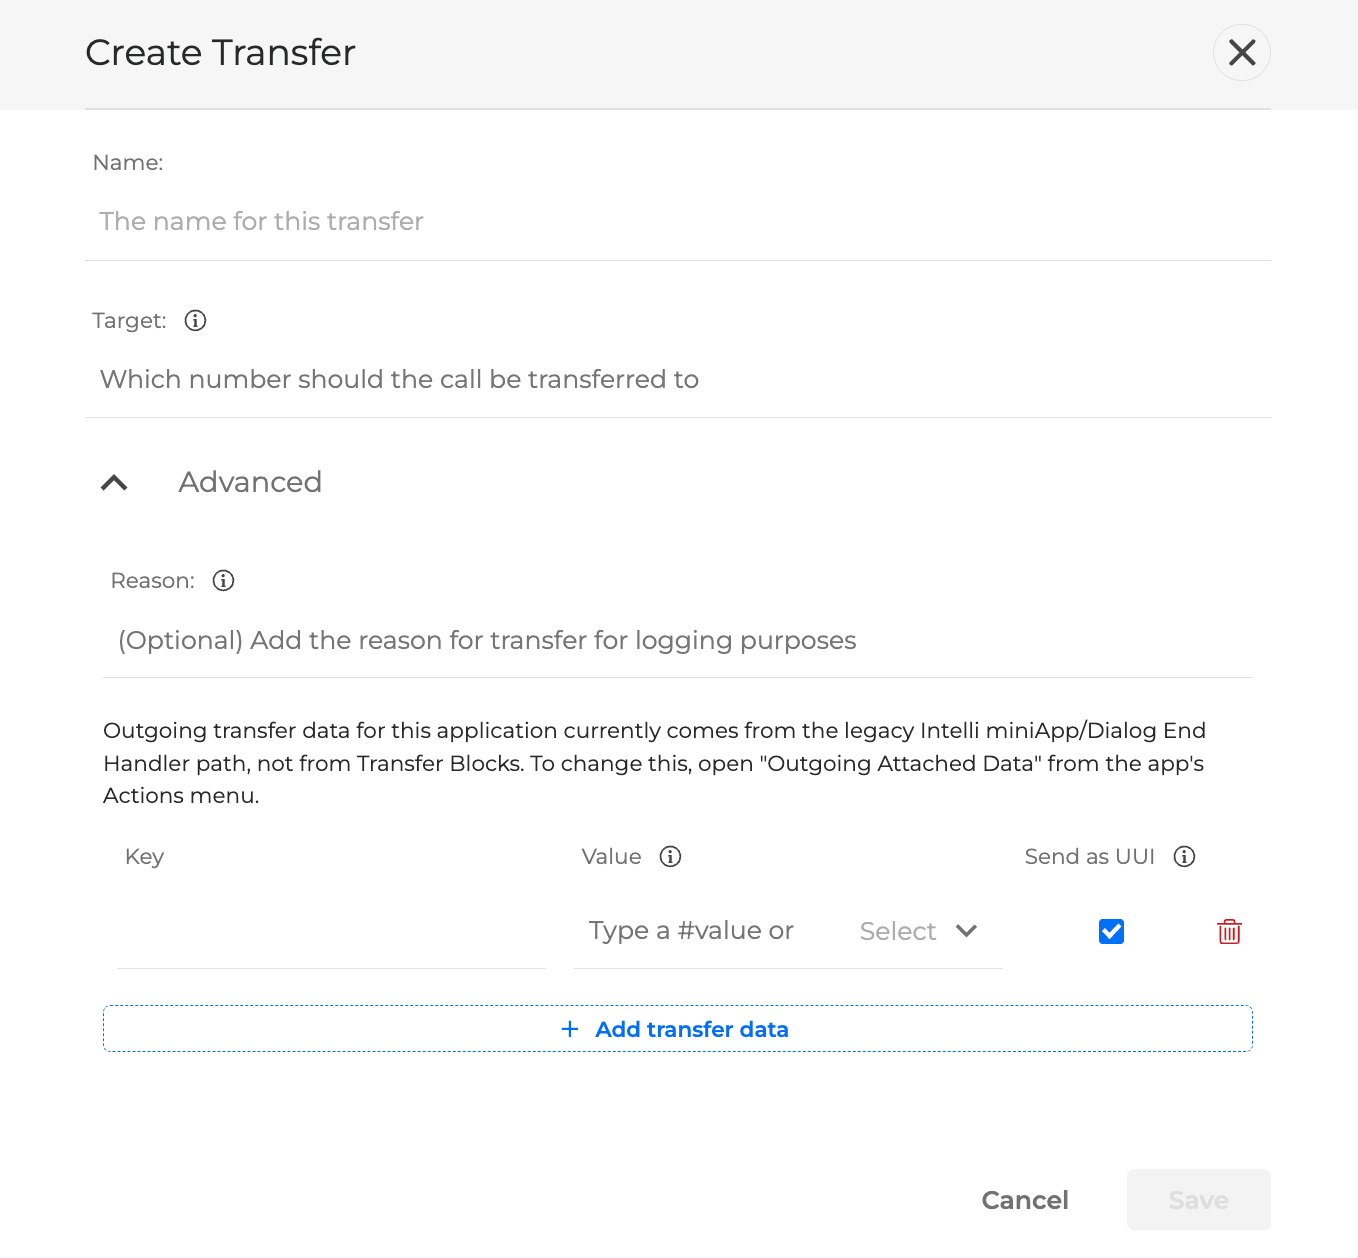
Fill in the fields in the modal window of the Transfer settings:
-
Enter a Name: the name of the transfer
-
Define a Target: the recipient’s data. For example, the agent’s phone number
-
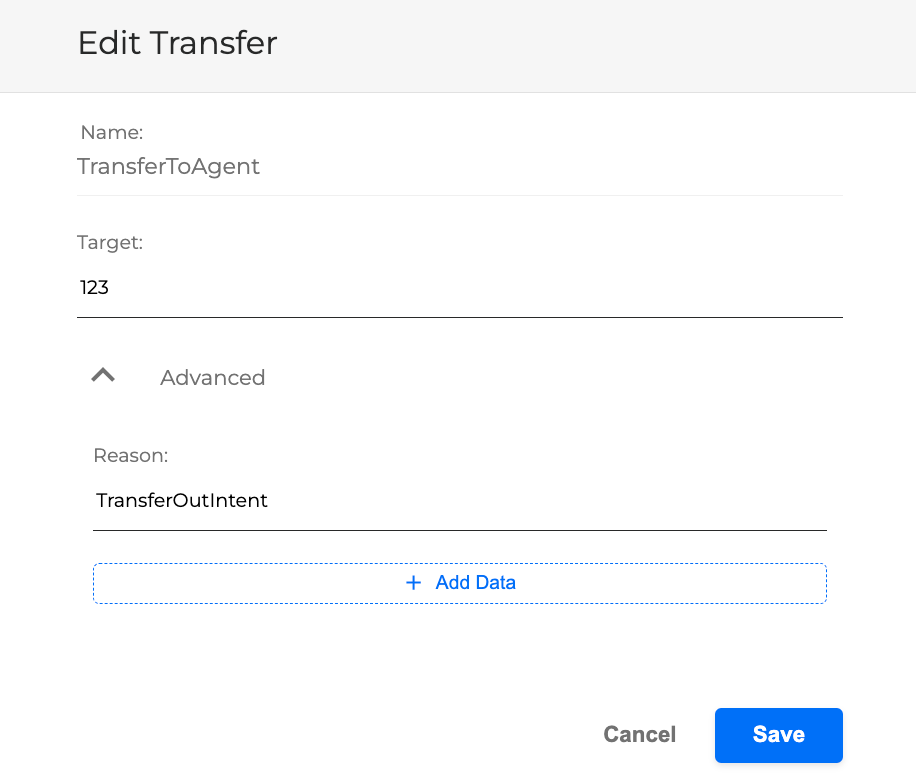
Click Advanced for additional settings. Enter an optional Reason to include in reporting logs (for example, TransferOutIntent), and select + Add Data to attach further information.
-
Click + Add Data to add key-value pairs for logging. To delete a Key or Value, click the red Trash can icon to the right of the pair. Tick the box on the right next to each pair if you wish to send it as UUI (User to User information).
-
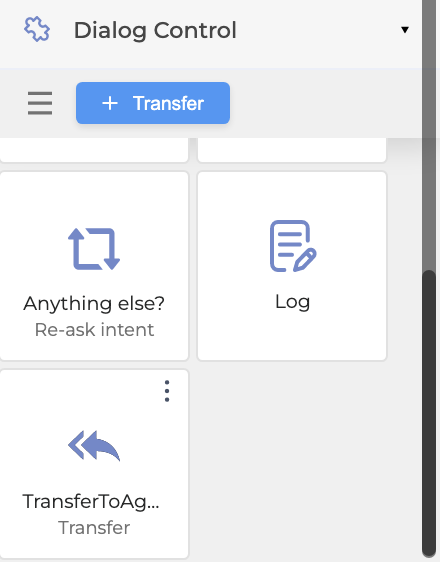
Click the Save button to finish. After saving, the Transfer appears in the Dialog Control panel list:
-
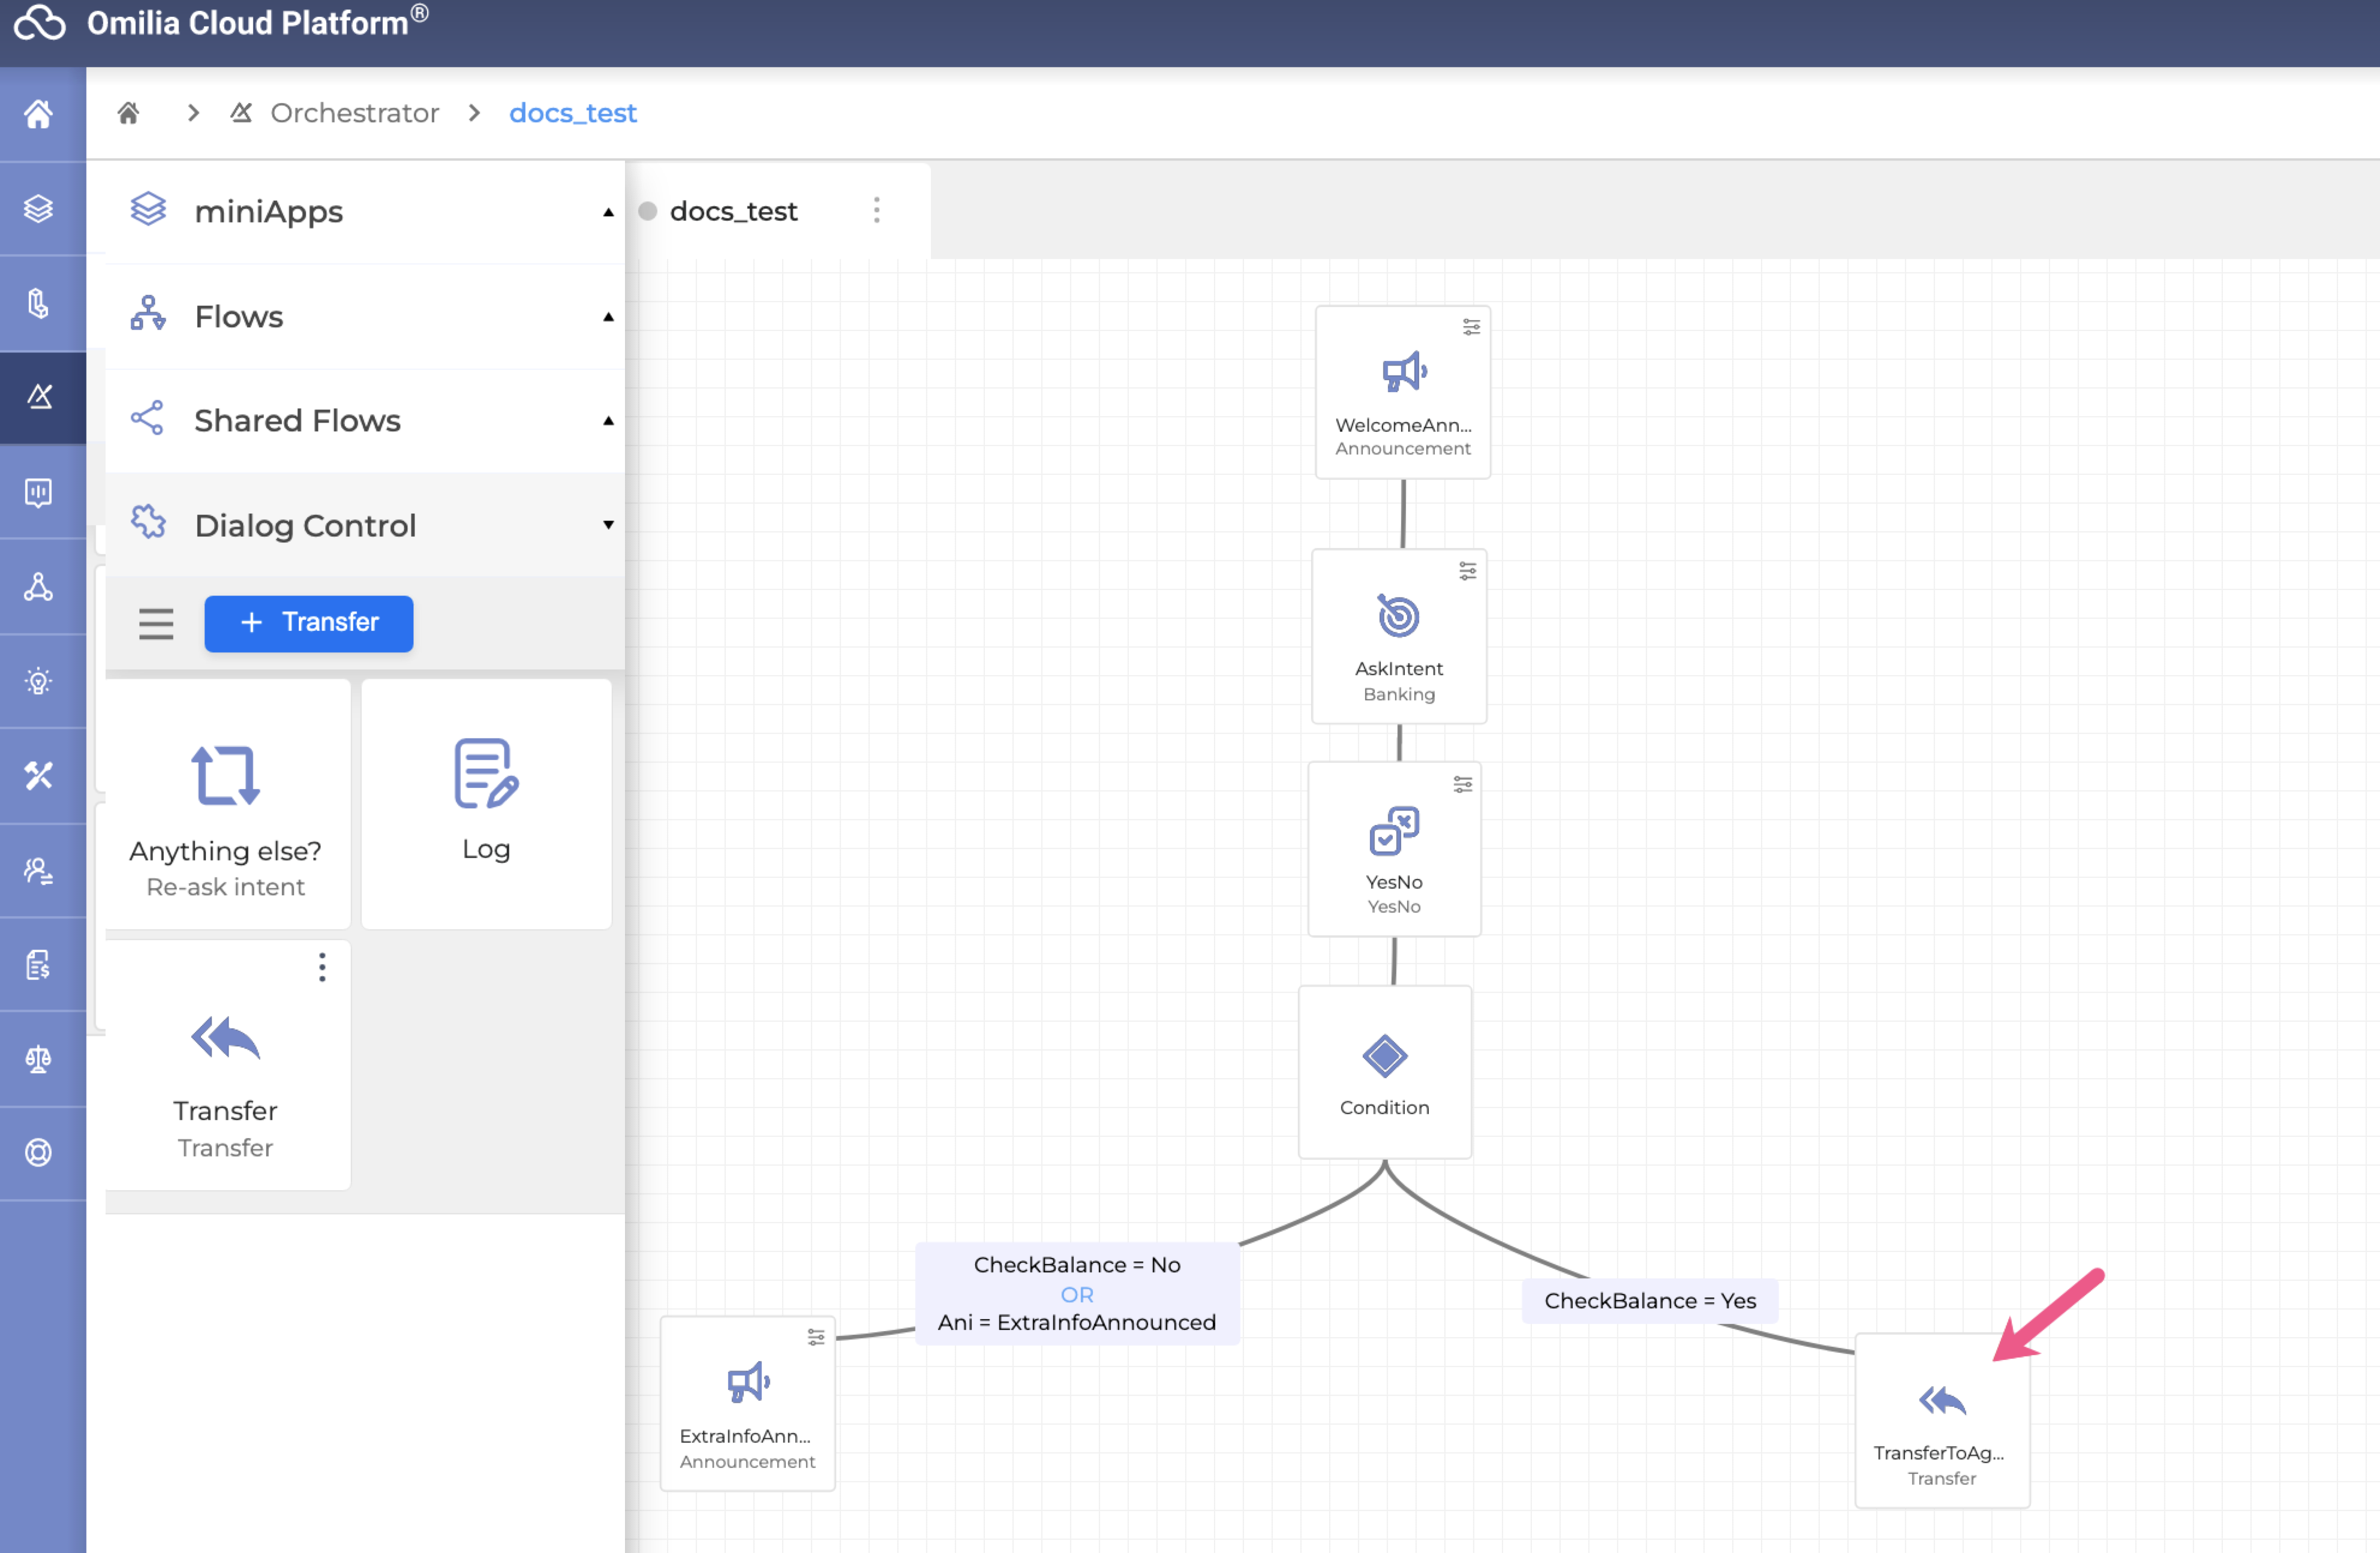
Select the Transfer from the Dialog Control list and drag and drop it onto the canvas.
-
Connect the Condition block with the Transfer by dragging a line between them.
If the miniApp asks the caller whether they want more information and the caller answers “no”, the Dialog Application routes to the Transfer building block, which redirects the caller to a live agent.
-
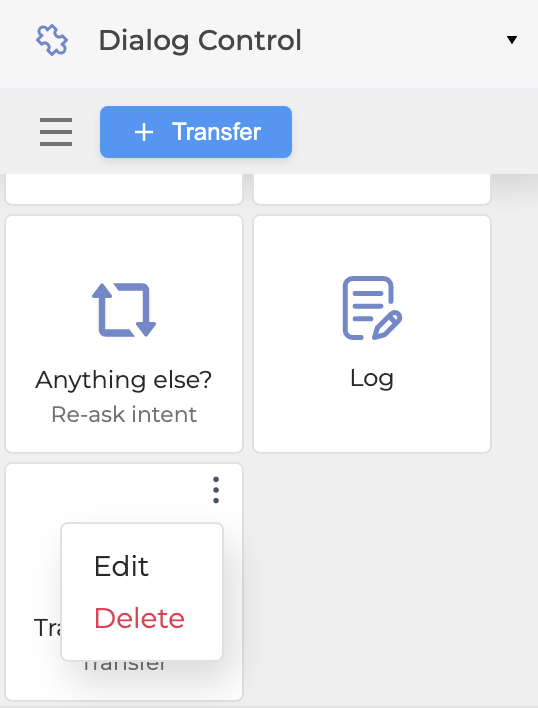
To delete or edit a Transfer, navigate to the Dialog Control panel, select a Transfer, and click the Options menu button.