Overview
This document describes how to integrate Voice Biometrics through Genesys Cloud.
Voice Biometrics (VB) is used to detect and verify a caller’s identity that has been authenticated in a past call and enrolled in the VB service.
The basic steps for VB are the following:
-
VB enrolment. Authoritatively assign a set of identifiers to a stored voice recording.
-
VB verification. Compare the active voice stream against stored voiceprints.
-
VB verification system expectations. Speaker verification systems calculate the similarity score between two or more voiceprints from the same speaker. They differ from speaker identification systems, where the goal is to identify who is speaking amongst a set of speakers.
Prerequisites
To integrate Voice Biometrics, prepare the following first:
1. Create VB Profile through the OCP Console.
2. Integrate miniApps®. For more information, go to OCP miniApps® integration with Genesys.
miniApps® are not required to use Voice Biometrics, however, the miniApps® Genesys integration wizard contains some elements that are required.
3. Have one free call number available in Genesys.
A telephone number must be available to avoid using the same one for miniApps.
4. Generate a token through the Access Management Tab.
Voice Biometrics integration
Voice biometrics integration is done via a flow of actions. In order to create this flow, the flow elements must be created first. The major steps of the integration are:
-
Install the required Integrations
-
Create two Data Actions
-
Genesys Cloud data action
-
Web Service data action
-
-
Configure the Data Actions
-
Create agent's custom dashboard
-
Create agent queue
-
Create the flow
-
Create Call Routing
-
Test the conversation
Install the required integrations
-
Log into Genesys Cloud.
-
Go to Overview → Admin → Integrations and select Integrations.
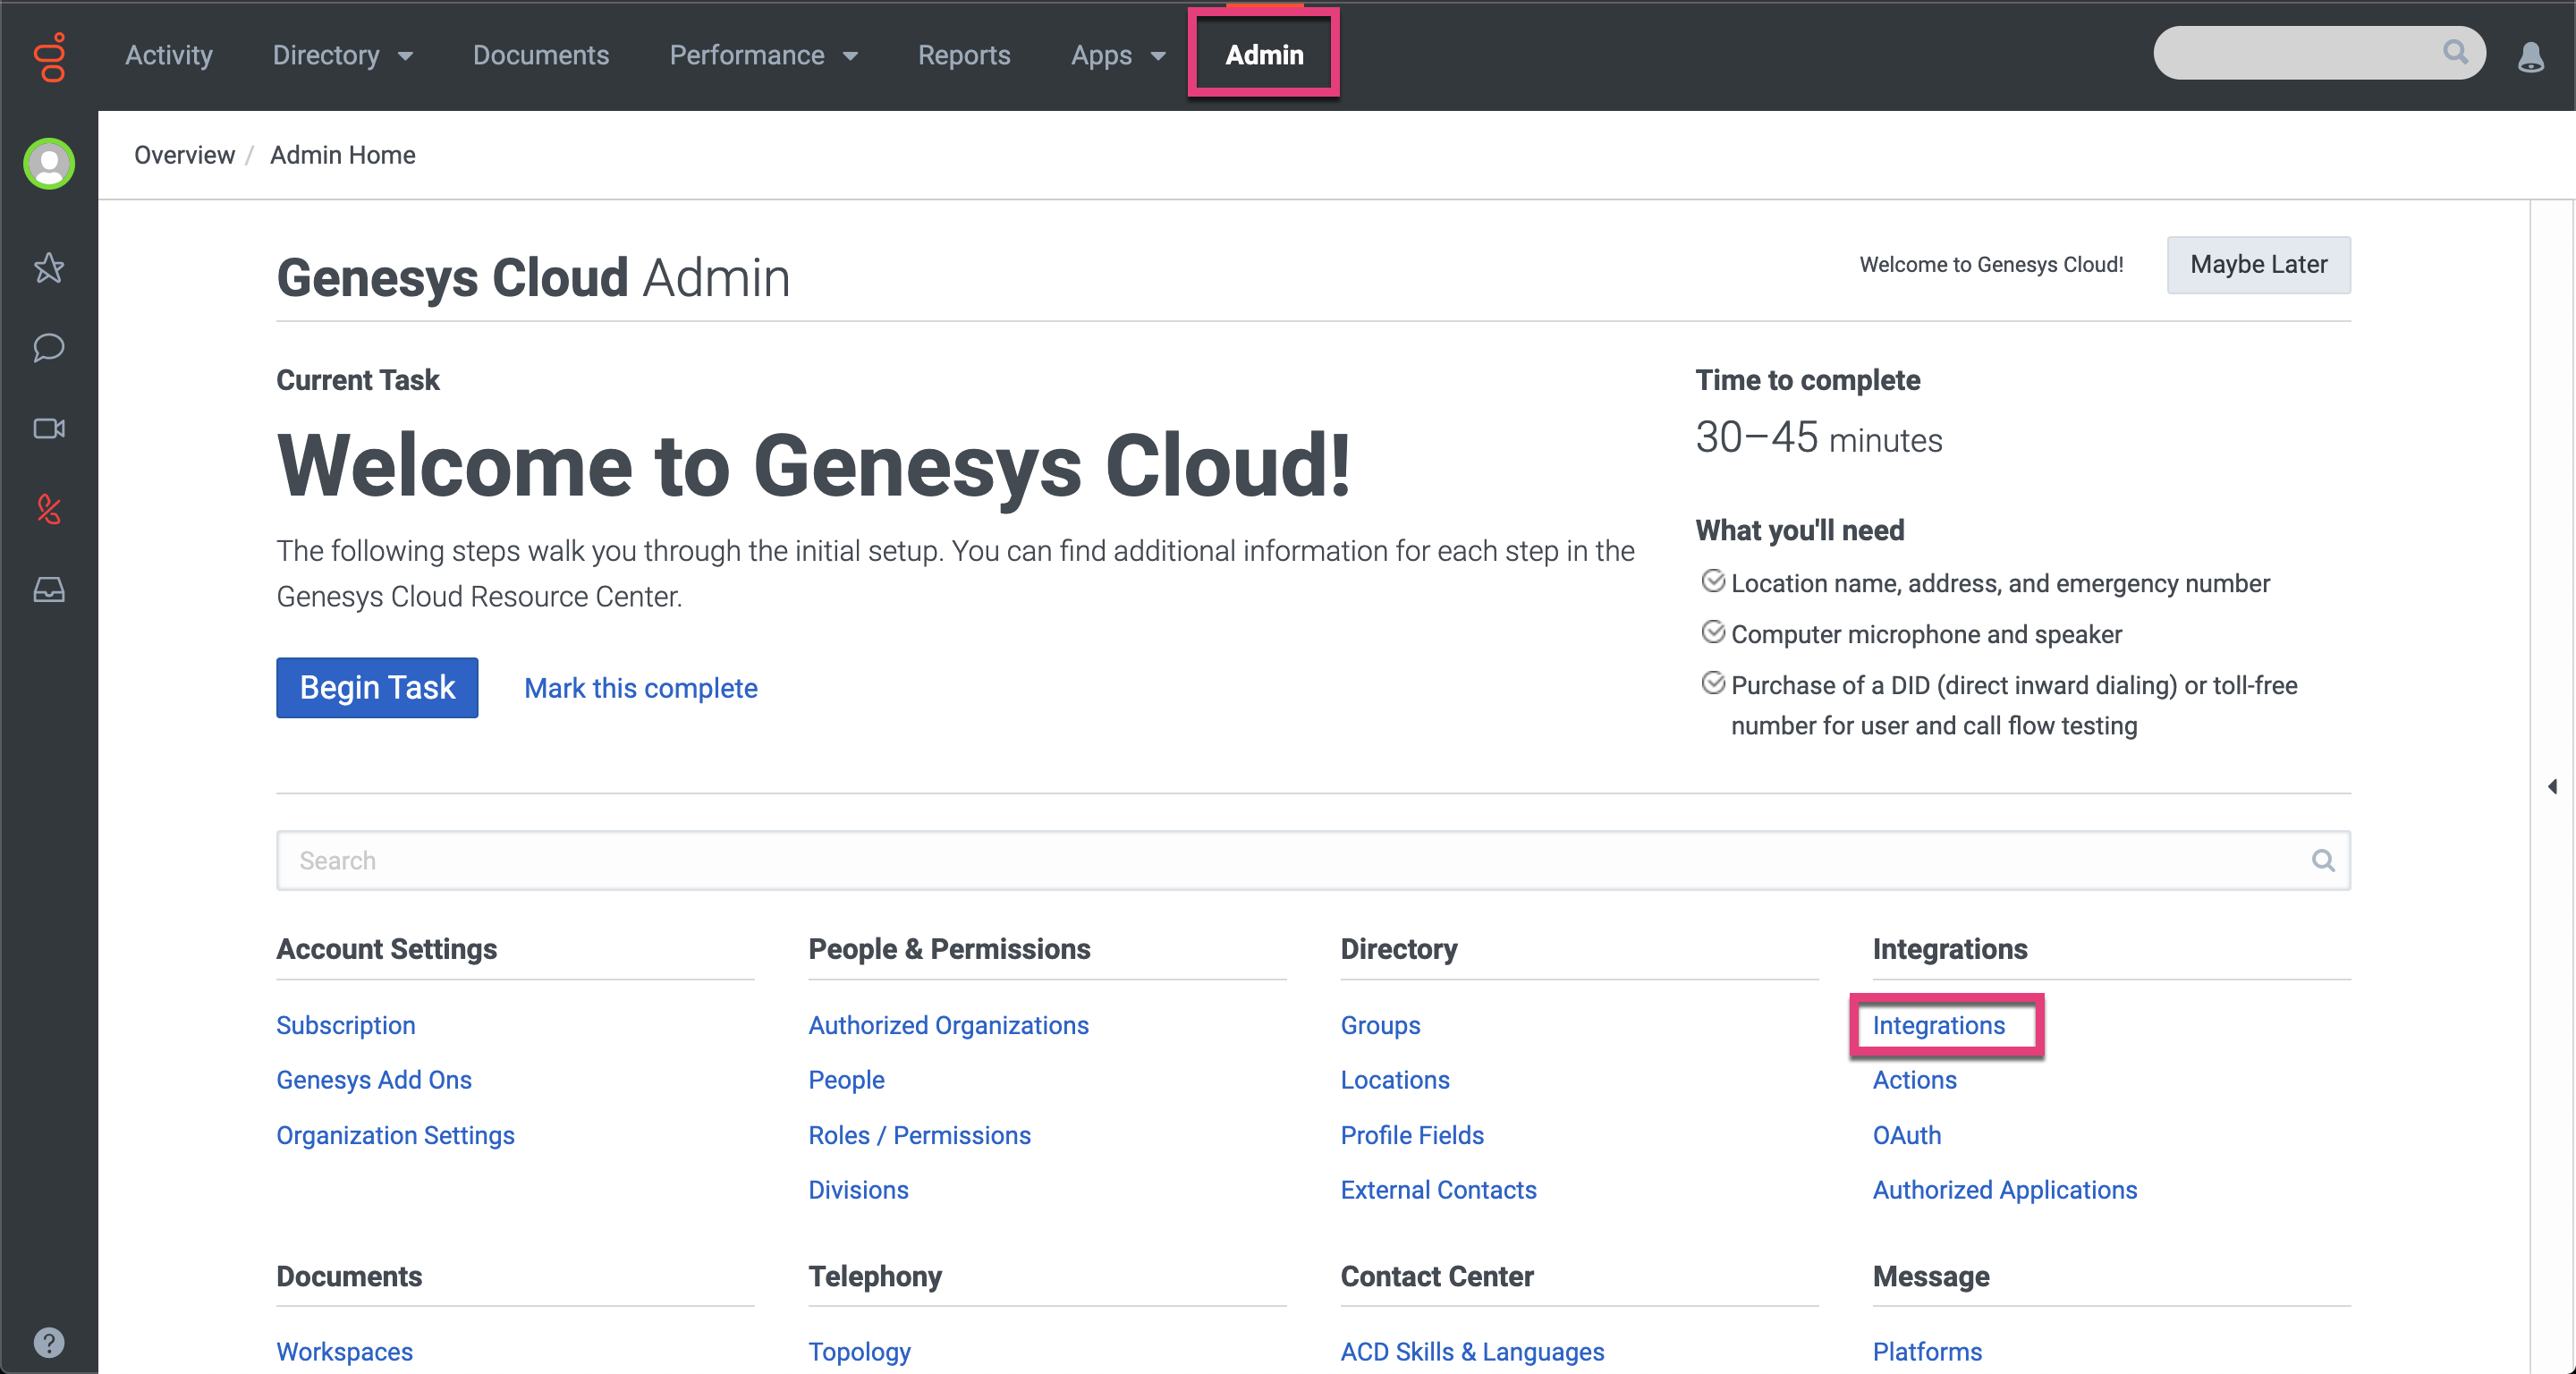
-
Click the +Integrations button on the upper right to install Genesys Cloud Data Actions.
You can find the Genesys Cloud Data Actions using the search engine box.
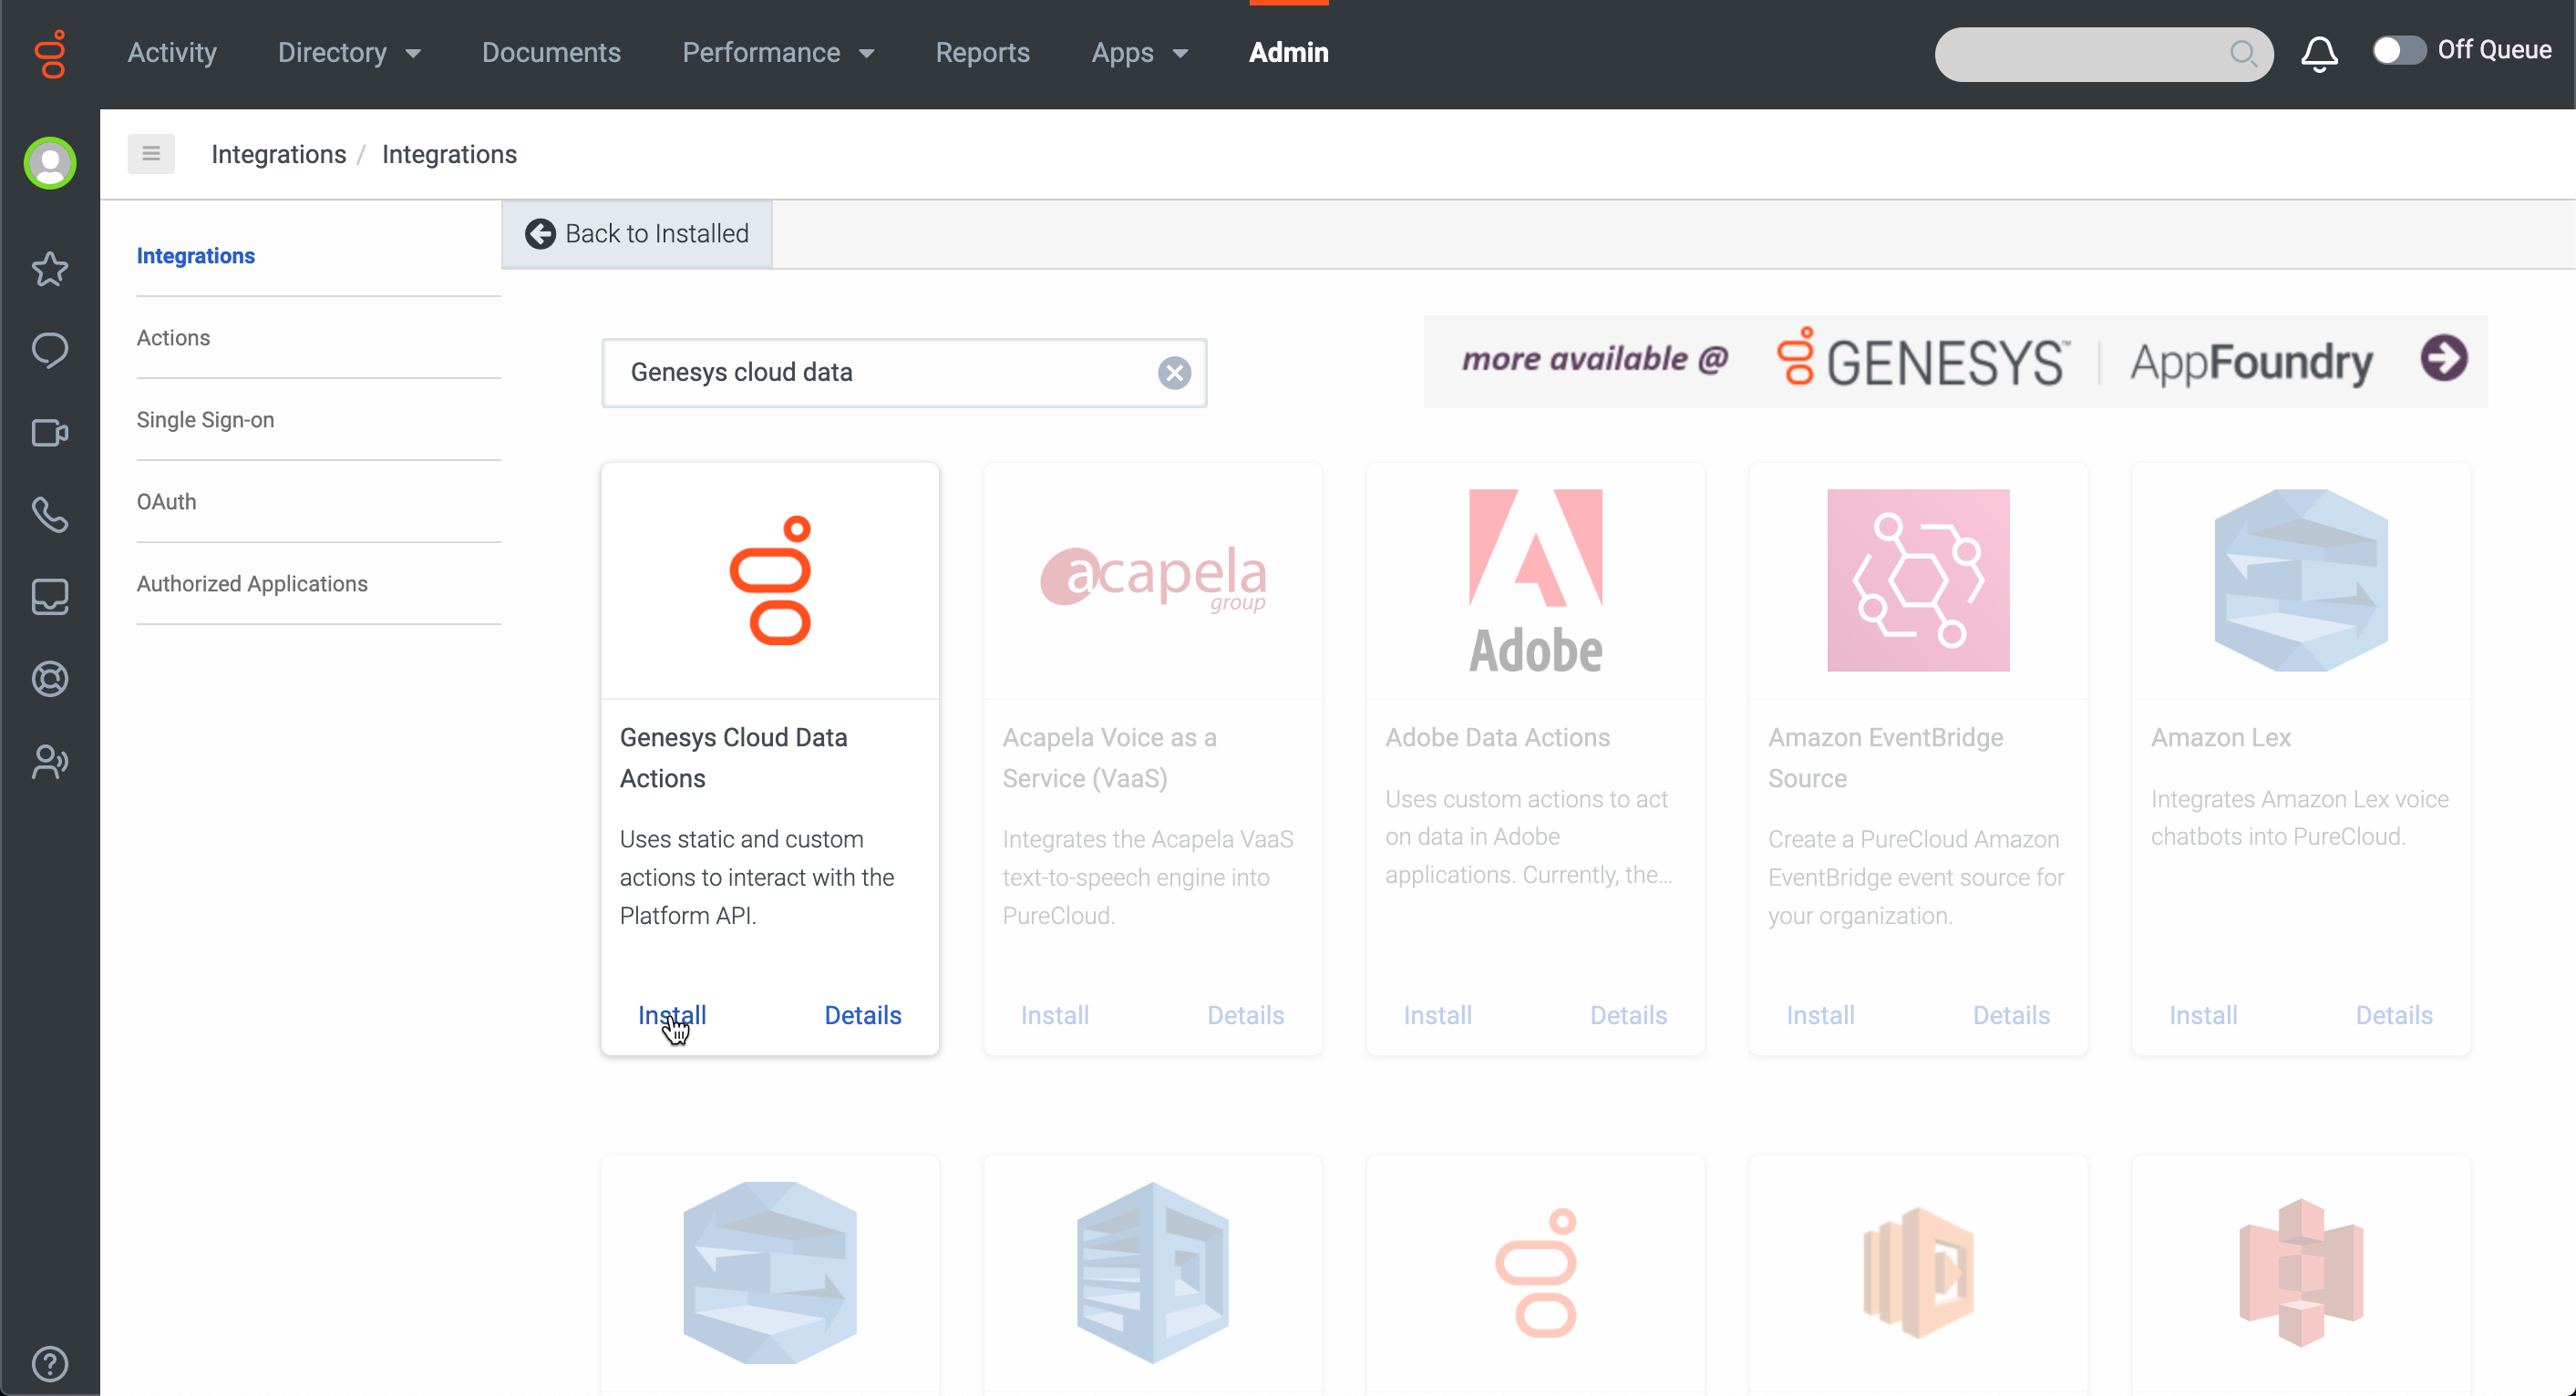
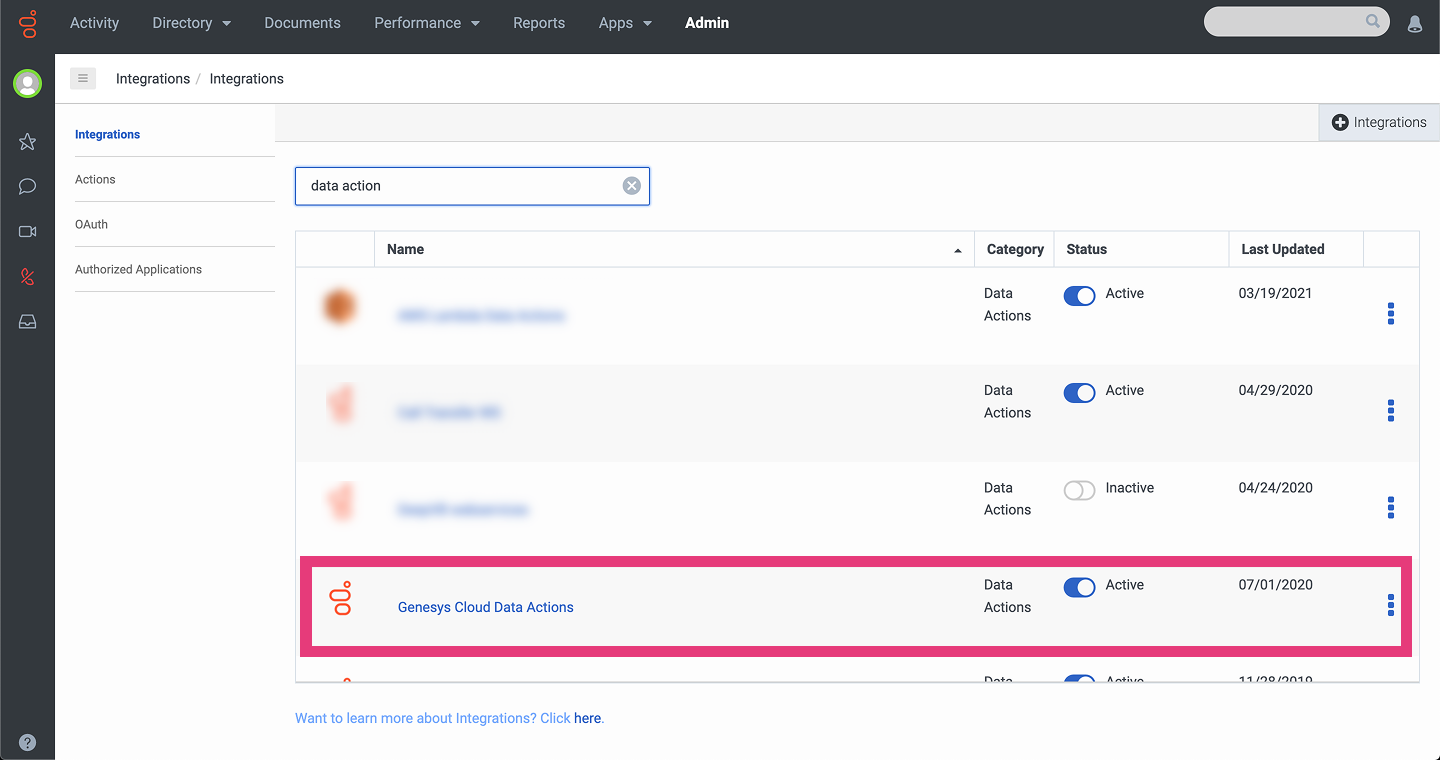
After the integration is installed you can activate it from the list of installed integrations.
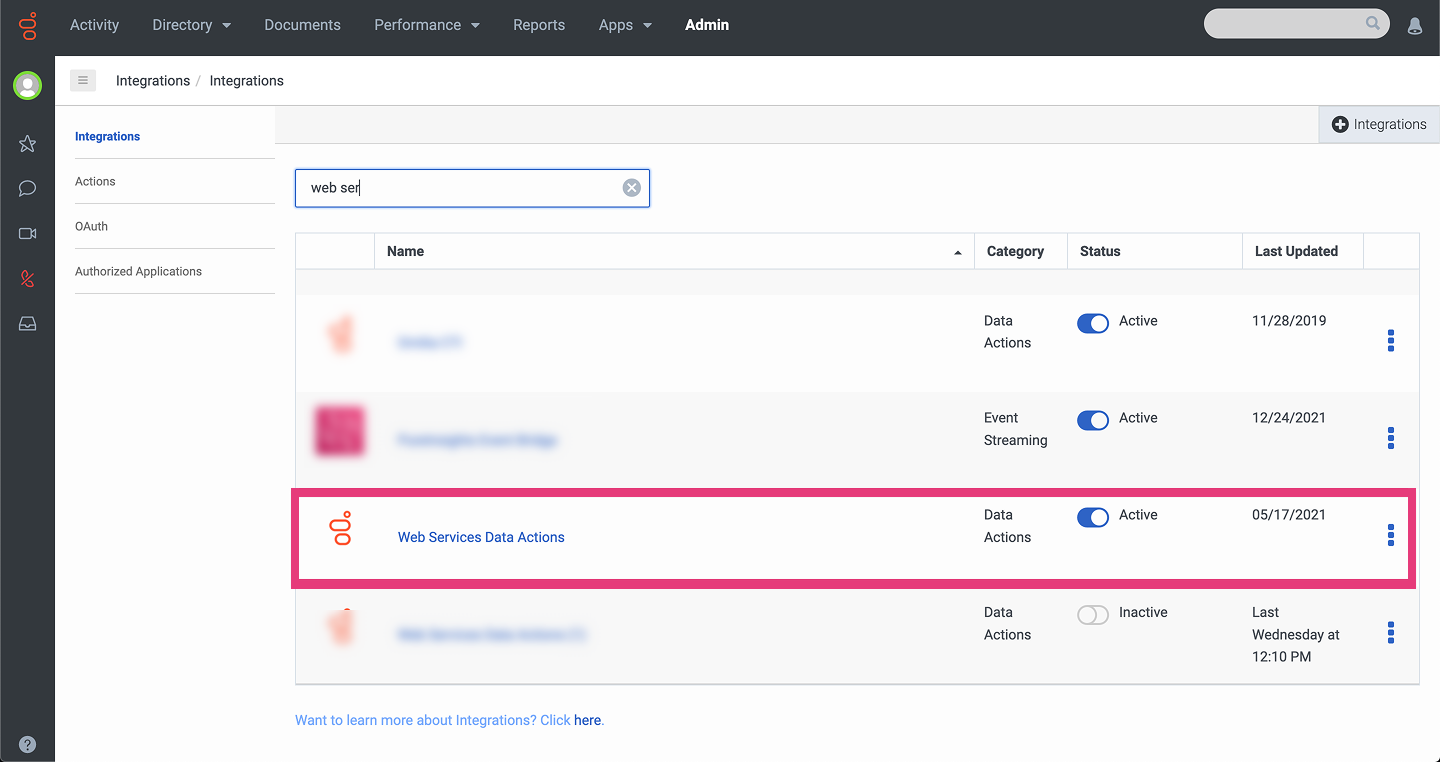
4. Click the +Integrations button to install Web Services Data Actions (Omilia Data Actions) in the same way as installed Genesys Cloud Data Actions.
It is possible to rename this data action as you find preferable during installation. (For example, Call Transfer WS (Omilia Data Actions).
Activate it from the installed integrations list.
Create the Data Actions
Data Actions created during these steps will be used later in the process flow creation.
-
Go to Integrations → Actions menu to create the Data Actions.
-
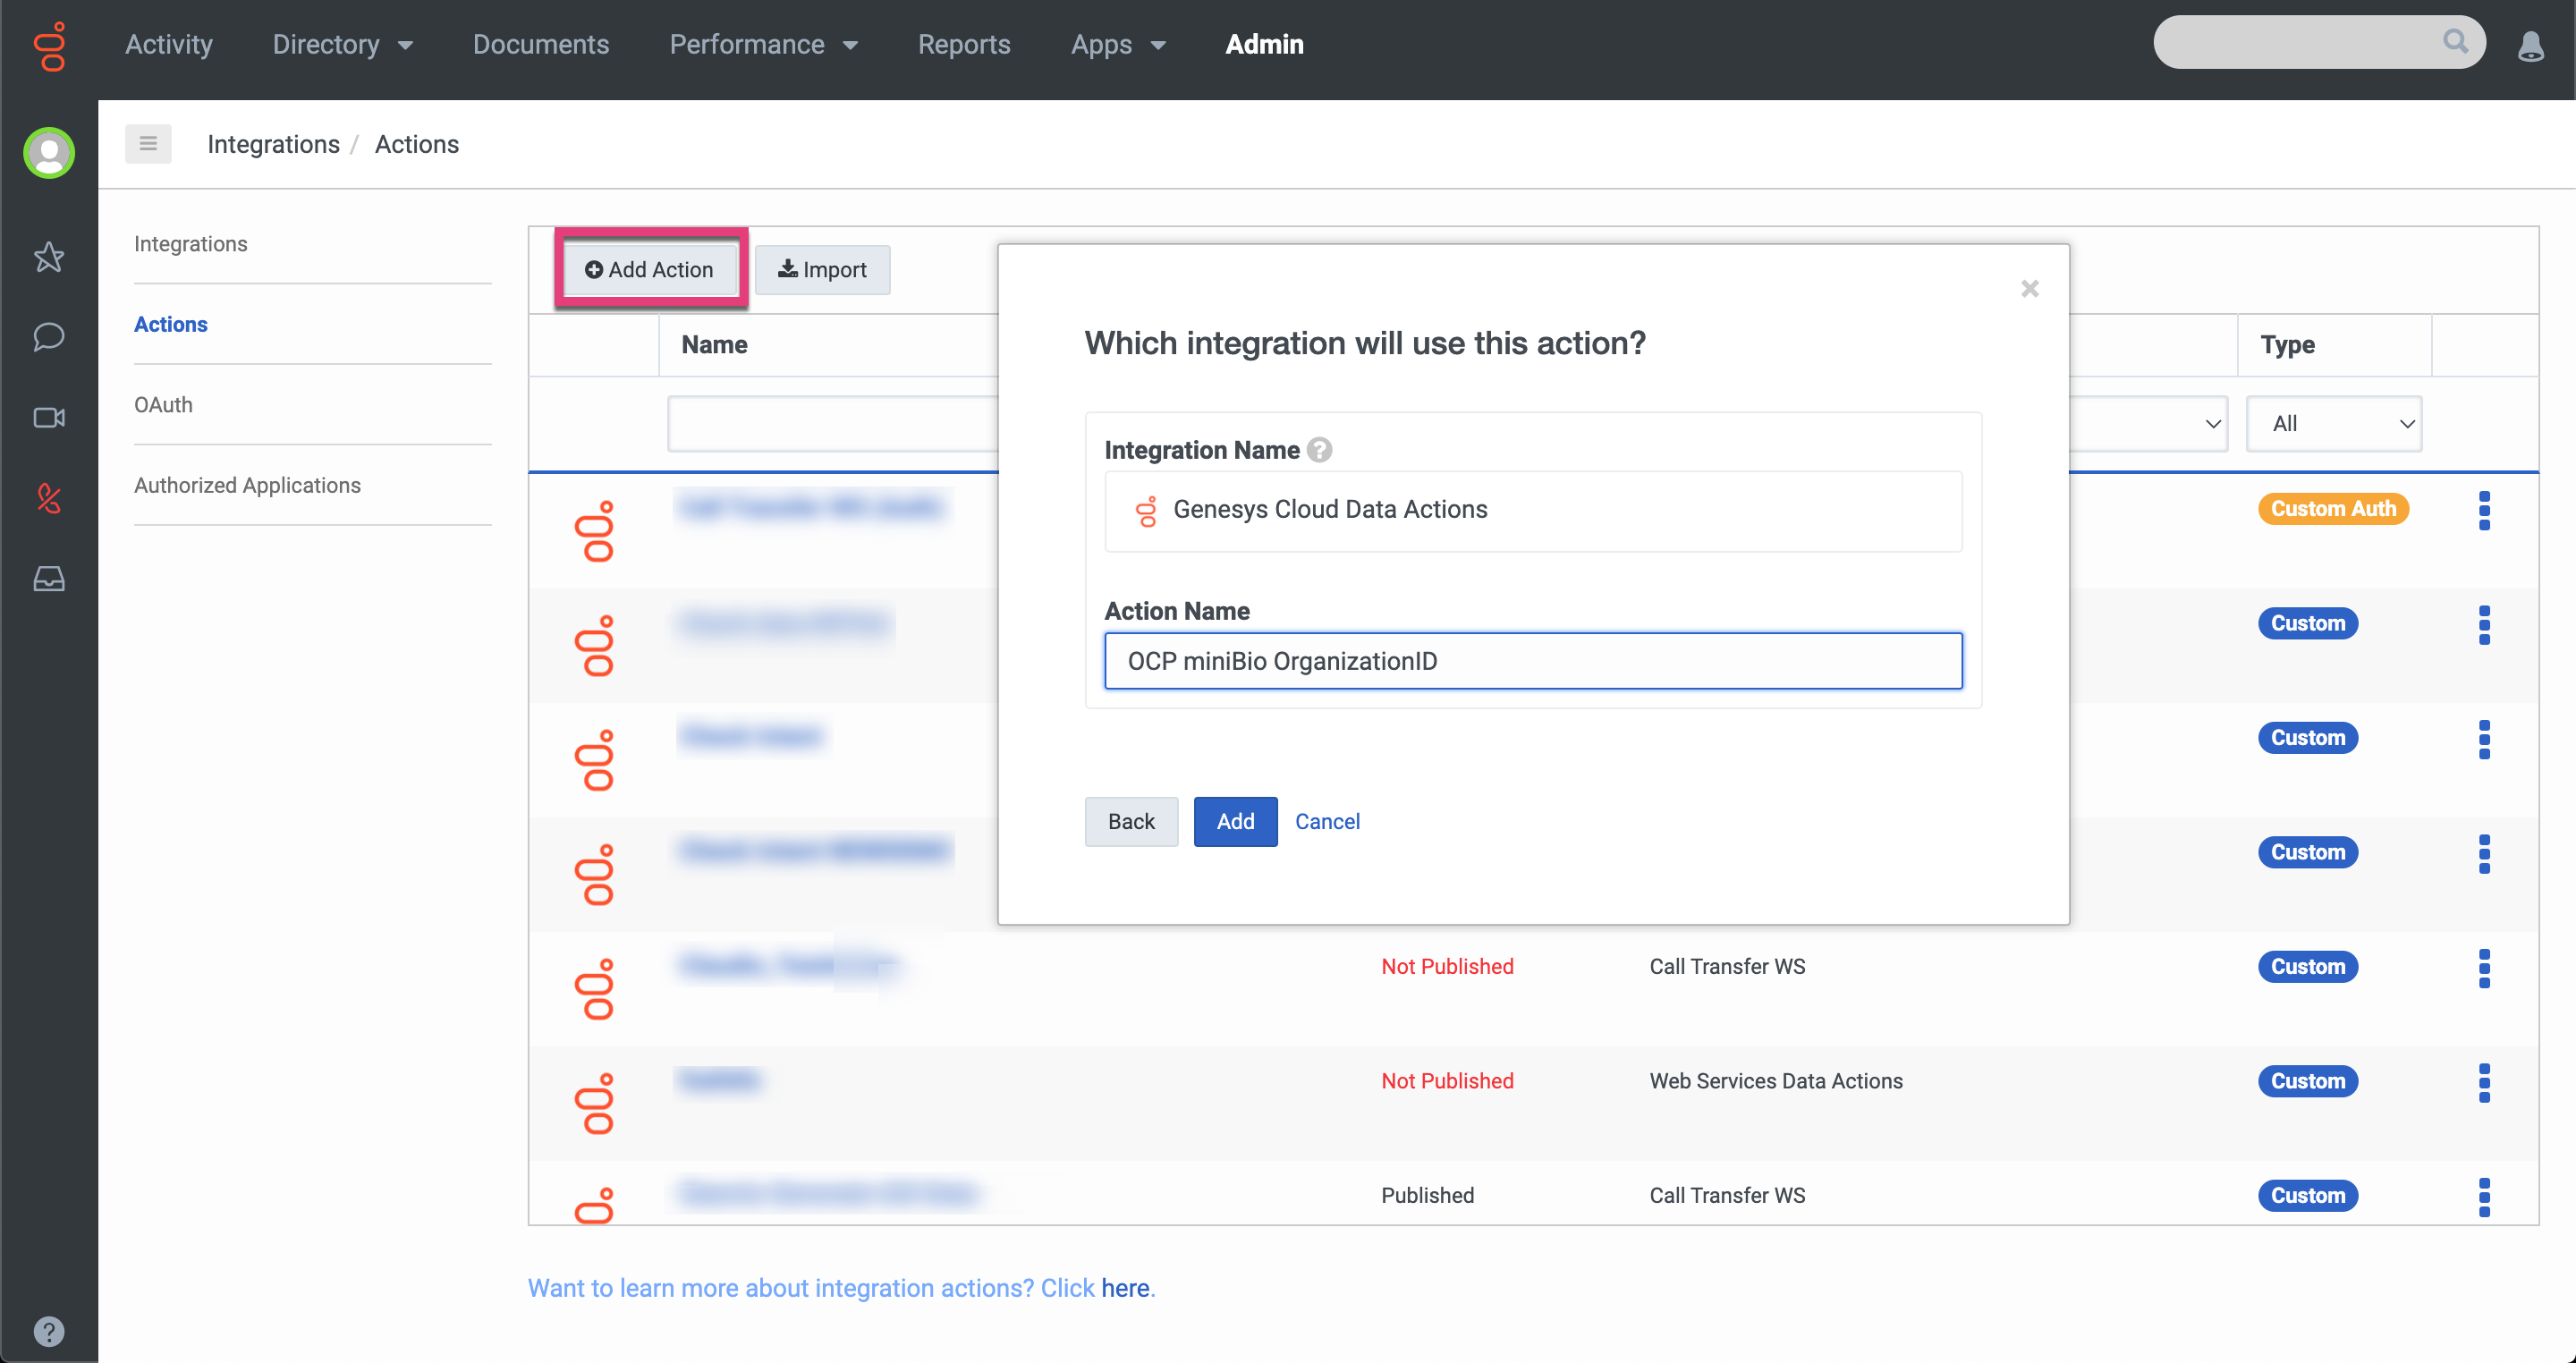
Click the +Add Action button to create a Get Organization ID Data Action.
-
In the pop up window, select the Genesys Cloud Data Actions from the Integration Name dropdown list.
-
Edit the Action Name.
-
Save to continue.
-
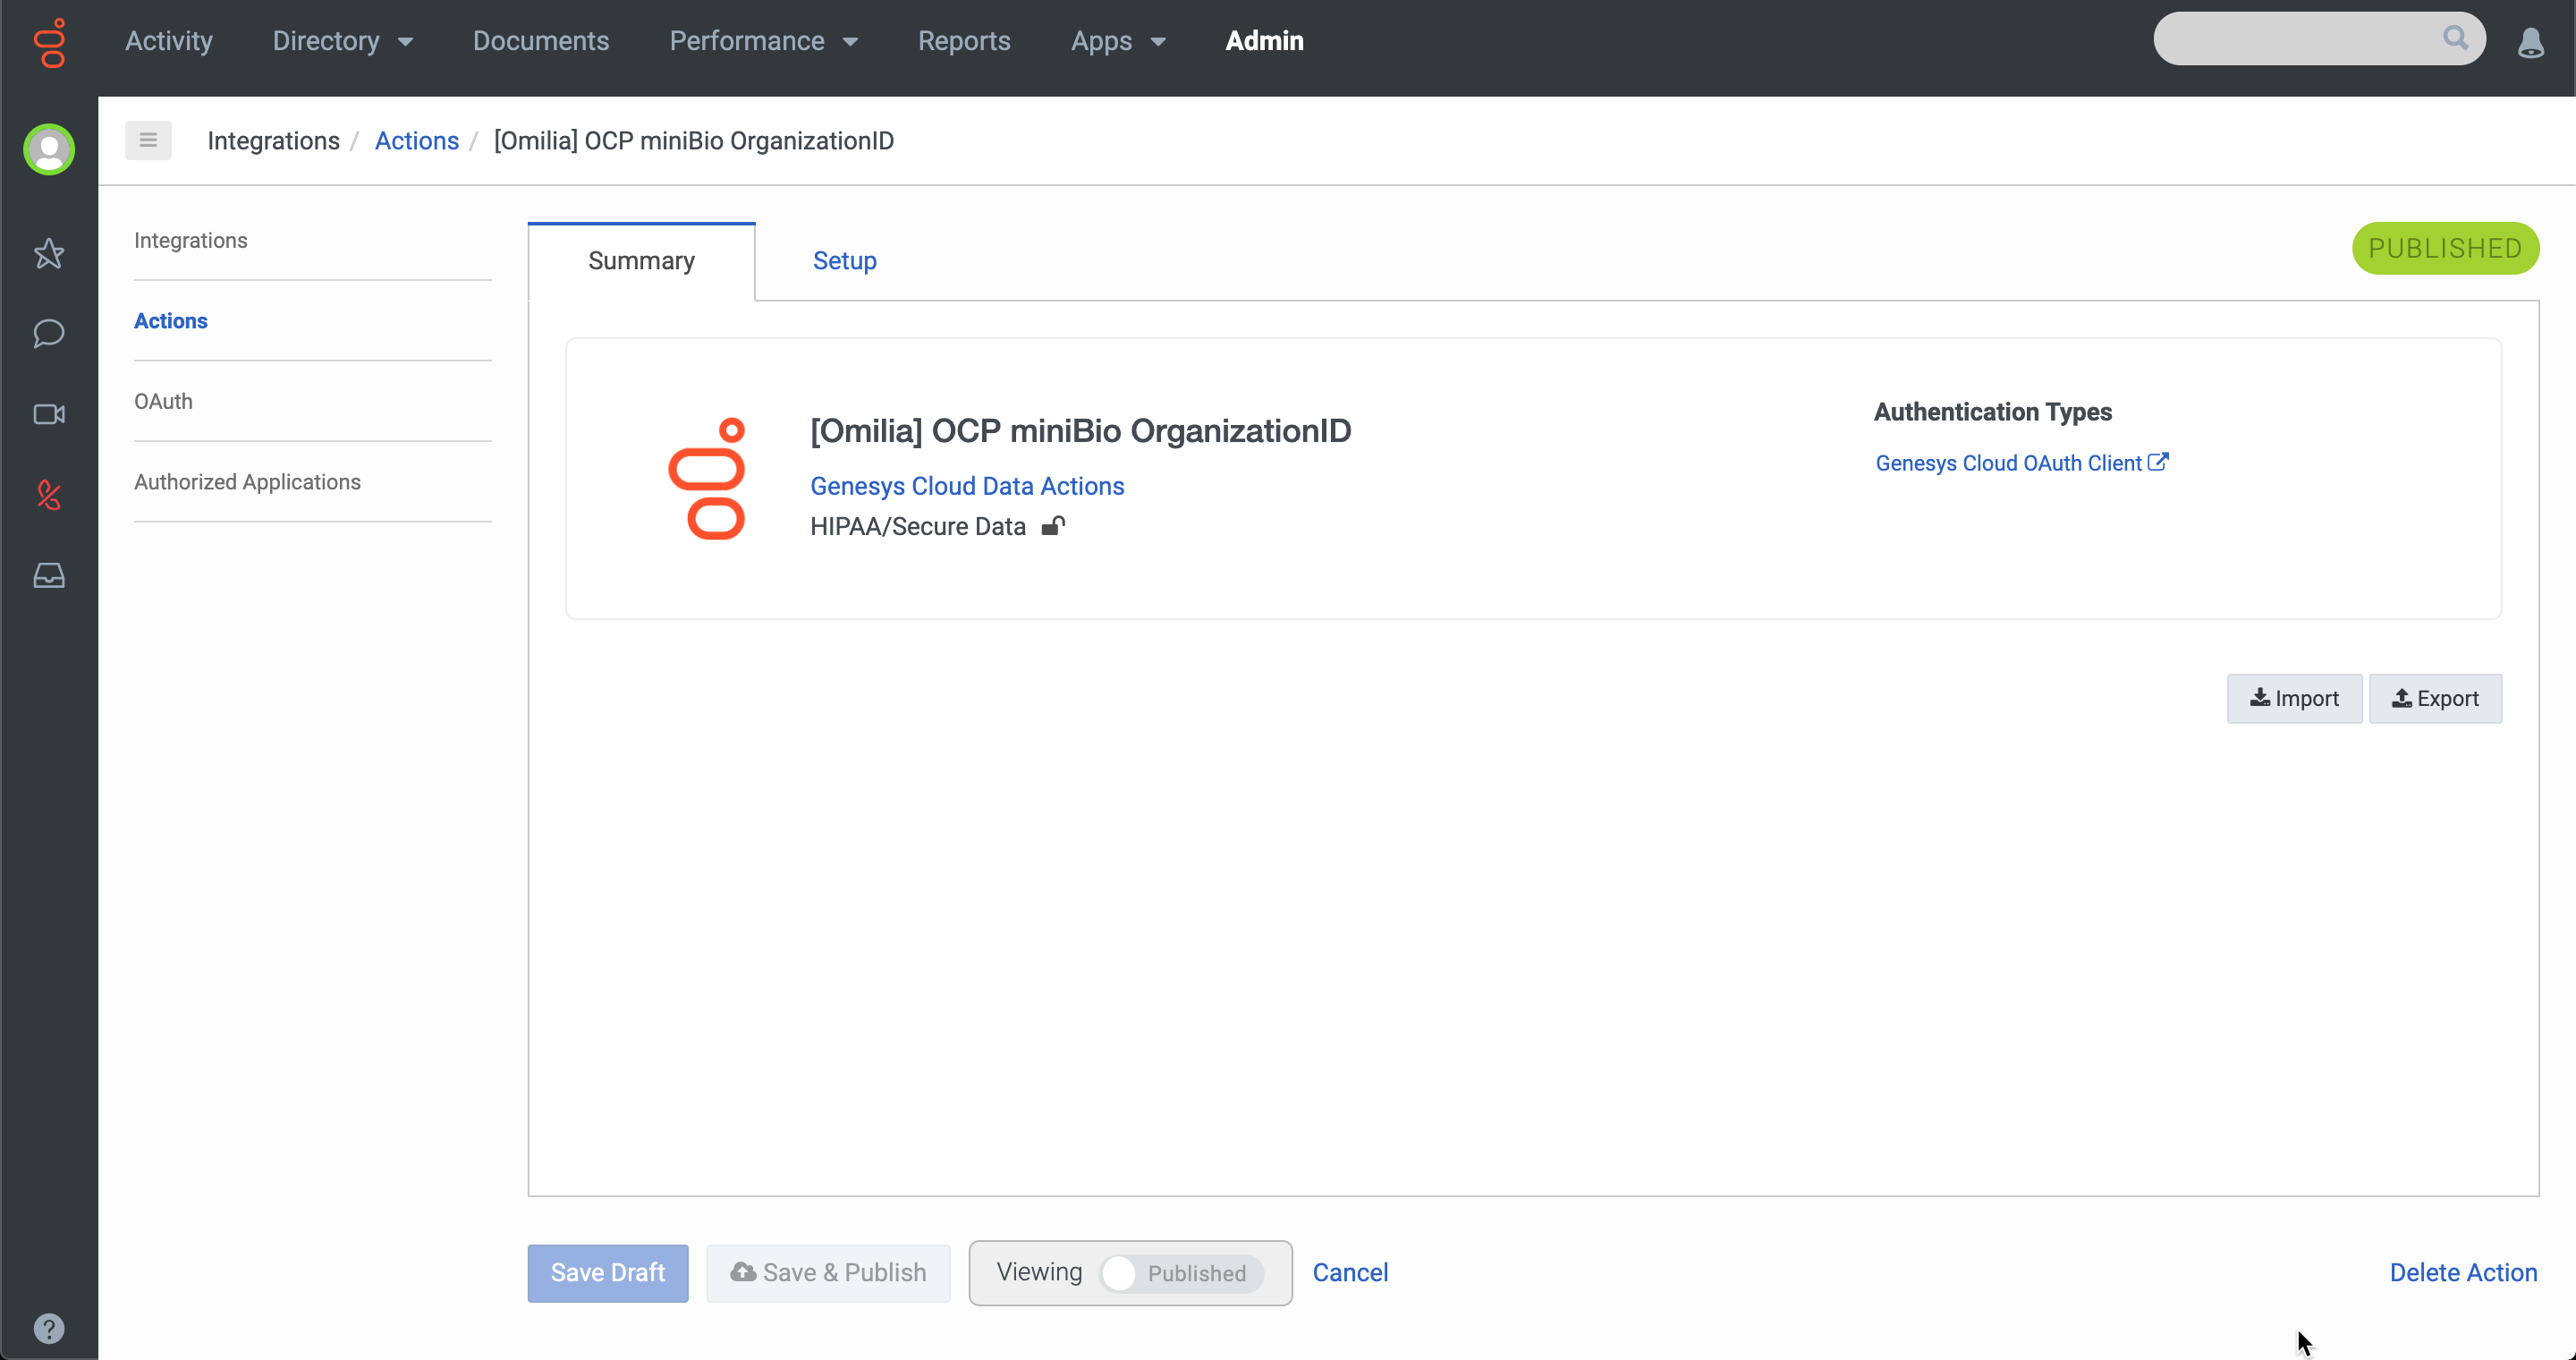
3. Select the created Data Action.
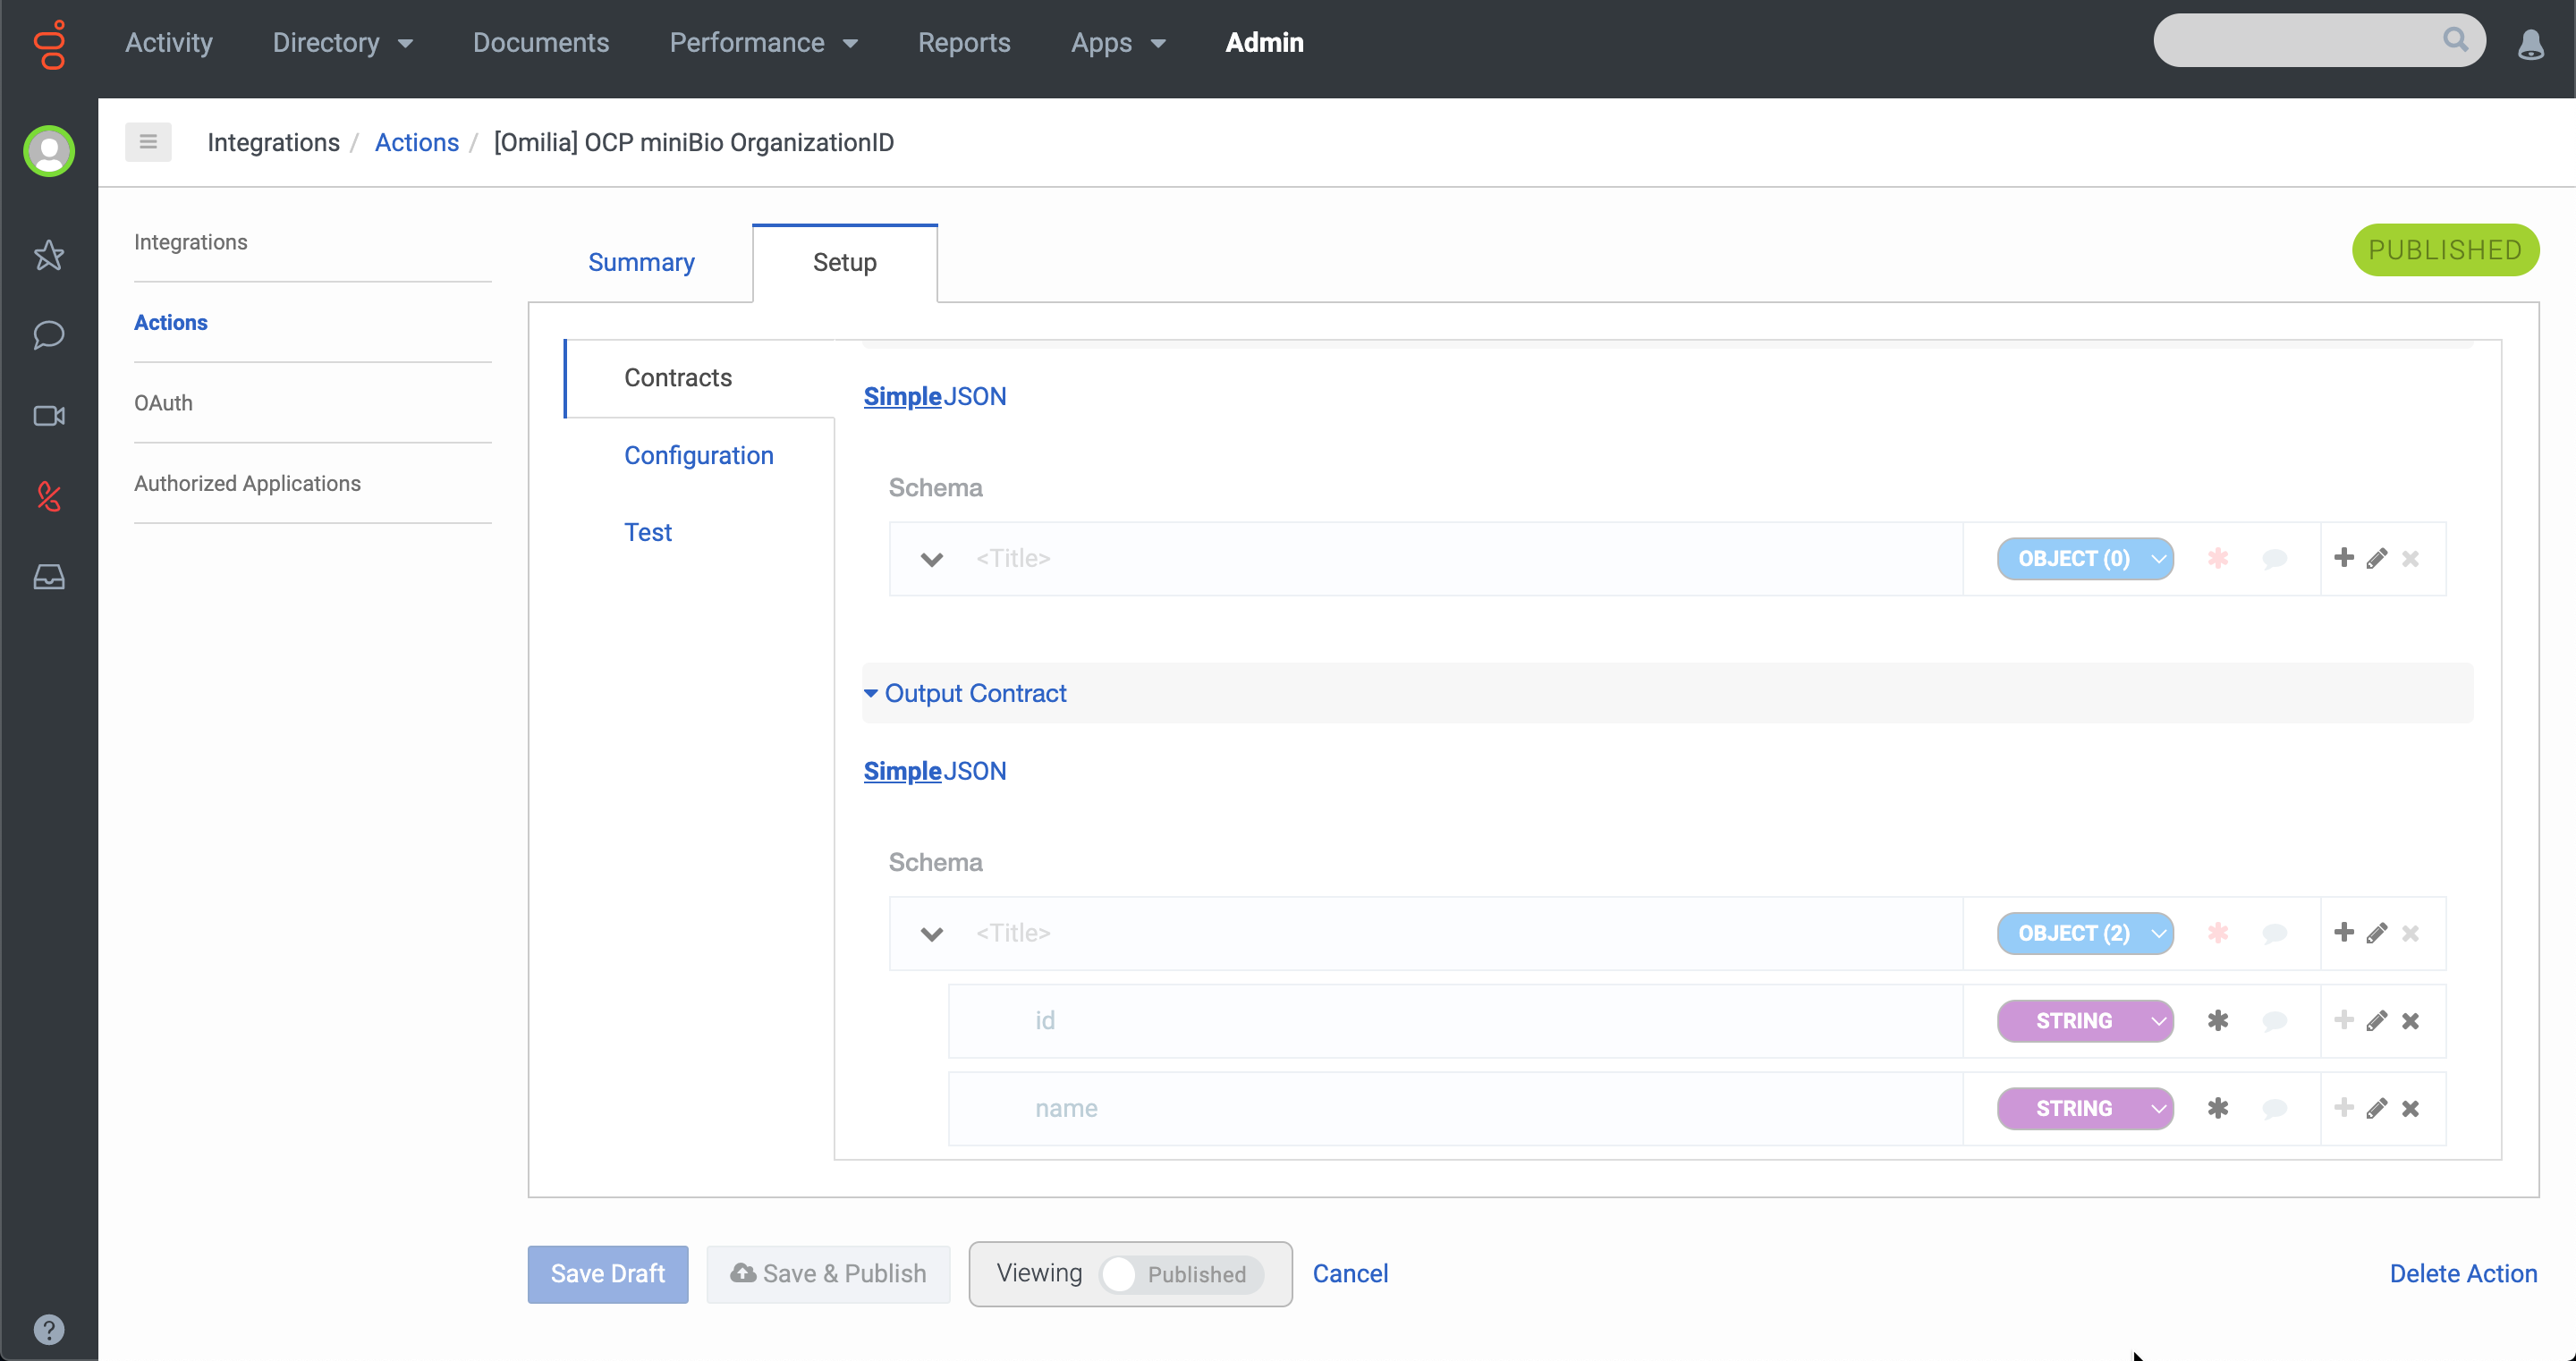
4. Setup the Contracts in the corresponding Setup tab. Add two string objects in the output, one for the ID and one for the name. The input can be left blank.
5. Configure the GET Organization ID Data Action with a GET request.
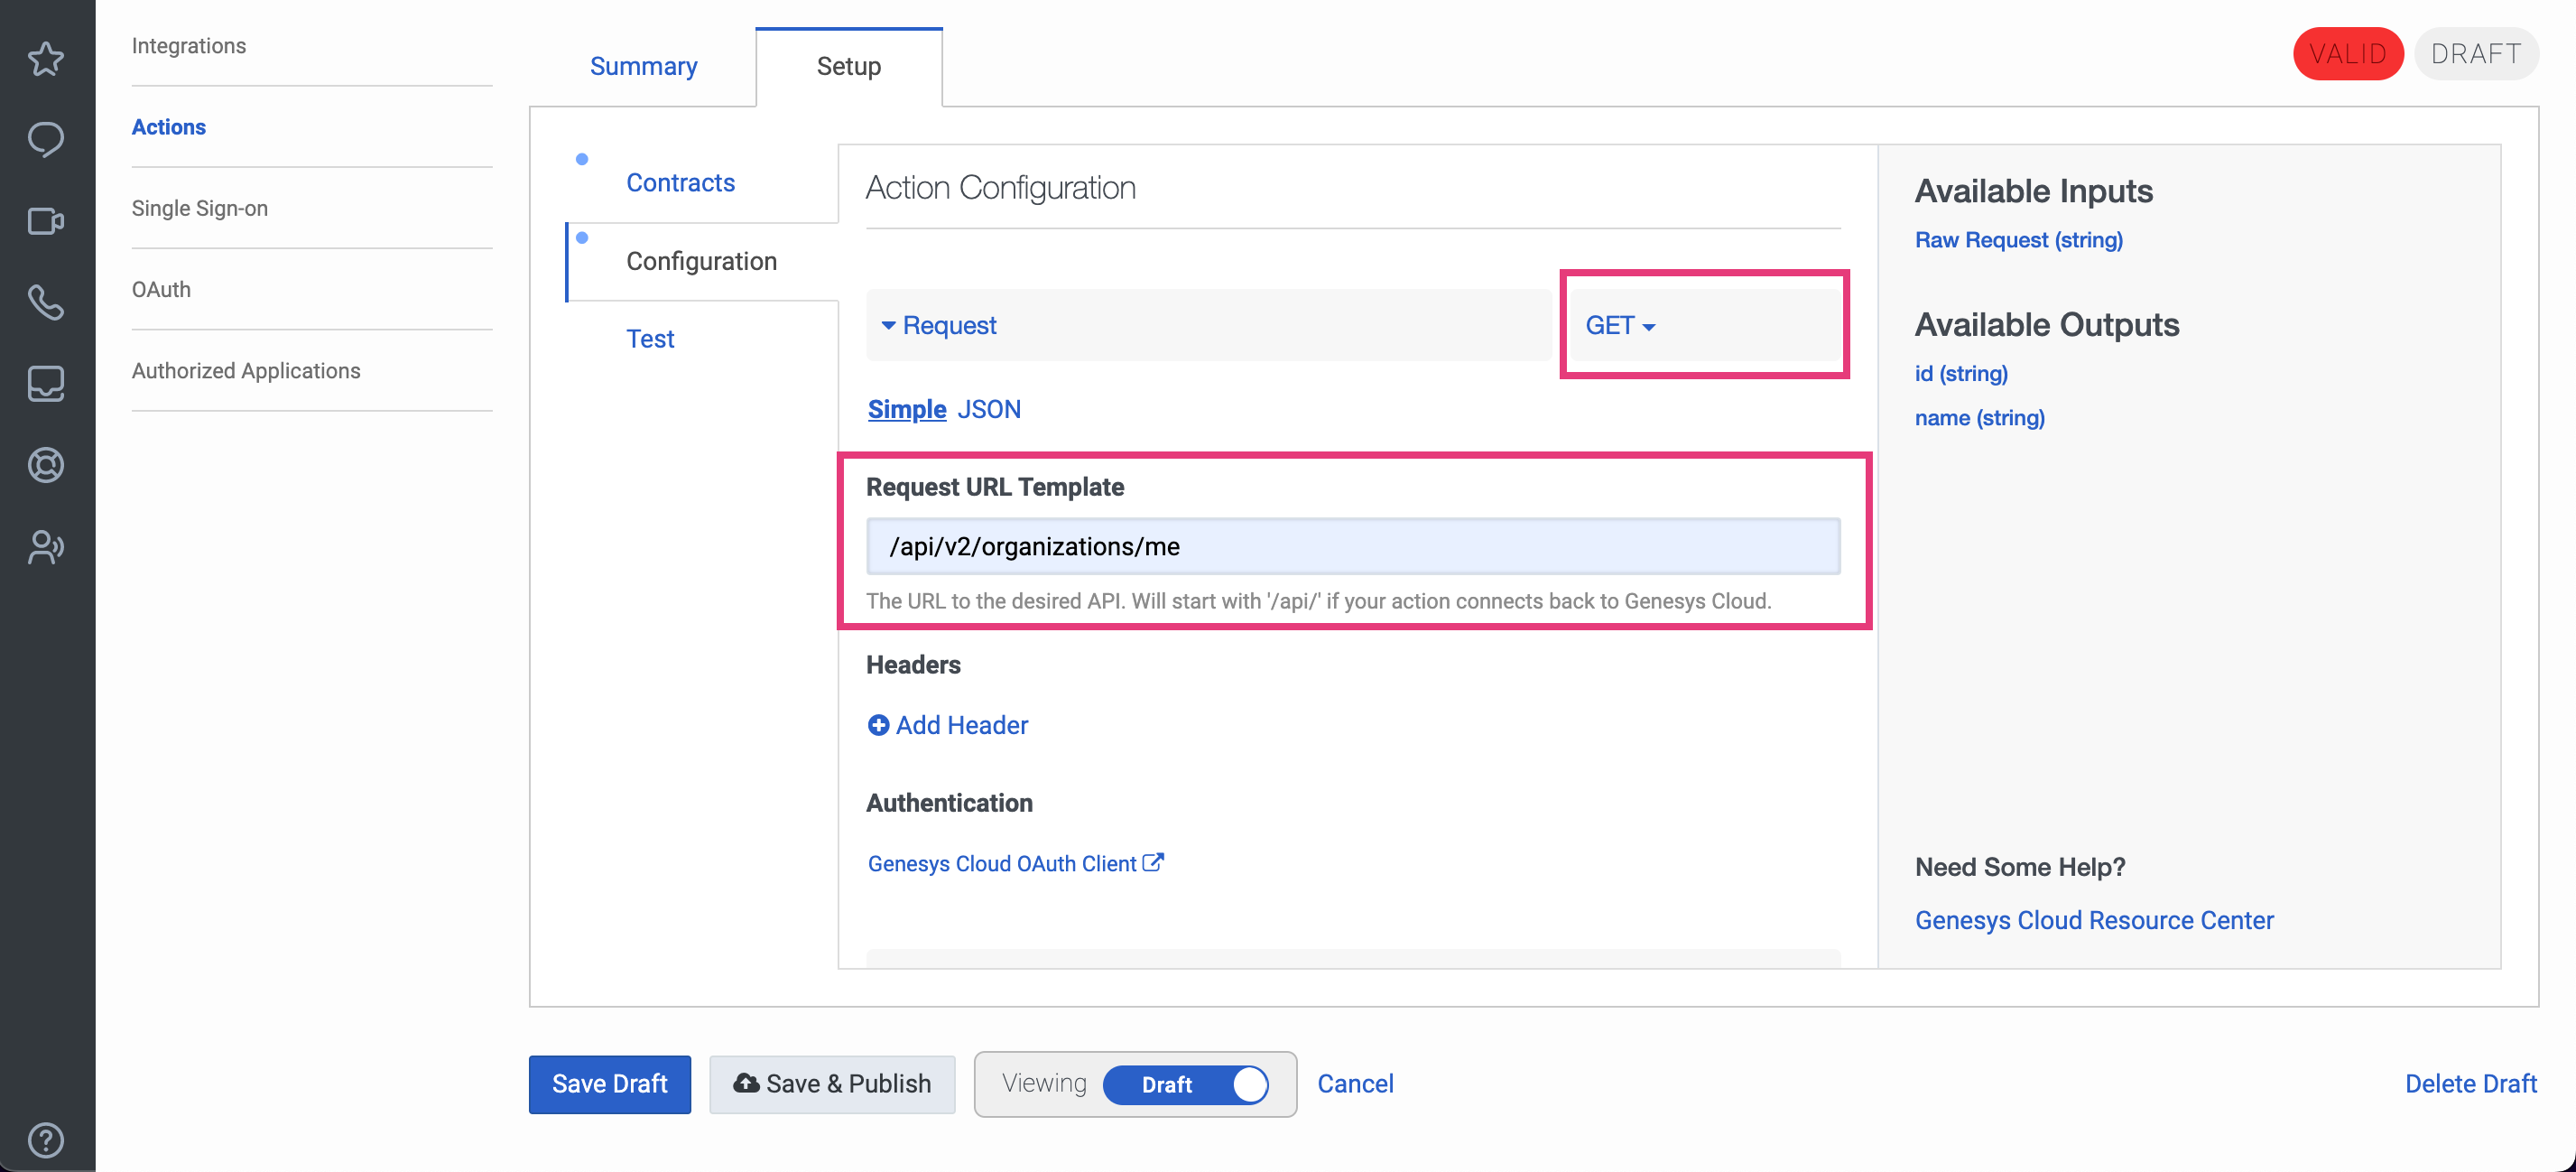
Request URL Template
/api/v2/organizations/me
Response
{
"translationMap": {},
"translationMapDefaults": {},
"successTemplate": "${rawResult}"
}
6. Go to the Test tab to run the test of the Get Organization ID Data Action.
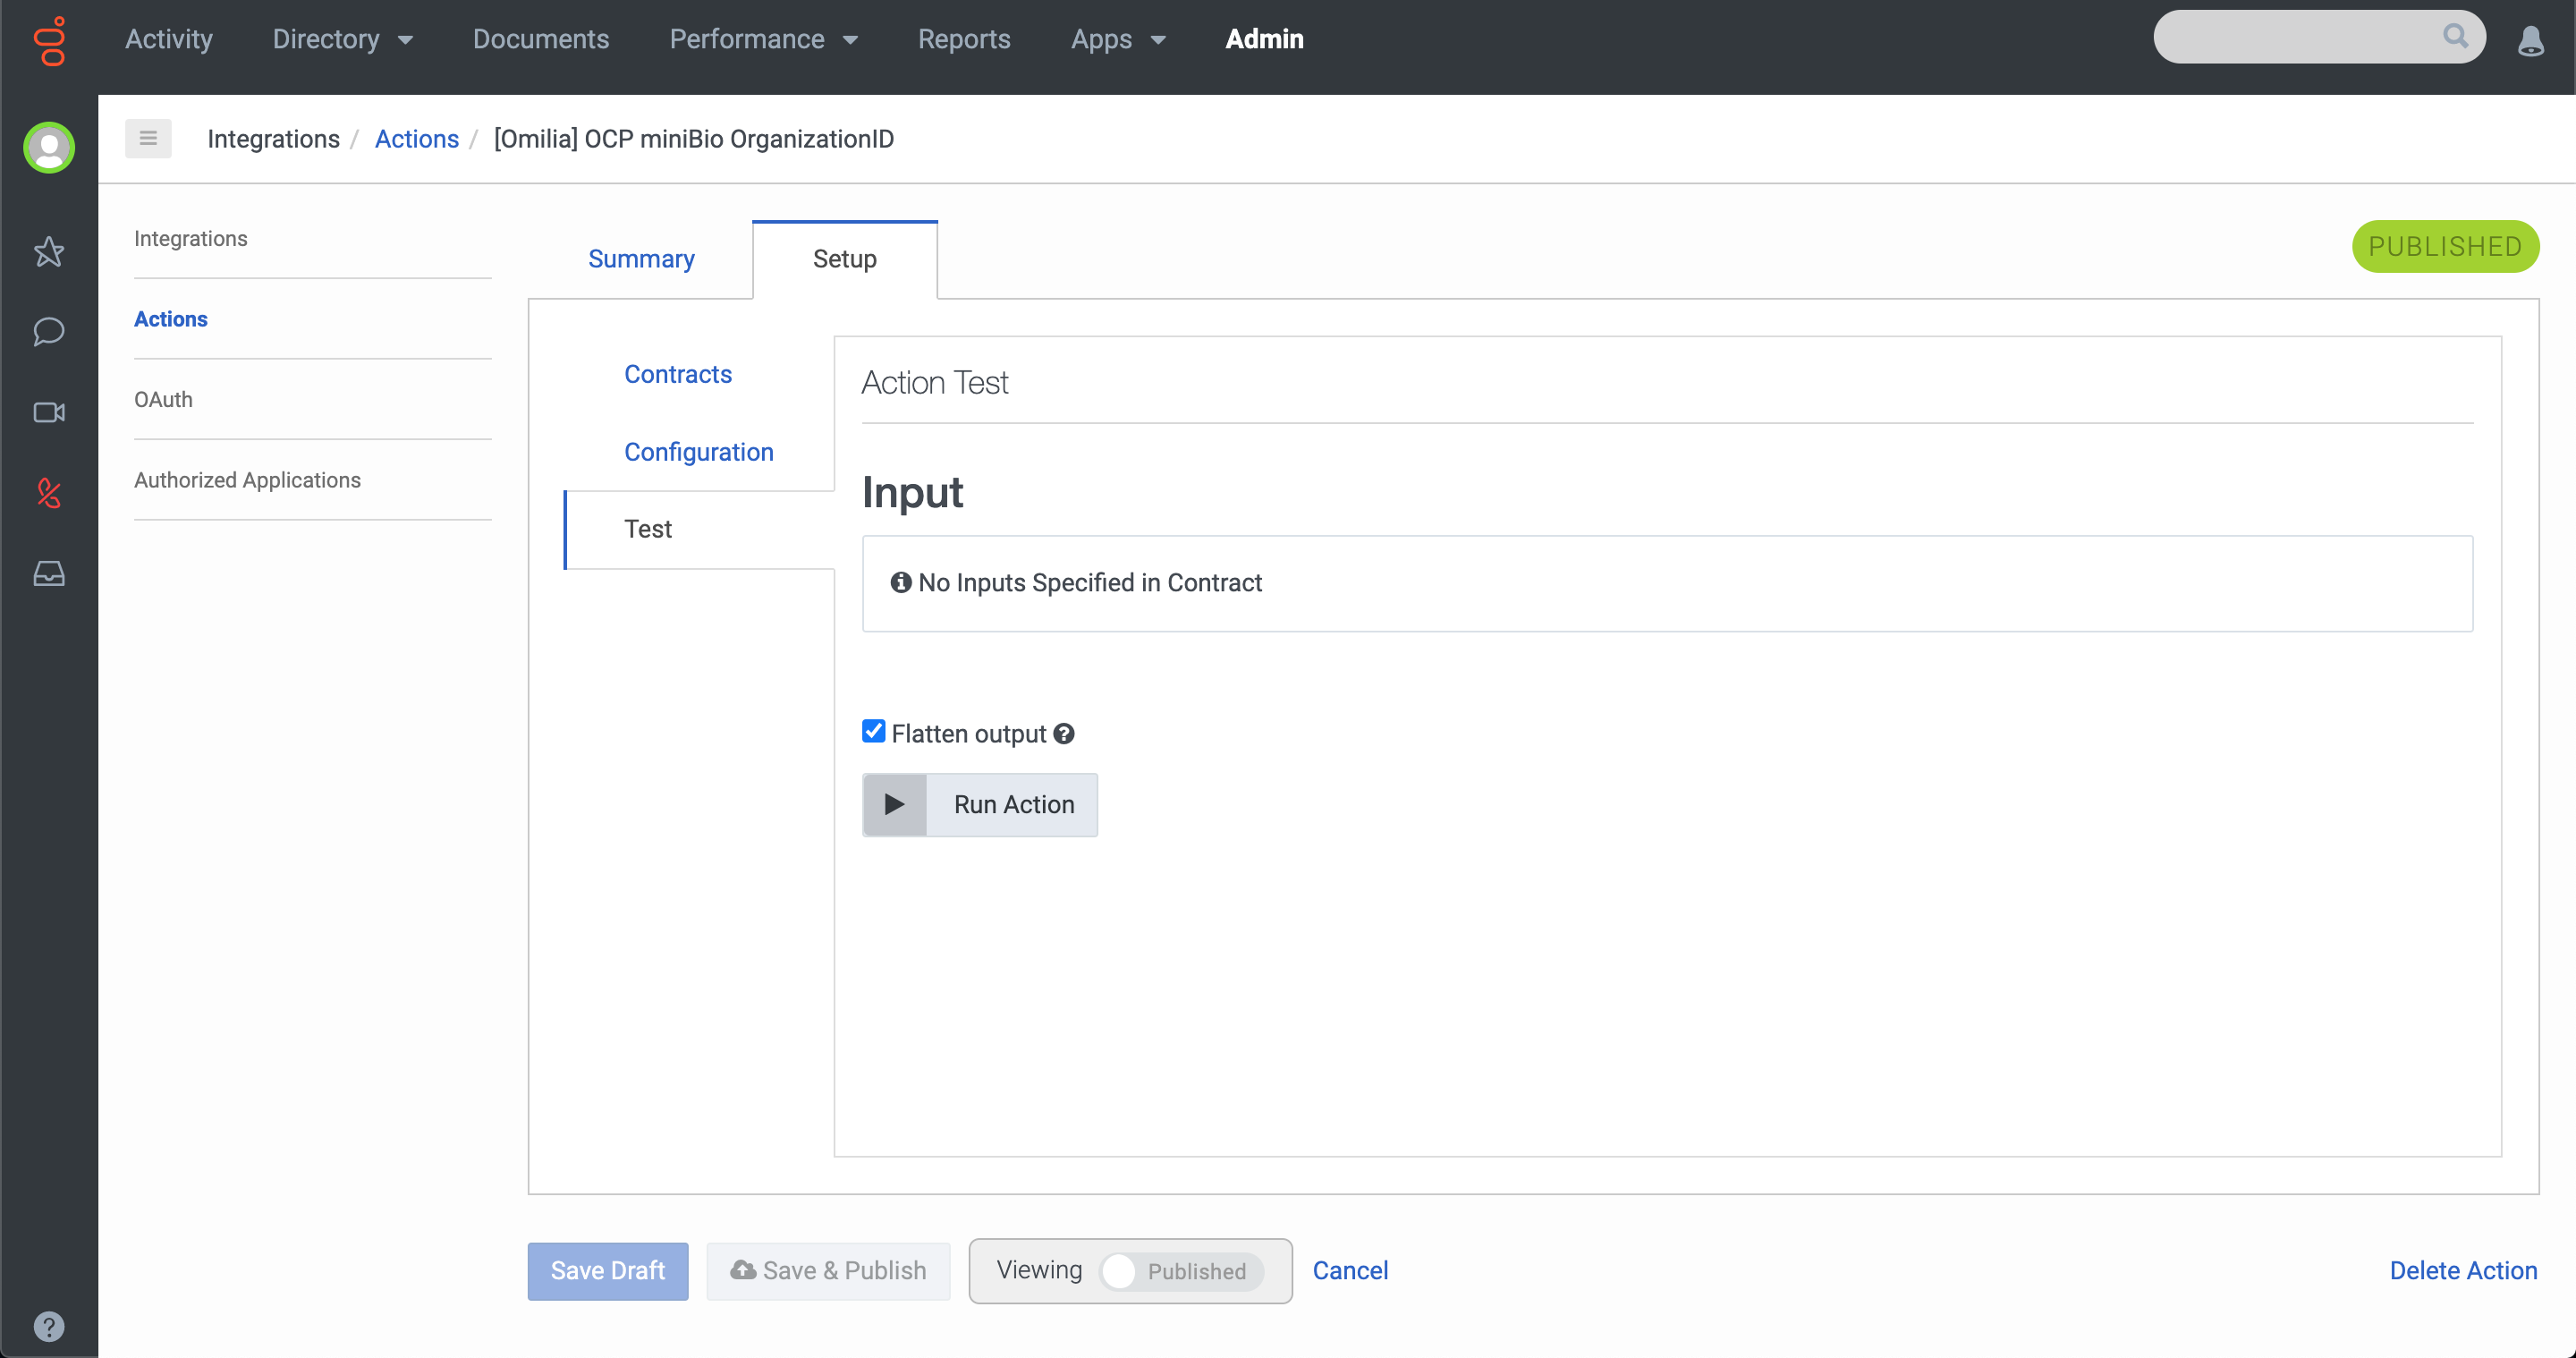
You should be able to see the organization ID and name on the output.
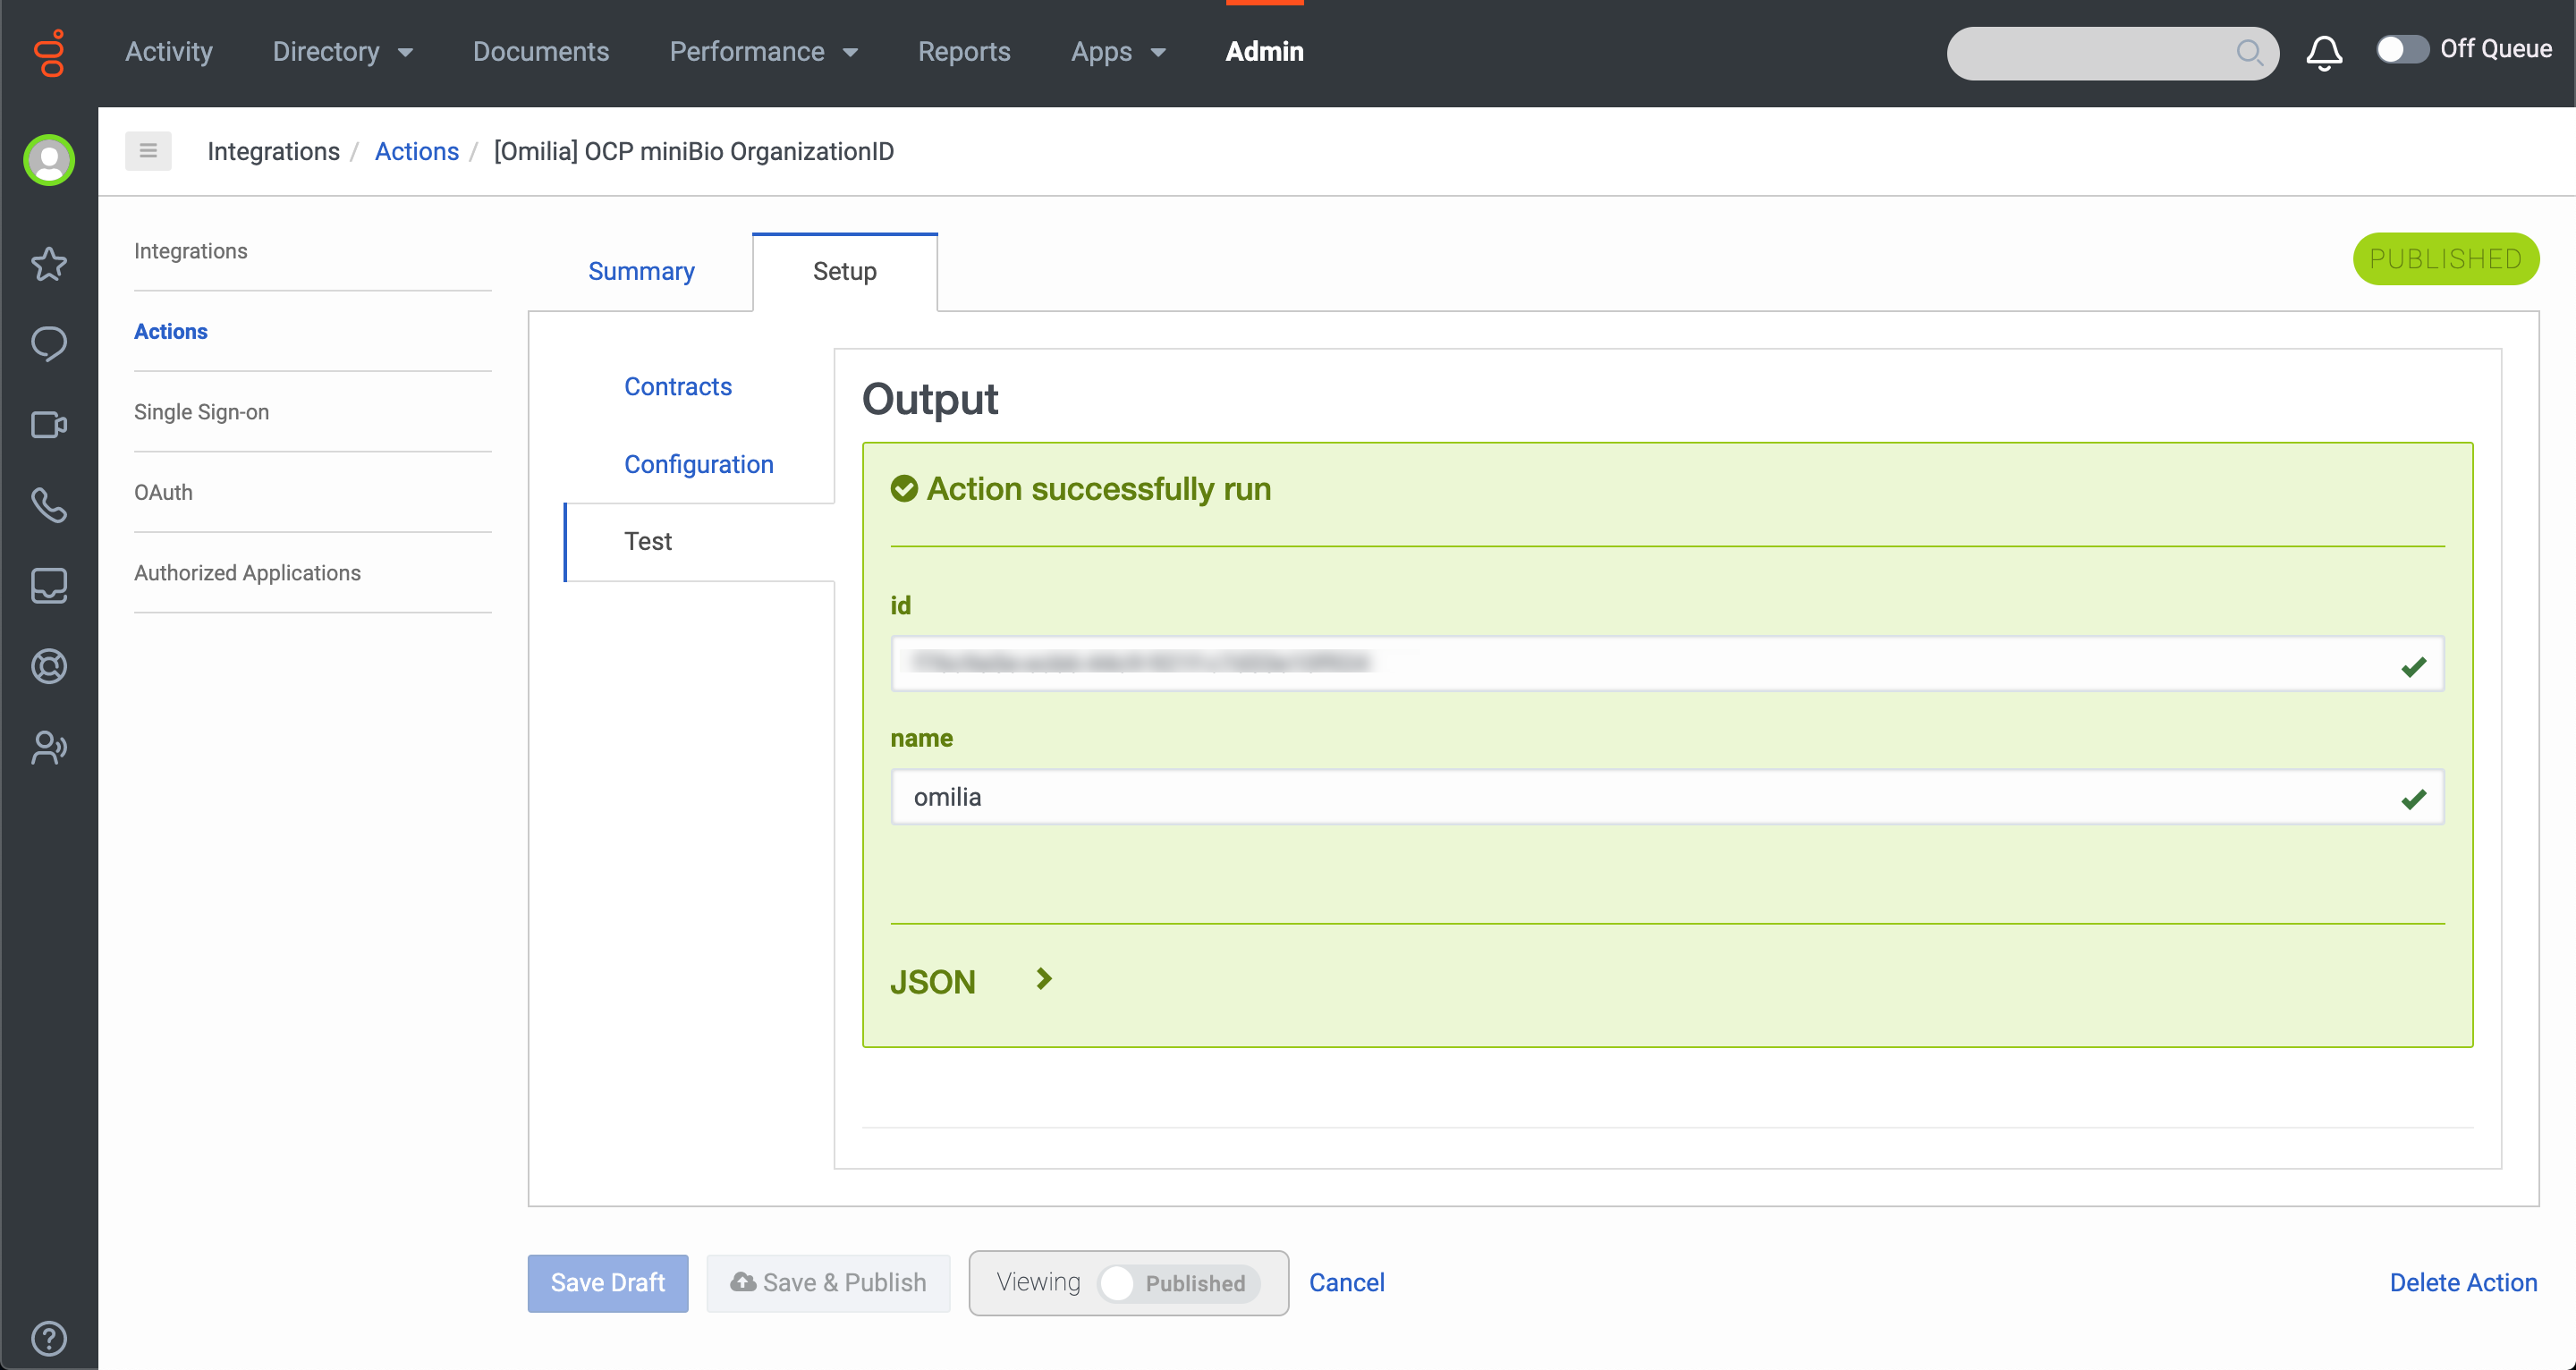
7. Click the Save & Publish button to complete the action setup.
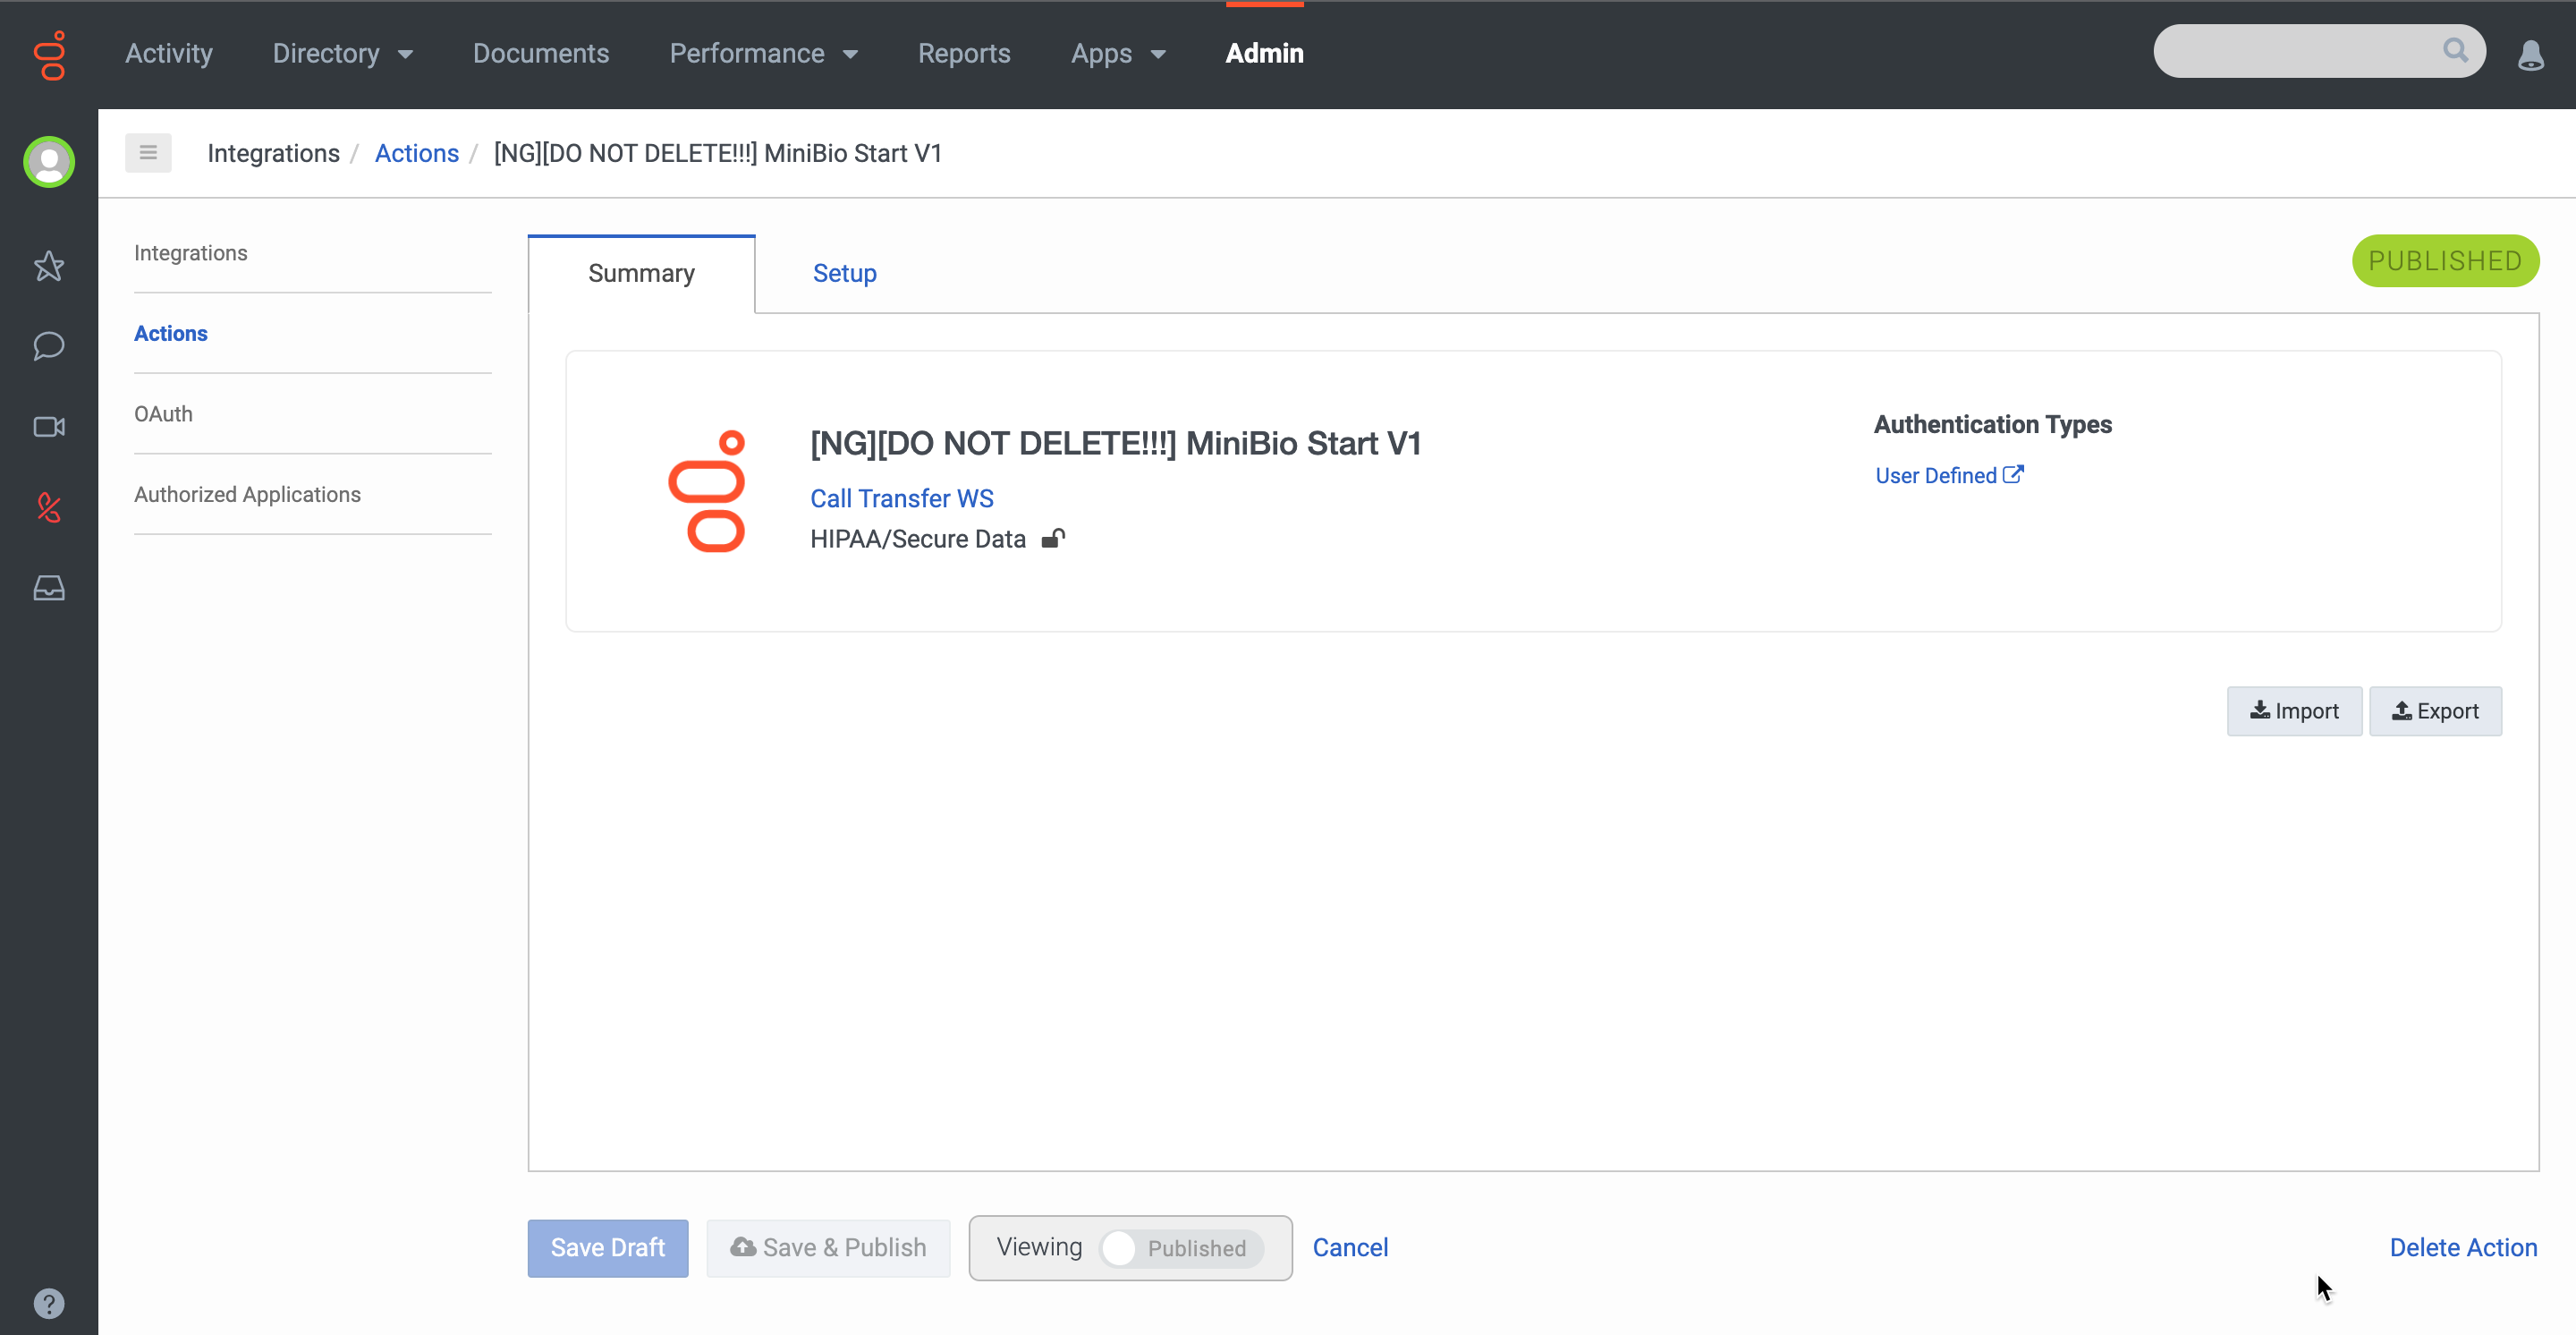
8. Configure a Web Services Data Action.
a. Select the created Data Action.
b. Setup the Contracts in the corresponding tab.
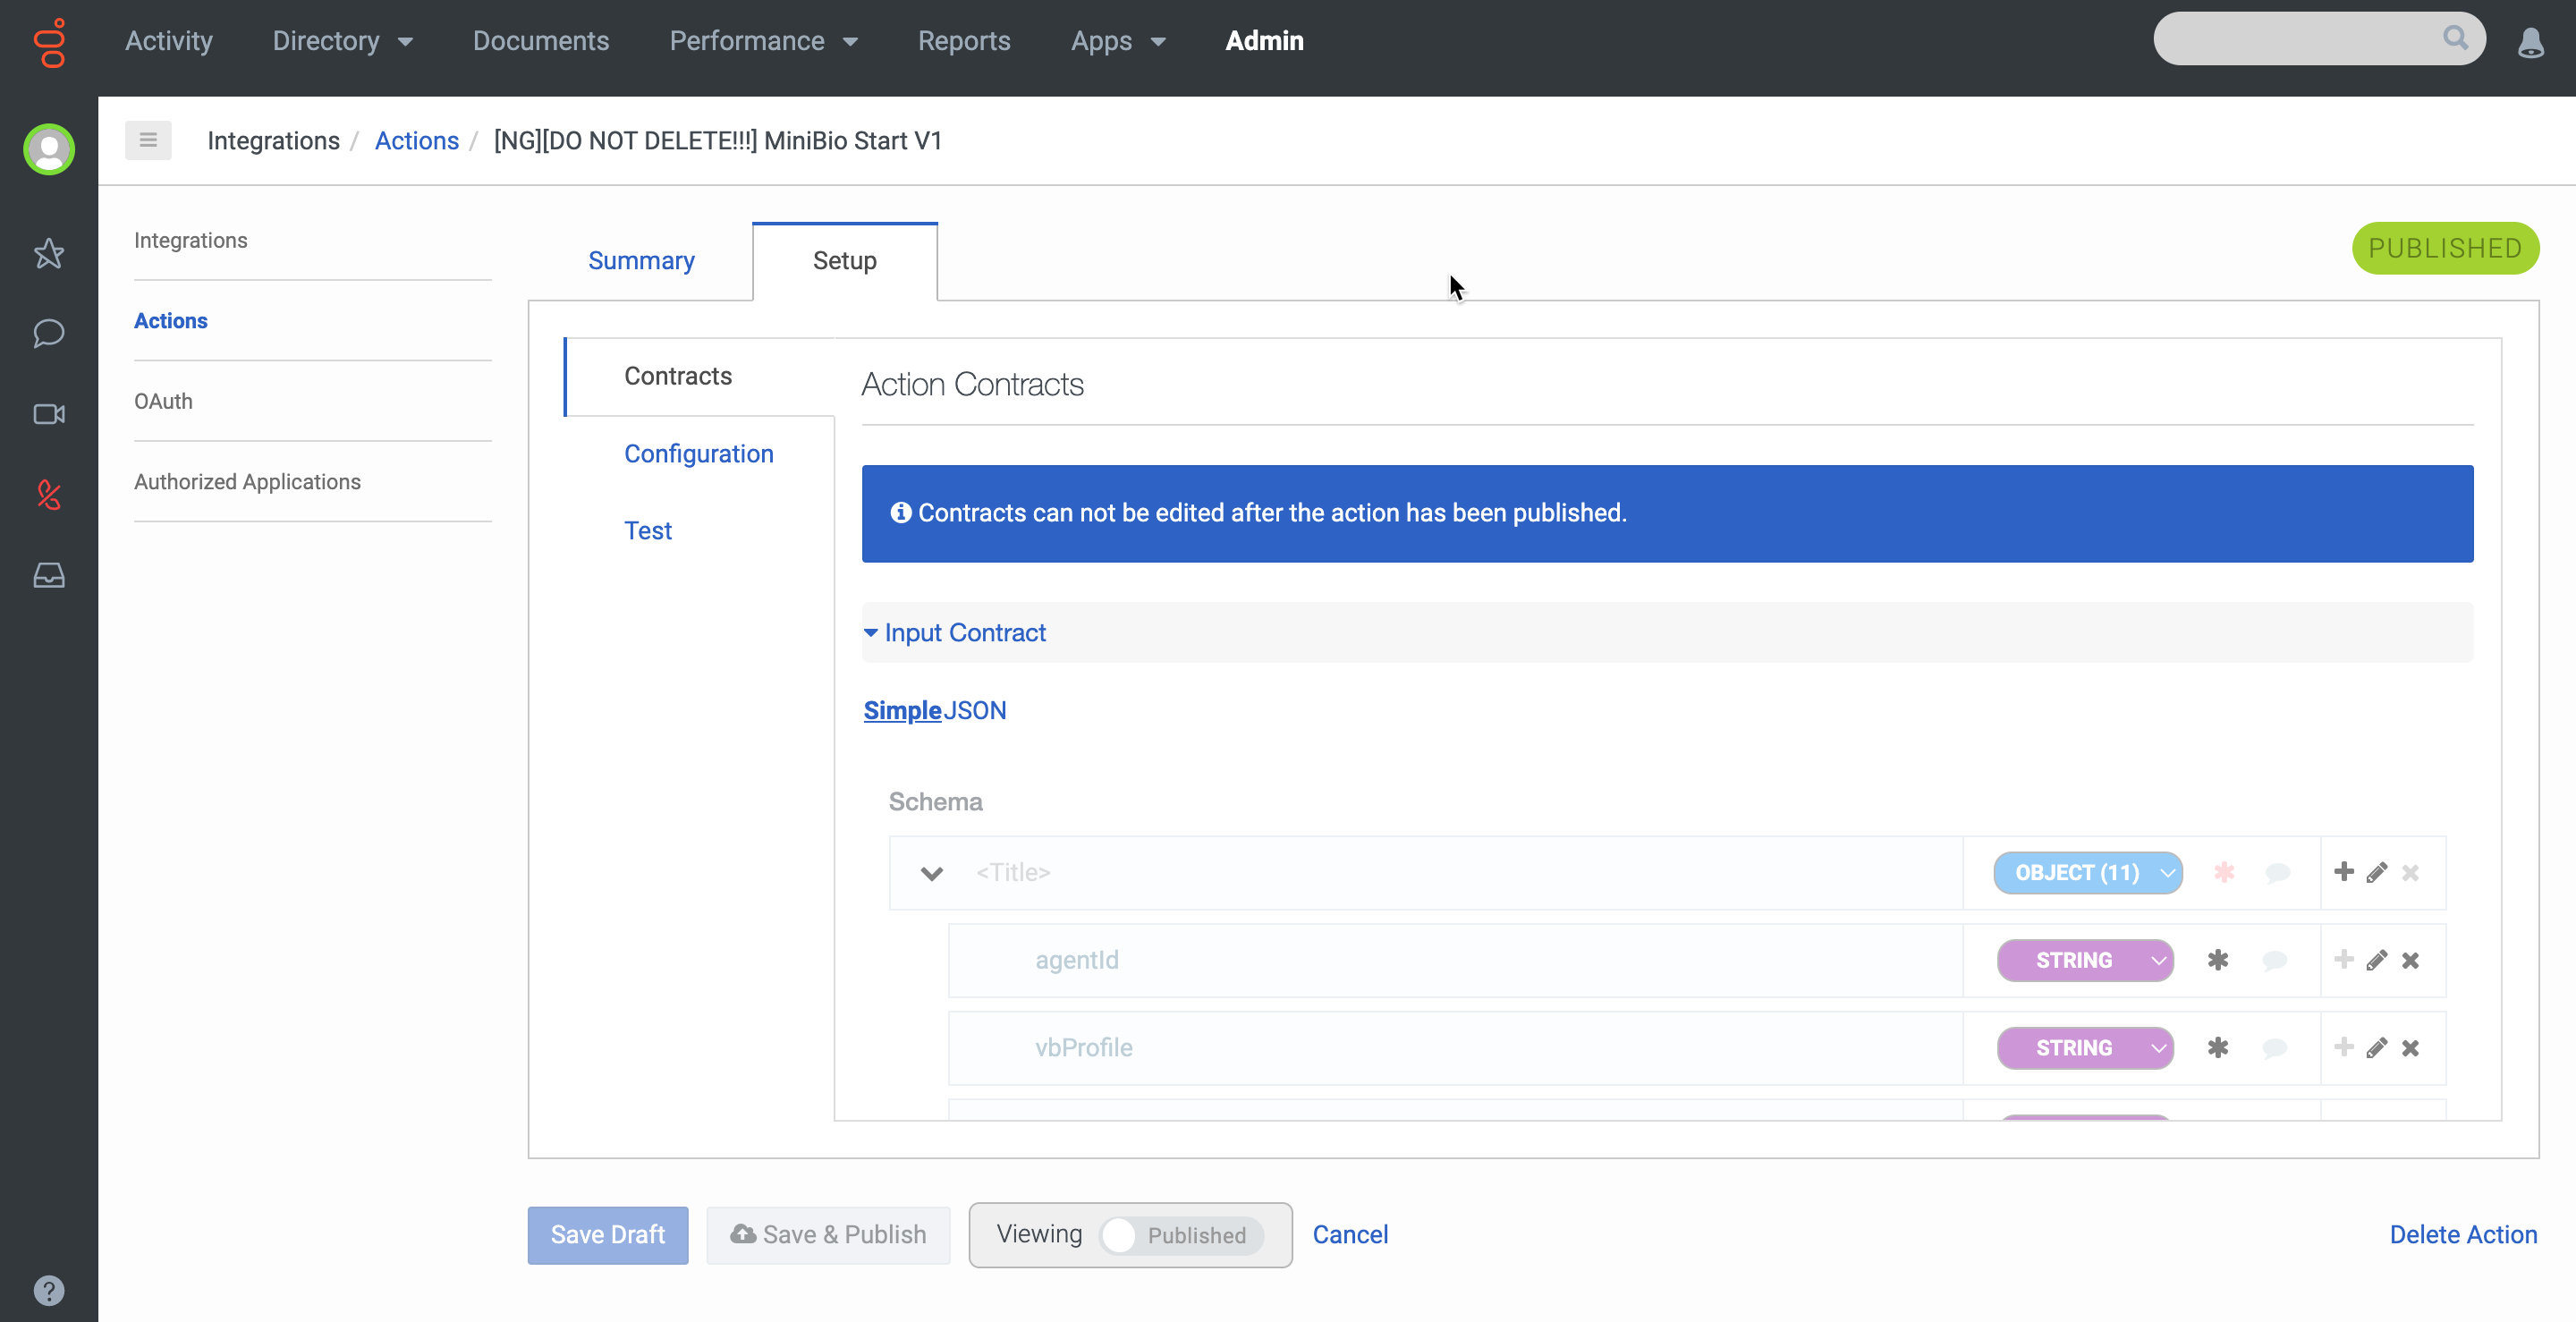
Input CoverifyEnablentract
|
Objects |
Type |
|
|---|---|---|
|
|
Object |
|
|
|
|
string |
|
|
|
string |
|
|
|
string |
|
|
|
string |
|
|
|
string |
|
|
|
string |
|
|
|
string |
|
|
|
string |
|
|
|
string |
|
|
|
string |
|
|
|
string |
|
|
|
boolean |
|
|
|
boolean |
Output Contract
|
Objects |
Type |
||
|
|
object |
||
|
|
|
object |
|
|
|
|
|
string |
c. Configure the data action.
The authorization bearer token is created in the Access Management Tab in Console.

Request URL Template
<region>.ocp.ai/agent-vb-mw/api/
Example: https://us1-m.ocp.ai/agent-vb-mw/api/token/
Headers
Authorization: Bearer $theTokenGeneratedByTheTokenService
Request Body Template
{
    "agentId": "${input.agentId}",
    "masterId": "${input.masterId}",
    "tenantId": "${input.tenantId}",
    "vbProfile": "${input.vbProfile}",
    "agentSkill": "${input.agentSkill}",
    "ccaasProvider": "GENESYS",
    "customProperties": {
      "memberID": "${input.memberID}",
      "dob": "${input.dob}",
      "phoneNumber": "${input.phoneNumber}",
      "validated": "${input.validated}",
      "enrolled": "${input.enrolled}"
    },
    "streamEnrol":false,
    "verifyEnable": false
}
Response
{
  "translationMap": {},
  "translationMapDefaults": {},
  "successTemplate": "${rawResult}"
}
Request Body Parameters
The request body for the agent-side middleware API includes the parameters listed in the table below:
|
Parameter |
Mandatory |
Description |
Variable |
|---|---|---|---|
|
|
Yes |
The agent's unique identifier. |
|
|
|
Yes |
The master identifier for the interaction. |
|
|
|
Yes |
The tenant's unique identifier. |
|
|
|
Yes |
The specific Voice Biometrics profile to use. |
|
|
|
Yes |
The agent's skill group or designation. |
|
|
|
Yes |
The Contact Center as a Service (CCaaS) provider. |
|
|
|
Yes |
An object containing customer-specific data. |
|
|
|
No |
A boolean flag to enable streaming enrollment. |
|
|
|
No |
A boolean flag to enable verification. |
|
Custom Properties
The customProperties object is used to pass additional, non-mandatory customer details.
|
Parameter |
Mandatory |
Description |
Example Value |
|---|---|---|---|
|
|
No |
The customer's unique member identifier. |
|
|
|
No |
The customer's date of birth. |
|
|
|
No |
The customer's phone number. |
|
|
|
No |
A boolean flag if identity has been validated. |
|
|
|
No |
A boolean flag if customer is already enrolled. |
|
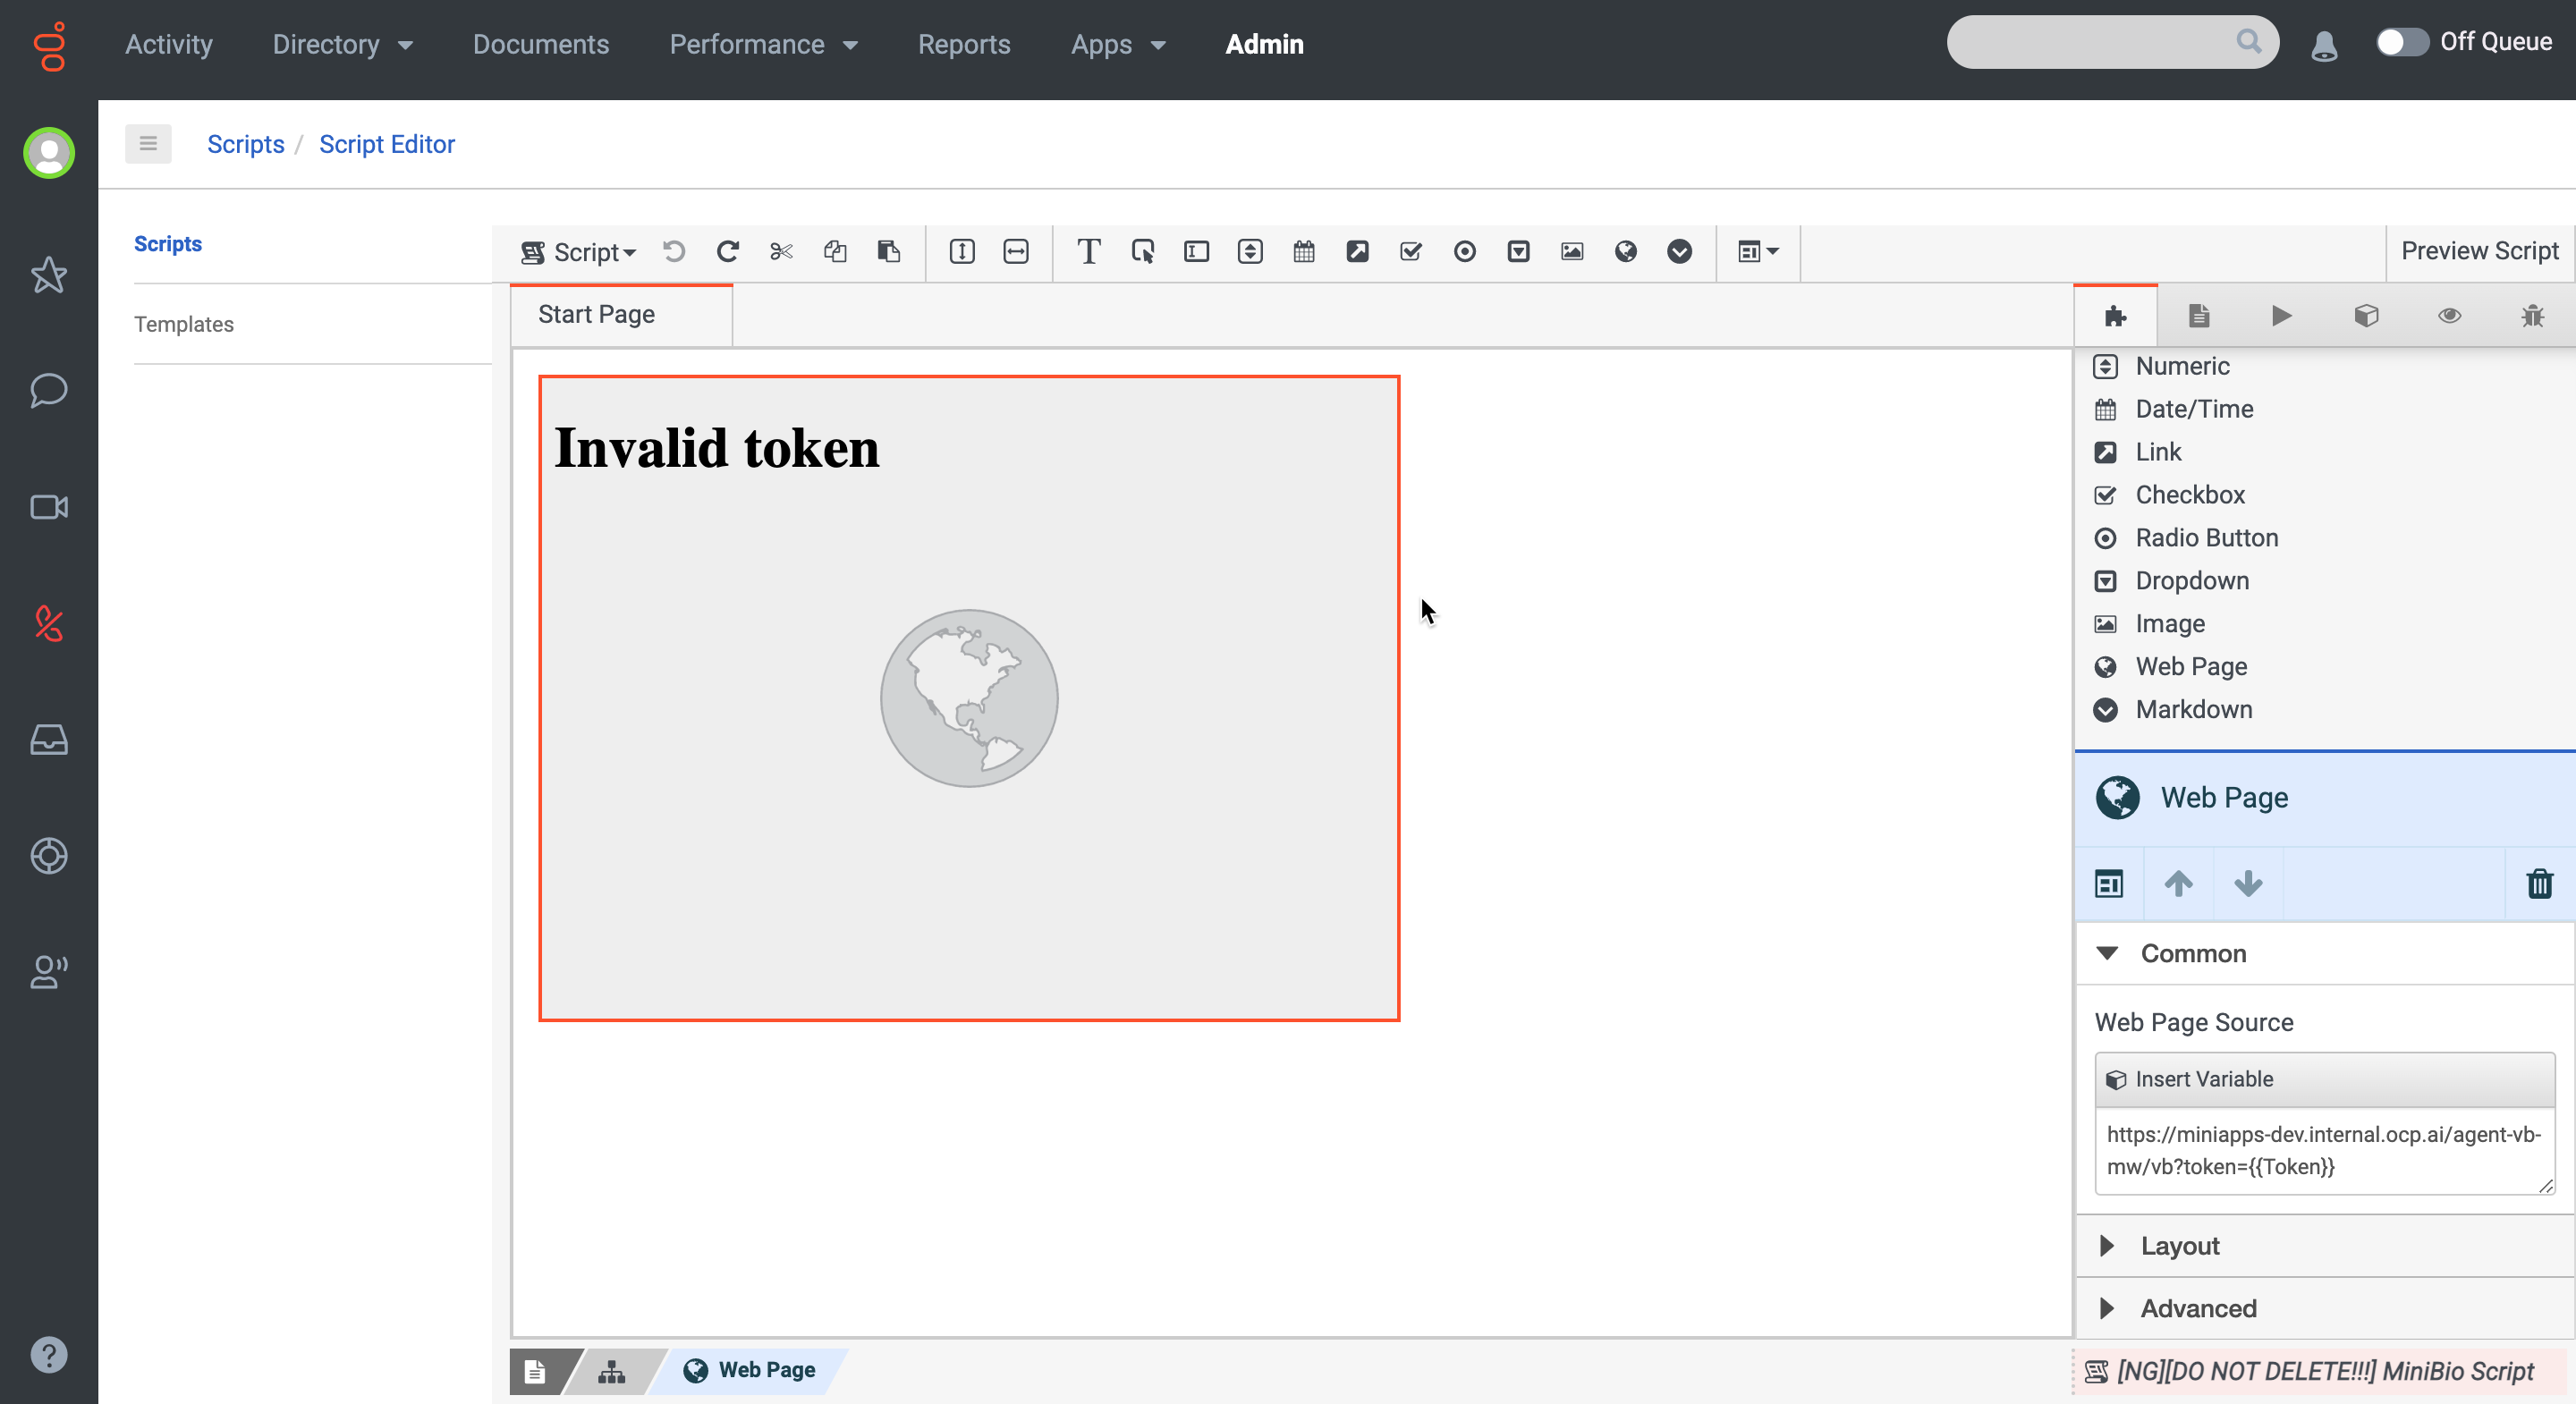
Create Agent’s Custom Dashboard
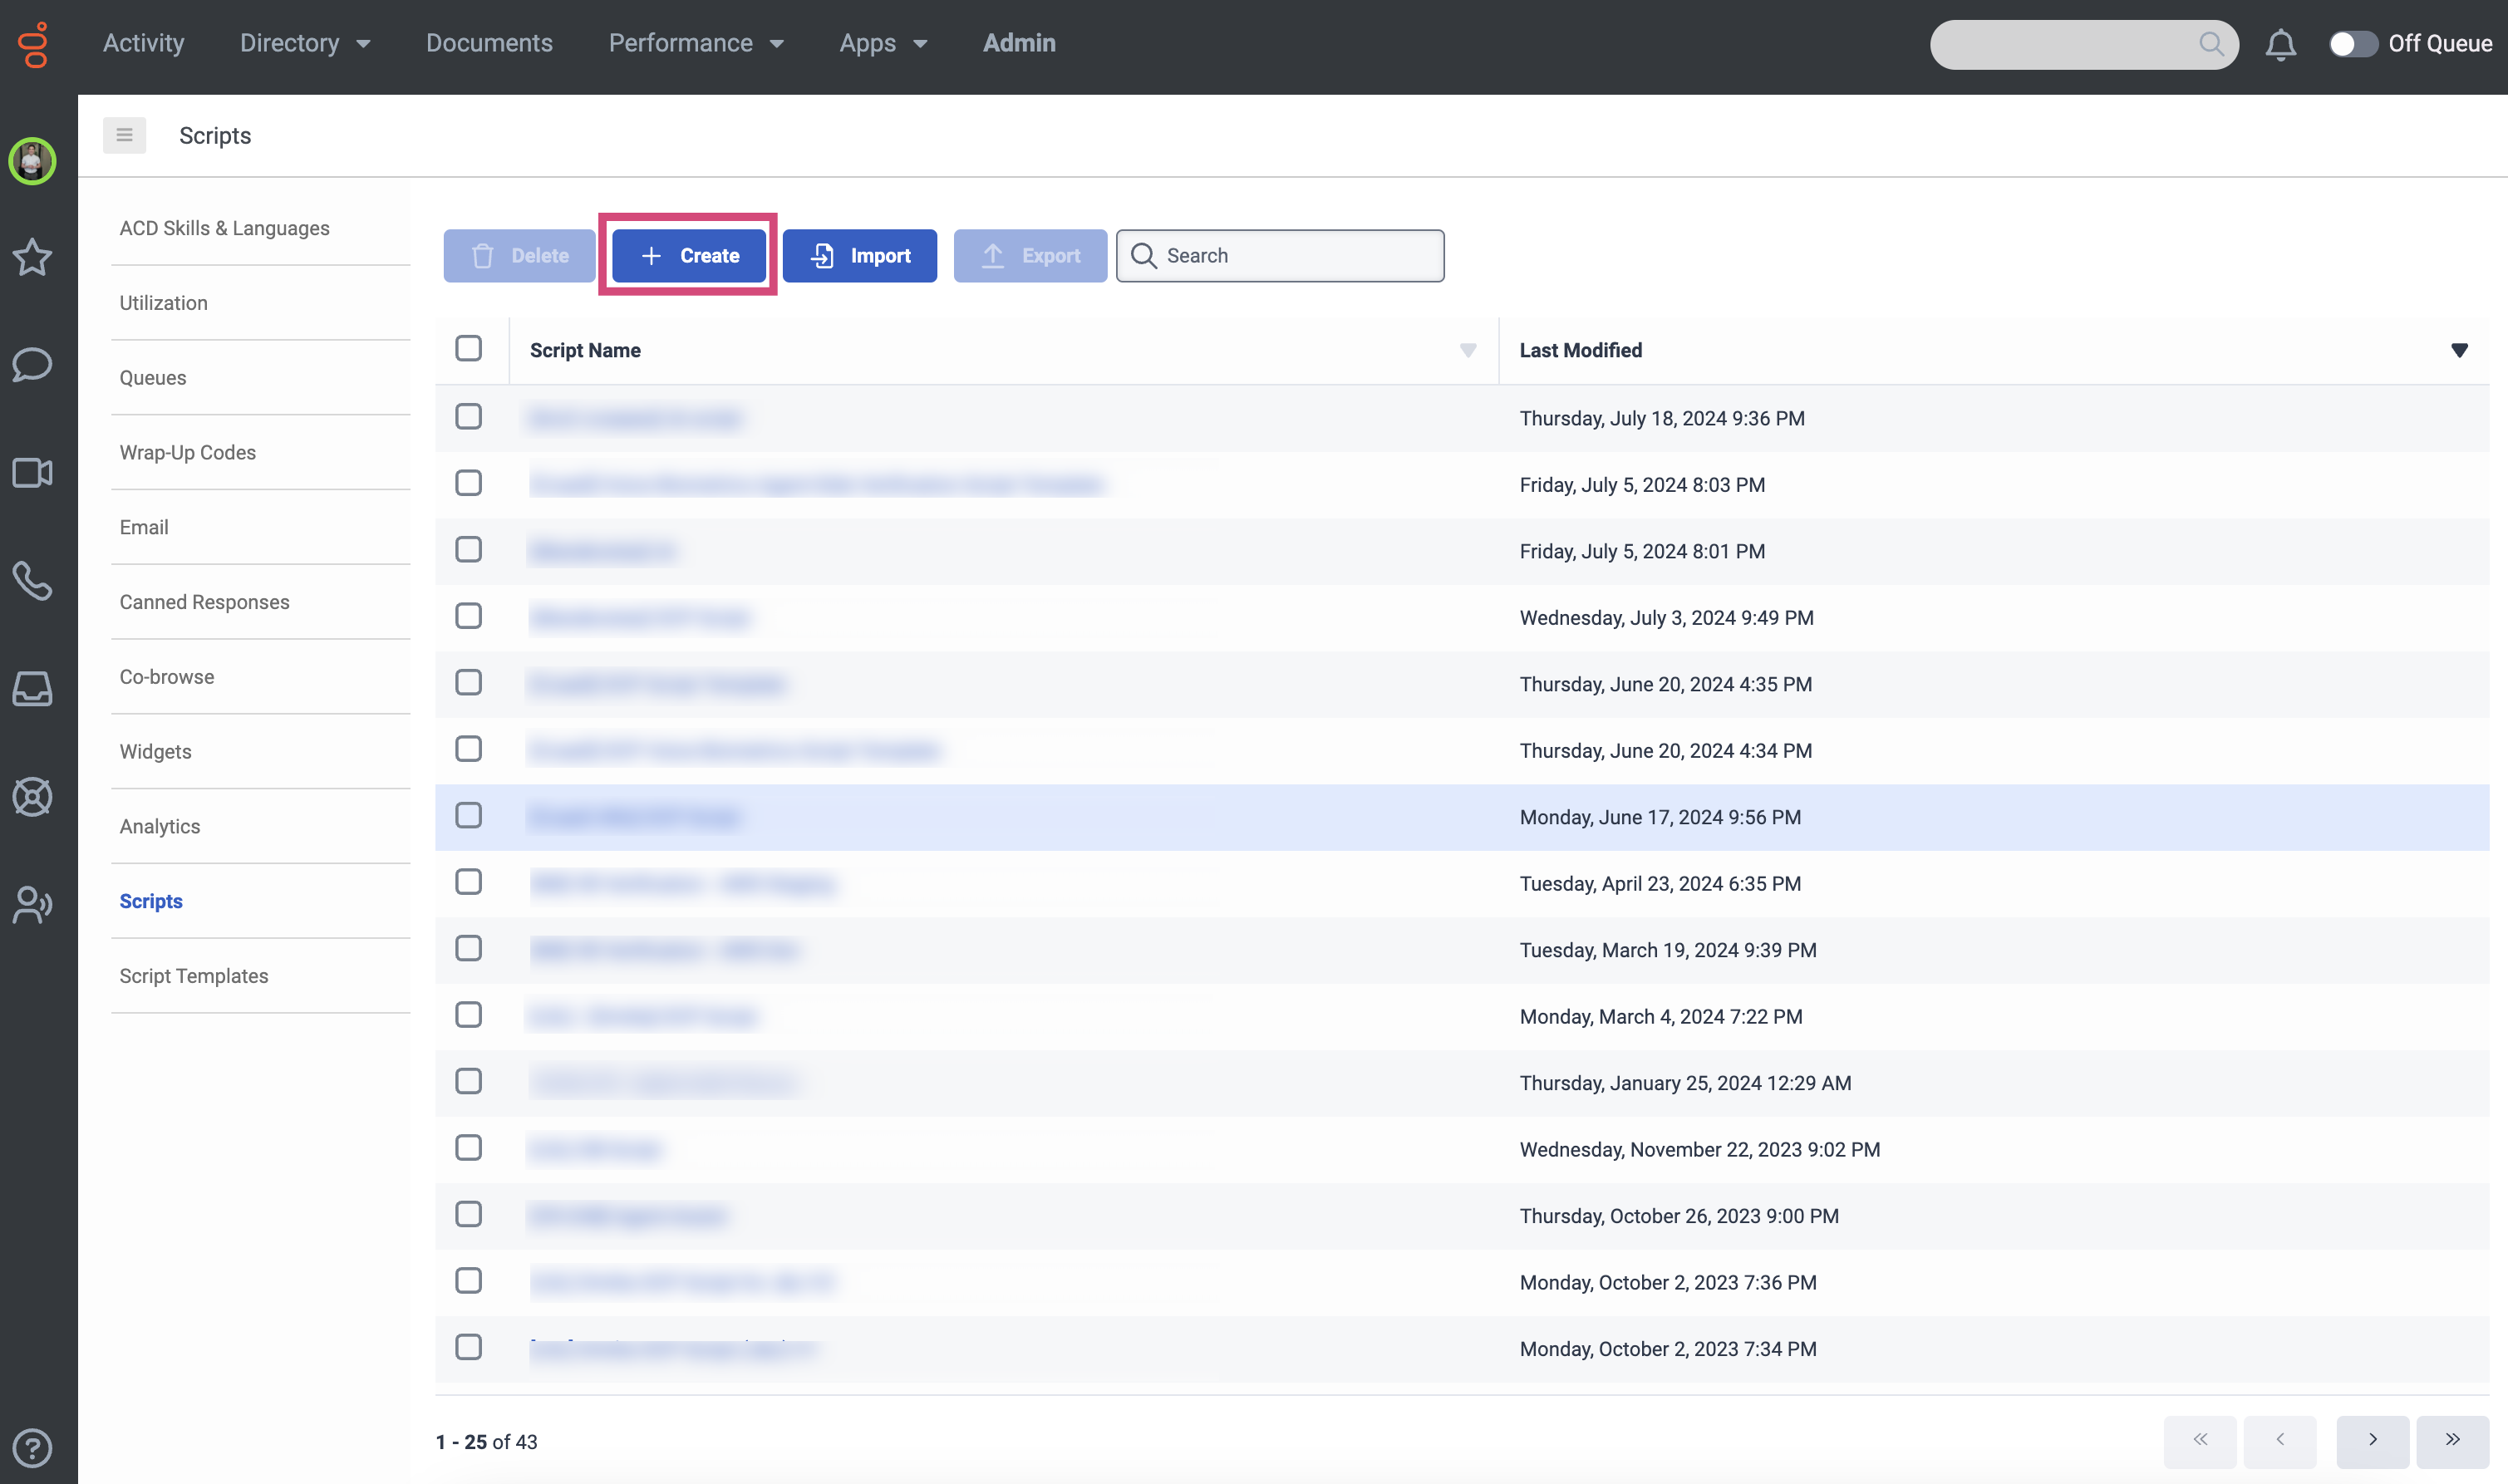
To create the agent’s dashboard, go to Admin → Scripts.
-
Click the +Create button to create a new Script.
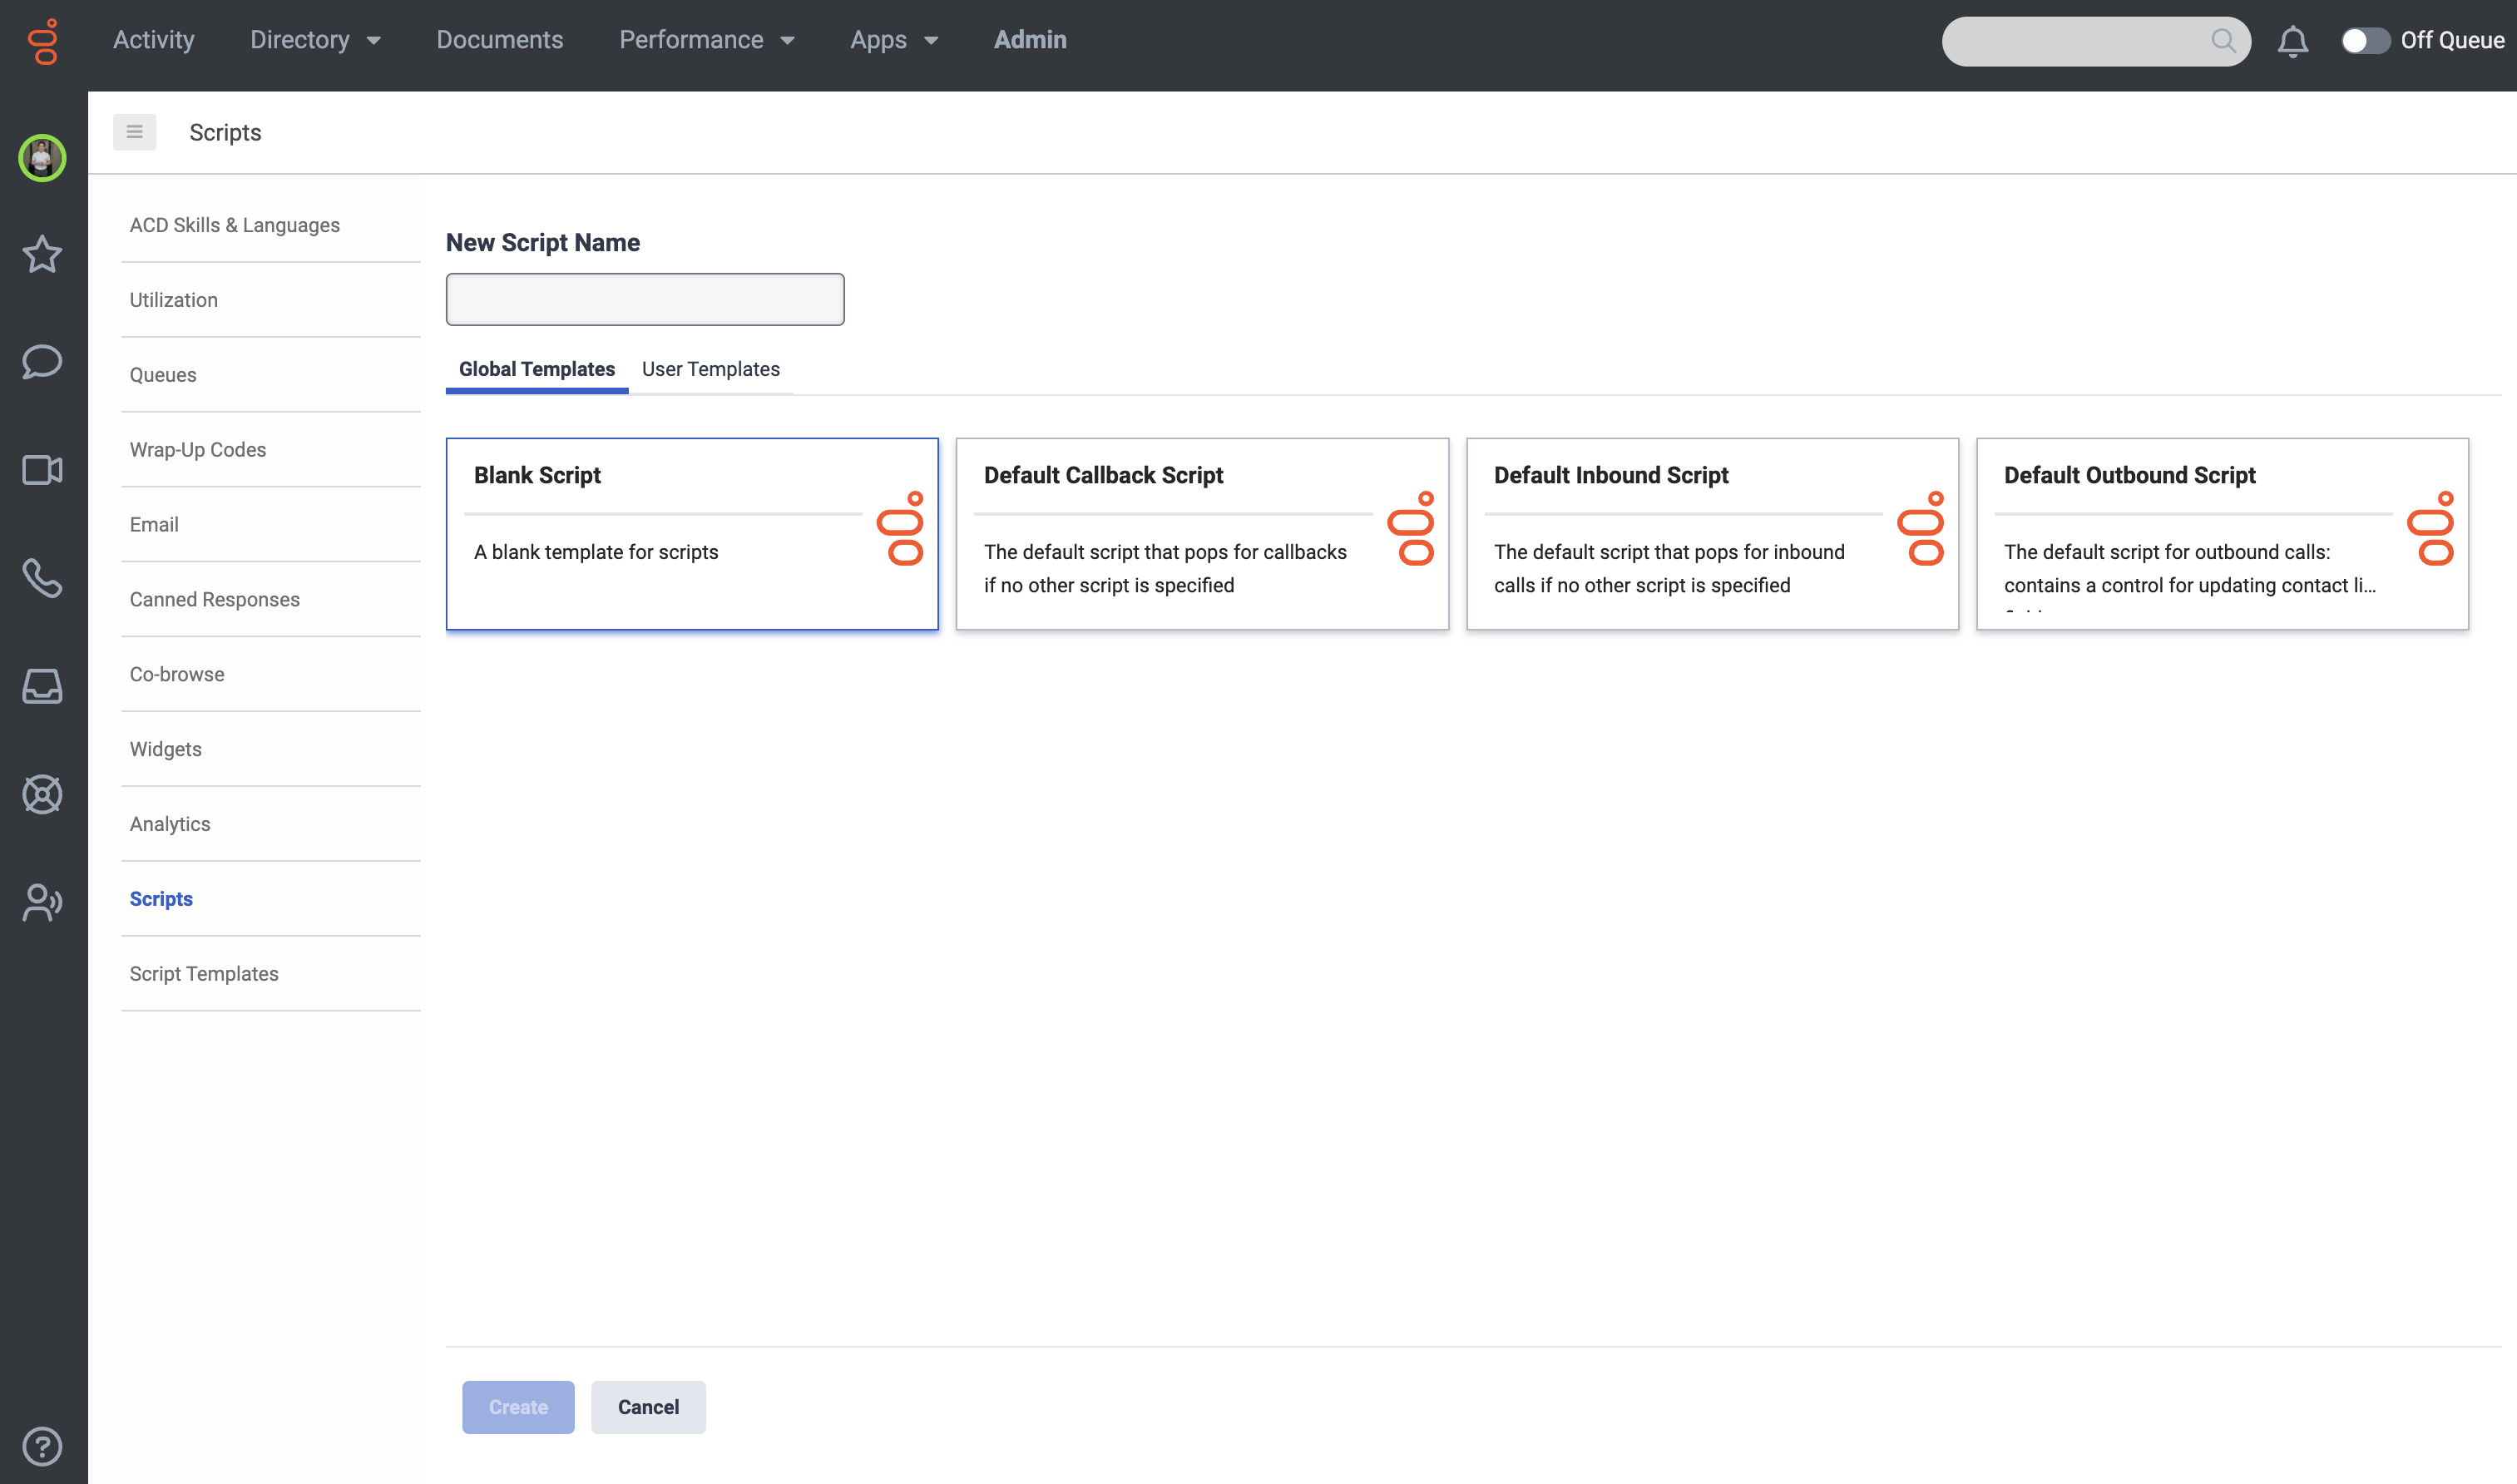
2. Select the Blank Script template.
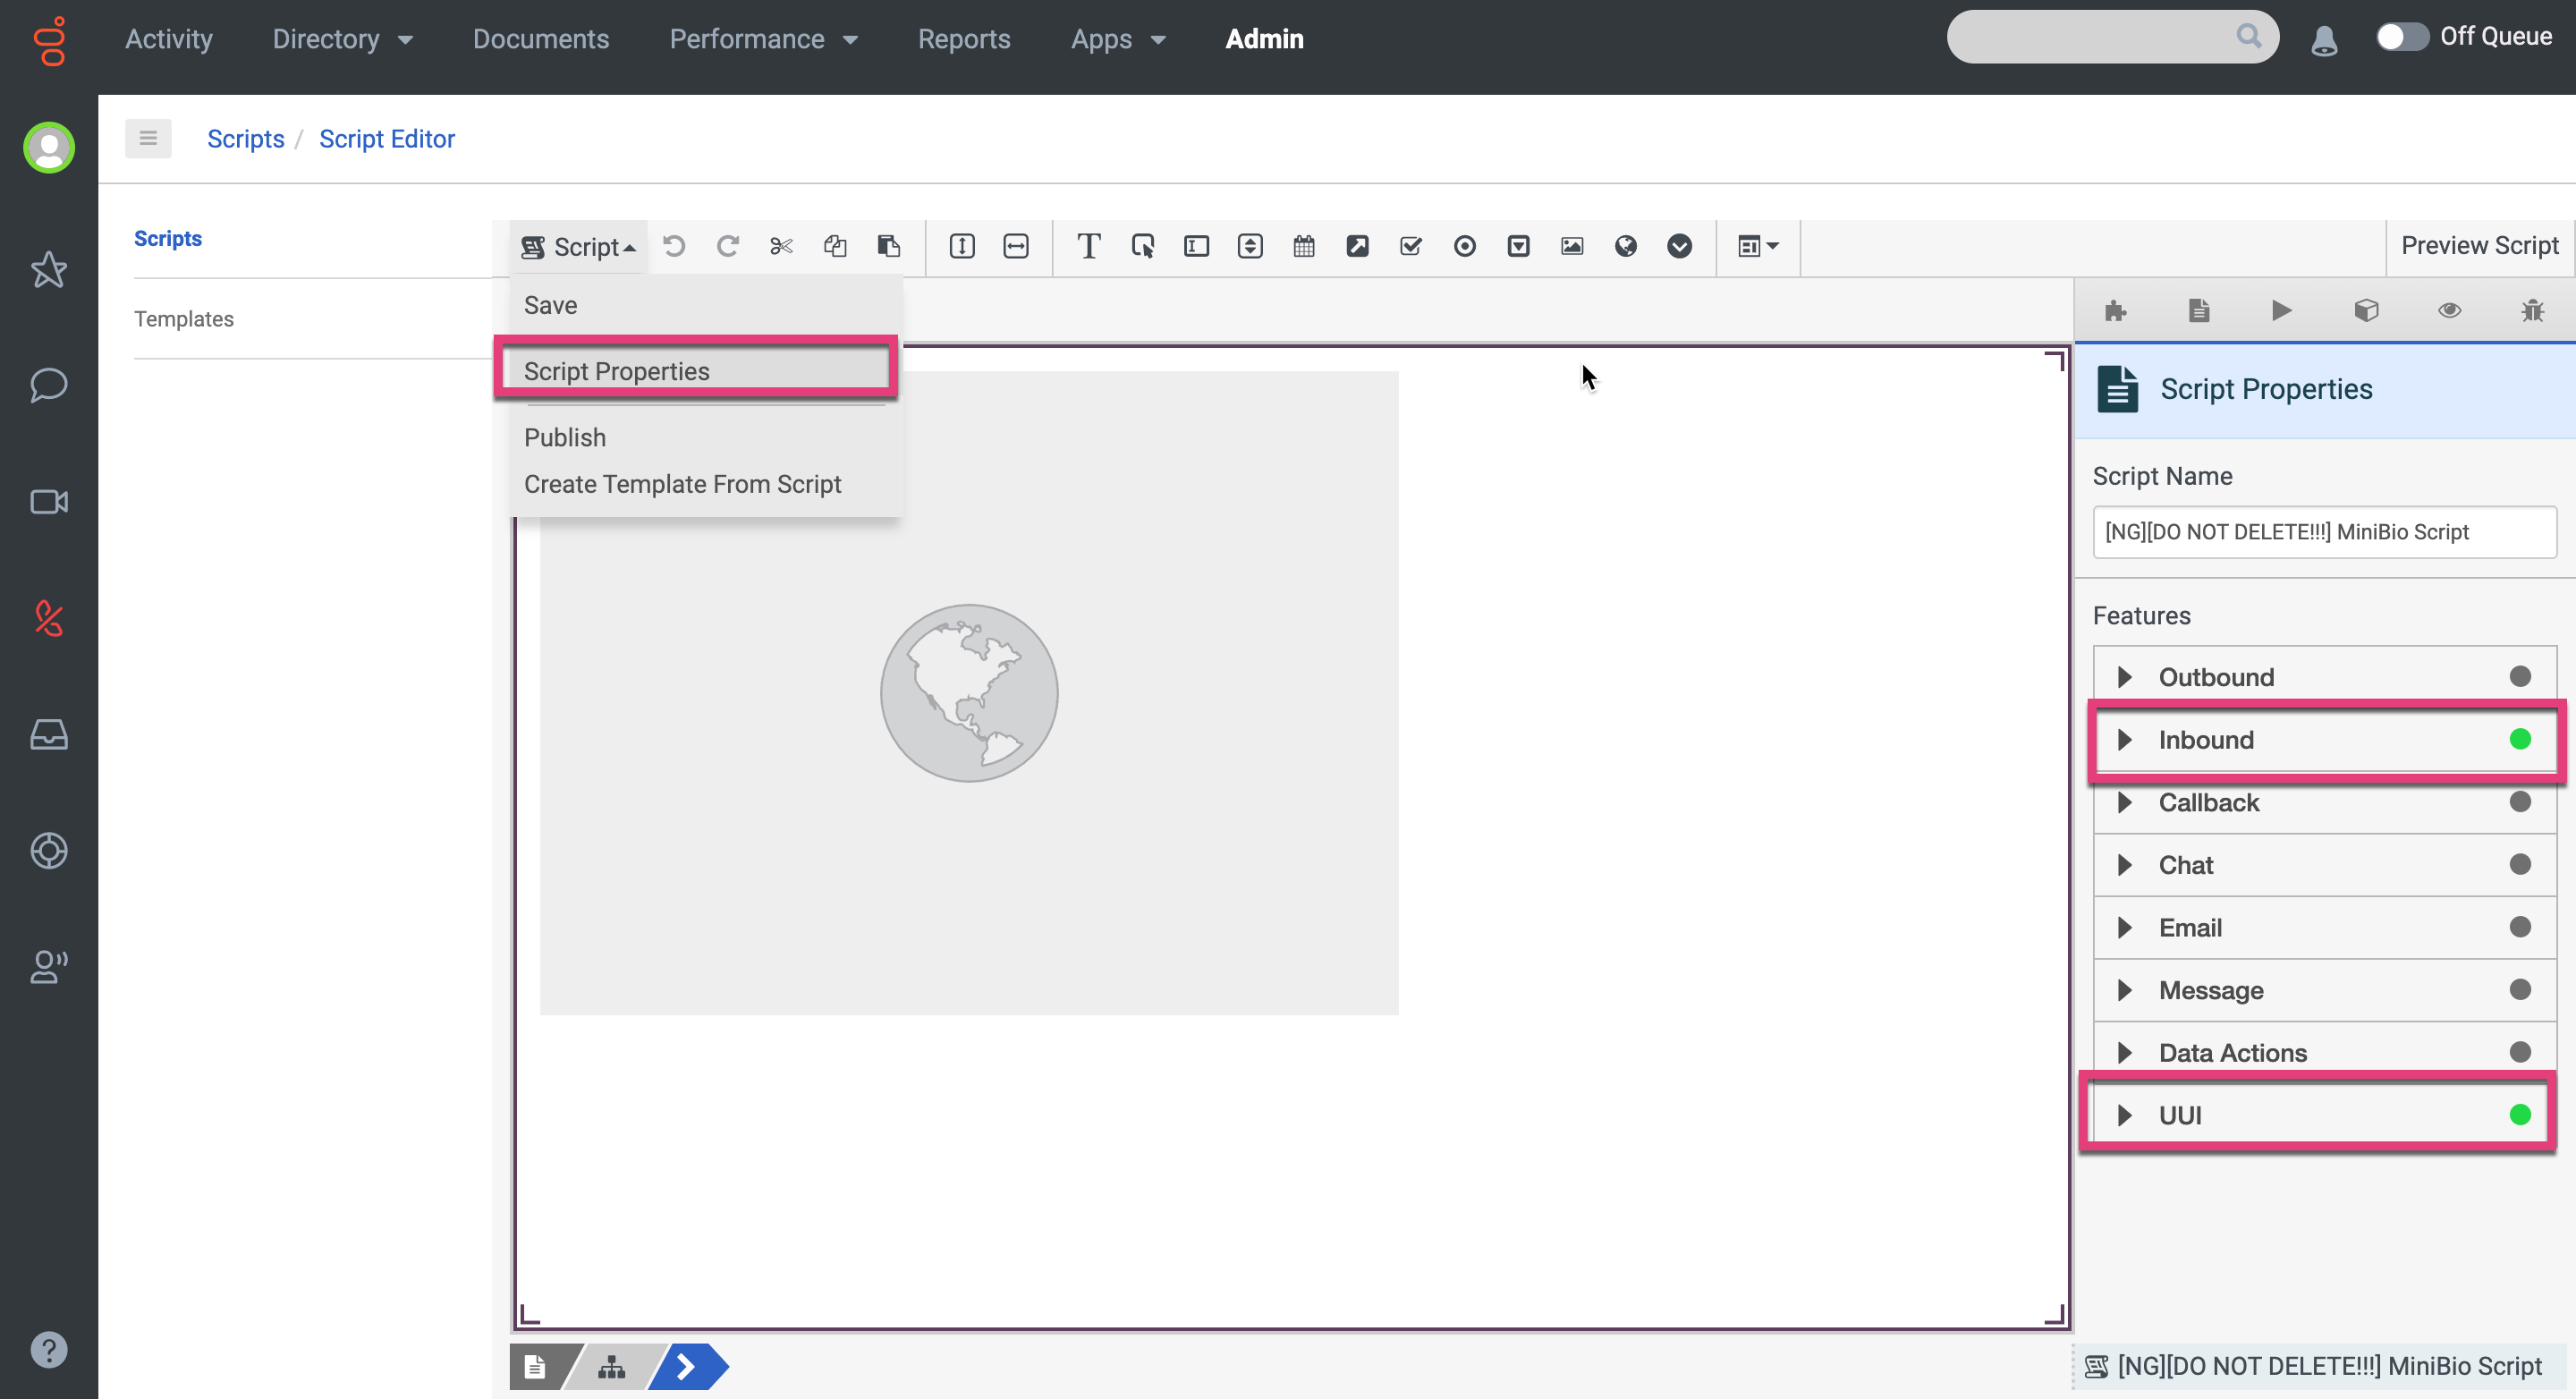
3. Go to Script Properties.
a. Activate Inbound (to get token).
b. Activate UUI.
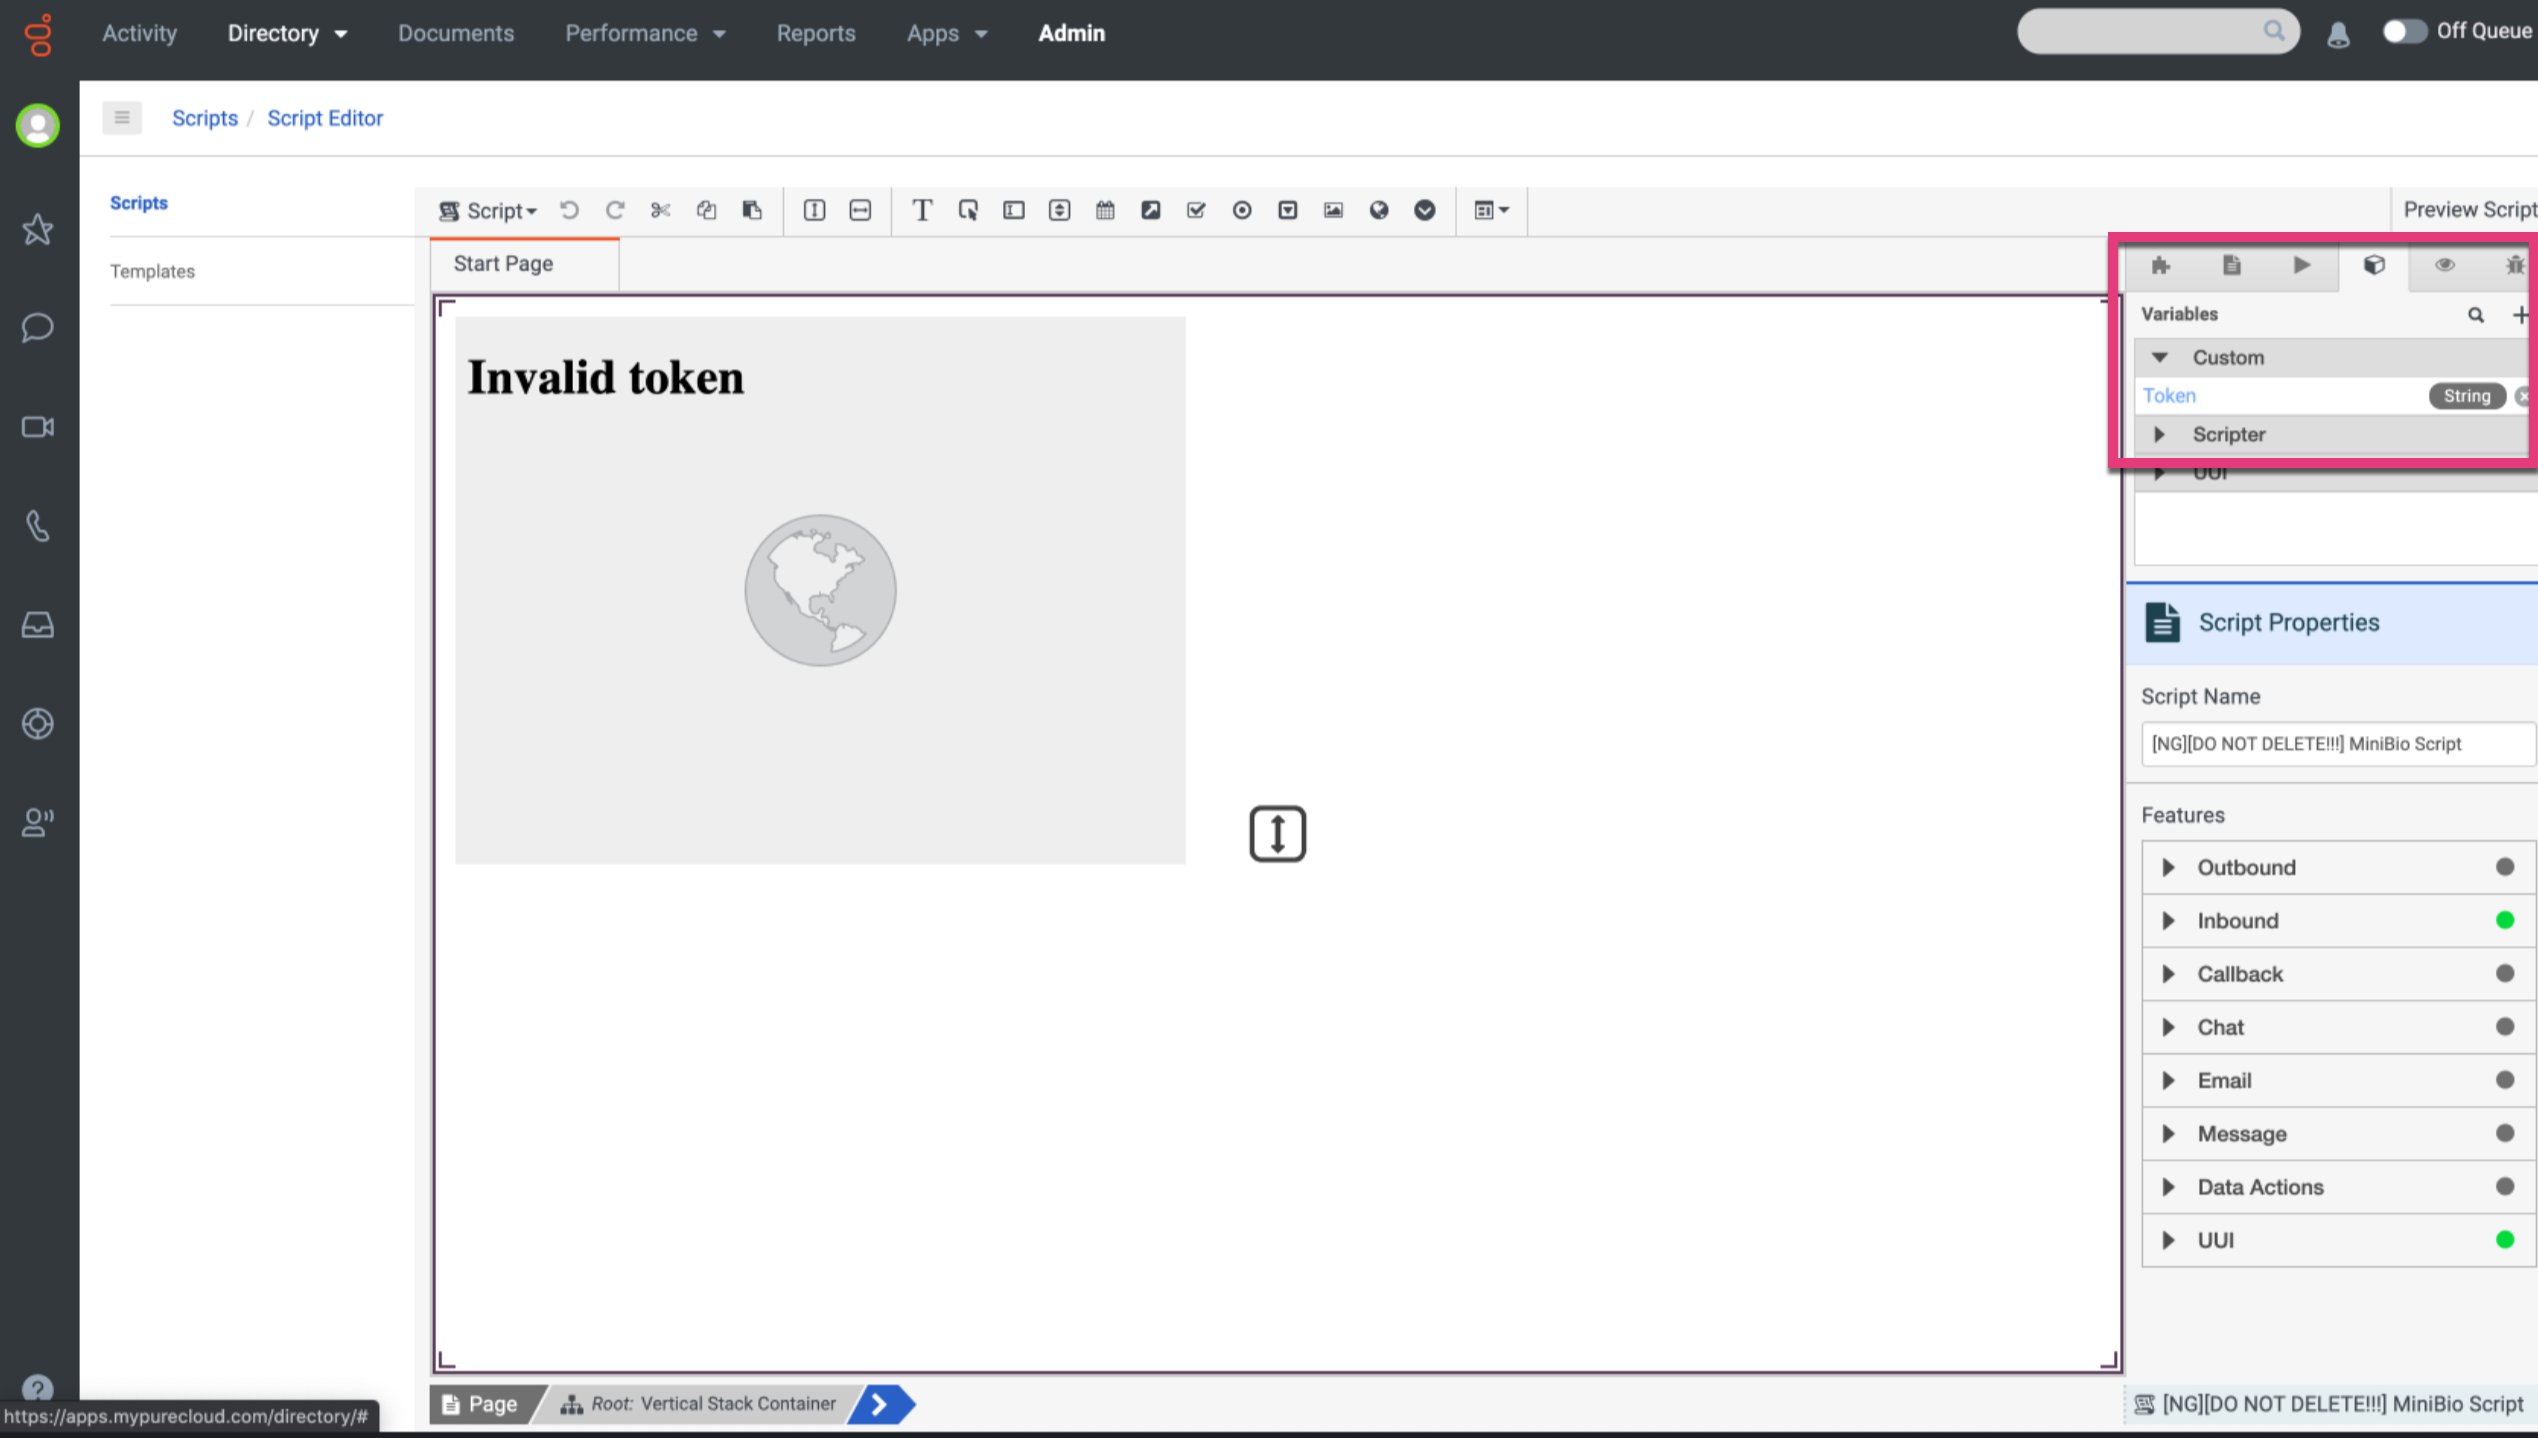
c. Create and declare the Token variable (String type).
d. Create a Web Page.
e. Add Web Page Source.
<region>.ocp.ai/agent-vb-mw/frame?token={{Token}}
Example: https://us1-m.ocp.ai/agent-vb-mw/vb?token={{Token}}
Create Agent Queue
Either use existing agent queue created from wizard ([Omilia] OCP Queue )or create a new one.
To create a new Queue:
-
Go to Admin → Contact Center and select Queues.
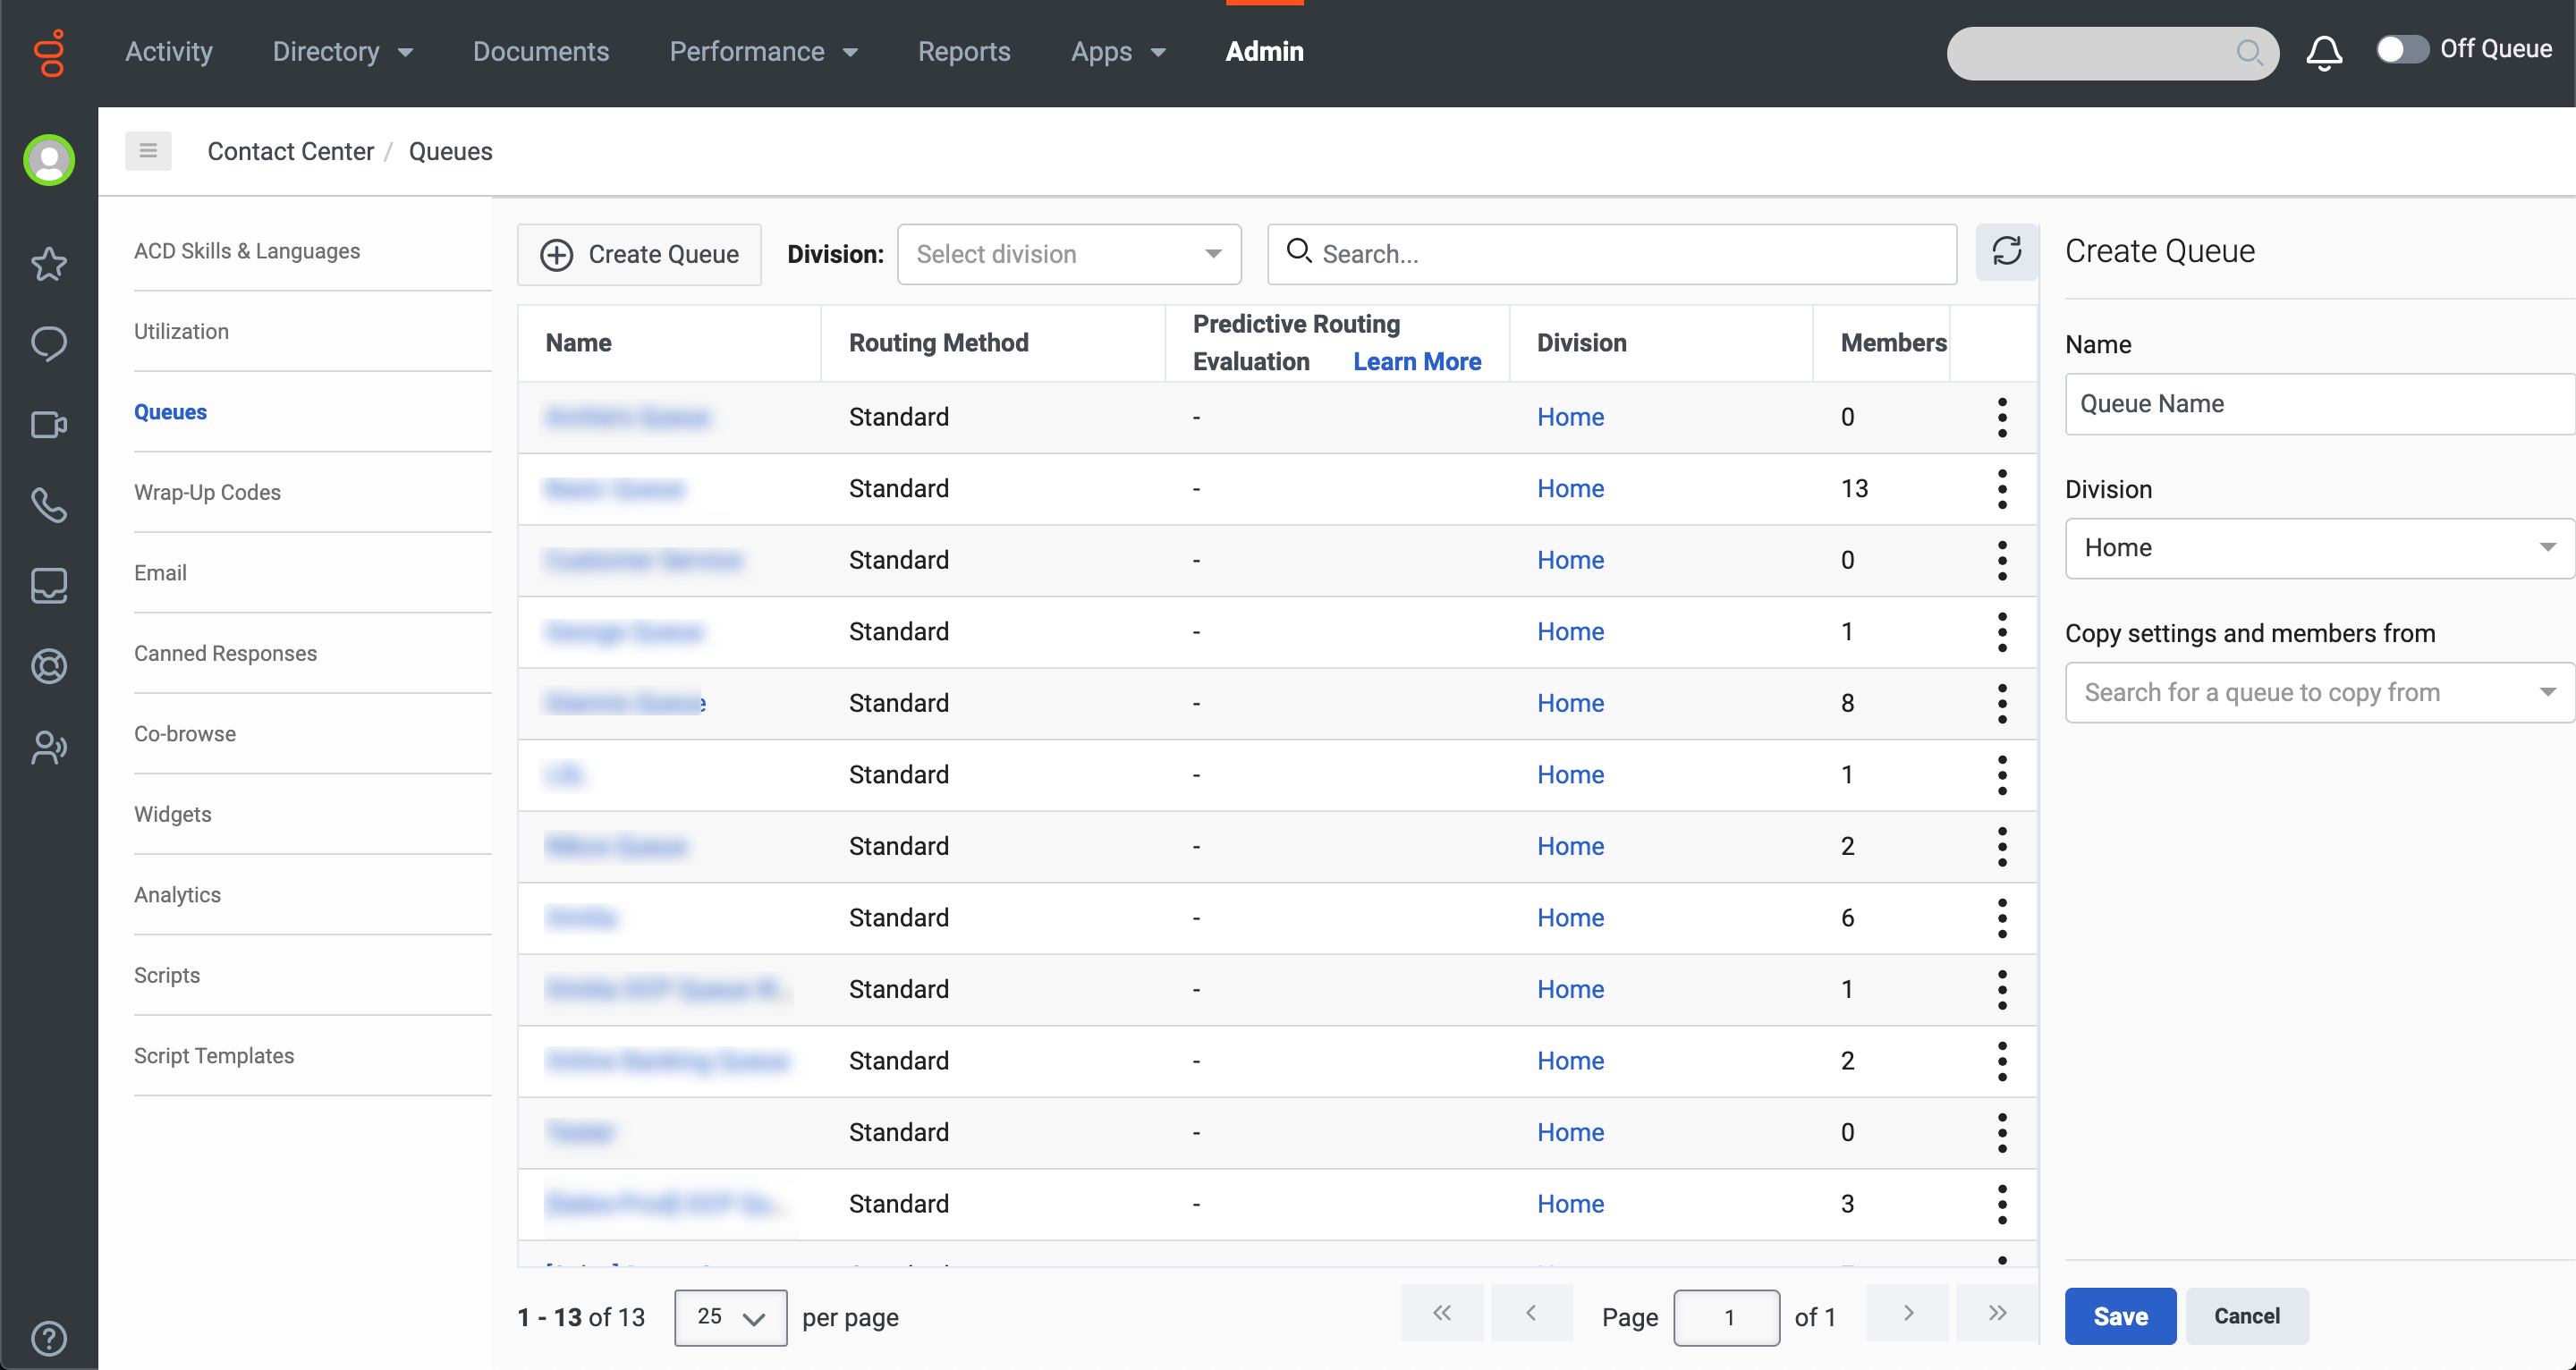
2.Click the Create New button and the right-hand side a panel appears.
3. Add the “Name” of the queue.
You can Copy the settings and members from an existing queue by selecting it from the corresponding dropdown list.
4. Click Save and the new queue will be added to the list.
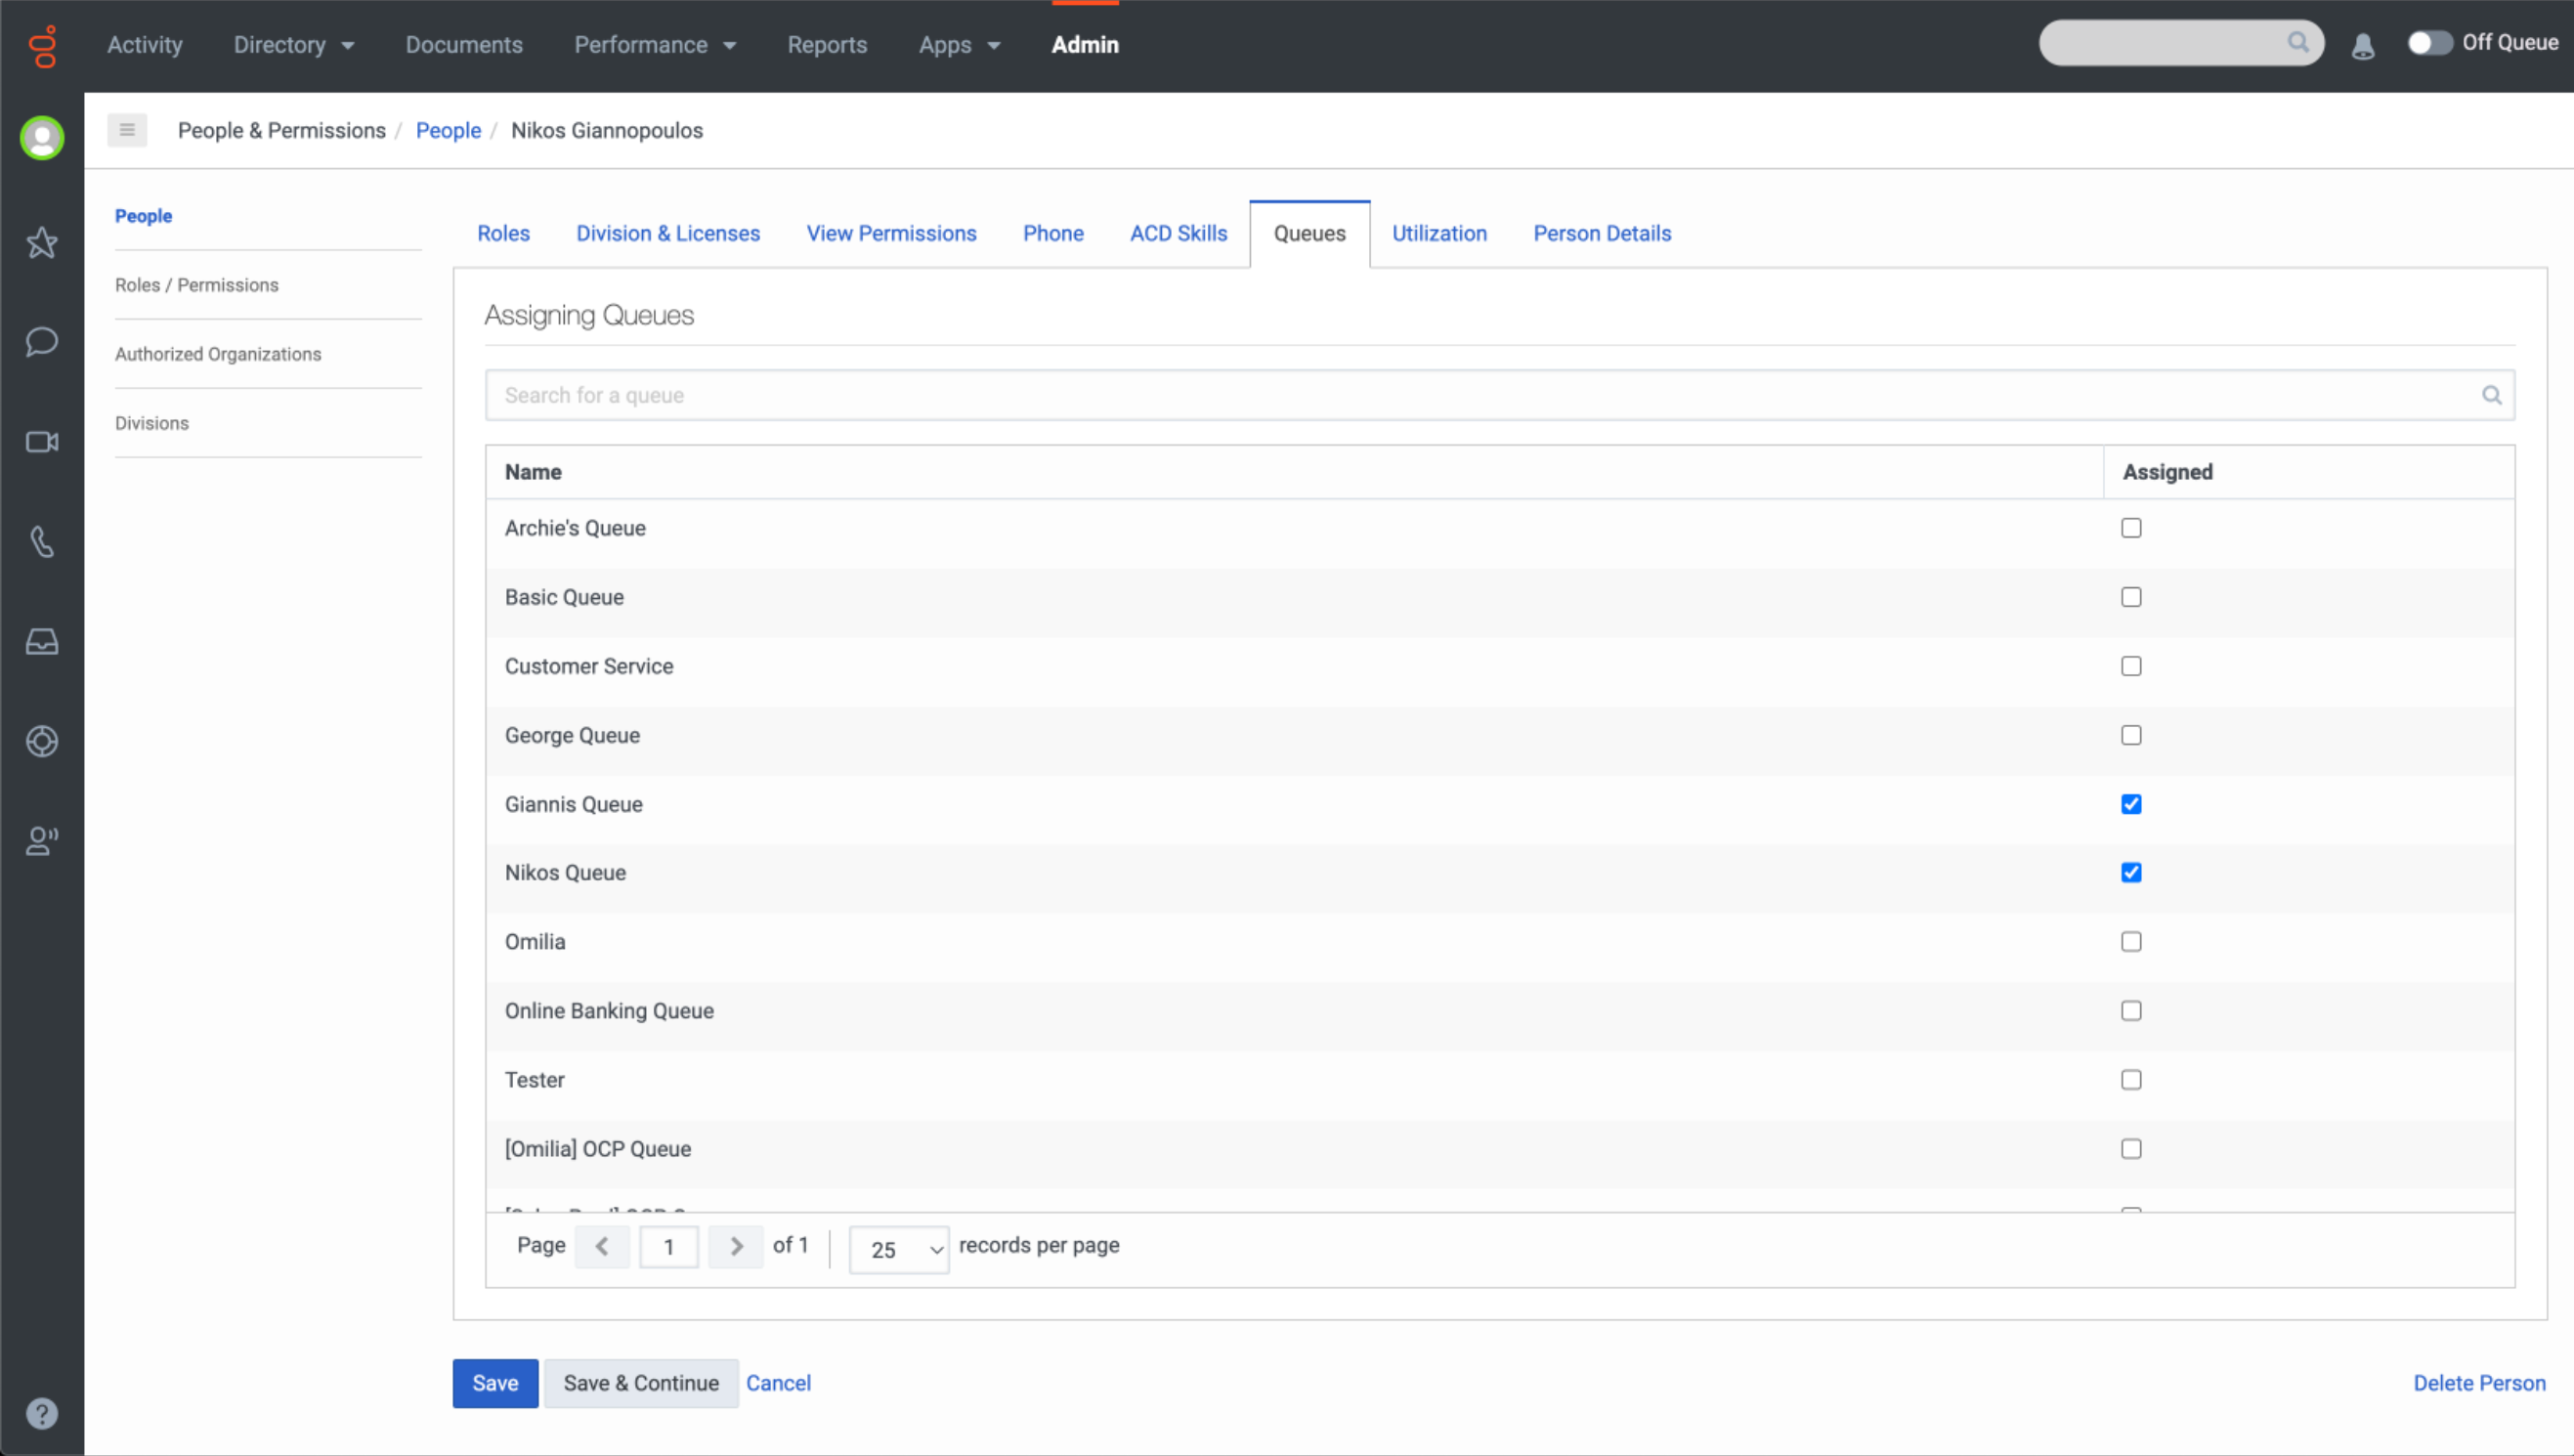
In case you create a new queue, register to the Queue to receive calls there.
-
Go to Admin → People & Permissions and select People.
-
Select a user.
-
Select the created queues from the list.
-
Click Save.
Create a new flow
To create a new flow, go to Admin → Architect and select Architect.
See the figure for flow Architecture below.
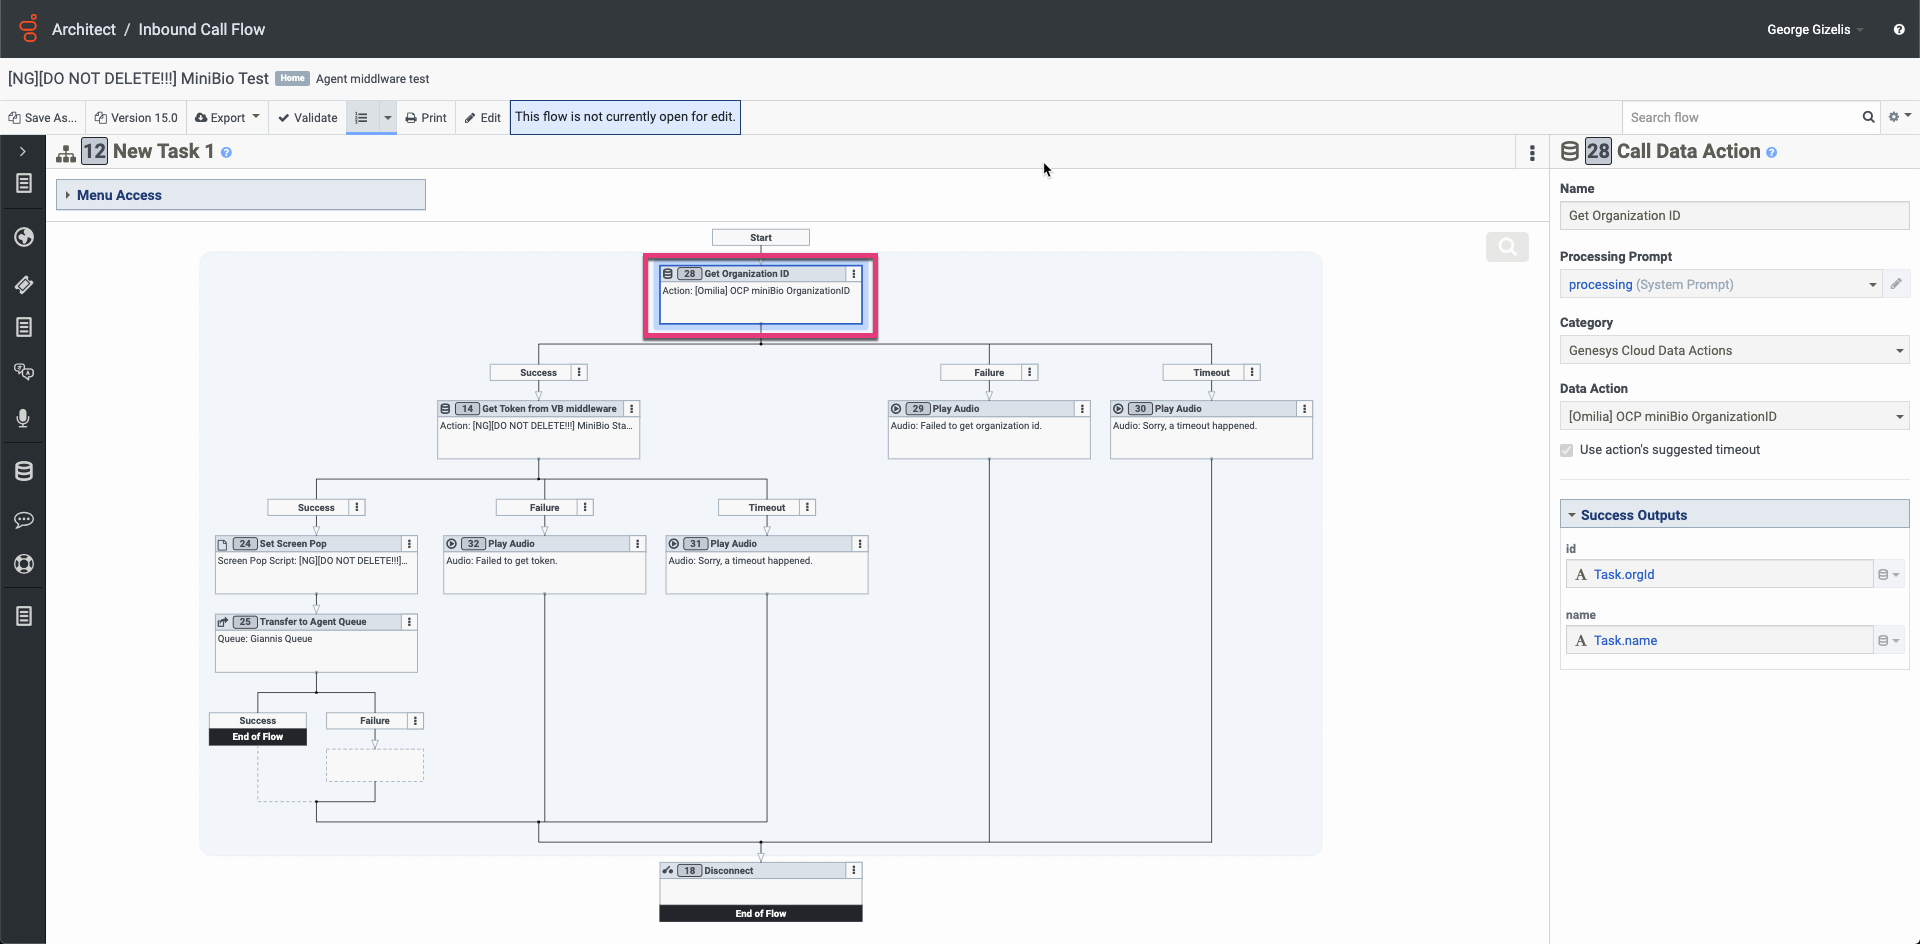
Configure flow Elements
The elements that have been created and added to the flow need to be configured for the flow accordingly.
Get Organization ID element
|
Field |
Data |
|---|---|
|
|
Get Organization ID |
|
|
processing (System Prompt) |
|
|
Genesys Cloud Data Actions |
|
|
OCP miniBio OrganizationID |
Success Outputs
|
Variable |
Variable name |
|---|---|
|
|
Task.orgId |
|
|
Task.name |
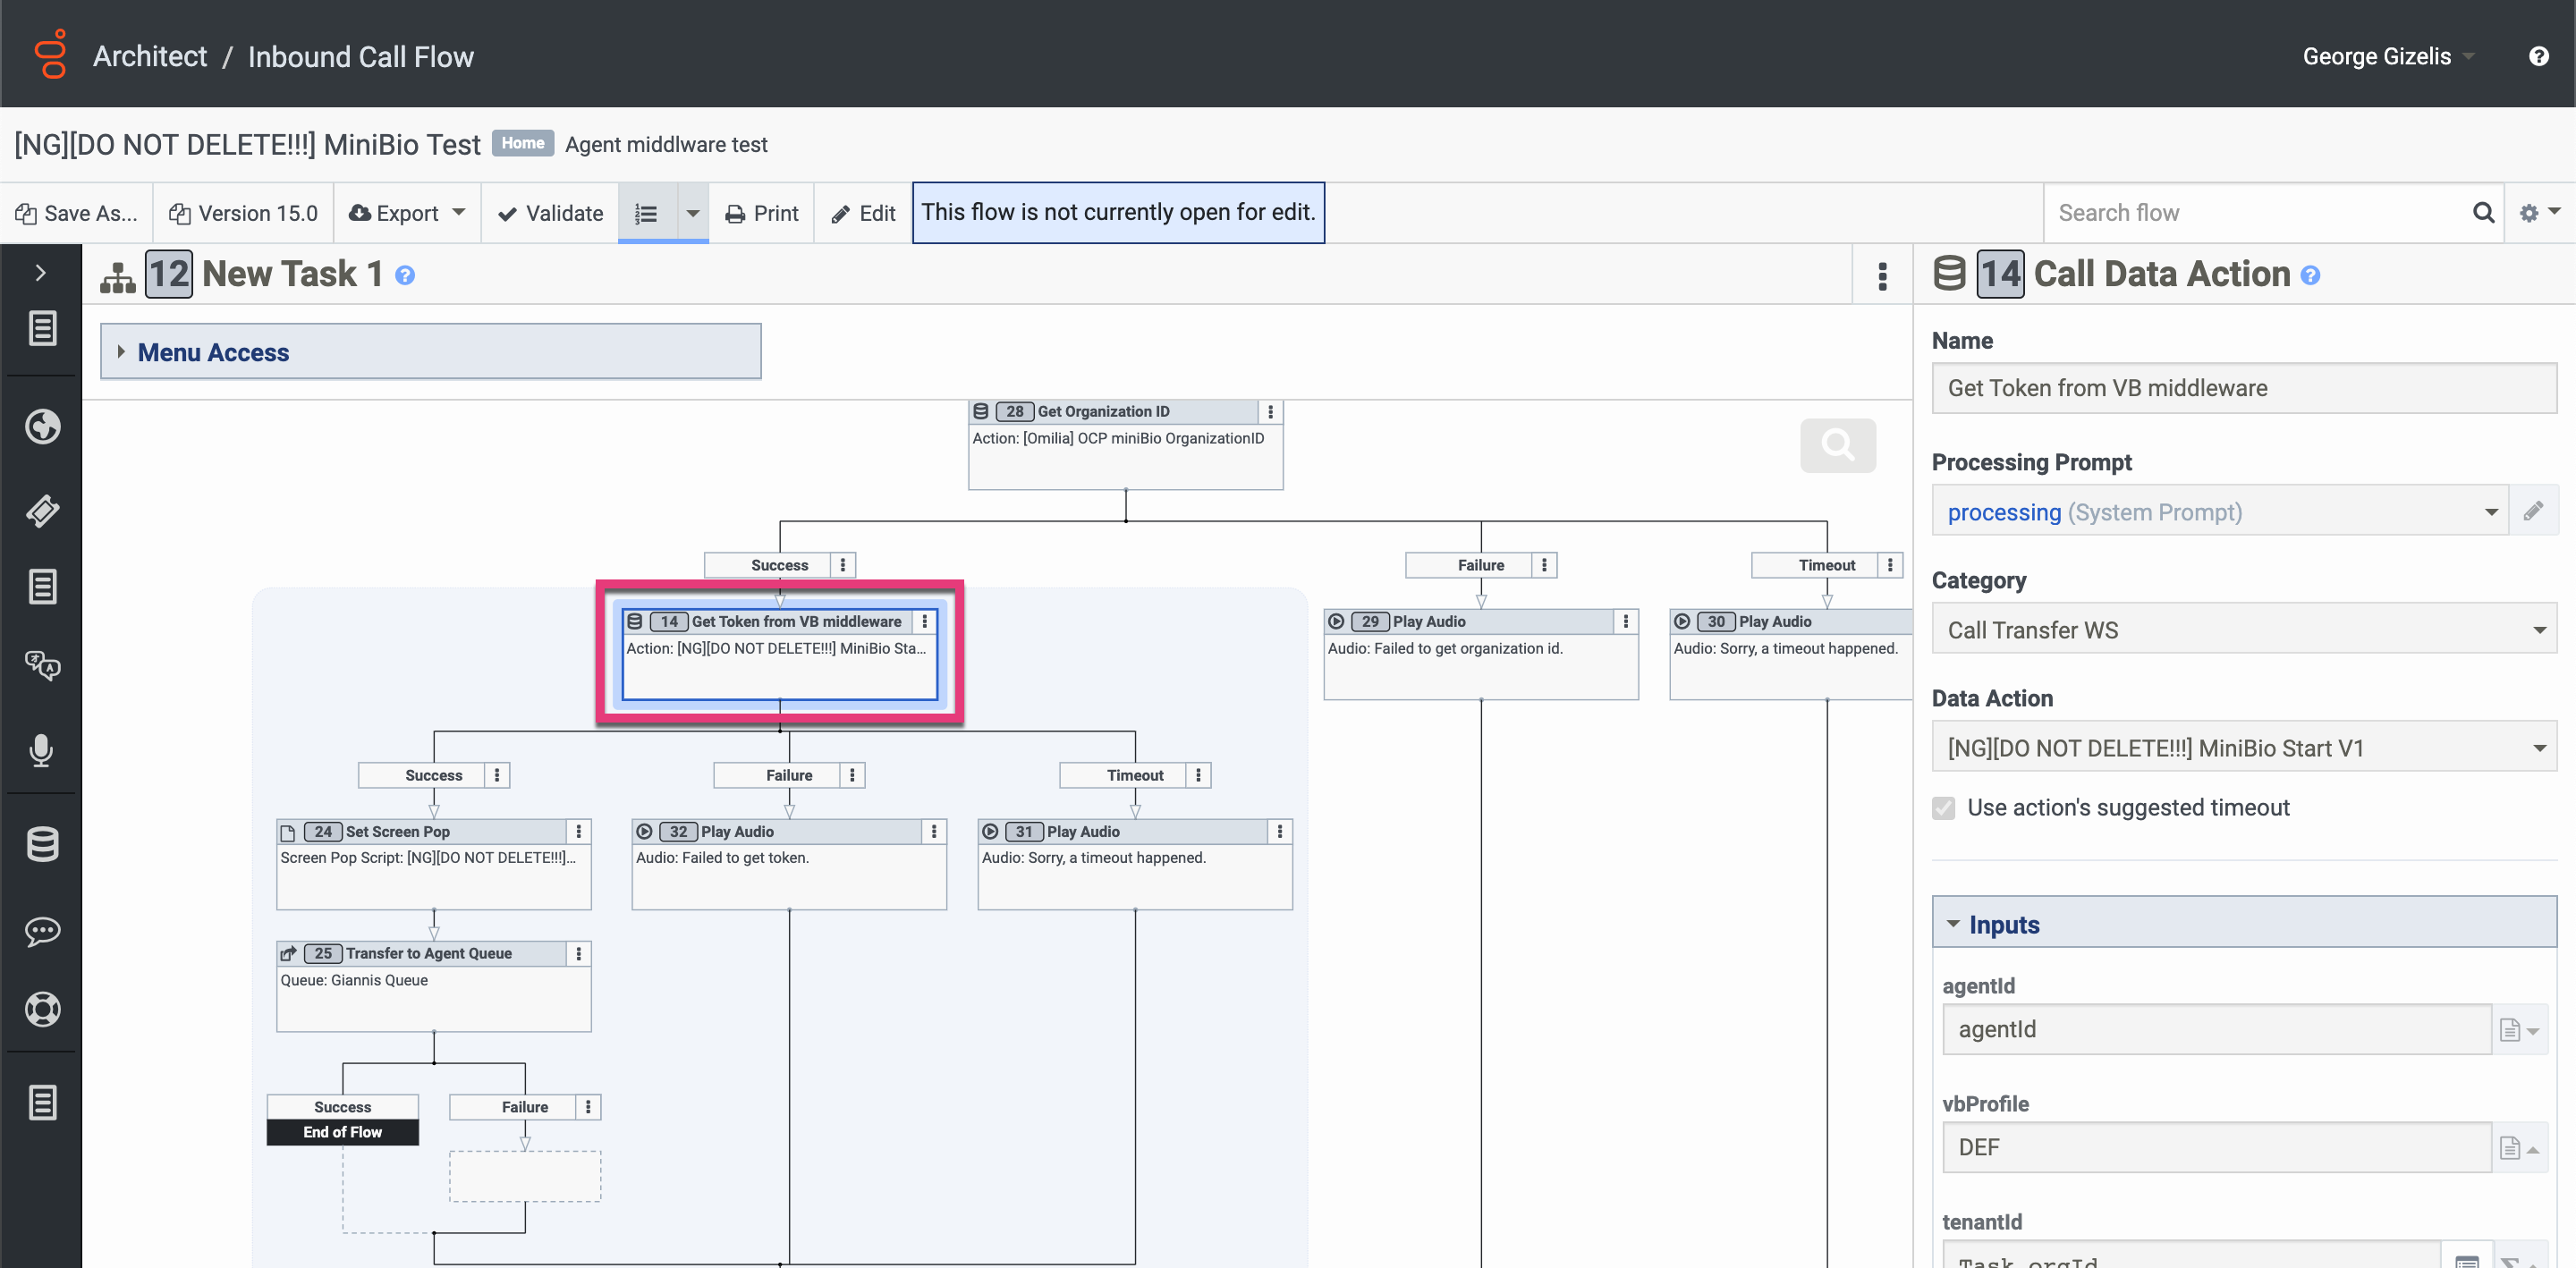
Get Token from VB middleware element
|
Field |
Data |
|---|---|
|
|
Get Token from VB middleware |
|
|
processing (System Prompt) |
|
|
Web Services Data Action |
|
|
OCP miniBio OrganizationID |
Inputs
|
Variable |
Mandatory |
Variable name |
|---|---|---|
|
|
Yes |
agentId |
|
|
Yes |
<Profile ID> |
|
|
Yes |
Task.orgId |
|
|
Yes |
Call.ConversationId |
|
|
Yes |
agentSkill |
|
|
Yes |
GENESYS |
|
|
No |
1234567890 |
|
|
No |
01/01/2001 |
|
|
No |
1234567890000 |
|
|
No |
false |
|
|
No |
false |
Success Outputs
|
Variable |
Variable name |
|---|---|
|
|
Task.token |
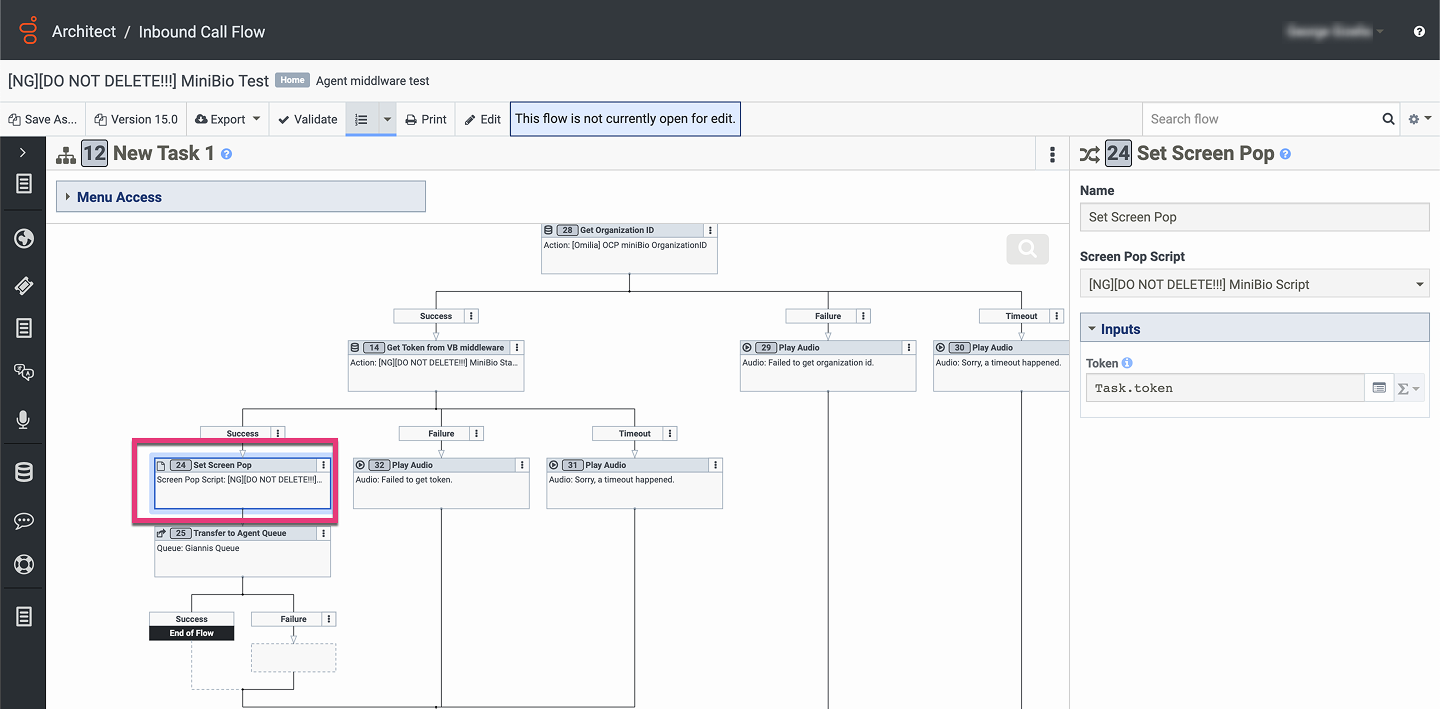
Set Screen Pop element
|
Field |
Data |
|---|---|
|
|
Set Screen Pop |
|
|
miniBio Script |
Inputs
|
Variable |
Variable name |
|---|---|
|
|
Task.token |
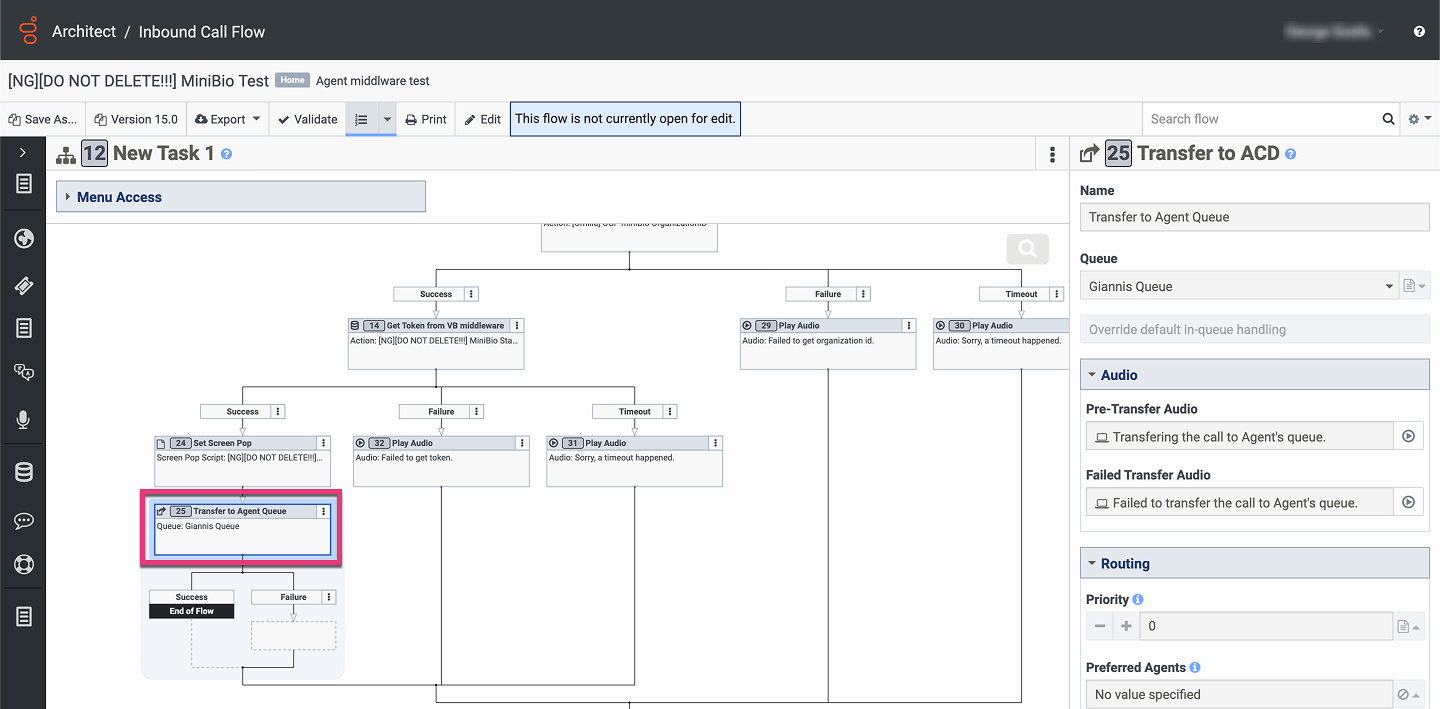
Transfer to Agent Queue element
|
Field |
Data |
|---|---|
|
|
Transfer to Agent Queue |
|
|
The selected Queue |
Audio
|
Field |
Data |
|---|---|
|
|
Transferring the call to Agent’s queue (example) |
|
|
Failed to transfer the call to Agent’s queue (example) |
Routing
|
Field |
Data |
|---|---|
|
|
0 |
|
|
null |
|
Language Skill |
default |
Failure Outputs
|
Field |
Data |
|---|---|
|
|
null |
|
|
null |
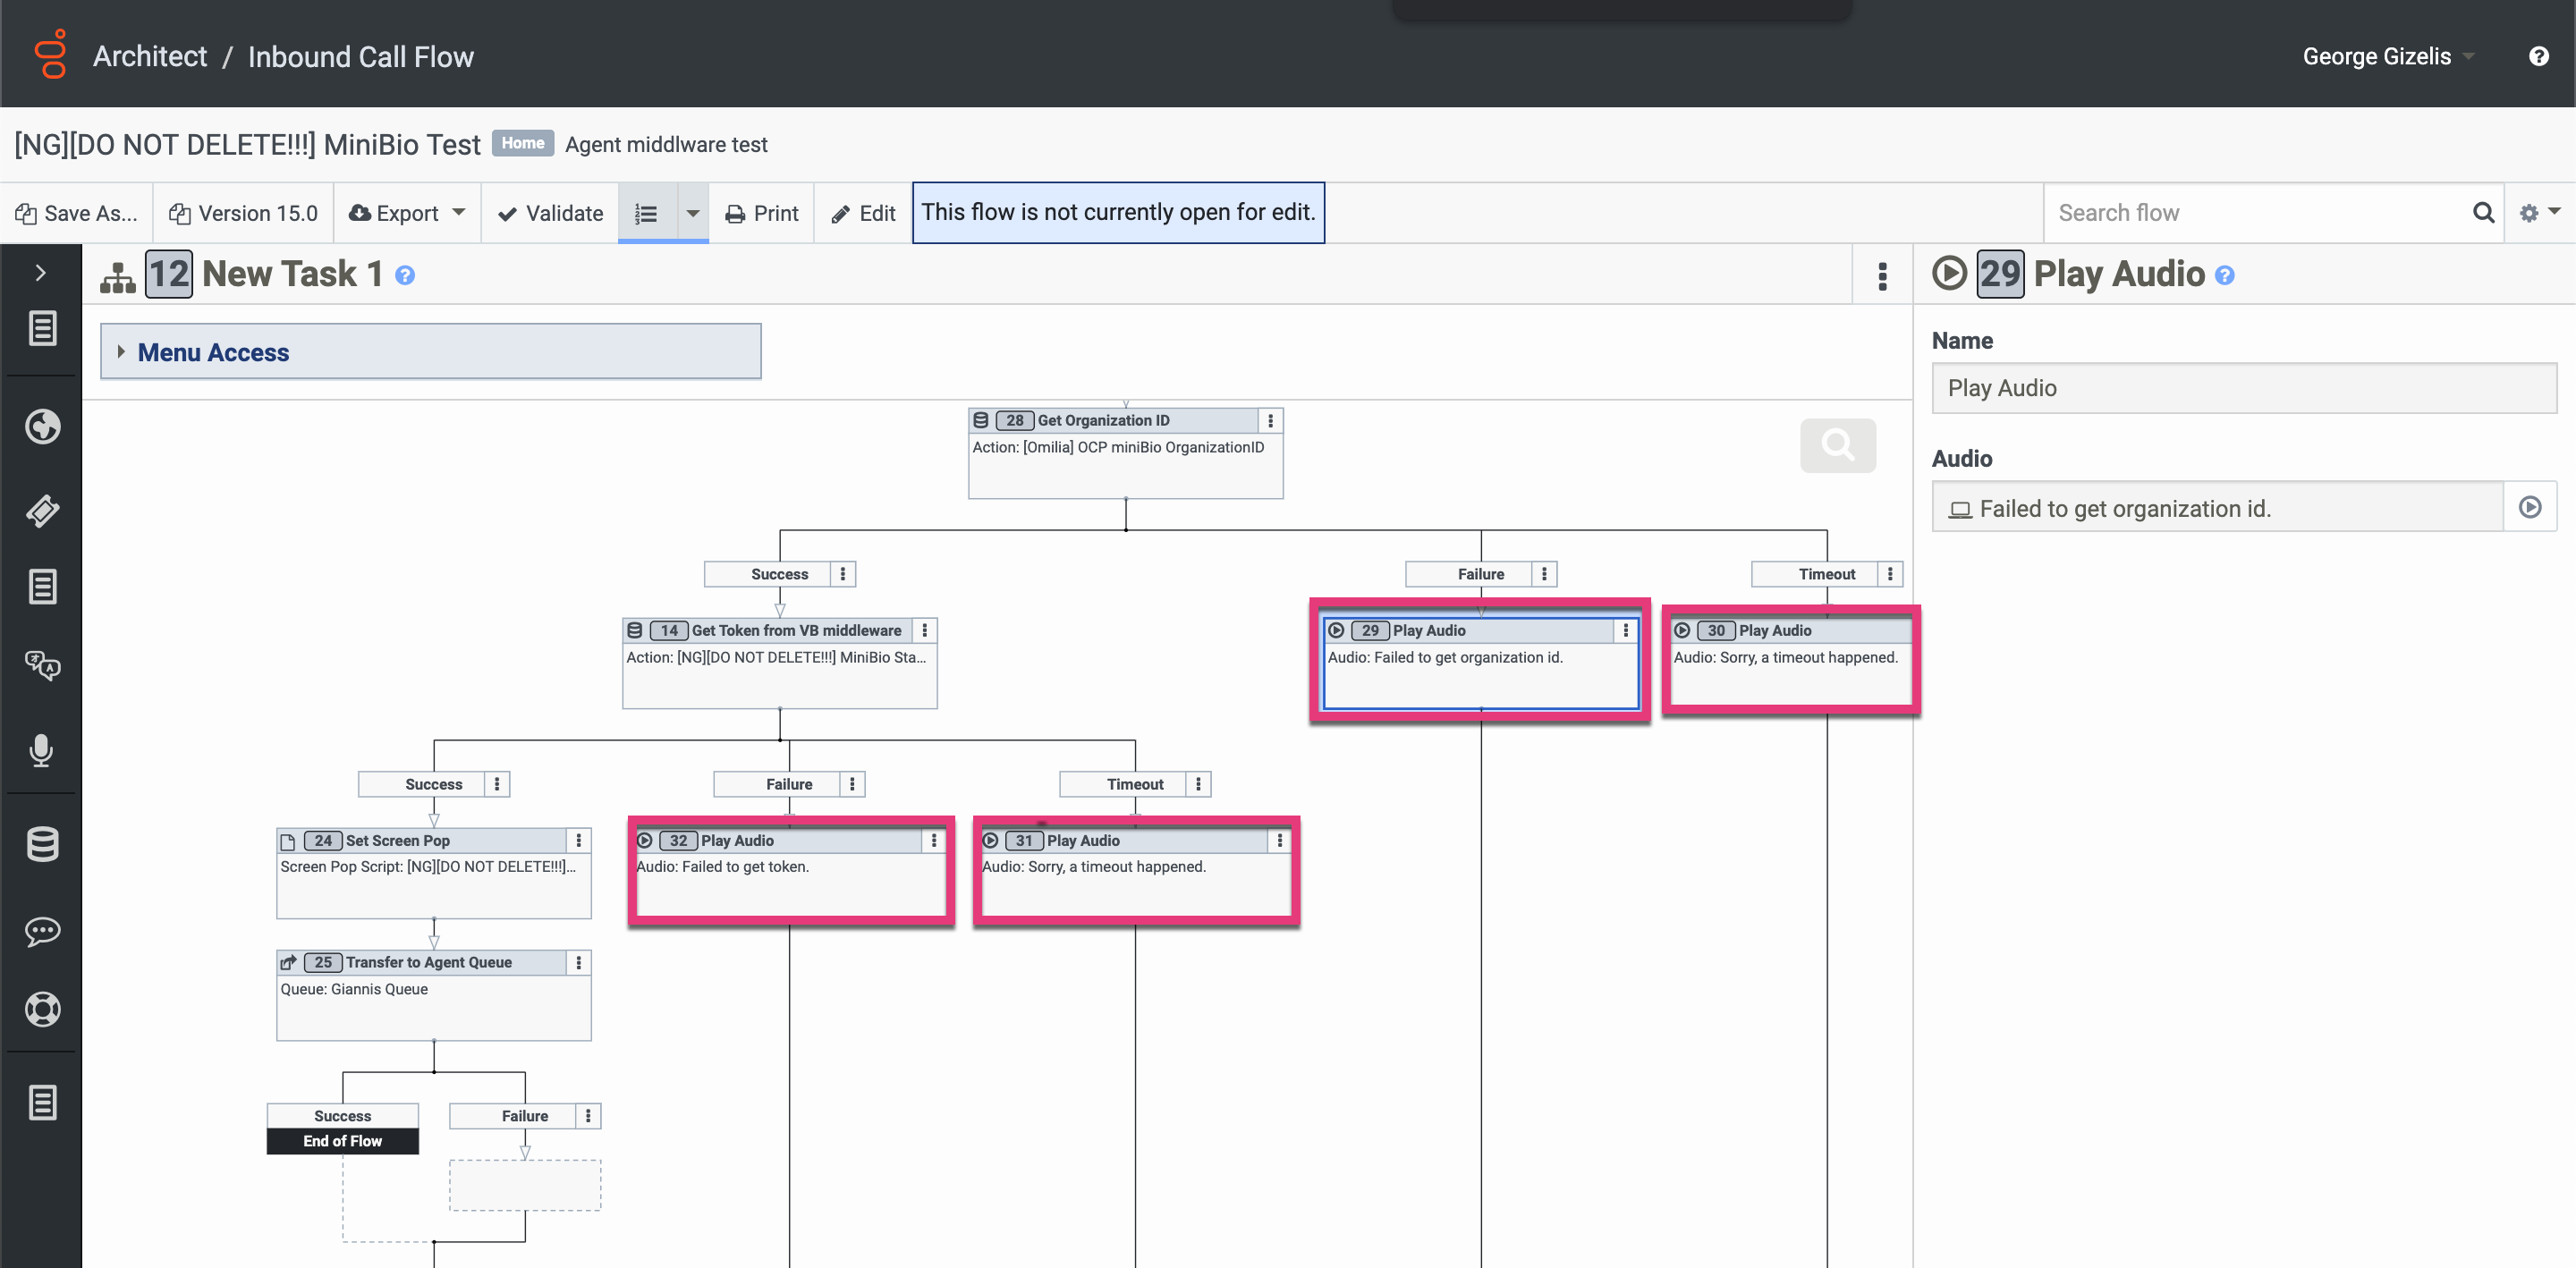
Play Audio elements
Play Audio elements data include a name and the audio that needs to be played depending on the case.
|
Field |
Data |
|---|---|
|
|
Play Audio |
|
|
Failed to get Organization ID (example) |
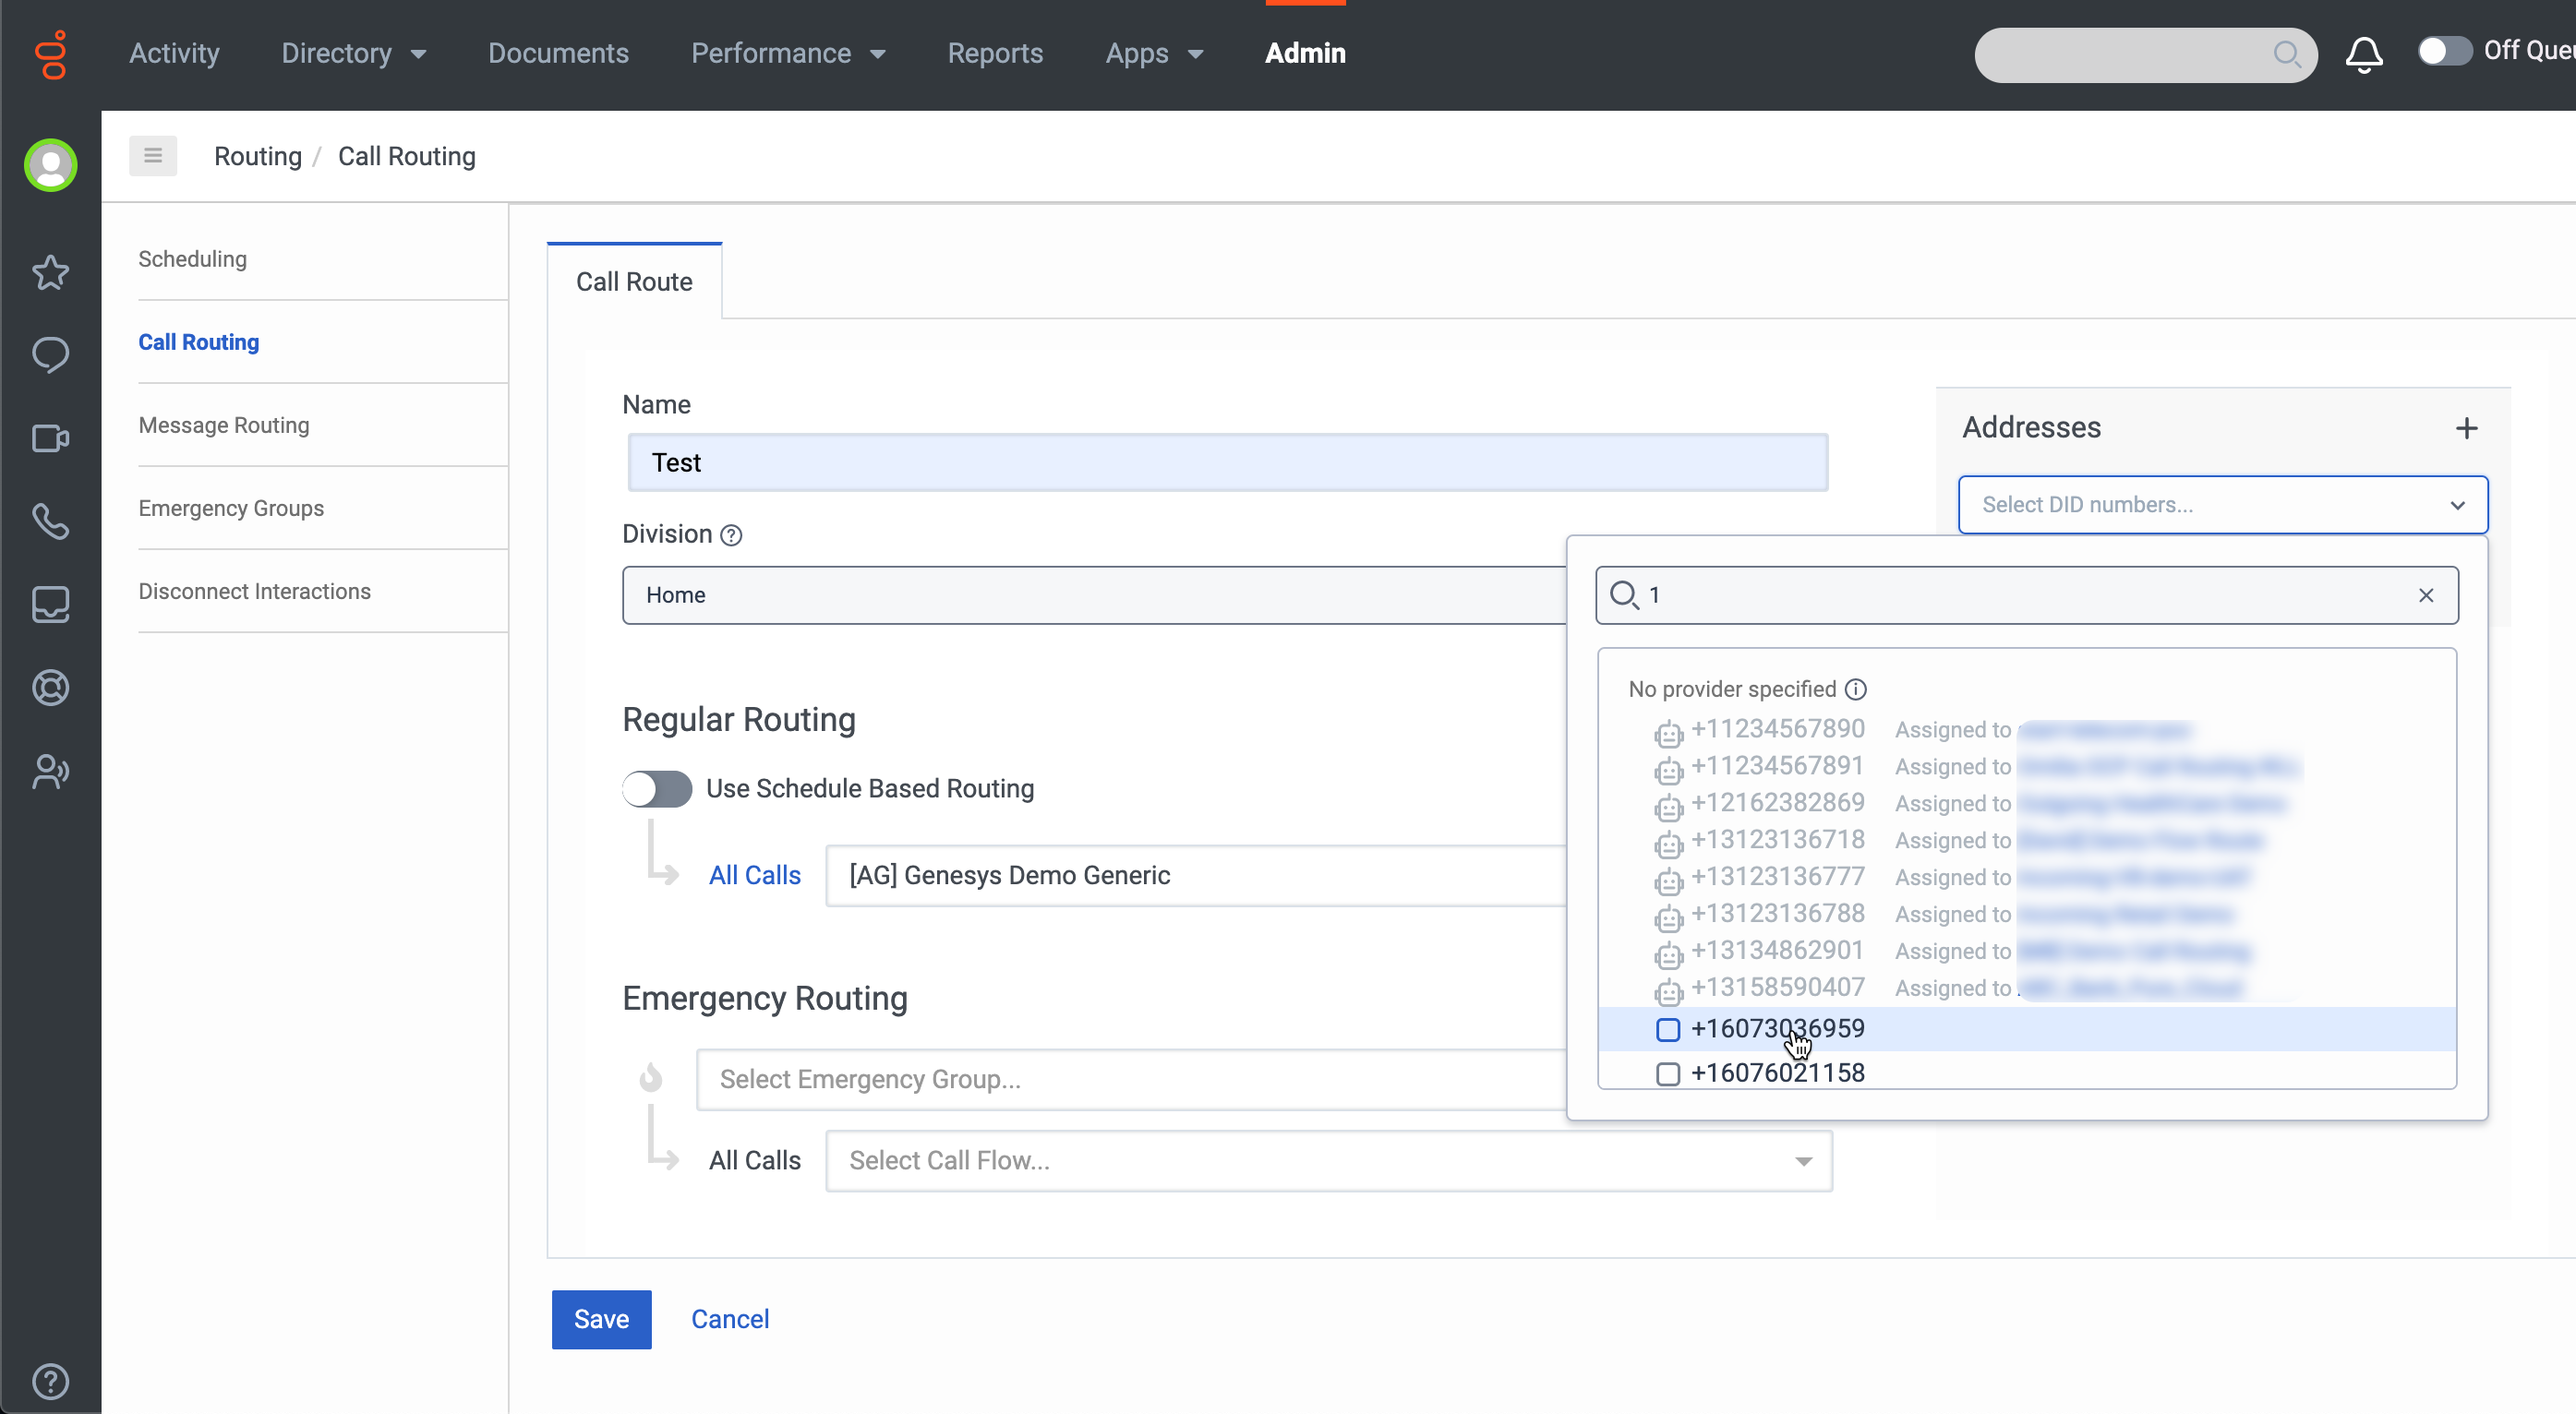
Create Call Routing
To create Call Routing, follow the steps.
1. Go to Admin → Routing and select Call Routing.
2. Click the +Add Call Route button and fill in the required details.
a. Add a Name.
b. Add a flow for the Regular routing. Select the required flow from the dropdown list.
miniApps Wizard creates a call route but a new one can be created in order to avoid disruption of miniApps.
3. Click the + sign on the Addresses to select the calling DID number provided by Genesys with +1 in front of the 10 digit number. Click the Add button to add it.
System will show which numbers are assigned and which ones are free.
A telephone number must be available to avoid using the same one used for testing the IVR miniApps integration.
4. Click the Save button to save the Call Route.
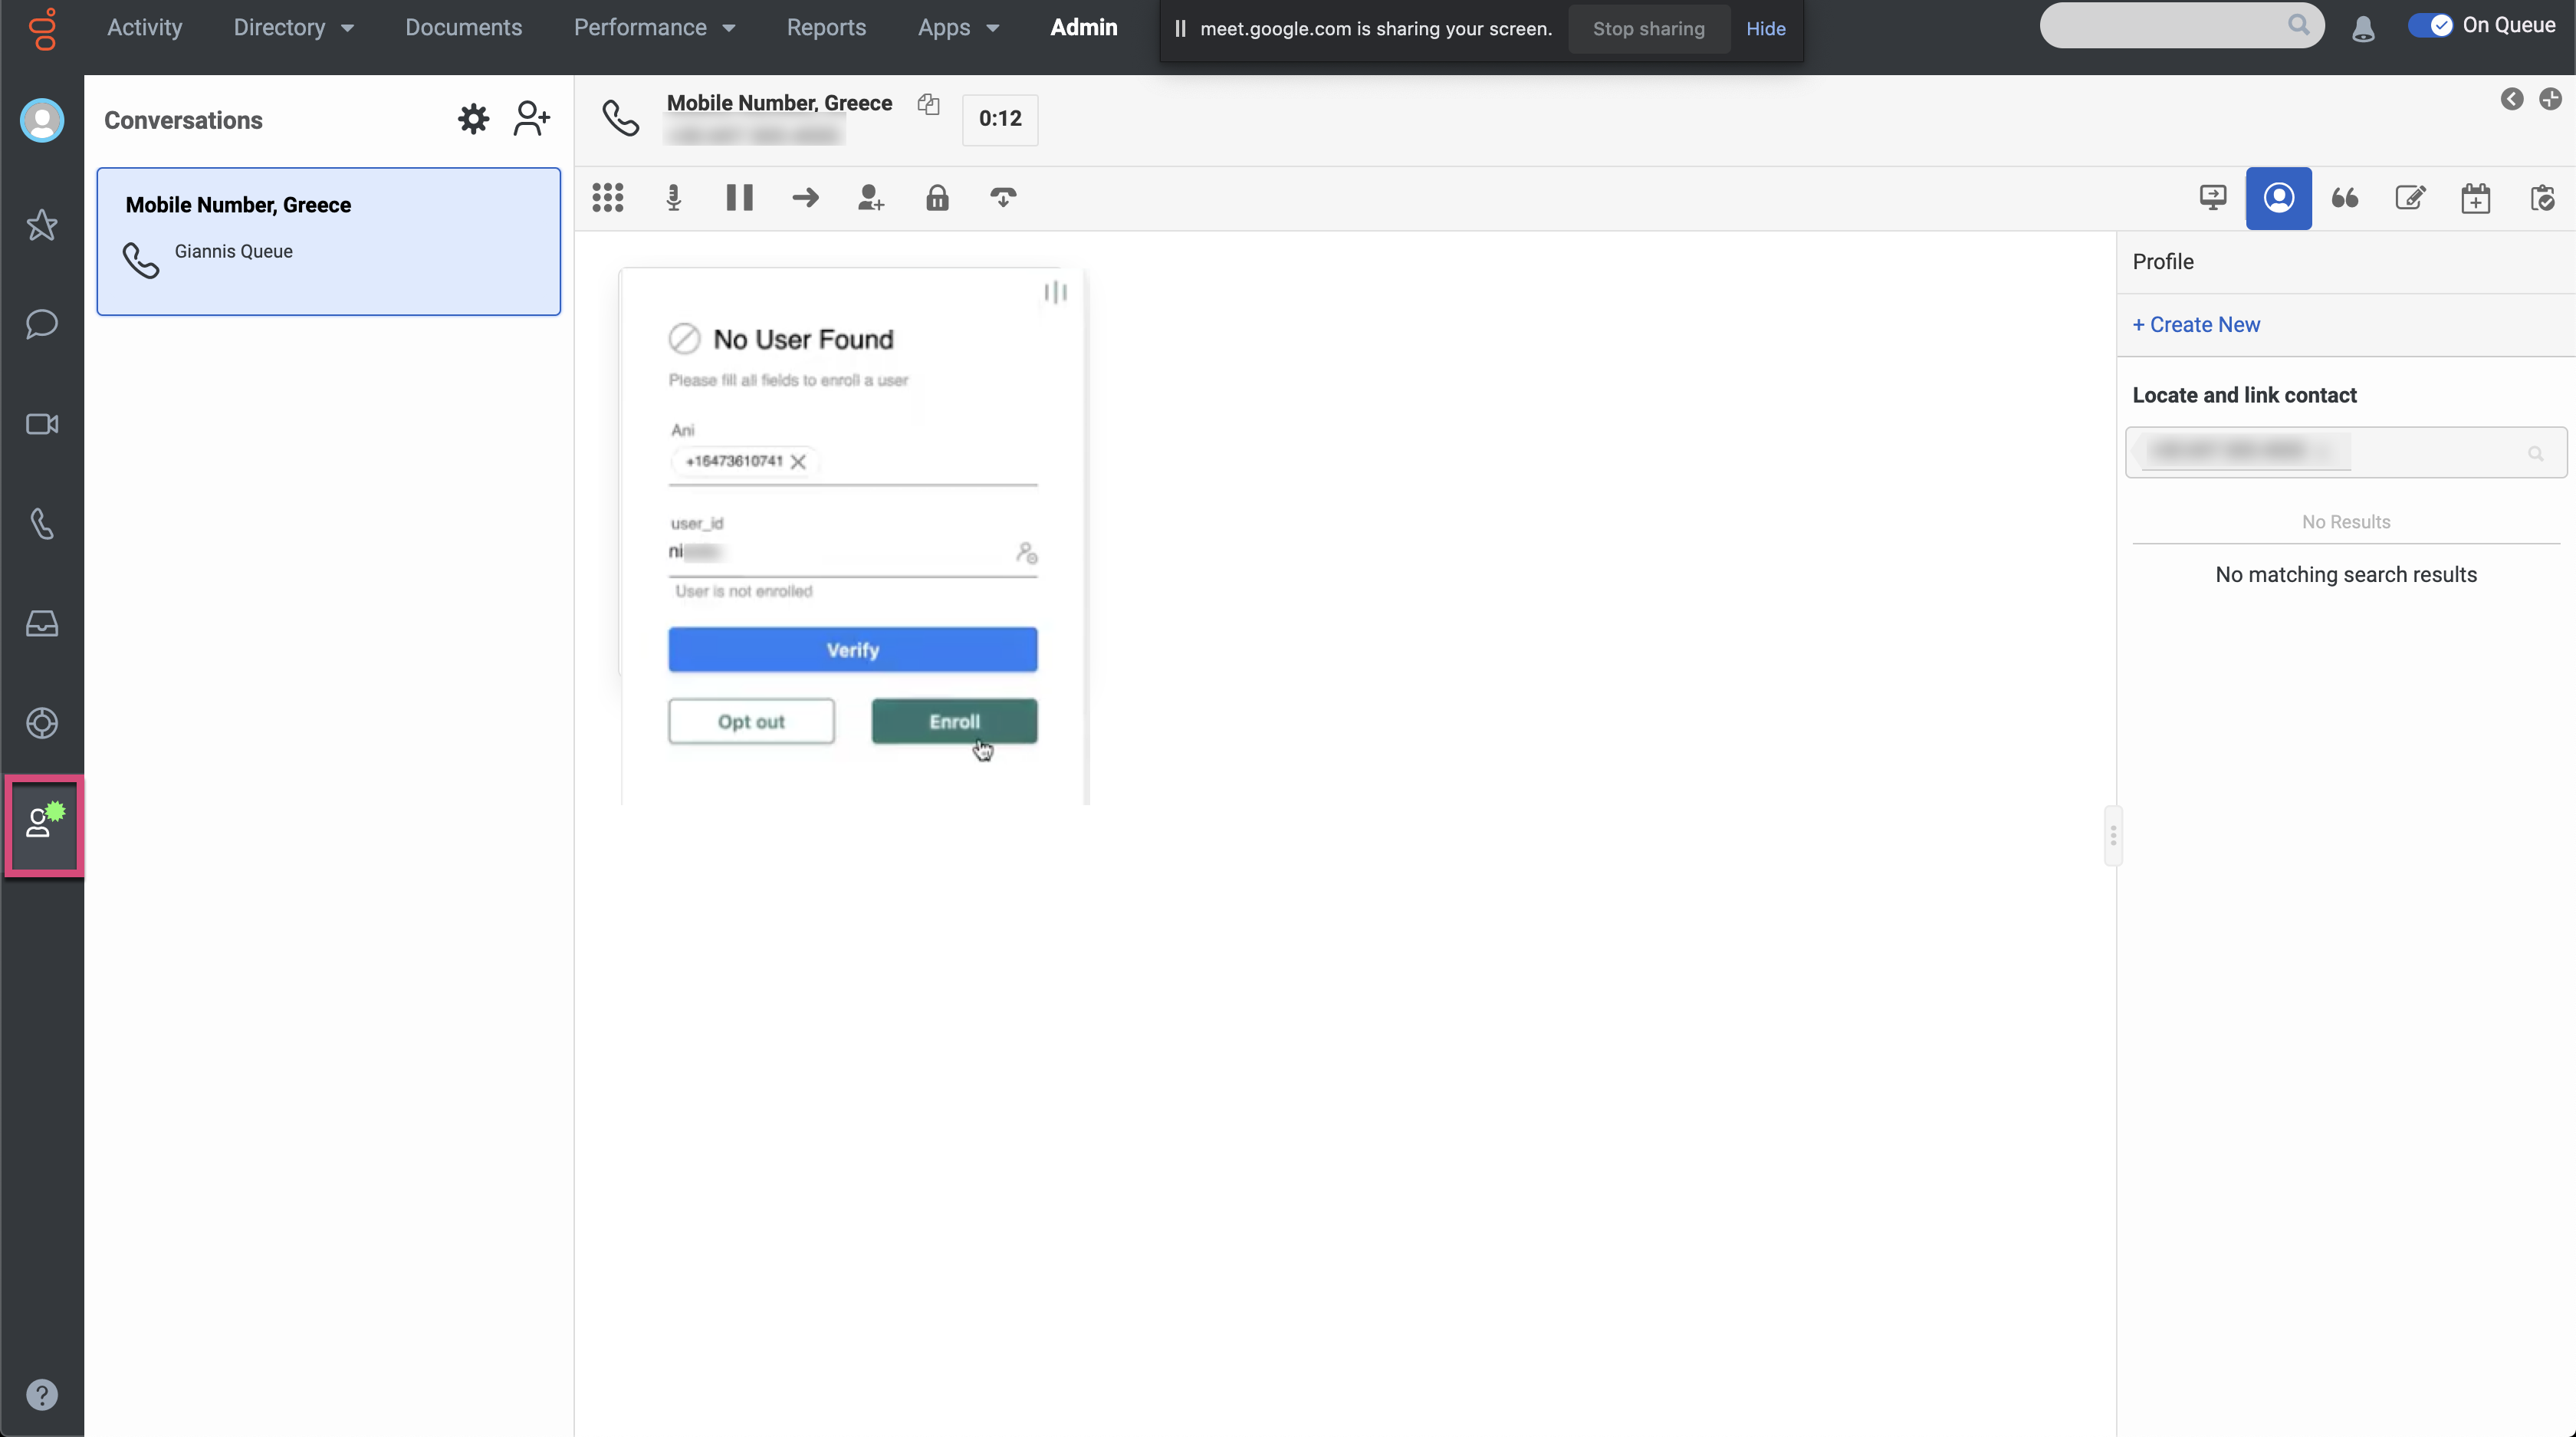
Test the conversation
To test the conversation, open the Interaction menu on the sidebar and make a call to the set call center.
Make sure the On Queue toggle button is turned on in order to receive calls.
Template Examples
Agent-side voice biometrics templates are pre-configured settings that define the behavior of VB processes initiated by a contact center agent. Omilia provides pre-configured JSON templates for the most common agent-assisted use cases. You can download these examples to use as a starting point for your configuration.