Overview
This is a step-by-step guide to integrating the agent-side verification with Genesys Cloud.
Prerequisites
-
Log in to Genesys Cloud with your Genesys credentials with an Architect role.
-
Create a Personal Access Token that belongs to the same group as the VB profile.
-
Get credentials for AudioHook from a created OAuth client.
Agent side verification integration
Add a Transcription
-
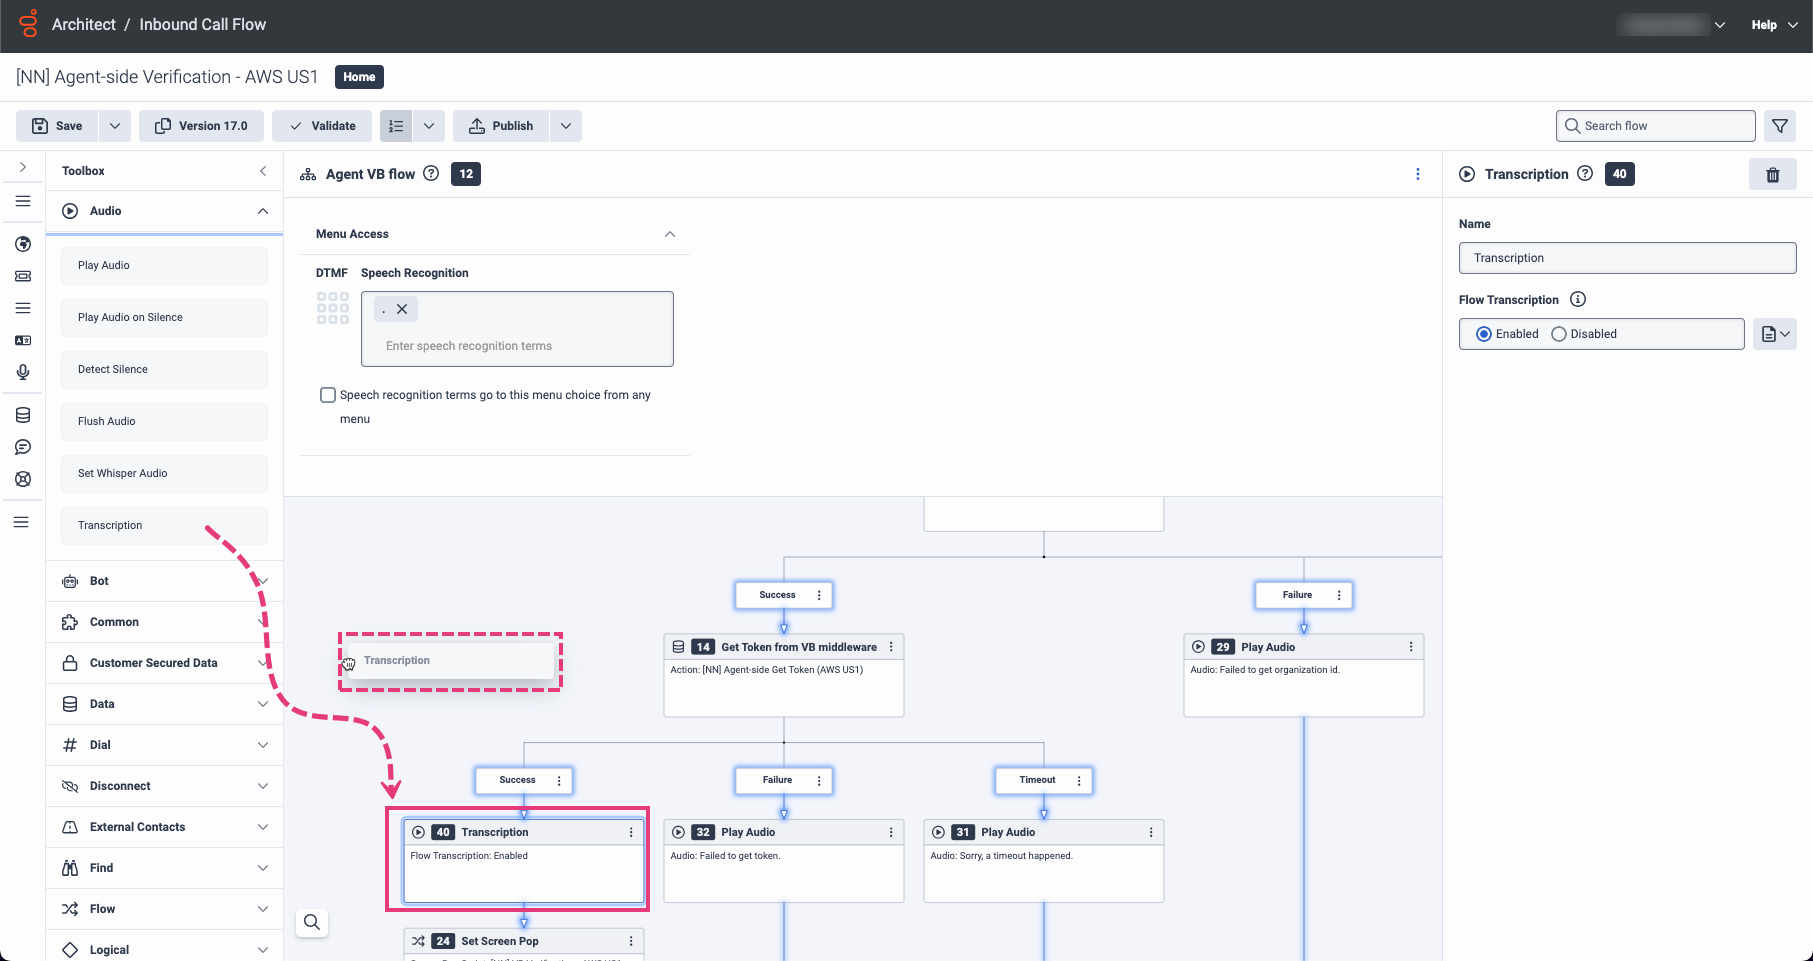
Go to the created flow you want to add agent-side verification to.
-
Drag and drop a Transcription from the audio toolbox after the session token generation request. This will activate Audiohook and enable the audio stream that the verification runs on.
-
Set
Flow Transcriptionto Enabled.
Create an Audiohook
-
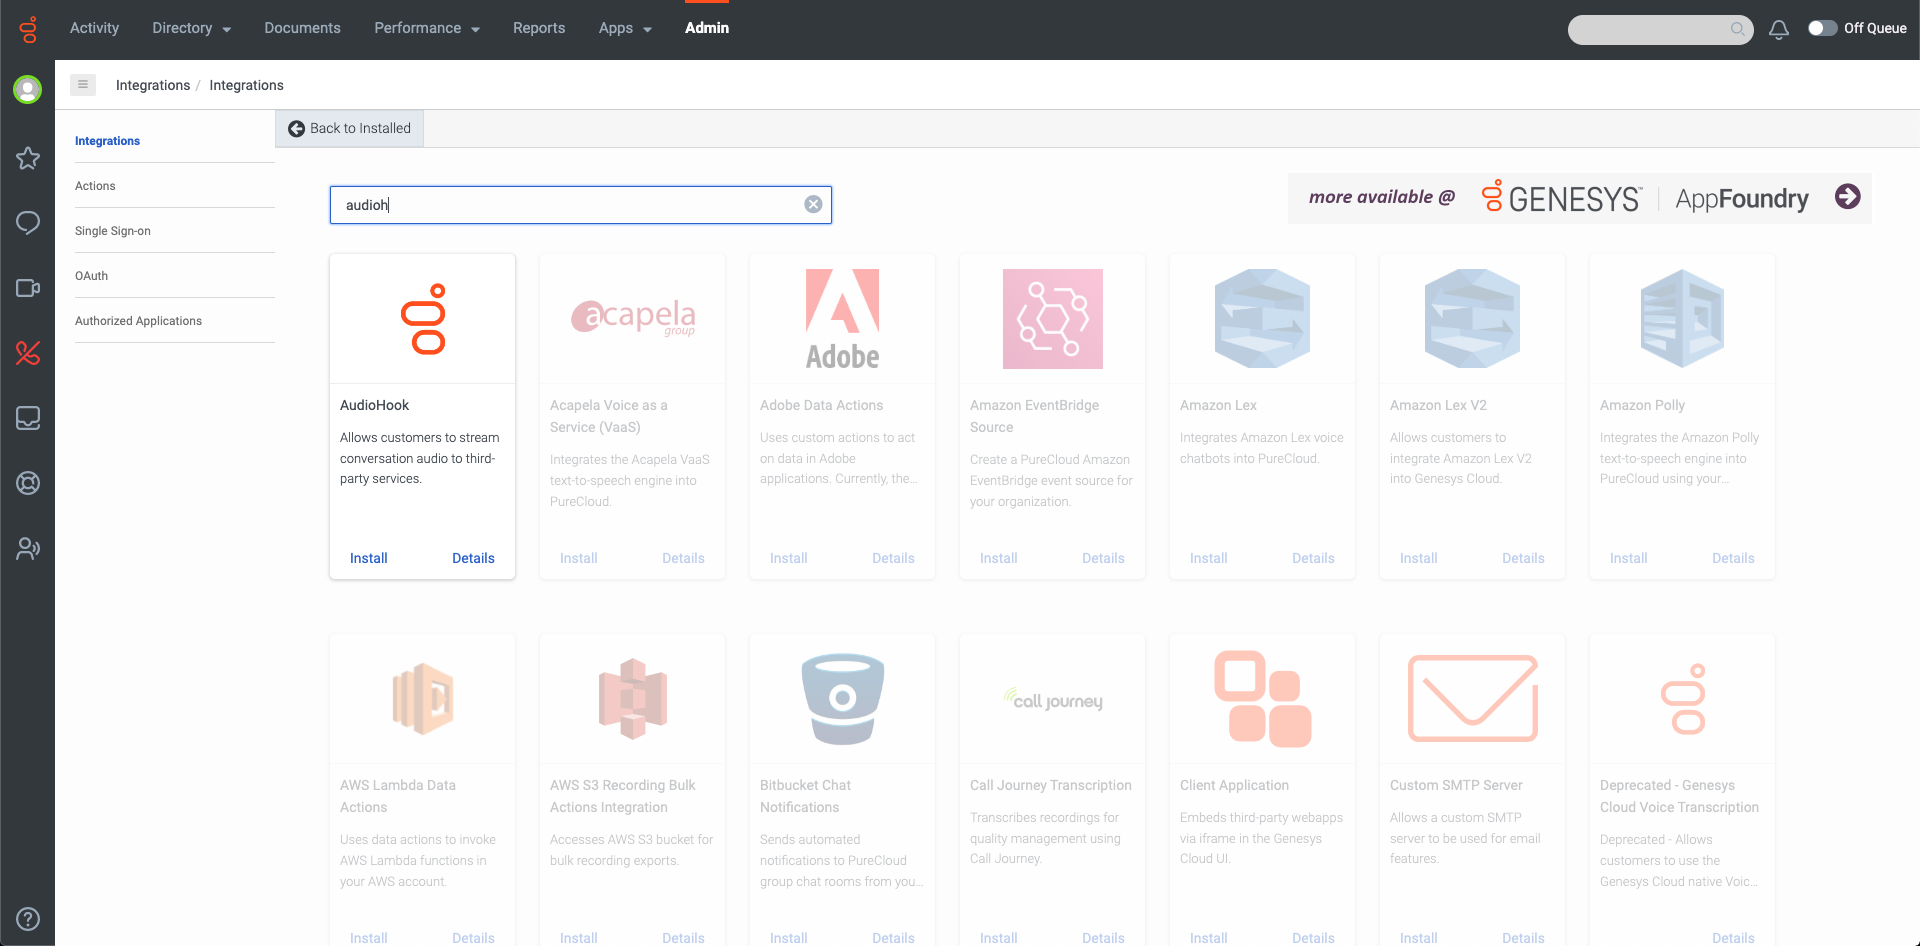
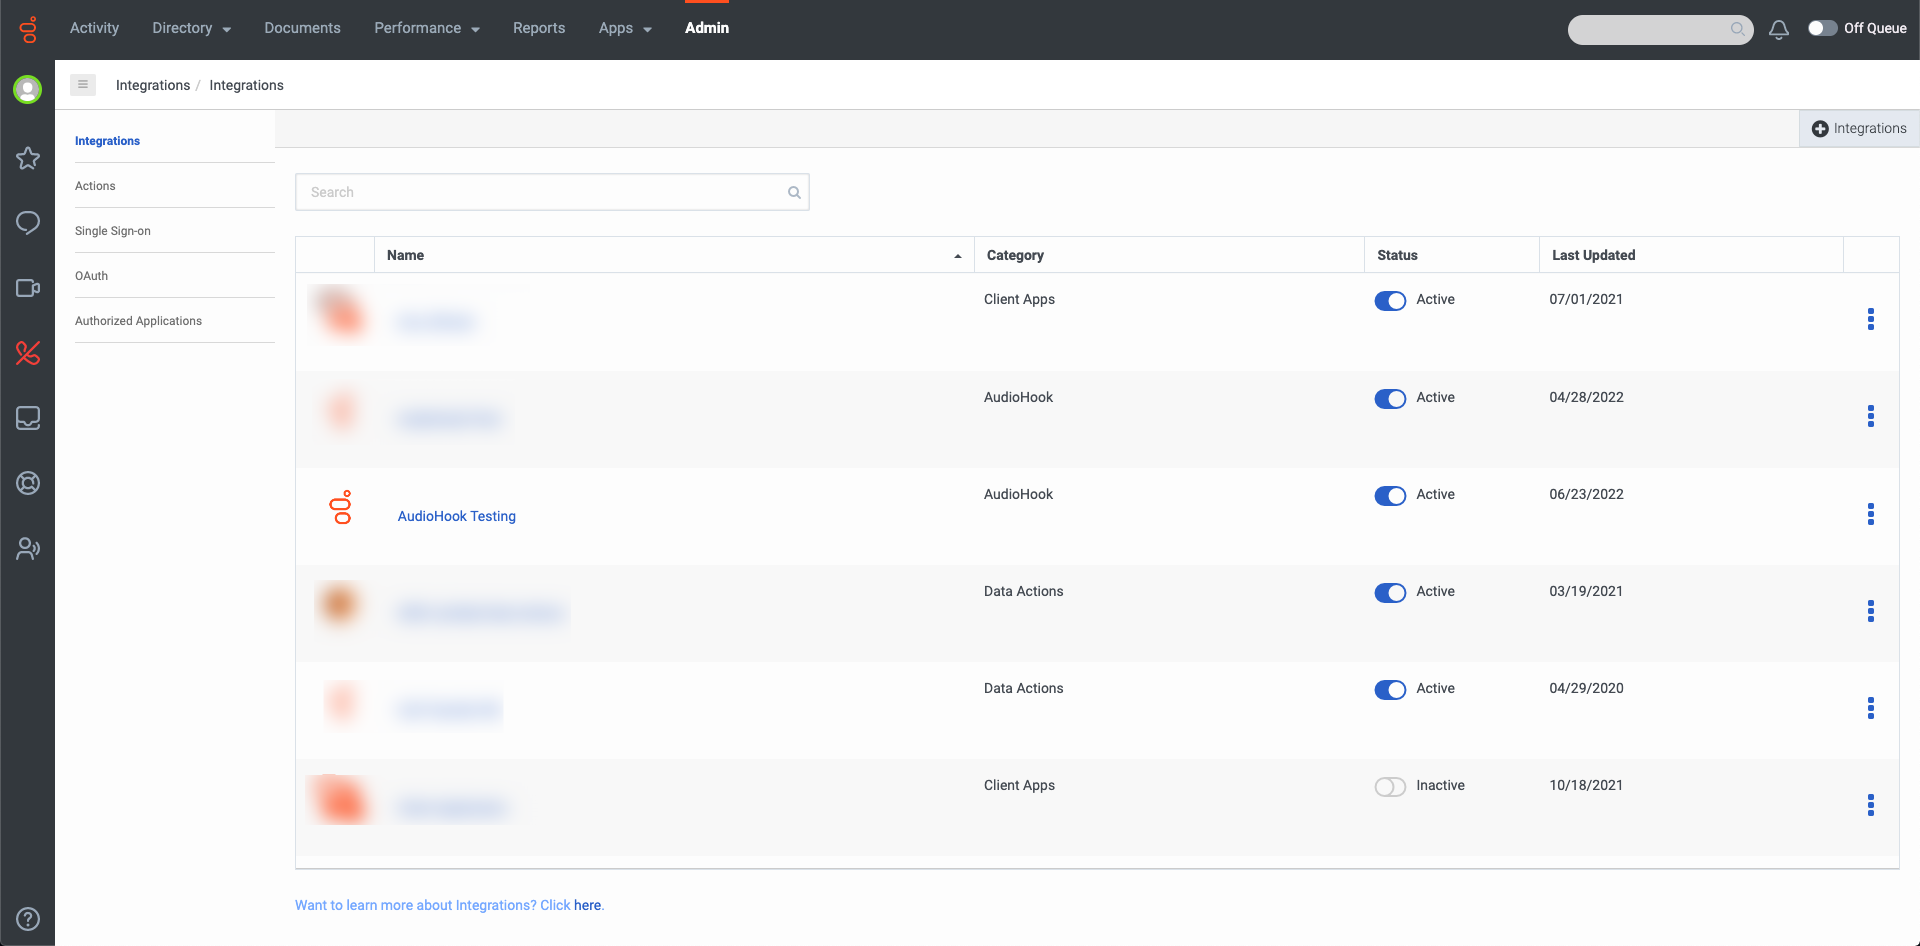
Install an Audiohook:
-
Go to Integrations.
-
Find AudioHook.
-
Click Install.
-
-
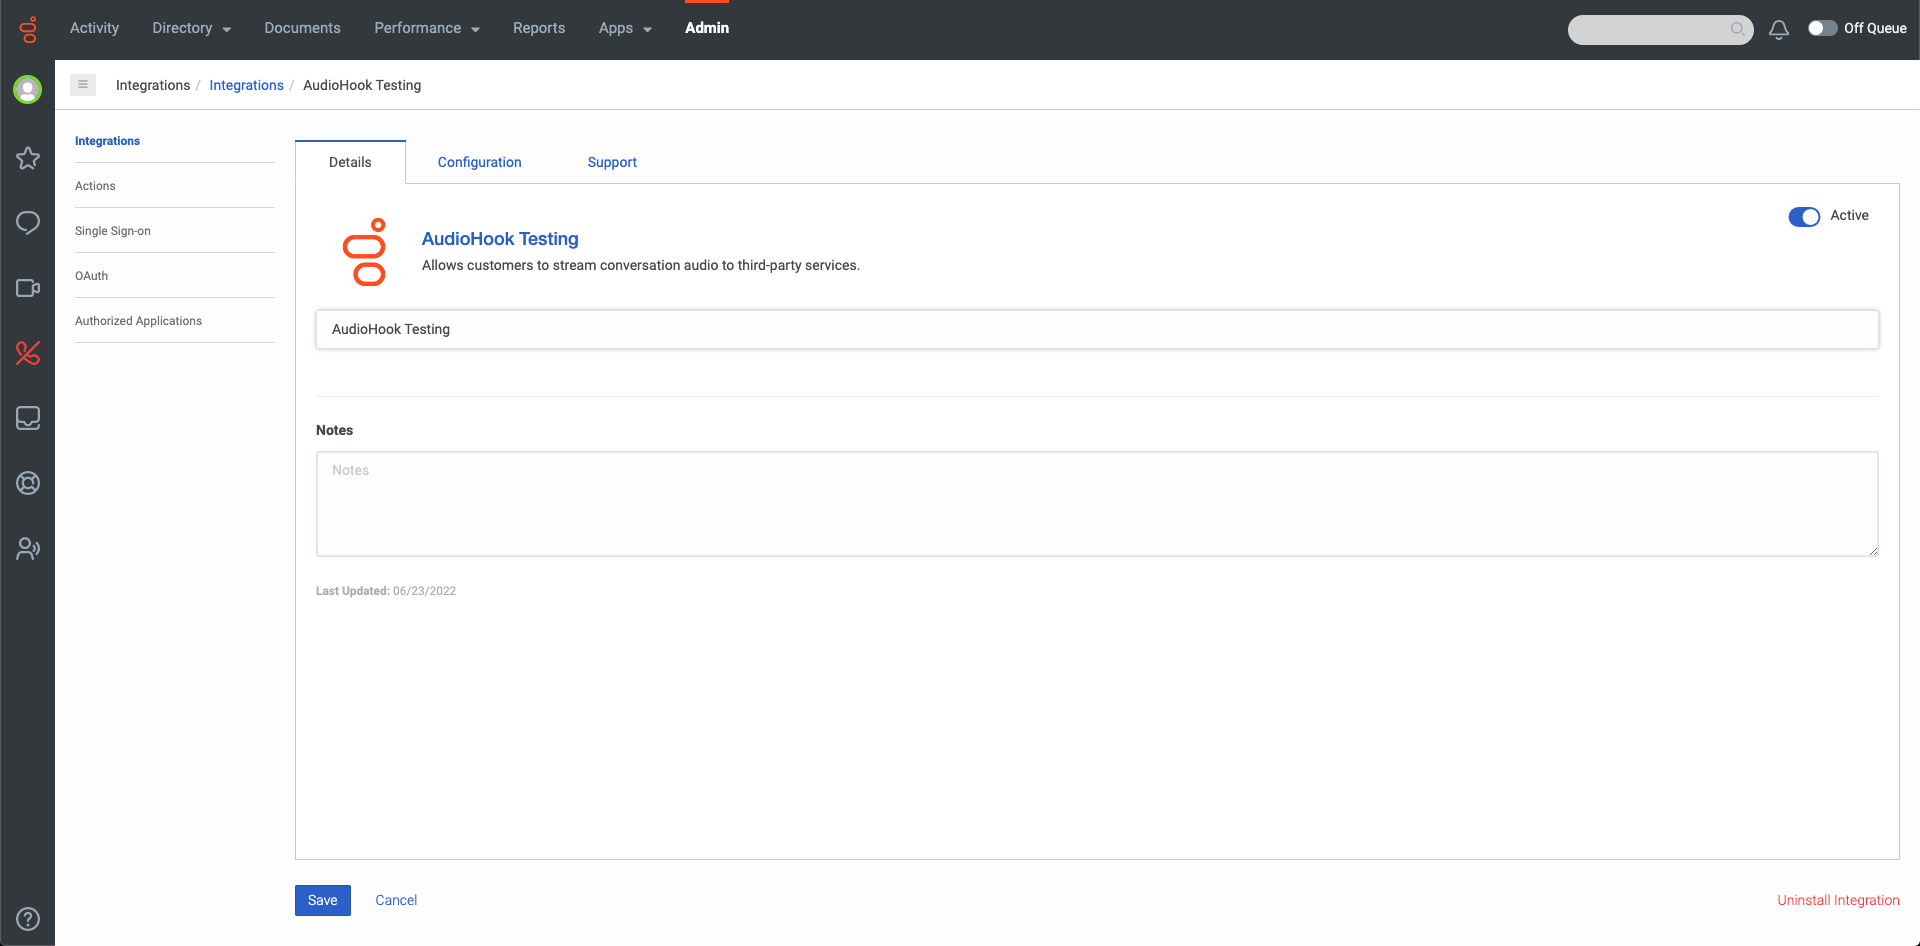
Configure the AudioHook:
-
In the Details tab, edit a name.
-
In the Configurations tab, set the Channel value to both.
-
In the Connection URI field, insert the address for the audio to be sent to.
Example: wss://us1-m.ocp.ai/agent-vb-mw/genesys/stream?idmToken=IdmToken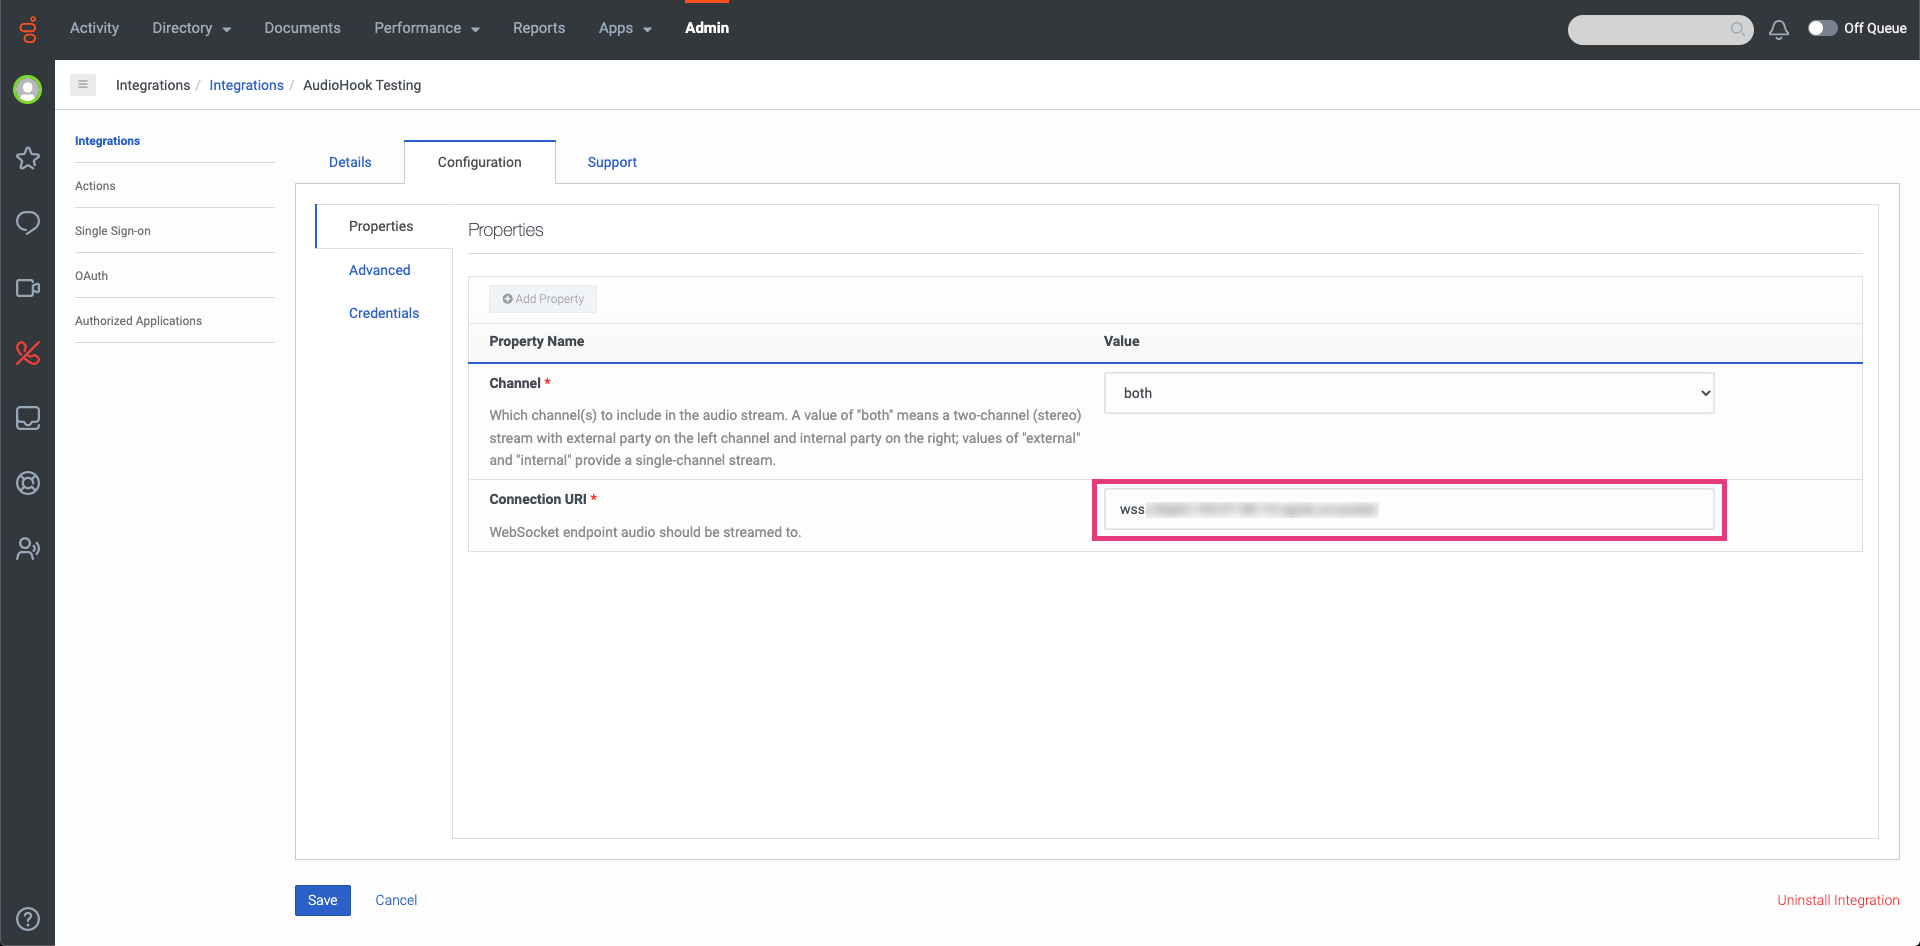
-
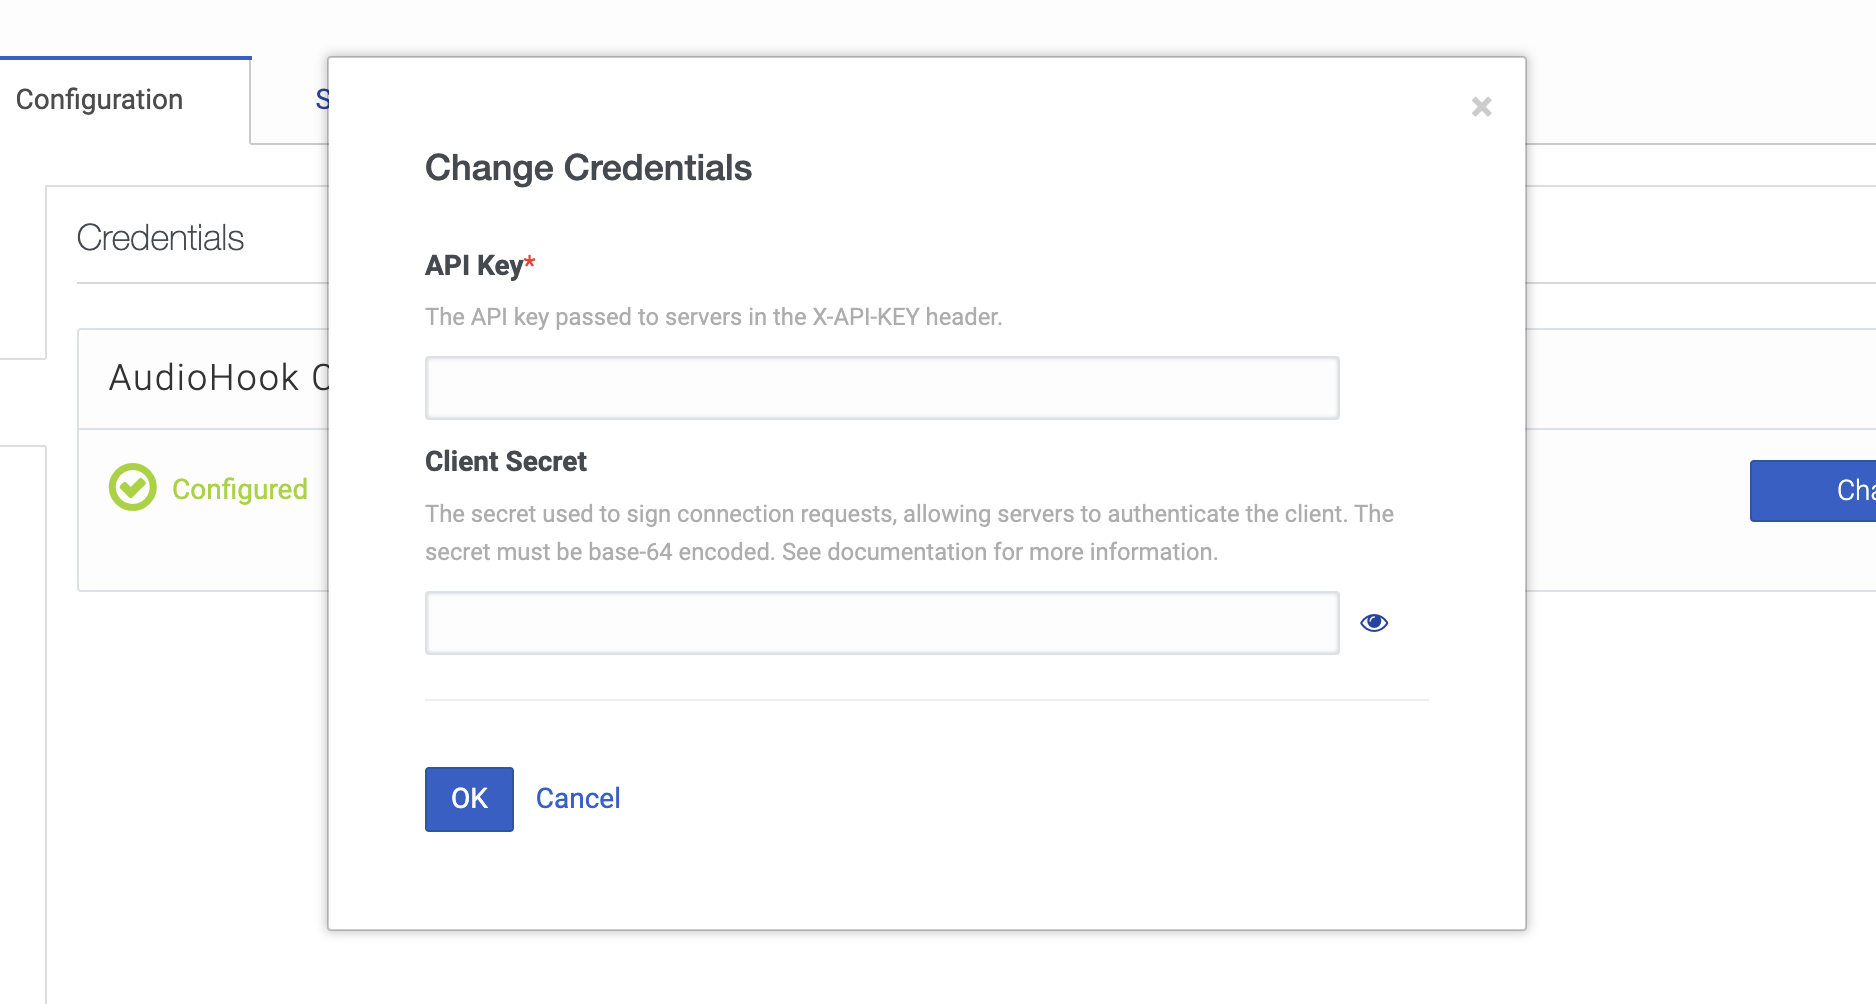
In the Credentials tab, click the blue button to update credentials. Enter the API key and Client secret created for your OAuth client. For more information on how to retrieve these credentials, see OAuth client creation.
-
-
Click Save. You will be sent back to the Integrations menu.
Create the Verification Script
-
Go to Admin → Scripts.
-
Click the +Create button to create a new inbound script.
-
Add a web page by adding
Web Page Sourcedata.
Example: https://ocp.ai/agent-vb-mw/ws/frame?token={{Token}}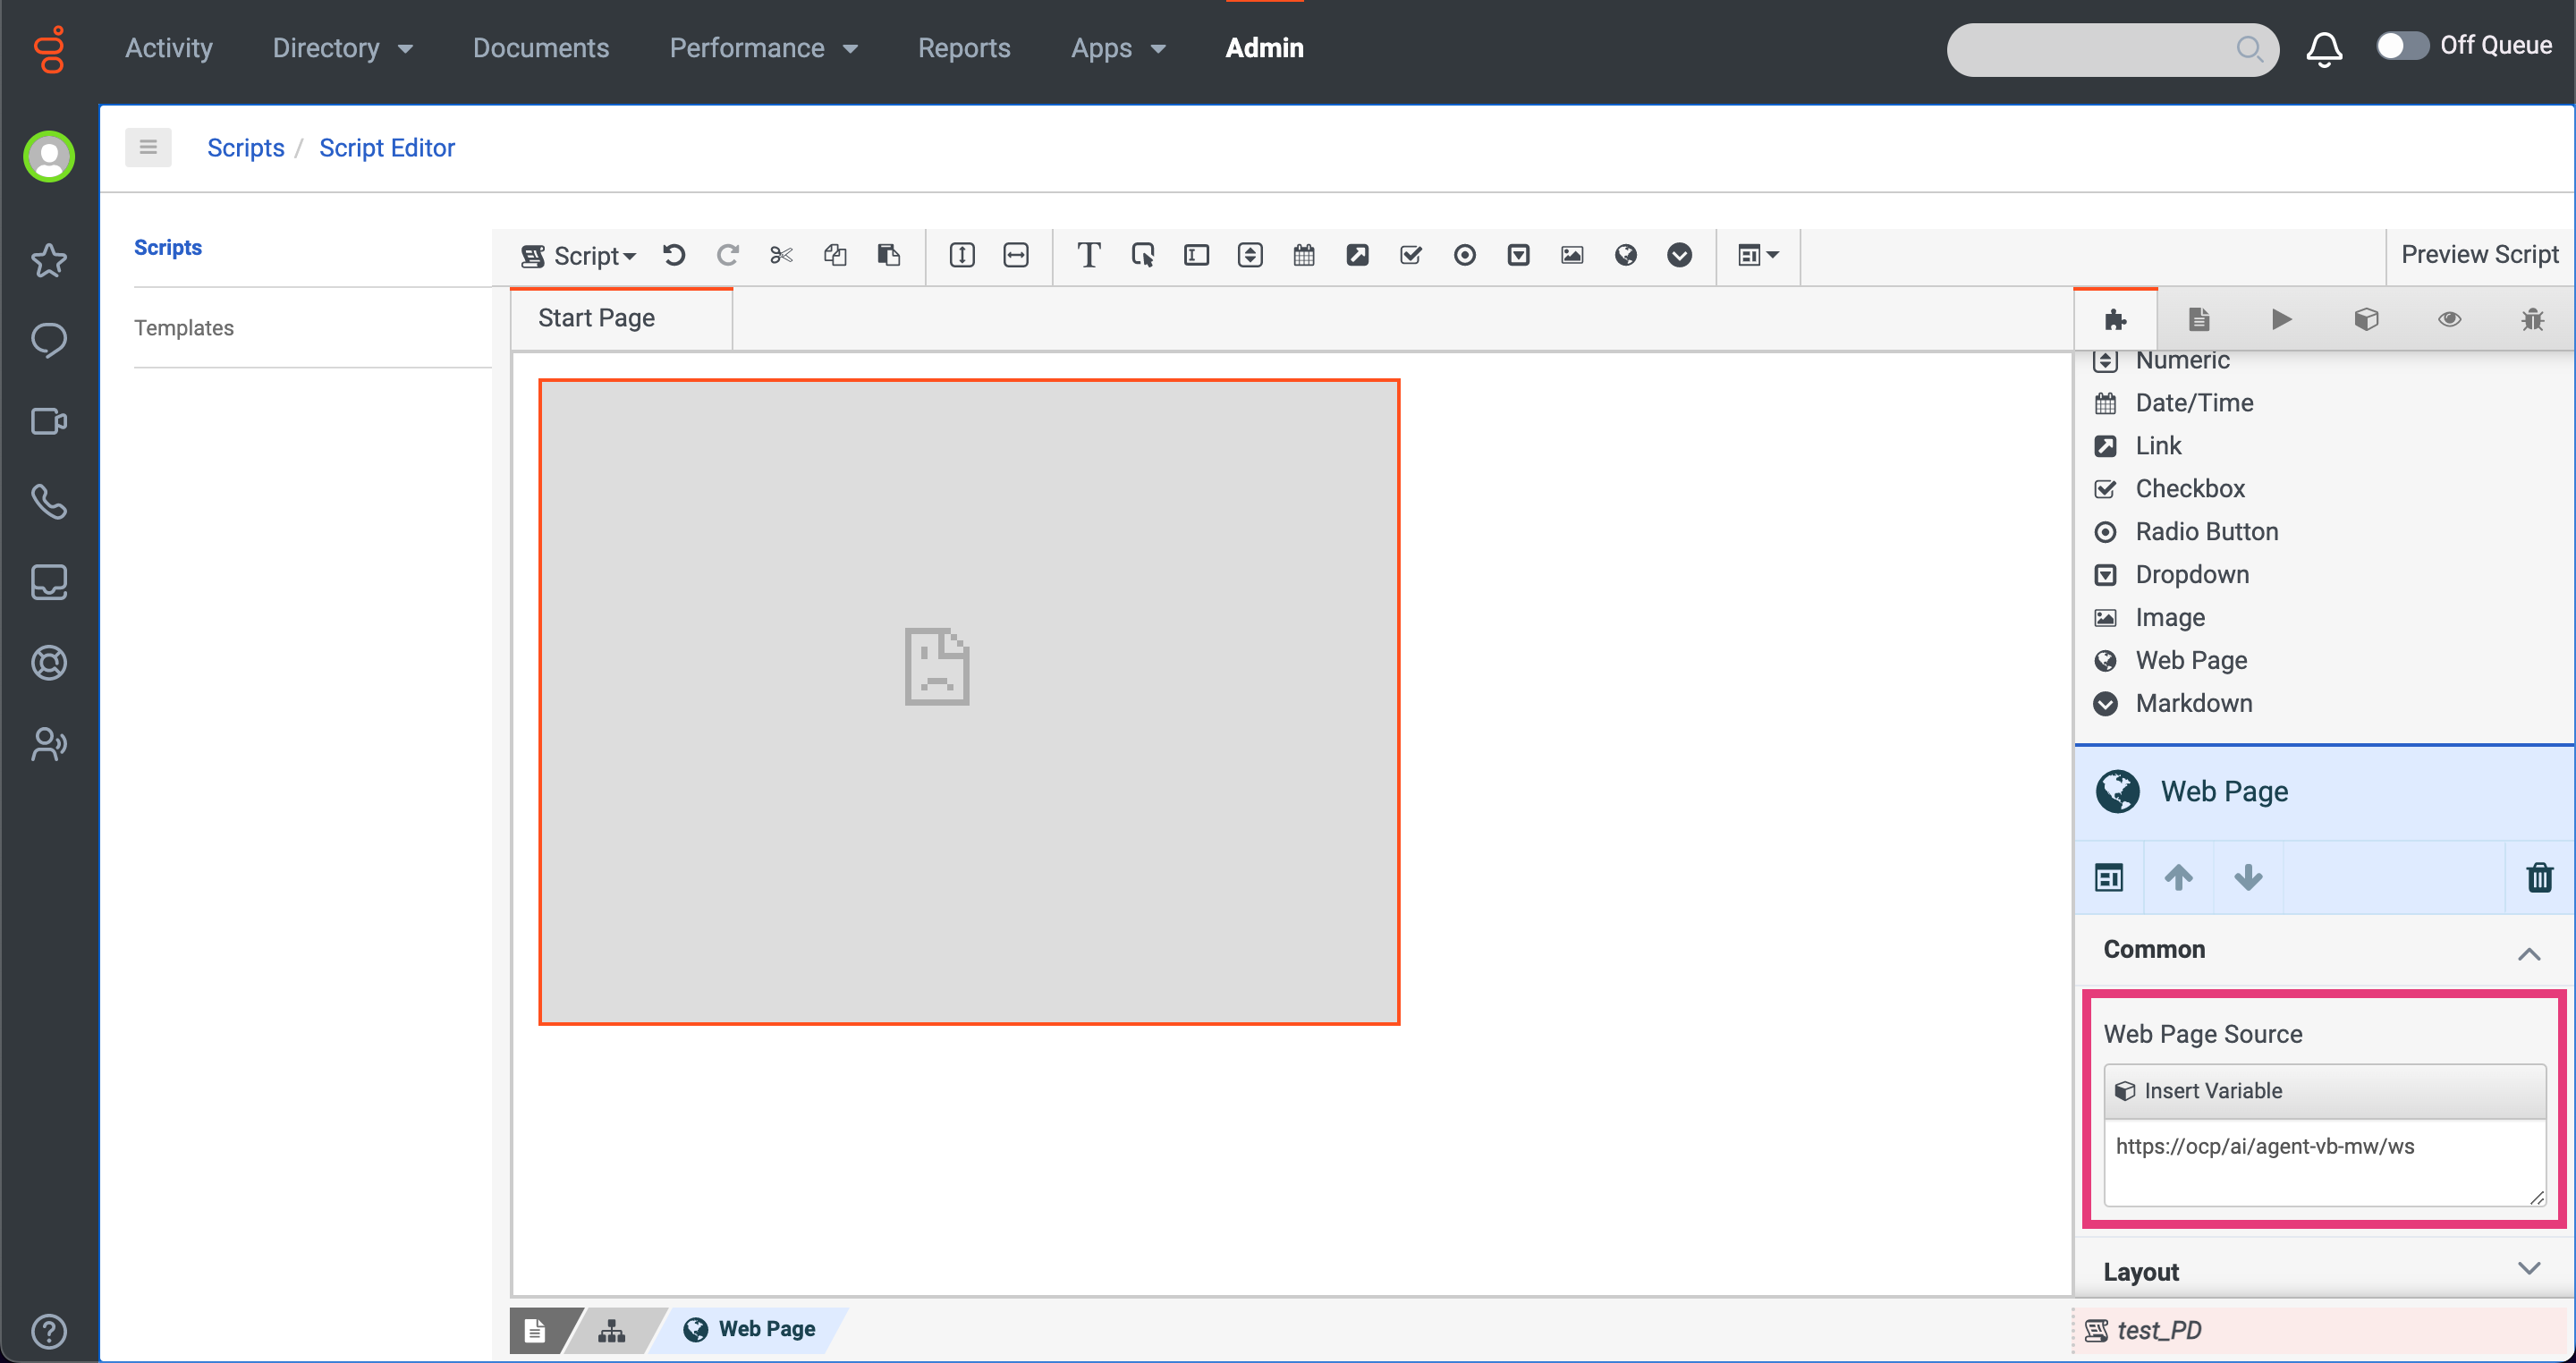
-
Edit the properties:
-
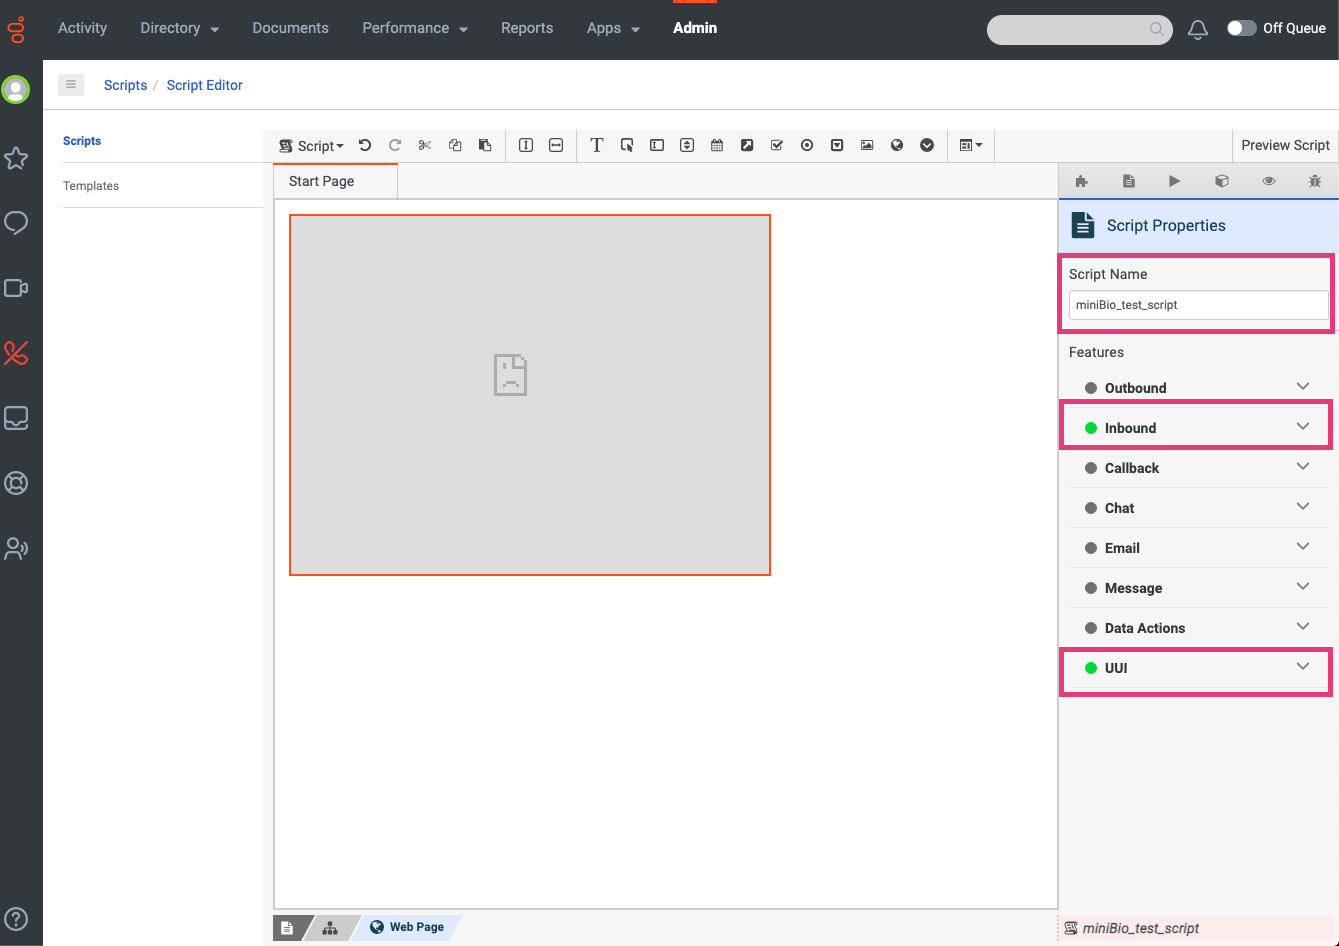
Add a script name.
-
Toggle ON the appropriate features (Inbound and UUI).
-
-
Save the script.
Edit the Queues
-
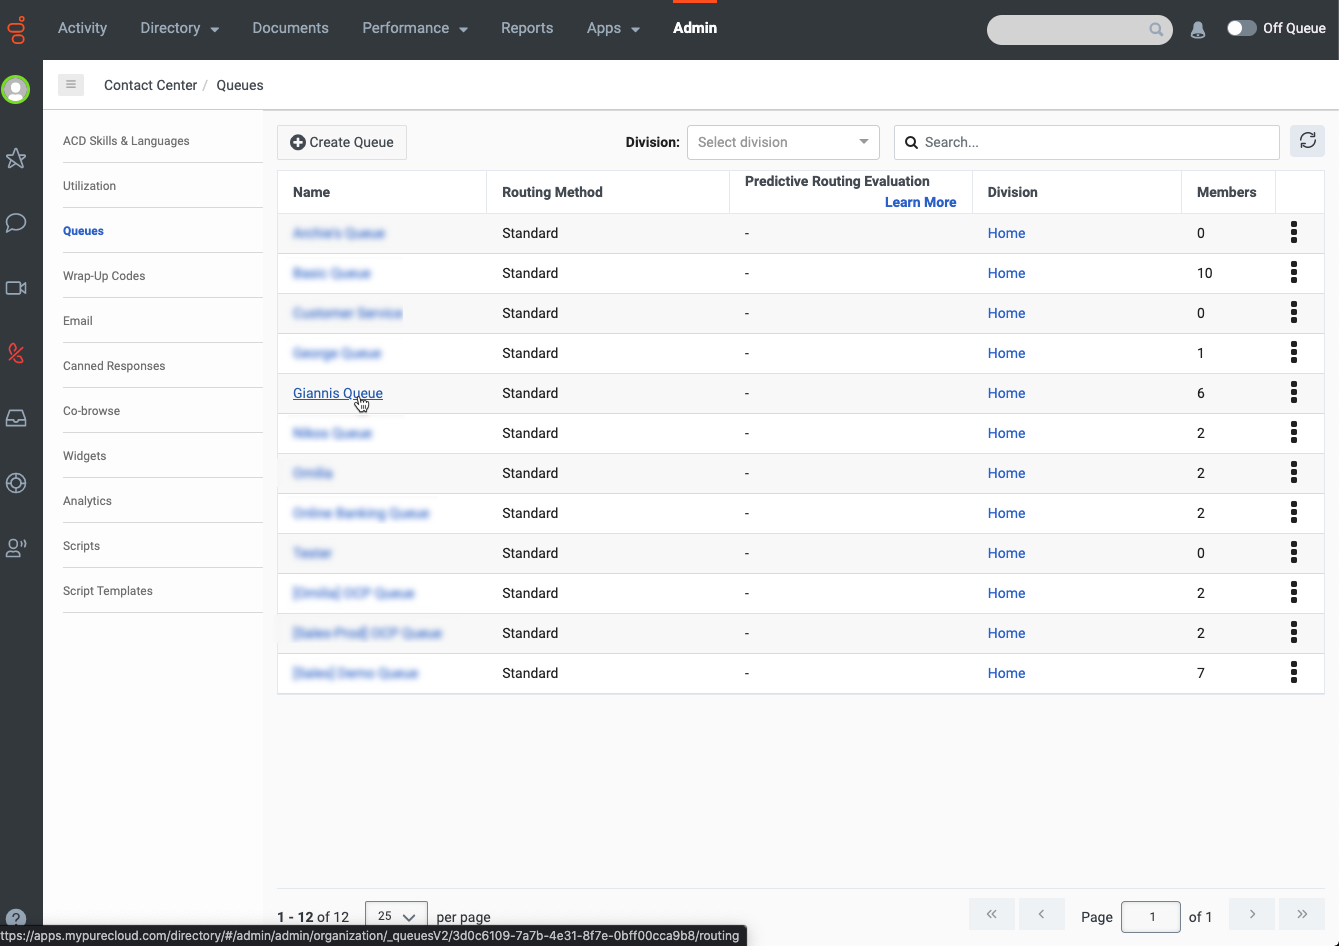
Go to Admin → Queues.
-
Select the queue used in your VB flow.
-
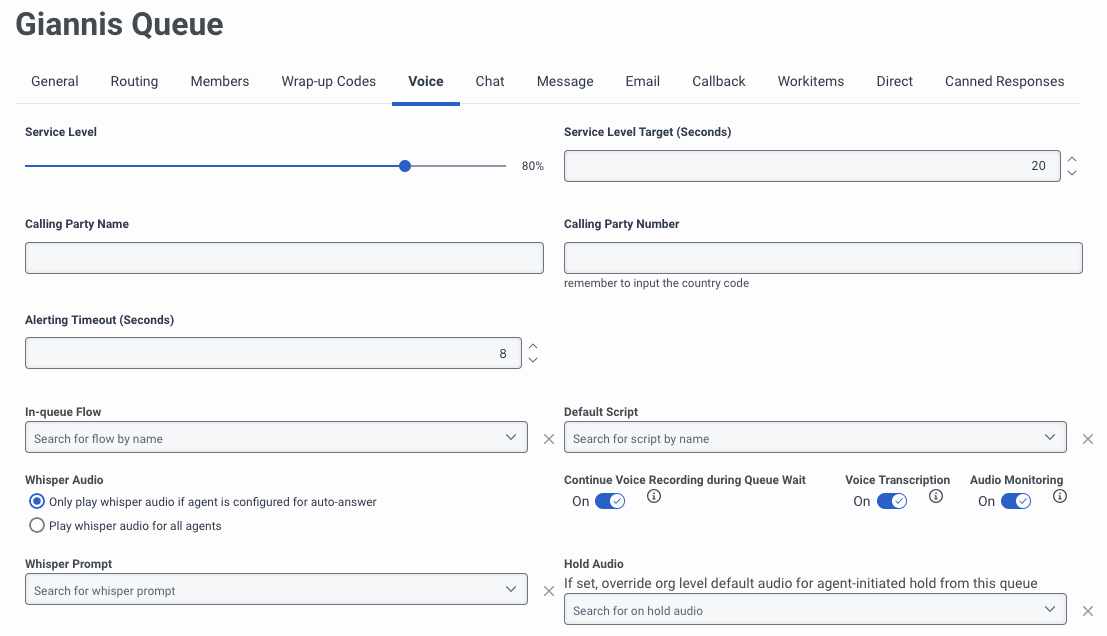
Enable stream for selected queues:
-
Toggle the Voice Transcription button and the Audio Monitoring button to ON.
-
-
Click Save to apply the changes.
-
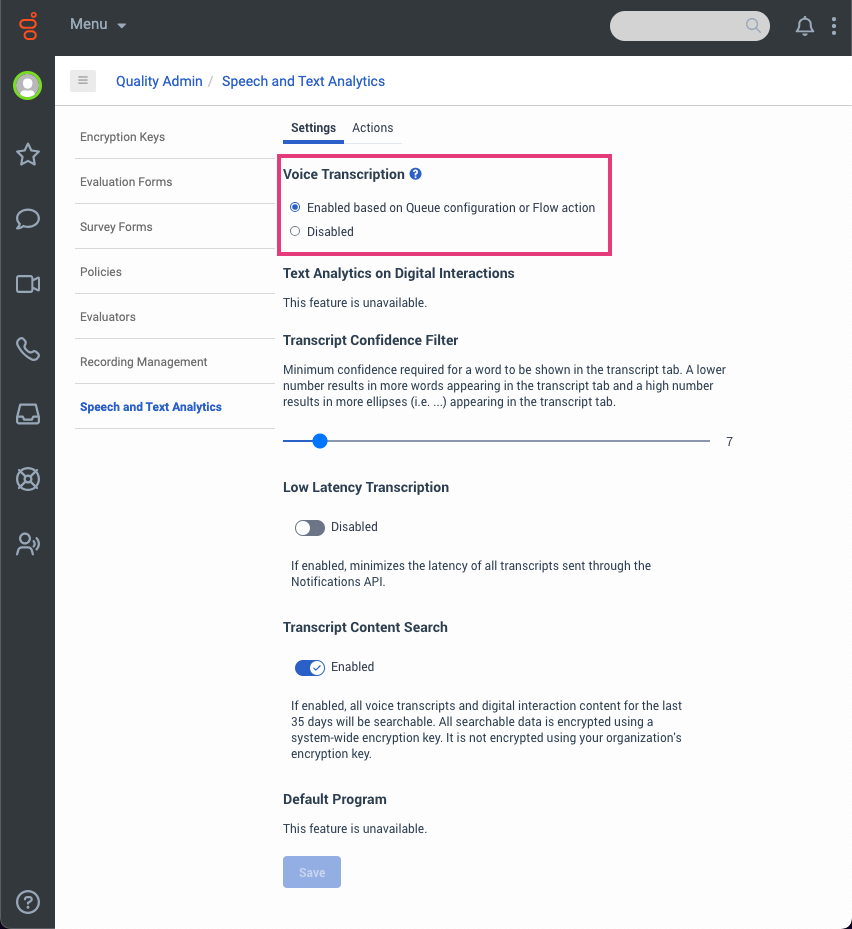
Go to Quality → Speech and Text Analytics.
-
Enable the Voice Transcription and configure analytics accordingly.
-
Click Save to apply any changes.
Assign DID Numbers
-
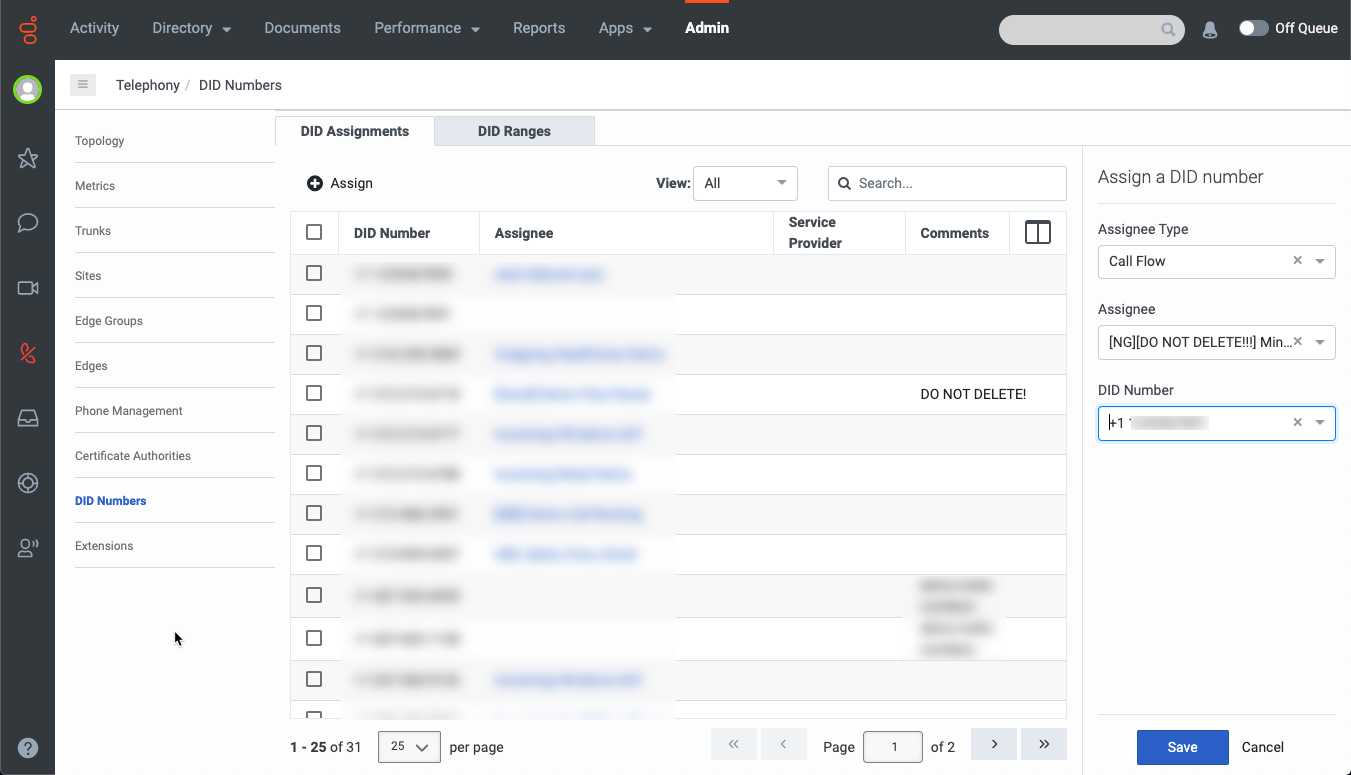
Go to Telephony → DID Numbers.
-
Click the +Assign button.
-
Edit the properties:
-
Assignee Type: Call Flow
-
Assignee: The VB Flow
-
DID Number: The selected telephone number.
-
-
Click Save to save changes.
Routing
Make sure a number has been assigned to the flow in the Routing → Call Routing menu.
-
Go to Routing → Call Routing.
-
Select the VB Flow.

-
Select the desired routing.
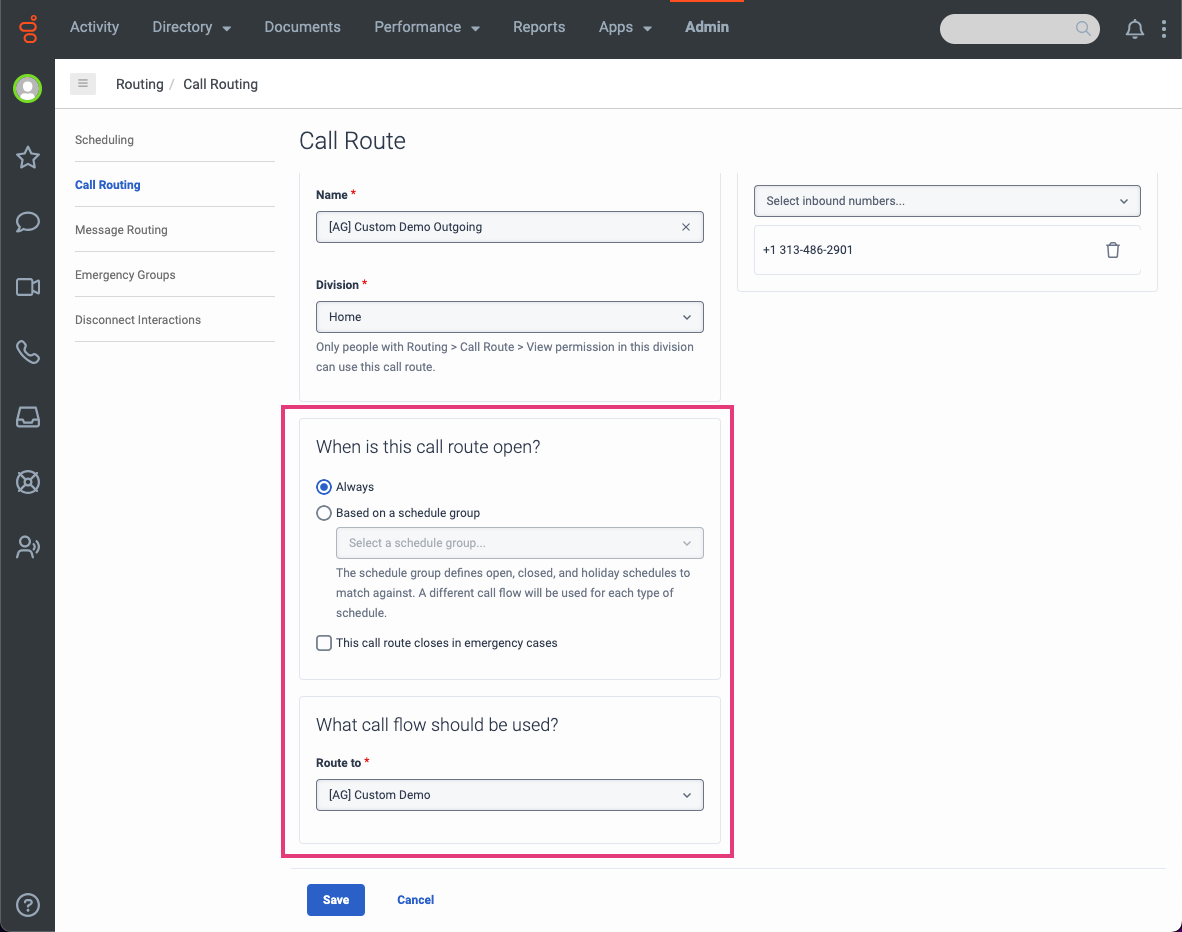
-
Click Save to save changes.