.svg)
Introduction
The Test Suites tab is your central workspace for organizing, configuring, and running tests in Testing Studio. From this tab, you can build and run test suites - collections of test case files grouped for execution - track results, and manage underlying test files.
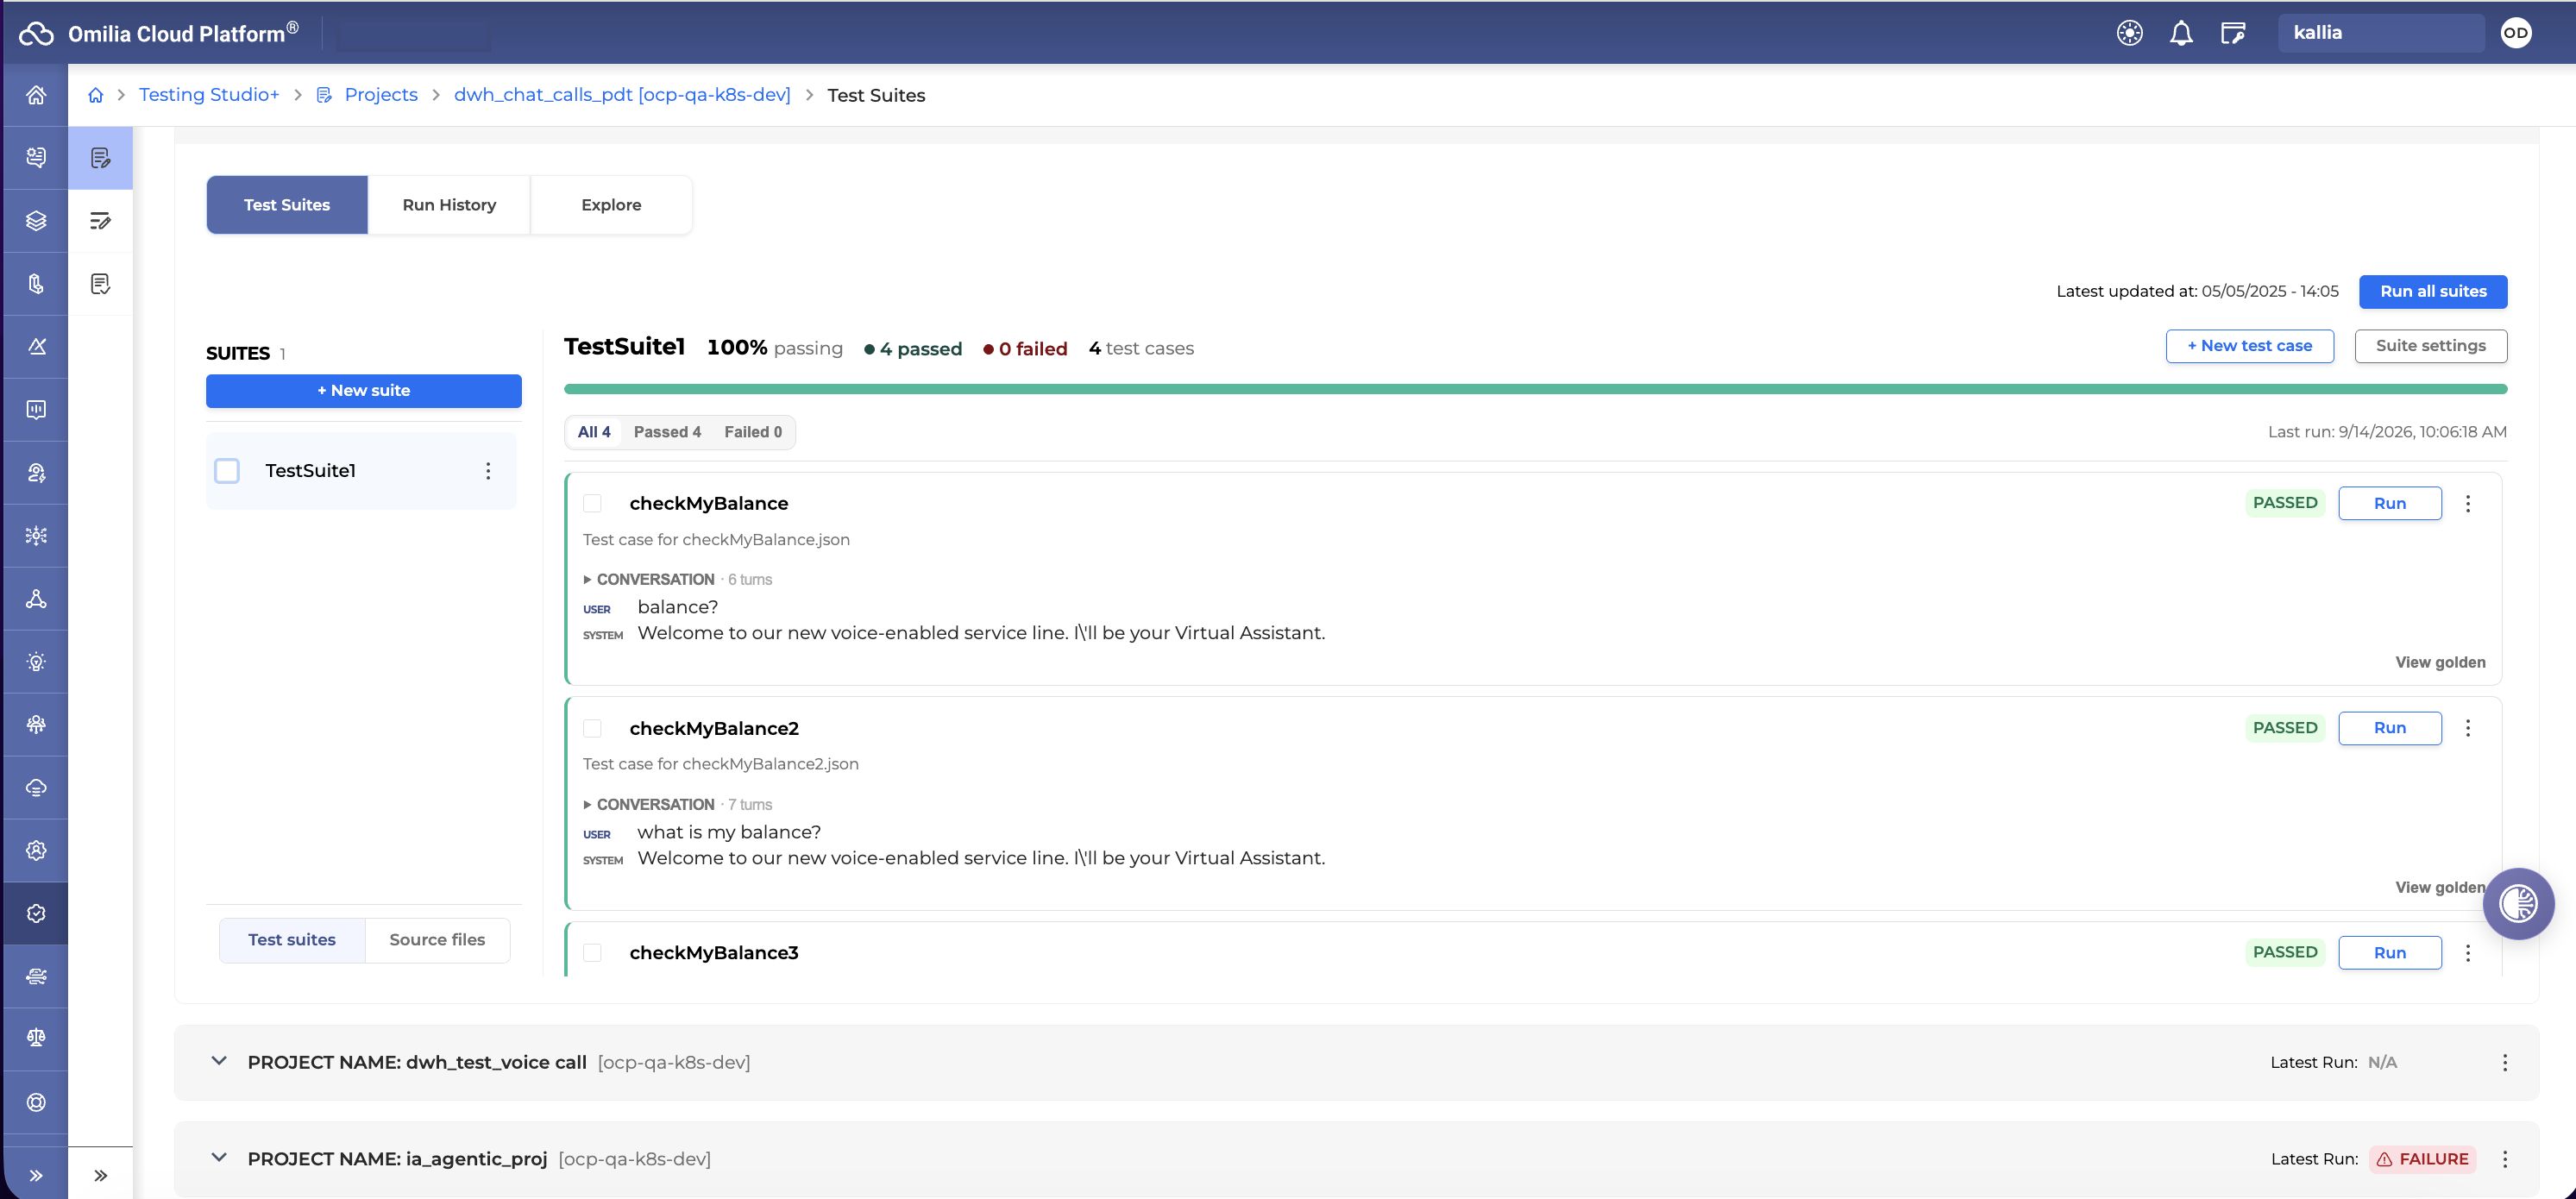
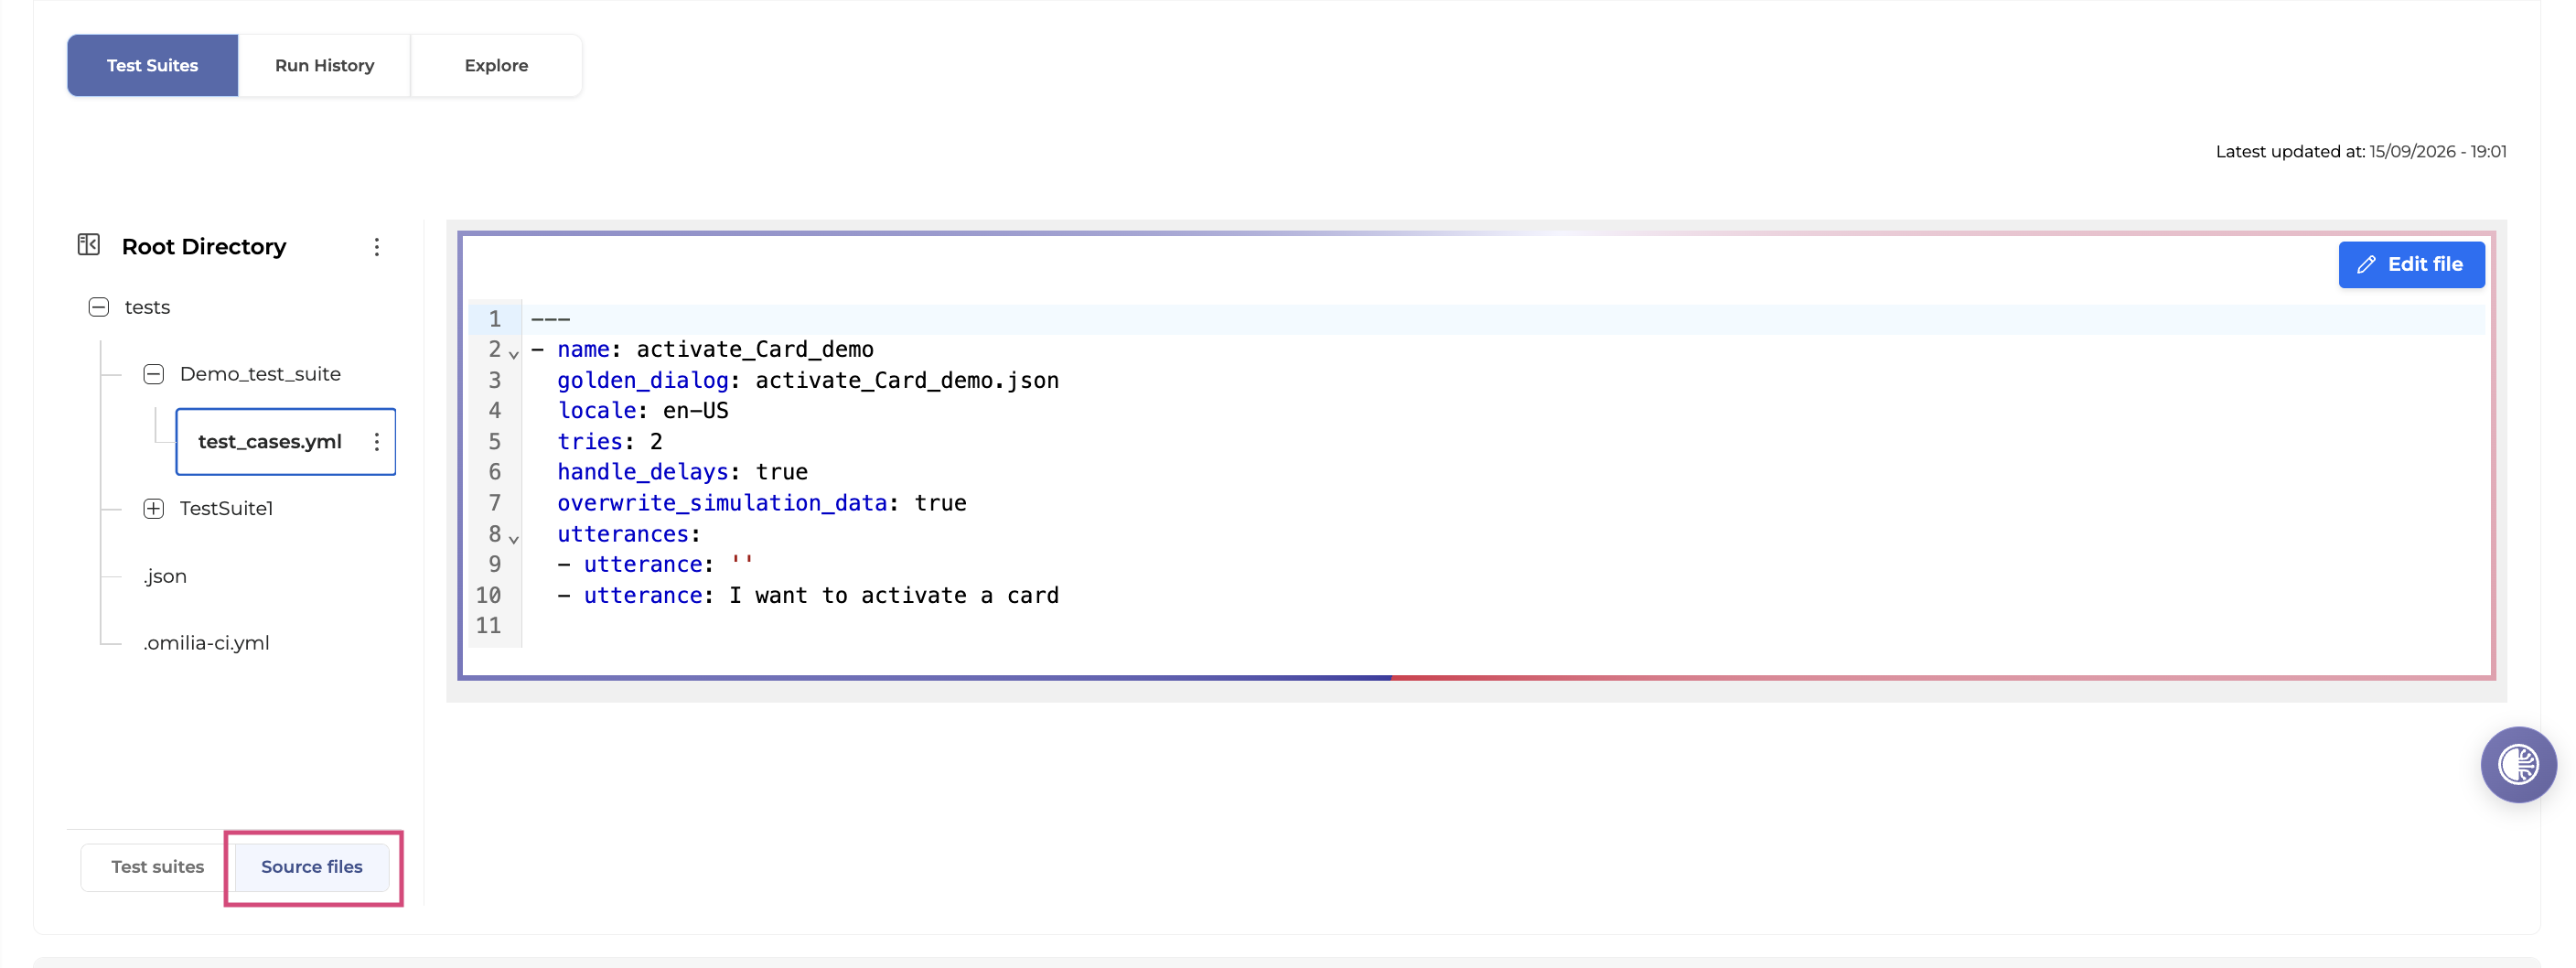
The Test Suites tab now has two views: Test suites and Source files.
-
Test suites view: The main working view for browsing, running, and managing suites and test cases.
-
Source files view: The legacy view, showing the raw file tree and underlying YAML/JSON files. Use this only when you need to inspect or hand-edit source files directly.
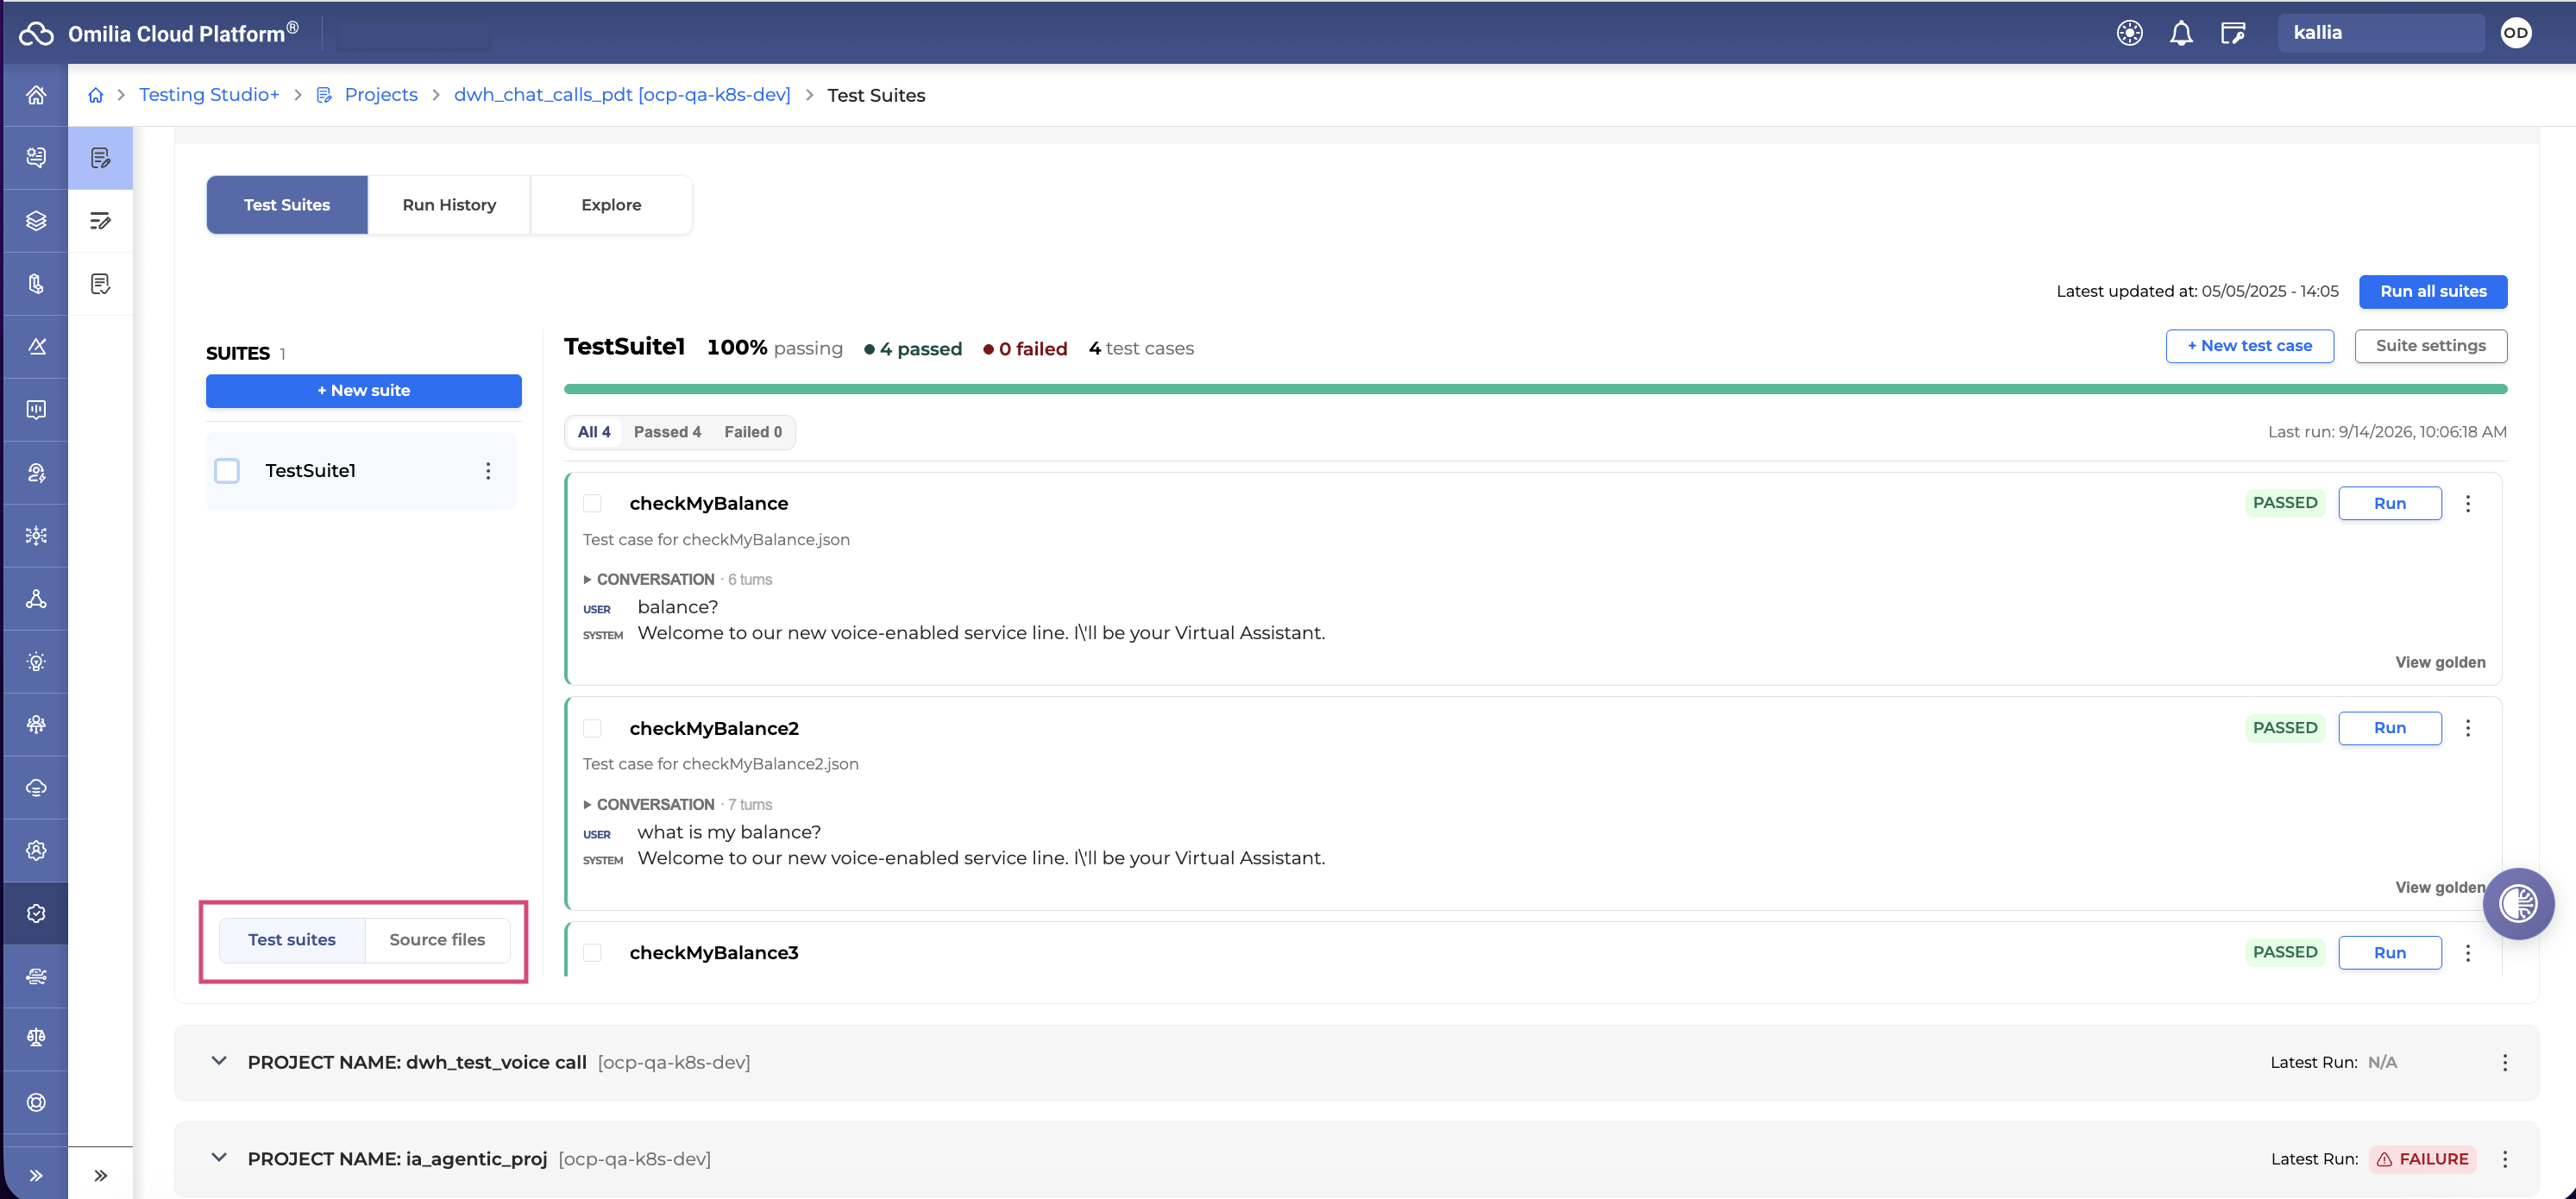
Test suites view
The Test suites view is the primary workspace for managing and running test suites. Use it to browse suites, review test results, configure suite settings, and create, edit, or delete test cases and test suites.
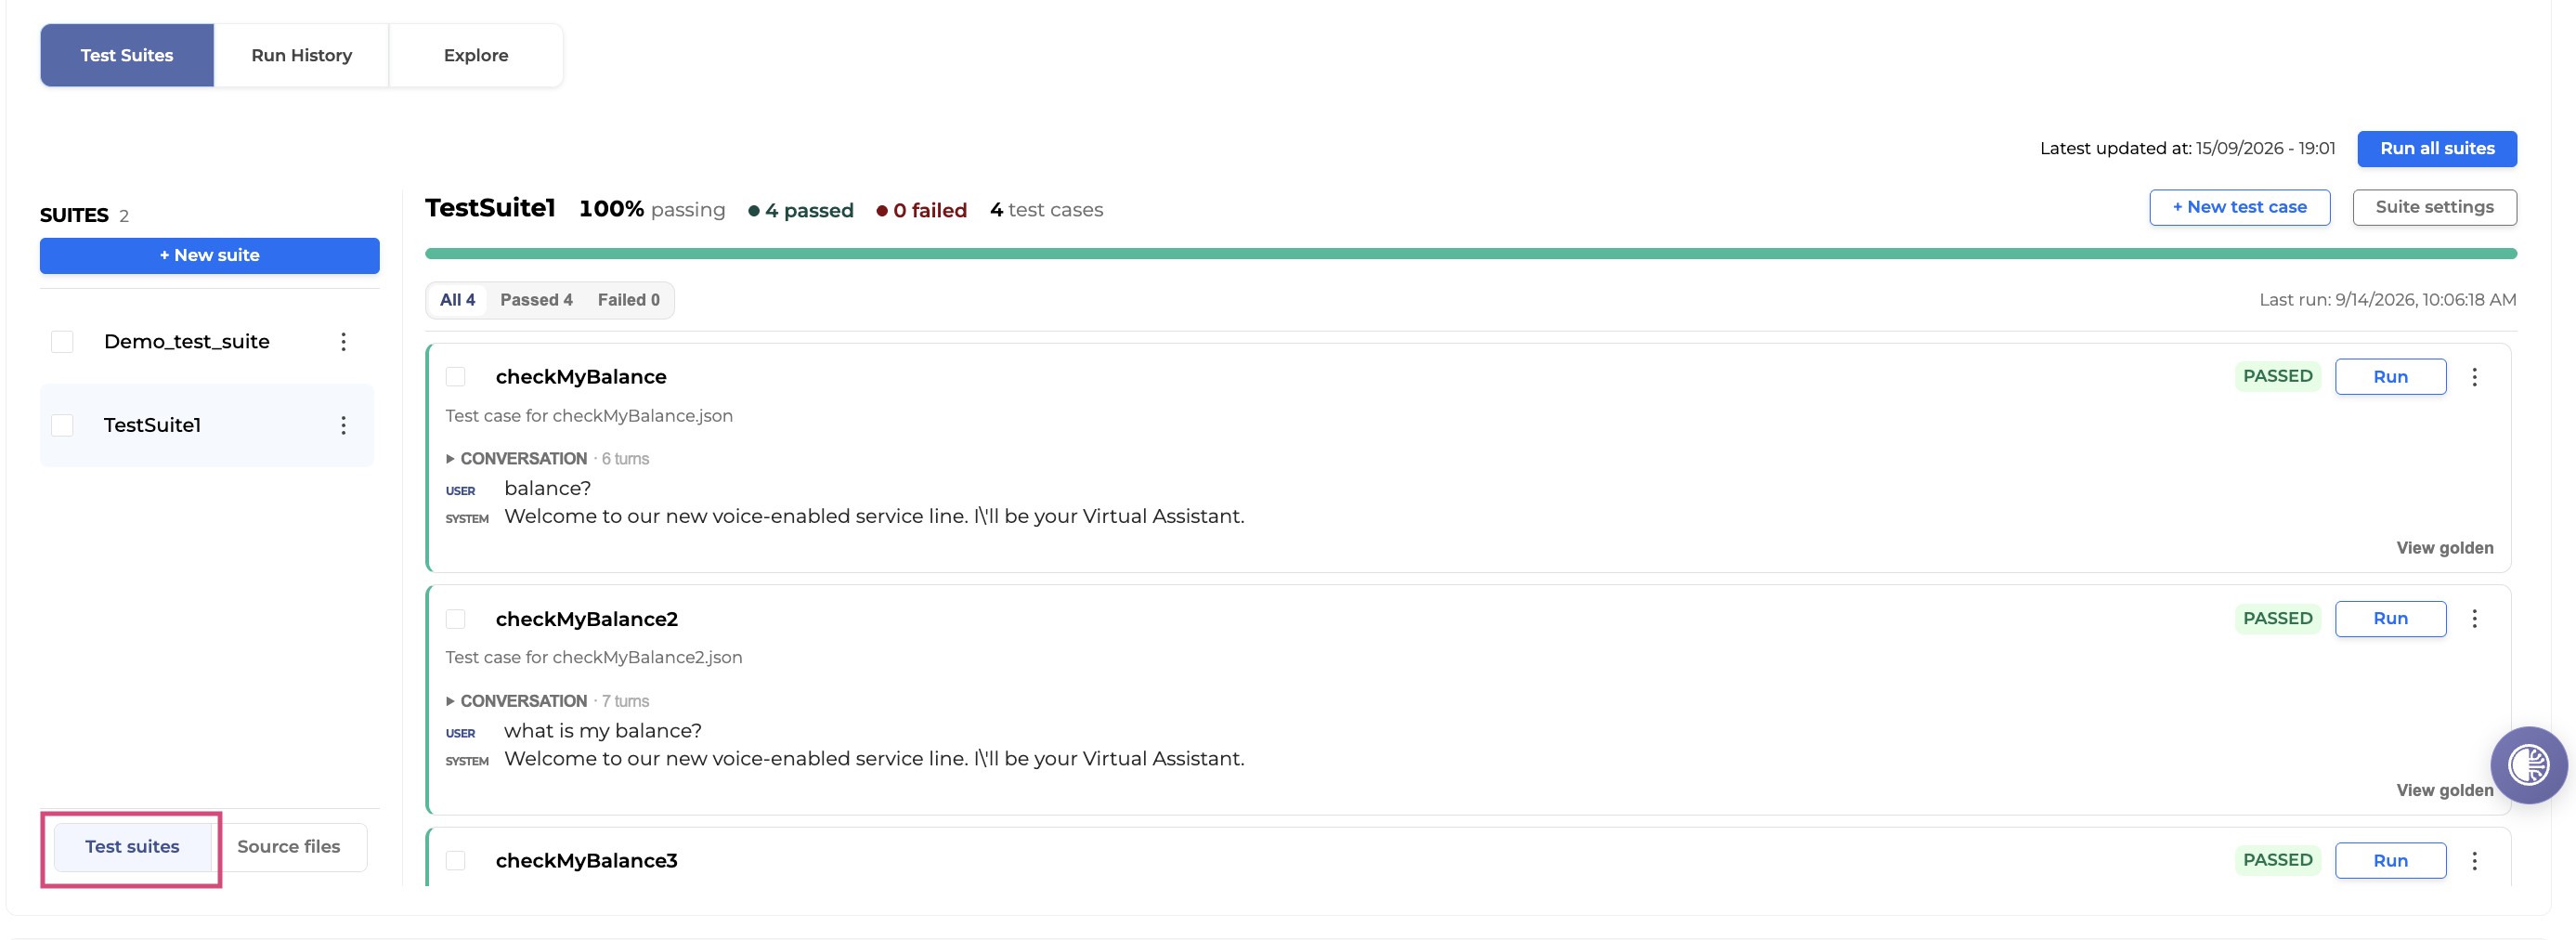
Navigation
You will find the navigation information below to easily move through the test suites interface and locate the information you need.
-
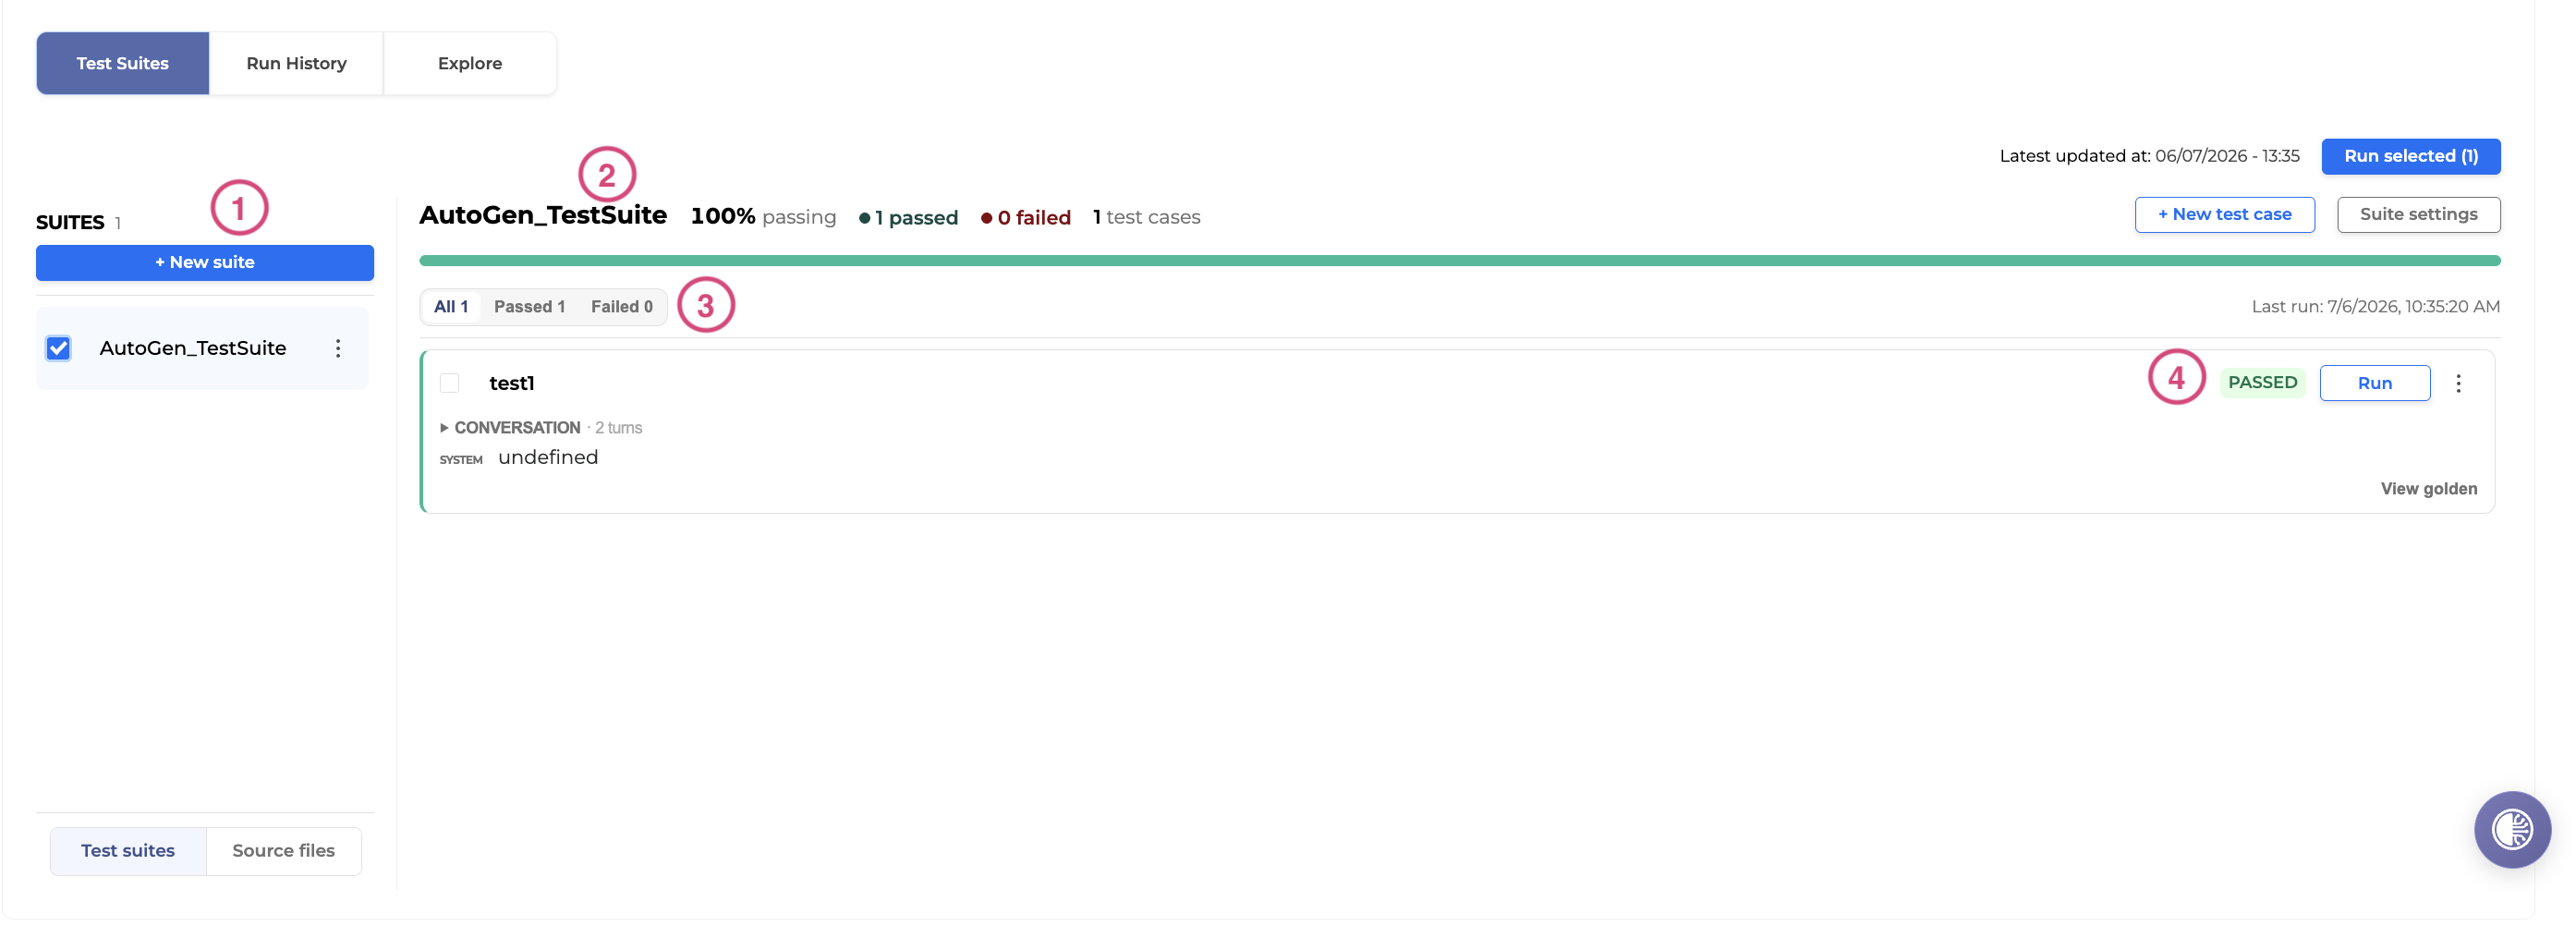
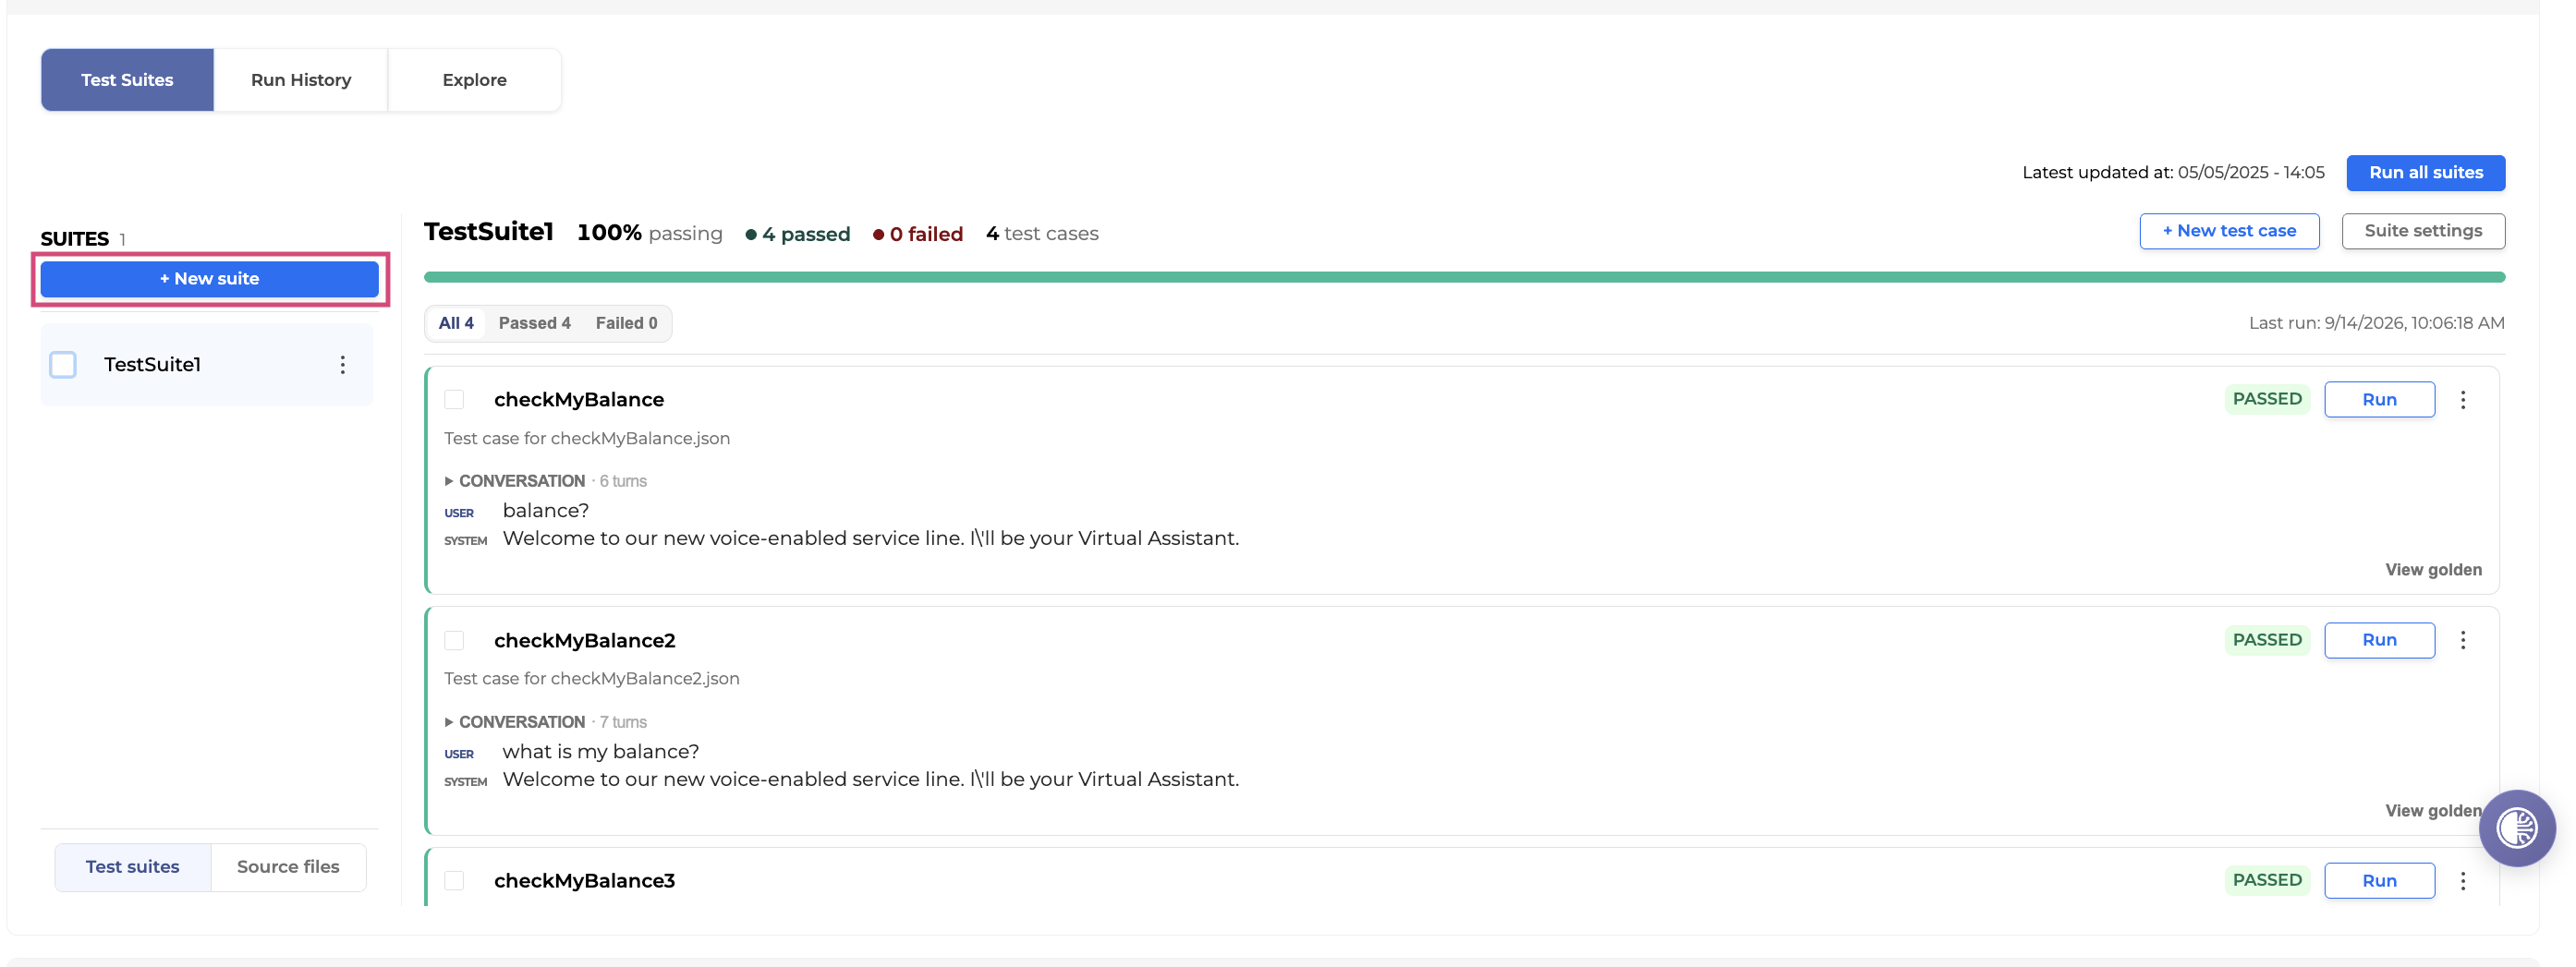
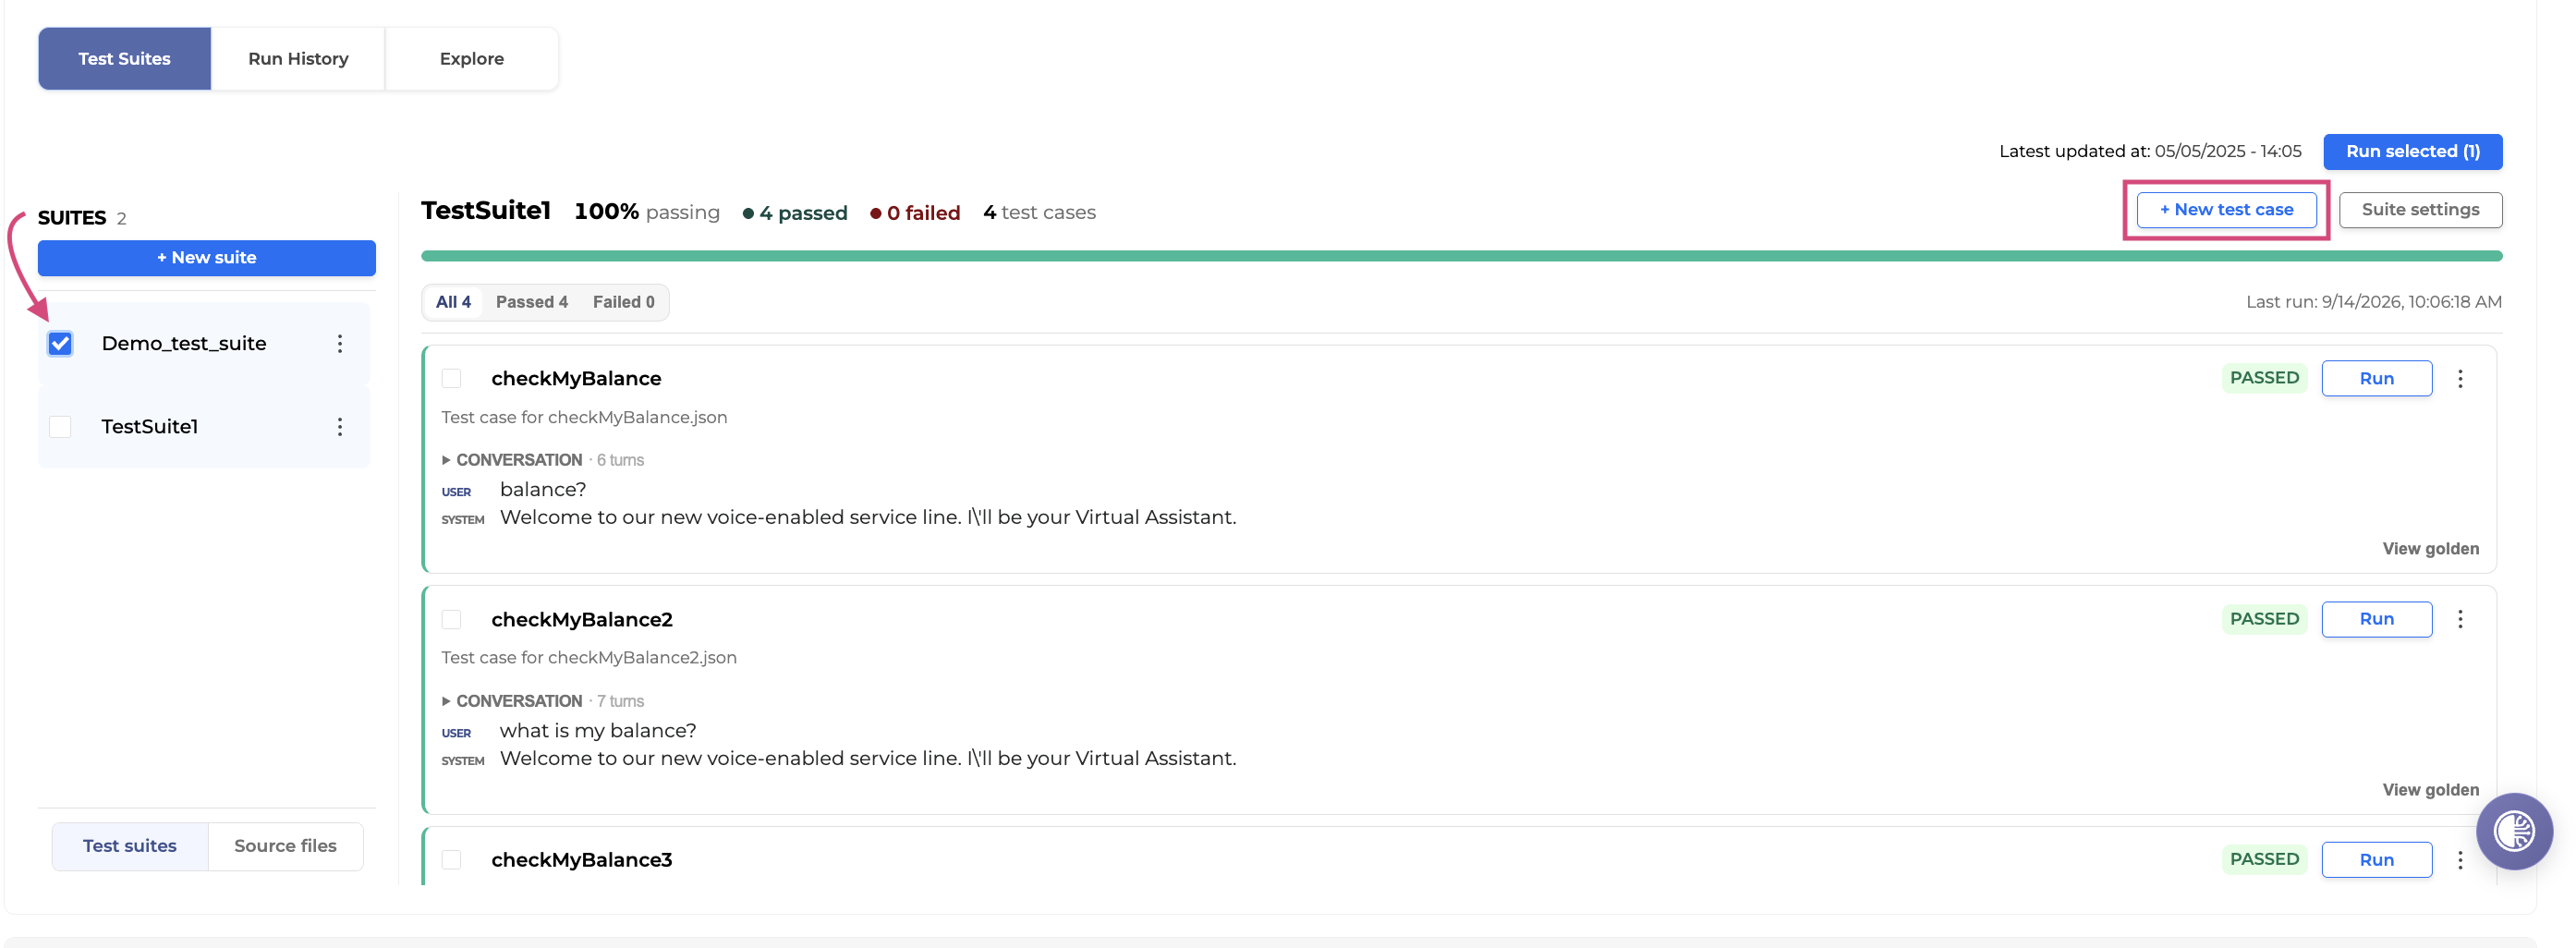
The left panel lists all Suites in the project, with a suite count and a + New suite button.
-
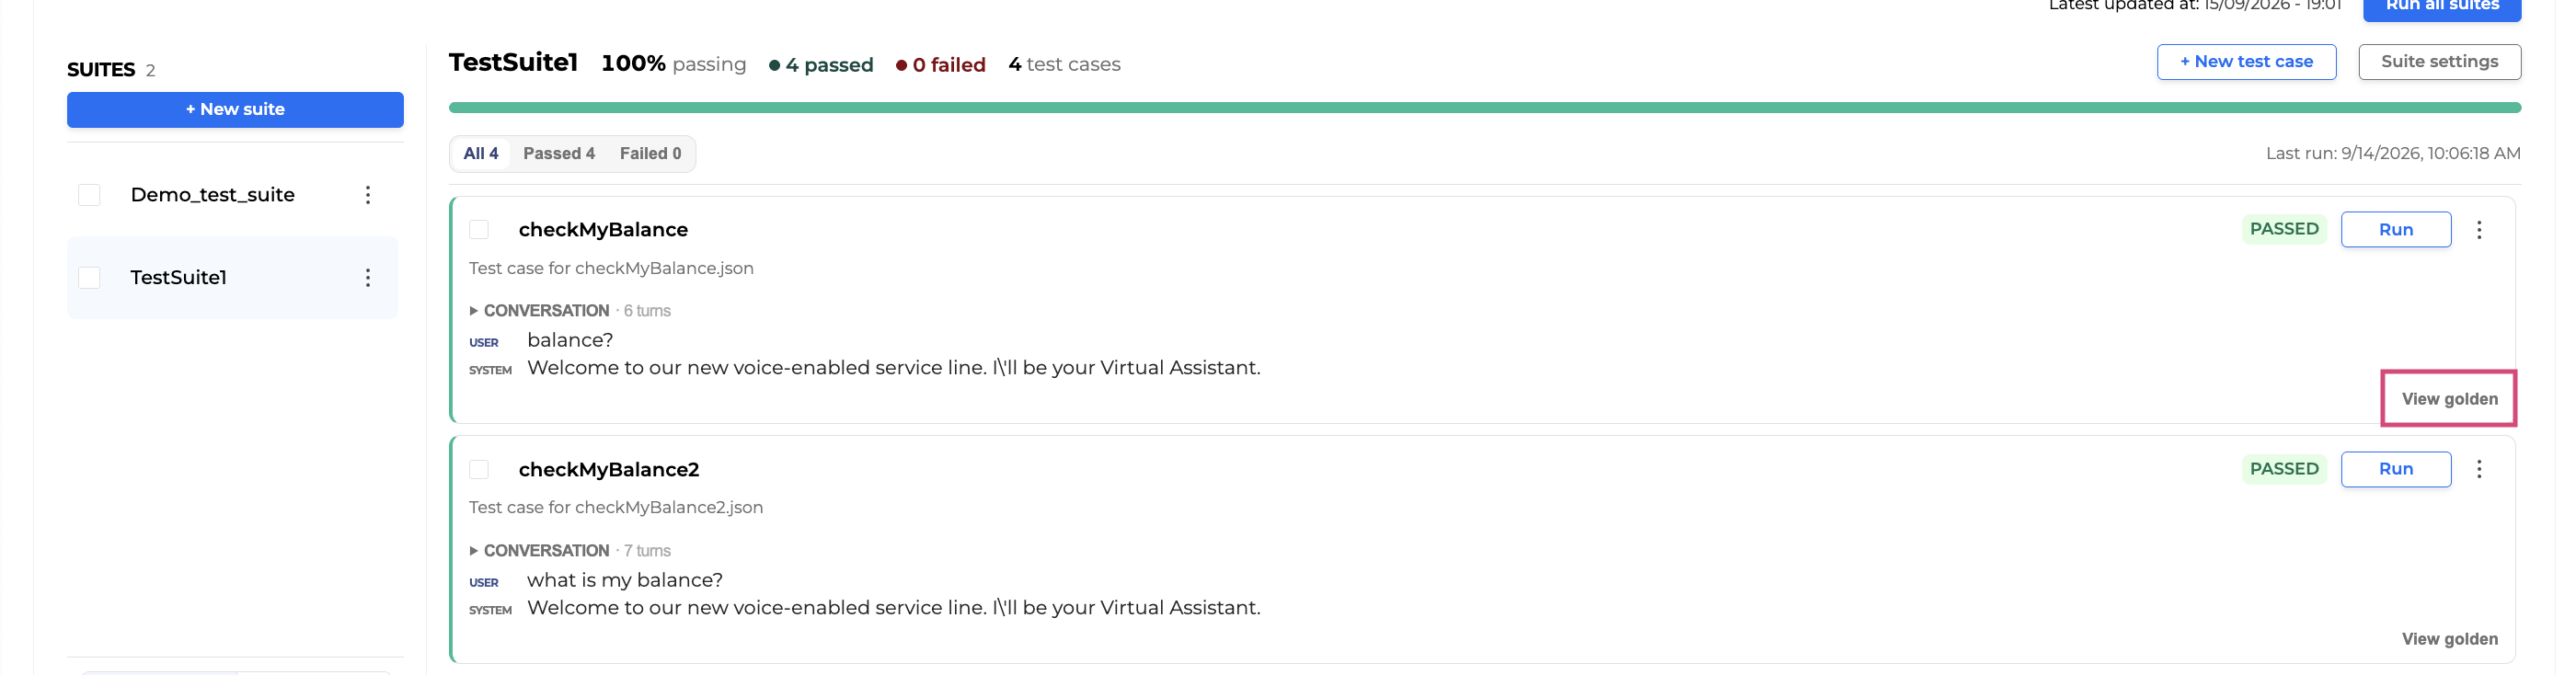
The main panel shows the selected suite's summary: pass percentage, passed/failed/unavailable counts, total test cases, a progress bar, and the Last run timestamp.
-
Filter tabs (All / Passed / Failed) narrow the test case list below.
-
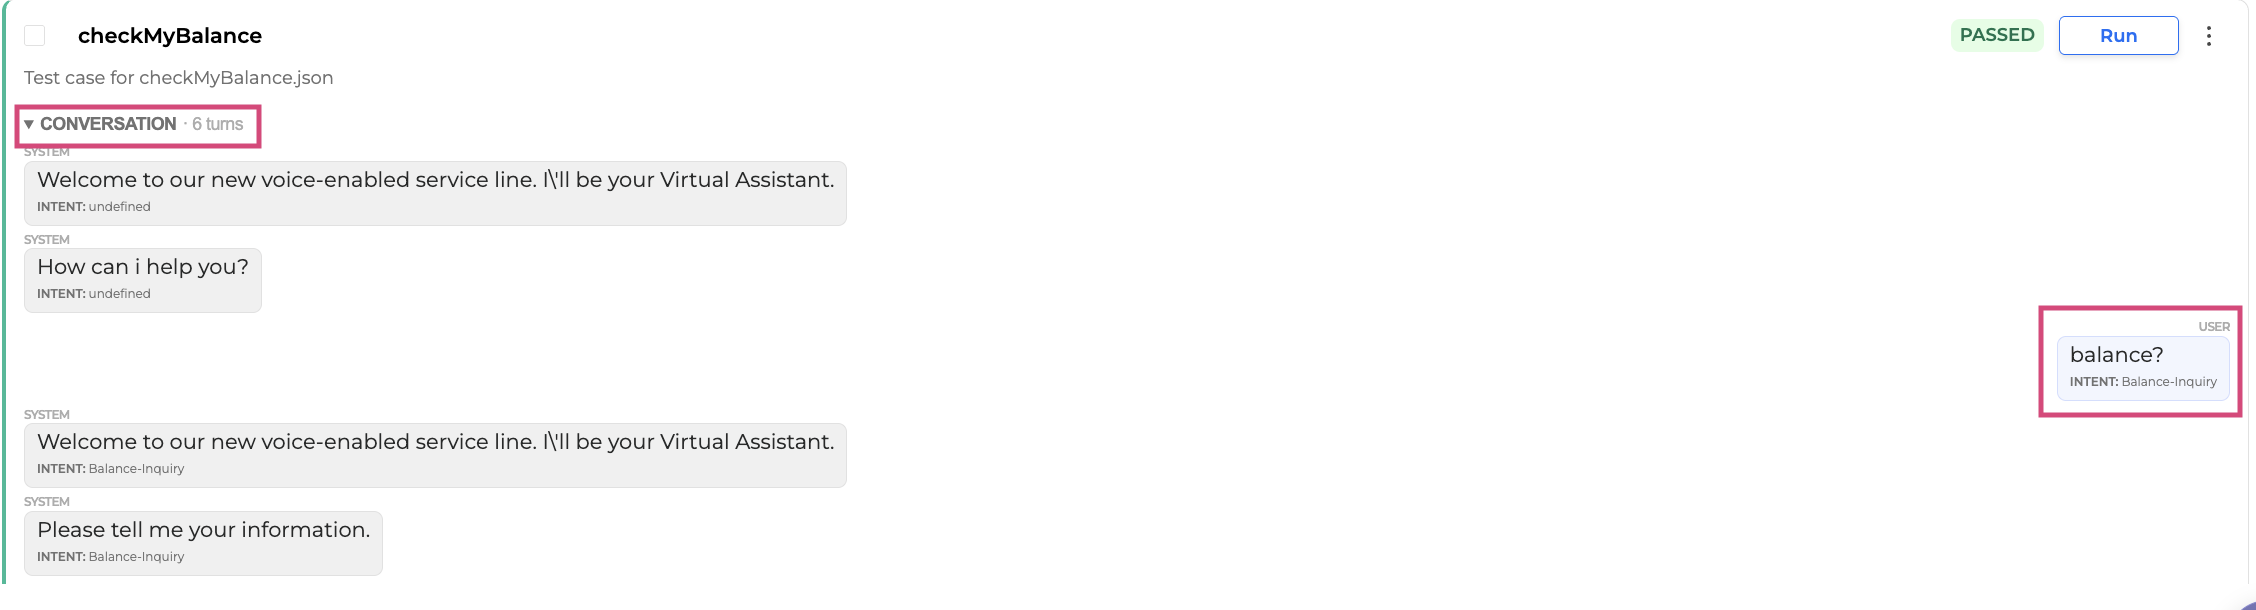
Each test case row shows its status (PASSED/FAILED), a Run button, a conversation preview, and a View golden link.
In a test case, expand the conversation to view the dialog and its associated intent shown below.
Create a new test suite
To create a new test suite, follow these steps:
-
In the left panel, click + New suite.
-
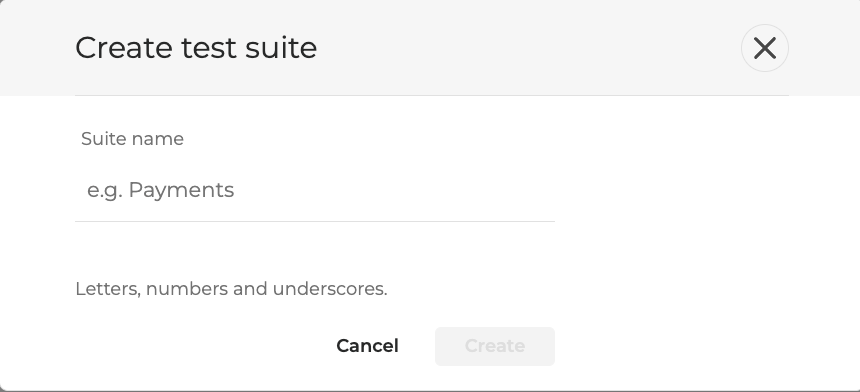
Enter a suite name (letters, numbers, and underscores only) and confirm.
-
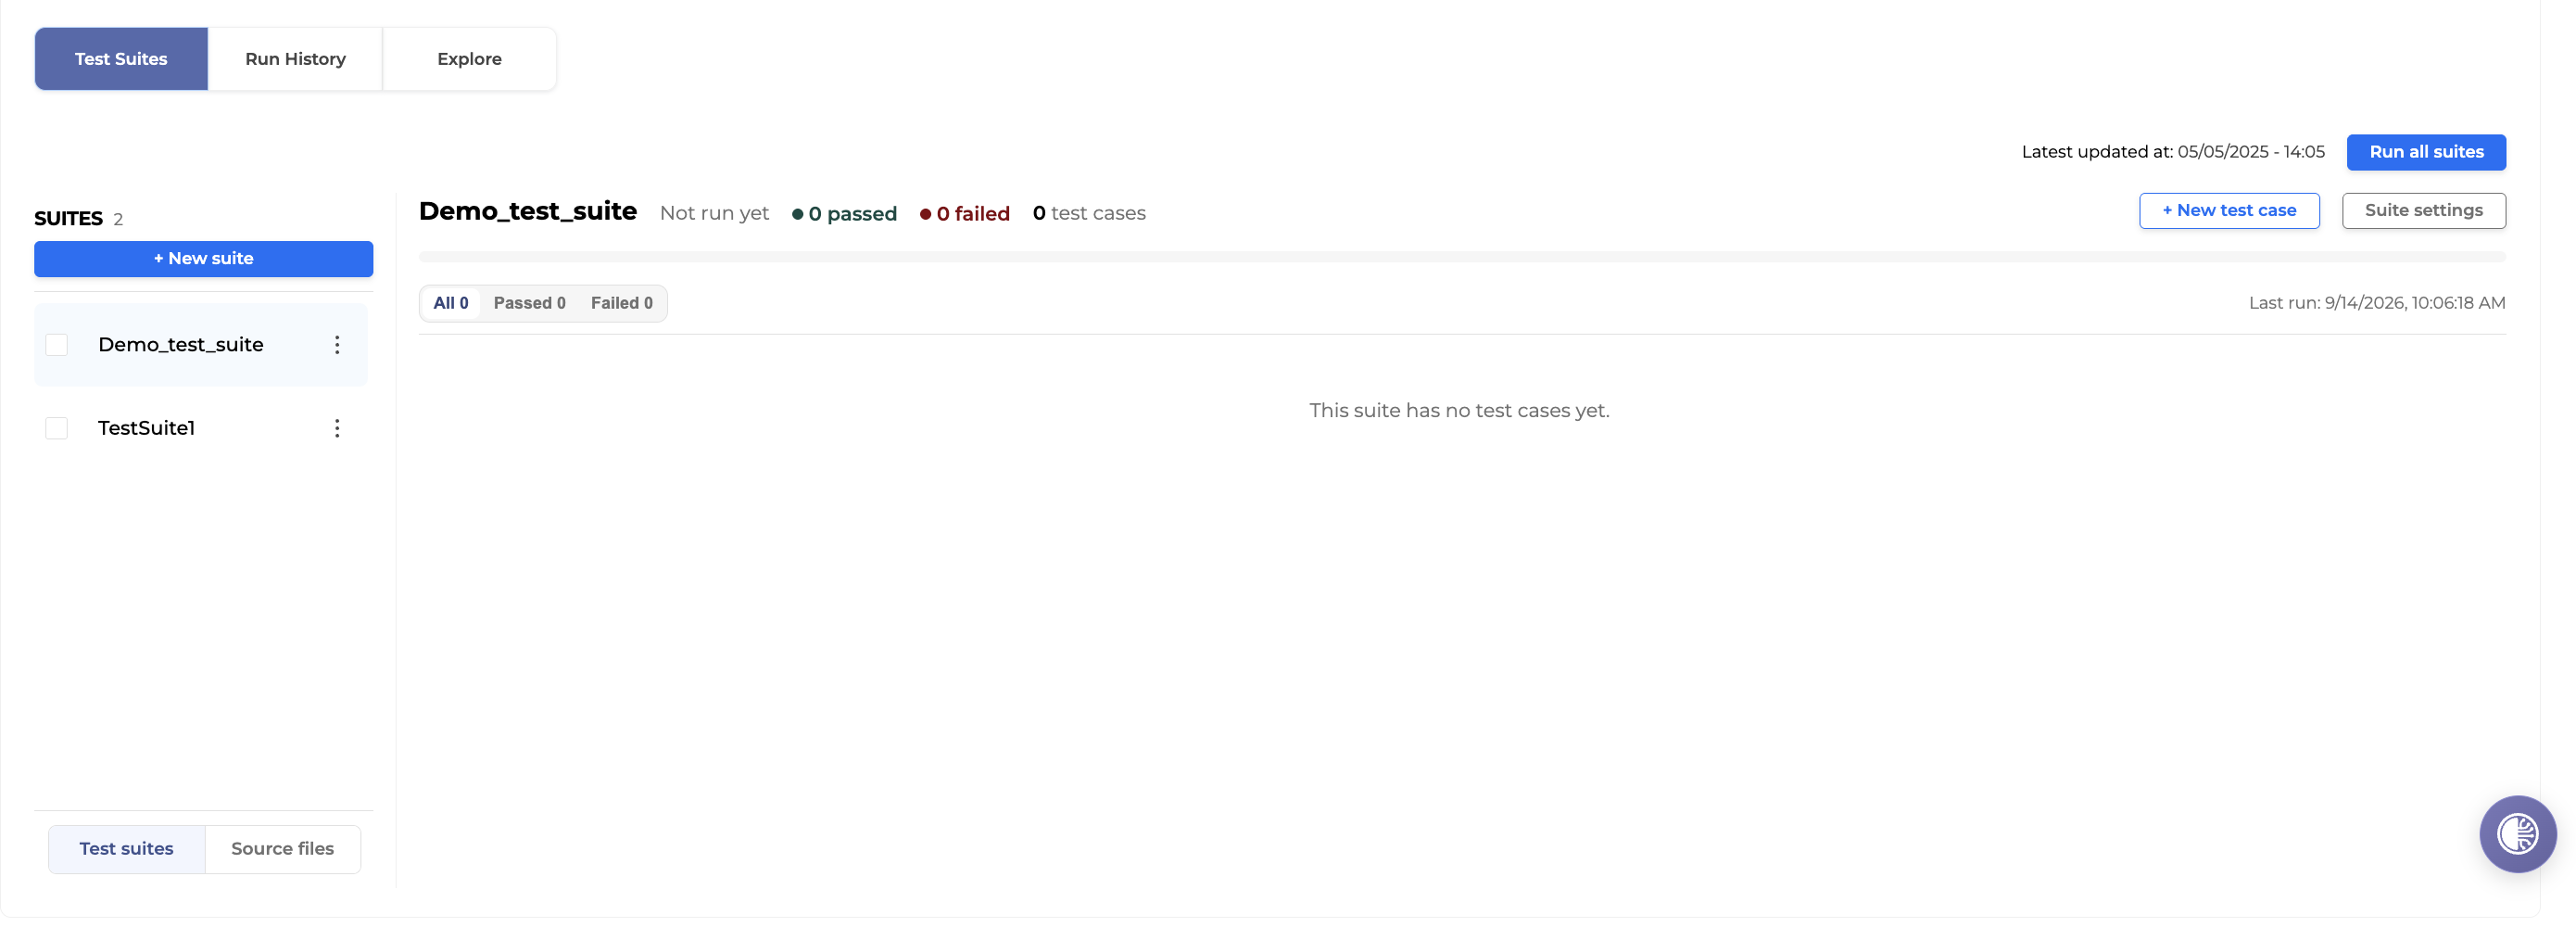
The new suite appears in the SUITES list.
Rename a test suite
-
In the SUITES list, click the Options menu next to the suite you want to rename.
-
Select Rename.
-
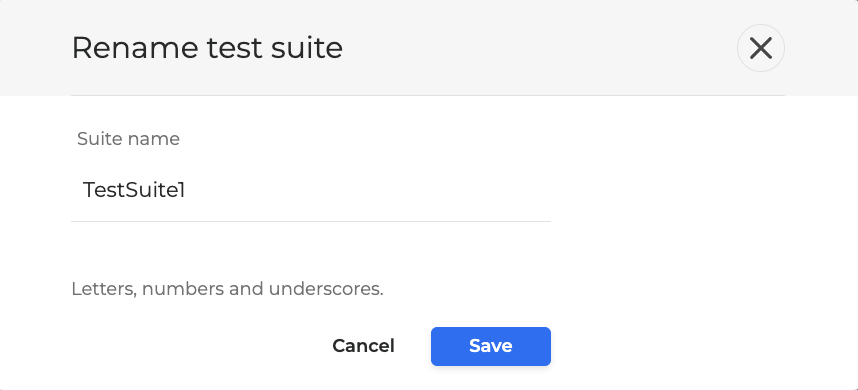
In the dialog box that opens, update the Suite name field.
-
Click Save.
Configure test suite settings
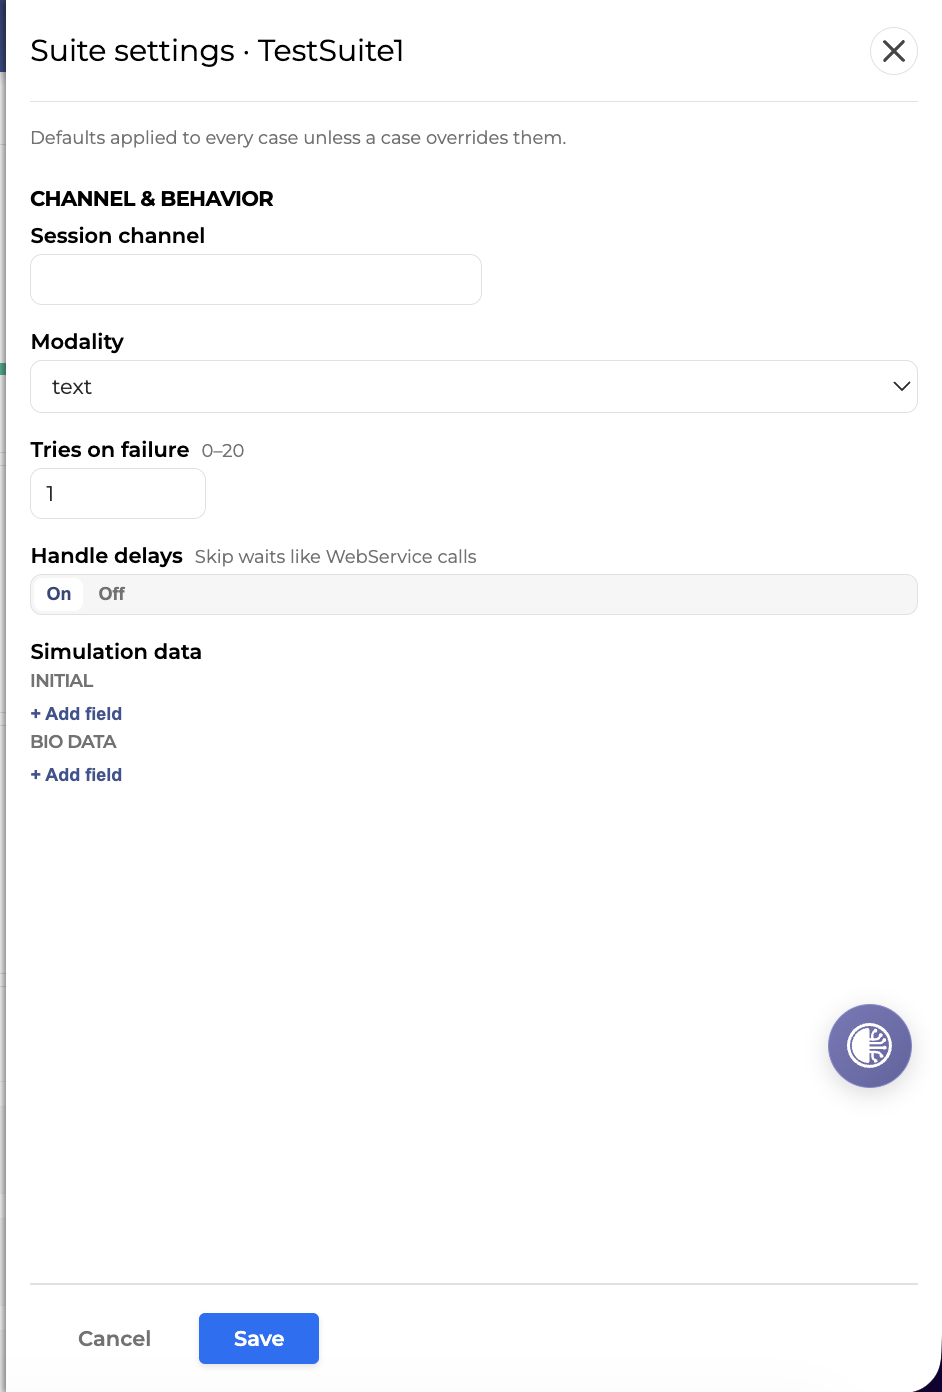
Suite settings are the Global properties presented in a human-readable interface.
-
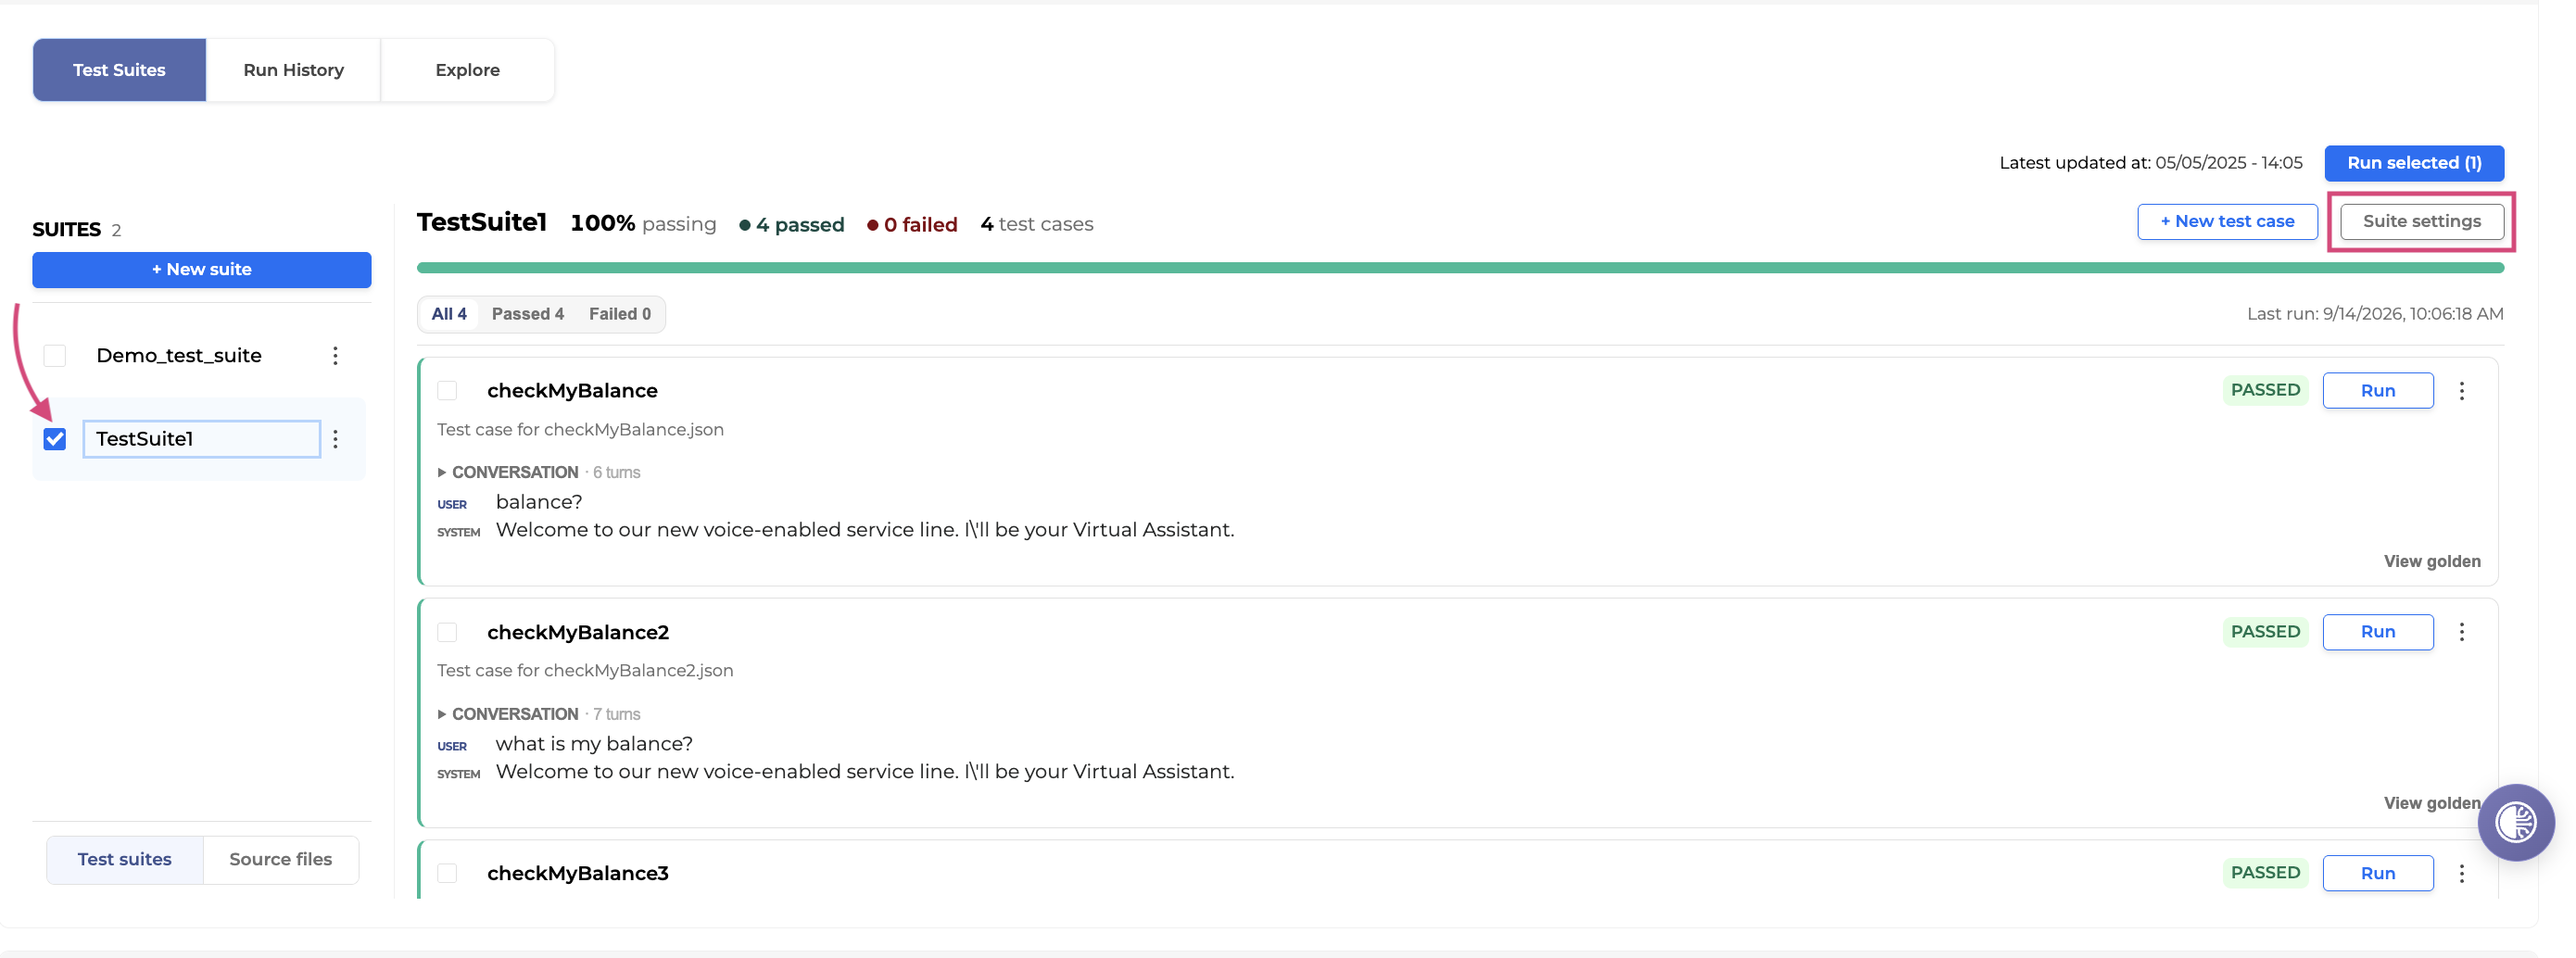
Select a test suite and click Suite settings in the suite header.
-
Update settings as needed:
-
Channel & Behavior
-
Session channel: Specifies the communication channel used to run the test session, such as voice or chat.
-
Modality: Defines the interaction mode used by the test, such as voice, text, or a combination of supported input and output modes.
-
Tries on failure: Number of retry attempts if a turn fails before the test case is marked failed. Supported values: 0-20.
-
Handle delays: Controls whether the test skips waits such as WebService calls.
Options: Default (inherits suite setting), On, Off.
-
-
Simulation data
-
INITIAL: Key/value fields representing initial simulation parameters passed into the test session (for example, testMode, envMode). Click + Add field to add a new key/value pair.
-
BIO DATA: Key/value fields representing simulated biometric data used during the test. Click + Add field to add a new key/value pair.
-
-
Click Save.
These parameters apply to every test case in the suite unless a case overrides them.
Delete a test suite
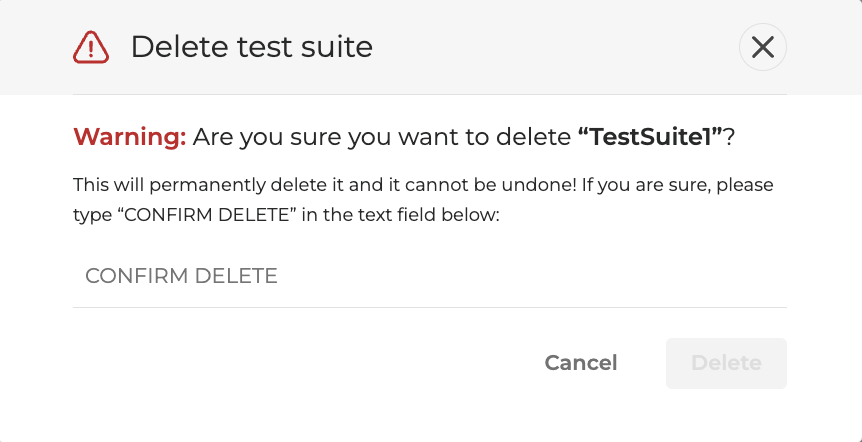
Deleting a test suite removes all test cases within it. This cannot be undone.
-
In the SUITES list, open the Options menu for the suite you want to delete.
-
Select Delete.
-
Confirm by typing CONFIRM DELETE.
-
Click Delete to finalize.
Create a new test case
-
Select the suite you want to add the test case to and click + New test case.
-
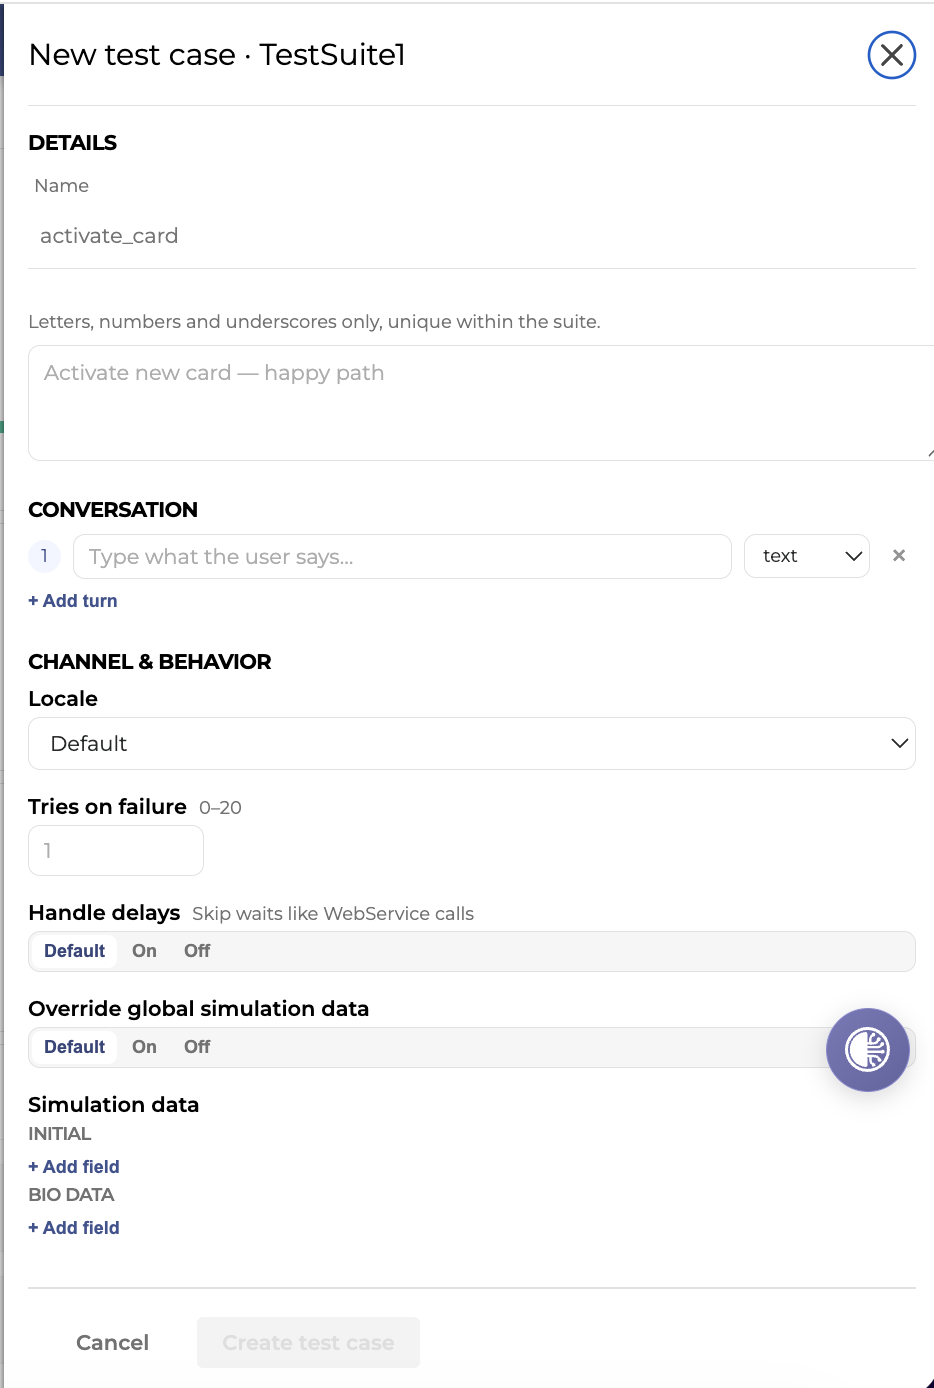
In the dialog box that opens, fill in the test case details as described below:
-
Details
-
Name: A short identifier for the test case. For example, activate_Card.
-
-
Letters, numbers, and underscores only; must be unique within the suite.
-
Description: A text summary of what the test case checks (for example, Activate new card - happy path). Optional but recommended for readability.
-
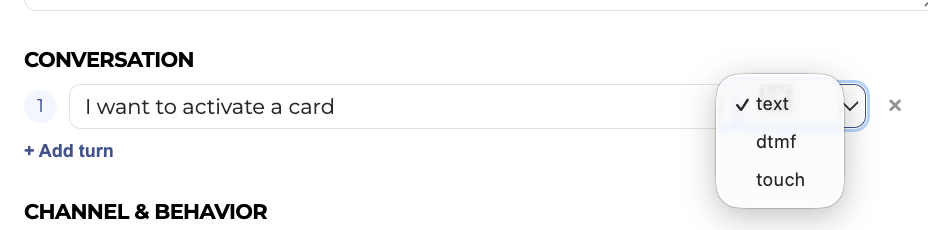
Conversation: Add one or more turns representing what the user says. Click + Add turn to add a new turn. Then enter an utterance and select type from the dropdown (text, touch, dtmf).
-
Channel & Behavior
-
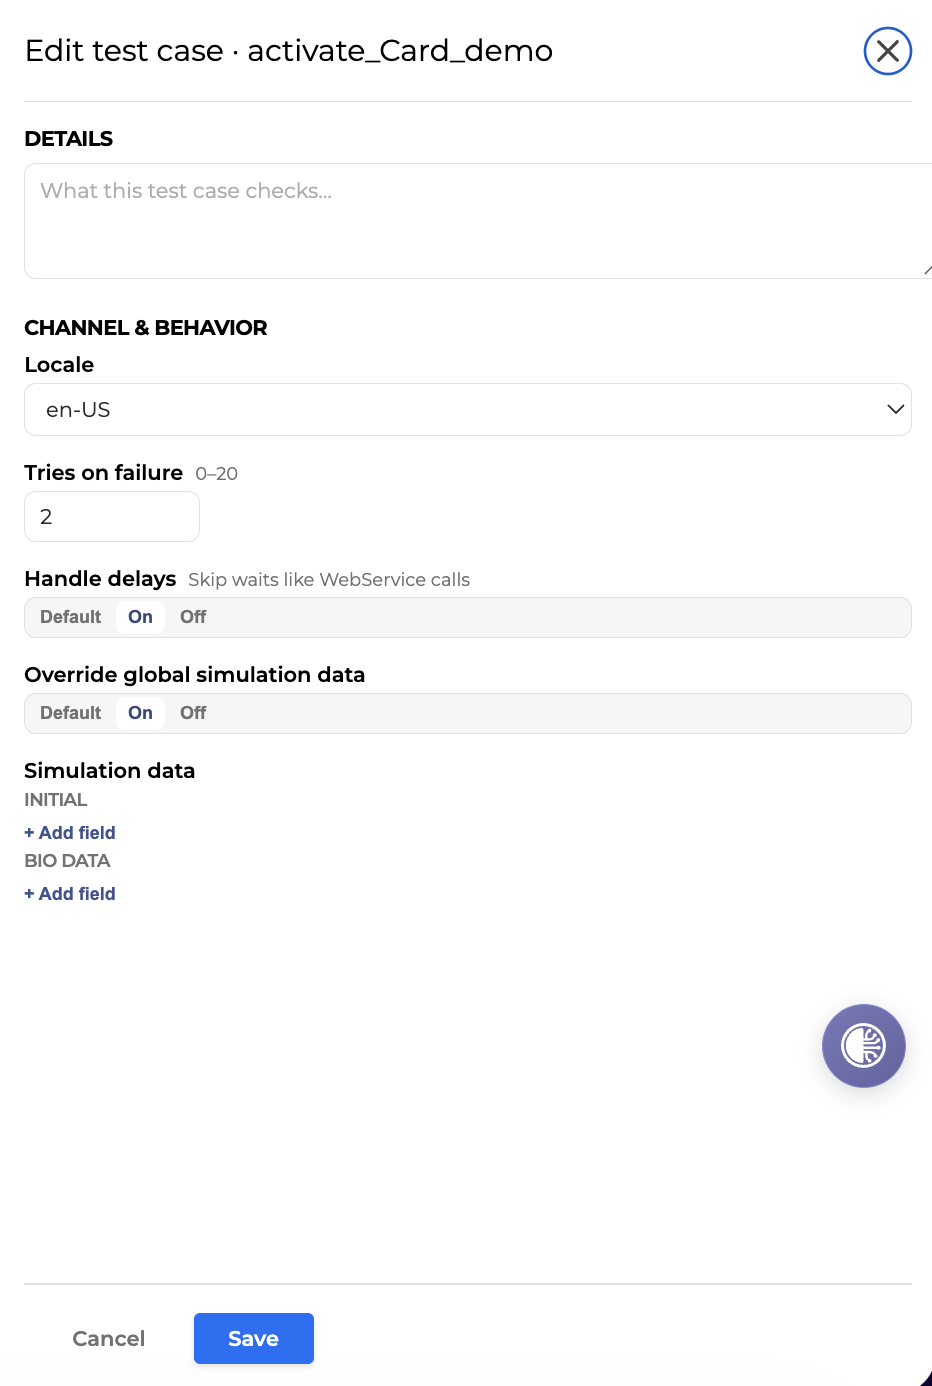
Locale: Select the language/locale for the test case. The Default option inherits the suite's setting.
-
Tries on failure: Number of retry attempts allowed if a turn fails before the test case is marked failed. Supported values: 0-20.
-
Handle delays: Controls whether the test skips waits such as WebService calls.
Options: Default (inherits suite setting), On, Off. -
Override global simulation data: Toggle to control whether this test case uses its own simulation data instead of the suite-level defaults. Options: Default, On, Off.
Must be On for the Simulation data fields below to take effect.
-
-
Simulation data
-
INITIAL: Key/value fields representing initial simulation parameters passed into the test session (for example, testMode, envMode). Click + Add field to add a new key/value pair.
-
BIO DATA: Key/value fields representing simulated biometric data used during the test. Click + Add field to add a new key/value pair.
-
-
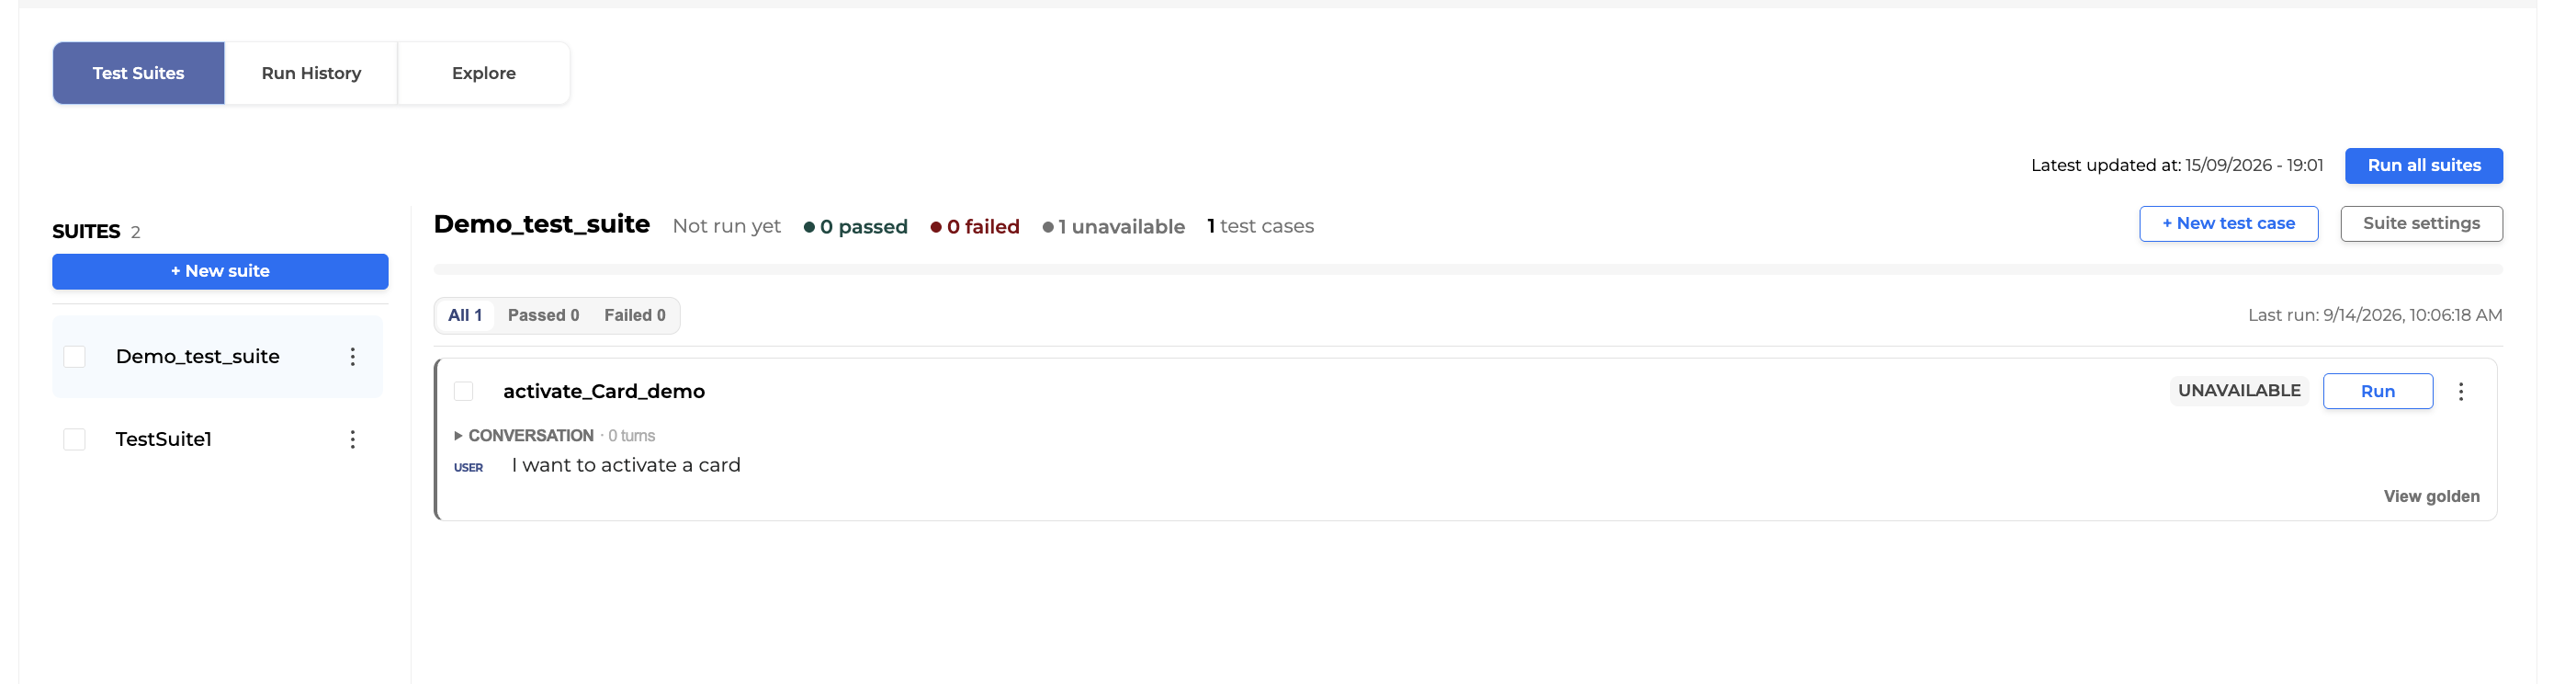
Click Create test case to save the test data. The new test case appears in the test case list for that suite.
Edit a test case
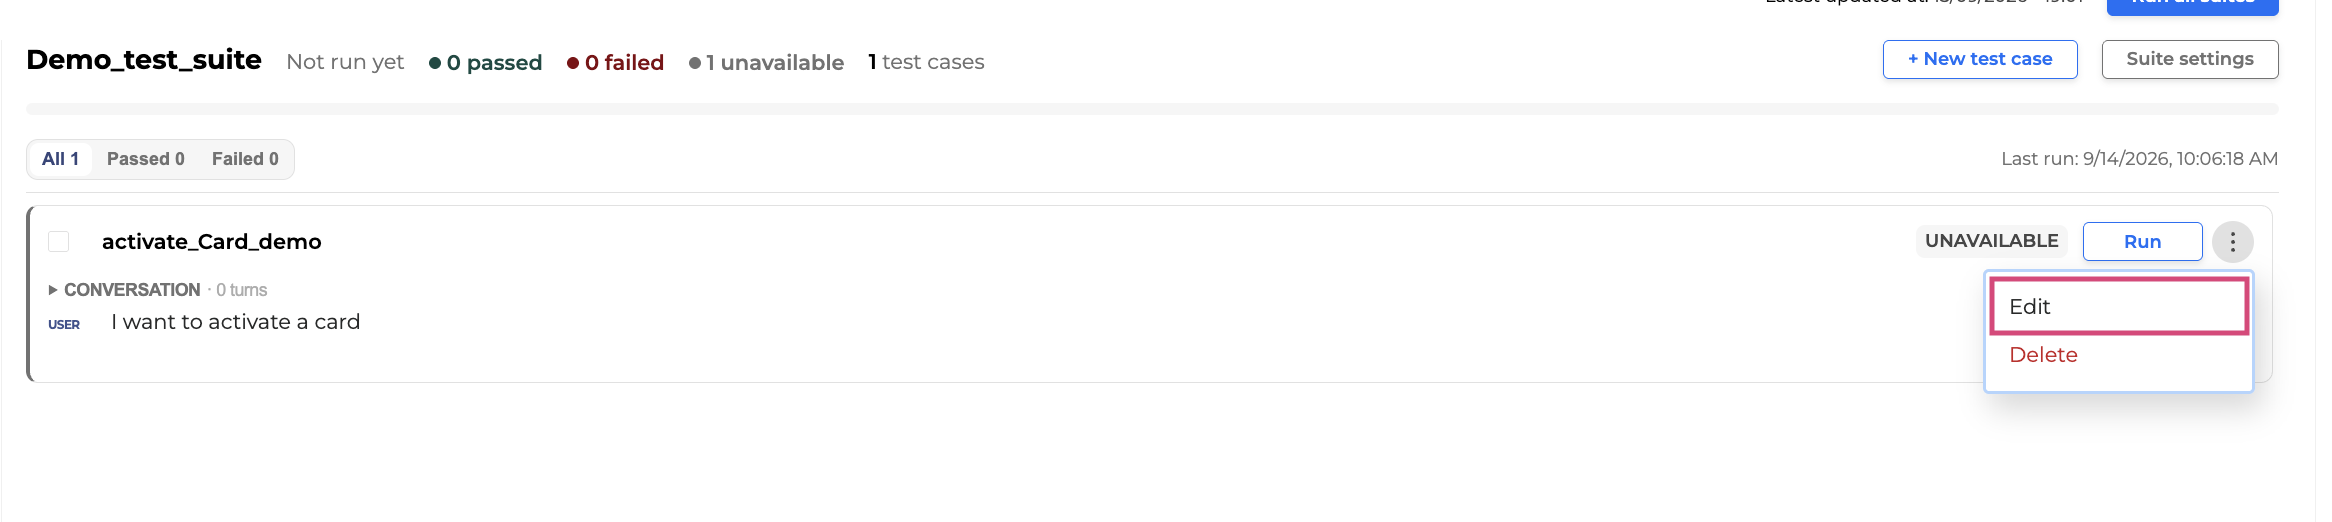
To edit a test case, follow the steps below:
-
Find the test case you want to edit, click the Options menu, and select Edit.
-
In the dialog box that opens, update the data.
-
Click Save.
View a test case's golden dialog
-
Find a test case in the list and click View golden.
-
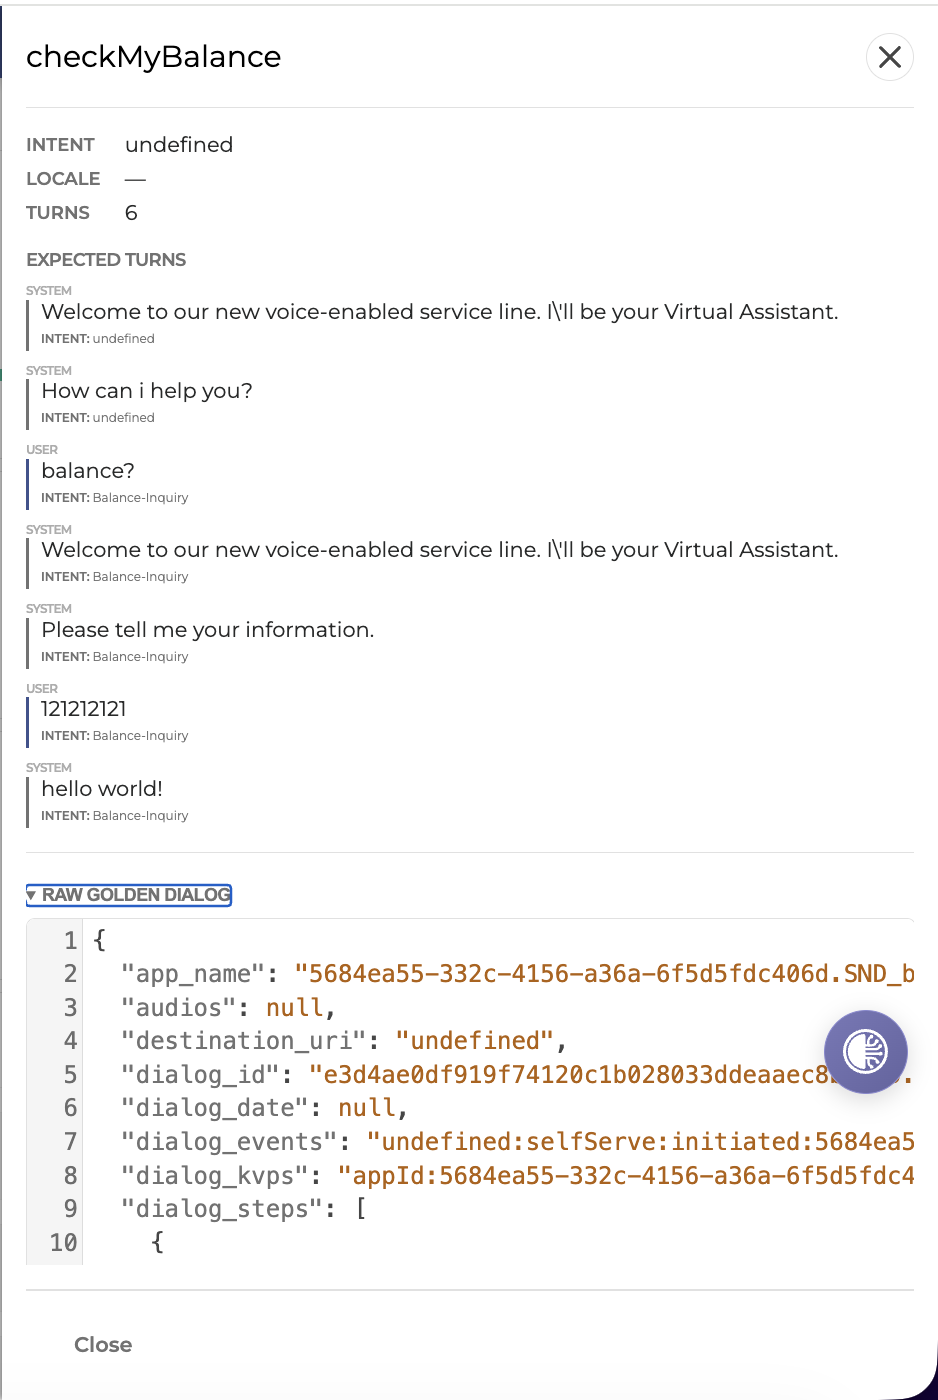
A side panel opens showing intent, locale, turns, the expected turns, and the expandable raw golden dialog JSON.
Goldenize a test case
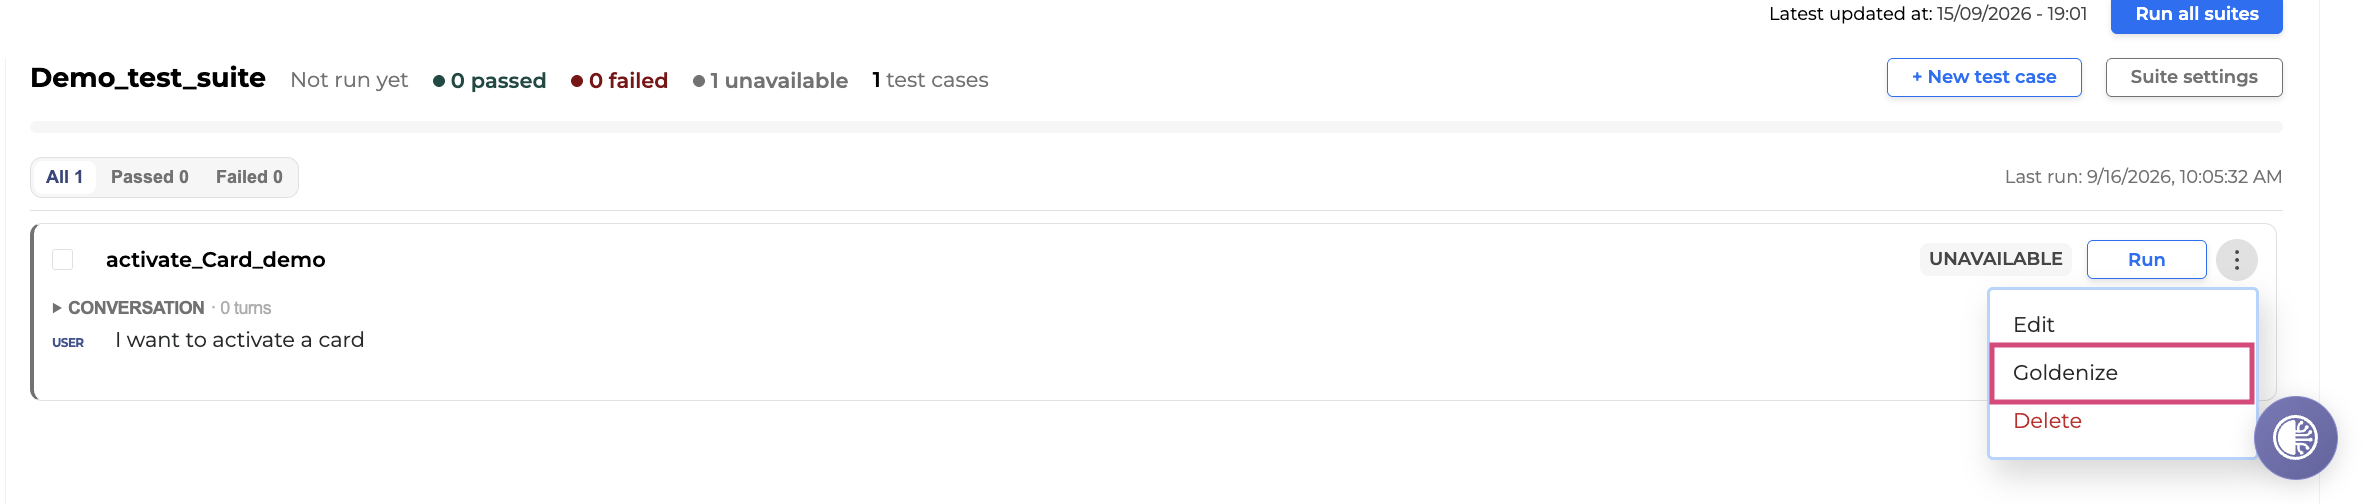
Goldenizing updates the golden dialog with the output from the latest test run. Use this option when a conversational flow has intentionally changed or when you confirm that the latest execution output is correct.
Prerequisites:
The Goldenize option is available only after the test case has been run at least once and its latest status is FAILED or UNAVAILABLE.
To goldenize a test case:
-
Locate the test case in the test cases list.
-
Click the Options menu next to the test case and select Goldenize.
-
The golden dialog is updated and will be used as the new baseline for subsequent test runs.
Delete a test case
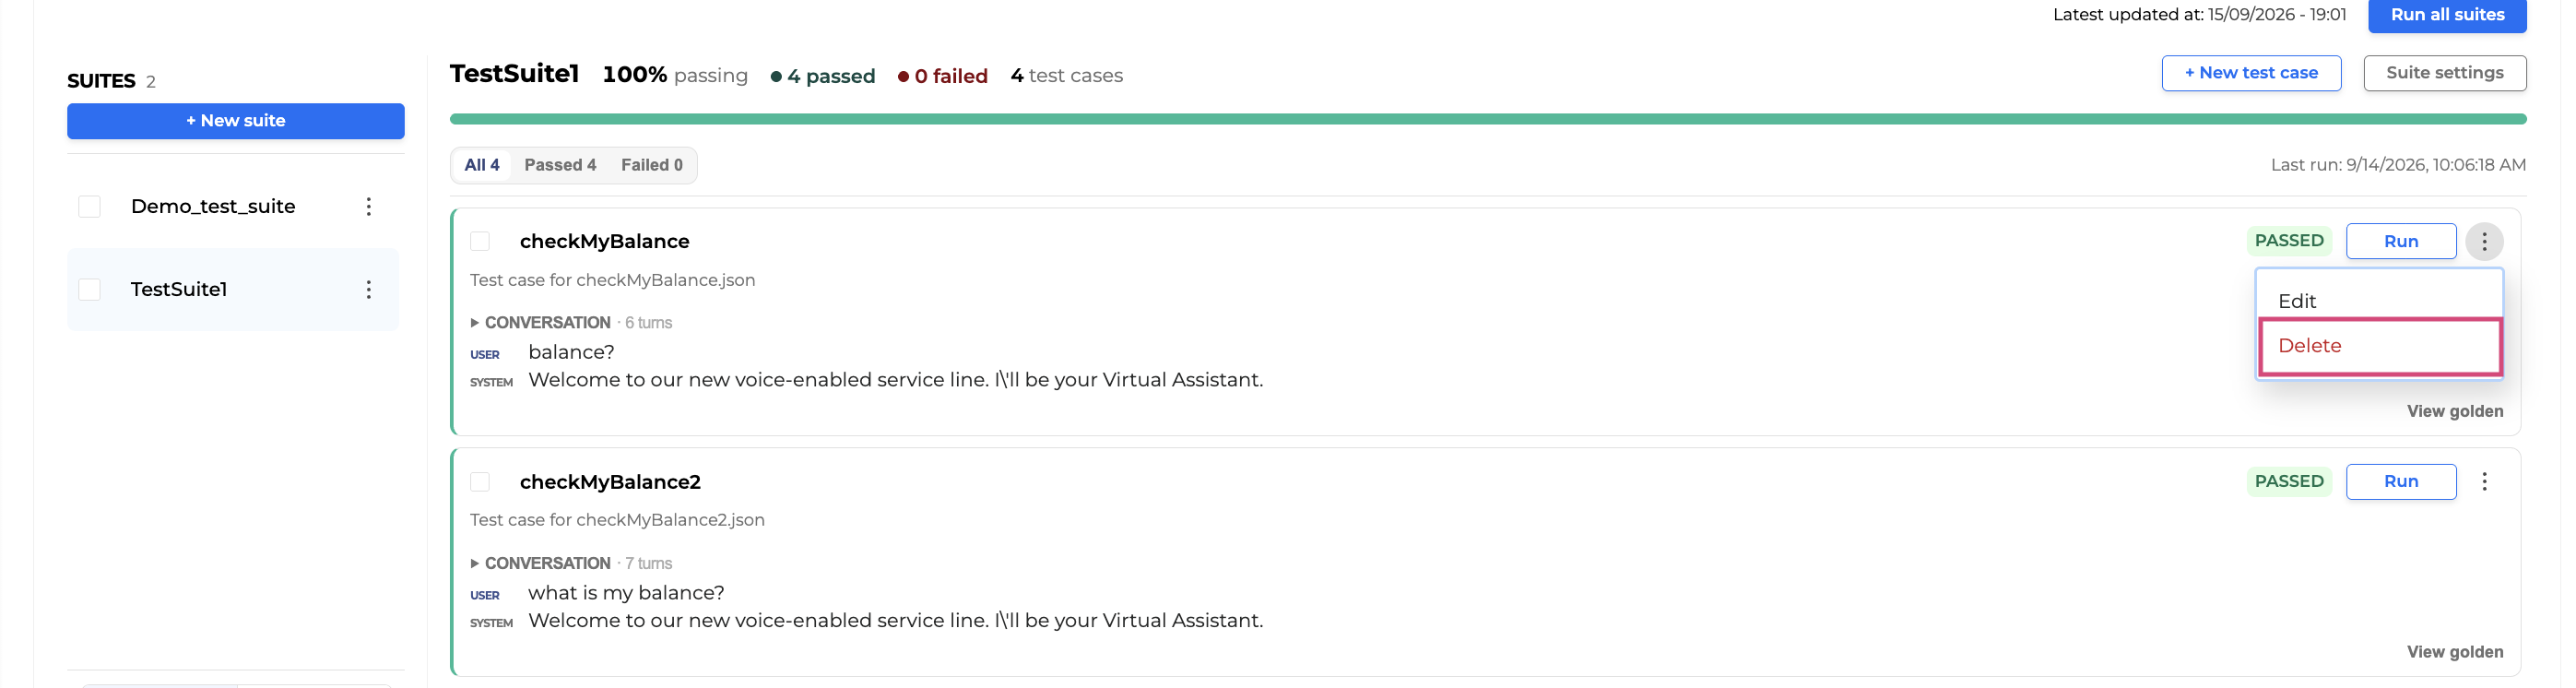
Deleting a test case cannot be undone.
-
Find the test case, click its Options menu and select Delete.
-
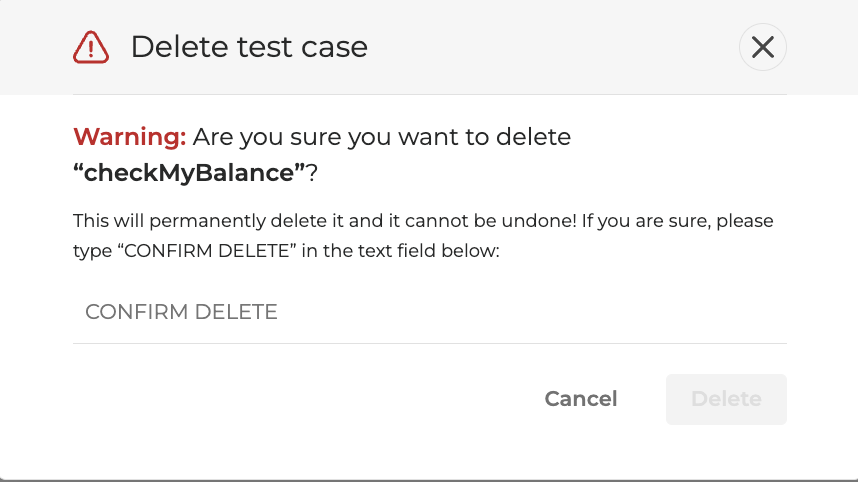
Confirm by typing CONFIRM DELETE.
-
Click Delete to finalize.
Running tests
Run tests individually, in selected groups, or across an entire suite or project to validate your conversational flows and review their results.
Run a single test case
-
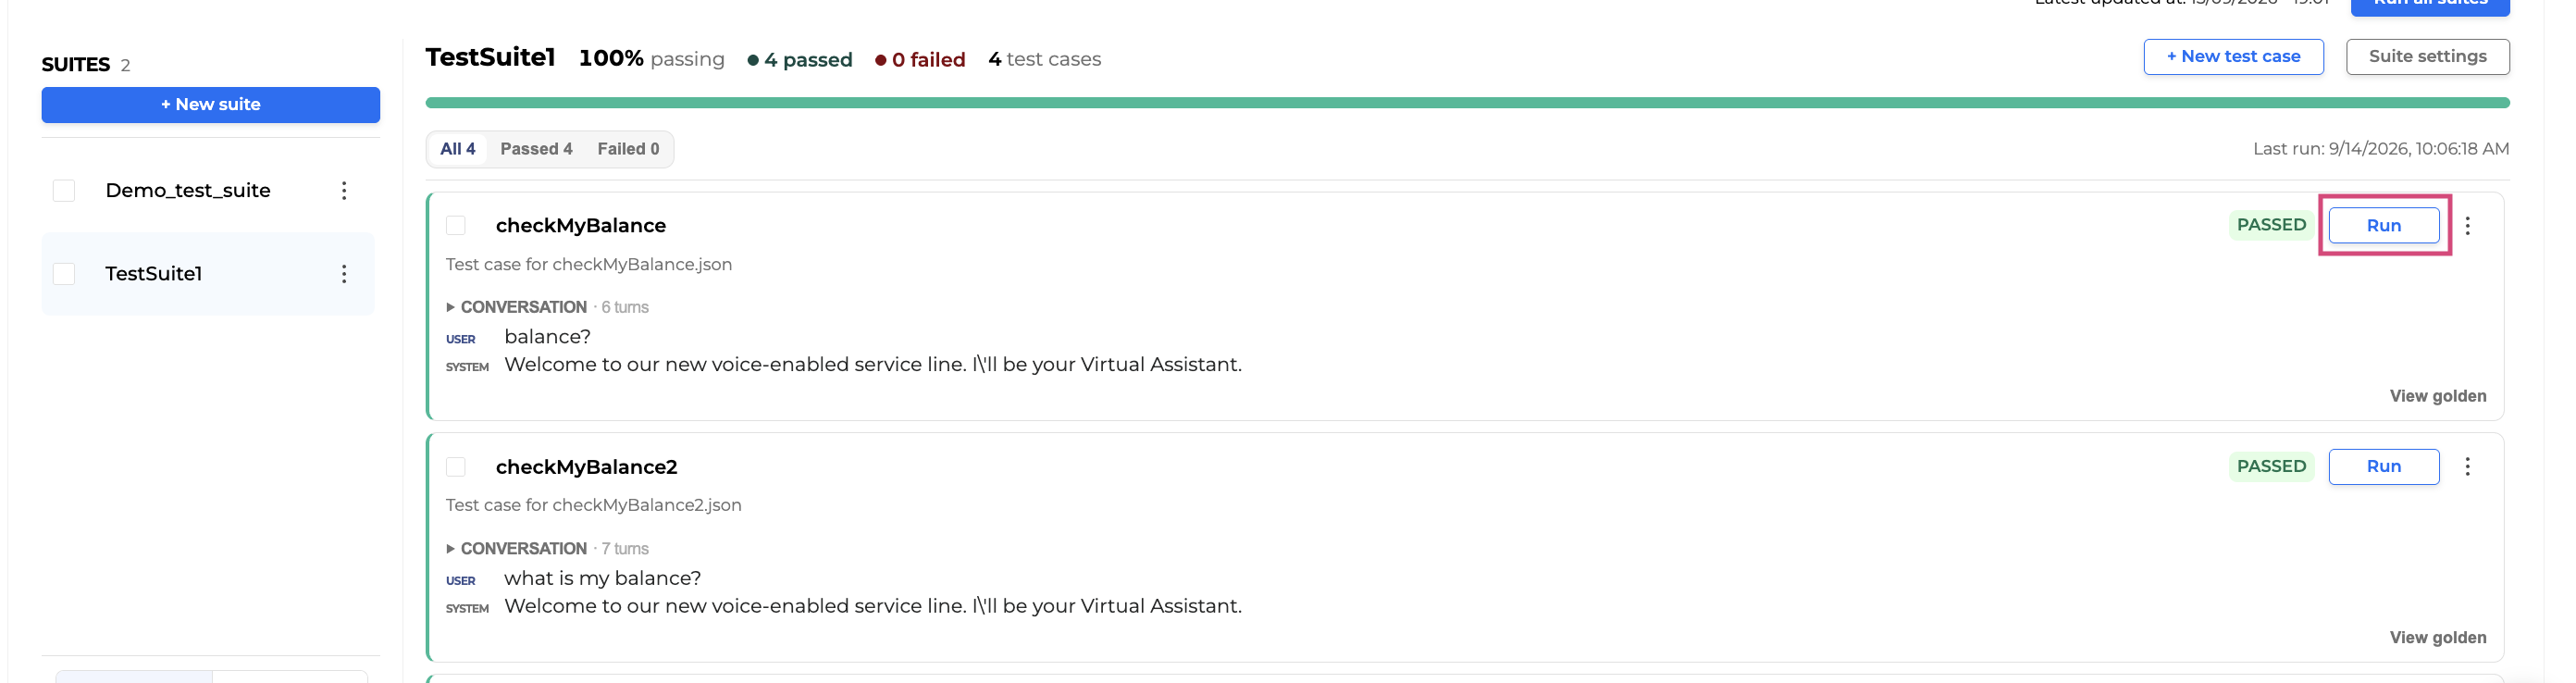
In the test cases list, find the test case you want to run.
-
Click Run in that test case’s row.
Run selected test cases
-
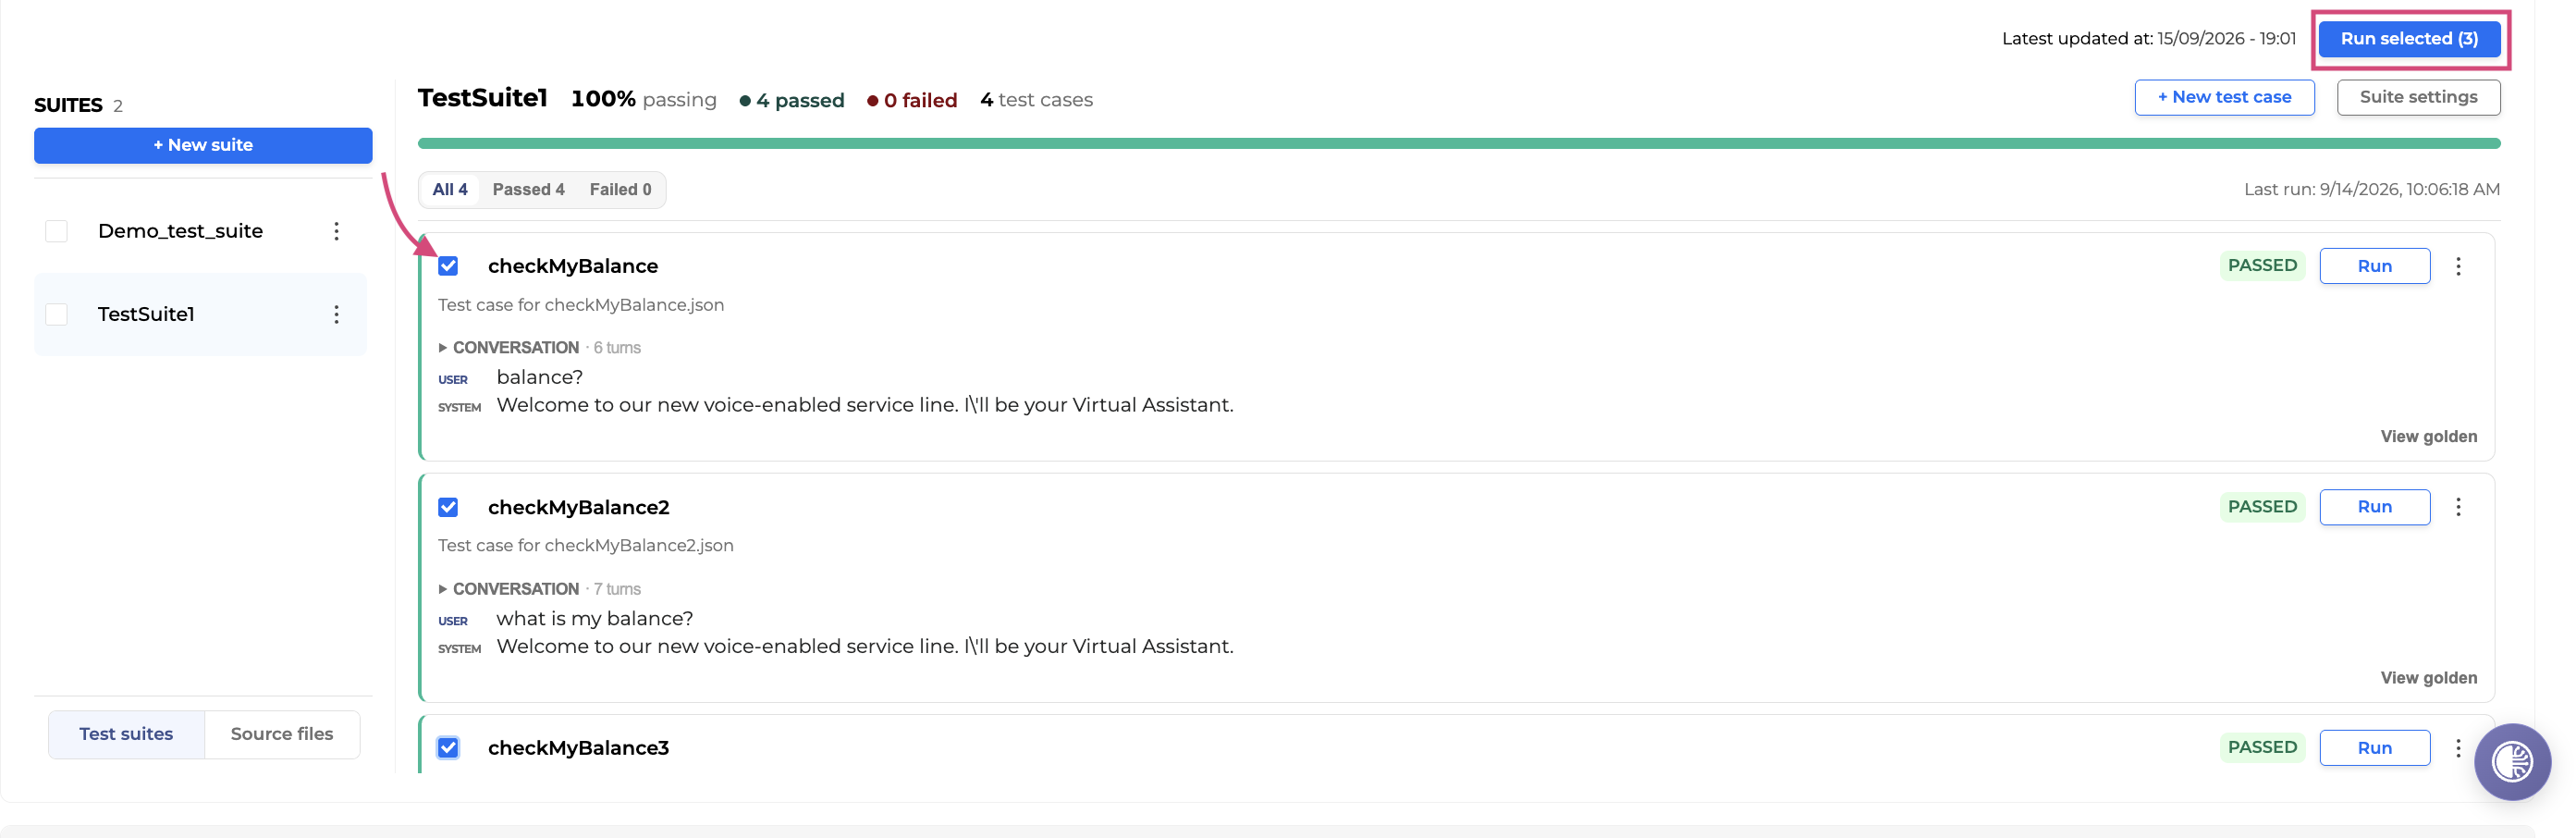
Check the boxes next to the test cases you want to include in the run.
-
Click Run selected.
Run selected test suites
-
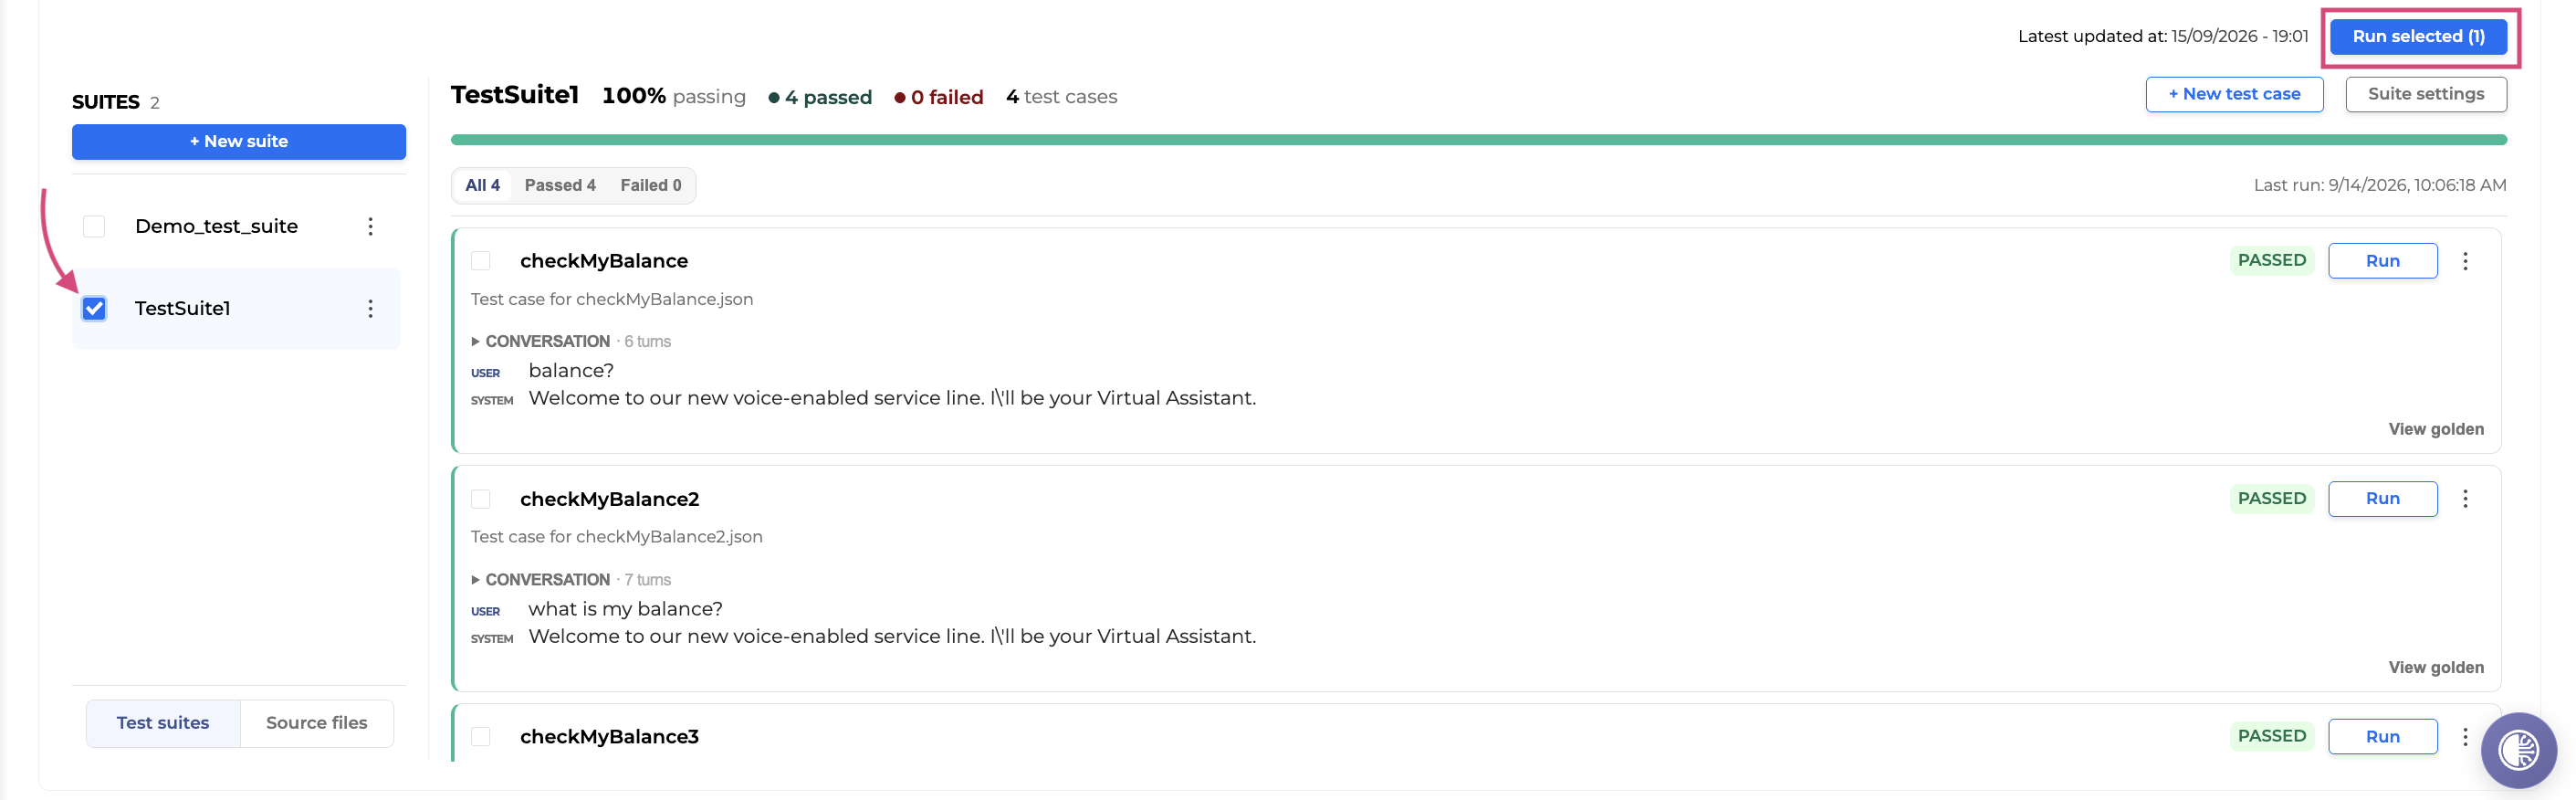
Select the suite you want to run.
-
Click Run selected.
Run all suites in the project
-
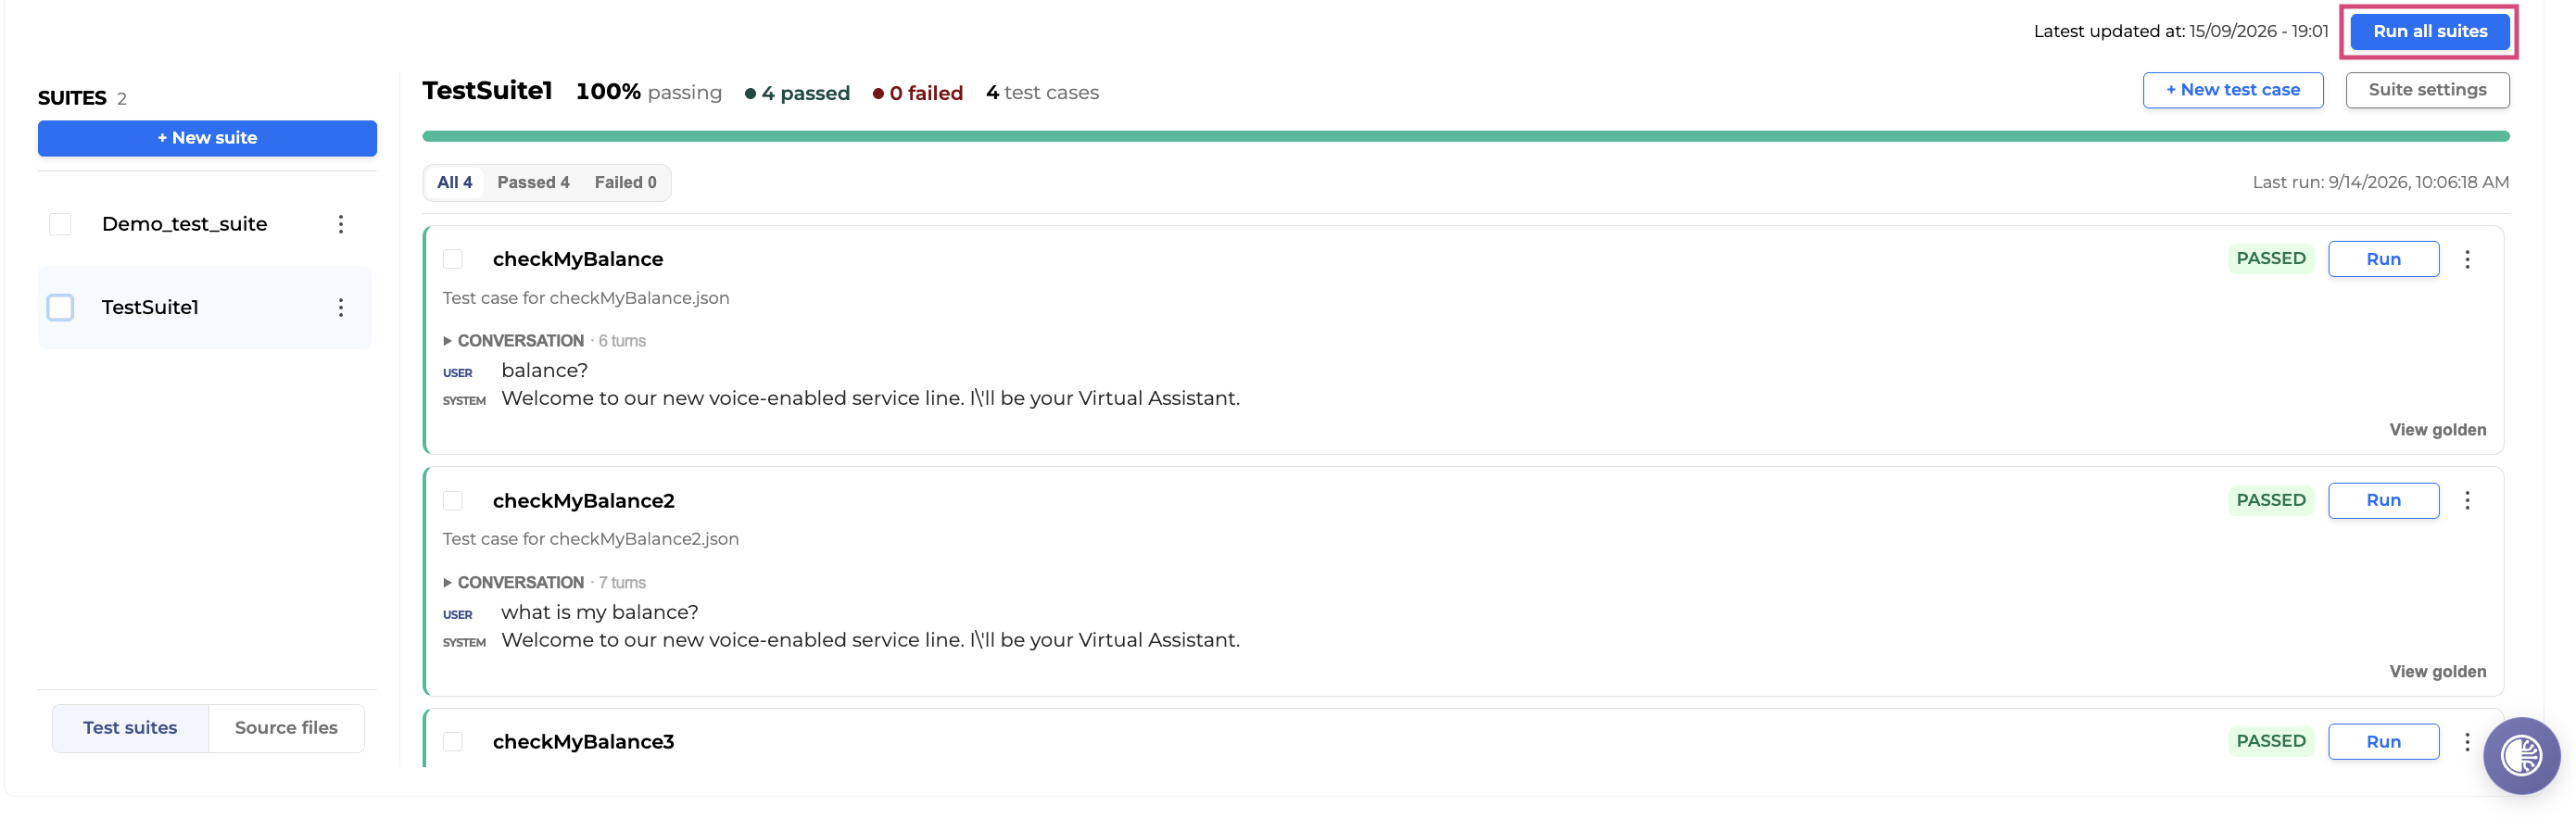
Go to the Test Suites view.
-
Click Run all suites in the top-right corner.
Create a test file from Orchestrator
You can create test files directly from the chat session in Orchestrator, and they will automatically be added to the AutoGen_TestSuite folder in Testing Studio.
This feature is only available for Cloud-type projects!
To create a test case in Orchestrator, follow the guidelines outlined below:
-
Navigate to Orchestrator and select a dialog application you want to test.
-
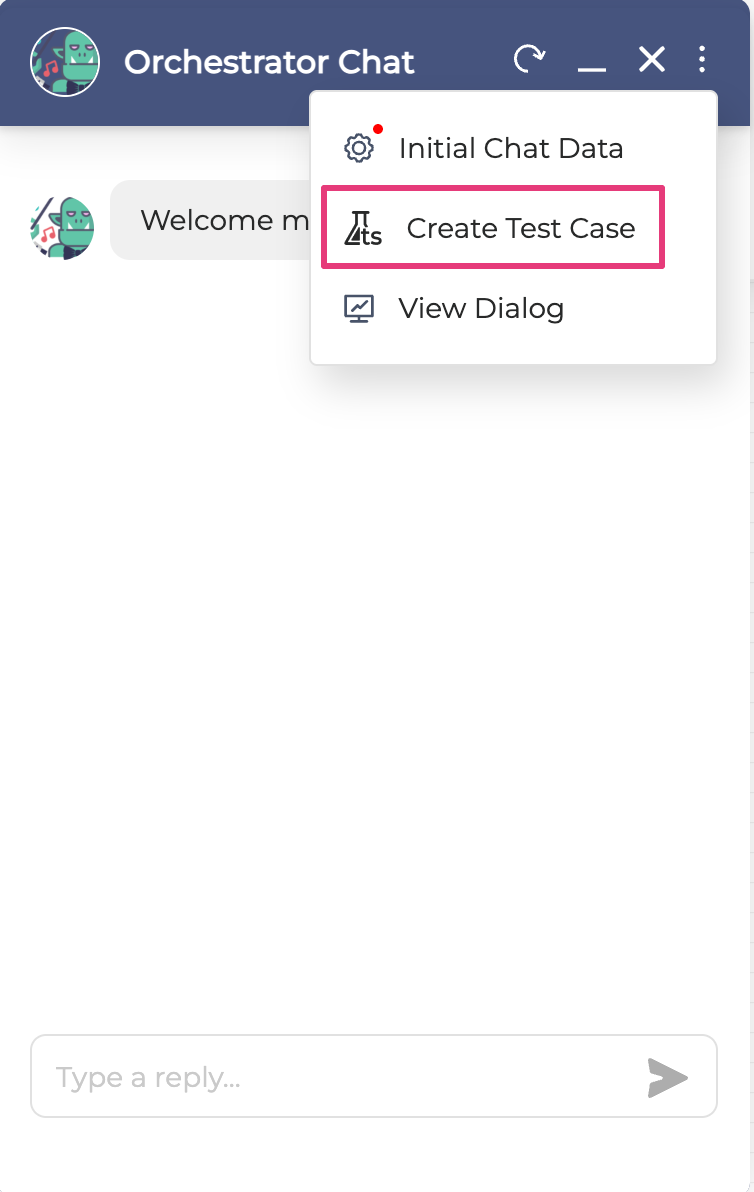
Open the Orchestrator Chat and click the three icon menu button and then select Create Test Case:
-
In the dialog box that opens, fill in the fields as described below:
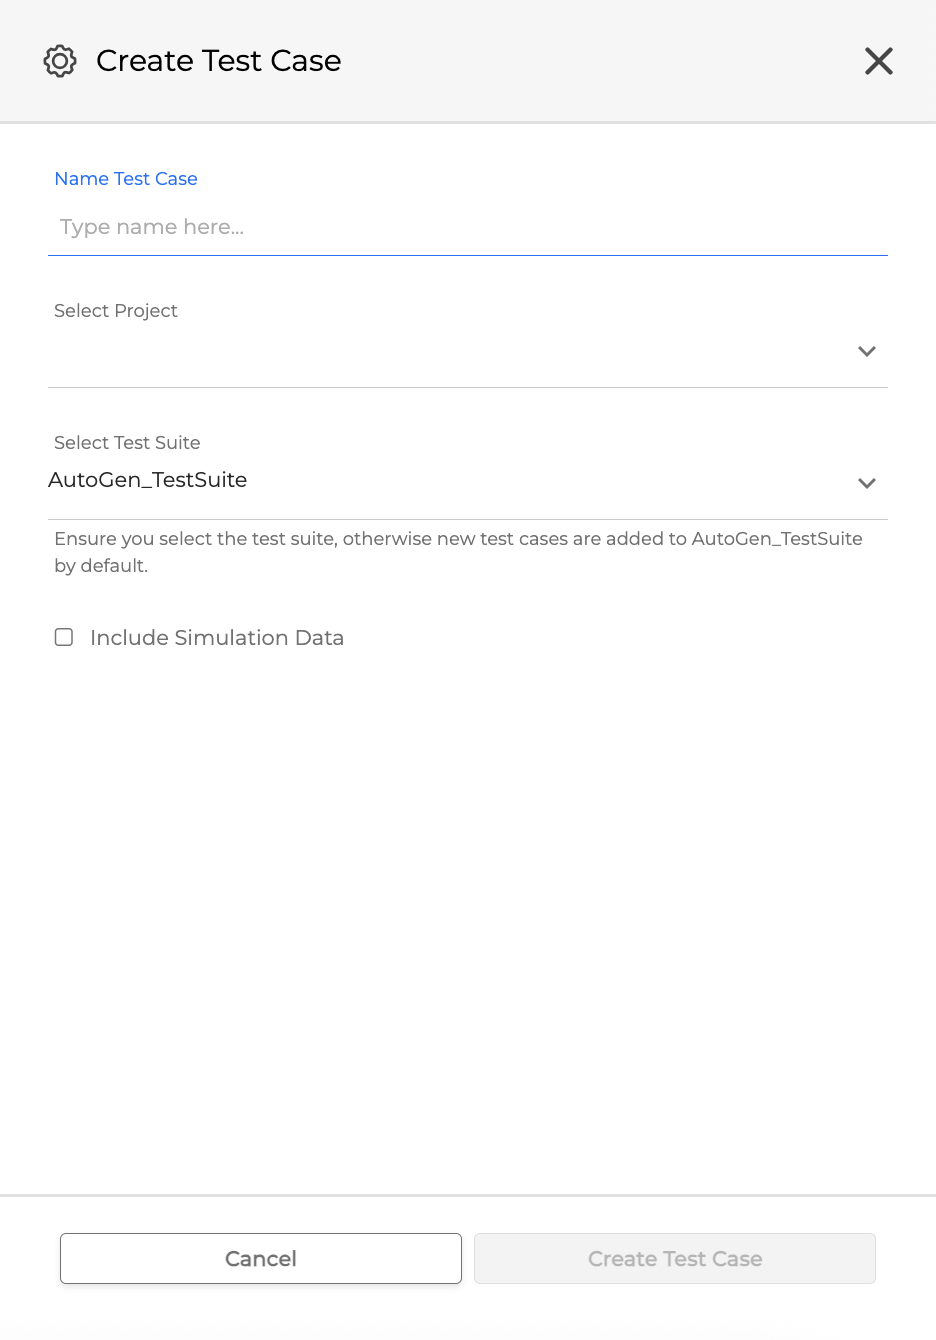
-
Name Test Case: Enter a unique name for the test case you are creating.
-
If a test case name already exists, it cannot be reused.
-
The name is restricted to the following characters: a-z, A-Z, 0-9 and underscores.
-
Select Project: Choose a Testing Studio project where you would like to add the test case.
-
Select Test Suite: Select a test suite folder to add the test cases. If none is selected, the generated test cases will be added automatically to the AutoGen_TestSuite folder in Testing Studio.
-
Include Simulation Data: If marked, simulation data will be added.
-
Click Create Test Case. The generation will start and the test case will automatically be added to the AutoGen_TestSuite folder in Testing Studio.
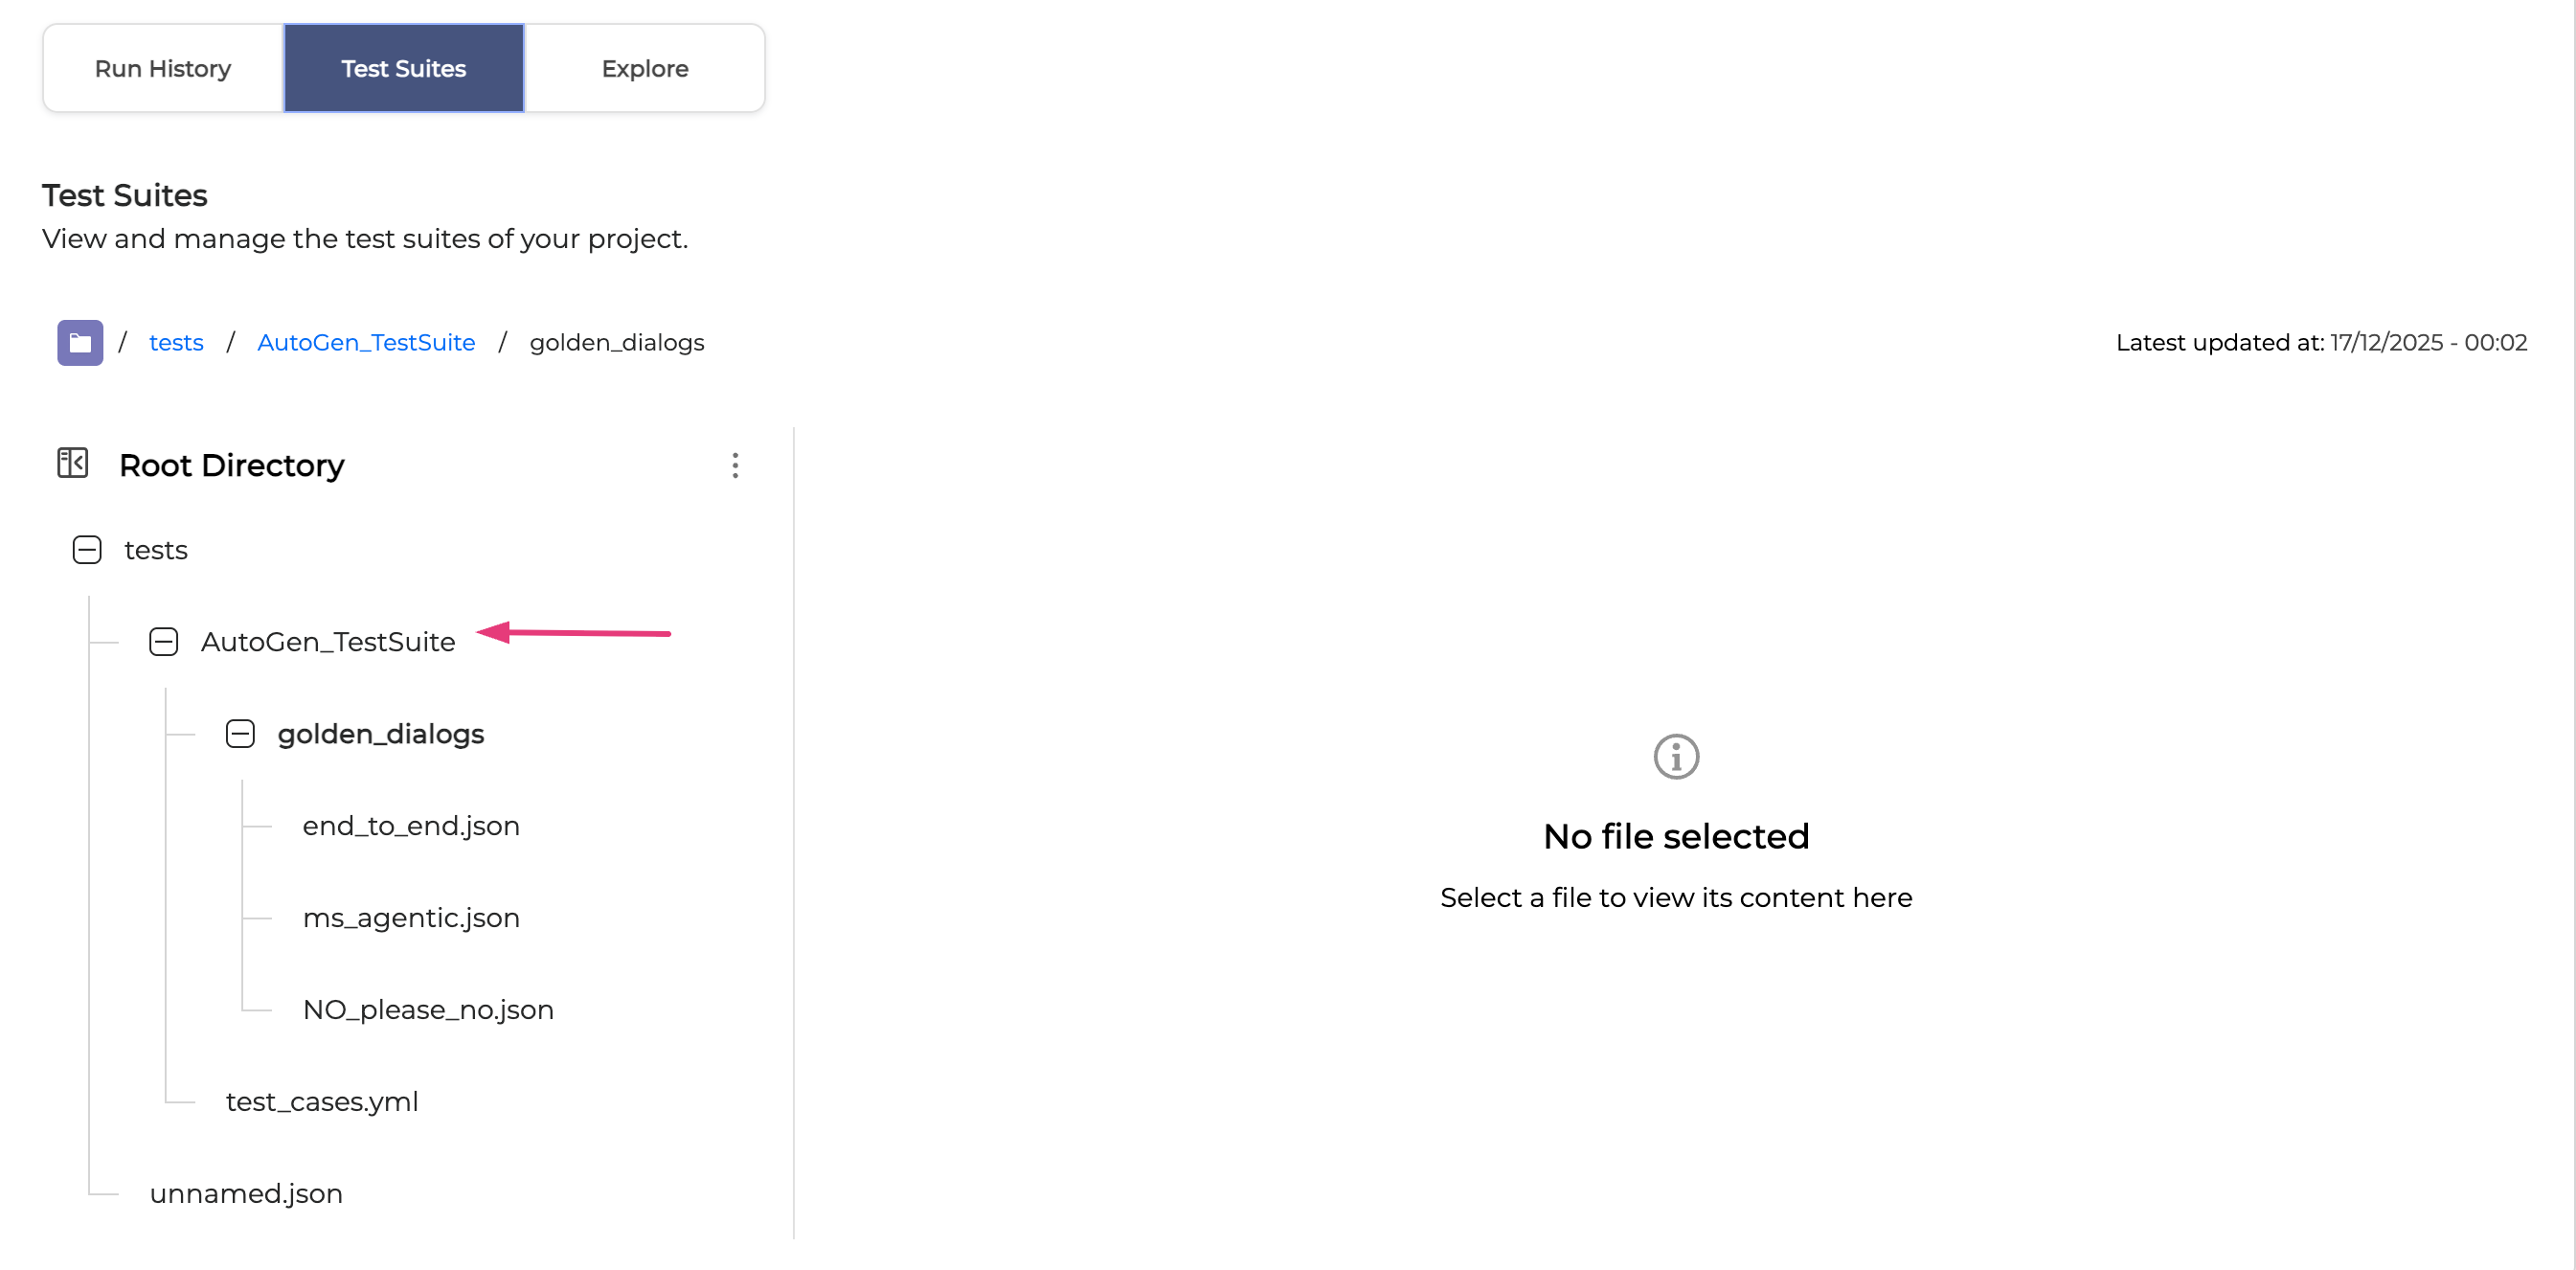
Now, you can view the content of the created test file, edit, create, and delete test files as necessary.
Create a test file from Monitor
You can create test files directly from Monitor, and they will automatically be added to the AutoGen_TestSuite folder in Testing Studio.
This feature is only available for Cloud-type projects!
To create a test case in Monitor, follow the guidelines outlined below:
-
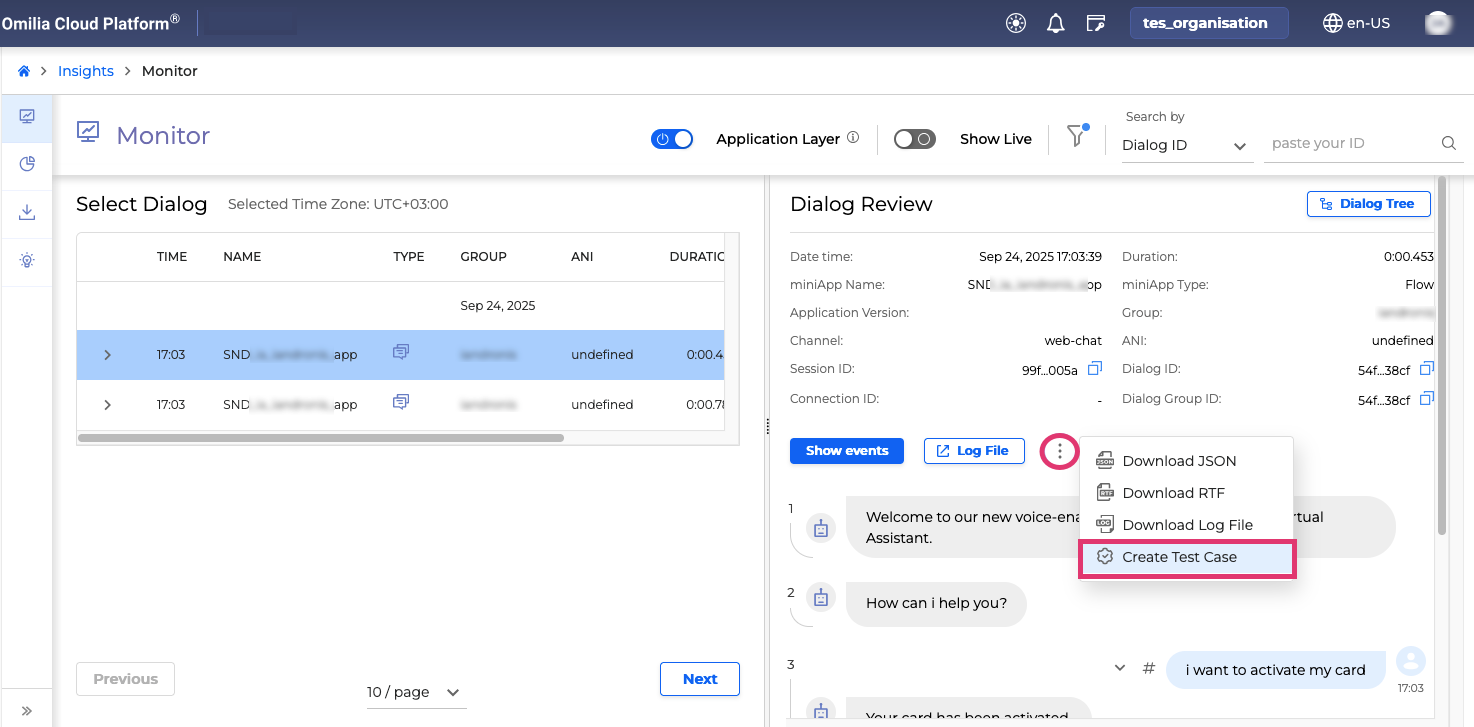
Navigate to Insights → Monitor and select a dialog you want to test.
-
In the Dialog Review section, click the Options menu and select Create Test Case.
-
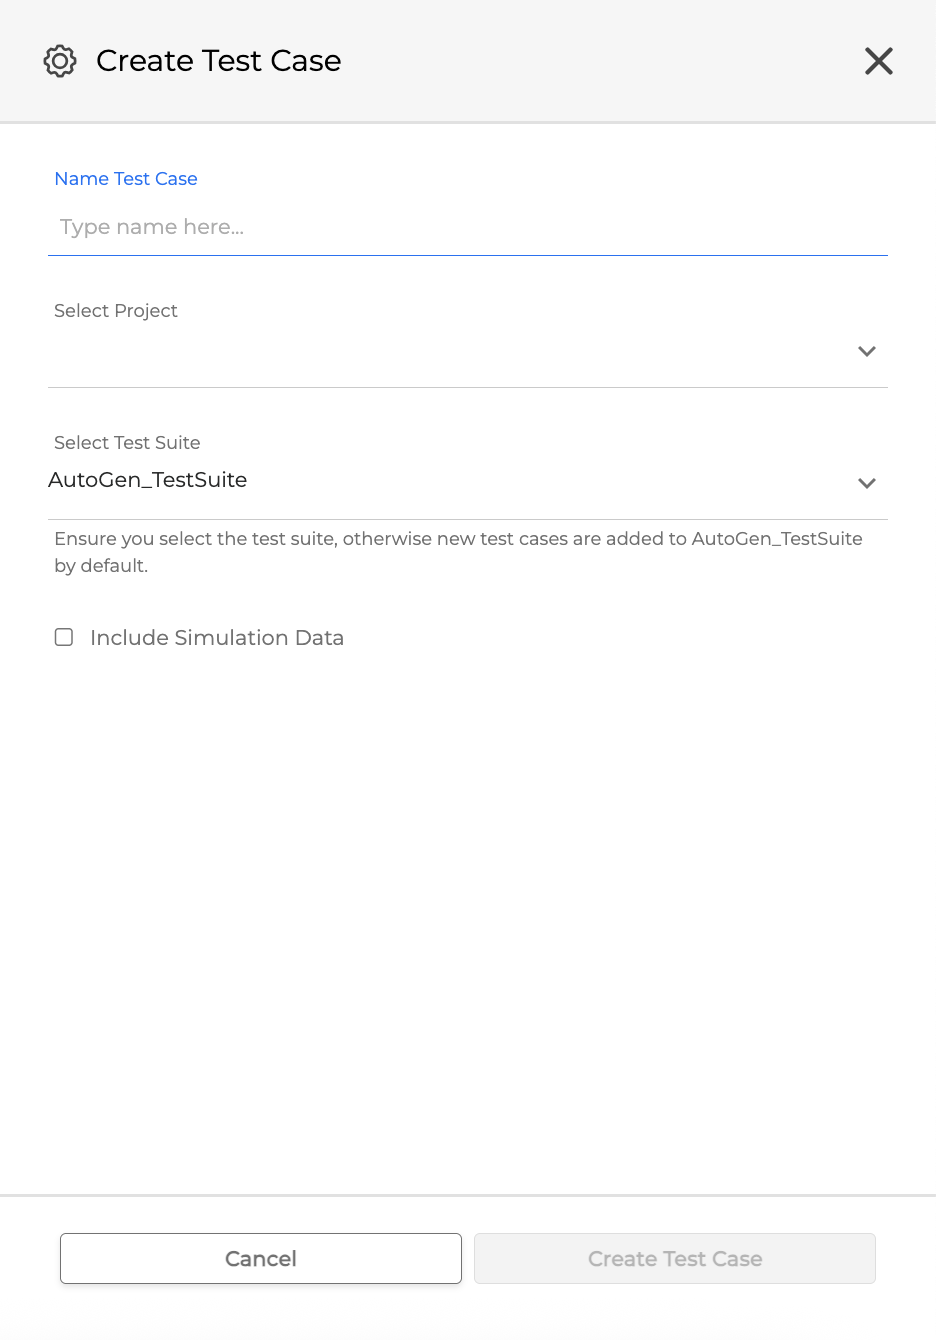
In the dialog box that opens, fill in the fields as described below:
-
Name Test Case: Enter a unique name for the test case you are creating.
-
If a test case name already exists, it cannot be reused.
-
The name is restricted to the following characters: a-z, A-Z, 0-9 and underscores.
-
Select Project: Choose a Testing Studio project where you would like to add the test case.
-
Select Test Suite: Select a test suite folder to add the test cases. If none is selected, the generated test cases will be added automatically to the AutoGen_TestSuite folder in Testing Studio.
-
Include Simulation Data: If marked, simulation data will be added.
-
Confirm by clicking Create Test Case.
Now, you can view the content of the created test file, edit, create, and delete test files as necessary.
Source files view
The Source files view displays the raw file tree and underlying YAML/JSON files. It is the legacy interface and is currently available alongside the new interface, so you can use either one during the transition.
Upload a Test Suite
You can upload your collection of test case files as a ZIP file from your computer to Testing Studio.
If you are using macOS, compress the Test Suite folder into a ZIP file using the Terminal before uploading to Testing Studio+, as other methods of compression may result in file rejection.
To compress via Terminal, enter the following command:
zip -r {output_file} {folder}
To upload a Test Suite, follow the steps below:
-
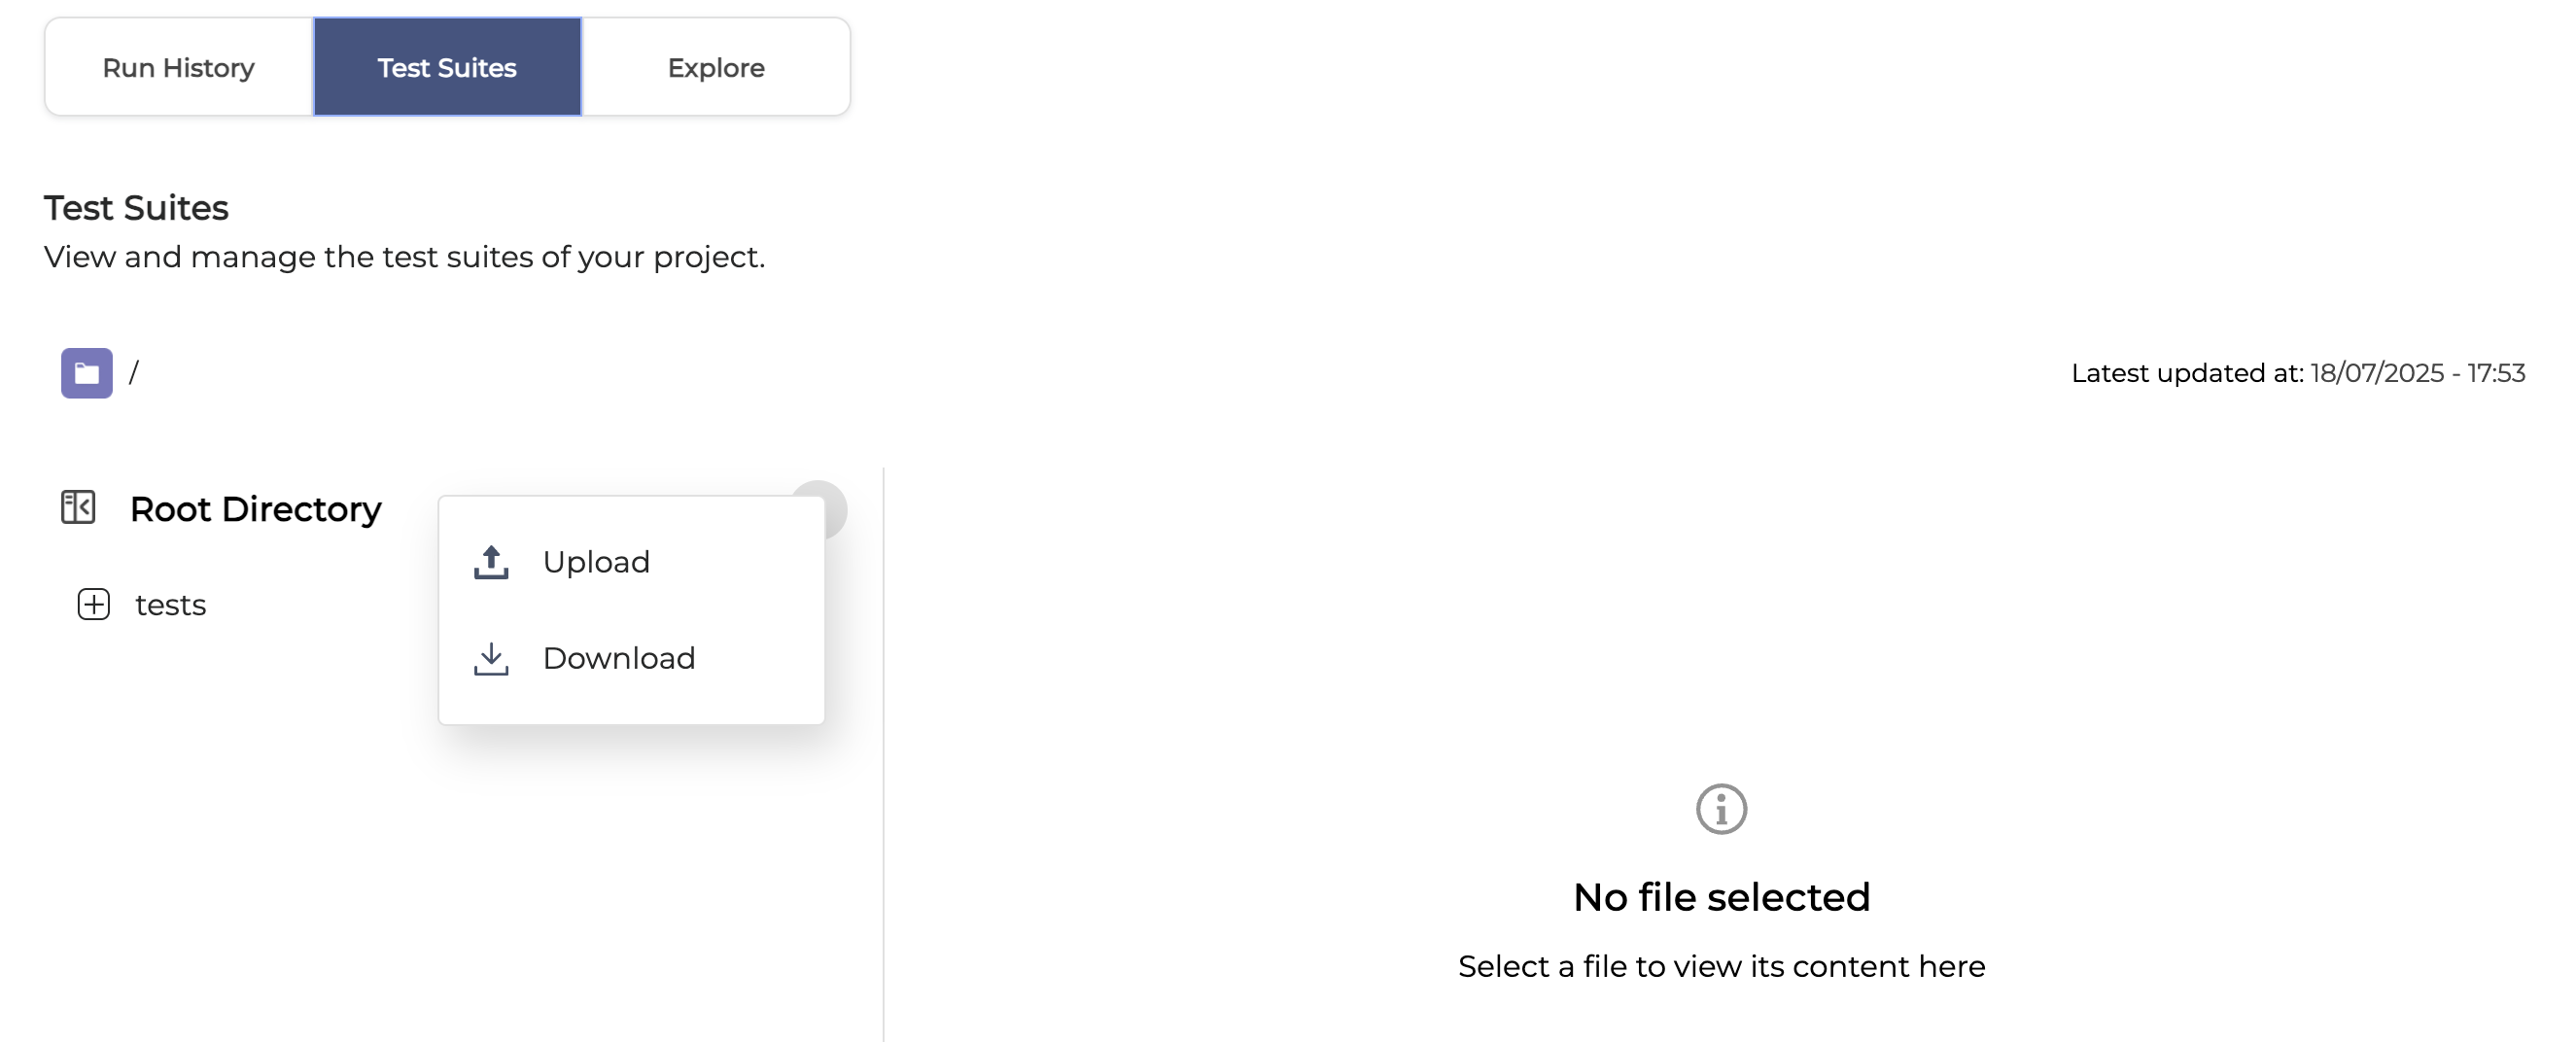
In the Test Suites tab, click the Options menu next to the Root Directory and select Upload.
-
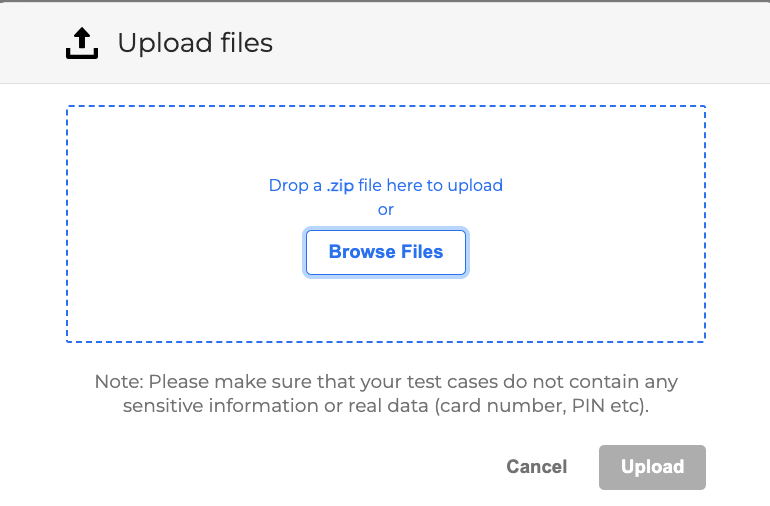
Drag and drop the ZIP file onto the drop zone, or click Browse Files and select your file.
-
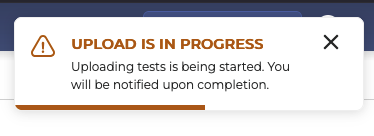
Click Upload to confirm. When the upload starts, you will see this pop-up notification.
-
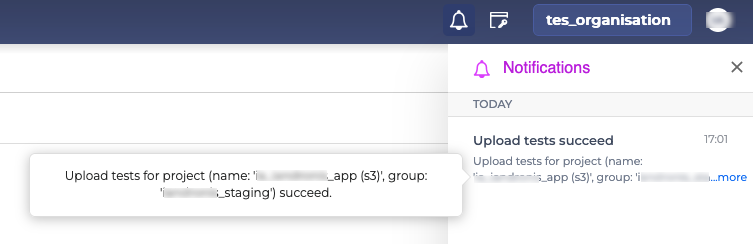
As soon as the upload is over, you will see this message in the right upper corner.
-
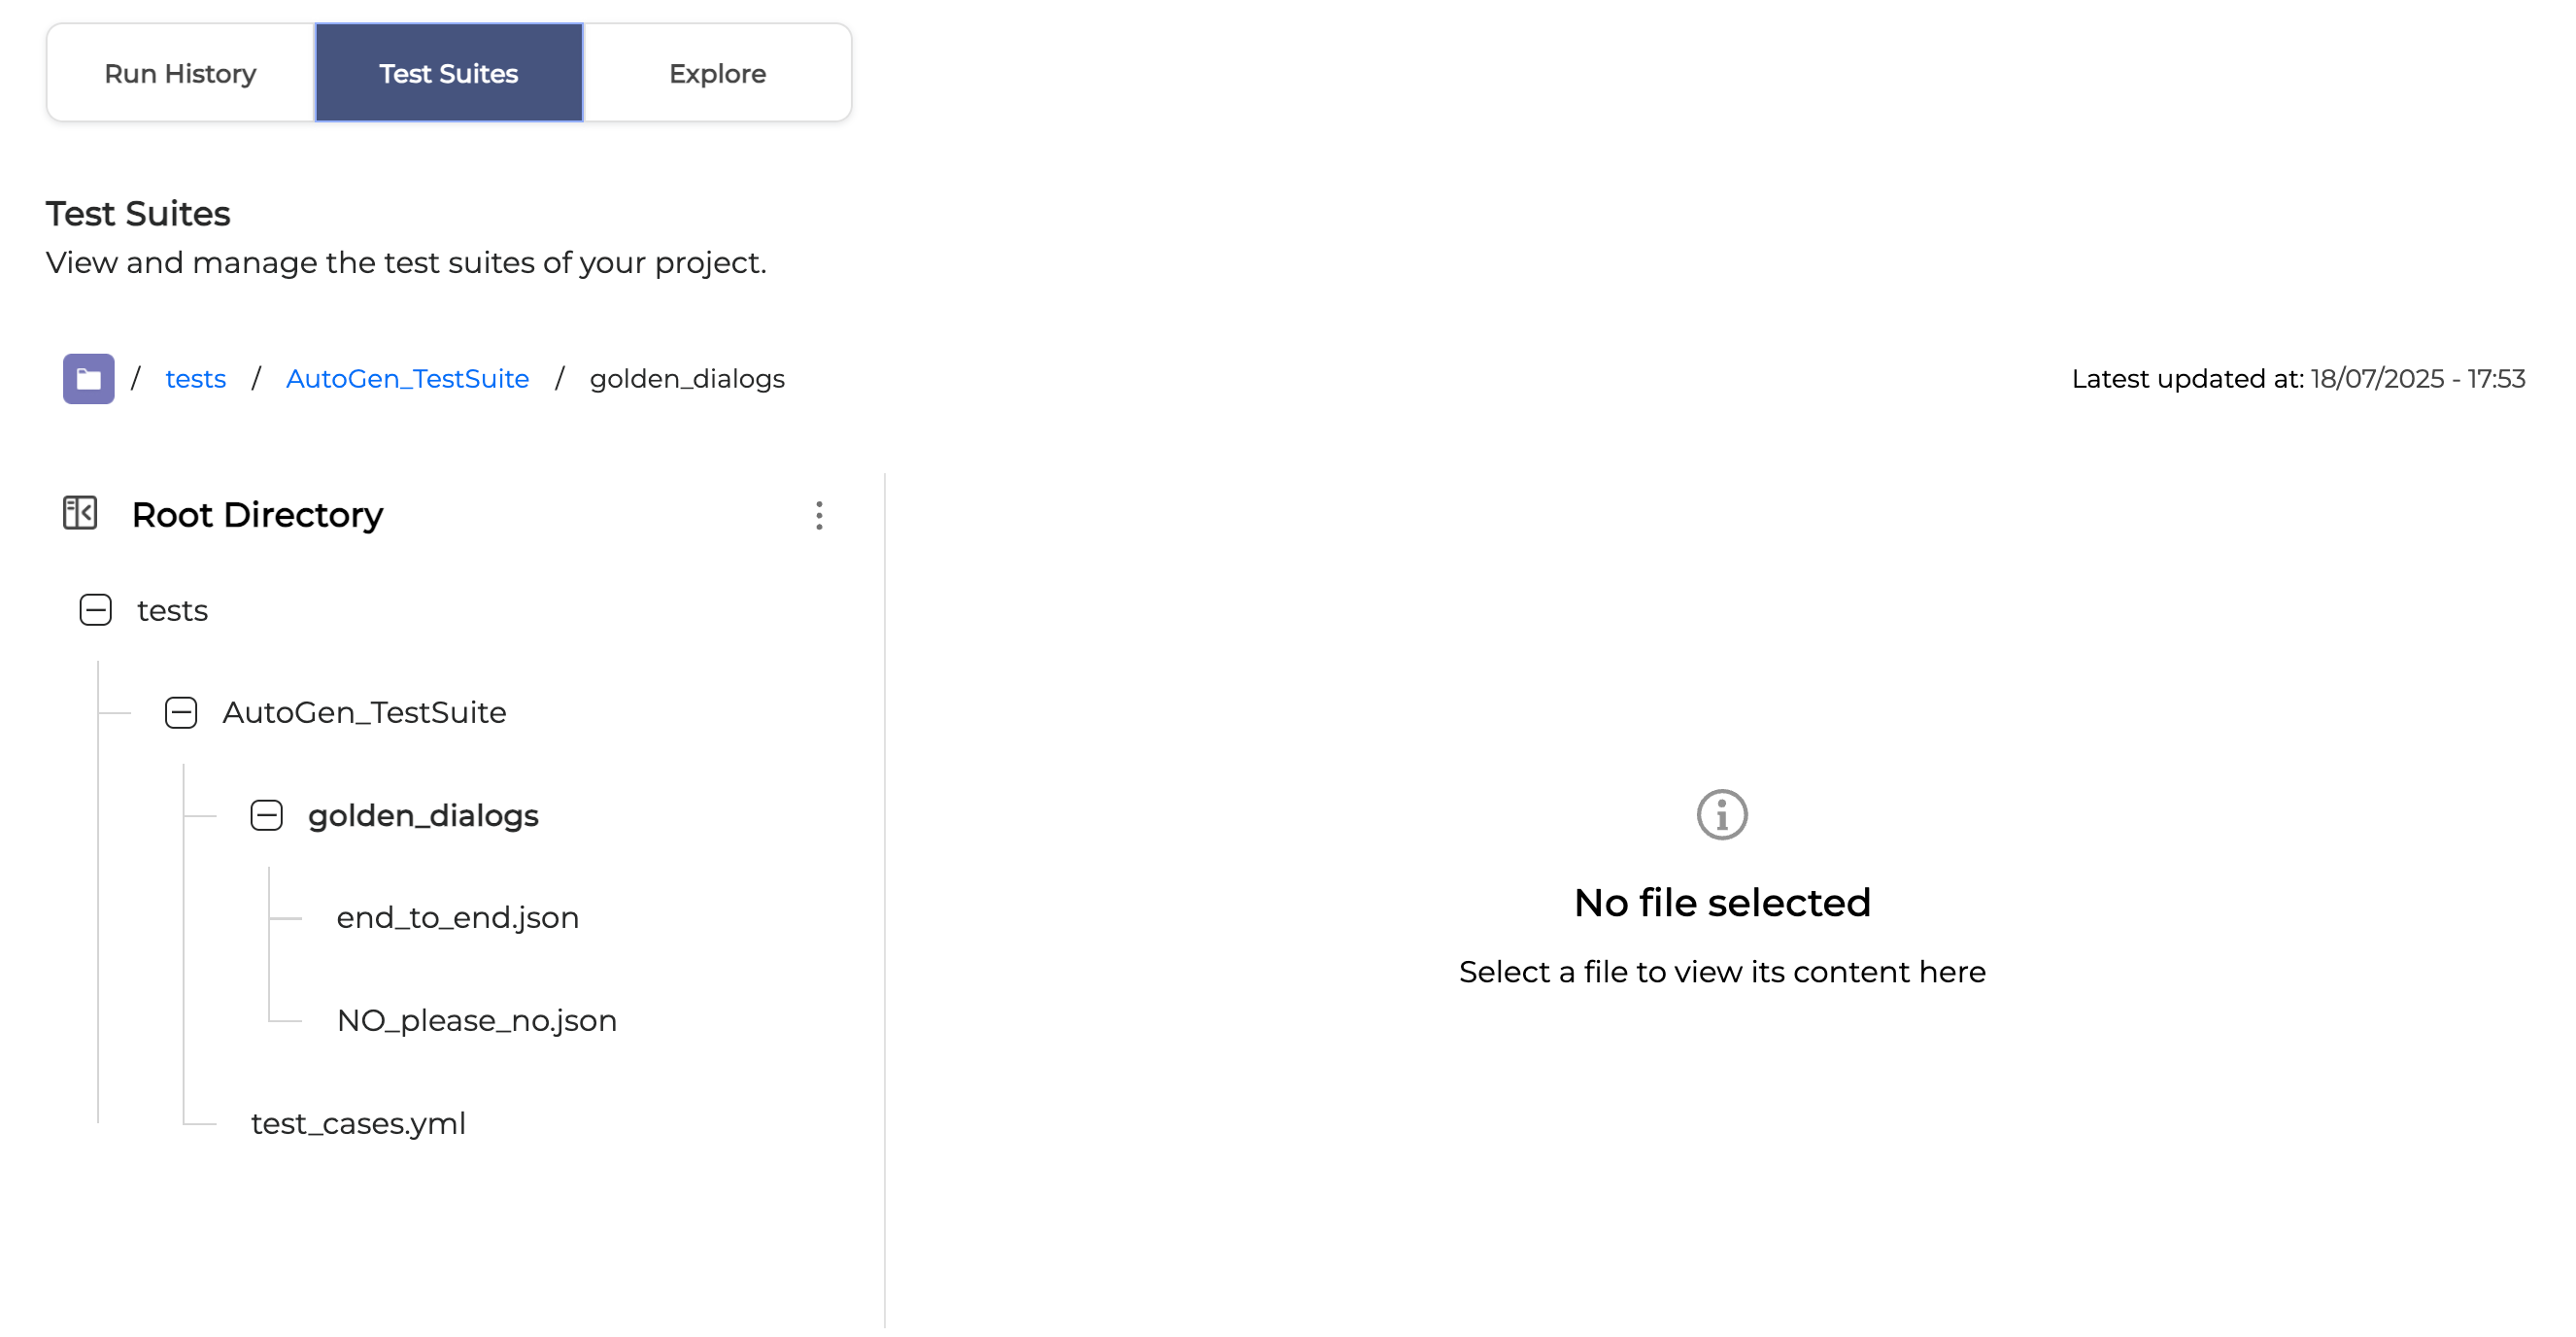
The uploaded Test Suite will appear in the list.
View a test file content
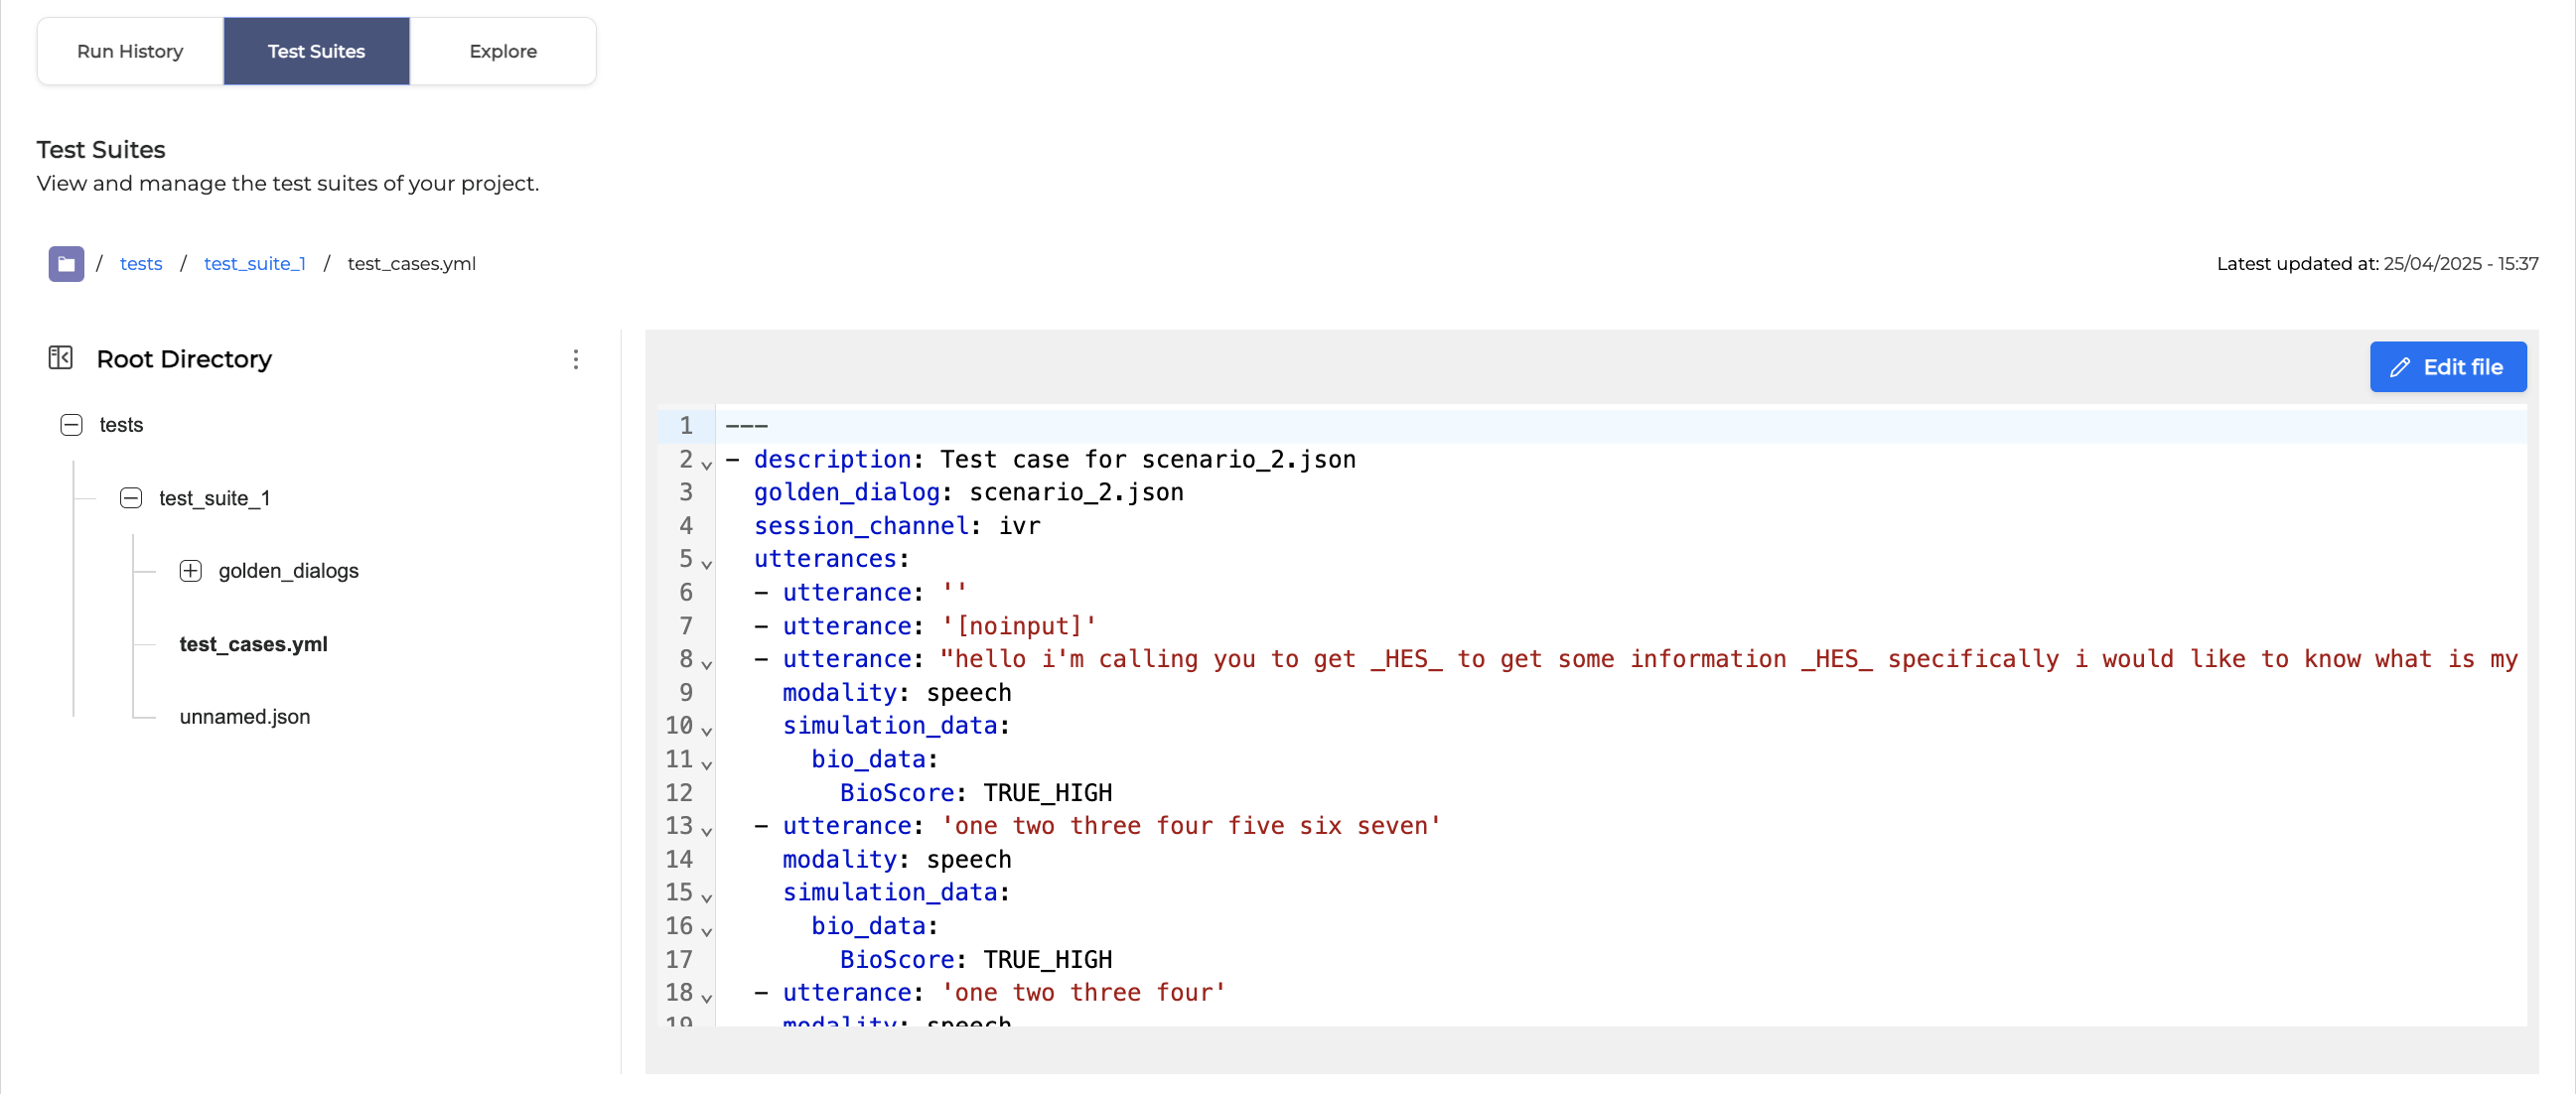
You can view the content of a test file directly within the Test Suites tab: simply select the file you want to view and click on it to display the content.
Edit a test file
You can edit a test file directly in Testing Studio. To do so, follow the instructions below:
-
In the Test Suites tab, select the file you want to edit and click it to open.
-
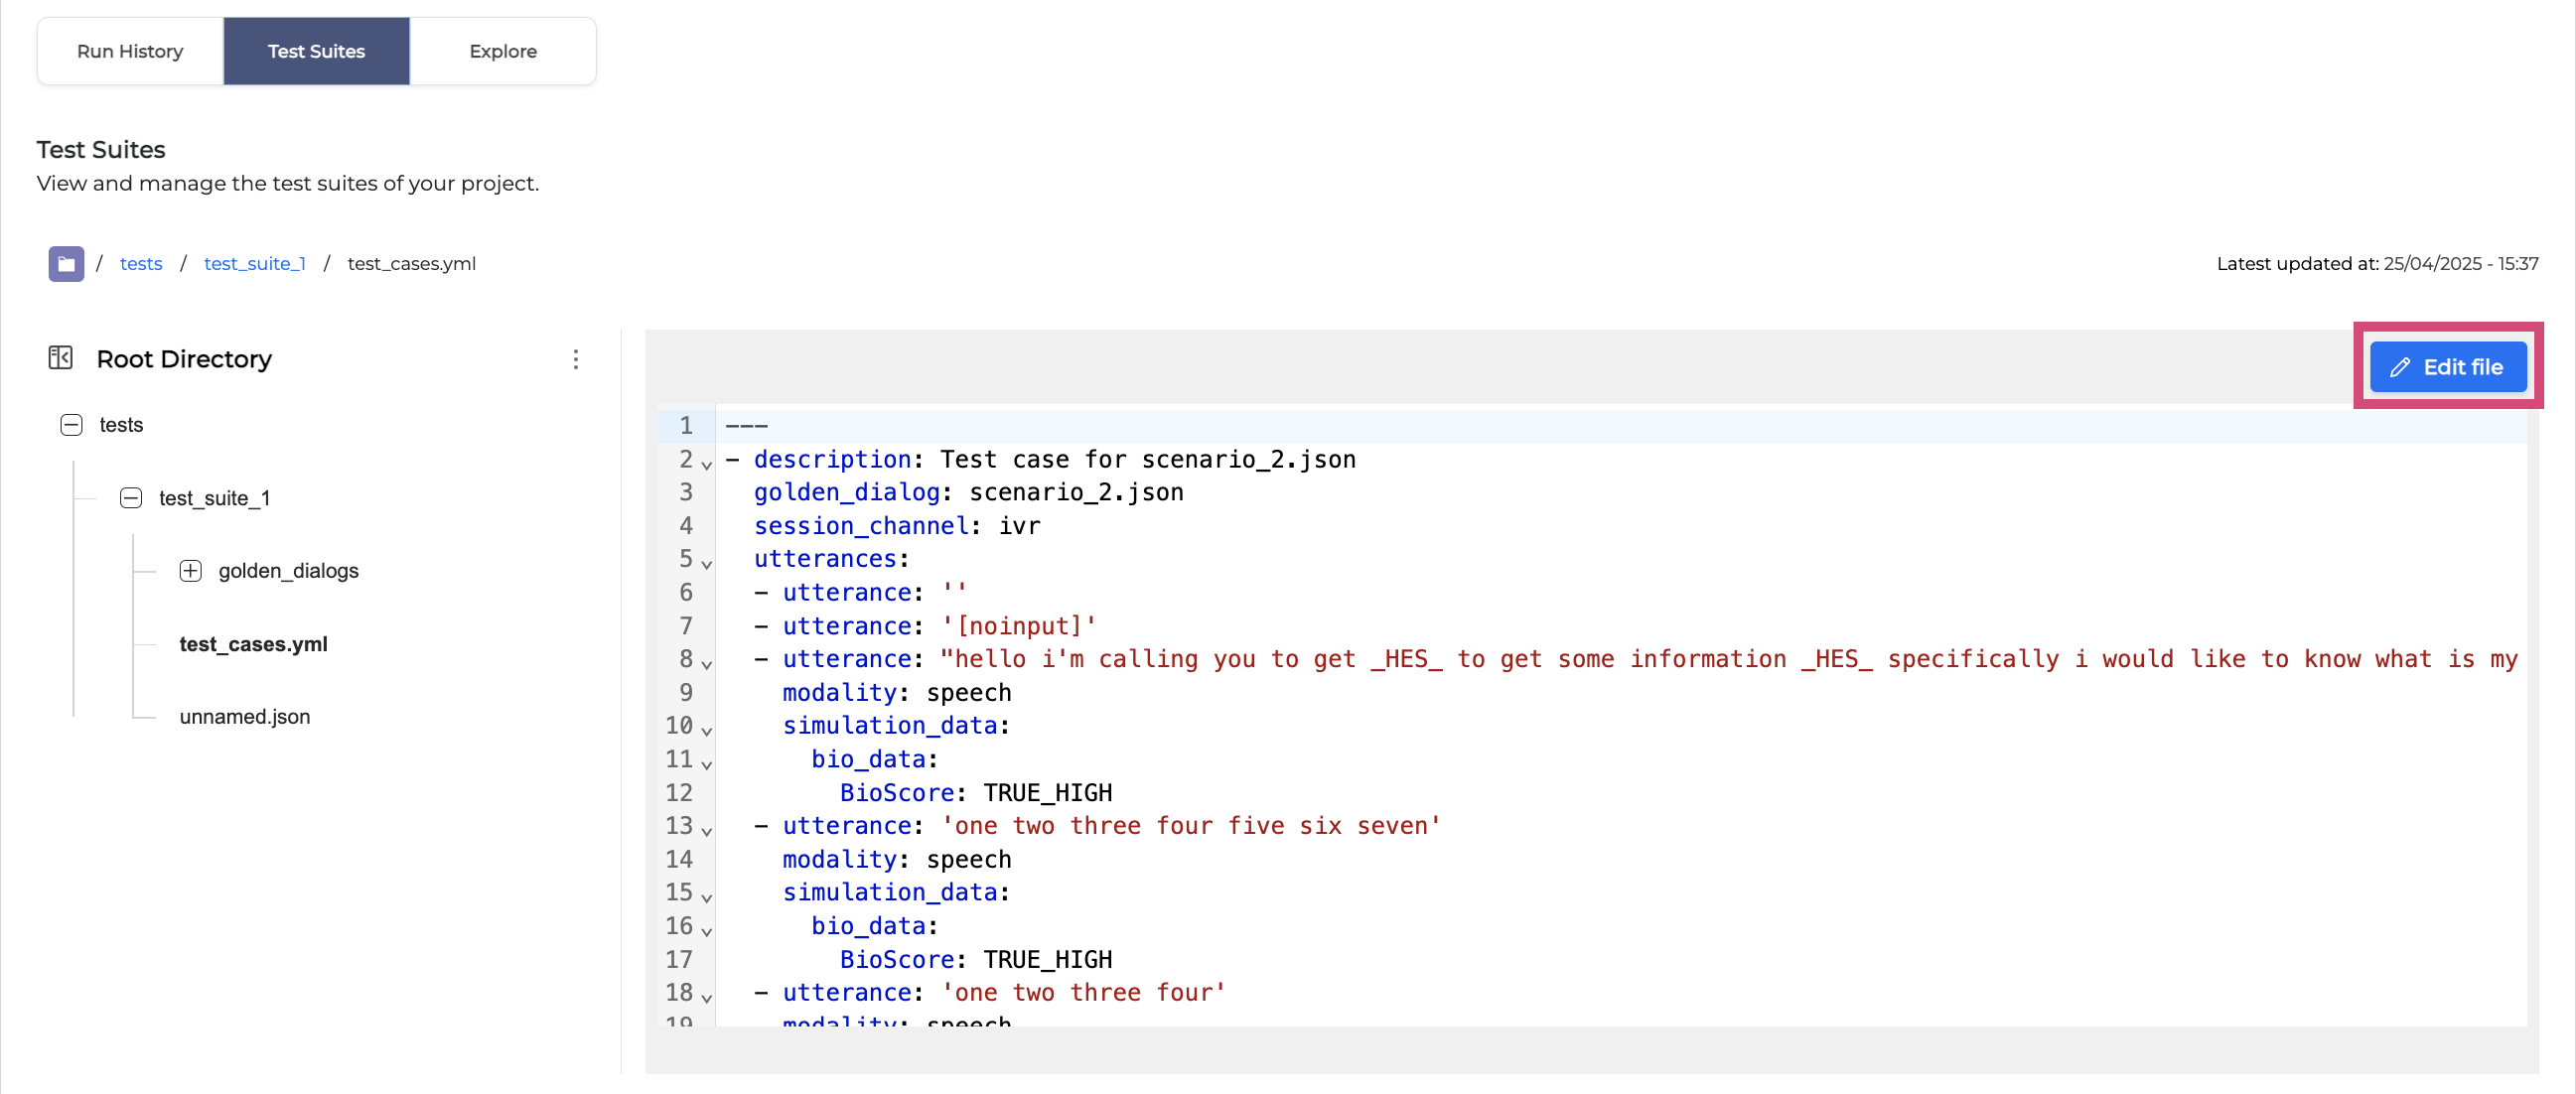
Click Edit file to start editing. Note that only one user can edit a file at a time.
-
Click Save Changes to apply your edits, or Cancel → Discard to discard them.
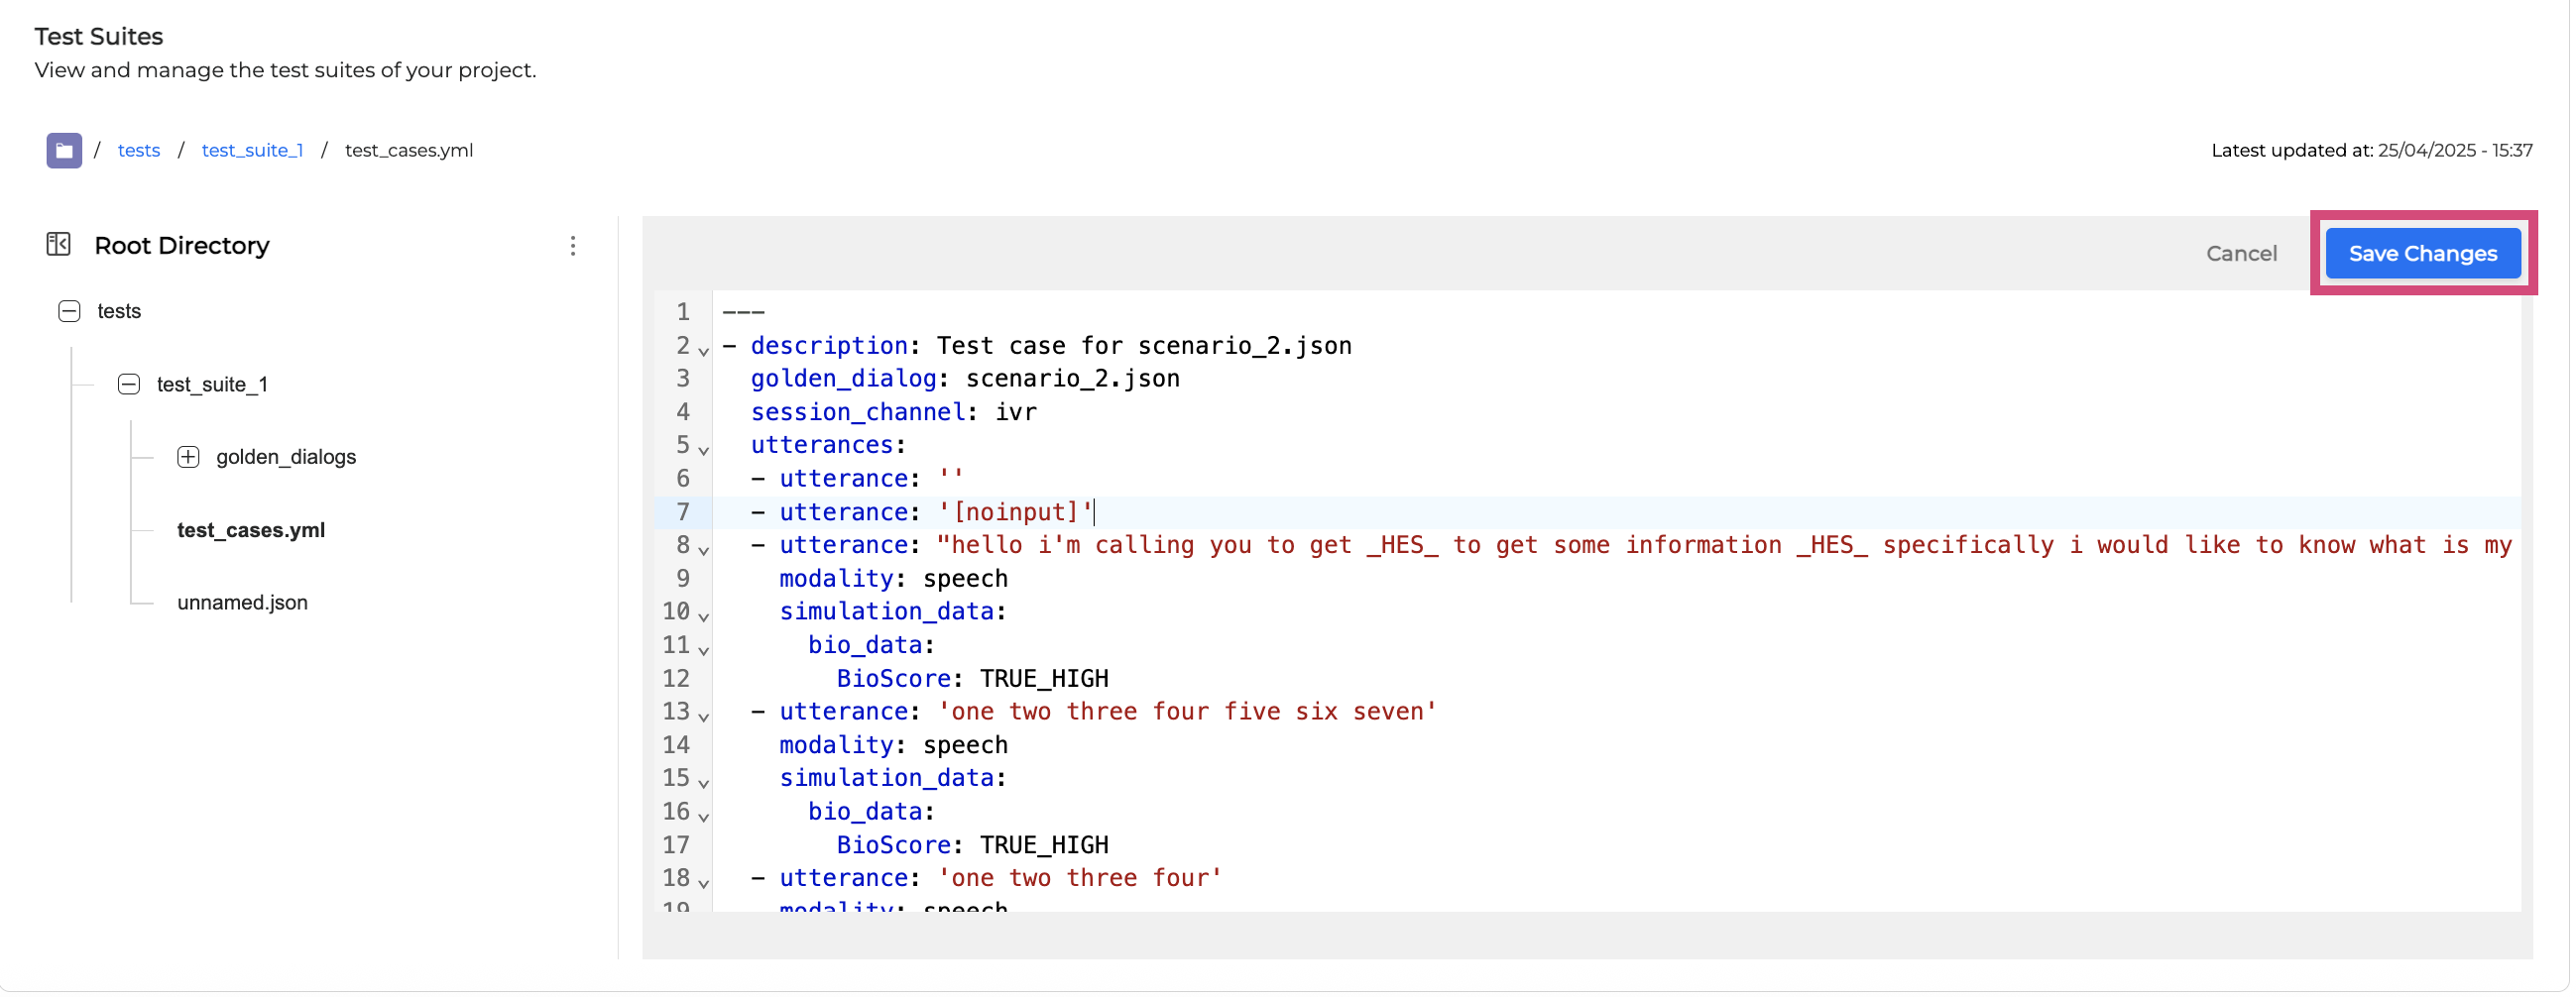
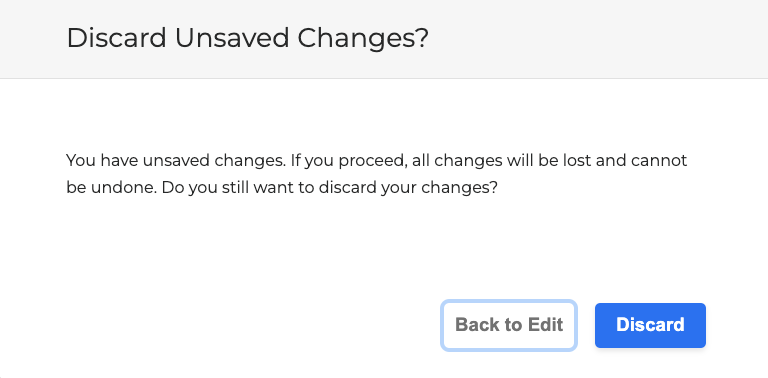
One user can edit the file at a time; if additional users want to edit at the same time, the Edit file button will be disabled for them.
Create a test file
To create a new test file, proceed as described below:
-
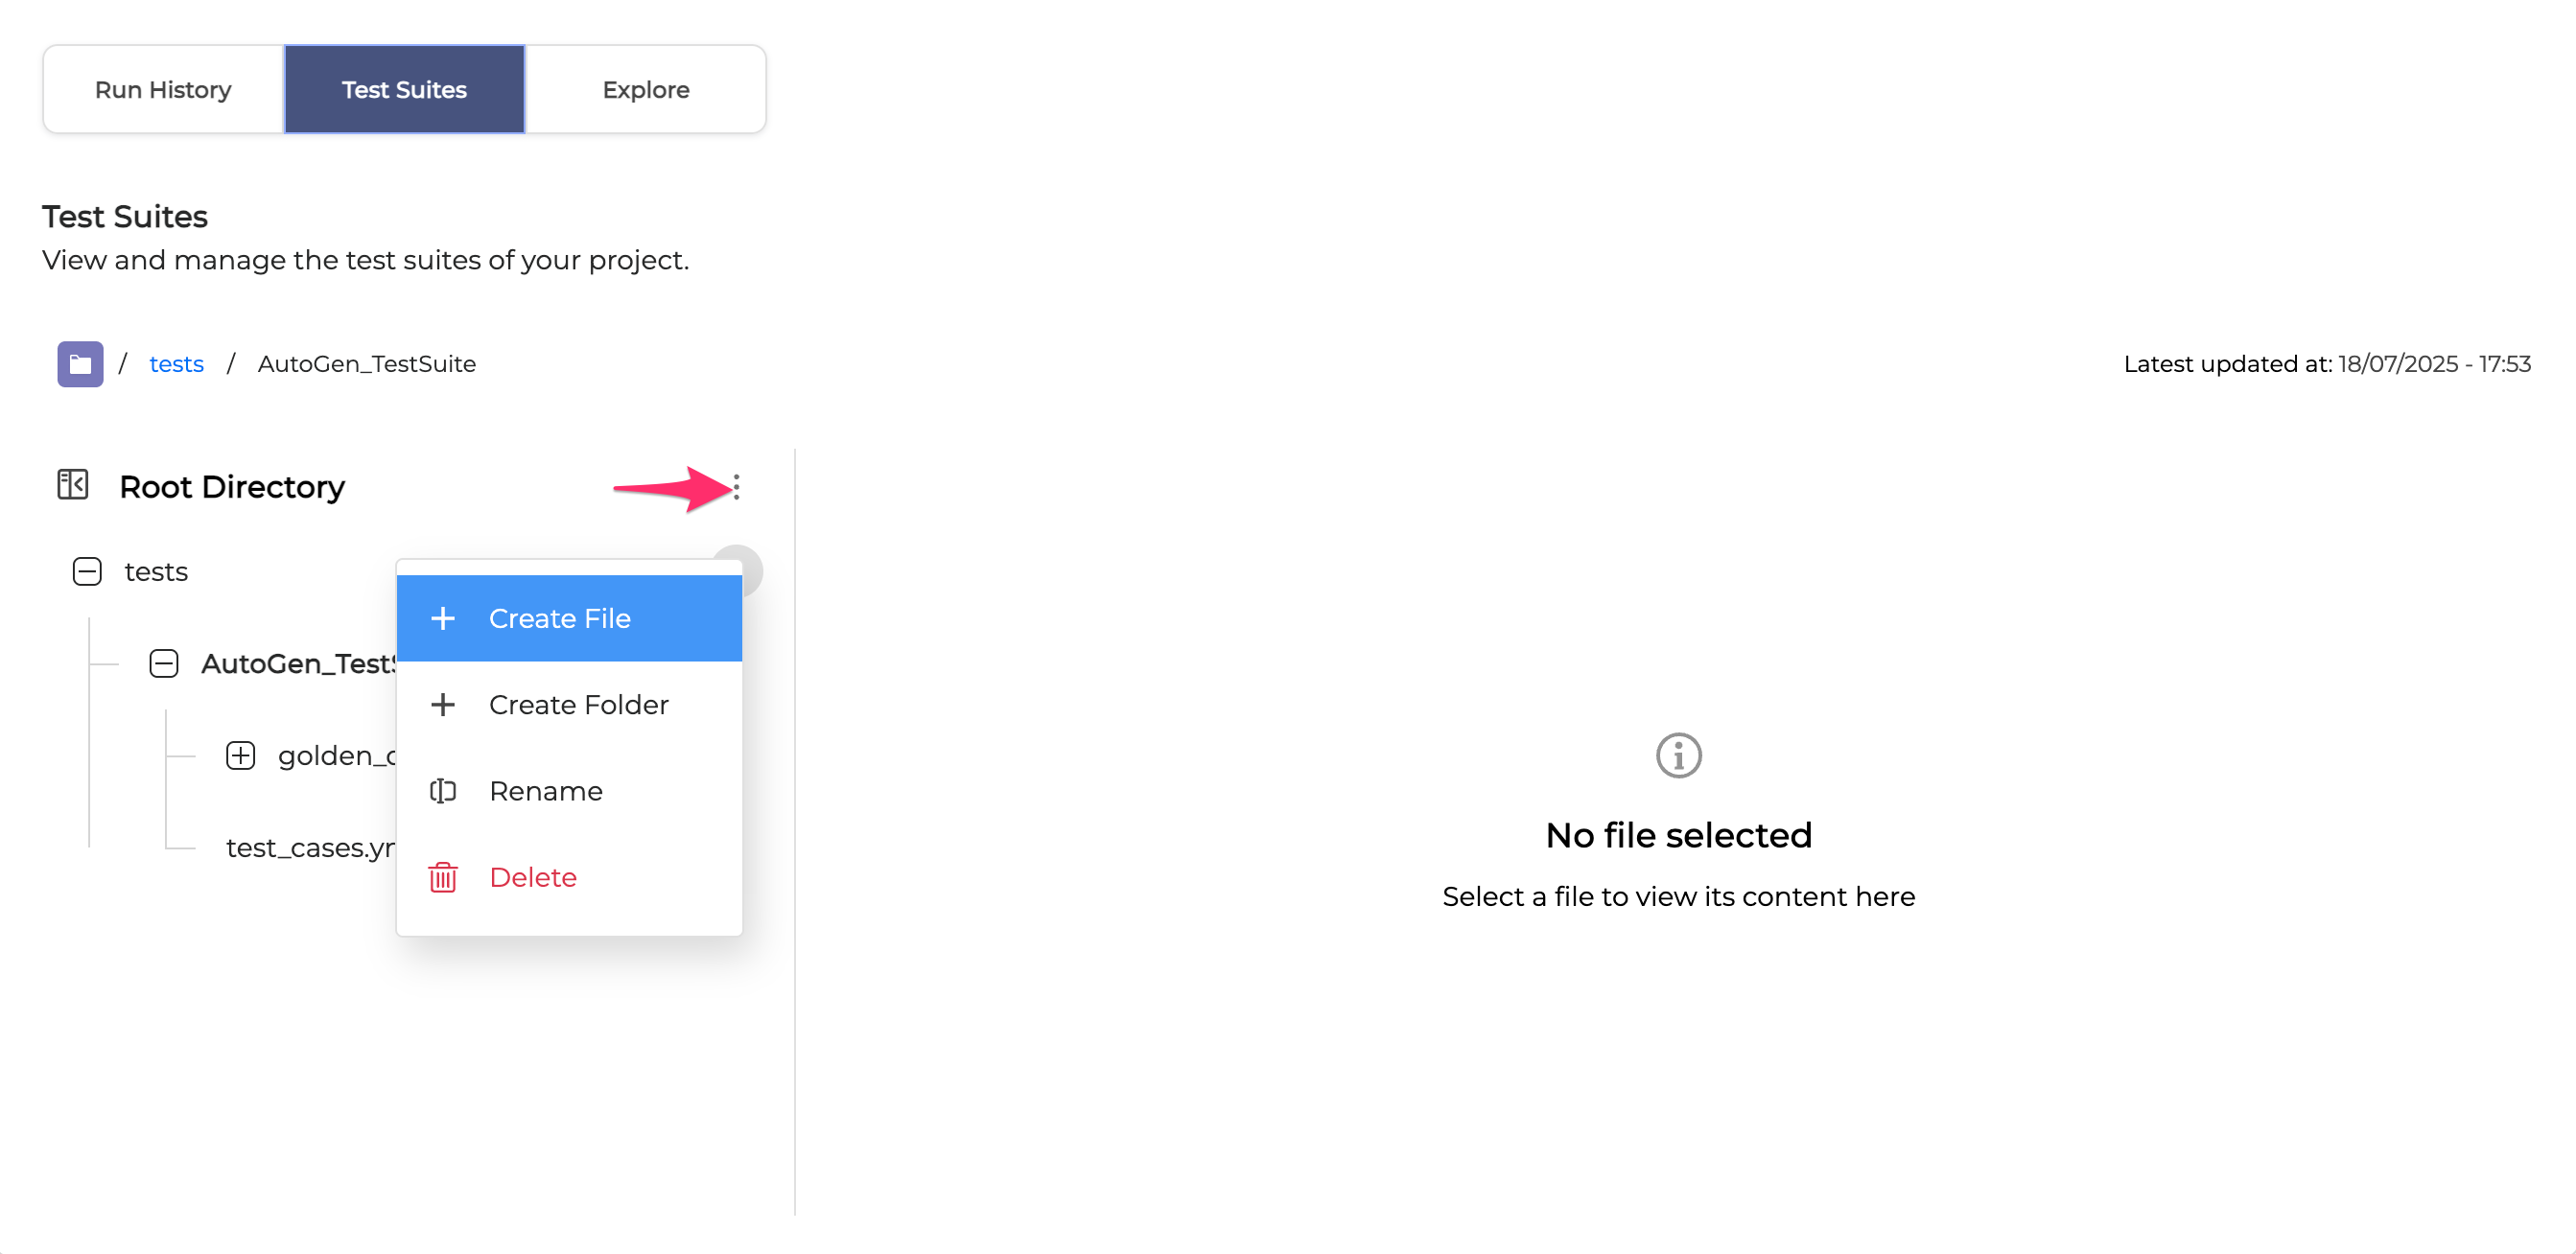
In the Test Suites tab, click the Options menu next to the folder where you want to create the file, then click Create File.
-
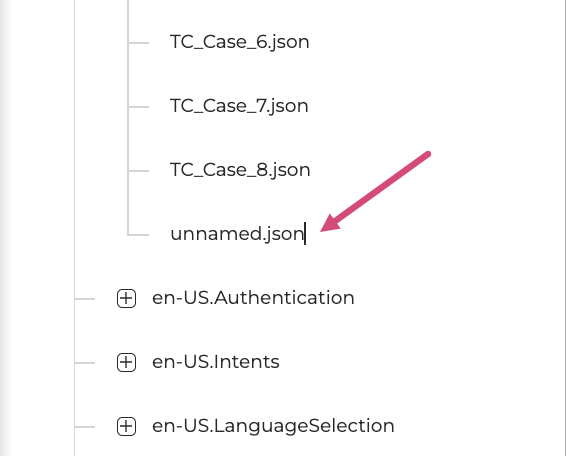
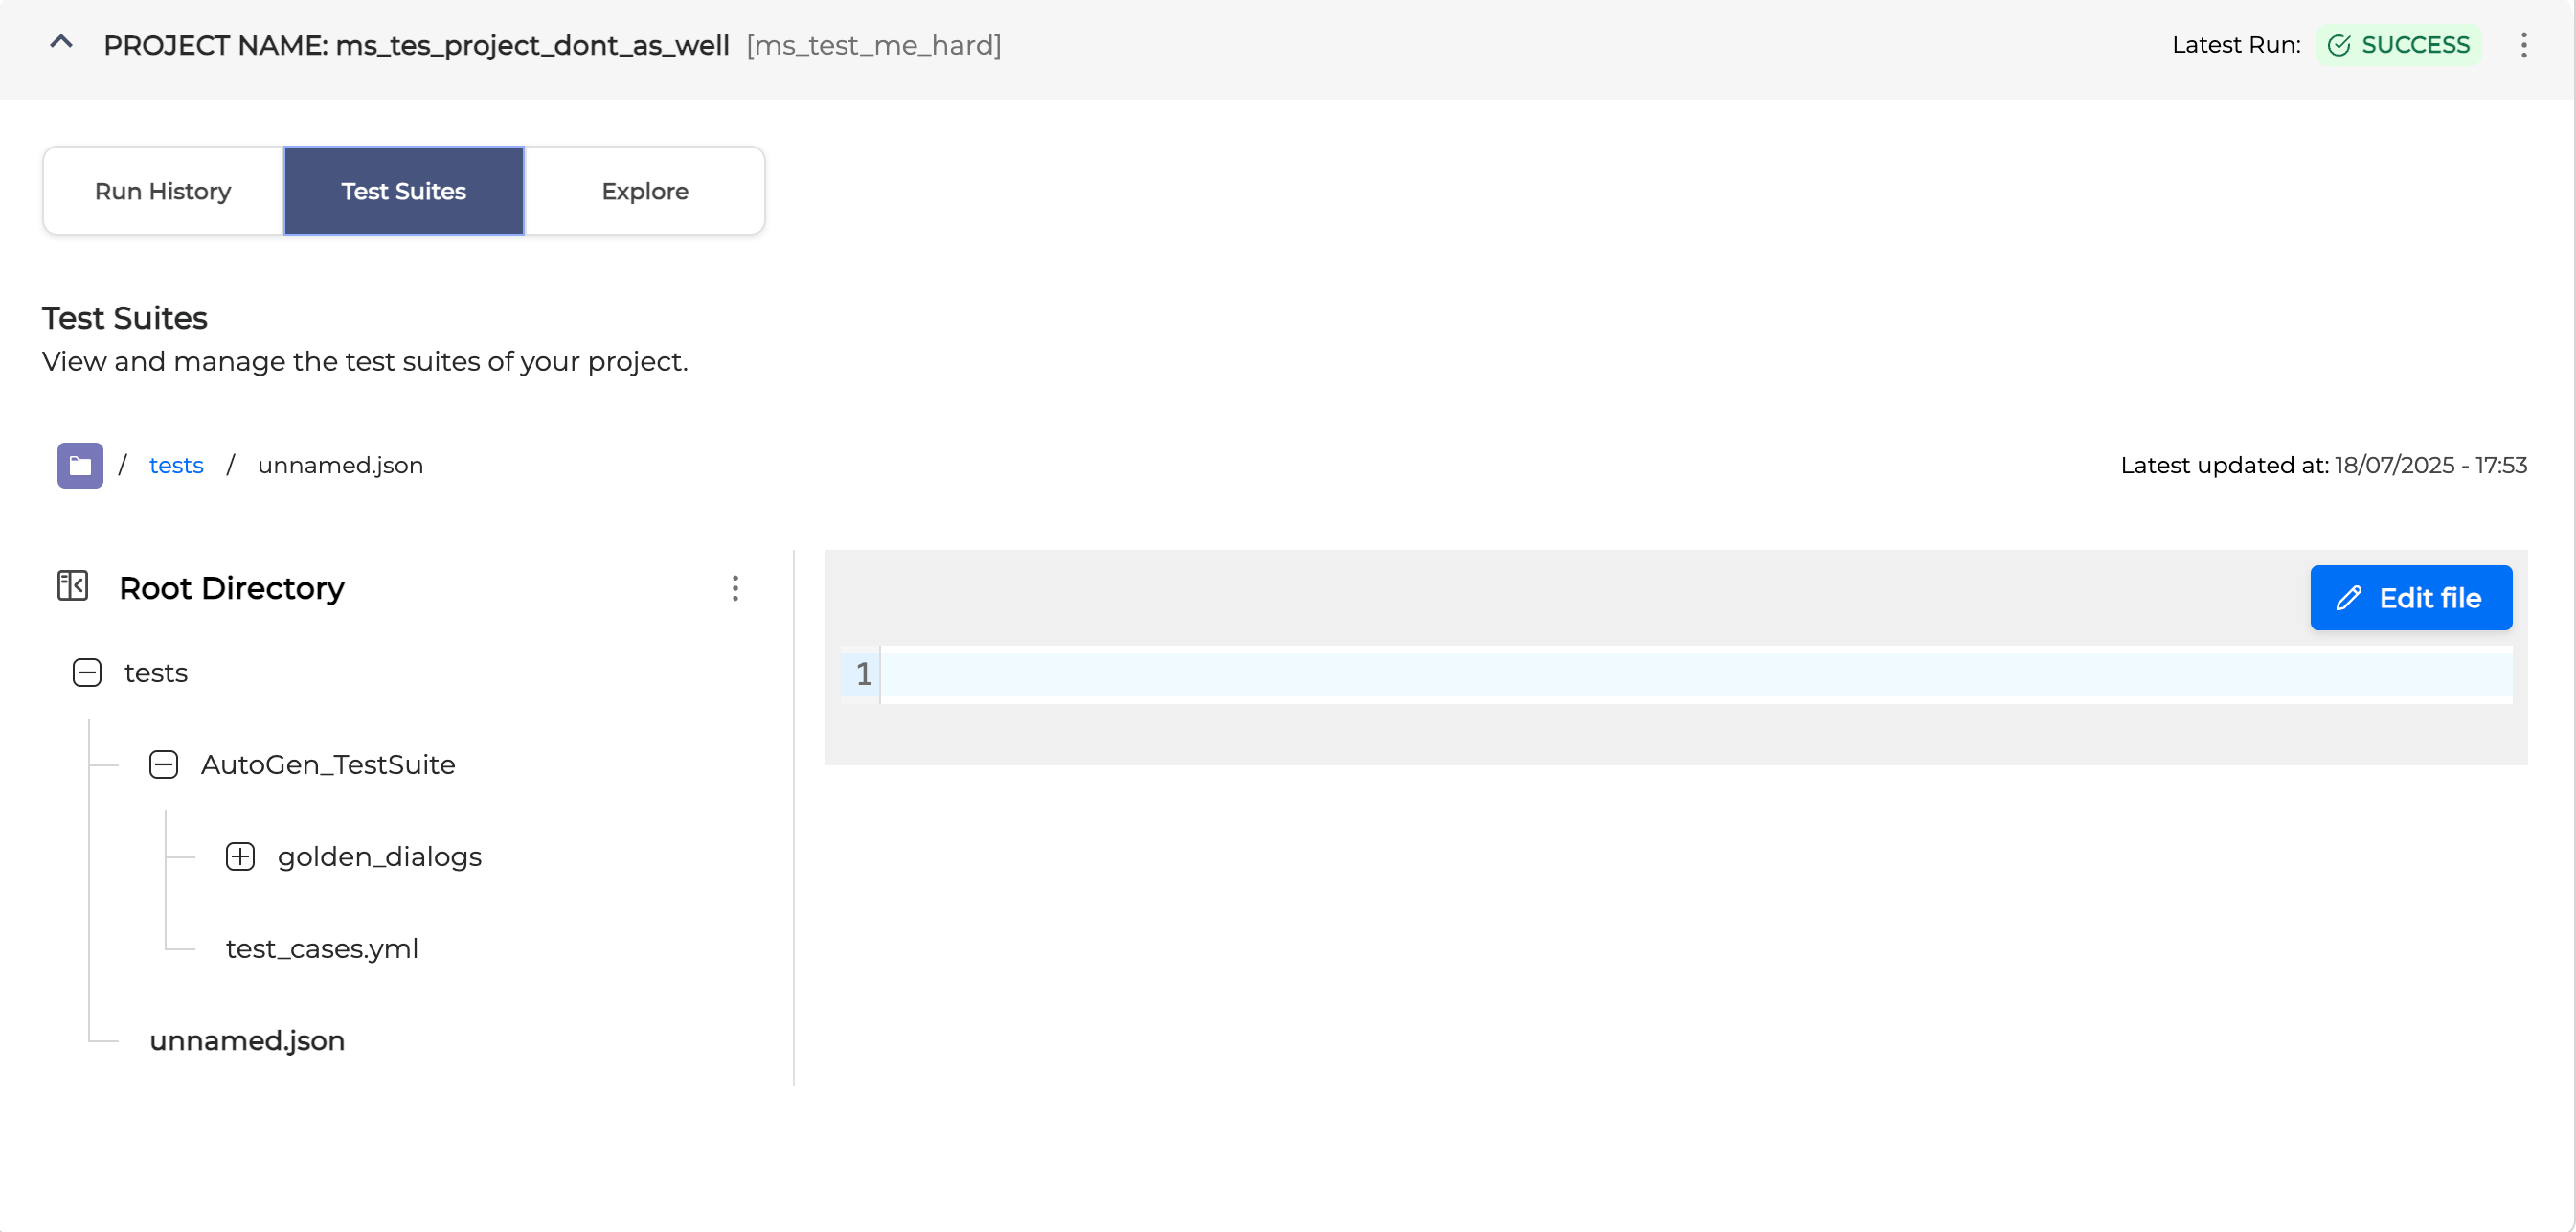
A new empty unnamed.json file will be added to the selected folder.
-
You can enter a new file name at this step or Rename your test file later.
Test files should be in either JSON or YAML format.
A file name may only include the following characters: a-z, A-Z, 0-9, underscores, and non-continuous dots.
-
Click the created test file to open it. You can now edit this file as described in the Edit a test file section.
Create a folder
To create a new folder, proceed as described below:
-
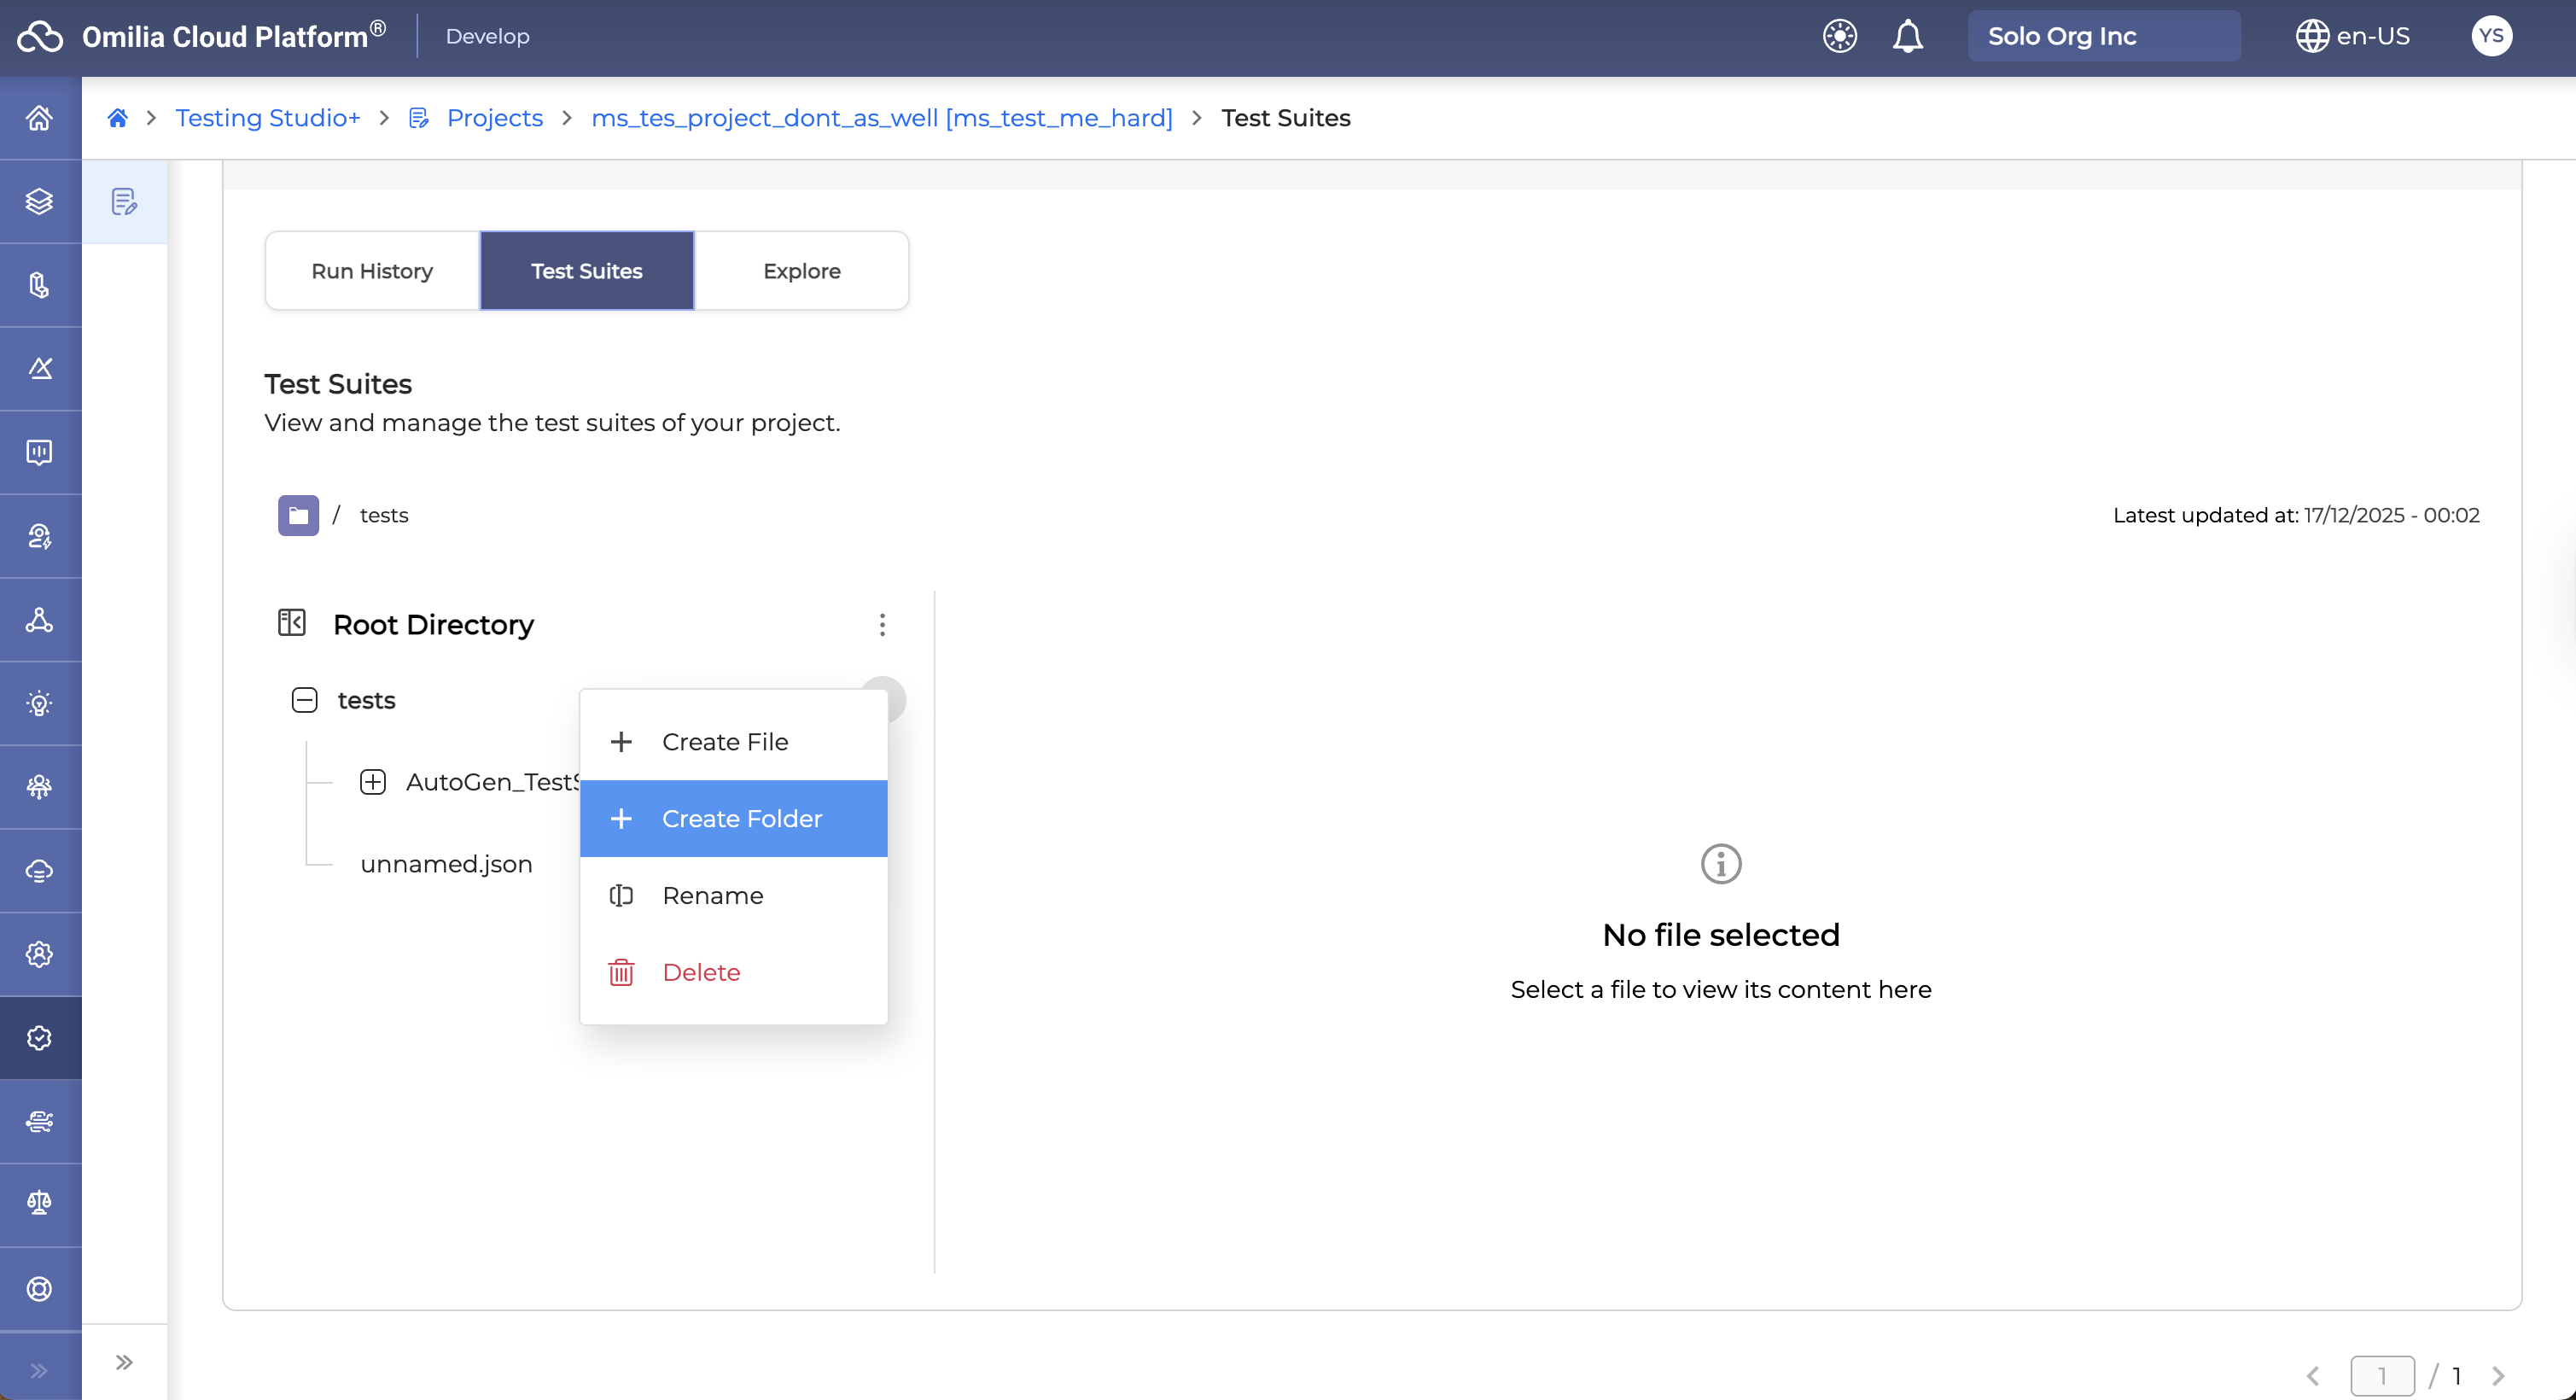
In the Test Suites tab, click the Options menu next to the folder that will contain it, then click Create Folder.
-
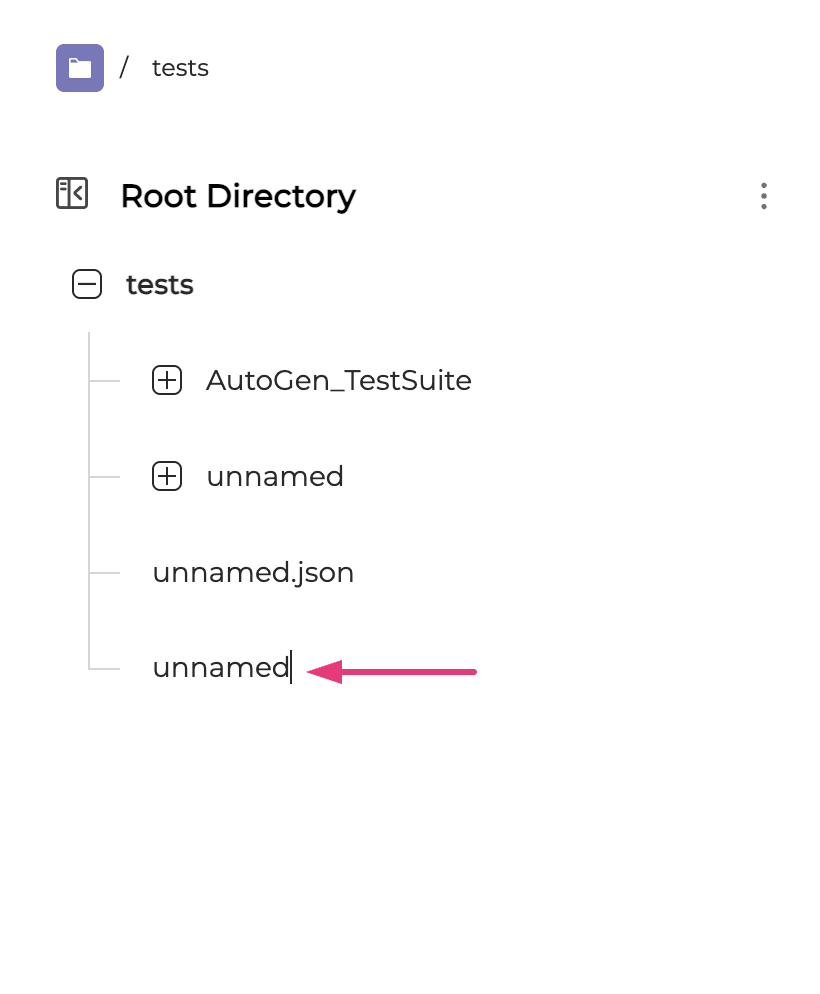
A new empty unnamed folder will appear.
-
You can enter a new folder name at this step or Rename your folder later.
A folder name may only include the following characters: a-z, A-Z, 0-9, underscores, and non-continuous dots.
Download a test file
To download a test file, follow the guidelines below:
-
Locate the test file you want to download.
-
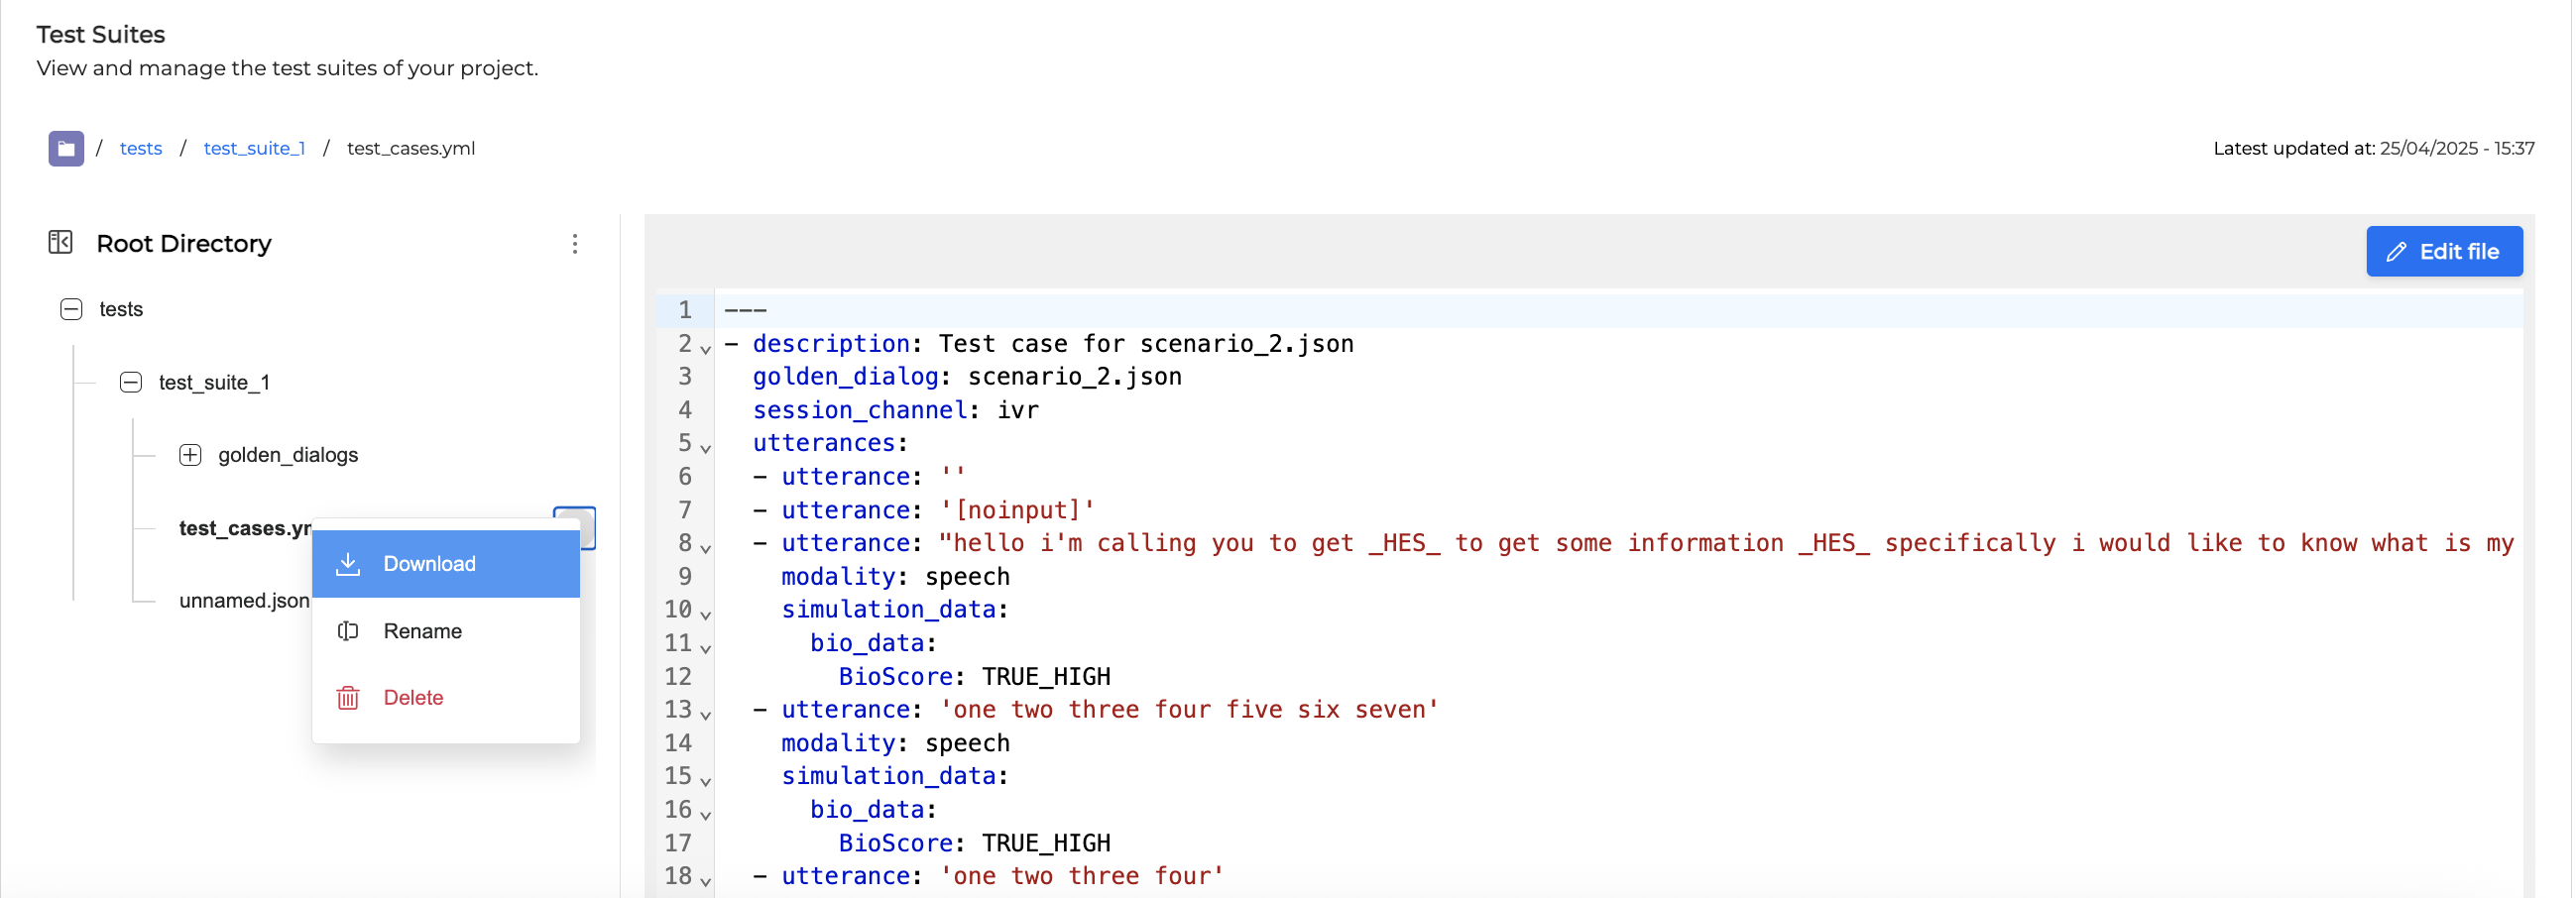
Click the Options menu and select Download.
-
The selected file will be downloaded.
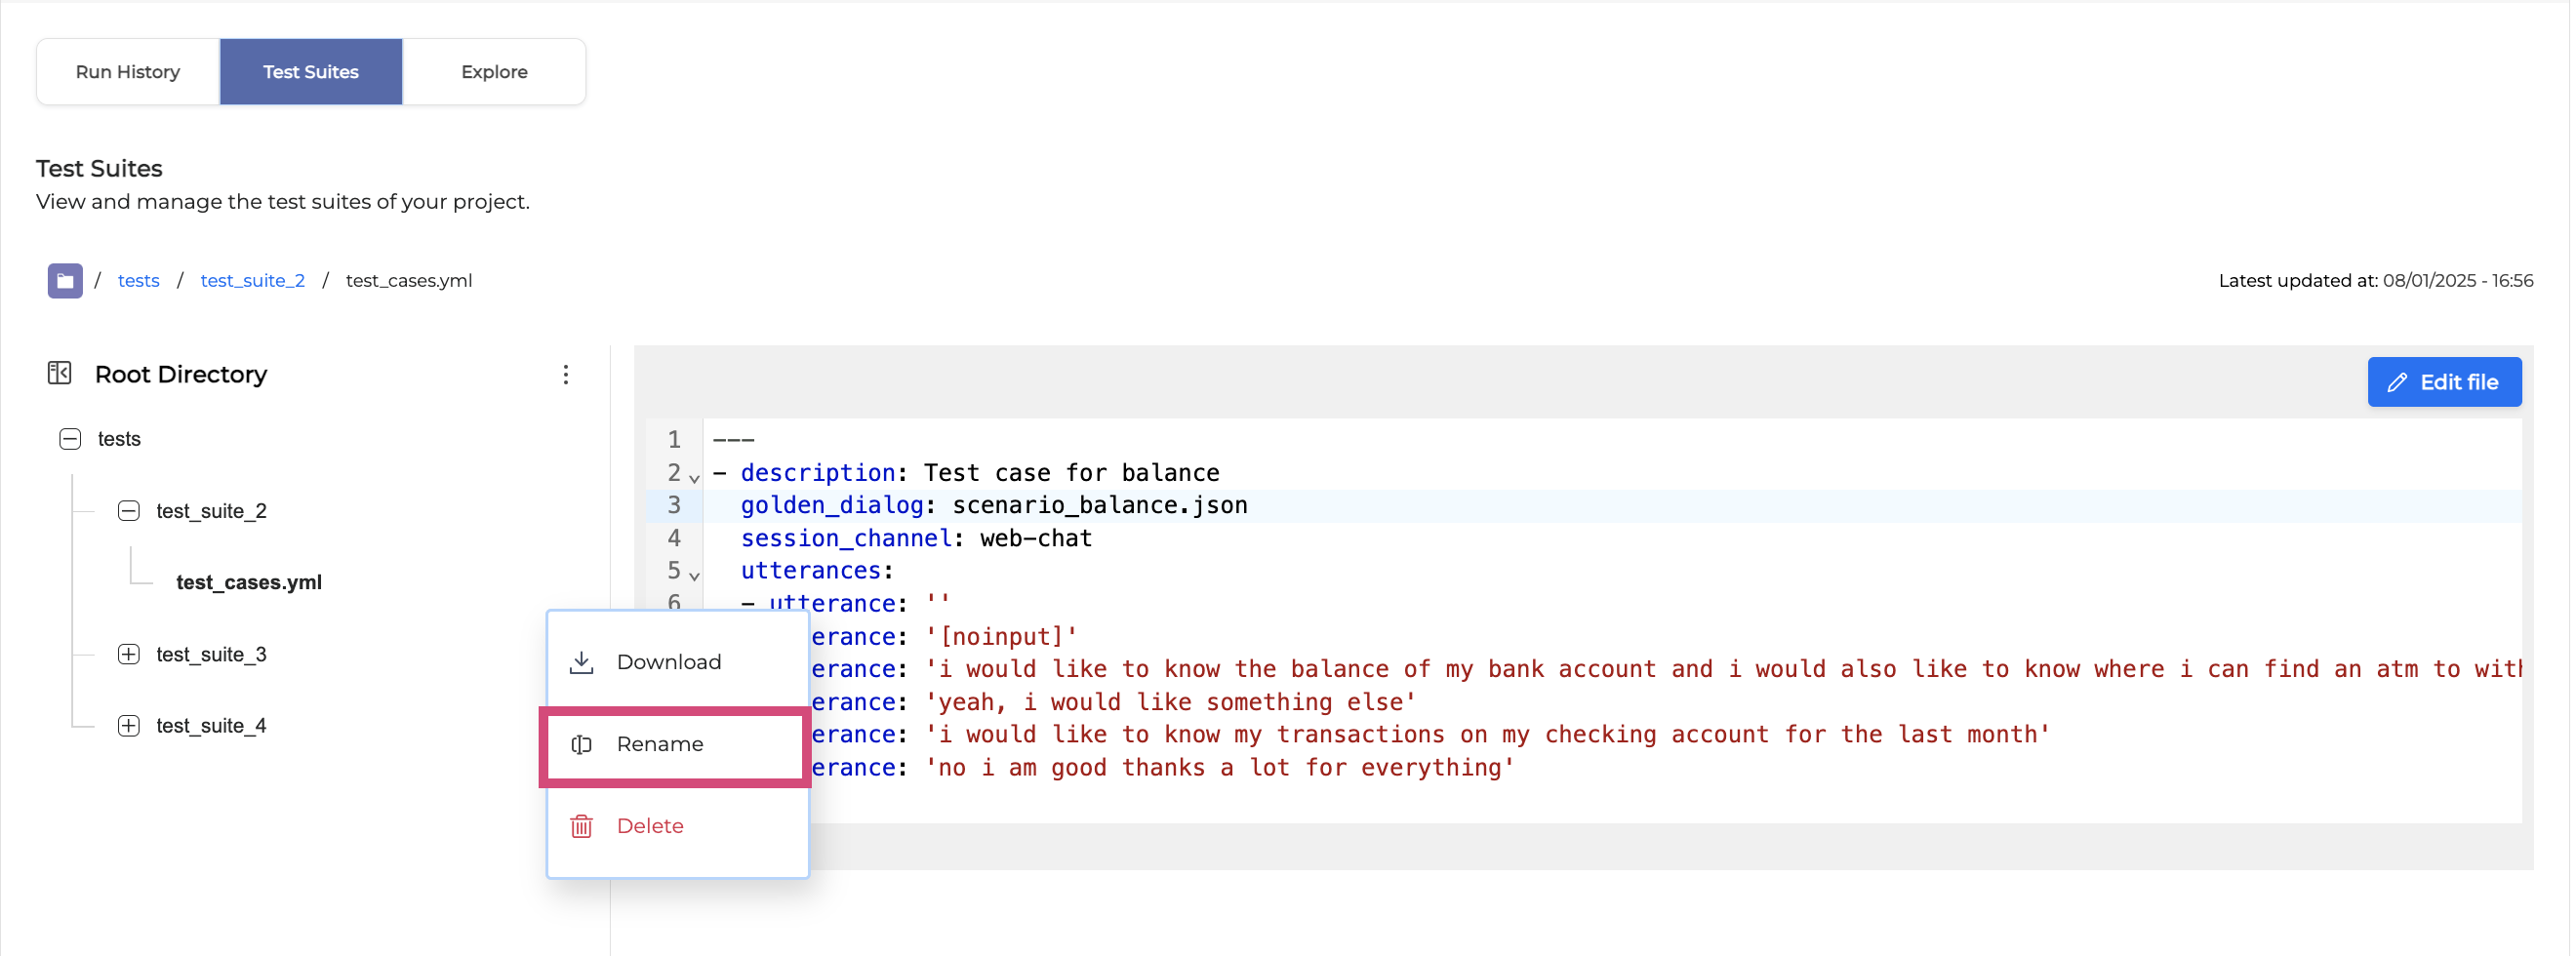
Rename a test file/folder
To rename a test file or a folder, follow the guidelines below:
-
Locate the test file or folder you want to rename.
-
Click the Options icon and select Rename.
-
Enter a new file or folder name and press <Enter>. The file/folder name will change accordingly.
A file or folder name may only include the following characters: a-z, A-Z, 0-9, underscores, and non-continuous dots.
Delete a test file/folder
To delete a test file or a folder, click the Options menu and select Delete.
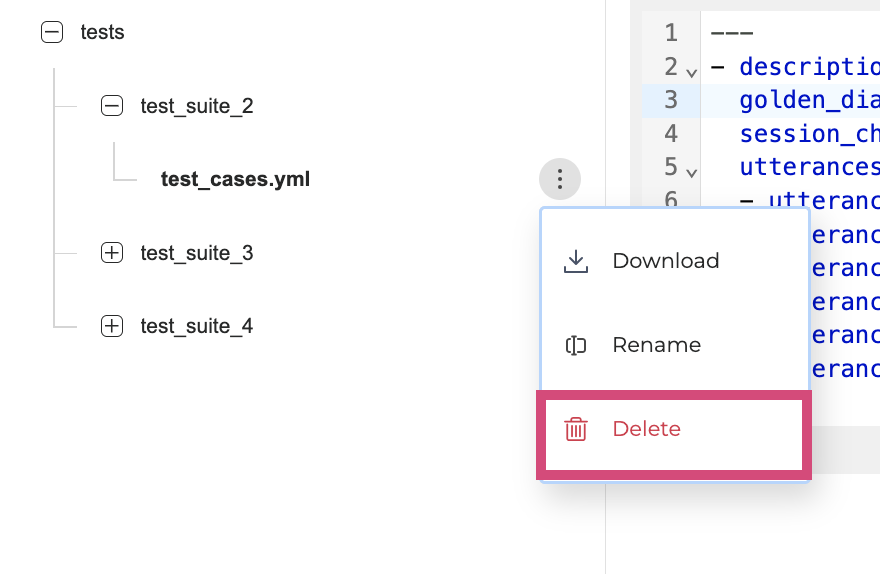
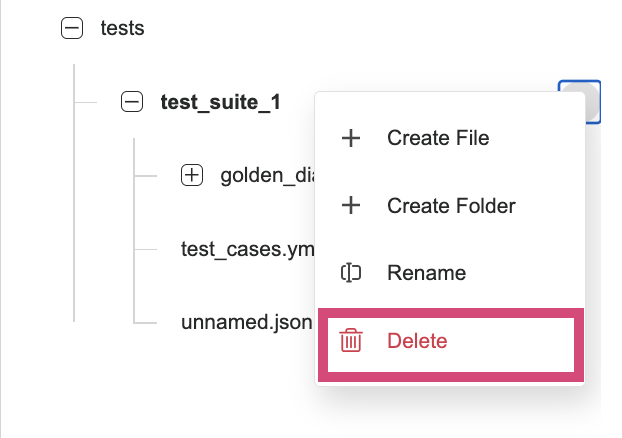
Deleted files and folders are permanently removed. Ensure you have selected the correct item before deletion.
Download a Test Suite
You can download your collection of test case files from Testing Studio to your computer.
To download a Test Suite, follow the steps below:
-
In the Test Suites tab, click the Options menu next to the Root Directory and select Download.
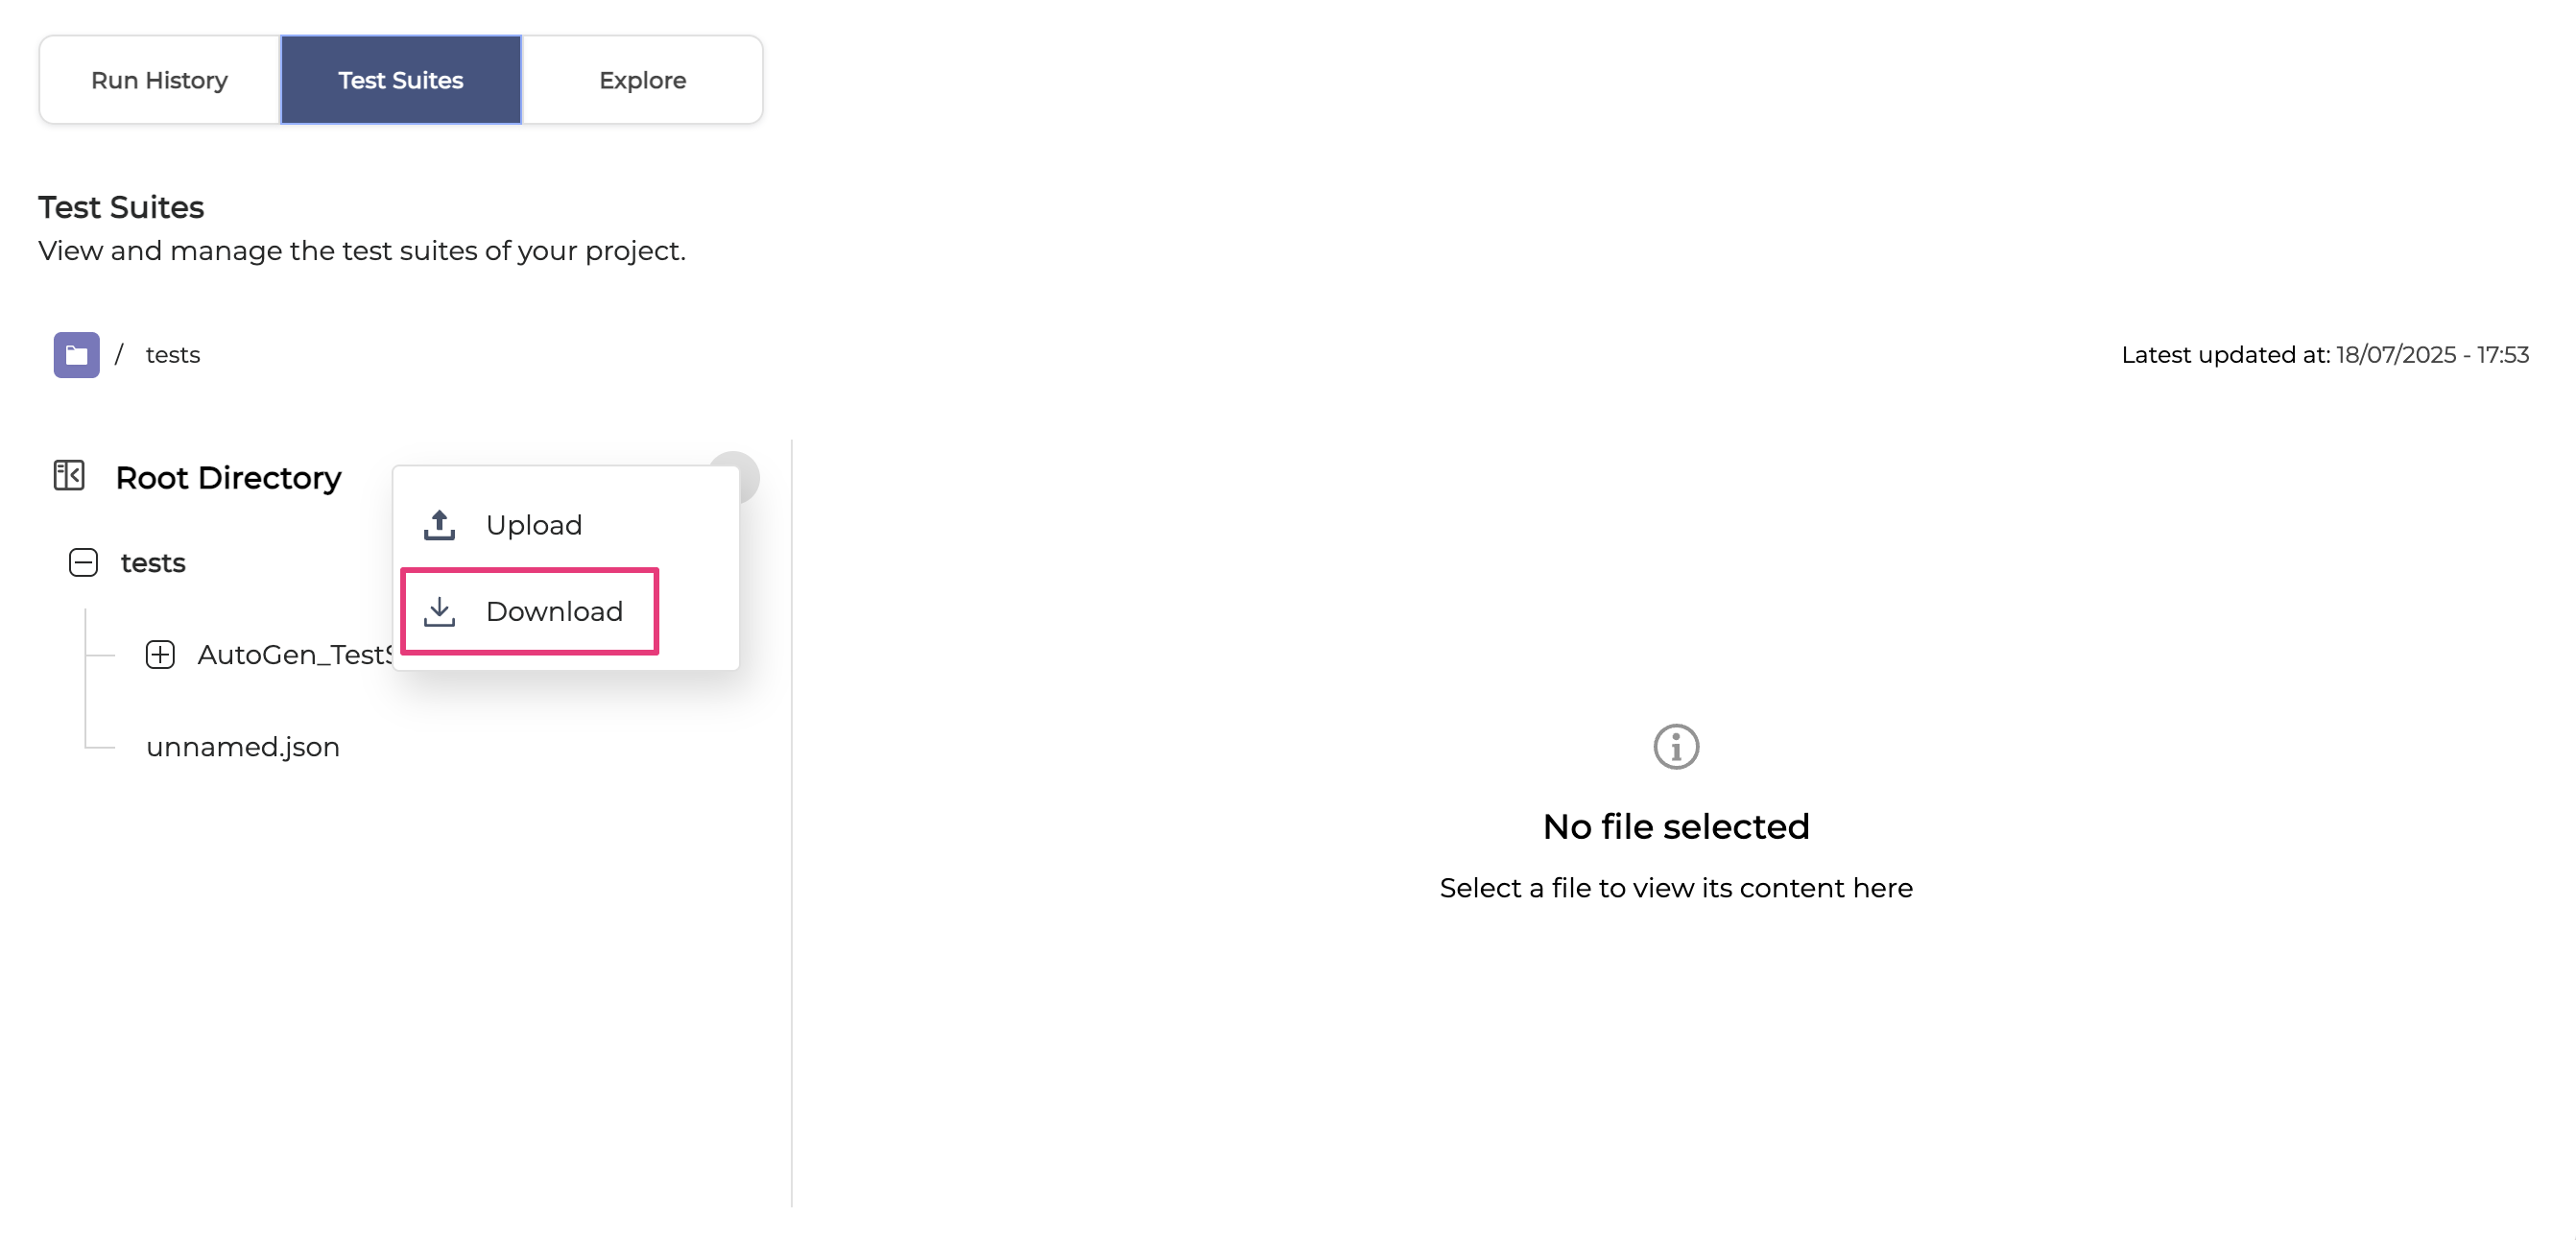
-
The Test Suite will be downloaded as a ZIP file to your computer.