.svg)
Run History Tab
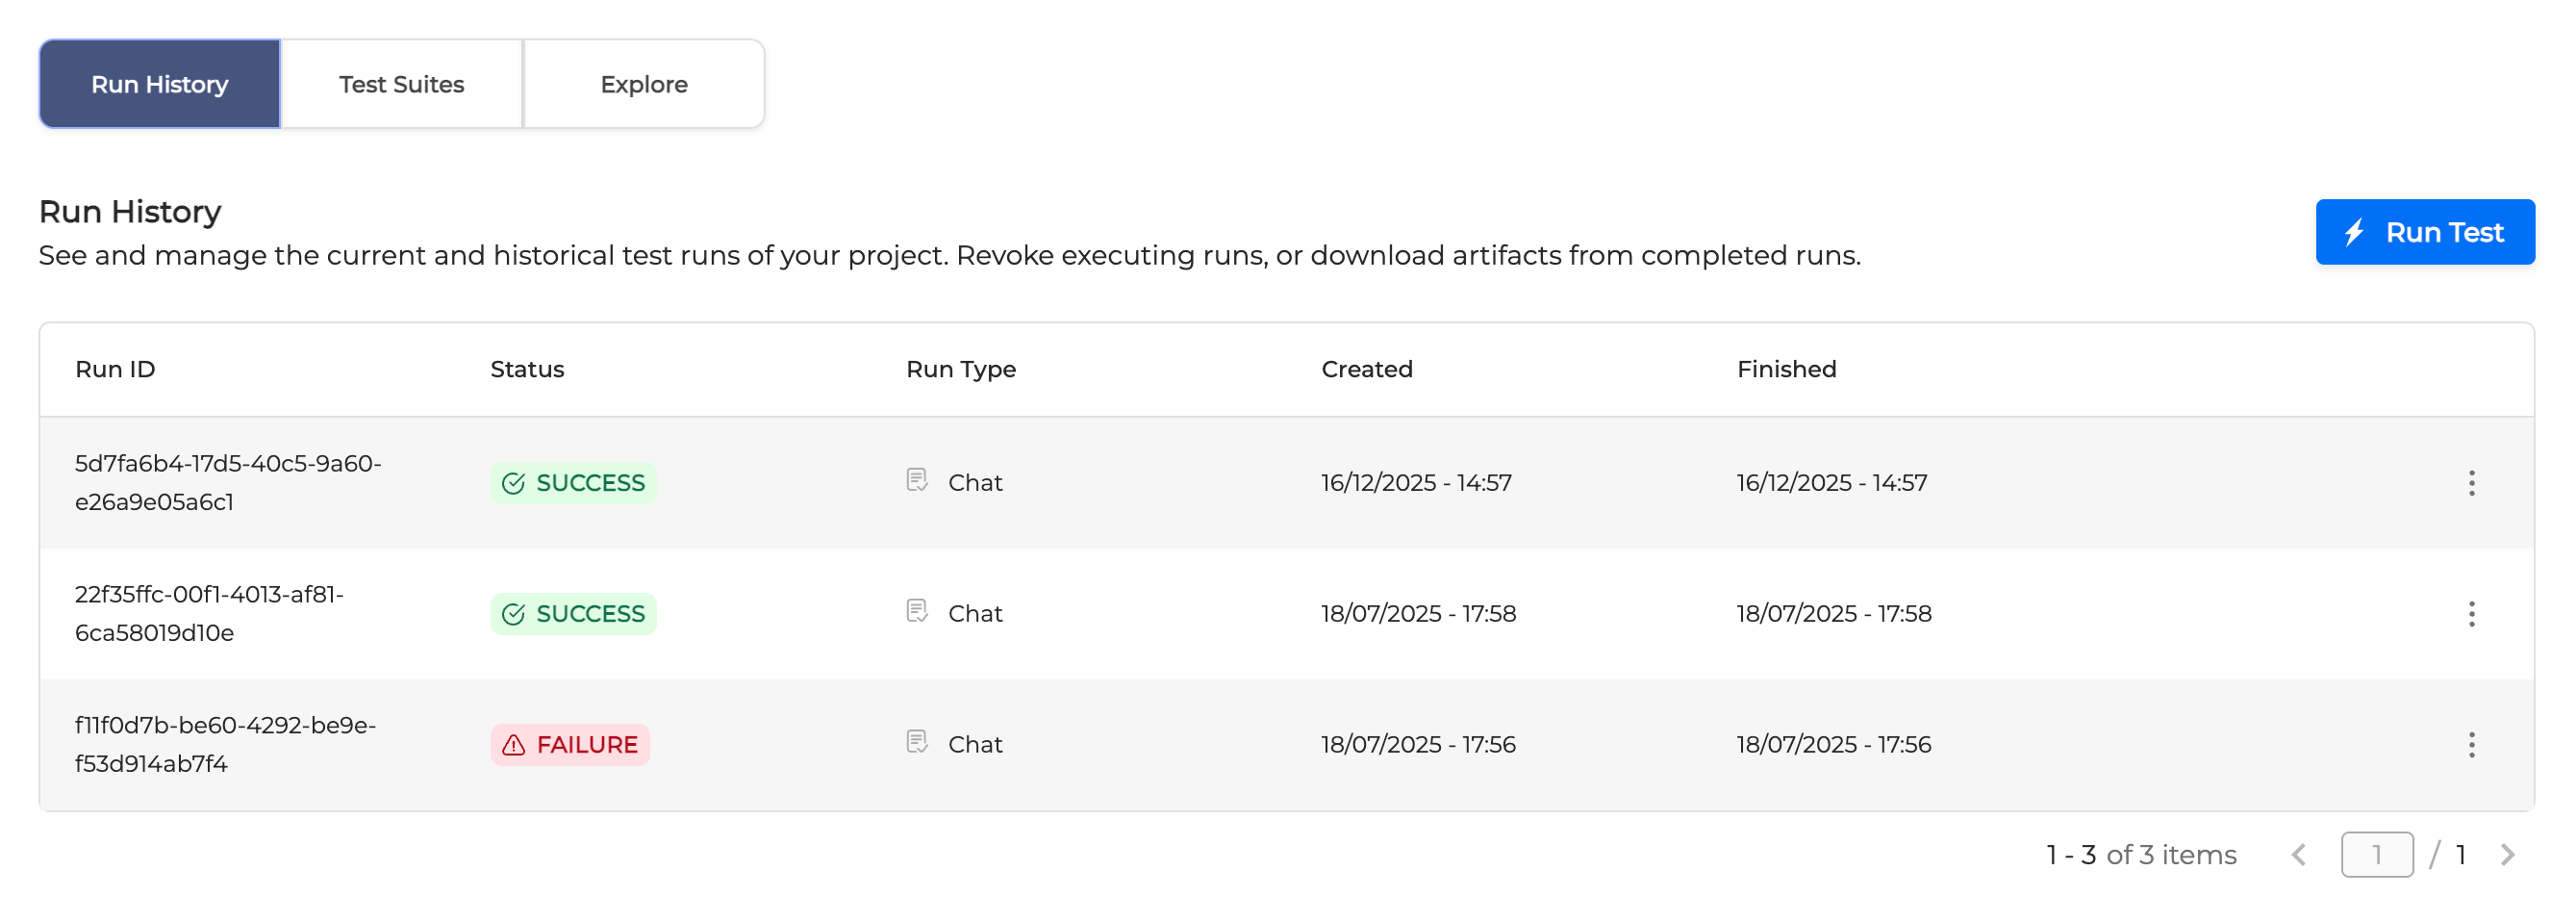
The Run History tab displays the current and historical test runs of the project.
-
Run ID: Test case unique identifier
-
Status: Test case run status. The following statuses are possible:
-
Started: The test case is currently running
-
Pending: The test case is pending. This might happen if there are no free workers for the test execution.
-
Revoked: The test case has been cancelled
-
Success: The test execution was successful
-
Failure: The test case failed to run
-
-
Run Type: Defines the type of the test case - Classic for regular test cases or Augmented for test cases which use LLM.
-
Created: The test case creation timestamp (starting date)+
dd/MM/yyyy - HH:mm:e.g.: 21/07/2020 - 17.32 -
Finished: the test case completion timestamp (ending date)
dd/MM/yyyy - HH:mm:e.g.: 21/07/2020 - 17.39
Run test cases
In the Run History tab, you can execute test cases. You can choose between two types of test cases:
-
Classic: Regular test cases.
-
Augmented: AI-enhanced test cases that generate alternative inputs.
Run a regular test case
To run a regular test case, follow the guidelines below:
-
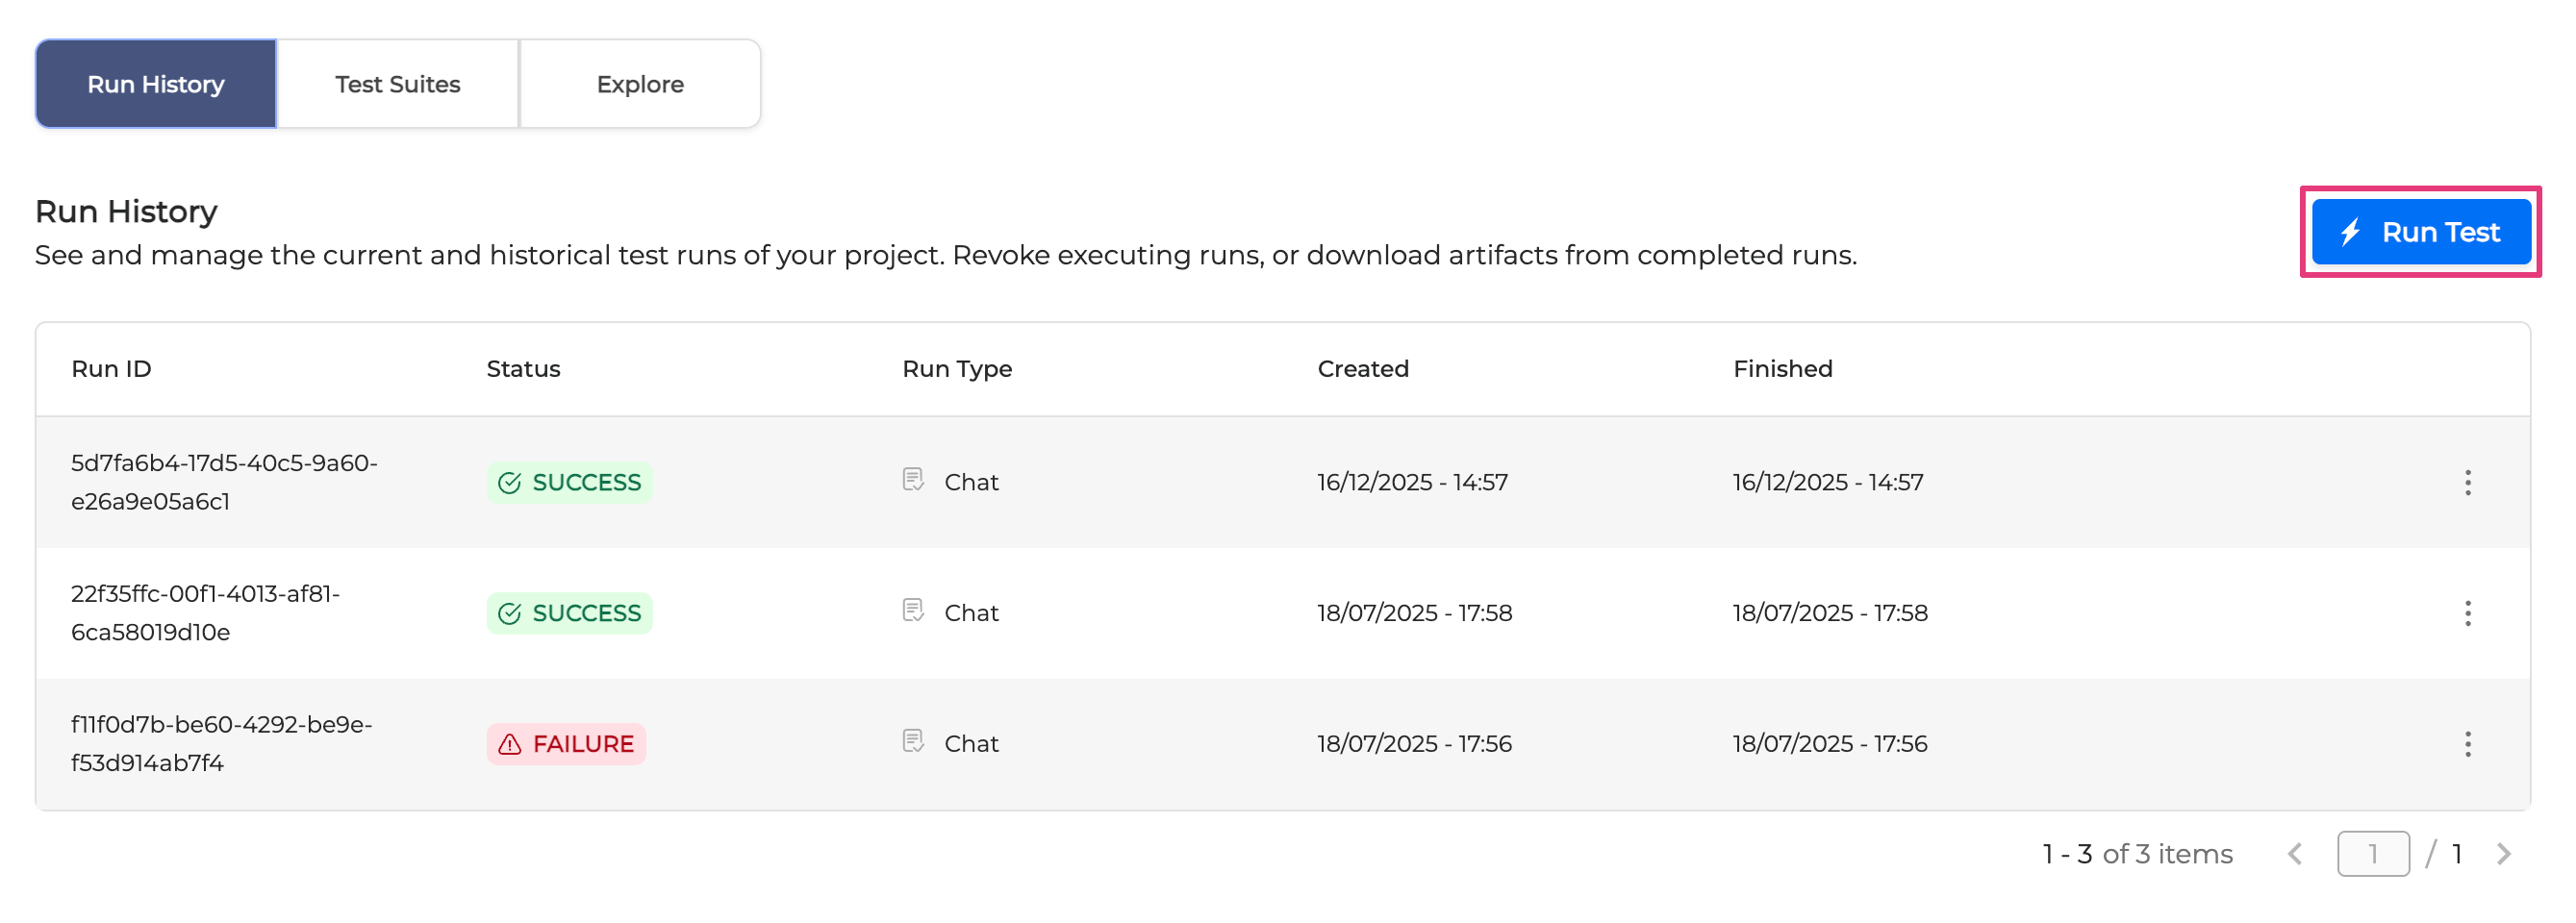
Open a project and click Run Test.
-
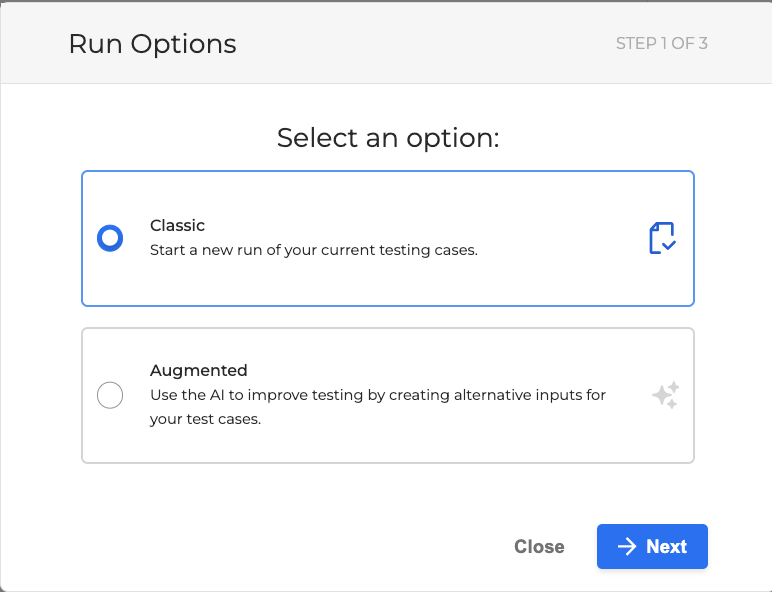
In the dialog box that opens, choose Classic and click Next.
-
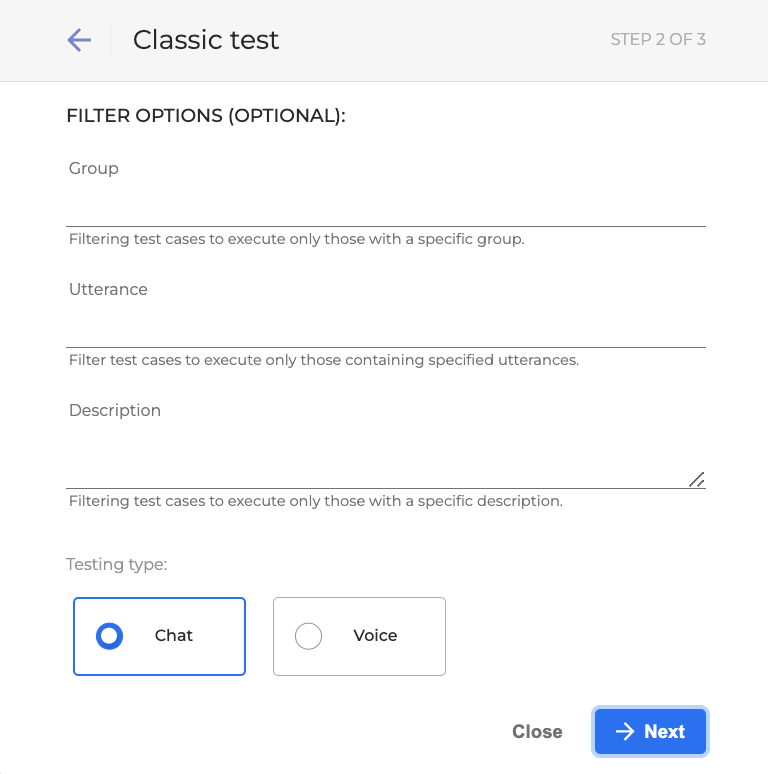
In the following dialog box, you can filter the test cases using the available attributes. All the fields are optional.
To run the whole project (which is basically the entire list of test cases), leave all the filter fields blank.
-
Group: A group the test case belongs to. Group basically serves as a tag.
-
Utterance : Utterances included in a test case.
-
Description : Test case description.
-
Testing type: A type of the test to run.
-
Chat: Simulate a chat-based test.
-
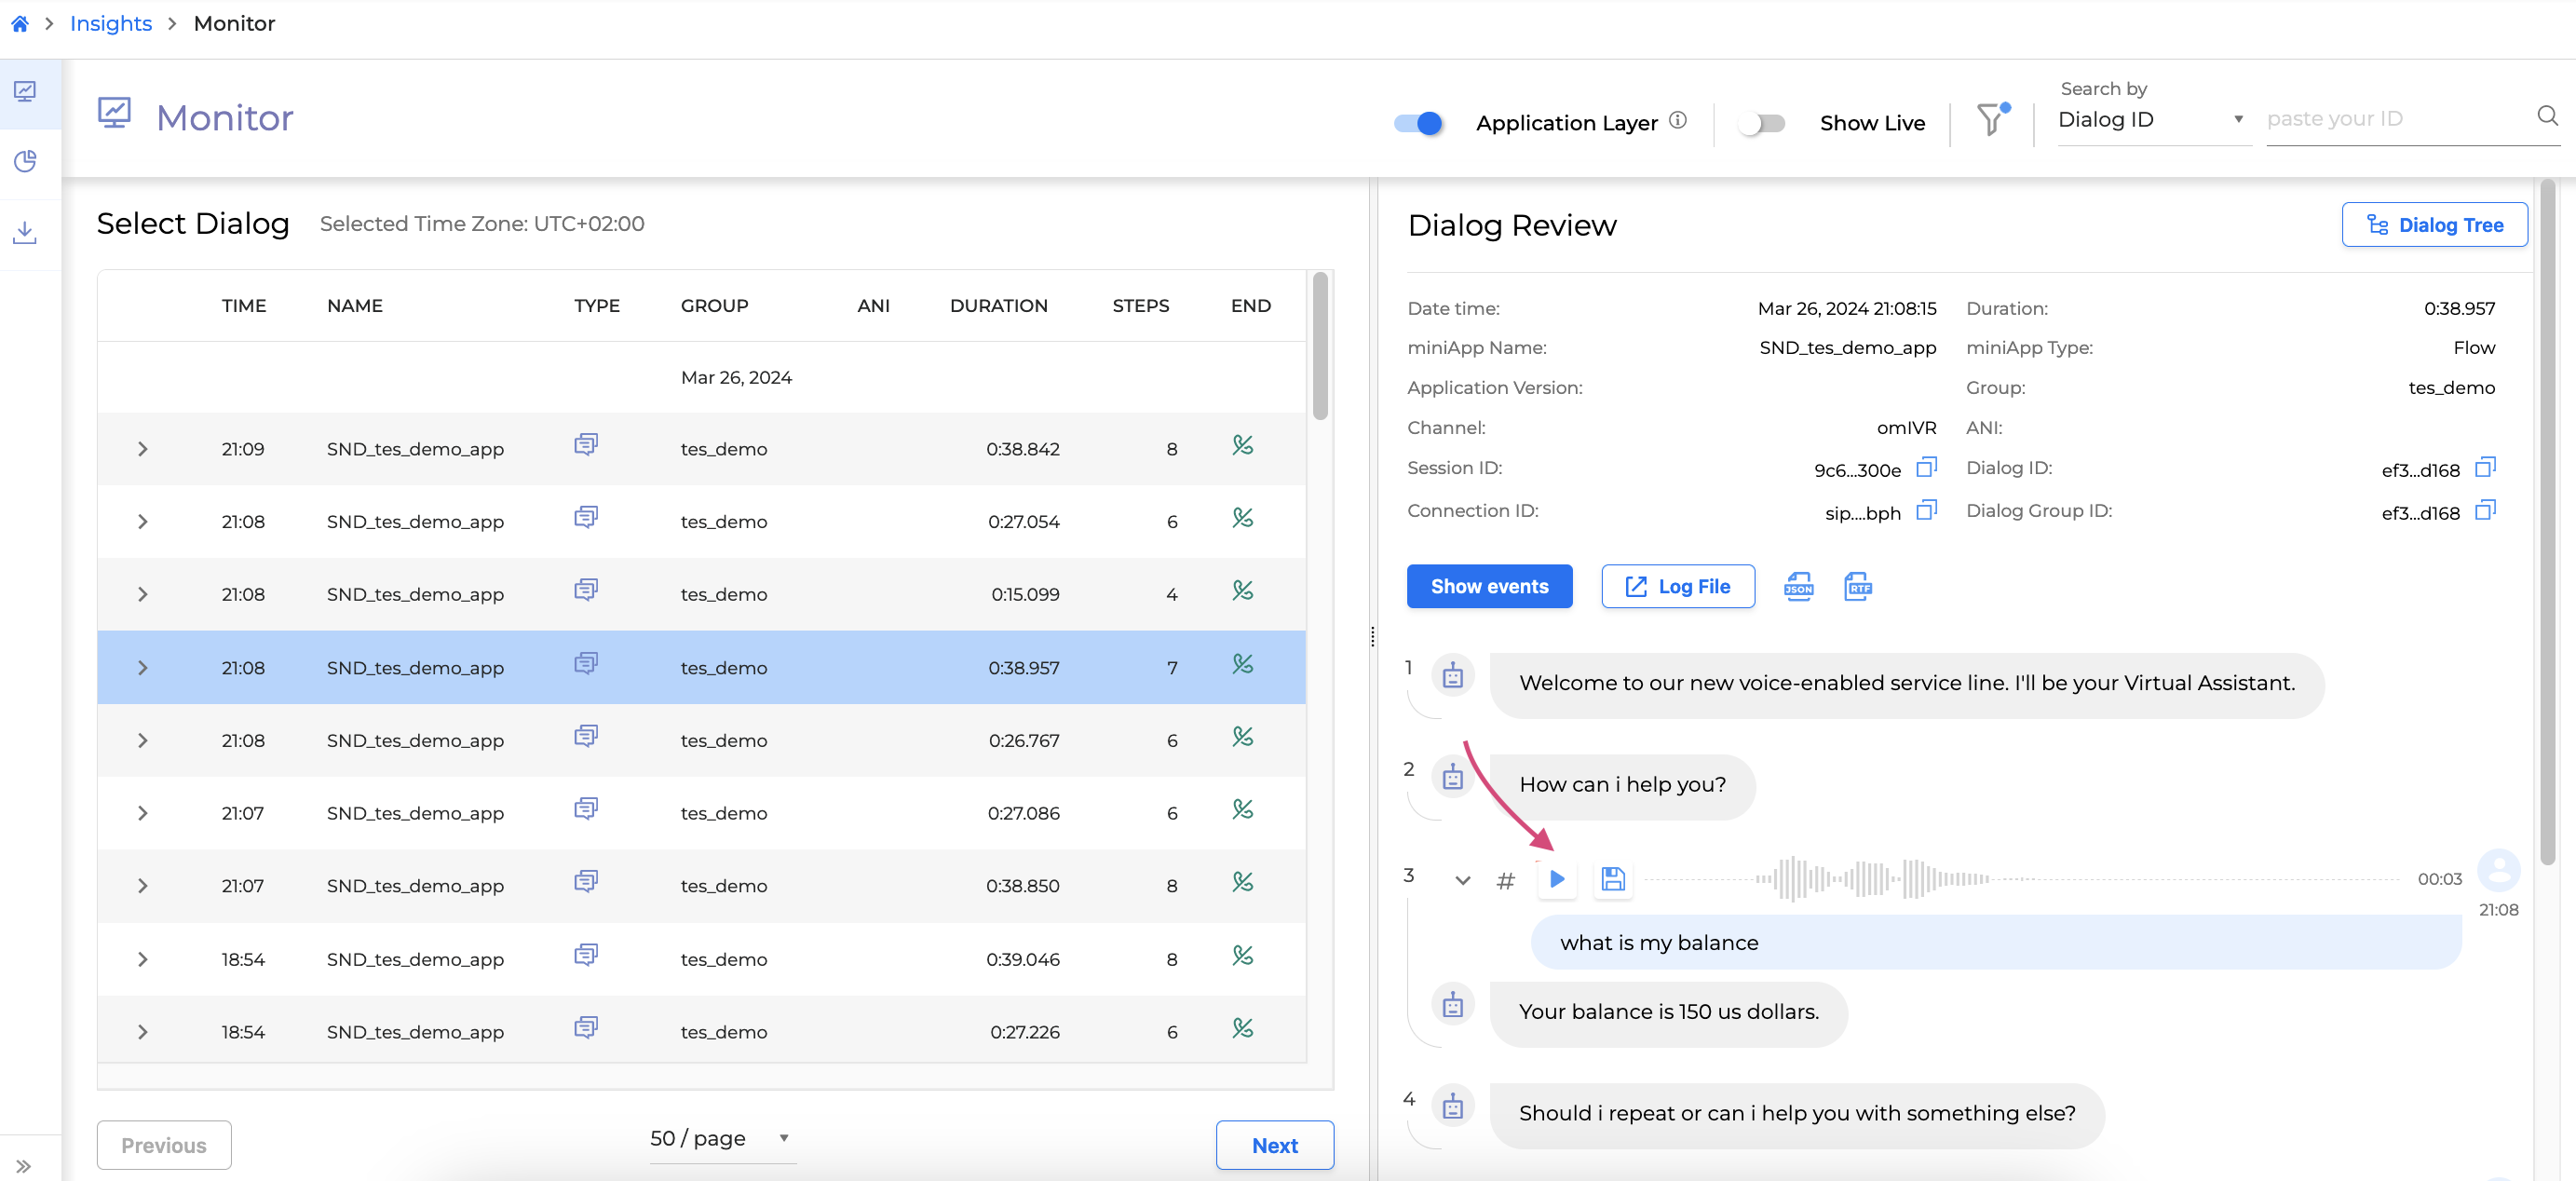
Voice: Simulate a voice call, noting that the duration will match the actual call length. For call durations, visit Insights → Monitor → select a call and navigate to the Dialog Review section. Click the Play button, the dialog gets played out. Every voice test operates by replicating each dialog in a similar manner.
-
Filtering supports the % symbol as a filter wildcard. For example:
-
balance%: matches all test cases starting with the word balance.
-
%card%: matches all test cases containing the word card.
-
%description: matches all test cases which ending with the word description.
Filter is case insensitive. The filter value desc% will match Desc, desc and DESC.
When multiple filters are provided, the behavior is that of an AND boolean expression. The filtered test cases are the ones that meet all the filter criteria.
-
Click Next to proceed.
-
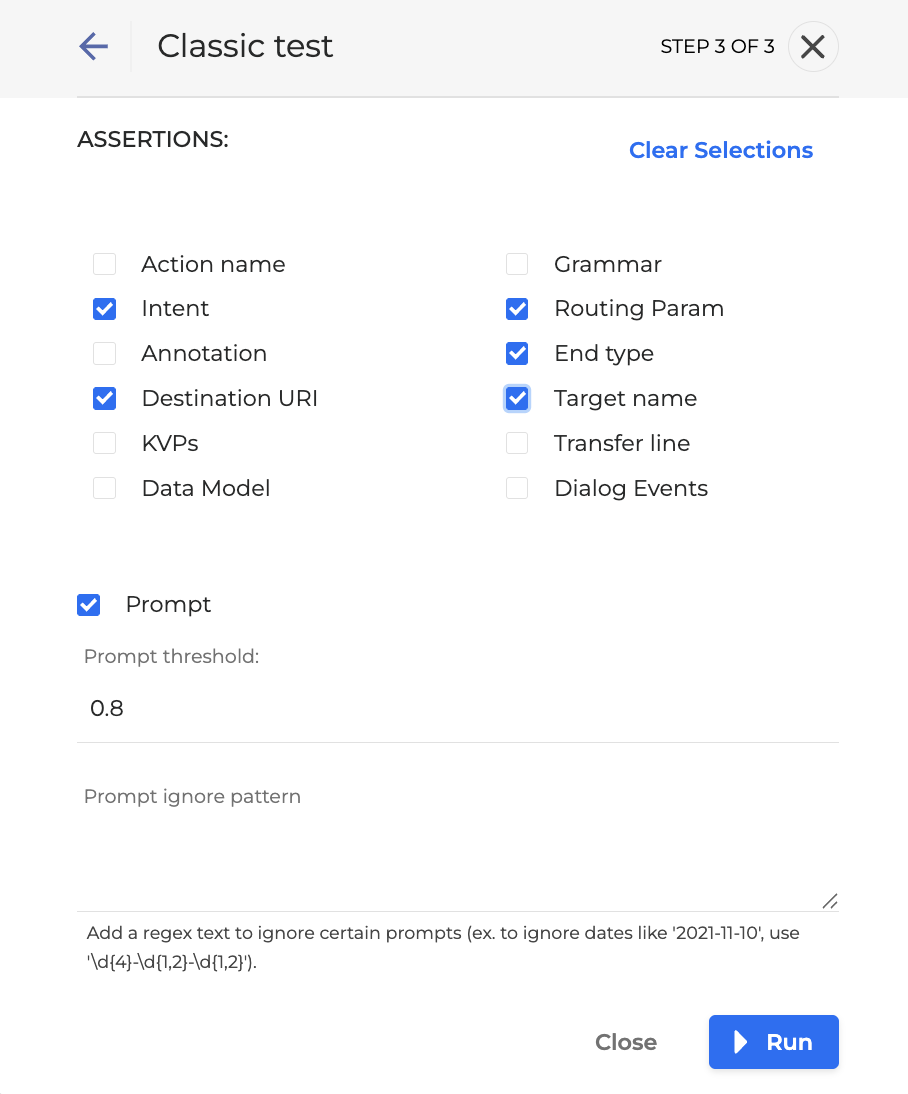
In the dialog box that opens, fill in the following fields to further define your test case execution:
-
Assertions: Choose one or multiple assertions, or click Clear Selections to unmark all.
-
Action name: Action name of the dialog step.
-
Intent: Intent of the dialog step.
-
Annotation: Annotation of the dialog step
-
Destination URI: Destination URI of the dialog
-
KVPs: Key-Value Pairs.
-
Data Model: Data Model fields returned in the dialog step. Available for chat runs only.
-
Grammar: Grammar of the dialog step.
-
Routing Param: The routing parameter returned by the Concierge Agent during a dialog step. Select this assertion to verify the routing parameter in the test run matches the expected value.
-
End type: The end type of the dialog.
-
Target name: Target name of the dialog step.
-
Transfer line: Transfer line of the dialog.
-
Dialog events: Events of the dialog.
-
-
Prompt: The prompt of the dialog step.
-
Prompt threshold: The lowest limit for the similarity of prompts. Allowed values are 0 to 1, the default value is set to 0.8.
-
Prompt ignore pattern: A text field that used as a regex to ignore prompts. For example, if you want to ignore dates like 2021-11-10, you can simply add \d{4}-\d{1,2}-\d{1,2}.
-
-
Click Run when all criteria are set. The test case will be executed per your selected filters and then appear in the Run History board with the corresponding run type.
Run an augmented test case
Running an augmented test case allows to expand the number of test case utterances by using different variations of them in order to cover more variants of utterances in scope of existing test cases. These variations are produced by AI which takes the original utterance and creates different versions of it, and then returns new utterances to the dialog.
For instance, if your original utterance is "What is my balance?", the LLM can formulate different versions of it, such as:
-
"Could you please tell me the amount in my account?"
-
"Could you please provide my current account balance?"
-
"What amount do I have in my account?"
-
"What's the current status of my account?"
To run an augmented test case, proceed as follows:
-
Open a project and click Run Test.
-
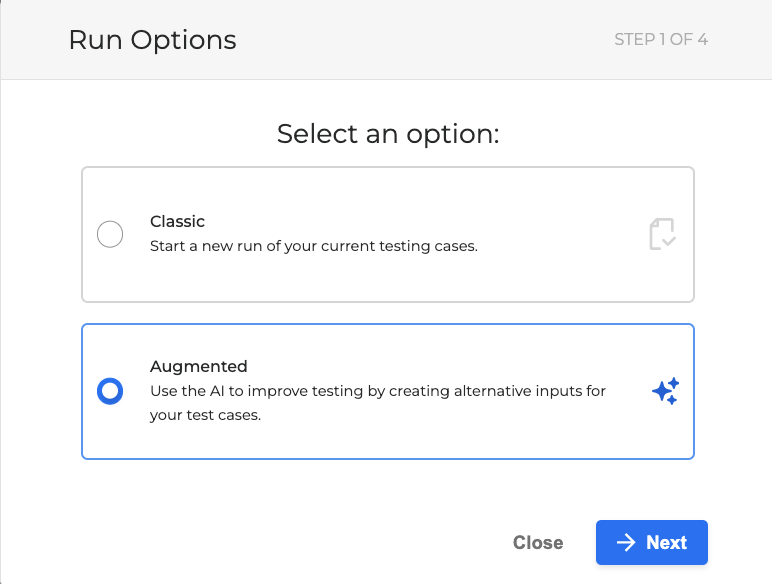
In the dialog box that opens, choose Augmented and click Next.
-
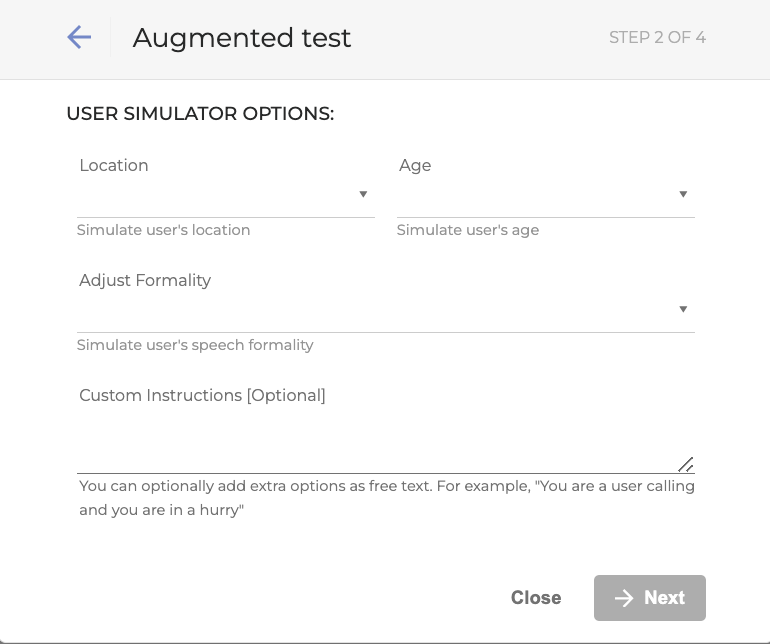
In the dialog box that opens, fill in the fields as described below. This will provide context for AI to make your request more precise.
-
Location: Select the user’s location from the dropdown list.
-
Age: Define the user’s age threshold from the dropdown list.
-
Adjust Formality: Choose how formal the utterances should be: Informal, Normal, Formal.
-
Custom Instructions: Add some extra information AI should take into account while creating new utterances.
-
Click the Next button.
-
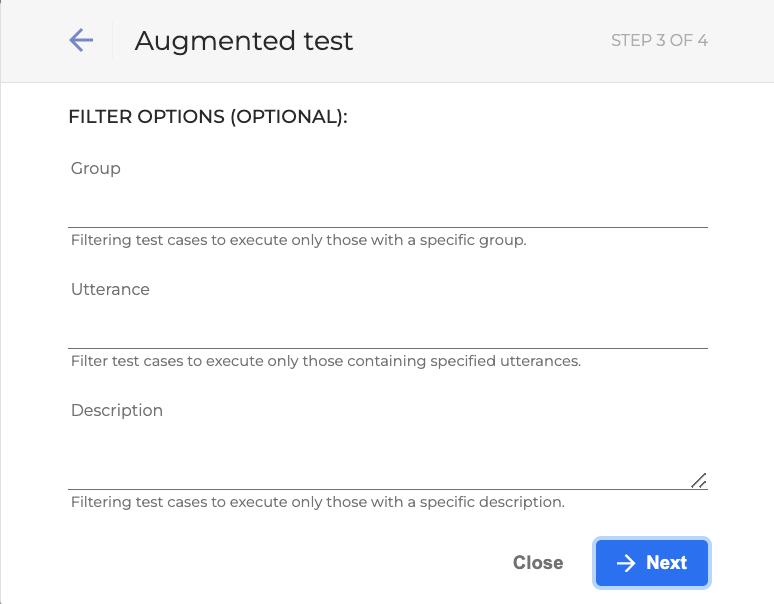
In the following dialog box, you can filter the test cases using the available attributes. All the fields are optional.
-
Group: A group the test cases belong to. Group basically serves a tag.
-
Utterance: Utterances the test case contains.
-
Description: Test case description.
Filtering supports the % symbol as a filter wildcard. For example:
-
balance%: matches all test cases starting with the word balance.
-
%card%: matches all test cases containing the word card.
-
%description: matches all test cases which ending with the word description.
Filter is case insensitive. The filter value desc% will match Desc, desc and DESC.
When multiple filters are provided, only those test cases will be executed that meet all the filter criteria at once.
-
Click Next to proceed.
-
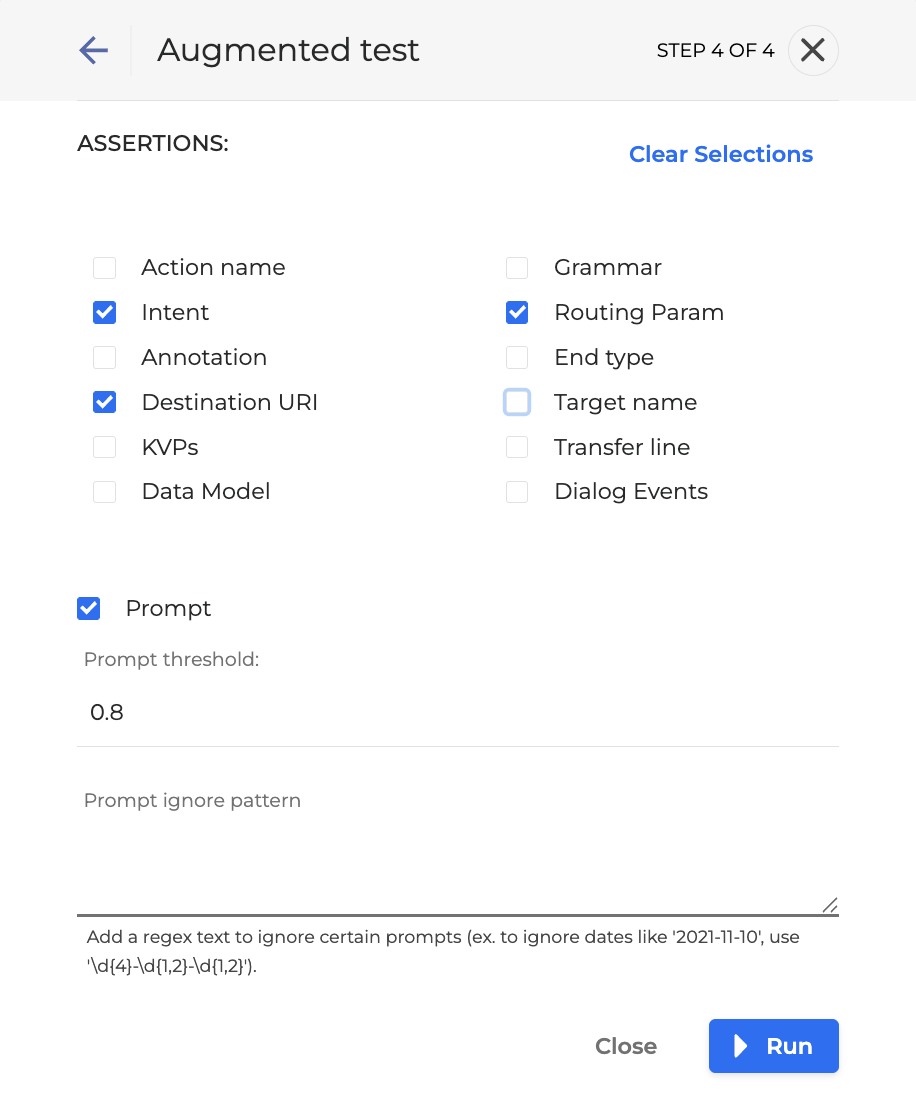
The following dialog box opens. Fill in the fields as described below:
-
Assertions: Choose one or multiple assertions, or click Clear Selections to unmark all.
-
Action name: Action name of the dialog step.
-
Intent: Intent of the dialog step.
-
Annotation: Annotation of the dialog step
-
Destination URI: Destination URI of the dialog
-
KVPs: Key-Value Pairs.
-
Data Model: Data Model fields returned in the dialog step. Available for chat runs only.
-
Grammar: Grammar of the dialog step.
-
Routing Param: The routing parameter returned by the Concierge Agent during a dialog step. Select this assertion to verify the routing parameter in the test run matches the expected value.
-
End type: The end type of the dialog.
-
Target name: Target name of the dialog step.
-
Transfer line: Transfer line of the dialog.
-
Dialog events: Events of the dialog.
-
-
Prompt: The prompt of the dialog step.
-
Prompt threshold: The lowest limit for the similarity of prompts. Allowed values are 0 to 1, the default value is set to 0.8.
-
Prompt ignore pattern: A text field that used as a regex to ignore prompts. For example, if you want to ignore dates like 2021-11-10, you can simply add \d{4}-\d{1,2}-\d{1,2}.
-
-
Click Run when all criteria are set. The augmented test case will be executed per your selected filters and then appear in the Run History board with the corresponding run type.
Test Execution Description
Testing Studio+ asynchronously runs test cases located in the /tests folder of the master branch of your git repo.
Make sure that /tests folder is located under the root folder of your git repo or upload ZIP file.
The way that the test cases are executed during a run is the following:
-
All test cases in a test suite are loaded and set to run.
-
All test cases both with and without a golden dialog start executing:
-
The test cases with golden dialogs are asserted and validated normally.
-
Test cases without golden dialogs are not asserted and defined as unavailable.
When loading test cases, Testing Studio+ does not distinguish between scenarios created by users inside scenarios.yml, individual test cases or test cases in test_cases.yml. If a generated test case is missing a golden dialog file (no matter if moved accidentally or deleted), it is treated as unavailable.
If an unavailable test case execution fails because of the other side (DiaManT closed the dialog unexpectedly), the test case is considered failed.
-
After execution has finished:
-
Unavailable test cases are stored inside output/Unavailable folder placed under the test suite directory.
-
Failed test cases are stored inside output/Failed directory, placed under the test suite directory.
-
The dialog that has executed the most steps is the one that gets written in the file. The equivalent validation error message is reported.
-
Report files contain successful, failed as well as unavailable test cases. All of them can be downloaded as Artifacts.
Download Test Run Artifacts
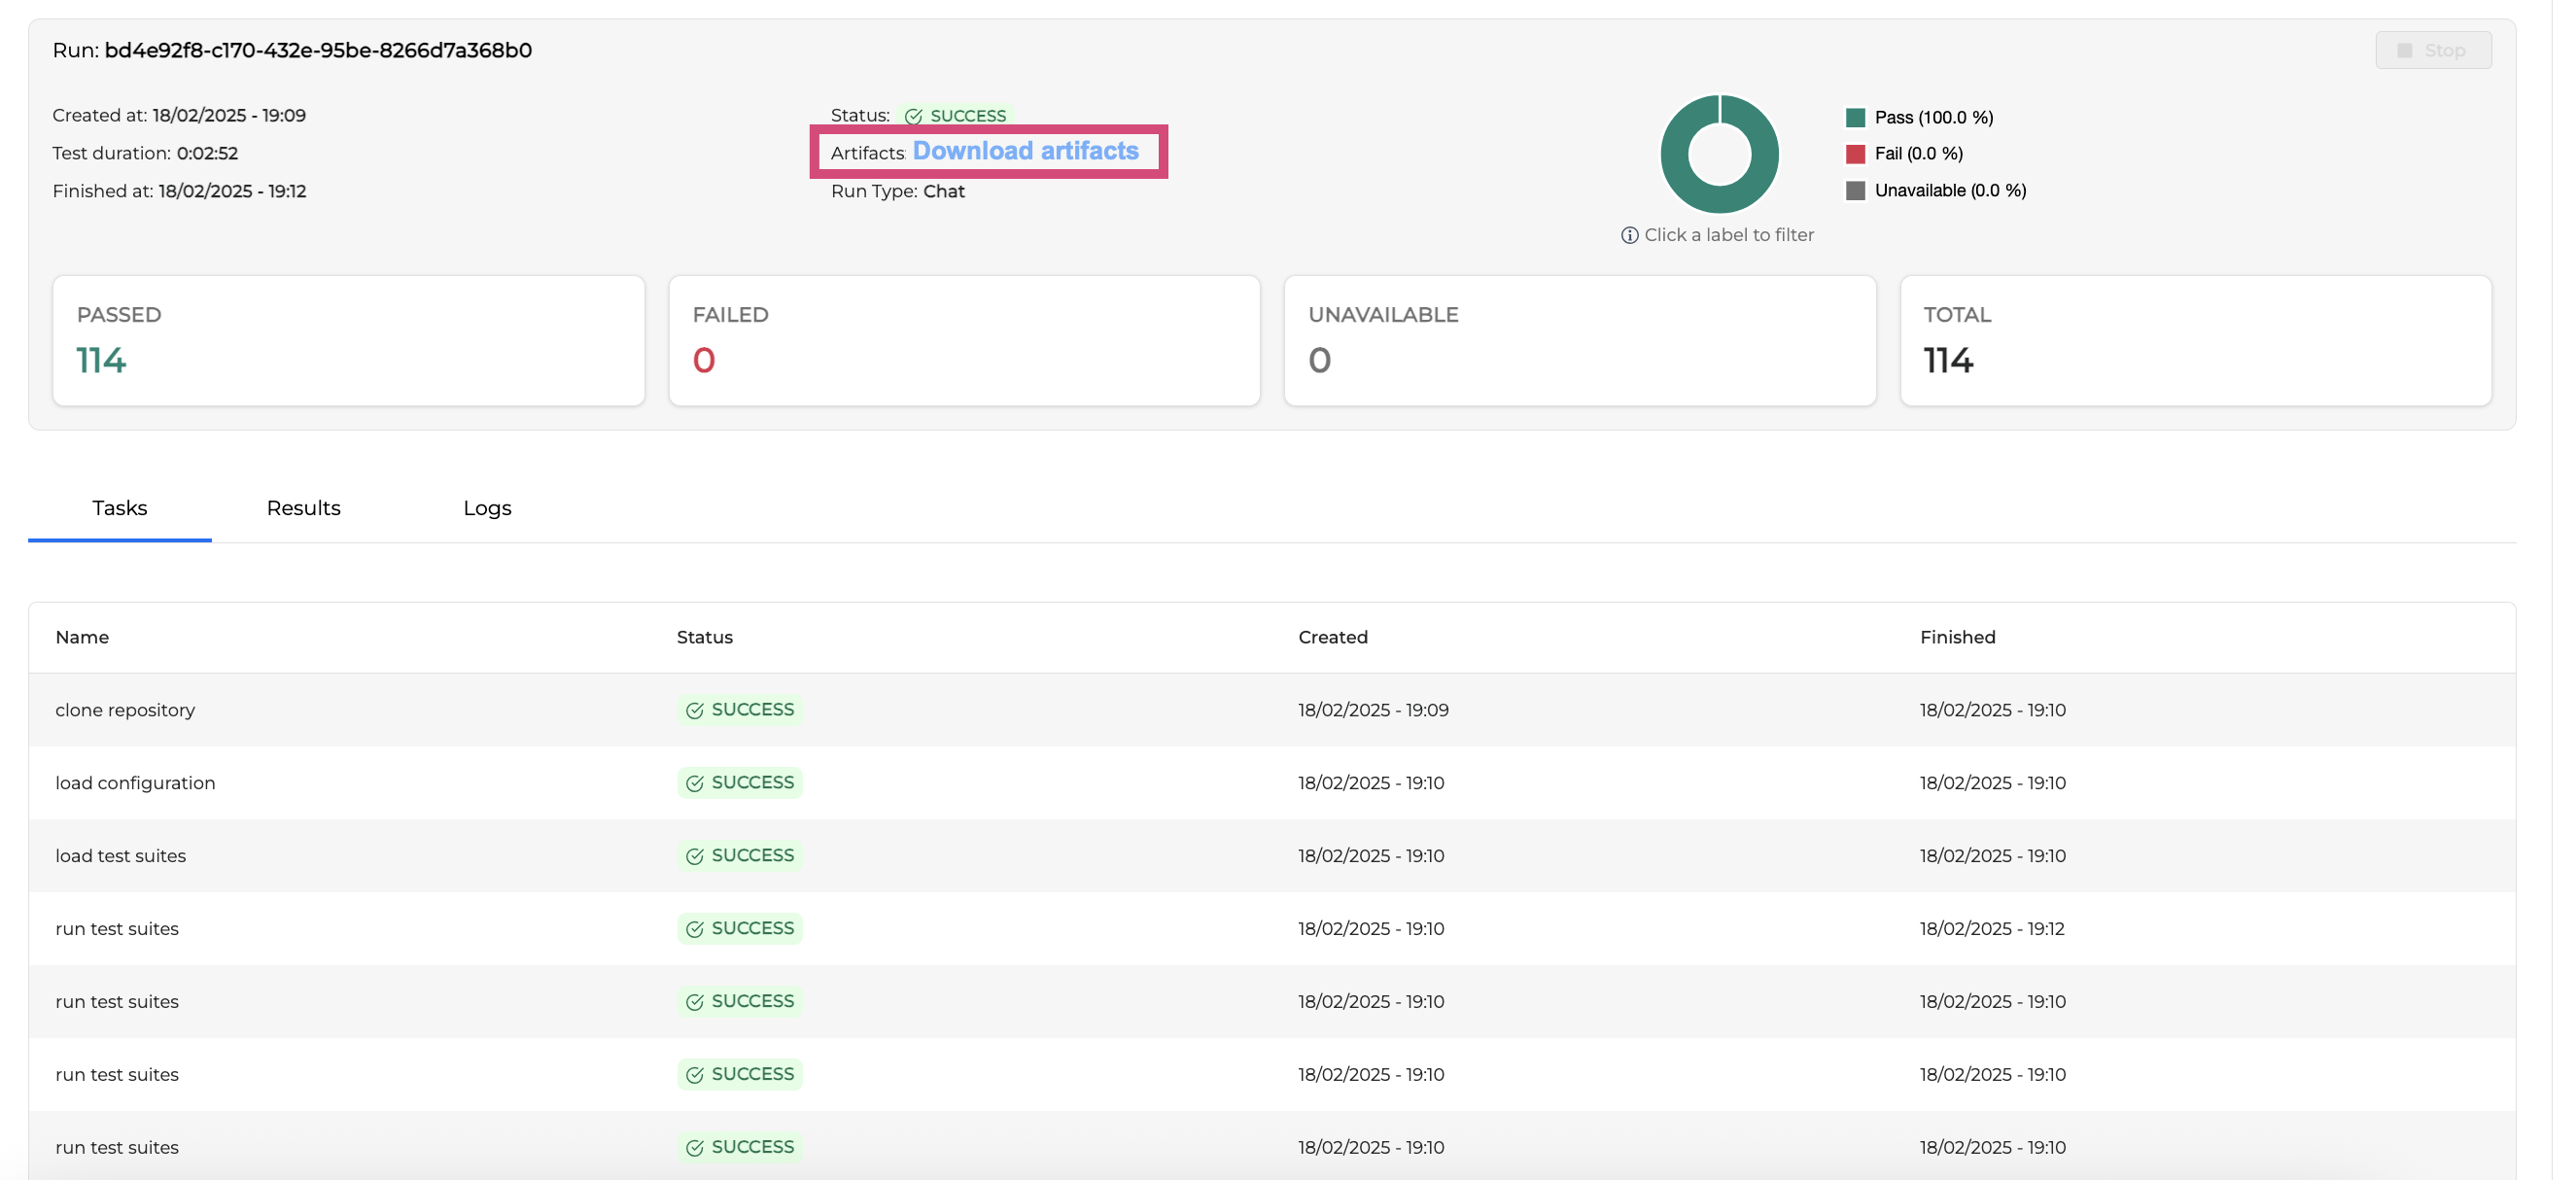
The test run details created after the run has been completed are called Artifacts. Testing Studio+ allows for downloading the artifacts to check the outcome of the run in detail.
To download artifacts of a selected test run, follow the steps below:
-
Open a project.
-
Click on a test run to open the run page.
-
Click Download Artifacts. The download starts.
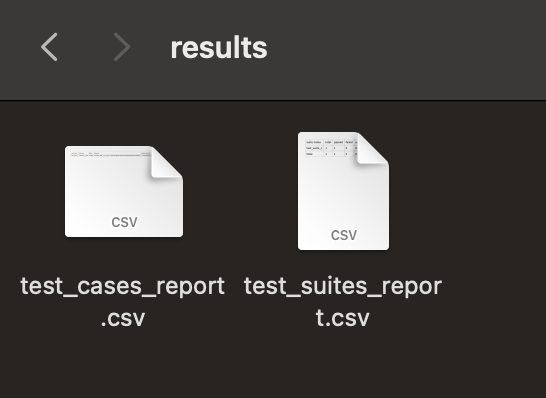
Artifacts are downloaded as a ZIP file containing results folder with two CSV files.
-
test_suites_report.csv: results report for each test suite. For example:
suite name,     total,  passed, failed, unavailable,  status
Test suite 1,   10,     10,     0,      0,             pass
Test suite 2,   20,     0,      10,     10,            fail
....
total,          30,     10,     10,     10,            fail
-
test_cases_report.csv: results report for each test case. For example:
test suite, test case,  status,        dialog id,  golden dialog id,  message
suite 1,    dialog 1,   pass,          dialogid1   1234,
suite 1,    dialog 2,   unavailable,   dialogid2   Unavailable,
suite 2,    dialog 3,   fail,          dialogid3,  123,               error message
...
suite x,    dialog x,   fail,          dialogidx,  12345,             error message
-
Output folder: created after each test run for every test suite. The
outputfolder contains candidate golden_dialog.json files for failed test cases or for unavailable ones (which means they have no golden dialogs).
test_suite
└── output
   ├── Failed
   └── Unavailable
You can goldenize Failed and Unavailable test cases directly from the Results tab (see Goldenize a Test Case). Alternatively, you can manually transfer the generated golden dialog file from output to the golden_dialogs folder within the appropriate test_suite directory.
Before every new run, the output folder gets deleted. Make sure you handle generated data before starting a new test case execution.