.svg)
Agents Unit Testing
Agents Unit Testing (AUT) is a regression-testing workflow for unit testing your agents (Q&A, Concierge) that are part of your agentic hybrid application. This tool allows you to build scenario suites, run them on any agent version, and receive a clear pass/fail result before shipping changes.
Agent Types
The scenario form and run automatically adapt to the type of agent you're testing, showing only the fields relevant to your agent type. You can test the following agent types:
-
Concierge: Acts as a router that replaces the traditional intent engine by capturing user intent and routing to either a flow, a Q&A agent, or a task agent.
-
Q&A Agent: Retrieves information from knowledge bases to answer FAQ-style questions.
You can read more about Agents in the Orchstrator User Guide.
Create a Scenario
To create a testing scenario, follow these steps:
-
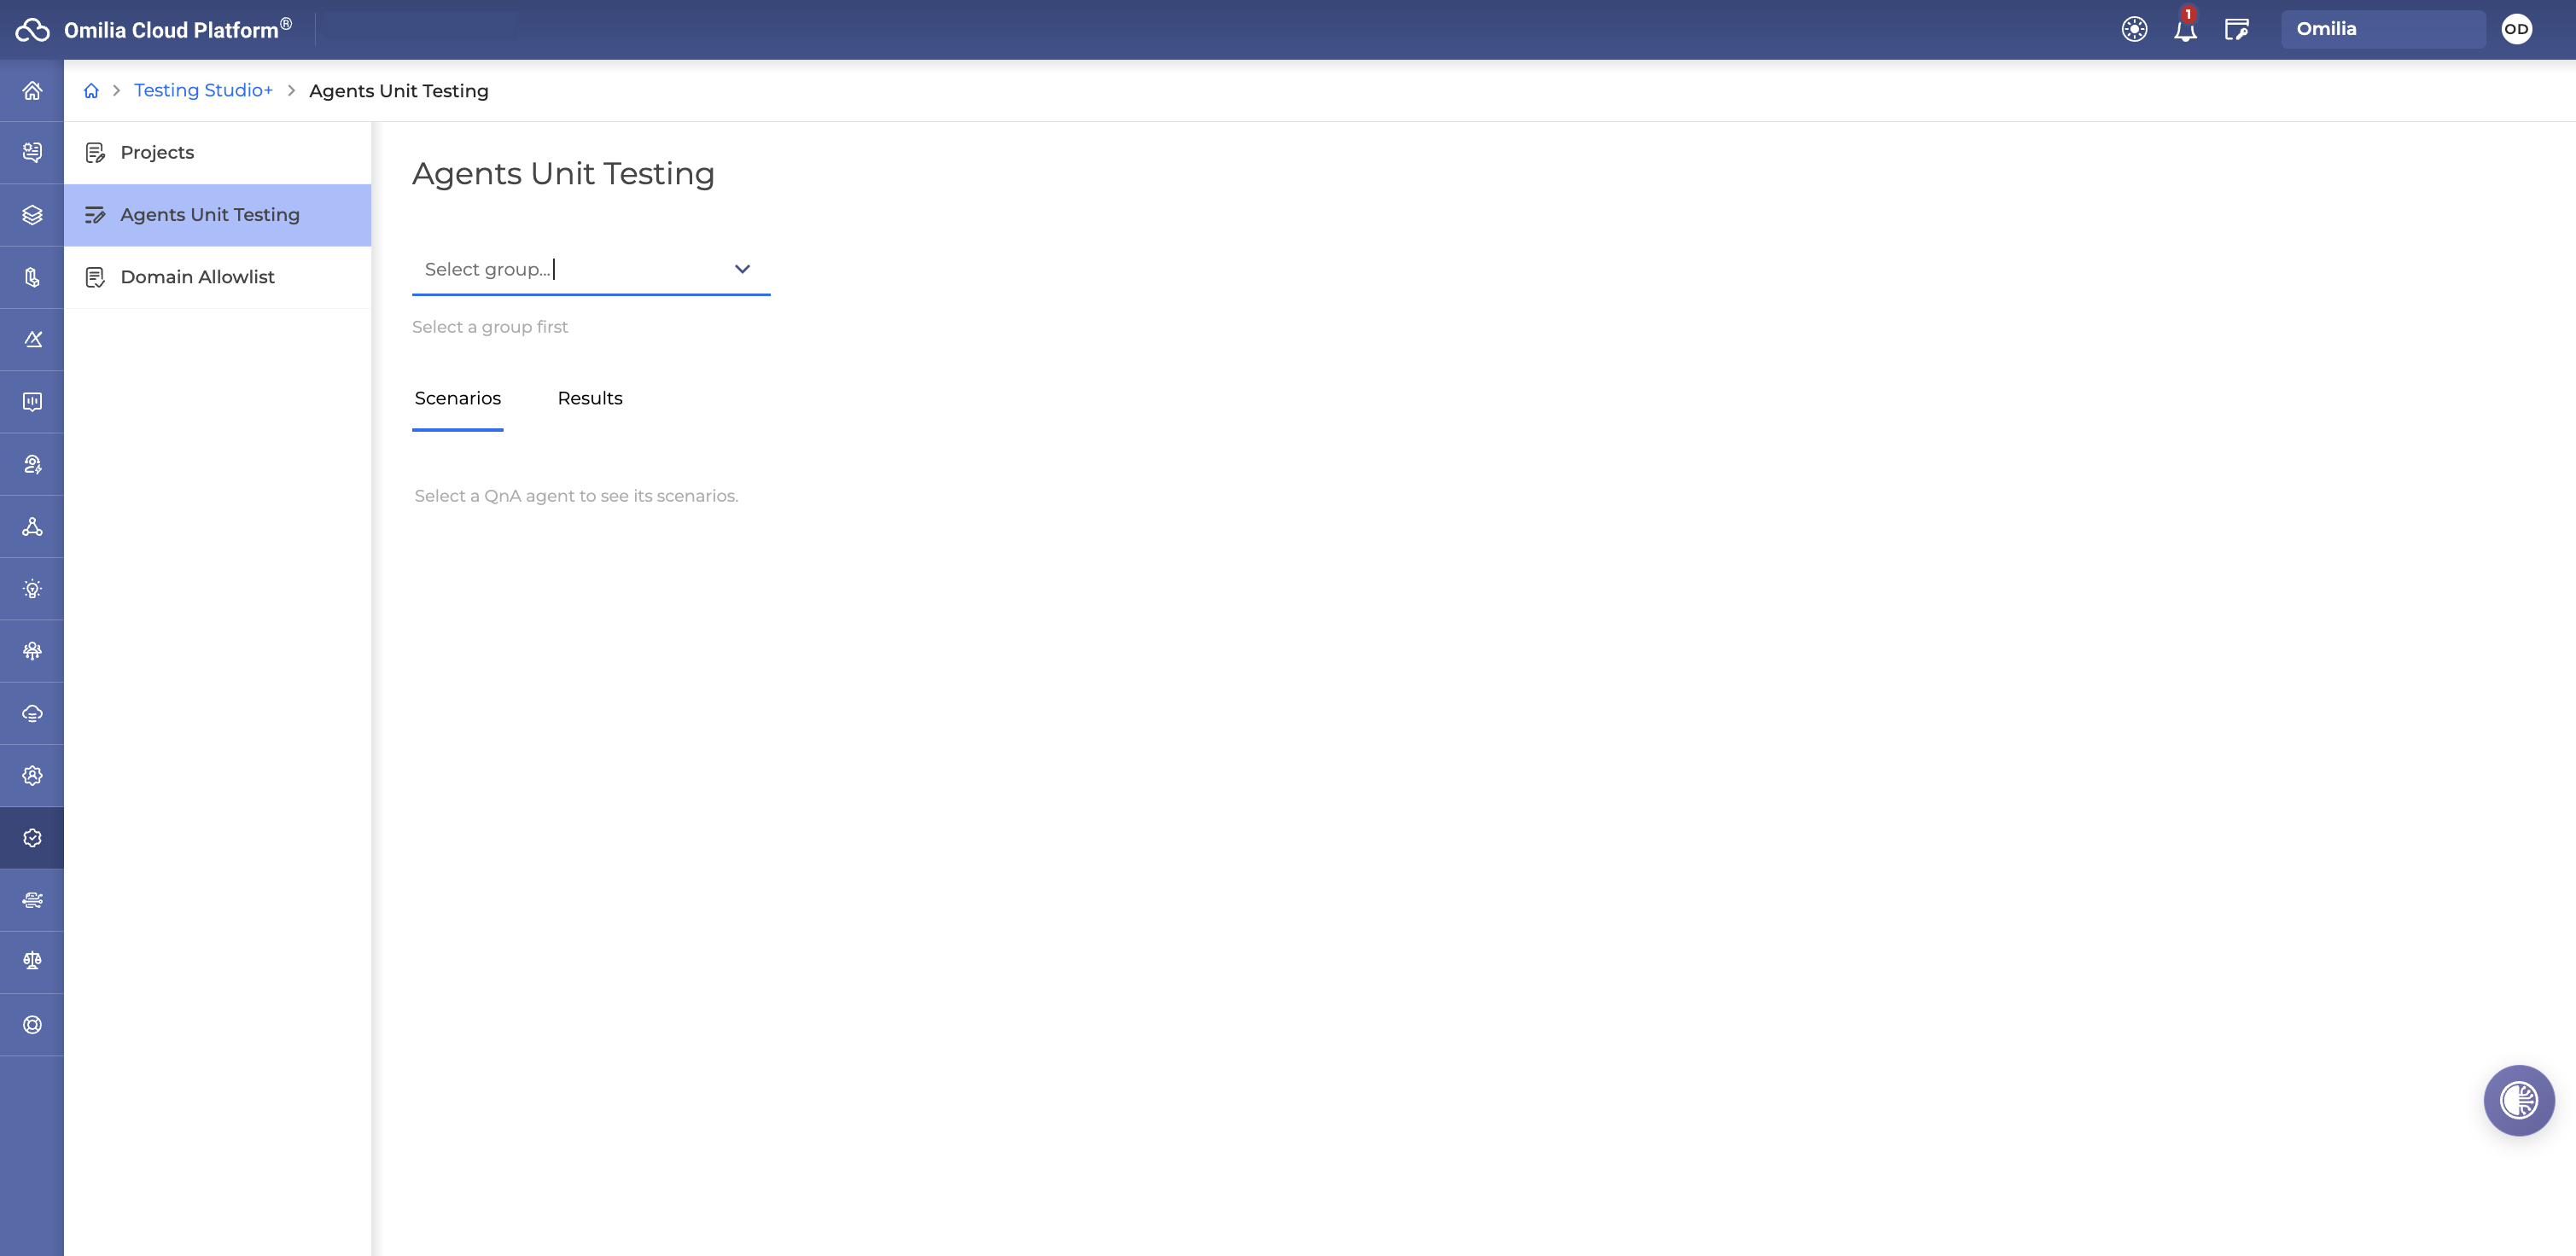
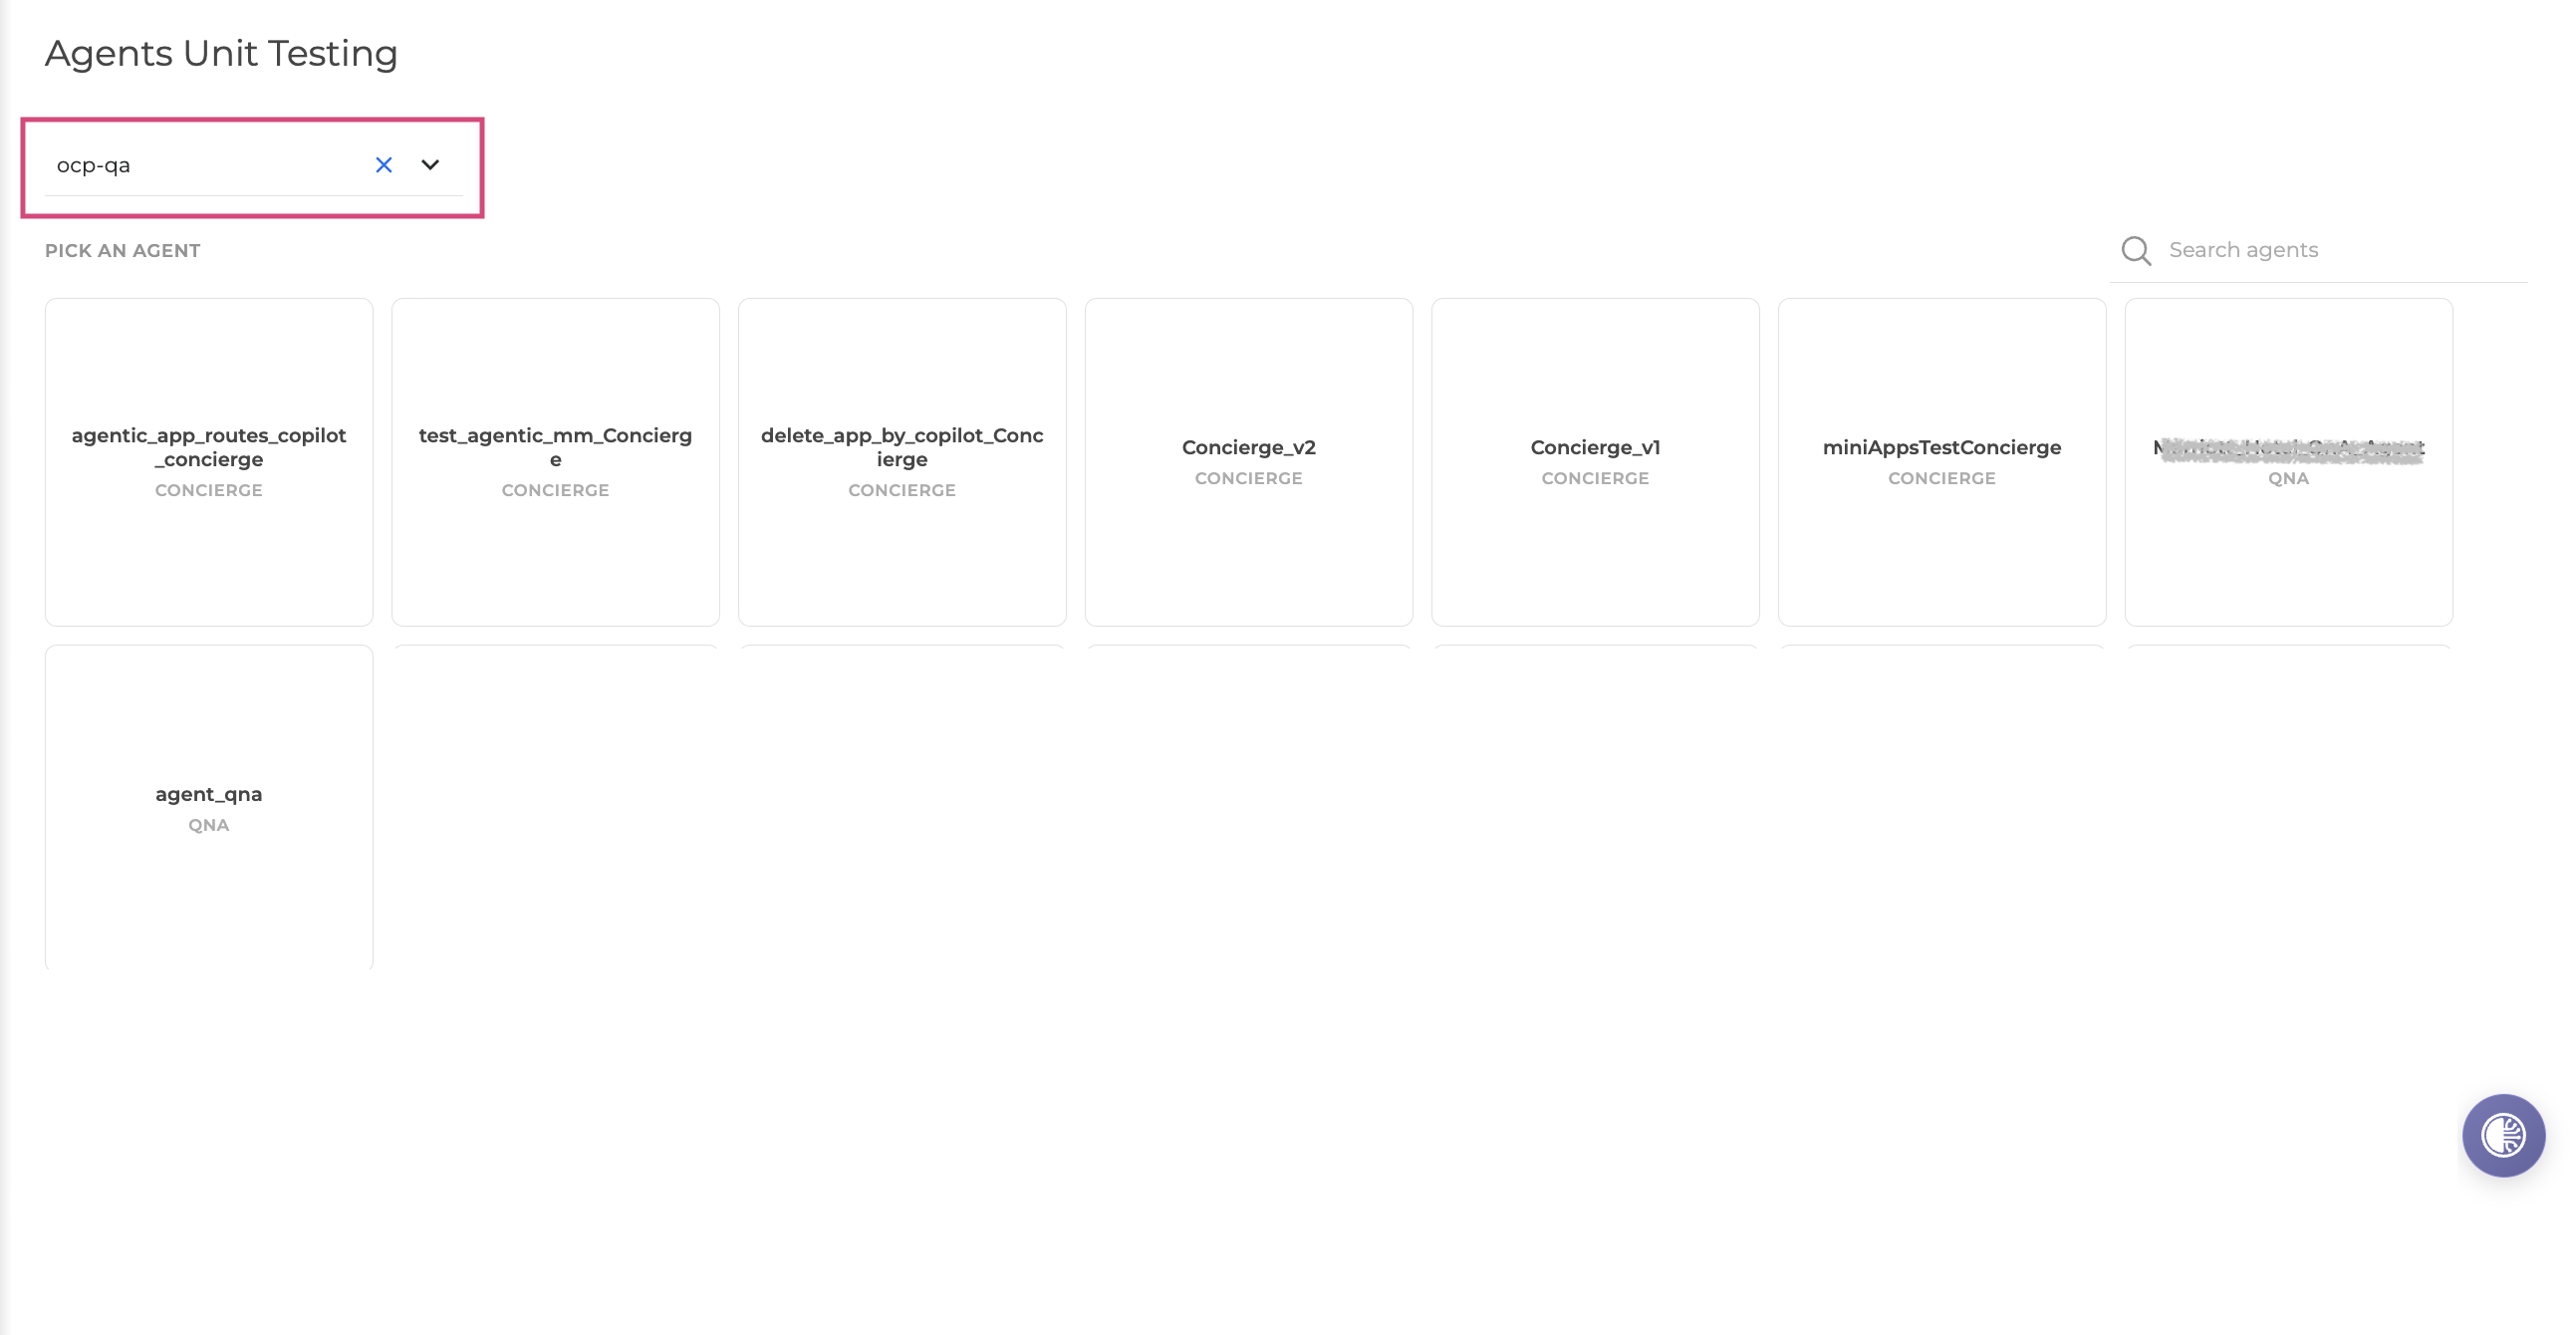
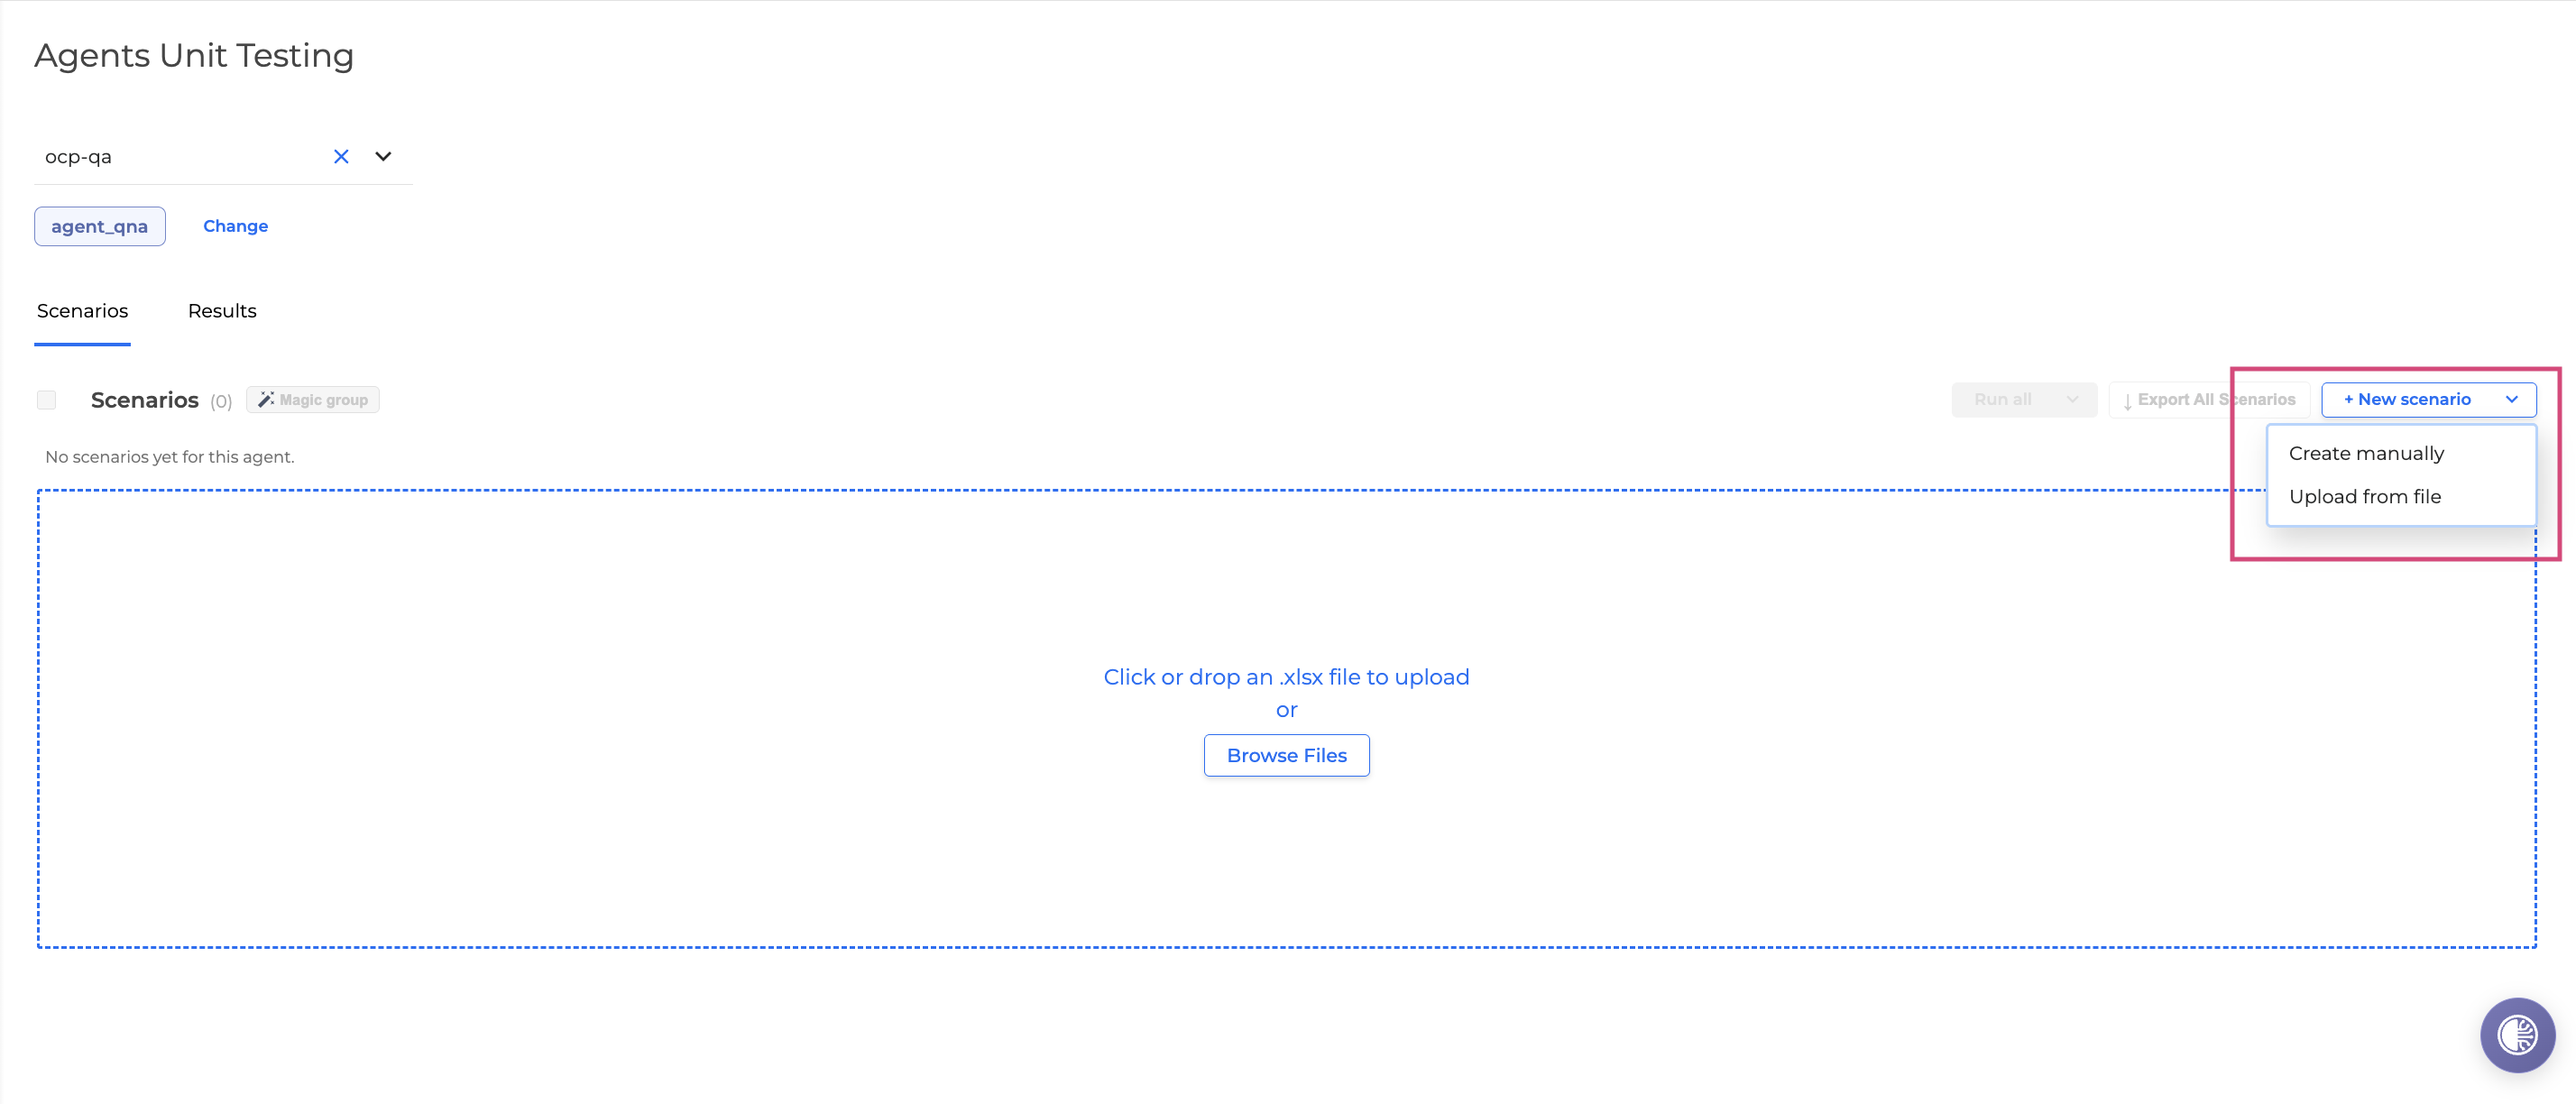
In the Agents Unit Testing tab, select a group from the drop-down to view all agents in that group.
-
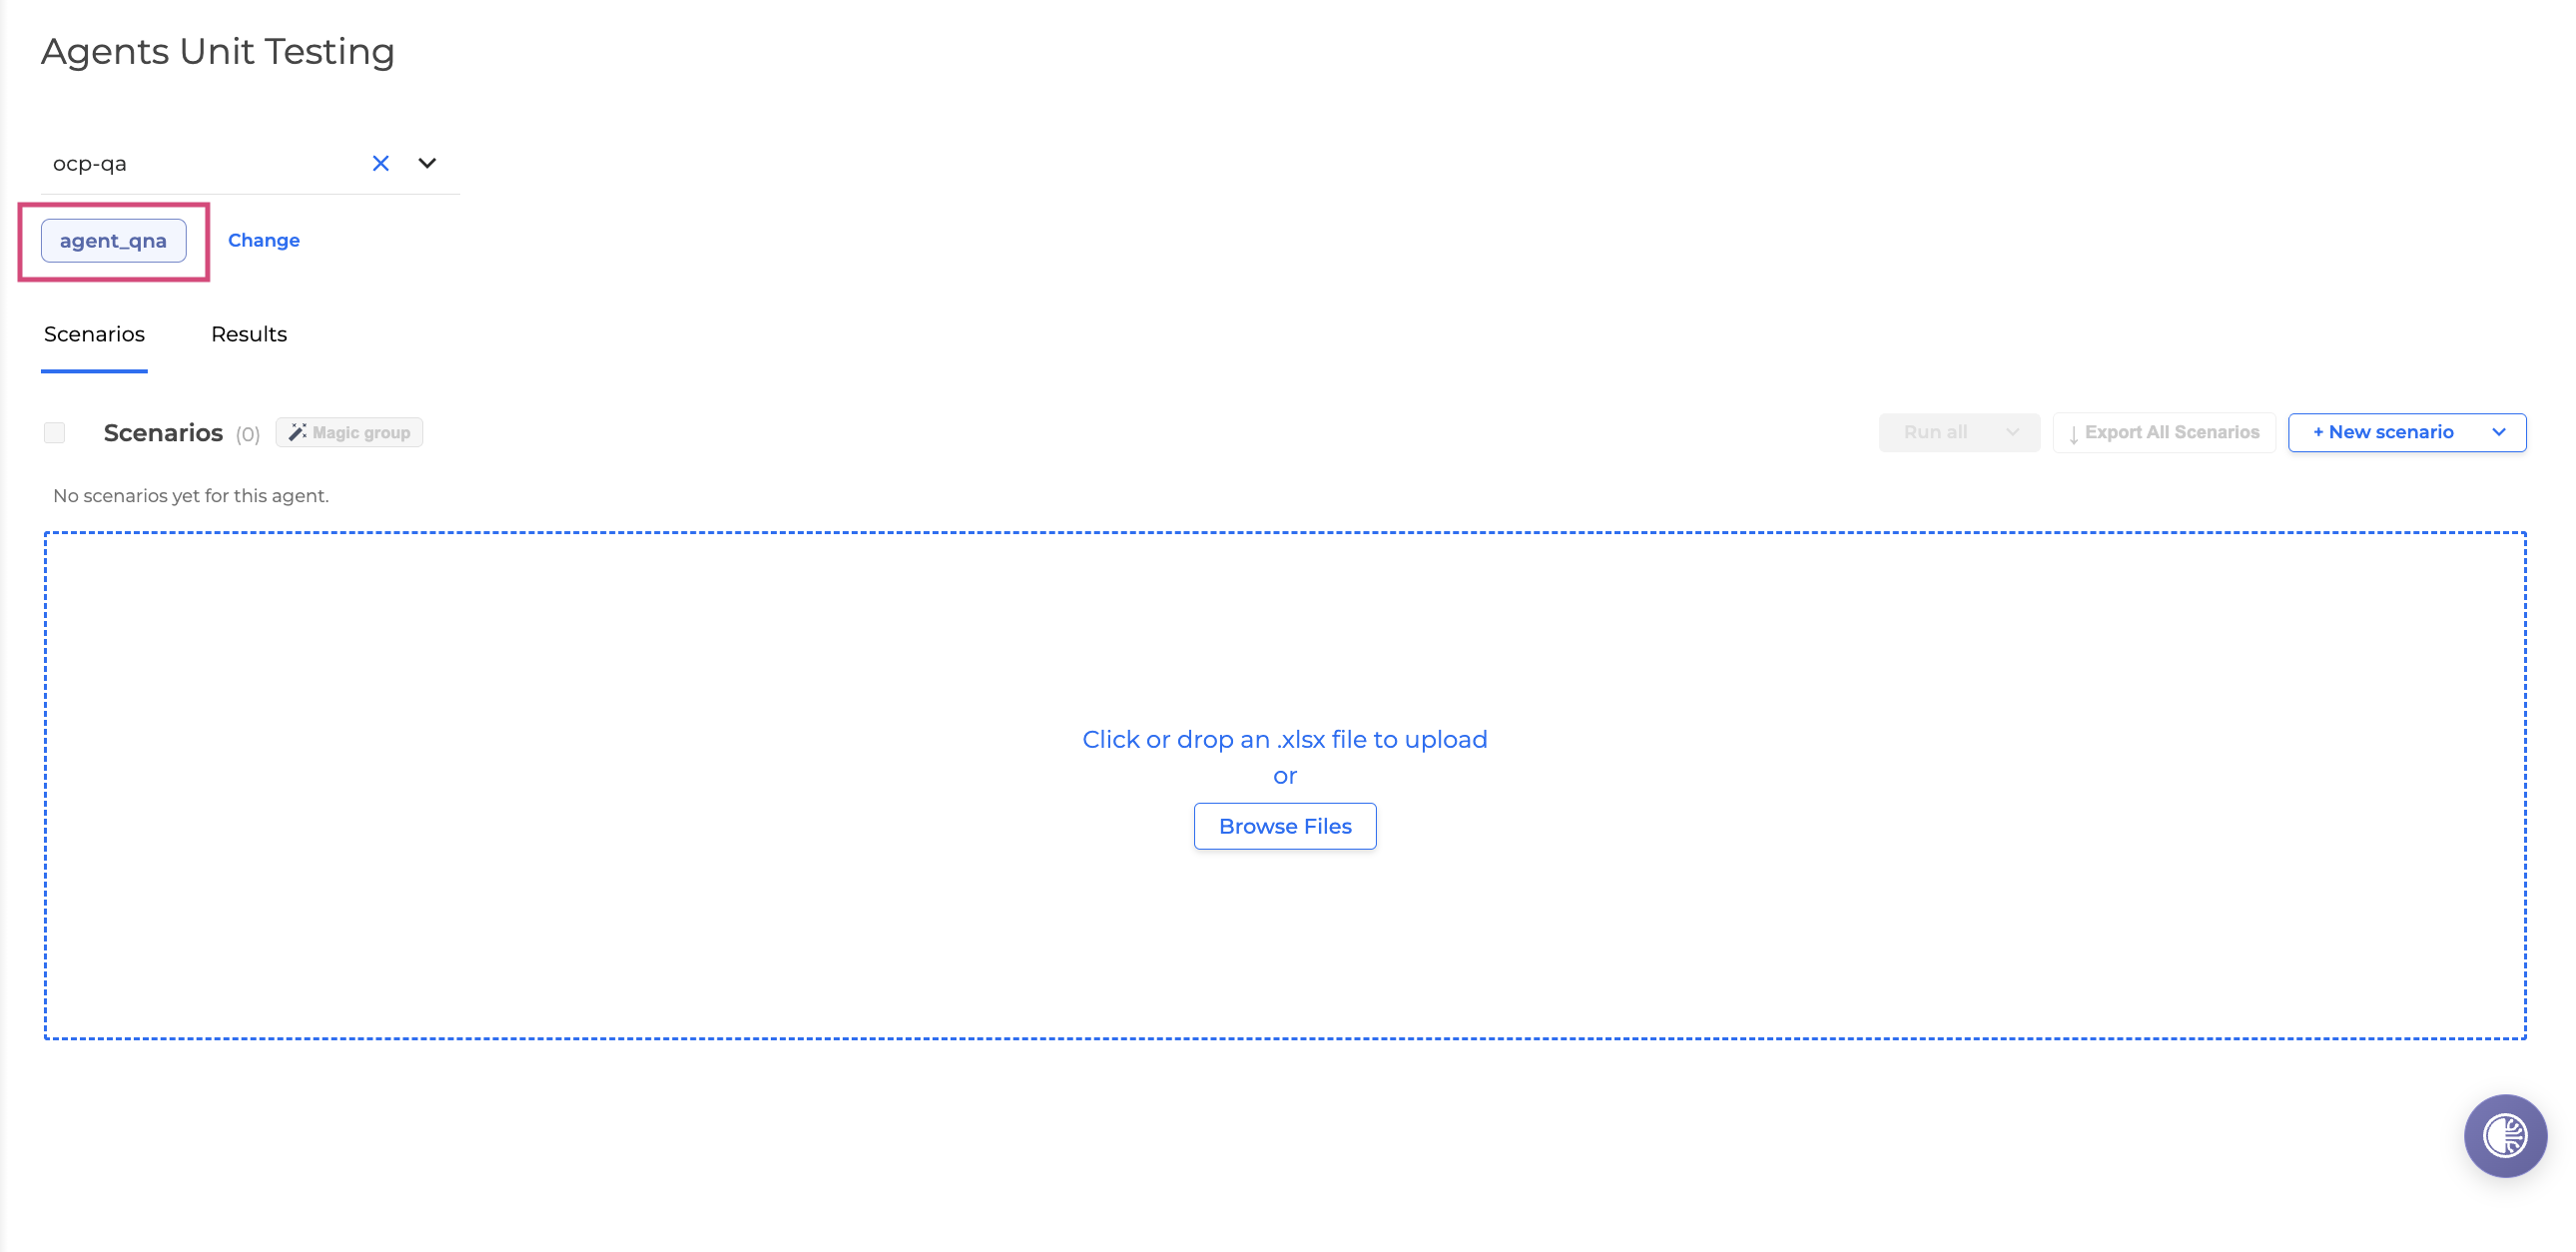
Select the agent to test. Click Change to go back and choose another agent.
-
Click + New Scenario → Create manually.
-
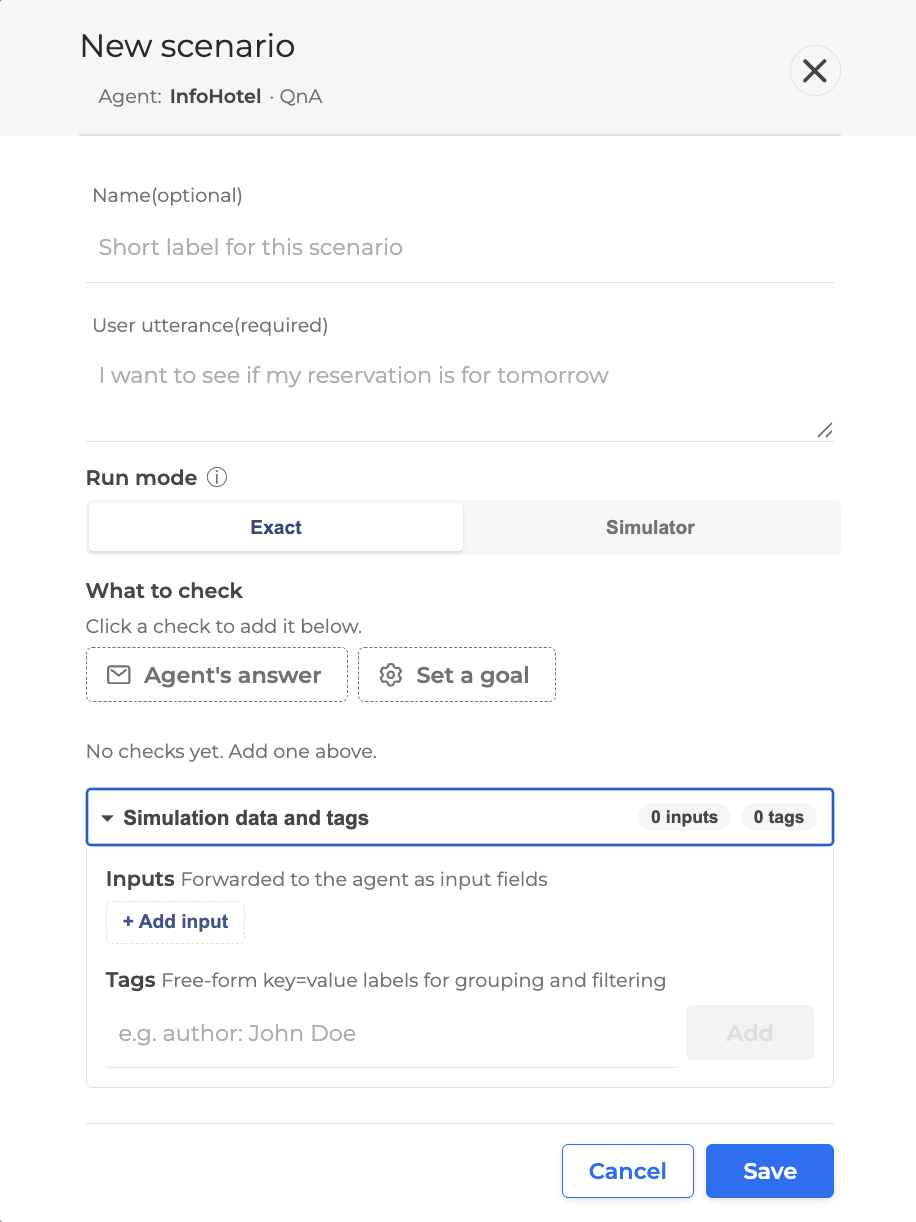
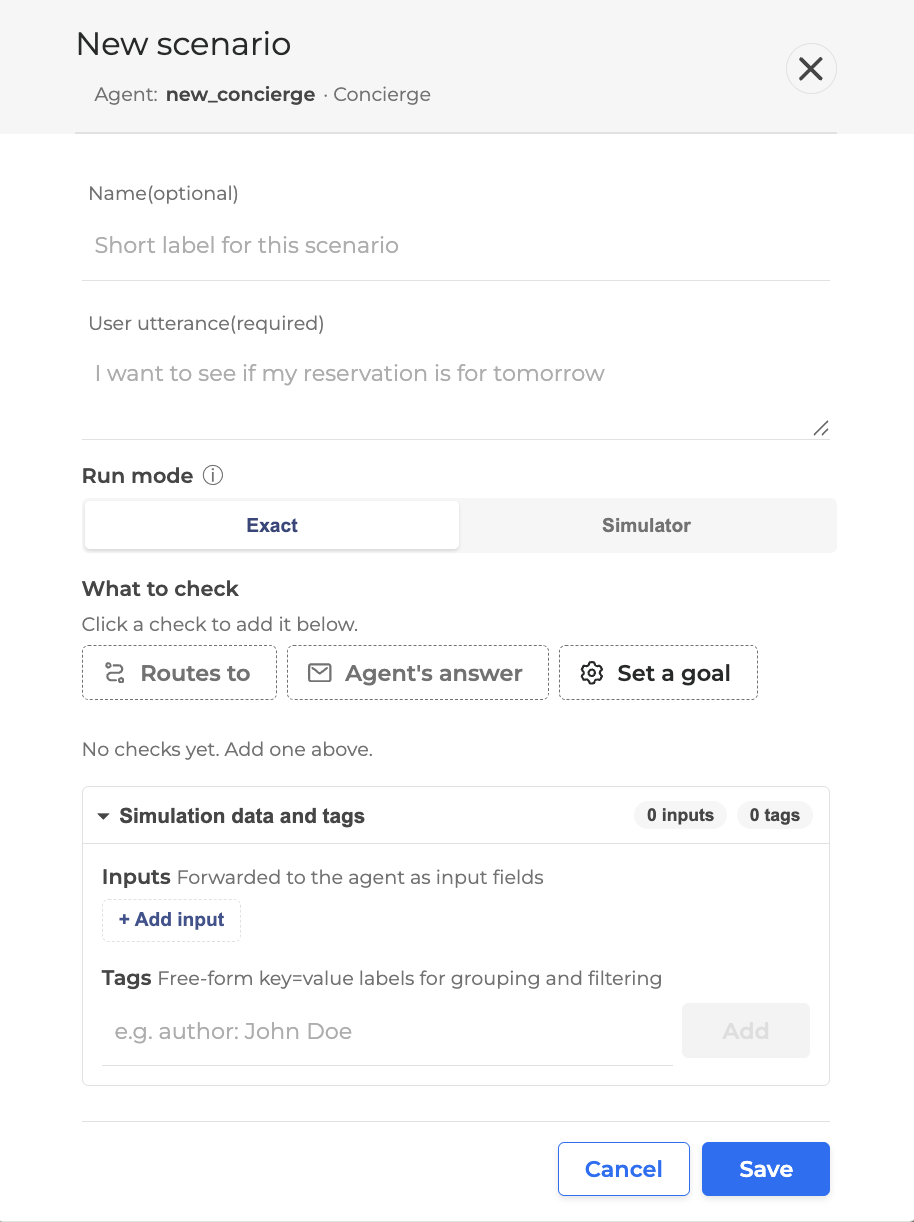
Fill in the form as described below. The form will vary depending on the Agent type.
-
Name: Enter a name for the scenario.
-
User utterance: Enter an utterance or a part of the utterance.
-
Run mode: Create a scenario to test your agent. You can select one of these modes:
-
Exact: Sends the specific phrase provided to the agent.
-
Simulator: Utilizes an LLM to improvise the dialogue, allowing for more natural variation in the test.
-
-
What to check: Optionally select one or several components to validate during the run, such as the route, answer, or other configured checks.
-
Agent’s answer: Optionally, enter the agent's expected answer.
-
Set a goal: Describe the goal the agent should reach.
-
-
Simulation data and tags:
-
Inputs: Provide inputs as key-value pairs. Use them to supply metadata (for example, an ID) so the agent retrieves the correct data from a structured knowledge base during isolated testing. Click +Add Input to add a key-value pair.
-
Tags: Enter a tag that will be used for search, grouping, filtering.
-
-
Name: Enter a name for the scenario.
-
User utterance: Enter an utterance or a part of the utterance.
-
Run mode: Create a scenario to test your agent. You can select one of these modes:
-
Exact: Sends the specific phrase provided to the agent.
-
Simulator: Utilizes an LLM to improvise the dialogue, allowing for more natural variation in the test.
-
-
What to check: Optionally select one or several components to validate during the run, such as the route, answer, or other configured checks.
-
Routes to: Select one of the agent's configured routes from the dropdown, or type a custom route name.
-
Agent’s answer: Optionally, enter the agent's expected answer.
-
Set a goal: Describe the goal the agent should reach.
-
-
Simulation data and tags:
-
Inputs: Provide inputs as key-value pairs. Use them to supply metadata (for example, an ID) so the agent retrieves the correct data from a structured knowledge base during isolated testing. Click +Add Input to add a key-value pair.
-
Tags: Enter a tag that will be used for search, grouping, filtering.
-
-
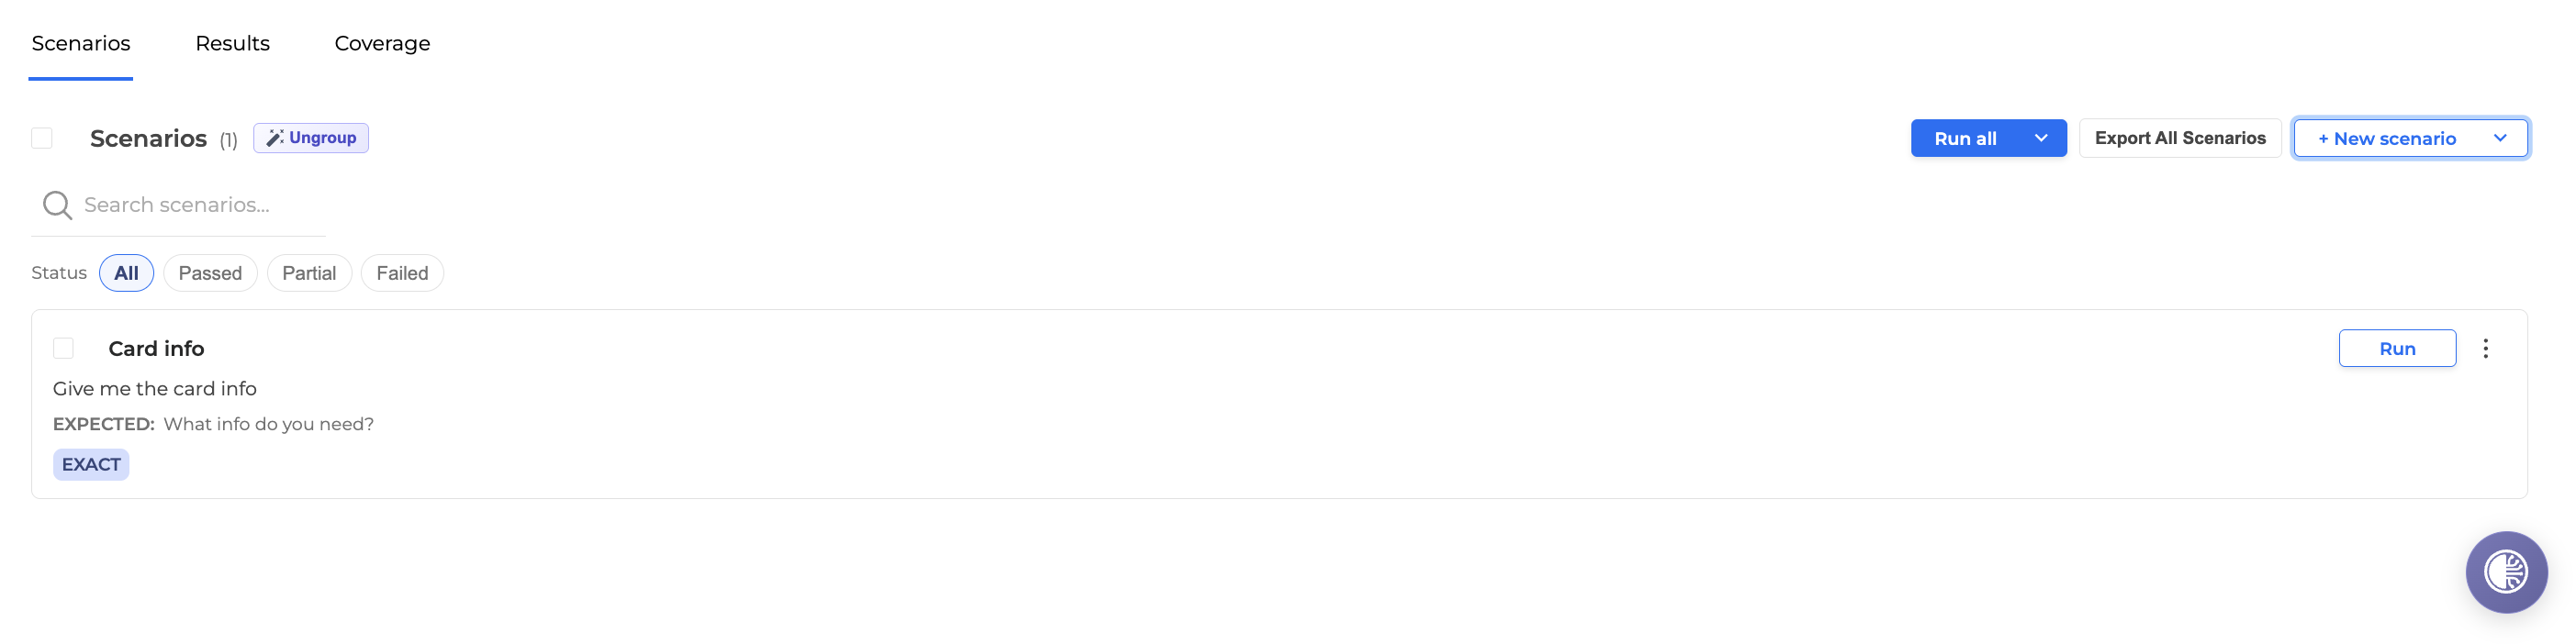
Click Save when finished. The scenario will appear in the list.
-
If a scenario is lacking defined assertions, it will be labelled as Missing expected.

Run a Scenario
To run the scenario, proceed as follows:
-
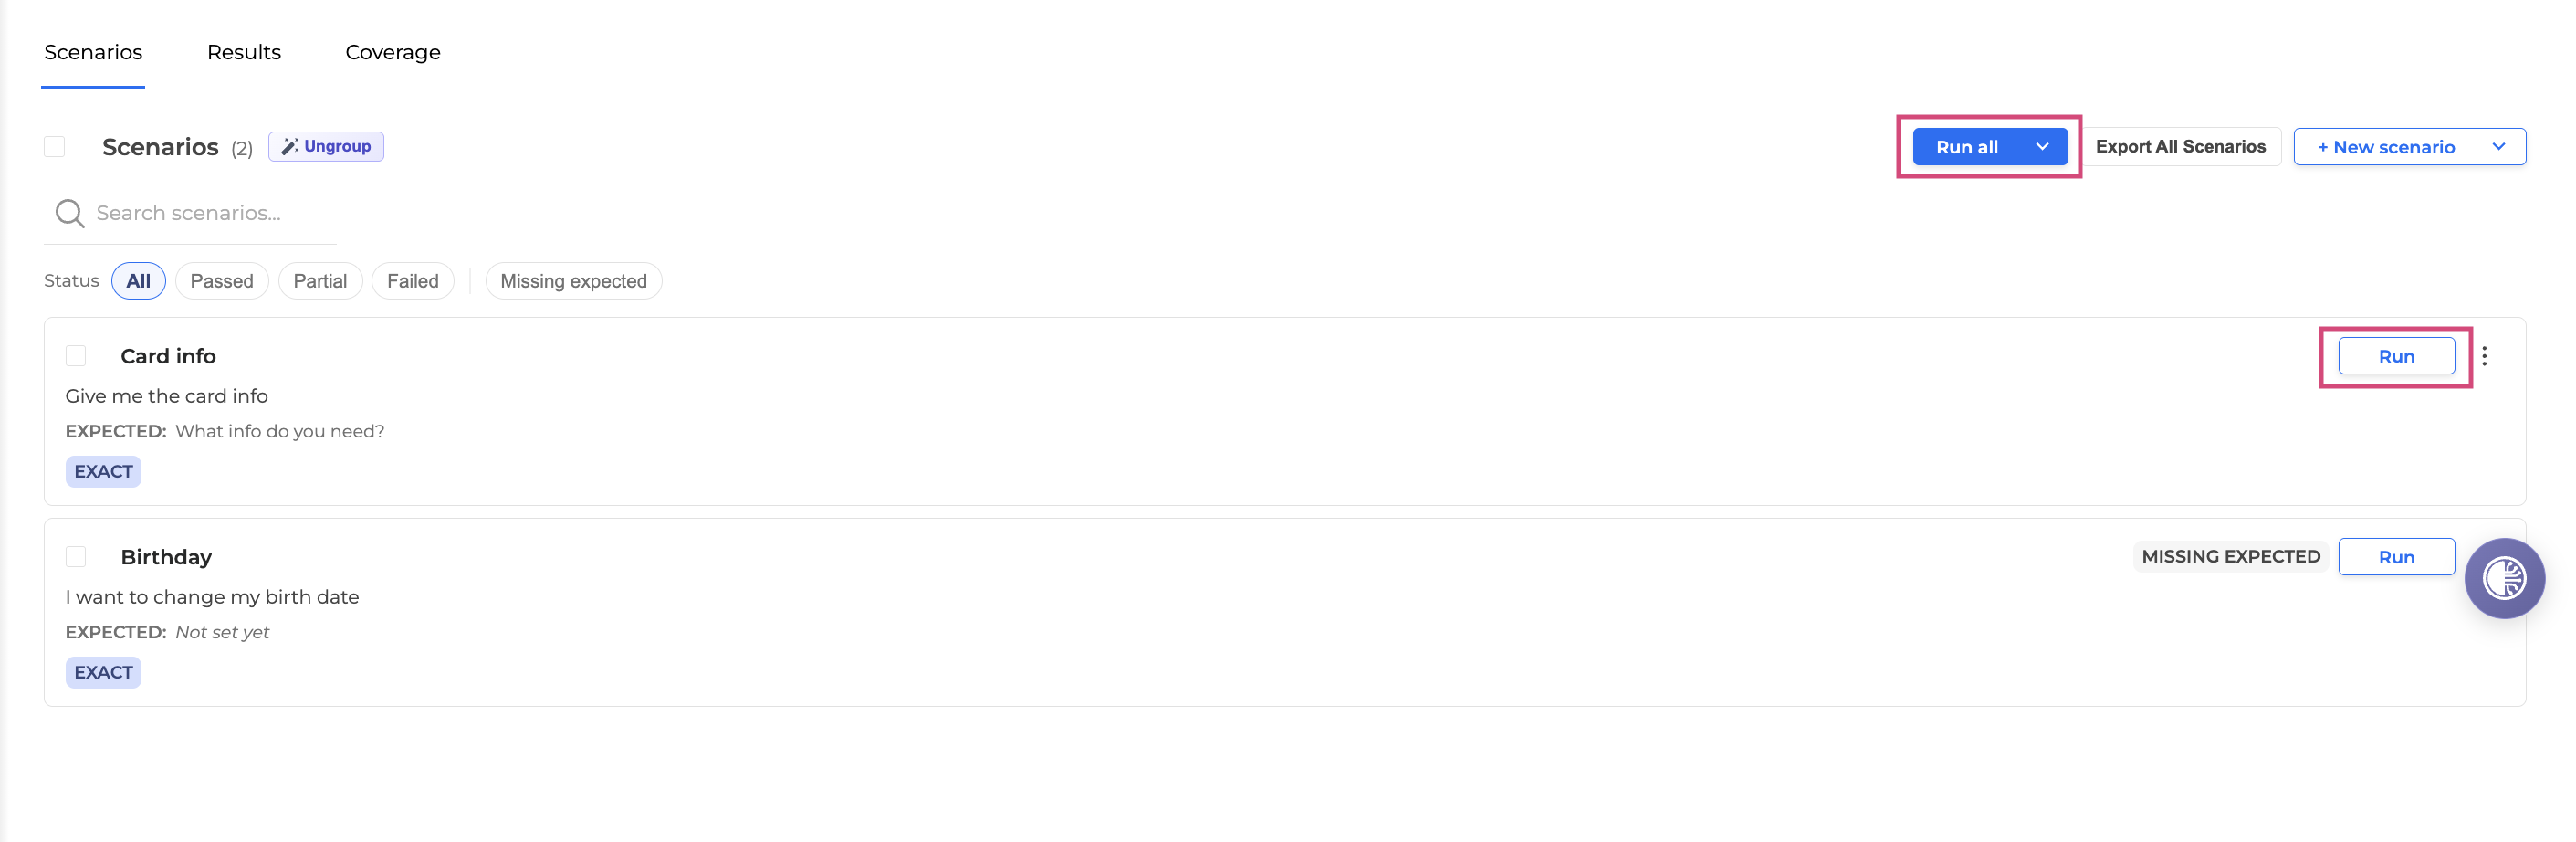
Select a scenario and click Run. To run all scenarios simultaneously, click Run All.
-
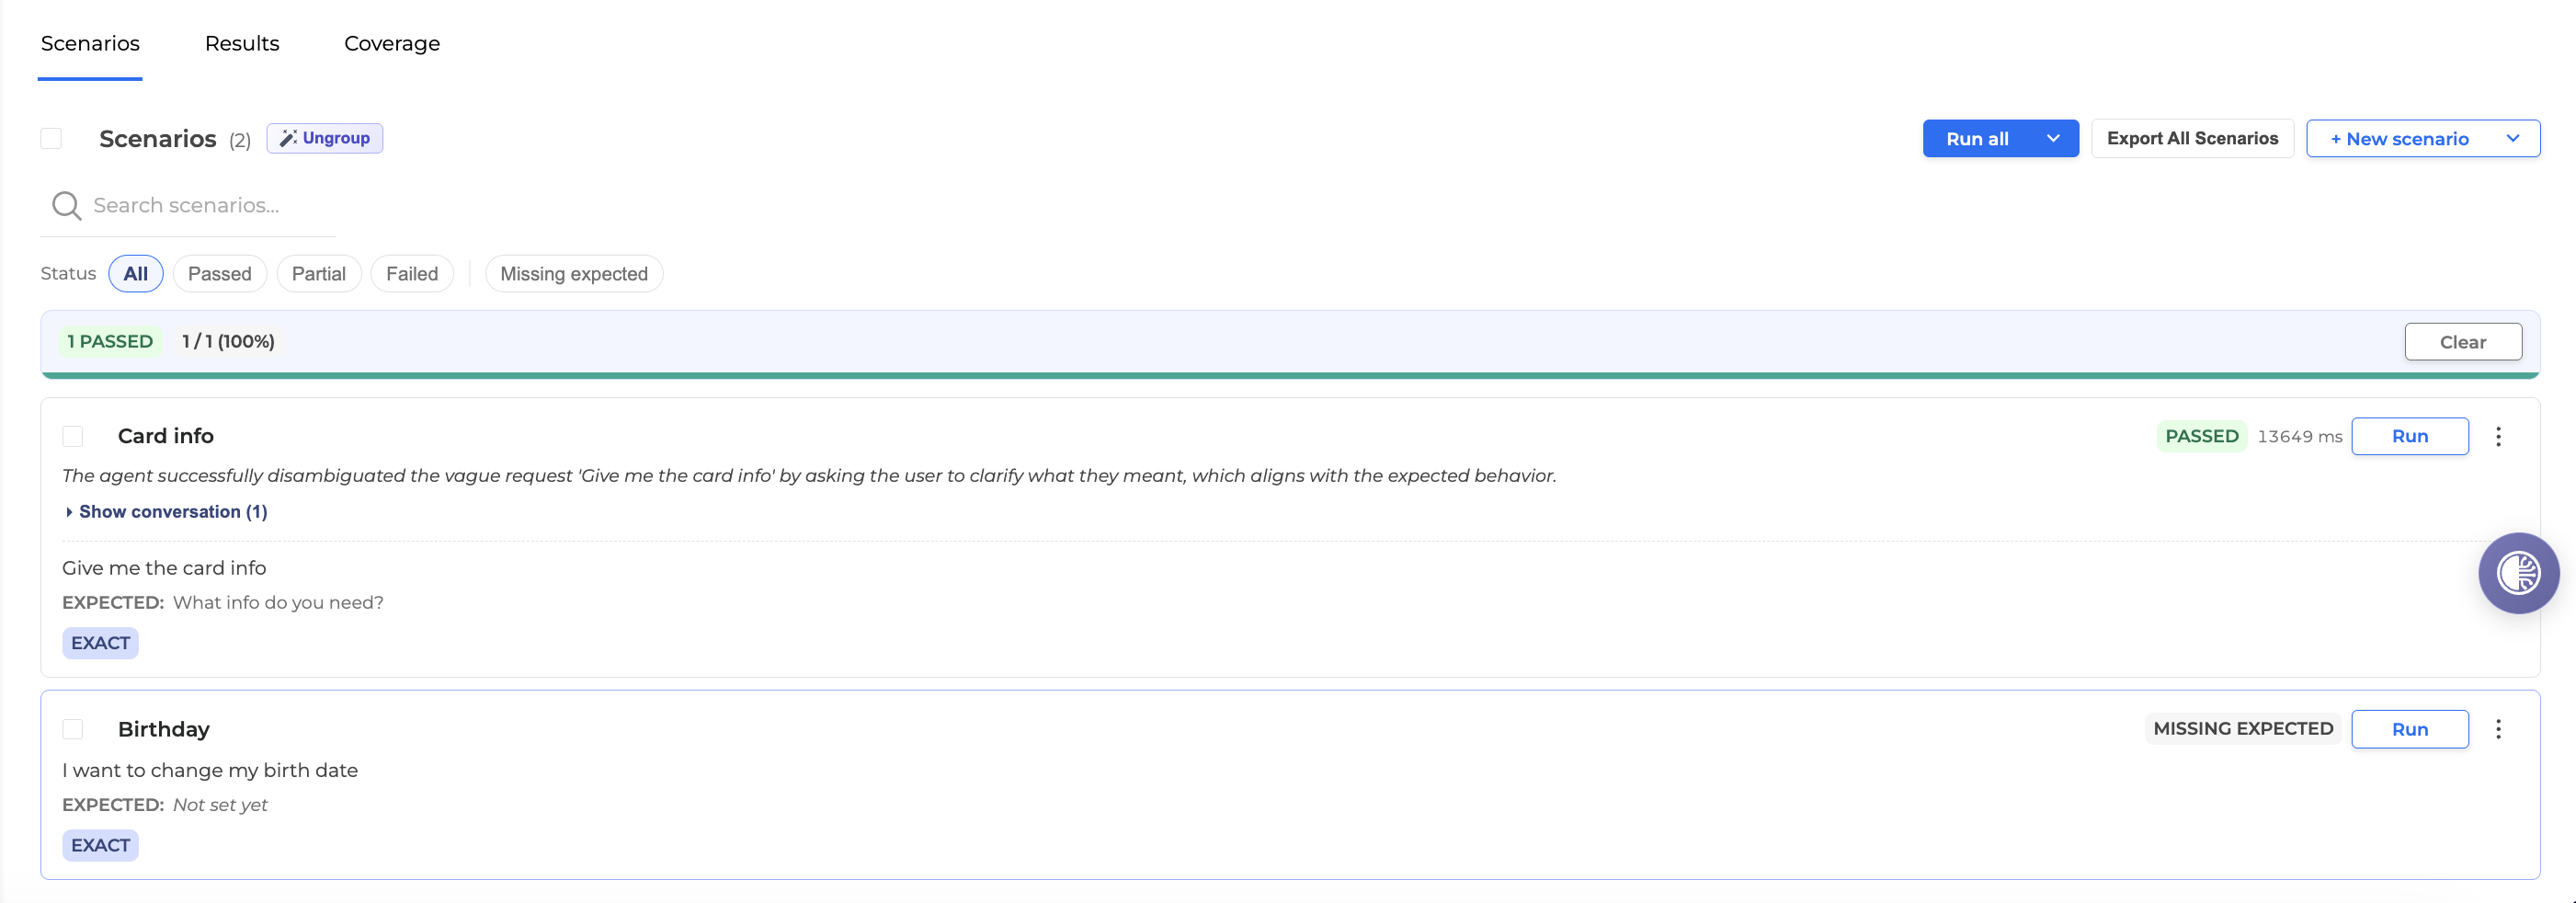
Once the run finishes, you will see the run result:
-
Passed: All the scenario components successfully executed
-
Failed: Scenario failed to run
-
Partial: Only one part of a multi-part reply is correct (for example, routing parameter or agent’s answer)
-
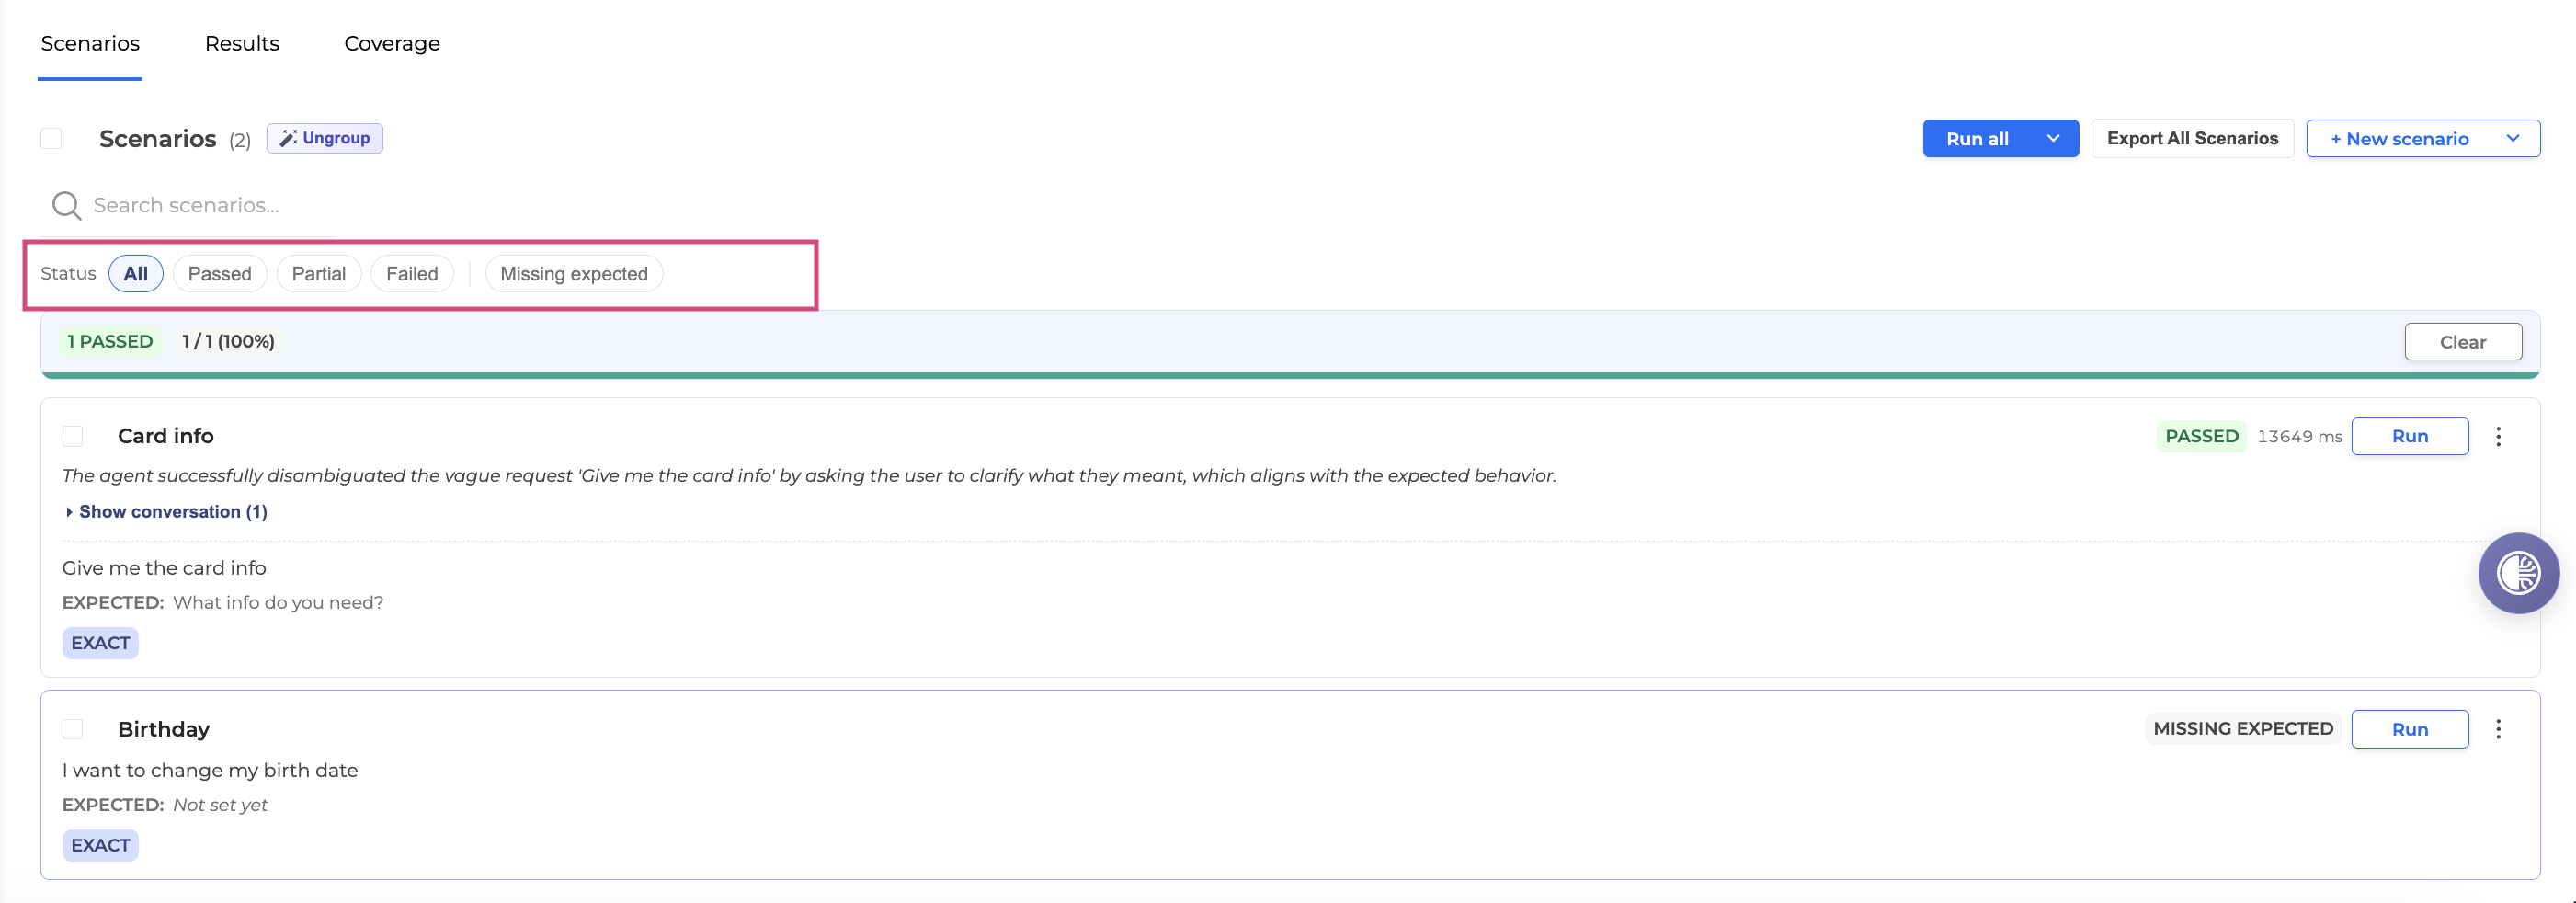
If the scenarios list is large, use filters.
-
For Concierge scenarios, expand a result to compare the expected route against the actual route selected.

-
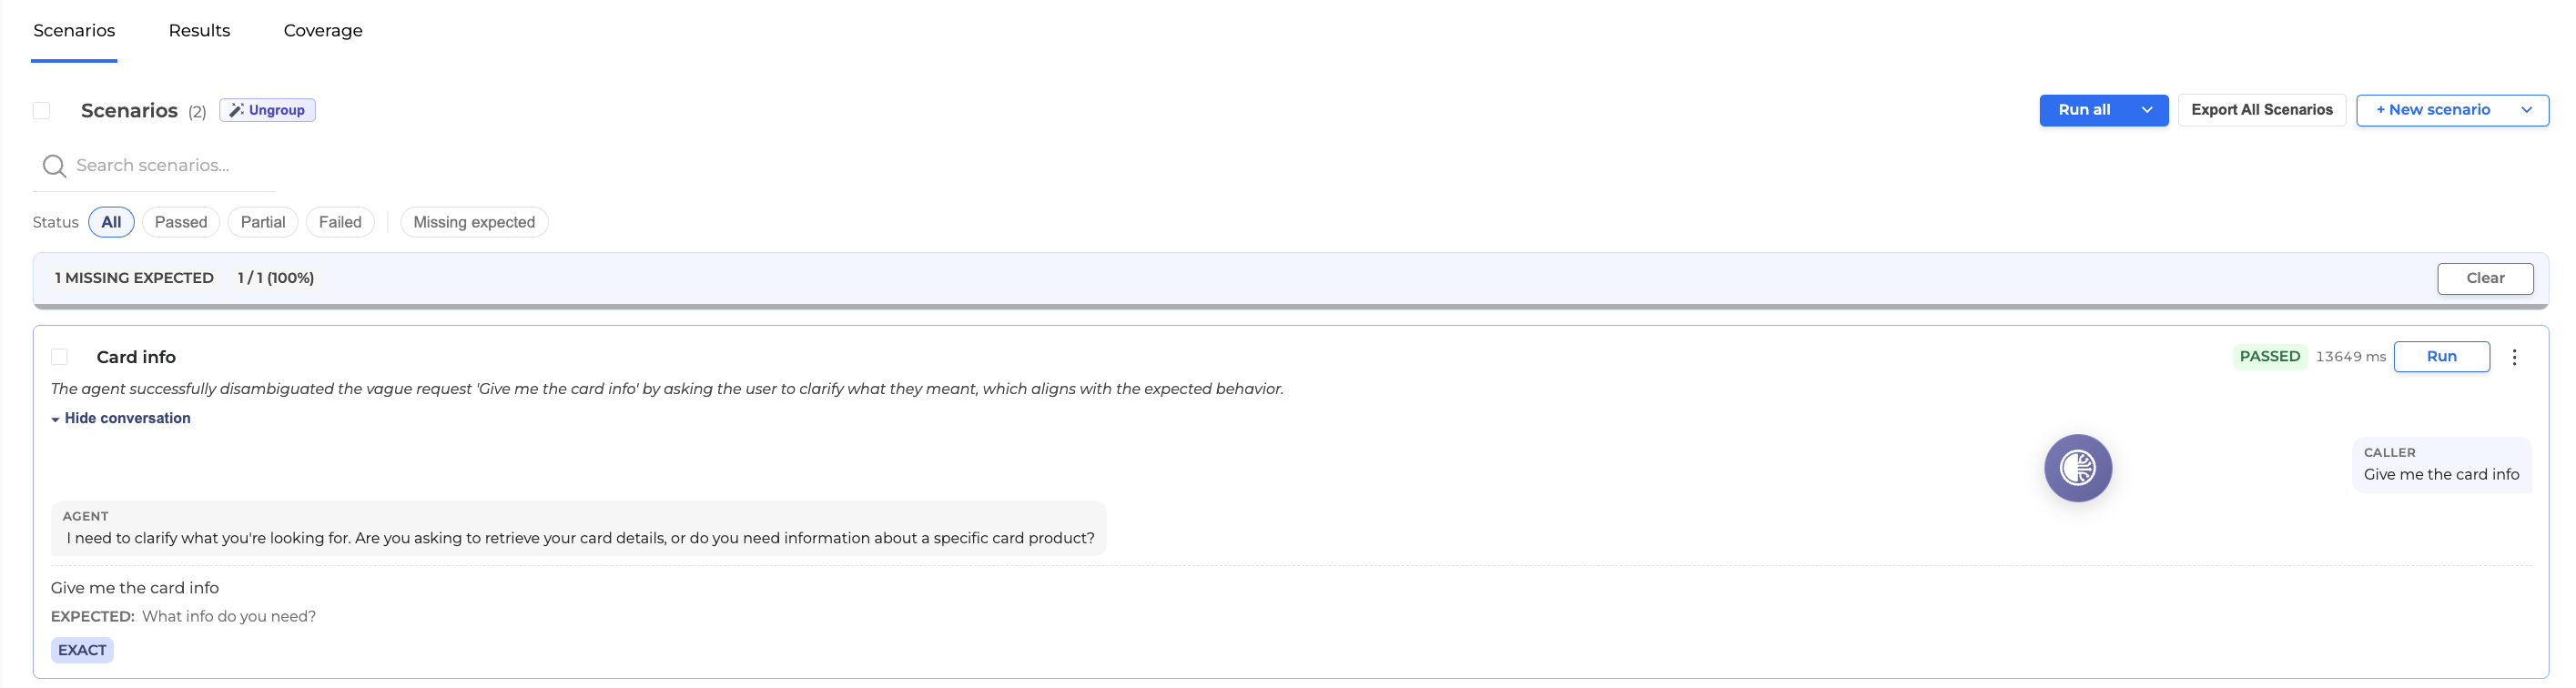
For Q&A scenarios, click Show conversation to expand the result and view the retrieved knowledge passages.
If a question doesn't have a known correct answer and the generated response is accurate, promote it by clicking Use as expected, then run the scenario again.
View the Results
Every run is recorded. The Results tab shows pass/fail counts across runs.
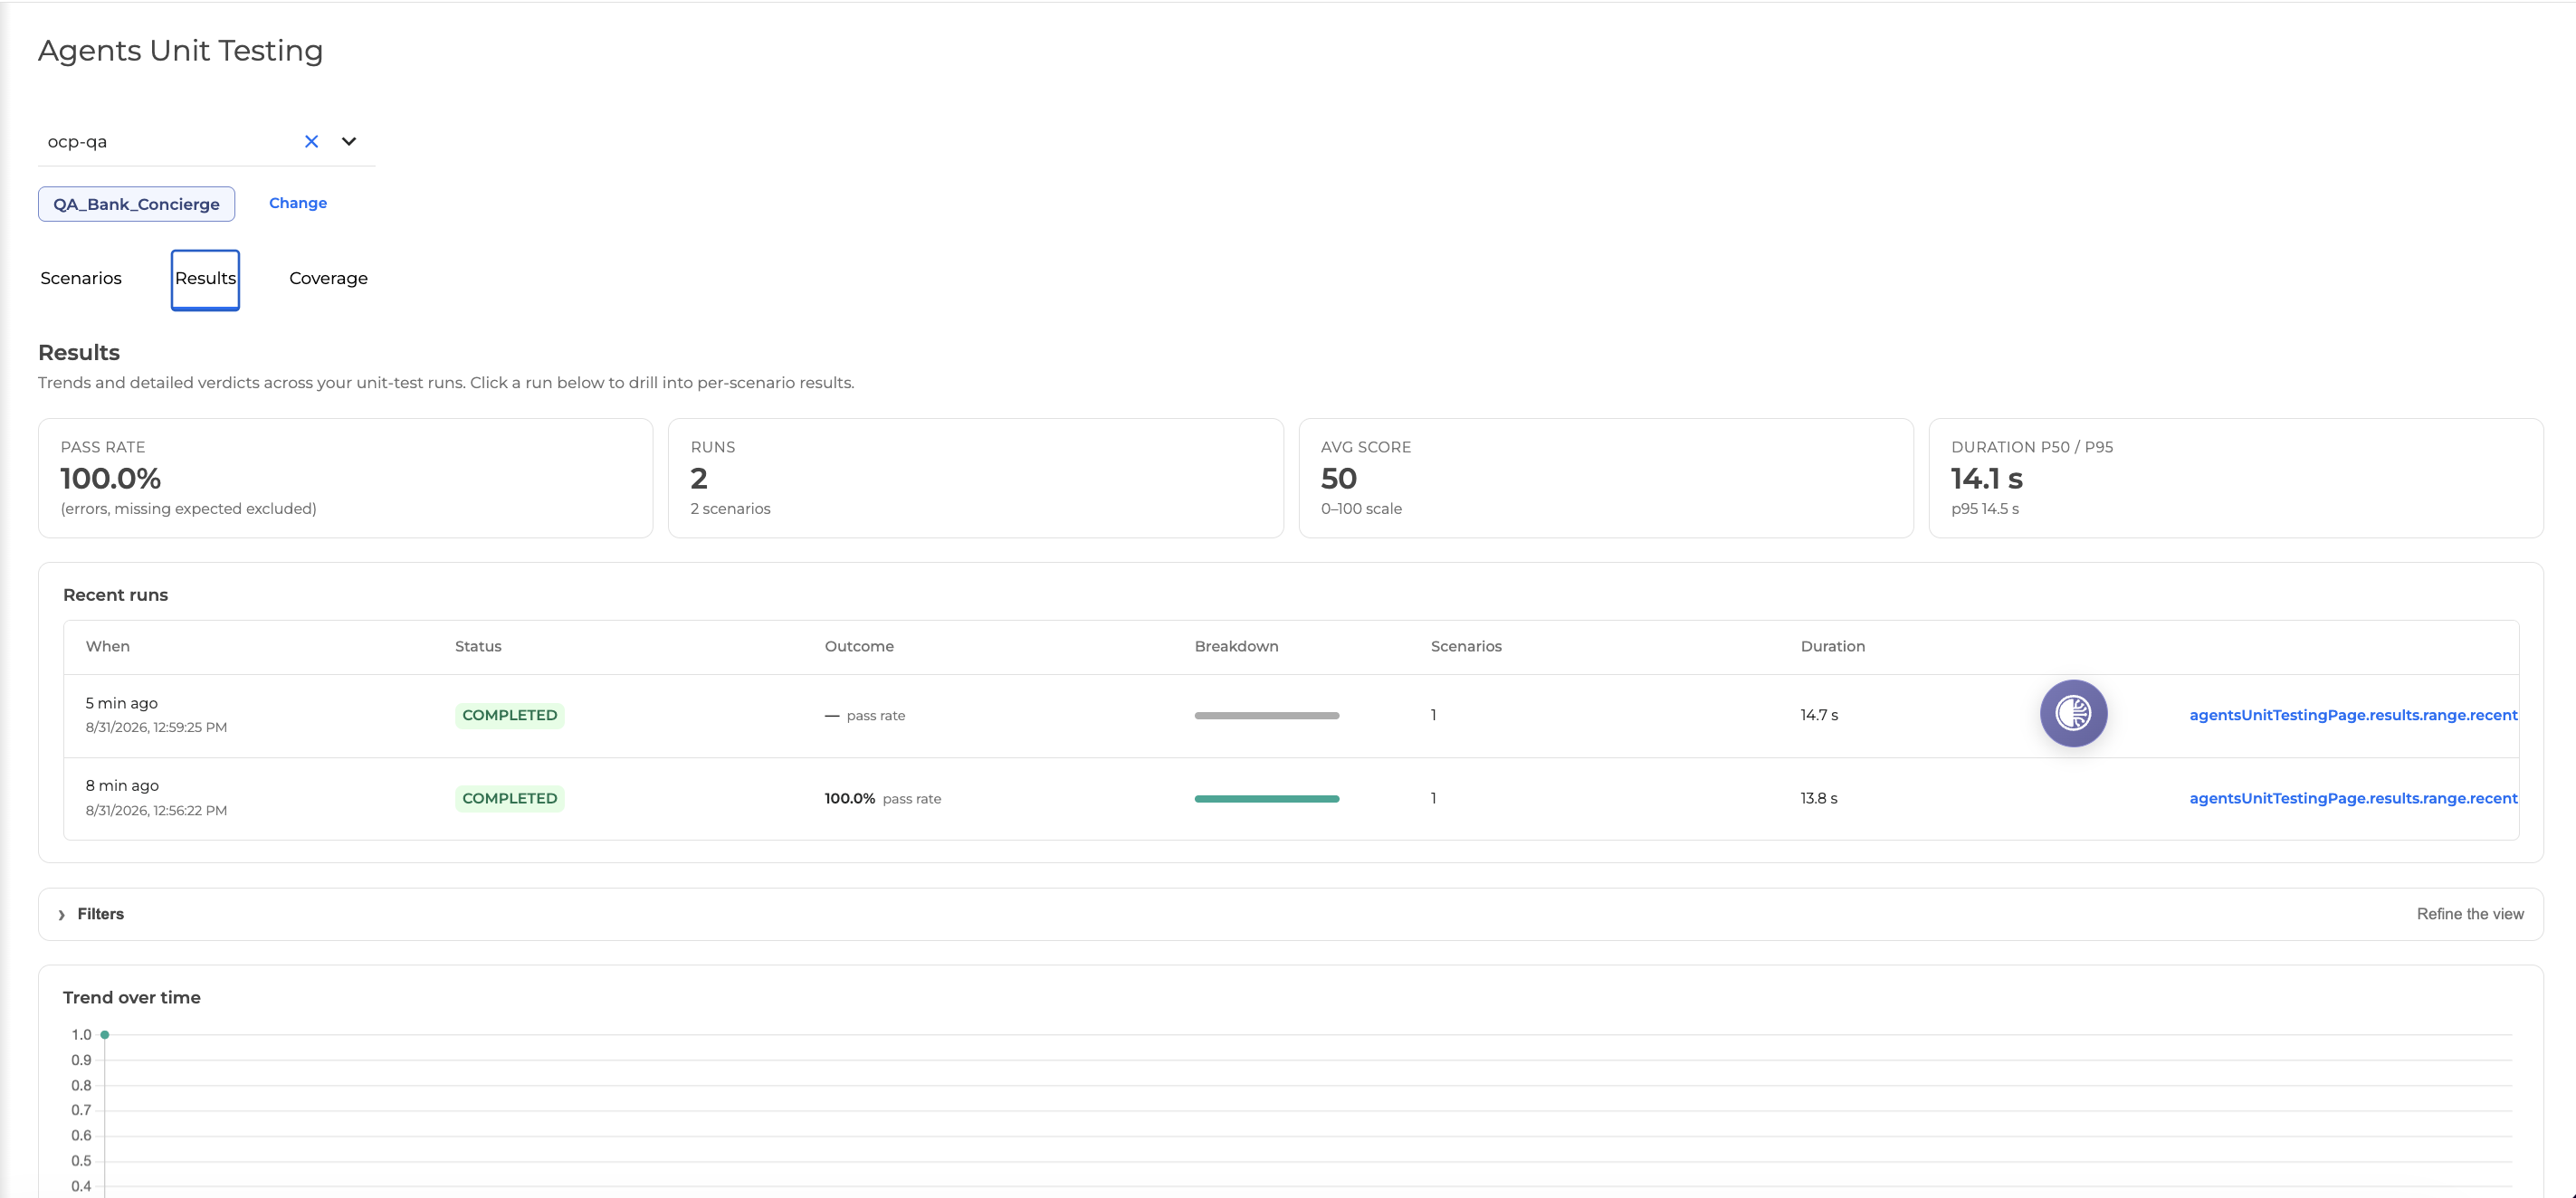
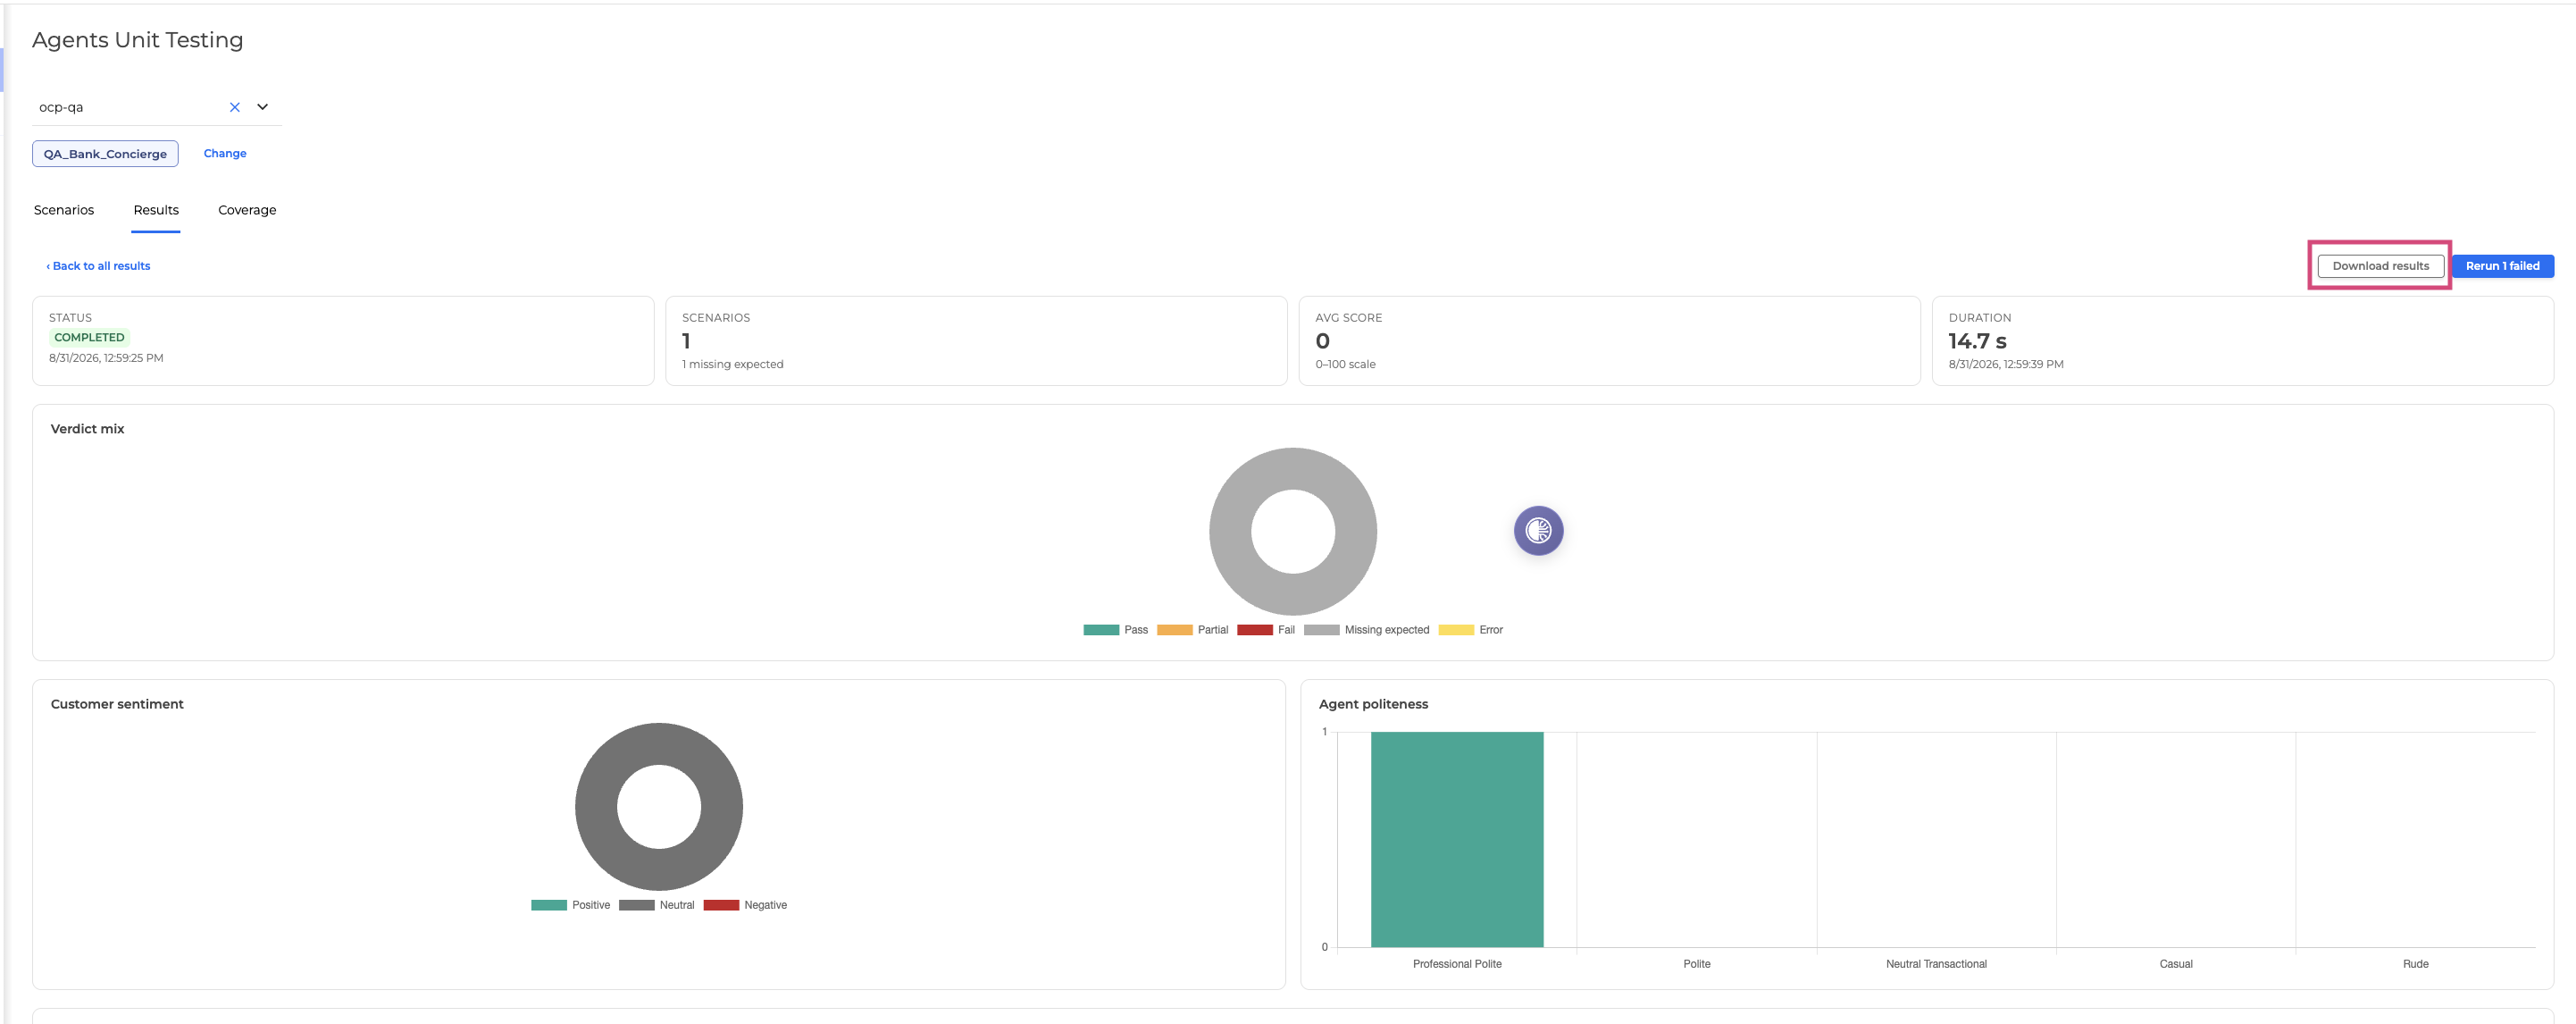
For more details, click on a run. Click Download results to download the run results.
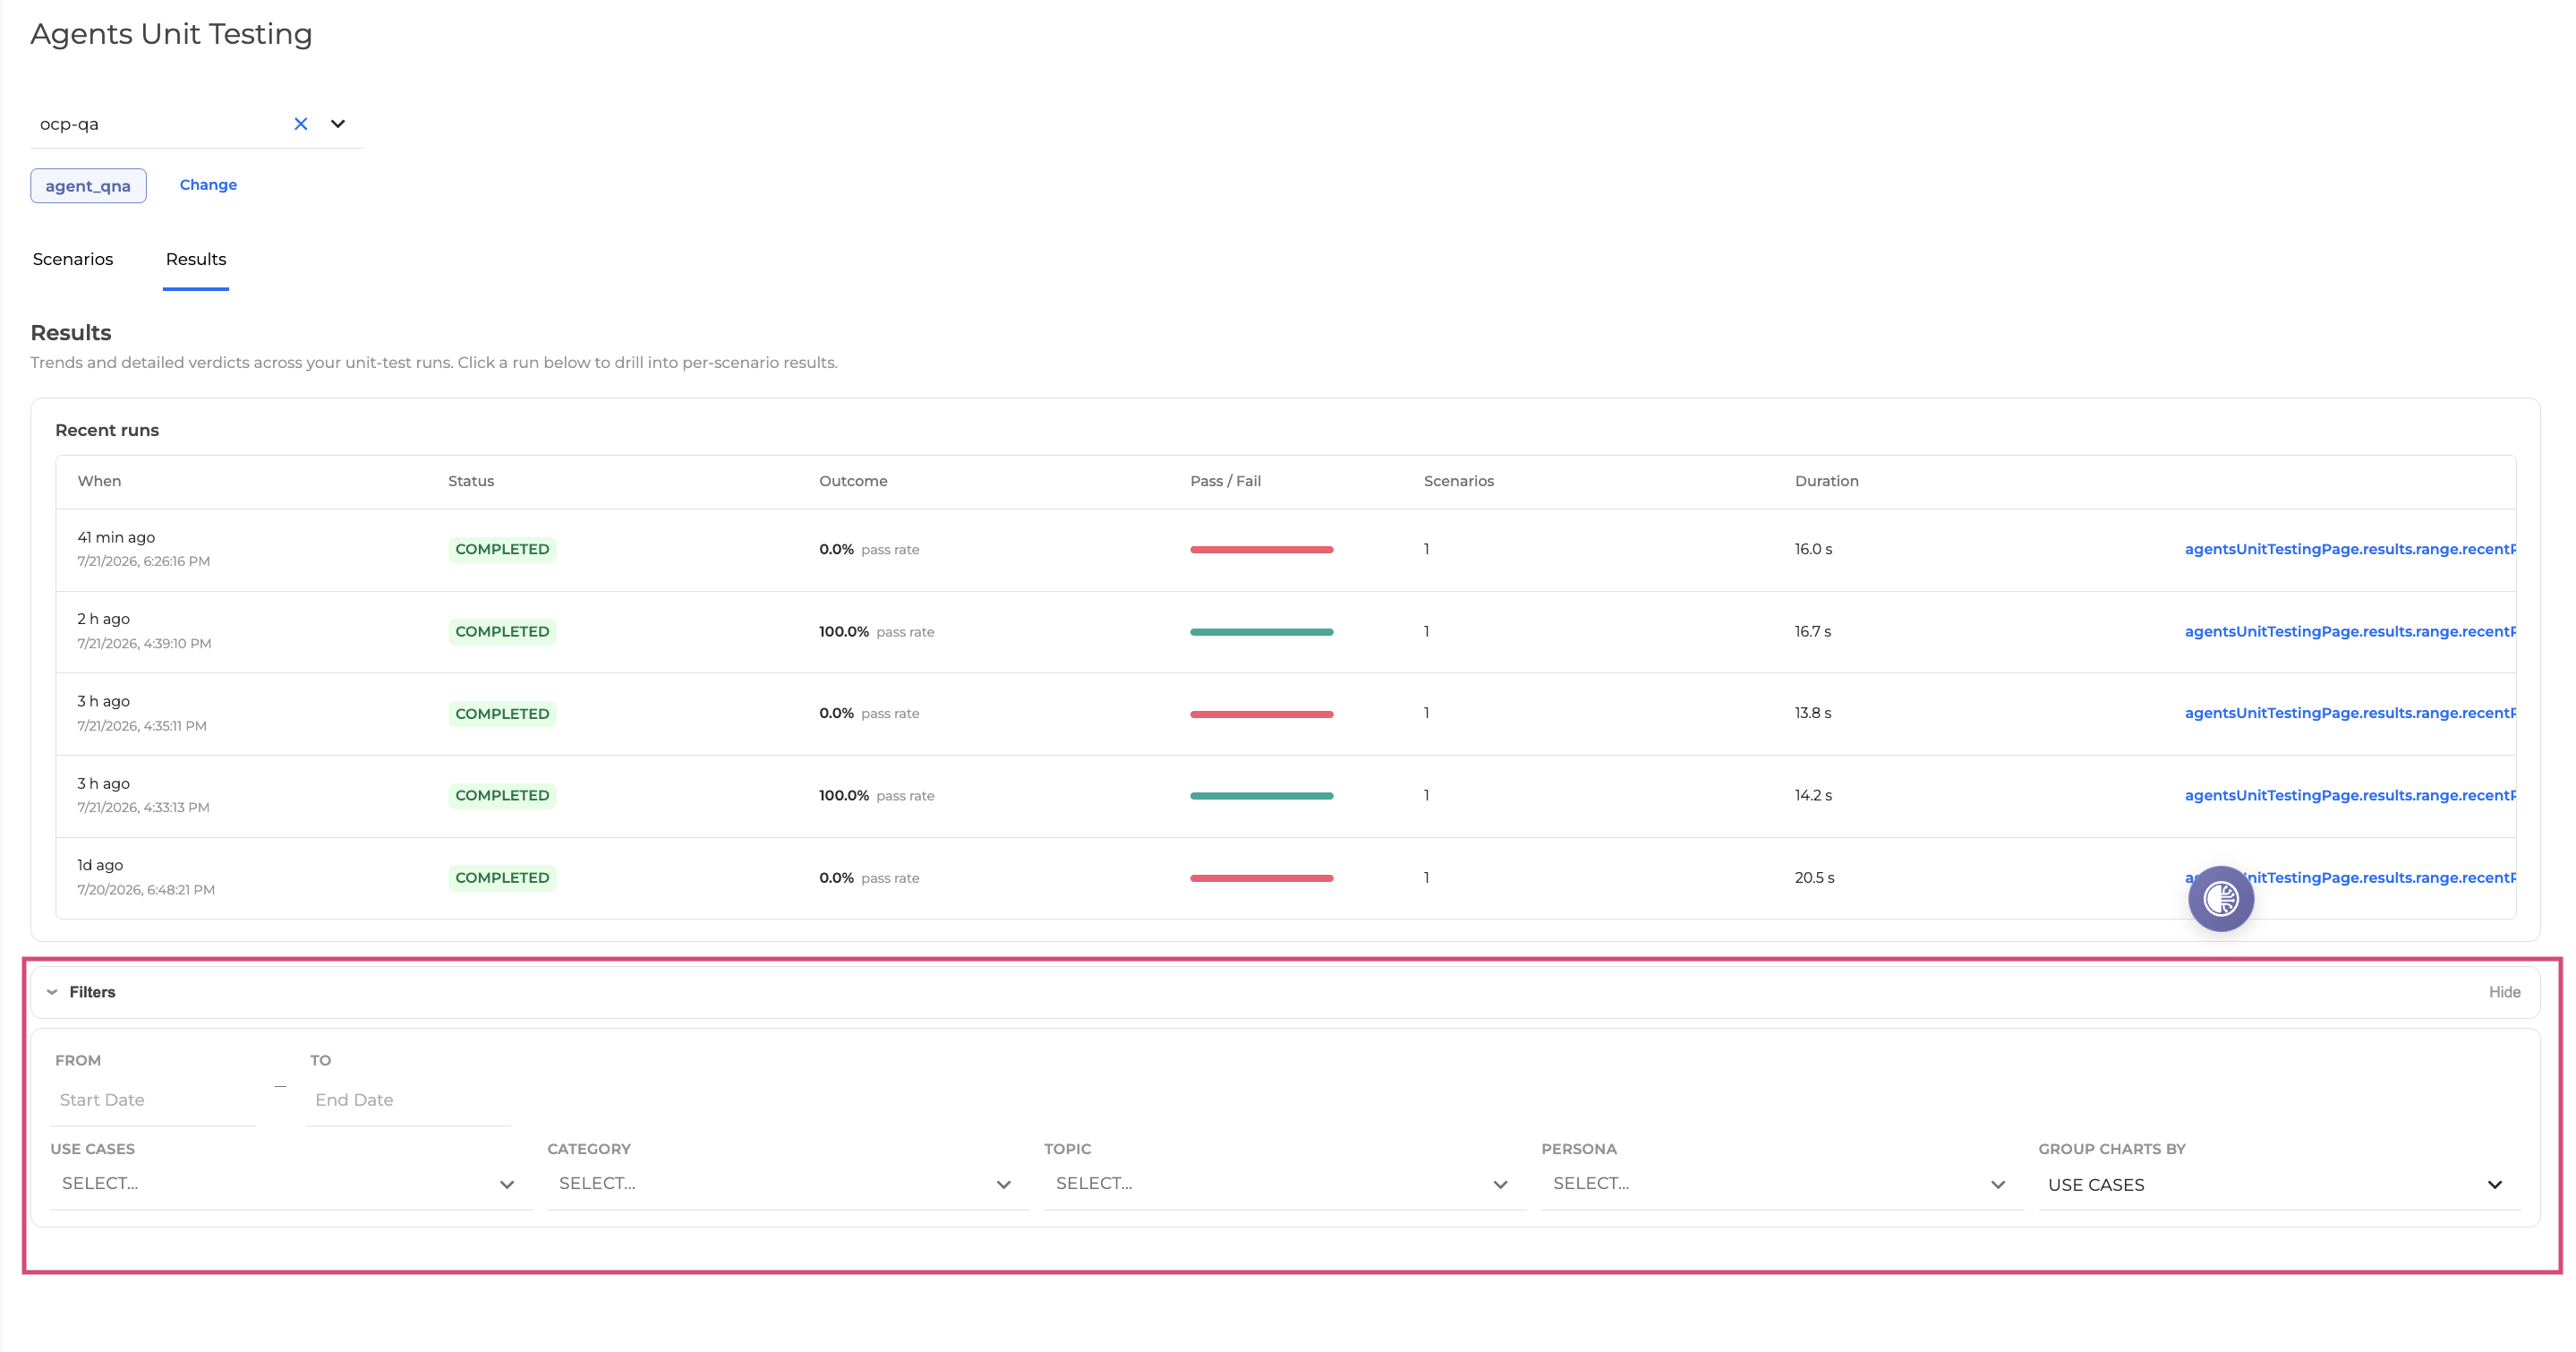
Use filters to search across the run history.
Edit a Scenario
To edit an existing scenario, follow the steps below:
-
Locate the scenario you want to edit, then click it to open it.
-
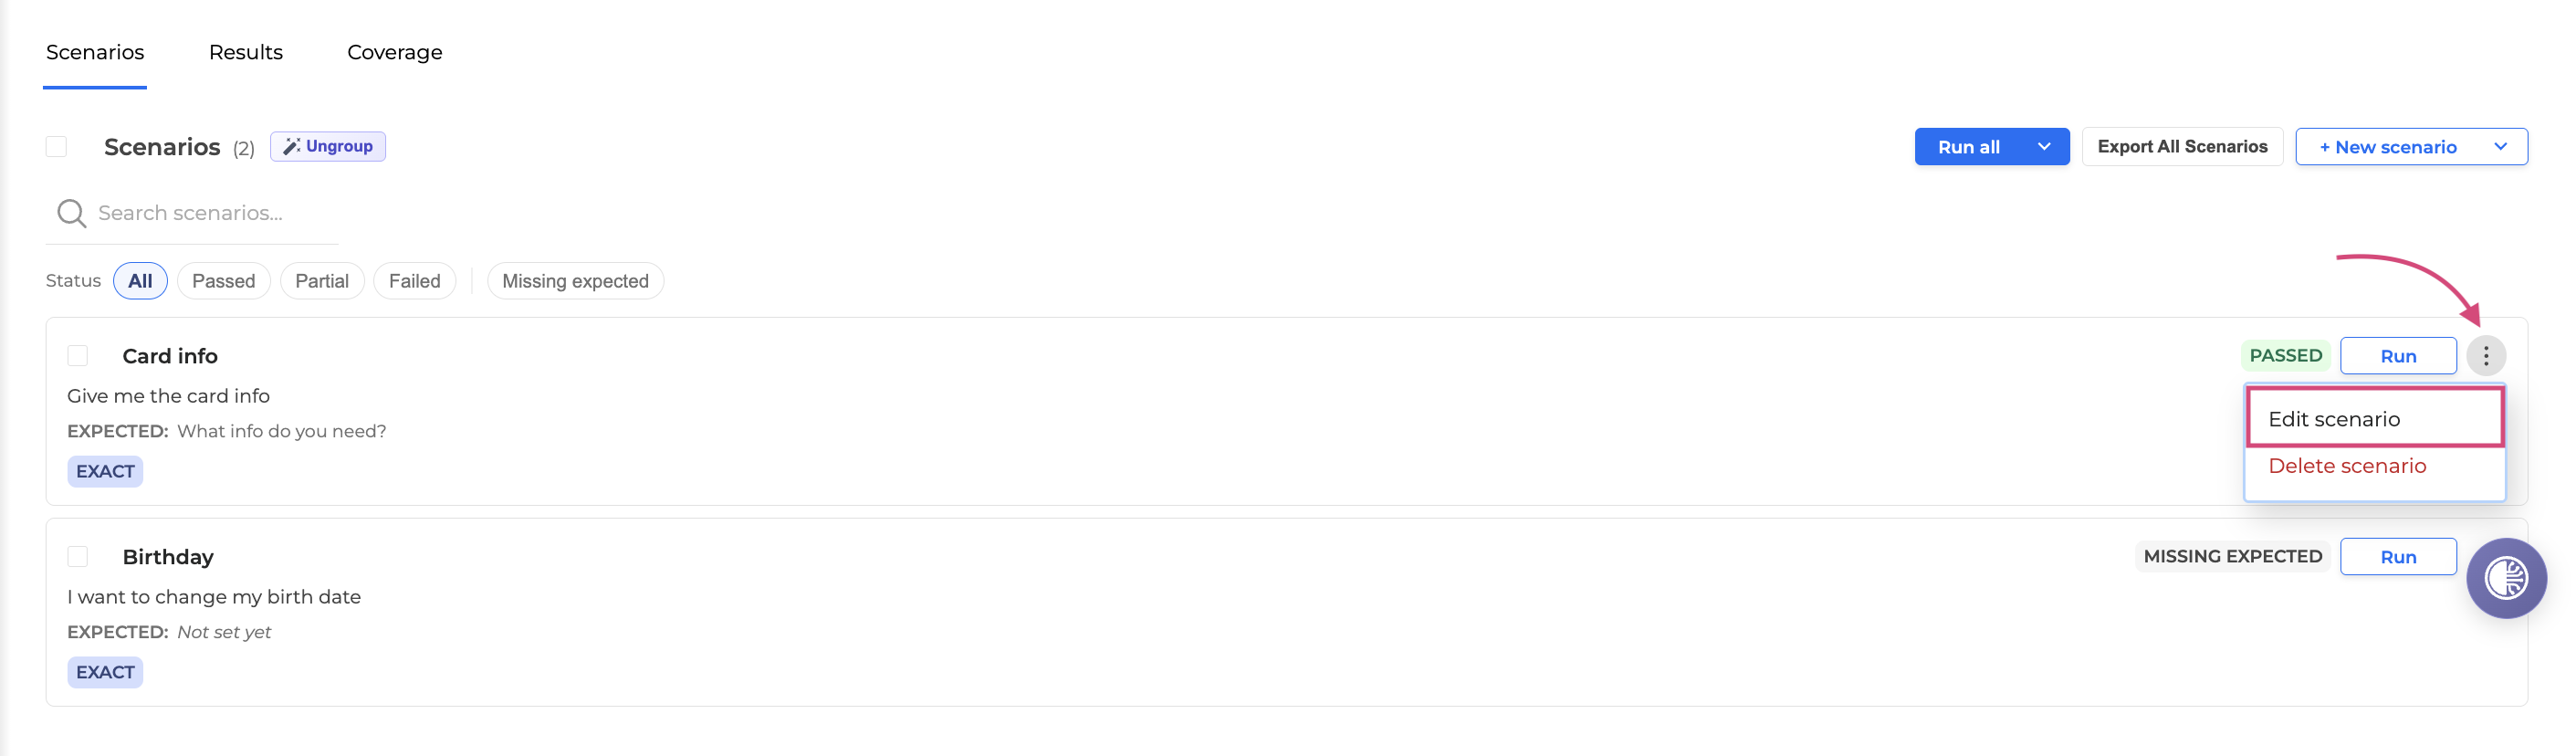
Click the Options menu → Edit scenario.
-
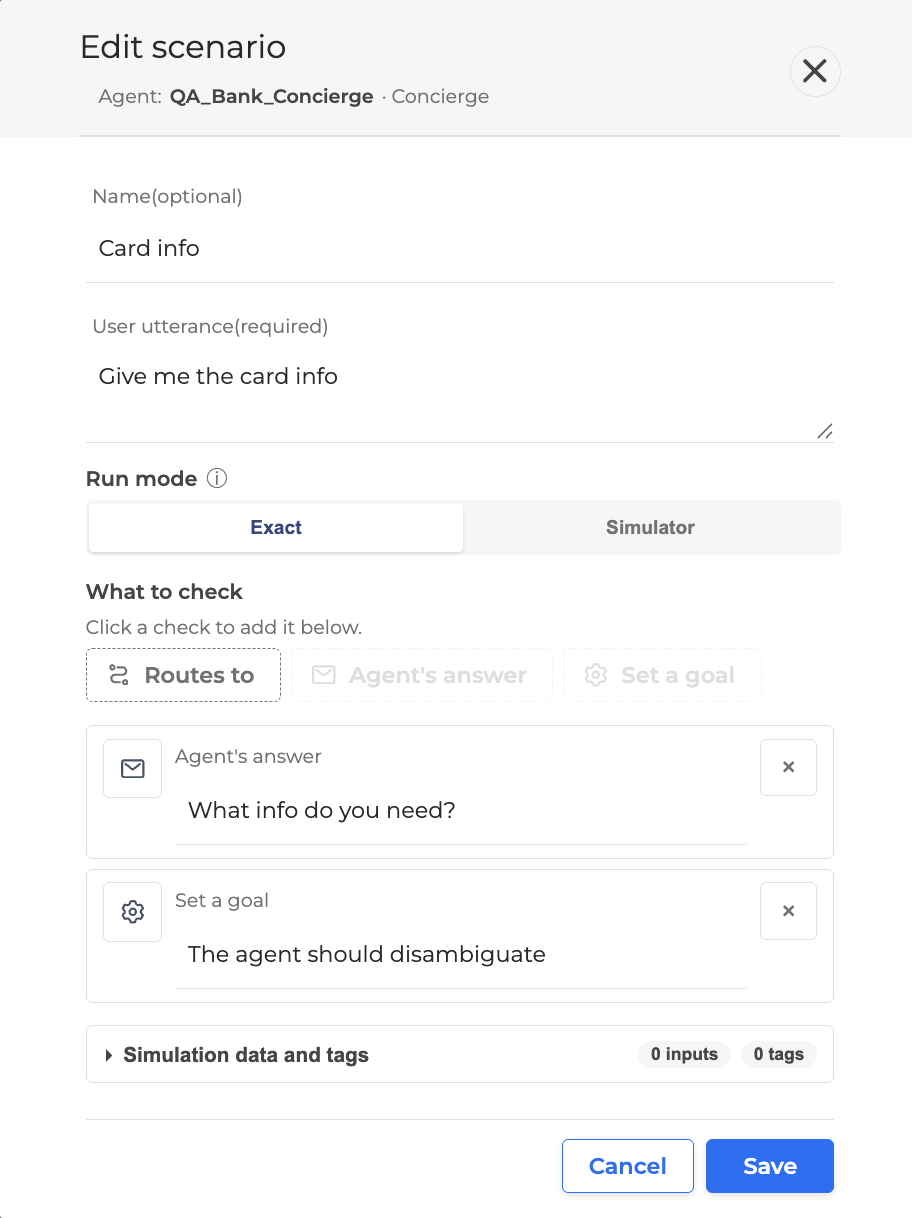
Update the fields as needed. The available fields depend on the agent type, as described in Create a Scenario.
-
Click Save to apply your changes, or Cancel to discard them.
Editing a scenario does not automatically rerun it. Click Run to validate your changes against the updated scenario.
Group / Ungroup the Scenarios
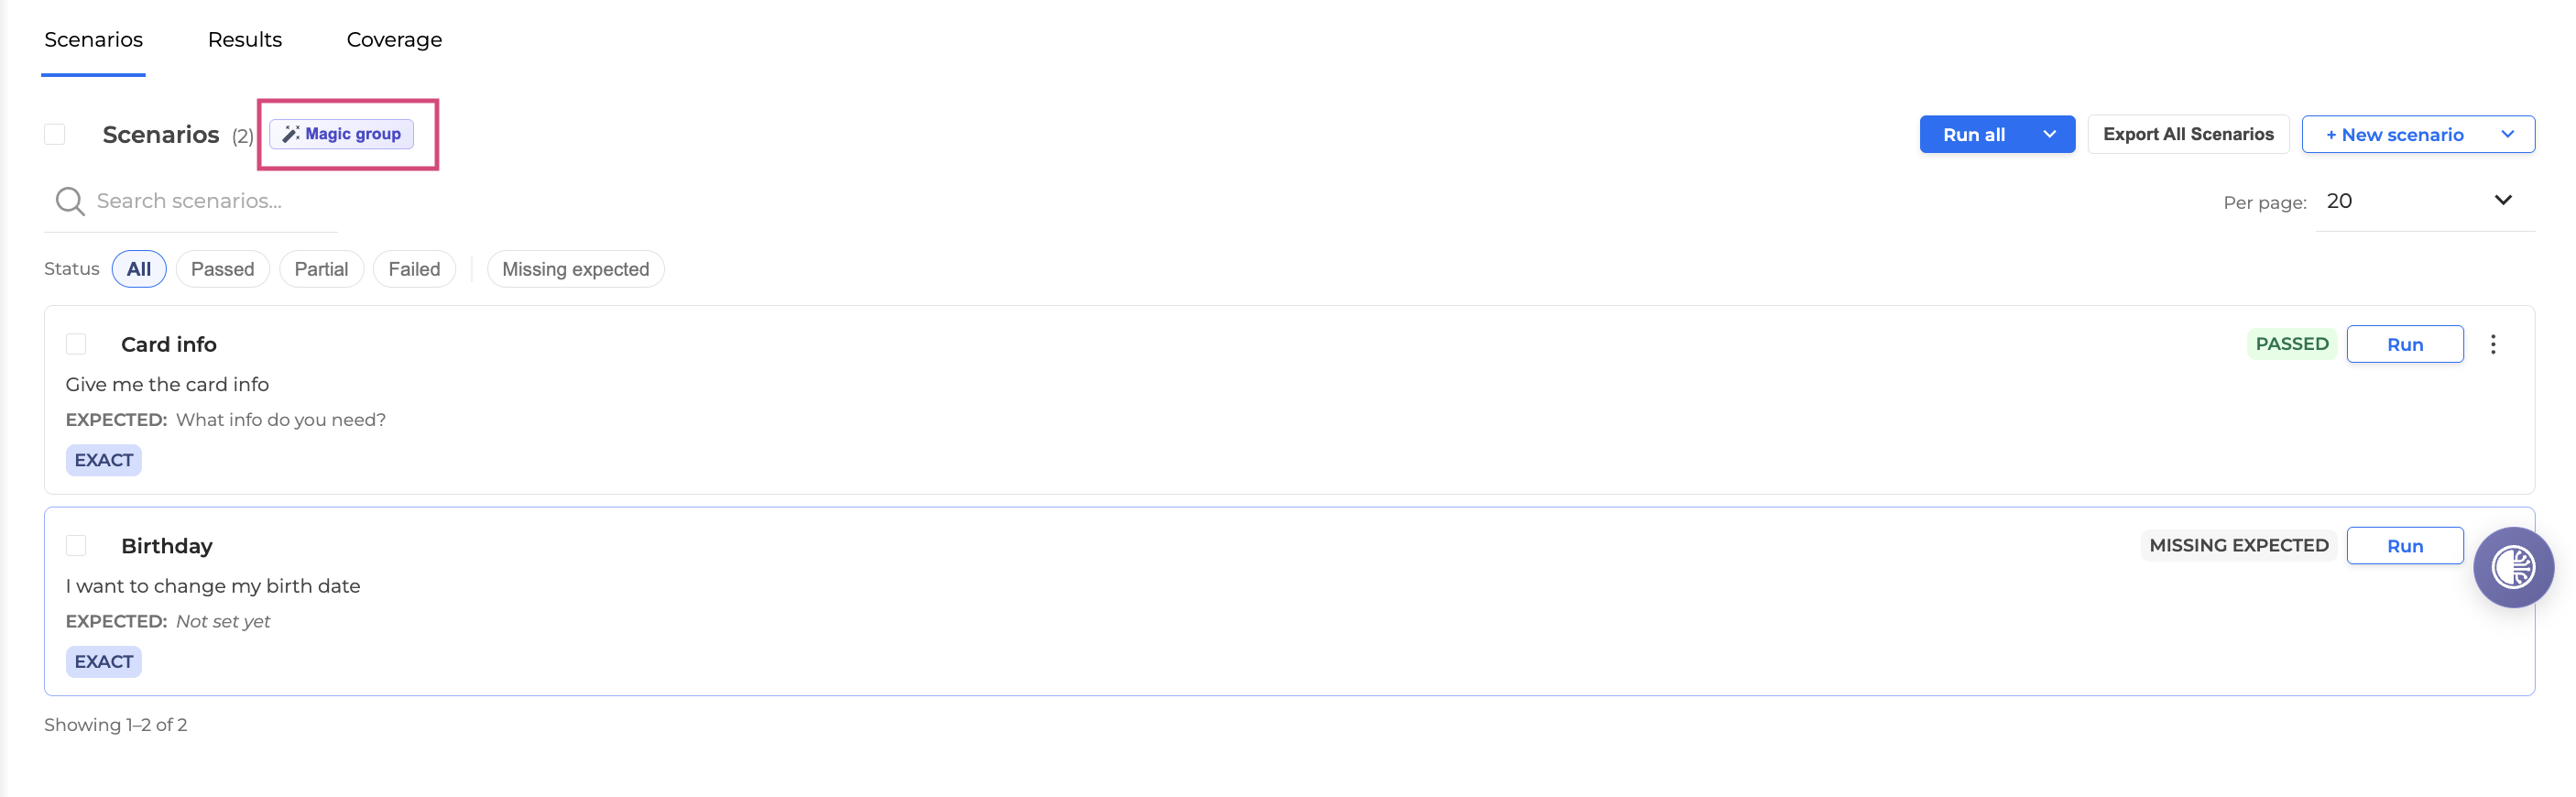
If multiple scenarios exist, the LLM groups them logically for easier management. You can run the whole group at once.
-
To view scenarios as a list, click the Ungroup button.

-
To regroup the scenarios, click the Magic group button.
Search for a Scenario
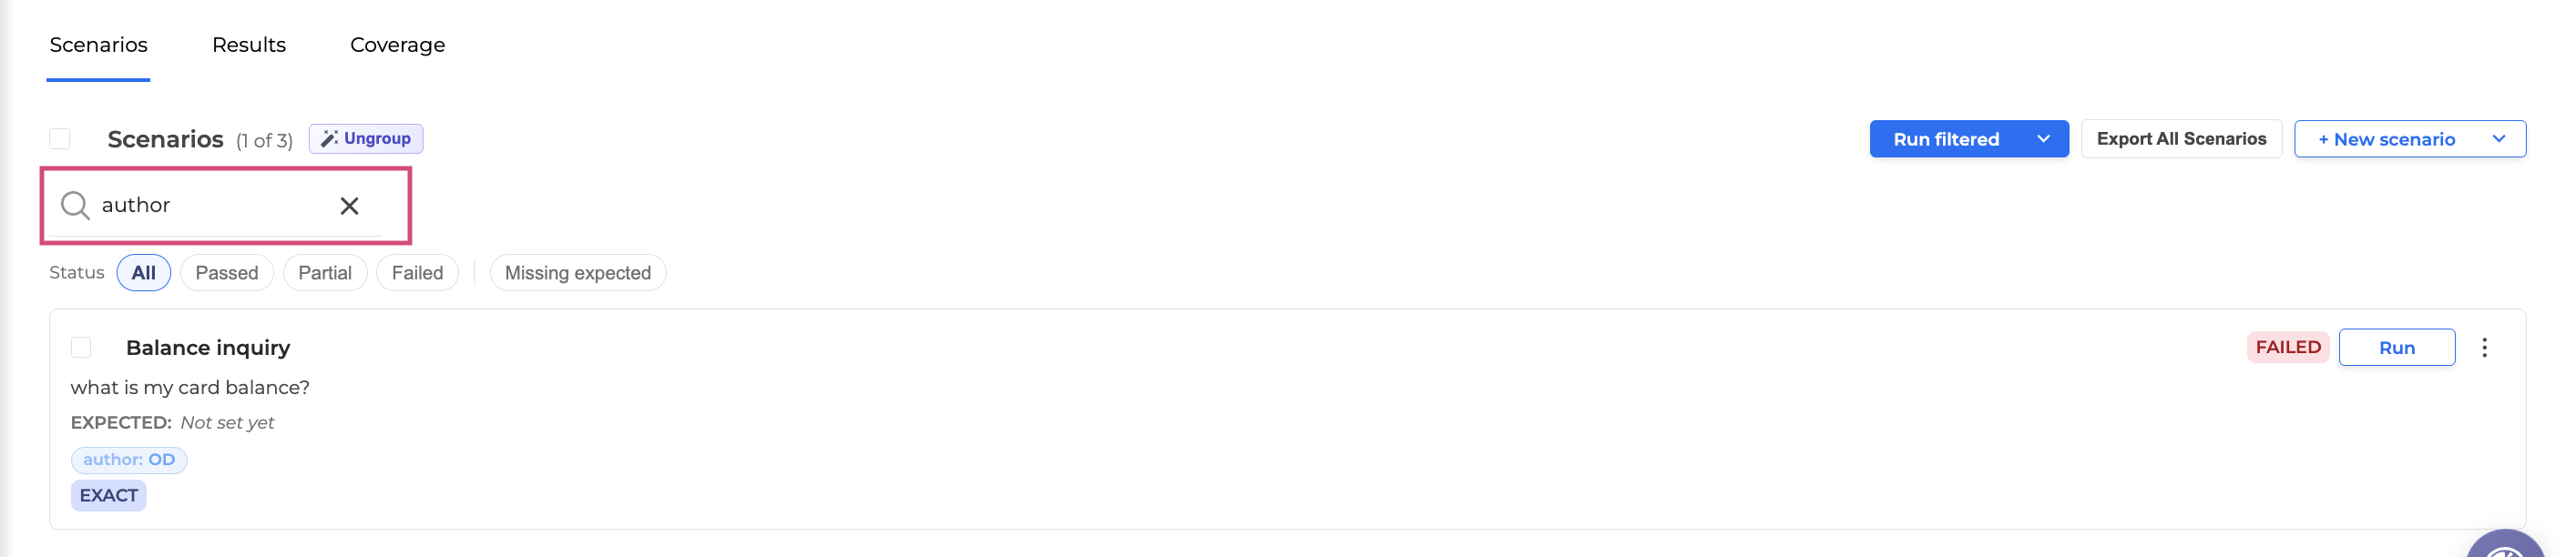
To find a specific scenario, use the Search field at the top of the Agents Unit Testing tab.
-
Enter a keyword matching the scenario name, tag, utterance (even a partial match), or an Input value.
-
The list filters in real time as you type.
-
Click the X icon to return to the full scenario list.
Search works within the currently selected agent and group. To search across a different agent, select it first as described in Create a Scenario.
Export Scenarios
You can export run results as CSV and re-import them as scenarios. This lets you build and maintain scenarios in bulk without losing data on the round trip, and review exactly what will change before overwriting anything.
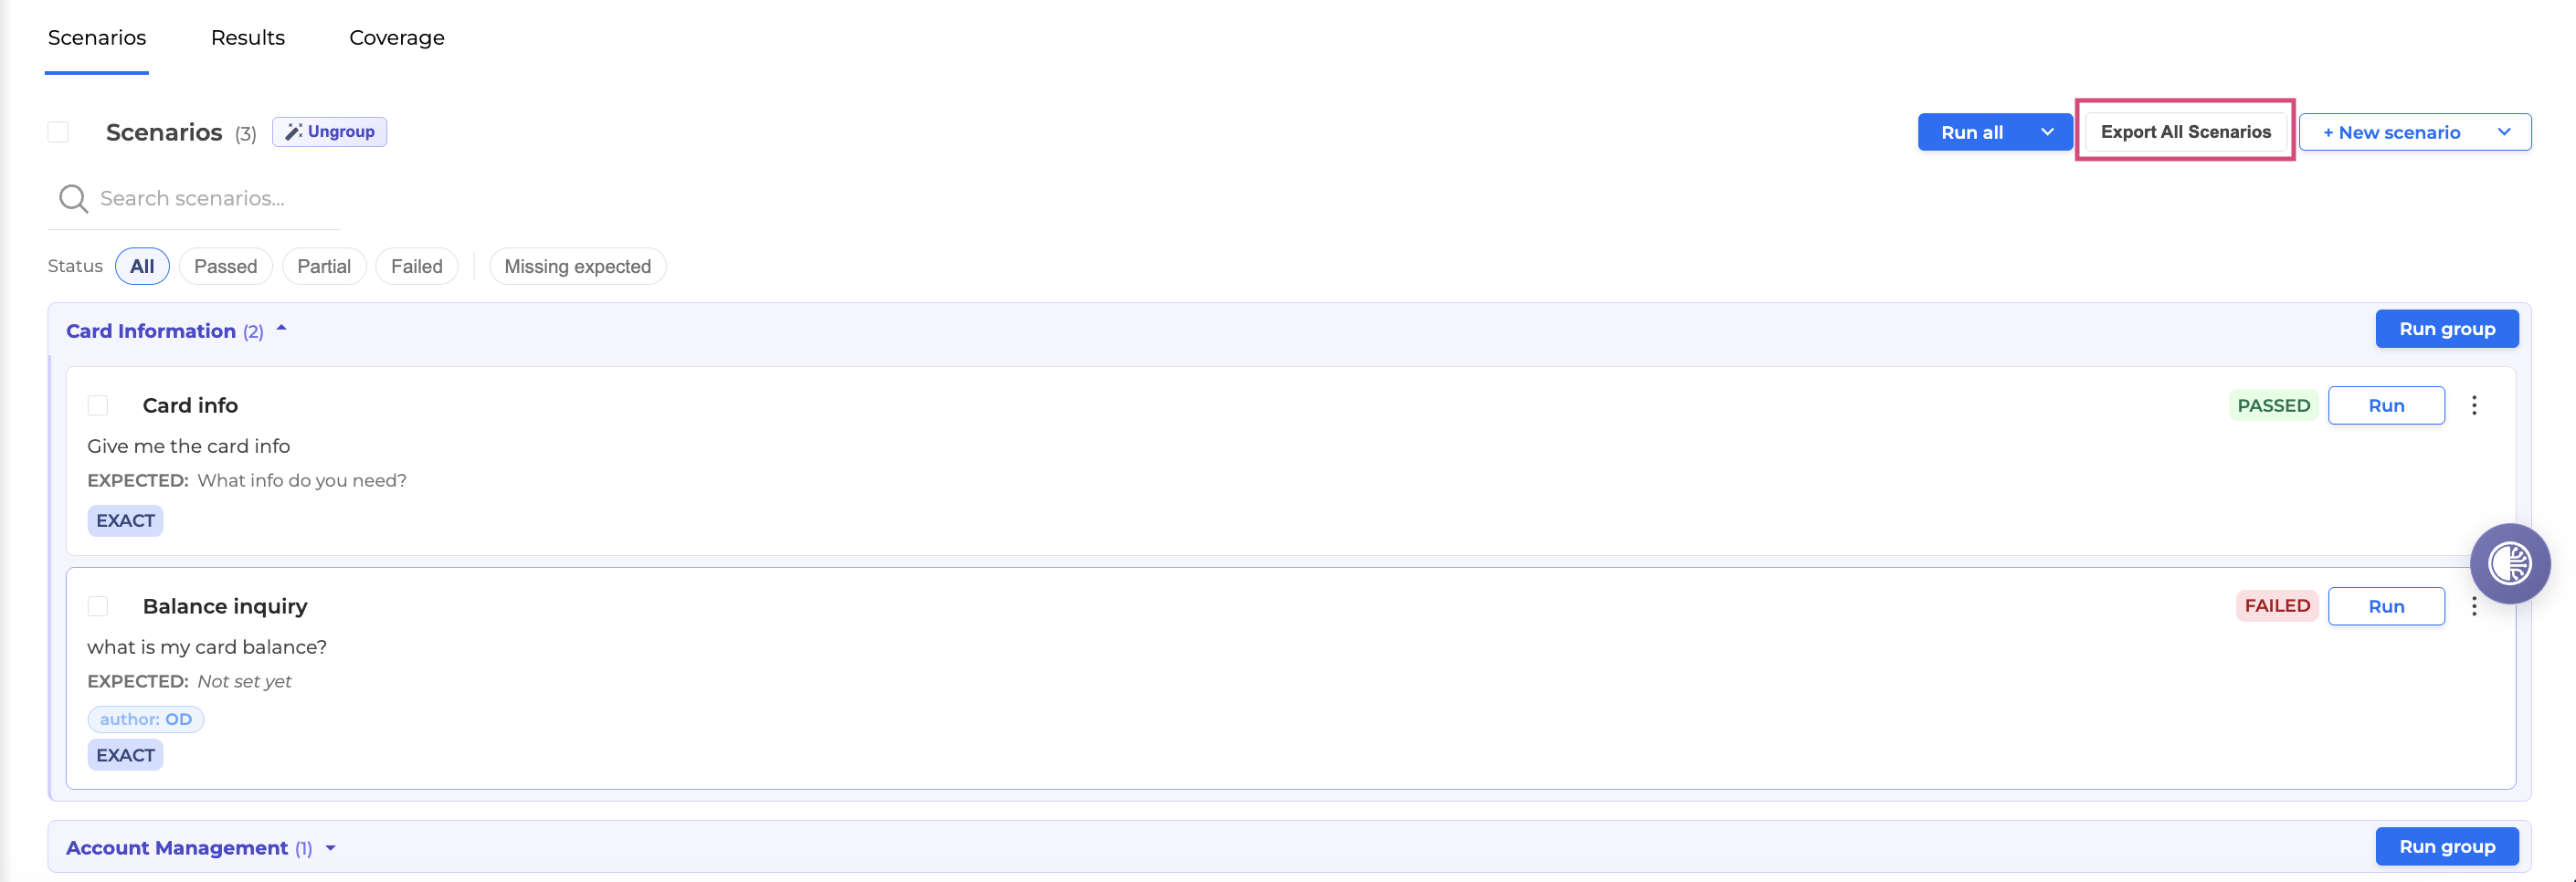
To export run results, click the Export All Scenarios button. The file will download automatically.
Depending on the Agent type, the exported file will contain the following columns:
-
QnA: name, utterance, expected answer, expected goal, inputs, tags
-
Concierge: name, utterance, expected route, expected answer, expected goal, inputs, tags
Import Scenarios
To import the result as a scenario, follow these steps:
-
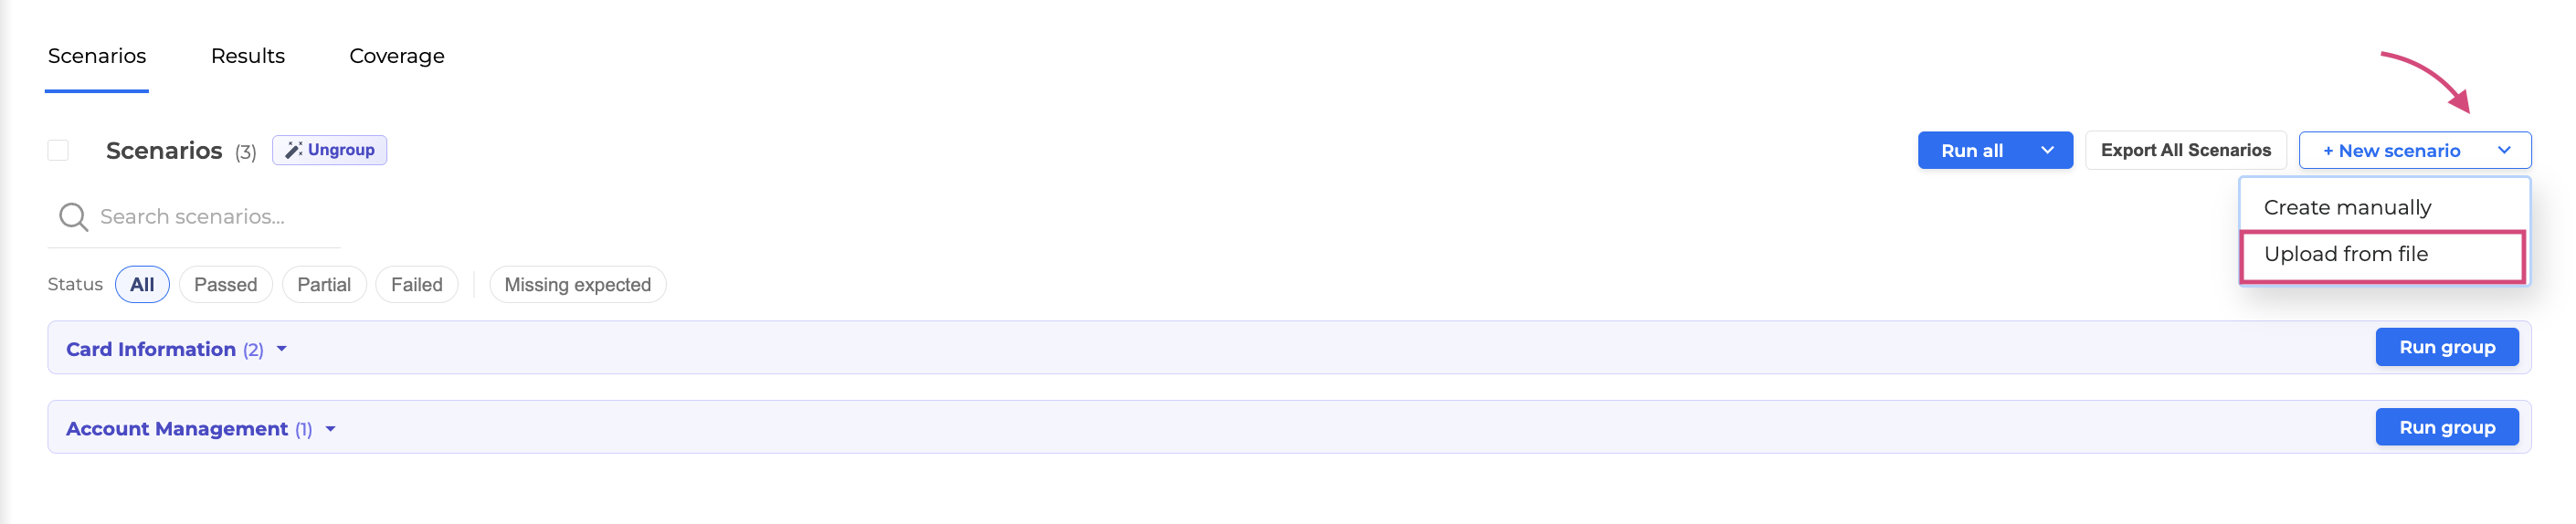
Click + New Scenario → Upload from file.
-
Select a CSV or XLSX file.
-
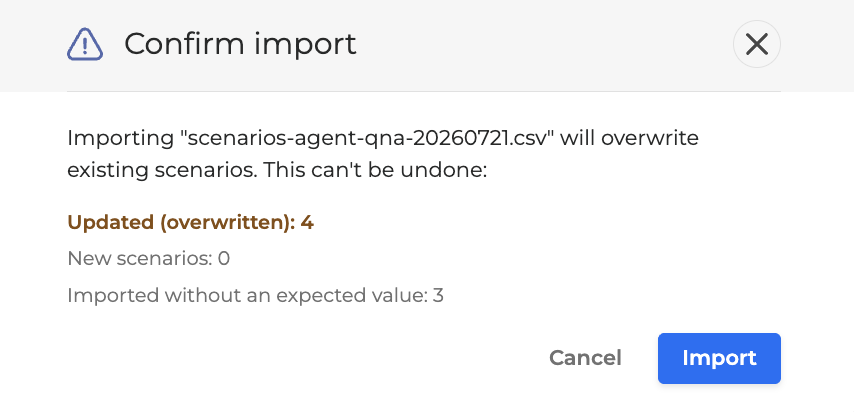
You will see a confirmation before the scenarios are overwritten.
-
Click Import to confirm.
Coverage
The Coverage tab shows how thoroughly your scenarios exercise a Concierge agent's routing destinations, and how those scenarios have performed when run.
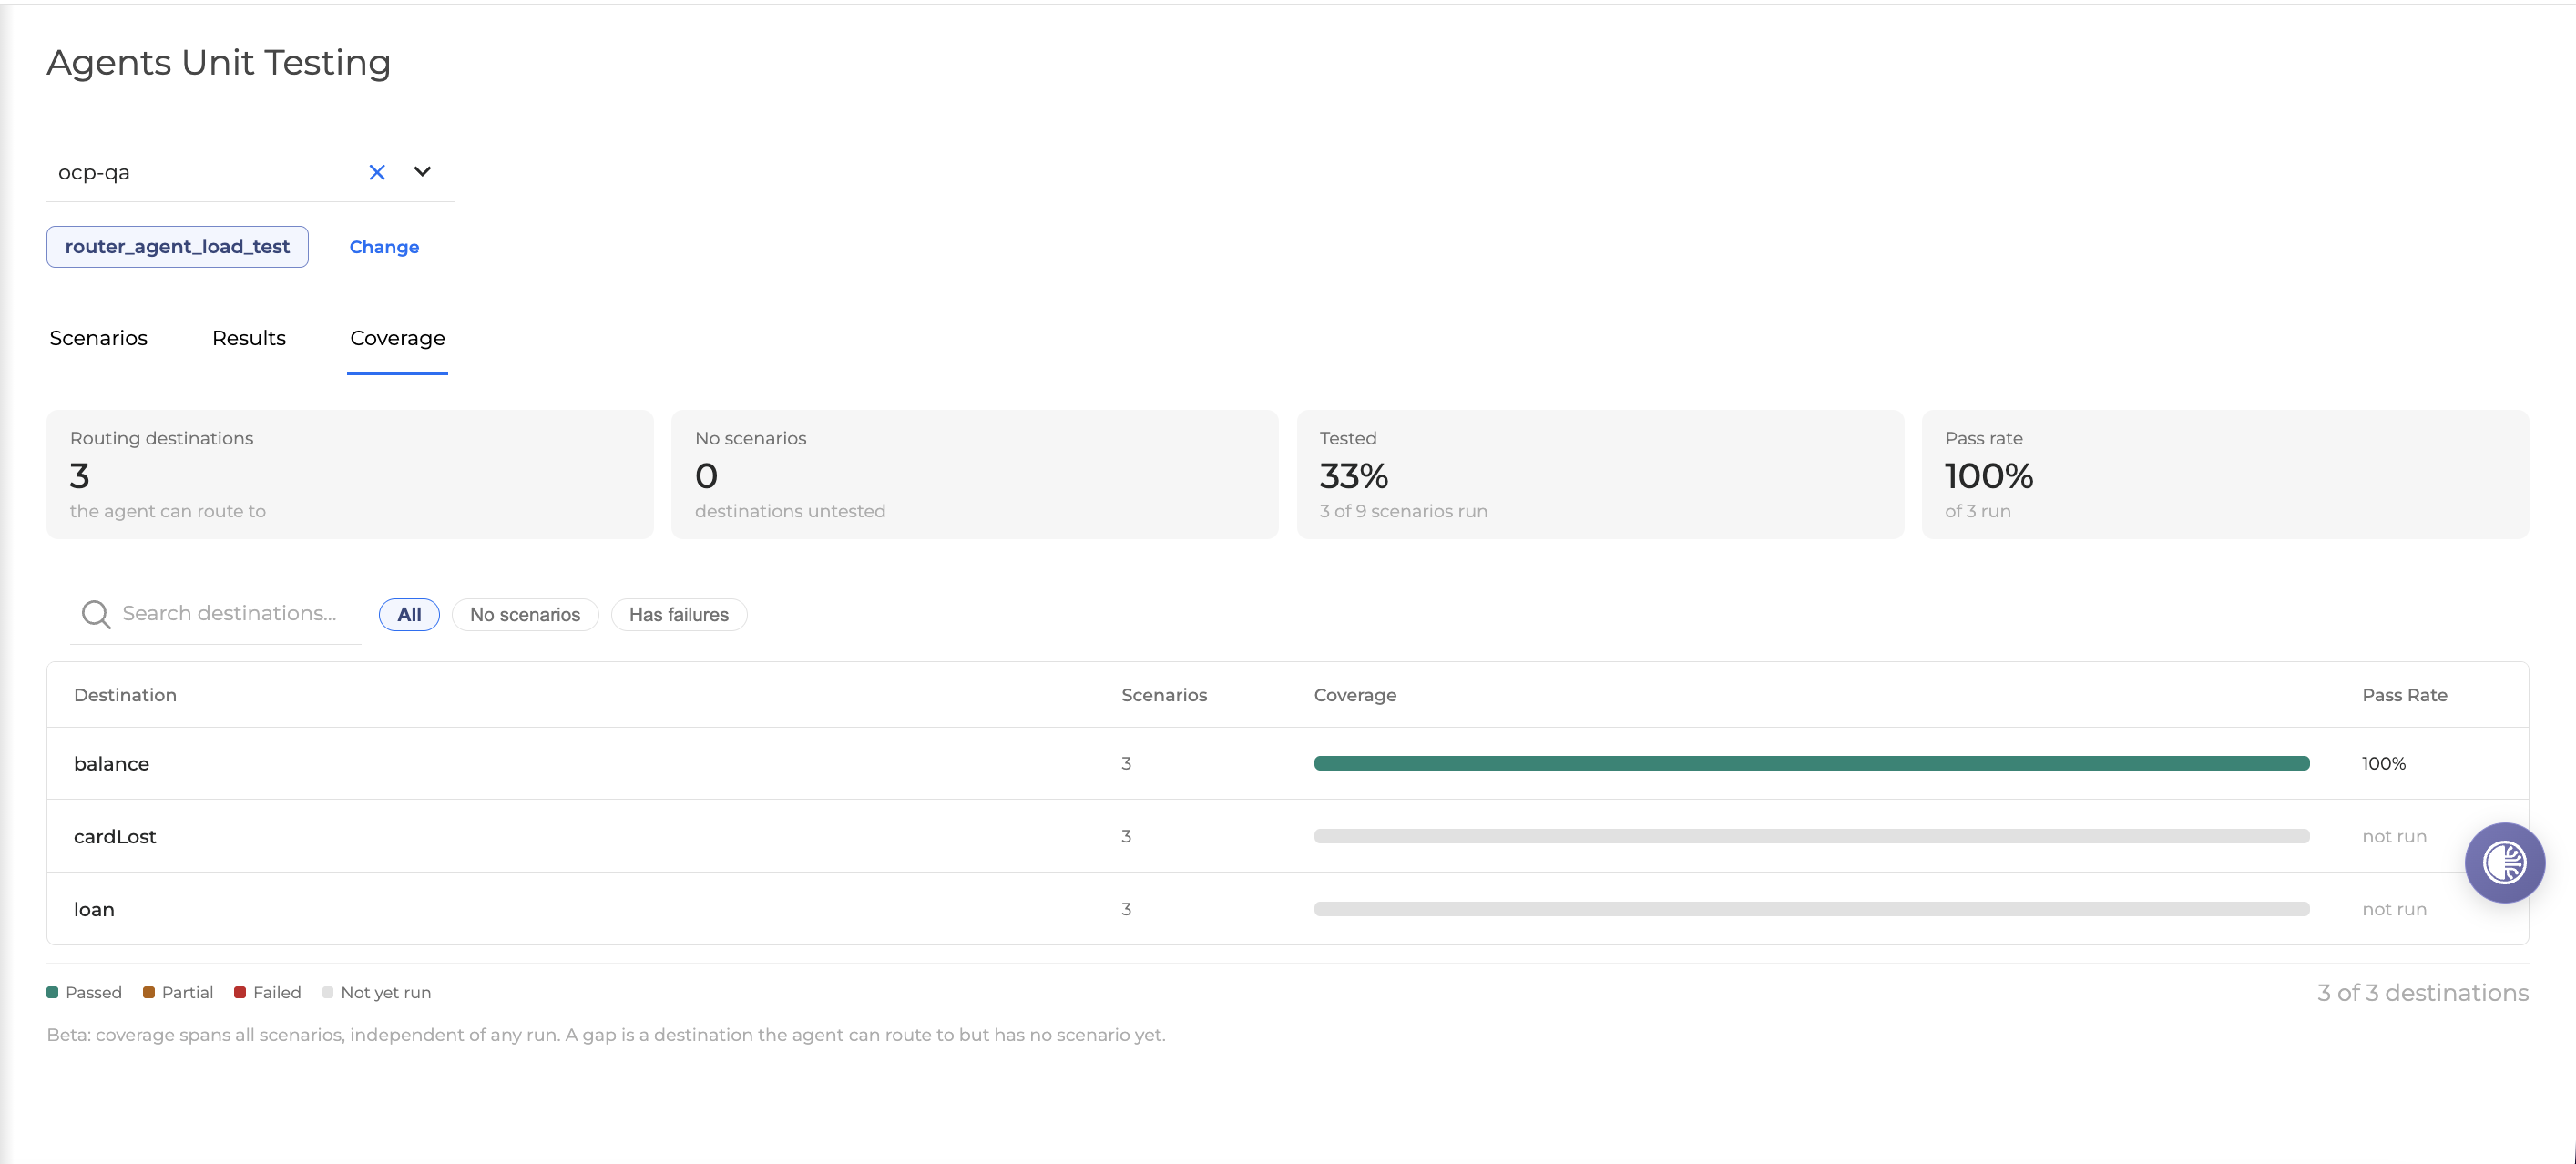
At the top, four summary cards show:

-
Routing destinations: the total number of destinations the agent can route to.
-
No scenarios: how many of those destinations have no scenarios yet.
-
Tested: the percentage and count of scenarios run at least once, out of all scenarios.
-
Pass rate: the percentage of run scenarios that passed.
Below the summary, the destinations table lists each destination with:

-
Scenarios: the number of scenarios covering that destination.
-
Coverage: a bar showing the pass/fail breakdown of that destination's scenarios (Passed, Partial, Failed, Not yet run).
-
Pass Rate: the pass rate for that destination, or not run if none of its scenarios have been executed yet.
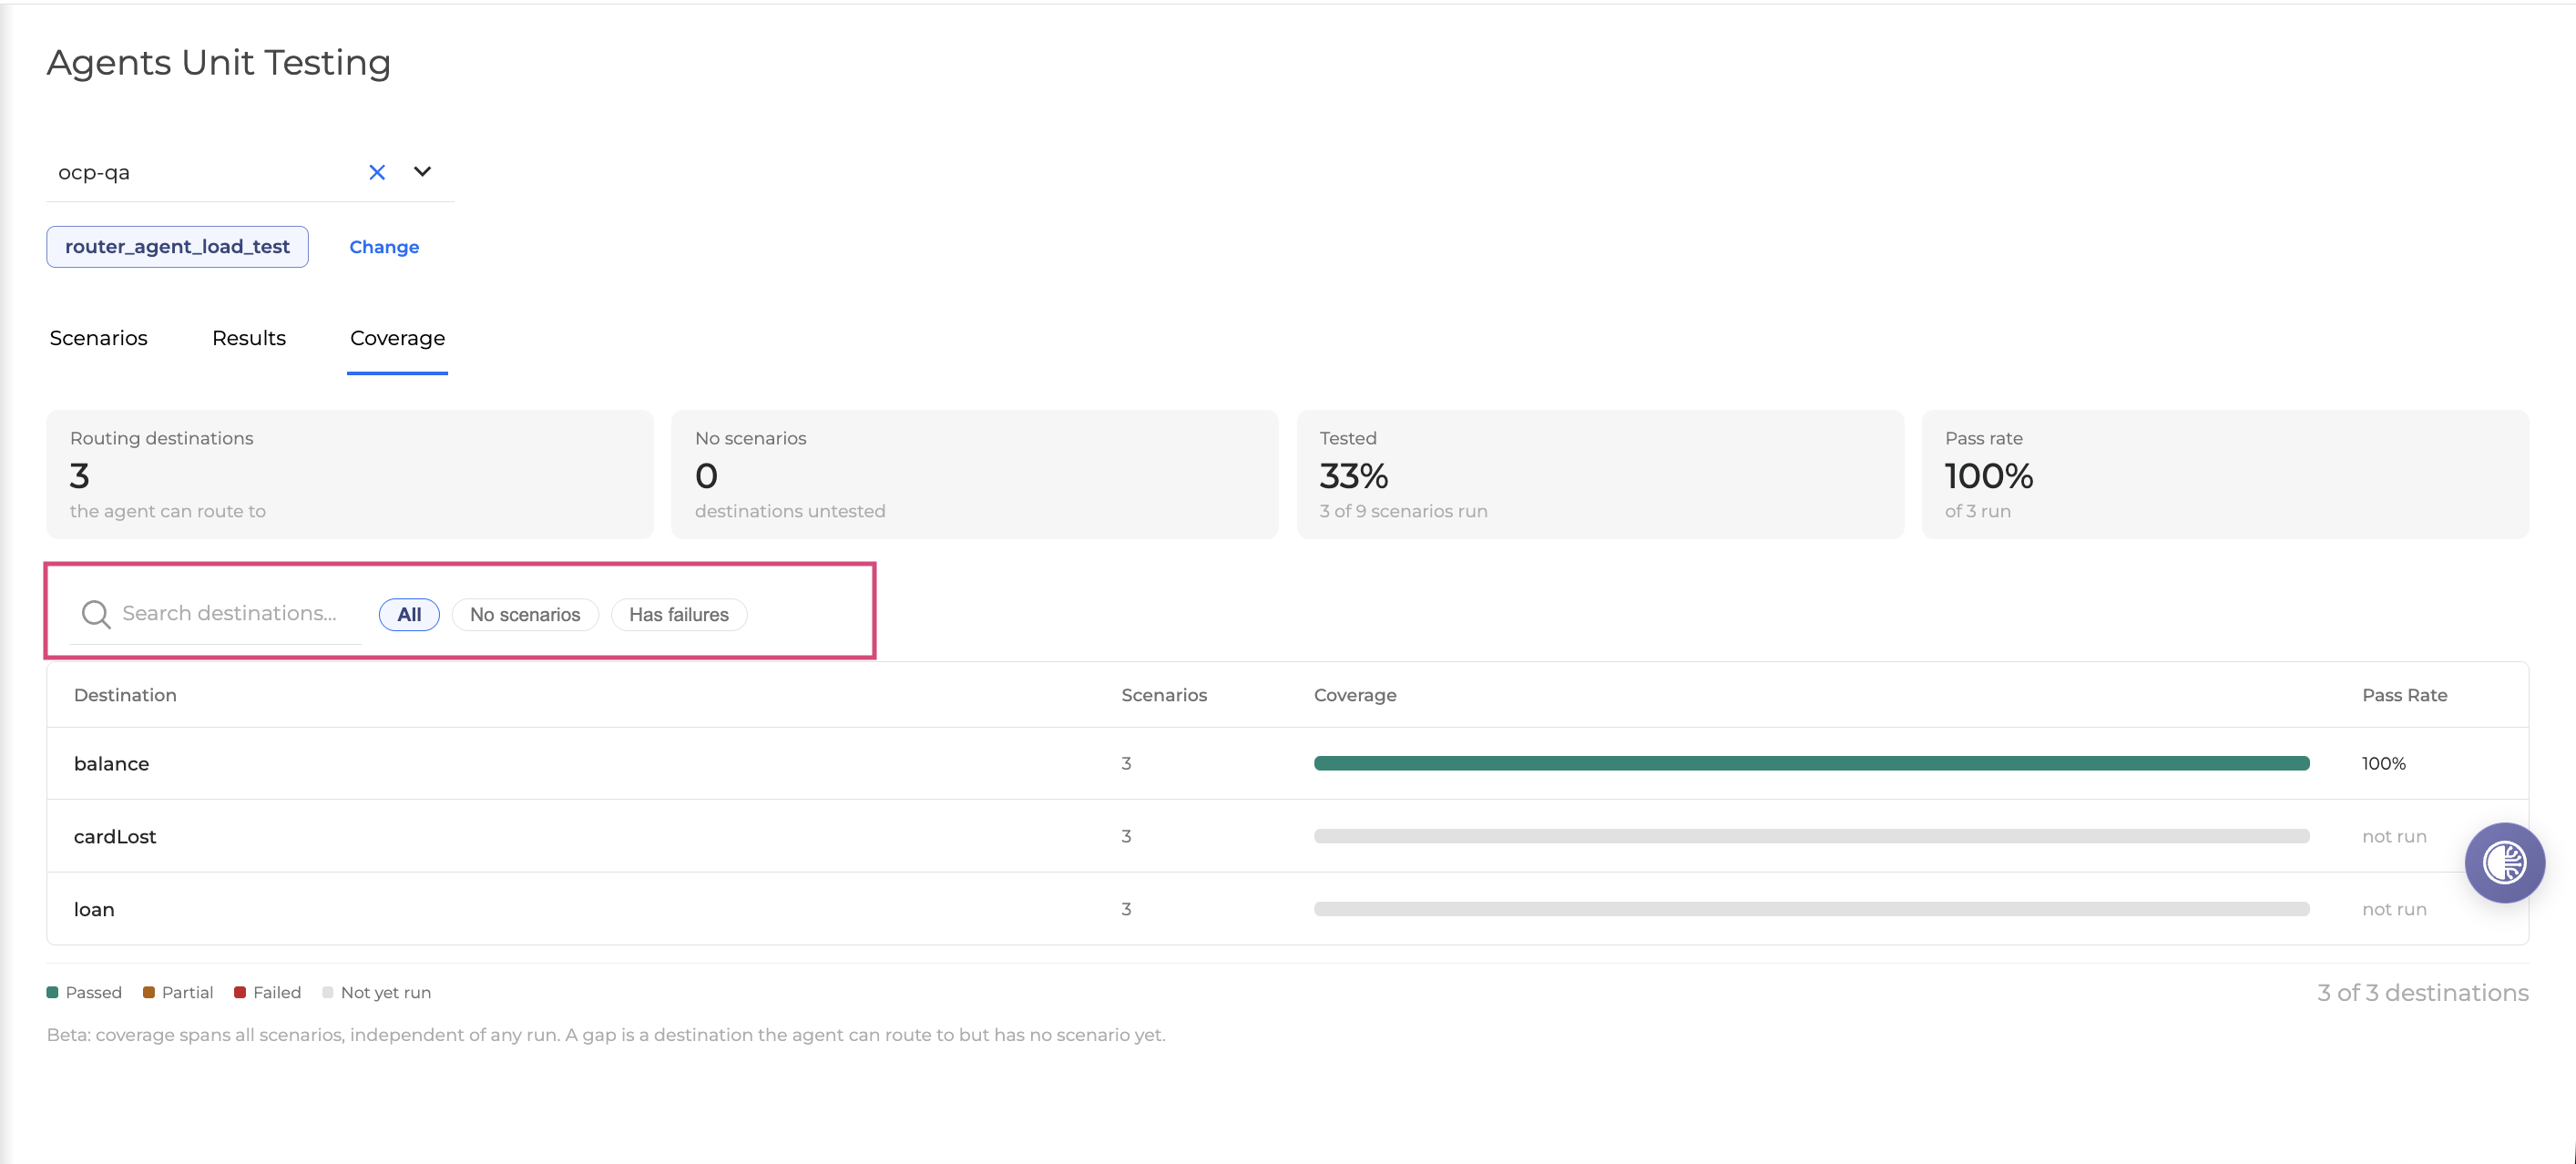
Use the Search field or the All / No scenarios / Has failures filters to narrow the list - for example, to quickly find destinations that still need scenarios or that have failing runs.
Coverage spans all scenarios regardless of when they were run. A gap means a destination the agent can route to has no scenario written for it yet.
Auto-generate Scenarios
For Concierge agents, the Auto-generate feature pulls the agent's routing destinations directly from the Orchestrator application and generates caller utterances for each one, so you can build test coverage without writing every scenario by hand.
To auto-generate scenarios:
-
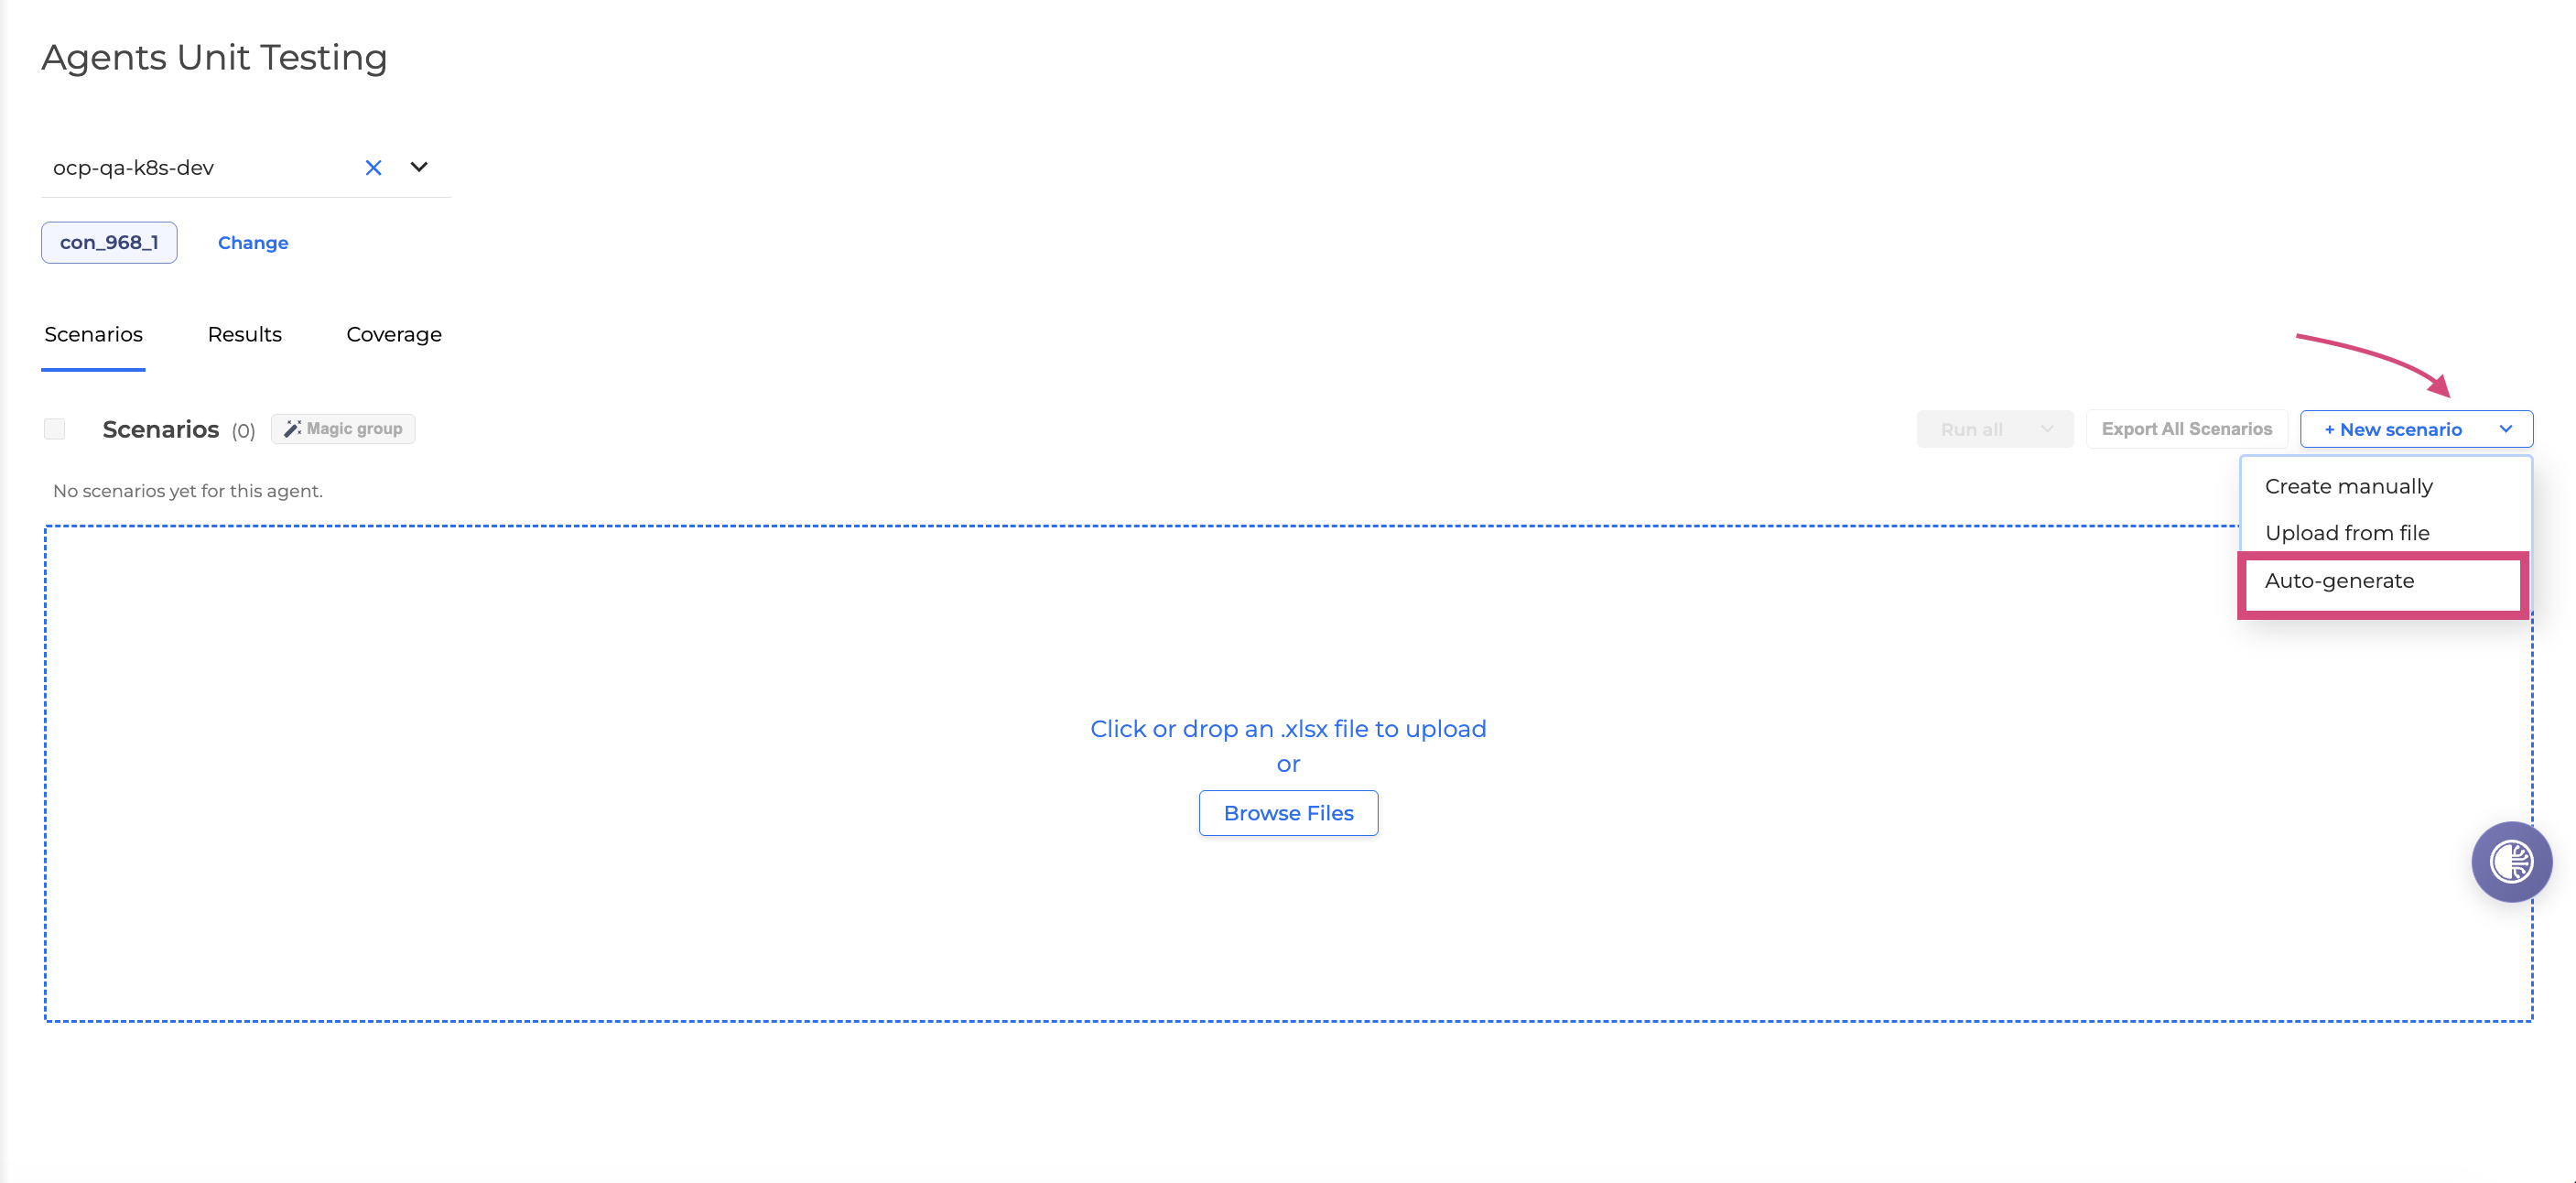
Click + New scenario → Auto-generate.
-
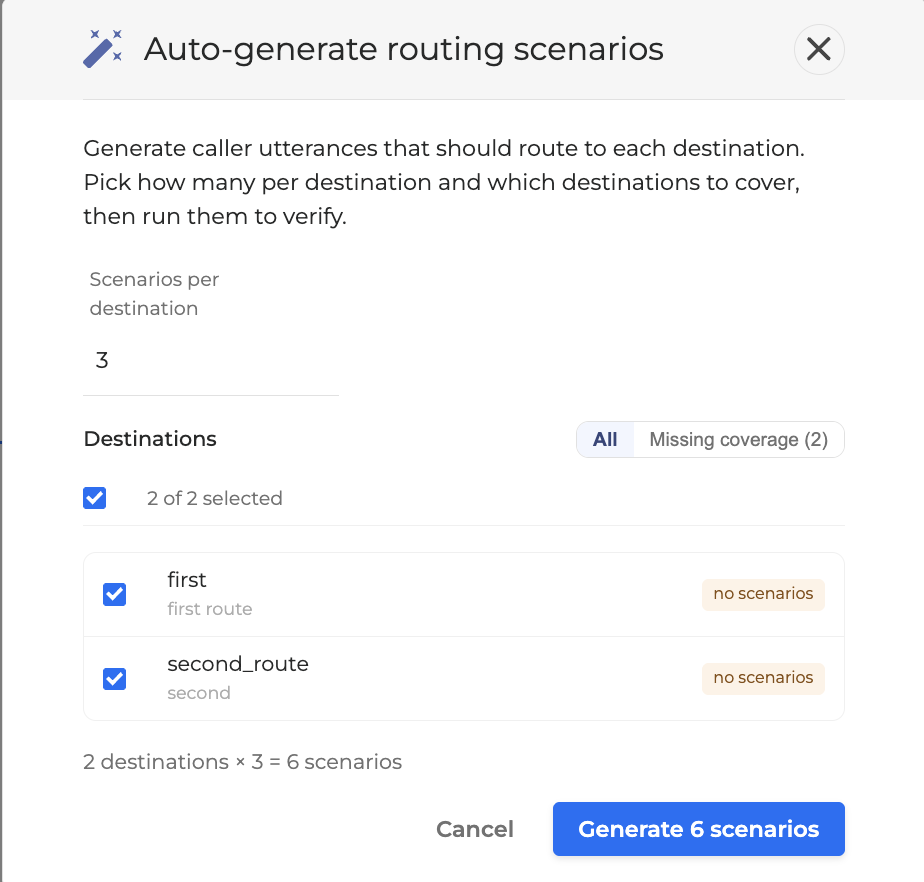
In the dialog box that opens, set Scenarios per destination (up to 10 per destination).
-
Under Destinations, choose which destinations to generate scenarios for:
-
All: shows every destination configured for the agent.
-
Missing coverage: shows only destinations that don't have scenarios yet, so you can close coverage gaps.
-
-
Use the checkboxes to select or deselect individual destinations, or the top checkbox to select/deselect all.
-
Check the summary line (in our example, "2 destinations × 3 = 6 scenarios") and click Generate 6 scenarios.
-
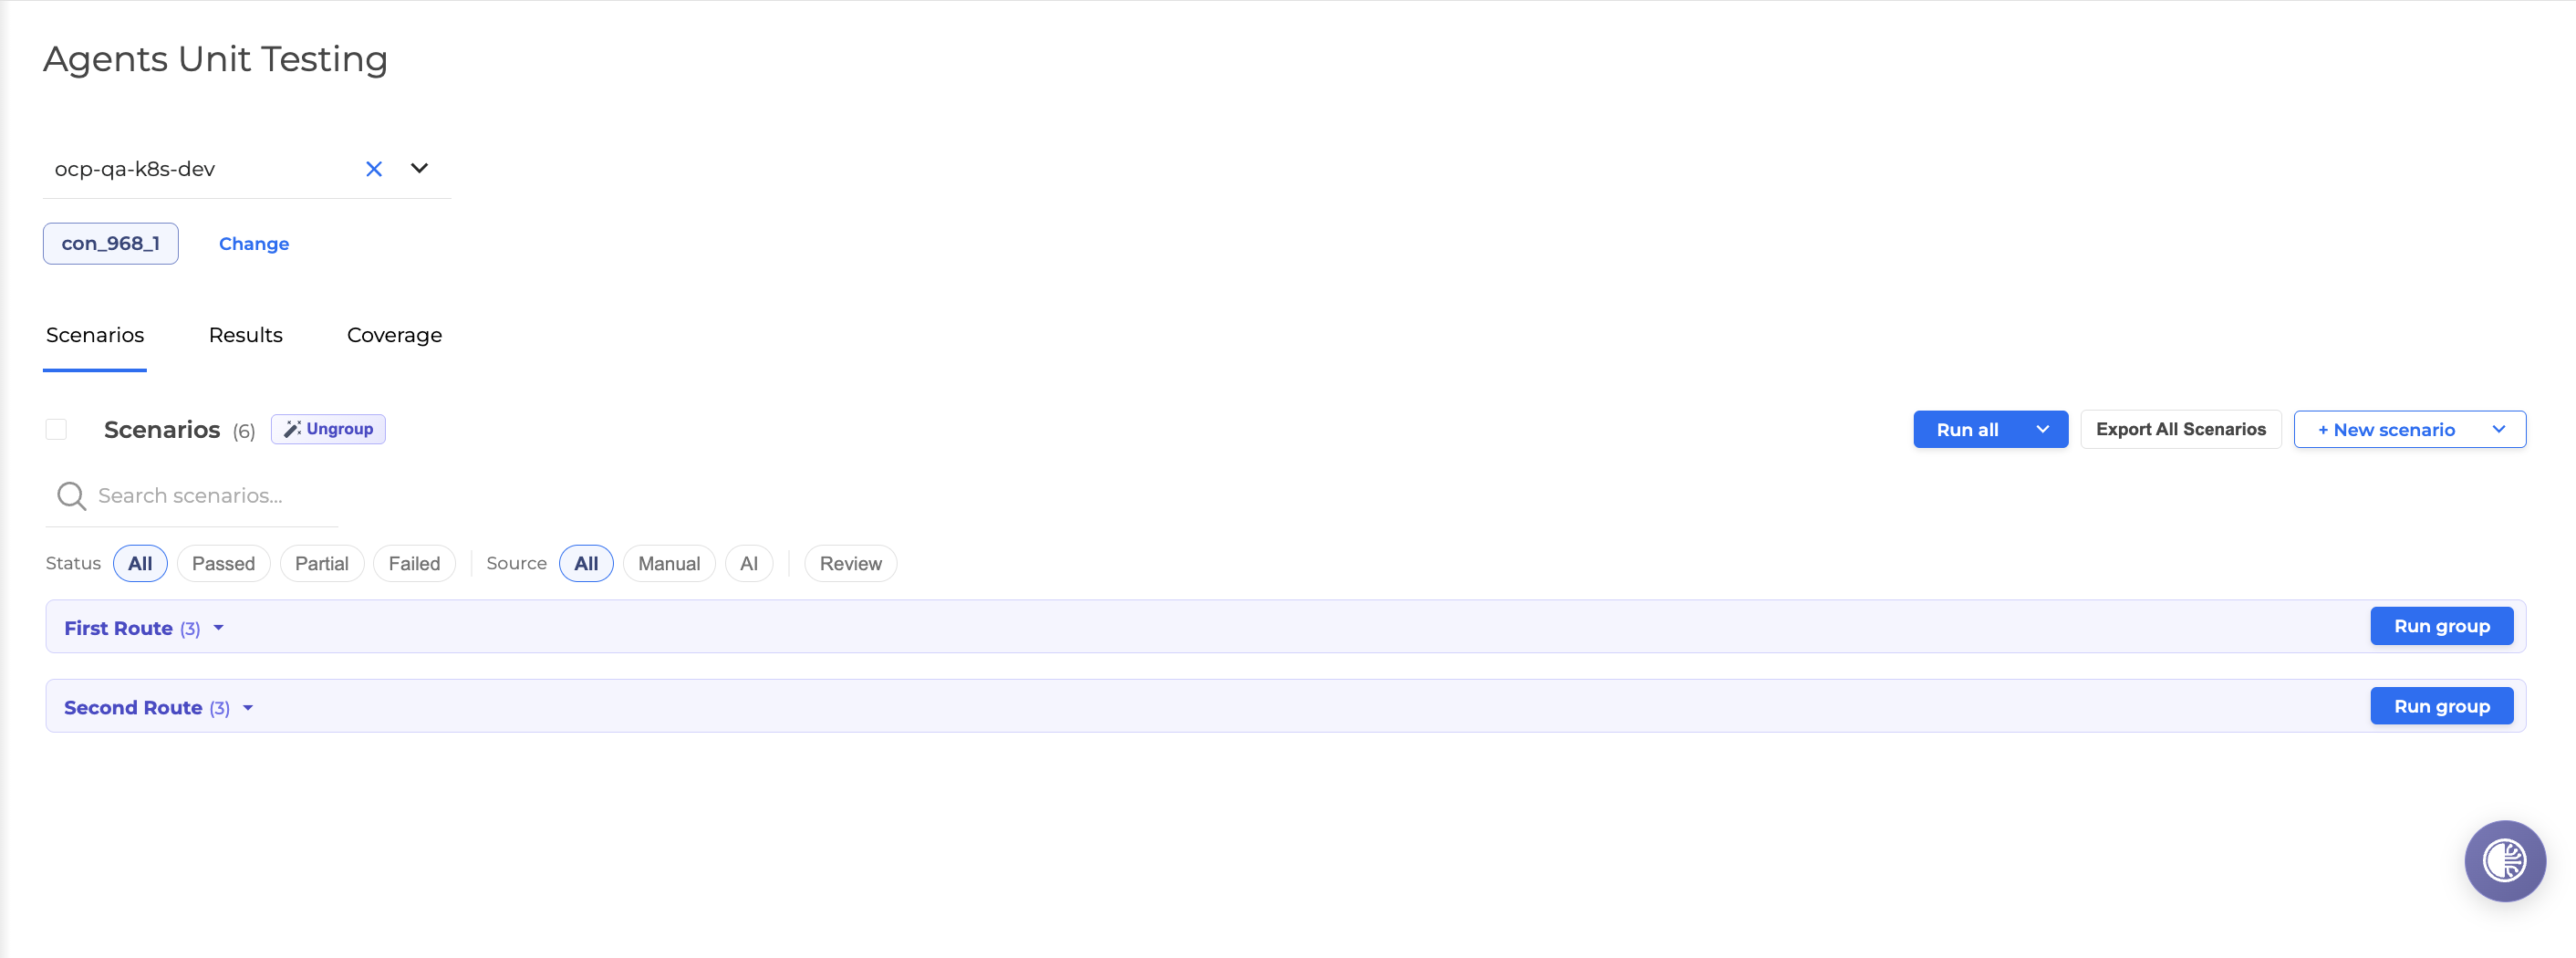
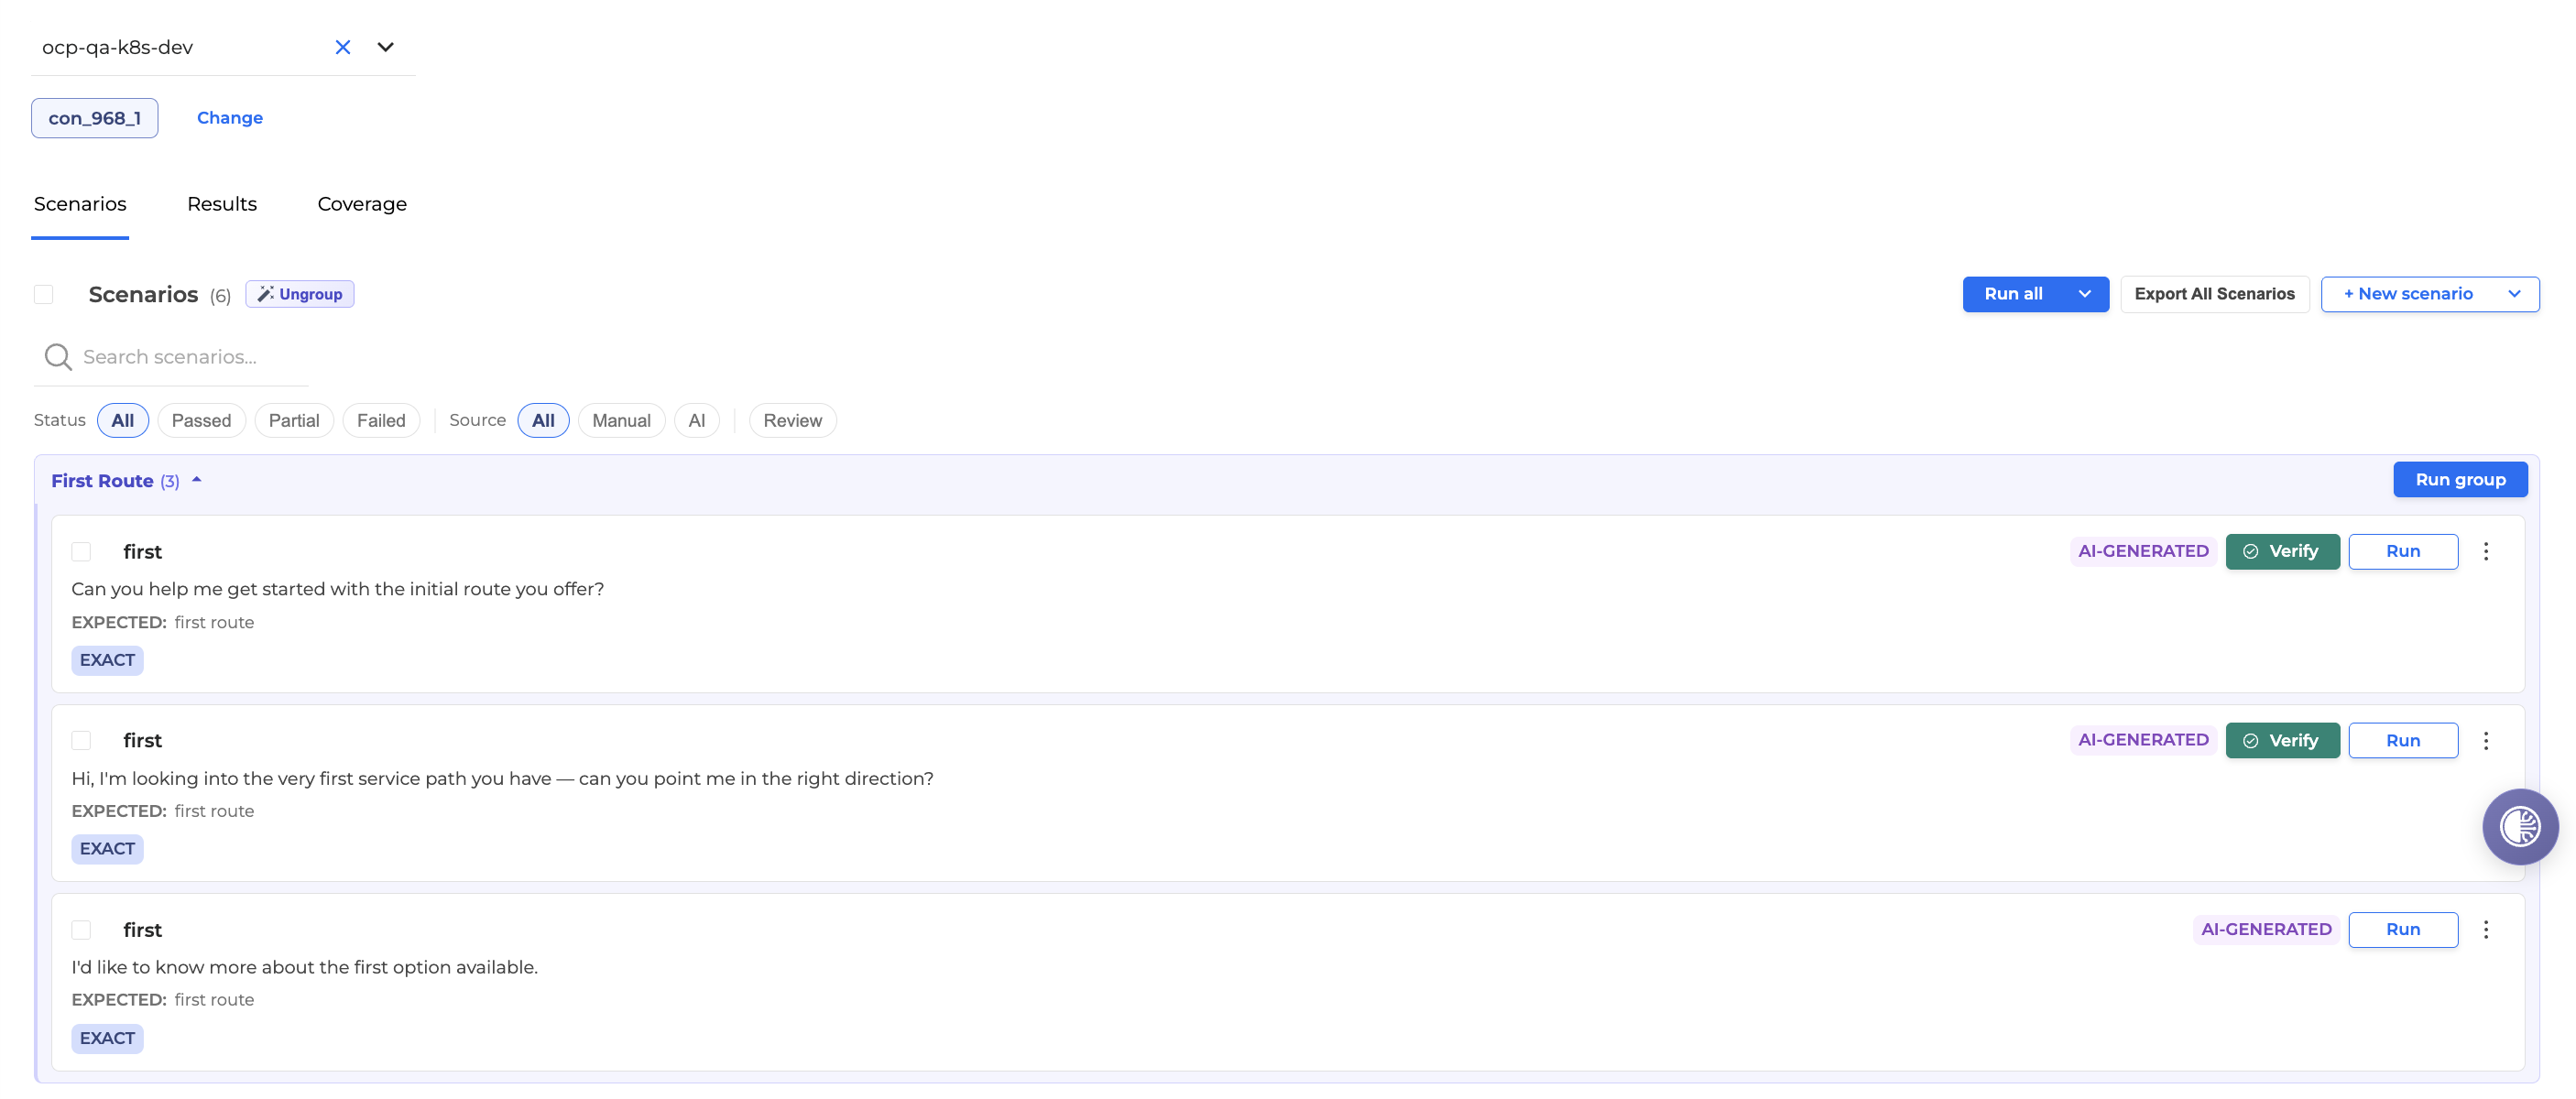
The generated scenarios are added grouped by destination/route.
-
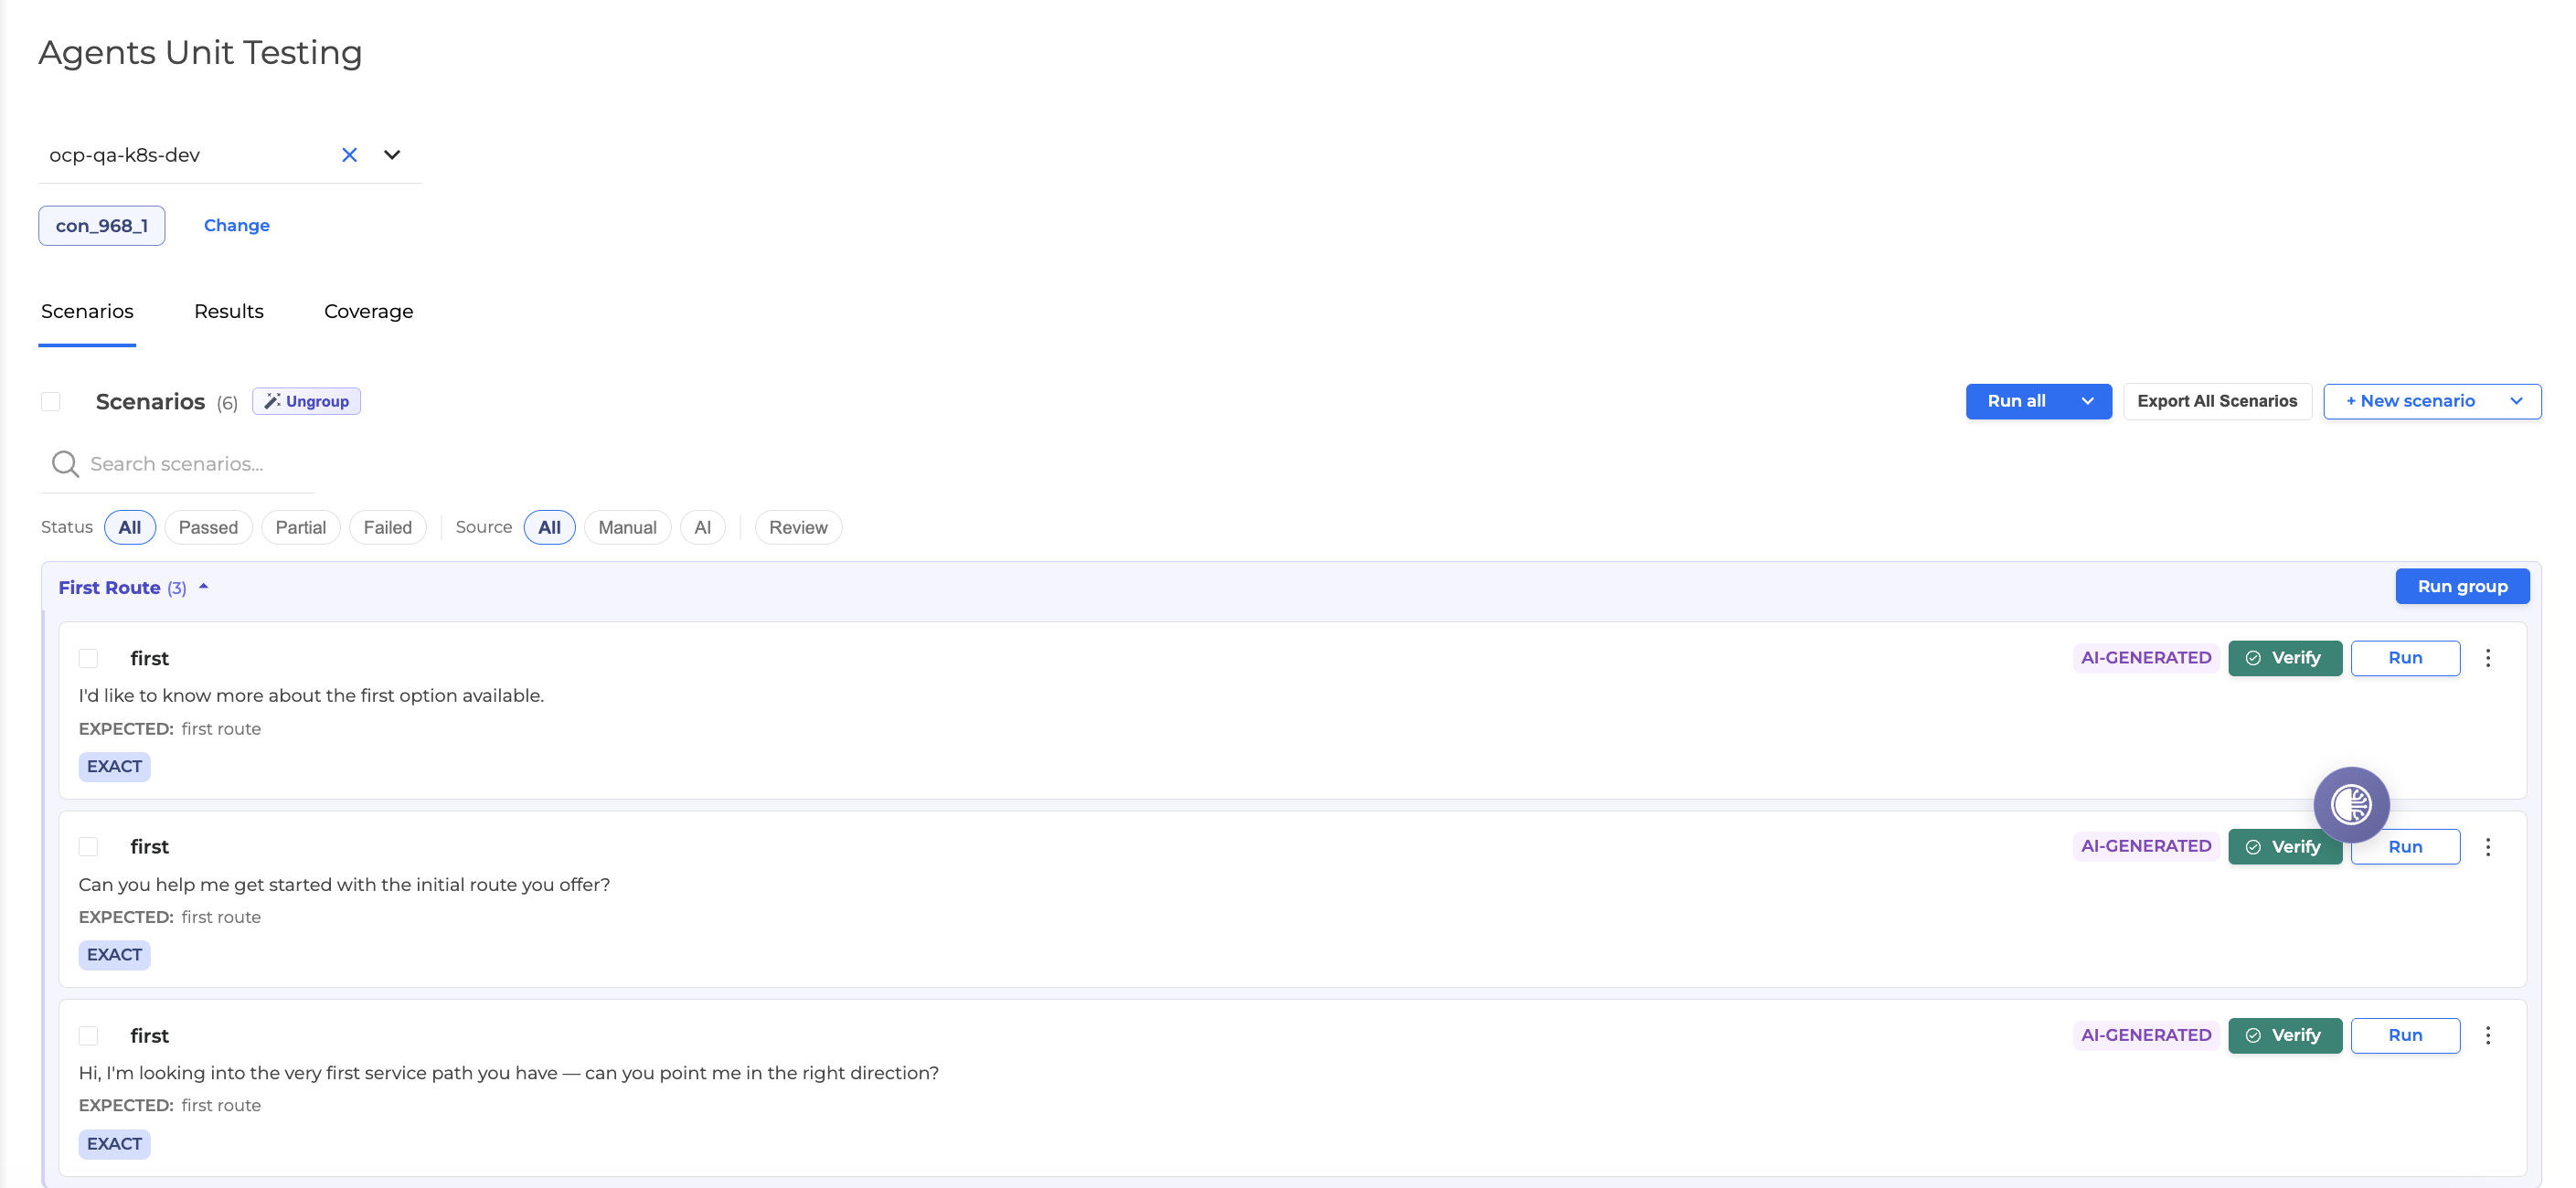
AI-generated scenarios are tagged AI-GENERATED, have an utterance, the Expected route, and run mode Exact pre-filled.
-
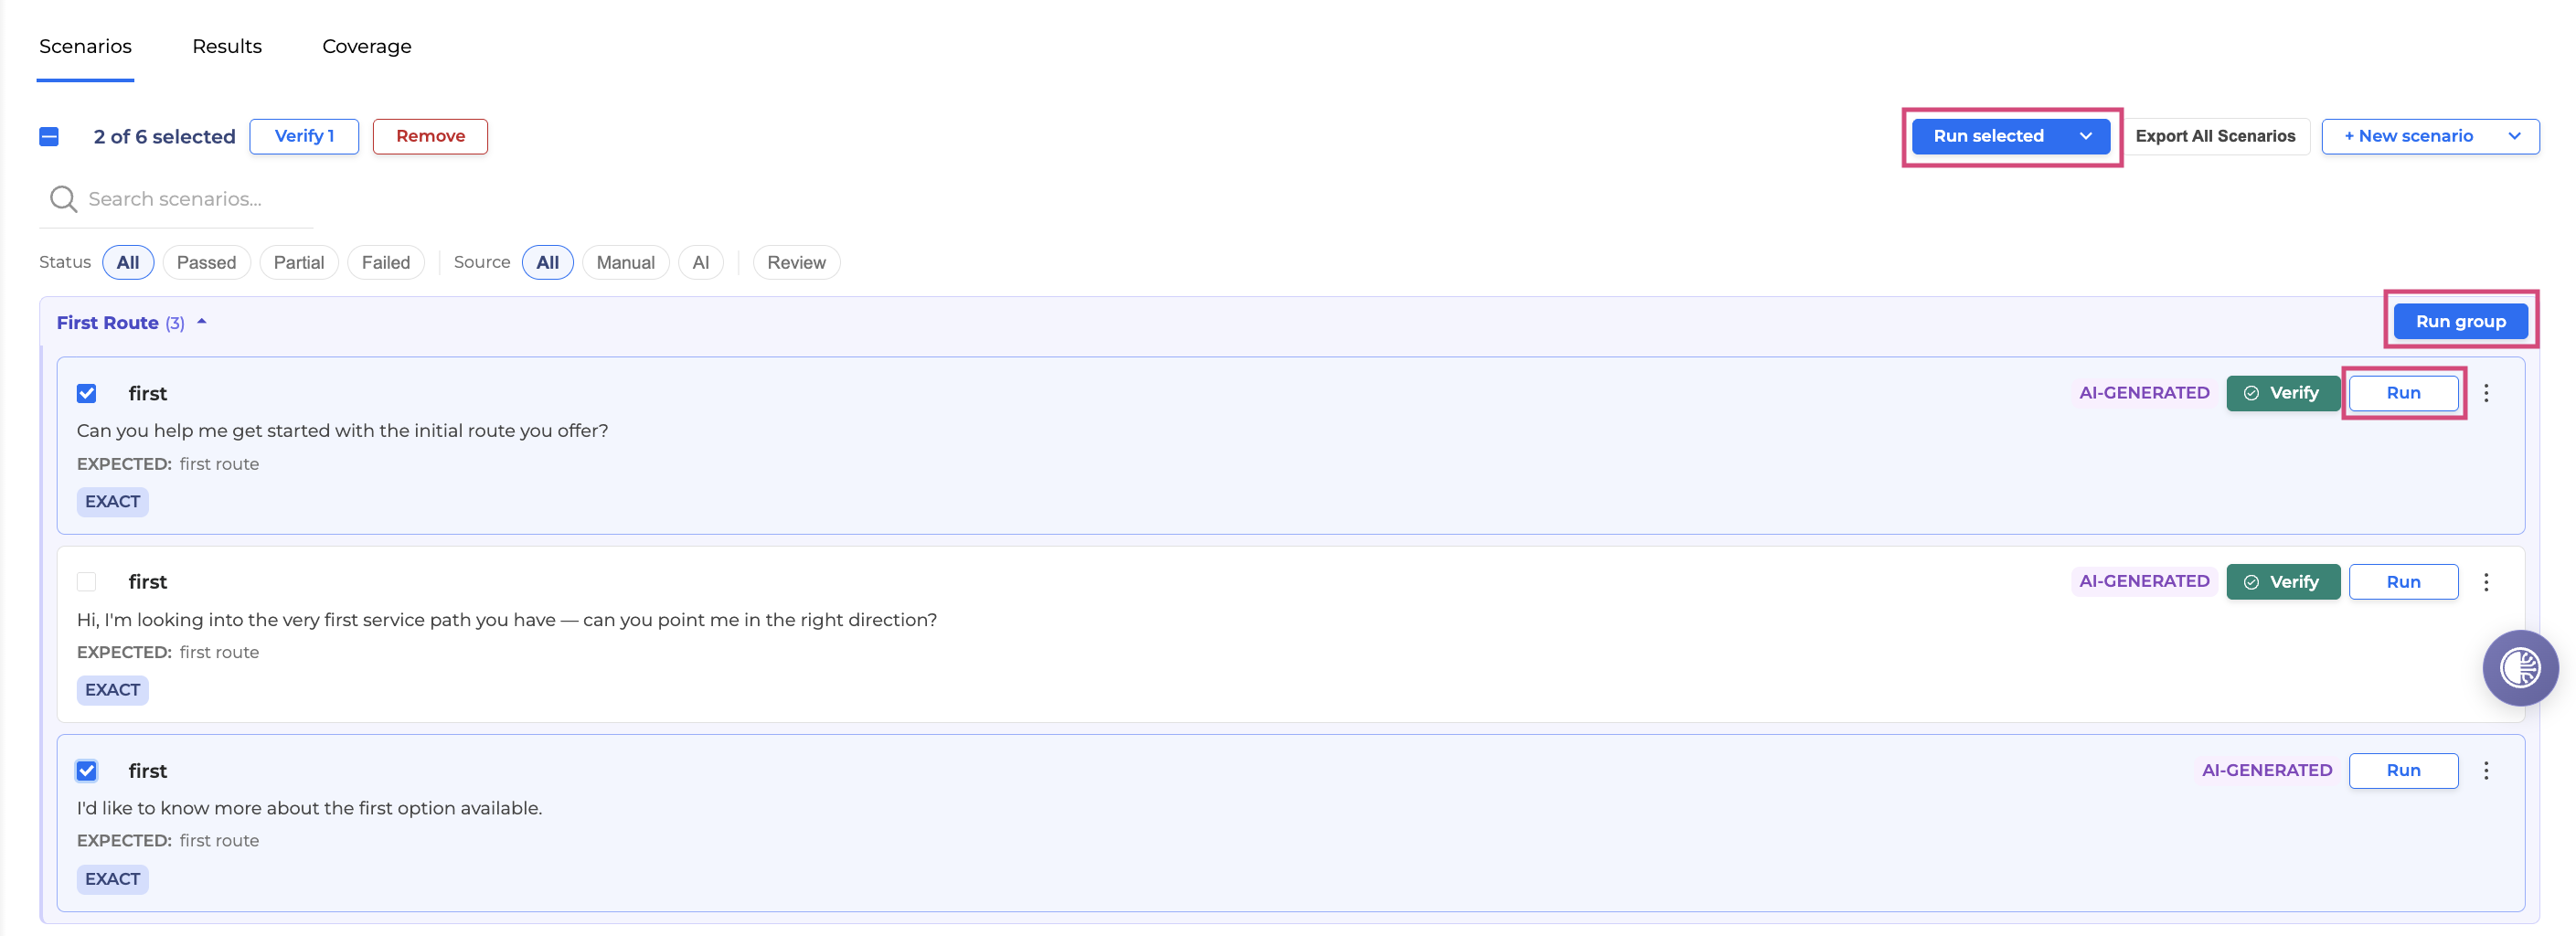
They require manual review before becoming trusted regression tests. Click Verify on each scenario to confirm the utterance and expected route are correct. A verified scenario will no longer display the Verify label.
-
You can run a single scenario with Run, or run an entire destination group with Run group.