.svg)
In this section, you will find detailed instructions on how to import and export an Application or Application Tag between different groups or environments. Additionally, you will learn the steps to promote an Application effectively.
When you export an Application, it is exported along with its associated agents, miniApps, Flows, a Variables Collection, and any referenced Pathfinder projects (Knowledge Bases). This process ensures that all necessary components are correctly integrated and functional. However, when exporting an Application Tag, the Variables Collection and Pathfinder projects are not included (Pathfinder projects are not tagged).
When exporting/importing applications between groups, changes to the NLU models are not automatically updated in the destination group if the model already exists there. To ensure that changes are carried over, consider creating a new version of the NLU model in the source group (for example, NLU_Model_v.2) with the updates. This new model, not existing in the destination group, will be imported as a separate entity.
Export Application
To export the application, proceed as follows:
-
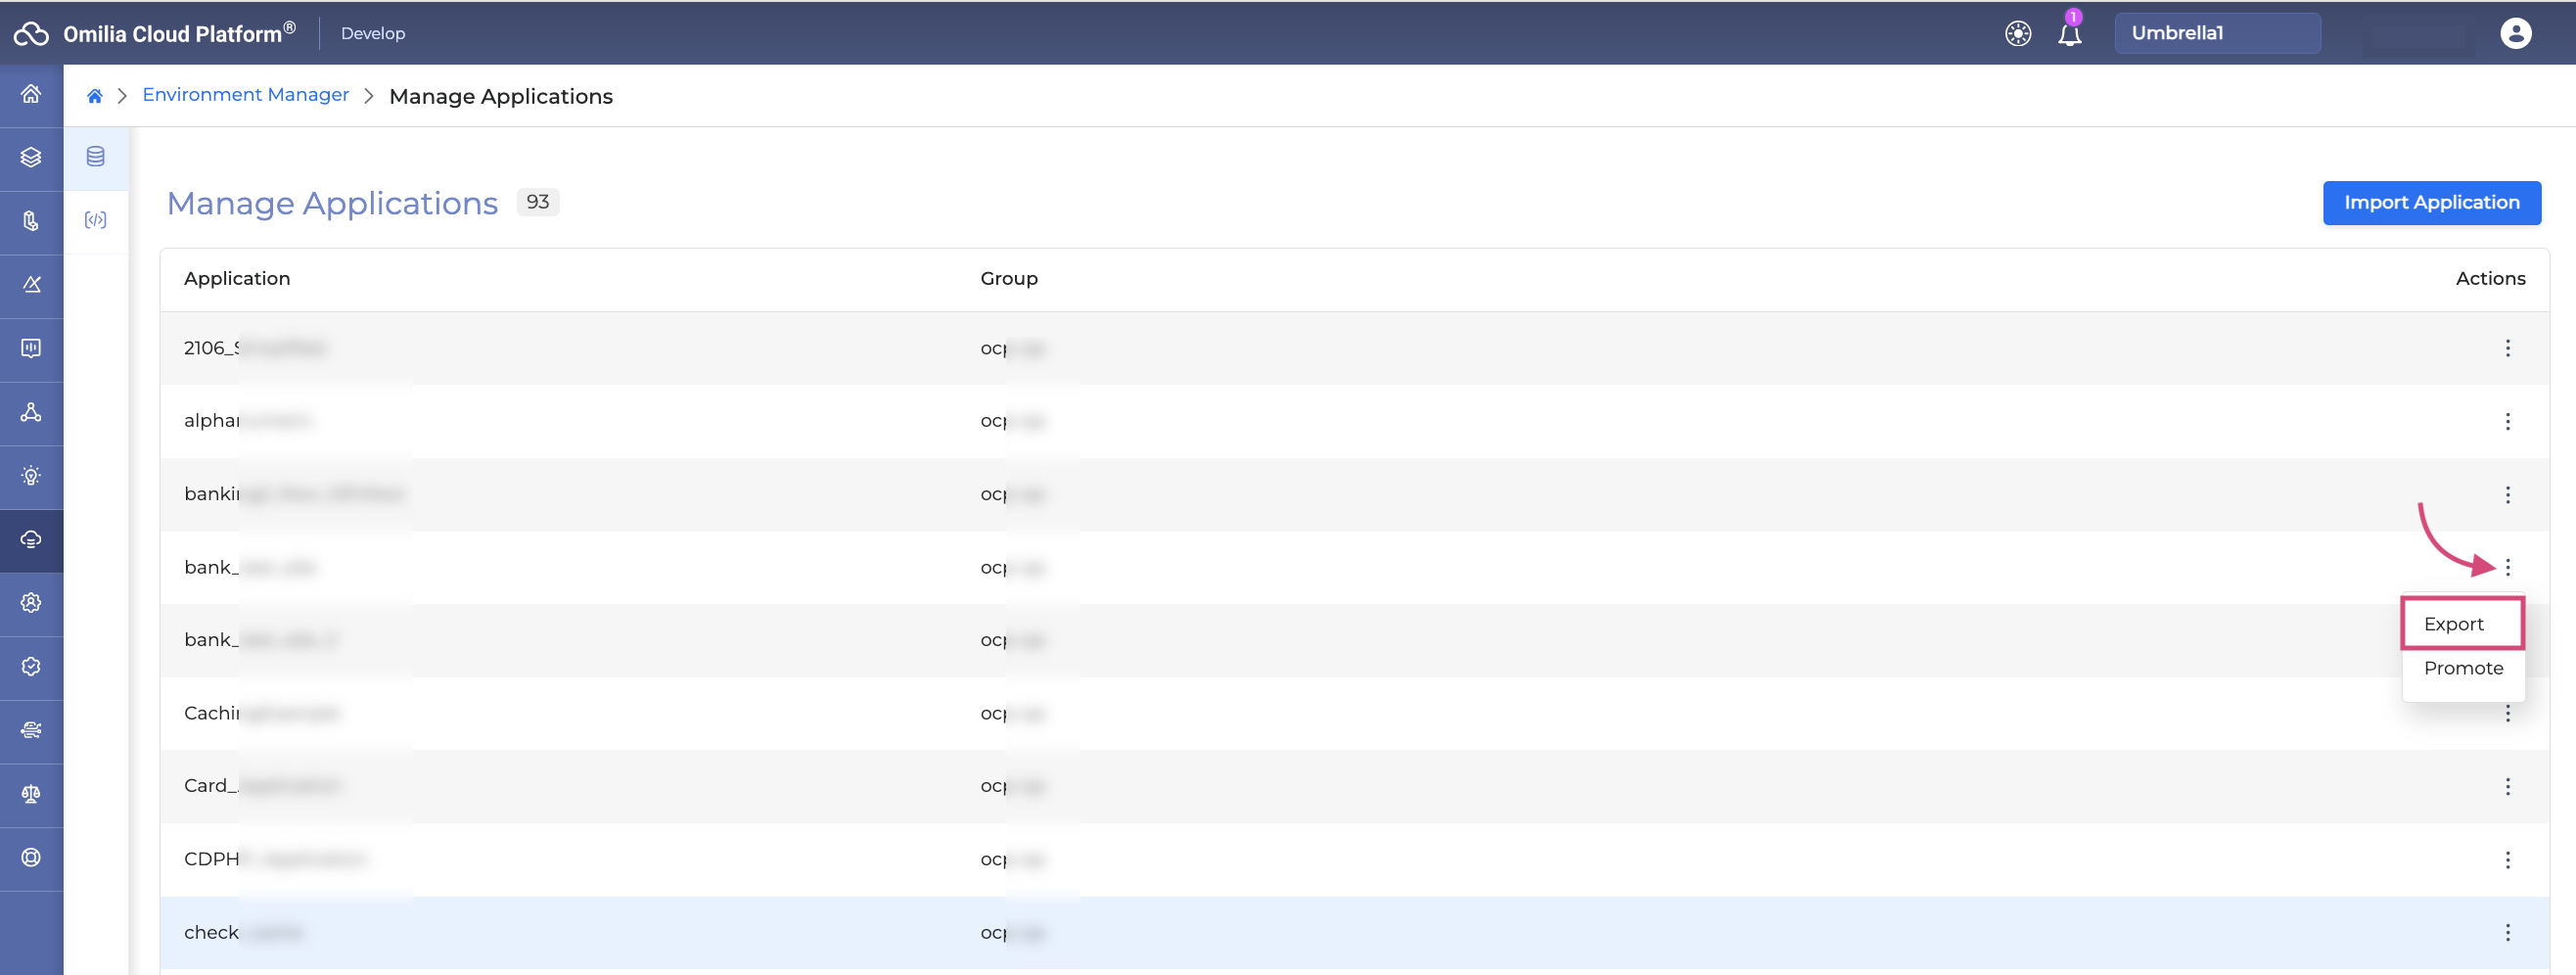
Select the application, click the options menu button on the right, and click the Export button.
-
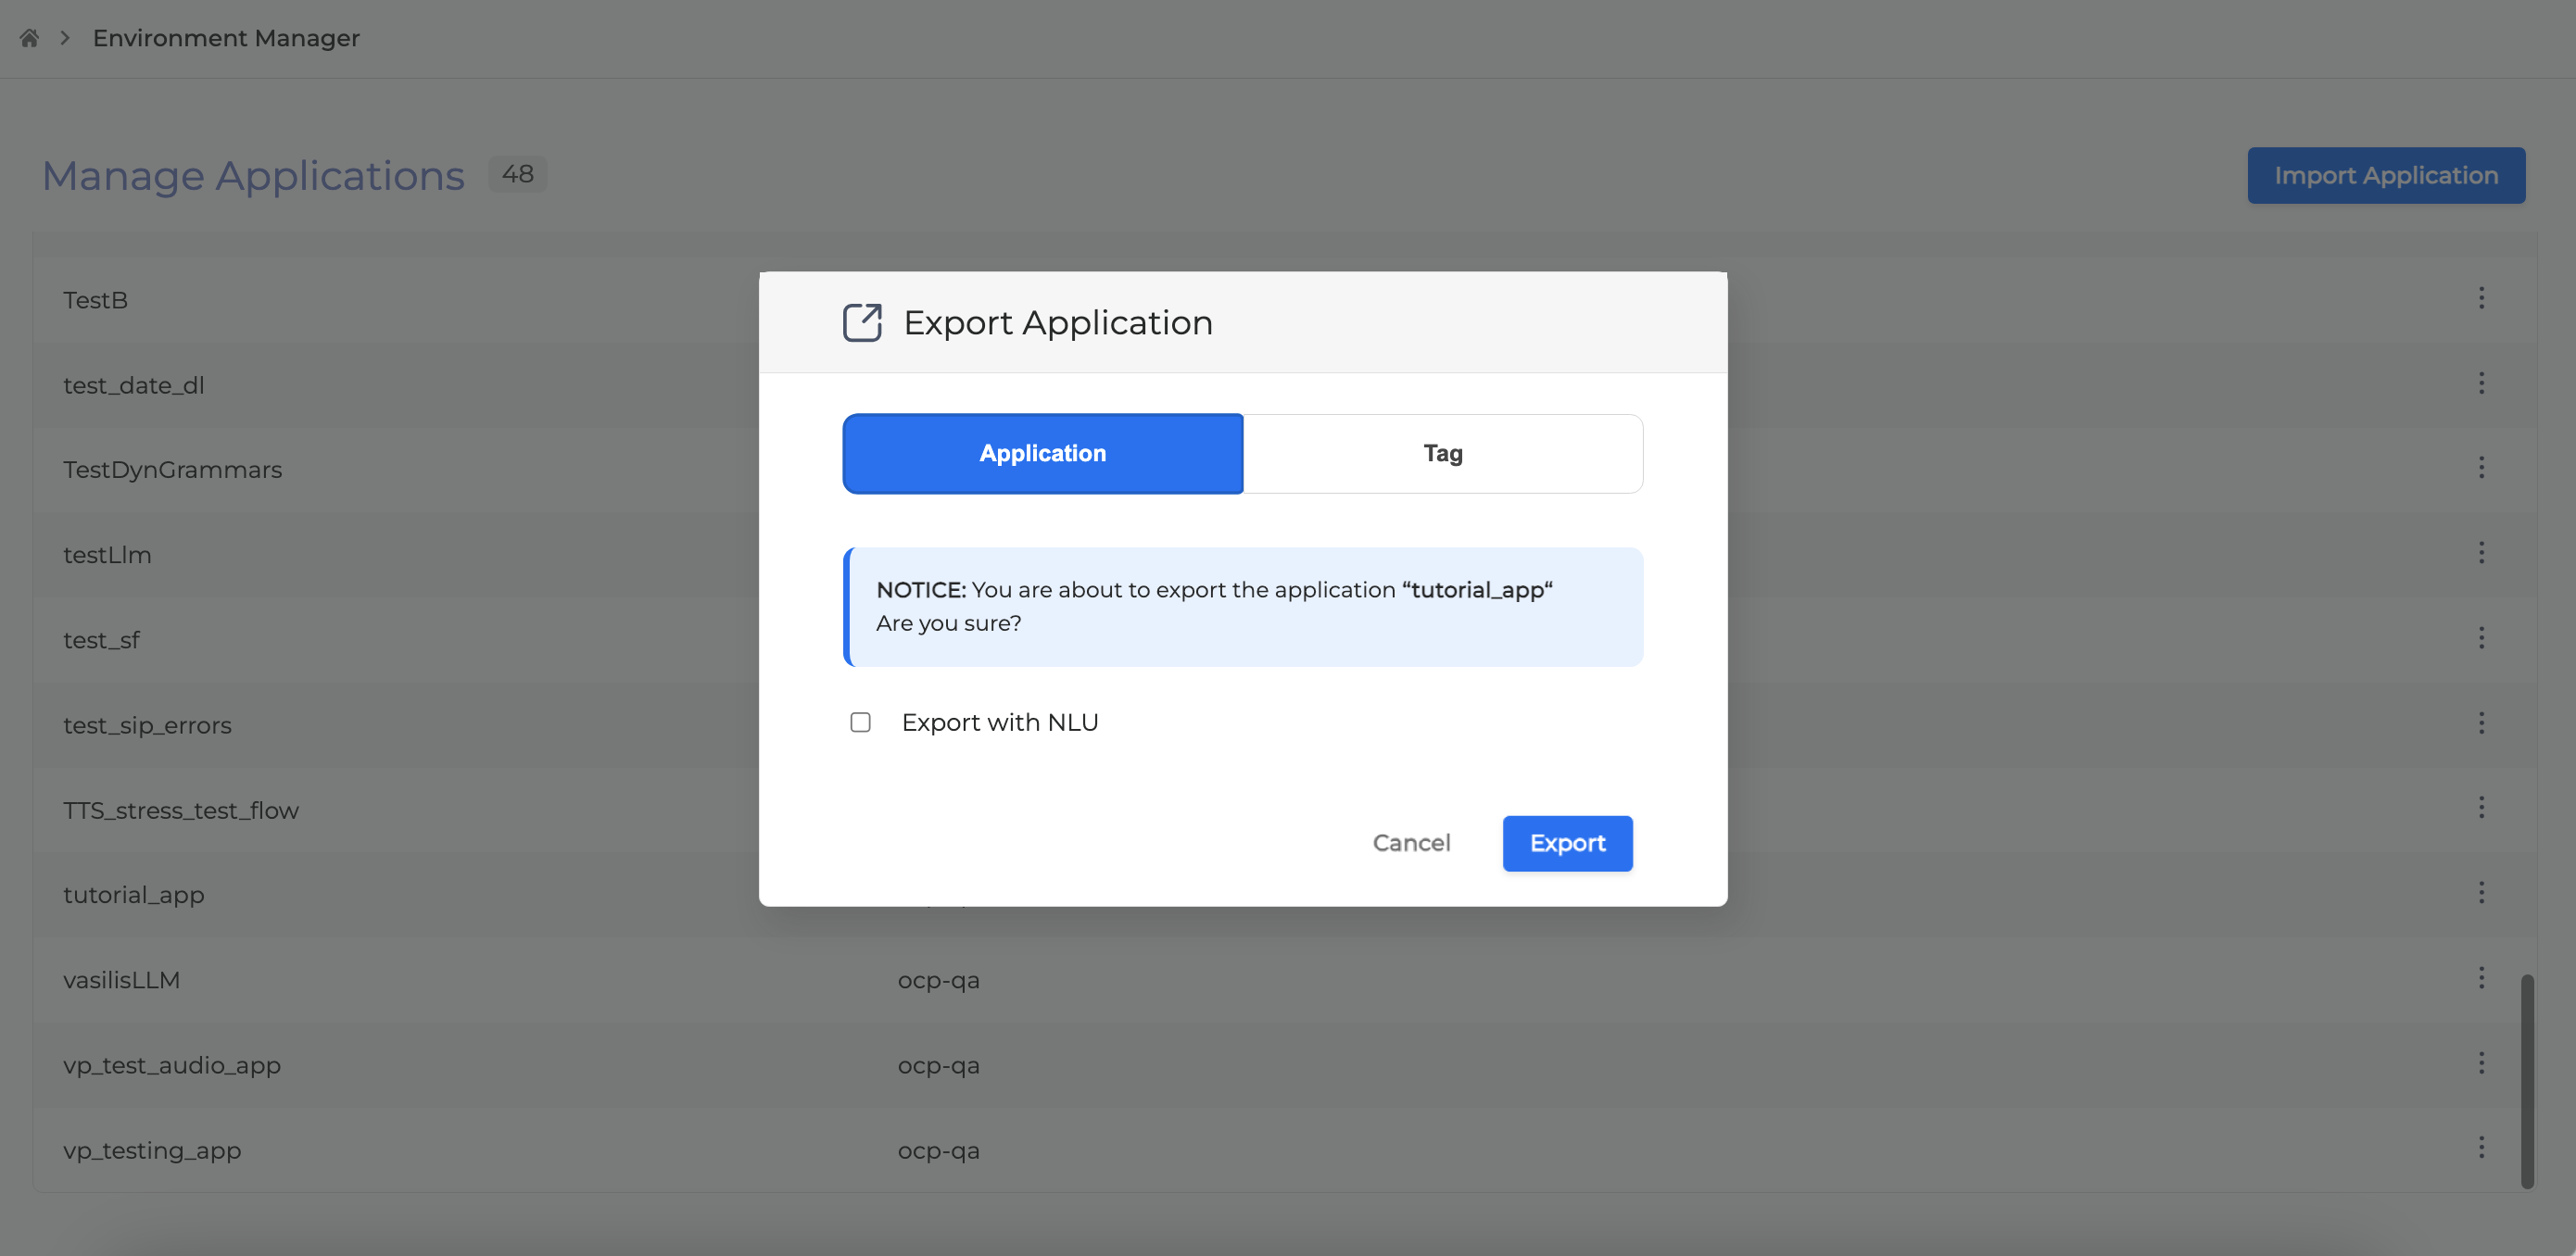
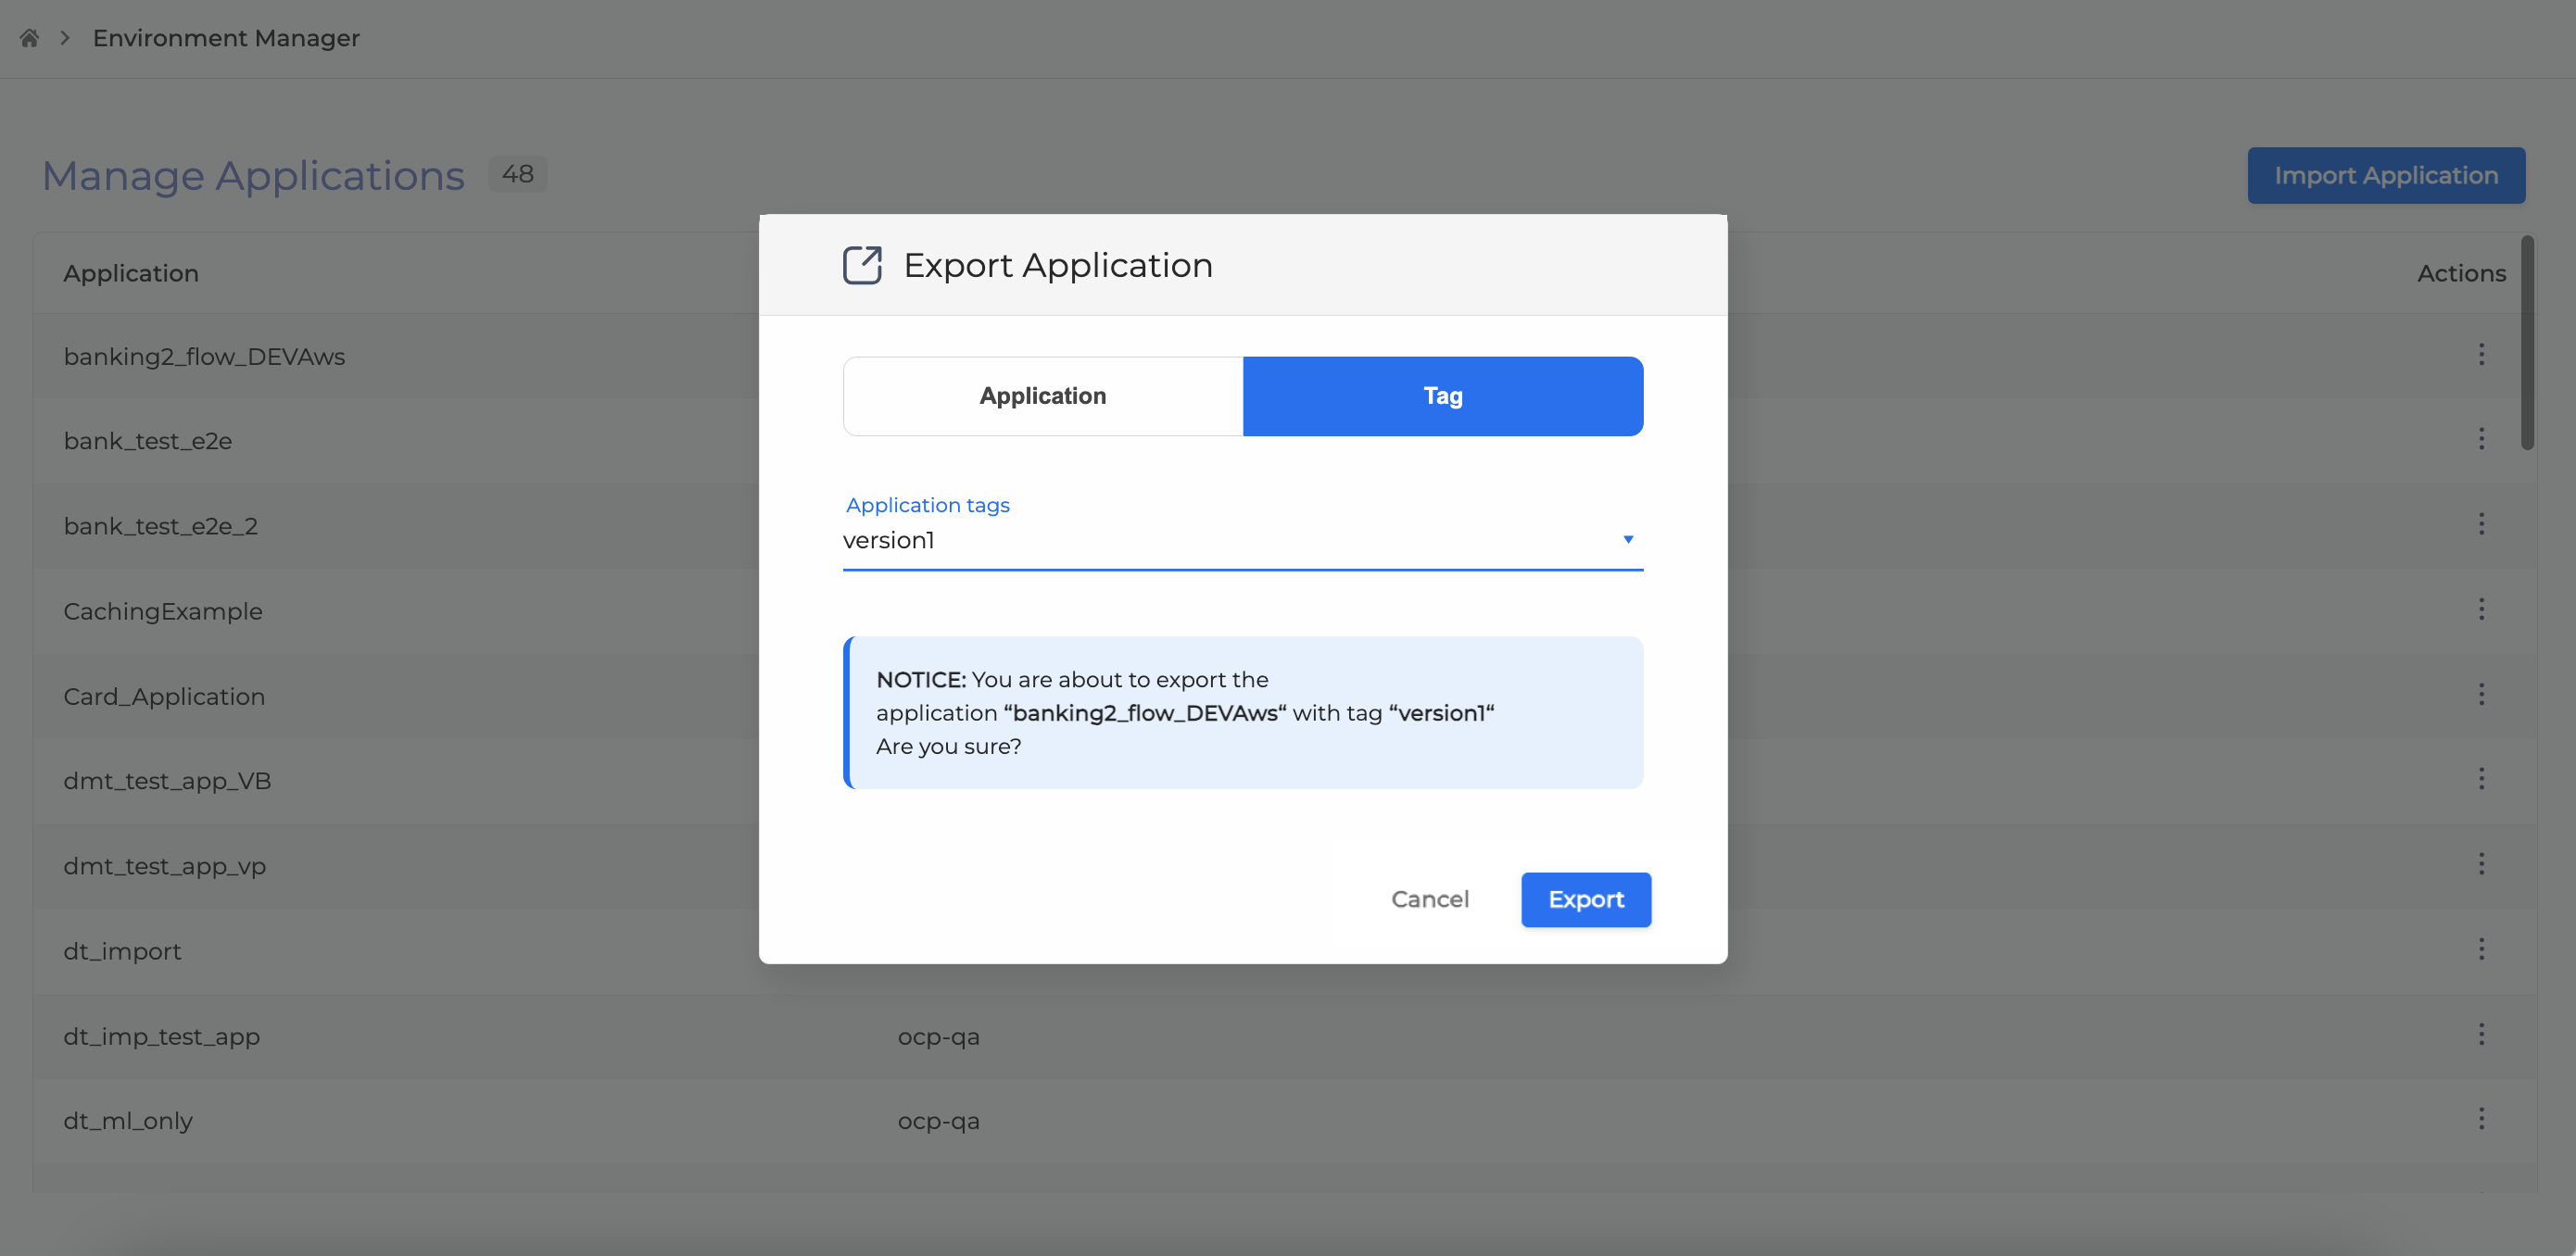
In the opened form, you can select to export an Application or Application Tag.
-
To export an Application, click Application. Here you may mark the Export with NLU box to also export NLU model references in the export files.
-
To export an Application Tag, click Tag and select an Application Tag from the available ones in the dropdown menu.
-
Click Export when completed. An EXPORT IN PROGRESS notification will appear, informing you that the export has been initiated. You can freely navigate away from the page while the export is processing - you do not need to remain on this screen.
-
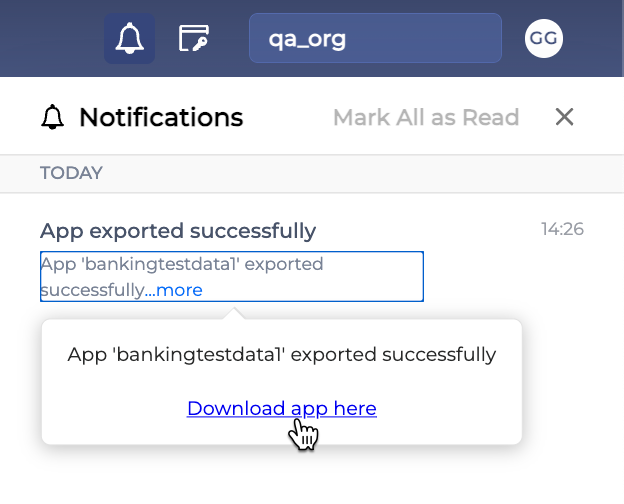
Once the export is complete, you will receive a notification. Click on it to open the Notifications panel.
-
On the Export notification, click …more to expand, and then the Download app here link to download the exported file.
-
A notification will let you know of the download progress.
-
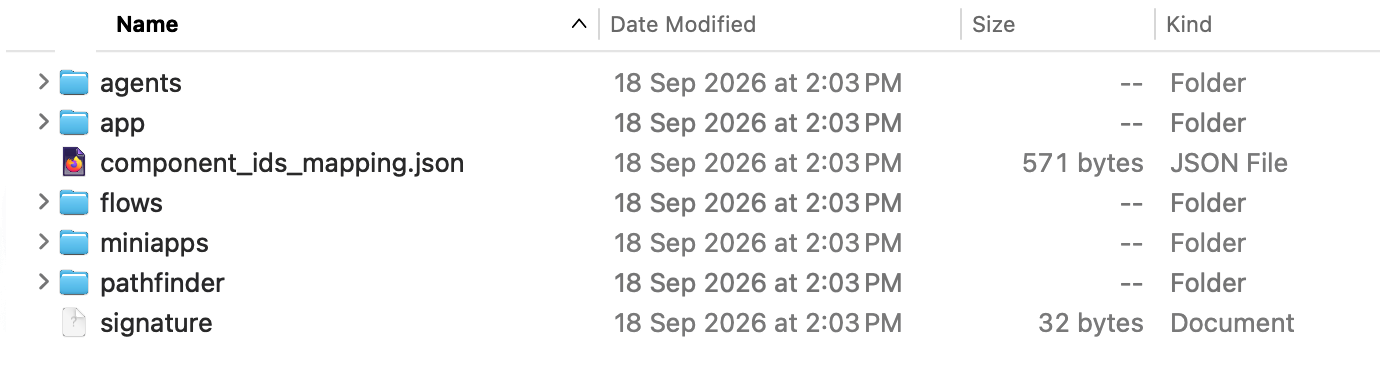
The exported application will be downloaded to the targeted folder as a ZIP file. Unpack the ZIP file to view the content. The ZIP file contains the Application with its agents, miniApps, Flows, global NLU configuration (found under
nluConfigin the application's JSON file inside the app folder), a Variables collection in JSON format, and any referenced Pathfinder projects.
Pathfinder Knowledge Base transfer requires Pathfinder 1.9.0 or later.

Ensure you have appropriate permissions in all groups that own any referenced NLU applications. The export will validate access across all owning groups before proceeding. For example, if an application references an NLU model belonging to Group B and you are not a member of Group B, the export validation will fail.
An export cannot contain multiple distinct NLU applications from different groups that share the same name. Because all referenced NLUs must be imported into a single destination group, duplicate names across groups are rejected up front to prevent naming collisions during import.
Import an Application
You can import either an Application as is, or an Application Tag, which is the application’s instance. You can read more about Application Tags.
When you import an Application, it is imported along with its associated agents, miniApps, Flows, Variables collection, and referenced Pathfinder projects. During import, referenced Pathfinder projects are automatically recreated in the target environment, and the application's agents are repointed to the newly created knowledge bases.
When importing an Application Tag, the Variables Collection and Pathfinder projects are not included.
Importing an Application
To import the application, follow the next steps:
-
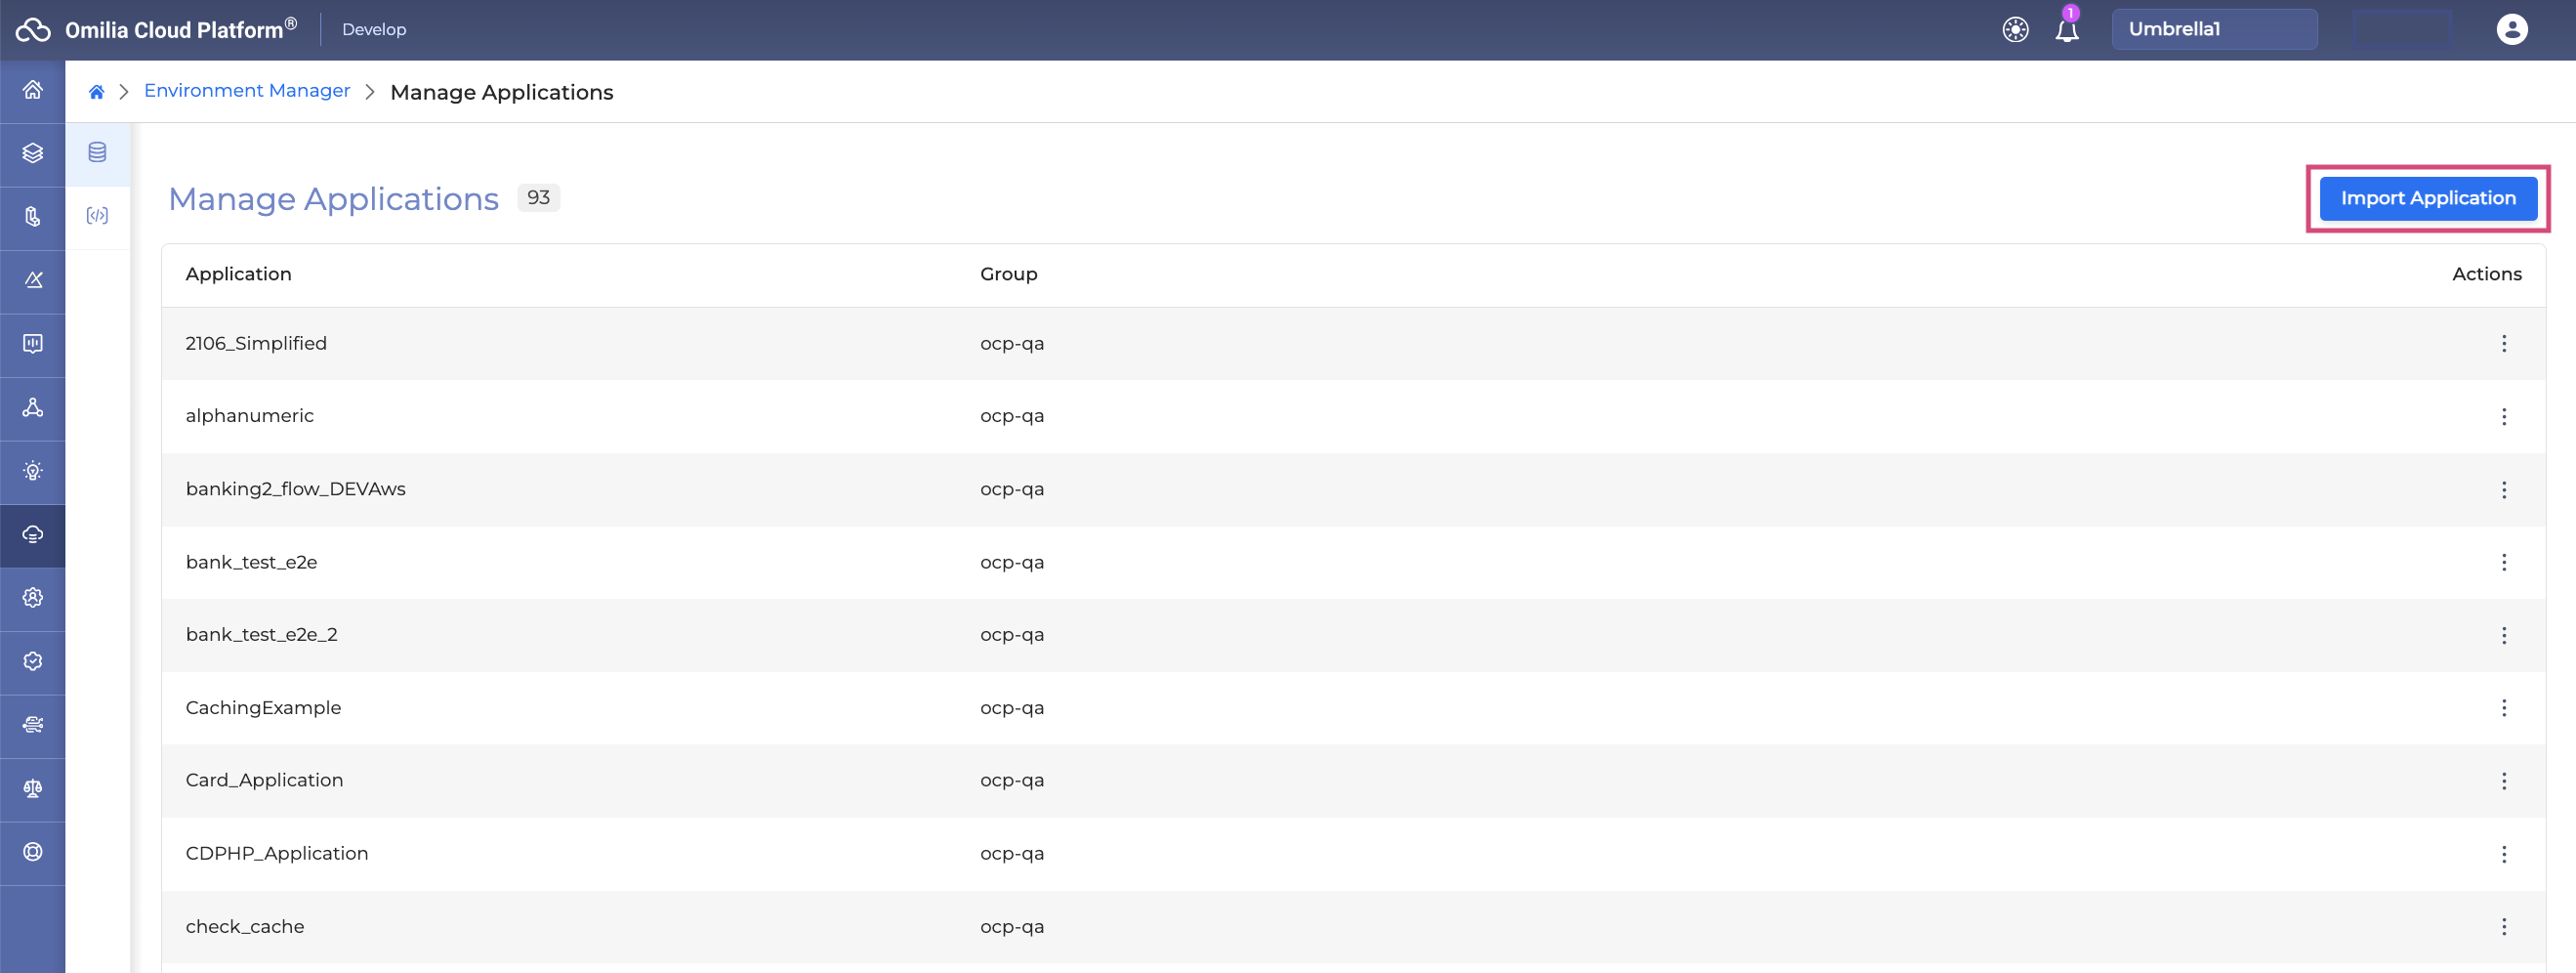
Click the Import Application button.
-
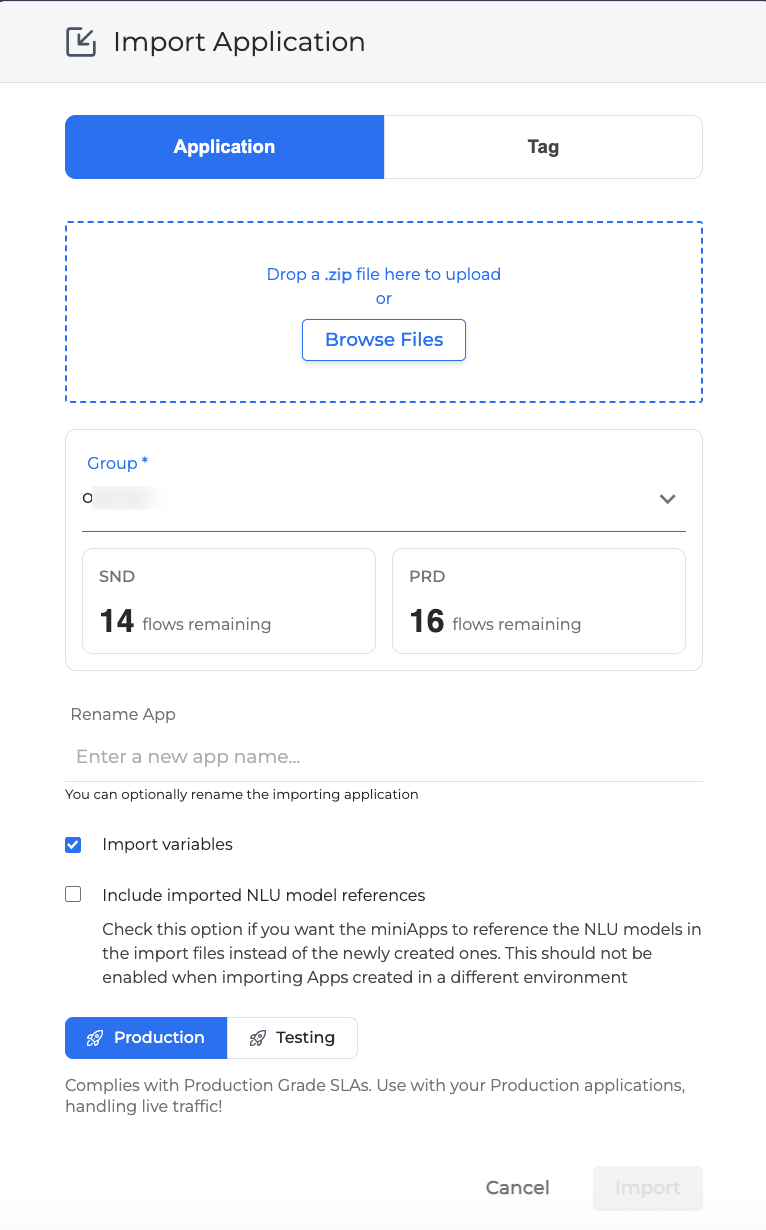
In the Import Application form, select Application.
-
Choose the application you wish to import and place it onto the drop zone or click the Browse button to select the application manually.
-
Complete the fields as described below:
-
Group: Select the group in which the application will be available. You will see how many flows remain available in the selected group. This helps you determine whether you have sufficient capacity to complete the import, reducing failed imports due to quota limits. If the flow information is unavailable, it displays as N/A.
-
Rename App: To change the application's name, enter a new name. Note that renaming is only available for applications. Flows and miniApps cannot be renamed!
-
VB Profile: Select a Voice Biometric profile from the drop-down list.
-
If a VB profile already exists in the selected group, it will be utilized by the application.
-
If no VB profiles exist, a new one will be automatically created with a name based on the group name, such as
mygroup_vb_profile. -
If multiple profiles exist, you can choose from the available ones.
-
-
Import variables: If checked, the application’s variables will be imported along with the application. If unchecked, the variables collection will be excluded during the import.
-
Include imported NLU model references: This optional check-box allows you to reuse the NLU models within the same environment. For example, if you export an application, and then import it to the same environment under the new name, checking the Include imported NLU model references box allows to use already existing NLU models without creating new ones. If you import the application to the new environment, the new NLU models will be created automatically.
-
Note that if the box is enabled, then selecting Production/Testing NLU Deployments is not available!
-
Select the NLU Deployment type:
-
Production (default) - this type complies with Production Grade SLAs. Use with your Production applications handling live traffic!
-
Testing - this type is cost efficient and used for Testing purposes only.
-
-
Click Import when finished.
-
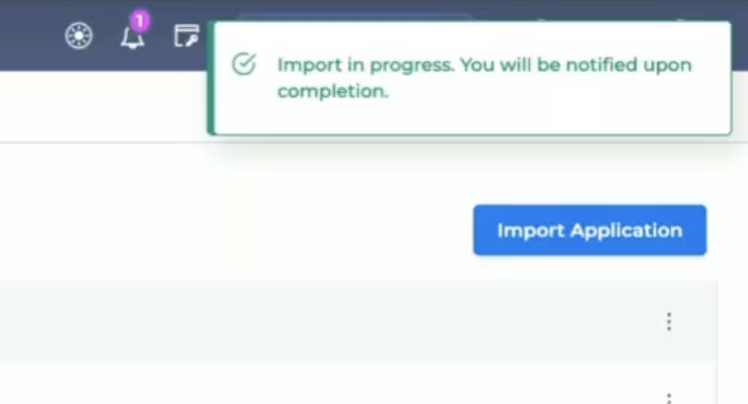
A toast message will appear in the upper-right corner of the screen, indicating that the import is in progress.
-
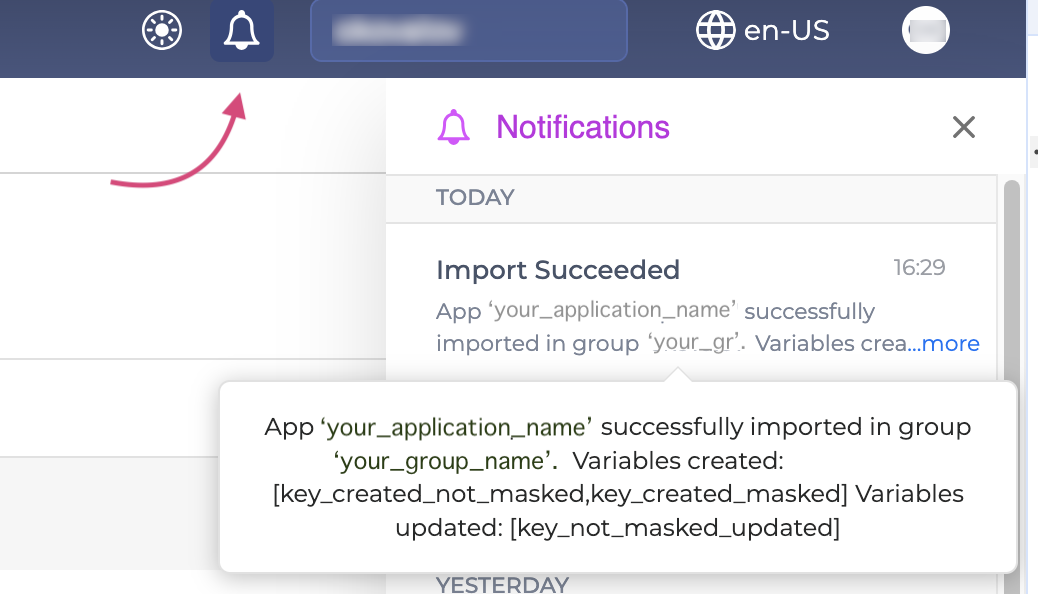
Once the process is complete, you will receive a notification regarding the newly created variables, updates to existing variables, and NLU deployment results:
-
NLU Binding Verification: The system automatically reads back and verifies all miniApp NLU bindings. If any binding fails to apply, the notification report will specifically list the affected miniApp and languages.
-
Audit & Recovery: NLU application IDs associated with the import are logged, allowing you to audit or recover the specific bindings applied during the process.
-
-
To view the service notification, simply click on the Bell icon and then select more to expand the notification text.
Importing an Application Tag
To import an Application Tag, follow the next steps:
-
Click the Import Application button.
-
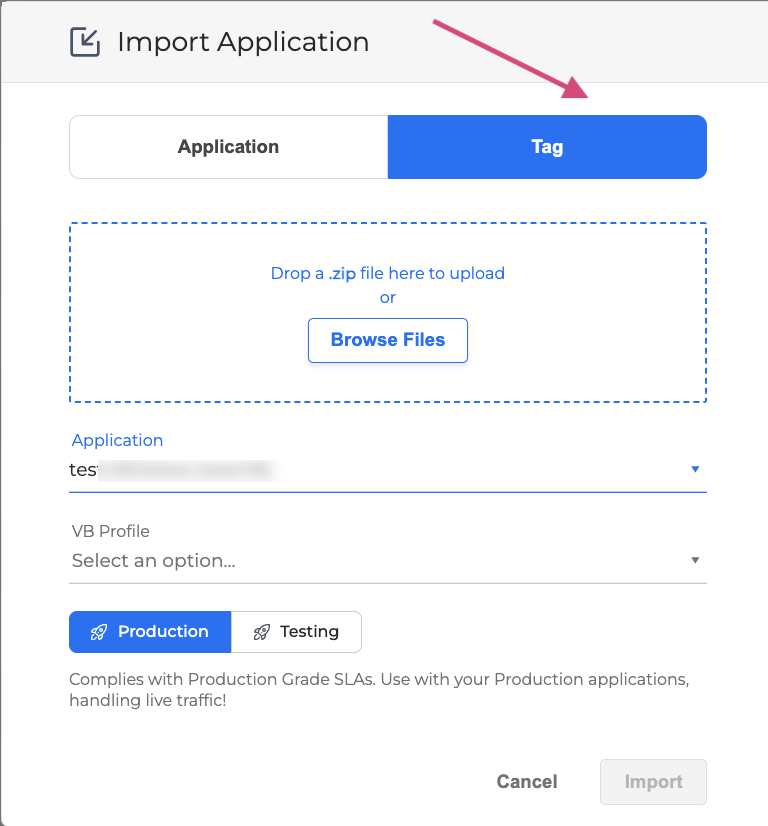
In the Import Application form, click Tag.
-
Select an Application Tag you want to import, and place it onto the drop zone, or click the Browse button to manually select an Application Tag.
-
Fill in the fields as described below:
-
Application: Select the Application from the dropdown list of the available applications.
-
VB Profile: Select a Voice Biometric profile from the drop-down list.
-
If a VB profile already exists in the selected group, it will be utilized by the Application Tag.
-
If no VB profiles exist, a new one will be automatically created with a name based on the group name, such as
mygroup_vb_profile. -
If multiple profiles exist, you can choose from the available ones.
-
-
-
Choose the Deployment type:
-
Production (default) - this type complies with Production Grade SLAs. Use with your Production applications handling live traffic!
-
Testing - this type is cost efficient and used for Testing purposes only.
-
-
Click Import when finished.
-
A toast message will appear in the upper-right corner of the screen, indicating that the import is in progress.
-
Once the process is complete, you will receive a notification regarding the newly created variables, updates to existing variables, and NLU deployment results:
-
NLU Binding Verification: The system automatically reads back and verifies all miniApp NLU bindings. If any binding fails to apply, the notification report will specifically list the affected miniApp and languages.
-
Audit & Recovery: NLU application IDs associated with the import are logged, allowing you to audit or recover the specific bindings applied during the process.
-
-
To view the service notification, simply click on the Bell icon and then select more to expand the notification text.
Importing a Large Application via the Chunked Upload API
The steps above use the Import Application form to send the whole archive in a single request. If your network path can't reliably complete one large upload (corporate firewall, proxy timeout, load balancer reset), use the chunked upload API instead. This API splits the archive into parts and uploads them one at a time.
To import a large application via the chunked upload API, proceed as follows:
-
Open a session and send a
POSTrequest to/api/v1/upload-sessions:
{
  "filename": "myapp.zip",
  "expected_size": 125829120,
  "total_parts": 3,
  "import_type": "app",
  "target_group": "my-group"
}
The response returns:
{
  "data": {
    "session_id": "5f1e...",
    "chunk_size": 8388608,
    "min_chunk_size": 5242880,
    "max_parts": 10000,
    "expires_at": "2026-09-04T12:00:00+00:00"
  }
}
chunk_size is informational only. It is a fixed constant, not a target to divide by, and it need not match your part sizes. The value that constrains you is min_chunk_size.
By default, min_chunk_size is 5 MiB (5,242,880 bytes). This is the S3 multipart floor for every part except the last. Read this value from the session response rather than hardcoding “5 MB" in your client, since it is an app configuration setting (UPLOAD_MIN_CHUNK_SIZE_BYTES) and may change.
-
Choose your part size and
total_parts.
You should pick the part size first, then derive the count - not the other way around.
P_min = max(min_chunk_size, ceil(expected_size / max_parts))
P     = your chosen part size, P >= P_min
total_parts = ceil(expected_size / P)
With today's defaults (min_chunk_size=5242880, max_parts=10000), for any file up to about 48.8 GB, P_min equals min_chunk_size. In practice, choose a part size of 5 MiB or larger and compute total_parts = ceil(expected_size / your_part_size).
Every part except the last must be exactly P bytes and at least min_chunk_size. The last part is exempt from this floor and can be smaller. For example, a 120 MB file split into 50 MB / 50 MB / 20 MB parts uses total_parts=3; only the two 50 MB parts need to meet the 5 MiB minimum.
-
Upload each part by sending a
PUTrequest to/api/v1/upload-sessions/{session_id}/parts/{part_number}:
multipart/form-data: chunk=<bytes>, content_md5=<base64 md5>
Repeat for each part number up to total_parts. Re-uploading the same part number is safe.
-
Commit the upload by sending a
POSTrequest to/api/v1/upload-sessions/{session_id}/commit:
{ "parts": [...], "checksum_sha256": "<optional>" }
This always returns 202 with a result_id. A 422 response means parts are missing; retry only the part numbers listed in meta.missing_parts.
-
Poll the result by sending a
GETrequest to/api/v1/results/{result_id}. This follows the same polling contract as the existing asynchronous/apps/import?async=trueresult.
If a part is unexpectedly rejected as too small, send a GET request to /api/v1/upload-sessions/{session_id} to check the session's actual stored total_parts and uploaded parts.
For a working example, refer to the Python script in Chunked upload and Import.
The rules above, not the script's comments, are the source of truth.
Promote Application
Promoting application requires a user to have deployment access to the PRD application which can be provided by the Omilia Support team.
Promoting an application allows to detach application traffic from different clusters.
Originally, if you want to deploy the application, it is deployed to the DiaManT Sandbox cluster (SND) where, for example, you can use the chat simulator to check the application. Promoting the application allows to create the copy of the deployed application which will be placed to the DiaManT Production cluster (PRD) with the real traffic, so that traffic for testing the application does not affect real calls.
When you promote an Application, it is promoted along with its associated agents, miniApps, Flows, Variables collection, and referenced Pathfinder projects. Promoting an agentic application across environments recreates its knowledge bases in the target environment and automatically repoints agents to the new knowledge bases, ensuring they do not point back to the source environment.
Prerequisite: Requires Pathfinder 1.9.0 or later.
To promote the application:
-
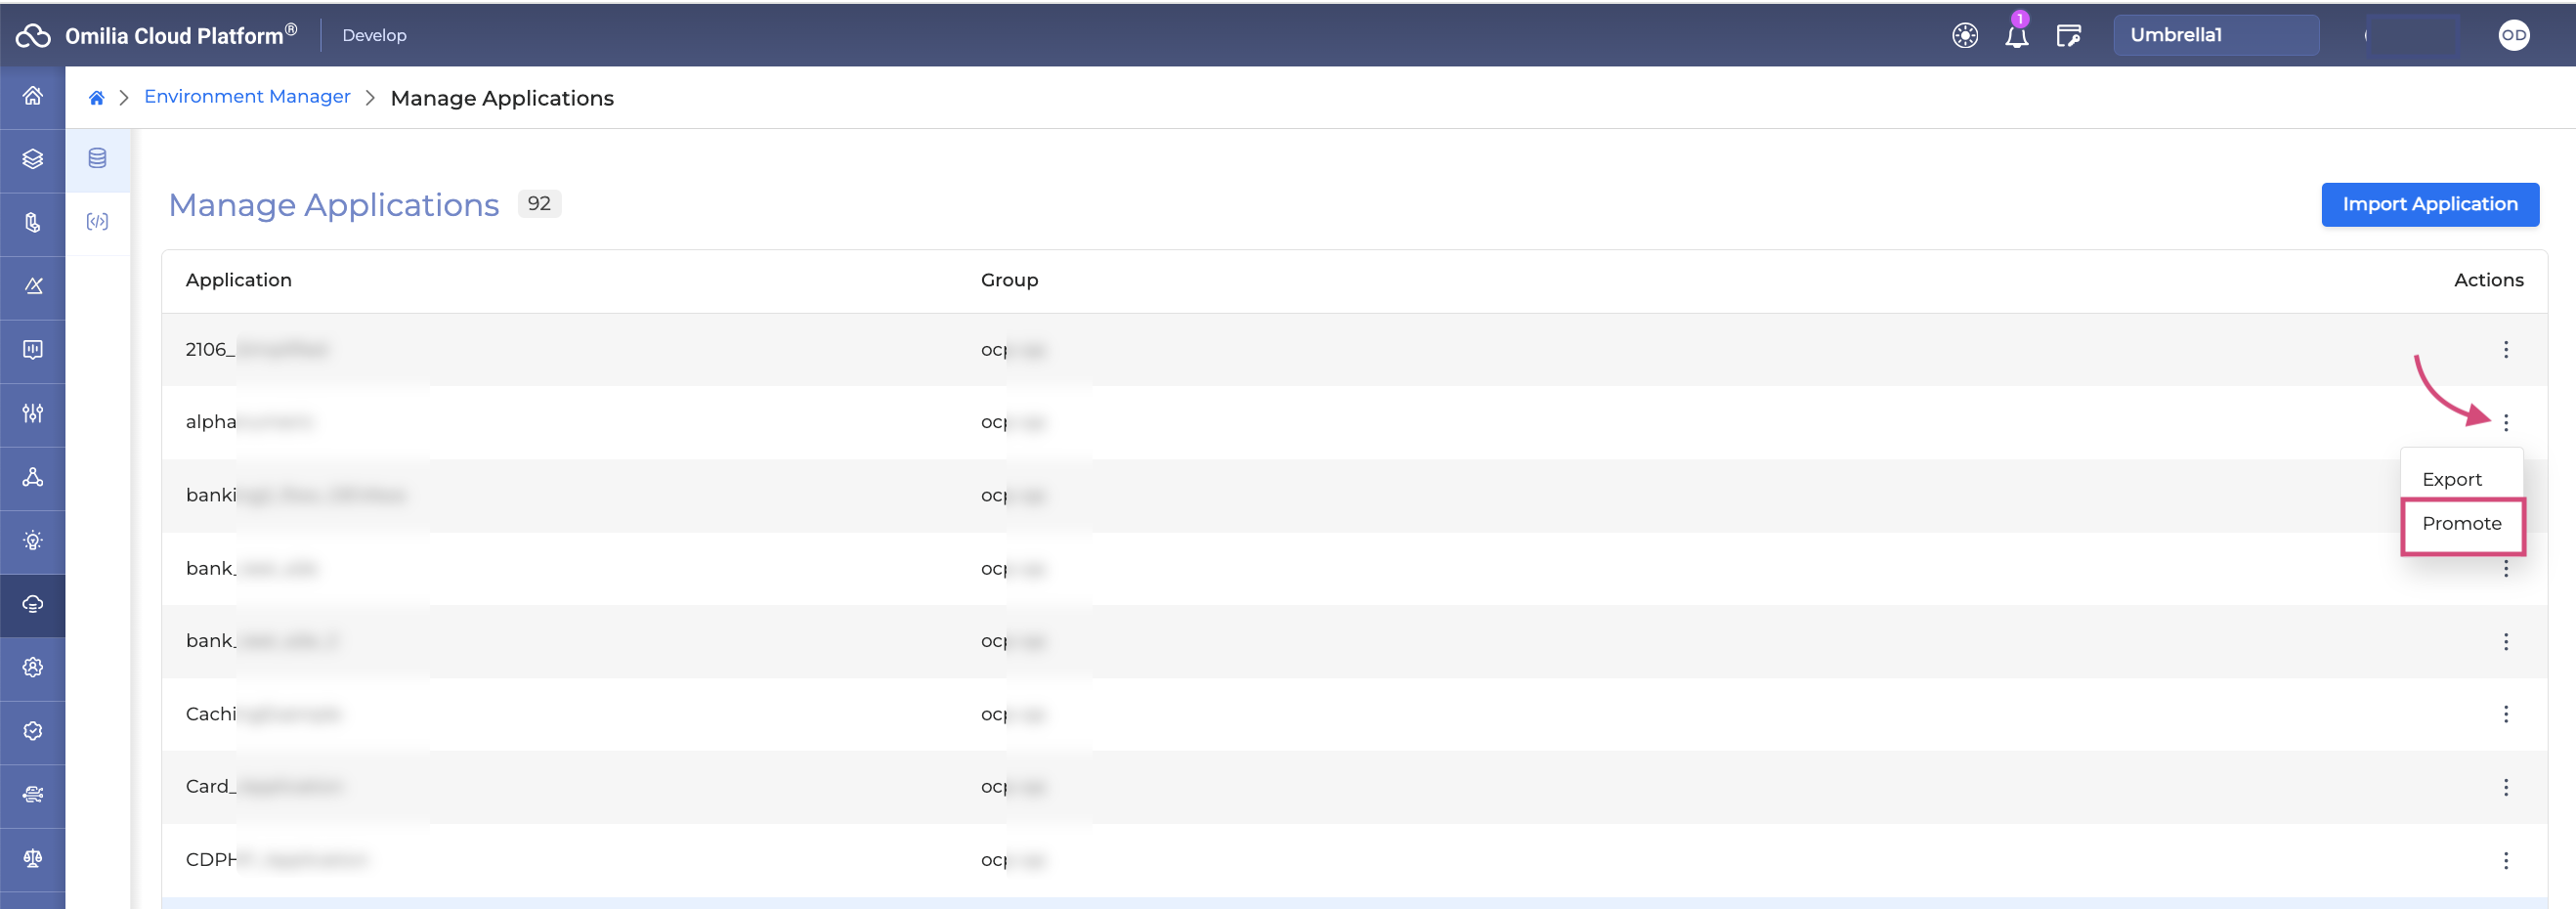
Select the application, open the Options menu on the right and click the Promote button.
-
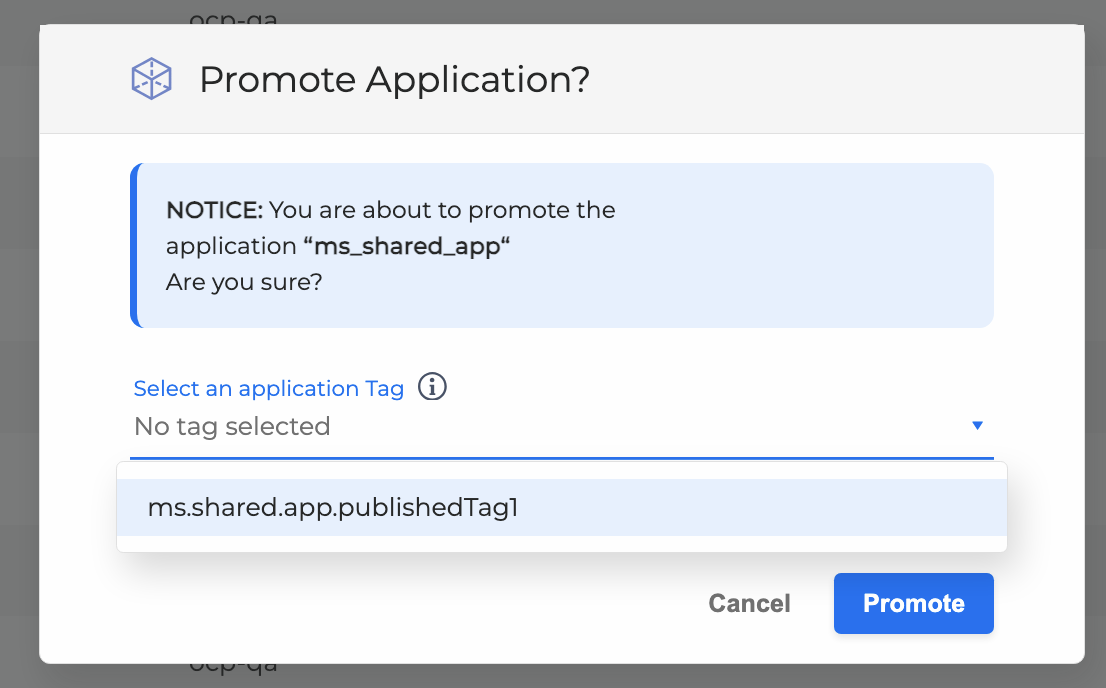
You may select an Application Tag from the dropdown list of the available ones (optional). Otherwise, you can promote the application by not selecting any tag.
-
Confirm by clicking Promote.
-
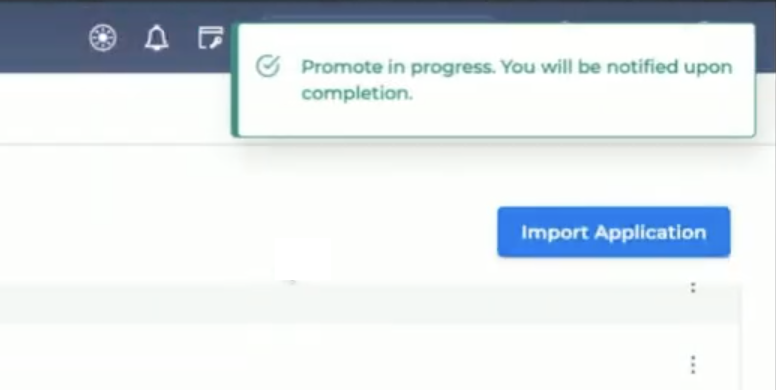
A toast message will appear in the upper-right corner of the screen, indicating that promoting is in progress.
-
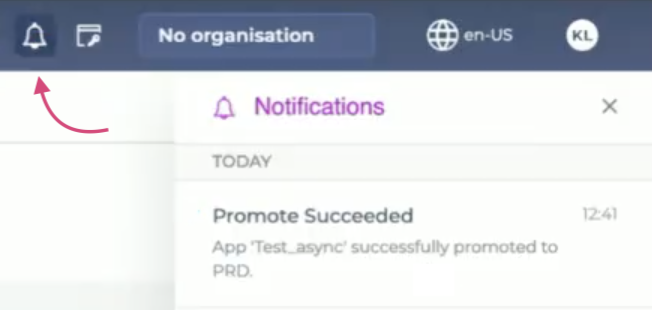
Once the process is complete, a service notification will display the import status. To see the service notification, click the Bell icon.
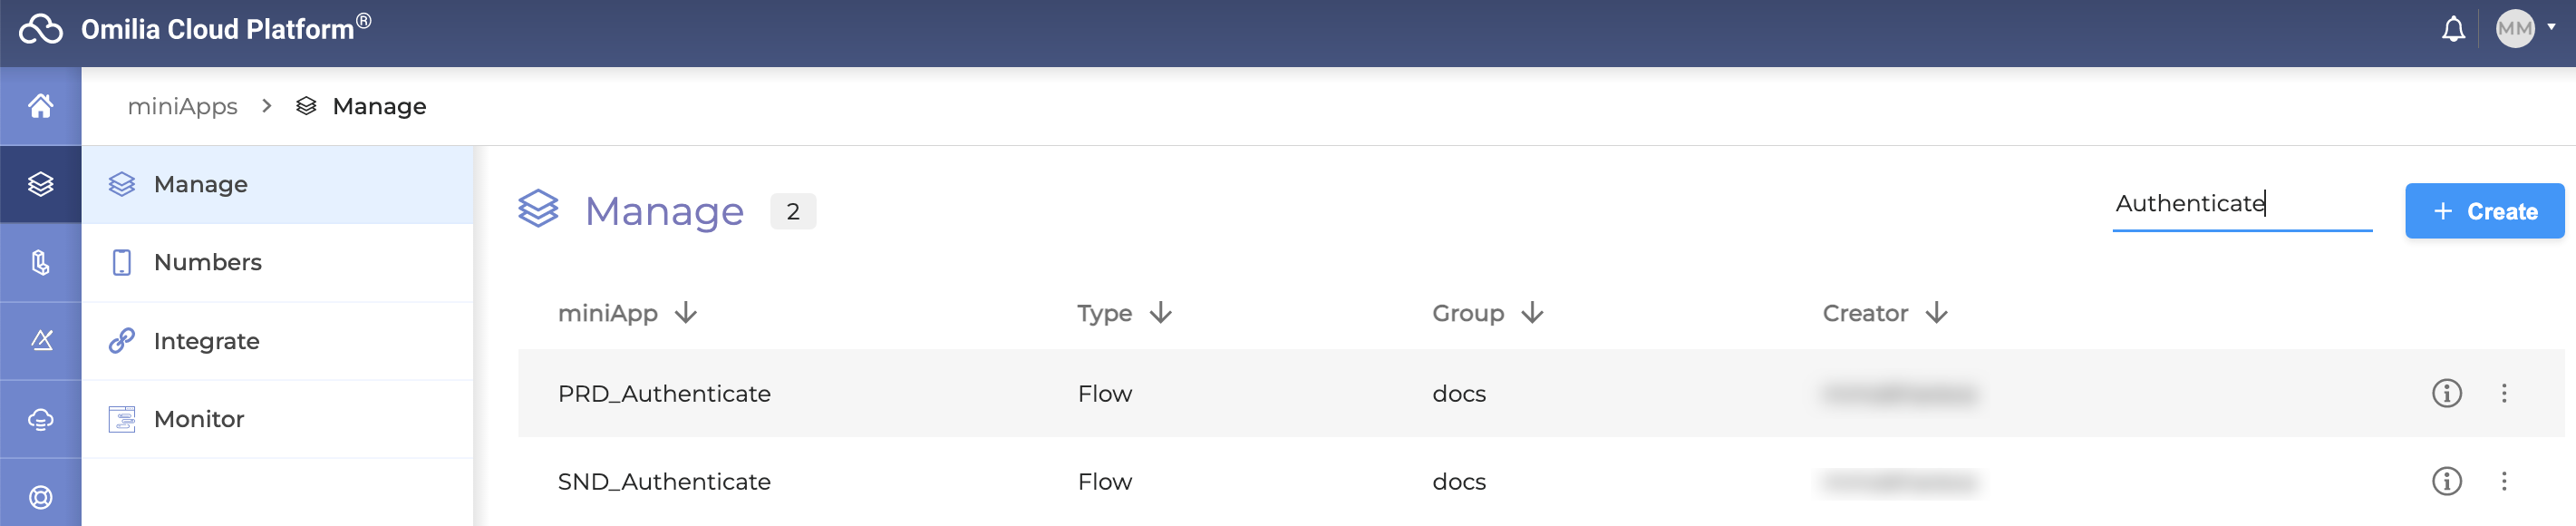
Navigate to Dashboard or miniApps in order to check the created clusters.
Application Tags
An Application Tag is an application’s instance. You can read more about Application Tags in Orchestrator User Guide. In the Environments Manager, you can find the list of all the Application Tags available for a particular Application.
List Application Tags
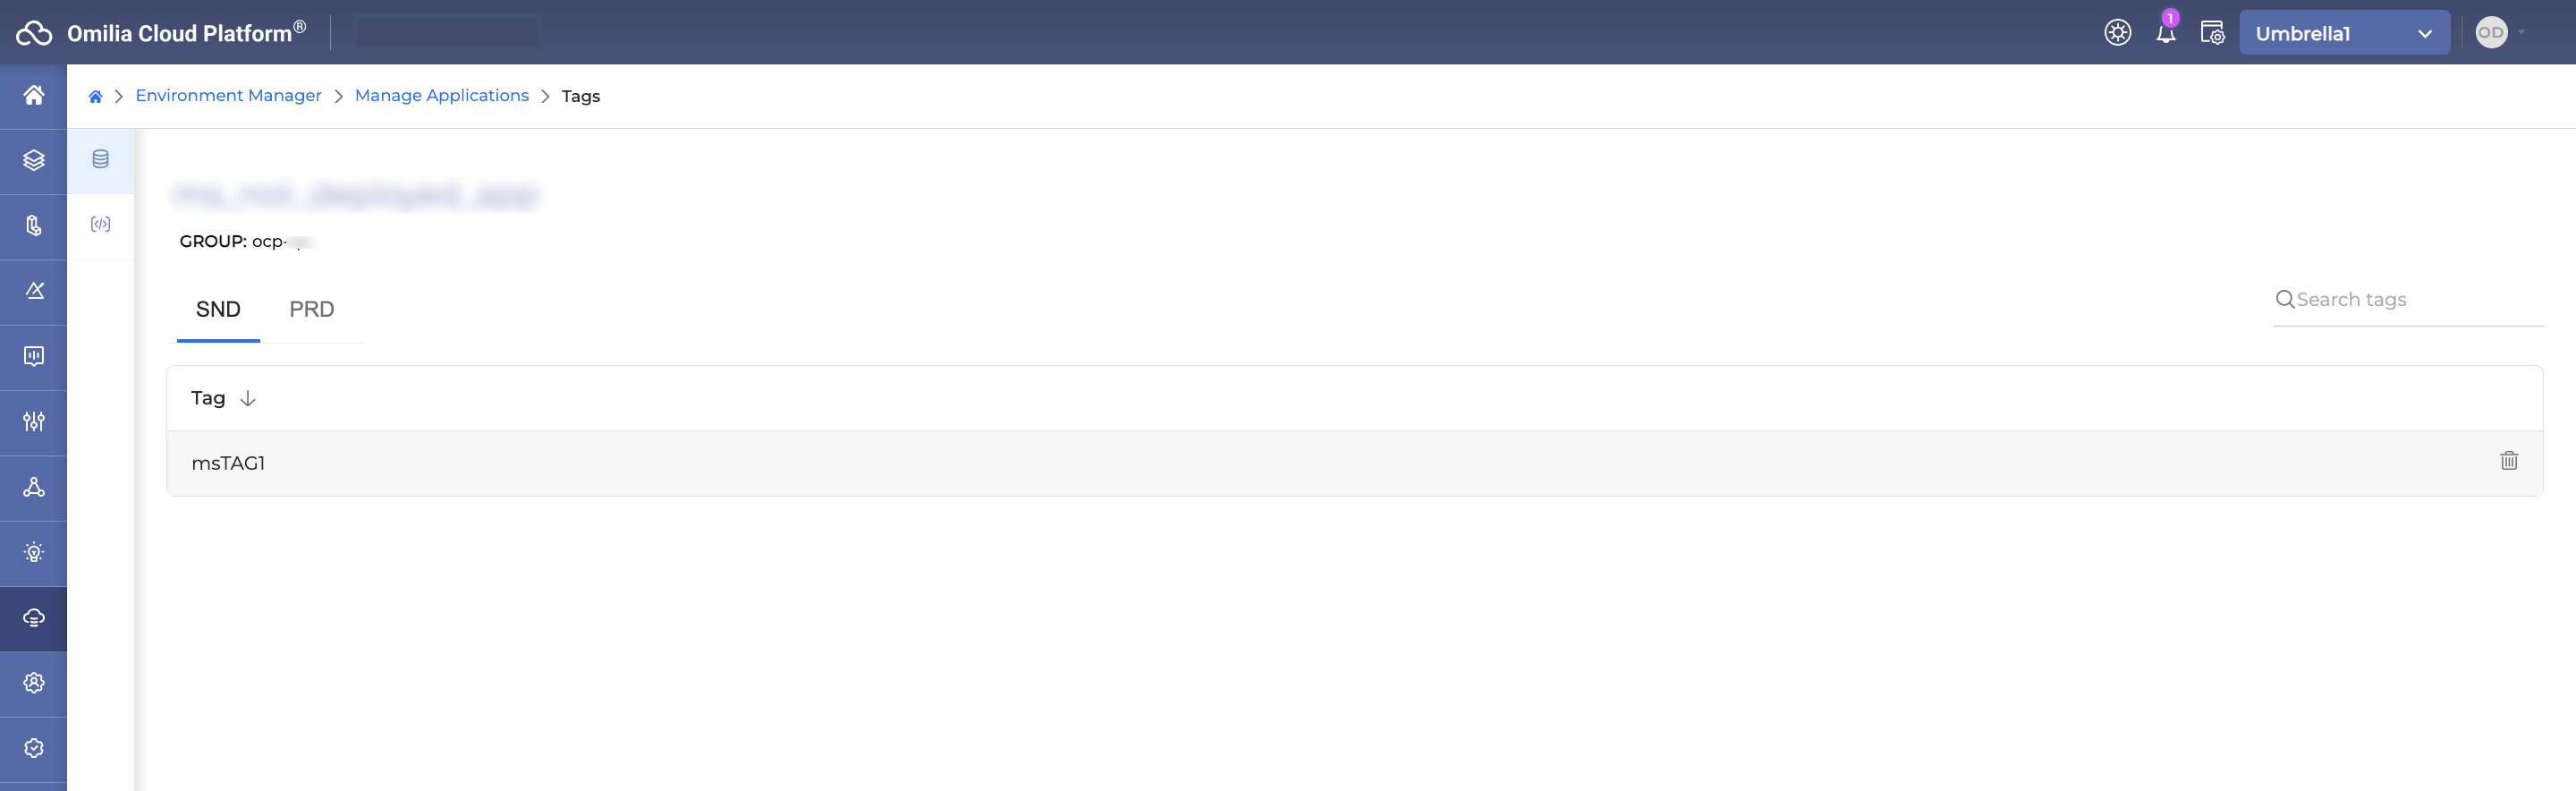
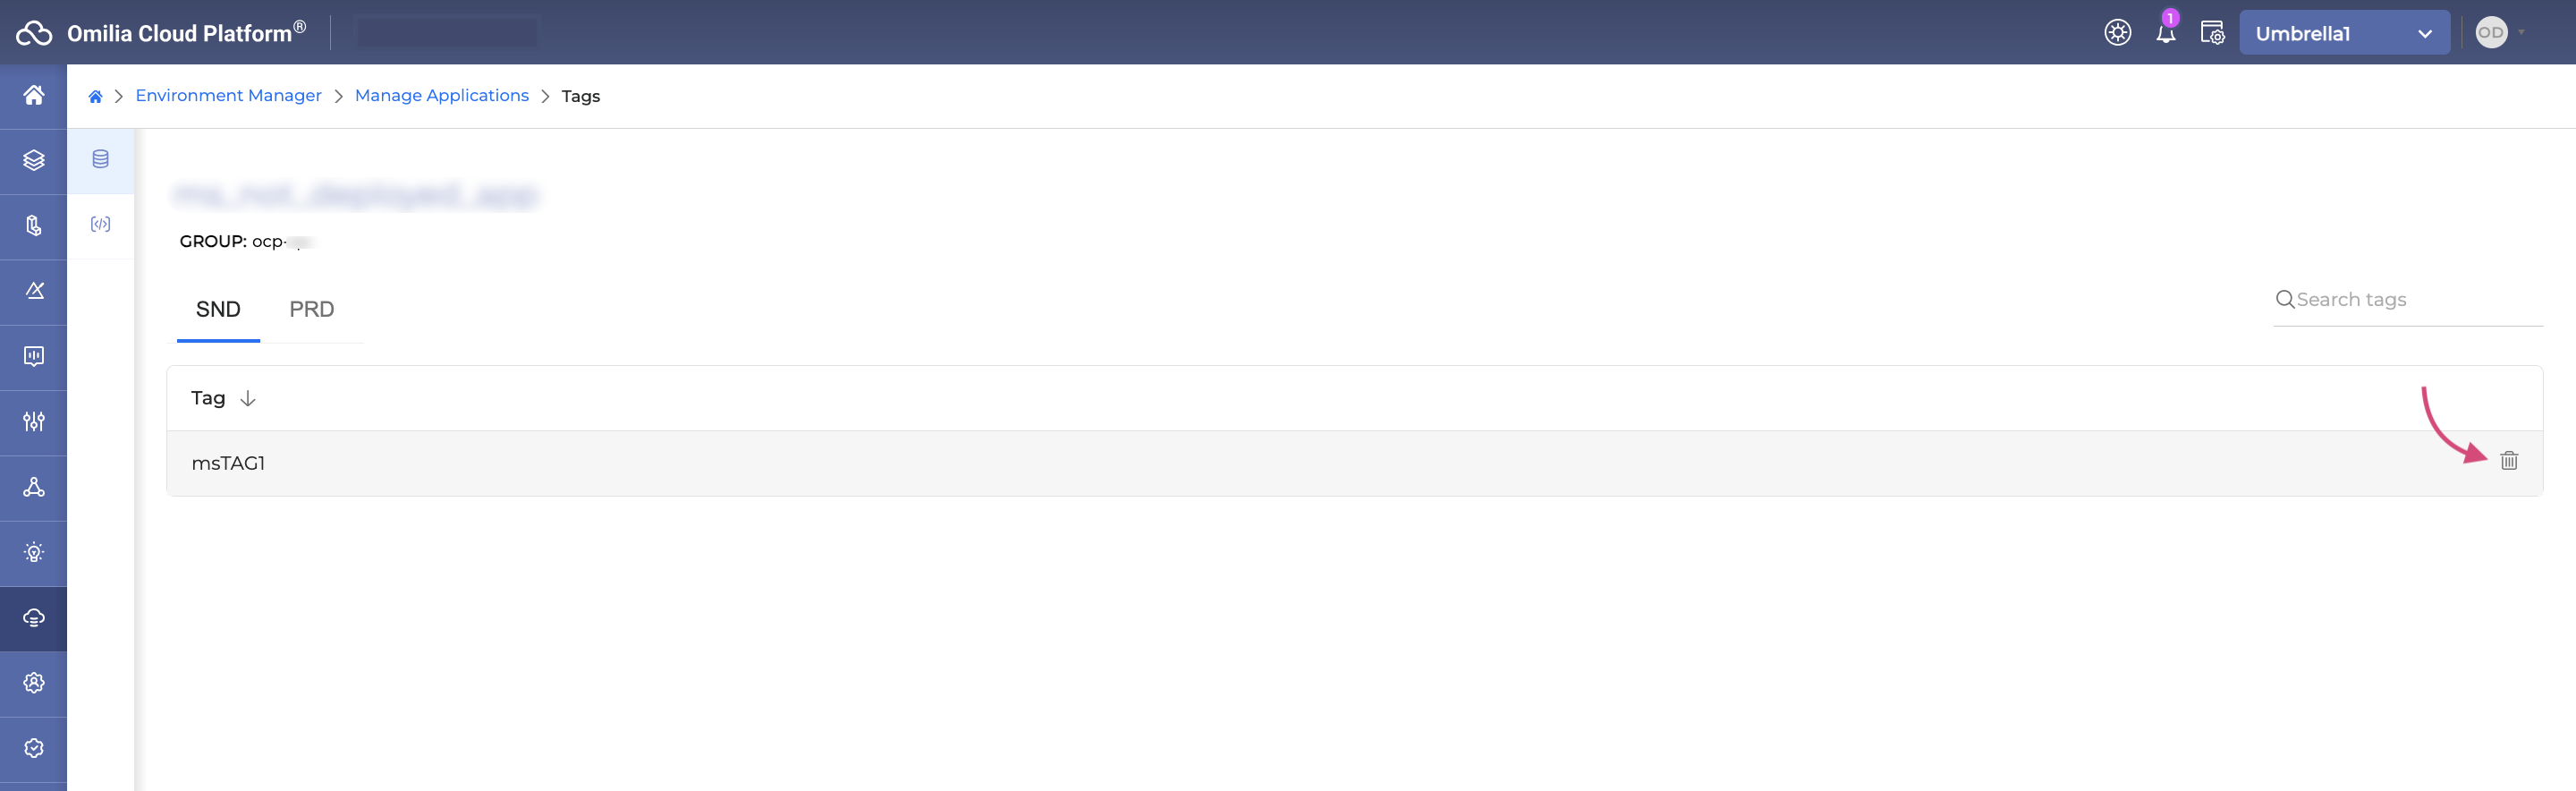
To find the list of Application Tags, click on a selected Application. This will open a page with SND (Sandbox) and PRD (Production) Application Tags available for the selected Application.
Delete an Application Tag
To delete an Application Tag, proceed as follows:
-
Click the Delete icon next to the selected Application Tag.
-
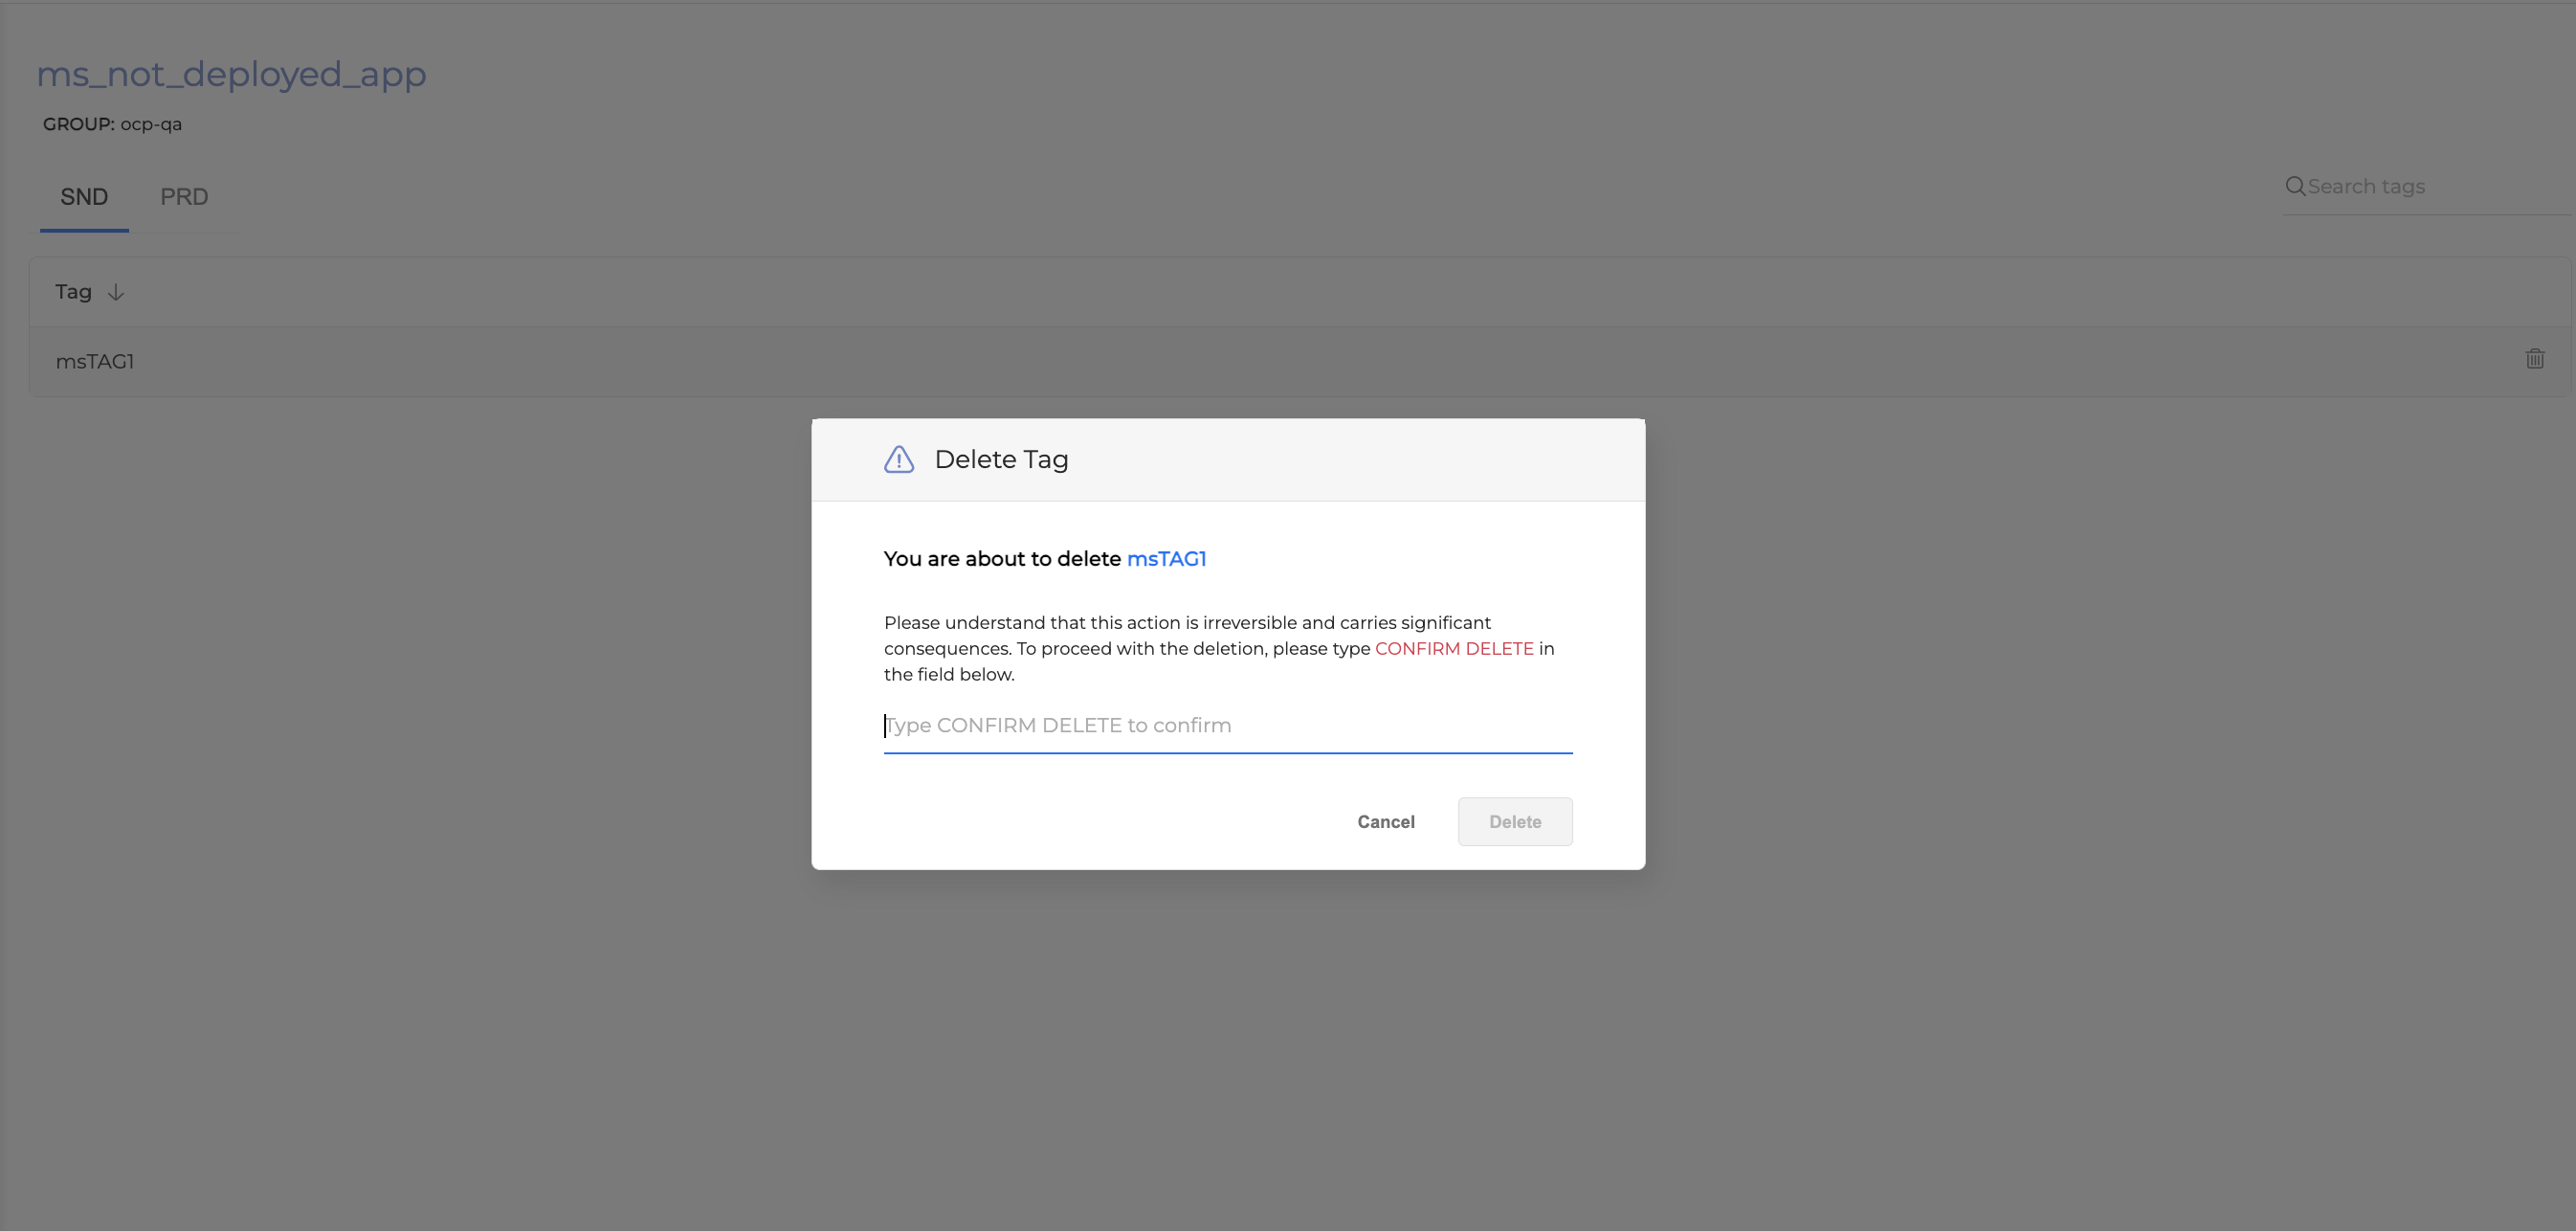
The following dialog box opens.
-
Type CONFIRM DELETE and confirm by clicking Delete. The Application Tag is deleted.