.svg)
Variable Collections
A Variables Collection provides a way to store information such as numbers, or text.
By using OCP variables, you can make your job scripts more dynamic and adaptable, as they enable you to change the stored data or perform calculations based on the values stored in the variable.
When you export or import an Application, it is exported and imported along with its Variables collection.
During the import process, pay attention to the following aspects:
-
Non-Sensitive Variables: Keys for both non-sensitive and sensitive Variables can be imported. However, to maintain security and confidentiality, the values of sensitive Variables are not included.
-
Create-Only Approach: The import mechanism follows a "create-only" approach for Variables. This means:
-
Creation of Missing Variables: If there are Variables in the imported collection that do not exist in the current environment or group, they will be created.
-
No Updates to Existing Variables: The Variables and their values that already exist in the environment or a group will not be updated. However, there is an option to overwrite the values of non-sensitive Variables during the import process. If enabled, this option allows the values of non-sensitive Variables to be updated with the values from the imported collection.
-
Data Searching, Filtering, and Sorting
Data Searching
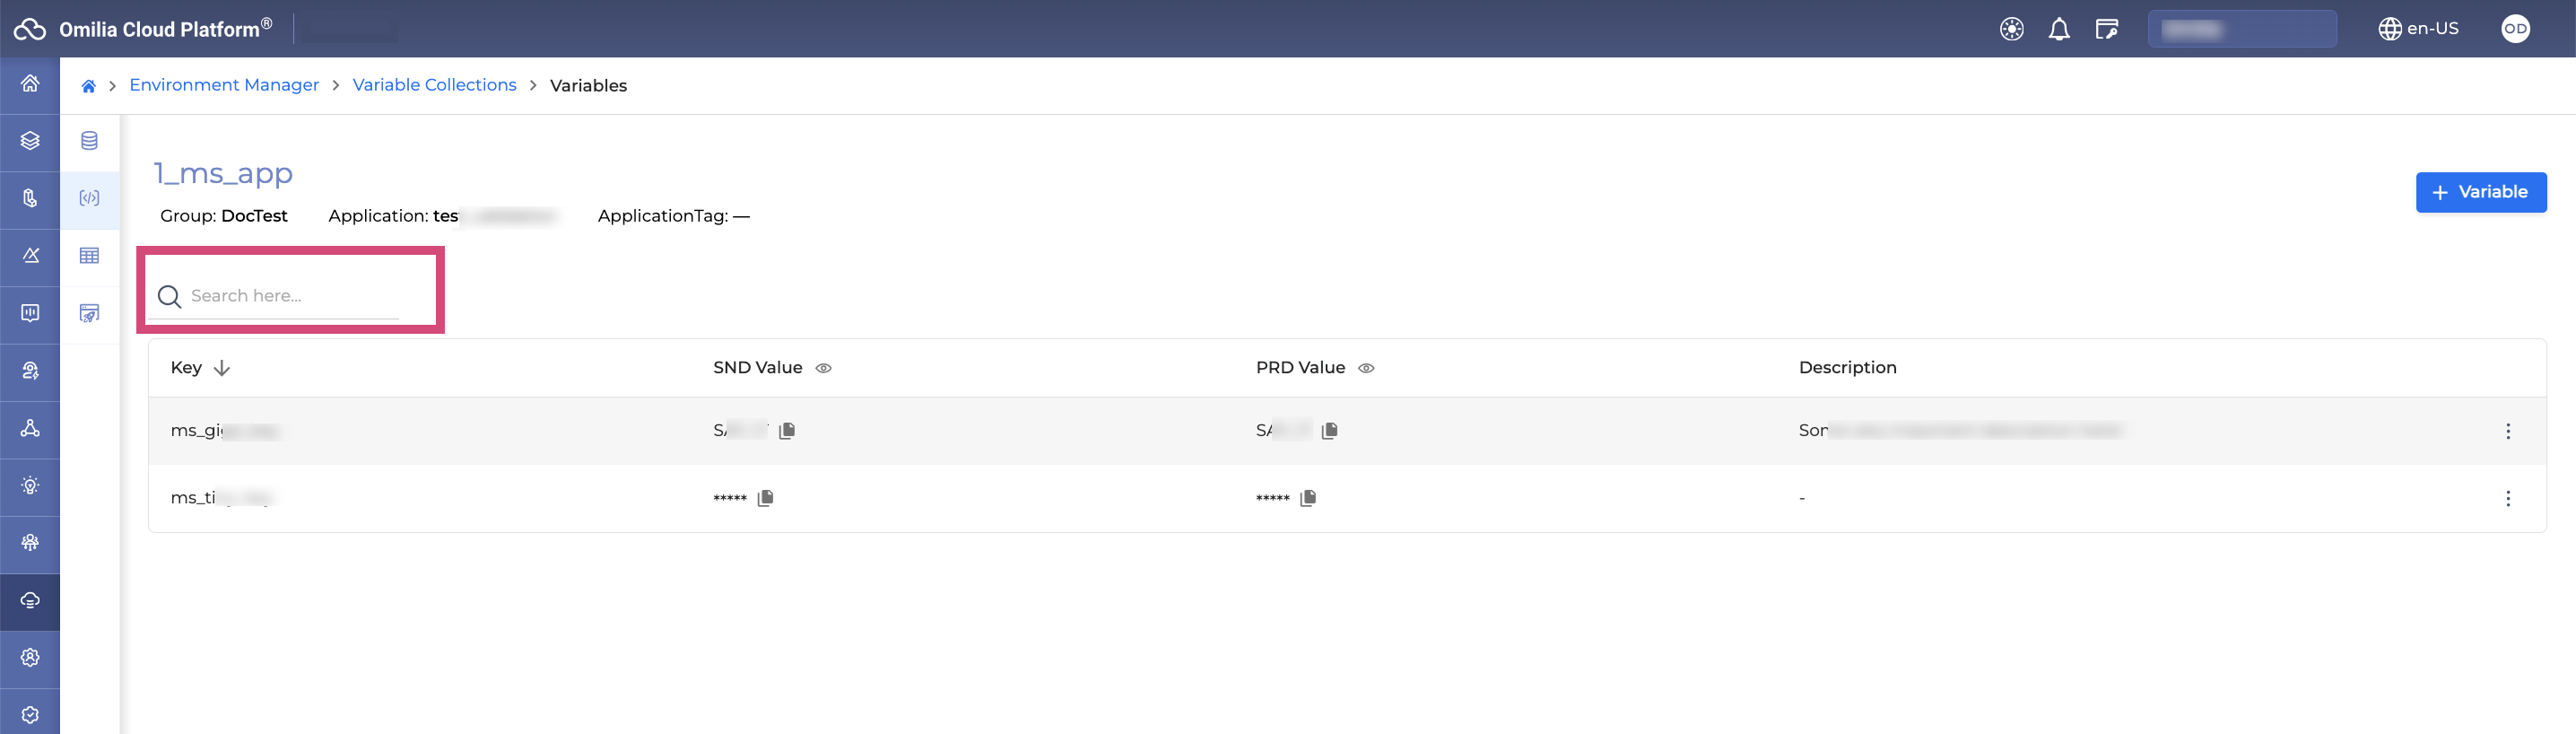
Use the Search field to shorten the list of collections to those associated with the text in the field.
The search engine will scan all elements related to a variable collection, such as the name of a variable collection, application, application tag and group.
Data Filtering
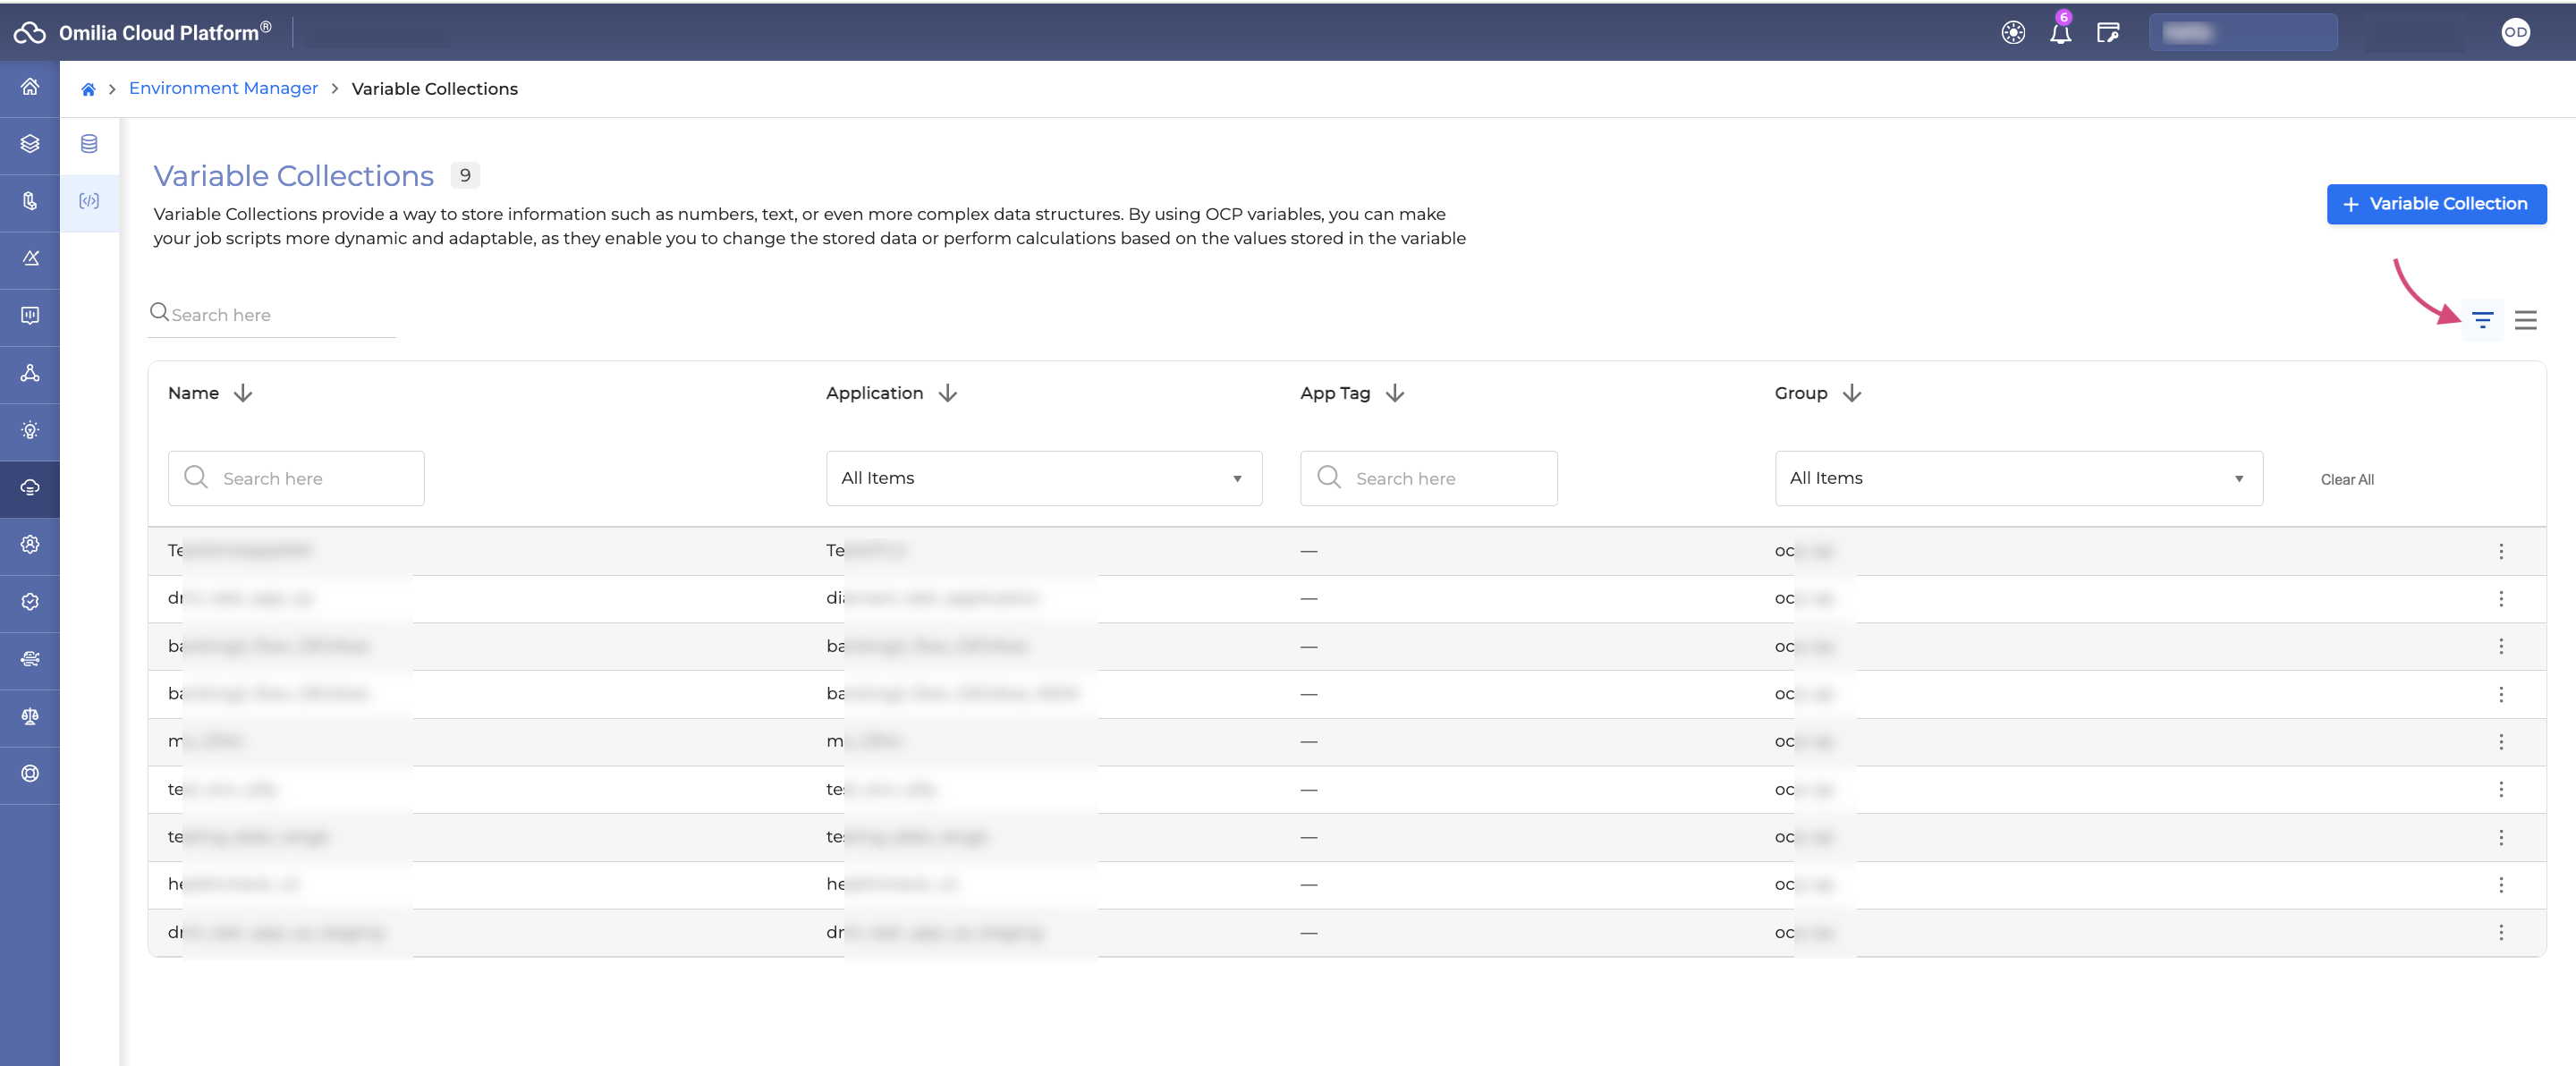
The search filters provide flexibility by allowing you to select multiple items from the list. When dealing with extensive lists, these filters include a convenient search field to streamline your selection process, enabling you to quickly locate specific items without the need for endless scrolling.
To open the search filters, click the Filter icon.
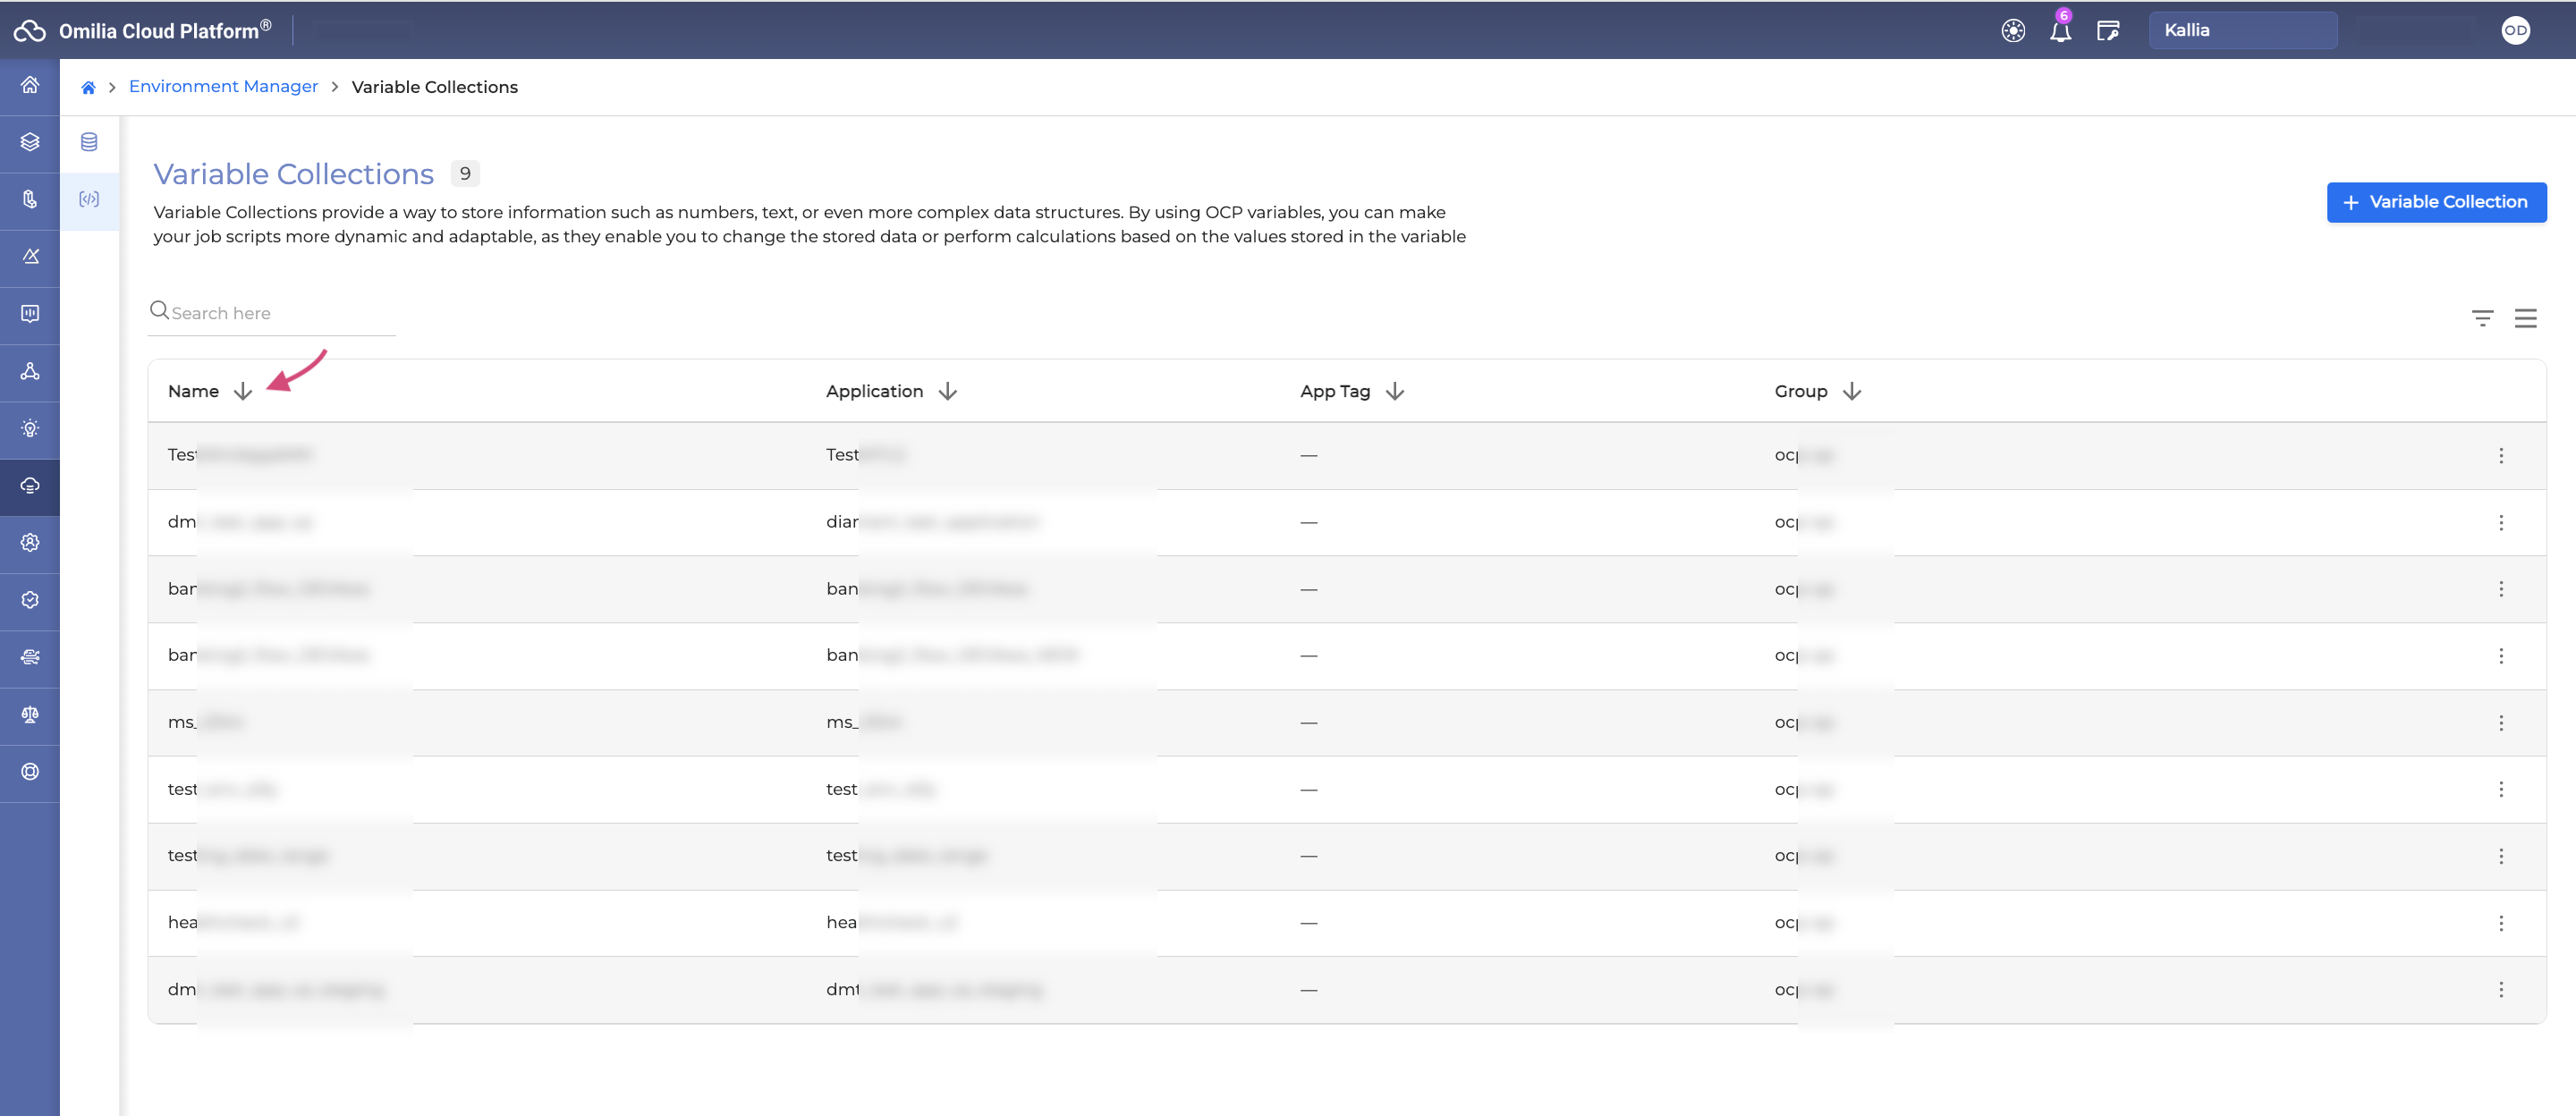
Data Sorting
To arrange the data alphabetically, click the Arrow icon. You can sort the data by criteria such as Name, Application, App Tag, and Group.
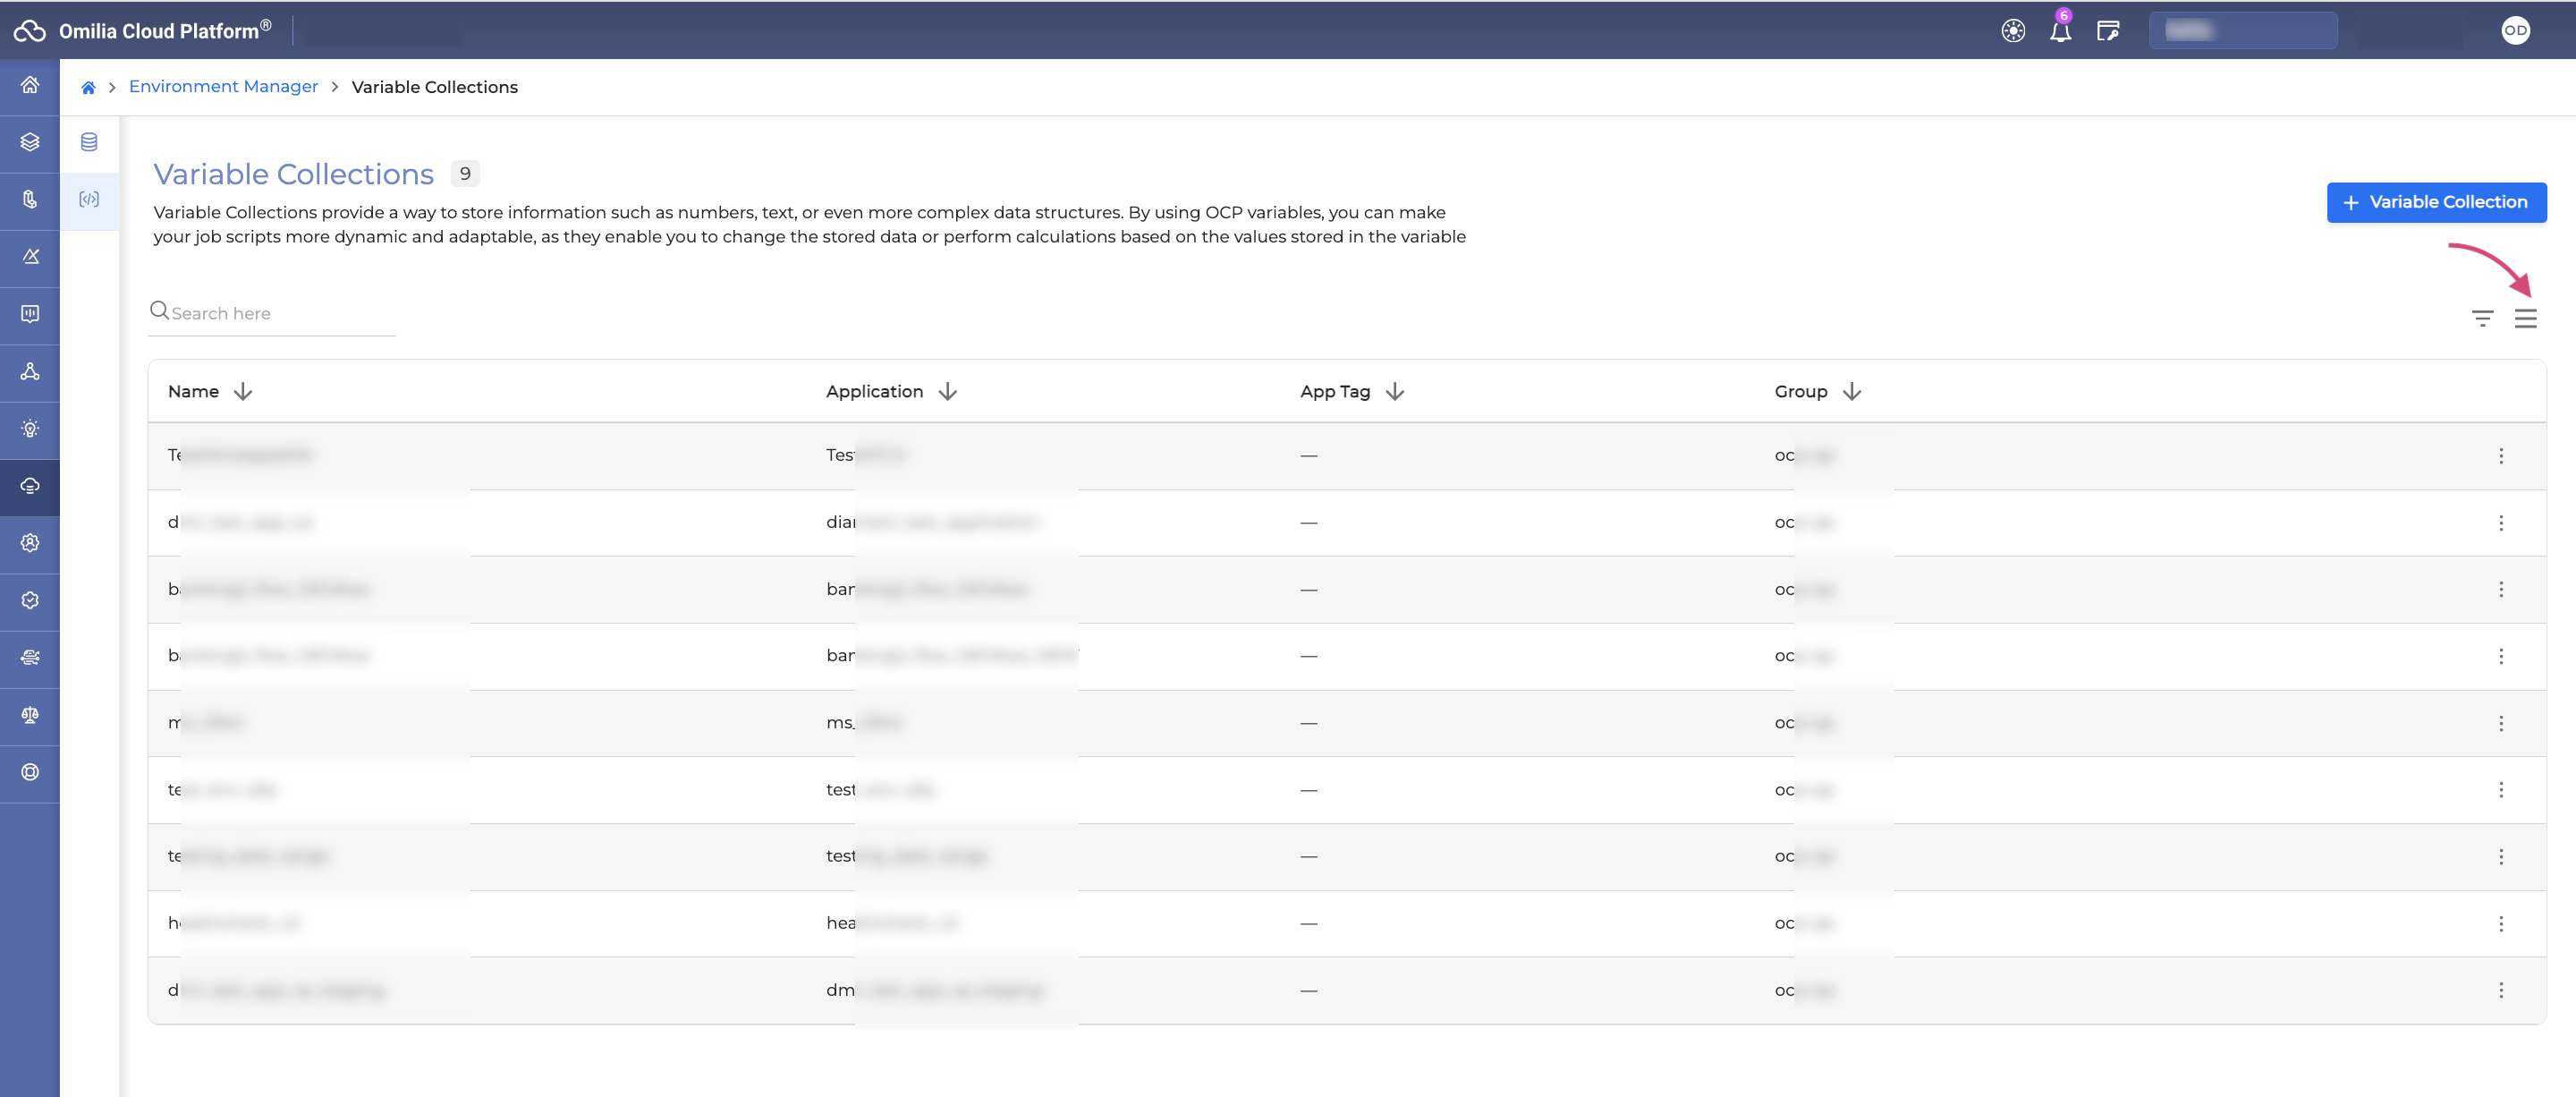
Rows height
You can adjust the height of the rows by clicking the Rows Height button.
Keyboard Navigation
The Environments Manager supports full keyboard navigation to comply with the European Accessibility Act (EAA). You can perform all actions in the application using only your keyboard.
Global Navigation
|
Key |
Action |
|---|---|
|
Tab |
Move focus to the next focusable element |
|
Shift + Tab |
Move focus to the previous focusable element |
|
Enter |
Activate the focused element (e.g., button, link) |
|
Escape |
Close modal dialogs, menus, or popovers |
|
Spacebar |
Activate a button or toggle a checkbox |
|
Arrow keys |
Navigate between menu items, dropdown options, or radio buttons |
Form Controls
|
Key |
Action |
|---|---|
|
Enter |
Submit a form when focused inside an input field |
|
Spacebar |
Toggle a checkbox or activate a button |
|
Arrow keys (↑ ↓ ← →) |
Navigate between options in a radio group or open dropdown |
|
Home / End |
Jump to the first or last item in a list or menu |
Tables
|
Key |
Action |
|---|---|
|
Arrow keys (↑ ↓ ← →) |
Move between cells |
|
Ctrl + Home / Ctrl + End |
Jump to the first or last cell in the table |
Modals and Dialogs
|
Key |
Action |
|---|---|
|
Escape |
Close the dialog |
|
Tab / Shift + Tab |
Move between focusable elements within the modal |
When a modal is open, focus is contained within it. Keyboard focus will not move to elements outside the modal until it is closed.
Create a Variables Collection
To manually create a Variables Collection for an application, proceed as follows:
-
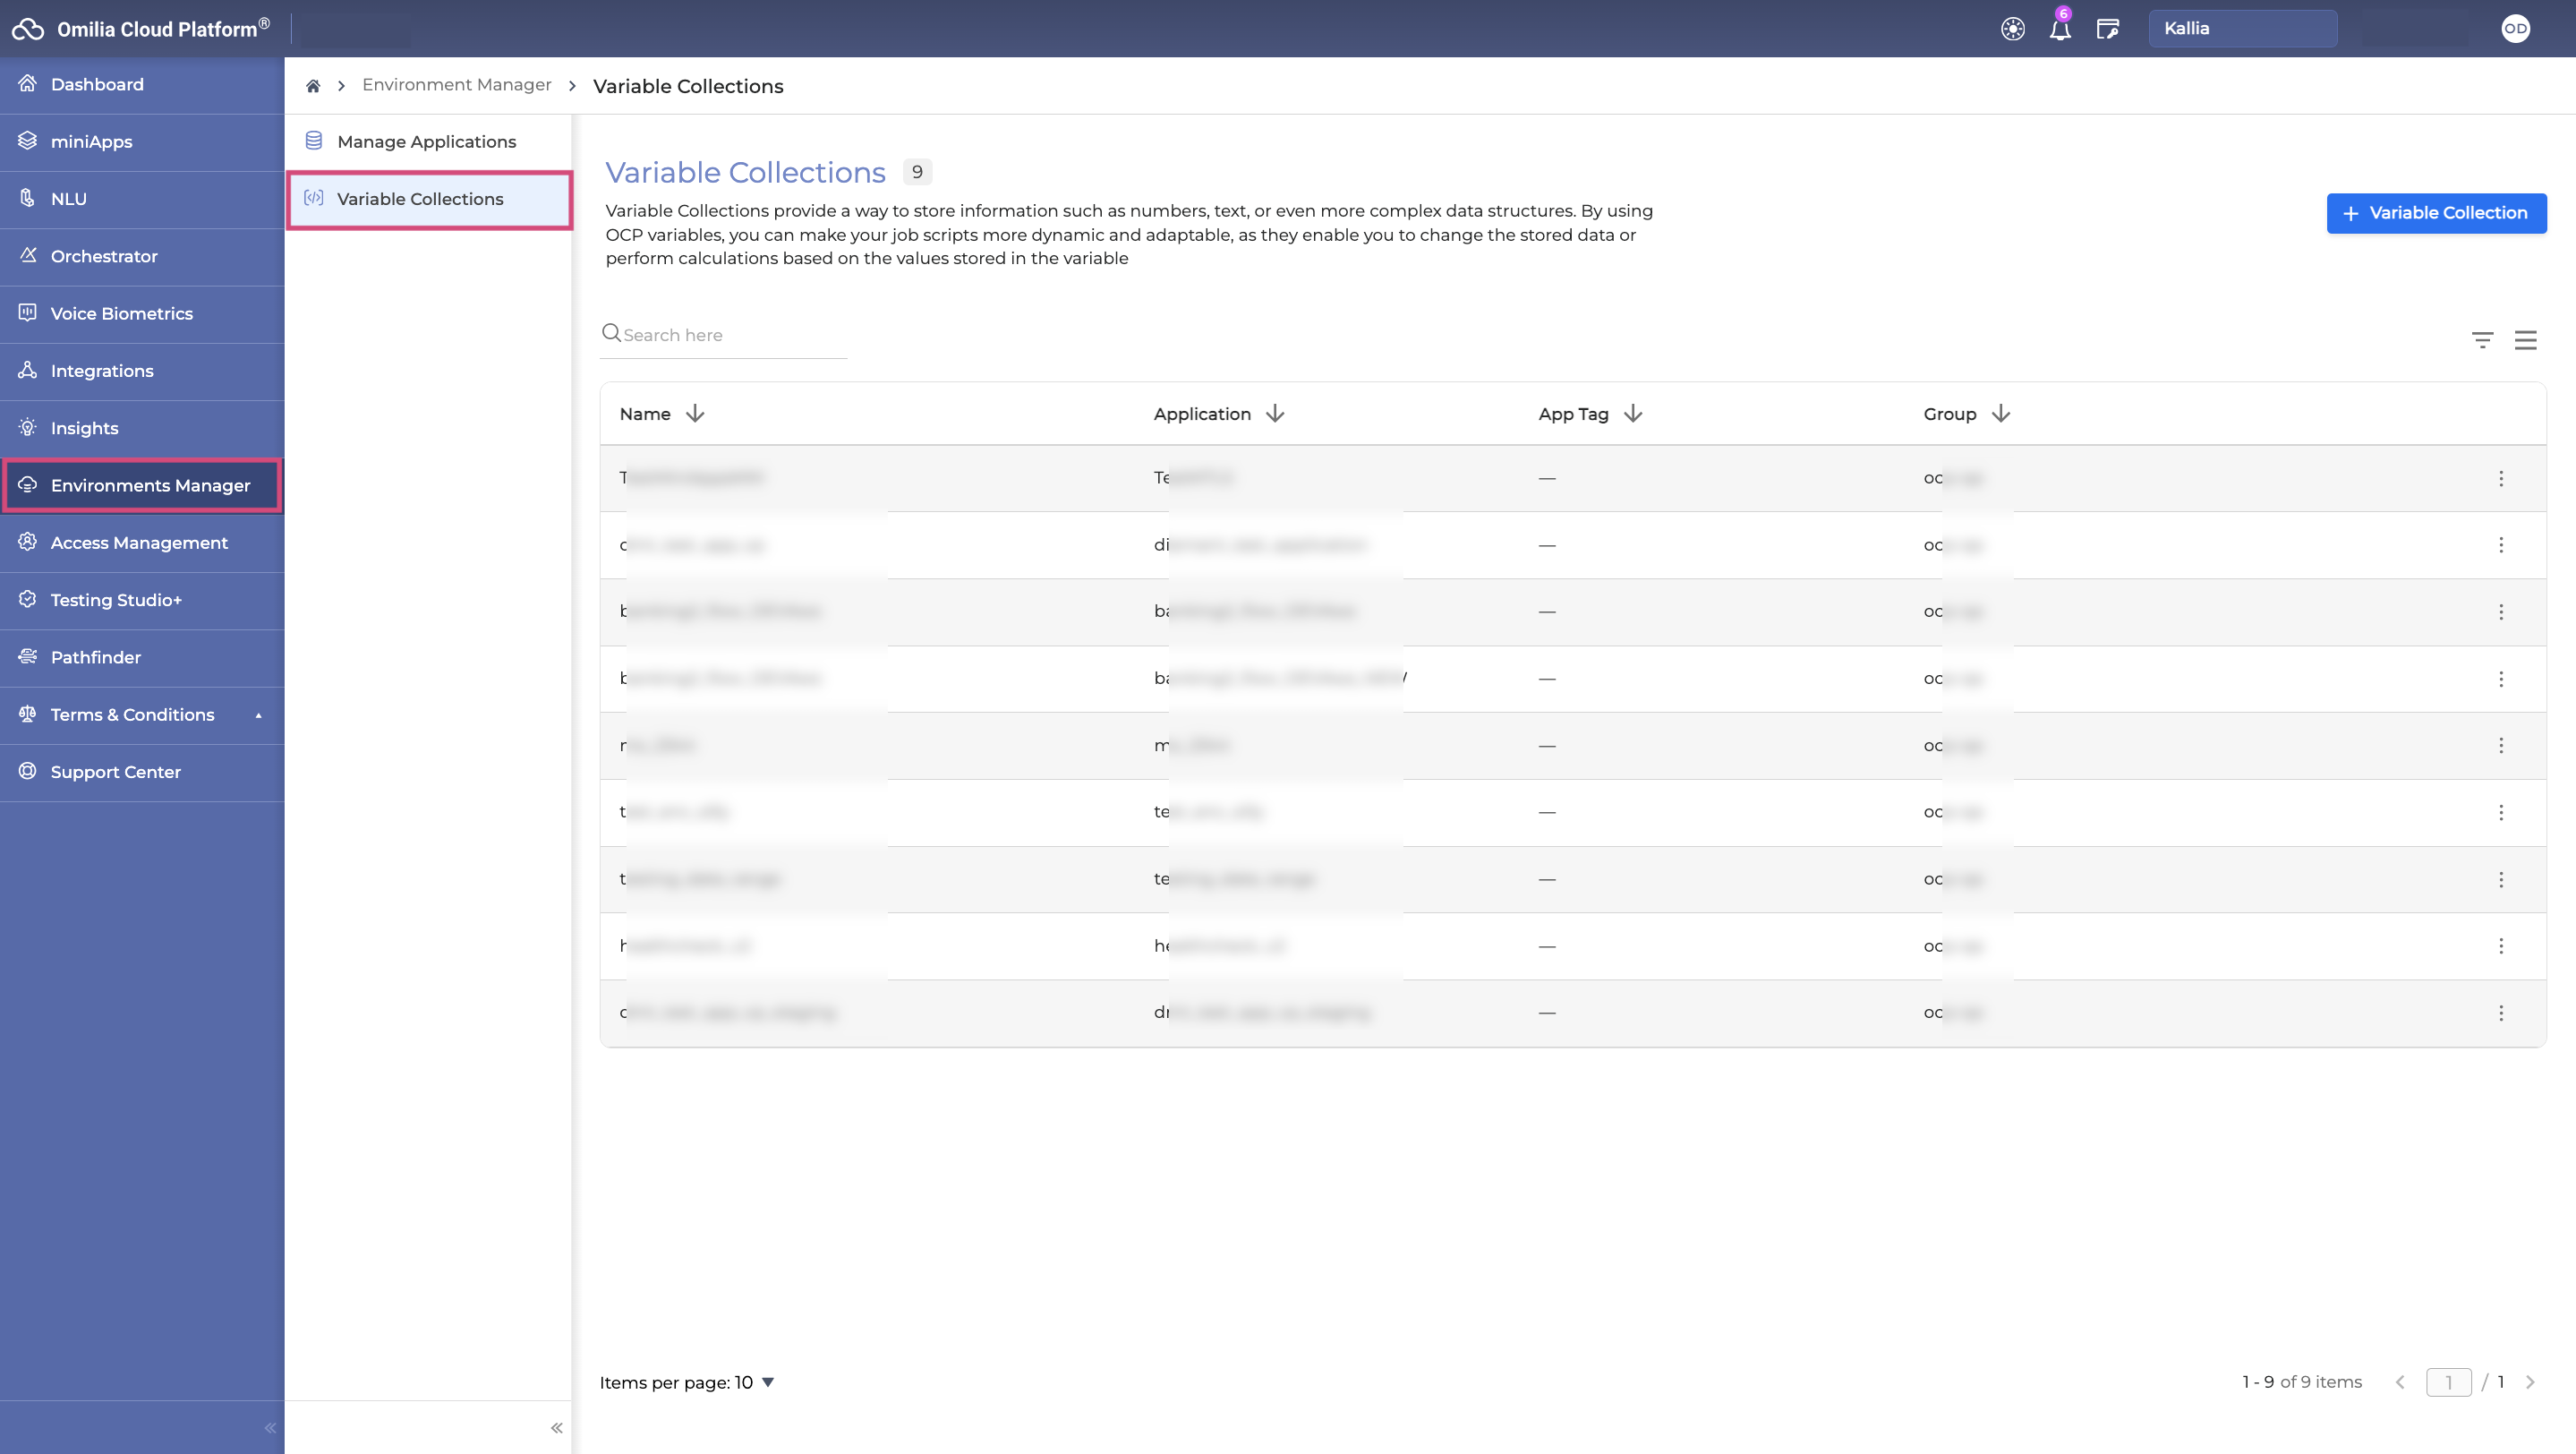
Navigate to Environment Manager → Variable Collections.
-
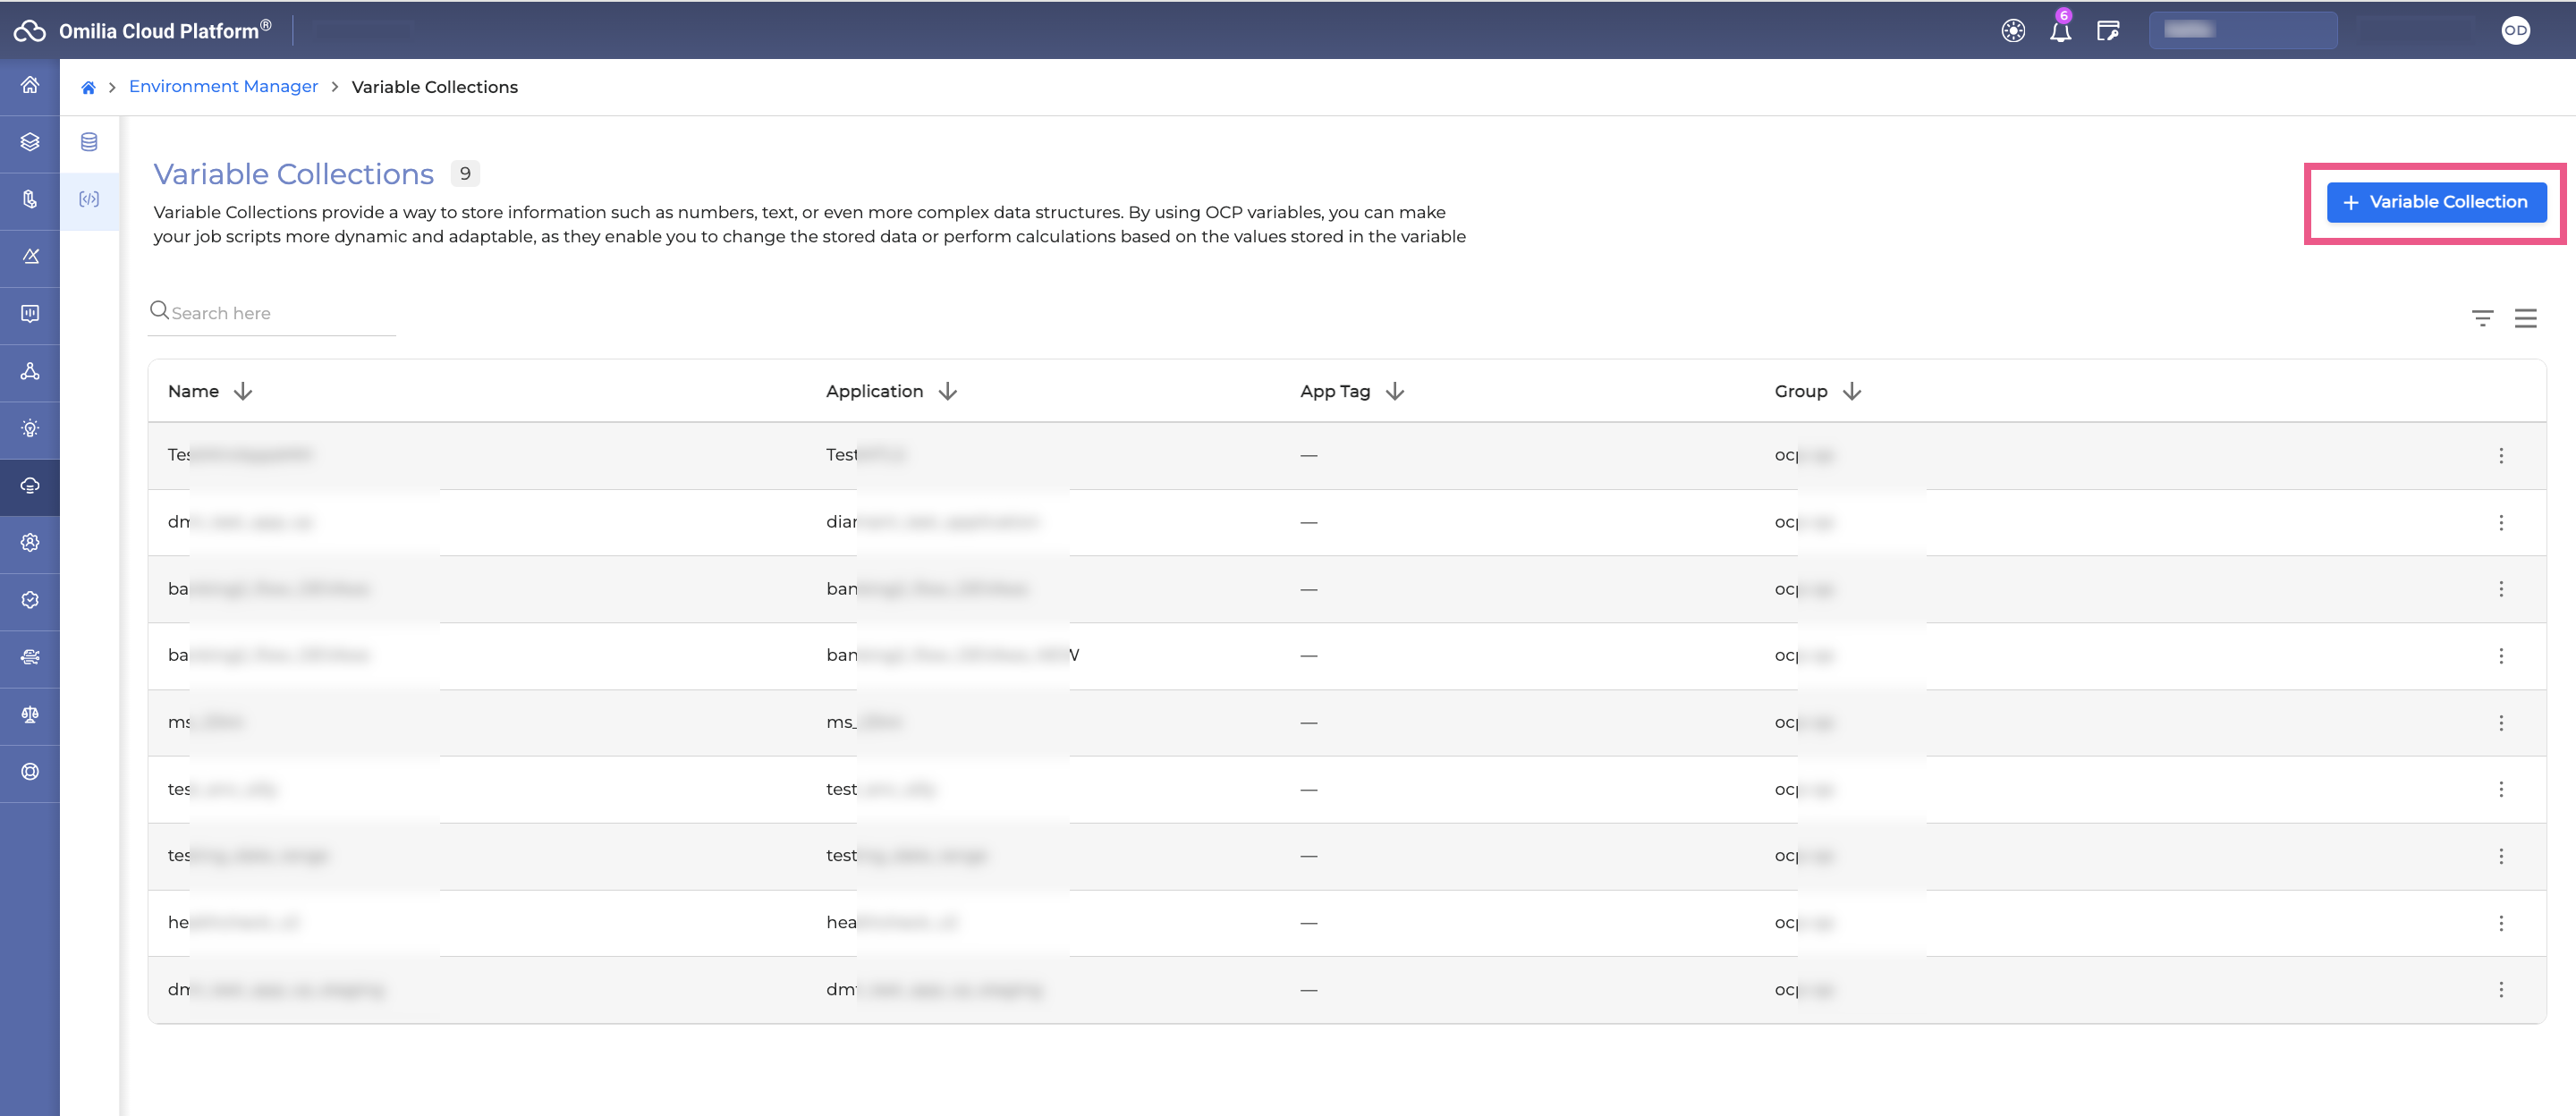
Click the + Variable Collection button.
-
Select an application from the drop-down list and provide a name for the Variables Collection you wish to create for it.
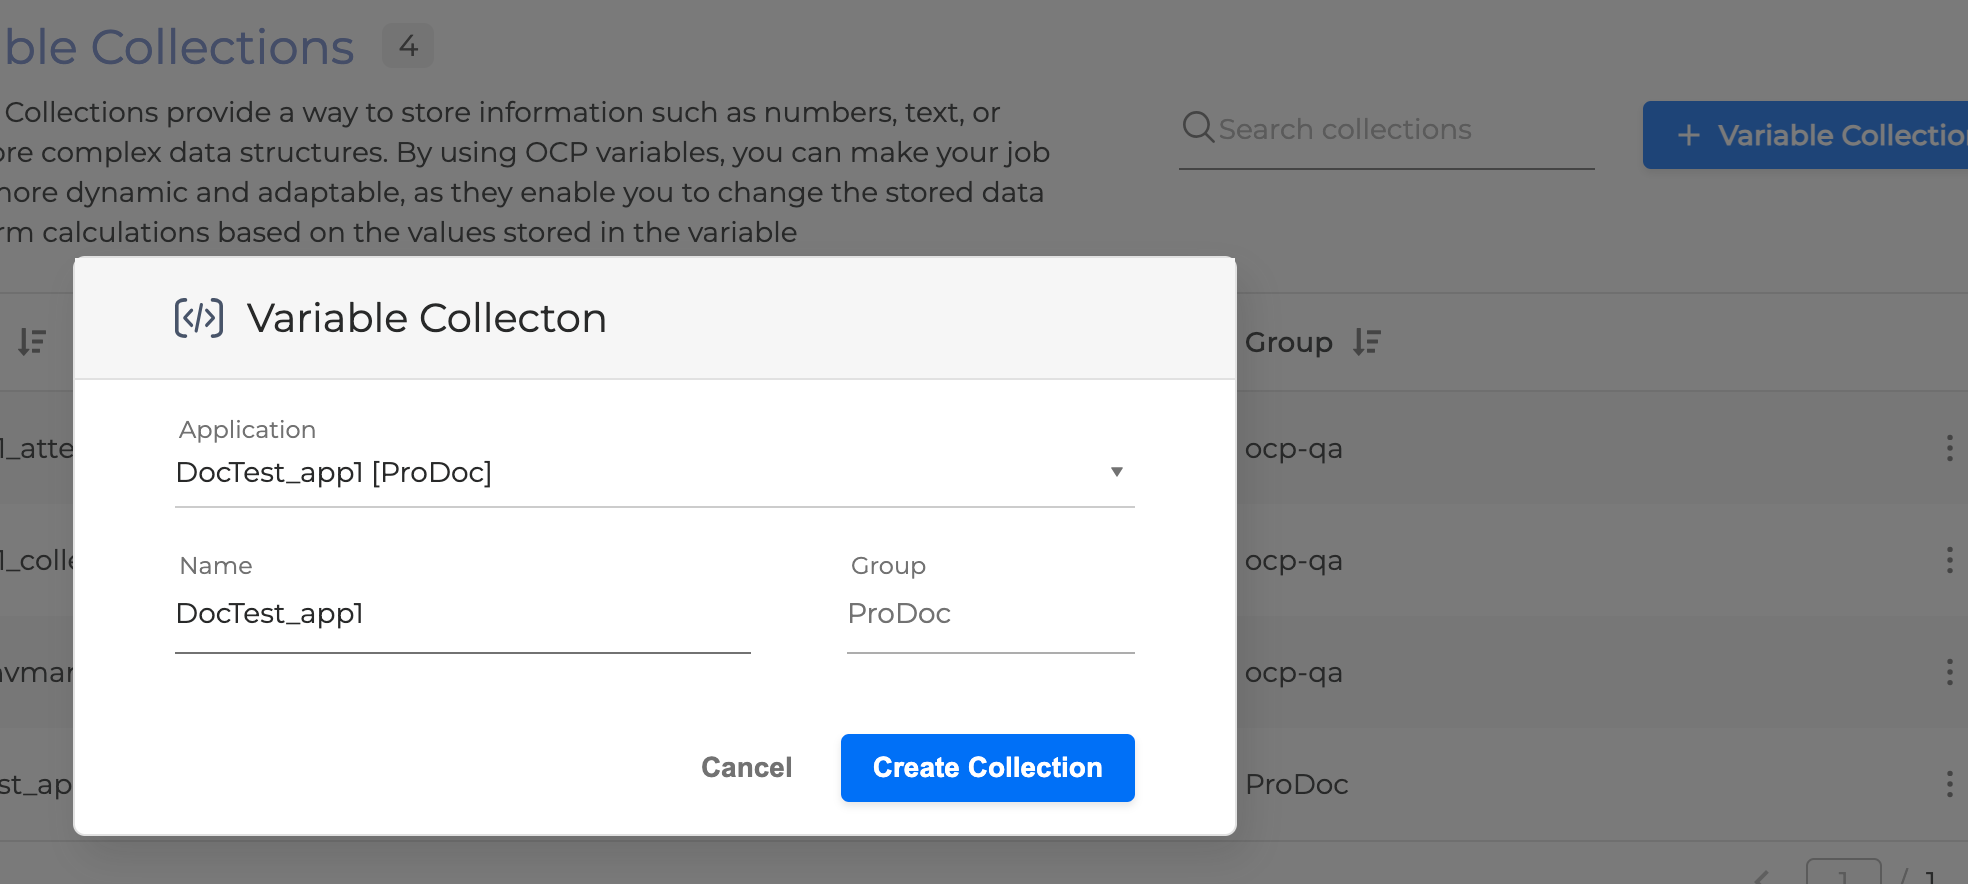
4. Click Create Collection button and the new collection will be added to the Variables Collection list.
You can create only one Variable Collection per Application.
Alway redeploy the Application in Orchestrator after a Variables Collection has been added.
When an application, which already has an associated Variable Collection, is published in Orchestrator with a new Application tag, a new Variable Collection is automatically created for the newly assigned application tag.
Create Variables
Once you have created a Variables Collection for a specific application, you can start creating variables within that collection, that can be used in your application and the related miniApps.
-
Navigate to Environment Manager → Variable Collections and click on the collection you wish to add variables to.
-
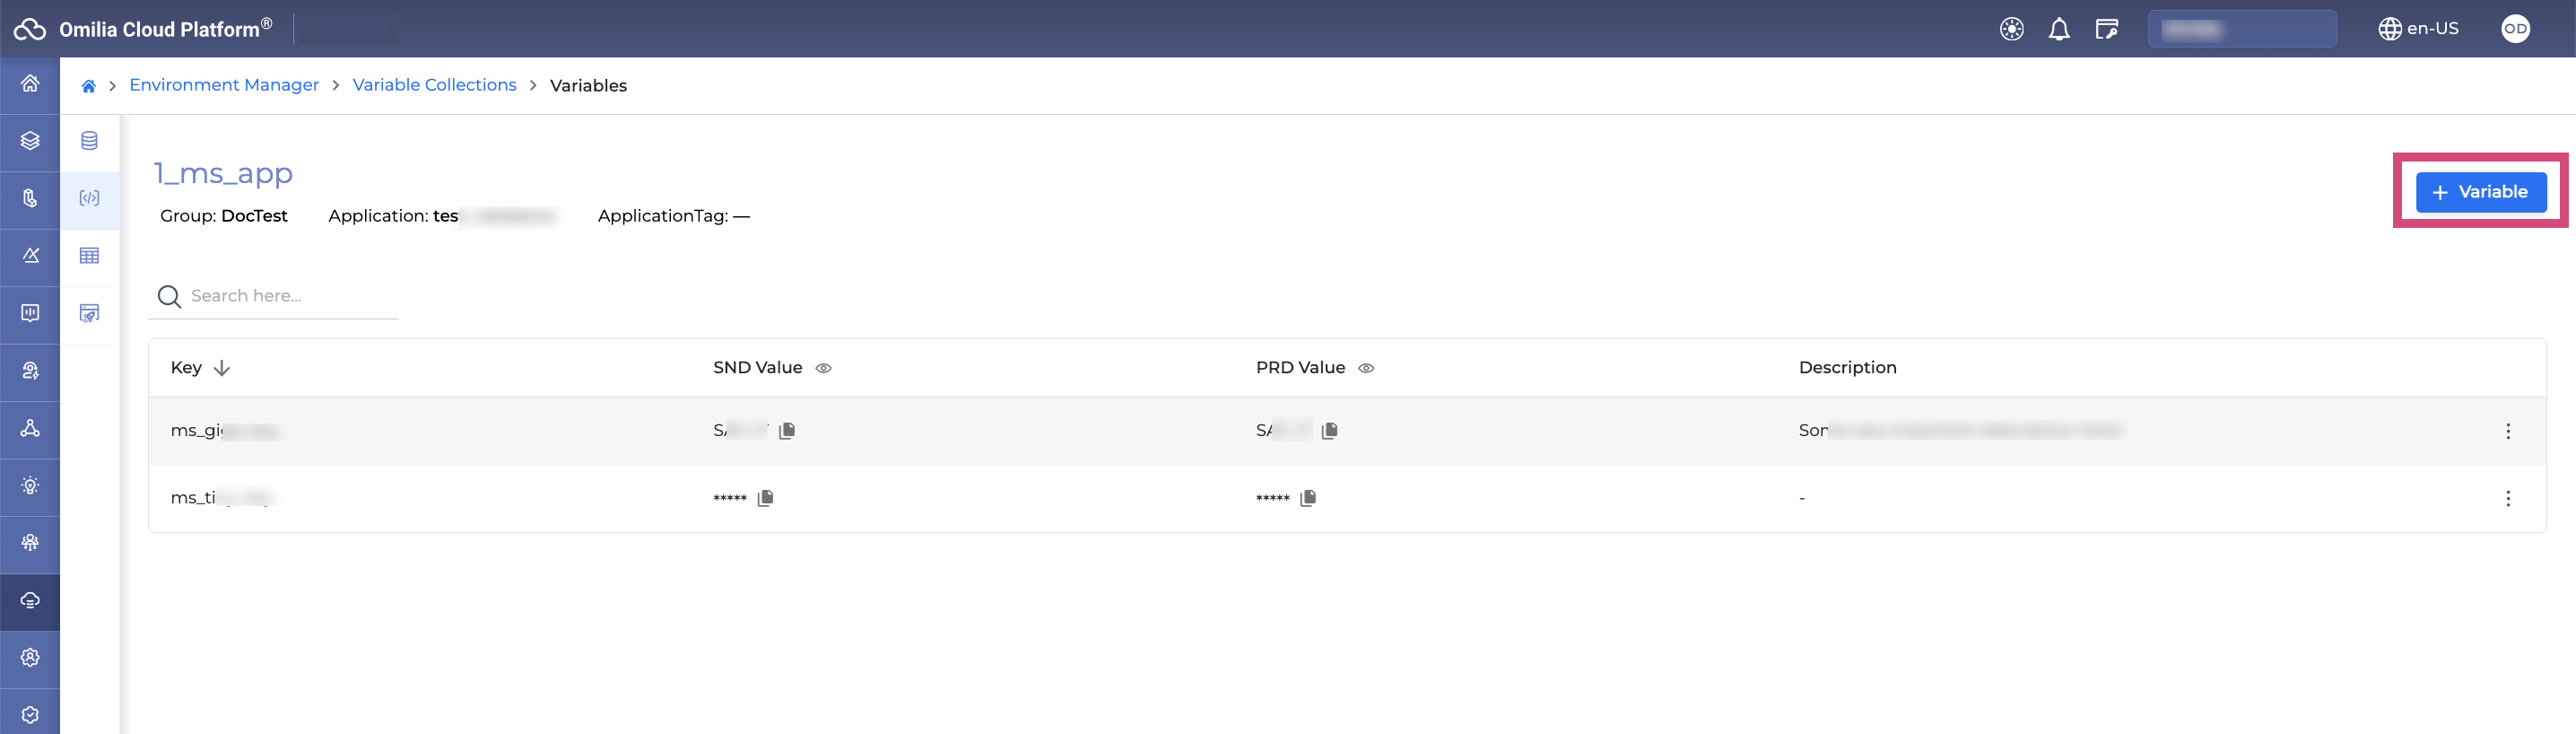
Click the + Variable button.
-
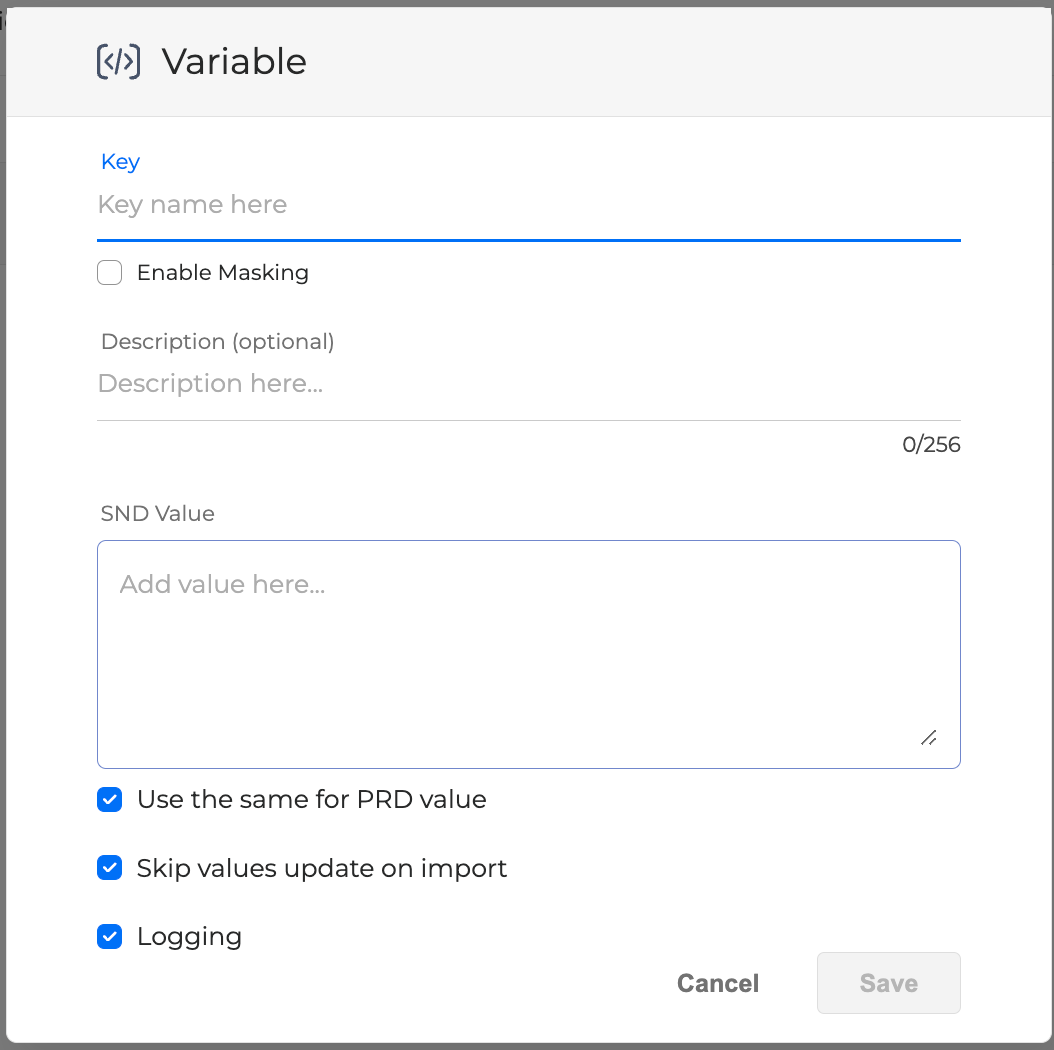
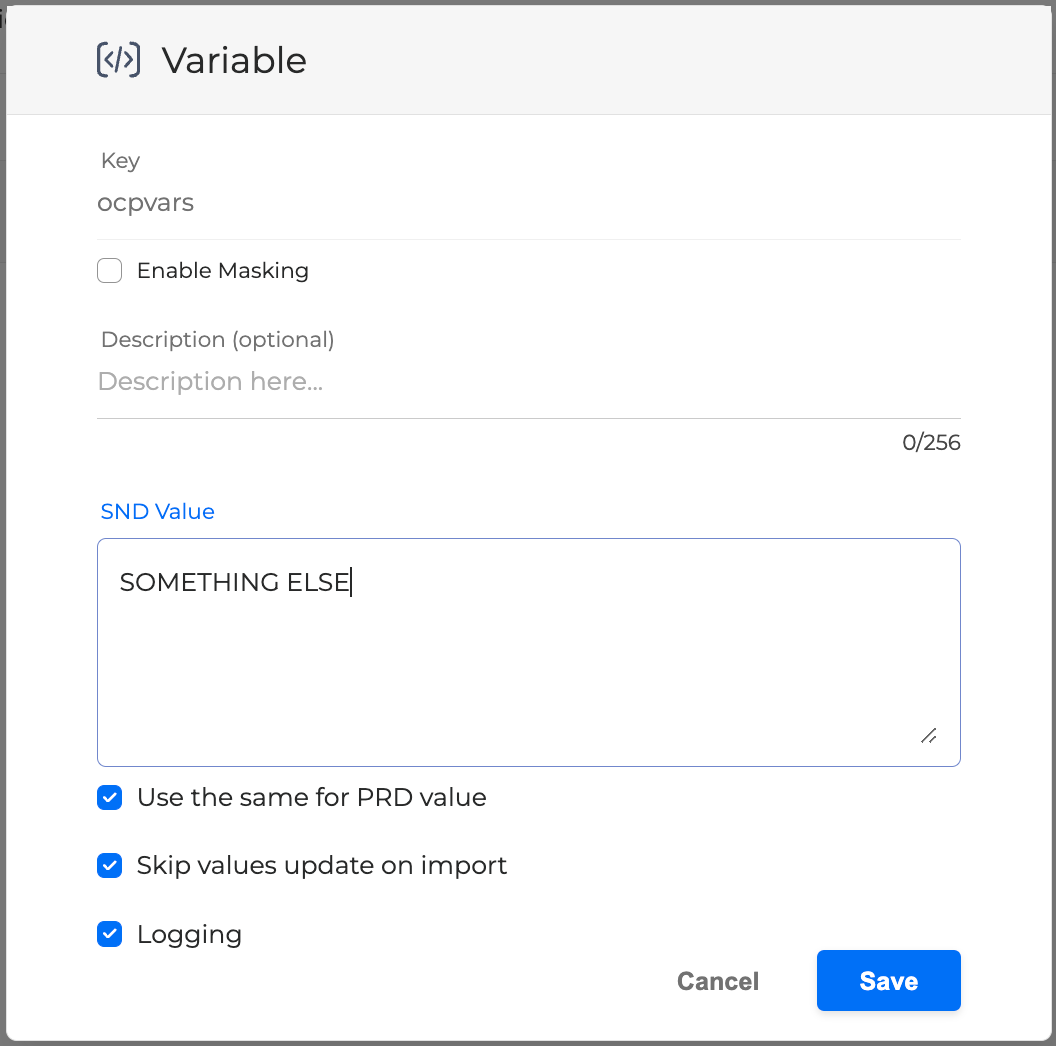
In the opened dialog-box, fill in the fields as described below:
-
Key name: Enter the name of the key.
-
Enable Masking: If marked, the variable will be treated as sensitive even if the application is not marked as sensitive. Sensitive variables will not be updated during the application import. Masked variables cannot be logged and the Logging option will not be available to be checked.

-
Description: An optional description for the created variable.
-
SND Value: Enter a Sandbox (SND) value for the variable.
-
Use the same for PRD value: If checked, the SND and PRD values will be identical. Otherwise, unmark the checkbox and fill in the PRD field.
-
PRD Value: Enter a Production (PRD) value if different from SND.
-
Skip values update on import: Specifies if the values are to be updated during the application import. If the Enable Masking checkbox is marked, the Skip values update on import checkbox is automatically greyed-out.
-
Checked: The value will not be updated during the application import.
-
Unchecked: The value will be updated during the application import. This only refers to non-sensitive data.
-
-
Logging: By default, the system logs variable values that are not masked. To stop this process and create a smaller and more manageable log file, deselect the respective checkbox. This can make the investigation process easier when needed.
-
Click Save. A new Variable will be added to your Collection list.
You can add as many Variables to a collection as required.
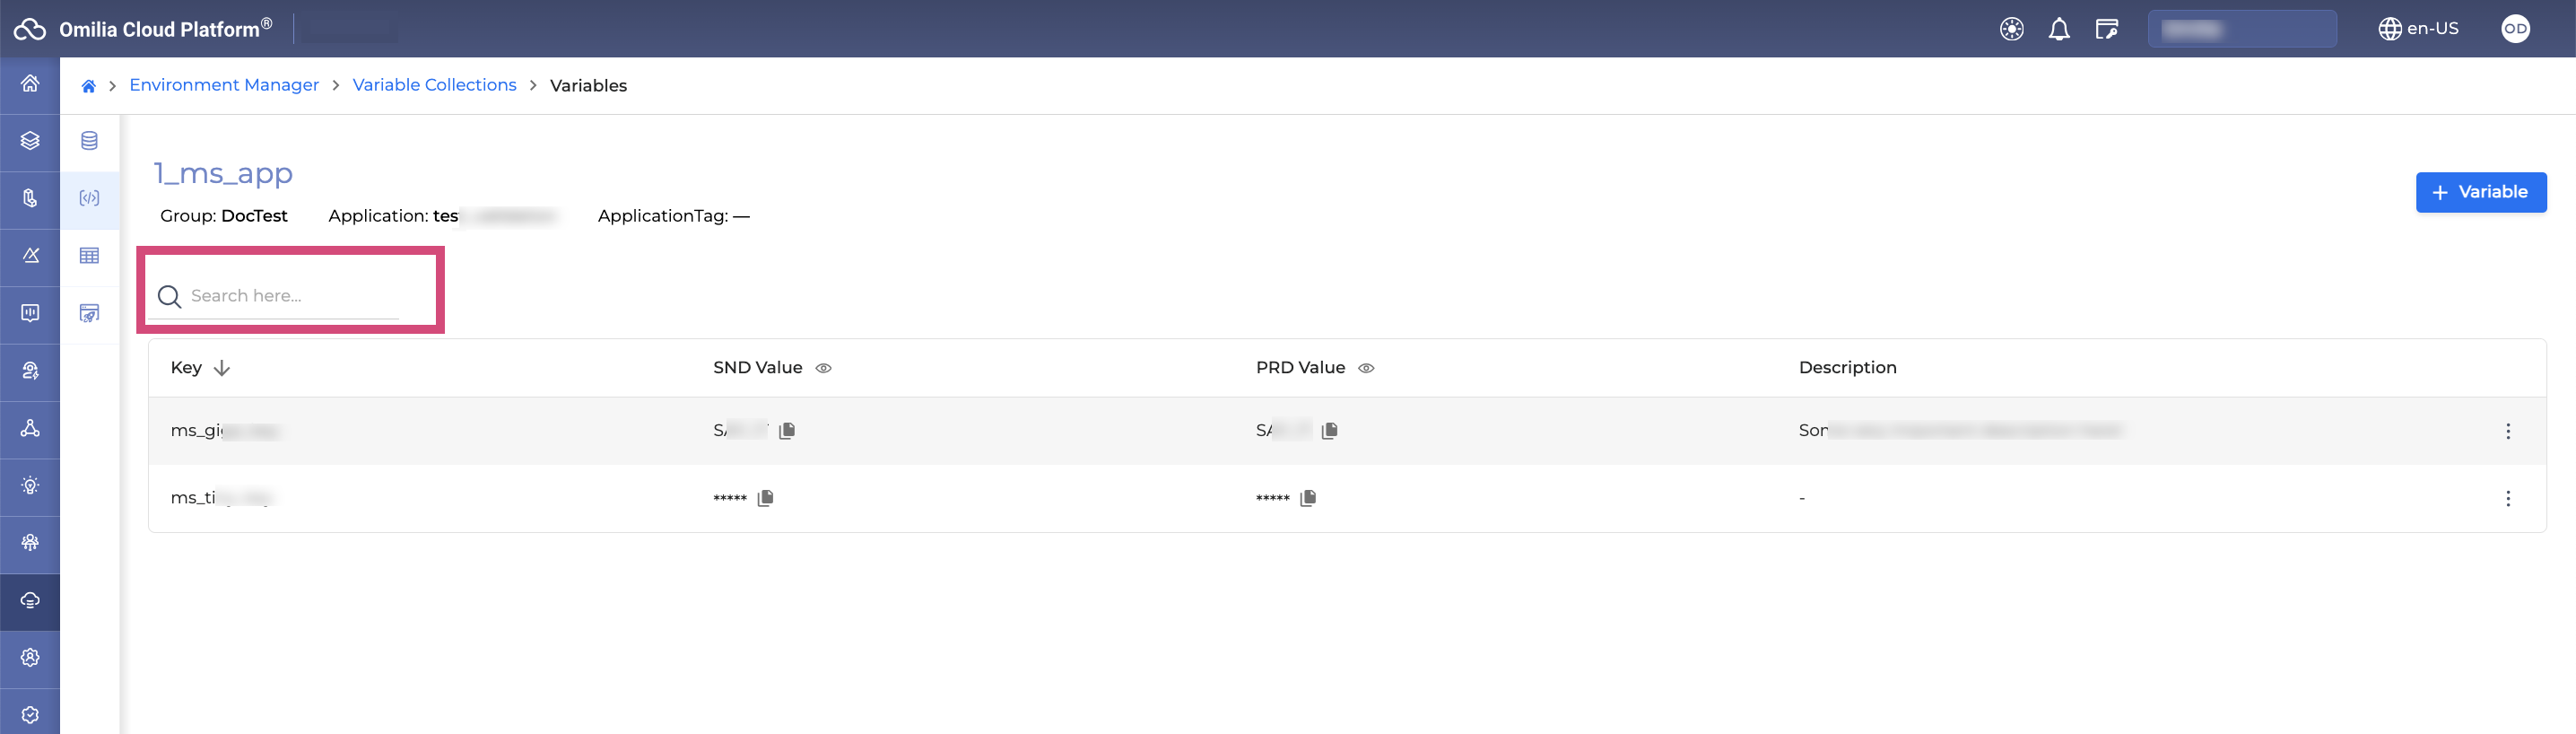
If the Variables list is extensive, use the Search field to locate the needed Variable.
Update Variables
To update a Variable from the list, proceed as follows:
-
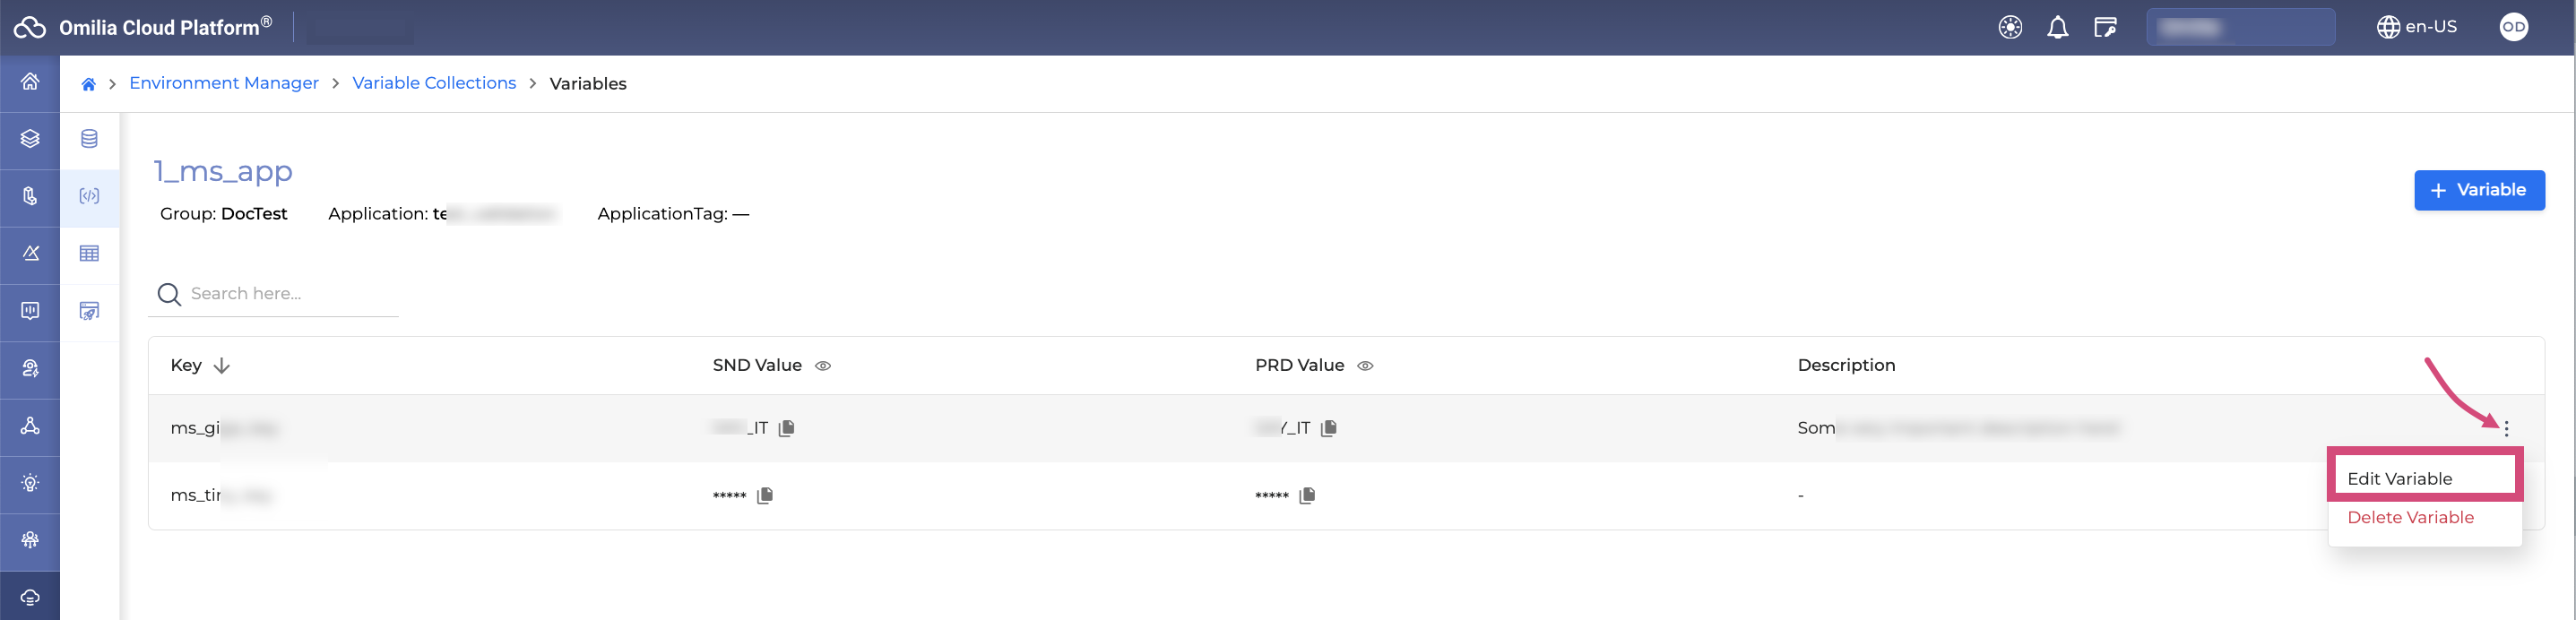
Click the Options Menu icon on the right of each variable and select Edit Variable.
-
In the opened dialog-box, modify the necessary fields same way as in Create Variables section. All the fields are editable.
Delete Variables
To delete a Variable from the list, proceed as follows:
-
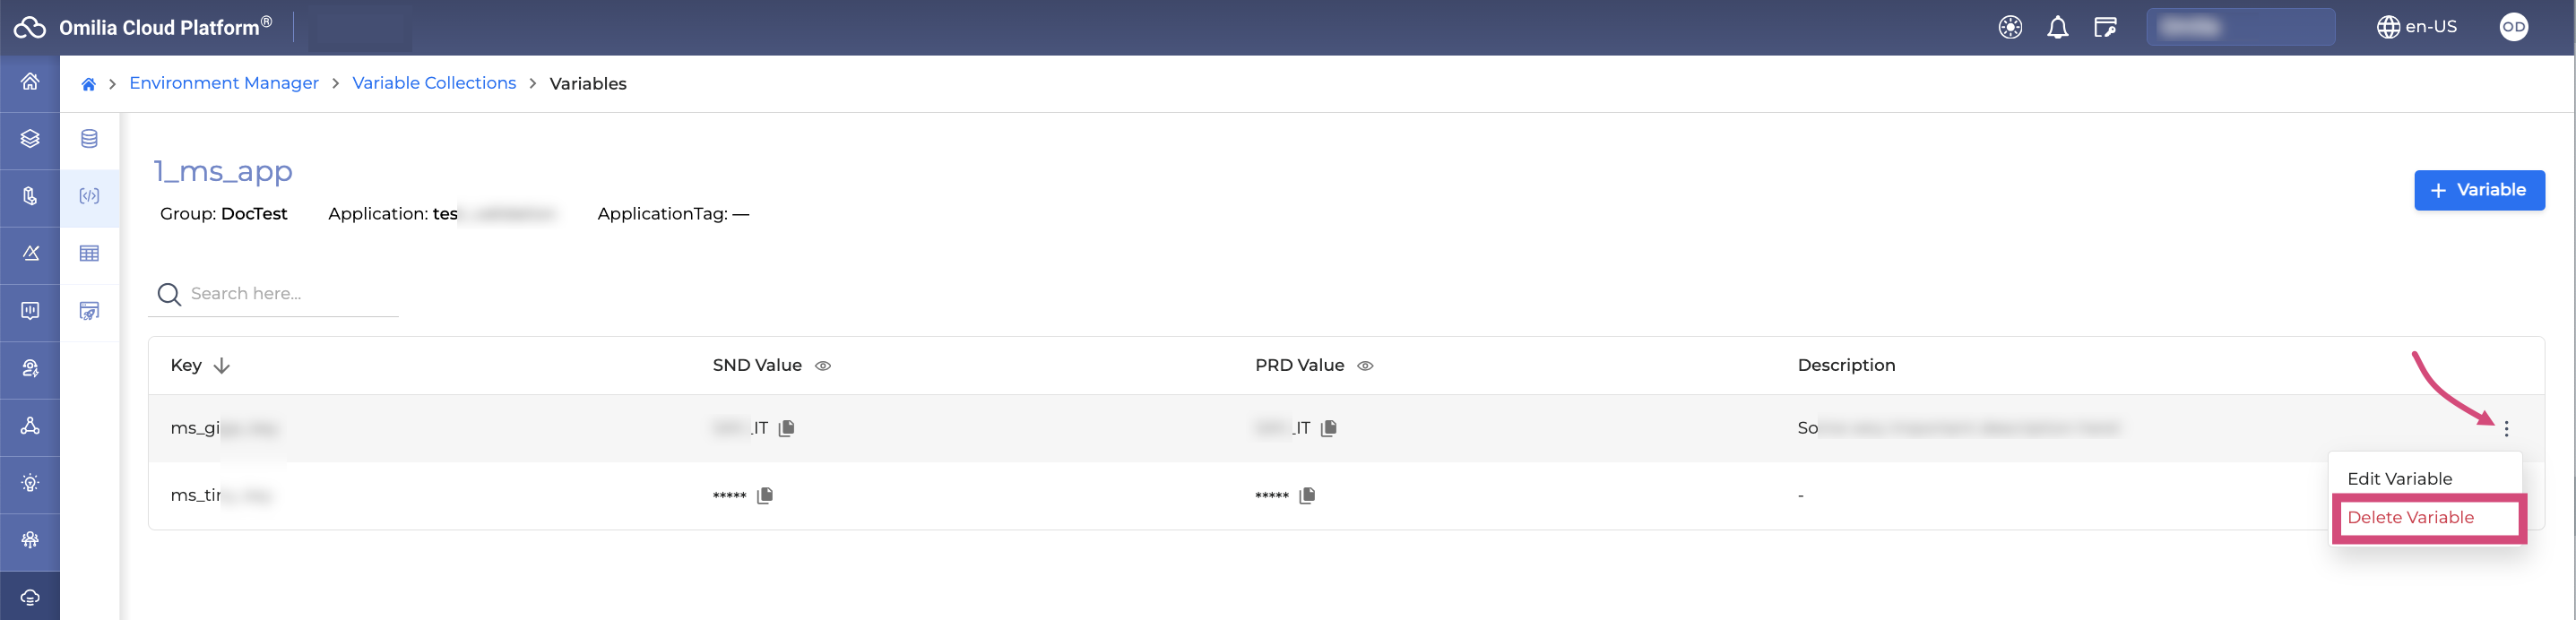
Click the Context Menu icon on the right of each variable and select Delete Variable.
-
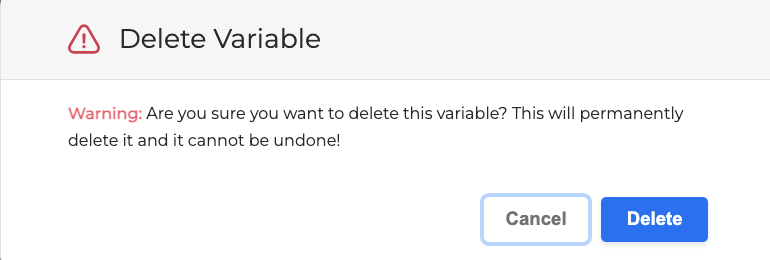
In the opened dialog-box, click Delete to confirm.
Use of Variables
Variables are JavaScript objects and can be used anywhere in OCP miniApps and Orchestrator as per below.
miniApps
-
As a dynamic value in prompts →
{{ocpvars:myKeyValue}}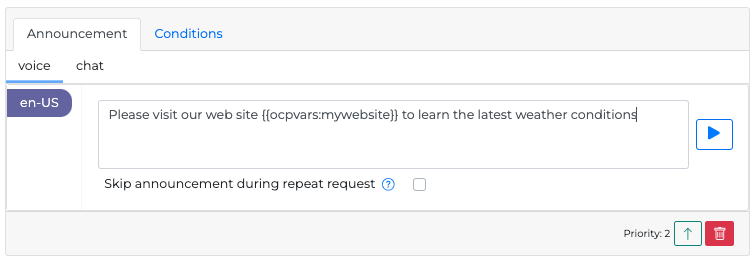
-
As a JS object in functions →
if (ocpvars.myKeyValue == "Test") { ... }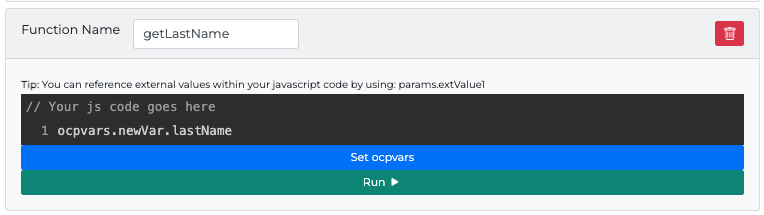
Orchestrator
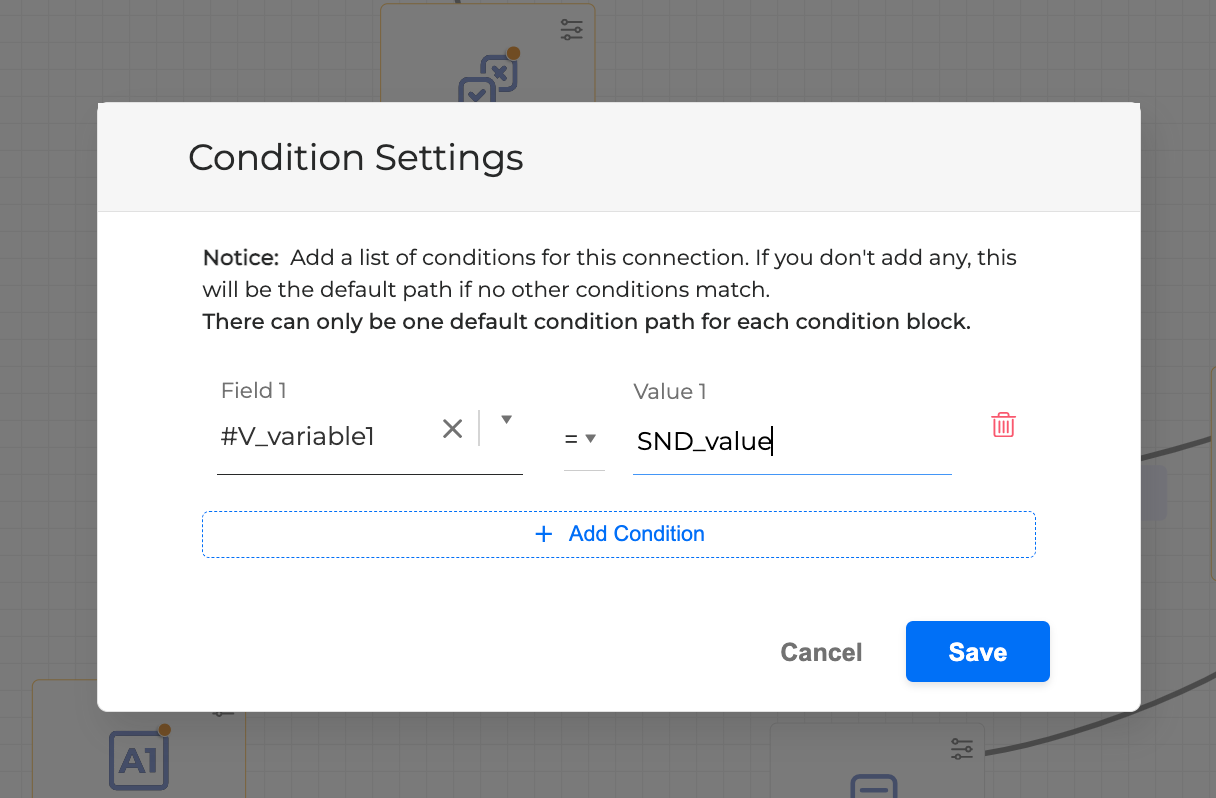
In Orchestrator variables can be used to create conditions in Condition blocks. Open the condition setting and enter the variable name in the Field as #V_{name}and the required value.
Rename a Variable Collection
To rename a Variable Collection:
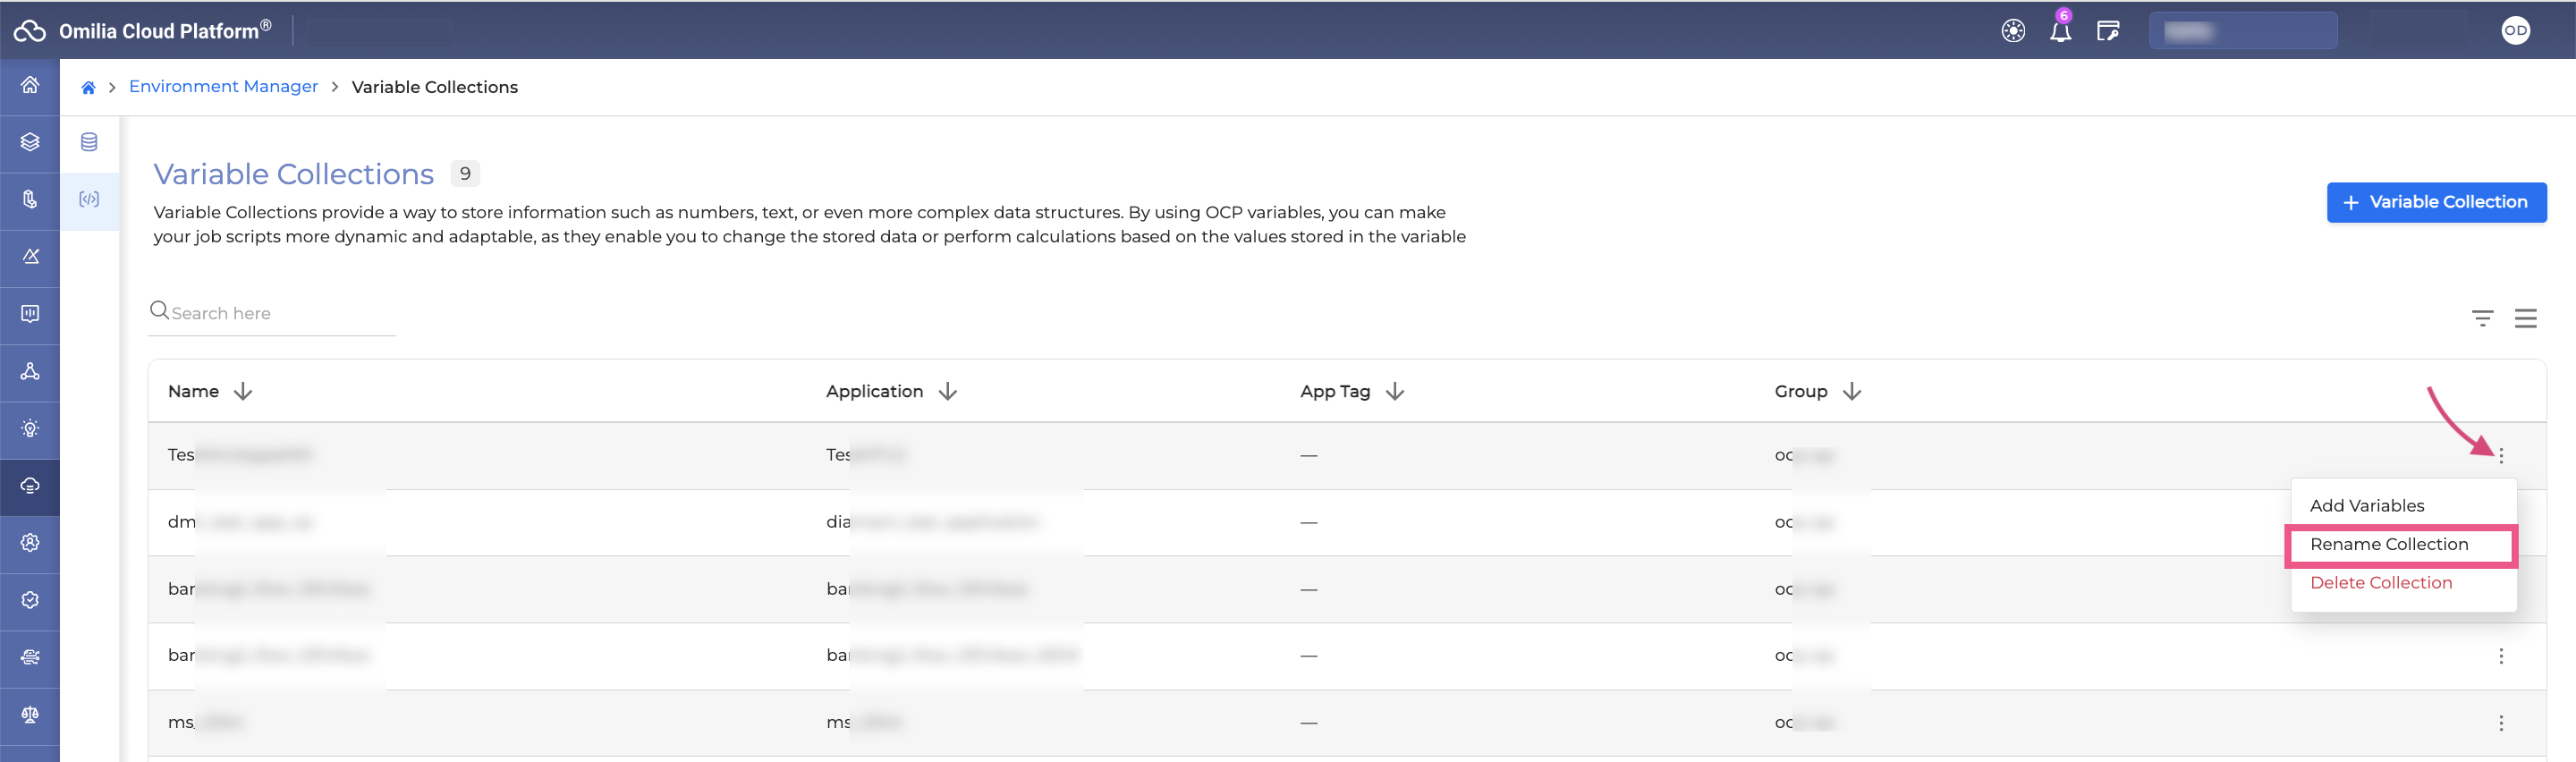
-
Click the Options menu icon on the right and select Rename Collection.
-
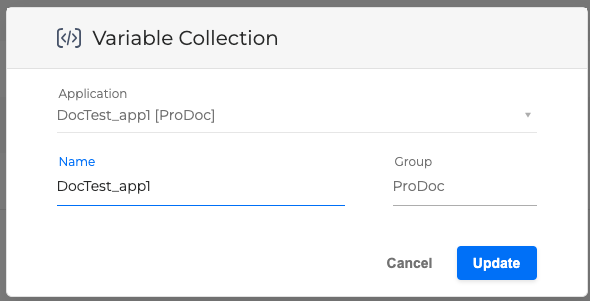
Edit the name of the collection in the Variable Collection window and click the Update button.
Export a Variables Collection
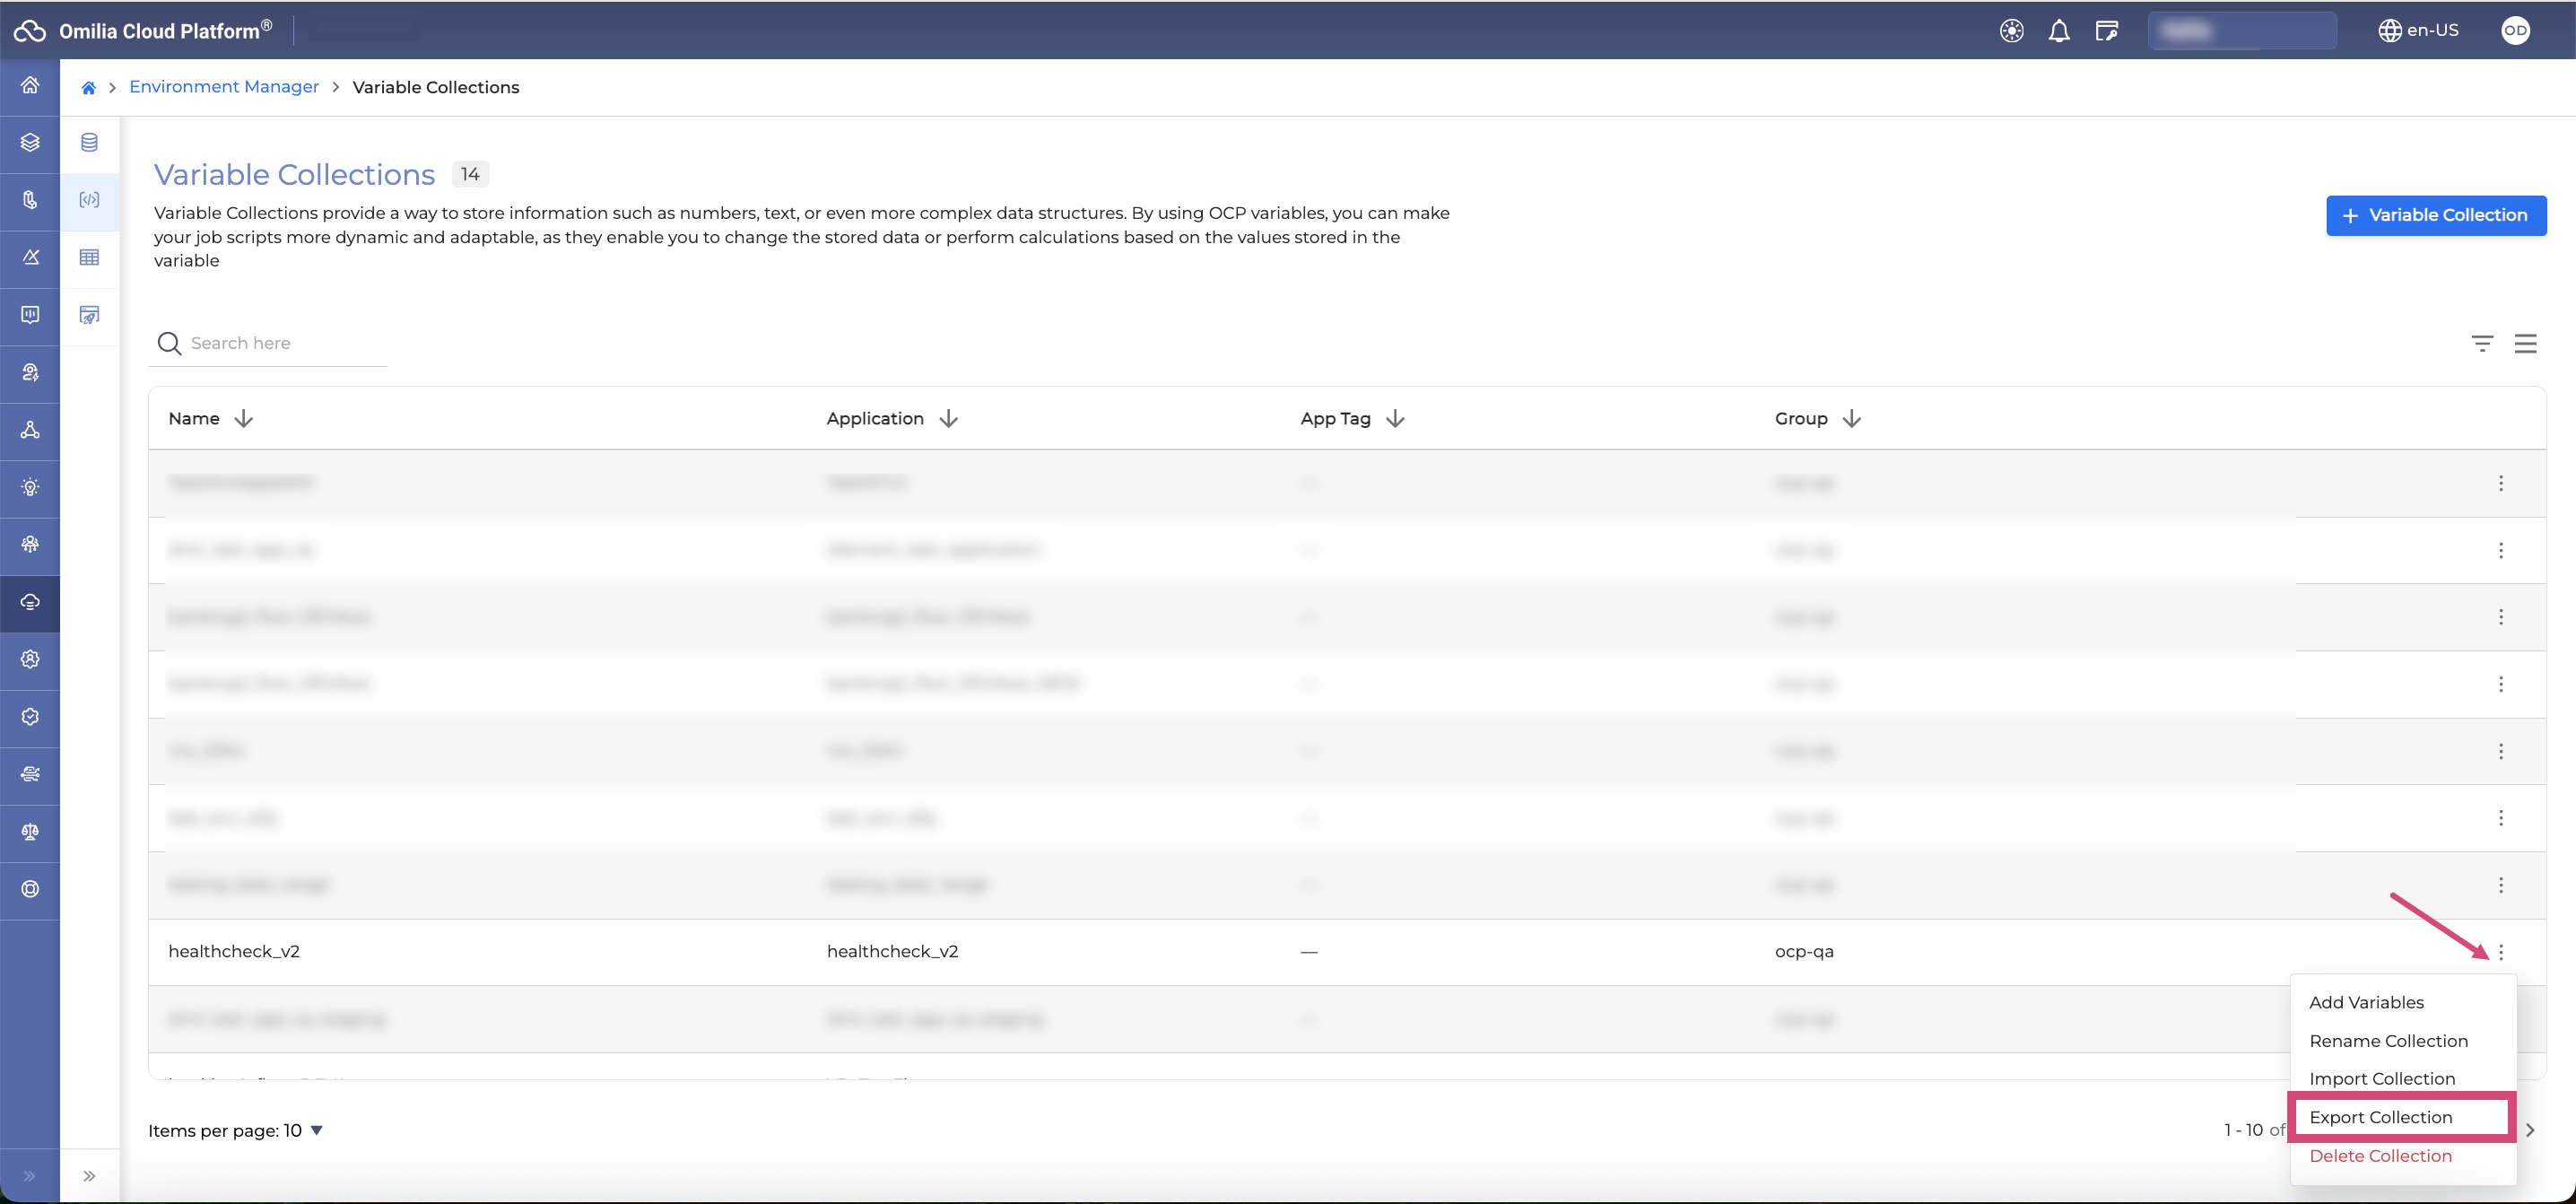
You can export a Variables Collection independently of its application. This allows you to transfer variables between collections without moving the entire application.
To export a Variables Collection, proceed as follows:
-
Navigate to Variable Collections.
-
Click the Options menu next to the collection you want to export and select Export Collection.
-
The collection will be downloaded automatically as a JSON file.
Exported collections can be imported into collections of other applications or saved for backup purposes.
Import a Variables Collection
Once you have exported a Variables Collection as a JSON file, you can import it into a collection of another application.
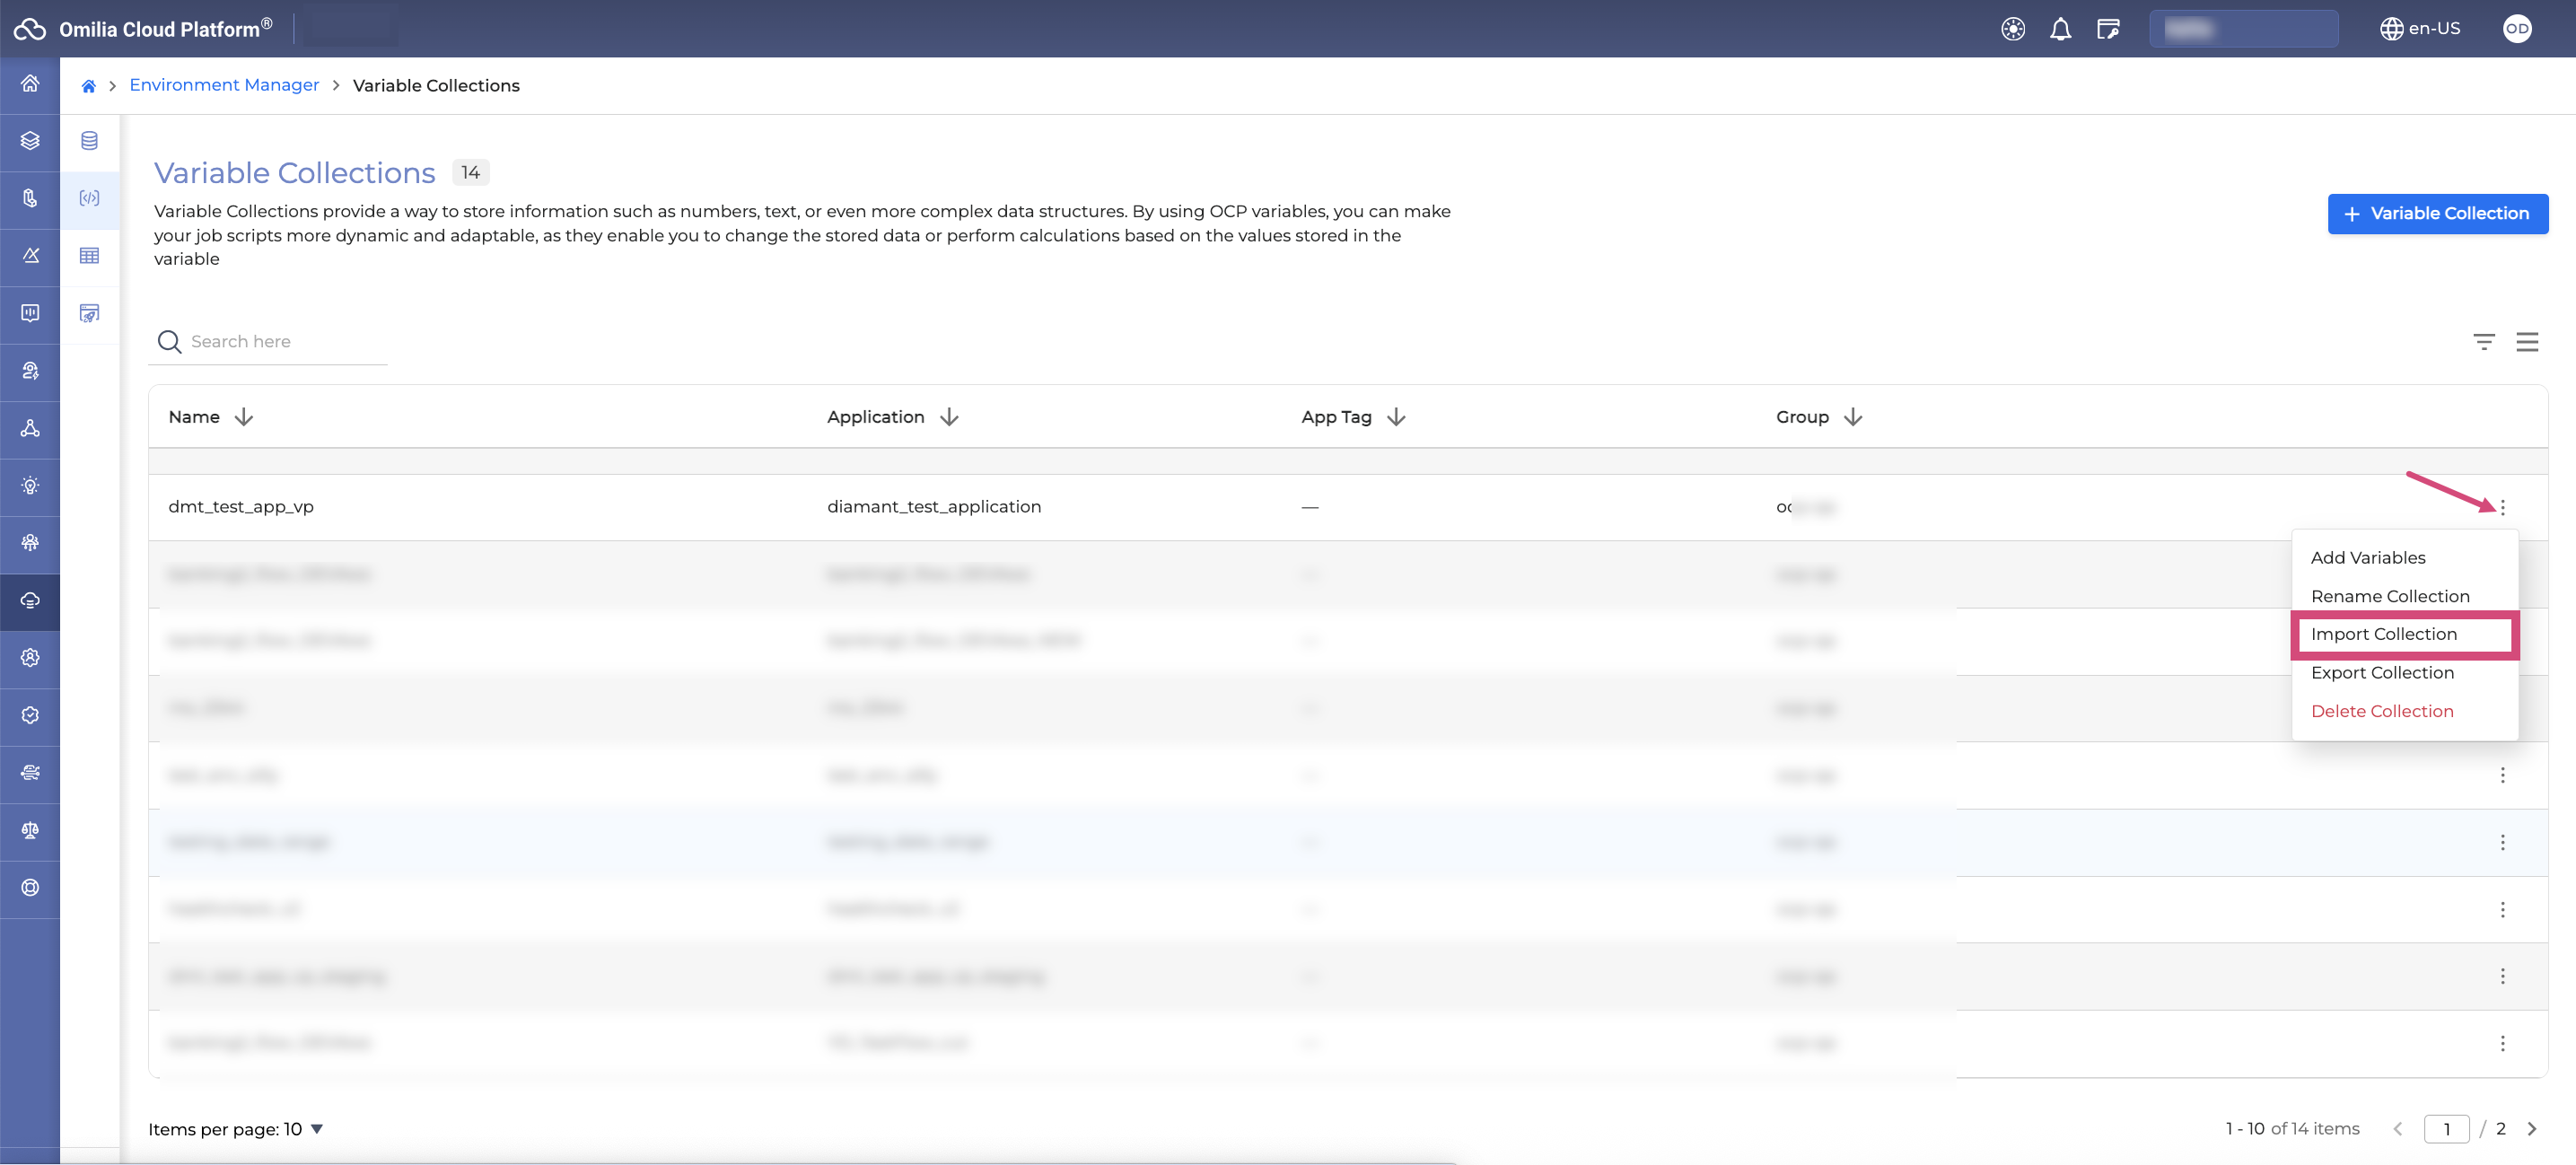
To import a Variables Collection, follow the steps below:
-
Navigate to the Variable Collections section and locate the Variables Collection where you want to import the variables.
-
Click the Options menu next to the target collection and select Import Collection.
-
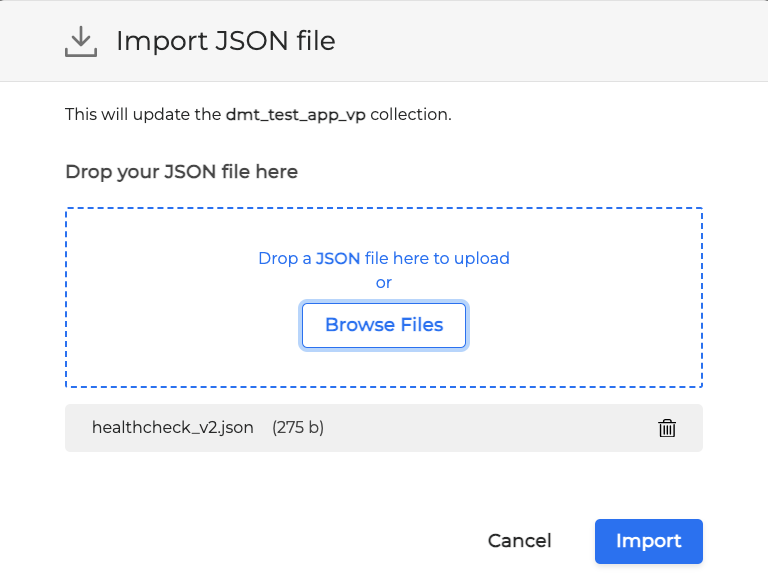
In the dialog box that appears, drag and drop the JSON file you want to import, or click Browse to browse for the file.
-
Click Import to start the import process.
-
After a successful import, the variables from the JSON file are merged with the selected collection. The sensitive variables with masking enabled are imported as masked.
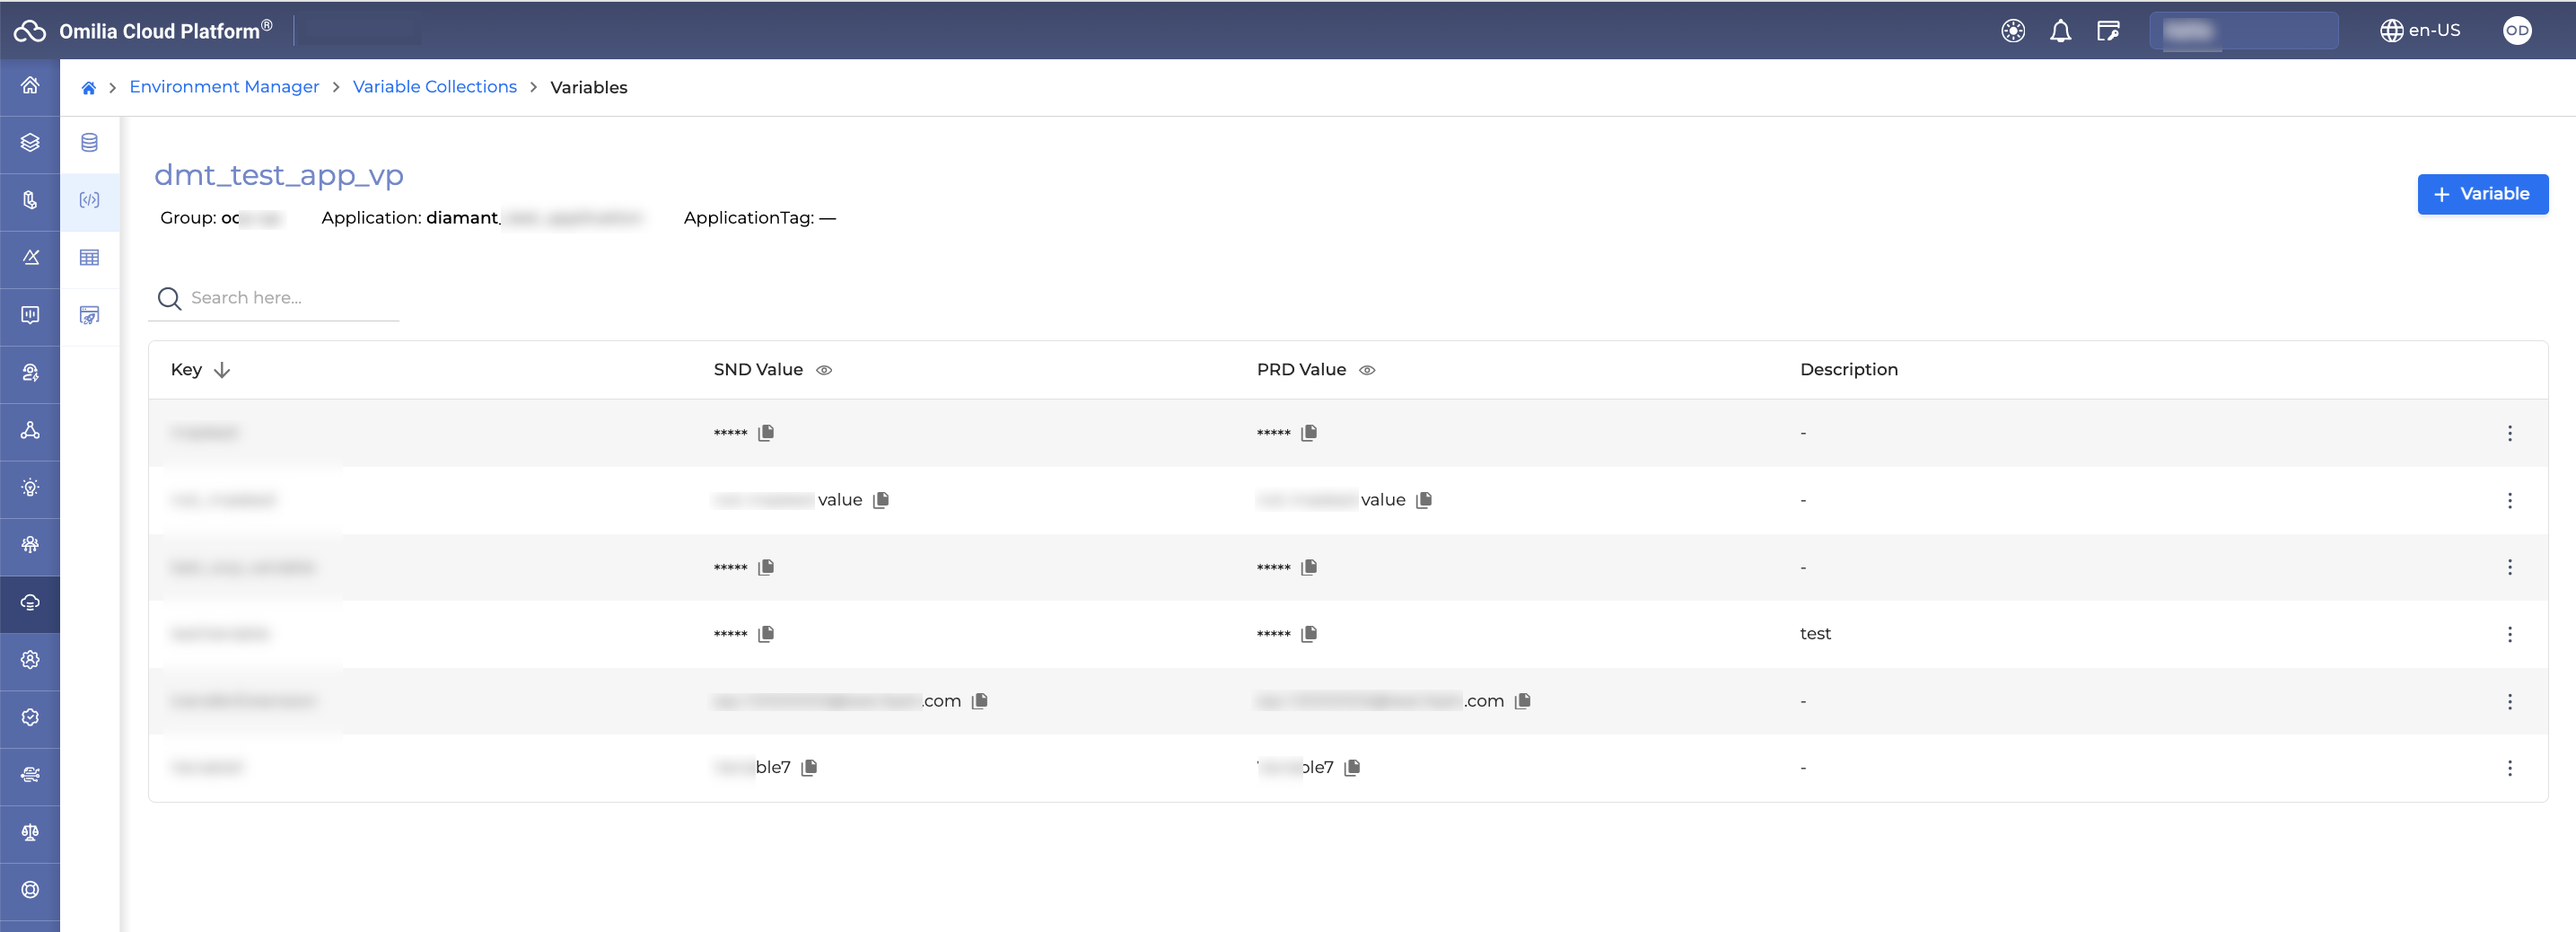
If you’re importing variables with the same names as existing ones, what happens depends on the Skip values update on import option:
-
If checked: The import will not change any existing values. The current values remain unchanged.
-
If unchecked: The values of any existing variables will be updated with the corresponding values from the imported JSON file.
Delete a Variable Collection
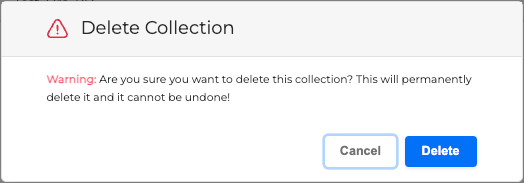
You cannot delete a Variable Collection that is being used in an existing application. To delete it, you must first delete the corresponding Application. A warning message will appear in this case.
.png?cb=6dd0f91a64f7a6709c03e61a9b3476d1)
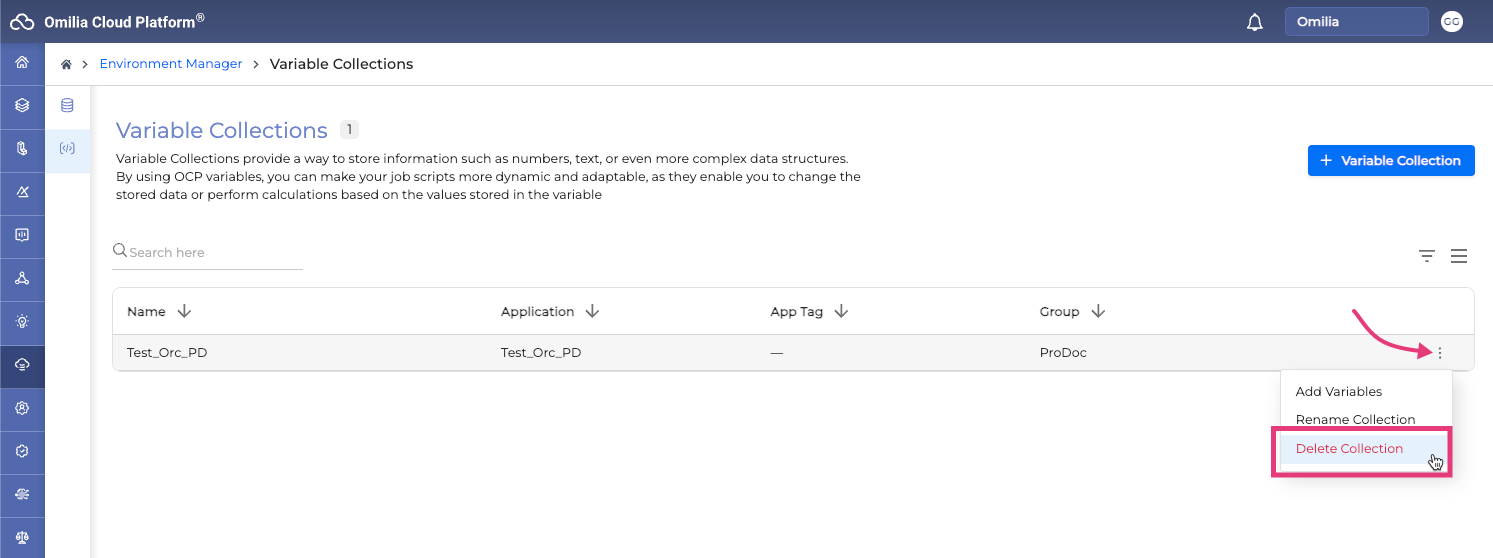
You may delete a Variable Collection if it is not required and is not used anymore. To delete it:
-
Click the Options menu of the Variable on the right and select Delete Collection.
-
Confirm that you wish to delete the collection by clicking Delete on the confirmation window.