.svg)
Intent OCP miniApps®
Configure the Intent OCP miniApps®
Prompts tab
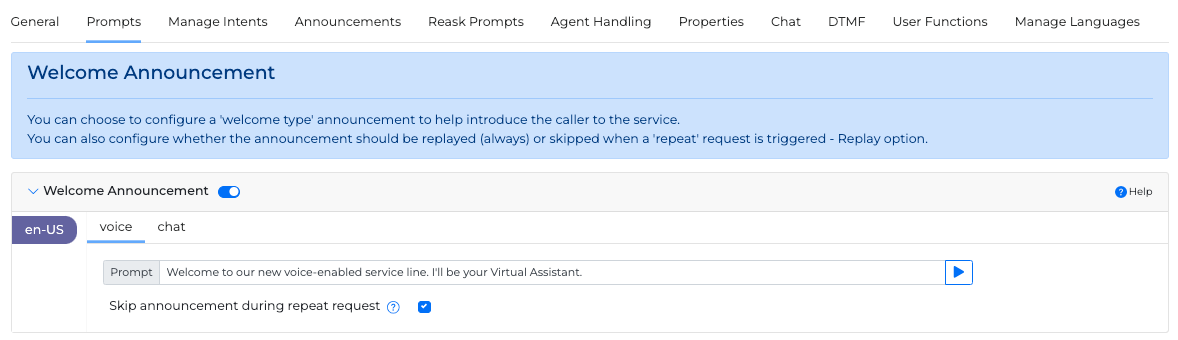
Welcome Announcement
The welcome announcement is the initial prompt responsible for establishing the interaction with the system, thus providing a more natural feel.
You can configure whether the prompt should be triggered or not during repeat requests by clicking on the corresponding checkbox.
Initial Prompt
OCP miniApps® allow you to fully configure three custom initial prompts depending on the error level of the initial system prompt:
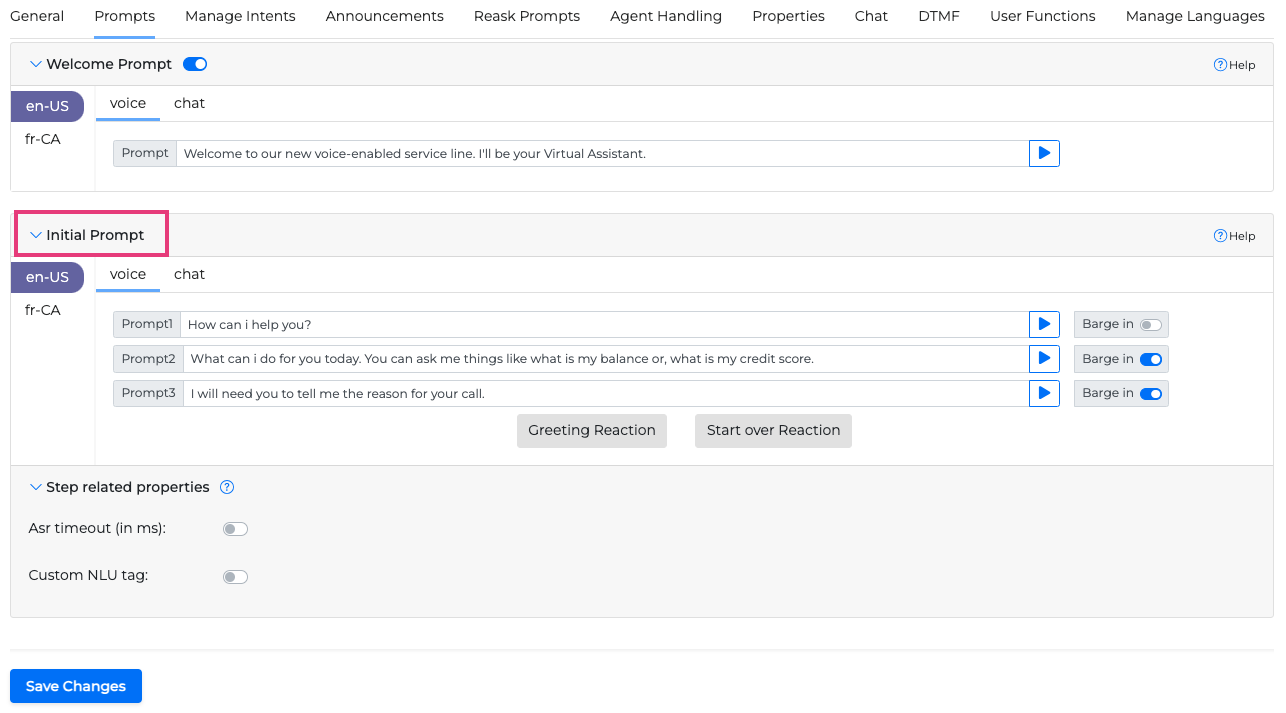
Prompt 1: Initial System Prompt that handles the initial prompt to be played to the caller
Prompt 2: Rephrase after 1st error (No Response, No Interpretation), it handles cases where you want to re-prompt to the caller, for example, if there was a
No Responseor aNo Interpretationevent.Prompt 3: Rephrase after 2nd error (No Response, No Interpretation), it handles cases where you want to re-prompt for a second time to the caller, for example, if there was a
No Responseor aNo Interpretationevent.
Greeting Reaction
Sometimes, when prompted for input, a caller may first greet the application instead of giving the input directly. For these cases, it is possible to configure a Greeting Reaction, which will trigger in conjunction with the initial prompt resulting in a more human-like experience.
To set up a greeting reaction, follow the steps:
Navigate to the Initial Prompt section.
Click
 Greeting Reaction. The pop-up window opens.
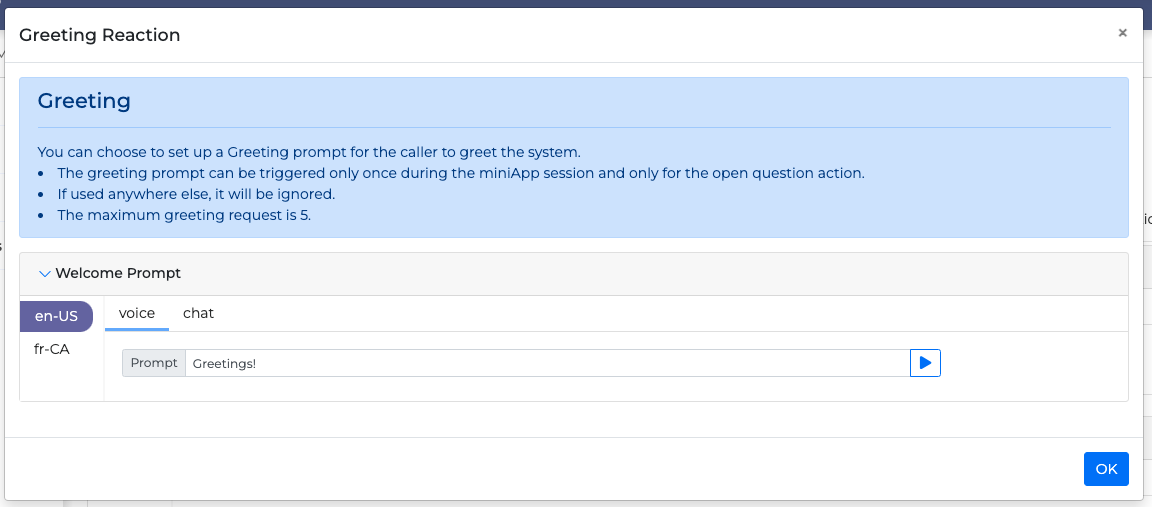
Insert the greeting text into the input field.
Click OK to save changes.
Barge-in option
If you want to activate barge-in for each step, use the toggle on the right side of each initial prompt:
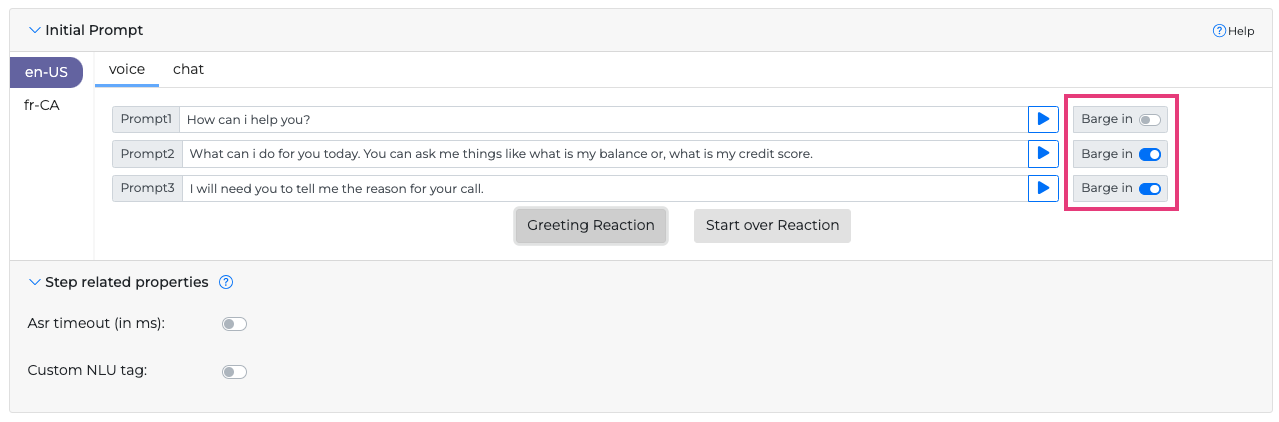
Currently the barge-in option works for the whole action, not for each individual prompt. This will be supported in a later version of the OCP miniApps®.
ASR timeout
You can also adjust the ASR timeout range slider to specify how long the system waits to trigger a NoInput event.
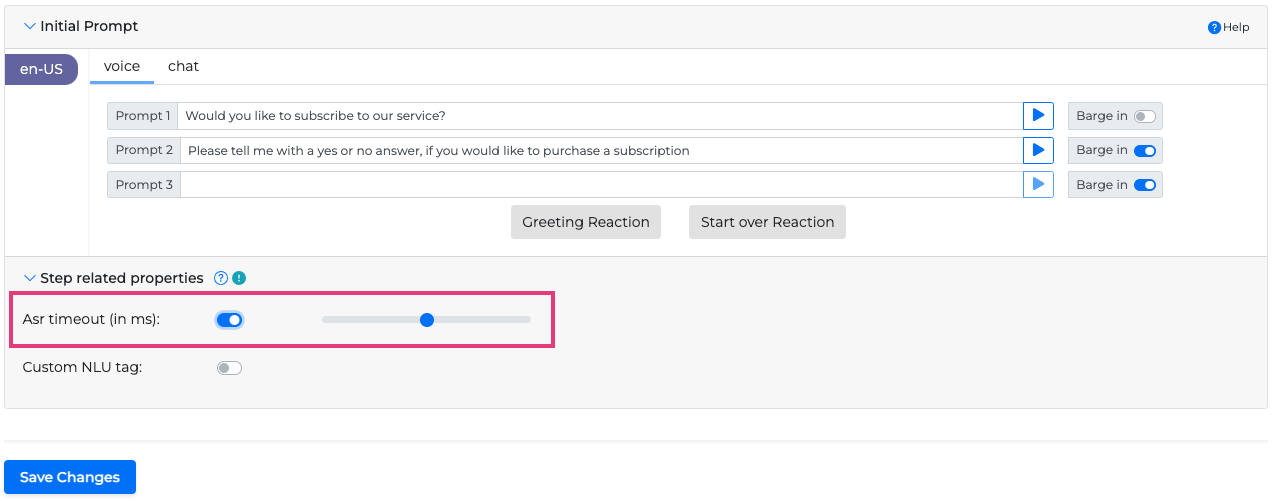
Custom NLU tag
Apart from the selection of an NLU model in the Natural Language Understanding section,It is possible to add a custom tag value in the corresponding text box, used to define a more specific context. Tag Hour for example. Under that tag context, a number input, for example, four, will be marked and understood as the time of the day from the system (four o’clock). So in general tags help differentiate and define a more specific meaning from user inputs.

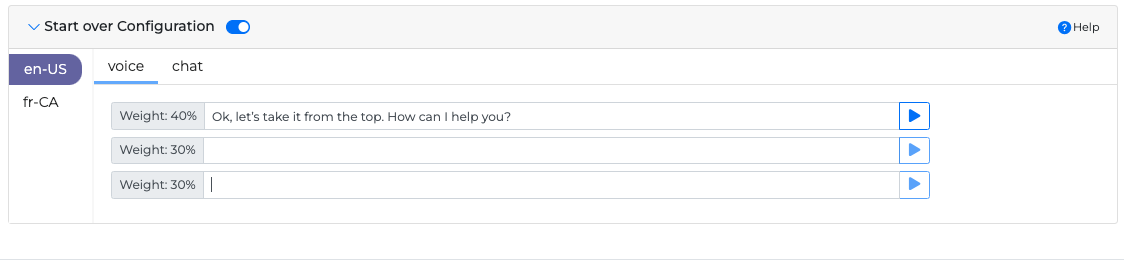
Start Over Reaction
Can only be triggered with the help of a Flow application, so should not be used in standalone miniApps. More info can be found in Event Handlers section Repeat Handlers function.
This functionality allows you to specify Start Over prompts that will be used after the user requests to start over. For instance, the following conversation may take place:
System: How may I help you?
User: I want to get information about my account.
If for some reason the system takes the wrong path here, the user might be inclined to interrupt with something like “no no, can we please restart”. In that case, in your Flow you can specify that upon hearing the word “restart”, the system will enter this miniApp with the specific Start Over prompt, like “Ok, let’s take it from the top. How can I help you?” as in the screenshot below.
To set up a Start over Reaction , follow the steps:
Navigate to the Initial Prompt section.
Click Start over Reaction. The corresponding pop-up window opens.
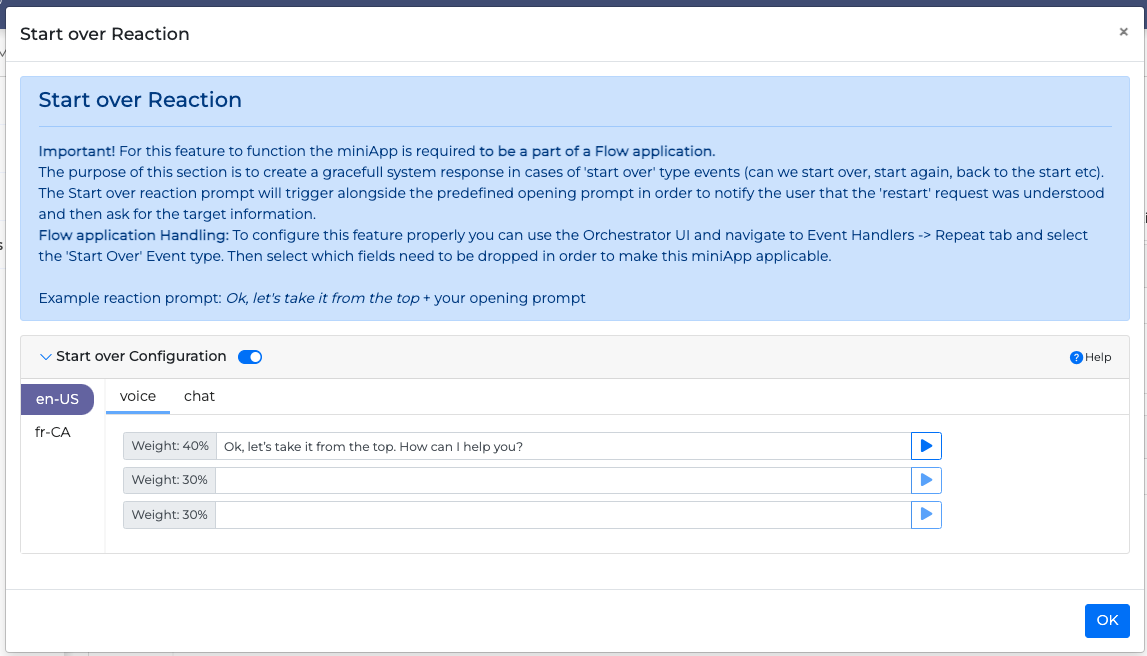
Enable the Start over Configuration.
Enter the text you wish to be played as a restart prompt. For example, “Ok, let’s take it from the top. How can I help you?”.
Press OK to save save the changes.
If you decide to use this functionality, you can additionally inform the user about which words will trigger the Start Over functionality by making the following announcement:
“Welcome to our service. At any point you can say 'start from the beginning' to take it from the top.”
After you configure the prompts, click Save Changes.
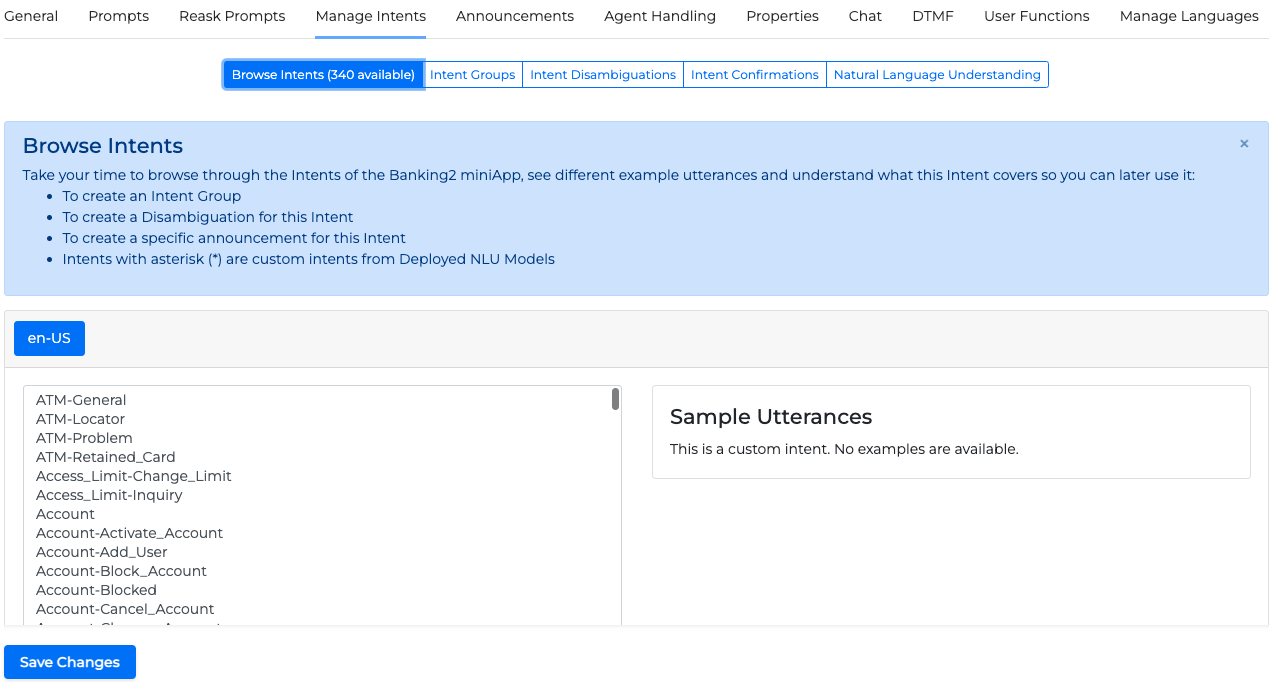
Manage Intents tab
In the Manage Intents tab, you can perform various actions on intents, like browsing intents, creating intent groups, and setting disambiguation intents.
Browse Intents
In this tab you can browse through the intents associated with the selected Intent miniApps, see the different sample utterances and understand what this Intent covers so you can later use it:
To create an Intent Group
To create a Disambiguation for this Intent
To create a specific announcement for this Intent
To export the announcements in TSV file.
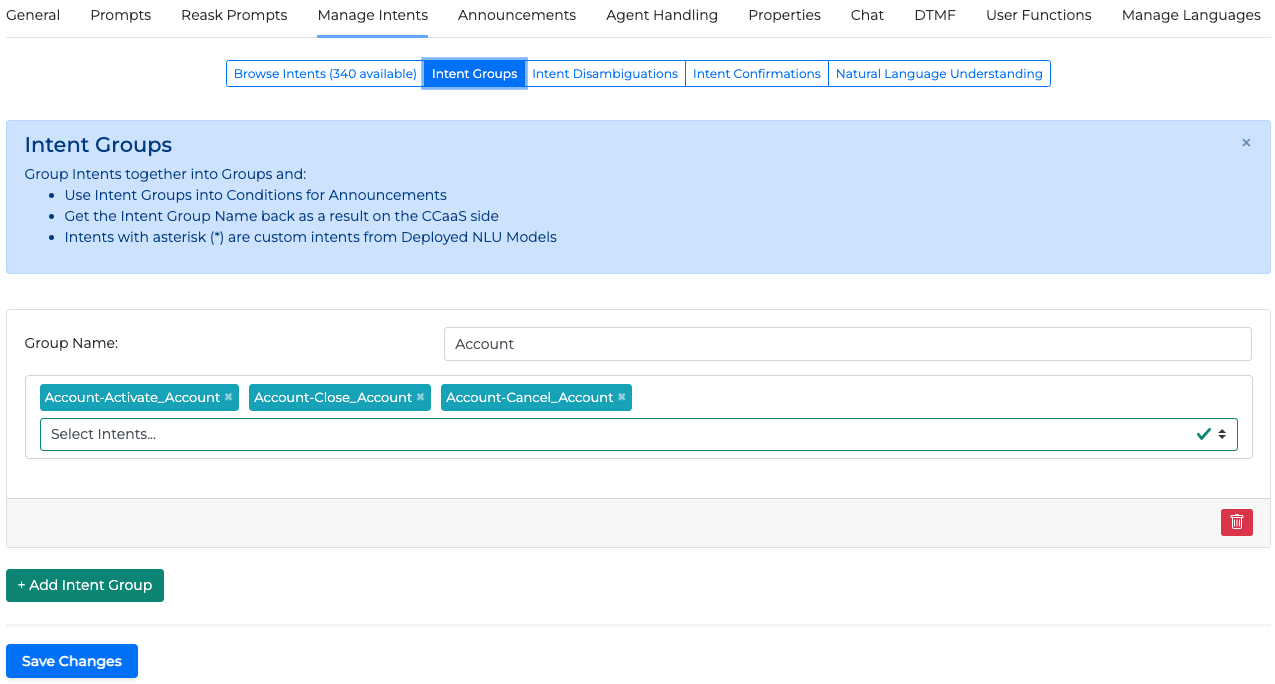
Intent Groups
In this tab you can group intents together to:
Use Intent Groups into Conditions instead of single intents for Announcements, Intent Disambiguations and Intent Confirmations
Get the Intent Group Name back as a result on the CCaaS side (this is not applicable for the standalone version)
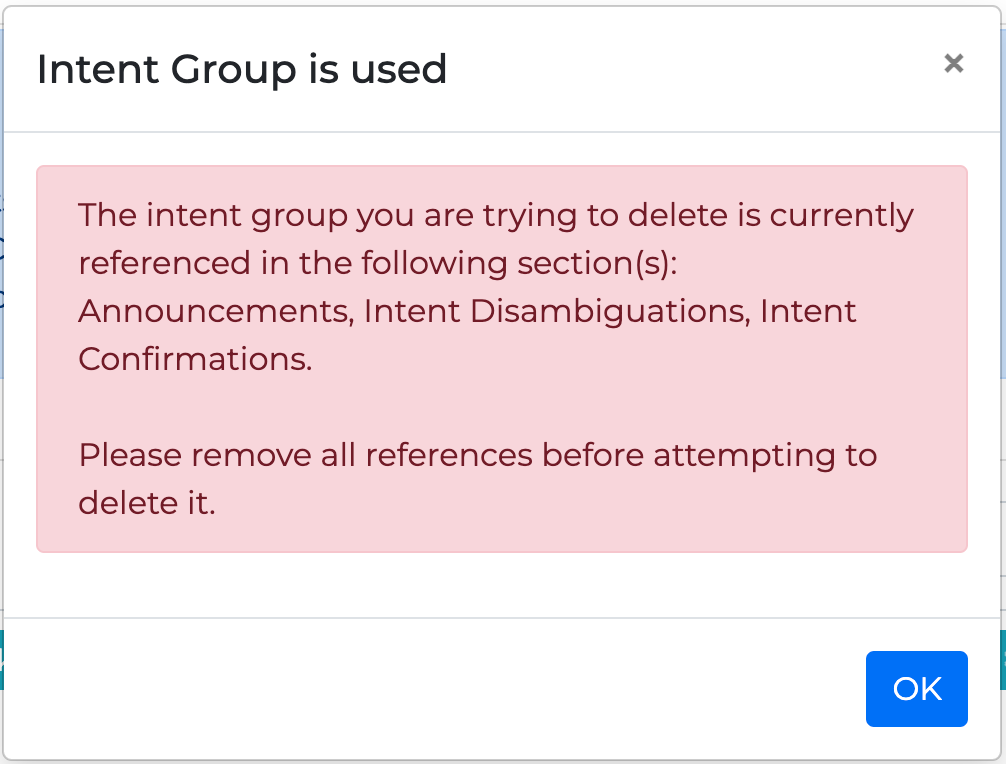
You cannot delete an Intent Group that is used in any condition, either in Announcements, Intent Disambiguation, or Intent Confirmation.
A warning message will pop up in this case.
Intent Disambiguations
Some intents may be overly general and ambiguous for your specific domain. To clarify these intents, you can use this tab to set custom prompts that rephrase the intent in various ways, based on the information available at that moment, including any data captured such as the intent or other NLU entities. This approach will create a more conversational dialogue and encourage the caller to share additional information, leading to a more accurate identification of the intent.
In the Intent Disambiguations tab, you can:
Choose how to handle such ambiguous intents, either by using a broader open-ended disambiguation strategy or by prompting the caller with a Yes/No question and resolving the ambiguity based on their response
Define and map specific conditions using intent and entity values that will trigger the disambiguation logic
Configure attributes for each disambiguation separately
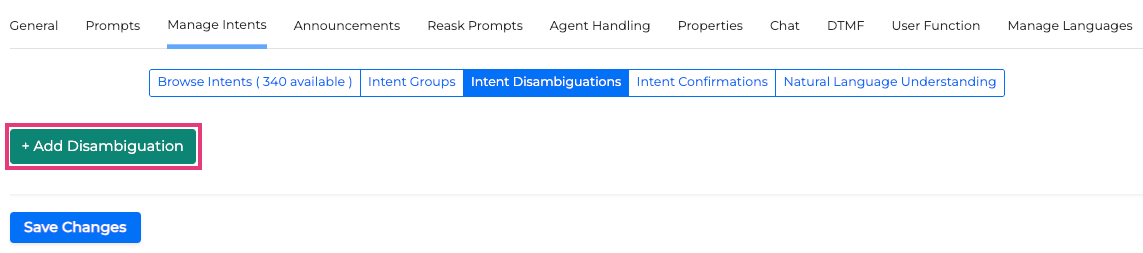
Add a Disambiguation
To add a new disambiguation:
Click the +Add Disambiguation button
Fill in the Disambiguation Prompts

Set the required conditions:
The conditional values that can be set include an Intent, various Entities (from CardType to UserSegment), ANI, DNIS and SessionChannel information, and external values passed from other miniApps.
If none of the listed values matches the requirement, click the Edit button
 to add a Custom tag.
In addition, there are several selections for the logic operator such as Equals to, Not equals, Answered and Not equals, Less than, Greater than, Defined, Not defined.
For miniApps created prior minApps v2.32.0 the Not equals operator will be renamed to Answered and Not equals. No actions required from the user side.
Difference between Not equals -vs- Answered and Not equals.
Not equals - Field is either undefined, or rejected, or value is not contained in the list of values (Either condition is met).
Answered but Not equals - Field is not undefined, not fulfilled, not rejected and field’s instance value is not contained on the list of values (All conditions met).
Open or Yes/No Disambiguation
When the miniApp recognizes that a caller is asking for balance without specifying whether it’s for a personal or business account, it will ask a clarifying question and accept a free-form answer.
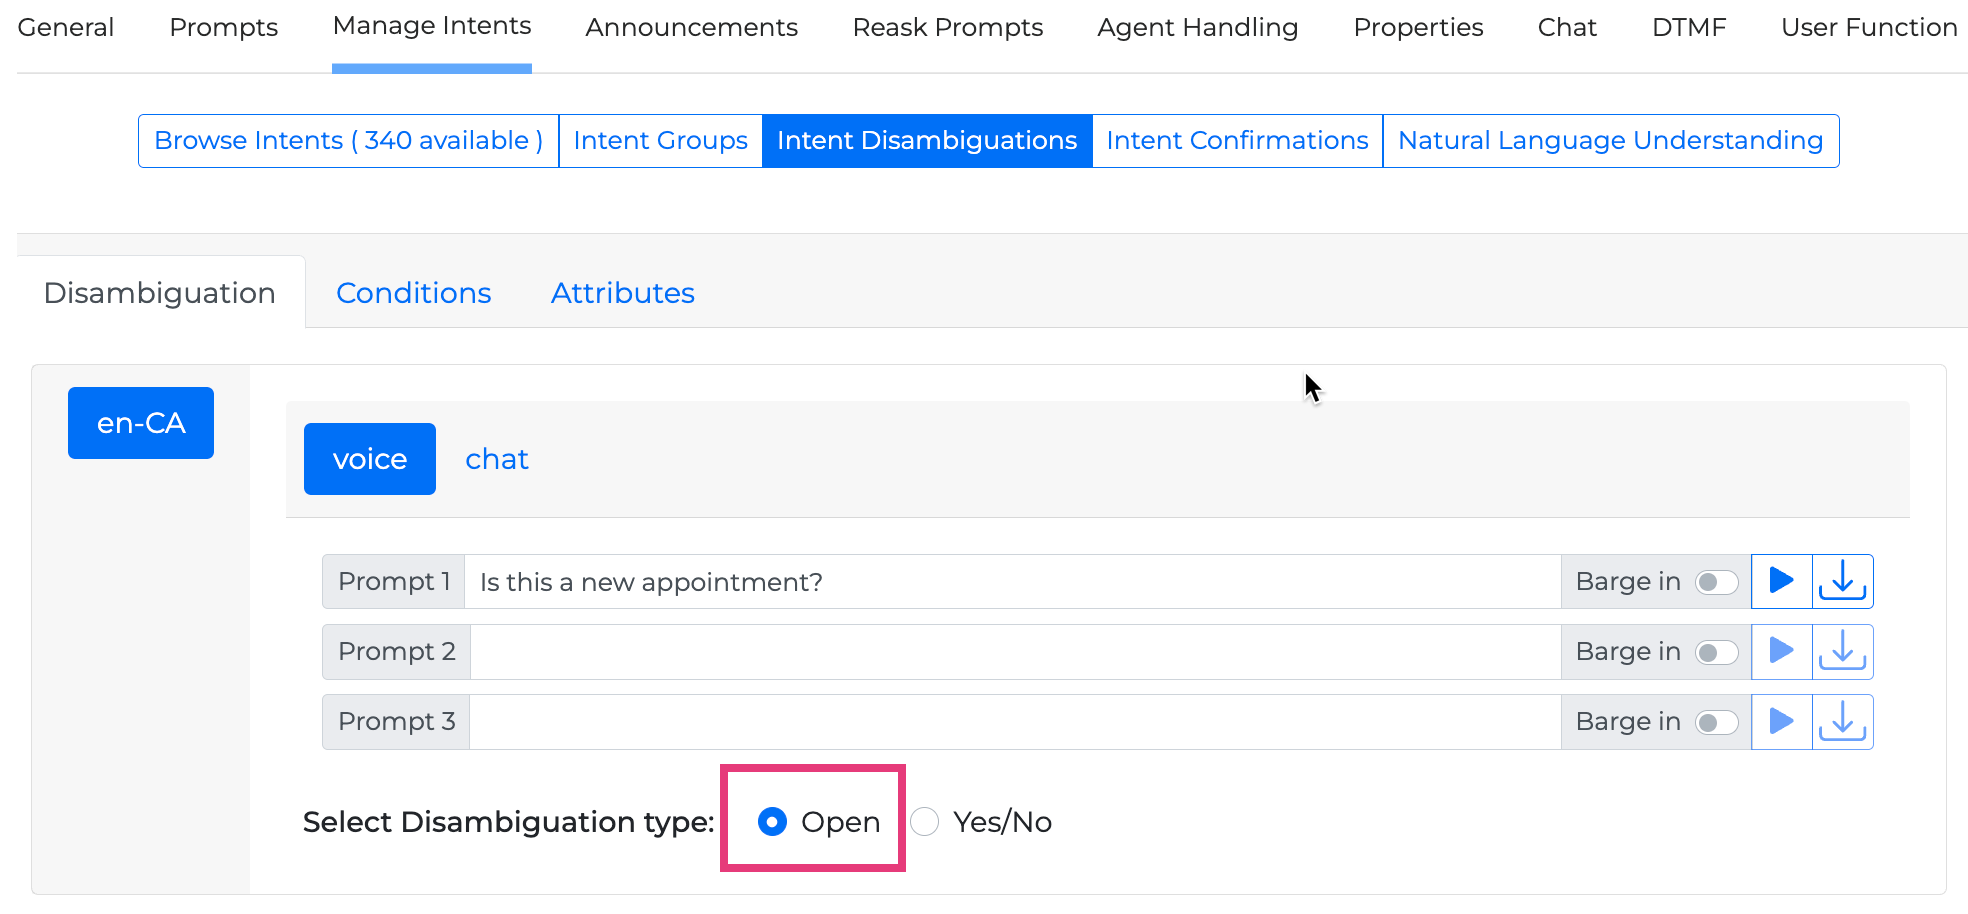
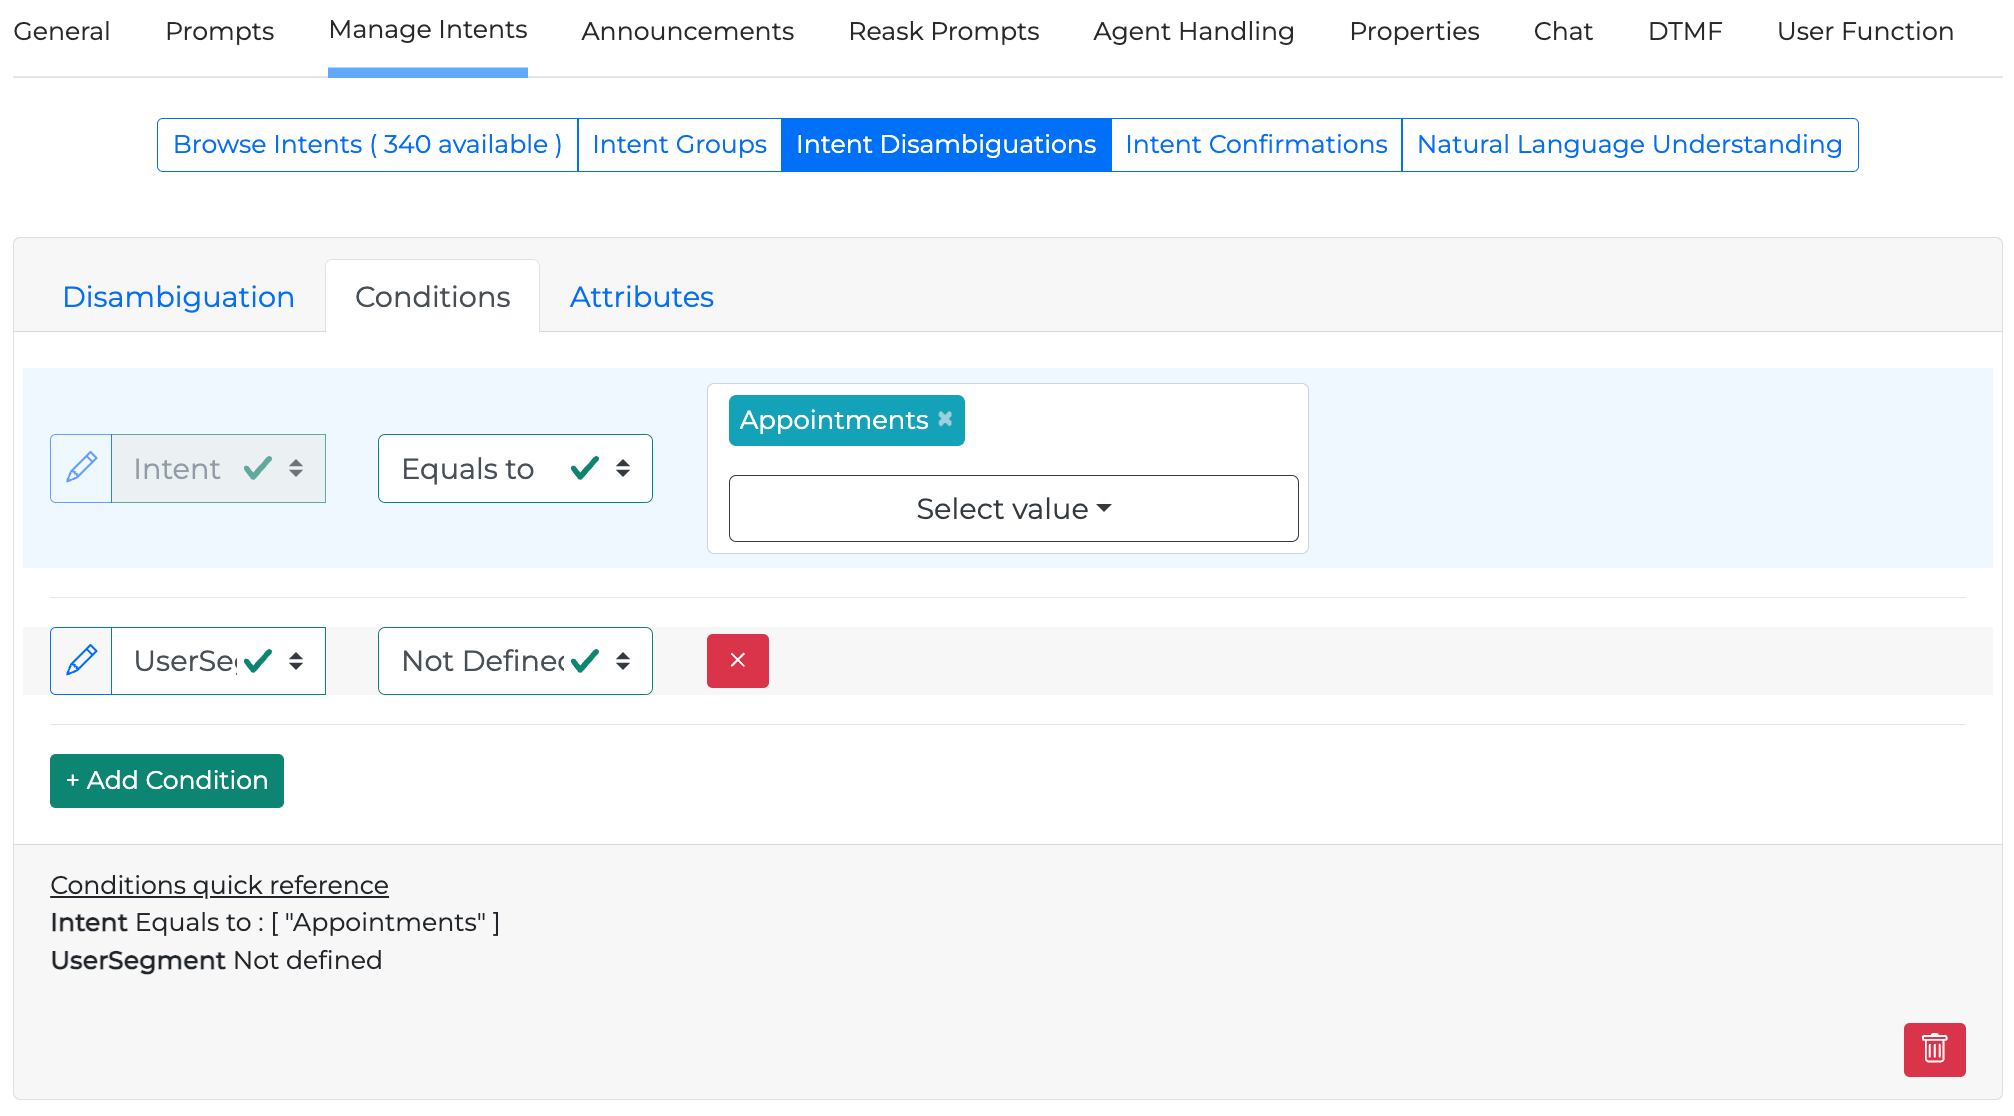
Instead of the Open Disambiguation option, you can also use the Yes/No Disambiguation. For example, if a caller’s intent is recognized to be Appointments (conditional operator equals to), you can set the following prompt and disambiguation:
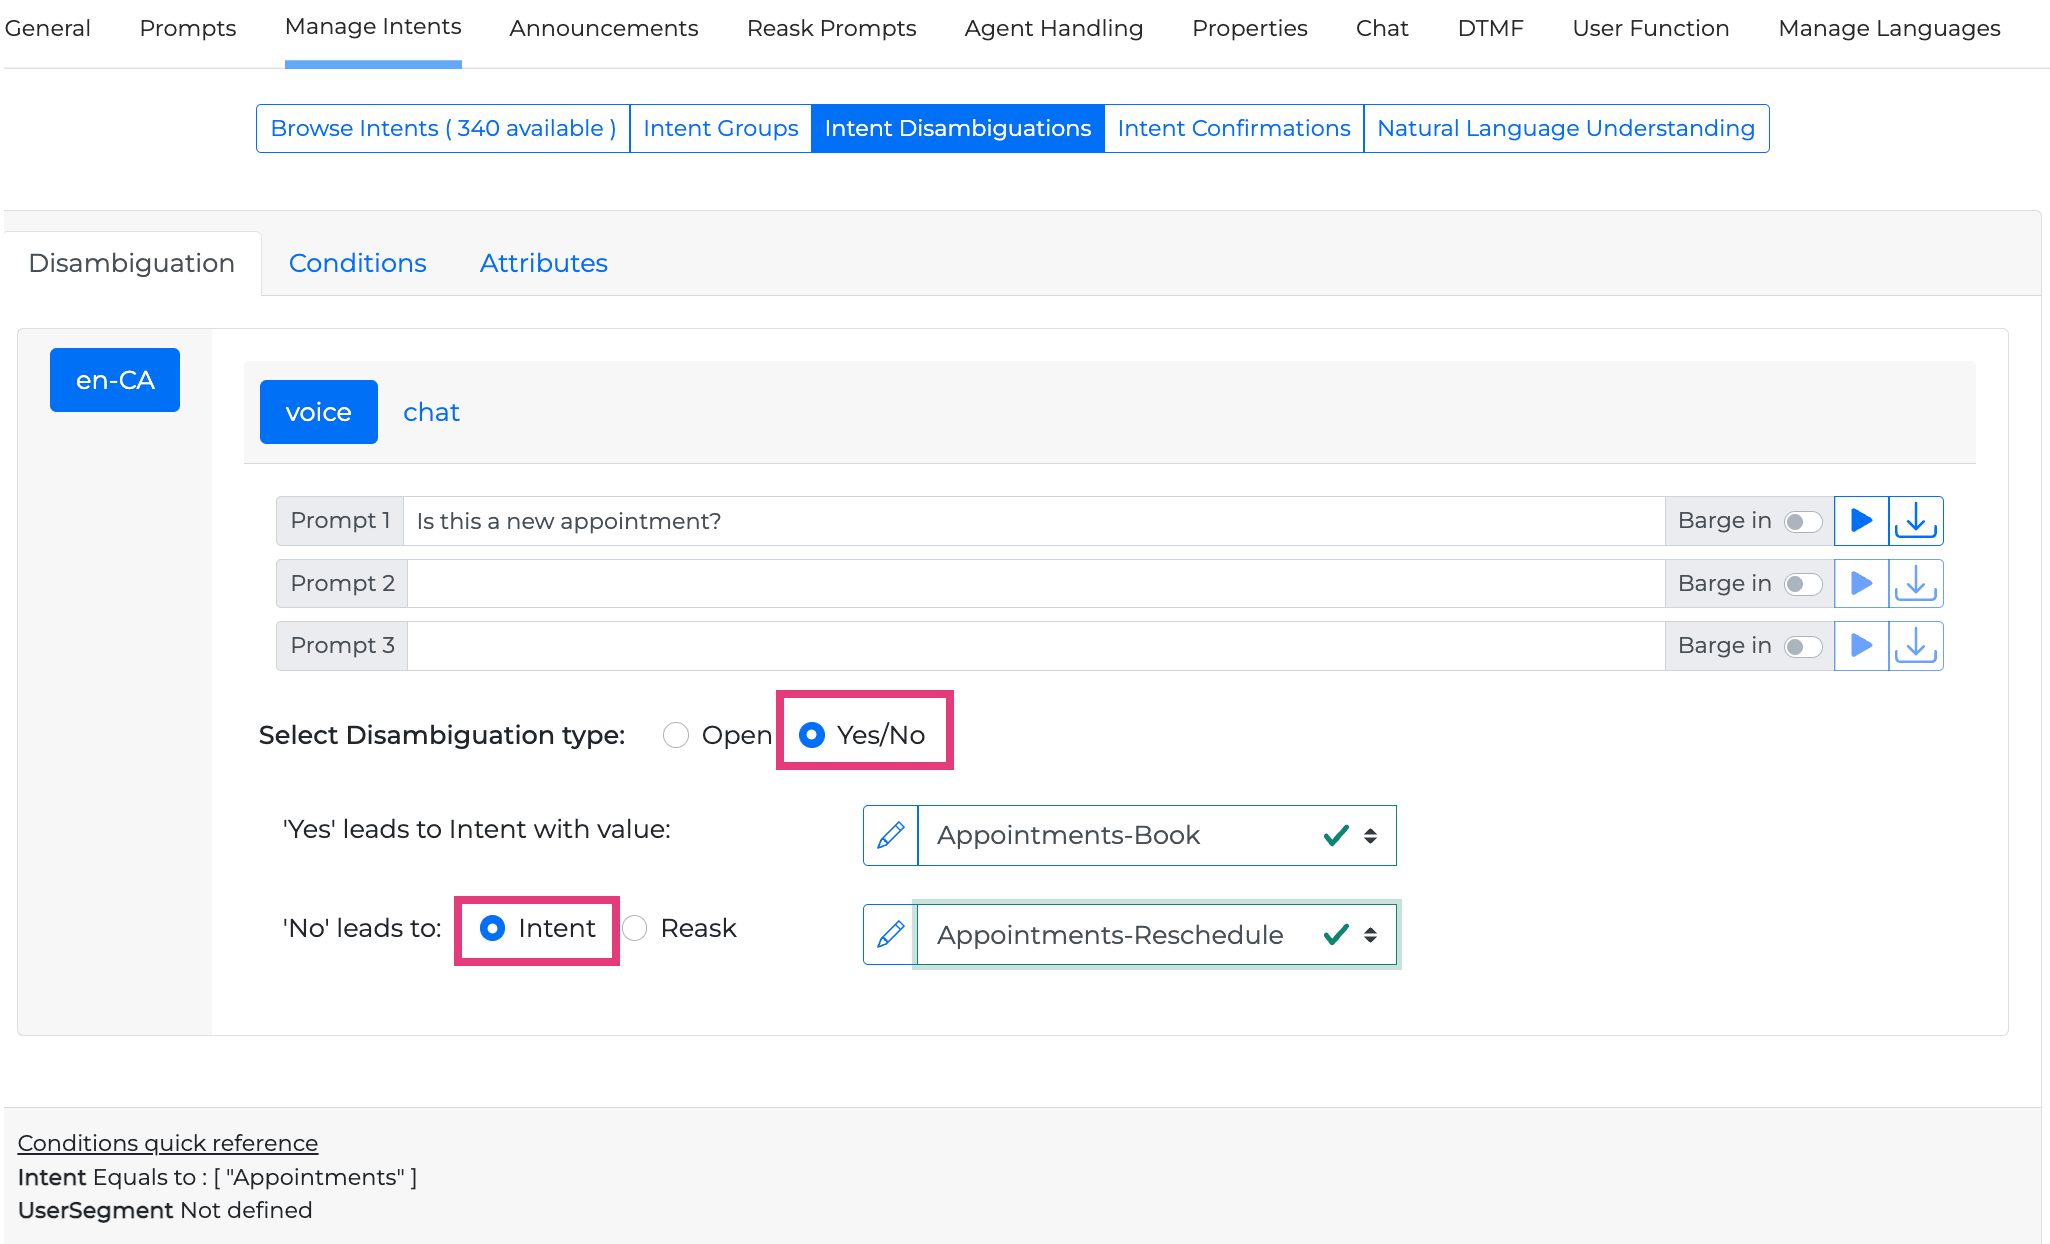
Intent values in Yes/No disambiguations can be dynamic as described in the correspondin Dynamic Values section.
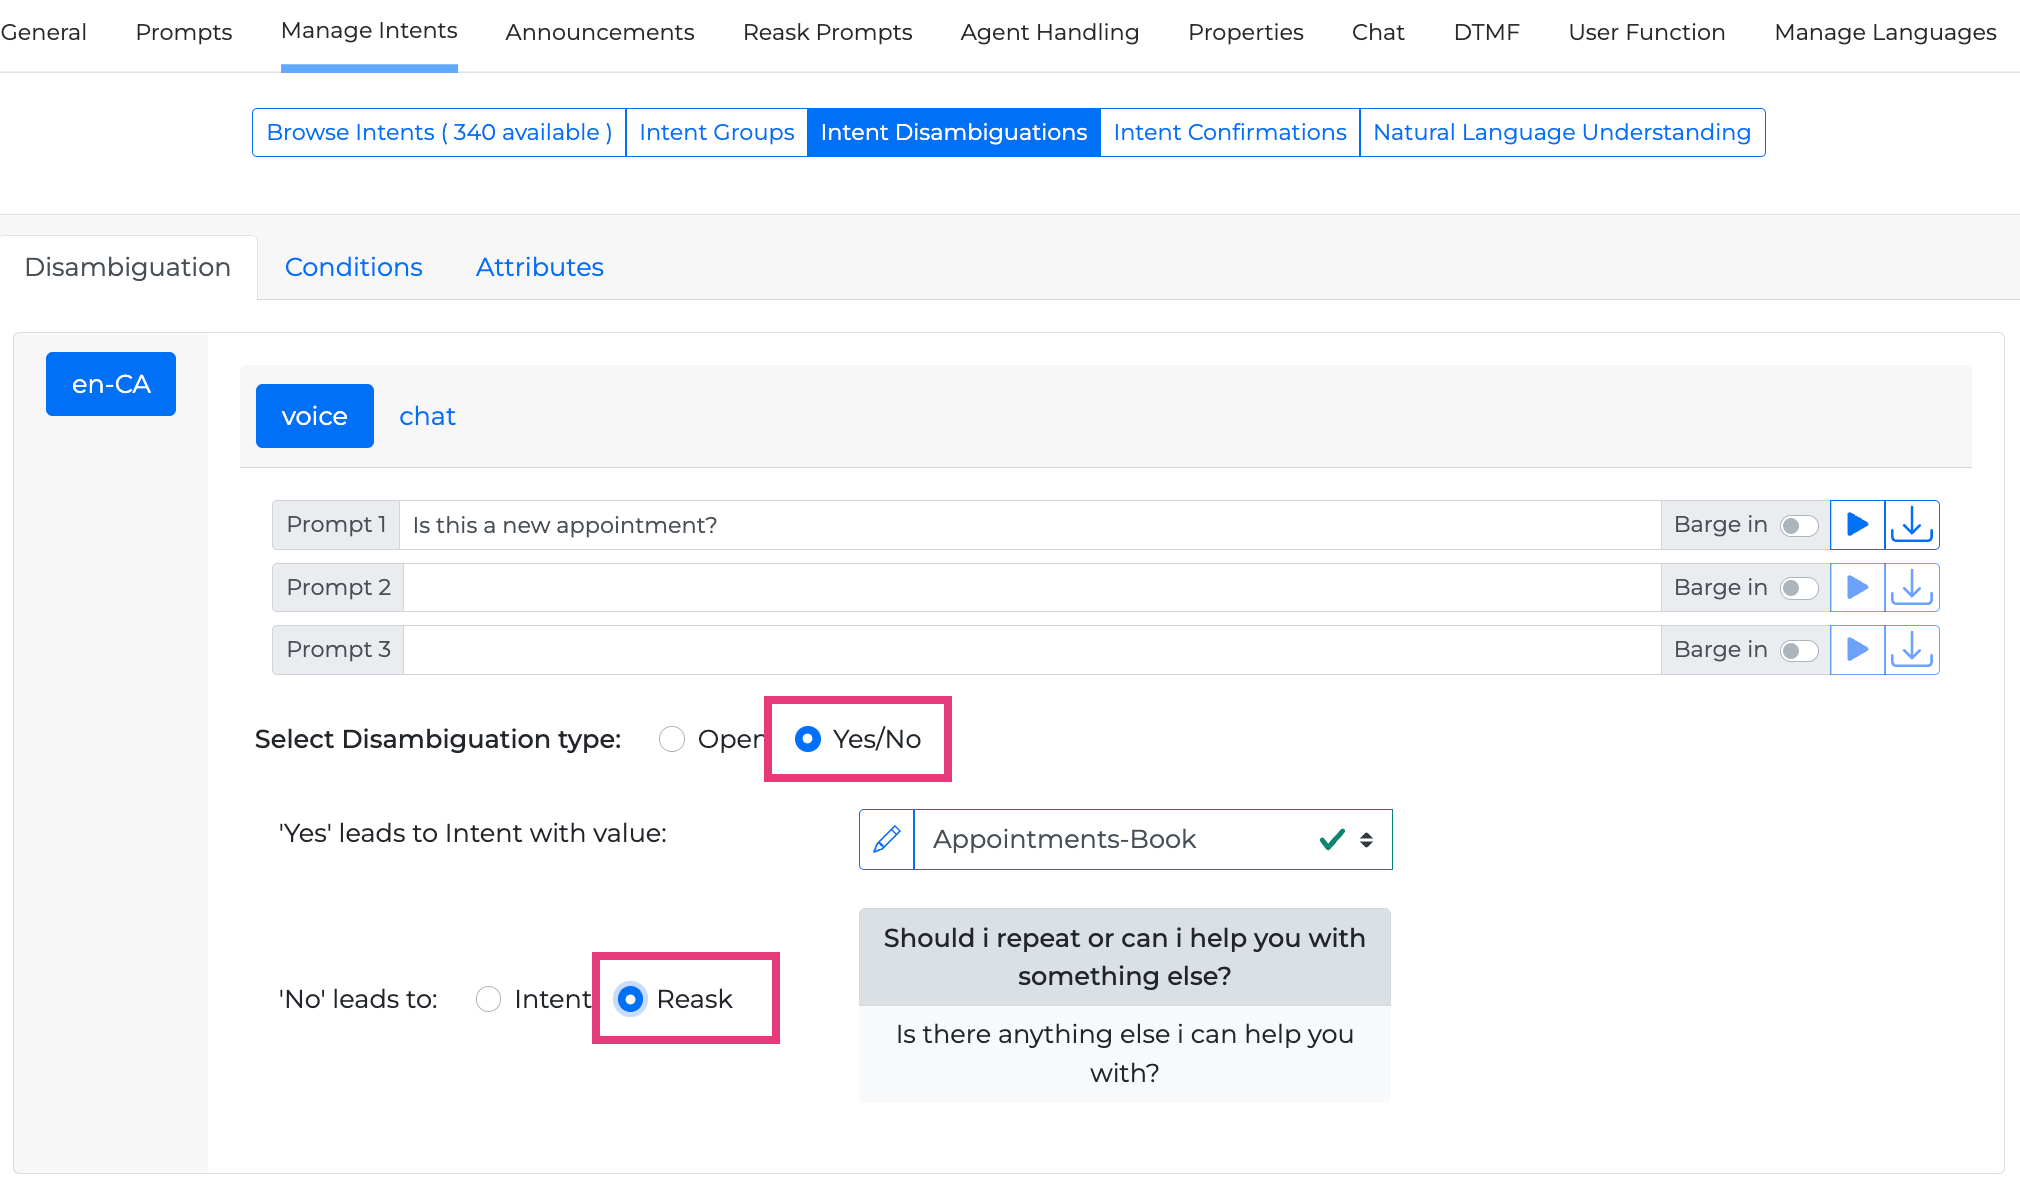
If the caller wants to book a new appointment, the intent becomes Appointments-Book; if not, then we can either assume they want to reschedule an existing appointment OR we can reask them and inquire what they want to do exactly, or ask them an open-ended "How can I help you?" in hopes of capturing a more precise intent, as in the screenshot below.
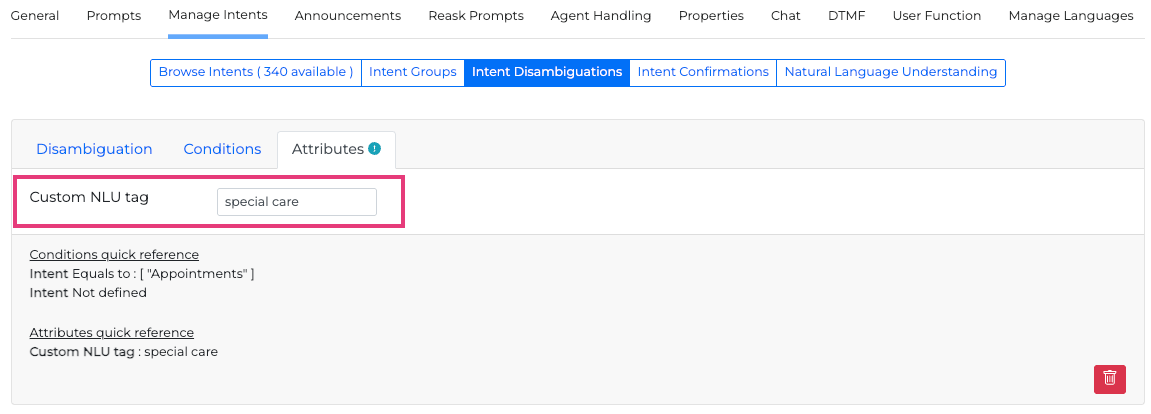
Disambiguation Custom NLU Tag
You can add a Custom NLU tag in the Attributes tab. This tag should clear the meaning for special disambiguous cases. You can add this in the corresponding text box, used to define a more specific context. A custom NLU Tag can be helpful in combination with a Custom NLU model where this tag could be used.
Double Intents and Intent Confirmations (Voice)
This tab is applicable to use if you have an unconfirmed intent that needs to be confirmed.
For instance, the following dialog might take place:
Caller: "I want to know my balance and make a payment" (Intent miniApp)
System: "Your balance is $200" (Announcement miniApp)
…
Since the Intent miniApp is able to understand double intents, after the first intent is executed ("Your balance is $200"), the system will activate the second intent, but it will enable the user to confirm the intent before proceeding. This is done by setting its status as Optioned. If one invokes an Intent miniApp by having an active intent with status Optioned, the Intent miniApp will look if there is an intent confirmation that matches.
The Optioned status is set by default to the second intent, whenever there is one.
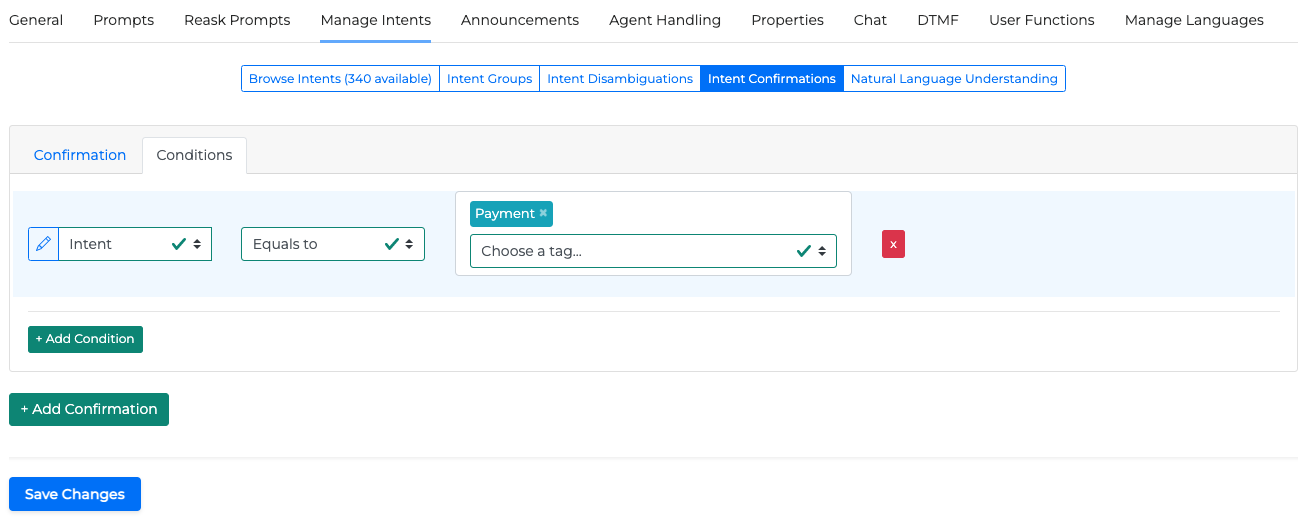
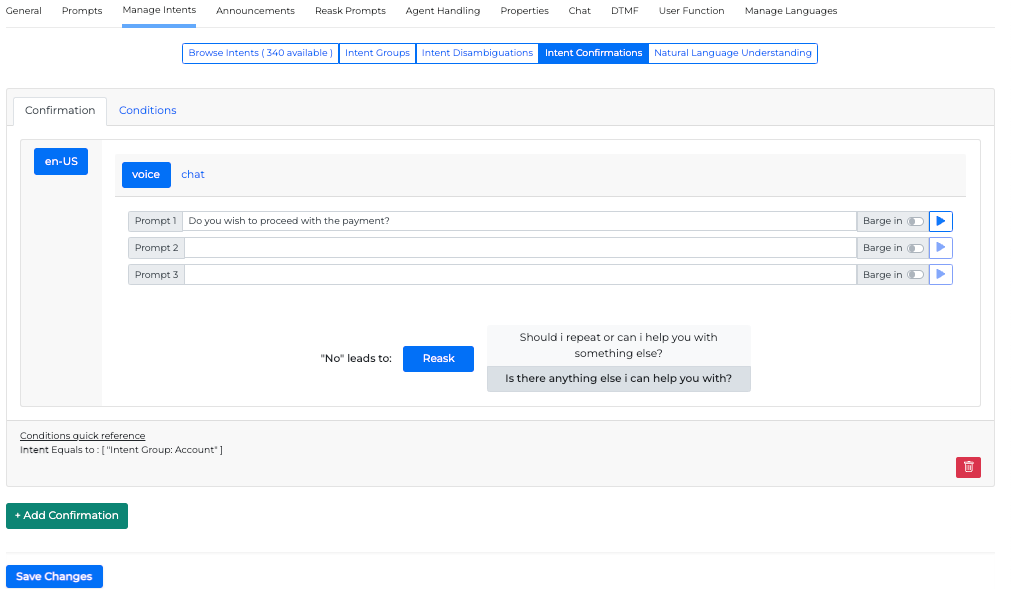
If a matching intent exists, the system will just confirm the intent by using the user-specific prompt such as "Do you wish to proceed with the payment?".
...
System: "Do you wish to proceed with the payment?" (Intent miniApp with Optioned Intent)
Caller: "Yes" (Intent miniApp with Defined Intent)
System: "Please tell me how much do you want to pay?"
In that sense, the Intent miniApp is not used to understand a new intent, but to confirm the existing one. If the caller confirms the intent, the Intent miniApp will change the status of the intent to Defined. Now, the system is ready to execute the Intent. "Please tell me how much do you want to pay?"
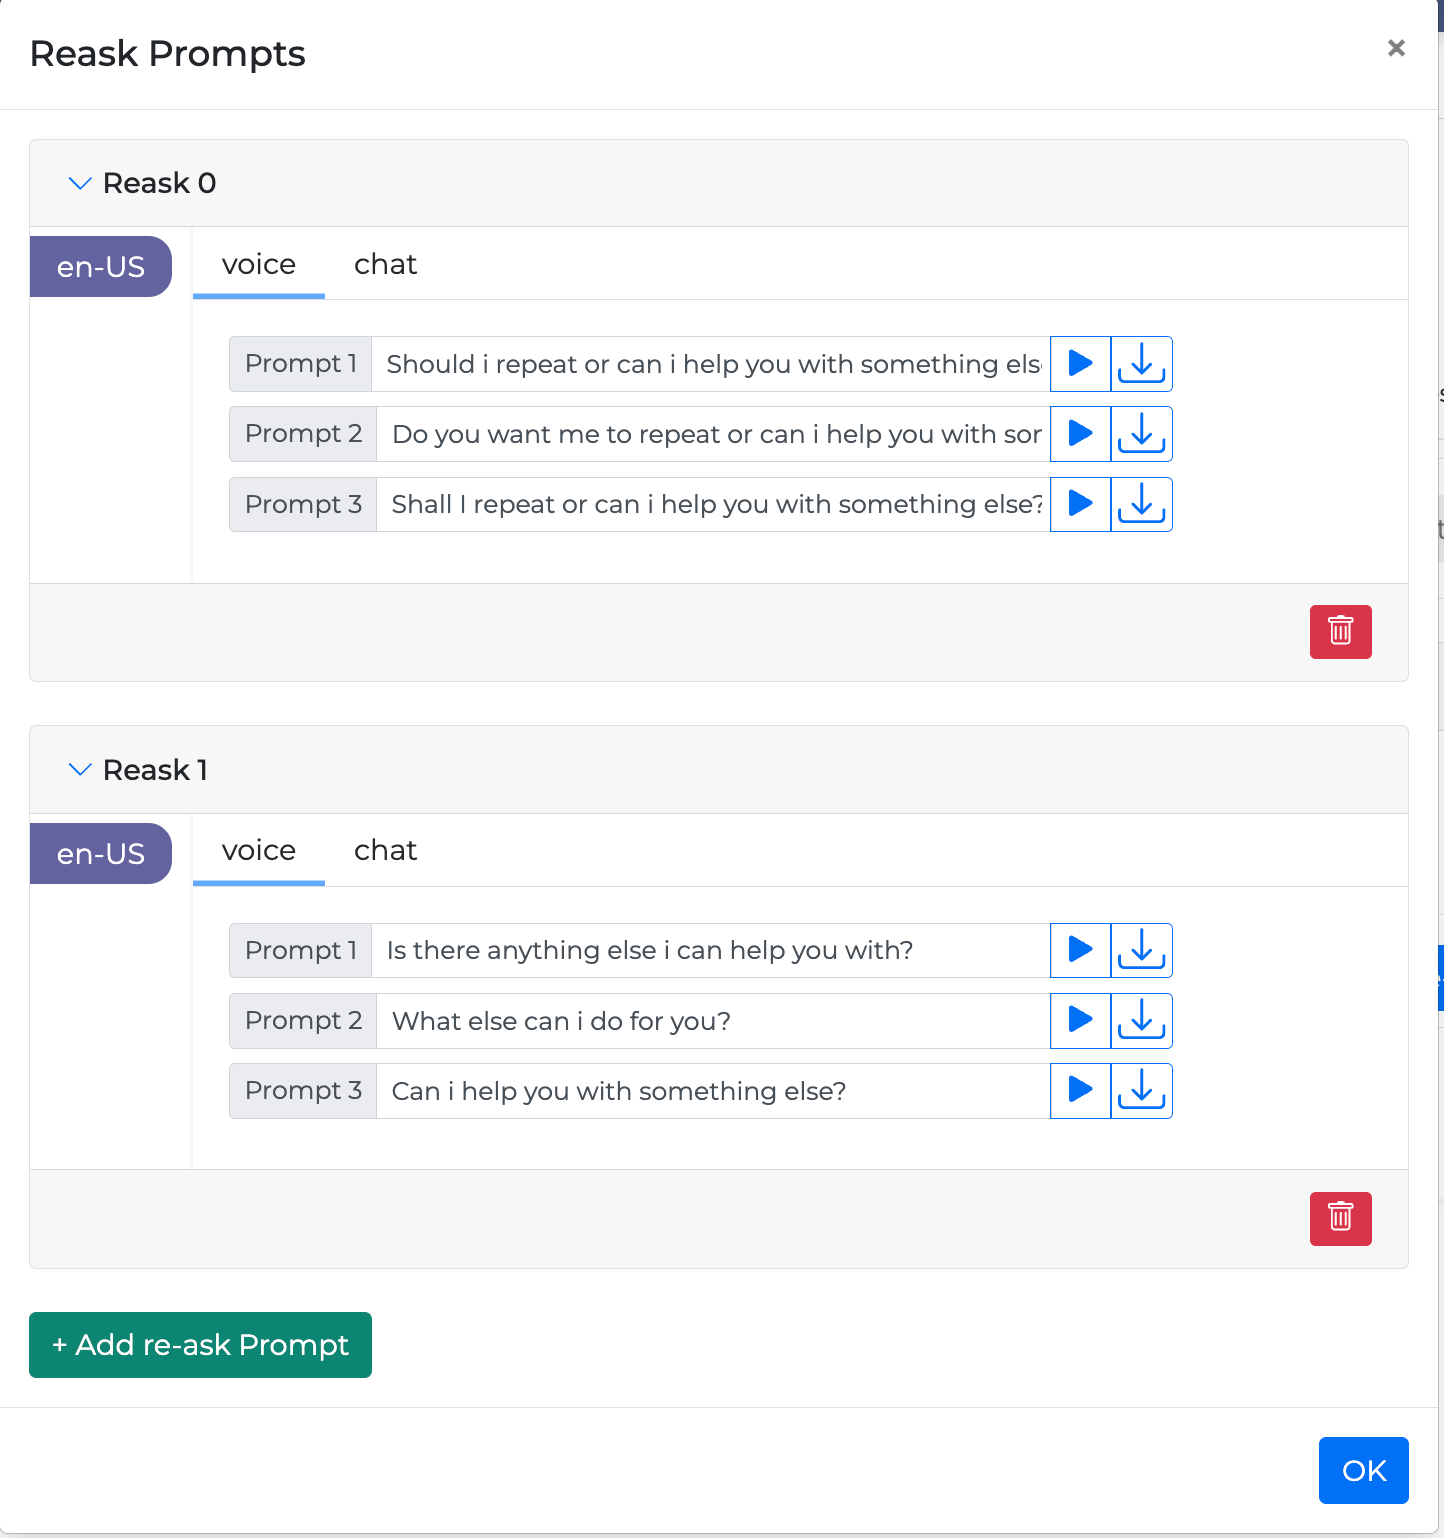
If the user disconfirms the intent, the system removes it so the Intent miniApp will ask for a new intent using the questions specified in the Reask Prompts tab: "So, is there anything else I can help you with?"
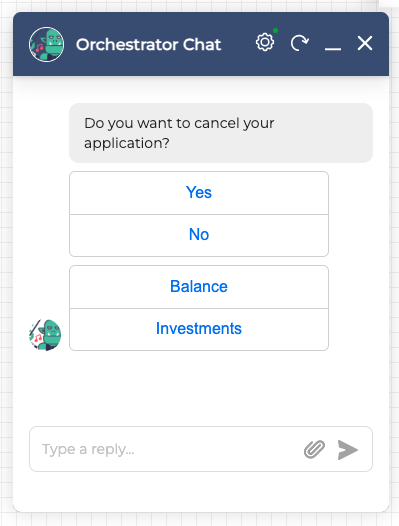
Double Intents and Intent Confirmations (Chat)
In additions to the features described in Double Intents and Configurations (Voice), there is additional feature only for Chat. It is possible to add up to two links related to the Rich Content Data Models created in the Chat tab.
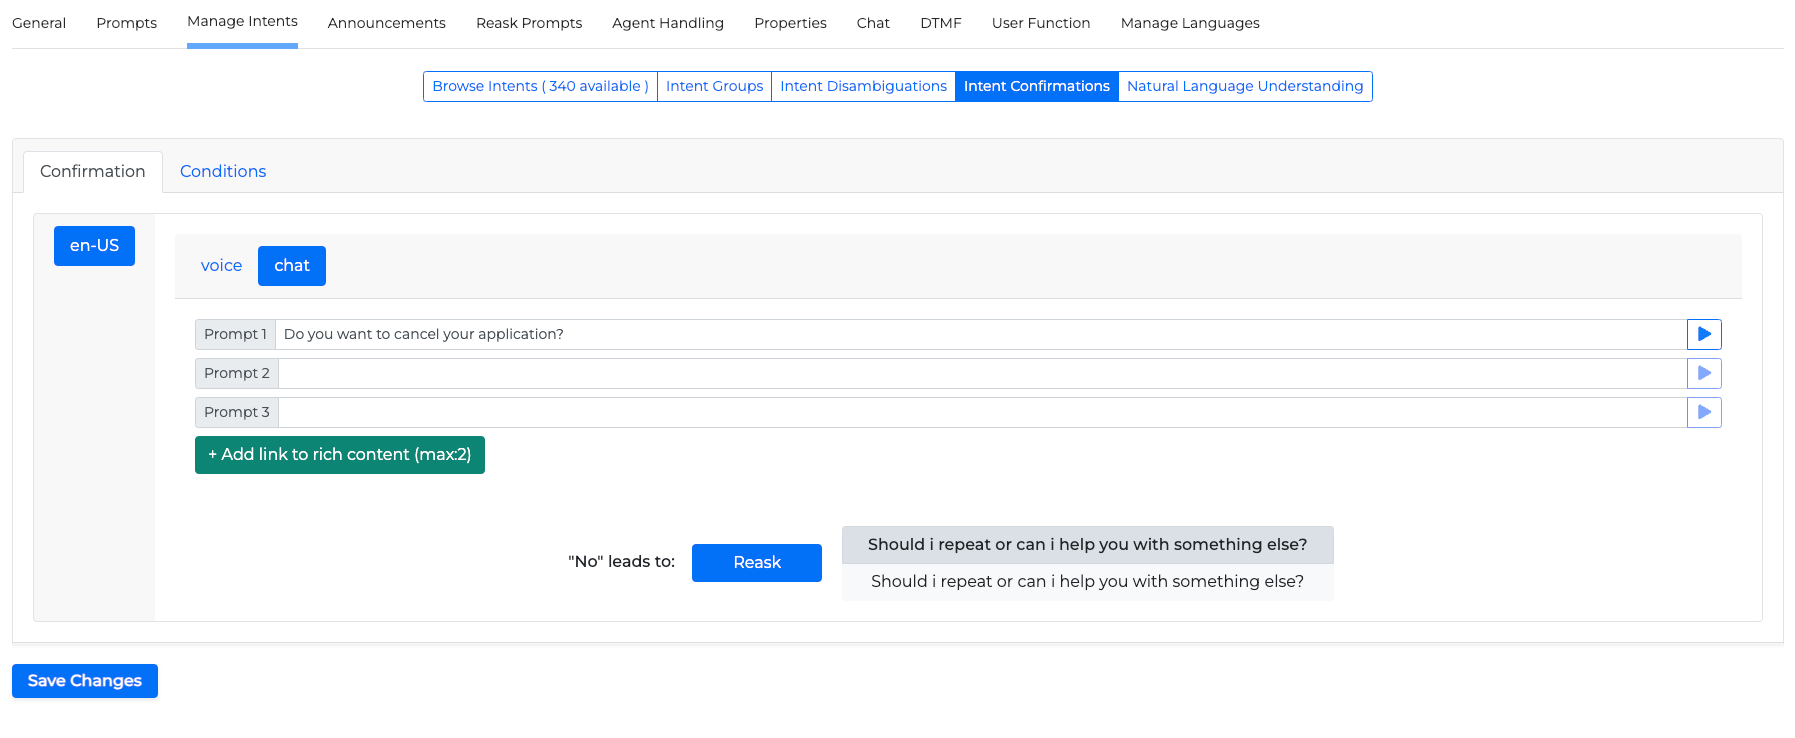
Click the +Add link to rich content button ![]() to add data models and select one from the available list.
to add data models and select one from the available list.
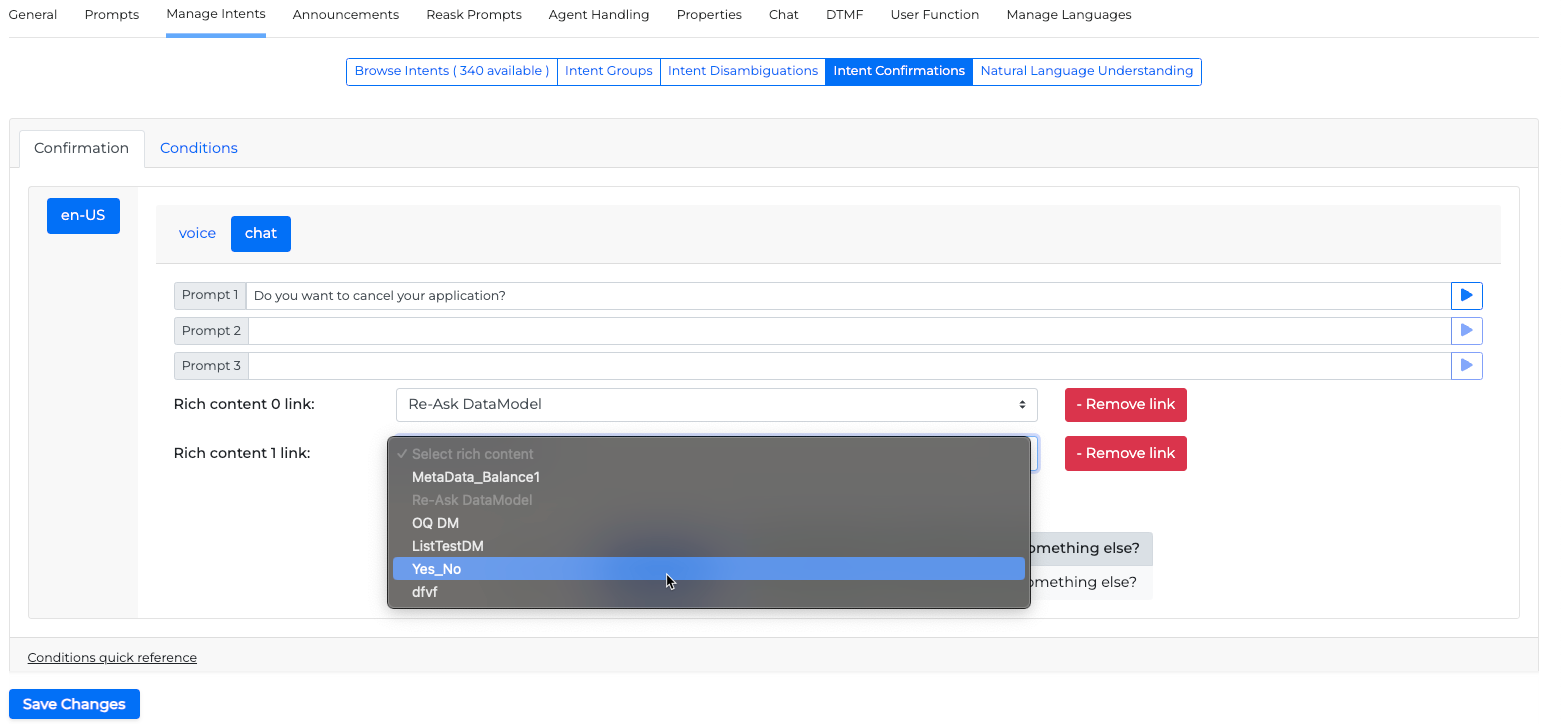
An example of how the chat dialogue would evolve is shown below.
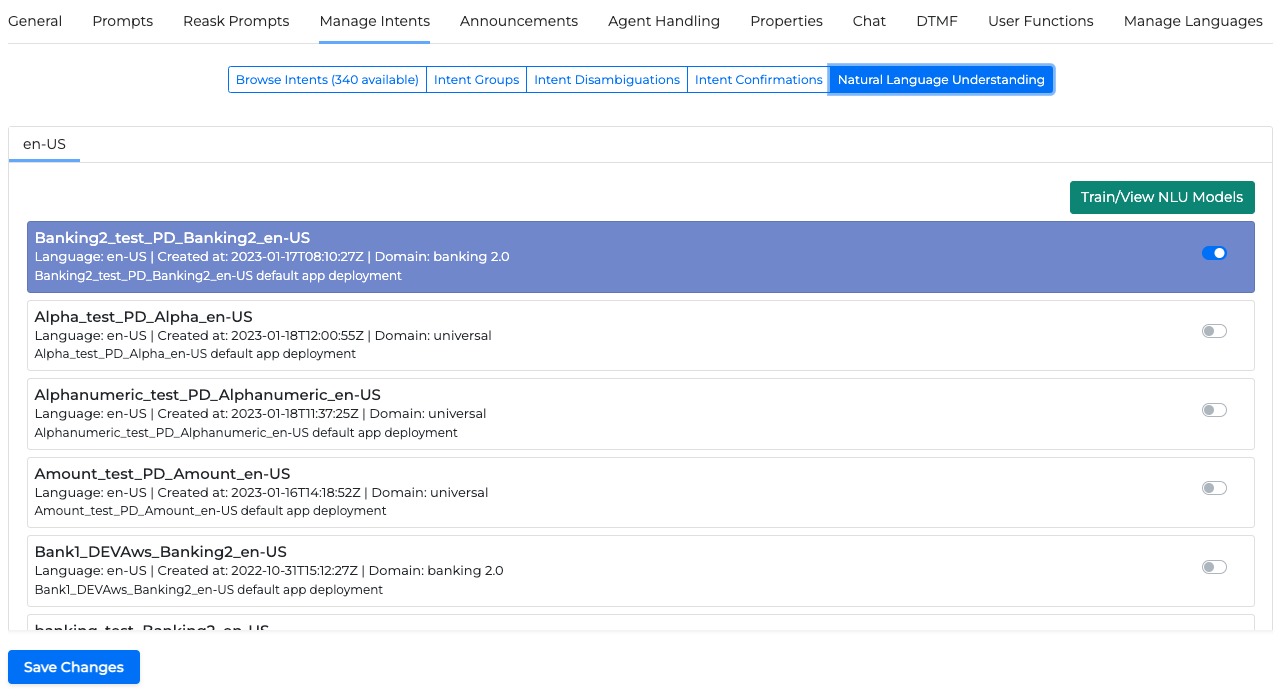
Natural Language Understanding
In this tab you can use the OCP ML-NLU Service to create a custom NLU model/application from your own set of utterances-intents, or to add intents in an existing model. To do so, select the Train/View NLU models button.
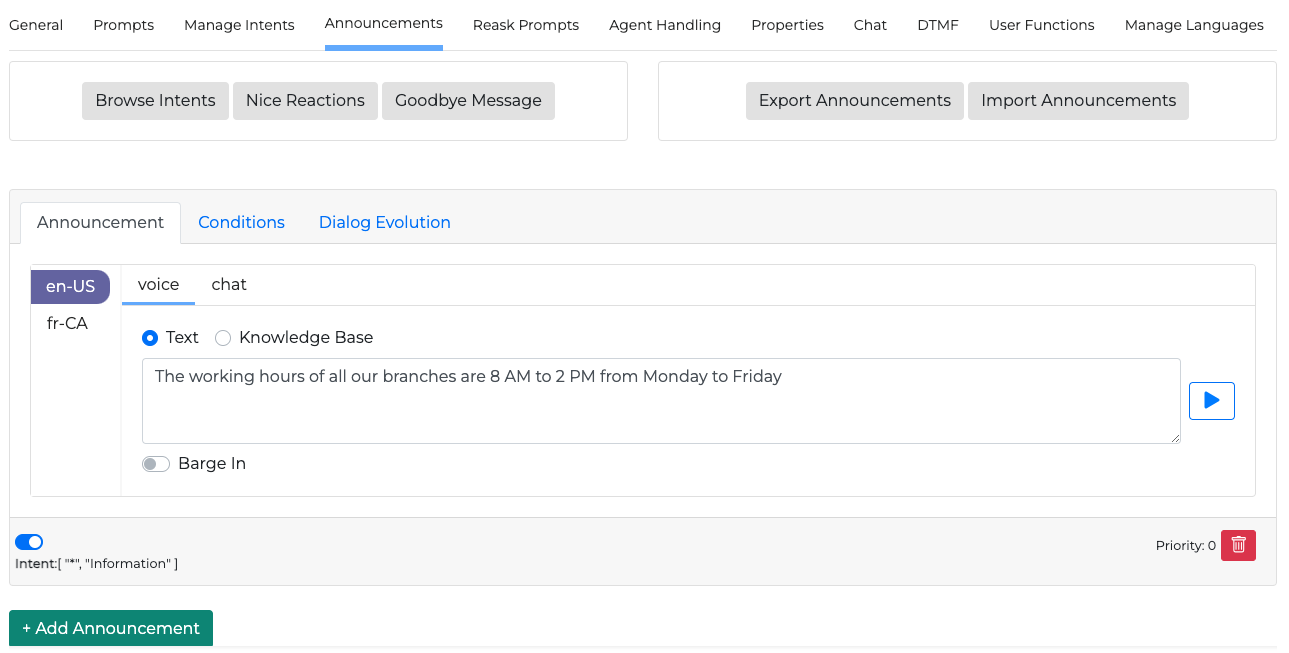
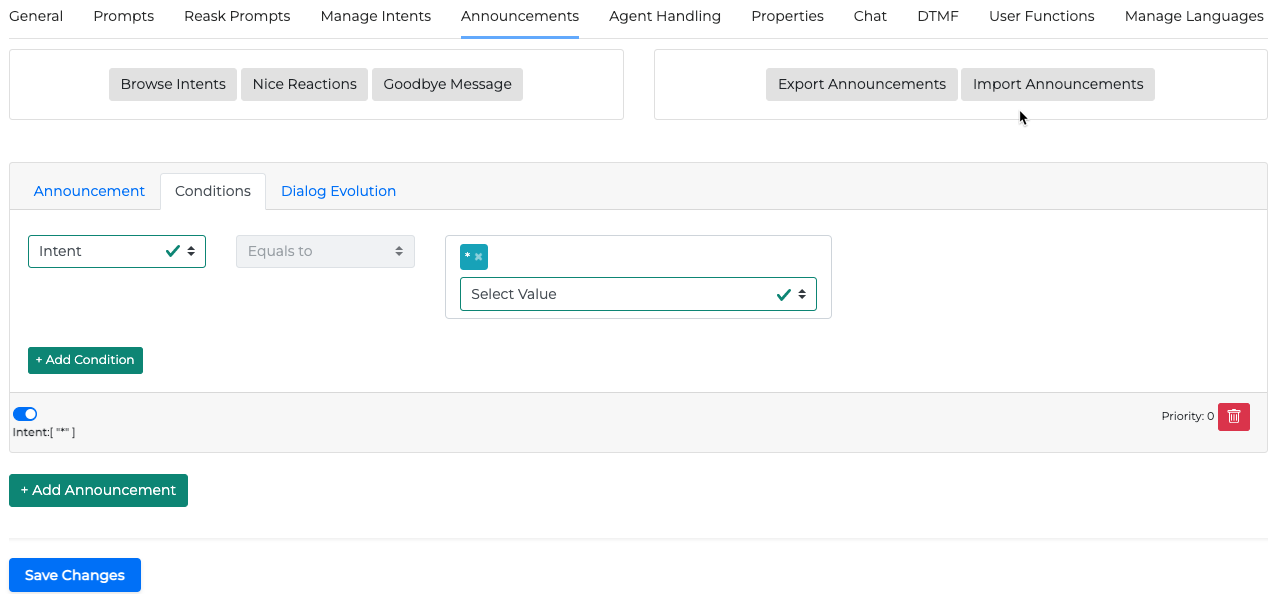
Announcements tab
In the Announcements tab you can set as many announcements as you want and link them to one or more intents from the Conditions tab. You can also choose additional entities in your conditions if you want to make the announcement more specific. Announcements can be a defined pre-selected text or based on a created knowledge base.
Additionally you can activate the Knowledge base fallback announcement that will take over if no Intent is detected. This will allow the miniApp to improvise and generate a logical announcement based on the dialog history.
Knowledge base fallback
Activate the Knowledge base fallback and select a Pathfinder project to handle the dialog evolution when no Intent is detected. The complete dialog history up to this point will be used to generate an appropriate announcement message. This is useful in situations where your NLU application isn’t fully configured, or when a follow-up question is asked after a successful announcement.
You can activate the Barge in option if you consider it useful. When barge in is activated it will allow the caller to barge in during the created announcement.

You can add a Post action re-ask prompt. This will trigger after a successful knowledge base announcement. Click the Manage re-ask Prompts button to configure the re-ask prompts through the Re-ask Prompts window.
Text Announcements
Select the Text announcement and edit the announcement that will be played once the conditions are met.
Knowledge base announcements
You can select to allow a tuned Knowledge Base to be creative for you and handle announcements, based on the available Pathfinder project you select from the dropdown list.
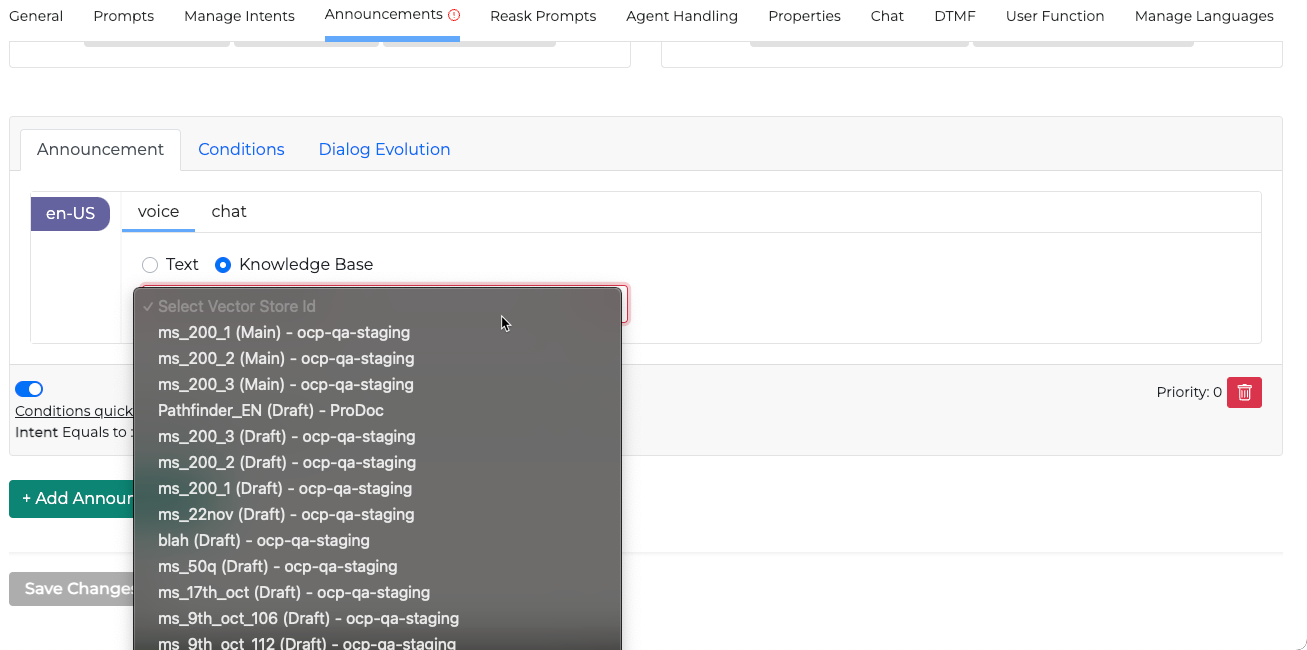
Knowledge bases may have a (Main) and a (Draft) version in the drop down list.
The Main version is the last deployed version of the knowledge base in the Pathfinder.
The Draft version contains any existing changes that have not been deployed yet.
Announcement order matters. If two announcement conditions match, the top one will be selected.
Make sure you put 'failover' announcements using the 'Any(*)' operator to the bottom.
For intent conditions, the operator is by default Equals to and cannot be changed.
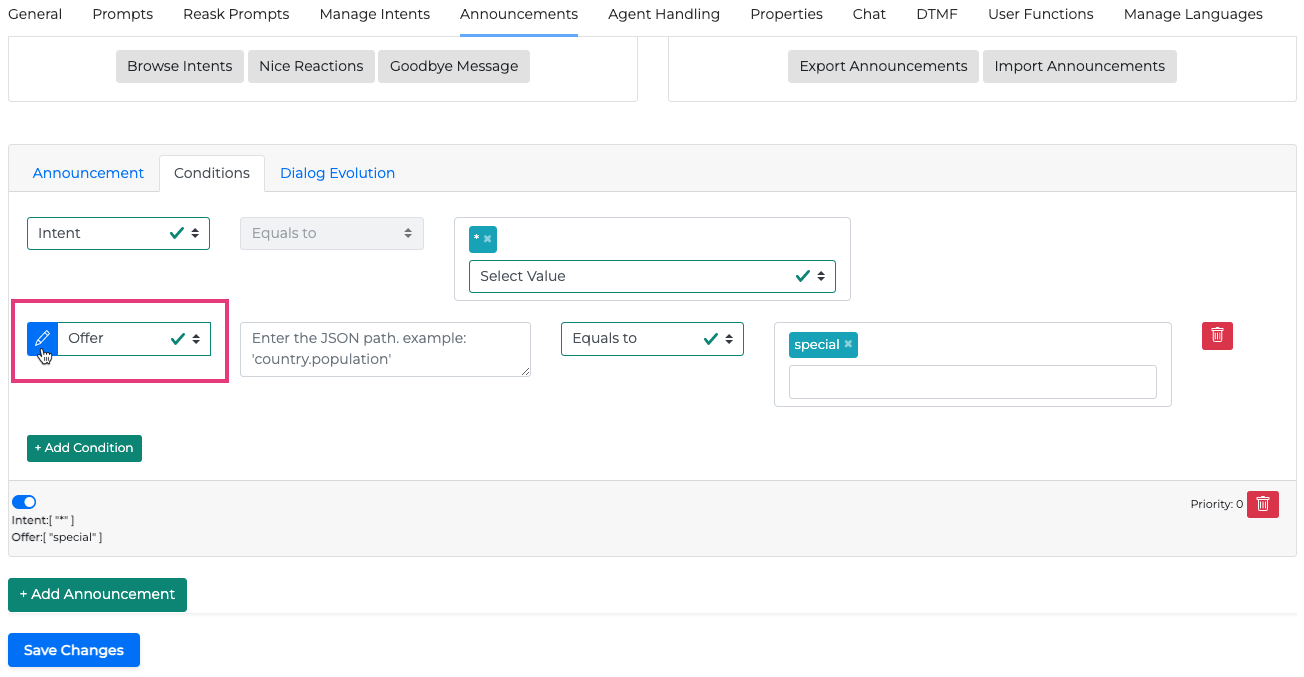
Add a second condition
Adding a second condition allows entering an entity from the list of entities or even adding a custom entity.
To add a second condition:
Click the +Add Condition button.
Select an entity from the list, or create a custom entity.
Enter the JSON path accordingly if required.
Select an operator from the dropdown list.
Enter the condition values.
The second condition can have a custom entity value. Click the Edit button to add a custom value.
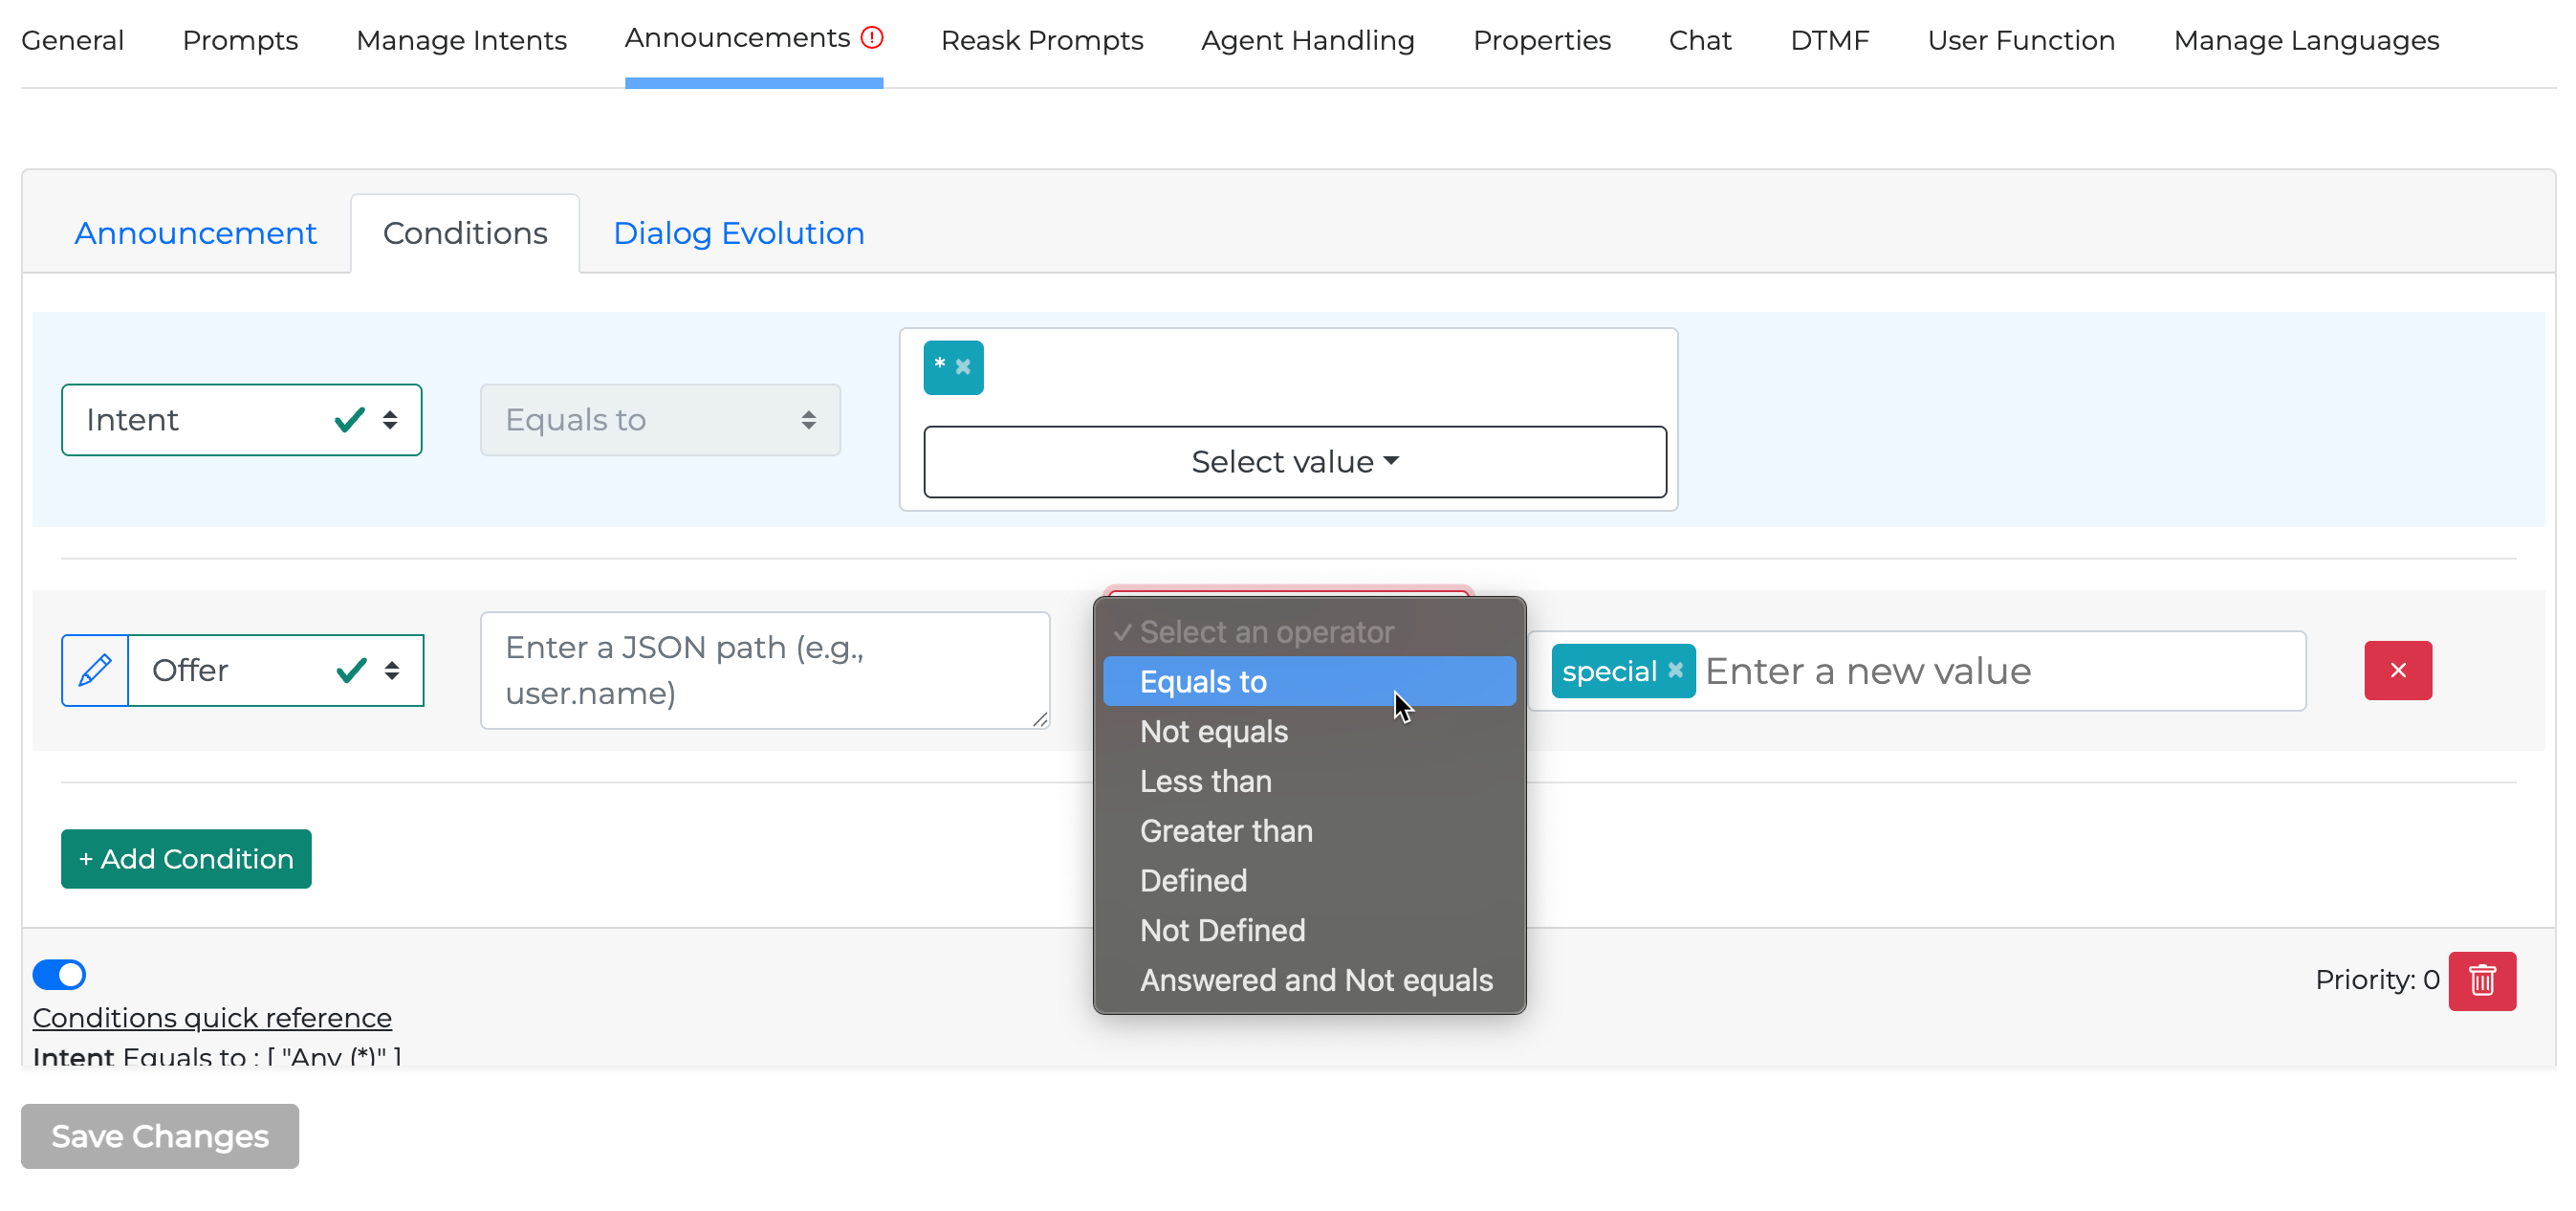
To add a custom entity, click on the Edit button
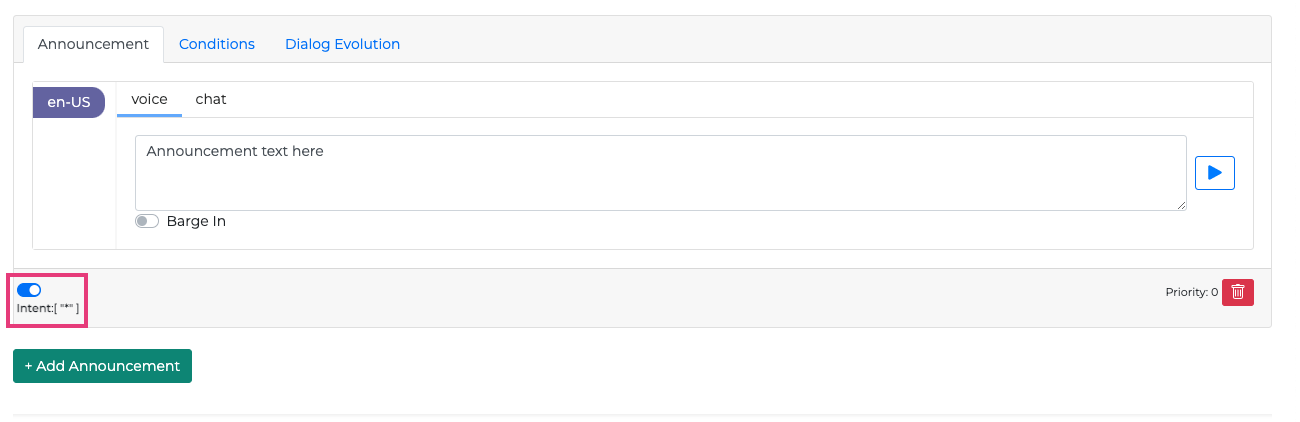
It is possible to disable an announcement by using the Intent enable/disable the Toggle button.
Once disabled, the announcement will be greyed out and it won’t be used on runtime.
Dialog Evolution
In the Dialog Evolution tab, you can check how the dialog unfolds and decide the next step (Reask Intent or End Call). Keep in mind that the Manage re-ask prompts button is just a shortcut to the main Reask tab.
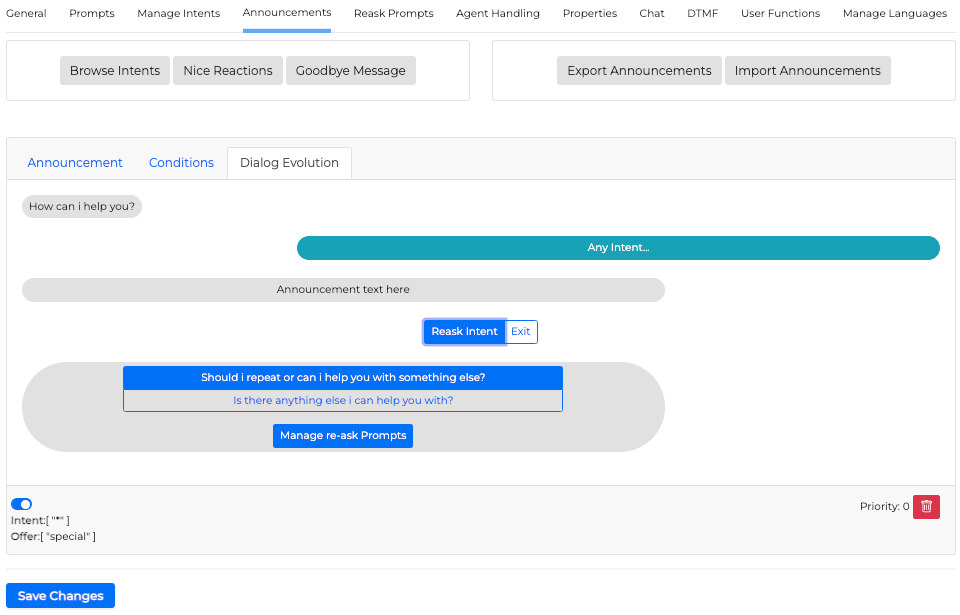
It is not possible to delete a re-ask prompt if it is being used in an announcement. Make sure that no announcement is using the re-ask prompt you want to delete.
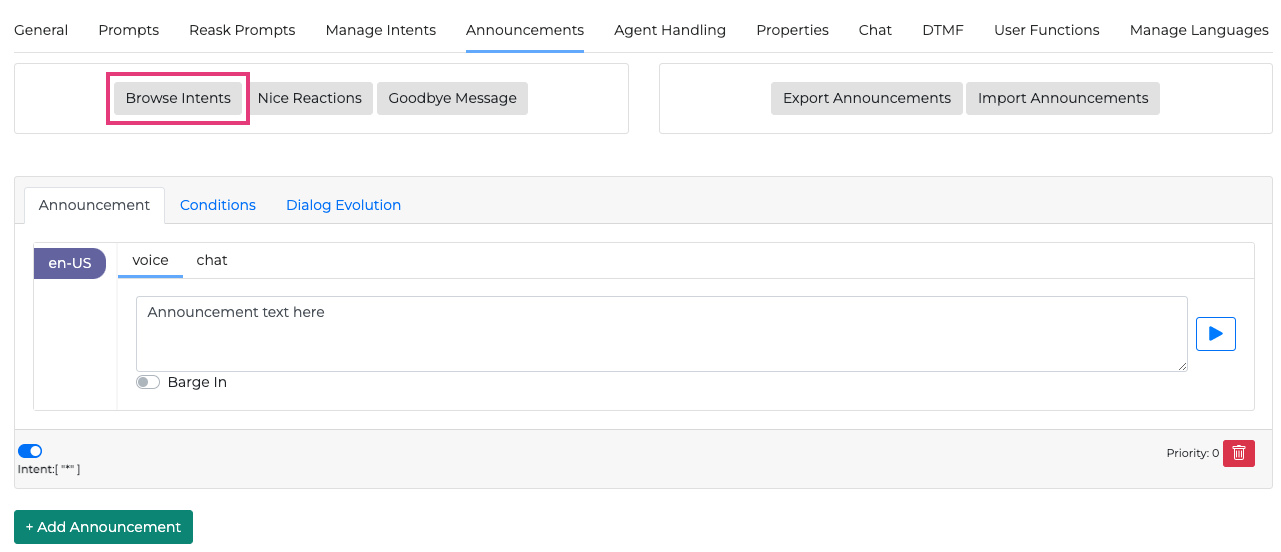
Browse Intents
To browse the set intents and sample utterances, select the Browse Intents button.
In the Browse Intents pop-up window, you can view the set intents and the respective sample utterances.
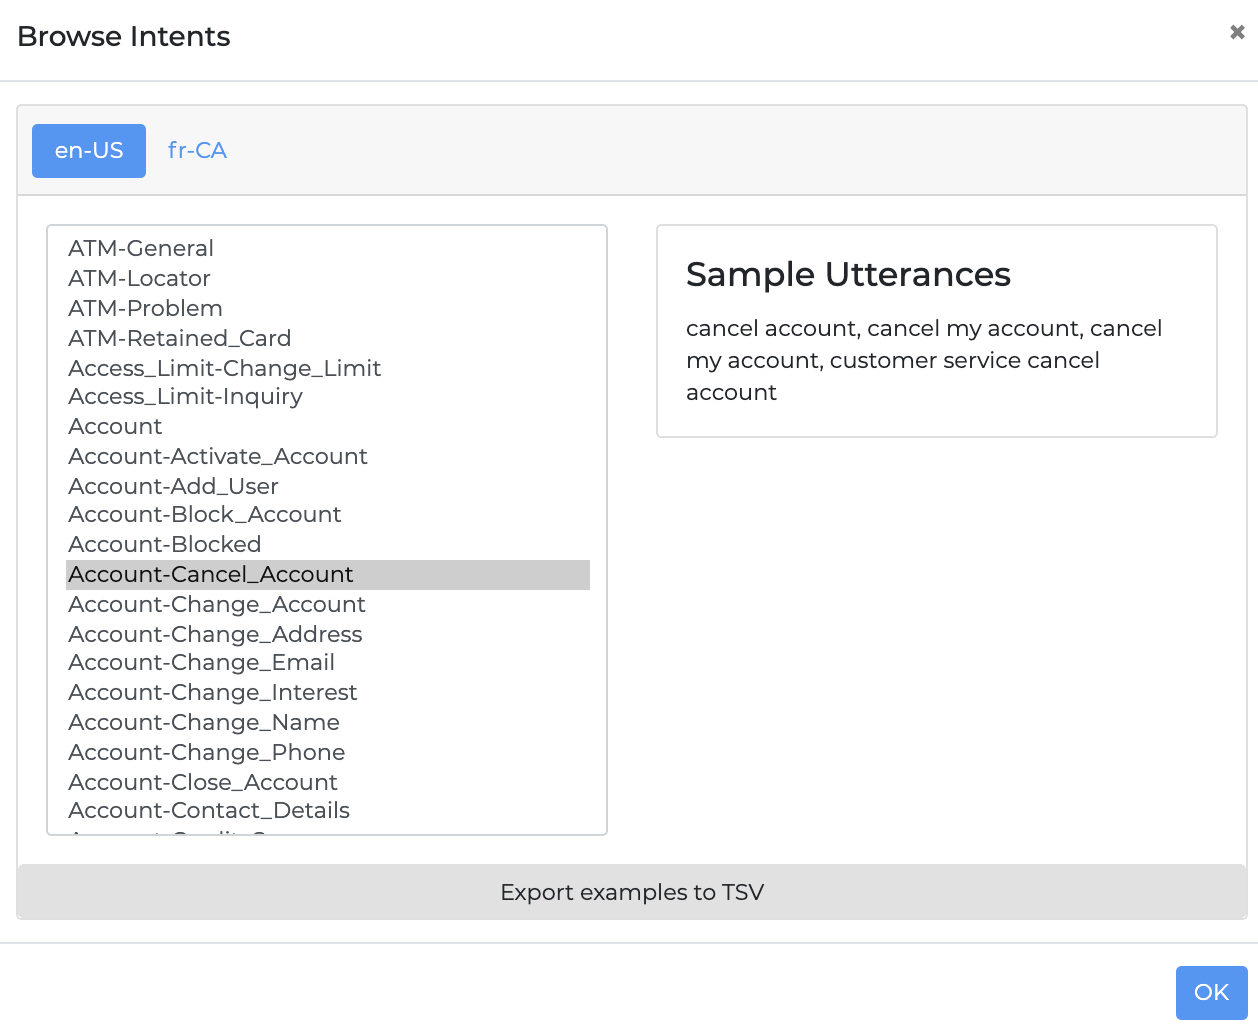
Browse Intents window
Commas between values act as an 'OR' operator and new lines act as an 'AND' operator.
To export the intents and sample utterances, select the Export examples to TSV button.
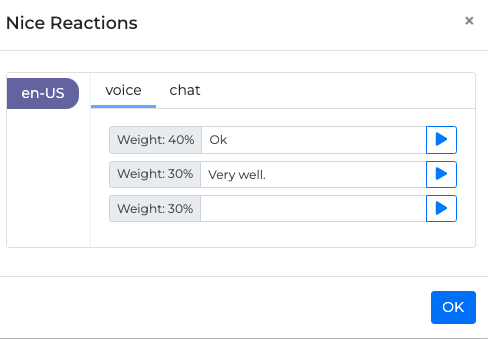
Nice Reactions
In the Nice Reactions window you can optionally set nice reactions. Whenever the application identifies an intent that is not ambiguous, then it throws a nice reaction before the announcement randomly (according to weight) to make the dialog sound more conversational.
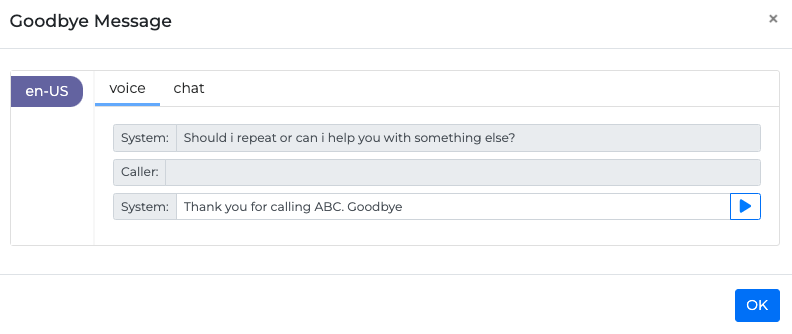
Goodbye Message
In the Goodbye Message window, you can optionally set goodbye messages.
Export Announcements
To export the announcements in a .tsv file, select the Export Announcements button.
Import Announcements
To import announcements from a .tsv file, select the Import Announcements button.
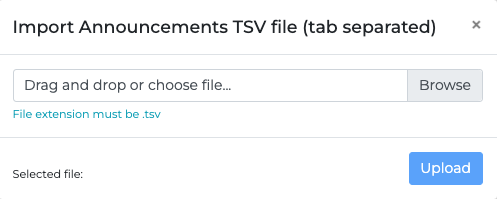
Then, browse for the .tsv file and select the Import Announcements button.
Reask Prompts tab
Here you can set and edit re-ask prompts.

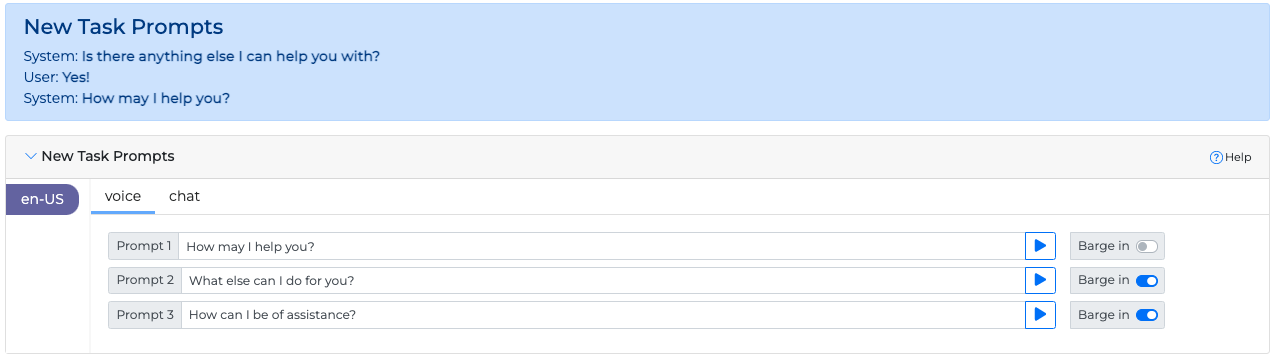
New Task Prompts
In case the caller responds positively to a question such as "Is there anything else I can help you with?", New Task Prompts will continue the conversation based on the defined prompts.
System: Is there anything else I can help you with?
User: Yes!
System: How may I help you?
Agent Handling tab
To see the details on how to configure the Agent Handling tab, check out this article.
Properties tab
To see the details on how to configure the Properties tab, check out this article.
Chat tab
To see details about the Chat tab, check out this article.
DTMF Tab
To see details about the DTMF tab, check out this article.
User Functions Tab
To see details about the User Functions tab, check out this article.
Manage Languages tab
To see the details on how to configure the Manage Languages tab, check out this article.