Voice Biometrics Enrollment through NICE CXone
Overview
This section describes the steps to be completed so that agents of an OCP customer can enroll callers to the Voice Biometrics service using NICE CXone.
Prerequisites
Before you enroll a user through the agent-side for Voice Biometrics make sure you have taken these steps:
Enroll a user
To enroll a user for Voice Biometrics, follow the steps below:
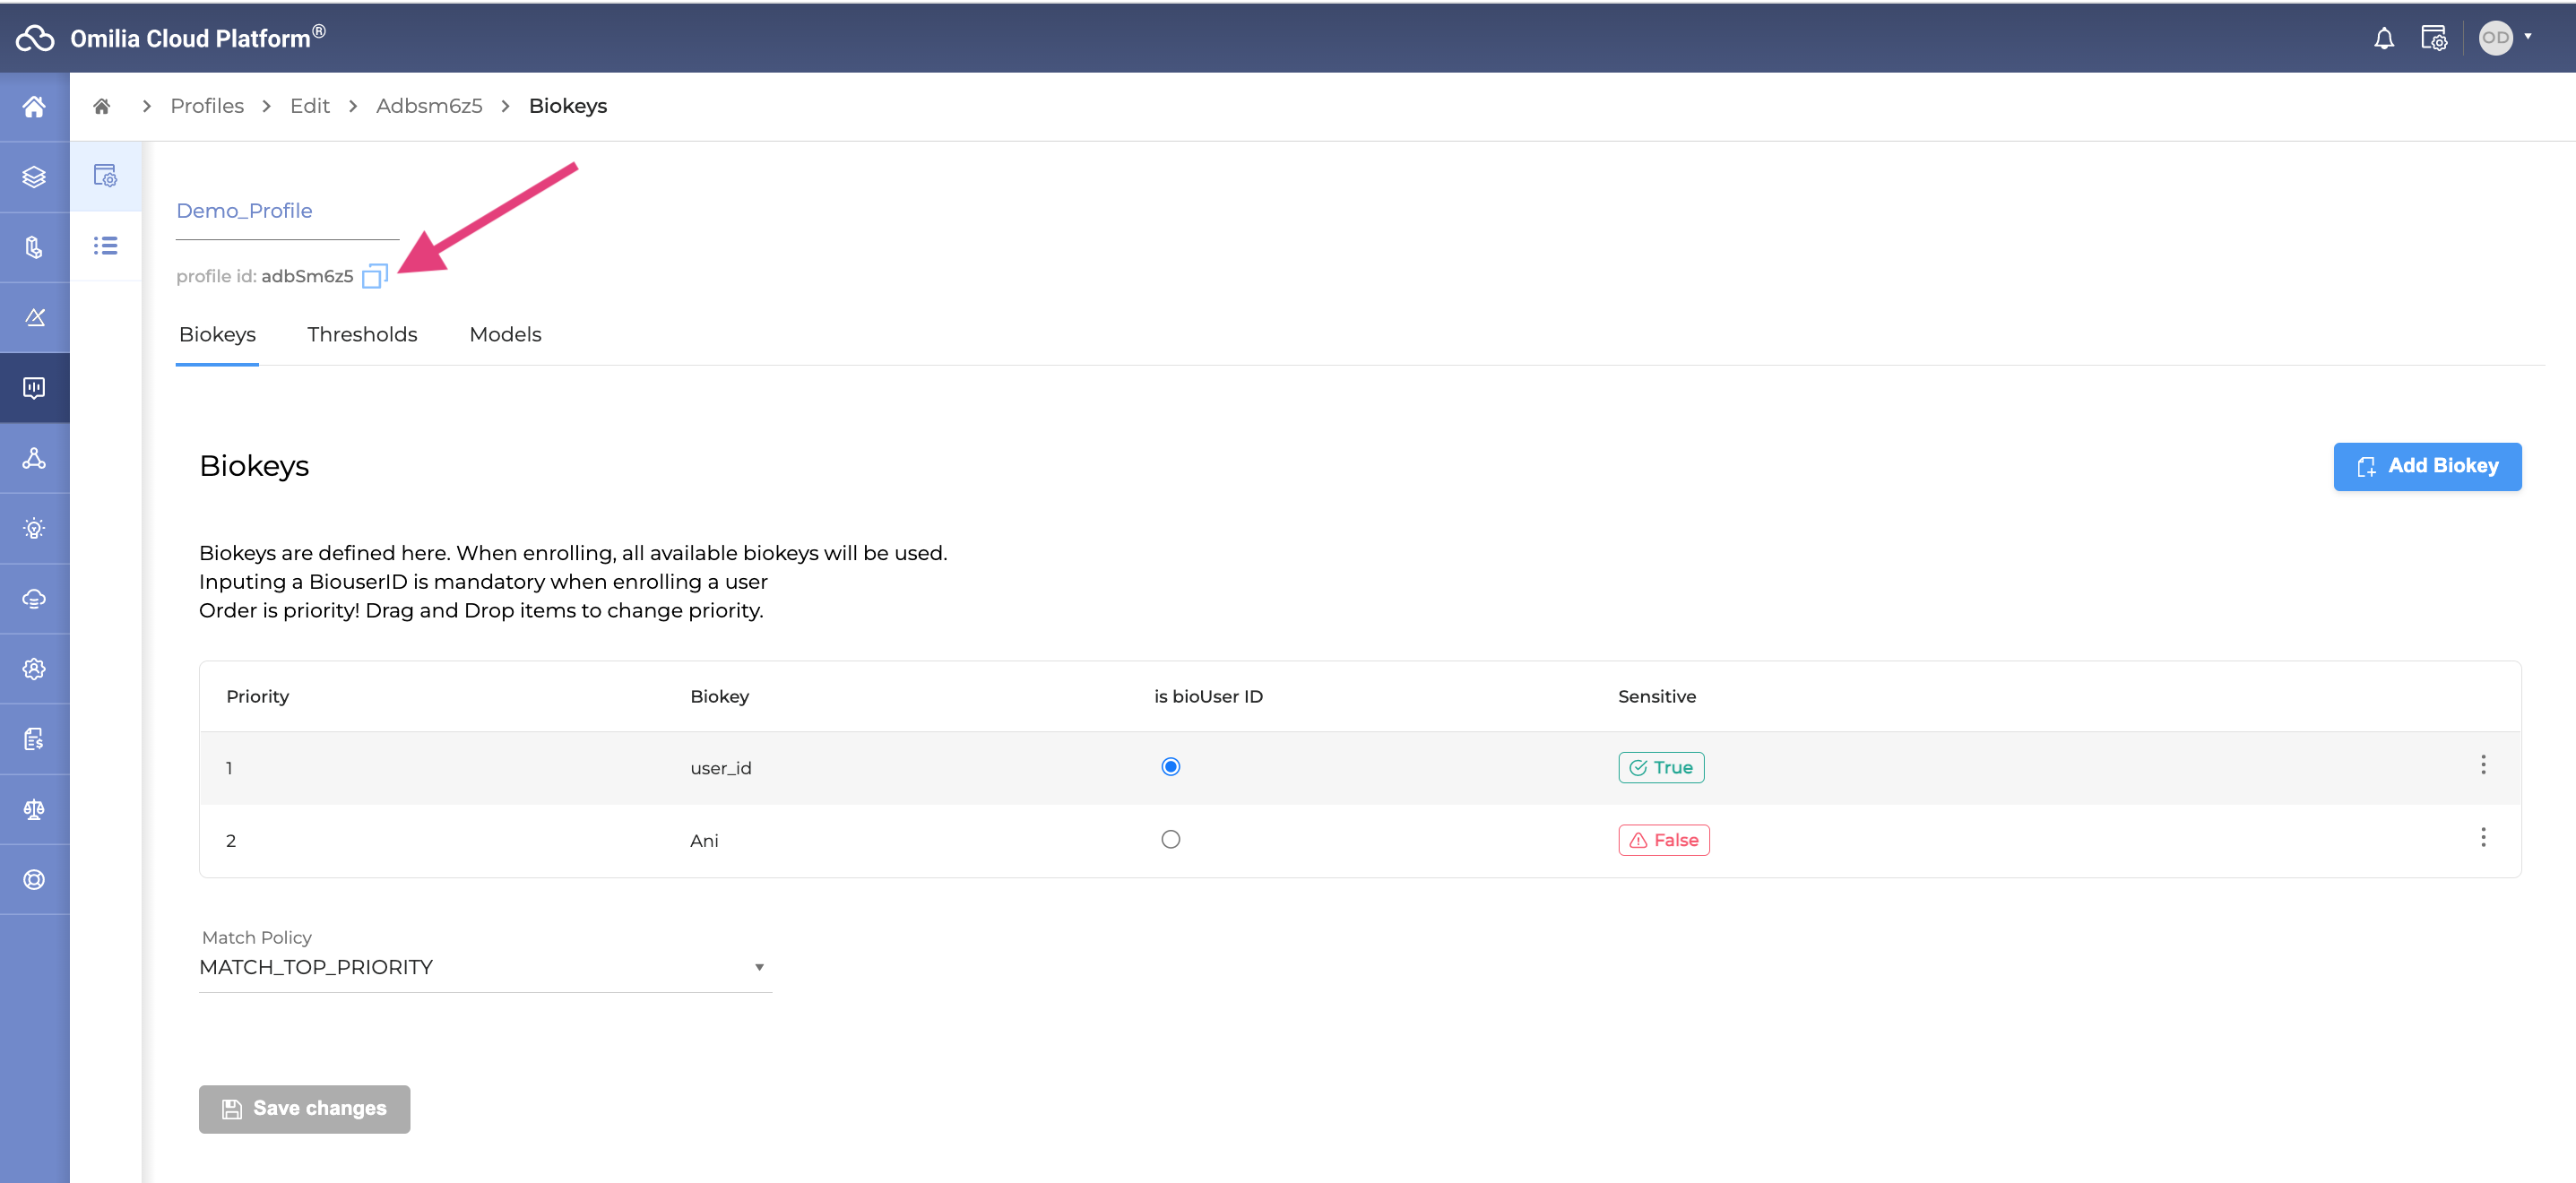
Navigate to Console → Voice Biometrics → Profiles.
Select a Voice Biometrics profile and click on it to open.
Copy the profile ID by clicking the Copy icon.

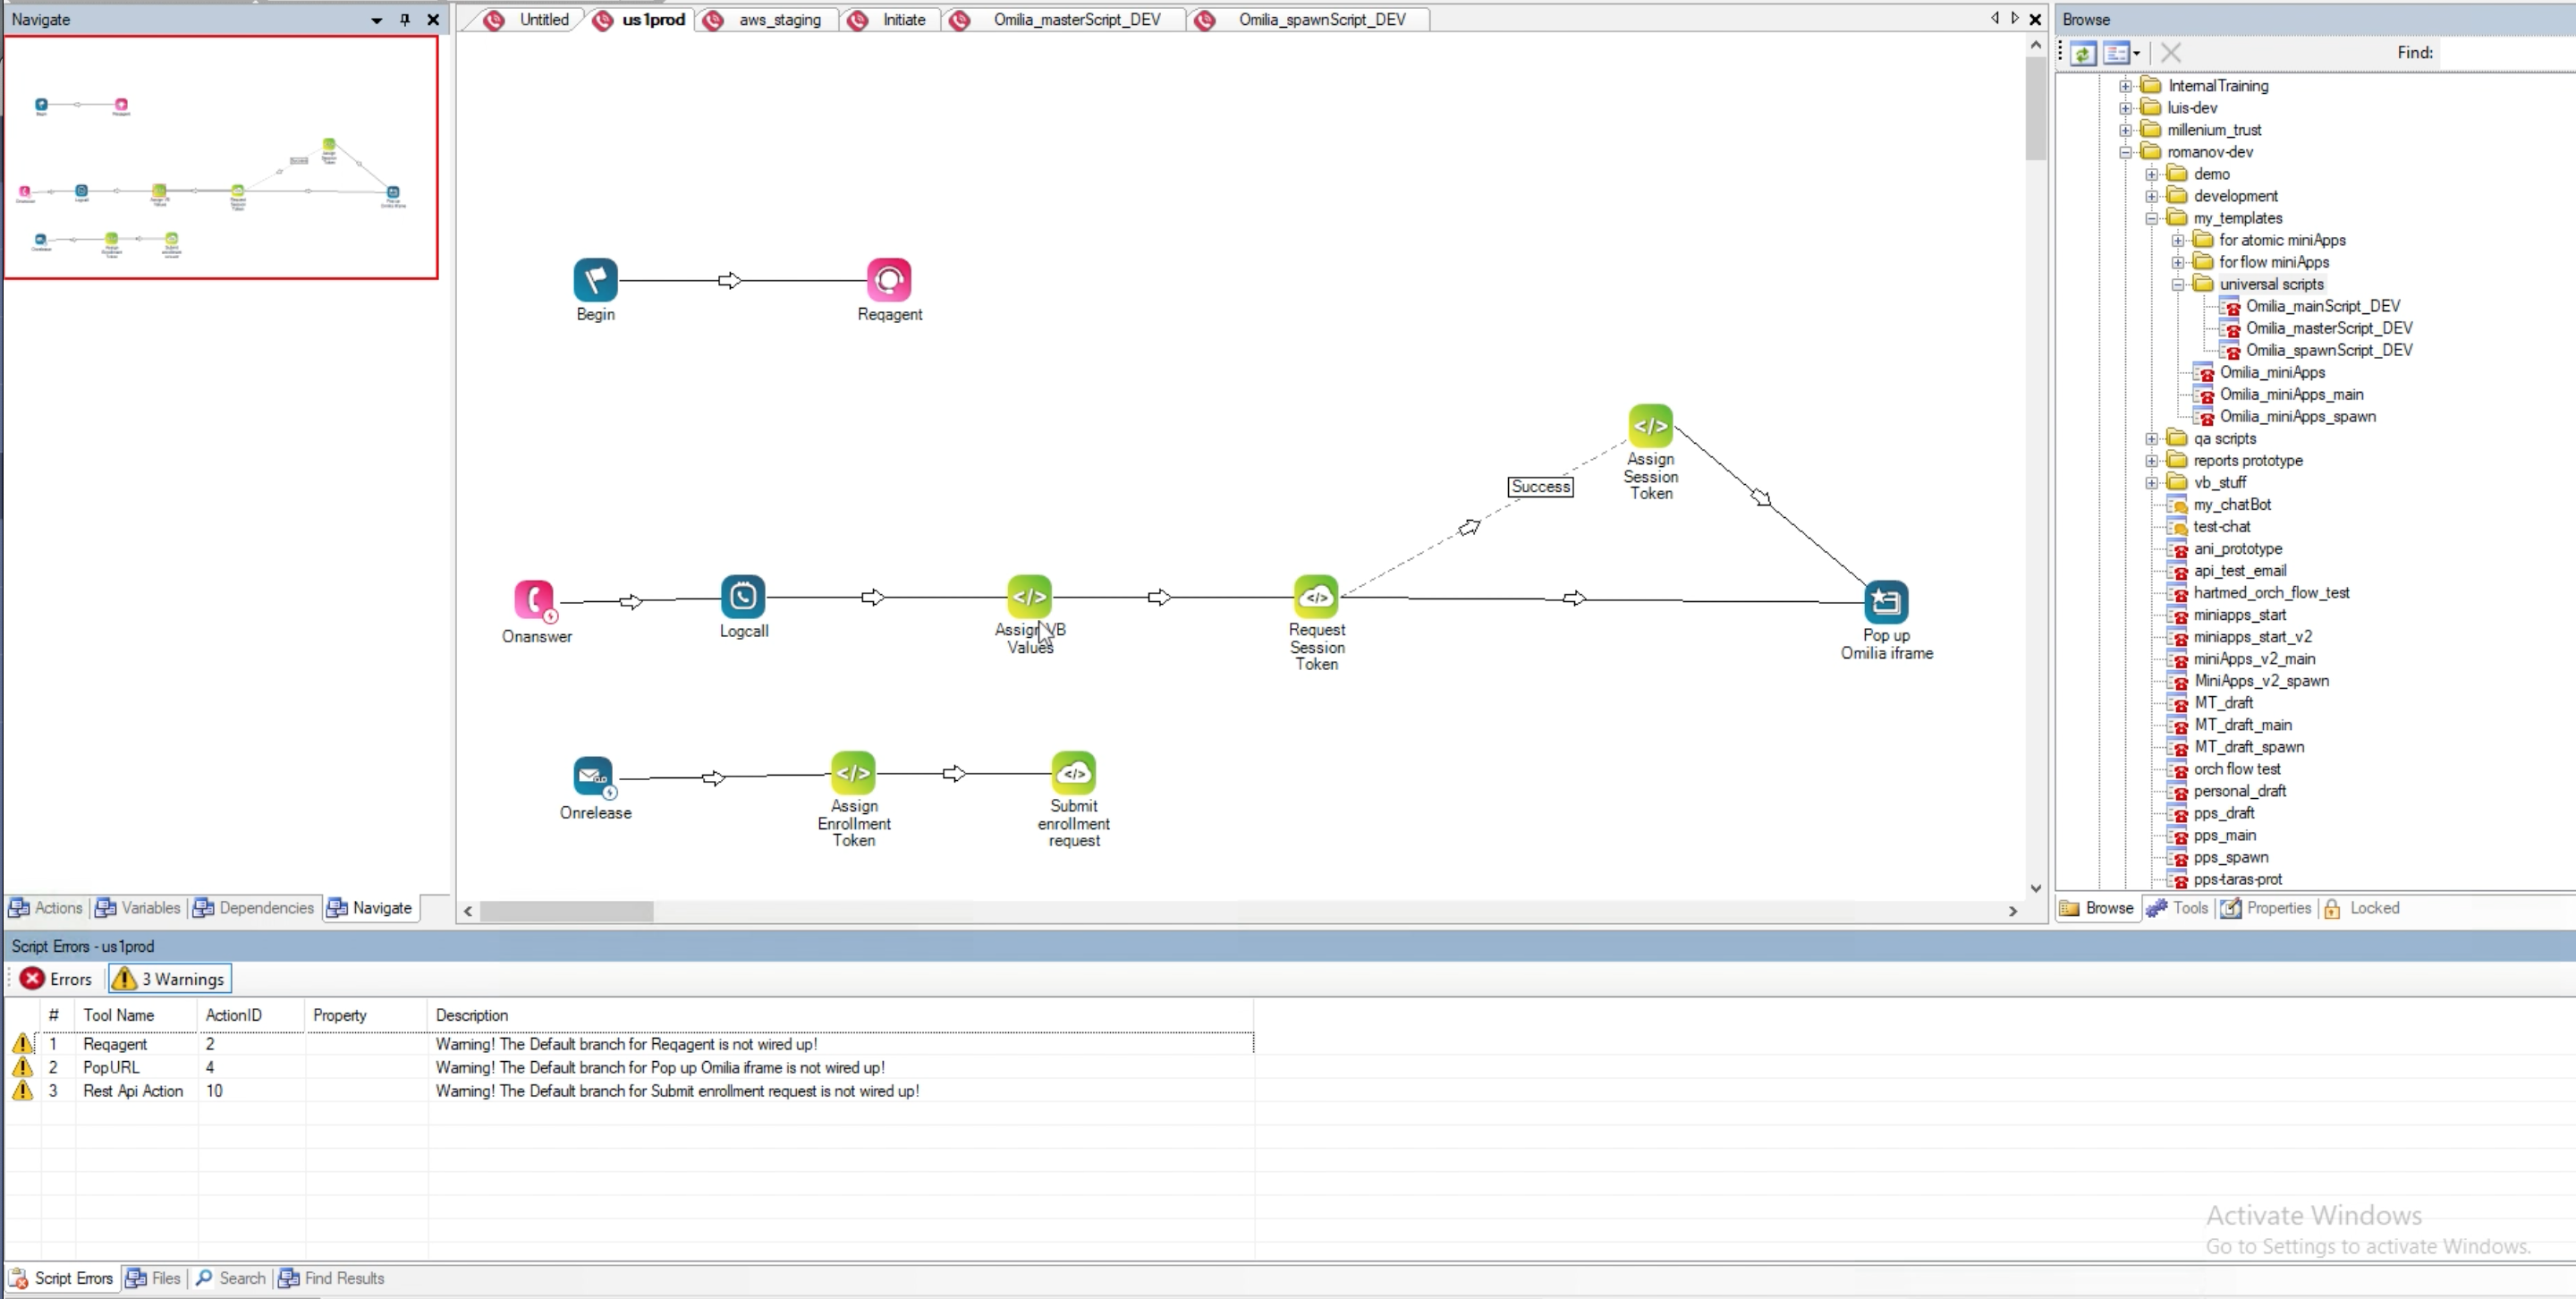
4. Paste the profile ID into the VB NICE CXone Studio script.

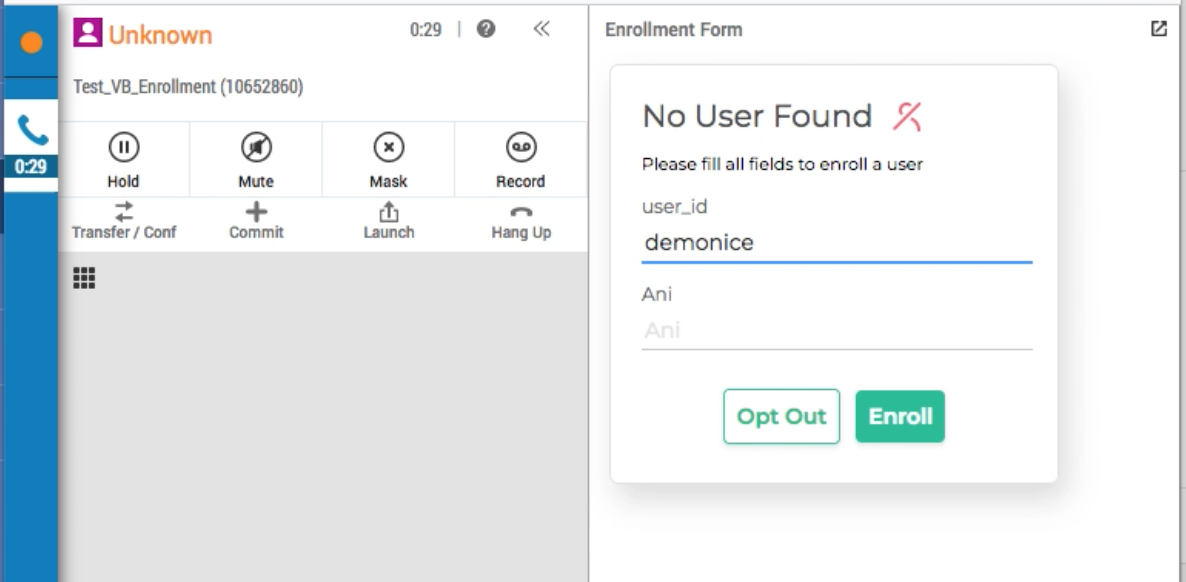
5. As soon as you receive a call, the Voice Biometrics widget will pop up.

6. Fill in the Voice Biometrics form to enroll the caller. The fields to be filled in correspond to the biokeys of the profile.
The list of required fields are the biokeys set for the selected VB profile.
user_id: The ID of the user
Use only alphanumerical values for the user_id.
ANI: The phone number of the user
7. Click Enroll.
The enrollment will be submitted after the call termination. This happens because the Omilia’s Voice Biometrics service allows some time to NICE CXone for the recording of the caller to become available. After that, the recording is retrieved from NICE CXone and the voiceprint is built.
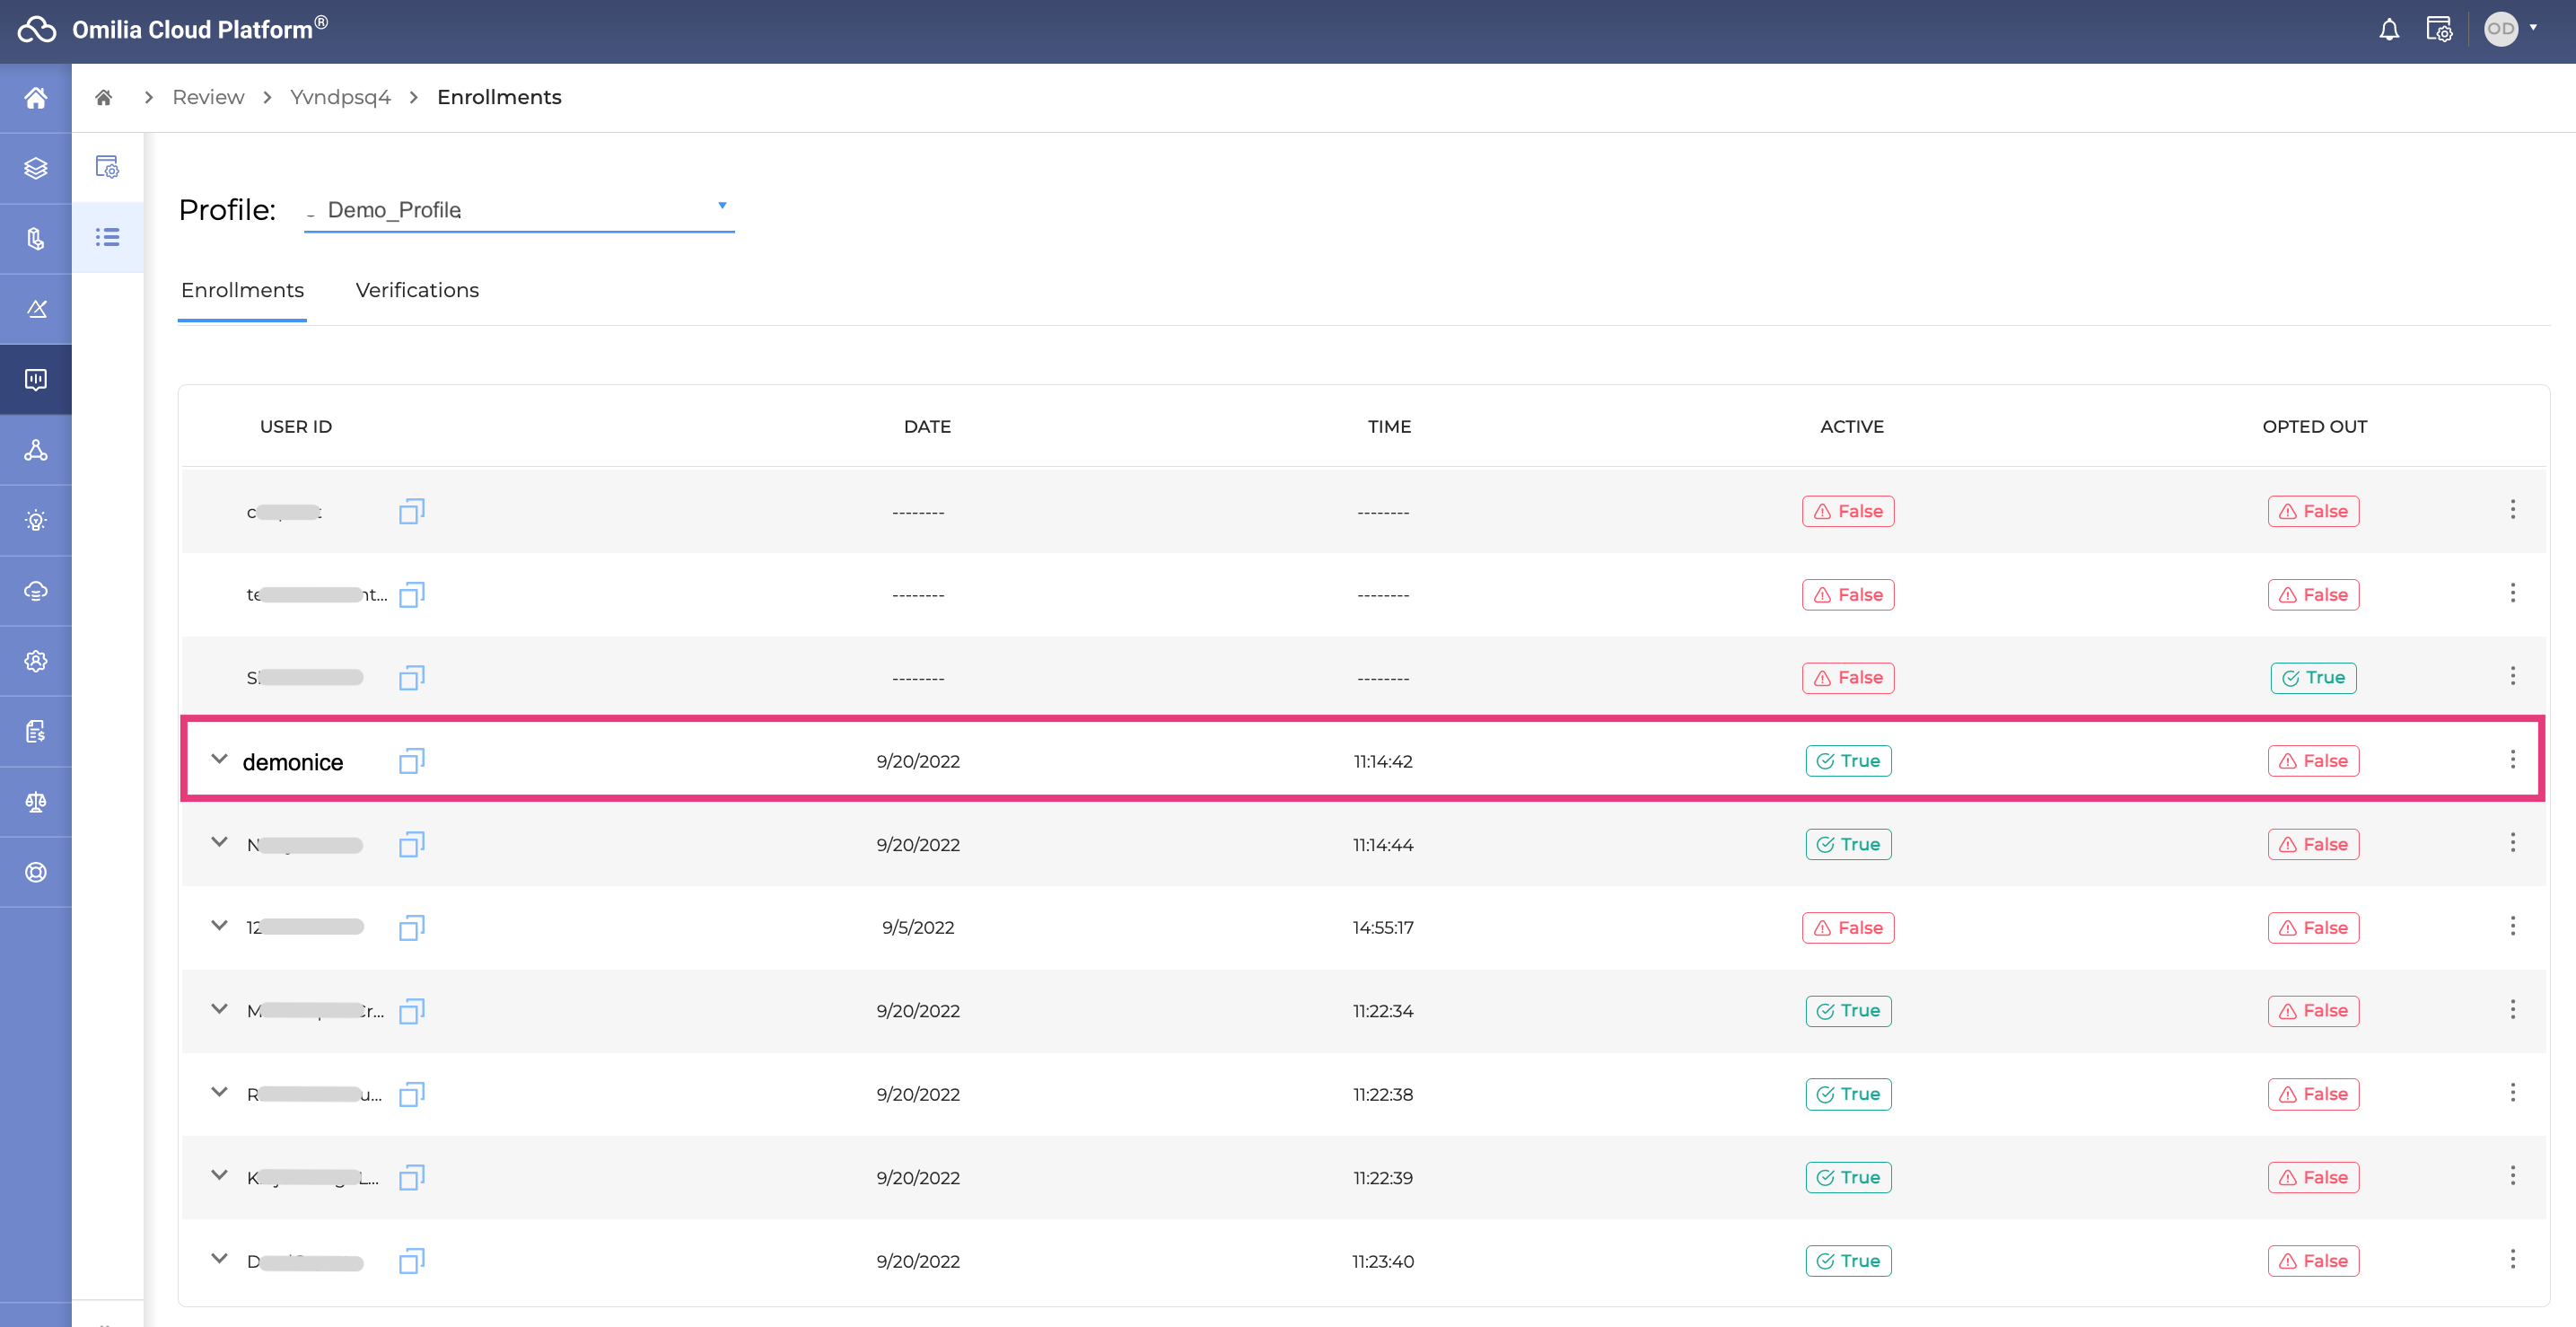
8. To check the enrollment details, navigate to Console → Voice Biometrics → Review.

.svg)