Numbers Control Panel
Introduction
The Numbers Control Panel is a multi-information, multi-task panel that allows you to add and manage telephone numbers for your applications.
Before diving into the functions available in the Numbers Control Panel there are some general rules to help you get the most out of the functionality.
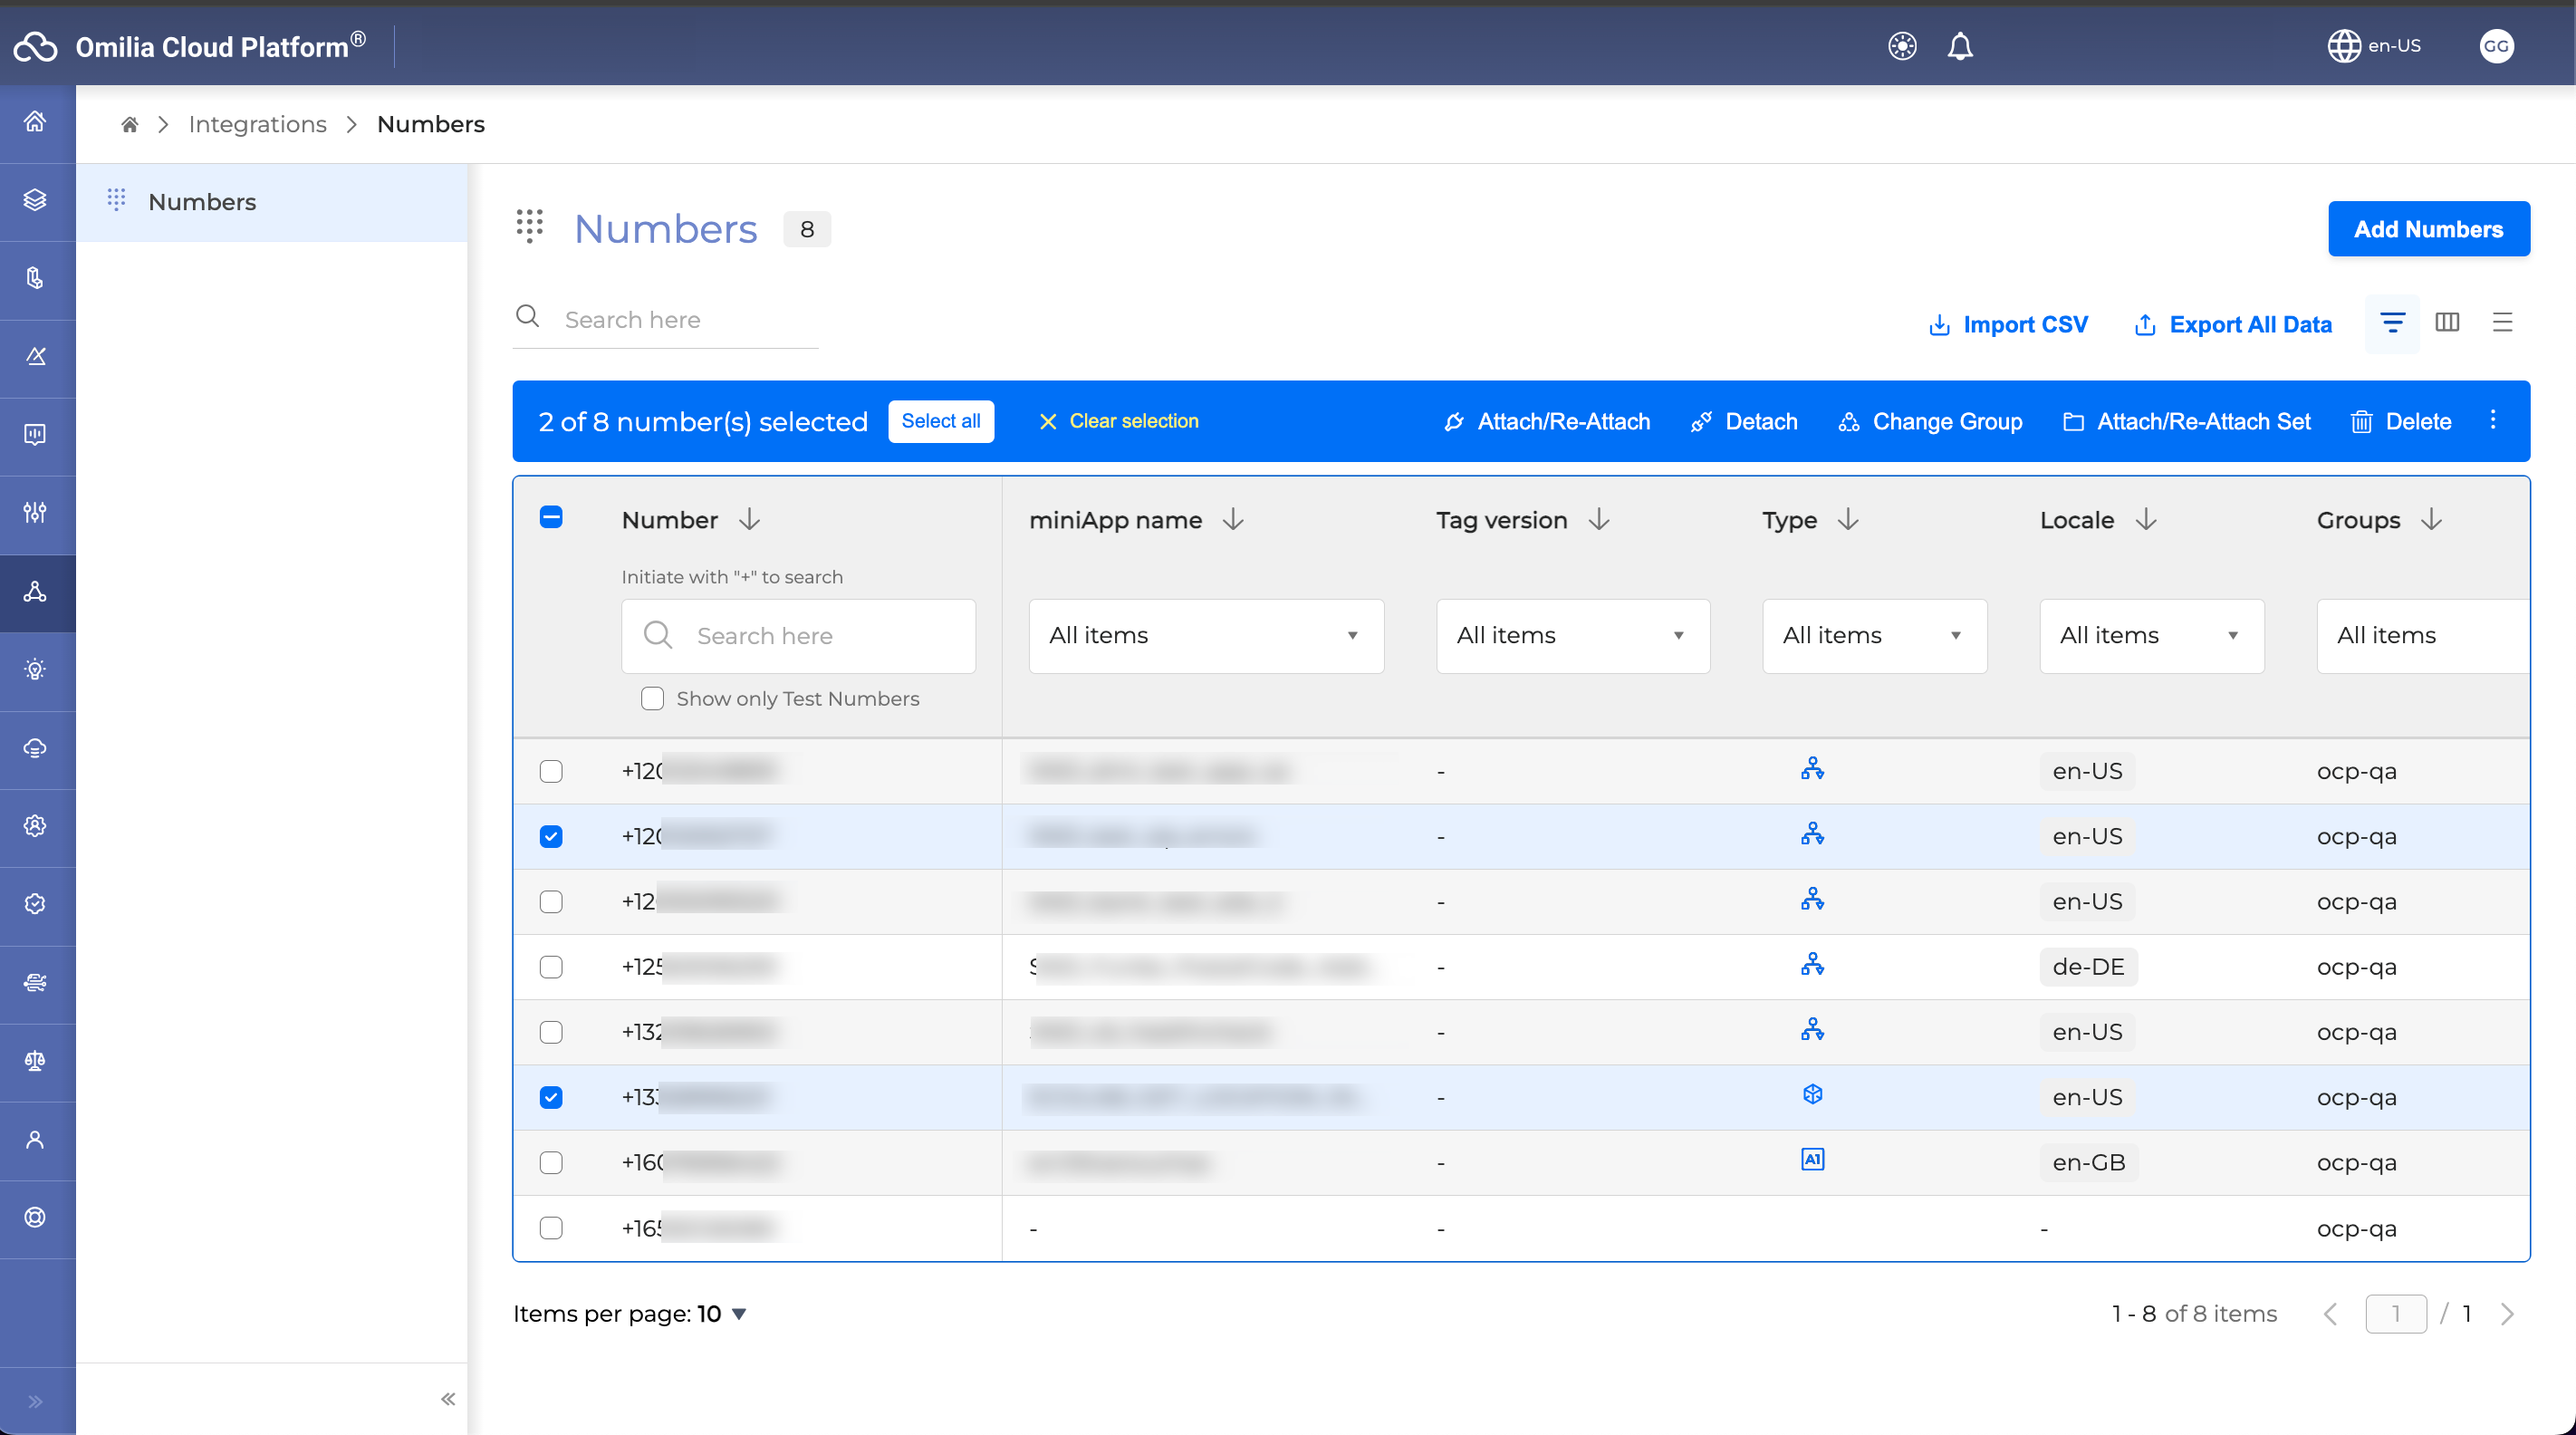
Search
Use the Search field to shorten the list of numbers to those associated to the text in the filed.
The search function will scan all elements related to a number, such as miniApp name, locale, type, and more.
Import CSV
Click the Import CSV button

In the Import CSV file dialog box, you can either drag and drop a CSV file or browse to select one for uploading.
To find more information about the CSV file format, read How to manage batch numbers through CSV.
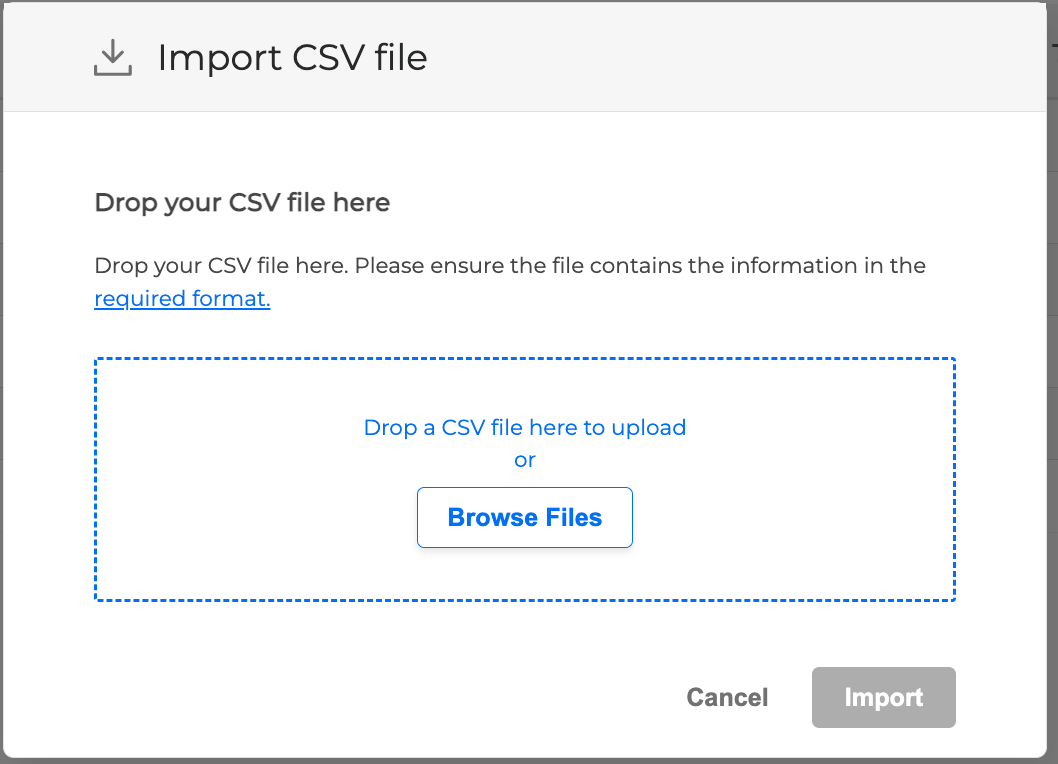
Click the Import button to finalize the action.
Export All Data
You can export all the data of your Numbers Control Panel to a CSV file.
Click the Export All Data button

A CSV file with the Numbers data will be uploaded to your computer.
Filters
The filters provide flexibility by allowing you to select multiple items from the list. Additionally, they include a search field to help narrow down choices in the dropdown menus when the list is too long to scroll through.
To open the filters, click the filter icon ![]()
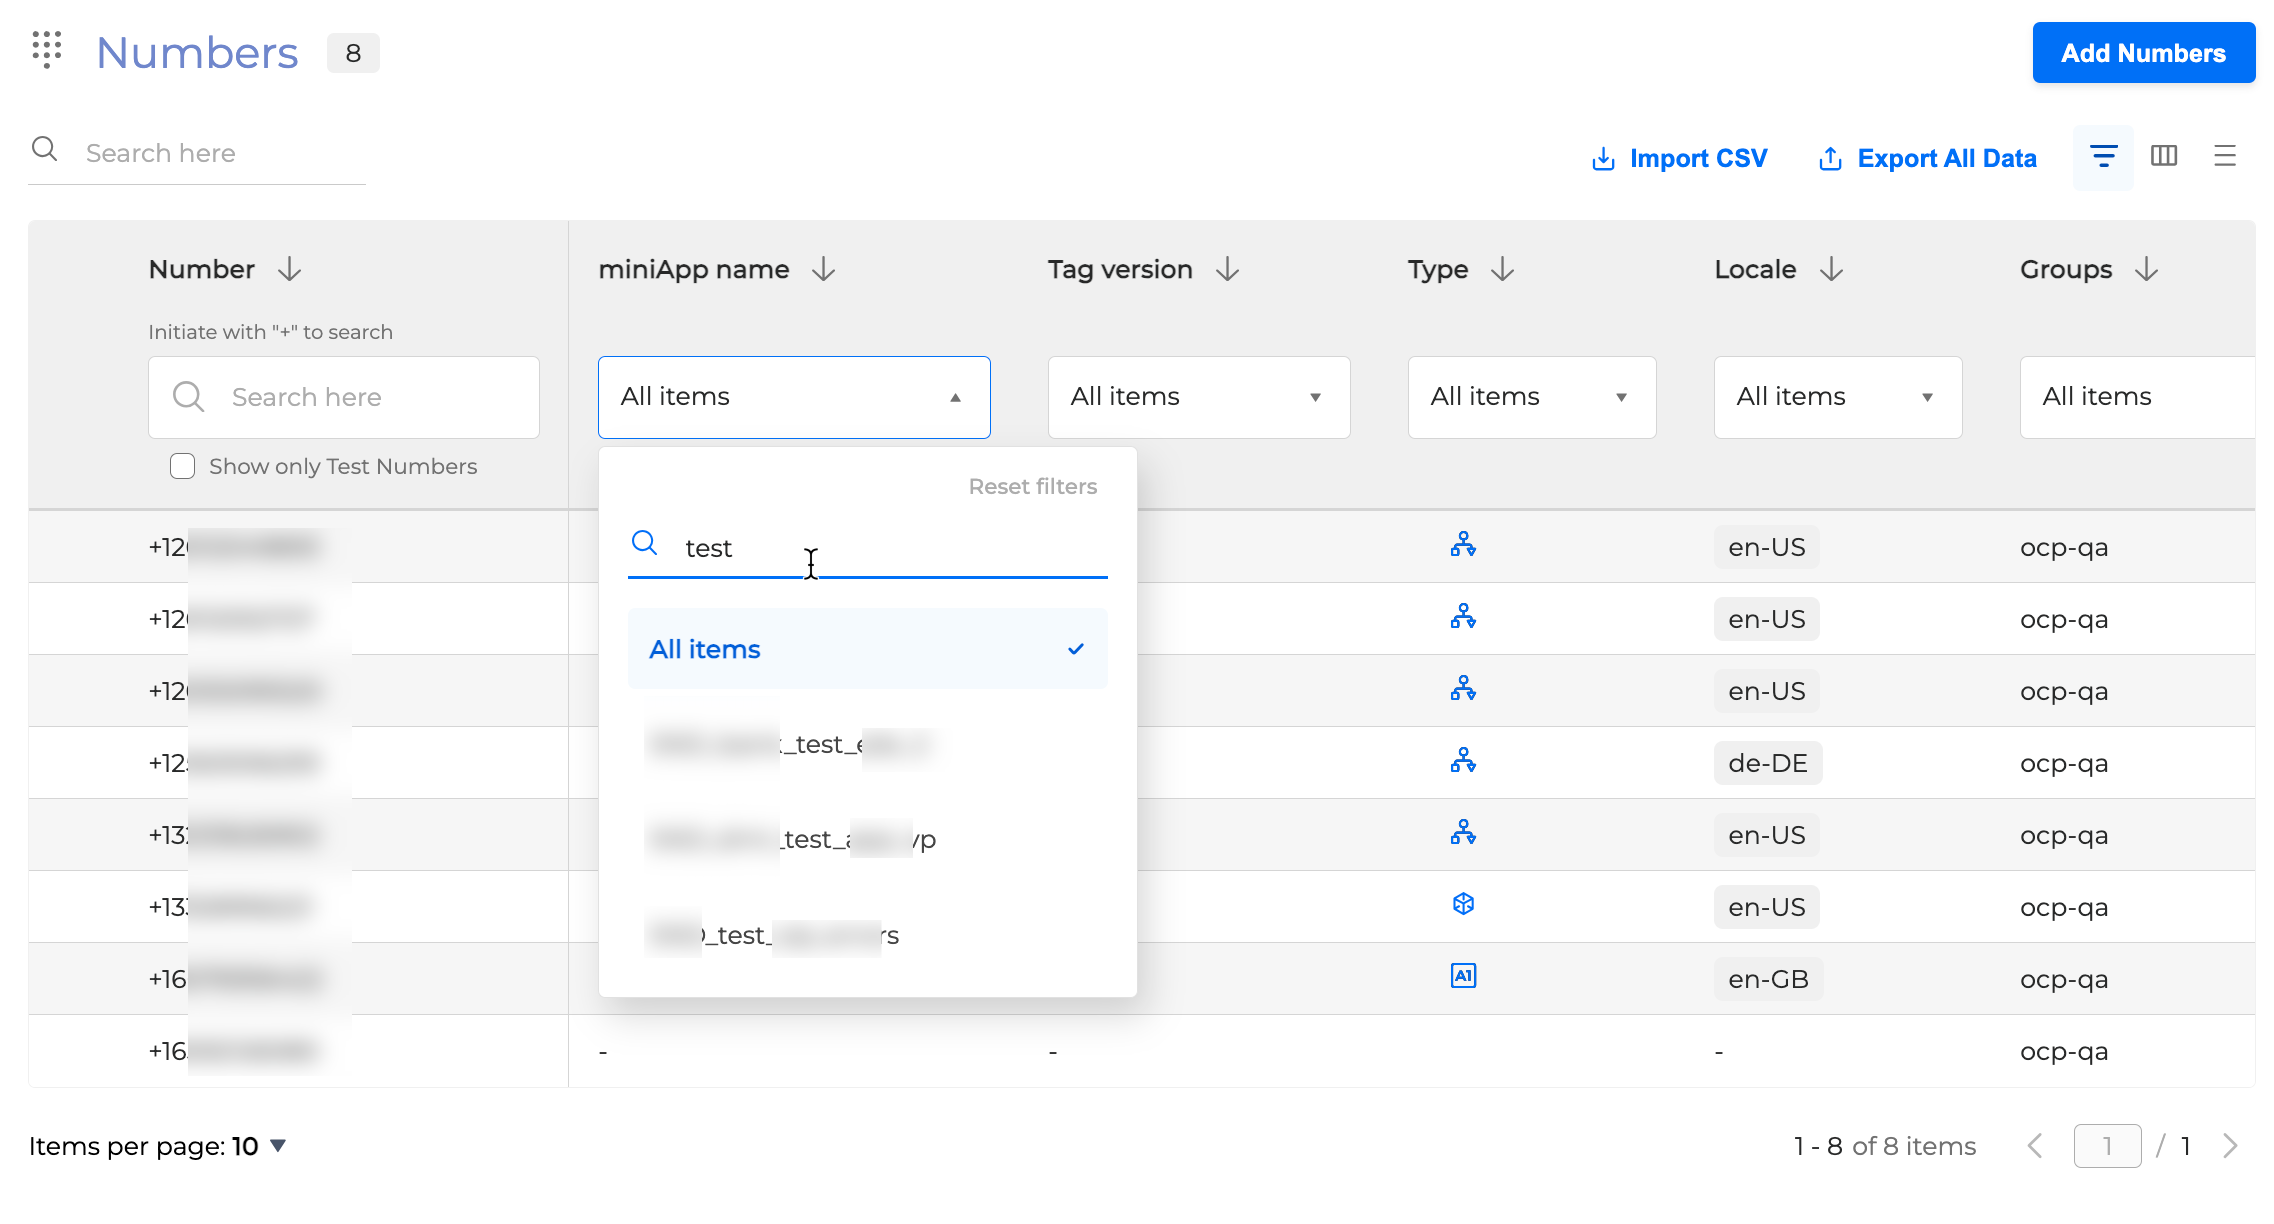
If you select numbers and then apply filters that hide those selected numbers, a notification will appear in the panel along with the Clear Filters button.
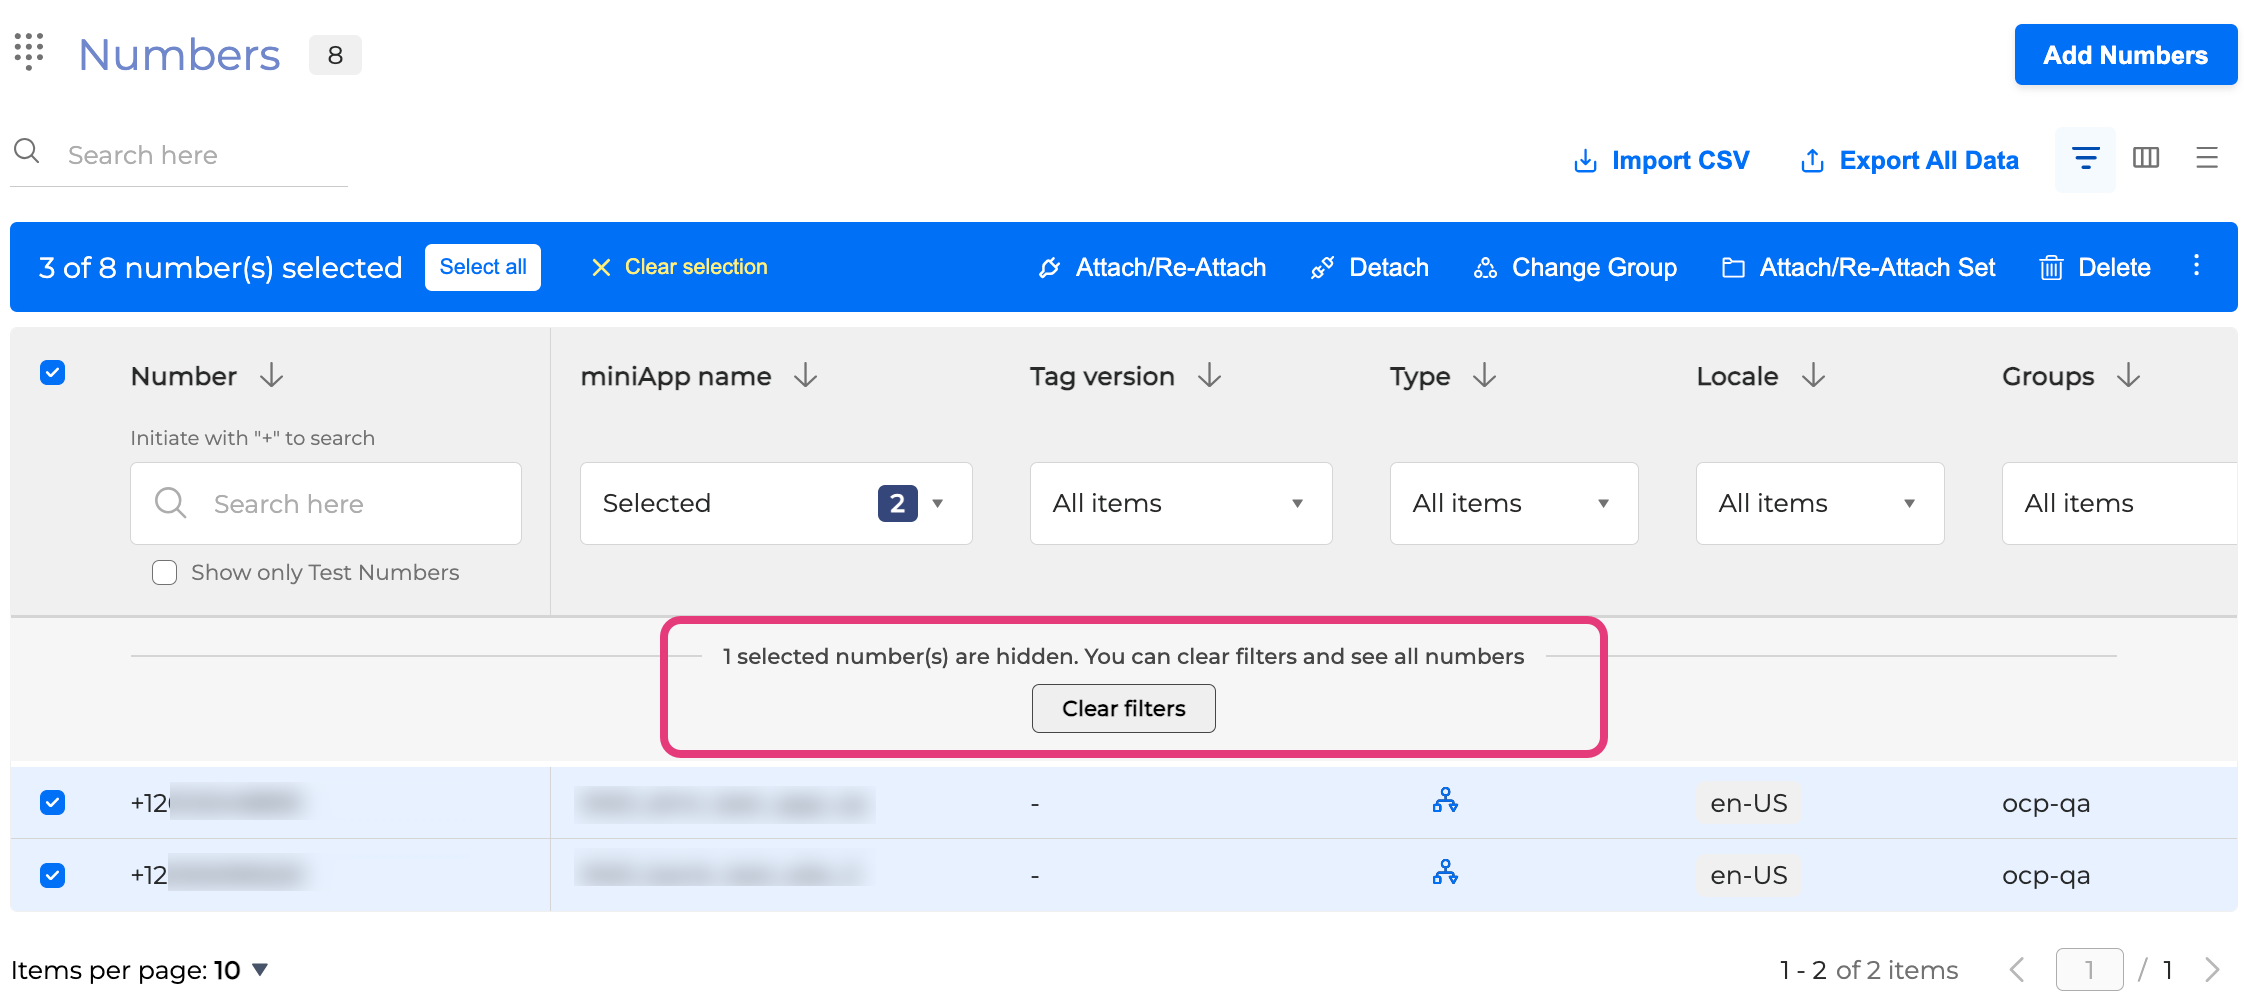
Control Panel View Columns
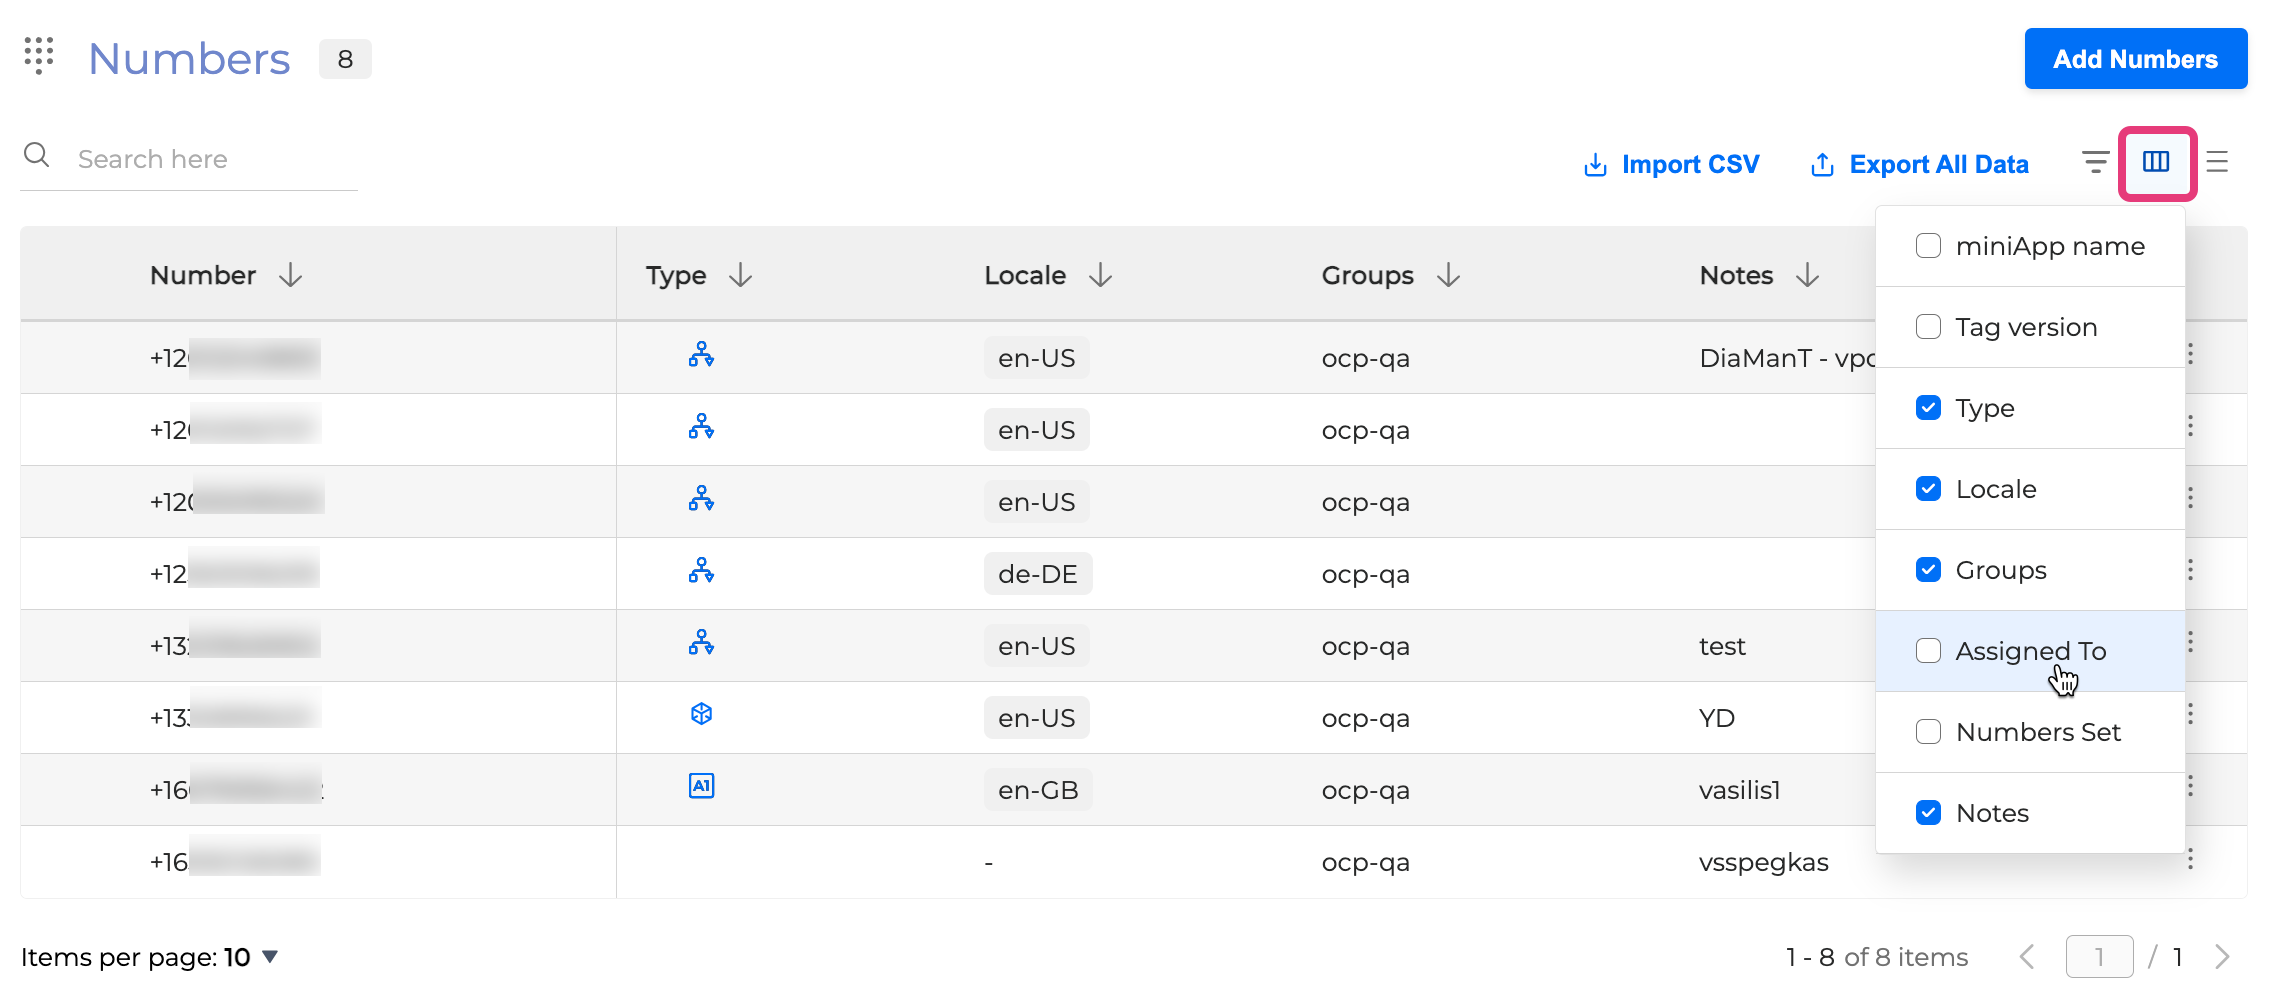
You can adjust the viewable columns in the panel by selecting / deselecting them in the view columns menu.
To open the menu, click the View Columns menu button ![]()
Control Panel Line height
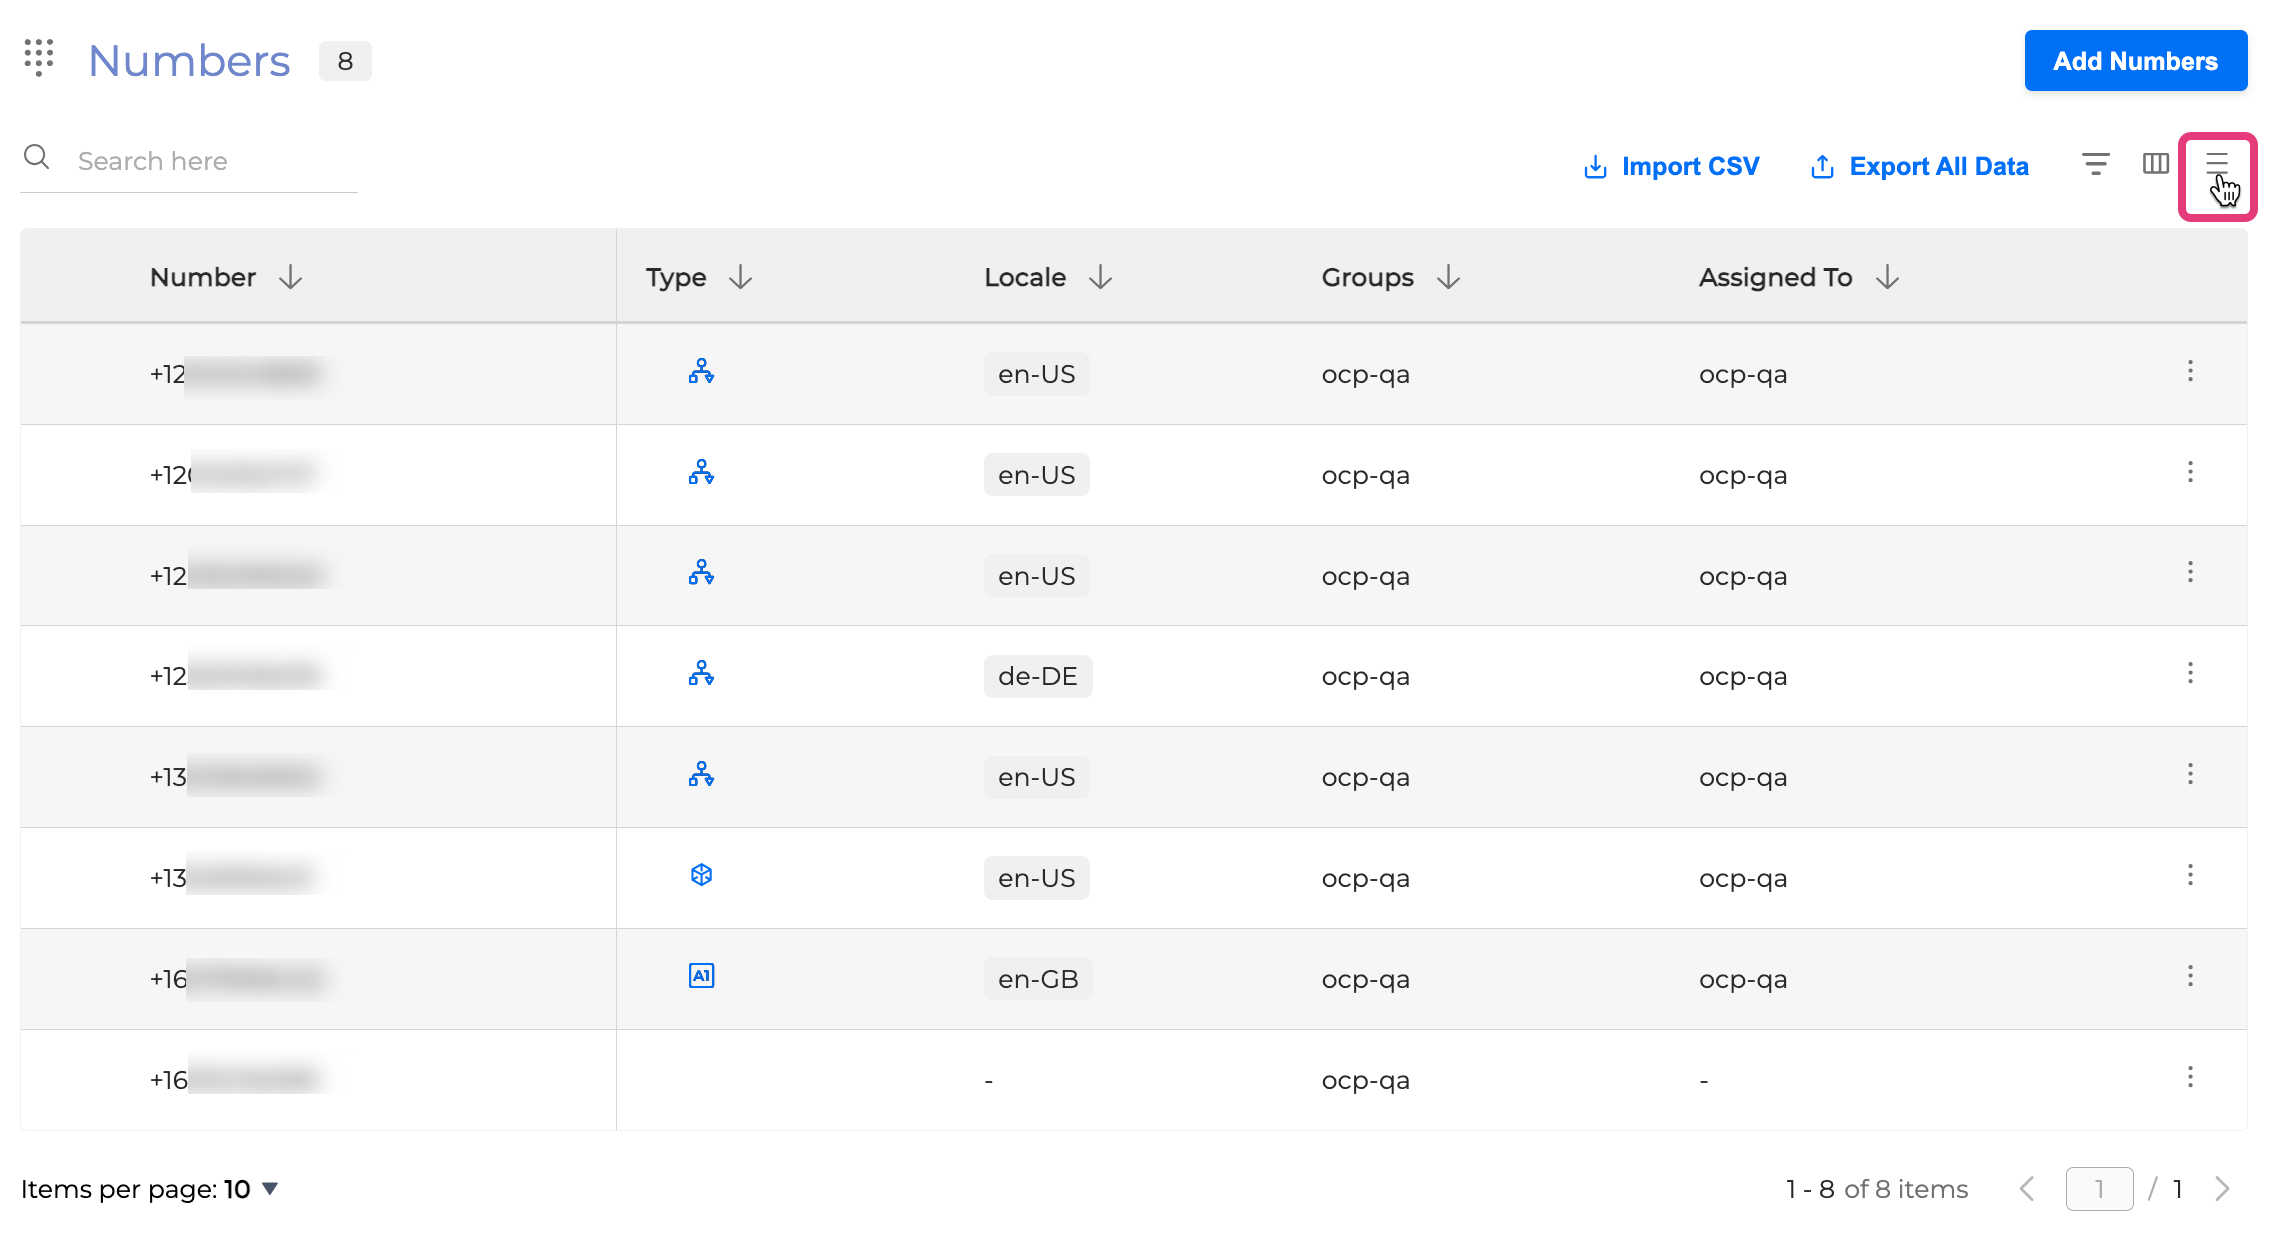
You can adjust the height of the rows by clicking the Row Height button ![]()
Numbers Control Panel
You can select one or multiple numbers to manage and perform the following functions:
Get a number for OCP applications
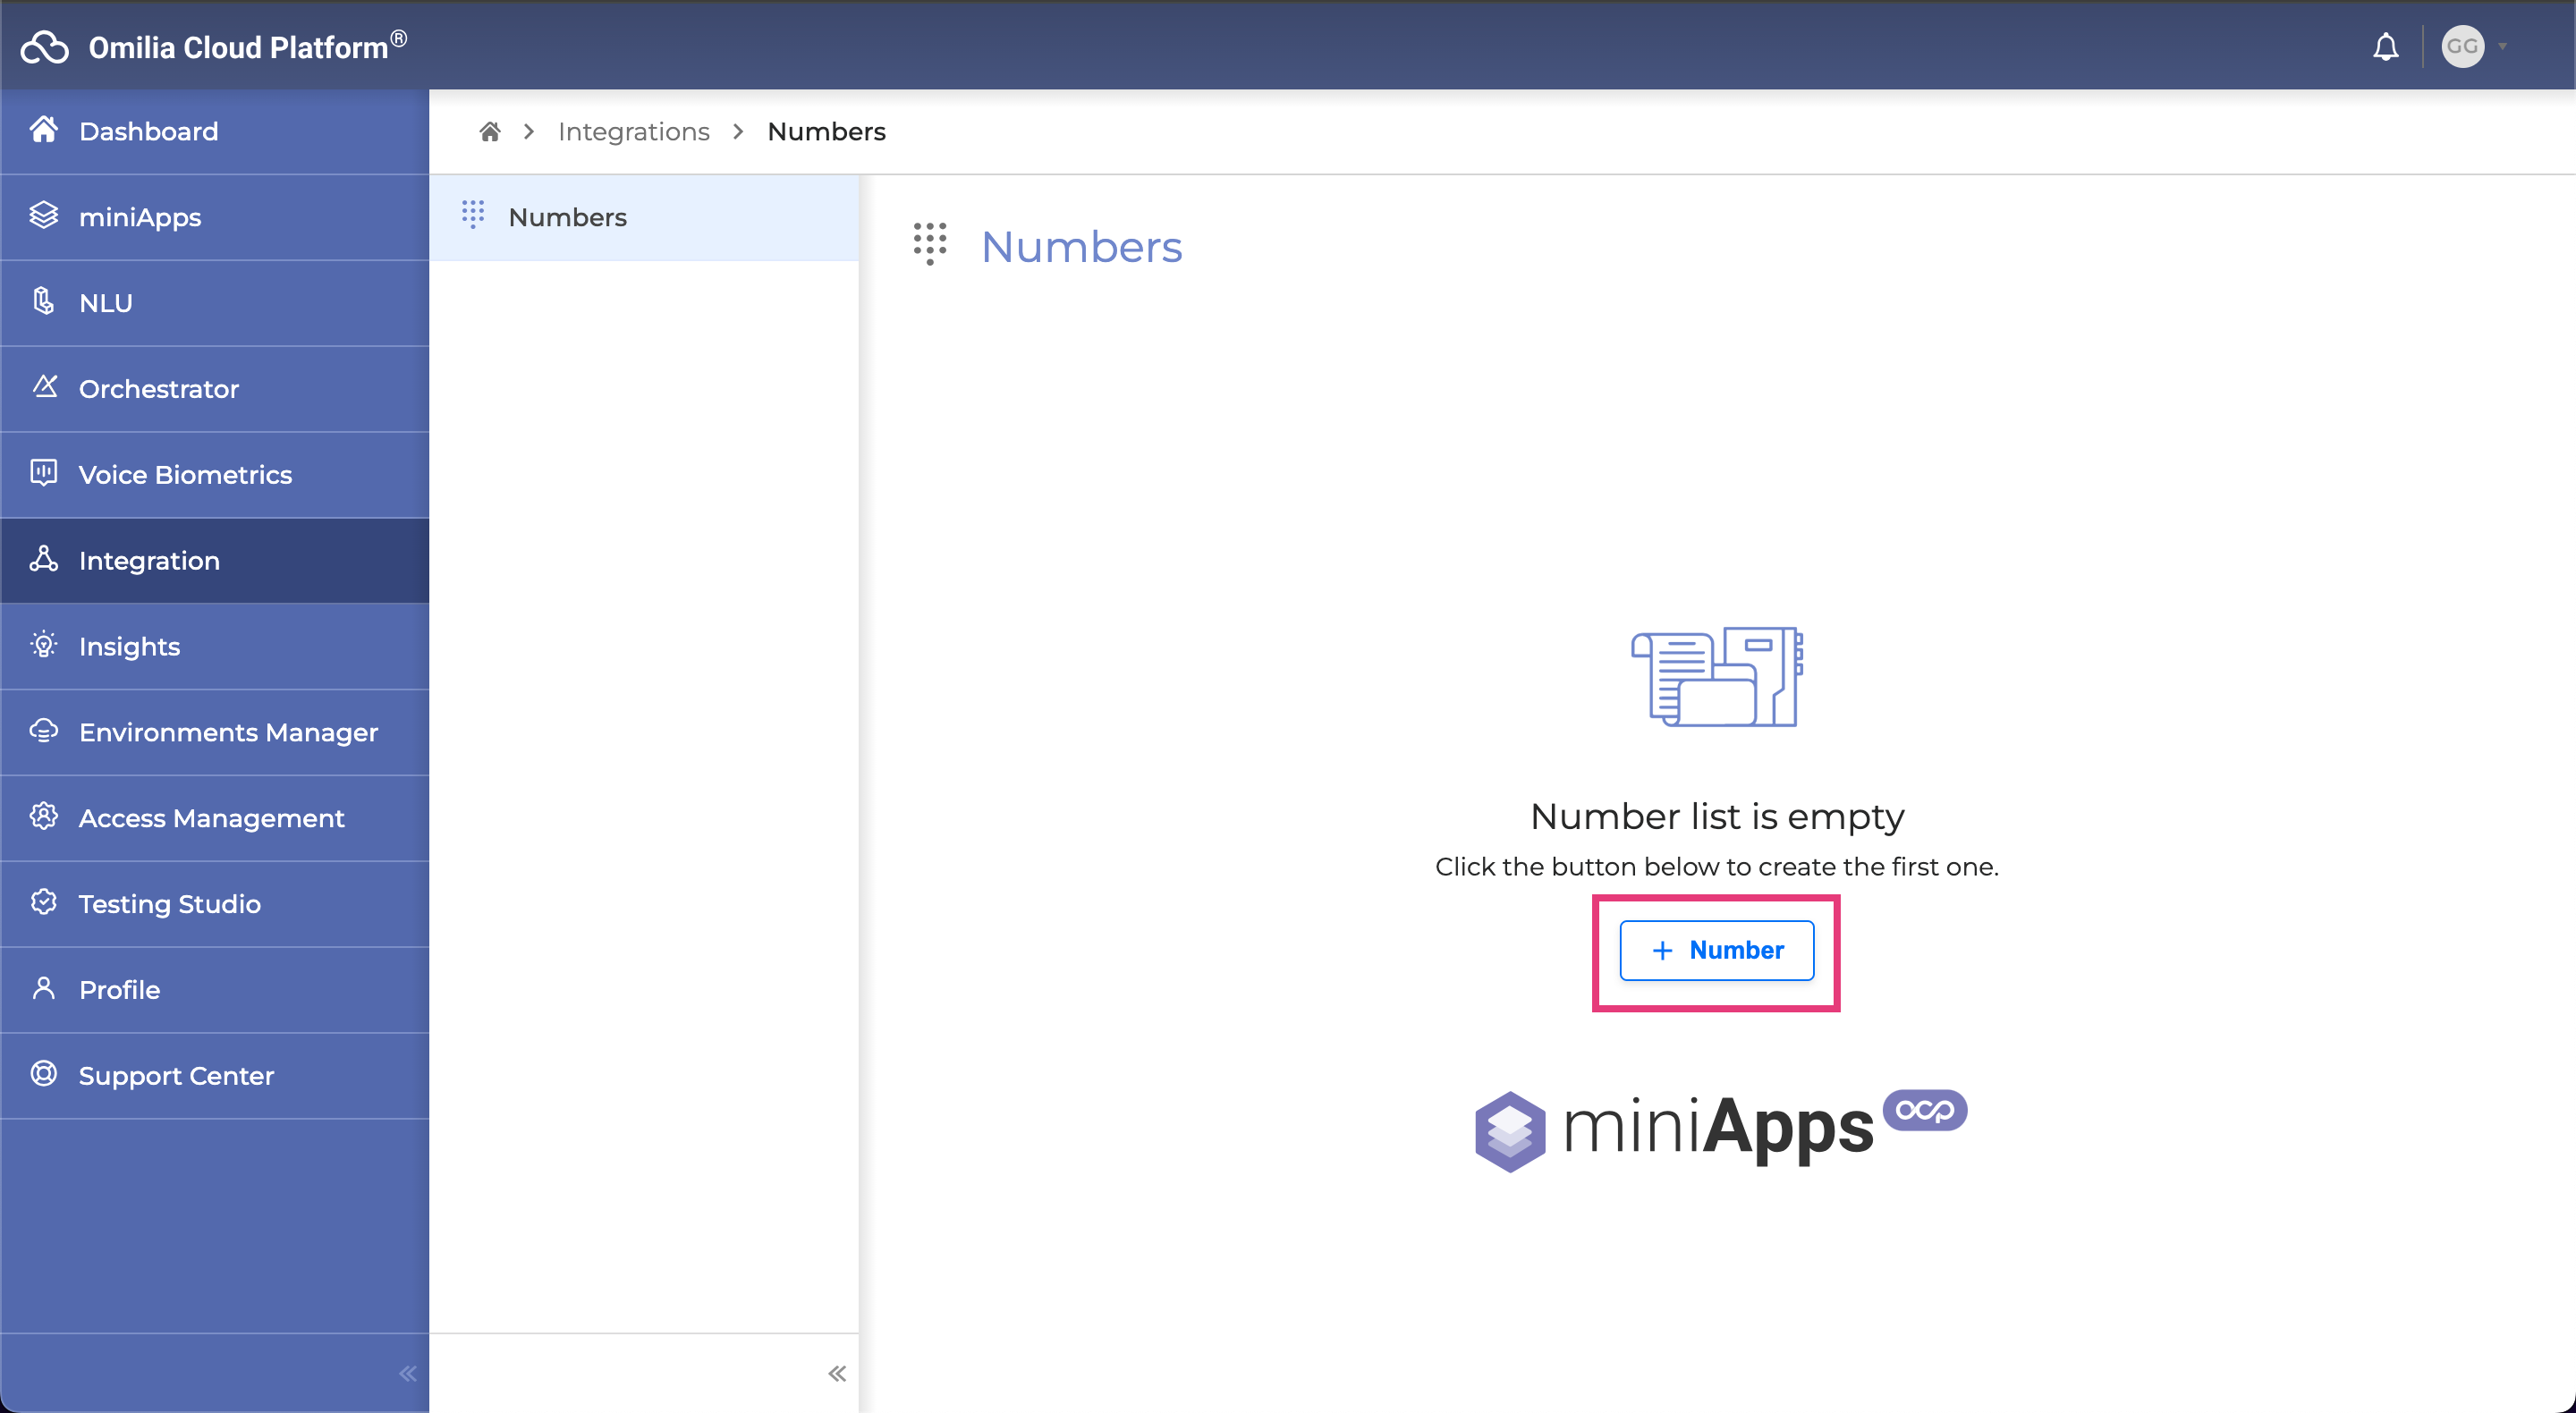
Go to the Integration → Numbers tab and click the + Number button to add a new number.
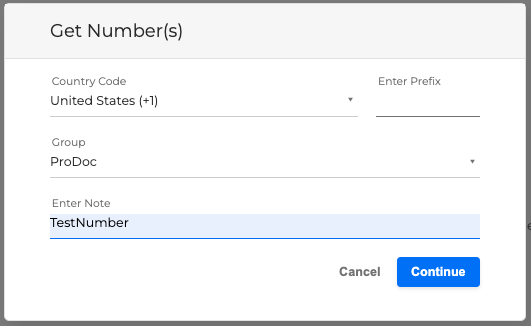
In the Get Number(s) pop-up window, select the Country Code, enter the prefix (or you can leave it blank), and click Continue.
You will be prompted to see Available Numbers with their Areas. Select the numbers you want to add and click Continue.
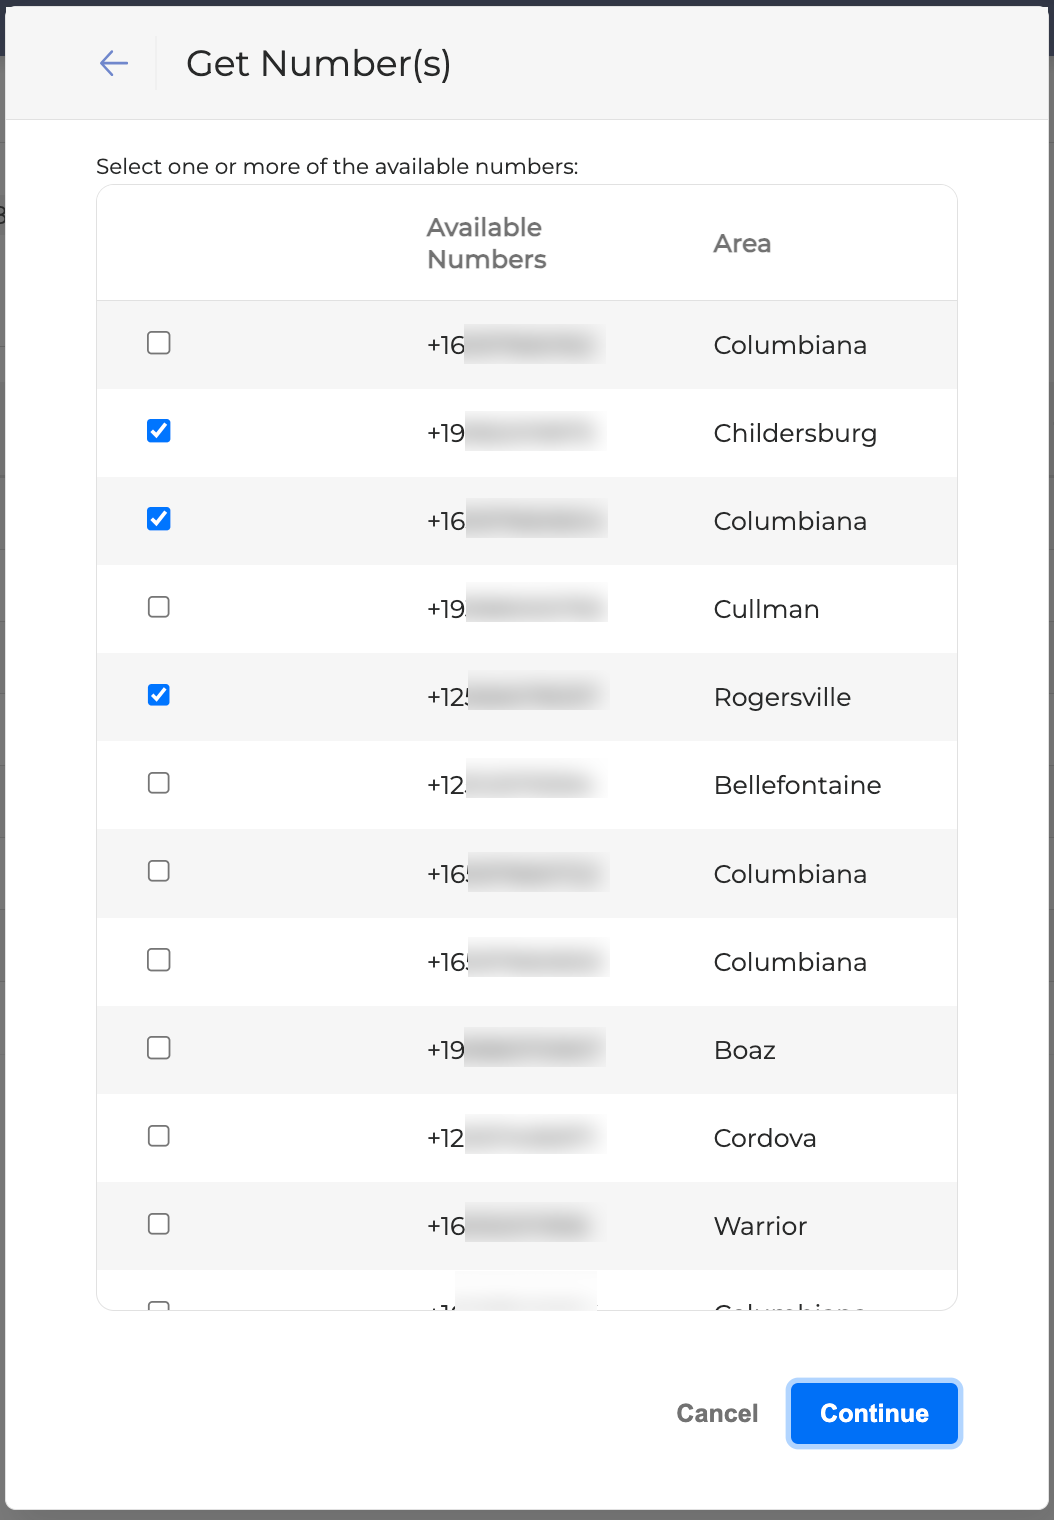
To get a European number, you need to have your physical address confirmed first.
If you face any problems getting numbers please contact our Customer Support by any convenient means described in the Omilia Care (Support Center) section.
If your group does not have any available numbers you will receive the following message:

If your group is not authorized to get numbers you will receive the following message:

When you are ready to proceed, click the Get button.
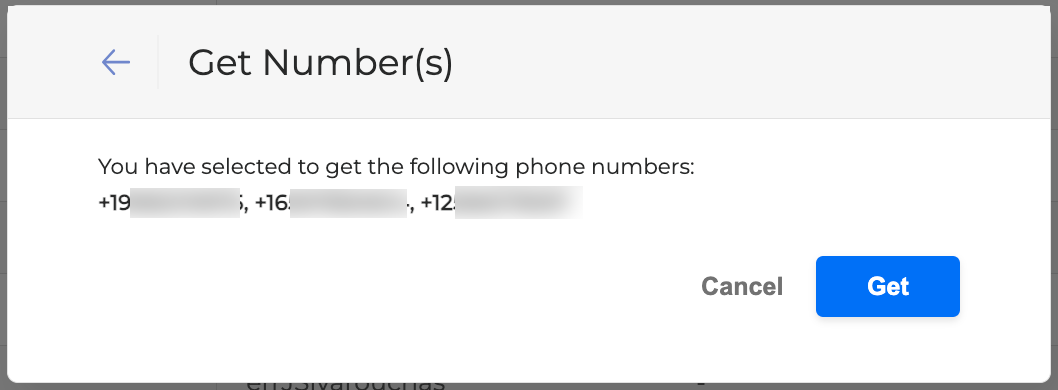
The selected numbers will be added to the Numbers Control Panel.
Attach/Re-Attach number to an Application
Attaching numbers to an application means that the application will be used when these numbers are called. To attach one or more numbers to an application or a miniApp follow the steps.
This action is irreversible and carries significant consequences.
Select the numbers you want to attach.
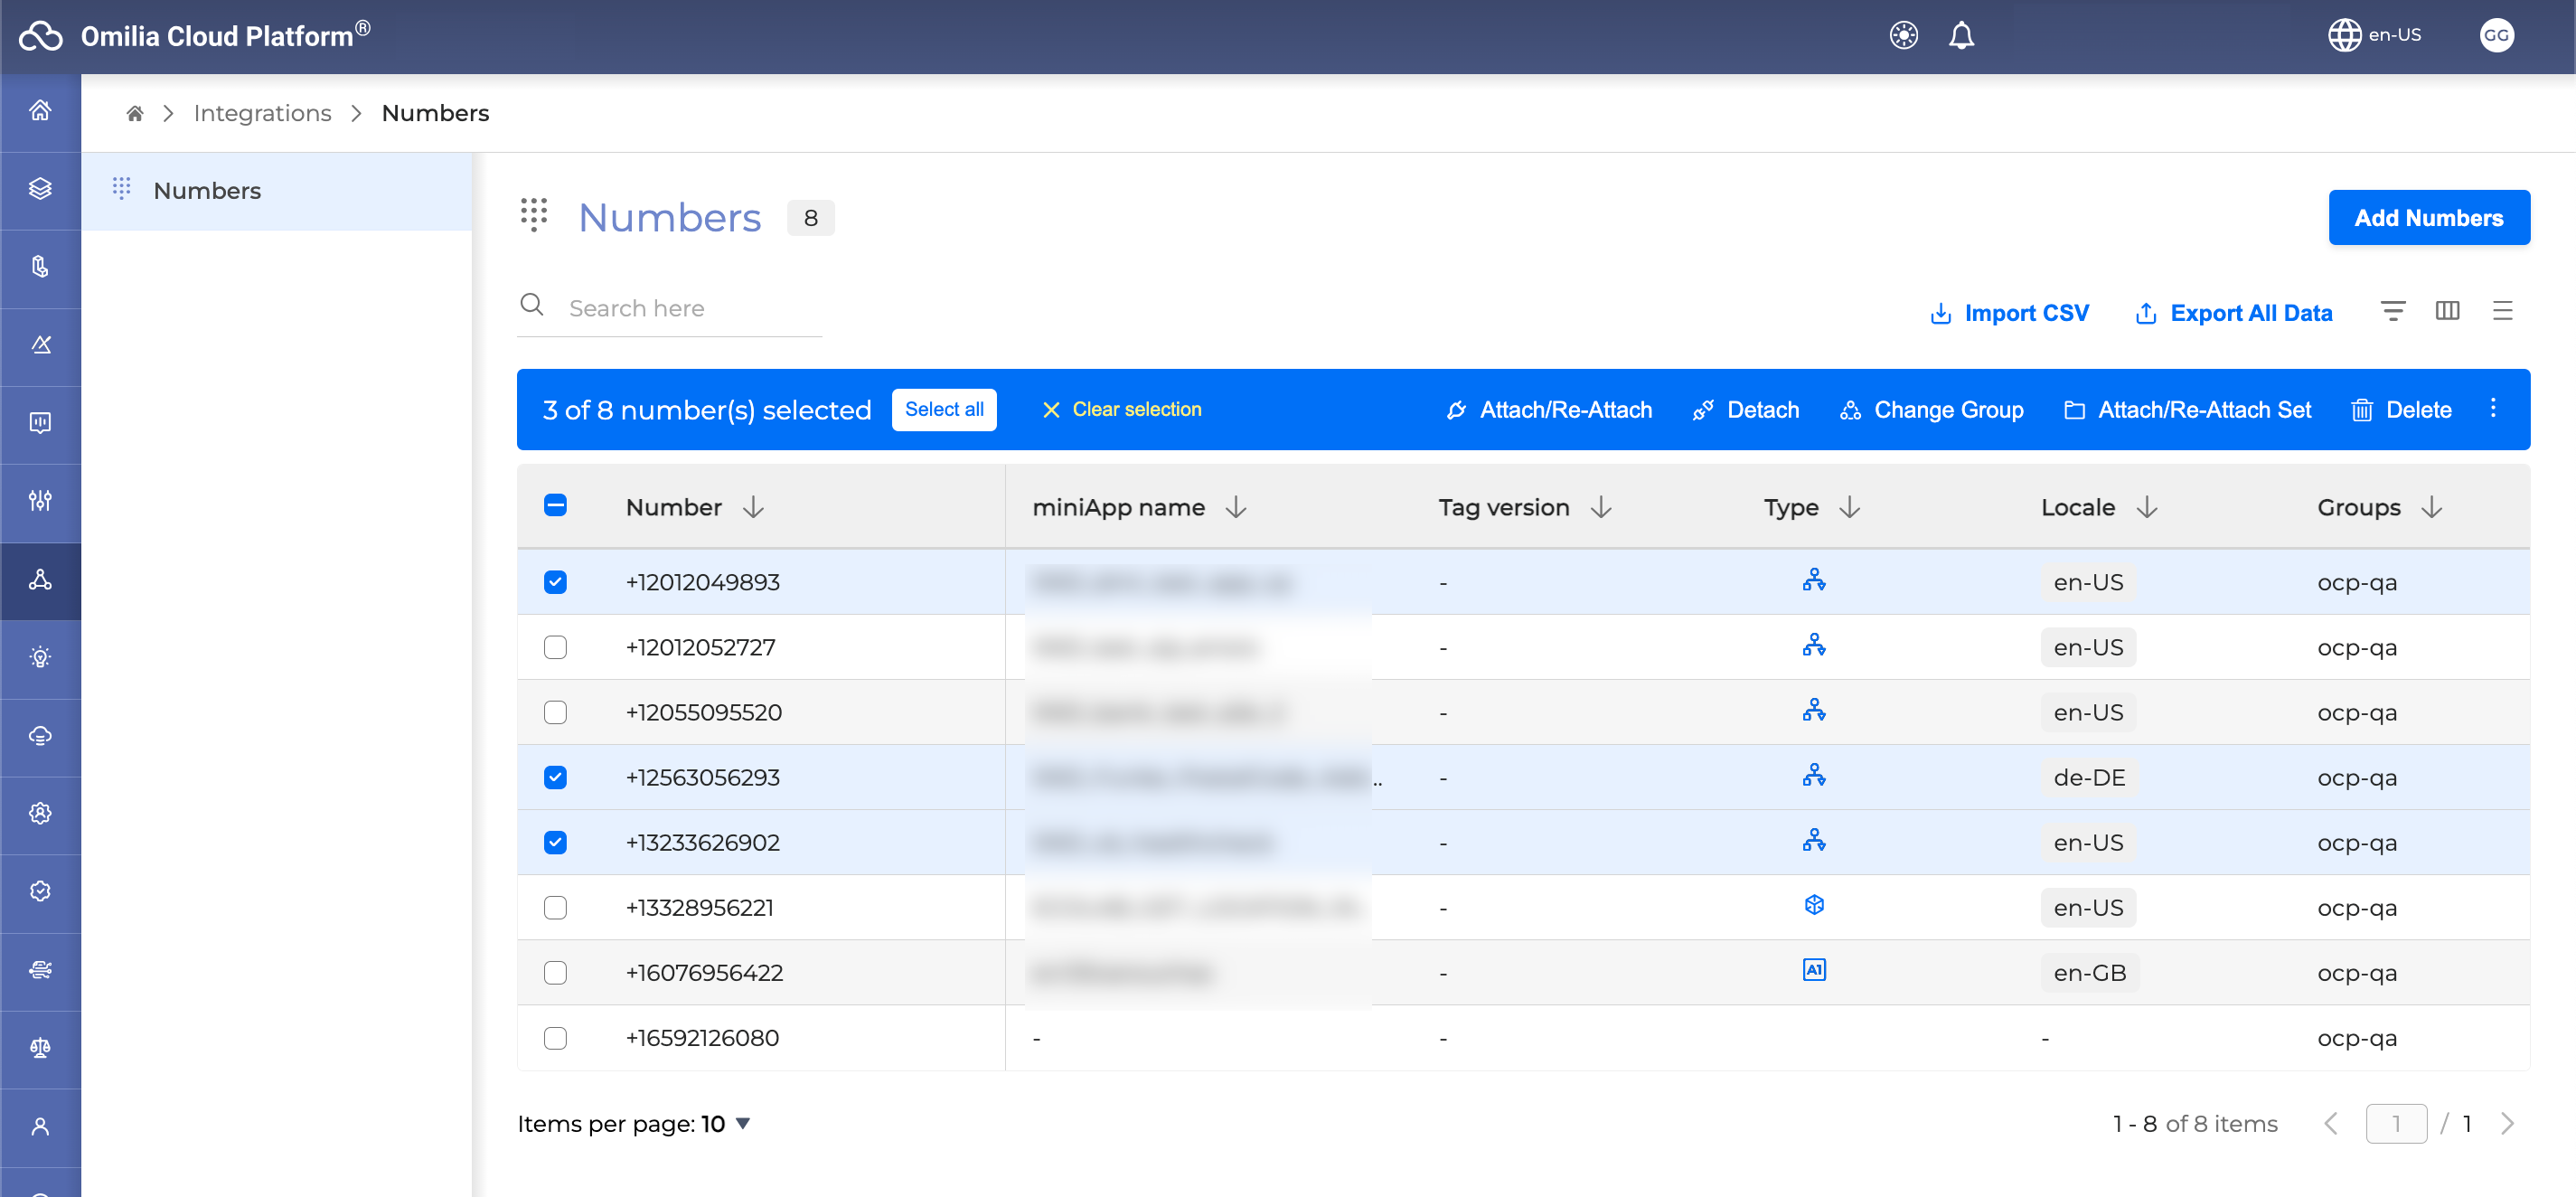
Click on Attach/Re-Attach

Add the required information in the modal window.
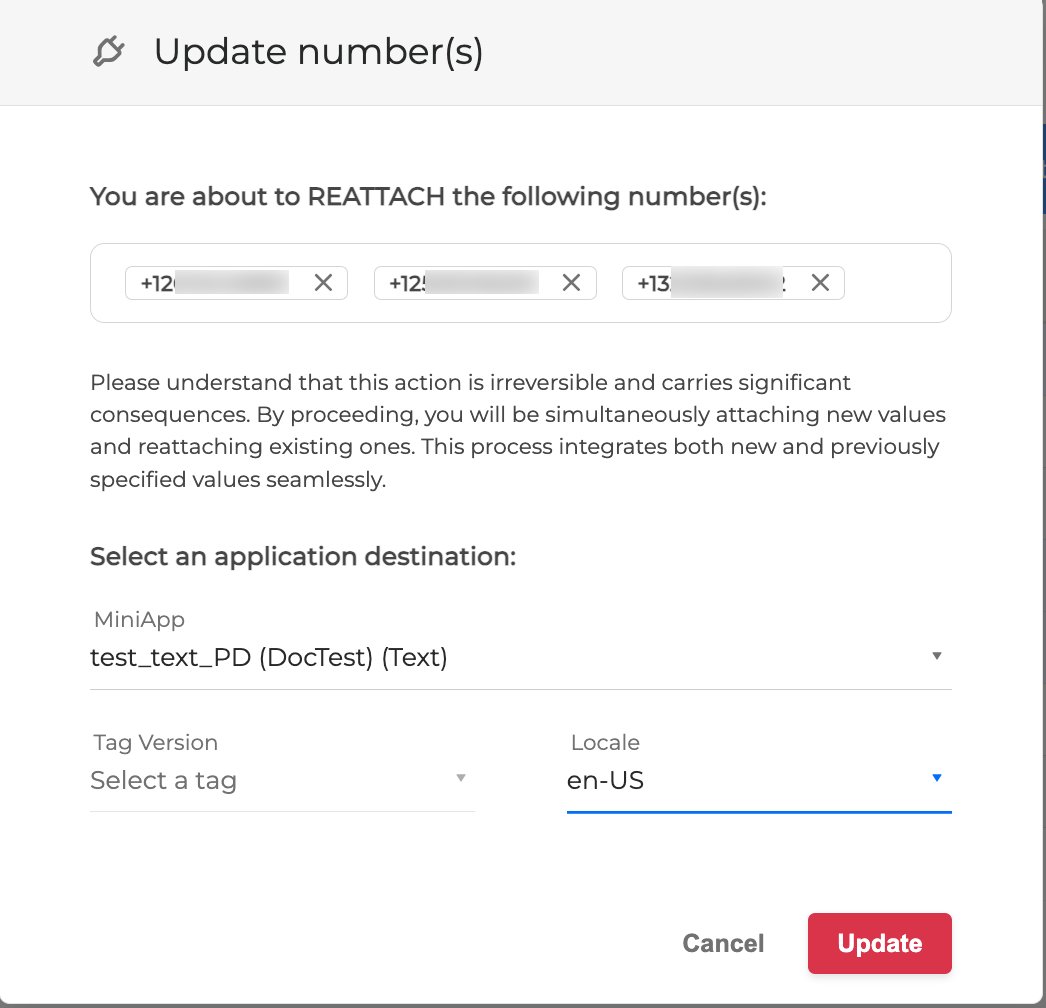
Application destination - Select a miniApp from the drop-down list.
Tag Version - If the application has a tag you can select the corresponding app instance from the list.
Locale - The available locales for the selected application.
Click the Update button to complete the attach/reattach action.
You cannot attach the same number to multiple applications.
Detach number from an Application
Detaching a number from an application makes the number available for others to select it and use it as required.
This action is irreversible and carries significant consequences.
To detach a number or multiple numbers from an application or a miniApp, follow the steps:
Select the numbers you want to detach.

Click on Detach

A confirmation modal will open.
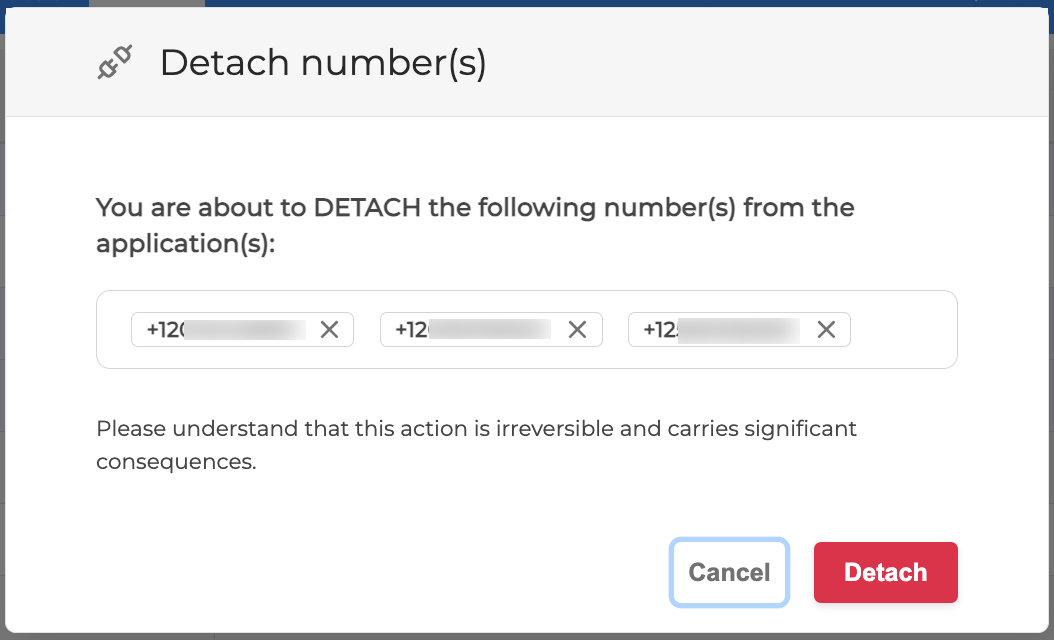
Click the Detach button to complete the action.
Change the numbers' group
You can change the group the numbers are assigned to allocate numbers as required.
This action is irreversible and carries significant consequences.
By adding these numbers to a different OCP Group, you will also remove these numbers from the associated Numbers Sets.
Select the numbers you want to change group.

Click on Change Group

Select the new destination Group from the list on the Change Group window.
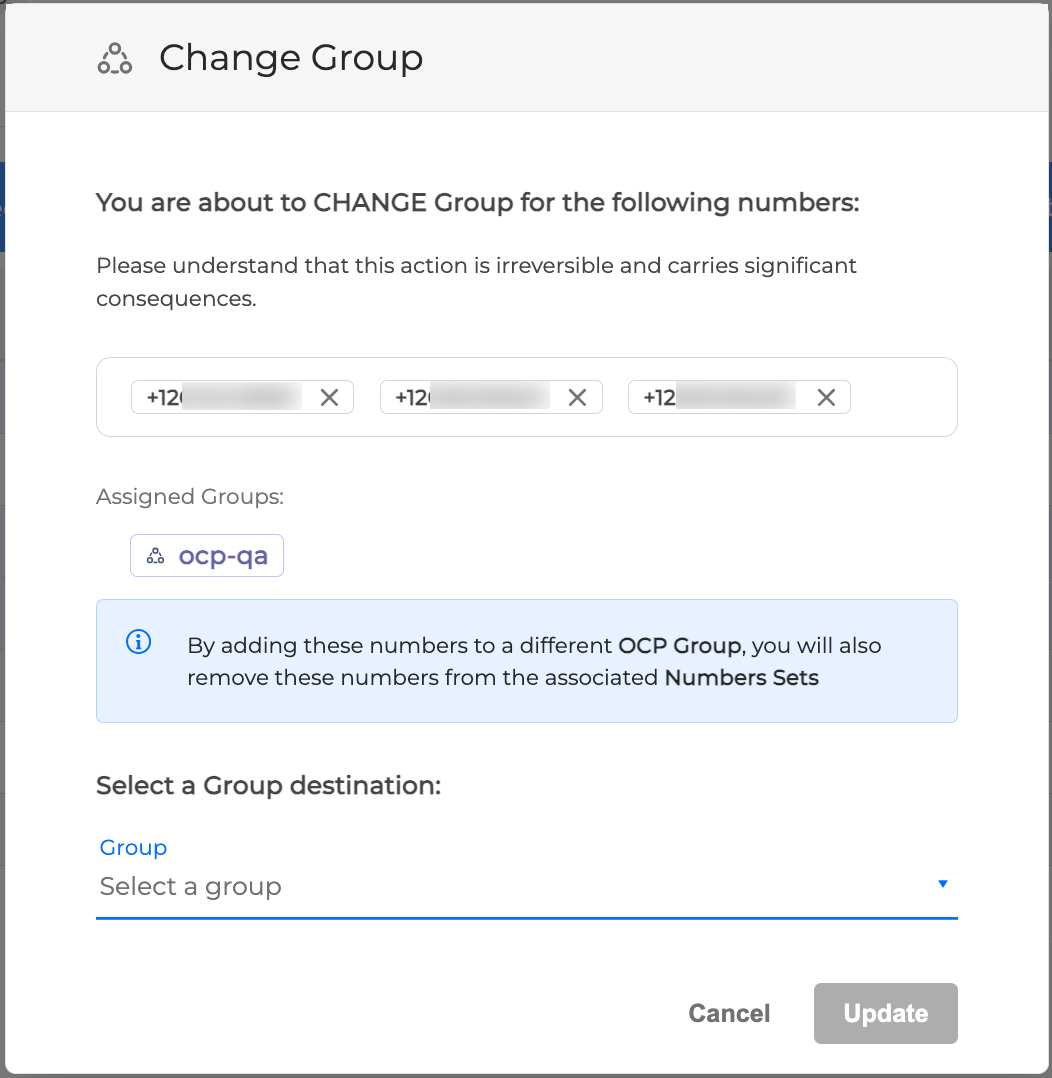
Click the Update button to complete the change.
Attach/Re-Attach number set to an Application
Once you have created a numbers set you can attach numbers to them to be used as a set.
Creating a numbers set can be performed at the moment only through API. To learn more read Managing phone numbers sets article.
This action is irreversible and carries significant consequences.
Select the numbers you want to add to the numbers set.

Click on Attach/Re-Attach Set

Select the Number Set from the available sets list.
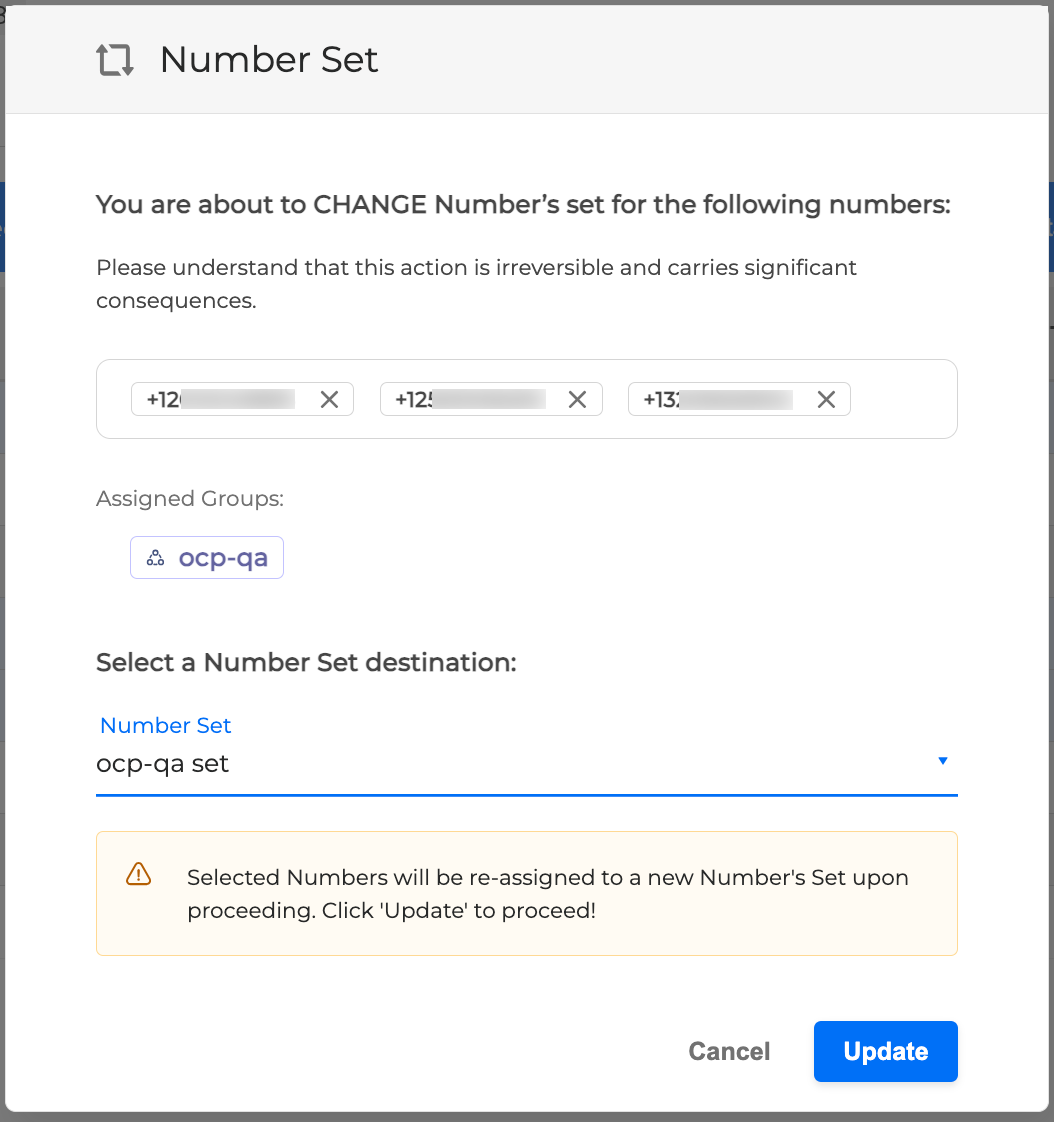
Click the Update button to complete the action.
Delete a number
If you want to remove numbers from your account you can delete them from the Numbers Control Panel.
This action is irreversible and carries significant consequences.
You can select up to 10 numbers to delete at a time.
Select the numbers you want to remove from your account.
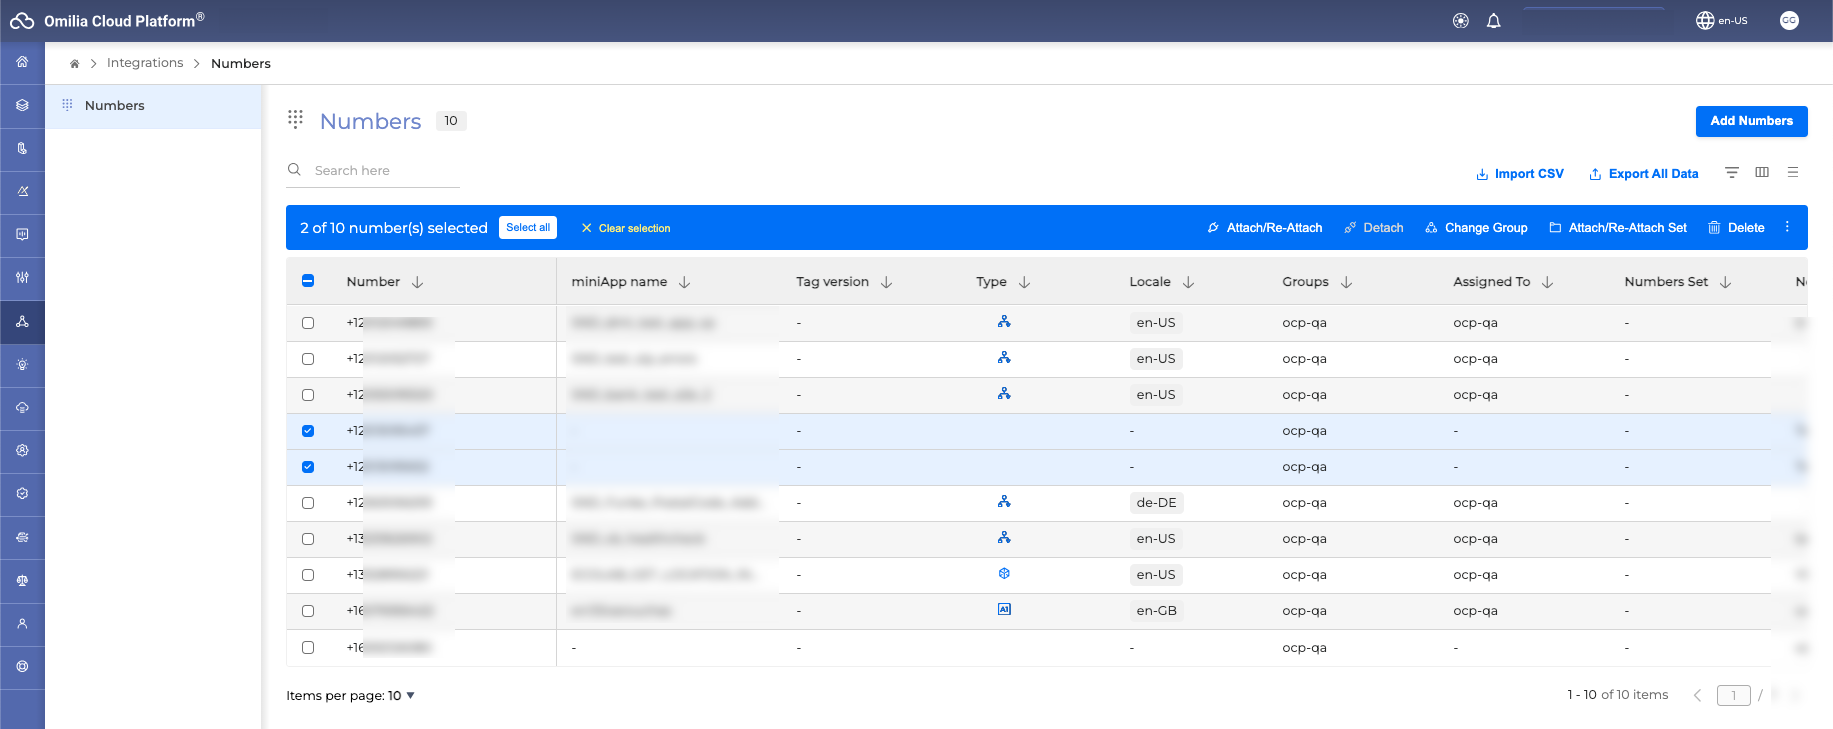
Click on Delete

Verify the numbers you want to delete and type CONFIRM DELETE in the opened window.
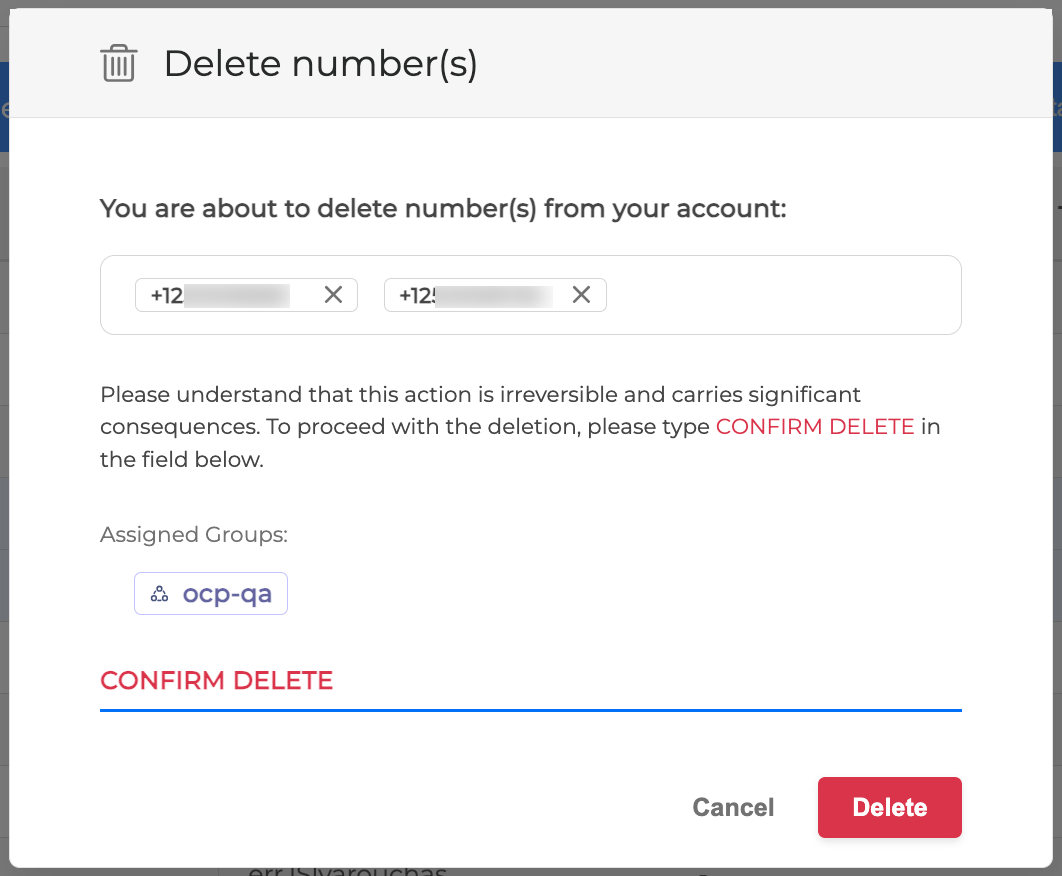
Click the Delete button to complete the action.
.svg)