.svg)
3 - Create your 1st miniApp
In this tutorial, you are going to learn what is a miniApp and how you can create it.
What is a miniApp?
A miniApp is a co-building block of OCP®, a stand-alone dialogical component that is used to handle a single task within a dialog. We can also compare it with a Lego-block that we use with other Lego-blocks to create a castle or, in our case, the whole conversation between a human and the system.
Create a miniApp
To create your first miniApp, follow these simple steps:
Log in to OCP Console® through ocp.ai . This is the unified entry point for managing all OCP services.
2. Select miniApps → Manage on the left pane.
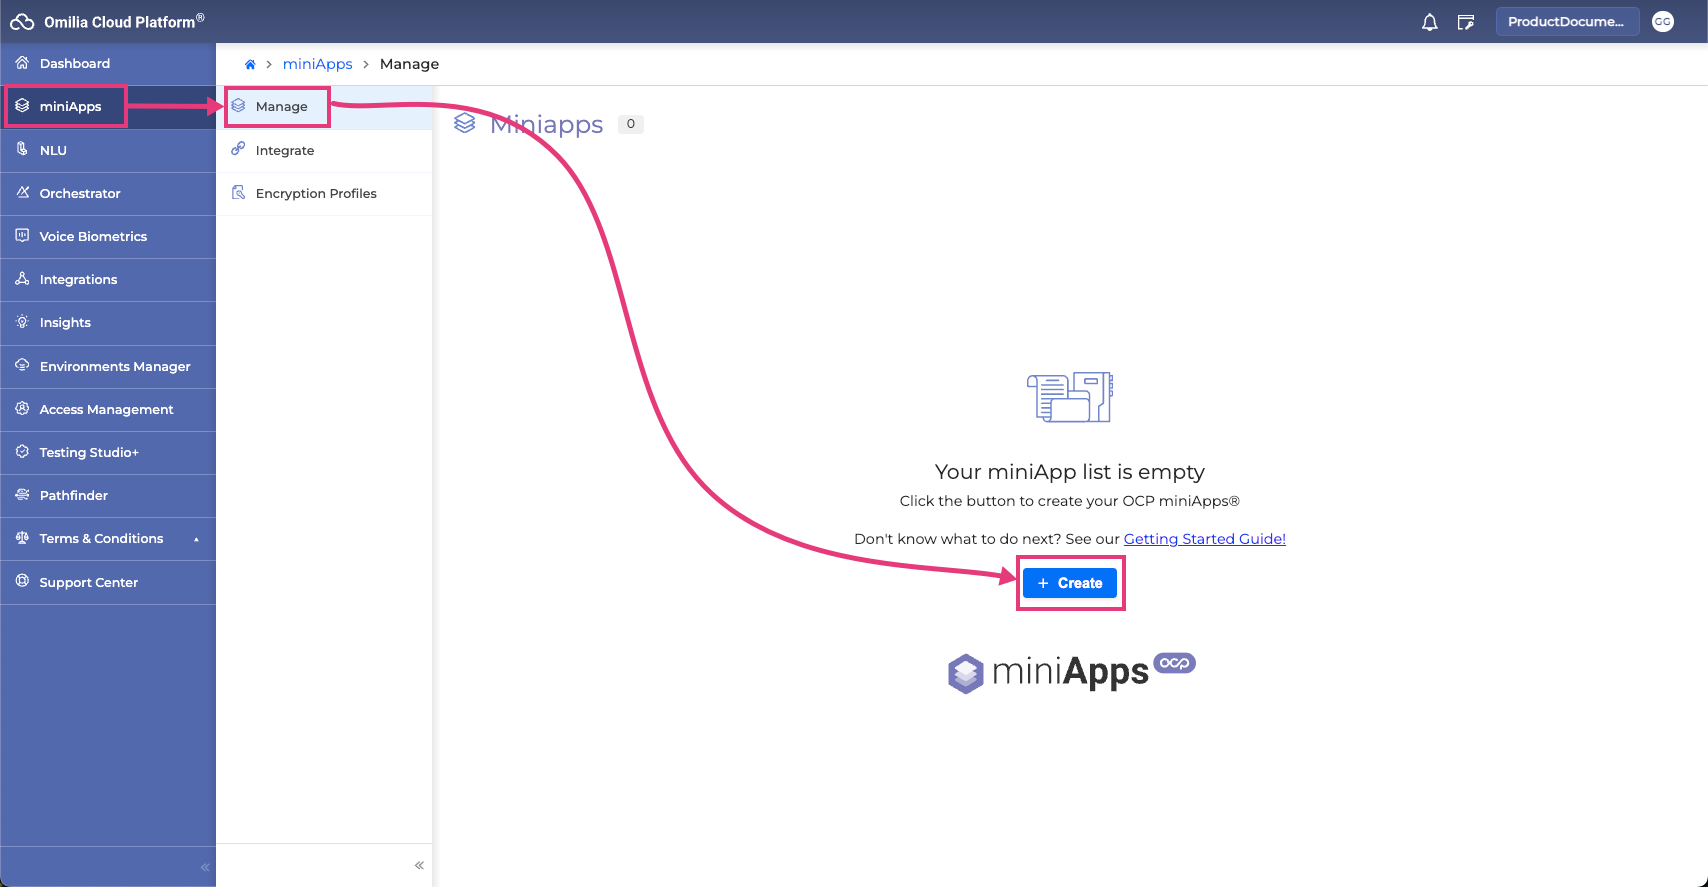
3. Click +Create.
4. Fill in fields of the Create OCP miniApps® pop-up window:
5. Select the Type of your miniApp. For introduction purposes, we are going to select Intent.
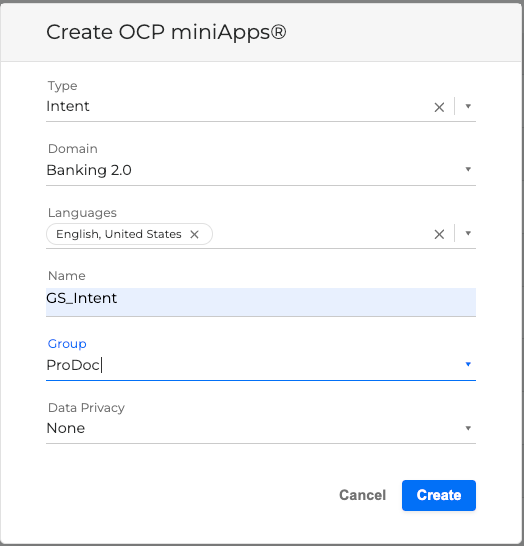
Select Domain. For introduction purposes, we are going to select Banking 2.0.
Select English, United States for Language.
Give your application a Name. In our case, the application name is GS_Intent.
Select Group. For introductory purposes, we have created a group named ProDoc.
In the Data Privacy field select None. Data Privacy is commonly used for encryption of any sensitive user’s data, which we don’t need for introduction purposes.
Click Create.
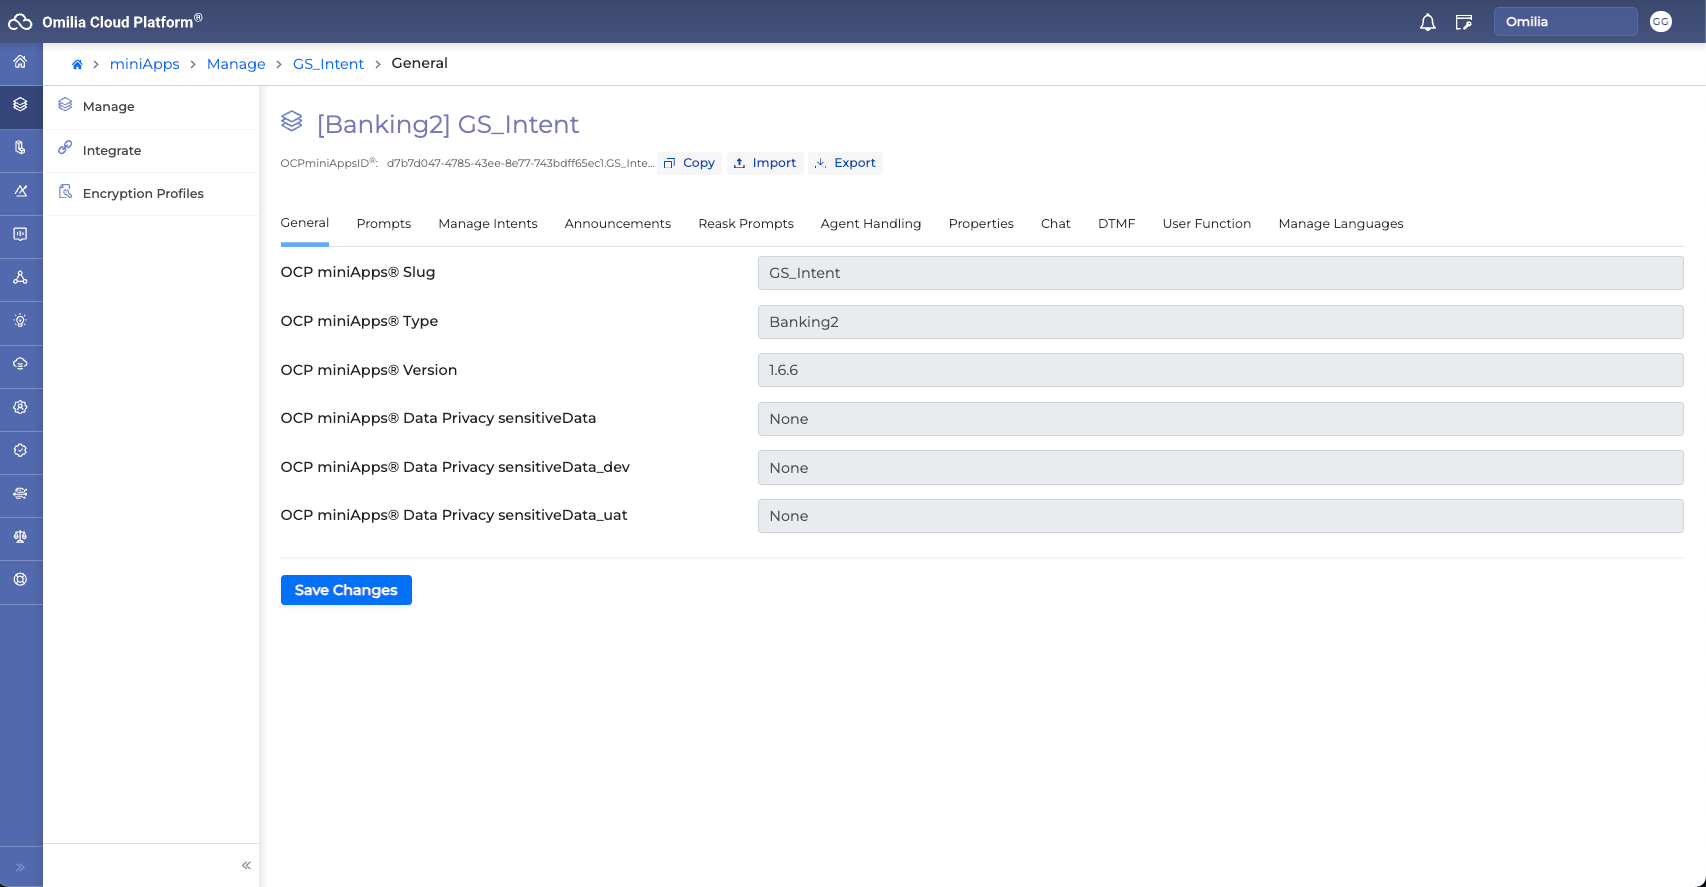
The app has been successfully created, and now you can proceed to configure it according to your purposes and needs.
Configure a miniApp
To configure your first miniApp, follow the guidelines below:
Go to Prompts tab and modify the Welcome Prompt. This is the first prompt a caller will hear once the dialog reaches the miniApp.
For example:
“Welcome to our new voice-enabled service line. I’ll be your Virtual Assistant.”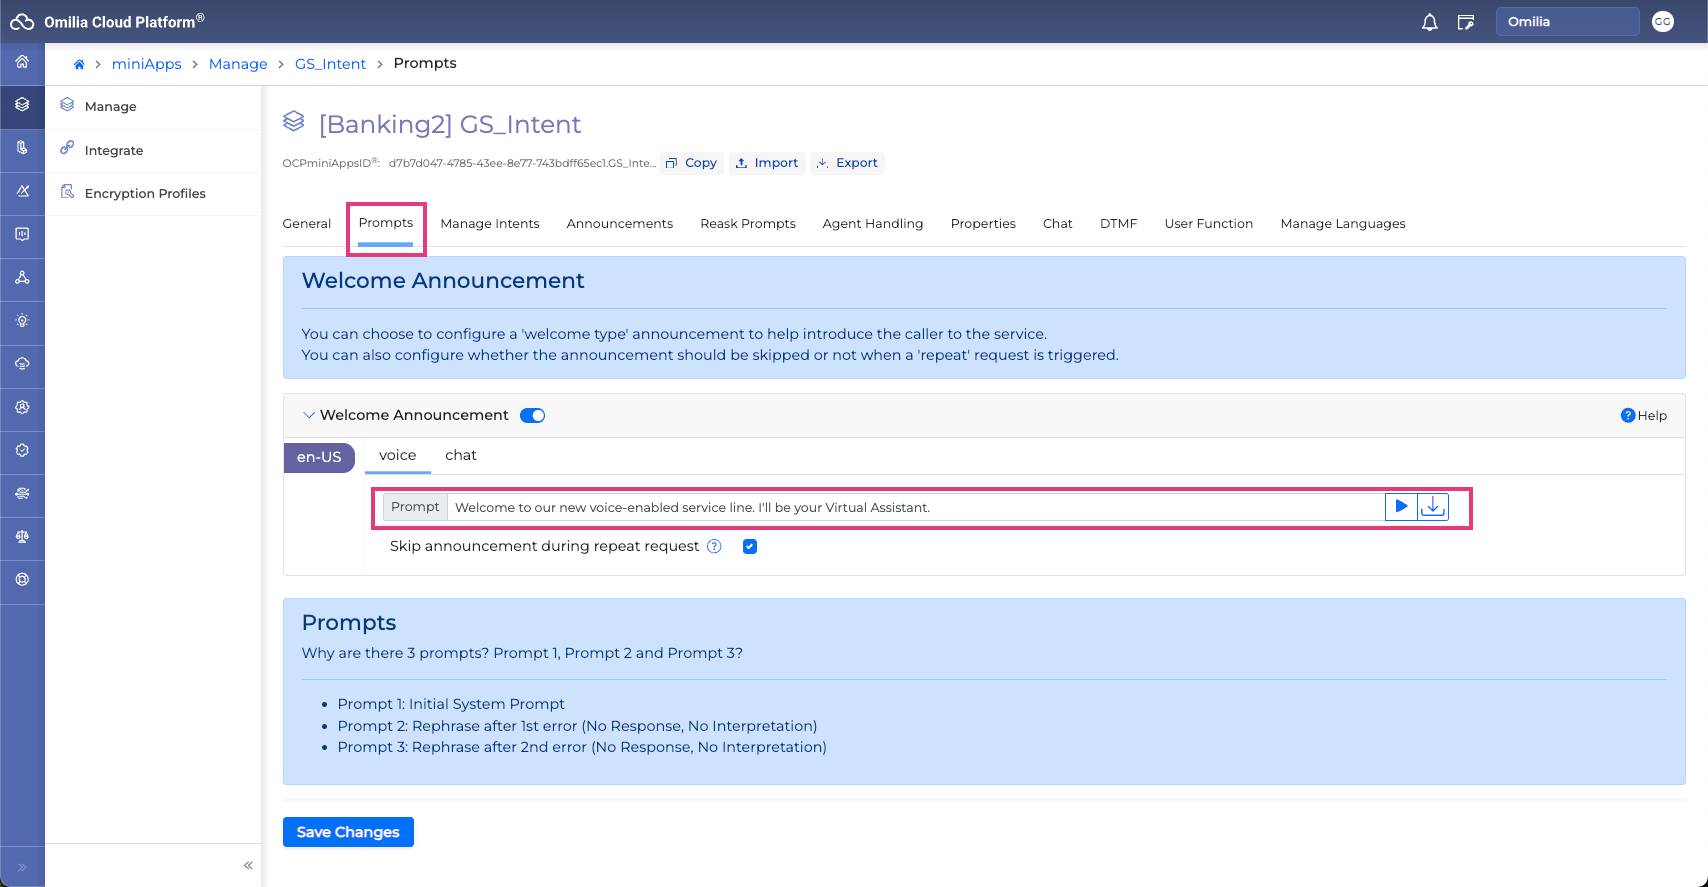
Scroll down and modify the Initial Prompt. The Initial Prompt is used to ask for the information needed from the user.
For example:
”How may I help you?”
There are three initial prompts and each of them represents the attempt to get the information from the user. You can configure the number of attempts and the reason for an error, however, these steps will be covered in one of our next tutorials.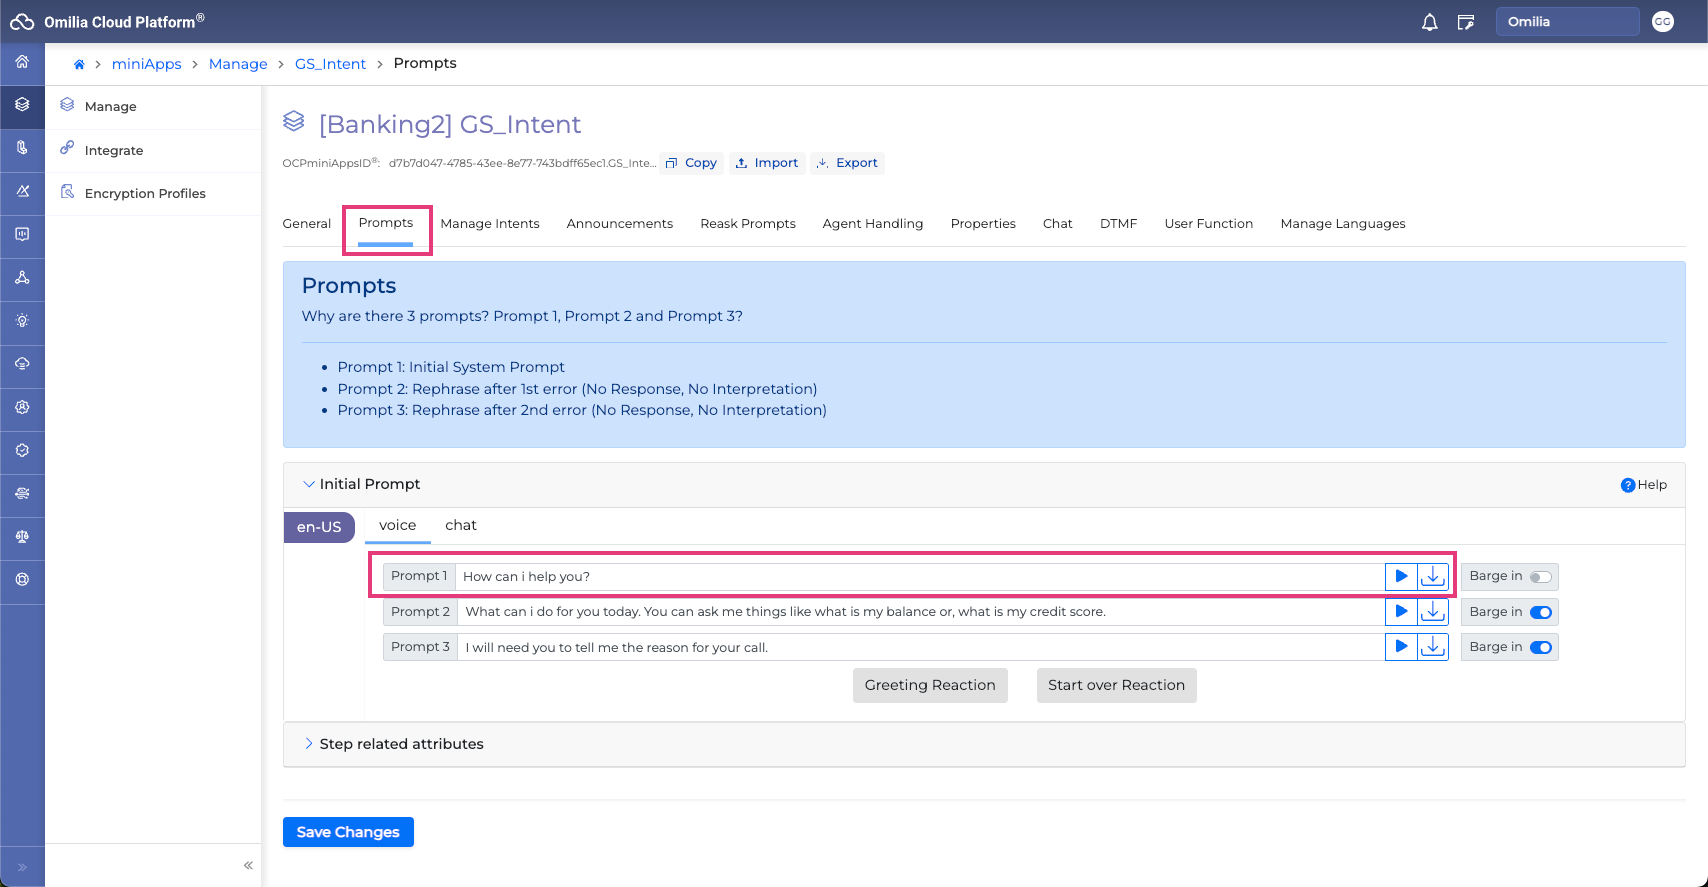
Click Save Changes.
In the next tutorials, we will proceed with configuring your first miniApp. But for now, let’s take a glimpse at the Manage Intents tab.
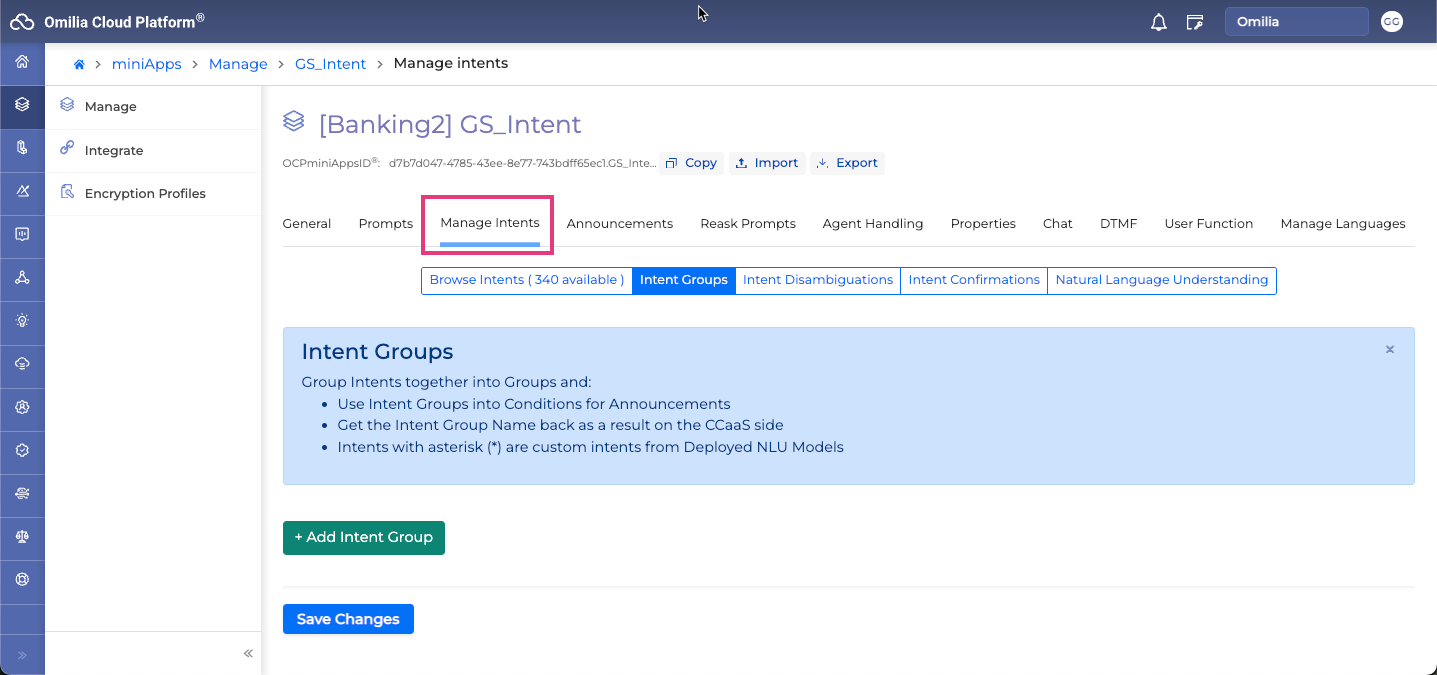
Select Browse Intents and find all available miniApps Intents with the sample Utterances which will trigger this Intent.
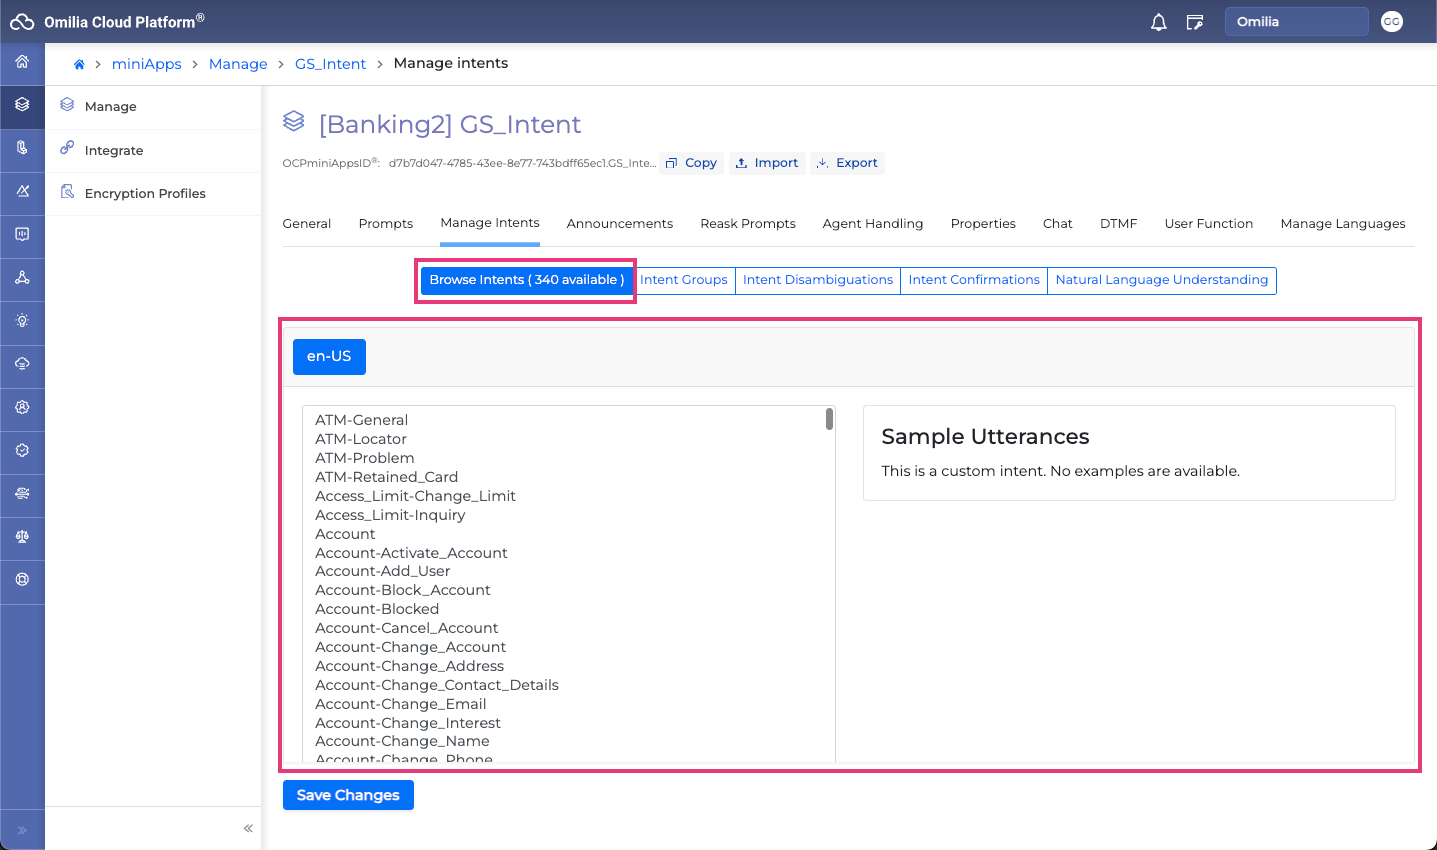
At the moment this miniApp offers 340 Intents which we are going to use to enrich and change the default behavior of our application.