.svg)
13 - Serve Exchange Rates using a Flow
Previous tutorial 12 - Create a Dynamic Announcement
In this tutorial we will combine what we have prepared for the exchange rates self-service in the Orchestrator.
We will use a different approach in Orchestrator, and instead of putting each building block on the canvas of the main application, we will create a Flow that can be used as a standalone building block.
The advantages of creating a Flow are a more readable and clean canvas but most important, a Flow that is created for a specific operation, such as a balance inquiry, and can be reused in another application.
For example, if a bank has three different business lines that need three different applications and all of them require the same authentication flow, it can be created only once and be reused in all of them.
Create a Flow
Go to Orchestrator → Flows tab.
Click the + Add button.
Fill in the details in the Add new Flow popup window.
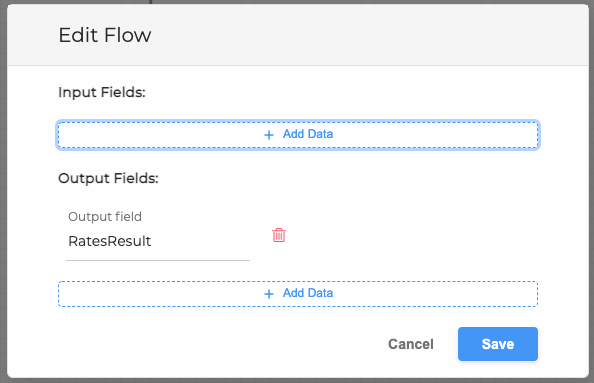
Flow Name: GS_Rates_As
Input Fields: (leave blank for this case)
Output Fields: RatesResult
Group: gettingStarted

4. Click the Save button.
The new Flow is now available in the list of Flows and can be edited and configured.
Configure a Flow
Select the Flow GS_Rates_AS from the list of flows. This will open a new empty canvas.
Drag and drop the previously created numeric miniApp GS_Ask_ClientID.
Click the Settings button on GS_Ask_ClientID to open the miniApp settings.
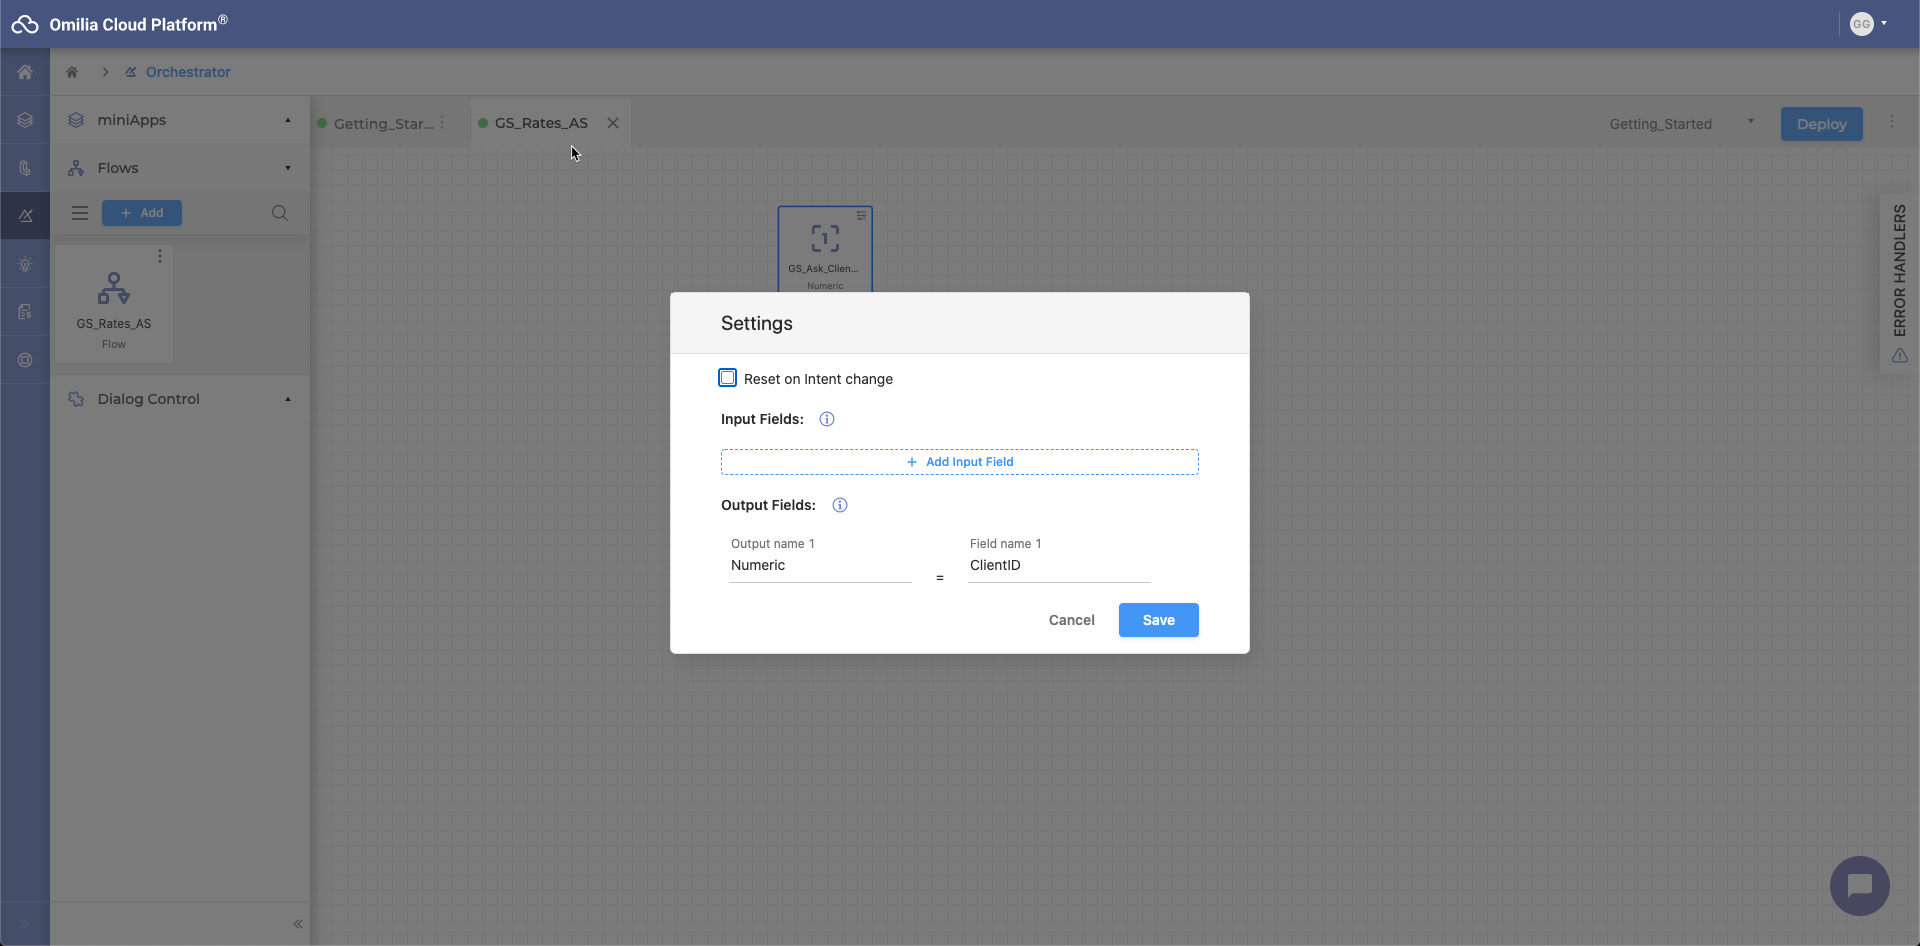
Name the specific numeric Output Field: ClientID
4. Click the Save button.
5. Drag and drop the previously created numeric miniApp GS_WS_getRates.
6. Link GS_Ask_ClientID and GS_WS_getRates miniApps together.
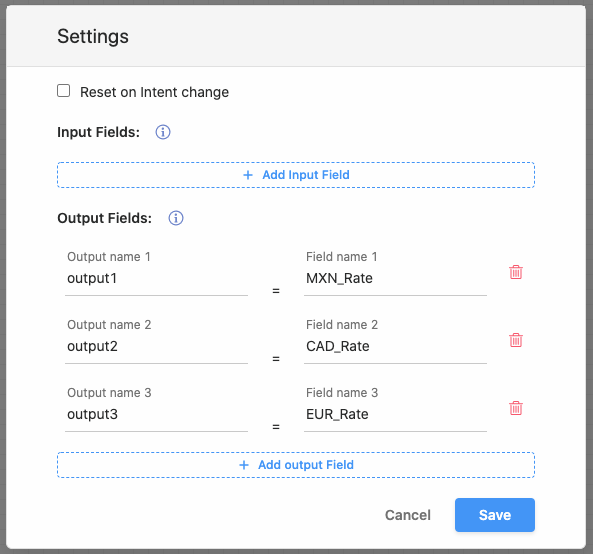
7. Click the Settings button on GS_WS_getRates to open the miniApp settings.
GS_WS_getRates miniApp must provide us with three outputs.
8. Click the +Add output Field button three times to add three outputs.
Output1: Mexican Pesos rate - MXN_Rate
Output2: Canadian Dollar rate - CAD_Rate
Output3: Euro - EUR_Rate
If we wanted to add the client ID as an input we should click + Add input Field and select extValue1 as input name and the value Client_ID.
As a result we have the web services fields on the left the flows fields on the right
Click the Save button to complete the settings changes.
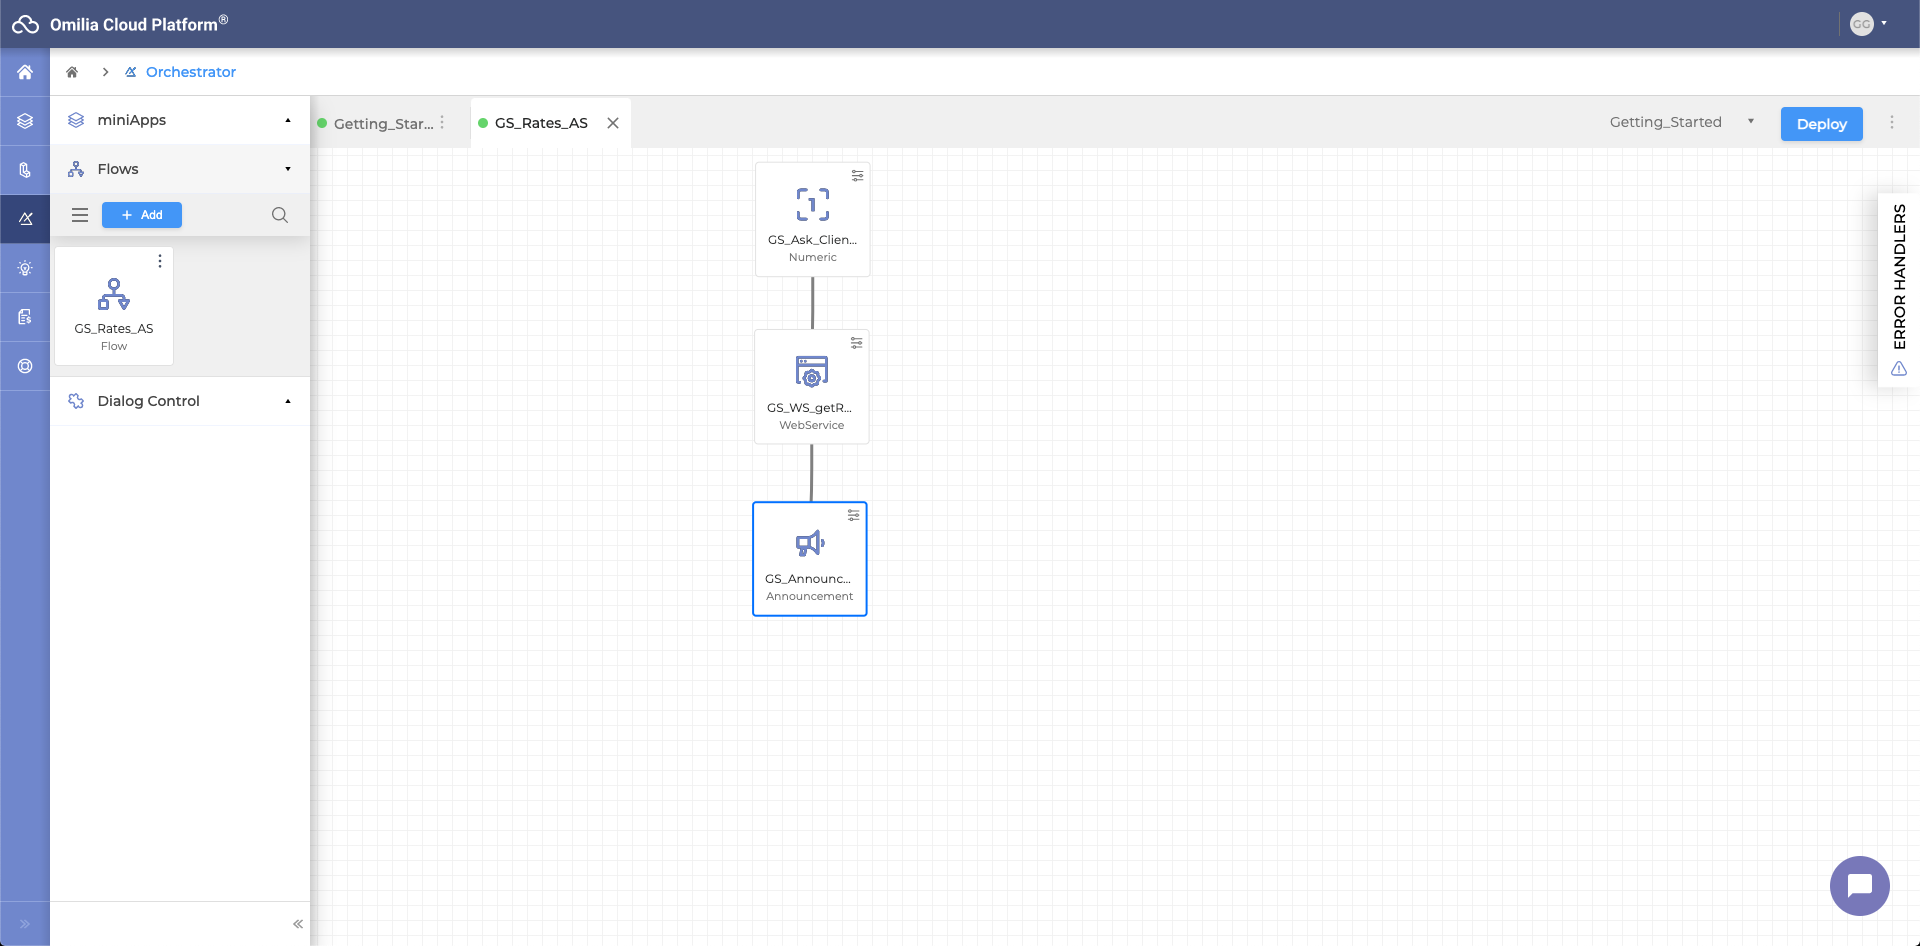
Drag and drop on the canvas the previously created announcement miniApp GS_Announce_Rates.
Link GS_WS_getRates and GS_Announce_Rates miniApps together.
Click the Settings button on GS_Announce_Rates to open the miniApp settings.
Add three inputs to the miniApp.
extValue1 - MXN_Rate
extValue2 - CAD_Rate
extValue3 - EUR_Rate
Add one output to the miniApp.
Announcement result - RatesResult
c. Click the Save button.
Flow Overview
Once the flow is involved, the first miniApp, a numeric one, GS_Ask_ClientID, gets the client’s number and puts its numeric value in the field ClientID. This can later be used as input in other miniApps.
Then the web service miniApp, GS_WS_getRates, is called and it gives three outputs with the value of Mexican Peso, Canadian dollar and Euro. These fields can later be used as input to other miniApps such as the announcement miniApp.
The announcement miniApp, GS_Announce_Rates, takes the output of the GS_WS_getRates as input with values for extValue1, extValue2 and extValue3 respectively to the output1, output2 and output3.
Finally the announcement contains the output field AnnouncementResult which can take two values, success or fail whether the announcement was completed or not.
The value of the success or fail will be put to the Flow output field RatesResult and is the final output we have configured for this flow.
Use a Flow
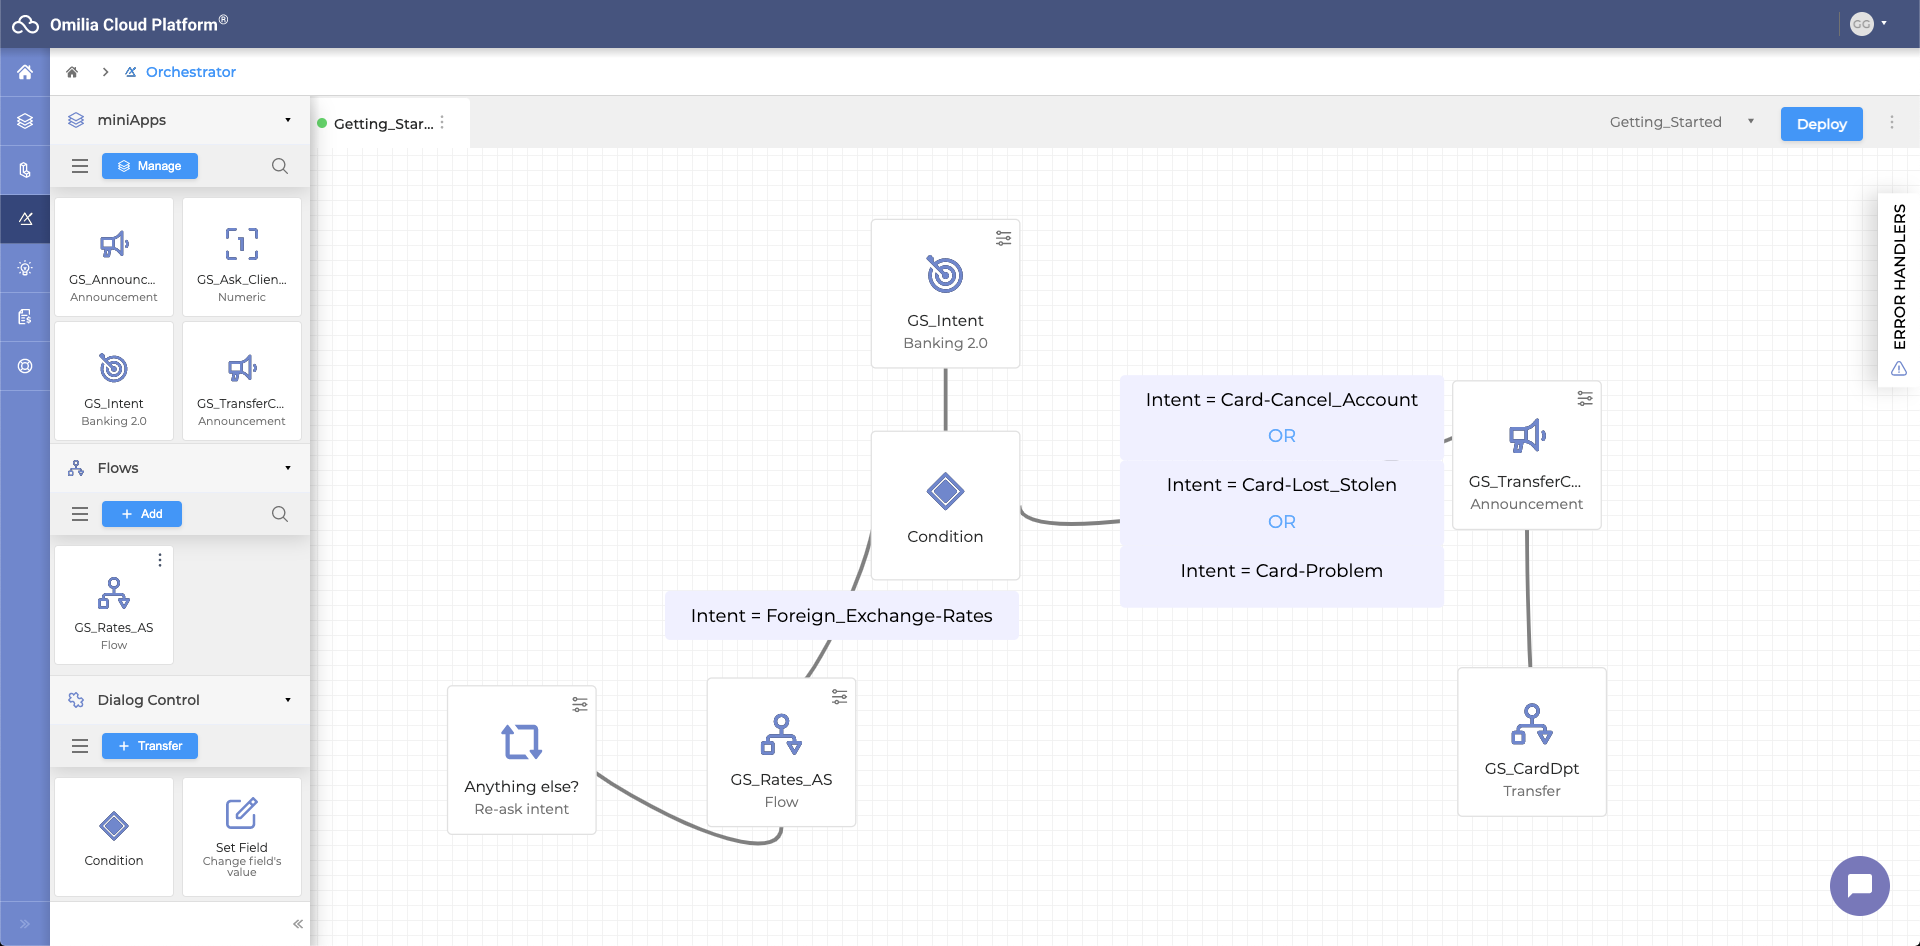
Open the main Application Getting_Started.
Drag and drop the created Flow application GS_Rates_AS.
Link the GS_Rates_AS flow application to the condition block and set up the condition.
Click + Add Condition.
Enter Field1 - Intent
Enter Value1 - Foreign_Exchange-Rates
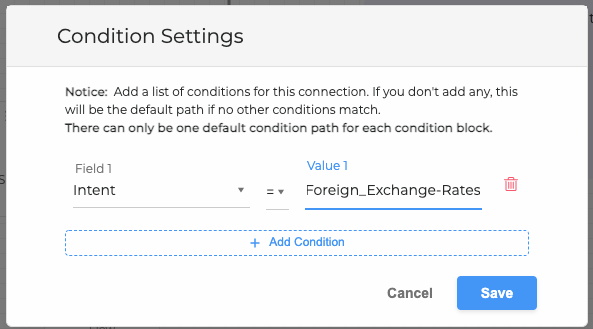
d. Click the Save button to save condition settings.
4. Click the Deploy button.
Complete Application
5. Test the application using the chat.
a. Click the Chat button to open the chat.
b. Ask for the exchange rates.
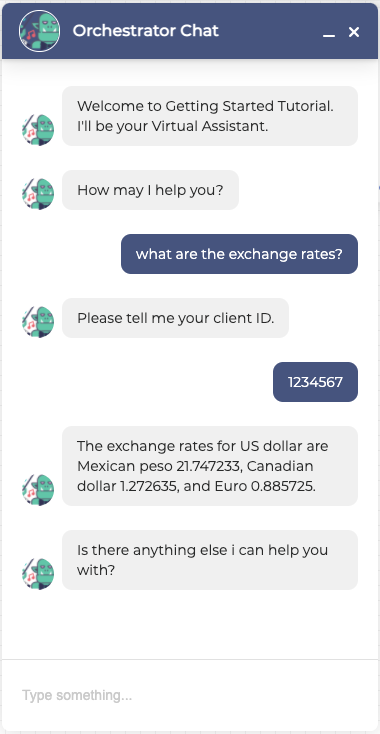
The main application provides us with all the requested information. This means it works as it should.
Next tutorial 14 - Re-ask an Intent